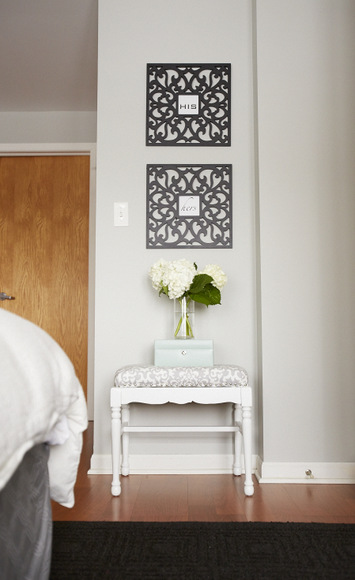
Upholstered Bench with Nailhead Trim
Upholstery projects can be incredibly intimidating. Trust me, I’ve been there.

In fact, my first ever DIY was reupholstering 4 dining room chairs. They were in Finn’s family for decades, and his mom gave them to us to makeover. #nopressure
We were absolute newbies, and I remember googling every step of the way.
Fast forward 2 years, and I’m still a bit intimidated by upholstery projects. But, I also know the instant “wow” factor new fabric and paint can bring to an old piece of furniture.
Upholstered Bench Tutorial
So when Finn’s mom gave us this adorable stool to makeover (she should be our furniture dealer), I took the challenge on without fear (okay maybe a little bit.)
Project Supplies
- Medium Grit Sanding Block
- Spray Primer (I used Rustoleum)
- Spray Paint (I used Rustoleum in semi-gloss White)
- Mask
- Gloves
- High-Density Foam
- Quilt Batting
- Spray Adhesive
- Box Cutter
- Scissors
- Fabric
- Staple Gun
- Staples
- Decorative Nails (I found mine at Jo-Ann Fabric for about $2 for a box of 36)
Steps to Upholster a Bench
After taking a look at the little stool, I quickly realized it was in need of some TLC.
The fabric was dirty & outdated. The wood had nicks and scrapes. And when I sat on it…well let’s just say my tushy wasn’t too happy.
My first order of business was to paint the base of the stool. I simply used a flat head to unscrew the cushion off, and I was left with the wood stool.
Once the cushion was off, I gathered my supplies, headed down to the basement of our building, and got to work.
First step was to get rid of the nicks, scrapes, and years of use this little guy had going on. I used medium grit sanding blocks to smooth out the wood, and create an even surface for the paint.
I then took a clean cloth and wiped my wood down with soap and water, to get rid of any dust and dirt.
I decided to go with a spray primer instead of a paint primer for this project. With all of the little nooks and crannies in the chair (I’m now craving an english muffin), I thought spray paint was the best way to give it full, even coverage. All it took was one light coat of primer.
After waiting a full day for the primer to dry, I spray painted the first coat of paint. I then repeated the process the next night.
While my bench base was drying, I worked upstairs to reupholster the seat cushion.
After pulling off 2 layers of fabric (holy moley dirty & dusty!) I was left with the wooden seat base.
I gathered my supplies and got to work padding this wooden base.
I decided to go with 2 inch foam for extra butt comfort #keepthetushhappy
I measured the padding to fit the base of the wood, and used the box cutter to cut it to size.
I then sprayed some of the adhesive onto the wood, to make sure the foam would stay secure.
Next step, covering the base with batting.
I cut the batting, leaving 4 or 5 inches around the edges.
Next, I tightly pulled the batting over the top of the cushion. I suggest starting in the middle of each side, and use the staple gun to keep it secure. Make sure you pull the batting tightly.
I made my way around the edges of the bench, until I was only left with the corners.
Keep in mind, I’m not an expert upholsterer. But, I do know that when it comes to upholstery the corners are the absolute worst. I just do my best to make it look as nice as possible.
I cut off any excess fabric in the corners, folded the batting, and secured with multiple staples.
Hooray, a comfy cushion!
Adding New Fabric
I wanted to keep the bench fairly neutral, simply because I didn’t really know where its final home would be. Going with a gray and white color scheme would allow me to move it from room to room, until I found a permanent home.
This fabric (found at Jo-Ann fabric for 50% off!) was just what I wanted for my neutral bench.
This step is optional, but I highly recommend you iron out any wrinkles in the fabric before adhering it to your cushion. That way you won’t have any stubborn creases on your finished product.
I used the same technique that I used for the batting, with the fabric.
Adding Nailhead Trim
I’m really on a nailhead trim kick right now. I love the industrial, yet glamorous look, those shiny nails can add to any piece.
I decided to give it a go for this project, and add silver nails along the bottom of the cushion.
I spaced my nails about 3/4 of an inch apart. To speed up the process, I measured first and made dots for each nail.
Then I used a hammer to tap in each nail into the wooden base of the cushion. They went in way easier than I thought, and I didn’t even have to use much force with the hammer. In took less than 30 minutes to get all of the nails into the cushion…not bad right?
Are the nails perfect? No way. But they really don’t need to be.
Pretty dramatic before and after huh? I’m totally loving the new look for this old piece of furniture.
Here is an updated photo of it all styled in our Chicago master bedroom…

Casey


