Casey’s Master Bedroom Reveal
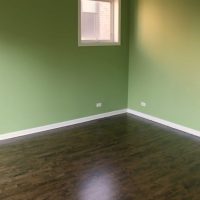
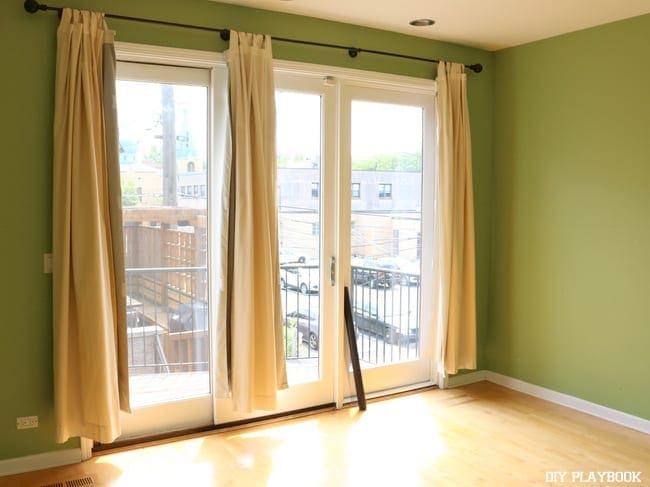
When we first moved into our condo, I had big dreams for our master bedroom. Sure, the walls were lime green, the floor was all scratched up, and it was in some serious need of window treatments…but I was still so eager to make it our own. 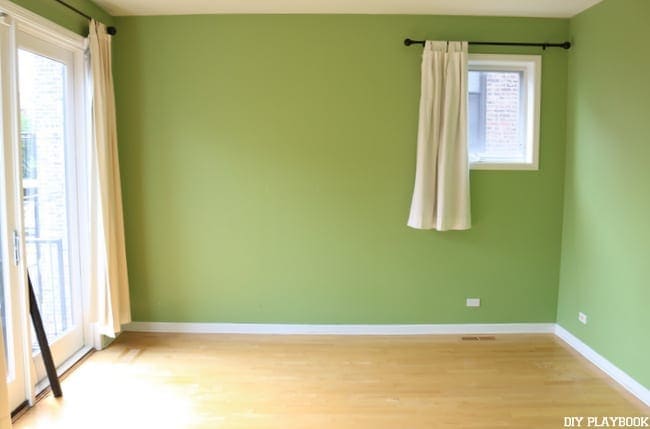
And now here we are, 5 months later, with what I consider a completed master bedroom space. 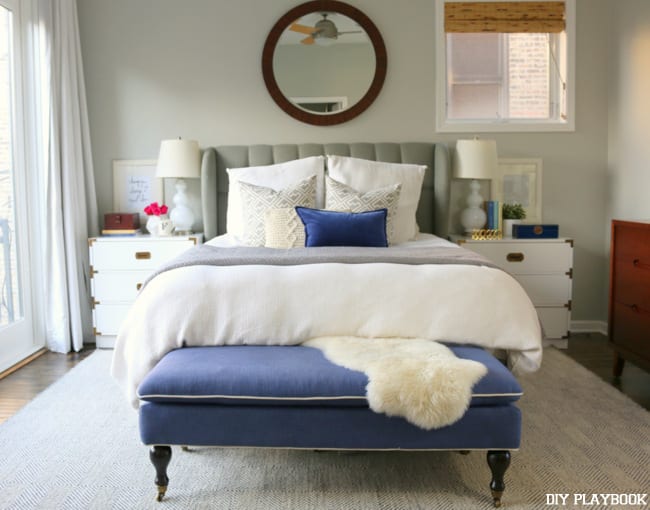
But as you know, the transformation of this room did not happen overnight. Oh goodness…not at all. Instead we slowly worked to acquire new pieces we loved, and inject our personal style into our bedroom.
So let’s recap all of the hard work that went into this bad boy…
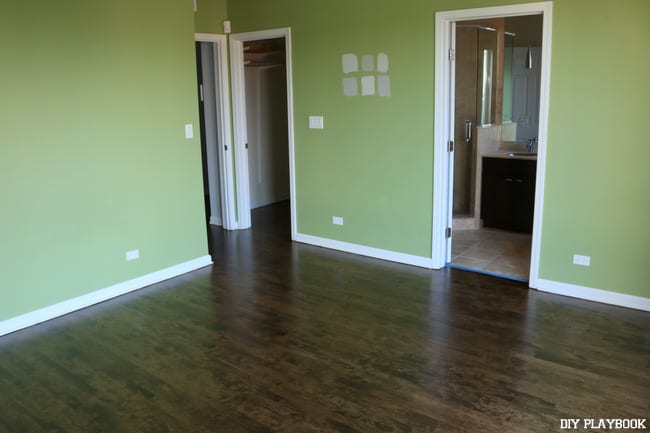
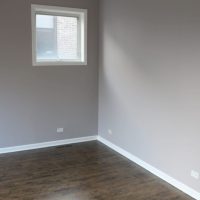
Before covering up that green for good, we re-did the floors throughout our entire condo. There were lots lot deep scratches and dents in them, and we figured as long as we were repairing them we might as well stain them too.
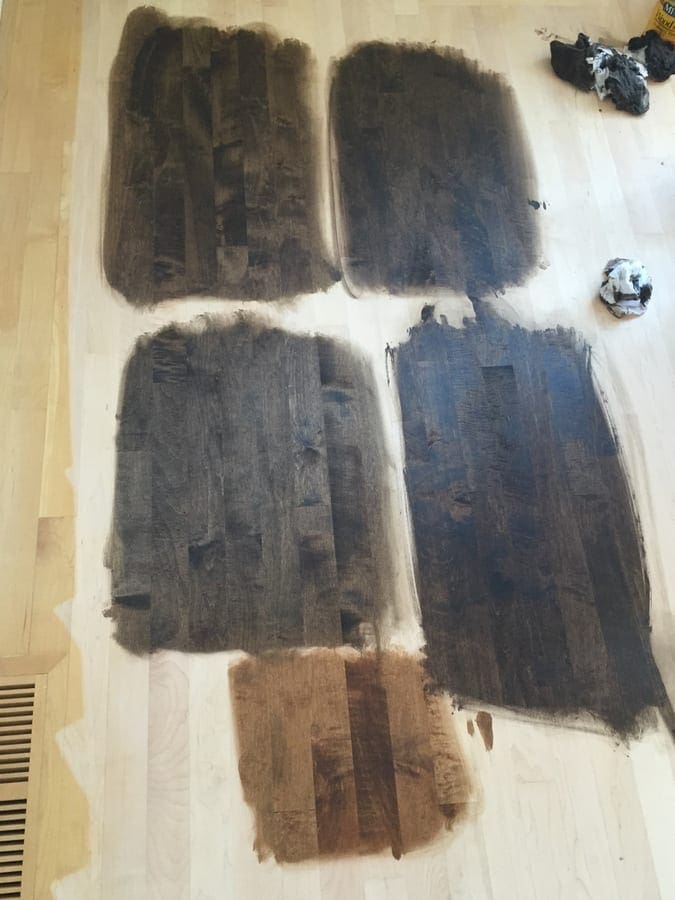 We chose the color “Jacobean” and never looked back. 5 months later and I’m still obsessed with them. I was worried about the dark color showing a lot of dirt, but honestly it’s not terrible. I swiffer a couple of times a week, and then do a good deep clean with the mop about once a week. We’re still so happy we re-did them before we moved in.
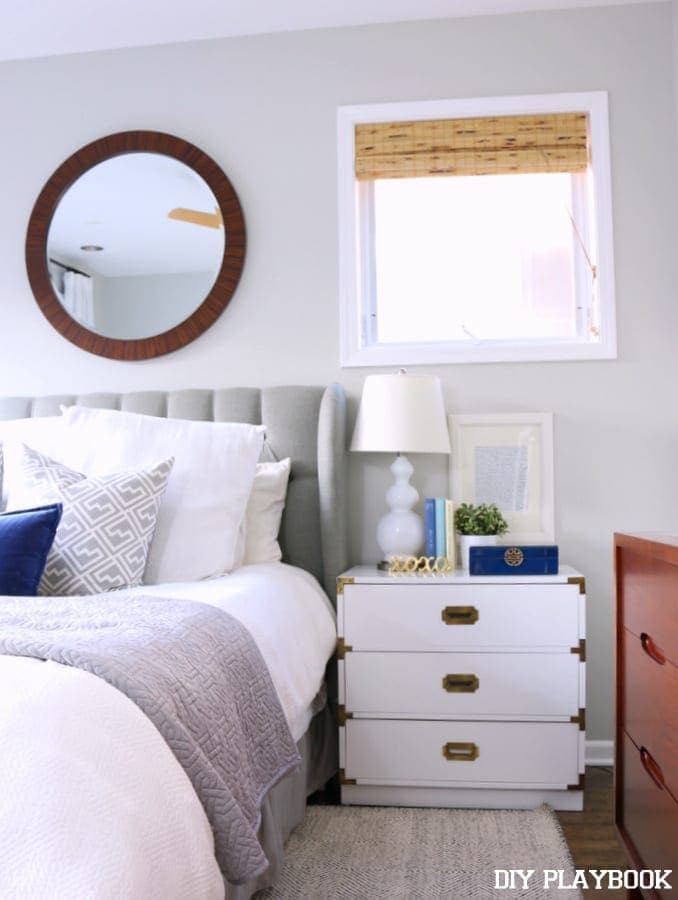
Once the floors were done, it was time to tackle the walls. I first went with the color “Mindful Gray” in our master bedroom, and it looked pretty darn purple to us. So we made a last-minute call, literally the night before we moved in, to have the painter re-do the room in “Gray Owl.”
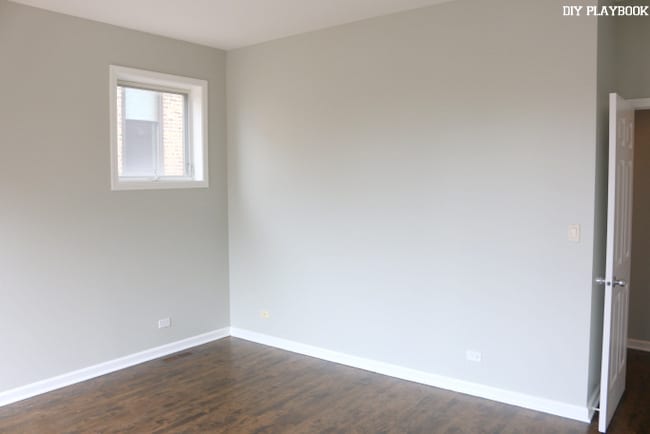 Honestly, so happy we listened to our gut and went ahead and repainted it to a less purple gray.
- Floors. Check!
- Painted Walls. Check!
Now onto the main furniture pieces…
 I found this large neutral rug from Rugs USA, and it was a great jumping off point for the rest of the space.
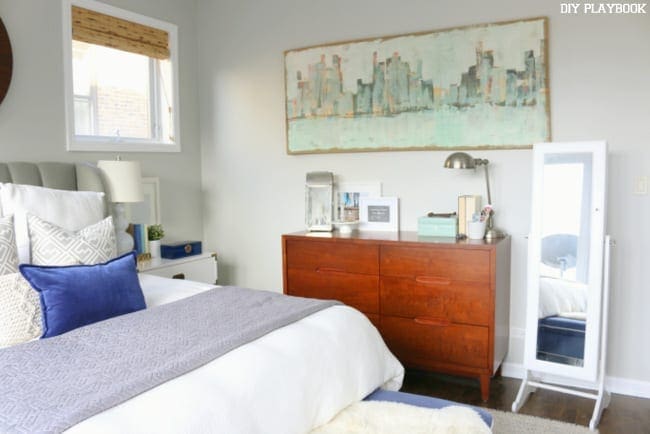
Then I found this wooden dresser from Land of Nod Outlet for a steal! Plus, I was able to Craigslist our old black dresser for $150 #moneyinmypocket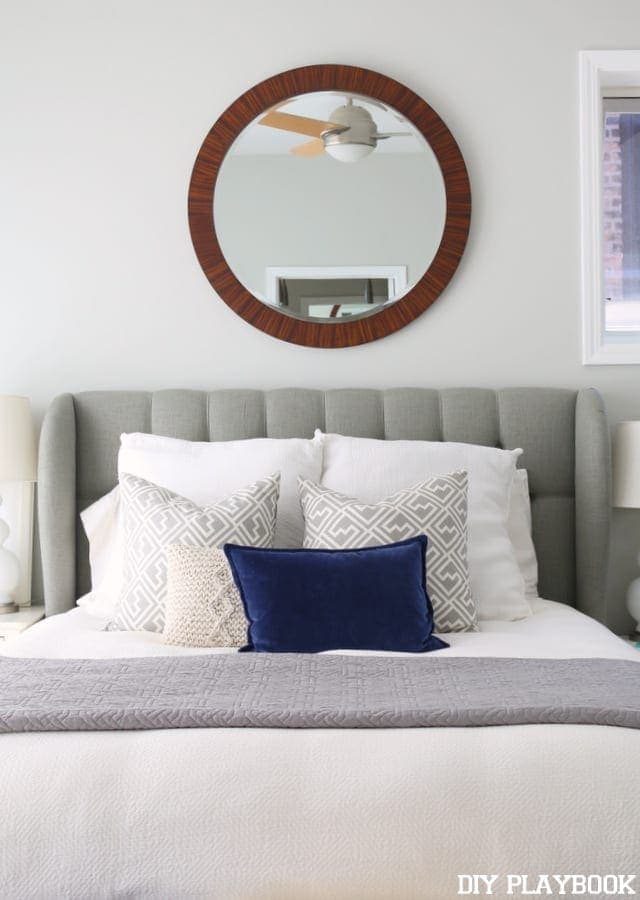
The space was finally starting to come together. That’s when we partnered with Lulu & Georgia to add some seriously stylish pieces to the room. 

But even though I was loooooving the direction this room was taking, we still had a daily battle…large windows with no real window treatments.
The large sliding doors first looked like this…
Then for about 2 months they looked like this…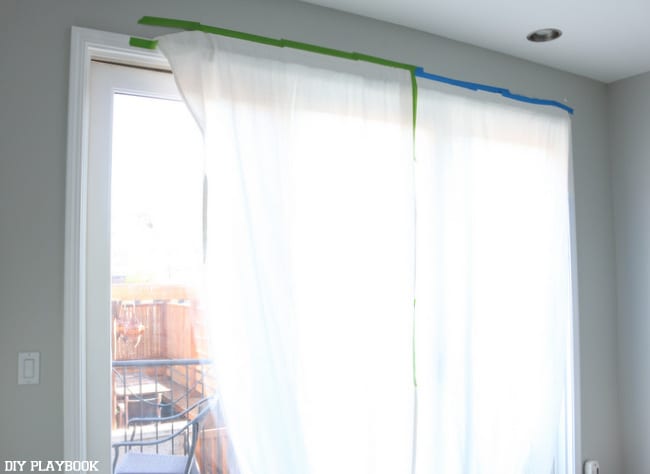
Yes…that is a curtain taped to the wall with painters’ tape #shame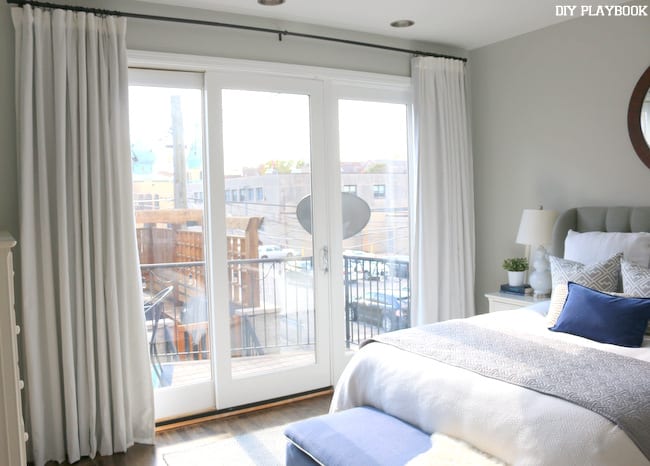
But I finally DIY’ed some blackout curtain shades from Ikea (without sewing a thing), and they’ve been amazing ever since.
With the sliding doors covered, I had to tackle our little window to the right of our bed. I simply bought some bamboo shades from Lowe’s and shortened them myself to fit our small window. An easy, but very worthwhile, project. 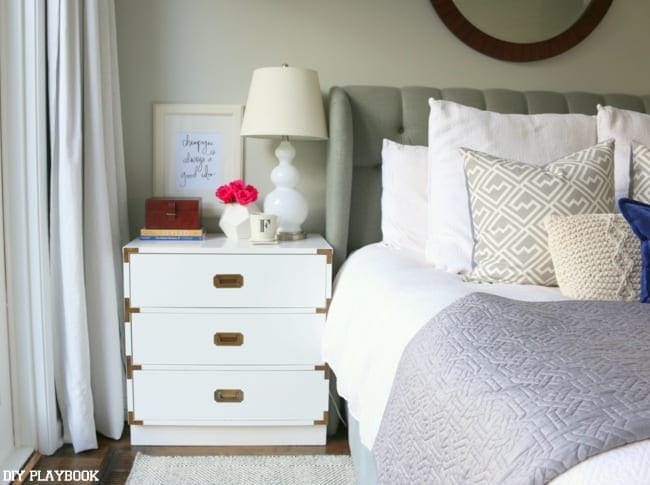
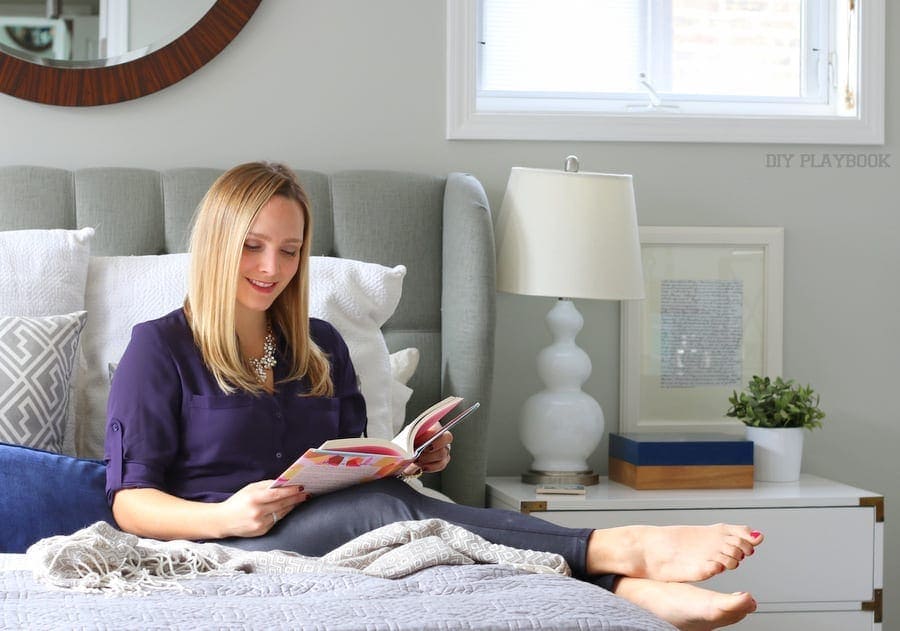
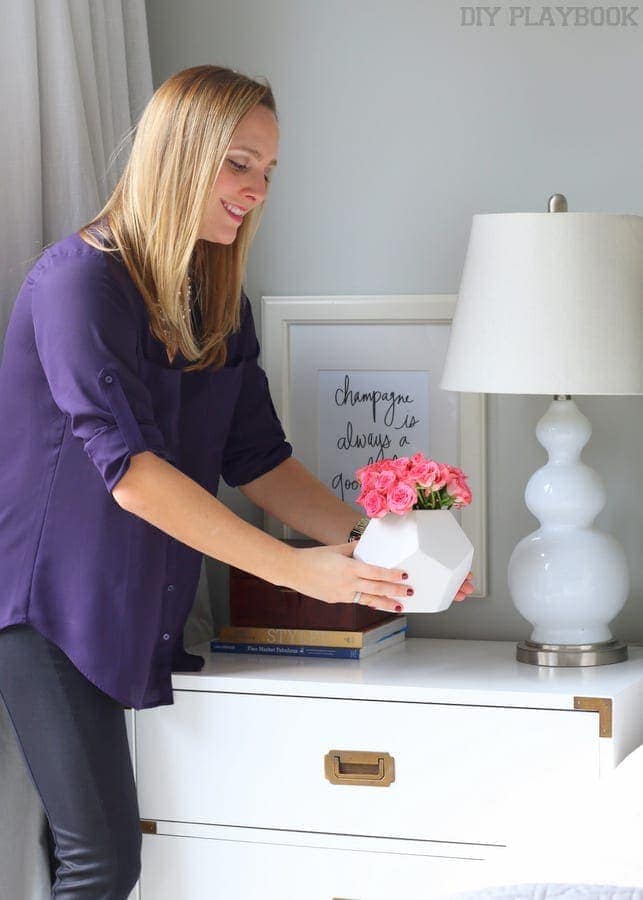
Then things halted for a while, as I searched for the perfect matching nightstands. After searching and failing for some time, I came across MegMade here in Chicago and found two campaign style nightstands that fit the bill. 
One side of the room was done, and it was time to tackle the other and put in a mini work station. 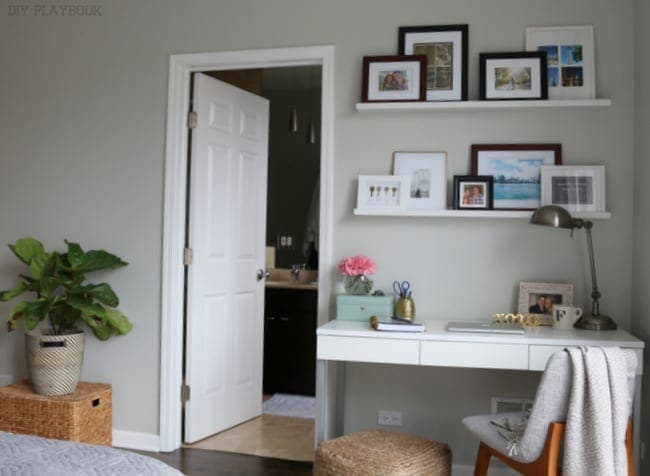
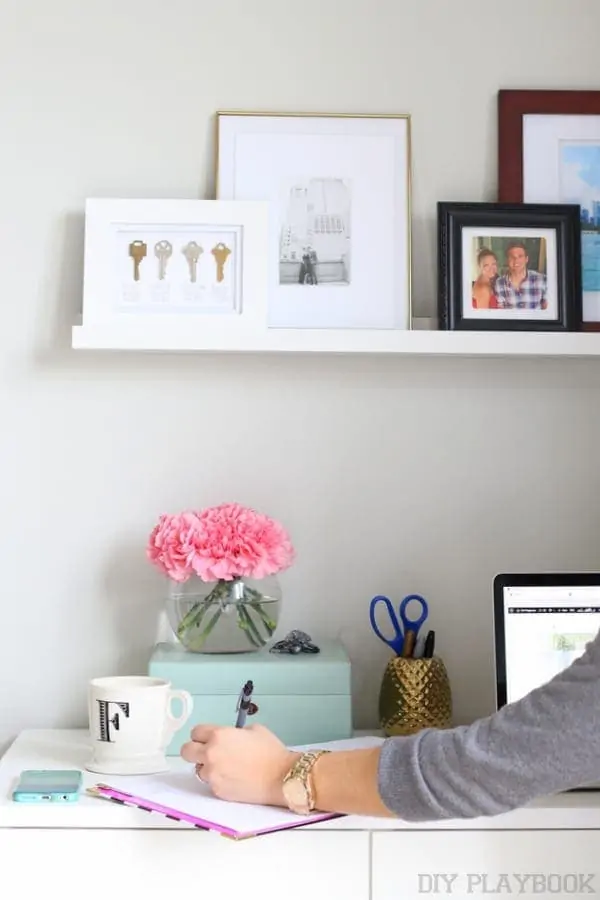
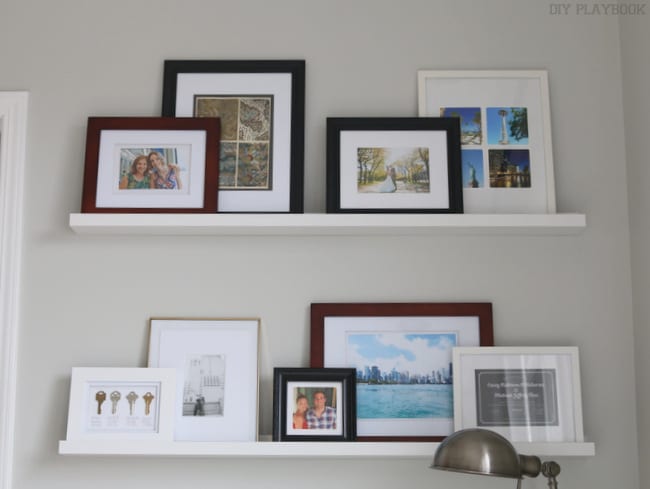
This space is just want I needed. A small area to sit and get work done, while being surrounded by some of my favorite memories. The perfect working area if you ask me.
And that is where this room makeover ends! It’s officially done and crossed off our new home to-do list.
But before I sit back and relax in my completed space, let’s get some before & after pics in here. Because that’s just about my favorite part of any makeover…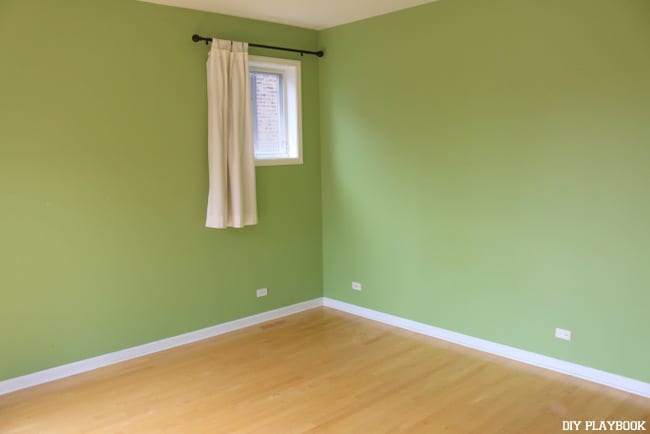

What I learned from our Master Bedroom Makeover
1. Be Patient: This is by far my #1 takeaway from working on this space. I’m the kind of girl who likes to get ‘er done, and check things off my list. But, that doesn’t always work when it comes to creating a home that you love. If I would have purchased new things for this space within the first week of living here, I can guarantee that I wouldn’t be as happy with the final result. Instead, living here and figuring out exactly what we needed helped me make design decisions with intention. So my advice to anyone decorating their home is to spend some time living in your home before you begin changing things. 
2. Trust your Gut: The last-minute paint change is the perfect example. Finn & I knew it wasn’t right for us, so we listened to our gut and changed it, even though it was a bit inconvenient. You know your style and your likes/dislikes more than anyone else…so trust yourself and go for it!

3. My Style: I feel like I’m often asked what my home style is, and I’ve never been very good at answering that question. Working on this room definitely helped me hone down what I like and do not like for our home. I think light & bright spaces are a personal preference, and I like cool tones with a few metallics thrown in there. Don’t forget to add some wood accents and nature too. When working on our master bedroom, I tried to get rid of anything that I didn’t absolutely love. Instead of holding onto random accessories or pillows just because, I purged what I wasn’t obsessed with and only displayed my favorite items. Now every piece in this space is something I really like. I think this is really going to help me as I conquer the rest of the areas in our home. With this look as my jumping off point, I’m ready to take those on with confidence. 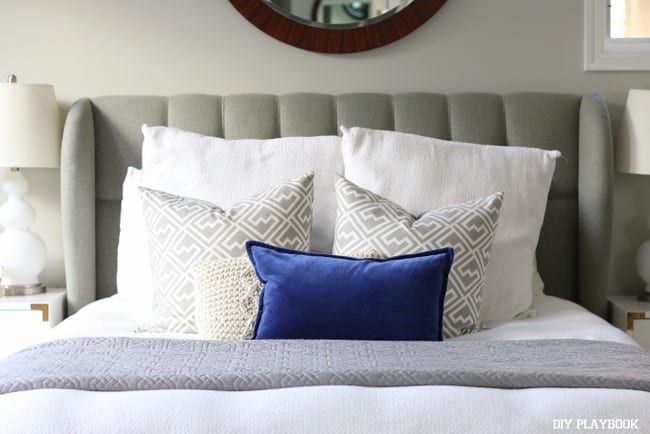
4. One Room at a Time: Now this might not work for everyone, but I’m really happy that we completely finished this space before moving onto our guest room (you guys do not want to see that space. It’s a little scary at the moment…). For us, it worked best to overhaul this room completely before thinking about another bedroom. Now I can consider this one done, and I can take what I learned and apply it to the guest room. 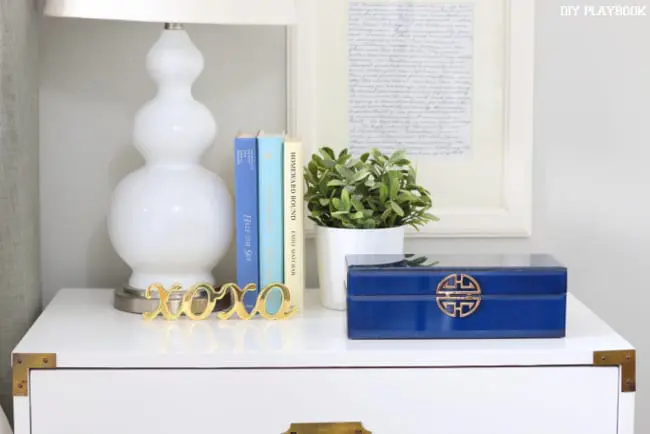

Okay enough yapping on my part. This post is already way too long. I hope diving into the 5-month journey of this space helps you realize that creating a room that you l-o-v-e doesn’t happen overnight. Instead it takes time, thoughtful purchases, and a few DIY projects, to truly make it your own. 
Casey
Psst… check out the full source list of everything in this space HERE!


