Ben turned one at the end of February and his first birthday meant our first chance to start making birthday traditions as a family! If you know me, you know I’m all about annual traditions, especially for special occasions like holidays or birthdays. But I also realize it’s hard to kick off a lot of the birthday traditions I had in mind because Ben is still far too young to realize what’s going on.
But that didn’t mean all tradition was lost this first year! I wanted to do something to get the ball rolling. I ran a few ideas past Matt and we decided one of the traditions we wanted to start for Ben’s birthday was to try and gift him something super intentional from the both of us.
Of course, there will be plenty of time to gift him toys and trucks and all the things that little boys love, but we wanted to challenge ourselves each year to also include one meaningful/intentional gift… which I’m sure will look very different each year.
This year’s intentional gift? A DIY growth chart that we will use to track Ben’s height each year (a tradition in itself!). And to my surprise, this DIY growth chart was SO easy (and affordable!) to create.
I skipped this step entirely because I like the color of the board without staining it or painting. But, I would encourage others to tackle this step if you want your DIY growth chart to be a specific color by using the stain or paint to match your home’s decor.
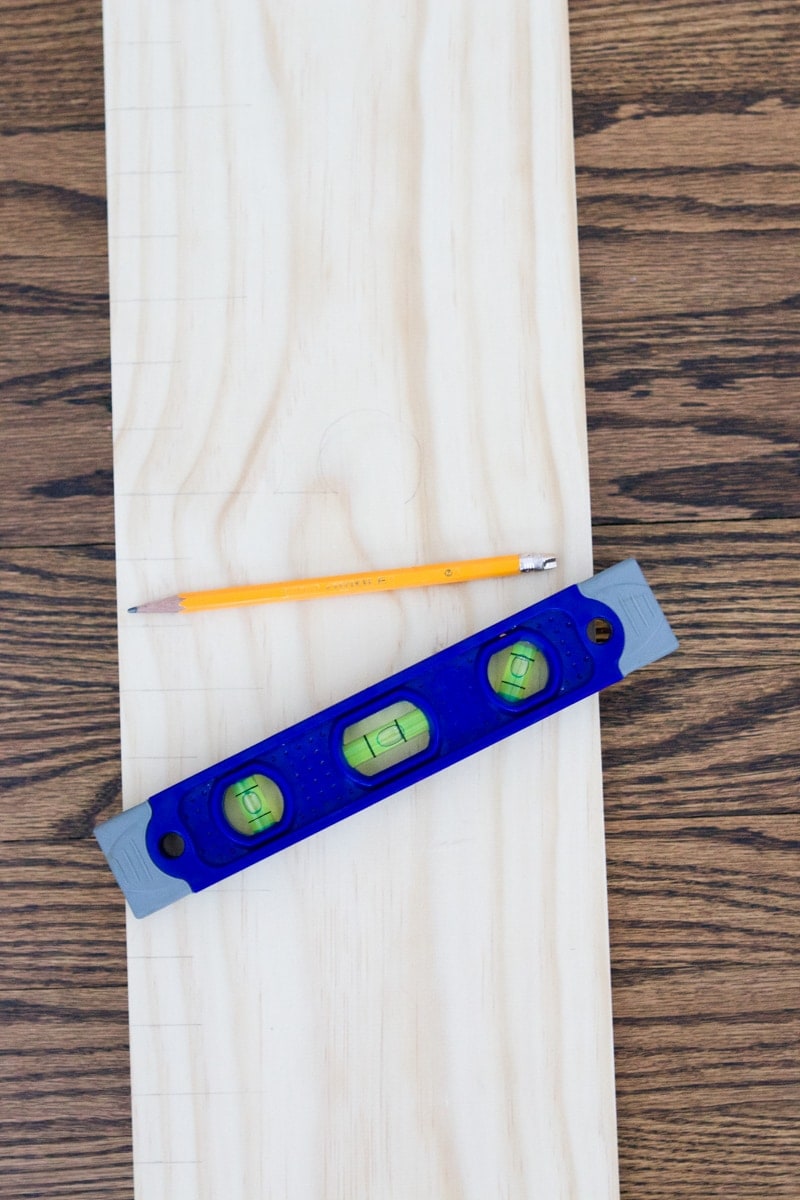
Measuring and Marking
This part seems a little intimidating, but I swear it is SO much easier than it sounds. The first thing you’ll need to do is figure out where you want to hang the board on the wall and mark where the 1-foot mark lands on the board in that position.
Then from there, mark the entire board in one-inch increments, making sure you keep tabs of where you marked the one-foot point.
Then, simply take a speed square (the best option) or a ruler (harder to keep the lines level, but it still works!) to extend these marks. I drew the foot markers 3 inches wide. From there, every two dashes should be 2 inches long and then the next one should be a longer one (3 inches long). Since that’s a little hard to explain, here’s what it should look like:
-1-foot mark (3 inches wide)
-1 foot, 1-inch mark (2 inches wide)
-1 foot, 2-inch mark (2 inches wide)
-1 foot, 3-inch mark (3 inches wide)
-1 foot, 4-inch mark (2 inches wide)
-1 foot, 5-inch mark (2 inches wide)
-1 foot, 6-inch mark (3 inches wide)
-1 foot, 7-inch mark (2 inches wide)
-1 foot, 8-inch mark (2 inches wide)
-1 foot, 9-inch mark (3 inches wide)
-1 foot, 10-inch mark (2 inches wide)
-1 foot, 11-inch mark (2 inches wide)
-2-foot mark (3 inches wide)
-Repeat
Making Your Marks Permanent
Once all of your marks have been penciled on the board, simply go over them using a permanent marker (or paint pen).
Adding Numbers
Now all that’s left to do is decide on how you will mark the numbers on the growth chart. I actually tried free-handing these but wasn’t in love with the final product. So I ended up re-doing all of the dashes and had my sister print me out large numbers from her Cricut machine. If you don’t have access to one of these, large stickers would probably look identical to this!
Hanging the DIY Growth Chart
There are two options when it comes to hanging this growth chart. You can hang it just like you would a normal piece of art by adding hardware to the back. BUT, I’ve heard from friends that their toddlers or little ones grab at these, which could potentially lead to this huge piece of wood crashing down on them if it’s only hung like a regular picture (yikes!).
That’s why I chose to go with a package of picture hanging strips. I simply stuck these all over the back of the growth chart and stuck the ruler on the wall. You can do whichever you feel most comfortable with, but I can reassure you that my growth chart is not going ANYWHERE thanks to these command strips.
Rookie Tip: Next time I wouldn’t put the strips right on the edge of the wood because you can see a bit of it from the side of my growth chart, which I am not a fan of. If I could do it again knowing what I know now, I would add these more towards the middle of the boards so they’re totally hidden after hanging the board.
Tracking Height
Now, the fun part… tracking Ben’s height! Matt and I decided that we will track Ben’s height on his birthday every year. Maybe we’ll do it again on his half birthday (during years where there has been lots of growth!), but we haven’t decided yet. I guess time will tell?
We did the first year already and my heart melts seeing this mark. I’m so excited that we have a “baseline” to go from. I can’t even imagine the day where we are marking 4, 5… or maybe even 6 feet! This mark already feels too tall, but I’m sure that someday we will look back at this tiny little man and laugh.
Planning For The Future
If you’re in the game to create something like this, I would highly recommend it. It was SO easy, very affordable, and my favorite part is that it can come with us if we ever move (or repaint). I’ve heard families say that it was extra sad leaving their house (or repainting their basement) when they had to leave the growth chart behind. This project solves this problem and helps you create a tracking system you can cherish forever!


 Rookie Tip: Next time I wouldn’t put the strips right on the edge of the wood because you can see a bit of it from the side of my growth chart, which I am not a fan of. If I could do it again knowing what I know now, I would add these more towards the middle of the boards so they’re totally hidden after hanging the board.
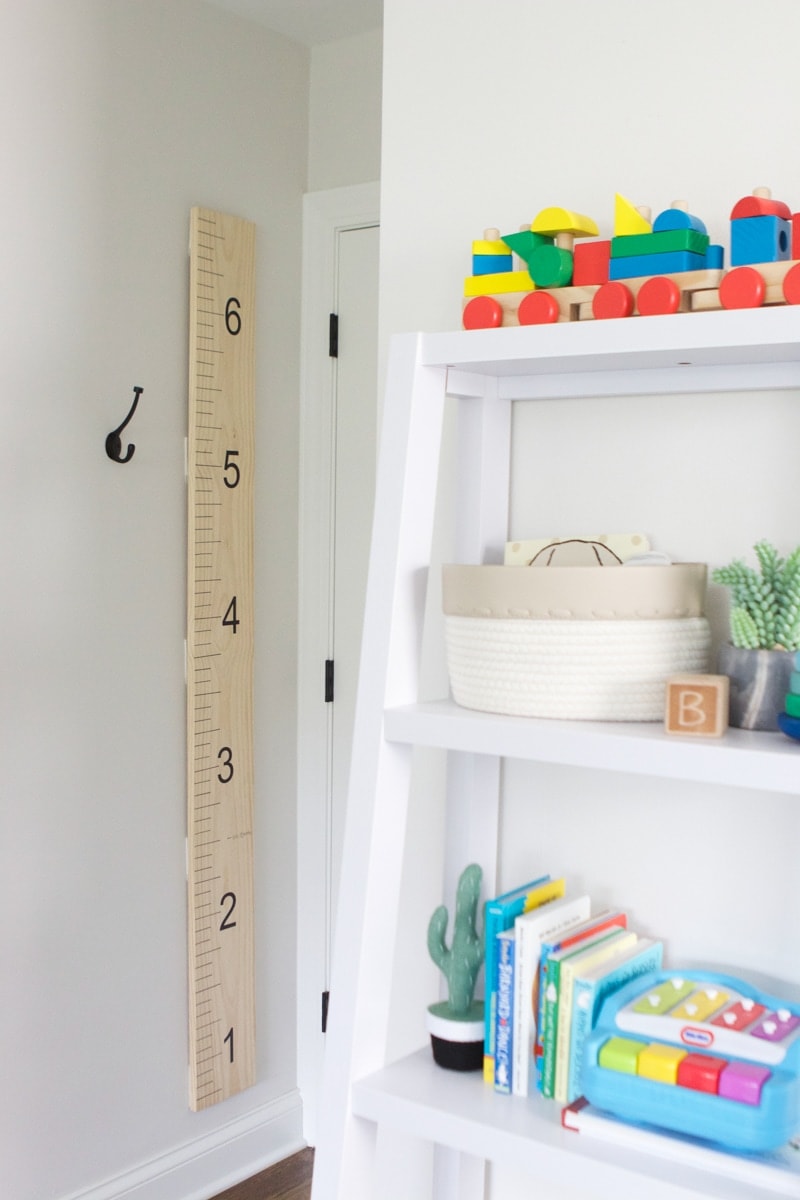
 We did the first year already and my heart melts seeing this mark. I’m so excited that we have a “baseline” to go from. I can’t even imagine the day where we are marking 4, 5… or maybe even 6 feet! This mark already feels too tall, but I’m sure that someday we will look back at this tiny little man and laugh.