Simple Faux French Braid Hairstyle
When I was growing up, I would often have my mom french braid my hair for sporting events or a special day at school. I’d run over to her with my comb, hair bands, and hairspray in hand and sit on the floor as she worked her magic on my unruly blonde hair. She was fantastic at it and I always felt so fancy going to school with my sweet braids.
I loved those braids so much and tried my best to learn how to french braid myself. I practiced on dolls and on friends, yet I could never get it down. The braids I did were loose, messy, and didn’t look a thing like my mom’s awesome french braids. 
Fast forward to today, and I still don’t know how to french braid. Wah wah. However, I have learned a technique that looks pretty close to “real” french braids, but is waaaaay easier! So if you’re like me and could never master the french braid, then this method is for you!
How to Do A Faux French Braid
The only things you’ll need are 2 hair bands, a comb, and some hairspray! I often do these braids when I don’t want to wash and curl my hair, so you can have clean hair or hair that is a day or 2 “old.”


Step 1: Use your comb to create 2 sections of hair all the way down the back. Sometimes I do a part right down the middle, but today I went with a side part. 
Step 2: Use your hairband to section off one of the chunks of hair. This keeps it out of the way as you braid the first side.

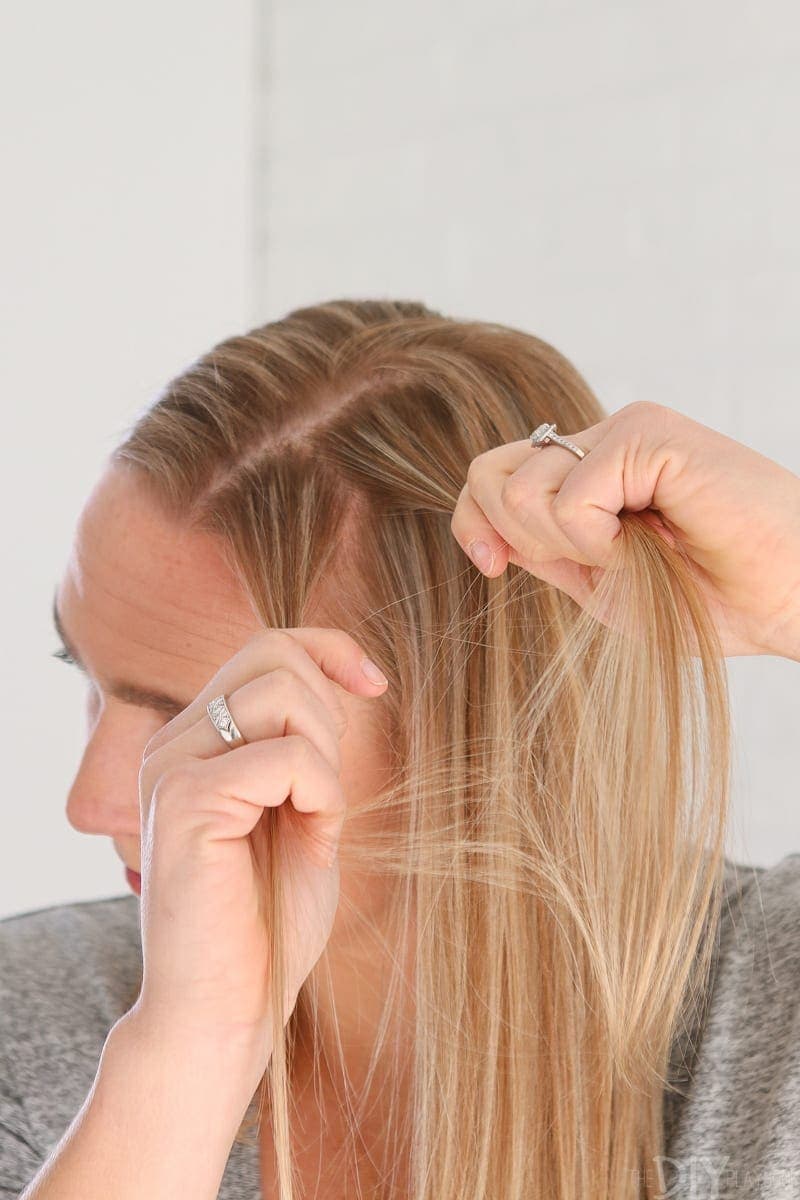
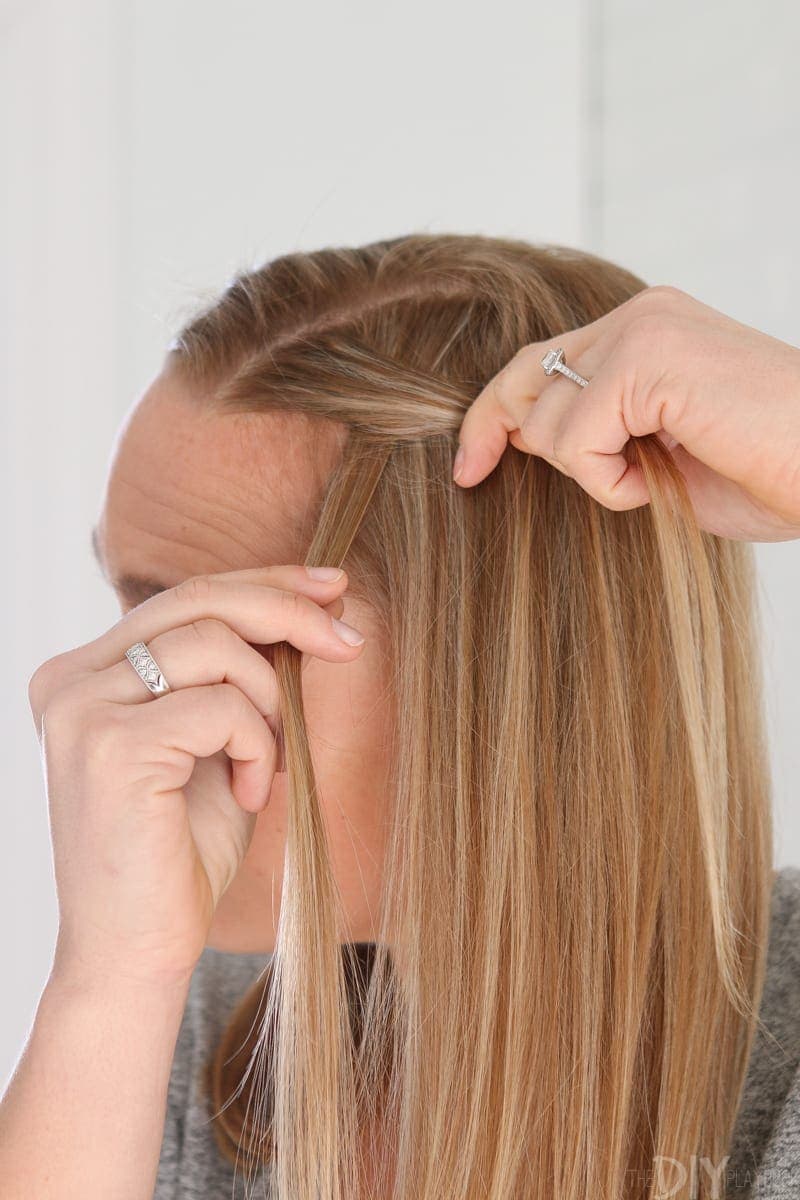
Step 3: Near your part, take a chunk of hair and separate it from the rest of the hair. Then separate that piece into 2 pieces. Now, take the piece closest to your face and pull it over the top of the second piece…kinda like you’re crisscrossing it!
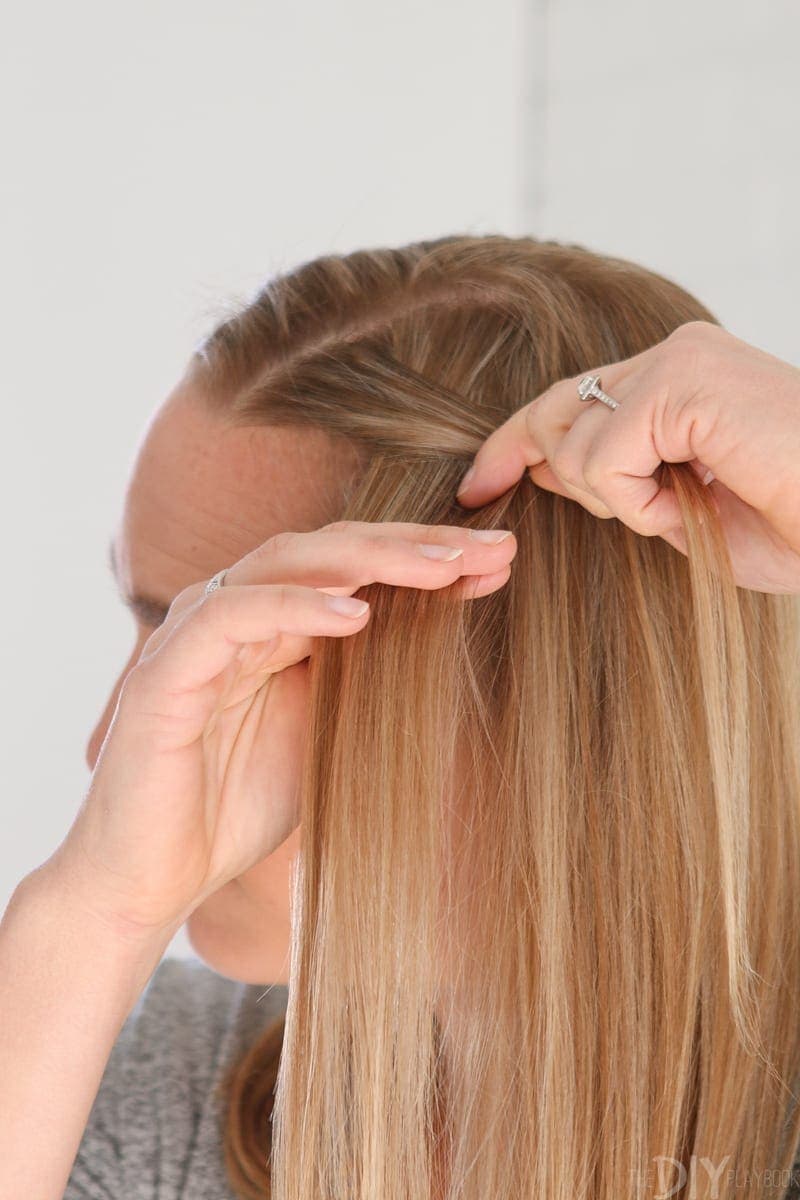

Step 4: Drop the first section of hair, and then scoop up another layer of hair into that strand. Crisscross this again going over the back piece of hair.


Step 5: Repeat these same steps all the way down to your ear. You’ll crisscross the strands, always dropping the front piece to add more hair to it.
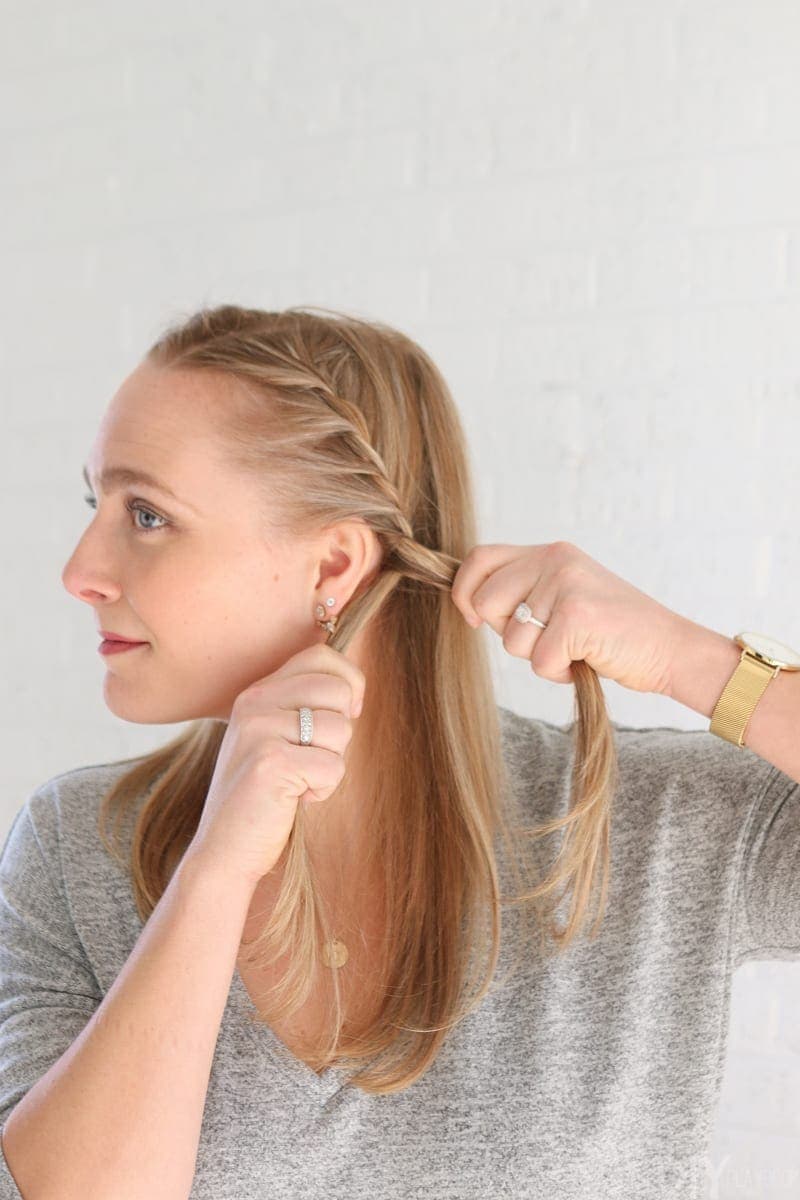


Step 6: Once you get to your ear, gather the hair that is left over in the back. With this hair, you now have 3 different sections of hair. Go ahead and braid these 3 pieces like normal all the way down.


Step 7: Secure with a hair tie and repeat on the other side!


Now, this certainly isn’t perfect, but it’s so incredibly easy and should only take you a few minutes on each side! I love that I can now get the french braid look, without all of the effort (& skill) it takes. 
This look is perfect for a workout, a day of DIY, or simply a day when I just do not want to do my hair. Sometimes I’ll do this faux french braid and then pin each side up in the back for a “fancy” updo. Great for those days when you want to look pulled together, but can’t bear the thought of washing and drying your hair #thestruggleisreal
More Hair Tutorials
Anyone else out there challenged when it comes to braiding? I’m certainly no professional hair stylist, but if I can do this faux french braid then anyone can!
Casey


