DIY Ice Cream Pumpkins
We know, we know…it’s isn’t even Labor Day and we’re already chatting about PUMPKINS! But we just can’t help ourselves. Fall is going to be here before we know it, and we want to be prepped for one of our favorite seasons.

Last year, Michaels challenged us to come up with a creative idea using their craft pumpkins, and we created these adorable DIY donut pumpkins. Michaels has craft pumpkins in so many shapes, sizes, and even colors this year (like blue!)… the possibilities are seriously endless!
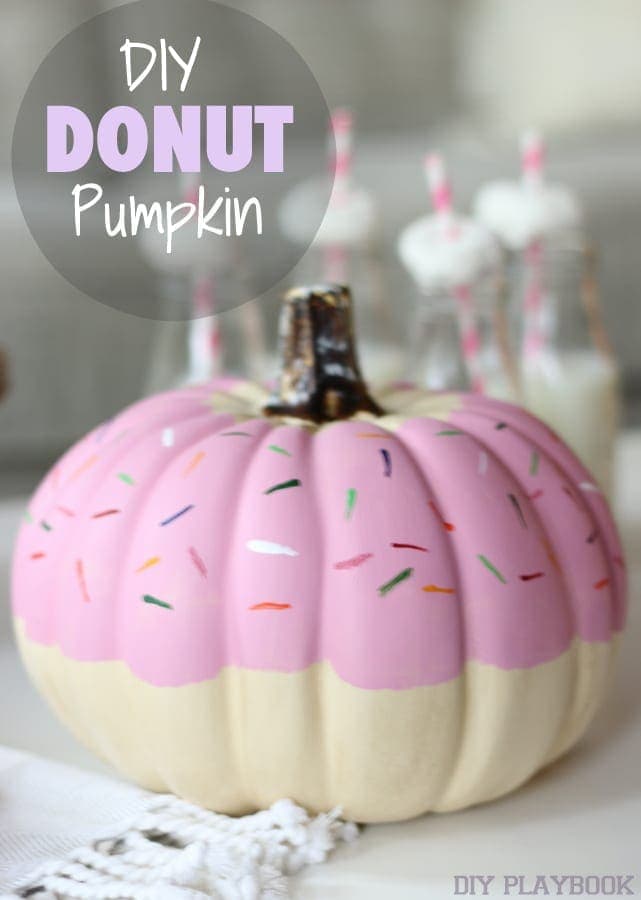
Is anyone else craving a donut right now?! Us too!
This year, we decided to keep the SWEETNESS going with our Michaels Makers pumpkin craft. And what do we love just as much donuts?
ICE CREAM!
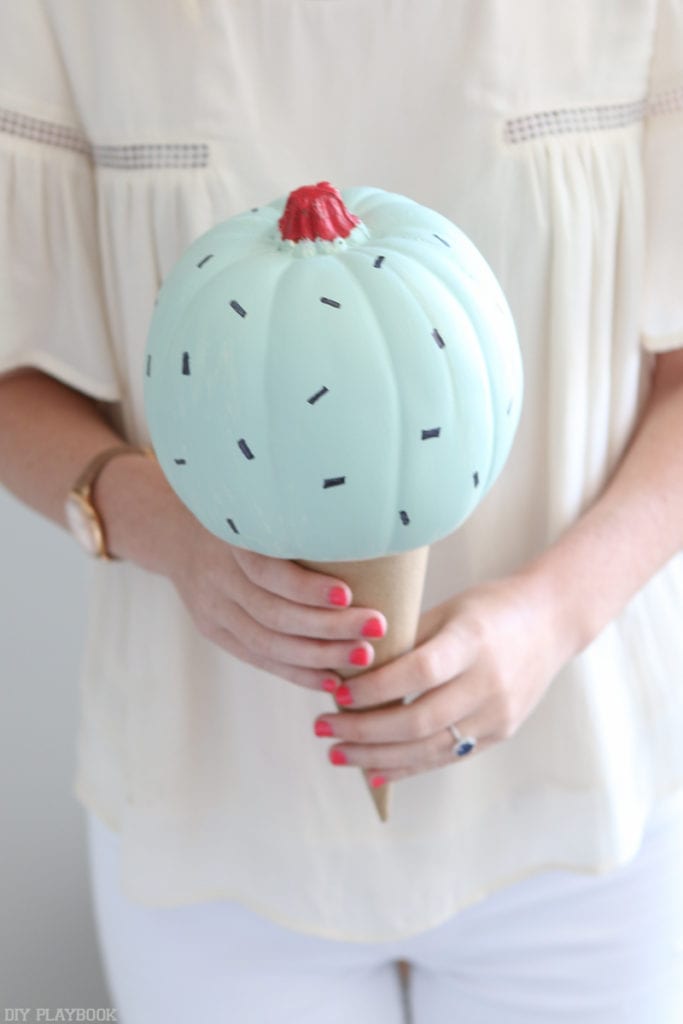
Just like last year’s pumpkin craft, these ice-cream pumpkins are super easy to execute (READ: NO CARVING REQUIRED!!) <— Not to mention creating a DIY Ice Cream Pumpkin takes about 15 minutes to create.
Pumpkin Ice Cream Cone – SUPPLIES
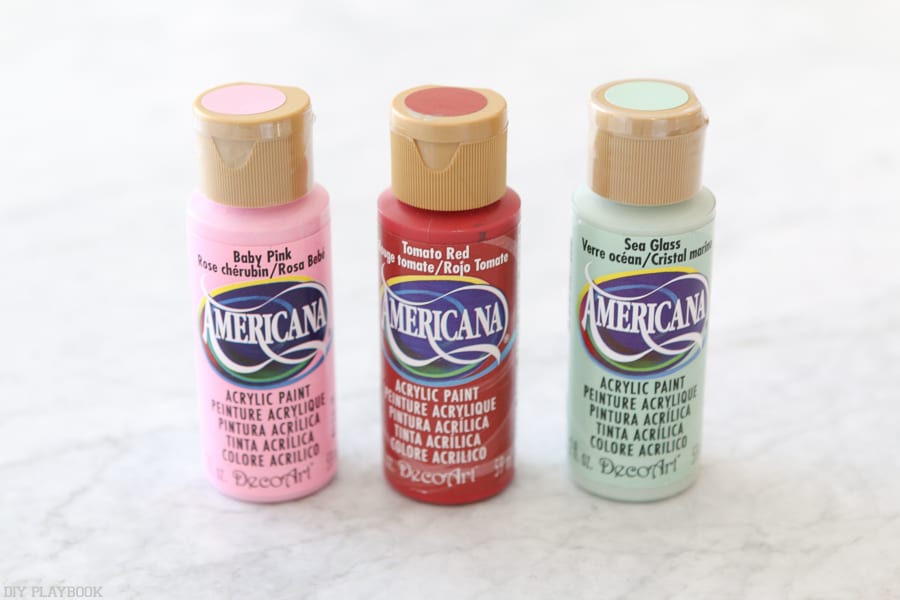
- Acrylic Paint in a variety of colors
- Paint Brush
- Craft pumpkins
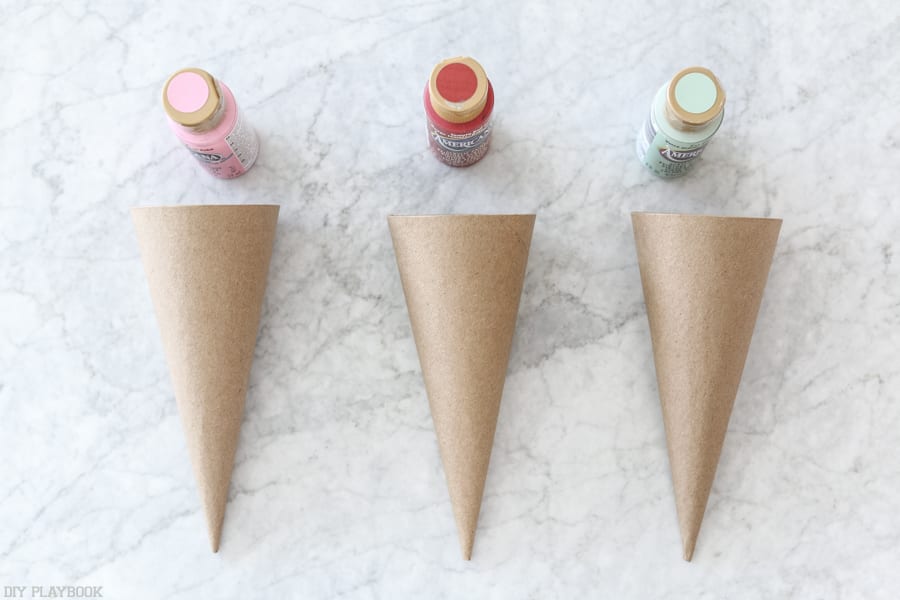
- Cardboard cones <— Available for about $1 in the cardboard/paper-mache aisle in Michaels
- Sharpie marker
We built a cone holder so that the pumpkins could sit right in their cones on the counter or porch. Here’s what you’ll need if you want to re-create that look:
- Wood (cut to size)
- Nail Gun
- Corner Brackets (options)
- Hole Saw + Drill to cut perfect circles
- Stain
Pumpkin Ice Cream Cone – STEPS
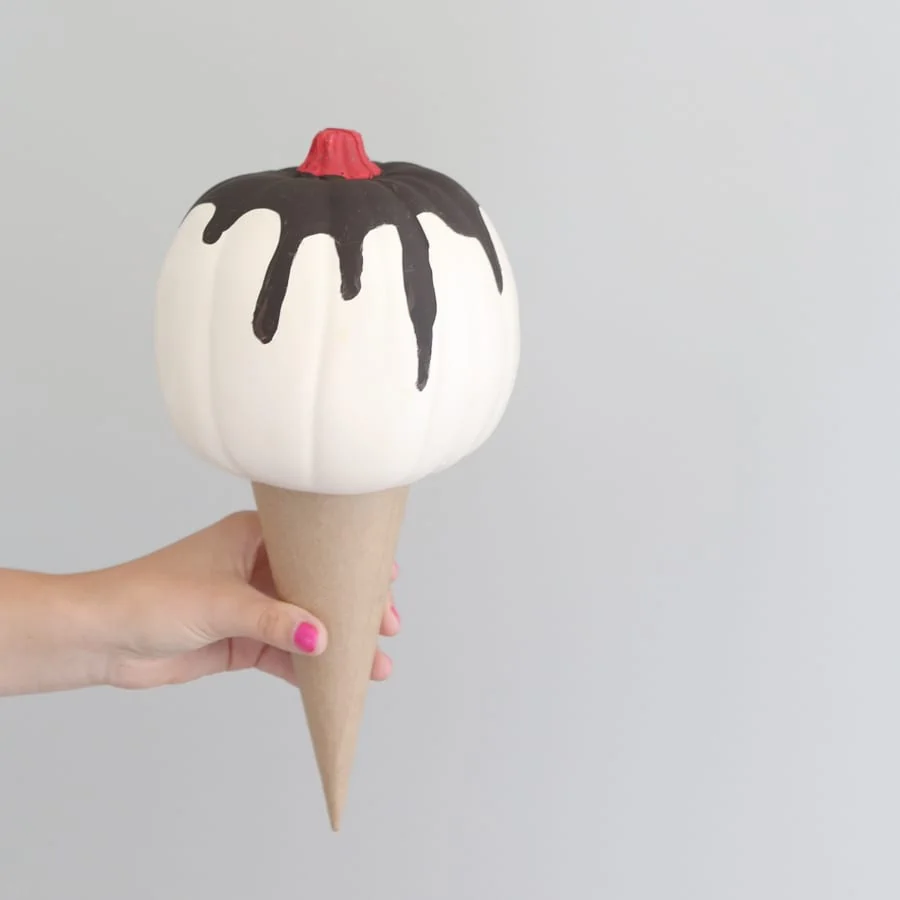
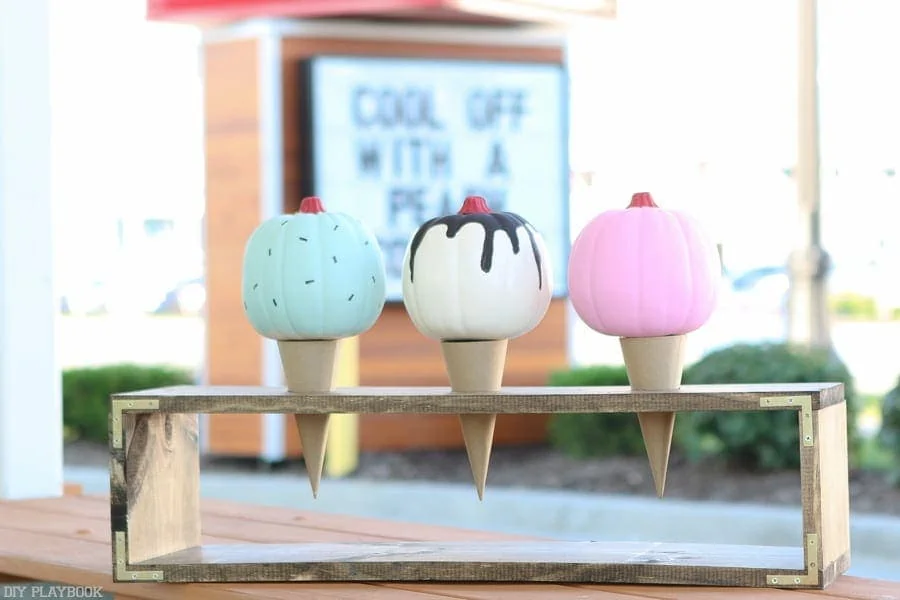
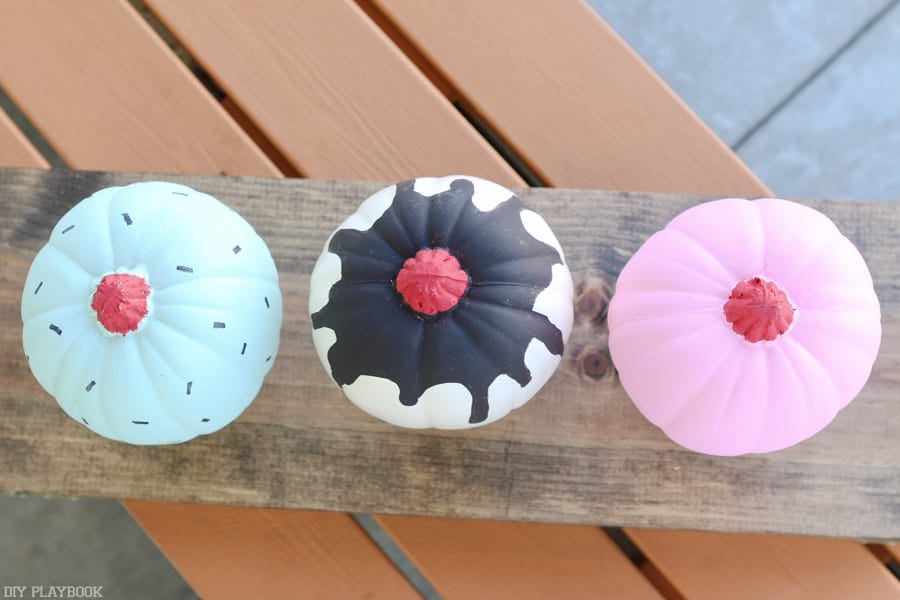
1. Instead of going with the orange craft pumpkins, we opted for the white ones. This made it a lot easier to paint on our ice cream “flavors.” We used a light green for the mint chocolate chip base, a pink for strawberry, and left one pumpkin completely blank for vanilla! We needed about 2 good coats of paint for each one, but it dries fast. Each pumpkin took us about 5-10 minutes to paint, then each coat dried within 20 minutes so we were able to complete each pumpkin pretty quickly.
2. With the base flavor dry, it’s time to add the “chocolate chips” and “hot fudge.” We used dark brown paint to create the fudge on top of the white ice cream cone. And simply used a sharpie to draw on the chocolate chips on the mint chocolate chip pumpkin!
3. Finally, it’s time to add the cherry on top, which may just be the easiest part of this entire project. Just paint the top portion of the pumpkin (the stem) with bright red paint and you’re good to go.
4. We opted to design our pumpkins using some of our favorite flavors, but feel free to use your favorites when designing your ice cream cone pumpkins. Heck, you could even stack two pumpkins on top of each other for a double scoop of deliciousness!
5. Once the pumpkins are completely dry, all you have to do is set it on top of these pre-made cardboard cones and you’re all set! It’s seriously that easy!! But BEWARE: if you’re anything like us, every time you look at these adorable pumpkins you’ll immediately crave an ice-cream cone!!
Extra Credit
We built this basic “cone holder” so that each of the pumpkins could sit freely on their cones all season long. Surprisingly building this basic “box” was a lot easier than we anticipated. All we had to do was pick up some wood and get it cut to size (2 pieces that were 9 inches long + 2 pieces that were around 24 inches).
We attached the pieces using a nail gun and stained the box to create a more “rustic” look, but painting this a bright color or a stainless steel color could look great too!
Then we added corner brackets, mostly for the “look” but they did add a bit of stability too.

And last but certainly not least, we used a hole saw on our drill (like this one!) and simply drilled three 1.5″ holes into the top of the box in order to hold the cones.
Once the cones are placed inside of the holes you drilled, you can simply place a pumpkin right on top each cone and they should sit perfectly to be displayed for all your trick-or-treaters to drool over. #literally

Cool off with a Pumpkin Cone
So what do you say, do you think you will give these no-carve pumpkins a try? If you do… we would LOVE to see what flavors you choose and how you put your spin on these delicious looking treats!

Bridget&Casey