How to Install the Nest Thermostat
Do you guys remember that Disney movie, Smart House? I’m probably dating myself here, but I remember thinking it was so cool, and that someday I wanted a “smart house” with all kinds of gadgets that would make my life easier.
When we moved into our new condo, I immediately knew I wanted to add a few smart features to our space. The first one on our list? A programmable learning thermostat. One that I could connect to my iPhone, one that would learn our daily habits, and one that would save us money on our heating/cooling system. There are a ton of options on the market, and I read reviews on a lot of them. My brothers both rave about the Nest thermostat, and since they’re the 2 “techiest” people I know…I figured I’d go with their recommendation.
How to Install the Nest Thermostat
 I purchased the Nest on Amazon, and 2 days later I was ready to install this bad boy and try it out! Having little experience with electrical work (& having never installed a thermostat), I was a little nervous about getting my new Nest set up. Luckily, it was incredibly easy. Let me walk you through how I installed ours.
Supplies for Installation
- The Nest: Just about everything should come in the box. Including a backplate, screws, trim kit, and a screwdriver
- Drill (optional)
- Anchors (optional)
- Touch-up paint, brush, painter’s tape (optional)
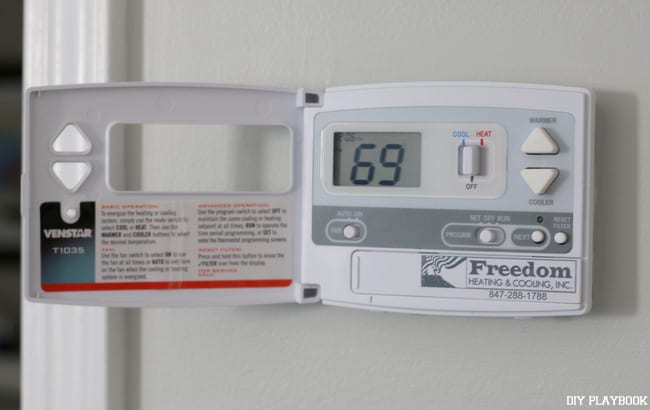 Here’s my old thermostat. This bad boy looks pretty ancient compared to the new models on the market.
 1) First and foremost, you’re going to want to turn off the power to your heating/cooling system. I did that…but I was still super worried about getting electrocuted. So I went ahead and turned off all of the power in our condo. No need to do this if you’re certain there is no power running to your thermostat, but I wanted to be extra careful.
2) Next, I took off the face of our old thermostat. Ours had some screws underneath, so I just undid those. But some will just pop right off. 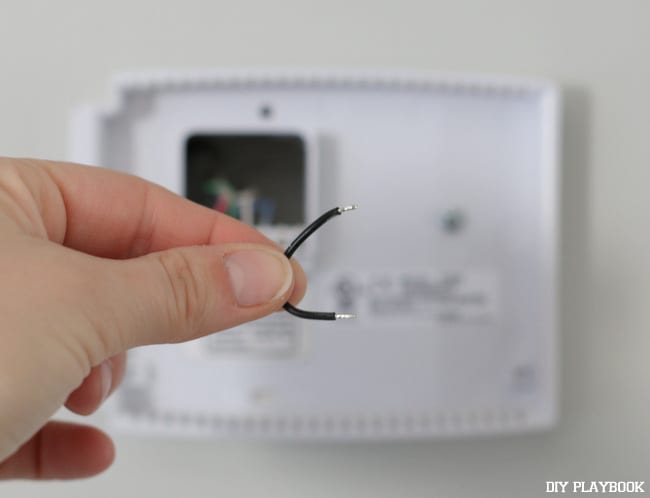 3) We had a black jumper wire on our old thermostat, that is not needed with the Nest. So I removed that and threw it away.
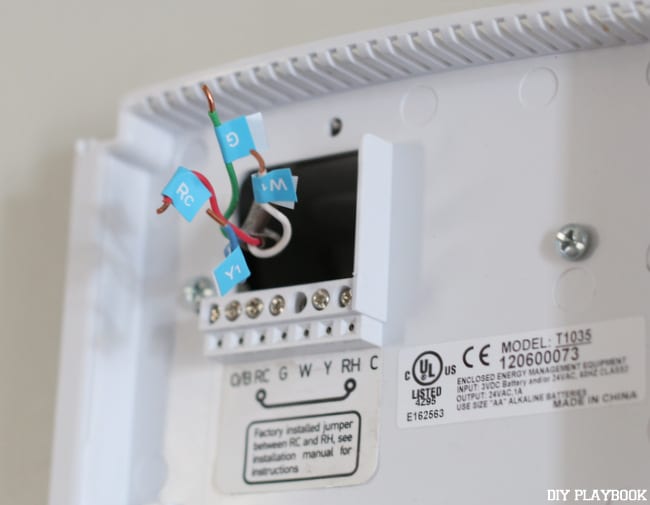
4) I then labeled all of the wires that were hooked up to my old thermostat. Luckily, some handy dandy stickers come in the Nest installation guide, so I just wrapped them around the wires.
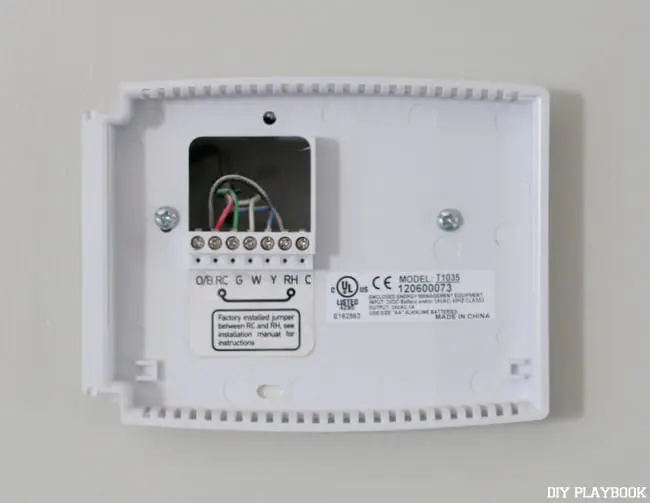
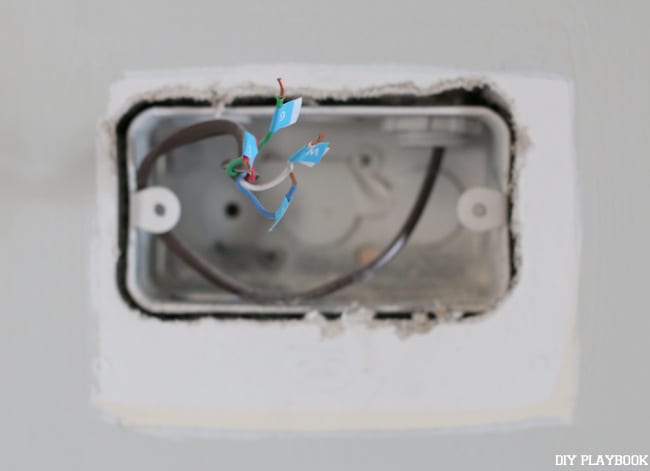 5) With the stickers on, I unscrewed the wires and took the base off of our old thermostat. That’s when things got a bit tricky…
 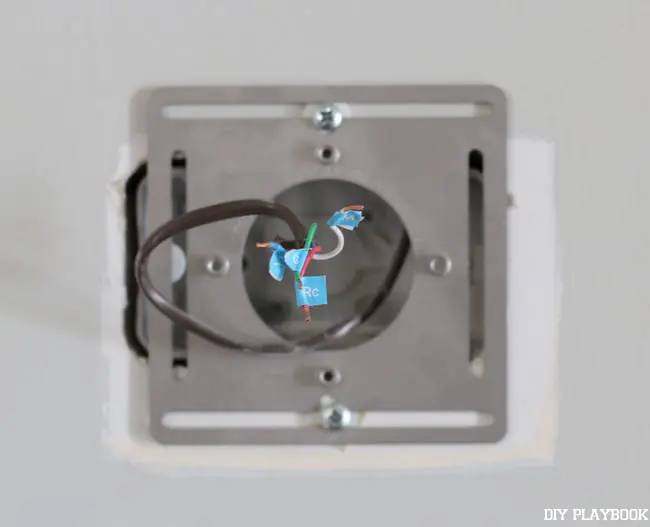 Because the size of our electrical box was too big, we knew we were going to have to use the white trim kit that came with the Nest. Not ideal…but we could live with it. So I started to install the backplate on the wall, but it was a bit loose due to the weak spots around the electrical box. I ended up having to use anchors and screws to secure the backplate to the wall.
 6) With the backplate firmly in place, I attached the white trim plate and the base of the Nest…carefully pulling the wires through. Then I hooked up each wire to the appropriate gray slot.
Rookie Tip: Make sure you get the wires into the slot so the button on the end stays down and in place. I didn’t realize that at first and was so confused as to why it wasn’t working properly.
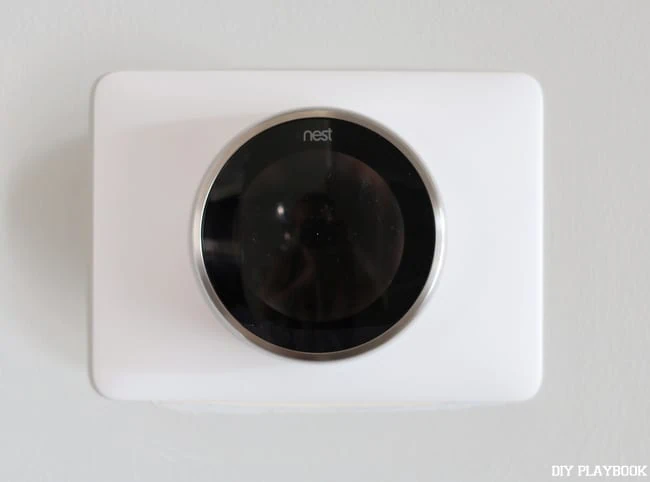
7) With all of the wires in place, I attached the face of the Nest. With it all finished, I went back to the breaker box and turned on the power. 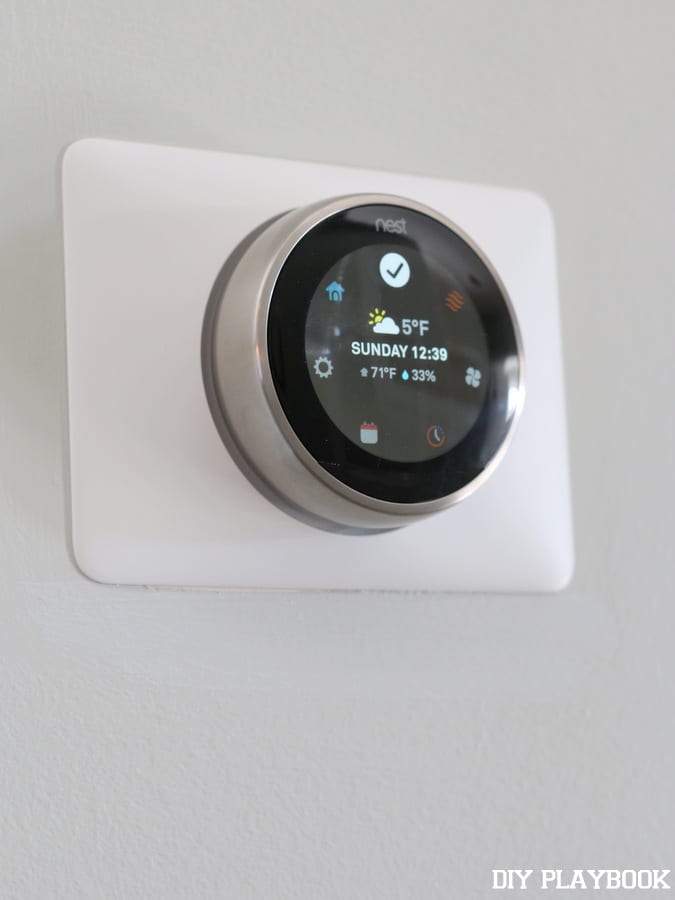 The display immediately lit up and I went through the steps for setup. You’ll connect the device to wifi, setup an account on your iPhone, and answer some questions about your current heating/cooling system. All in all…pretty straightforward.
  8) With our Nest working wonderfully, I did a little touch-up job of paint on the bottom side of the trim plate.
 Even though we ran into a few minor issues, I’m still so happy I installed it all on my own. The directions were incredibly easy to follow, and every time I walk by it I give myself a mental pat on the back. Yes, it was a bit pricey ($249), but I think we’ll end up saving some money on our heating/cooling bills in the long-run. Plus, I love that I can always check-in and change the temperature of our home. While we’re at work, we keep it in the “away” setting so it doesn’t go below 62 degrees or higher than 80 degrees. Then on my way home from work, I always turn the heat on so it’s nice and toasty when I walk in the door.
 Looks like I’m on my way to having a smart house of my own…
Casey


