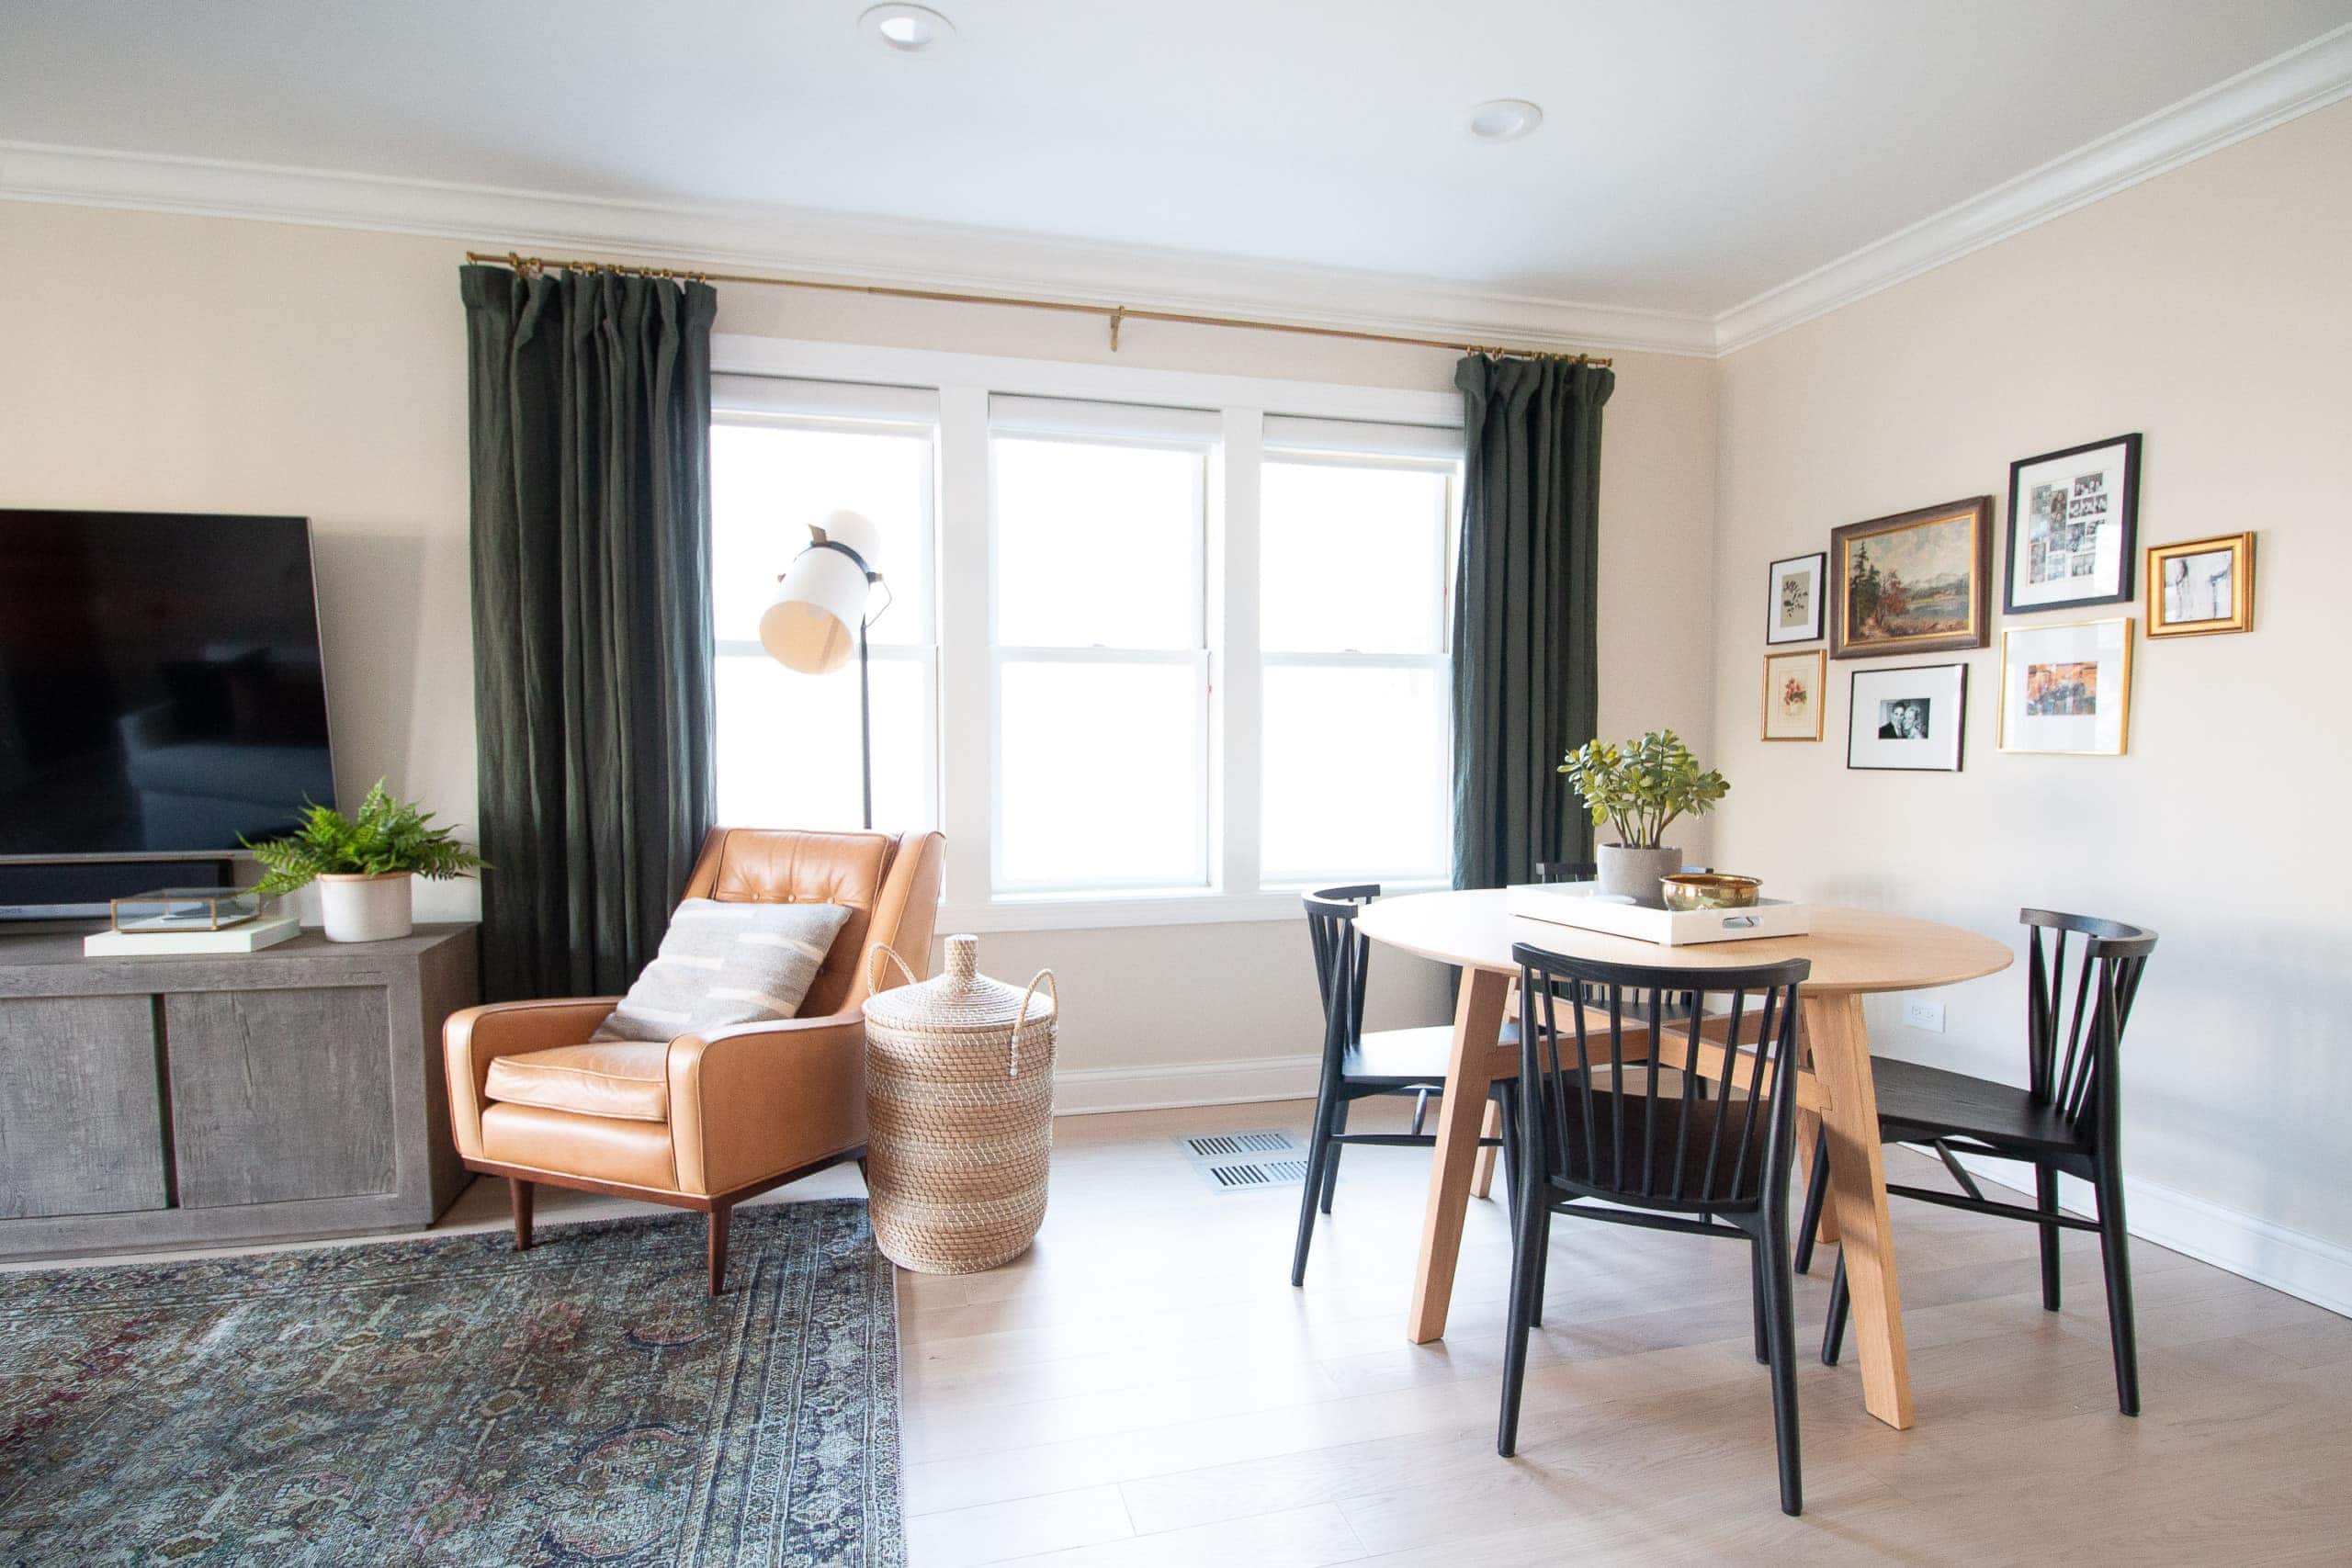
Our New Living Room Gallery Wall
As I mentioned in this blog post about our new living room shades, I had one item left on our living room to-do list and that was to add some personality to the walls. It seems crazy to me that hanging a living room gallery wall was the last item on my list! We only moved in in September and I’m so proud of how this room has come together over a short span of time. 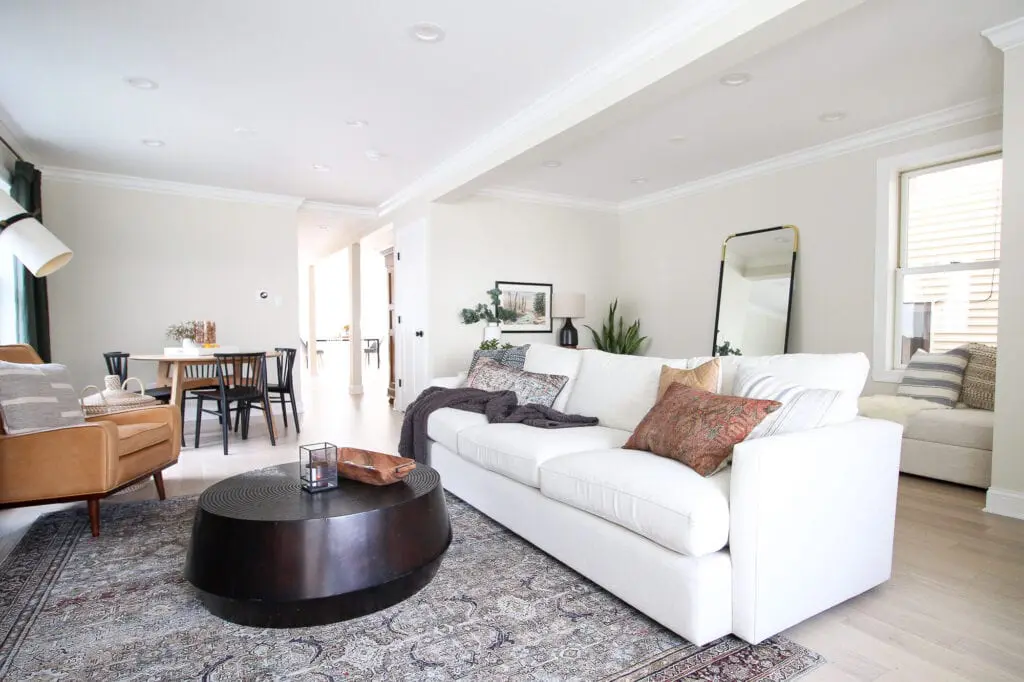
Art and photographs are a must for every single home because they tell the story of the people who live there. They are personal, they tell a little bit about your history, what you like, and maybe even give a unique glimpse into your past. Our living room is the first space you see when you enter our home so I want all of the pieces in here to feel like us. I already have a few meaningful pieces on the walls in our living room that I absolutely adore.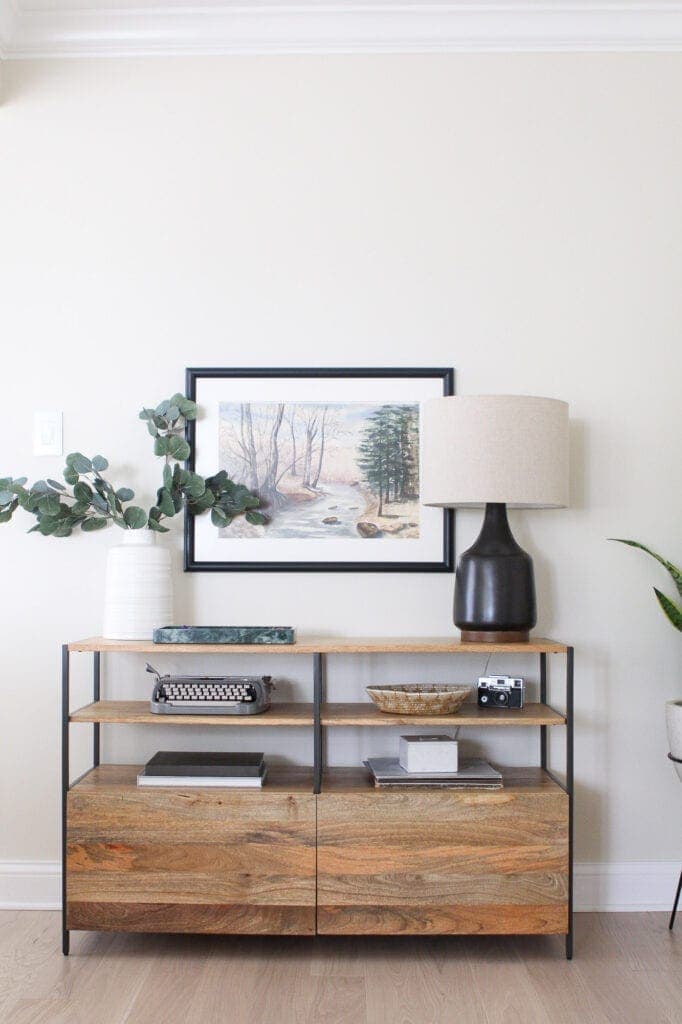
This watercolor landscape painted by my great-grandmother hangs over our entryway console. 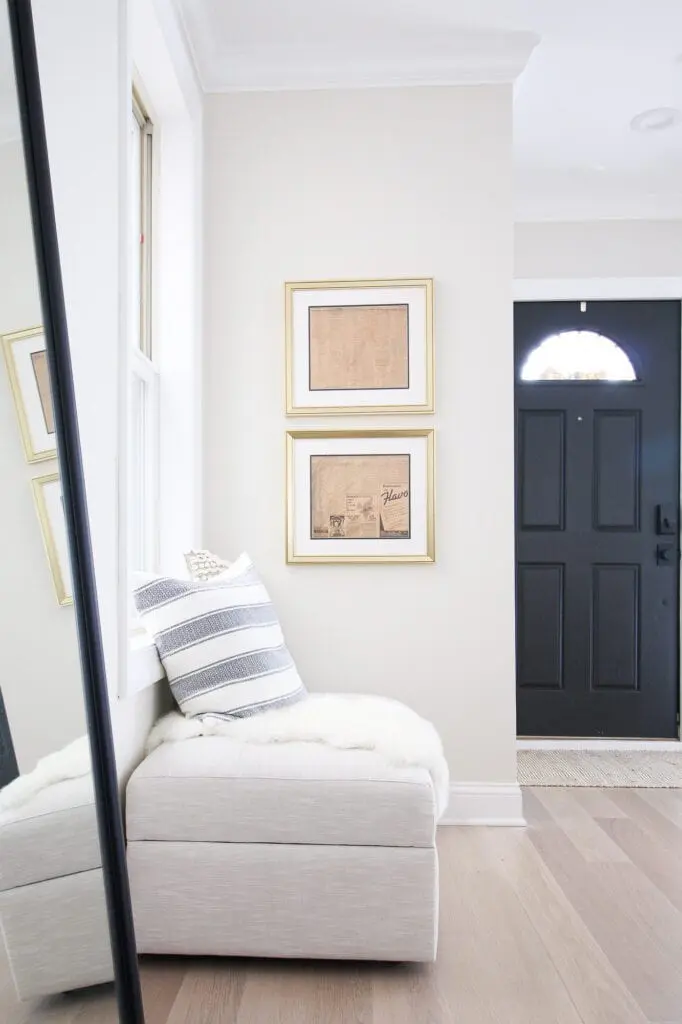
I framed two sections of a Chicago newspaper from 1938. We found that old paper in the walls during our renovation this summer. 
And finally, our home key art lives by the front door, showcasing the keys from all of the places Finn and I have lived together. 
We have lots of special pieces in this room already, but I still had one wall that was just begging for some attention. The wall right behind the wood table in this room needed a little somethin’ somethin’. I didn’t want to just go ahead and hang anything, so I thought about it for a few months until I came up with the perfect plan.
Finding Special Art & Photos

I considered adding one or two really large pieces of art to this blank wall, but ultimately, I decided that a living room gallery wall would be more fun. Once I decided on a gallery wall, I started to figure out exactly what I wanted to include, knowing that I wanted each piece to feel special to us, while still working with the other elements of the room.
I’ve kept a large stash of frames and art in our basement storage room just waiting to hang them around the house. I got out all of the frames and decided to use some of the gold and black ones for this room. Because I didn’t want them all to be photos, I ended up buying this piece from Artfully Walls and I found the gorgeous landscape at an antique store when shopping with my mom this winter!
Once I had a pretty good collection of frames, art, and photographs, I took an afternoon and got to work hanging.
Tips to Hang a Living Room Gallery Wall
For some reason, people are really intimidated to hang gallery walls. Don’t be! Symmetrical gallery walls are definitely more difficult (you can see my tips here), but an asymmetrical gallery wall isn’t supposed to look perfect, so you really can’t screw it up!
Tape Out the Wall

The first thing I like to do is understand the space I’m working with. A gallery wall is meant to be viewed as one large piece of art, so figure out how high, low, and wide you want it to be. I didn’t want to go floor to ceiling for mine (although that is a cool look in the right space), but instead, I wanted it to be visible over the table and take up a good chunk of the wall to the left of our thermostat. I used painter’s tape to make a visual guide for myself to get the area just right and then measured the height and width of that space.
Transfer to the Floor
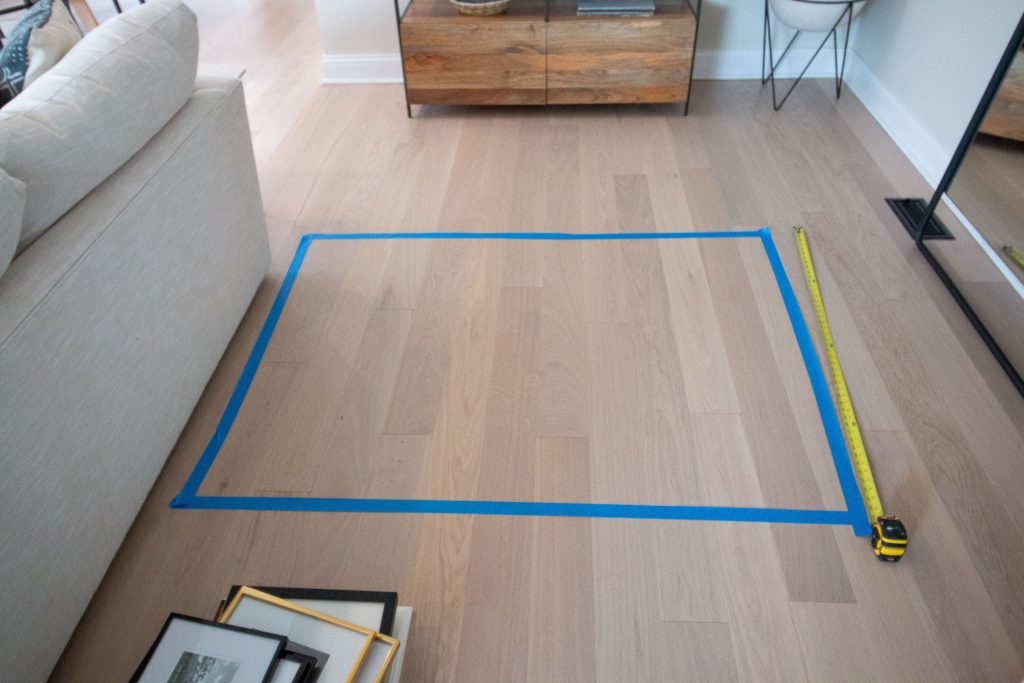
It’s much easier to play around with your frames and layout on the ground. I took the measurements from the wall and transferred them to the ground, using painter’s tape to visually map it out. Remember, this is just a rough template. You can go beyond the tape, but know that you’ll then have a larger gallery wall in the end.
Playing around with the layout is the trickiest part (but also the most fun!). Here are some tips to keep in mind…
- Choose your biggest (or favorite) piece and place it slightly off-center. For me, my biggest and favorite was the landscape art.
- Build around that piece, making sure you add both horizontal and vertical frames.
- Stick to no more than three frame colors and make sure they’re scattered throughout the grouping. (I went with gold, black, and then the wood).
- Mats are usually a good idea to make photographs look better (more about that in this rookie mistake post).
- Use larger frames (try to avoid 4×6 frames and 5×7 frames). My smallest frame is the 8×8 gold frame on the right.
- I usually try to have about 2-4 inches of space between each frame. If you have too much distance, it will start to feel disjointed.
- Don’t hang your gallery wall too high (literally the biggest mistake I see!)
Use Wrapping Paper
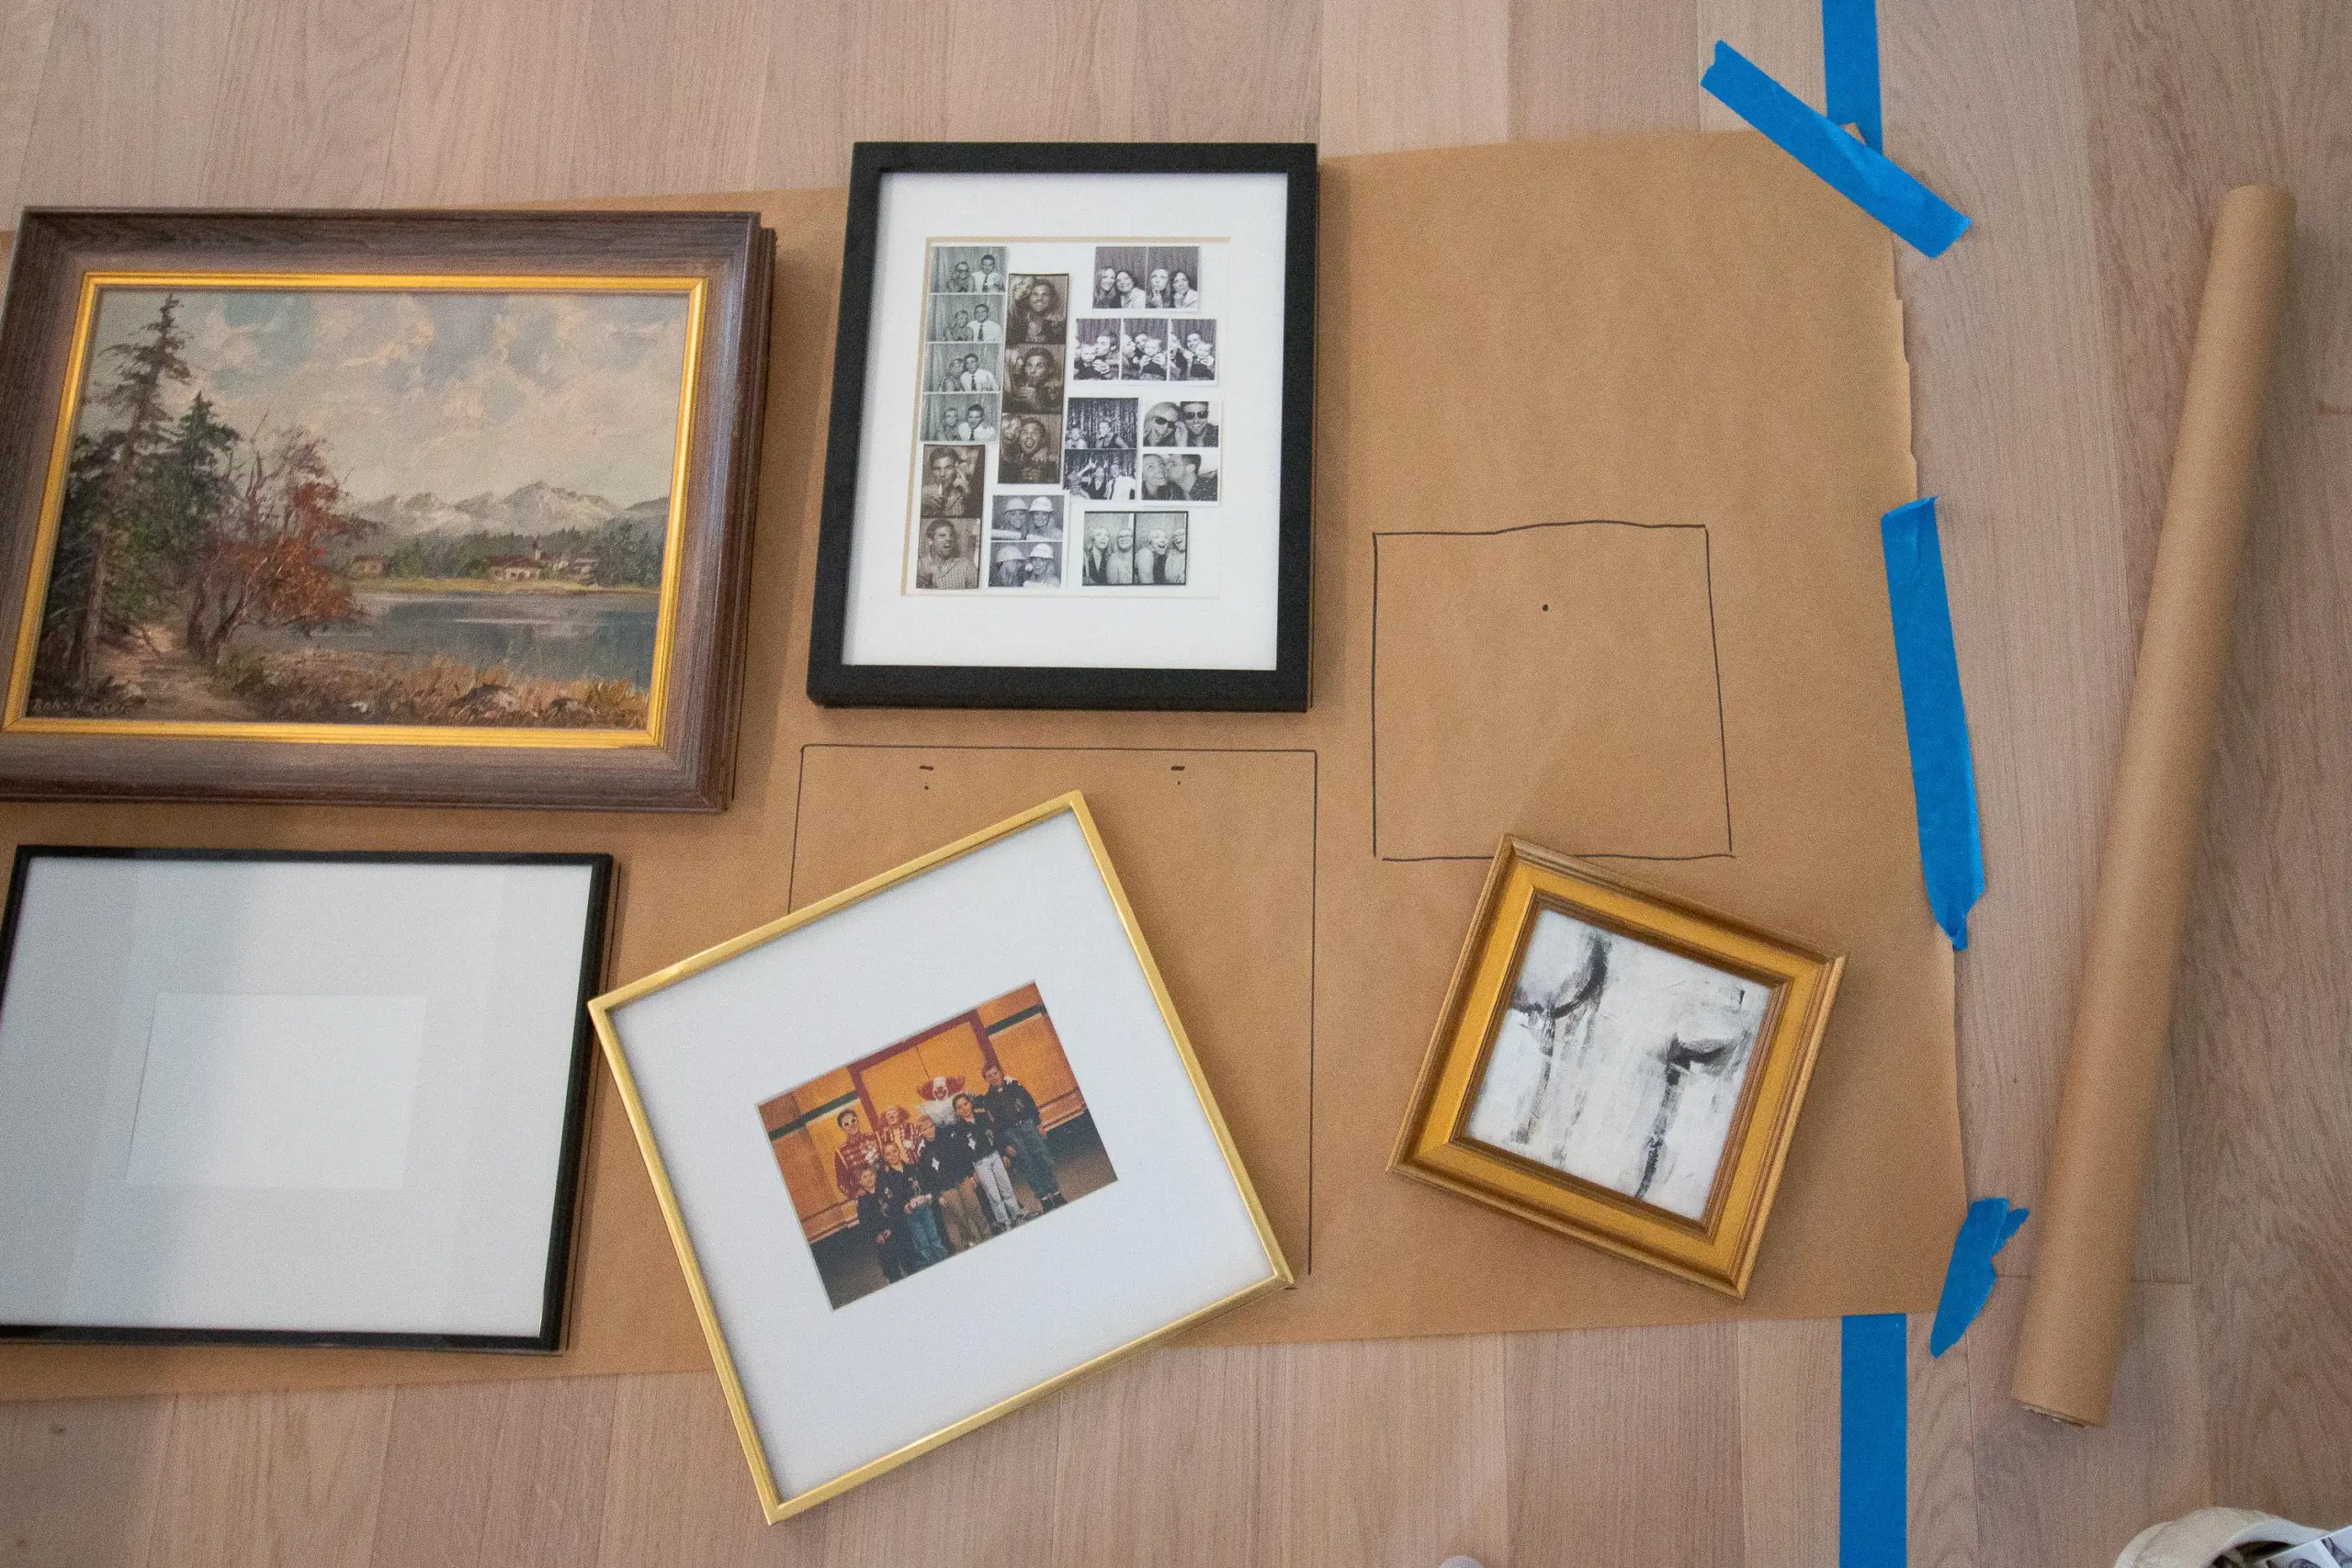
Once you finalize your perfect layout, how the heck do you get it to the wall? Here’s where my favorite trick comes into play! Grab a roll of wrapping paper (I had plenty left over from Christmas!) and lay it out on the ground. If your gallery wall is really large, you may need to tape two sheets together to make it tall enough. Tape the wrapping paper on the floor and then move your frames over it. 
Go ahead and trace every frame. You can also measure where the hooks are on the back and transfer that directly to the paper. I explain it in more detail in this blog post, but seriously…do it! It is such a timesaver! When everything is marked on the wrapping paper, transfer it to the wall using the same painter’s tape box you made in the beginning.
Grab the Right Supplies
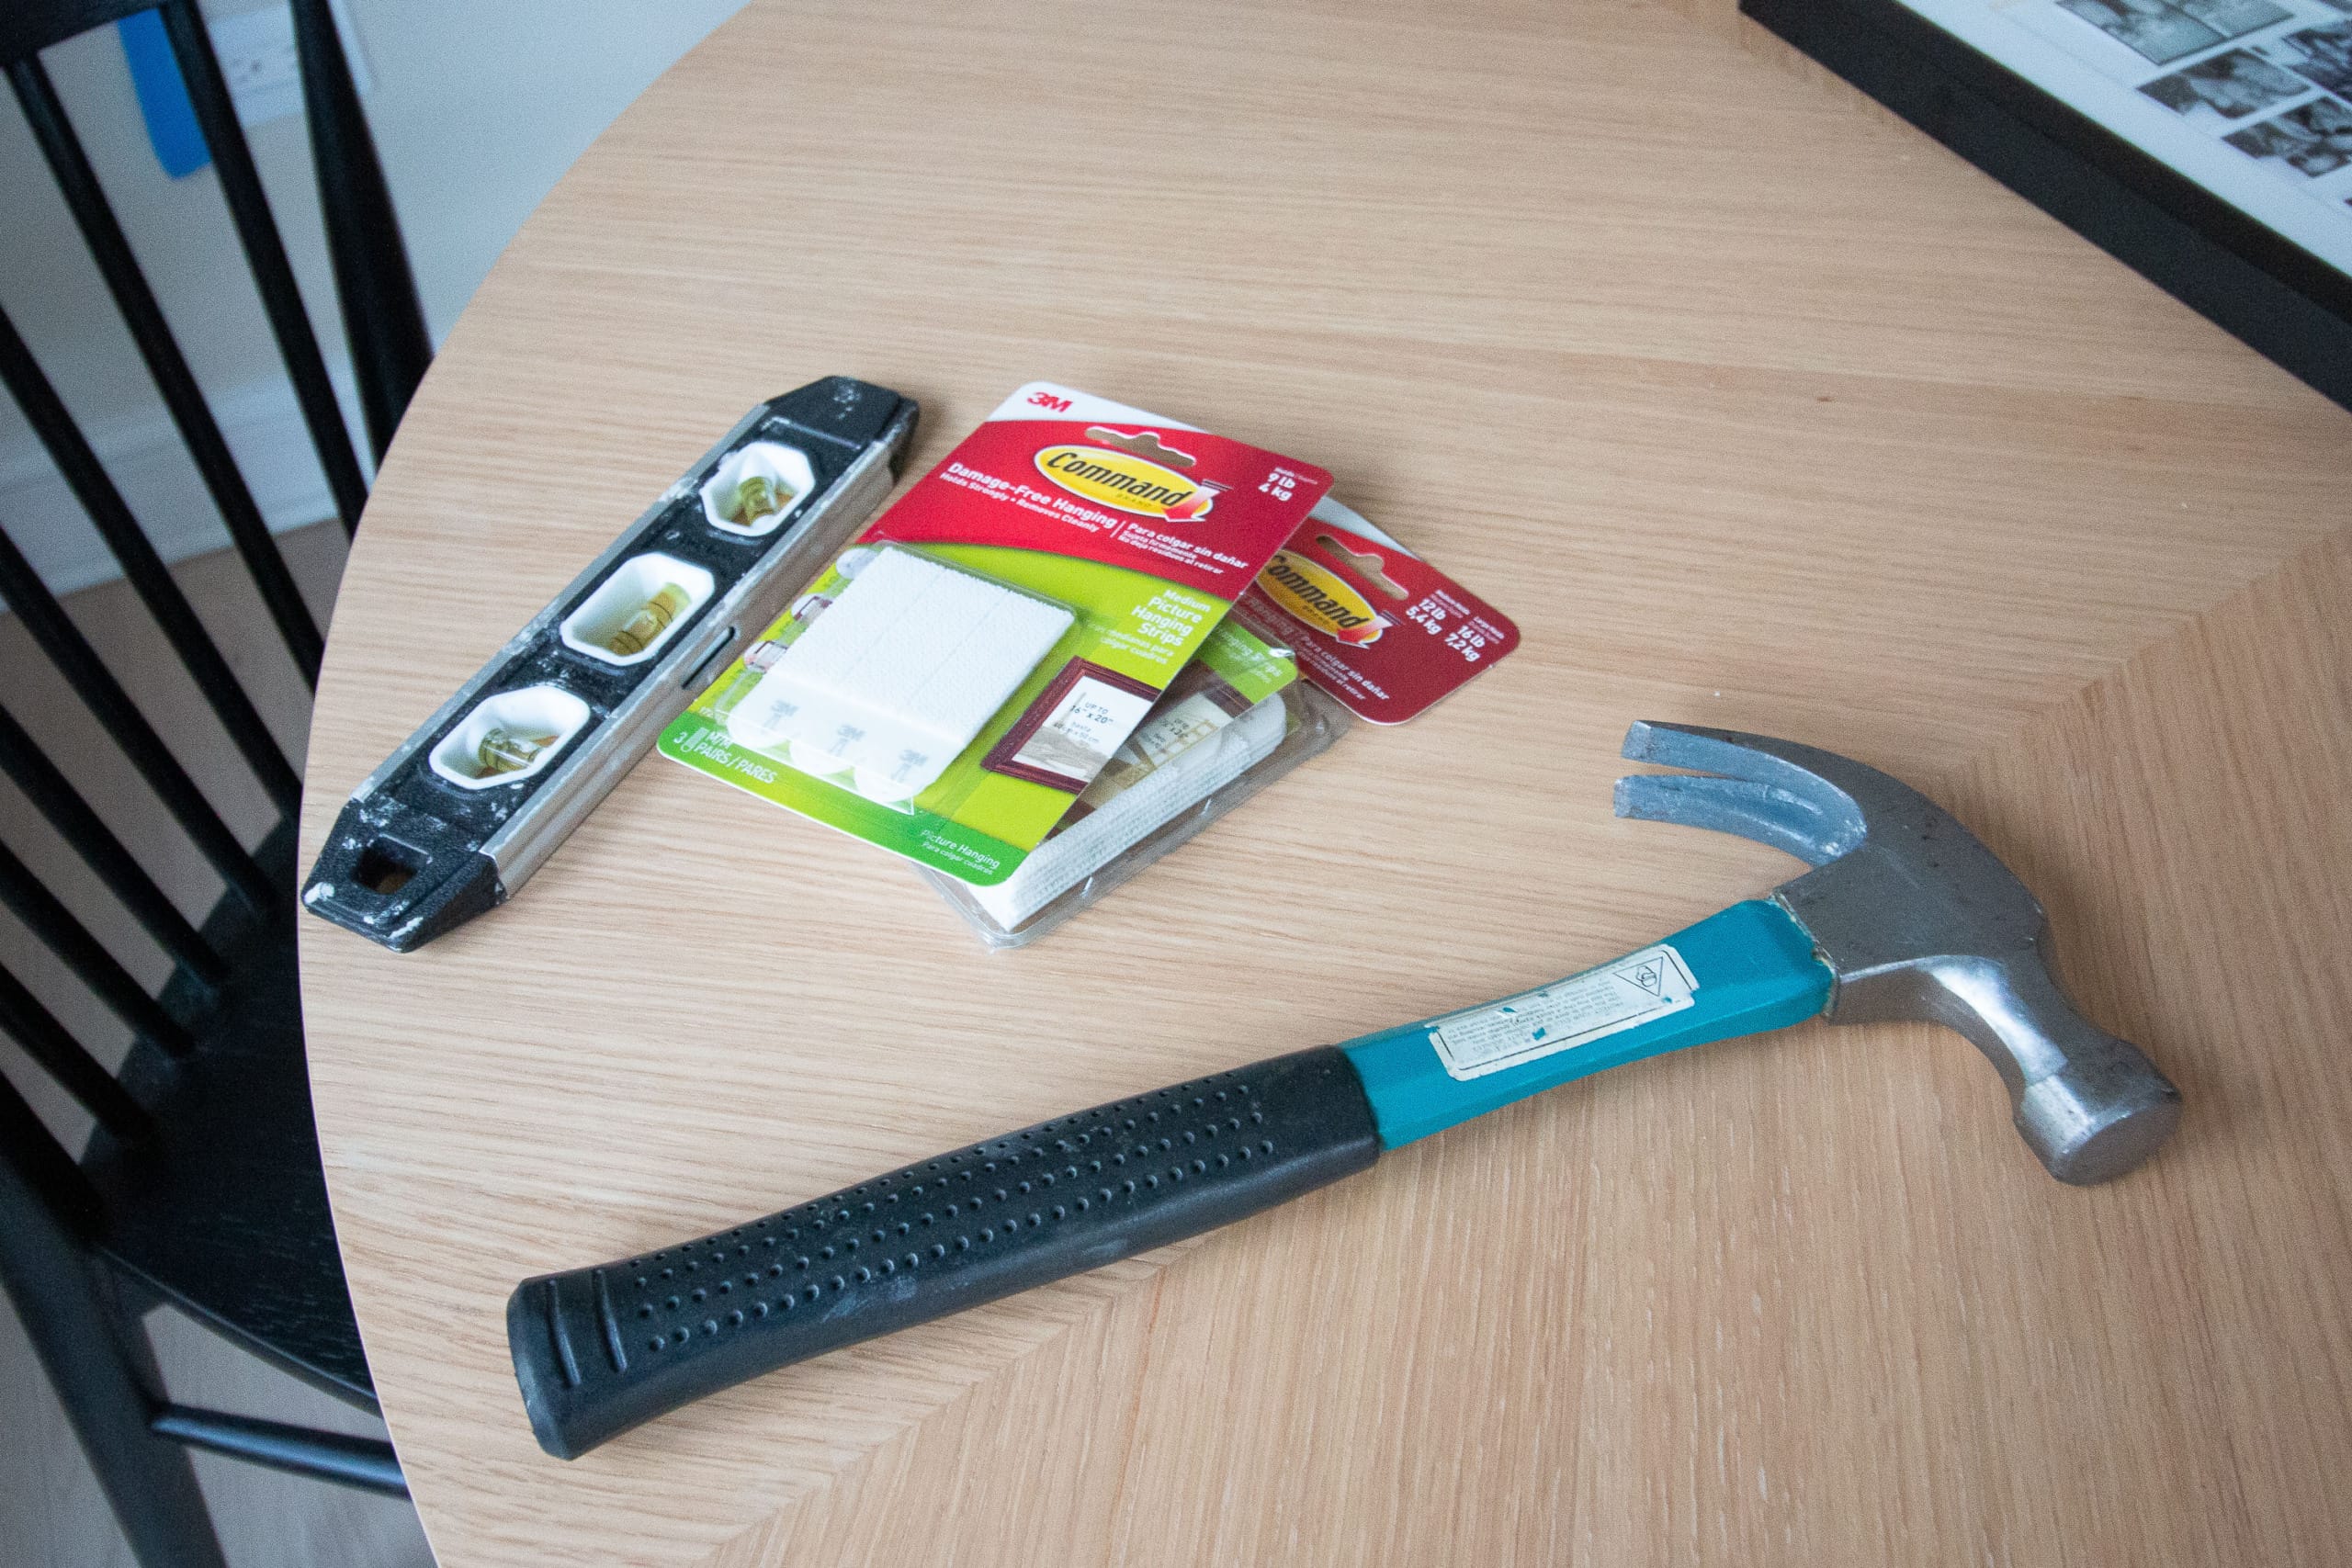
For this living room gallery wall, I ended up needing a hammer, nails, level, and Command Strips to hang all of my pieces. If you have a really heavy piece of art (and you’re not hanging it into a stud), then you’ll also need to grab an anchor and screw. For me, I used a combination of nails and Command Strips for the heavier items. The Command Strips help to keep each piece straight and prevent them from wiggling around! Then, for the lighter/smaller art, I only used Command Strips to hang them – no nails or anchors and screws needed. 

Just go slow; make sure you’re following your guide; keep your level handy, and you’ll be good to go!
Our New Living Room Gallery Wall


Special Art
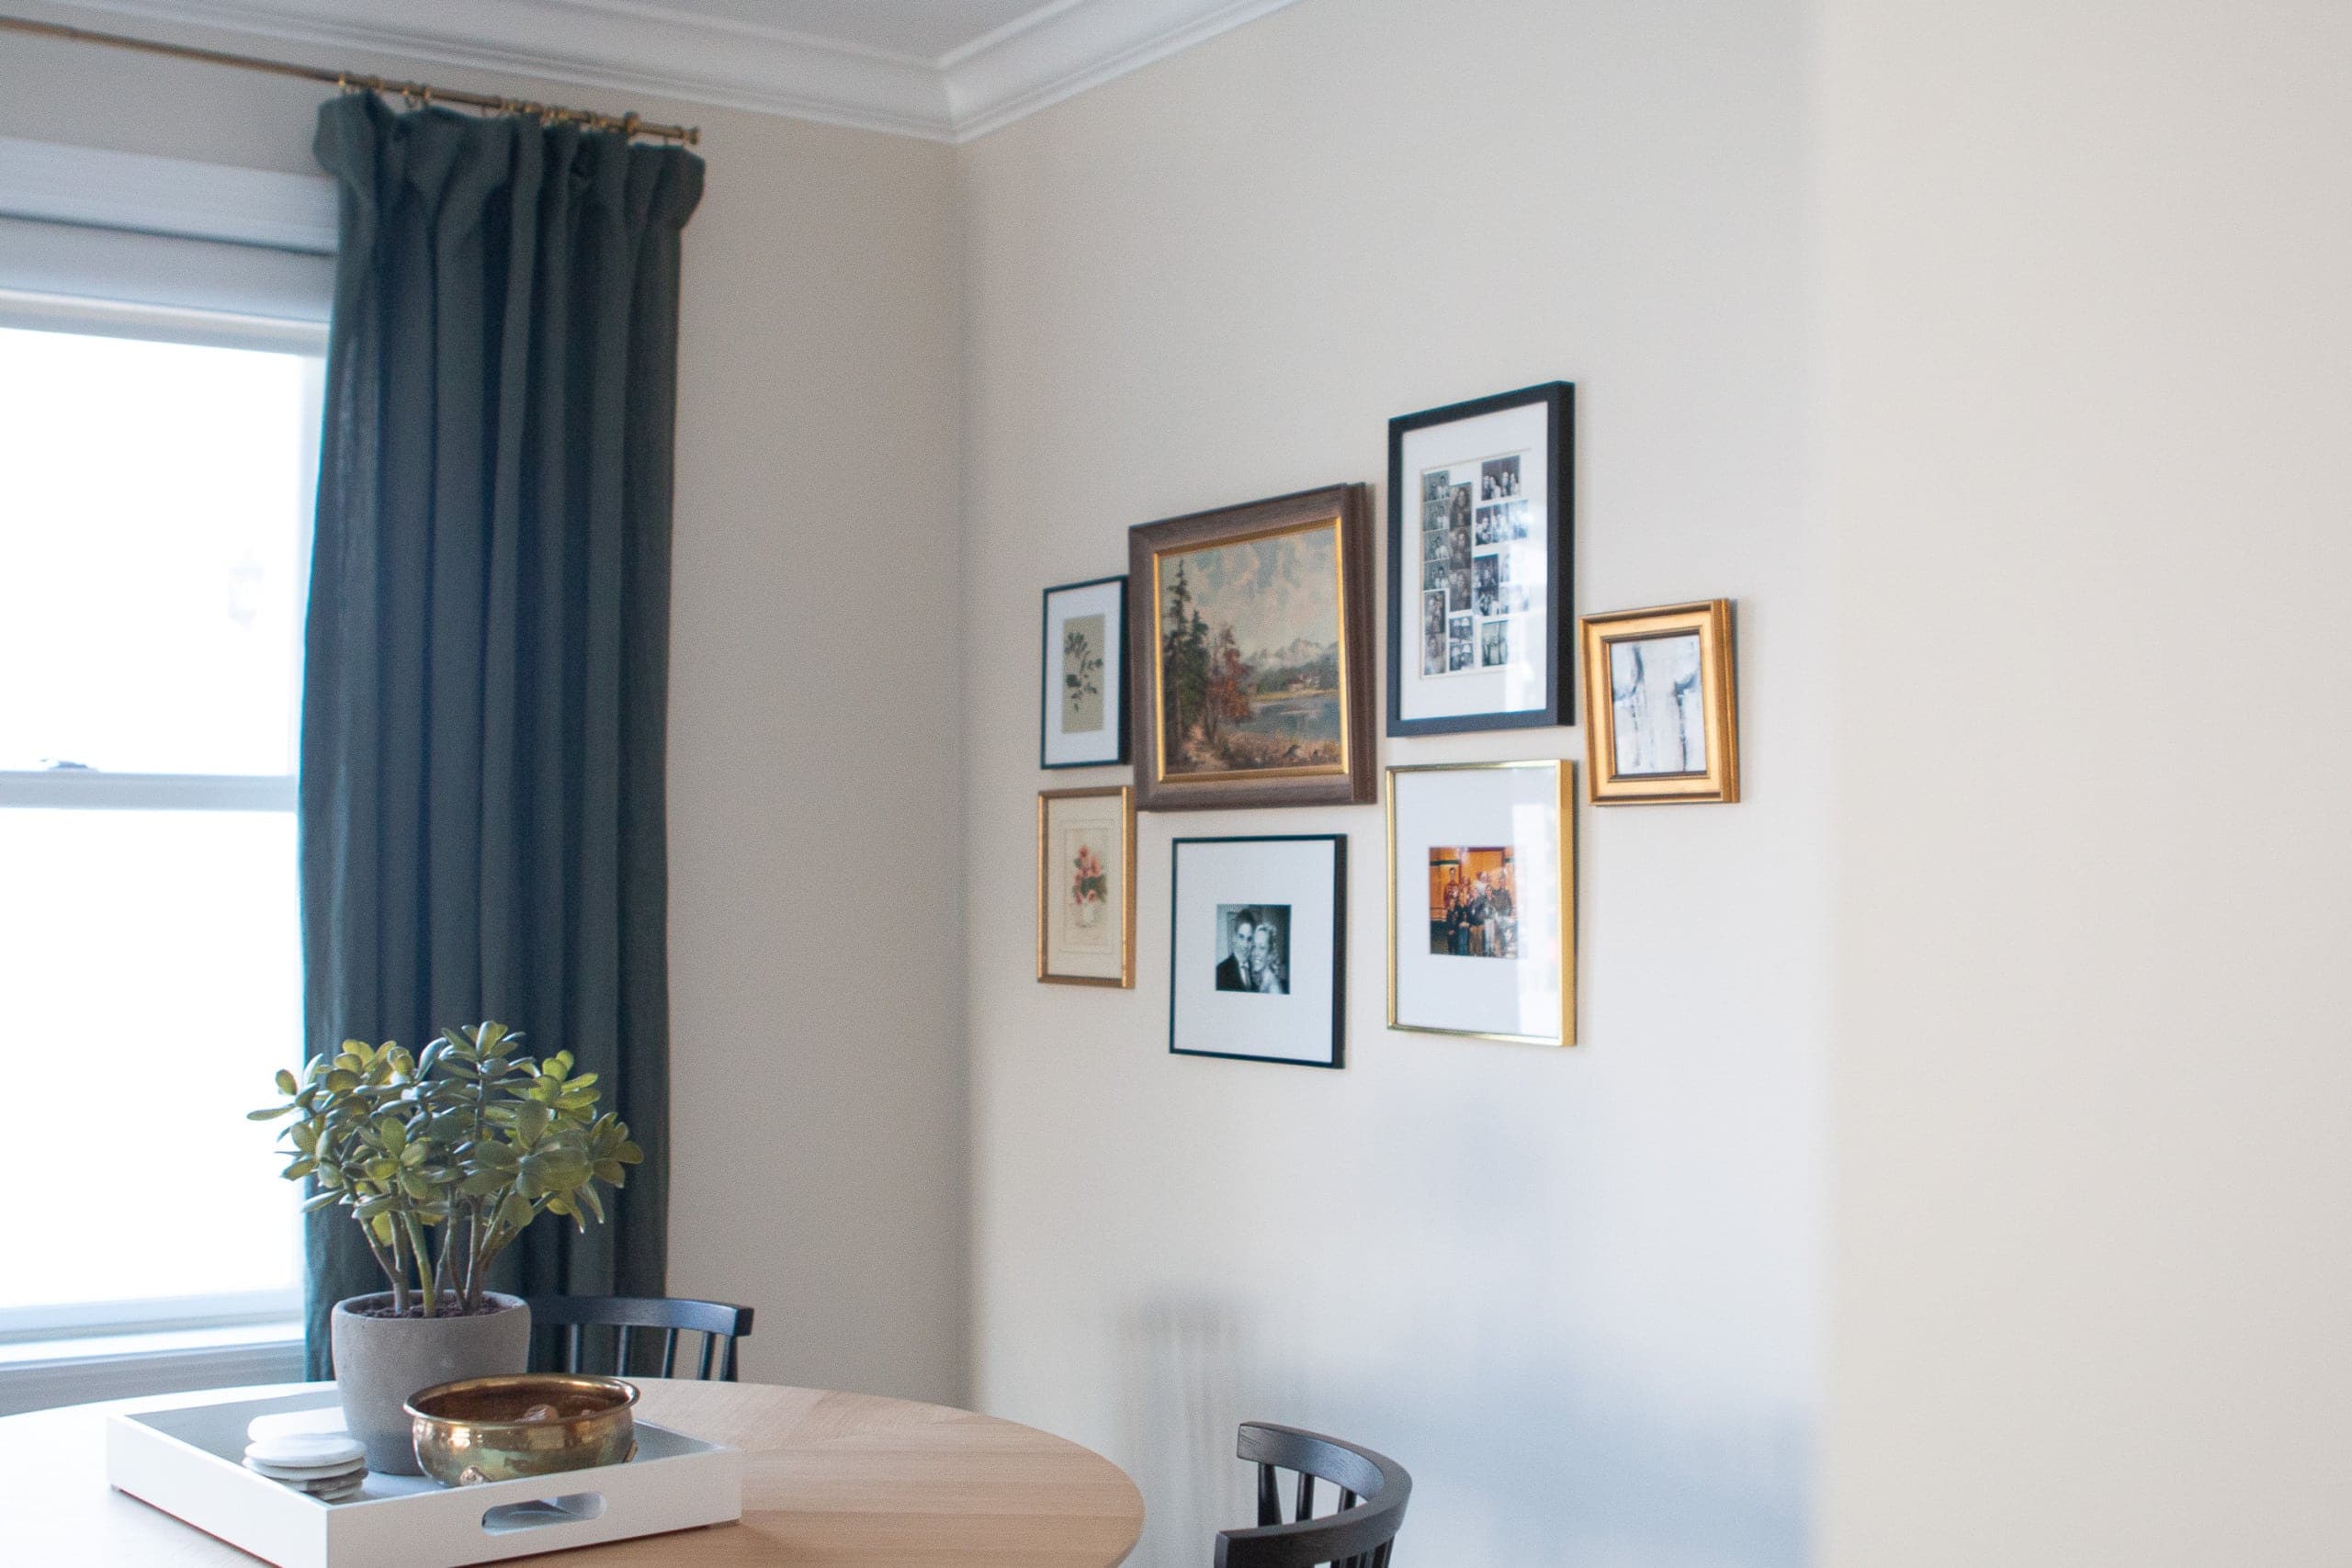 From Left to Right: 8×10 Black Frame (Michaels), Juniper Print Shop Art (no longer sold) // 9×11 Gold Frame, Vintage Art // 15×20 Oil Painting // 11×14 Black Frame (Michaels), B&W Photo // 12×15 Black Frame (Michaels), Photo Booth Strips // 13×13 Gold Frame, Photo // 8×8 Gold Frame, Art
I love the way it turned out! But what I love even more is the fact that every piece is special to me. Let’s take a closer look…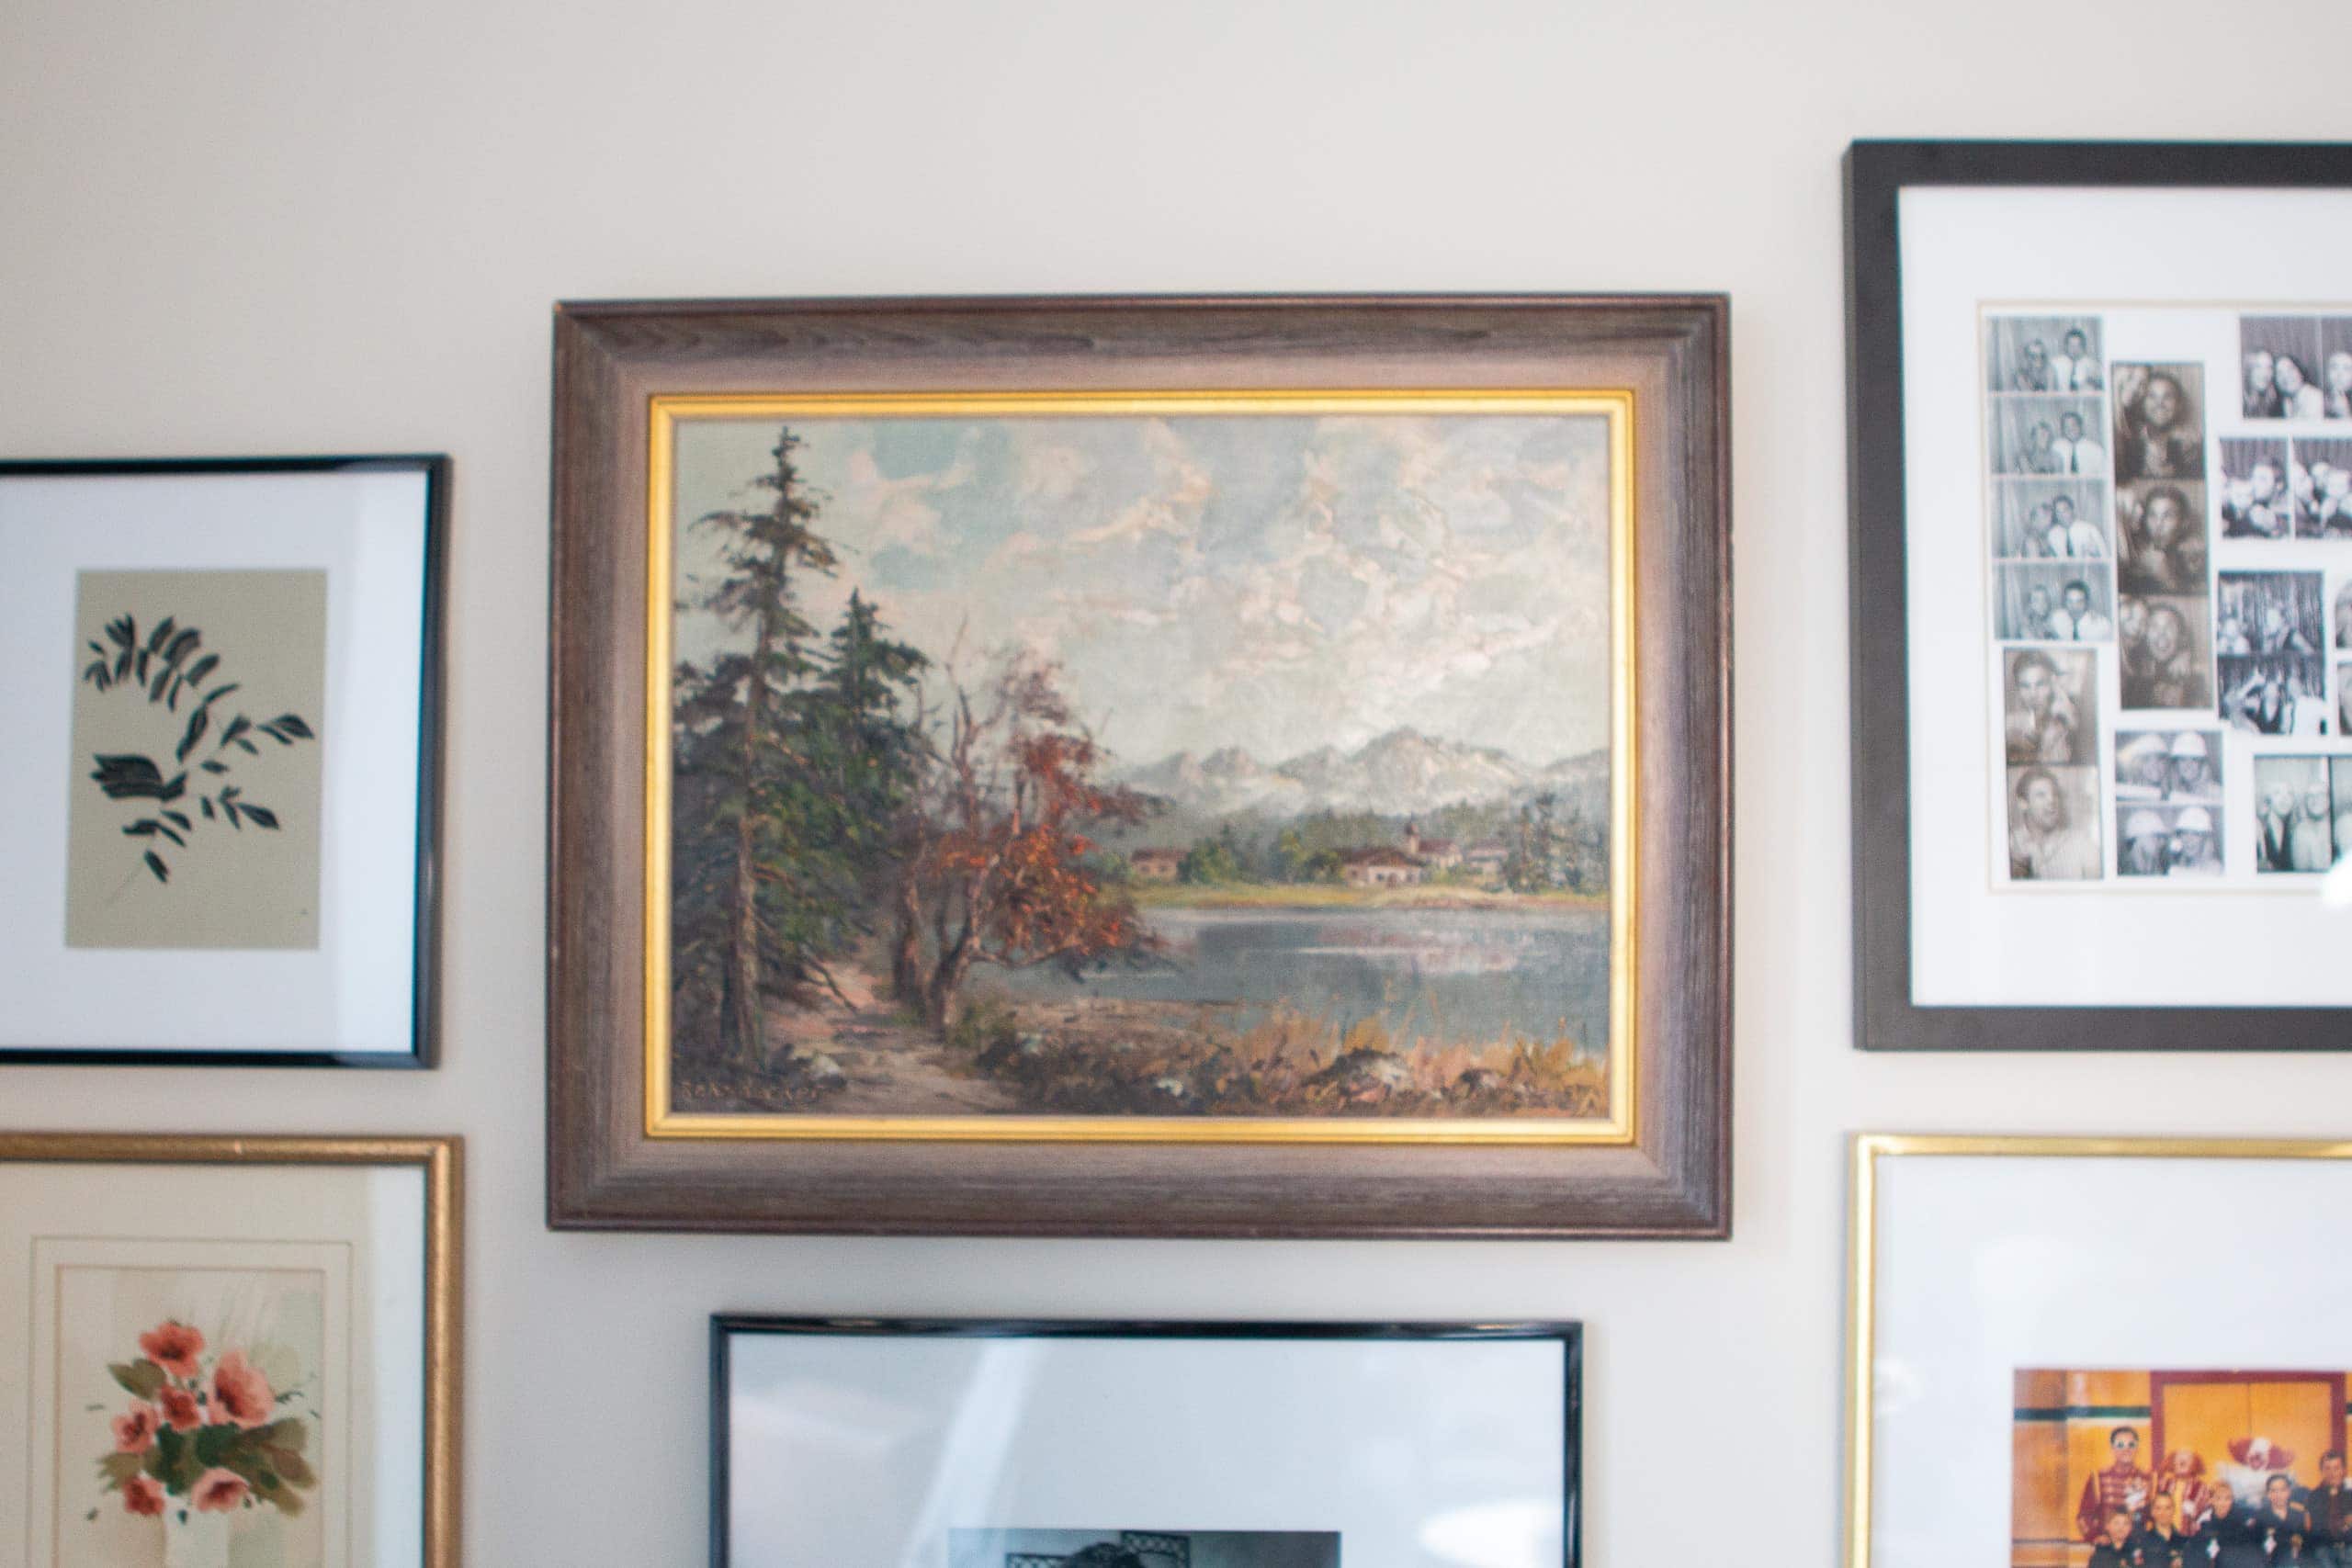
First, my “anchor” piece of the gallery wall is this piece of art I found shopping with my mom for only $50. It was such a score for a large painting. 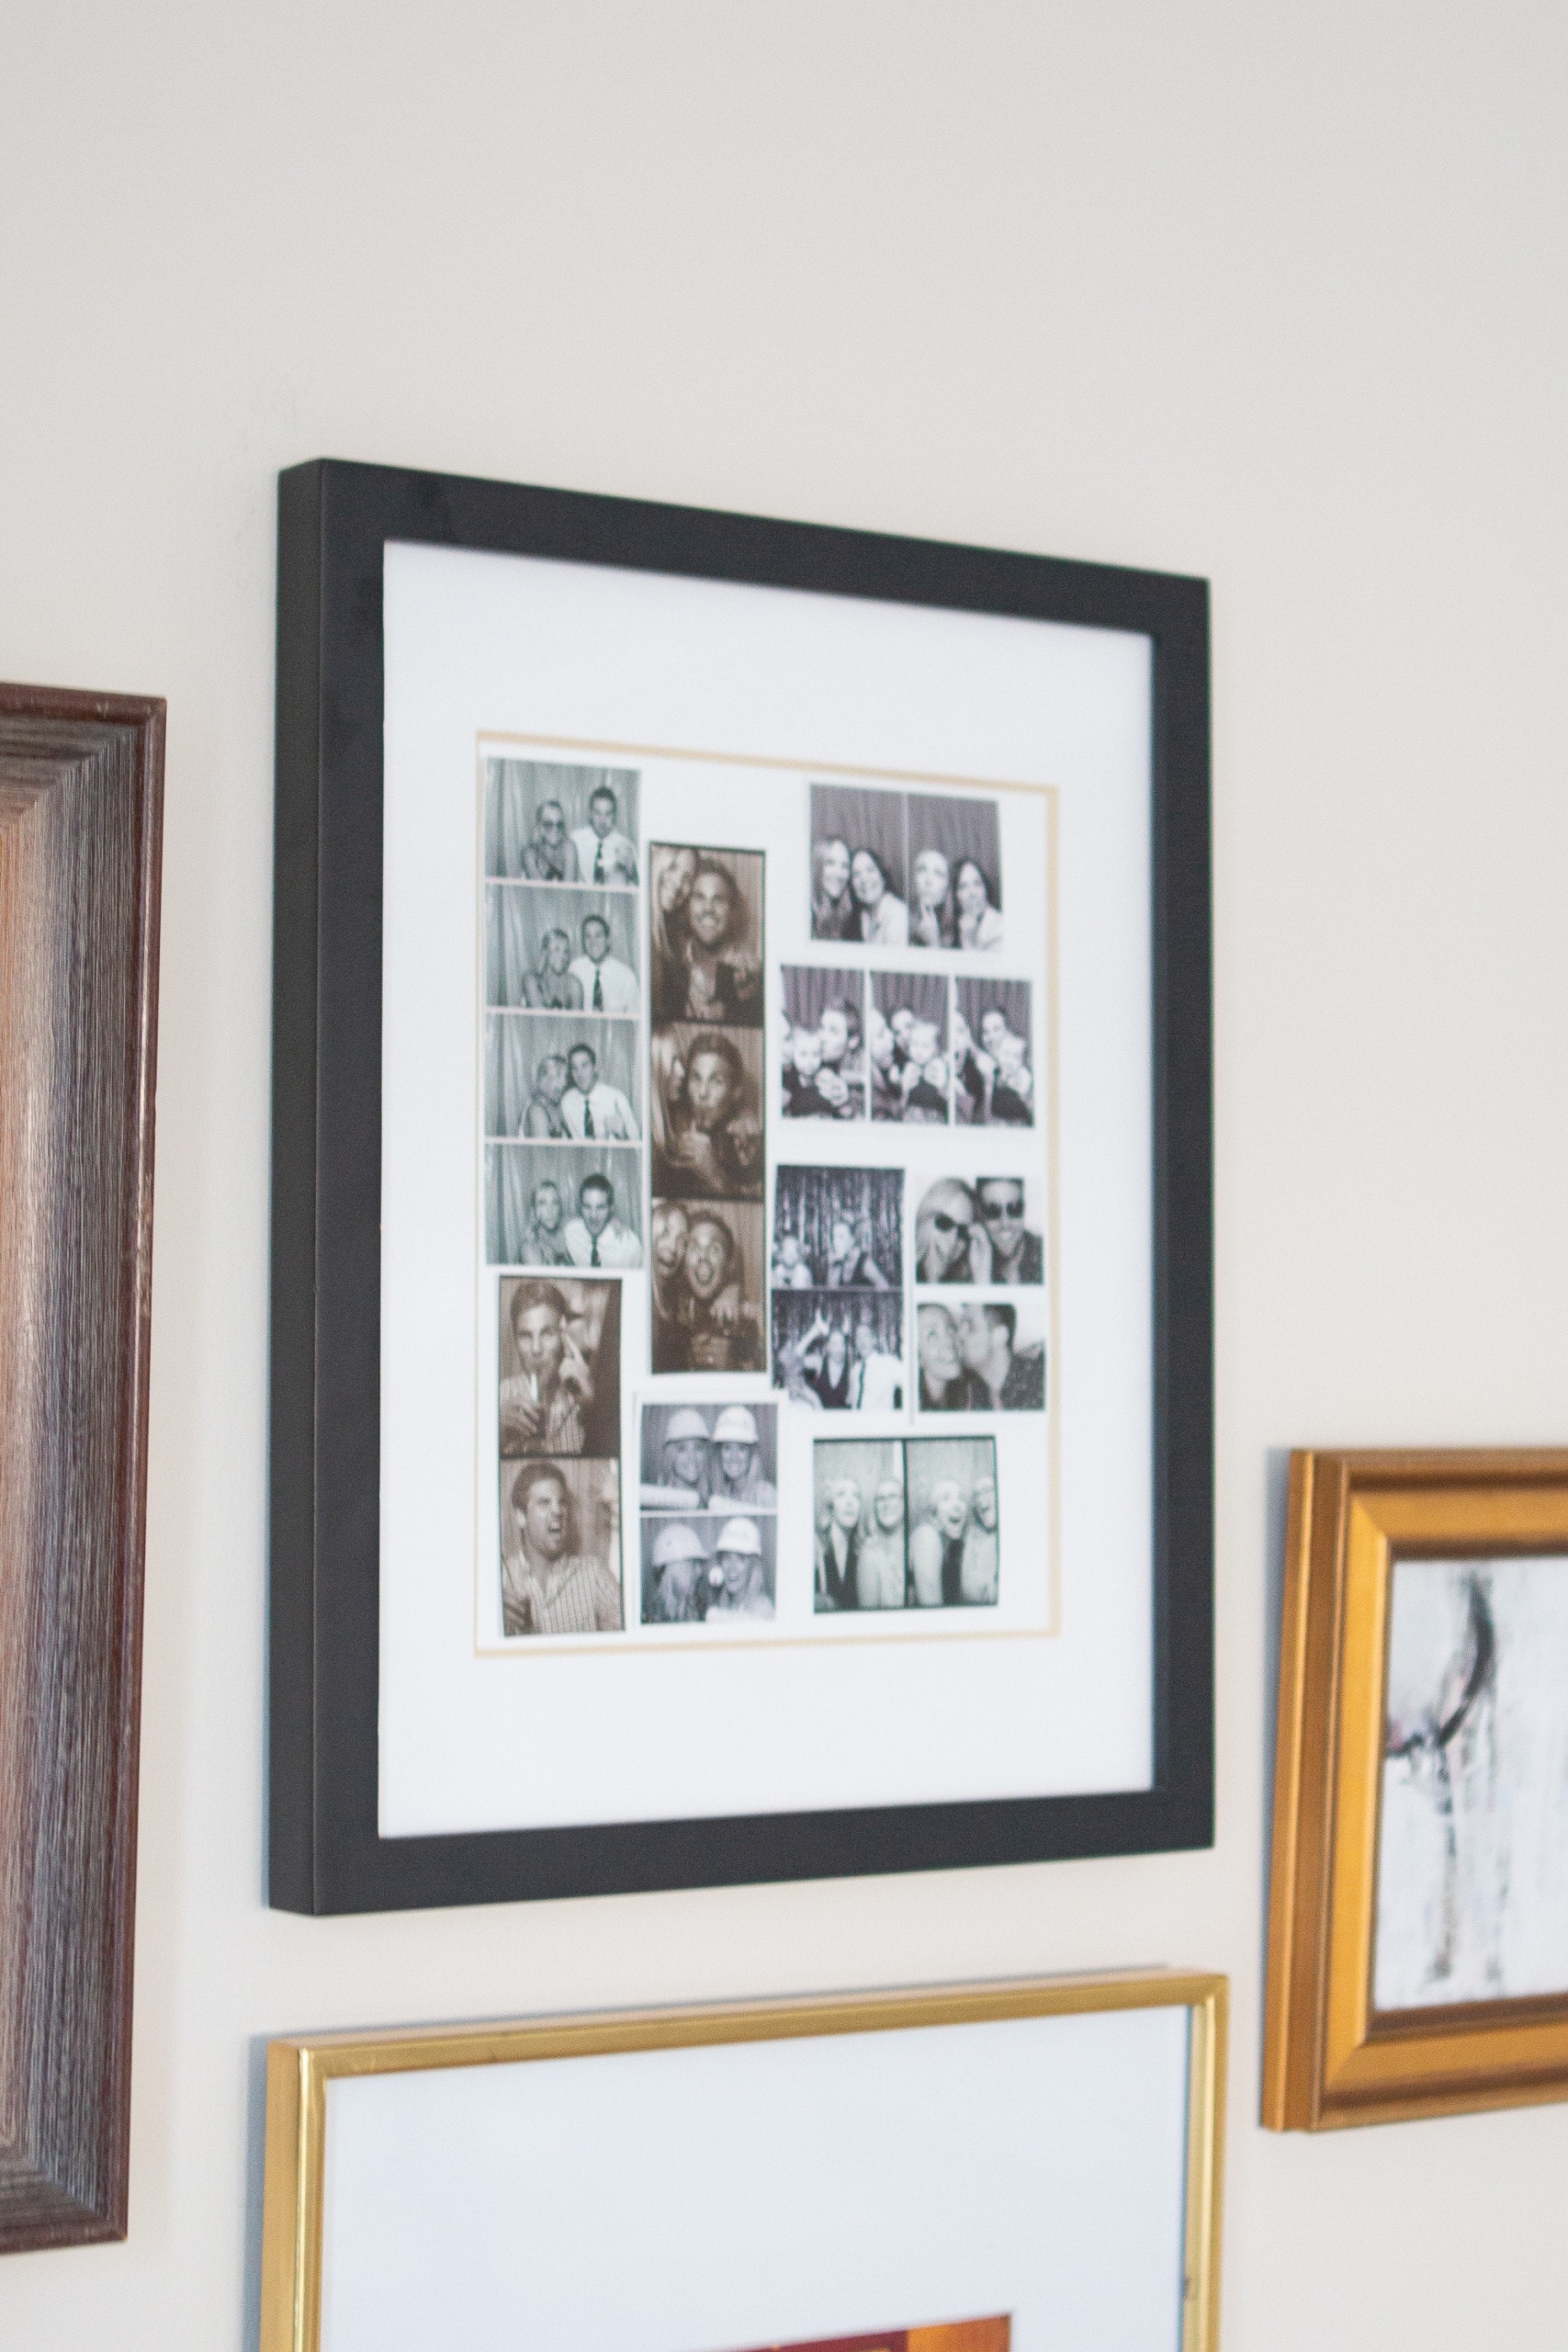
To the right of it, you’ll find this collage of photo booth strips. I actually wrote an entire blog post about ideas for your photo booth strips (with weddings these days, I feel like everyone has so many!). I chose my favorite black and white ones and put them in this frame on the wall. That makes for so many fun memories on display!

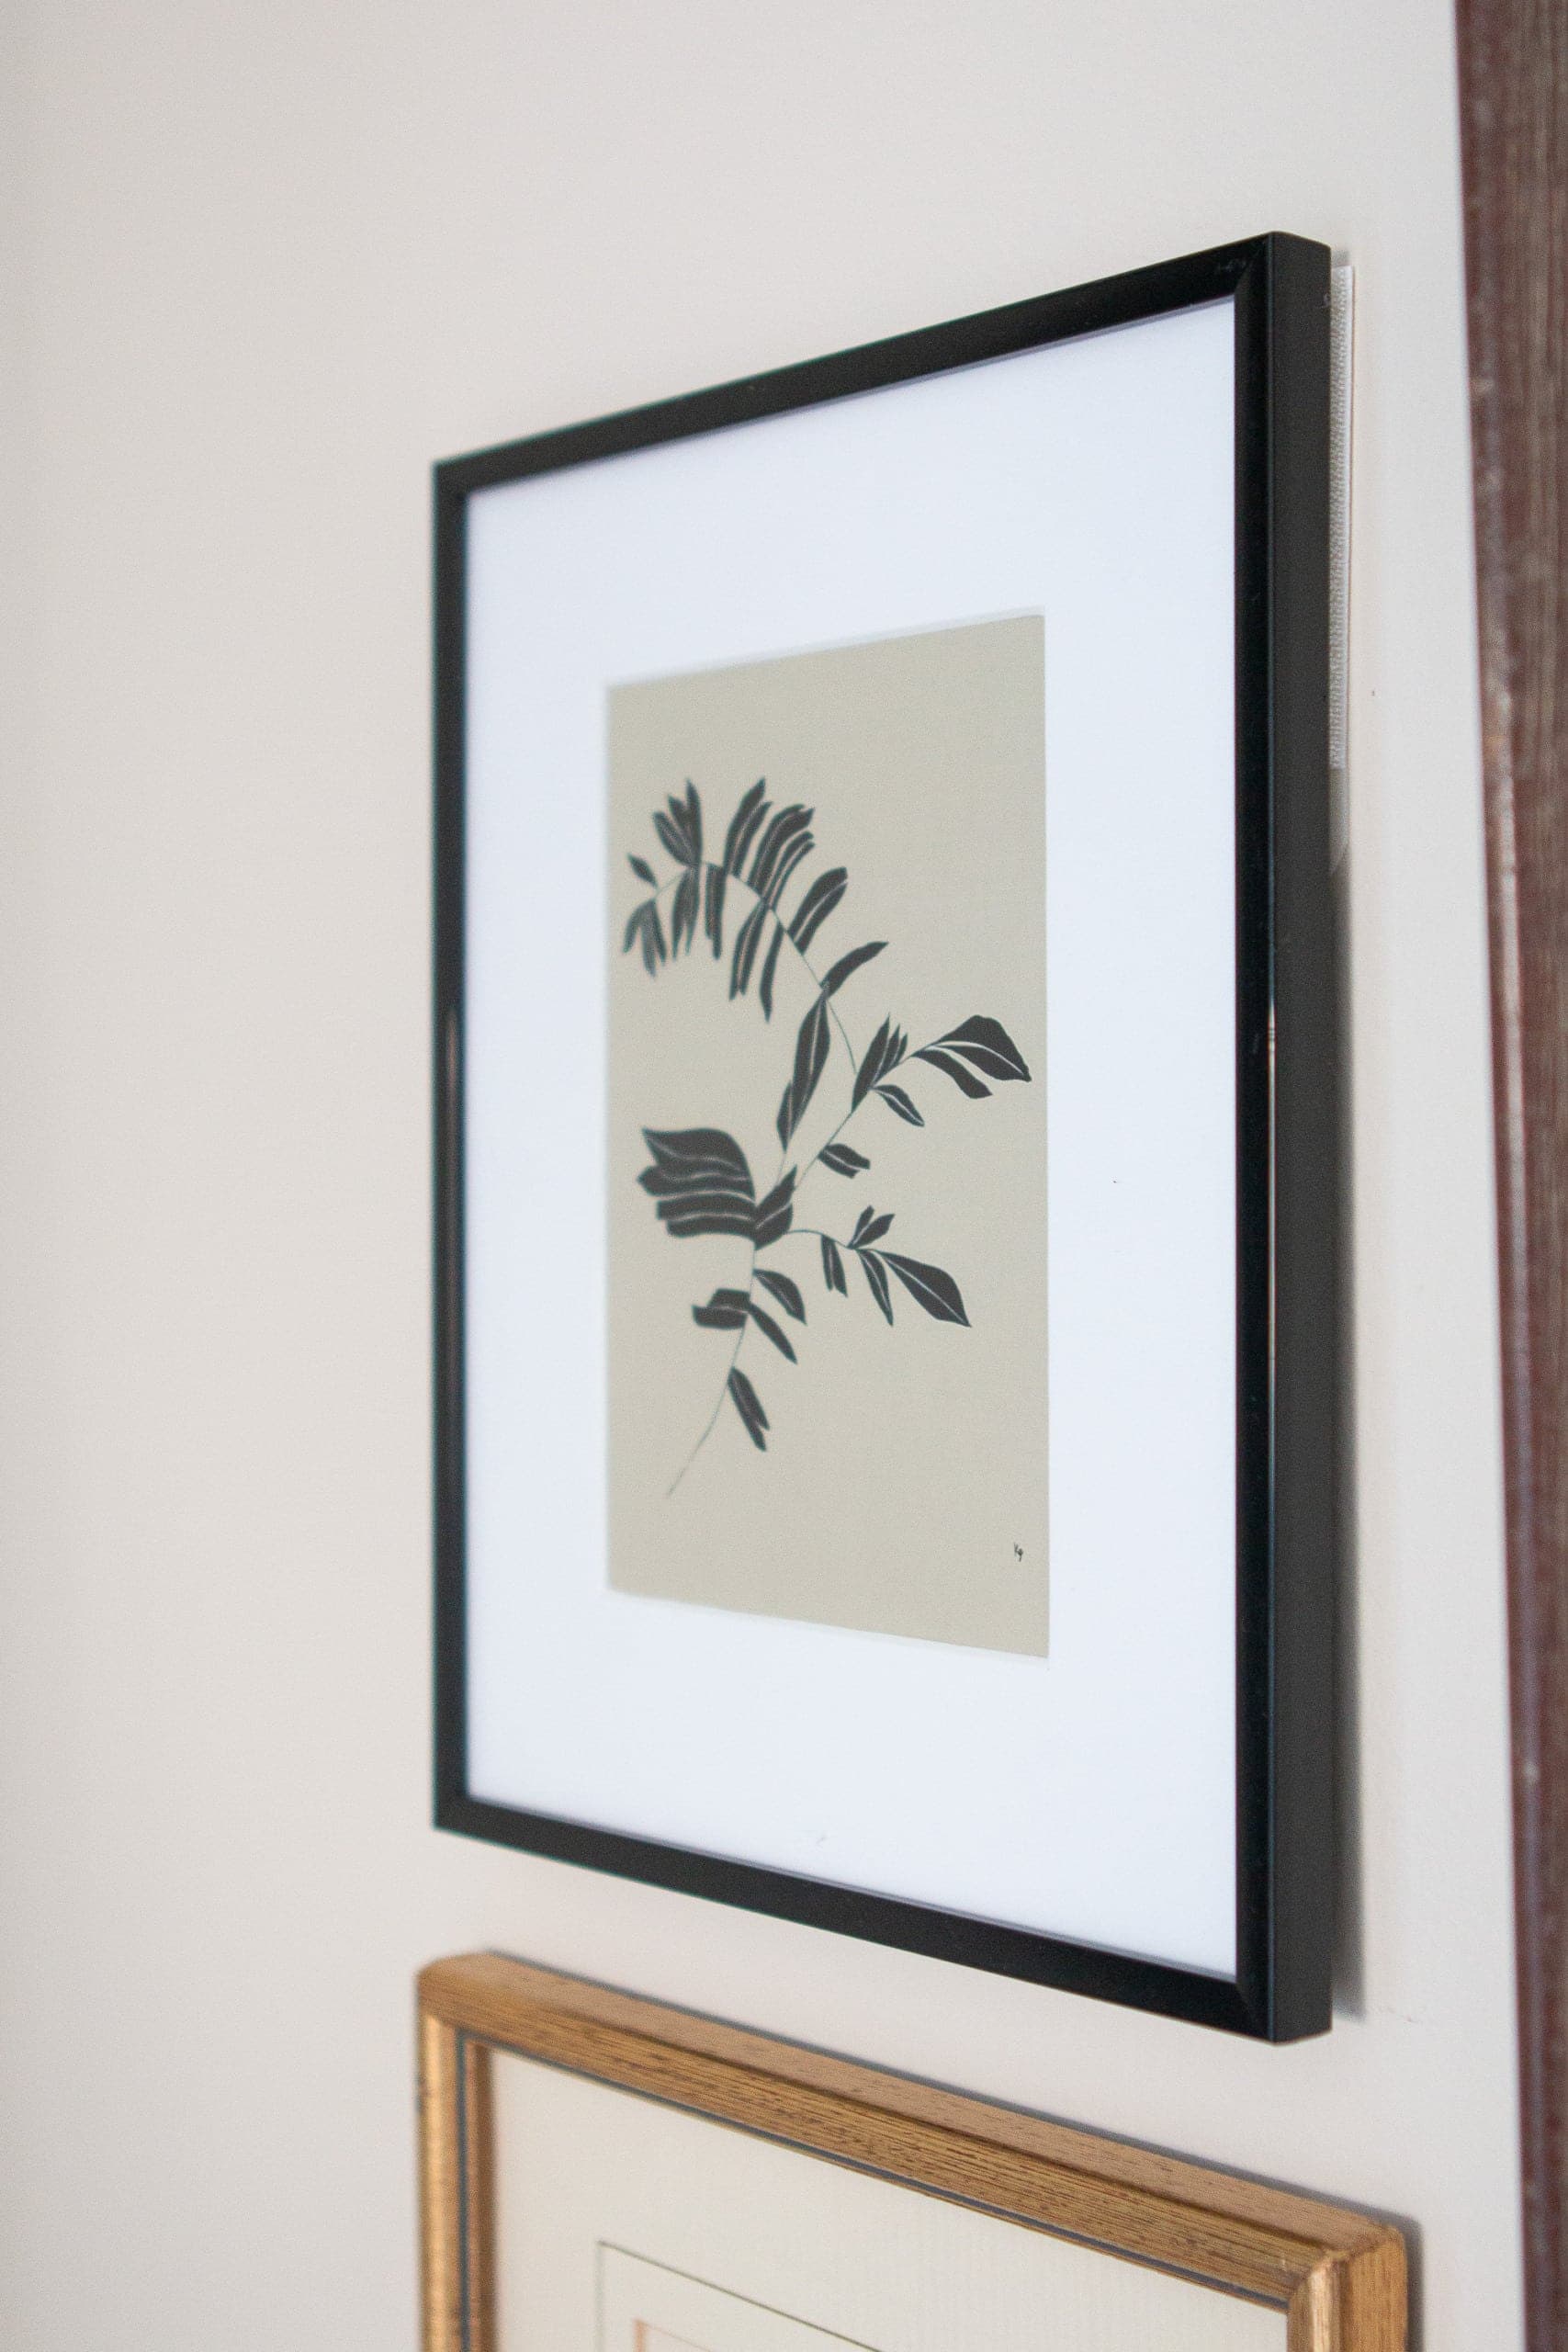
The gold floral piece was a gift from my mother-in-law, while the top art is a piece of art from Juniper Print Shop (no longer sold). I really loved the colors and simplicity of it. 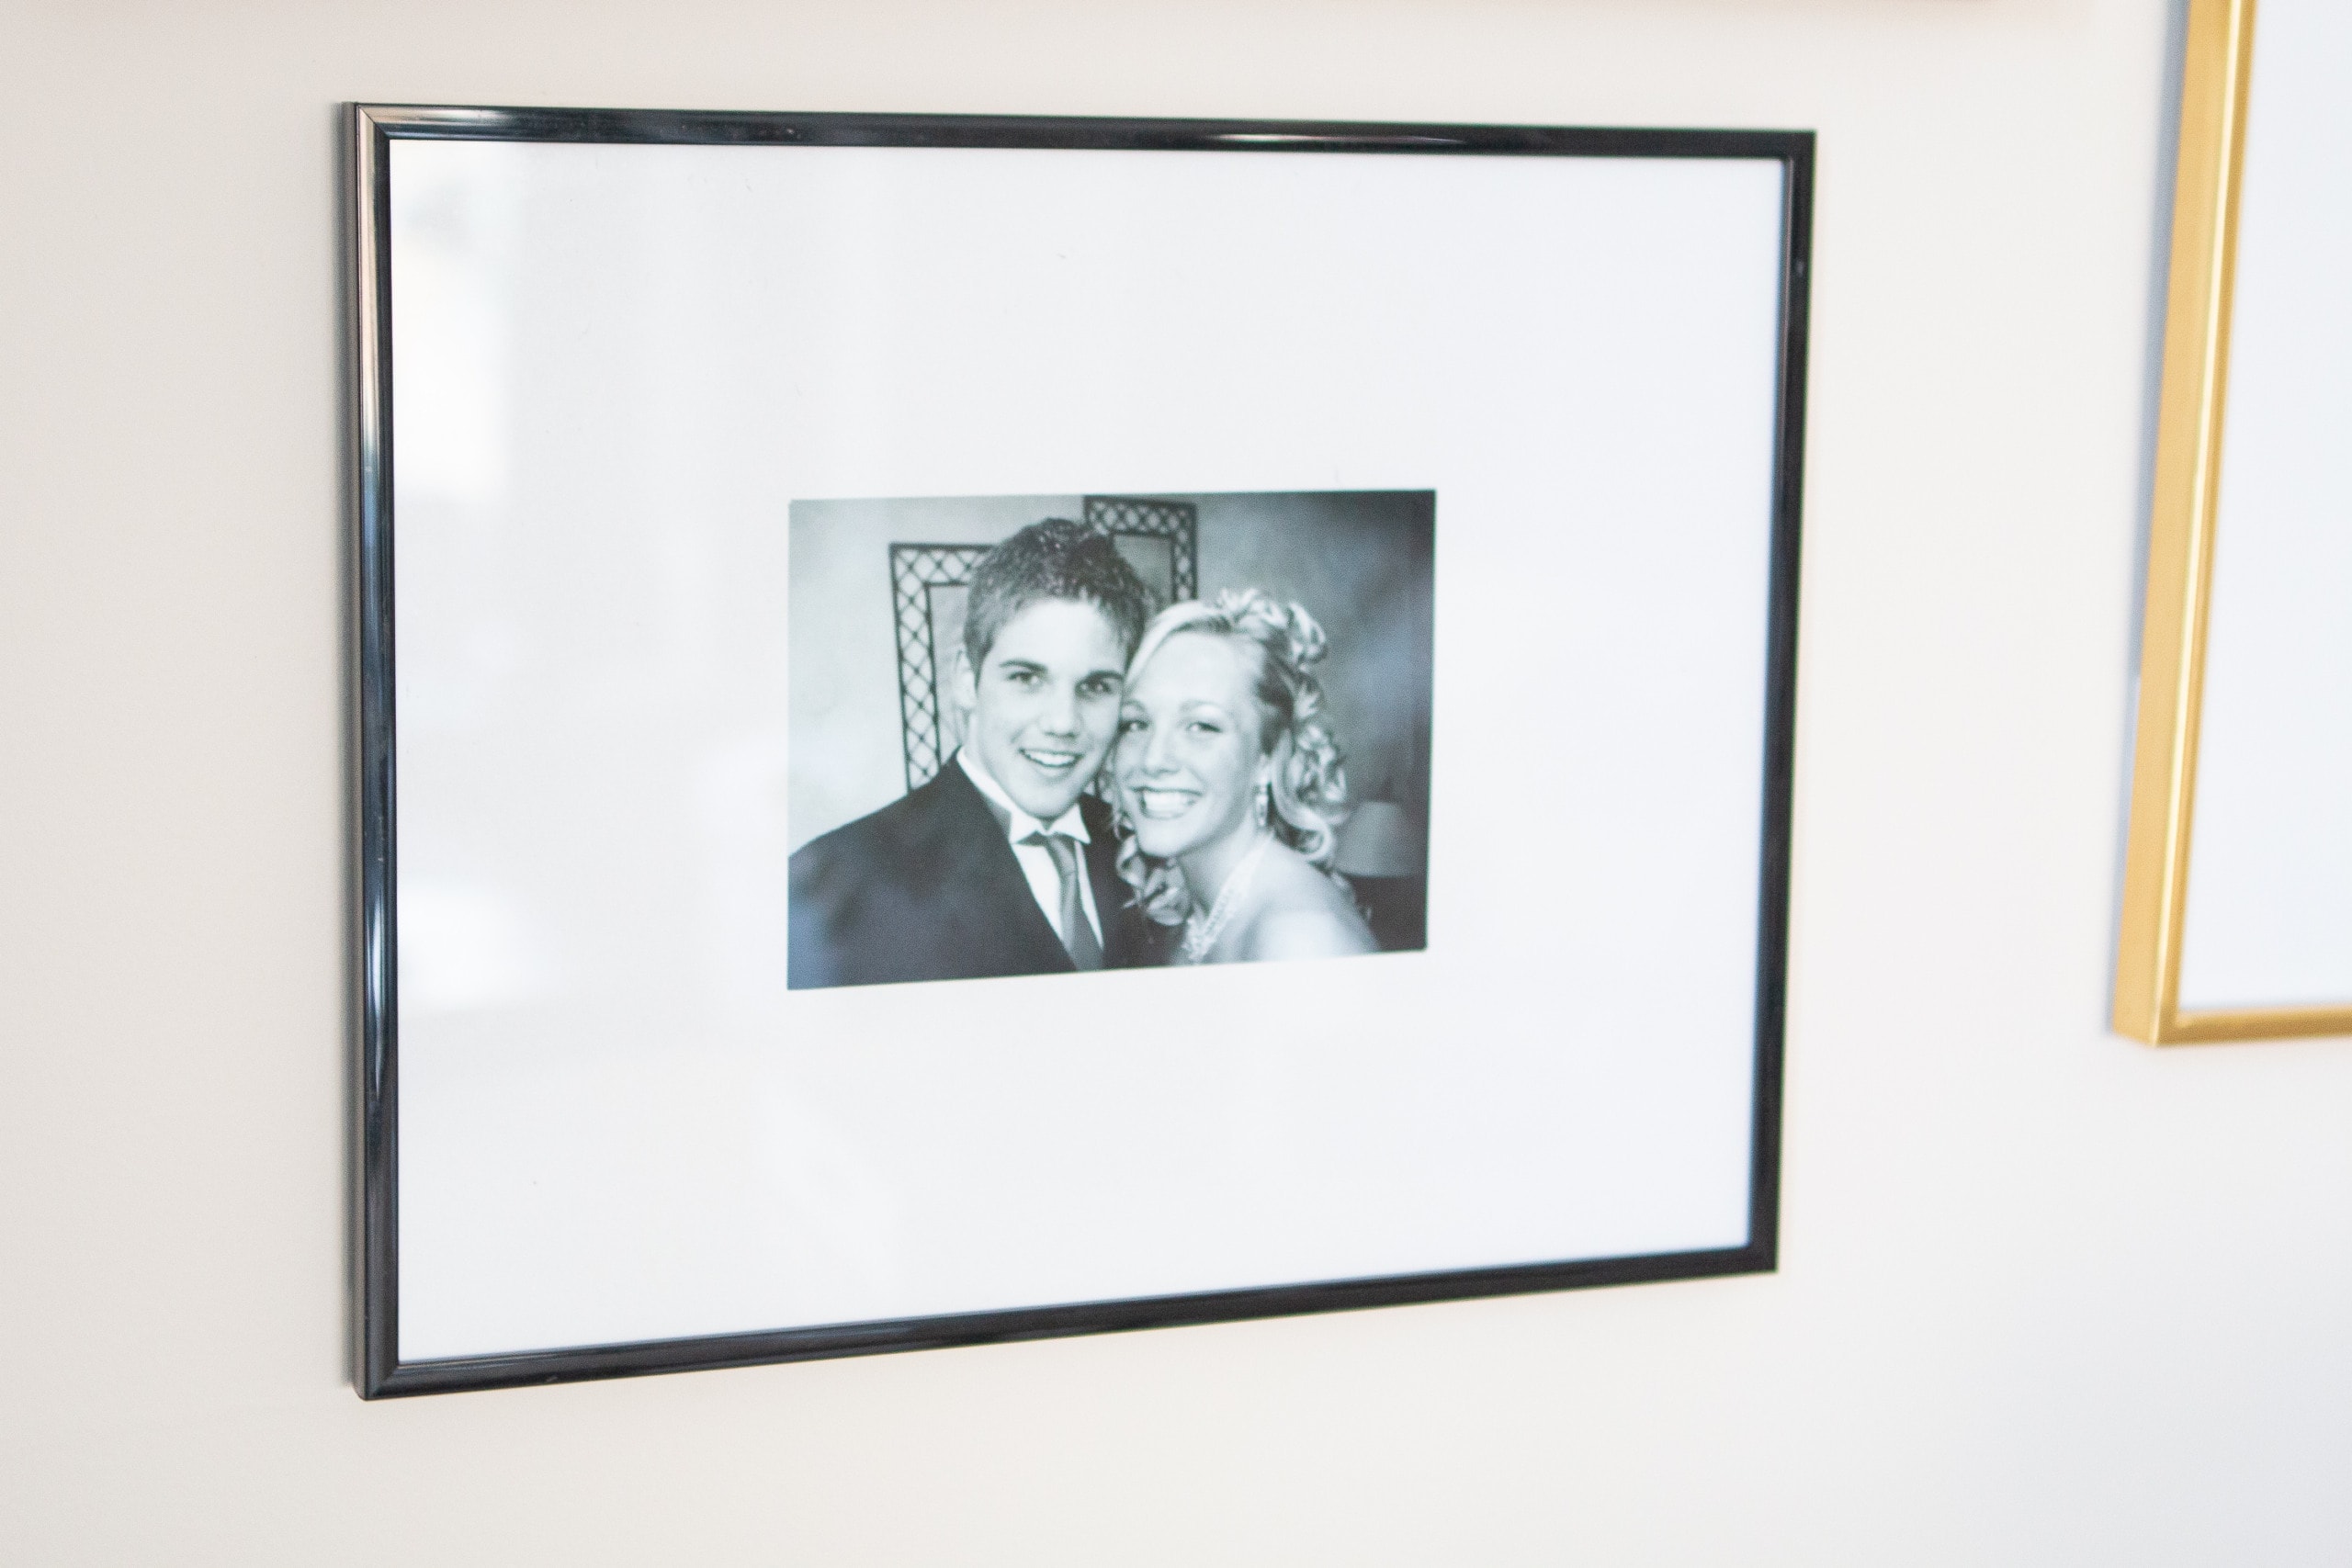
This simple black frame (from Michaels) features one of my favorite photos of Finn and me. It’s from Prom 2005!! We look like babies, but we were so happy, young, and in love. Some people assume it’s our wedding photo (ha, I promise I wasn’t a child bride at 16!). 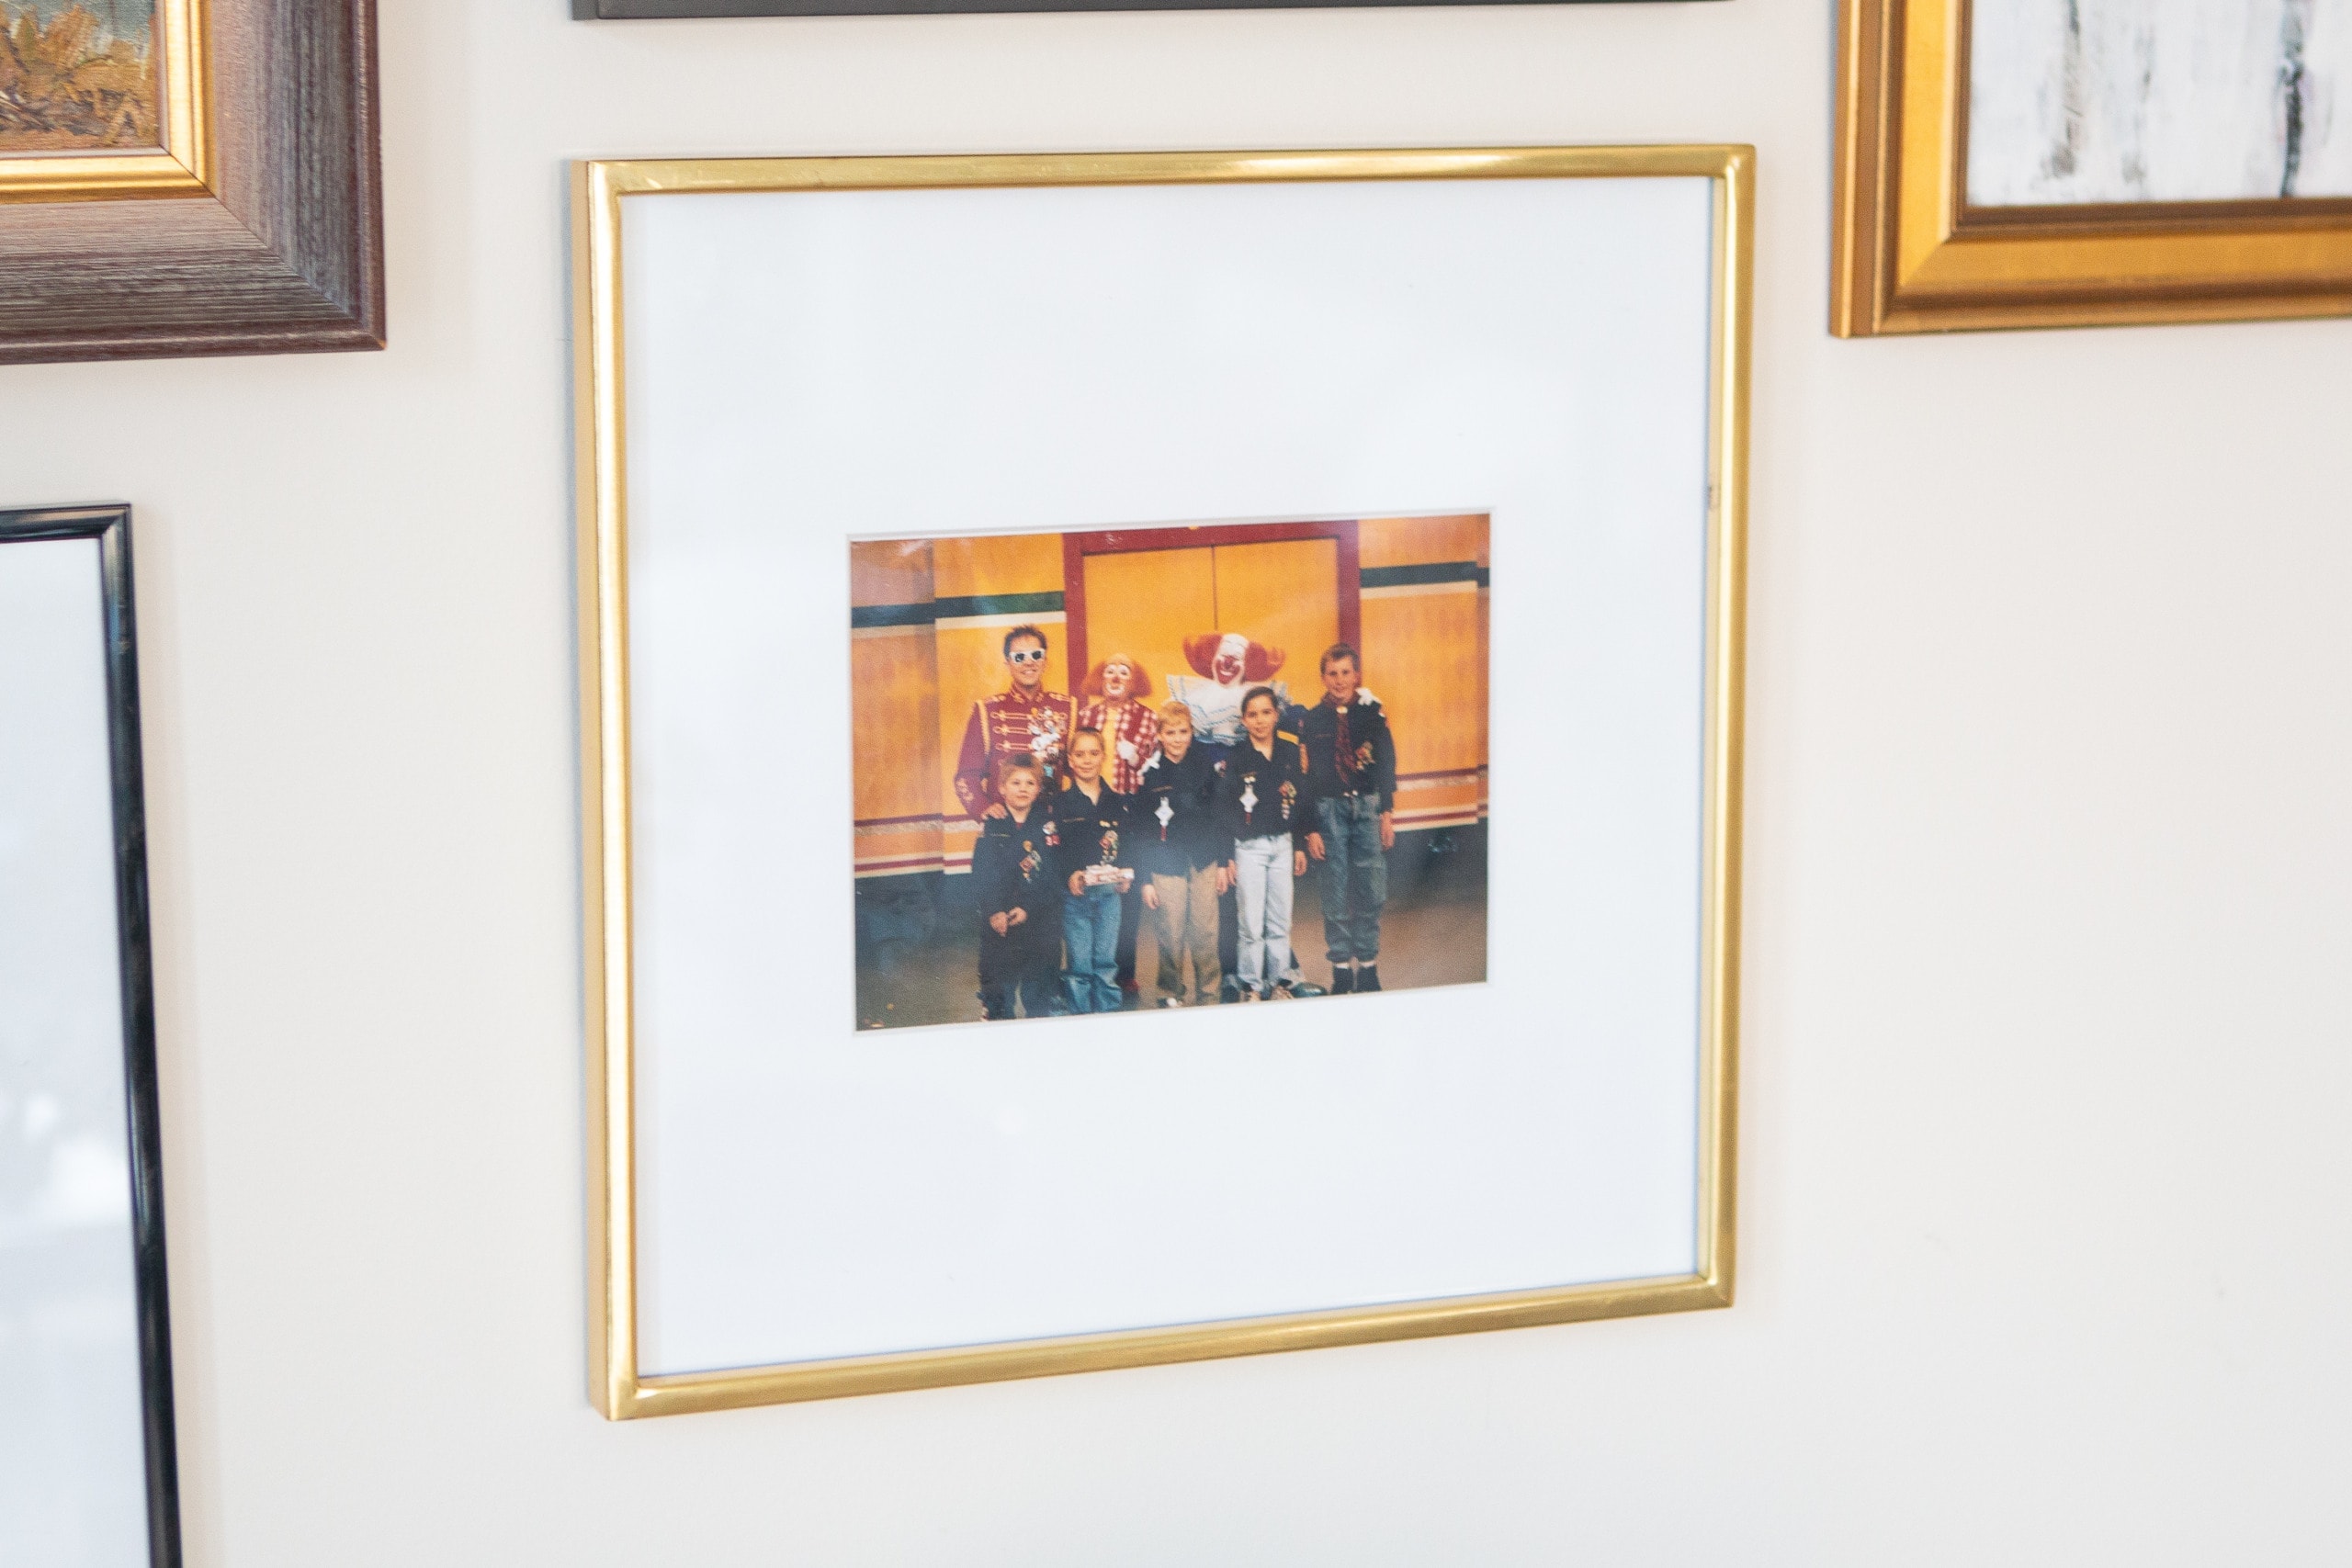
Okay, ready for the craziest story ever? The above photo features Finn (on the left), my brother Ryan (right next to Finn), and then my oldest brother, Harry, (two down from Ryan). They were all at the Bozo Show, here in Chicago, as kids. My brothers were there for Cub Scouts. Finn wasn’t old enough to be a Cub Scout, but he was at the show with his sister’s Girl Scout troop and they put him in a Cub Scout uniform so he could go to the show! The photo was taken by the Cub Scout Den Mother, who got the tickets and drove all the kids to the show. She just lined up the boys and took the picture. Finn and I didn’t meet for another twelve years or so (and he certainly didn’t know my brothers or my family before we met in high school). Finn found this photo years ago when looking through old pics and we both were in shock that he had this photo of himself as a child with his future brothers-in-law. What a crazy world!! This was a must to hang in our home and I used this gold frame. 
Finally, I got this framed piece of art from Artfully Walls. It’s just an abstract piece, but it reminds me of elephants. Finn and I are really digging elephants as our baby’s spirit animal and we have incorporated subtle (very subtle!) elephant touches around the house. Elephants are intelligent, empathetic, and such gentle creatures and we even got a little stuffed elephant for our baby girl that sits on our nightstand (okay, maybe that’s TMI, but can you tell we’re stoked to be parents?!).
I’m really happy with how the gallery wall turned out and I feel like I even have some room to build on it (maybe expanding to the right or down?). 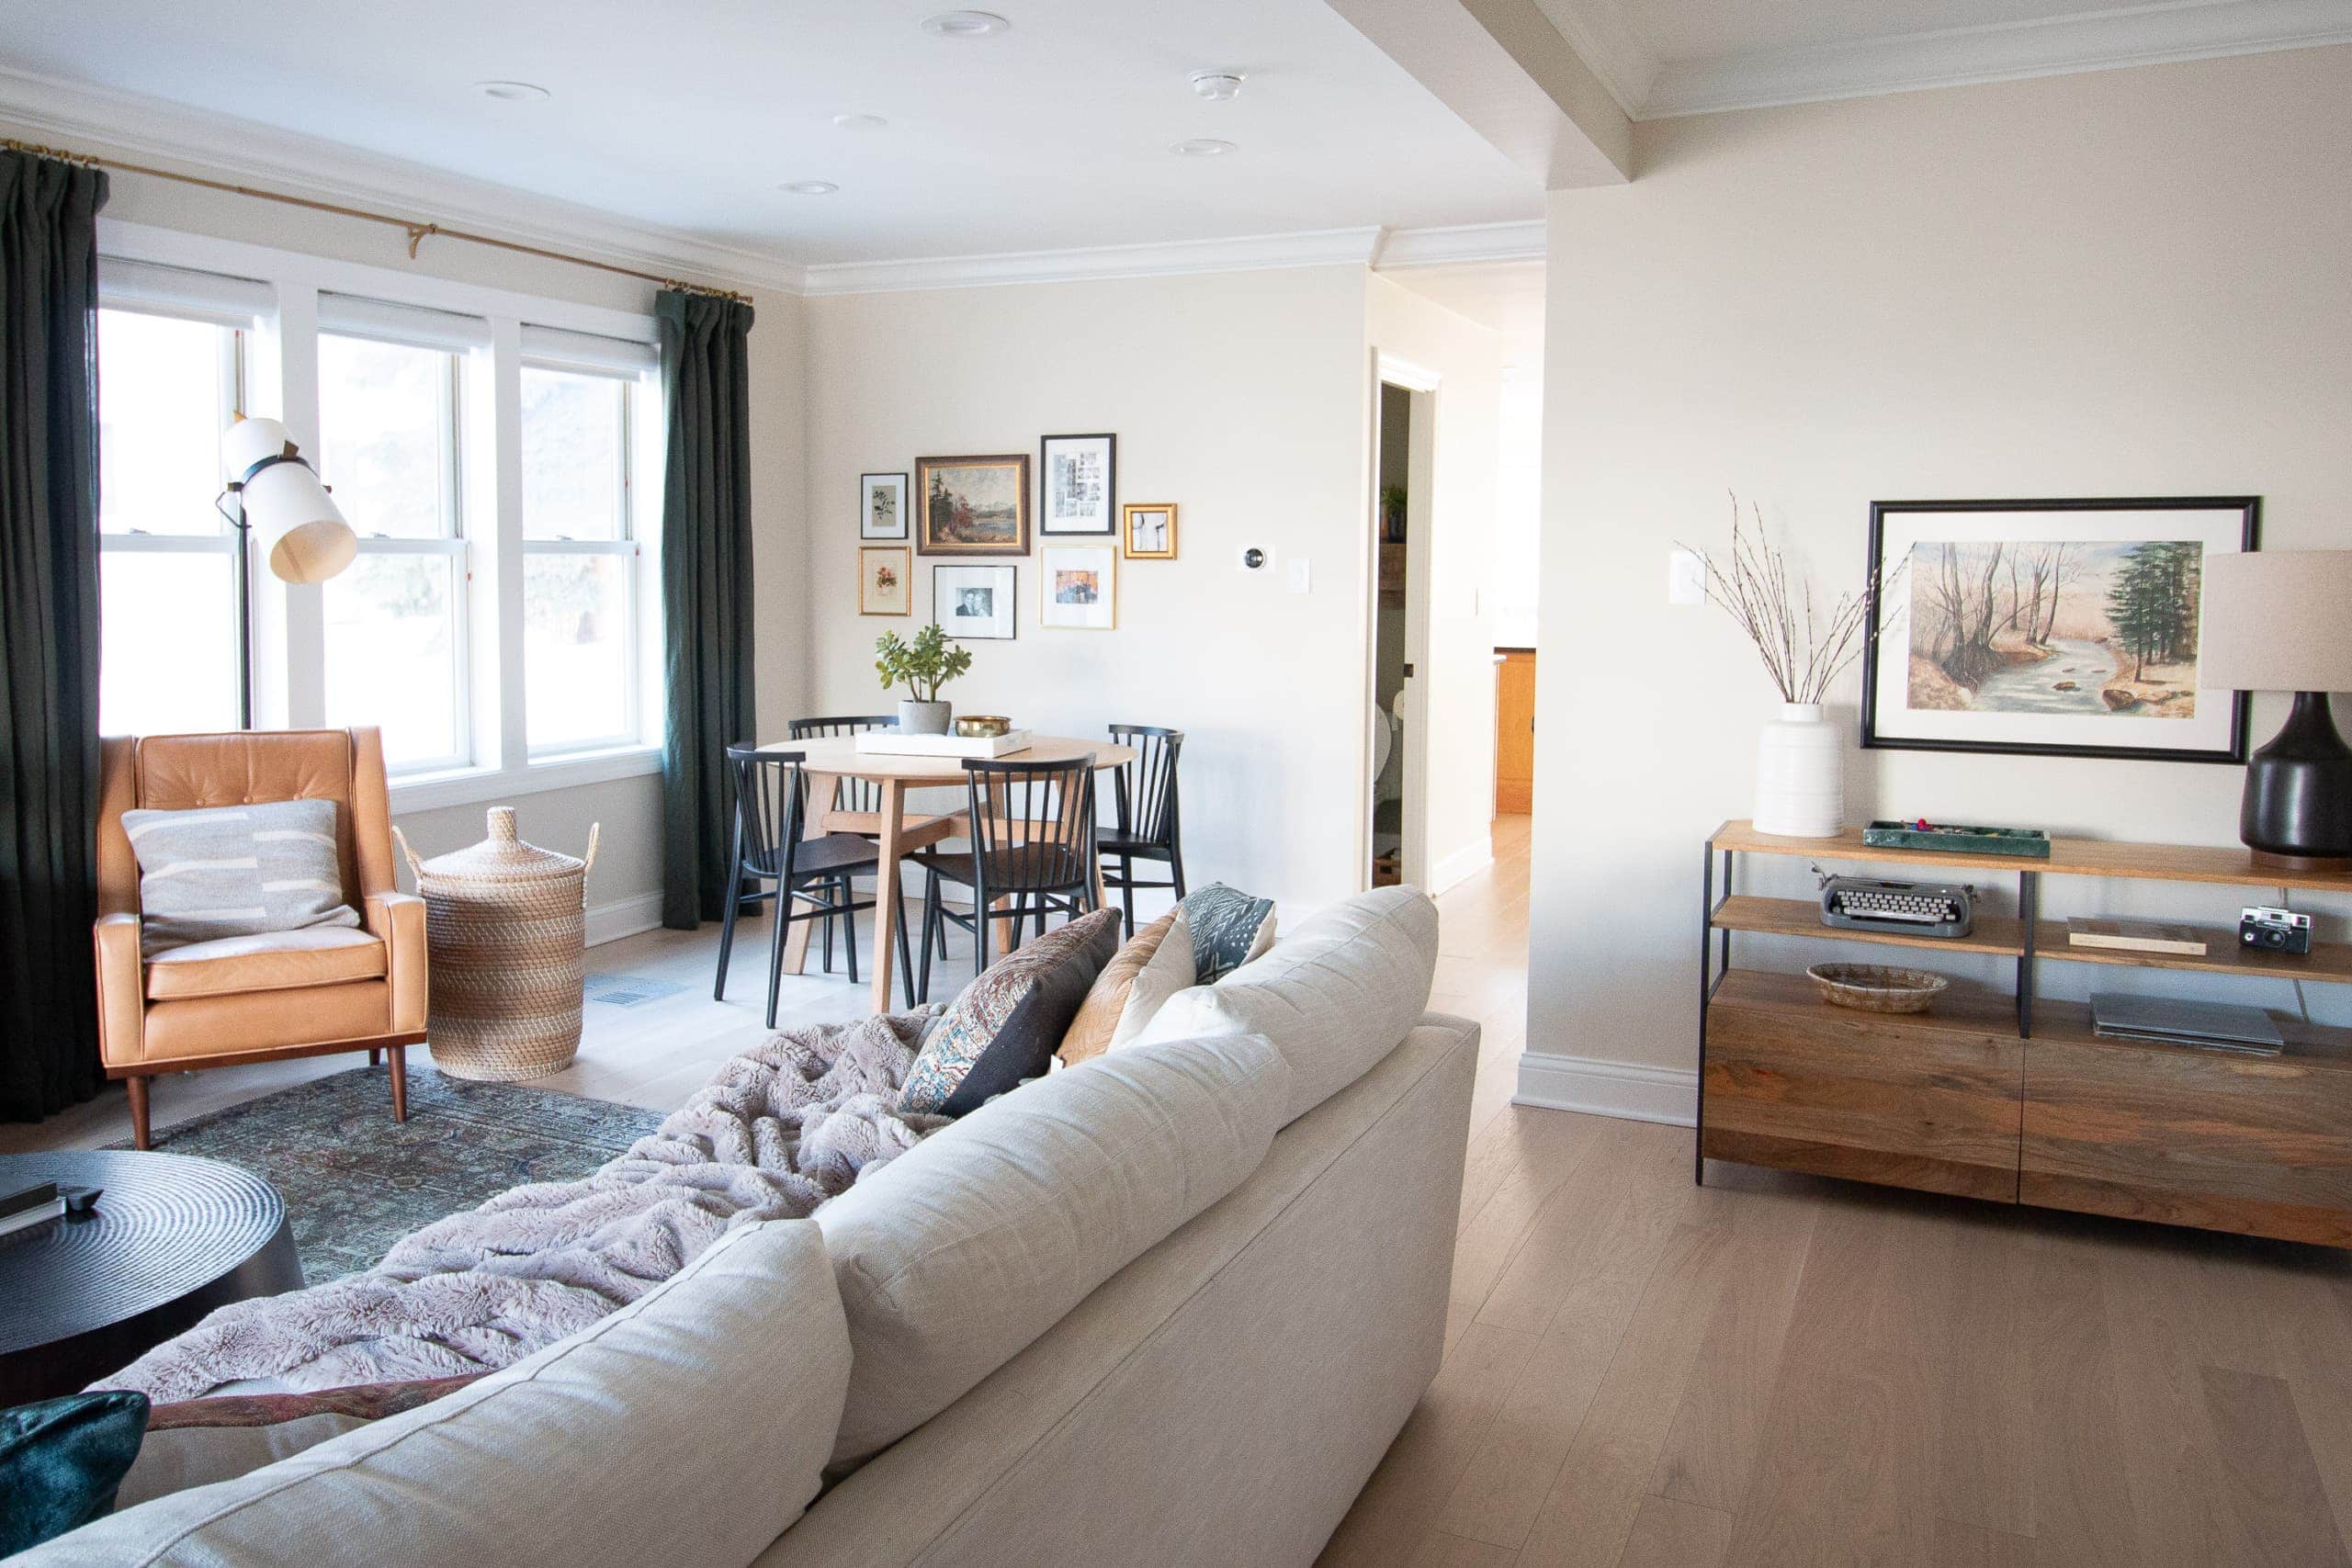
Living Room Before & After // Living Room Sources
It’s the best view I could ask for when I walk in the door of our home. And I can hardly believe it, but I’m considering our living room done (for now at least…)!
Casey