B’s Outdoor To-Do List Progress Report No. 1
I’m taking a bit of a different approach in today’s post because I have so many mini updates to share with you guys. I contemplated skipping this post and sharing specific tutorials for each of our outdoor projects first, but that would create a huge backlog on the progress of our outdoor to-do list and leave you guys weeks behind on what’s actually happening behind the scenes.
Updates Now, Tutorials Later
So instead of sharing the tutorials up front, I’m going to share a general outdoor to-do list progress report first, and then circle back throughout the summer with more detailed tutorials for most of the projects (like how we painted our garage doors, swapped out our exterior lights, planned our landscaping, hung our shutters, etc.). For those of you who have reached out and requested tutorials on these projects as I’ve shared them on instaStories, stay tuned… I promise they’re on their way!
Outdoor To-Do List Progress (33% done)
Okay, now it’s time for my favorite part of any to-do list… looking back & checking items off of it! Here’s what we’ve accomplished so far:
Clean windows and screens- Rip all of the old bushes out (this week!)
- Remove rocks/brick (this week!)
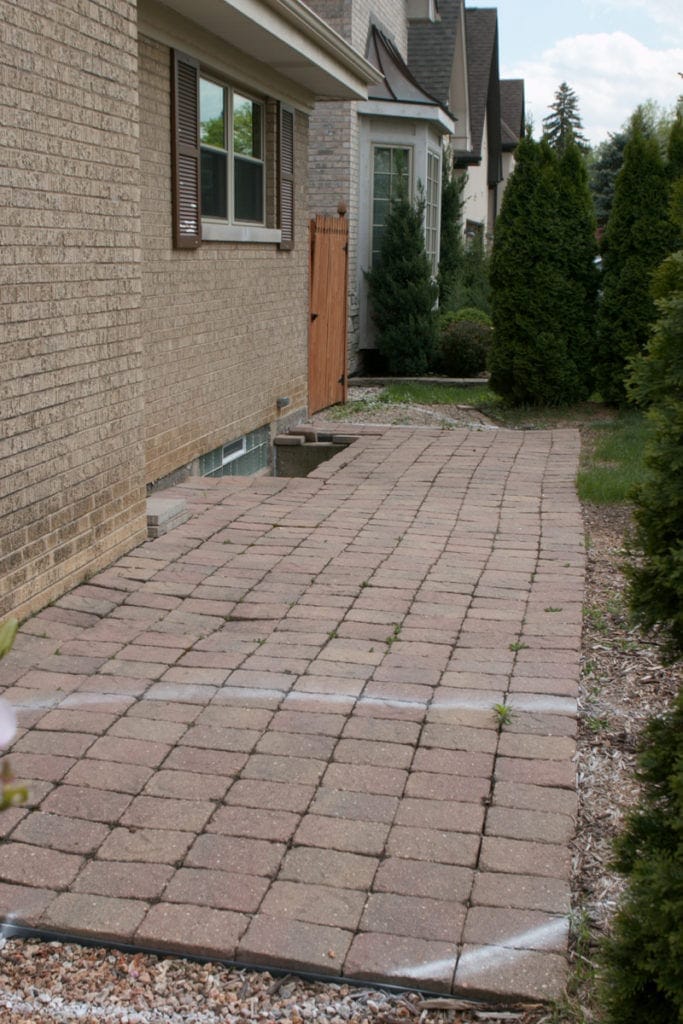
Find and hire a landscaper for projectGet a permit from the city for a new patio- Install new patio (this week/weekend!)
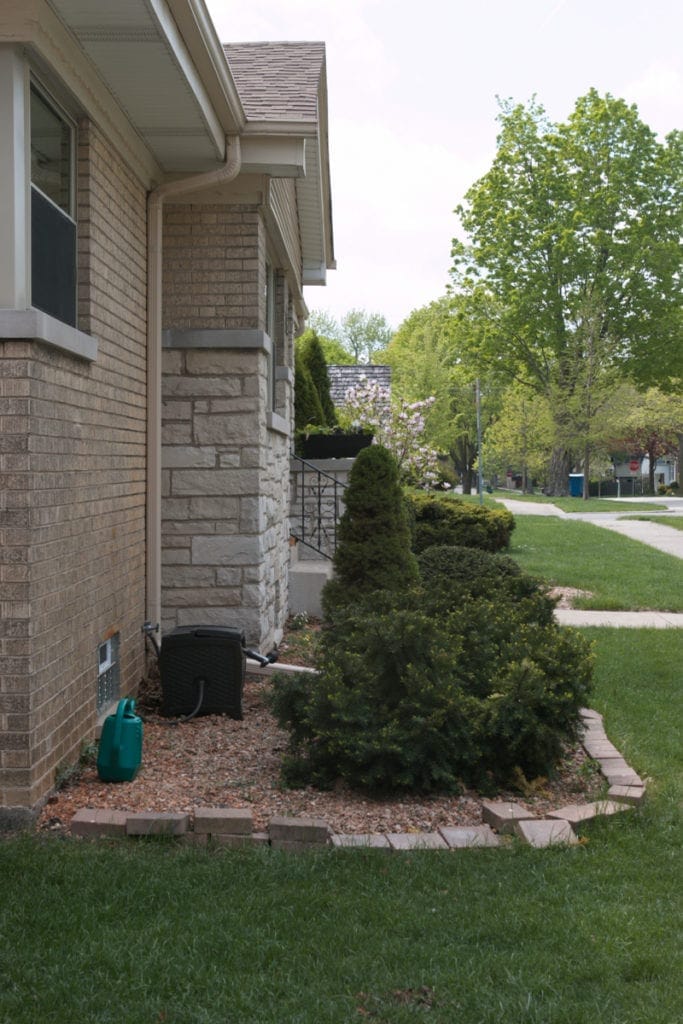
- Hide window wells
- Power wash shutters and repaint (change of plans)
- Power wash the home’s brick
- Add window flower boxes (like we did in our last house)
- Update address plate (still love this one from our old house)
Power wash mailbox and repaintPower wash step up to the mudroom door and repaint- Fix the pavers by the mudroom door (this week!)
Pick a color for the front doorPaint the front door- Buy and set up furniture (gotta start thinking about this soon)
Upgrade lighting(and figure out how to turn on the outside lights!!) — (1/2 way done)- Add some type of shade on the patio
Paint garage door and mudroom doorGive the grass some extra TLC- Add string lights on a timer
- Hide garbage cans from the street
- Change the handrail up to the front door (in need a few supplies before I DIY this!)
- Add more shutters (in progress)
- Increase overall curb appeal
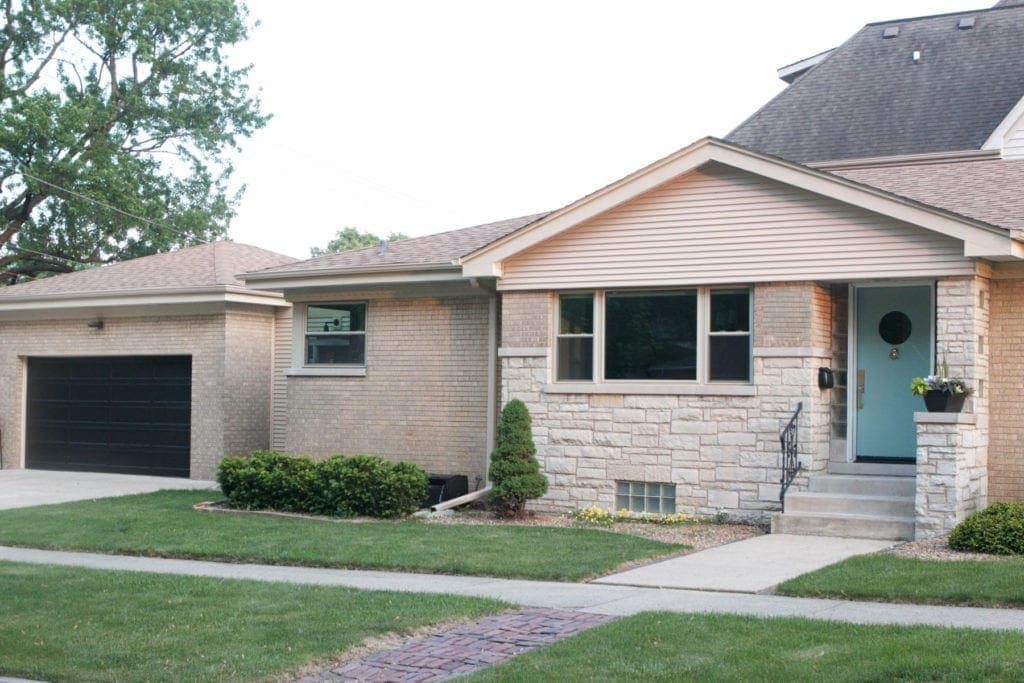
Paint Garage


I’m obsessed with this upgrade and was surprised at how EASY it was to do! I factored in at least a whole weekend to do his project and it was done in just a couple of hours. I also expected the steps to be pretty intimidating and they were far from that. I have a detailed tutorial coming your way because this is a DIY project that is worth trying! By the way, the black paint color is called “Tricorn Black” by Sherwin Williams.
Paint Mudroom Door/Stoop
My dad came over and help me tackle the mudroom door and stoop on the same day that we tackled the garage door. We used the same exterior paint (Sherwin Williams Tricorn Black) as we did in the mudroom and I love the fresh black. Three cheers for no more brown!


I hemmed and hawed at what color to paint the stoop and eventually decided on the same black as the door so it would blend in. I originally thought about going gray, since black will show so much dust/dirt, but ultimately did not want to introduce another color into the outdoor color scheme. I know I’ll have to deal with seeing all the dust particles/imperfections on the black, but I decided it was worth it. We’ll see if I feel the same way after living with it for awhile…
Upgrade Lighting
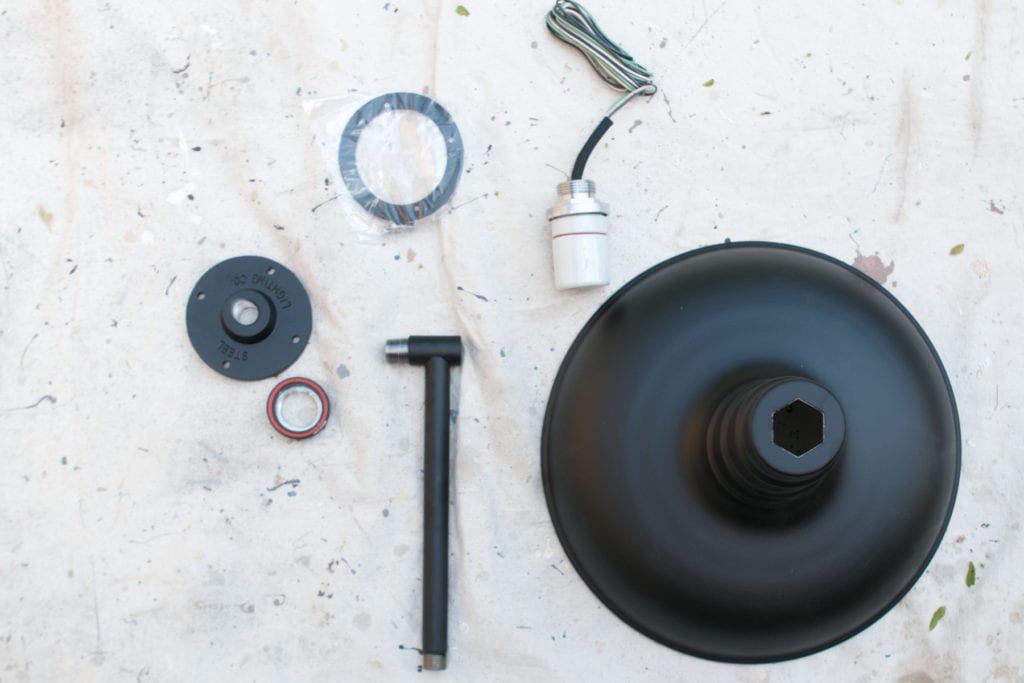 The light over the garage door has never worked since we bought the house. That means I have to call in a professional electrician to fix the wiring before I swap out the fixture.
 However, I was able to swap out the outdoor fixture above the mudroom door and I’m loving the upgrade. I bought this fixture for the mudroom door and a super similar one for above the garage. I’m hoping to get the electrician out soon so I can officially check this item off of the outdoor to-do list.
Paint Front Door
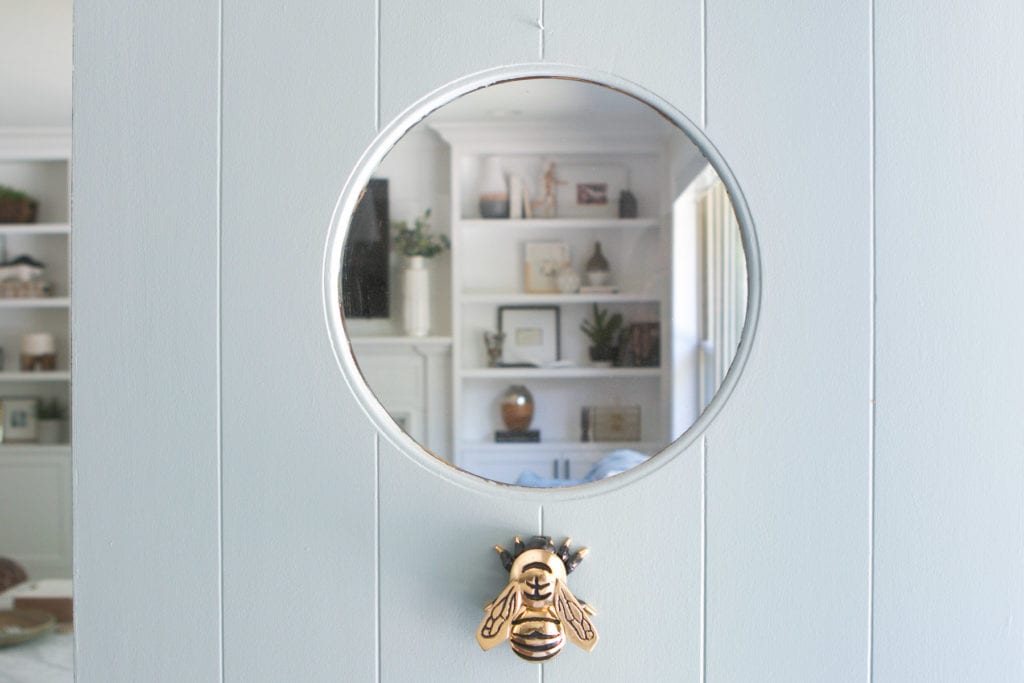
You guys know all the details about that project, but if you missed the post, you can catch up here. The color is Benjamin Moore’s Stratton Blue and the bee knocker can be found here.
Paint Mailbox


I shared the step-by-step of this project on our instaStories because it was such a simple project that I was able to complete in one day. I sprayed two coats of this spray paint on the mailbox and then took sandpaper to reveal the brass finish that was hiding underneath the brown paint. This was such a fun surprise and one that really makes the word “MAIL” pop.

This project not only took the shortest amount of time, it was also the cheapest…. coming in at $0! I had the spray paint and sandpaper on hand so this project was a total score all around. Someday I may upgrade the mailbox to one that is more my style but honestly, a free upgrade sounds good to me.
Hire Landscaper
I’ve gotten a lot of questions about how we found and hired our landscaper and honestly, it wasn’t in a way that was too complicated. I belong to a Facebook group of moms in my community and people are constantly posting on there requesting recommendations for all things home/ community-related.
I’ve never posted anything on this board until it was time to hire a landscaper. I asked the group for recommendations on an affordable, reliable landscaper in the area and very quickly had about ten recommendations. I immediately starting looking into these landscapers via their Facebook profiles, websites, and even made a few phone calls.
 I made sure to look at photos of their past work, reviews from previous customers and how organized their process seemed when I talked to them on the phone. Through this “vetting” process, I narrowed it down to a few I liked, called each over for a free quote, and ultimately decided on the one we liked the best. Hopefully, after the project is over I’ll have even more feedback to share about the process. I plan on writing a whole post for others looking to tackle a similar project. If you have any specific questions about the process, be sure to leave them in the comments below and I’ll include them in the recap.
Choose Landscaping Design

I will get into even more details on this topic in that recap post, but long story short, I got super lucky! A friend of a friend knows a landscape architect who volunteered to help me with my landscaping design. I sent her pictures of my house and an idea of what I envisioned and she sent me back this gorgeous rendered photo with a list of plants based on the size/sunlight/color/etc. I took that picture and met with my landscaper. We discussed the setup, made a few minor tweaks, and he placed the order for the plants!
 But the good news for those of you who don’t have this resource available is that a lot of the landscaping companies I contacted offered this service for a couple hundred bucks. I know that seems like a lot, but I personally think it’s worth it, especially if you’re like me and aren’t super familiar with landscaping. It was incredibly helpful to see a rendered photo so I knew exactly what I was paying for. At my last house, I didn’t do this and left it up to the landscaper. When I pulled up the first time, I was super underwhelmed with what he chose and ended up wishing I had communicated more of my vision. #lessonlearned
Shutters

My original plan was to power wash the shutters and repaint them Tricorn Black. That was until I took a closer look at them. They were originally intended for inside, were in pretty crappy condition, and were the wrong size for our window.
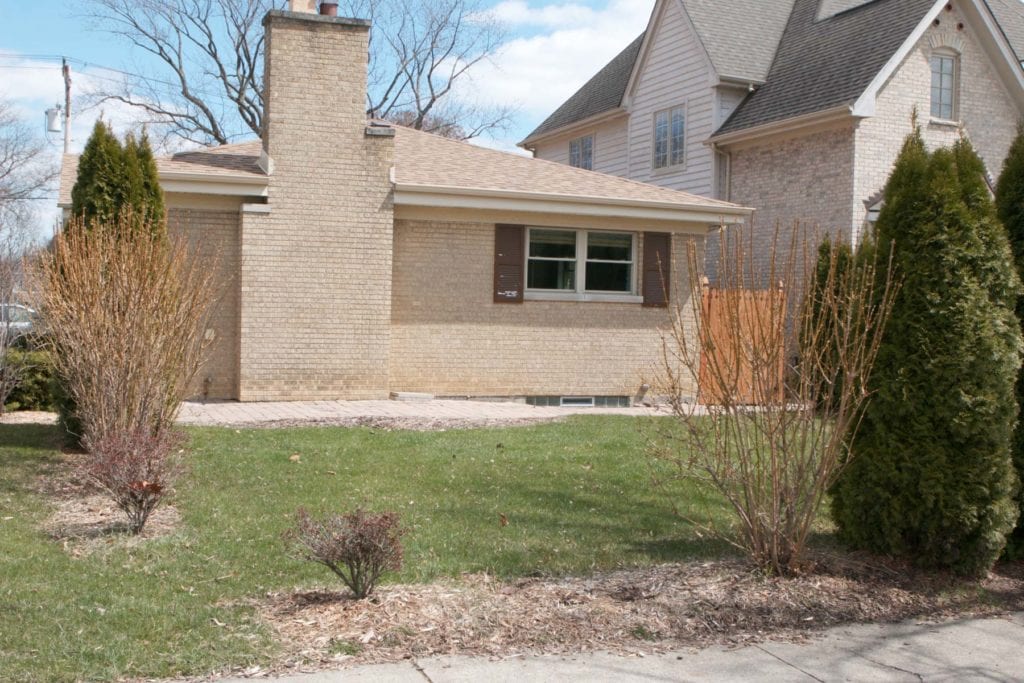 Then I found out that I could get a new, black set for under $50 and figured it was probably worth it. I also bought a larger pair to “test out” on the front windows and I can’t wait to see how they look — stay tuned!
Out with the Old, In with the New
If you’re following along on InstaStories over the next few days, you’ll see that the old landscaping and patio is being demo-ed and replaced with the new stuff this week/weekend and probably into next week. I’ll be sure to share it in real time there and will touch back here with all the details as soon as I can!
 To say that I’m excited is quite the understatement. I literally cannot wait. And although I have rendered photos of the landscaping, I still just can’t imagine how different everything will look “in real life”. And don’t even get me started on the new patio! Matt and I are counting down the days until we set up our new furniture (which we haven’t even thought about yet!) so we can start hosting family, friends, and neighbors. Stay tuned, I know it’s gonna get a whole lot messier before it gets better, but we are so ready!
Bridget