How To Hang A Stairway Gallery Wall (My Best Tips)
A few weeks ago, I shared my latest project – adding a stairway gallery wall to our basement walls. This was a project that I’ve put off all year long because it intimidated me. I wasn’t sure how to bring my vision to life. However, once I got started collecting all of the art, frames, and photos, it motivated me to get this project done. Plus, I knew the basement stairwell was the perfect place to have a little fun with this.
I’m happy to announce that my stairway gallery wall is officially done! And today, I’ll walk you through the process of getting all of these pieces hung up on the blank wall.
Now, I’ve hung lots of gallery walls in my life, but hanging one on a large staircase wall like this comes with its own challenges. But don’t worry, I’ll walk you through everything, step-by-step, so you too can hang anything with ease!
Gallery Wall Supplies
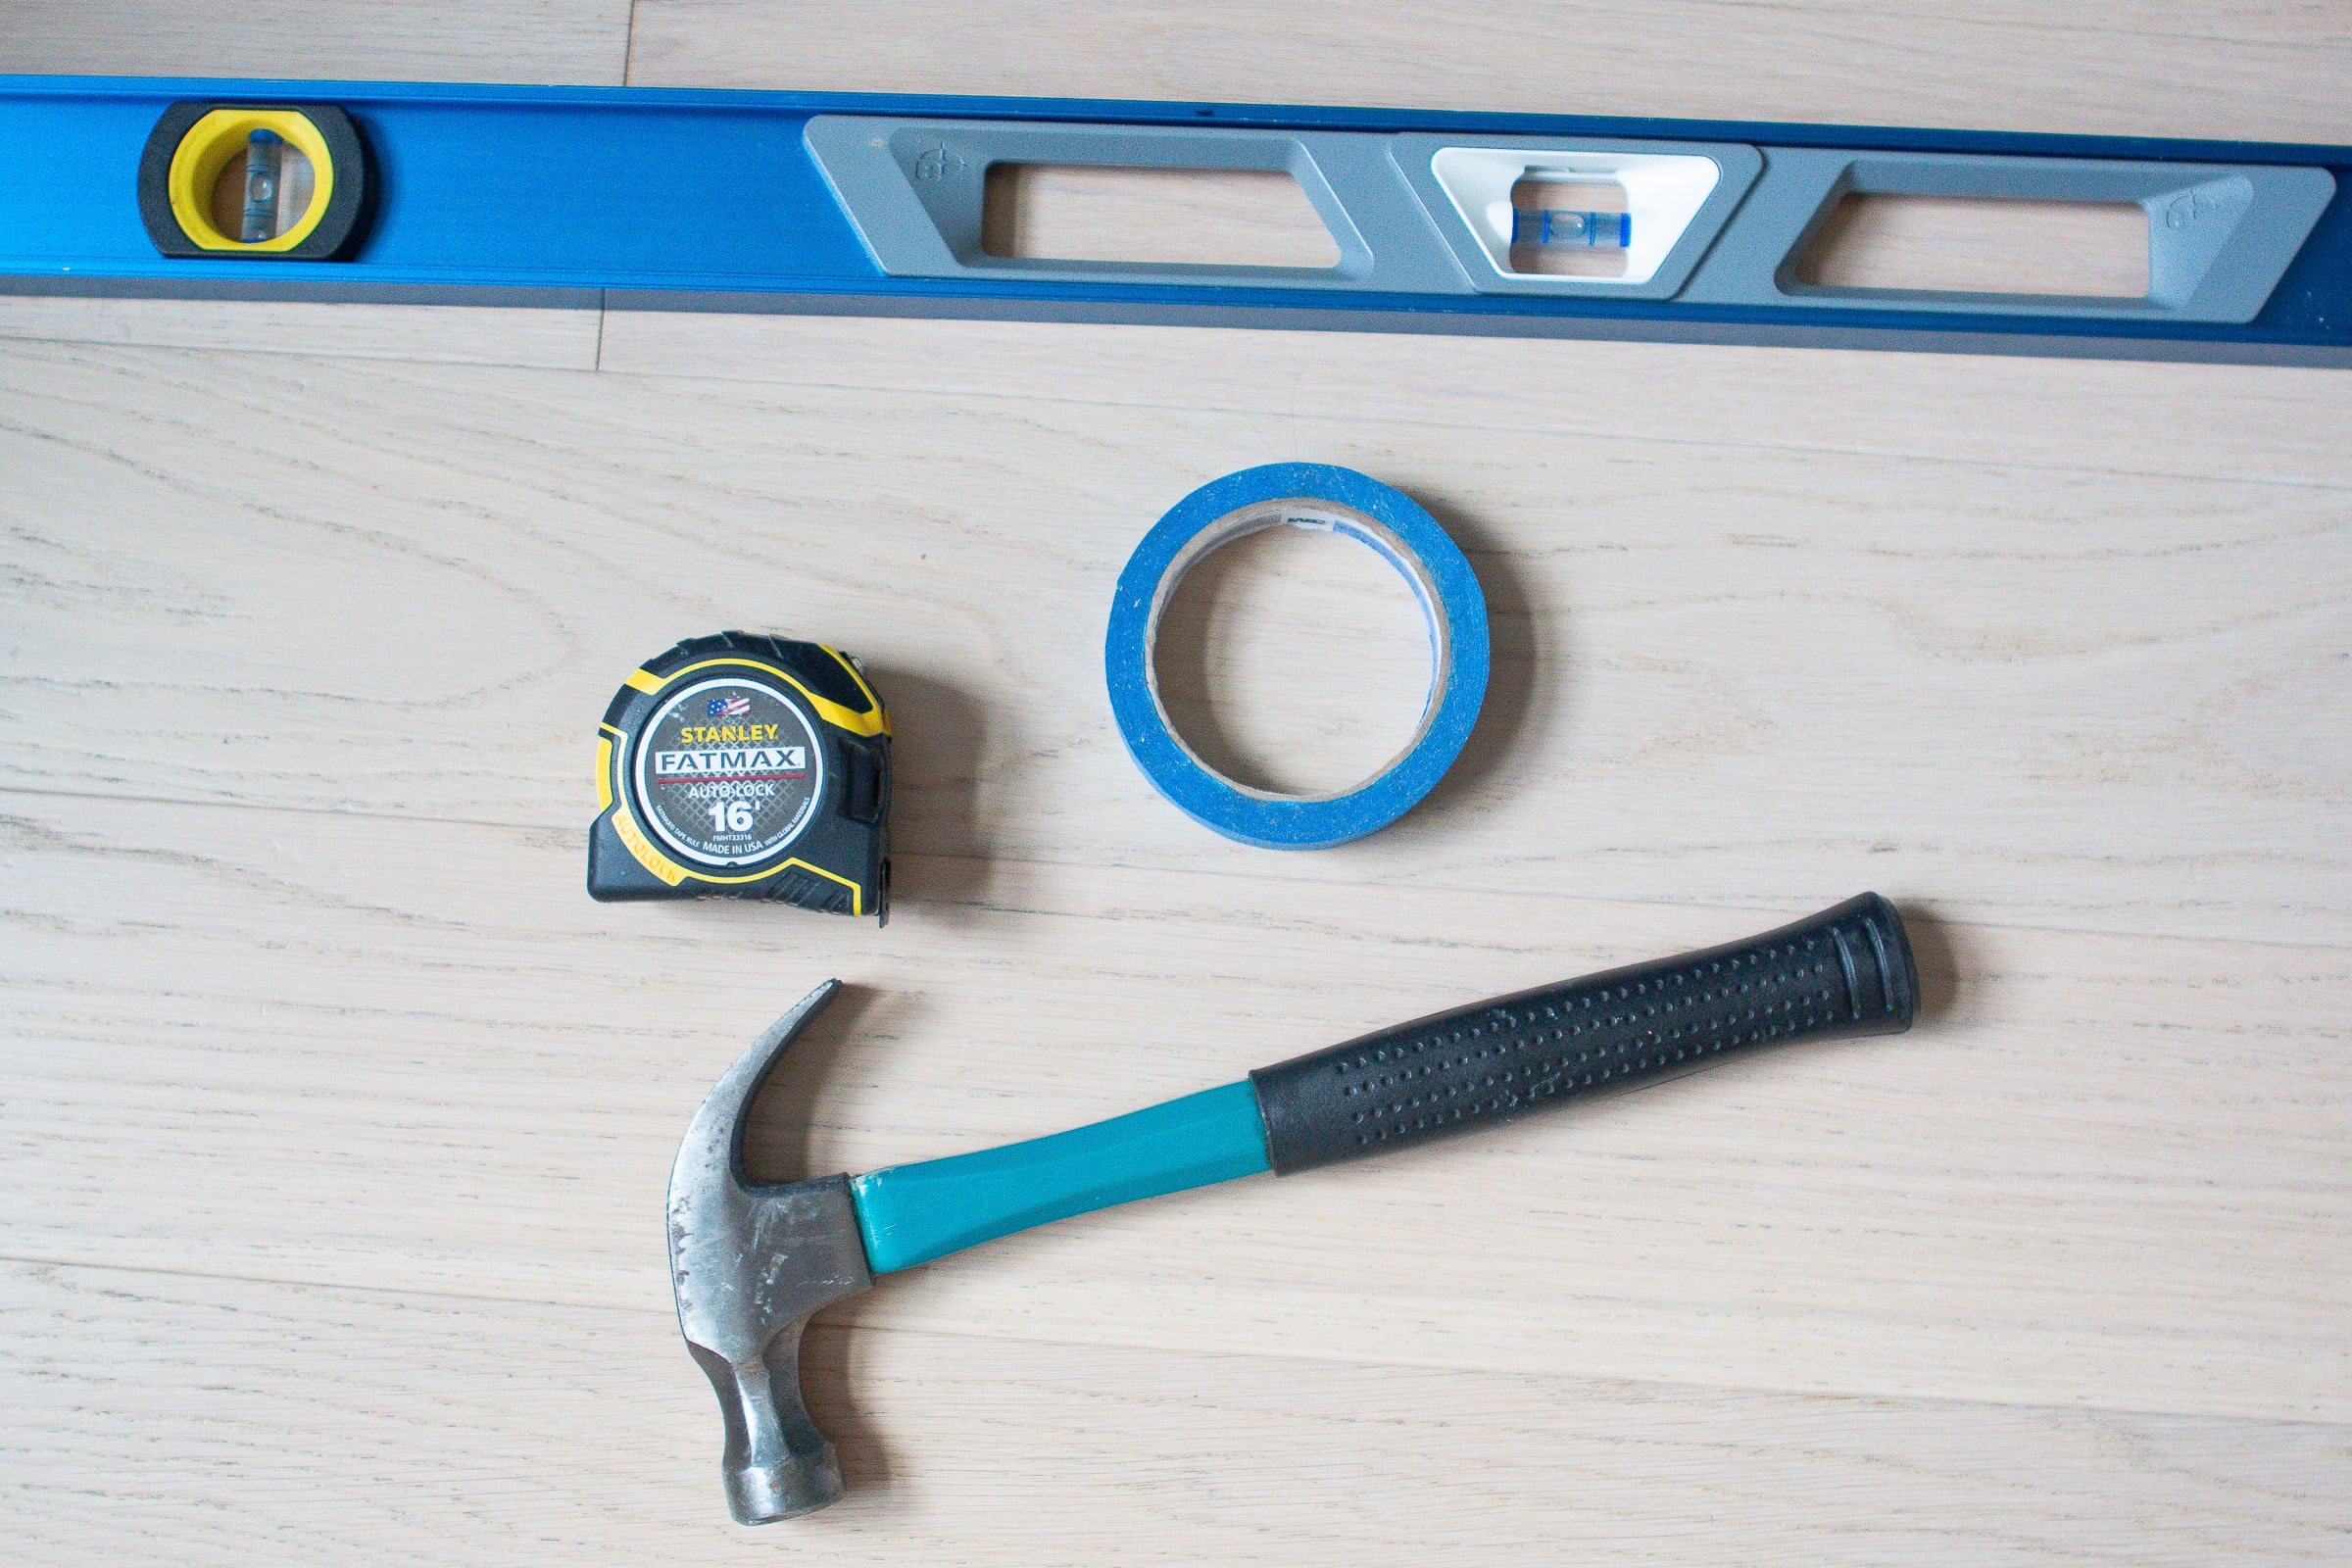
Here’s what you’ll want to have on hand for this DIY project.
- Rosin paper (or wrapping paper)
- Painter’s tape
- Tape measure & pencil
- Hammer
- Nails (I like this kit with assorted sizes)
- Command strips
- Museum wax
- Step ladder
- Level
Measure Your Wall
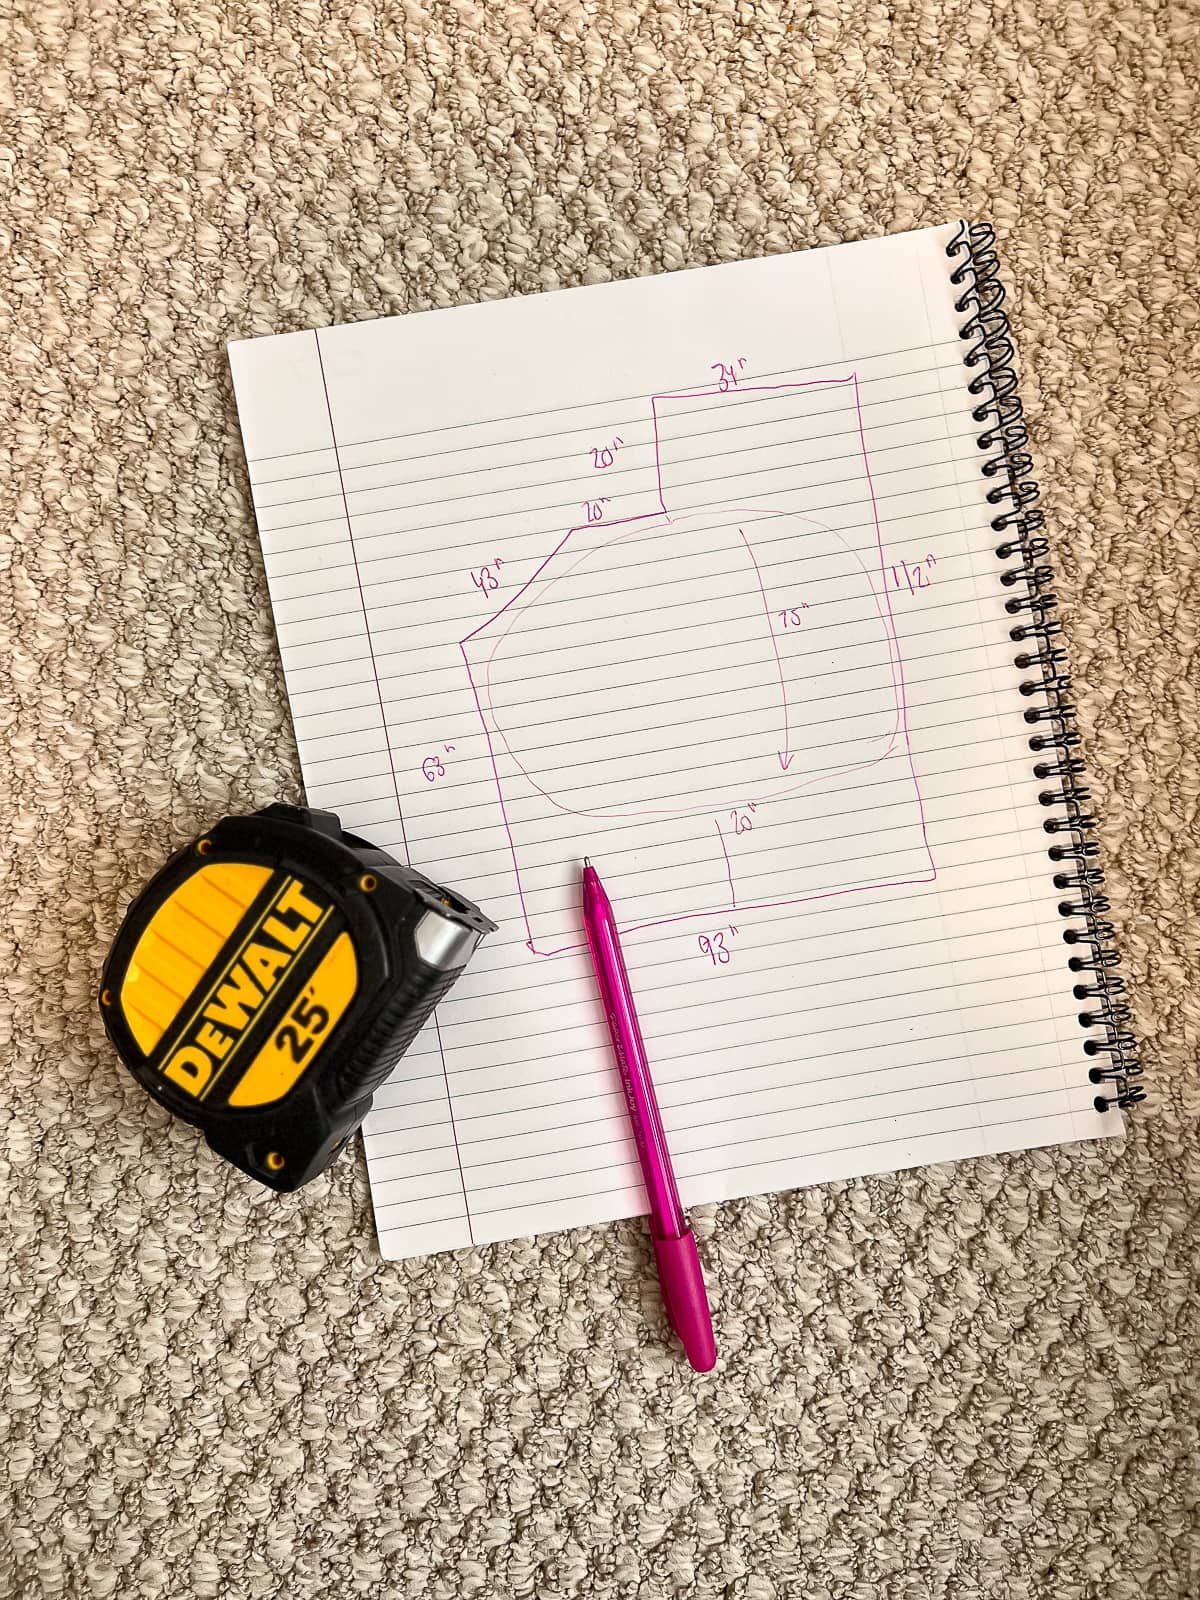
First, measure your wall. I grabbed my step ladder and a stepstool and headed to the stair landing.
I measured the entire wall, from top to bottom, and wrote down those measurements. Then, I determined how much space I wanted the stairway gallery wall to cover. I knew it needed to be at least a few inches away from the side walls and a few feet down from the ceiling and up from the floor.
Use Painter’s Tape On The Floor
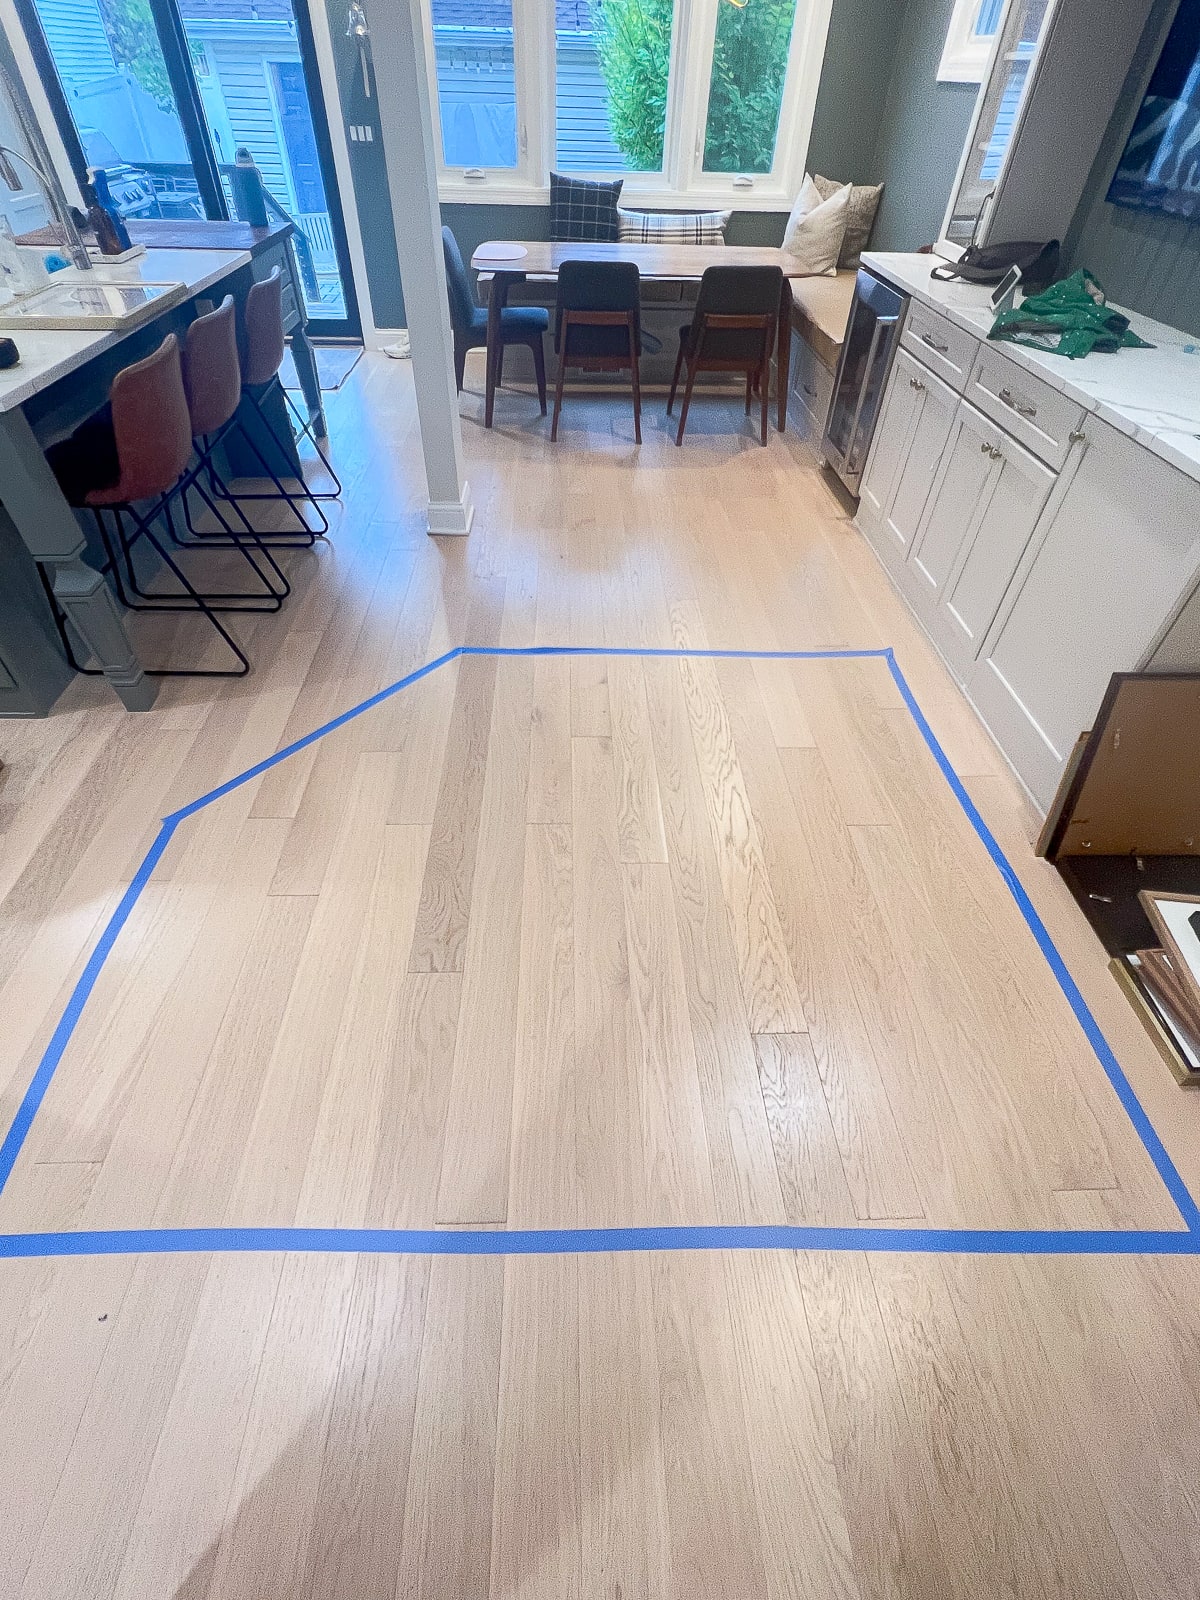
Once I had a good idea of the space I wanted to cover, I translated those measurements to the floor, using painter’s tape. This is very helpful when you’re going to be hanging a ton of frames and art. Instead of just hanging and making lots of unnecessary holes in your walls, go in with a plan!
This painter’s tape helped me figure out if I had enough frames and art to fill up the entire staircase wall. I had a few empty frames at this point, which just permitted me to add a few more pieces to our art collection.
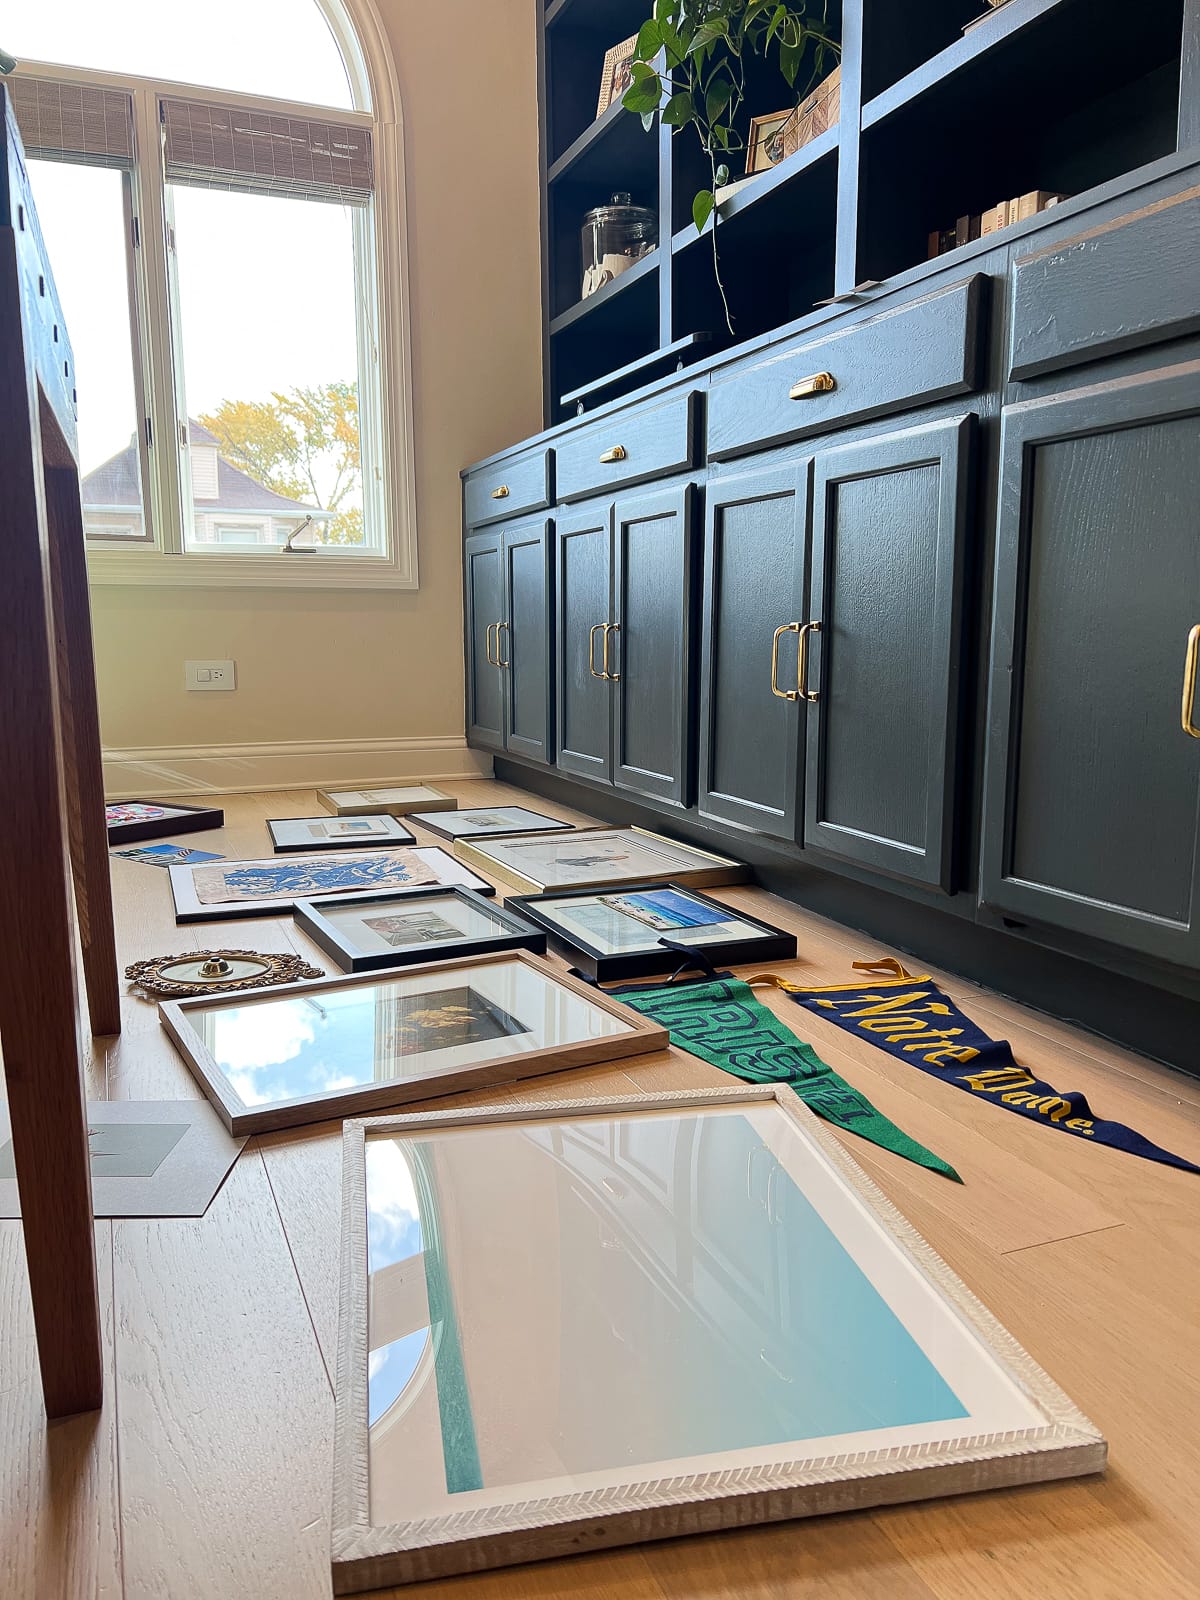
Figure Out Your Staircase Gallery Wall Layout
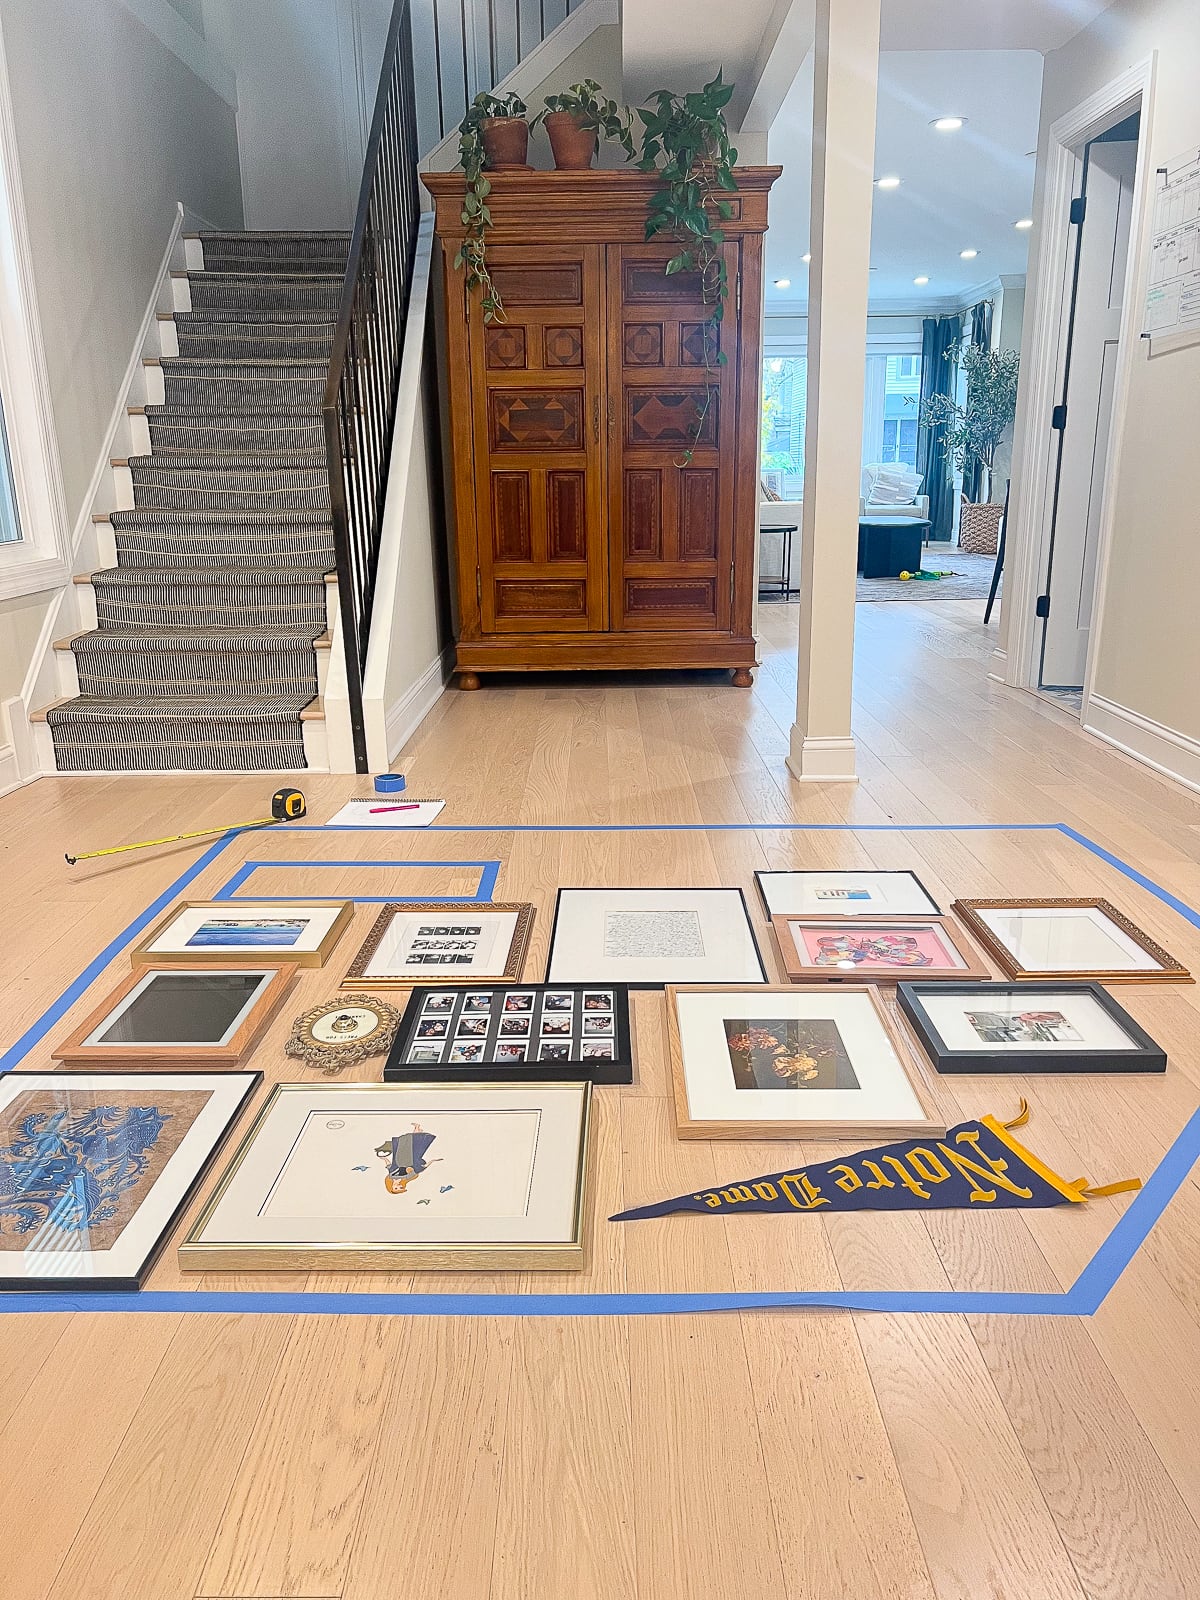
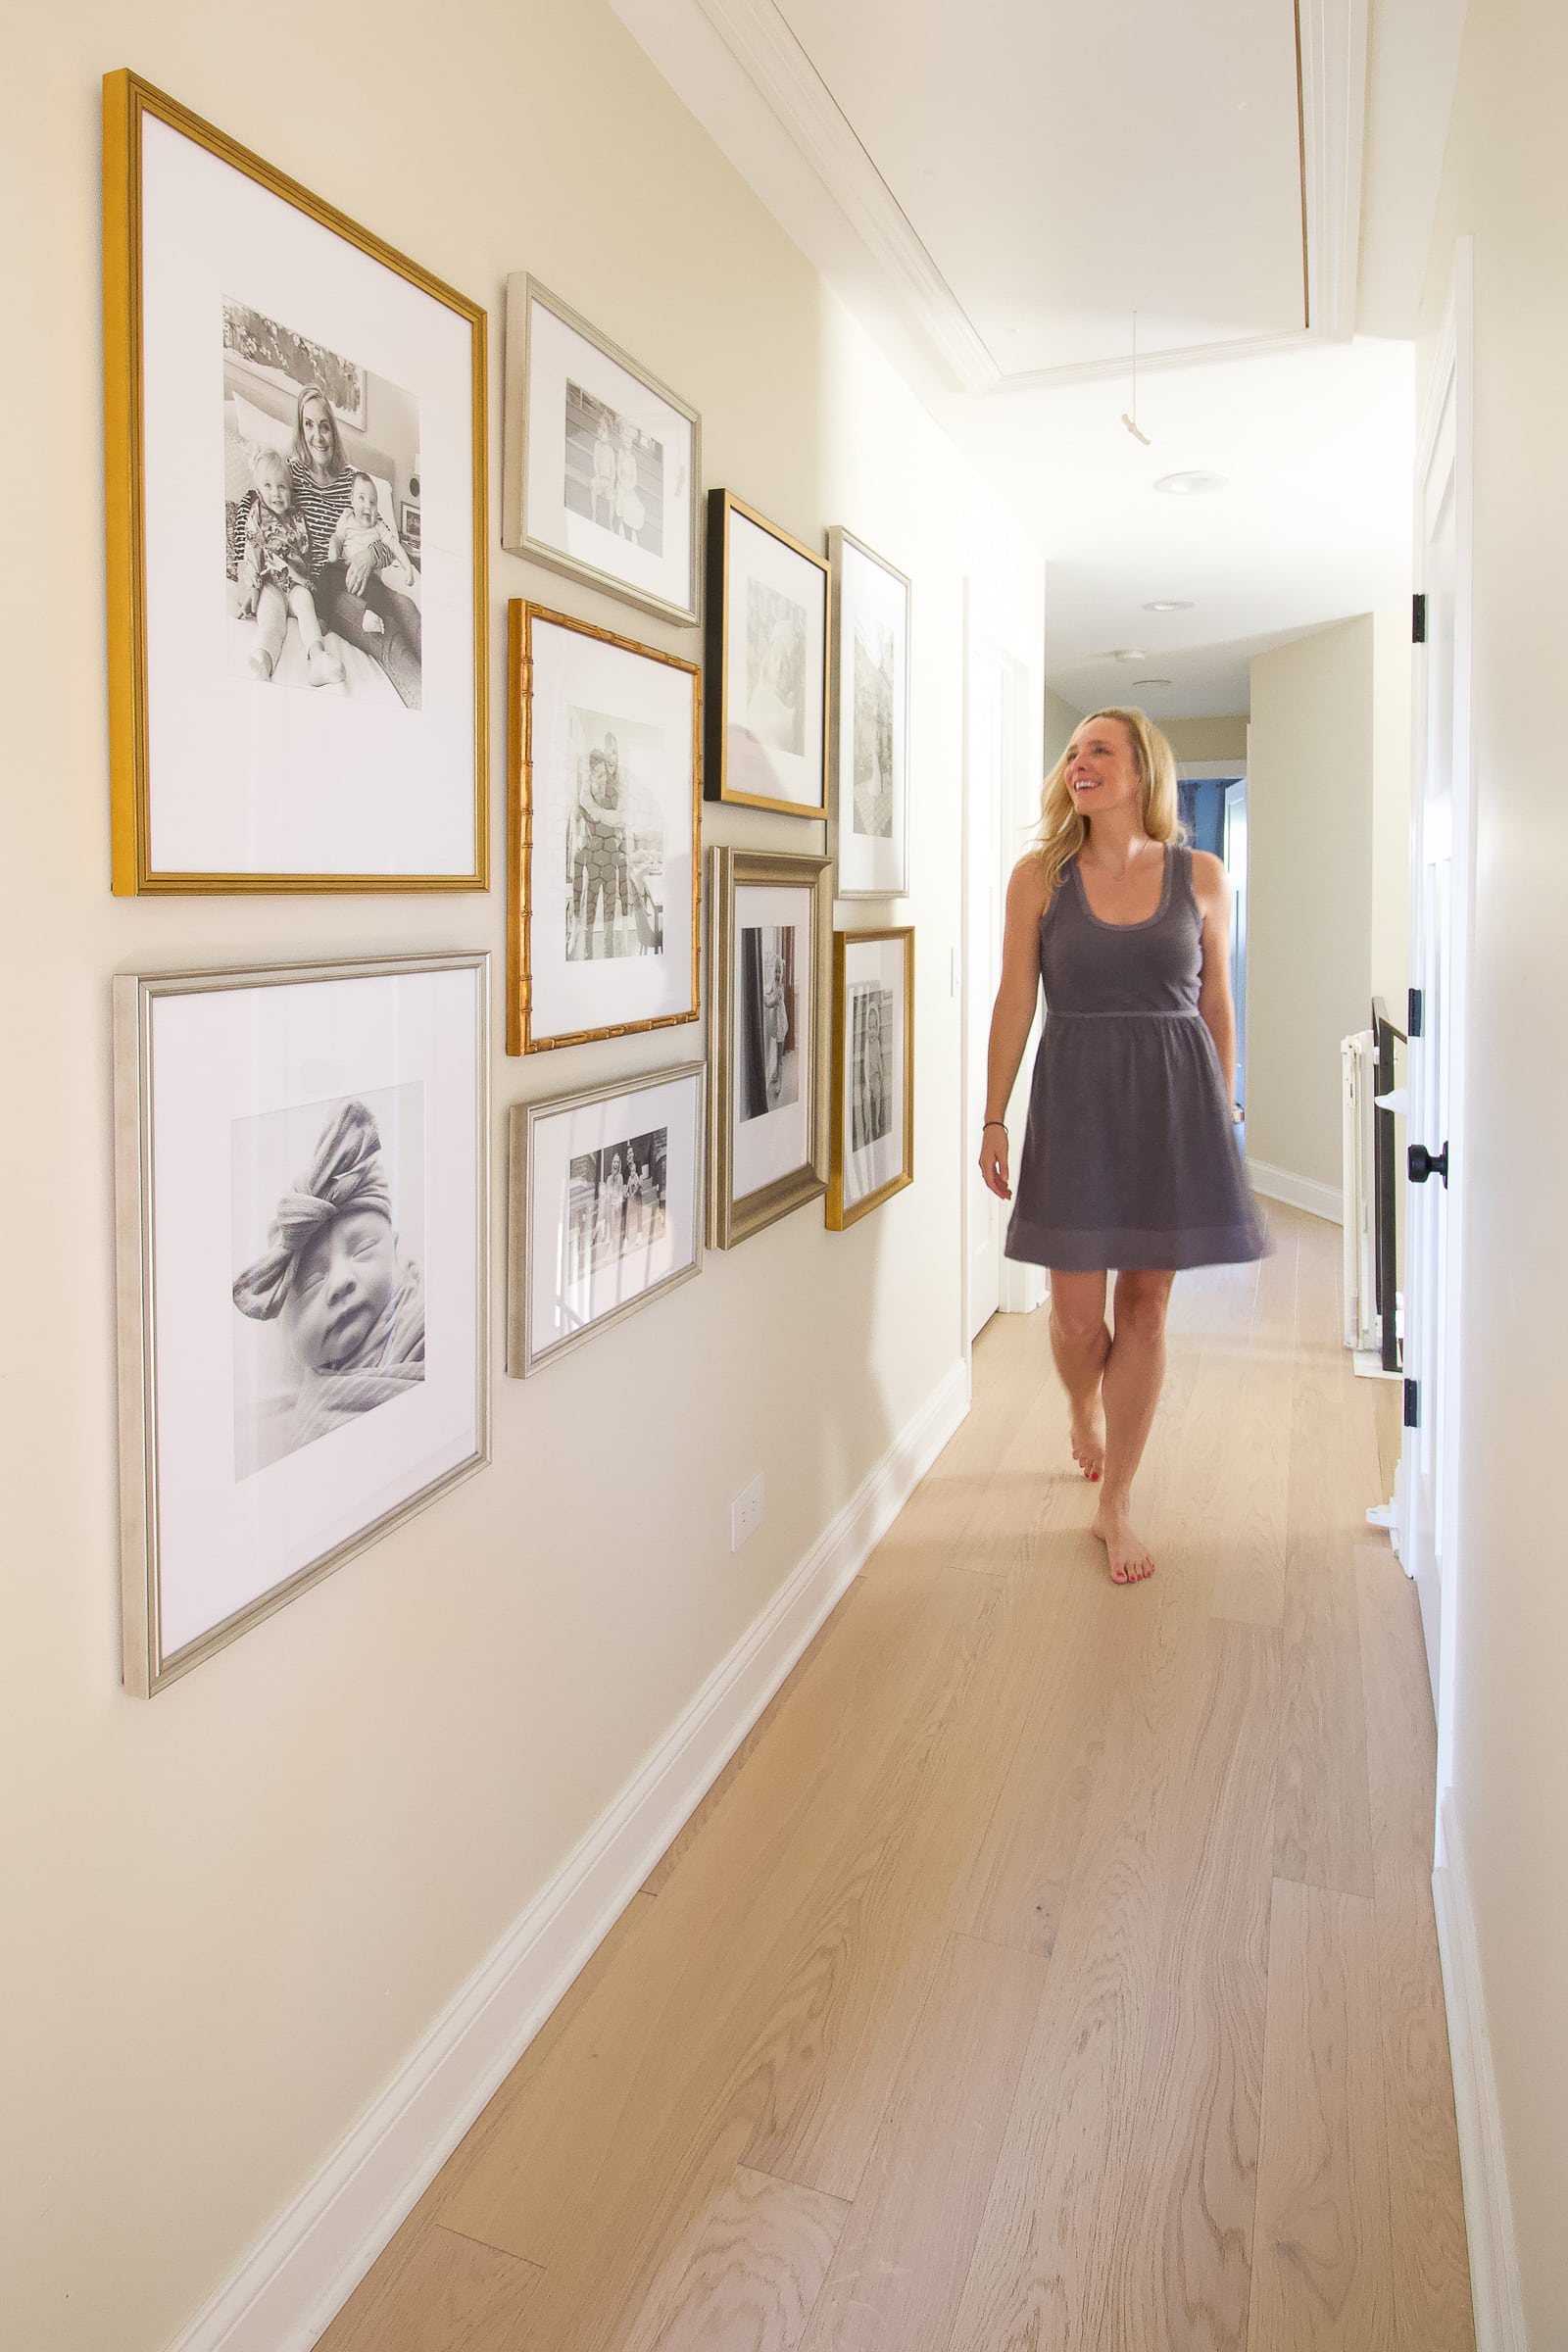
Then, it was all about figuring out the best layout to create a cohesive look. I put on some music and just had fun arranging and rearranging as I went. Here are some tips to keep in mind as you go.
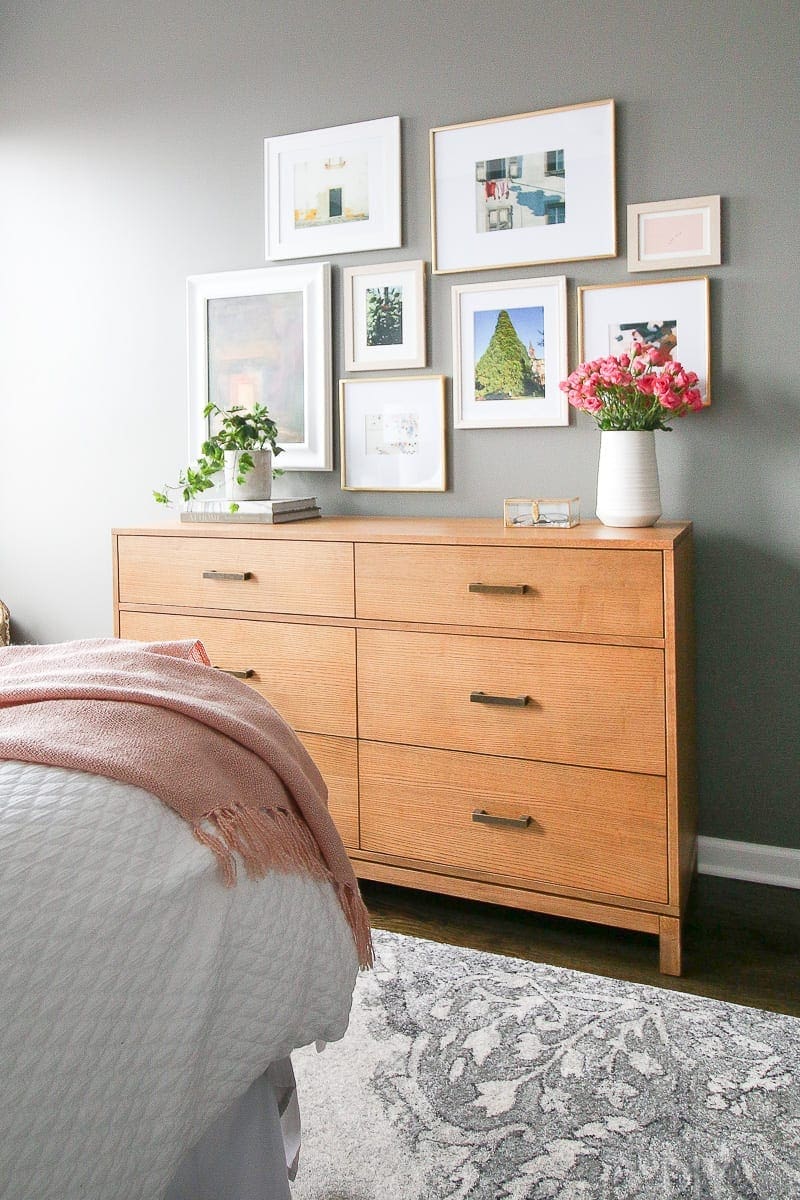
- Keep frames 2-3 inches apart. Any farther and things will look disjointed.
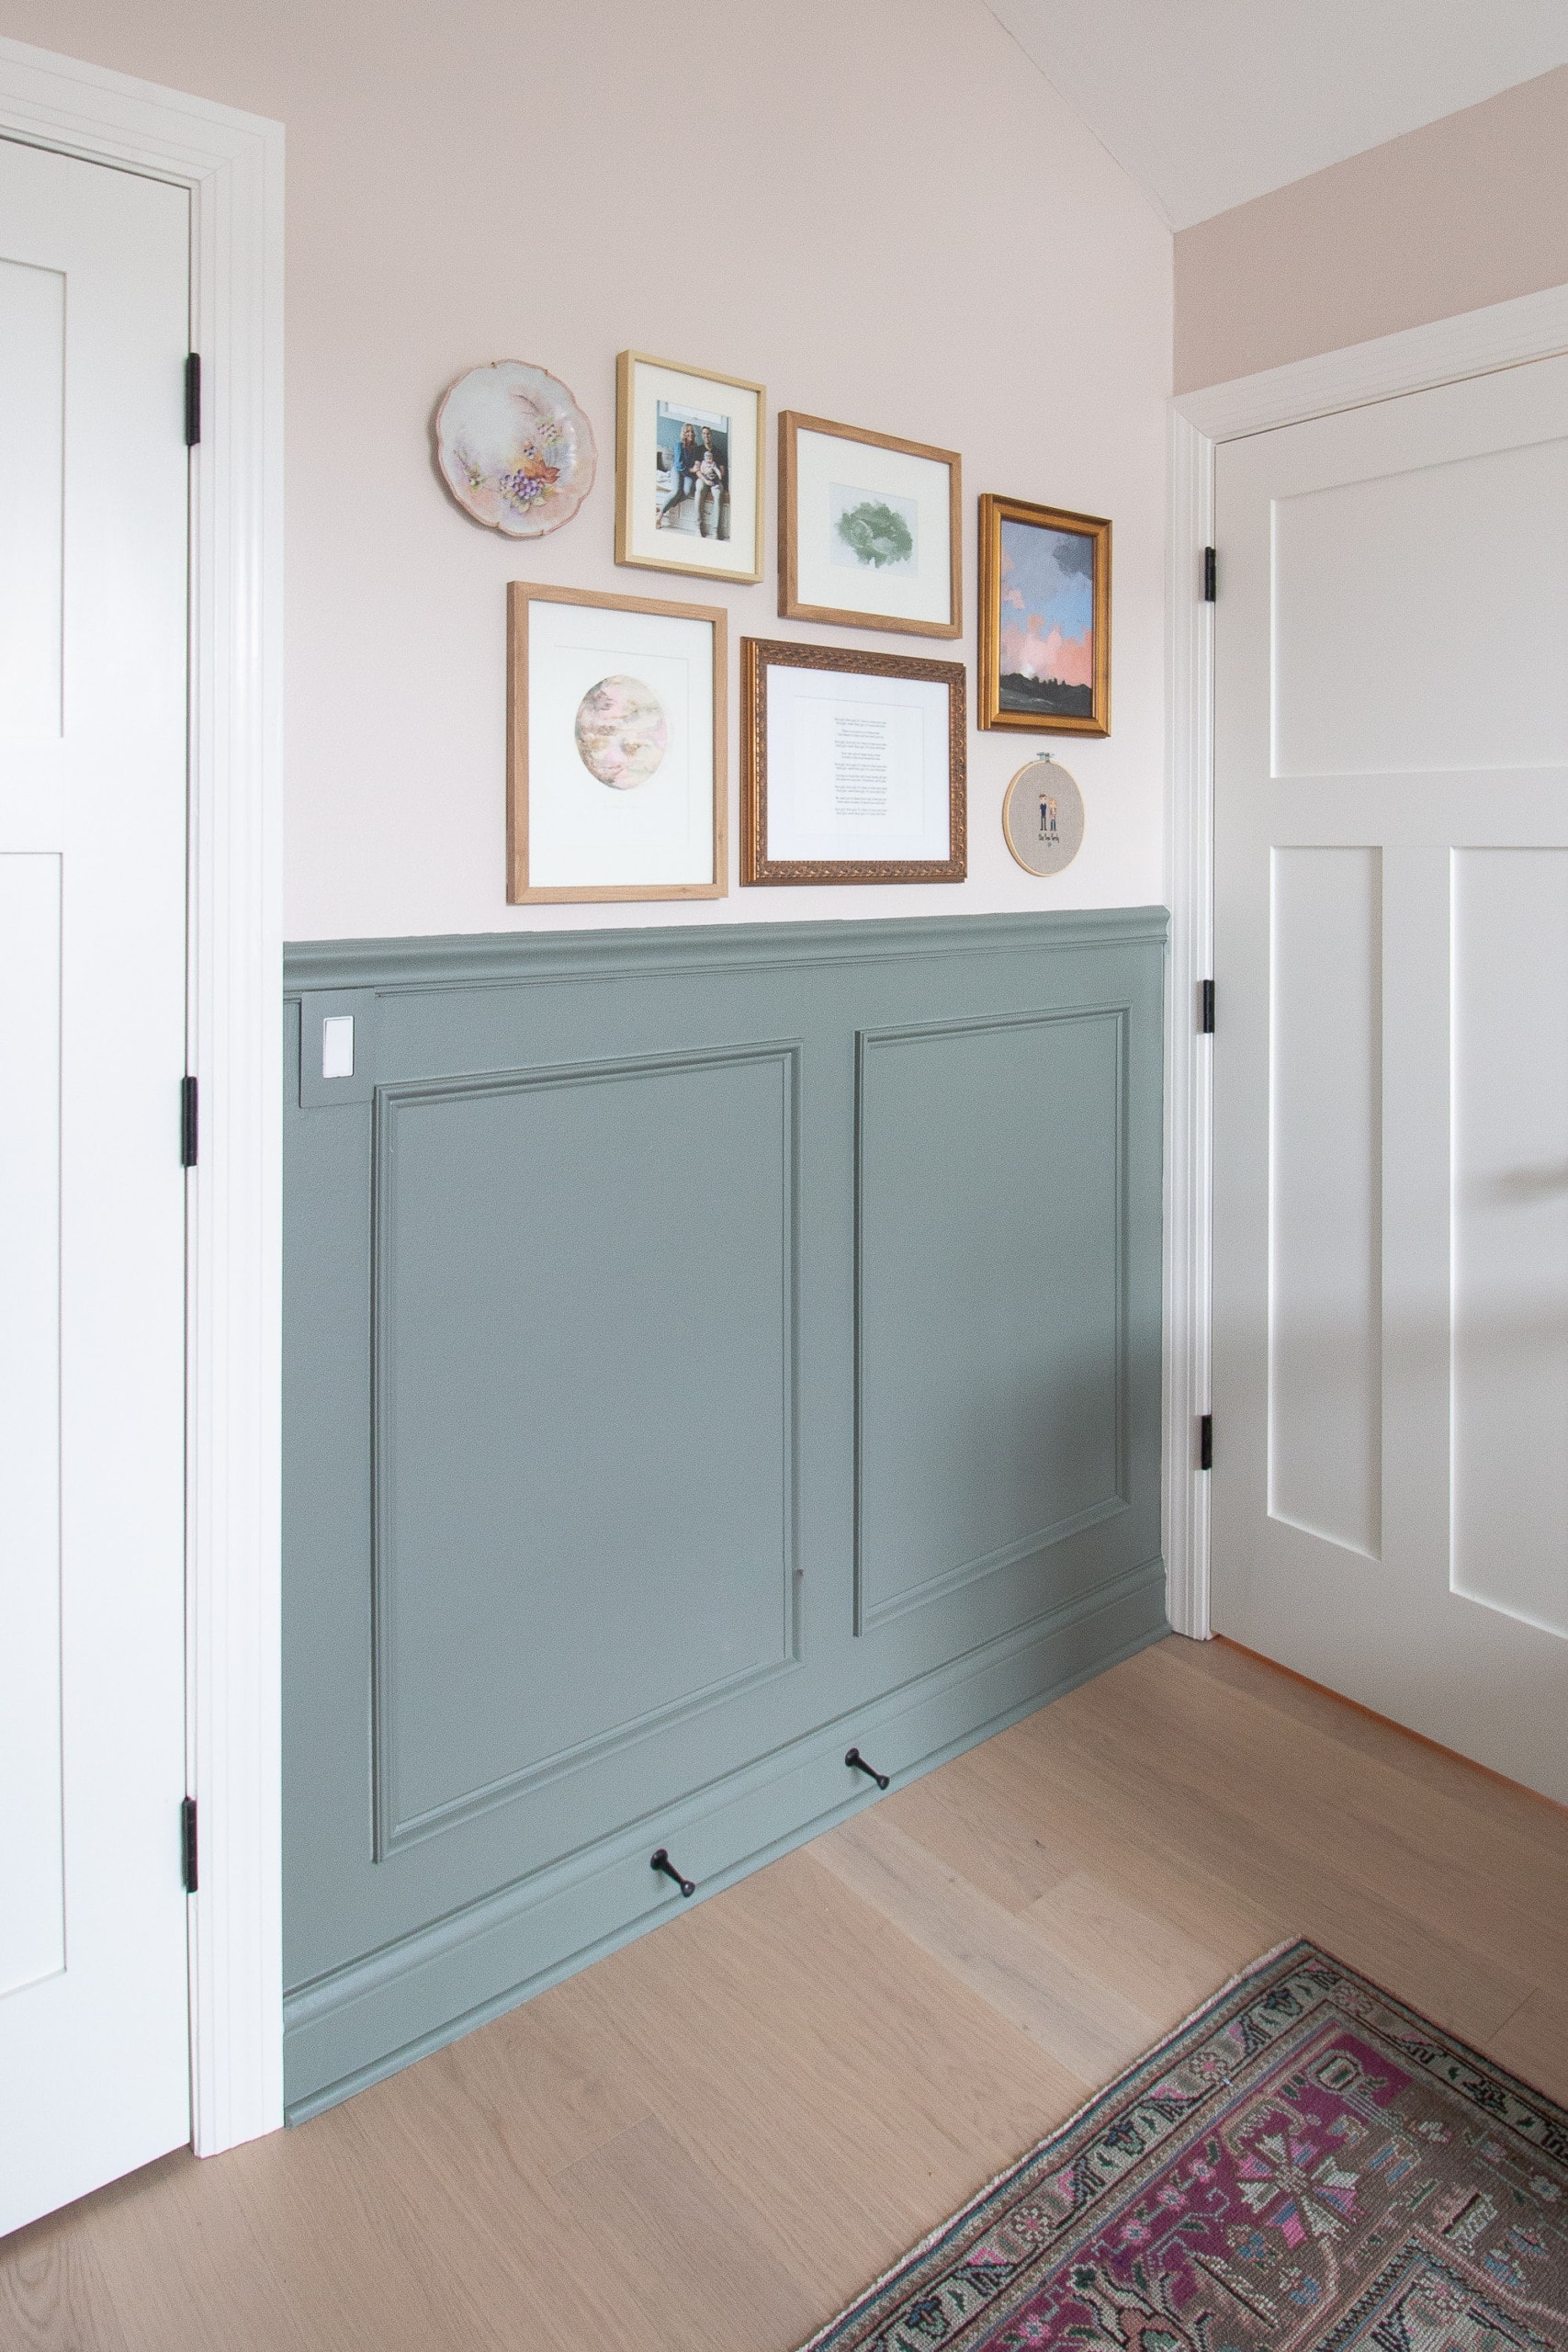
- I mixed up the frame color and used black, wood, and gold. I made sure to distribute these throughout the gallery wall layout.
- If you’re doing a collected gallery wall (as I am), then be sure to vary up the items you’re showcasing. I didn’t want to have the same size frames, colors, or similar art next to each other.
- To create an eclectic feel, I used some “non-frames” in my setup (the Notre Dame pennant and champagne sign), so I made sure to spread these out in my collection.
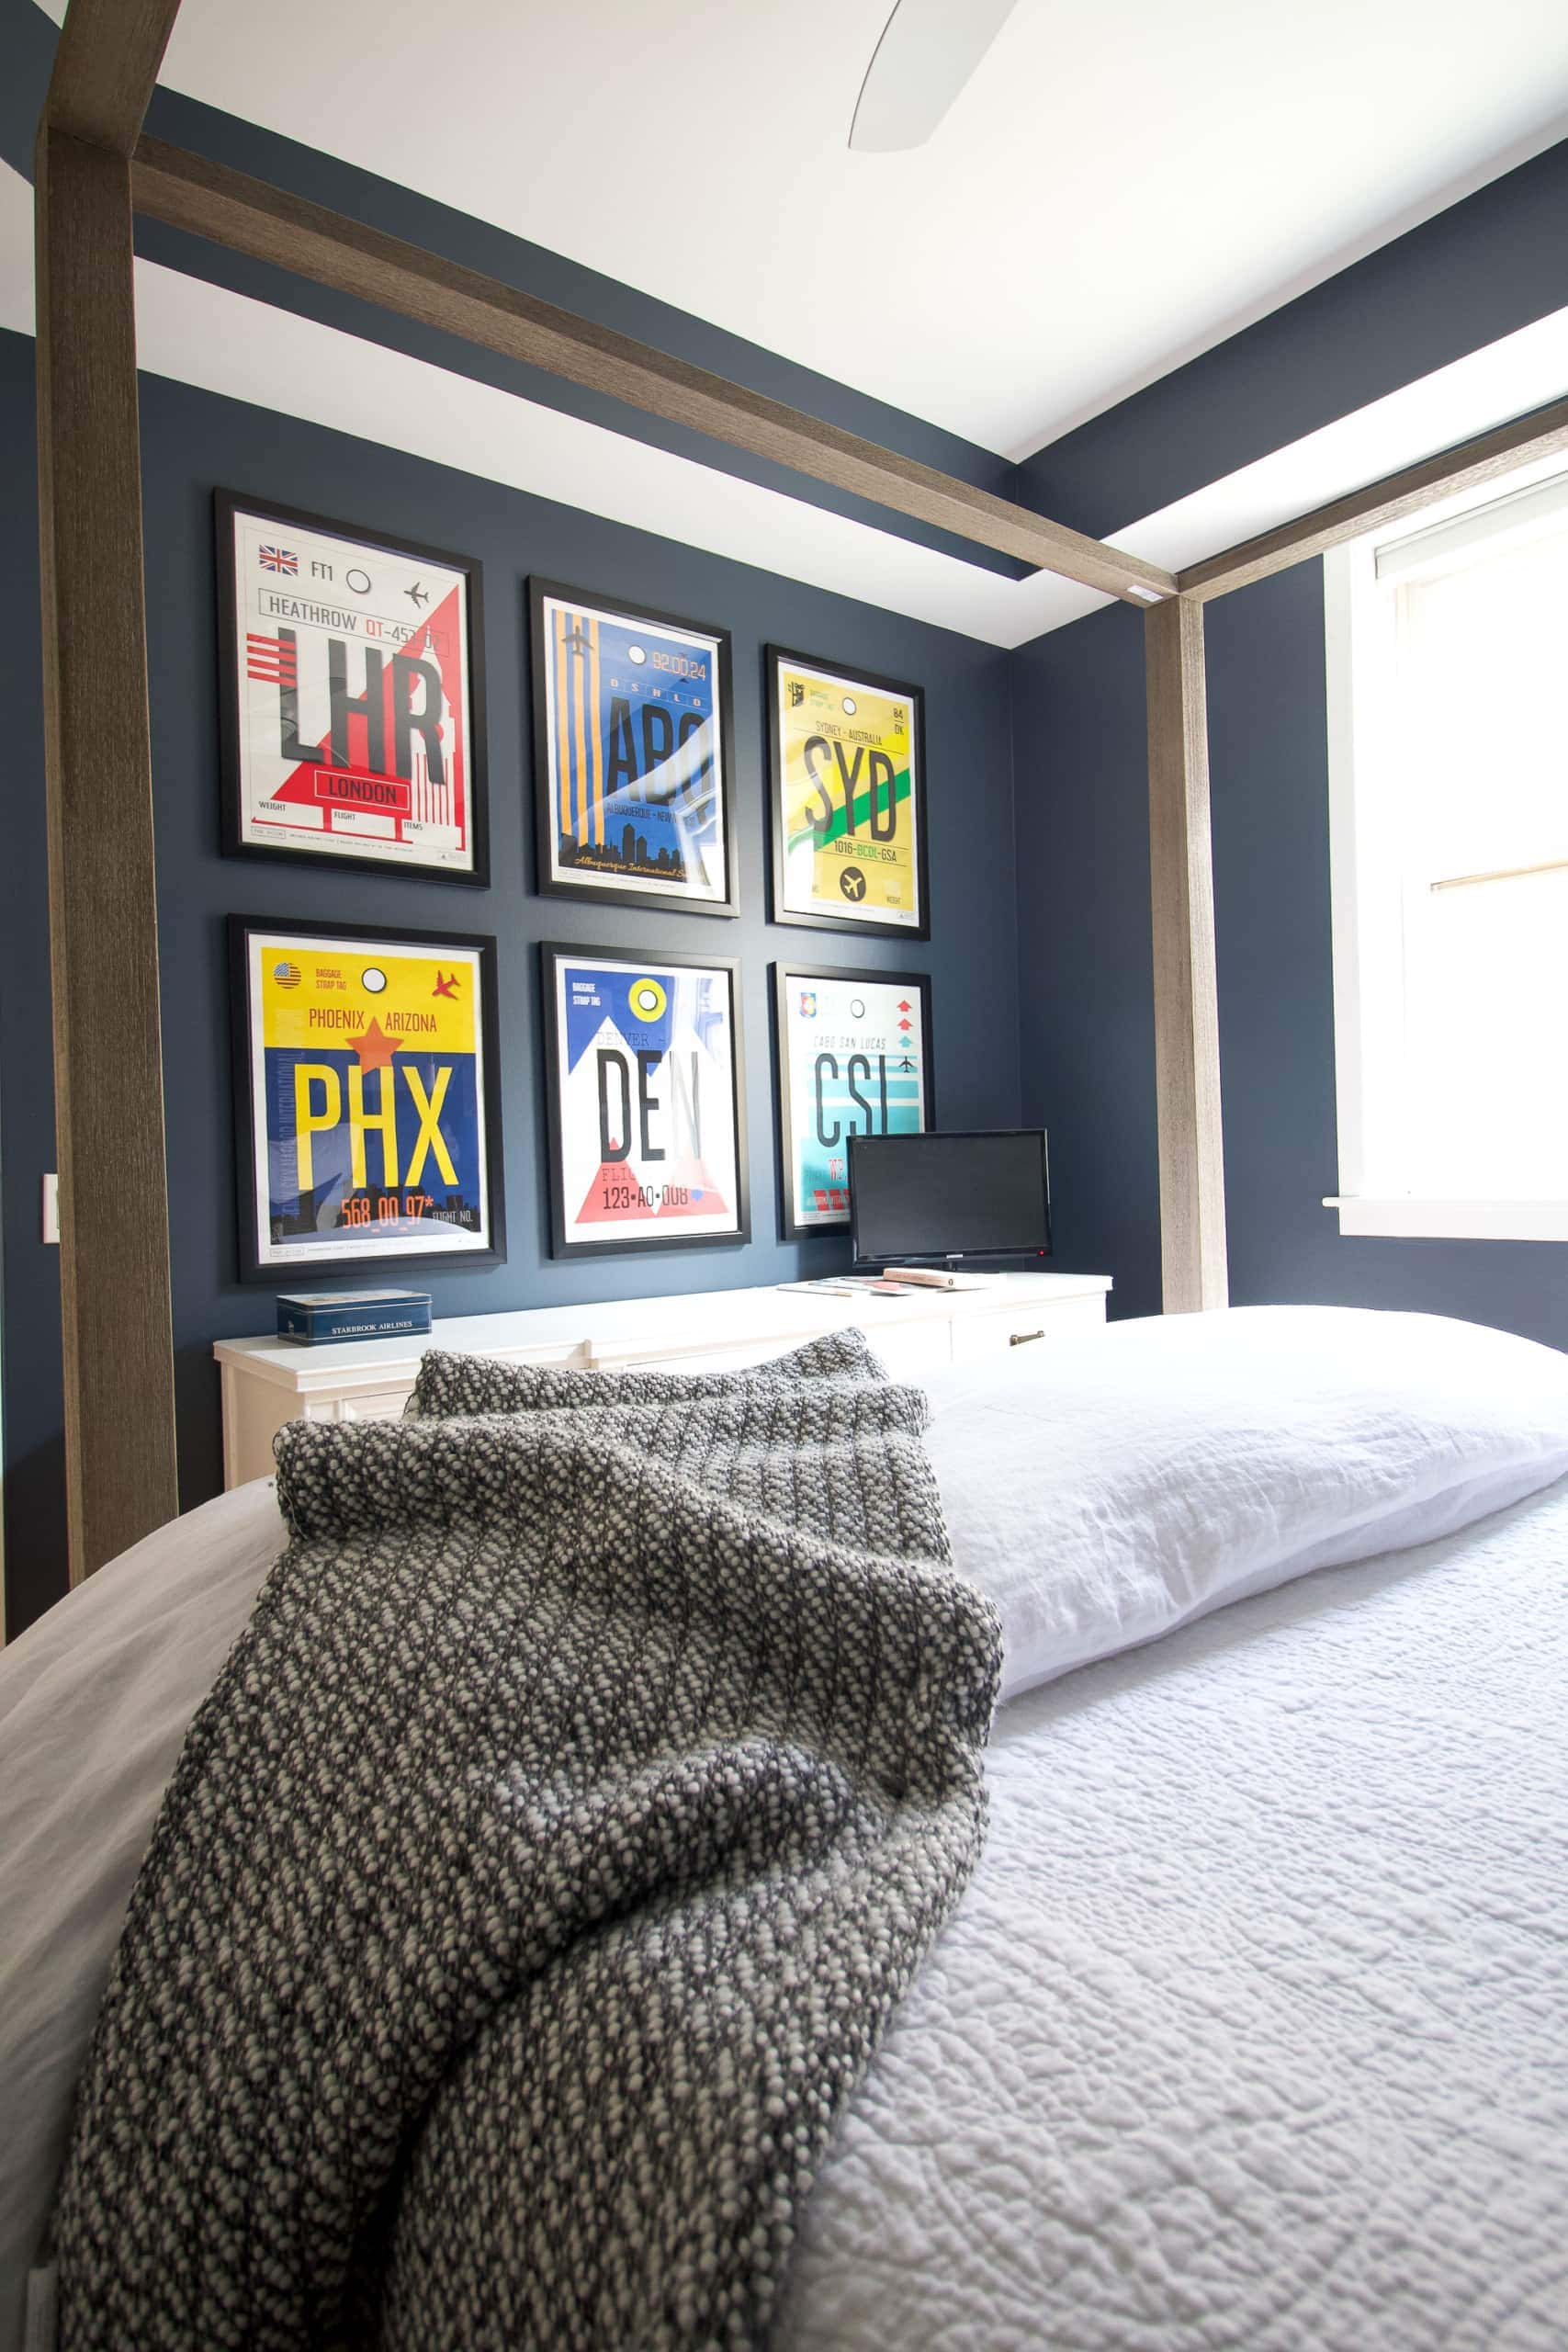
- On a big wall like this, the size of the frame matters. I went for larger frames of at least 8×10 and bigger. These larger pieces were scattered throughout the layout.
Transfer It To Paper
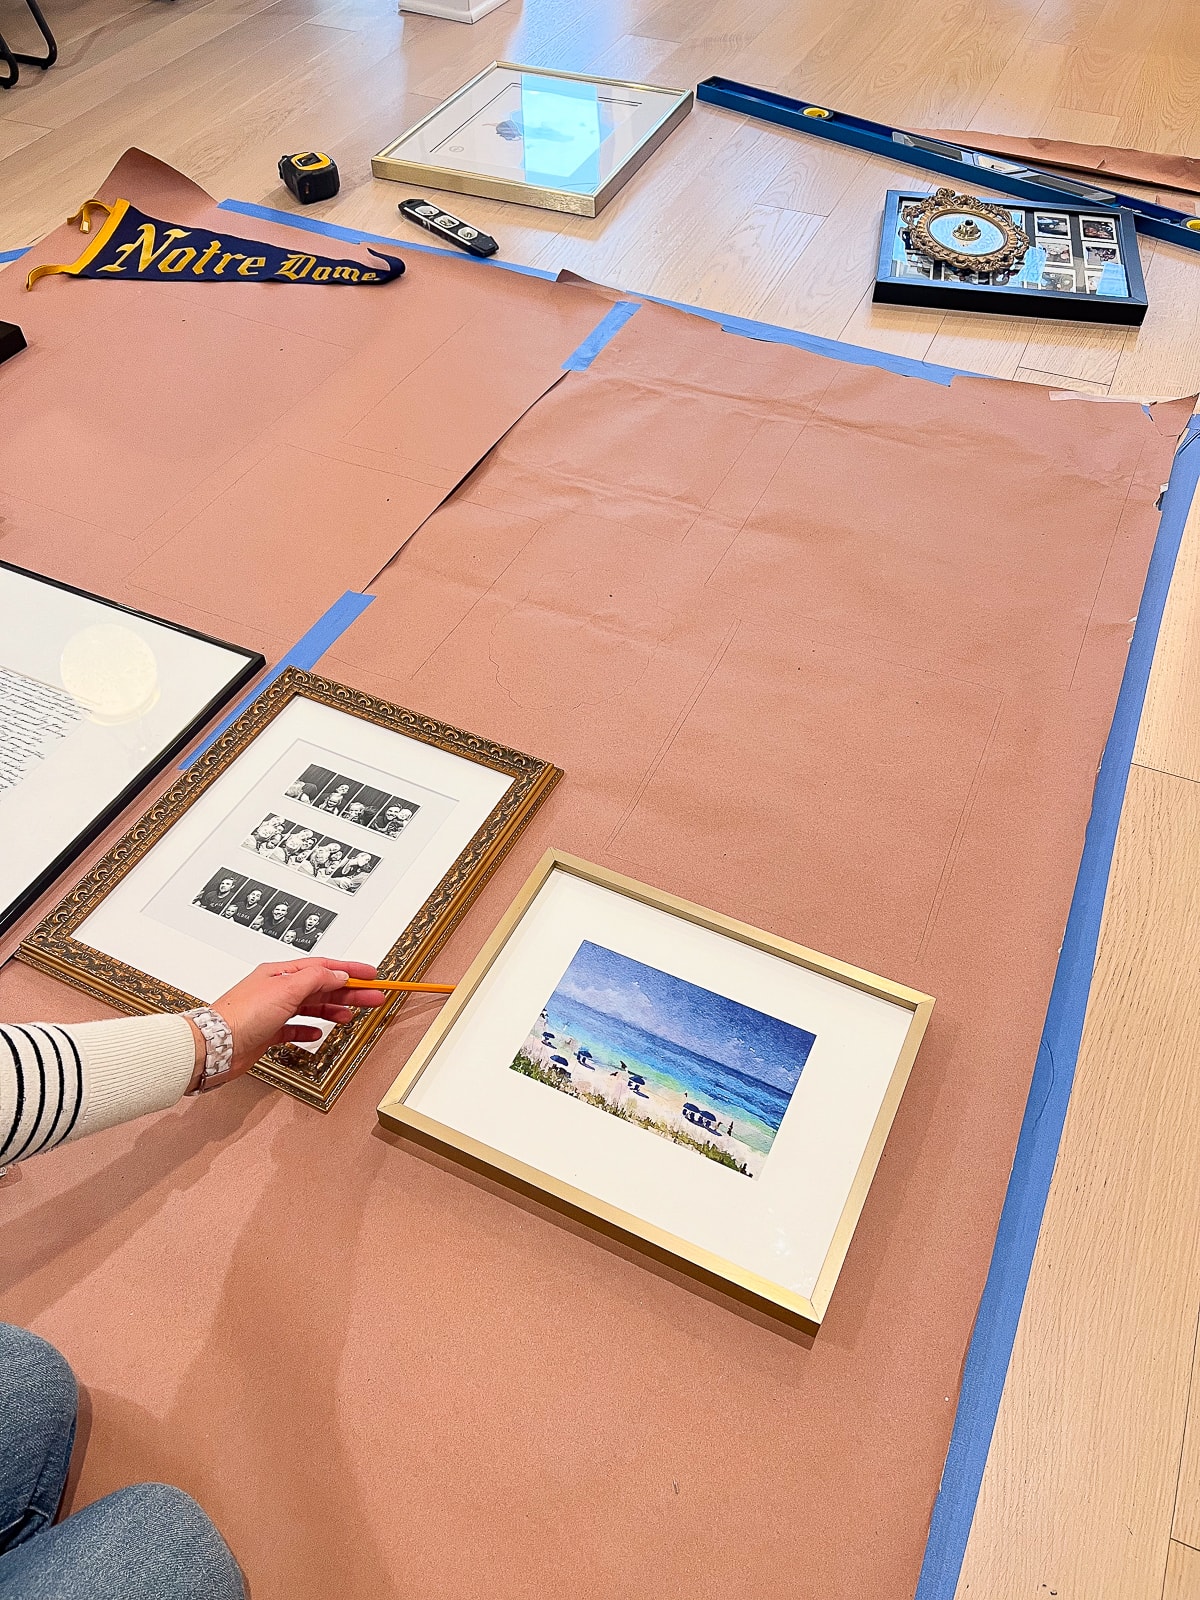
Once I landed on a layout that I liked, I took a picture of it with my phone and then got out some rosin paper. I cut this and taped it to the floor so it matched my painter’s tape layout. I then added the frames back over the paper.
With everything back in the proper space, I traced an outline of each and every frame using a pencil. Next, I marked the placement of the frame hangers directly onto the paper. This ensures that you’re putting your nails in the correct spot. It’s much easier to put this on paper than to figure it out once you get to the wall!’
I used to make paper templates for all of the picture frames. I would individually cut them out and then arrange the paper on the wall. One large paper template has given me better results and is the easiest way to create a beautiful gallery wall.
Add The Paper To The Wall (& Level It)
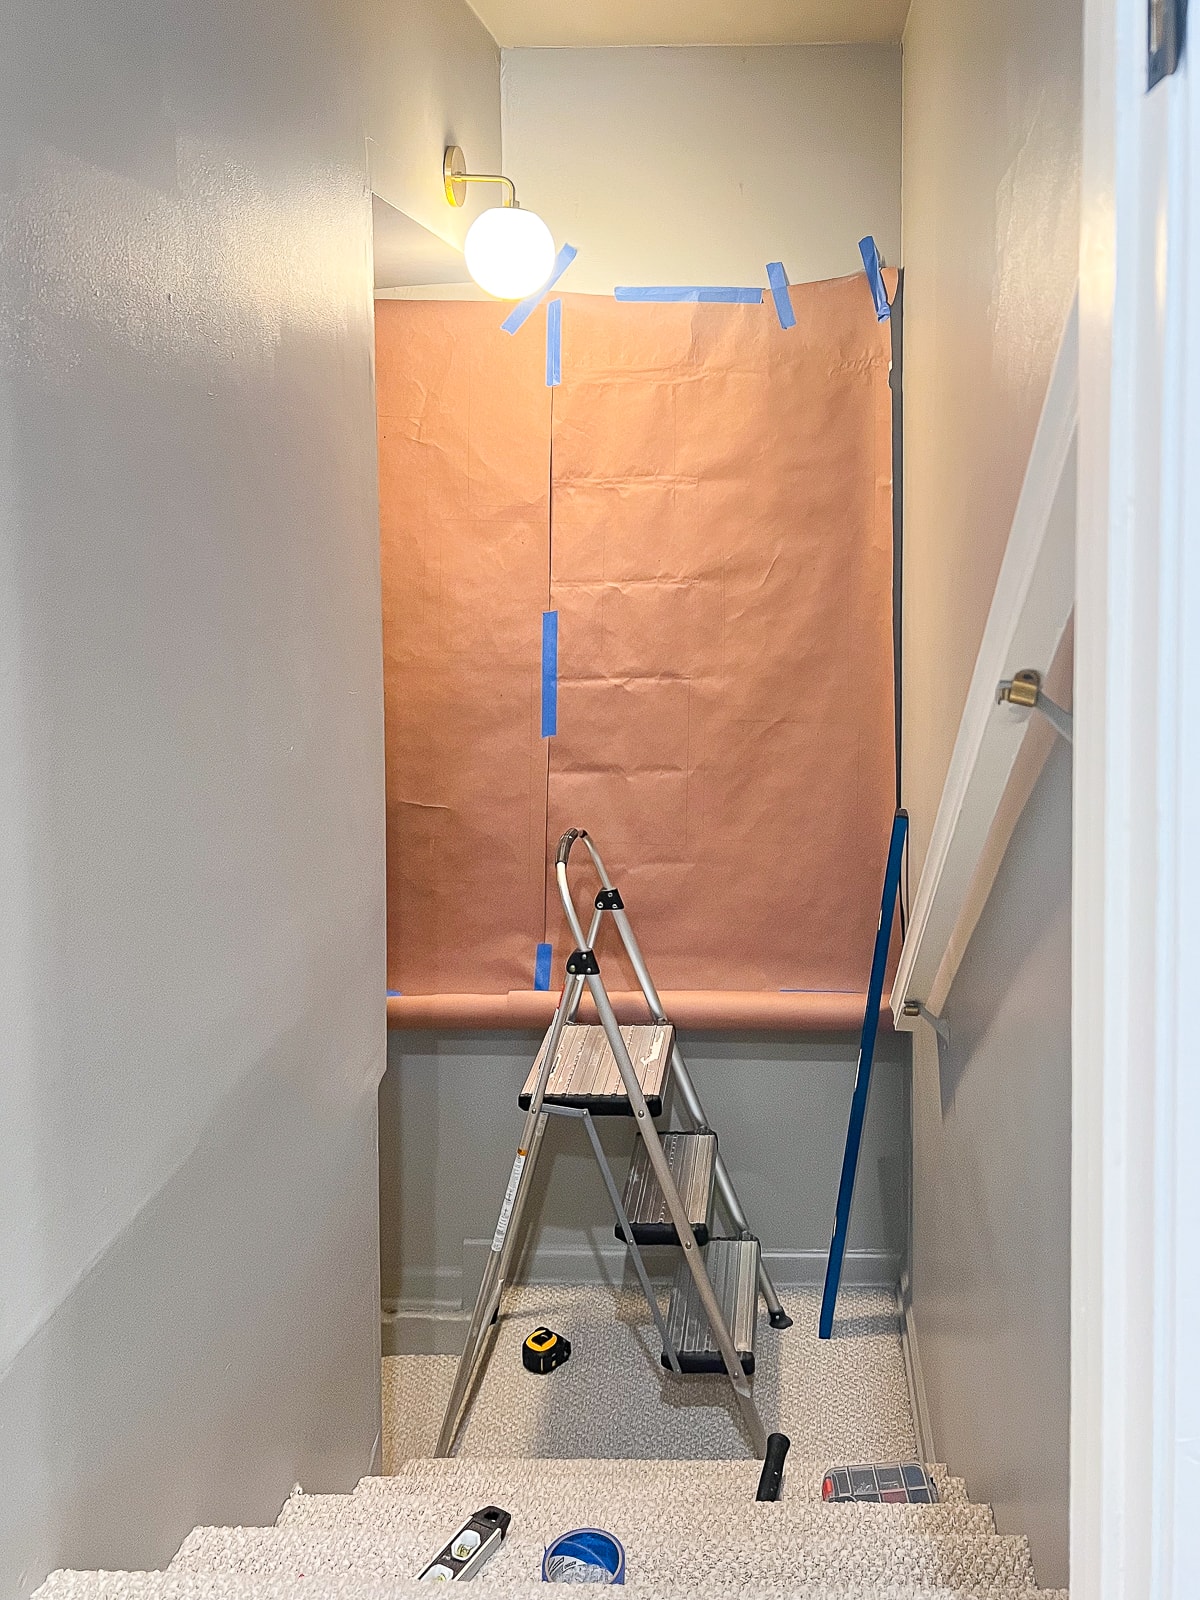
We are almost to the hanging part, I promise! With my paper all marked up, I hung it on the large wall using more painter’s tape. I grabbed my level and made sure that it was straight and hung properly.
Start Hanging!
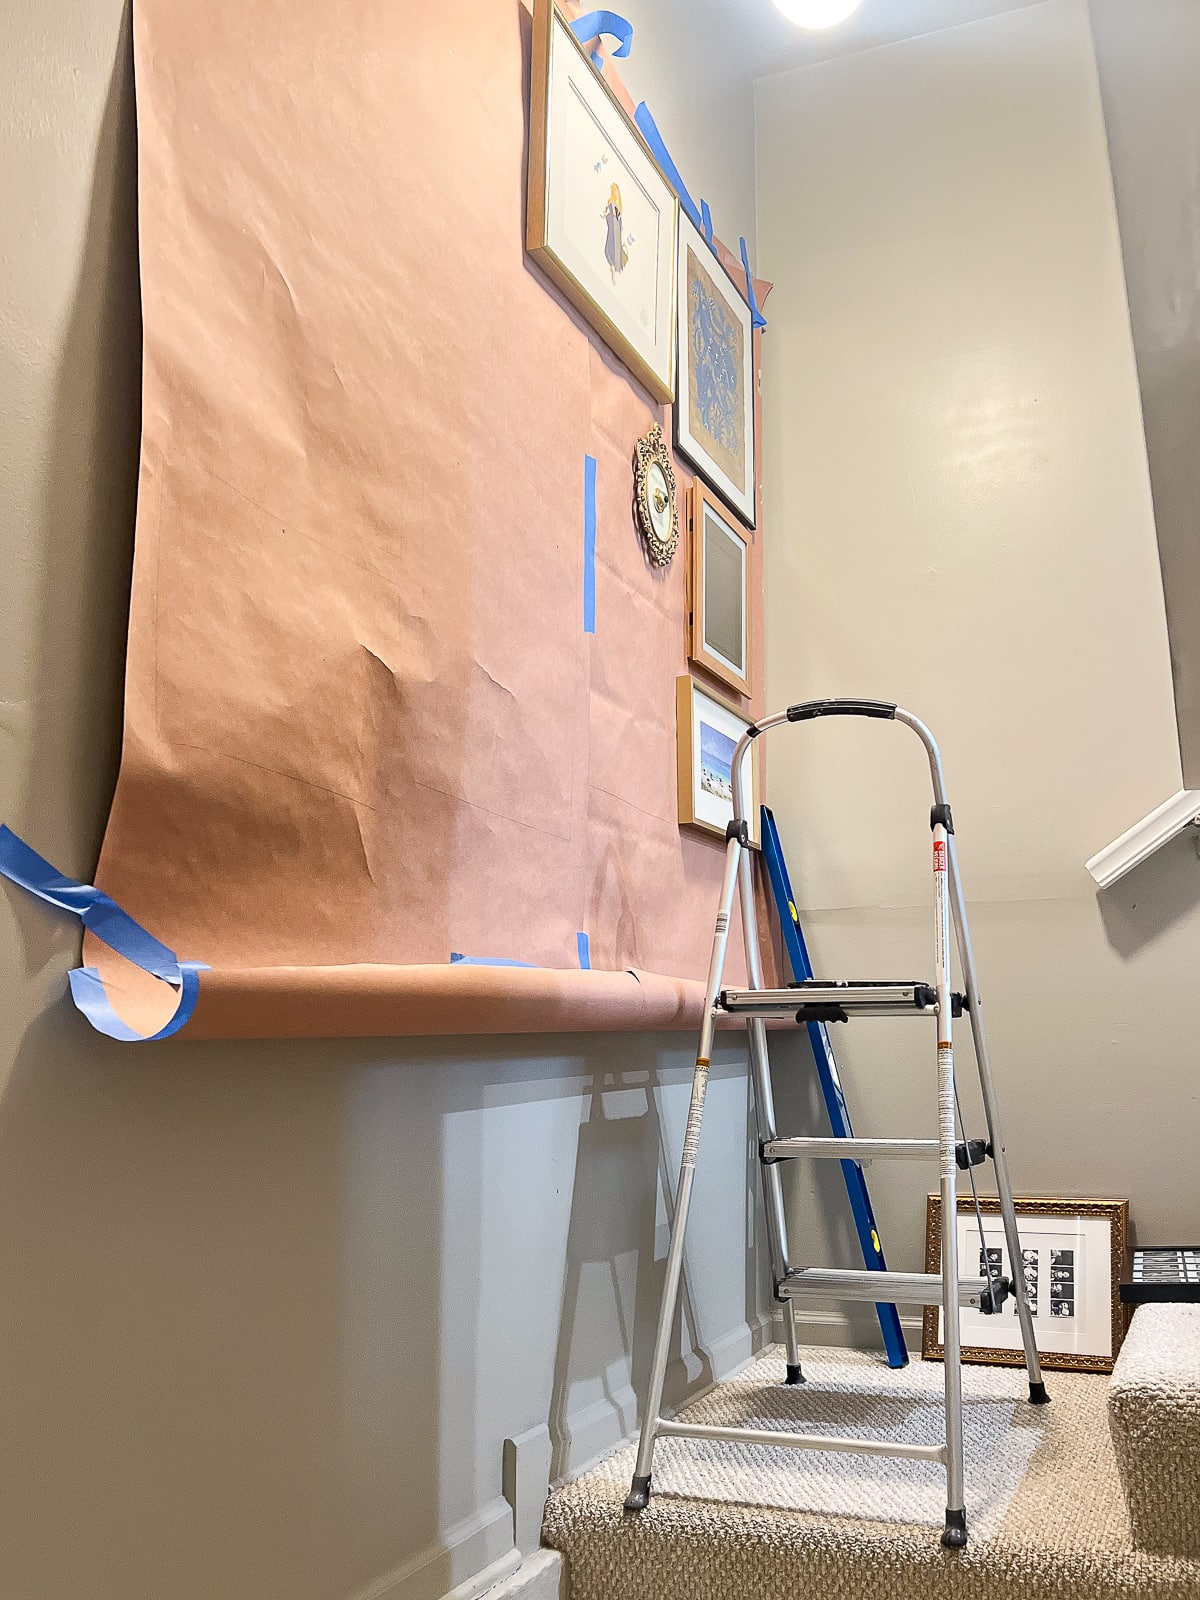
With my template in place, it was finally time to start hanging! I started at the top right corner and tapped nails into the wall as I went. I like to go one at a time to ensure that things are looking good as I go. This also ensures that no frame gets too off from my template.
Remove The Paper
Once everything was in place, I removed each frame and piece of art so I could take the paper off of the wall. I then re-hung each frame so everything was in its place.
Use Museum Wax & Command Strips Too
While some of my pieces were secured with just two nails, others needed a bit more reinforcement. Since this is a high-traffic post and the kids will be running up and down these stairs, I don’t want anything accidentally falling off. So, I grabbed two of my favorite supplies.
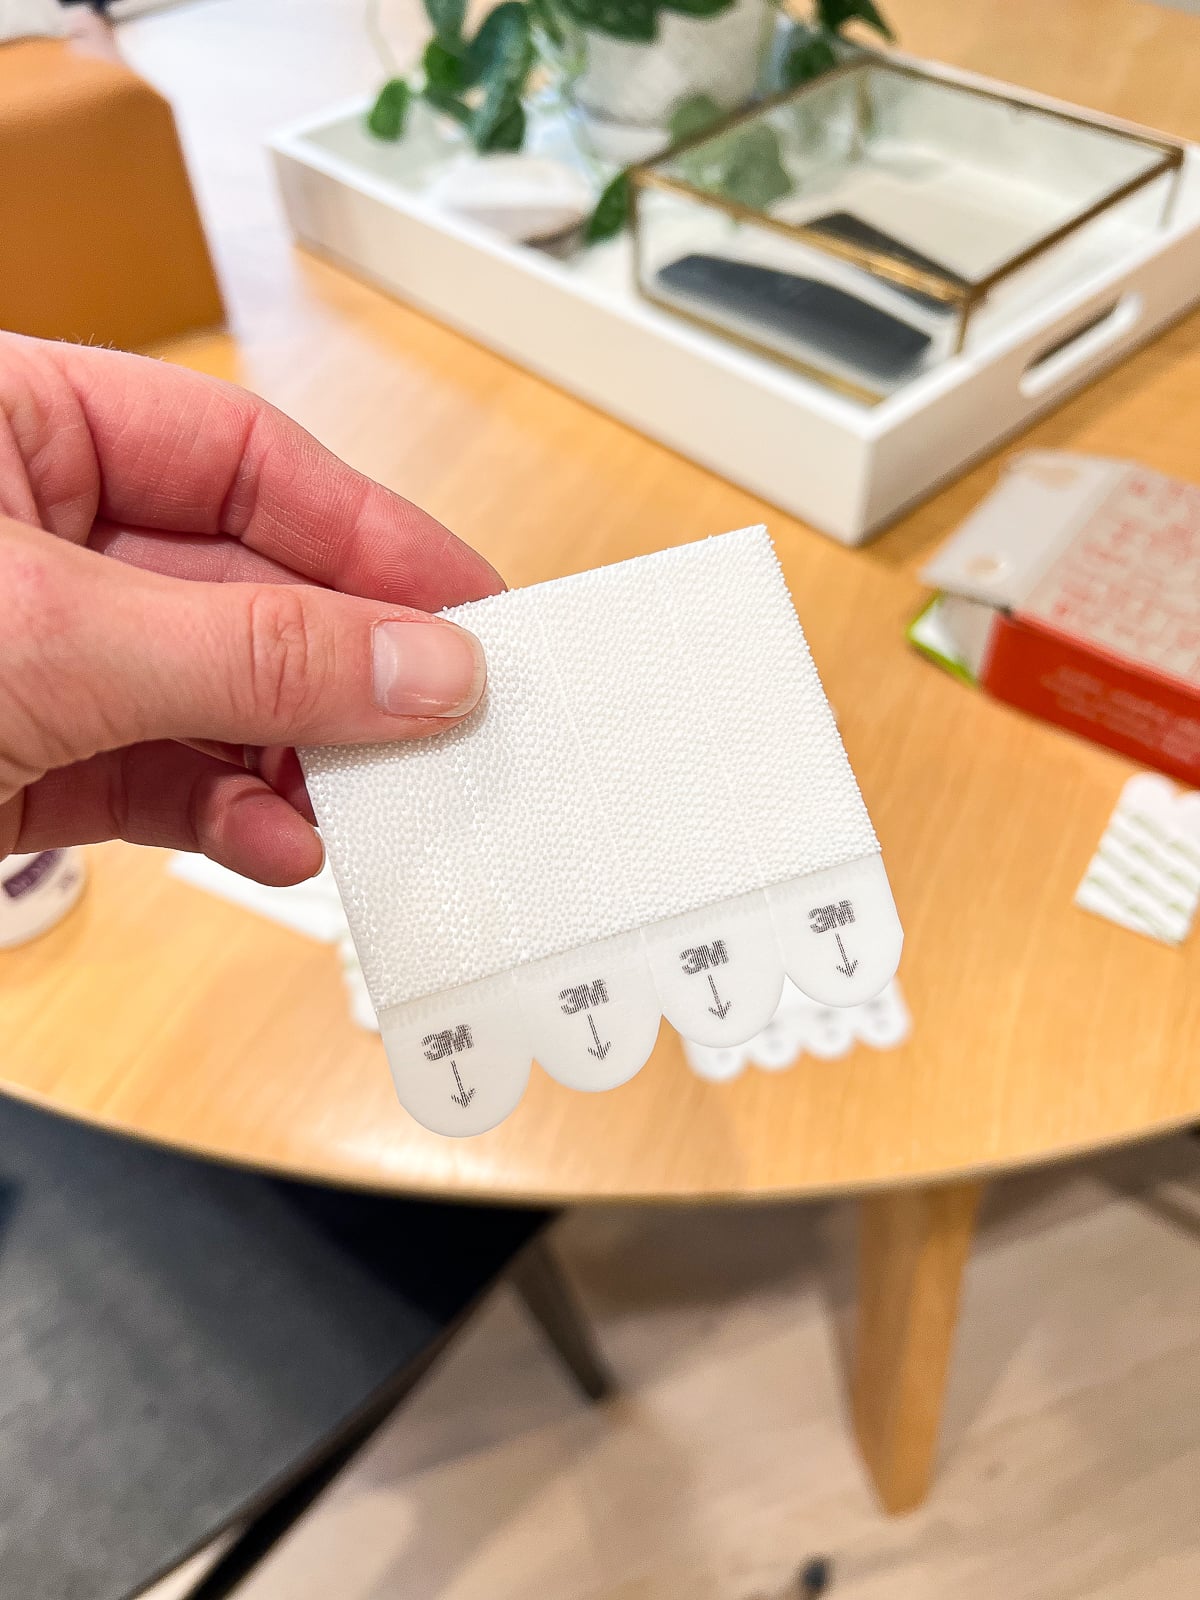
You really can’t hang a gallery wall without Command strips. These come in handy when a frame only has one hook on the back and you need it to stay straight and secured to the wall. I always have this box of assorted sizes on hand. If you don’t want to put any nail holes in your wall, Command strips can help with that too.
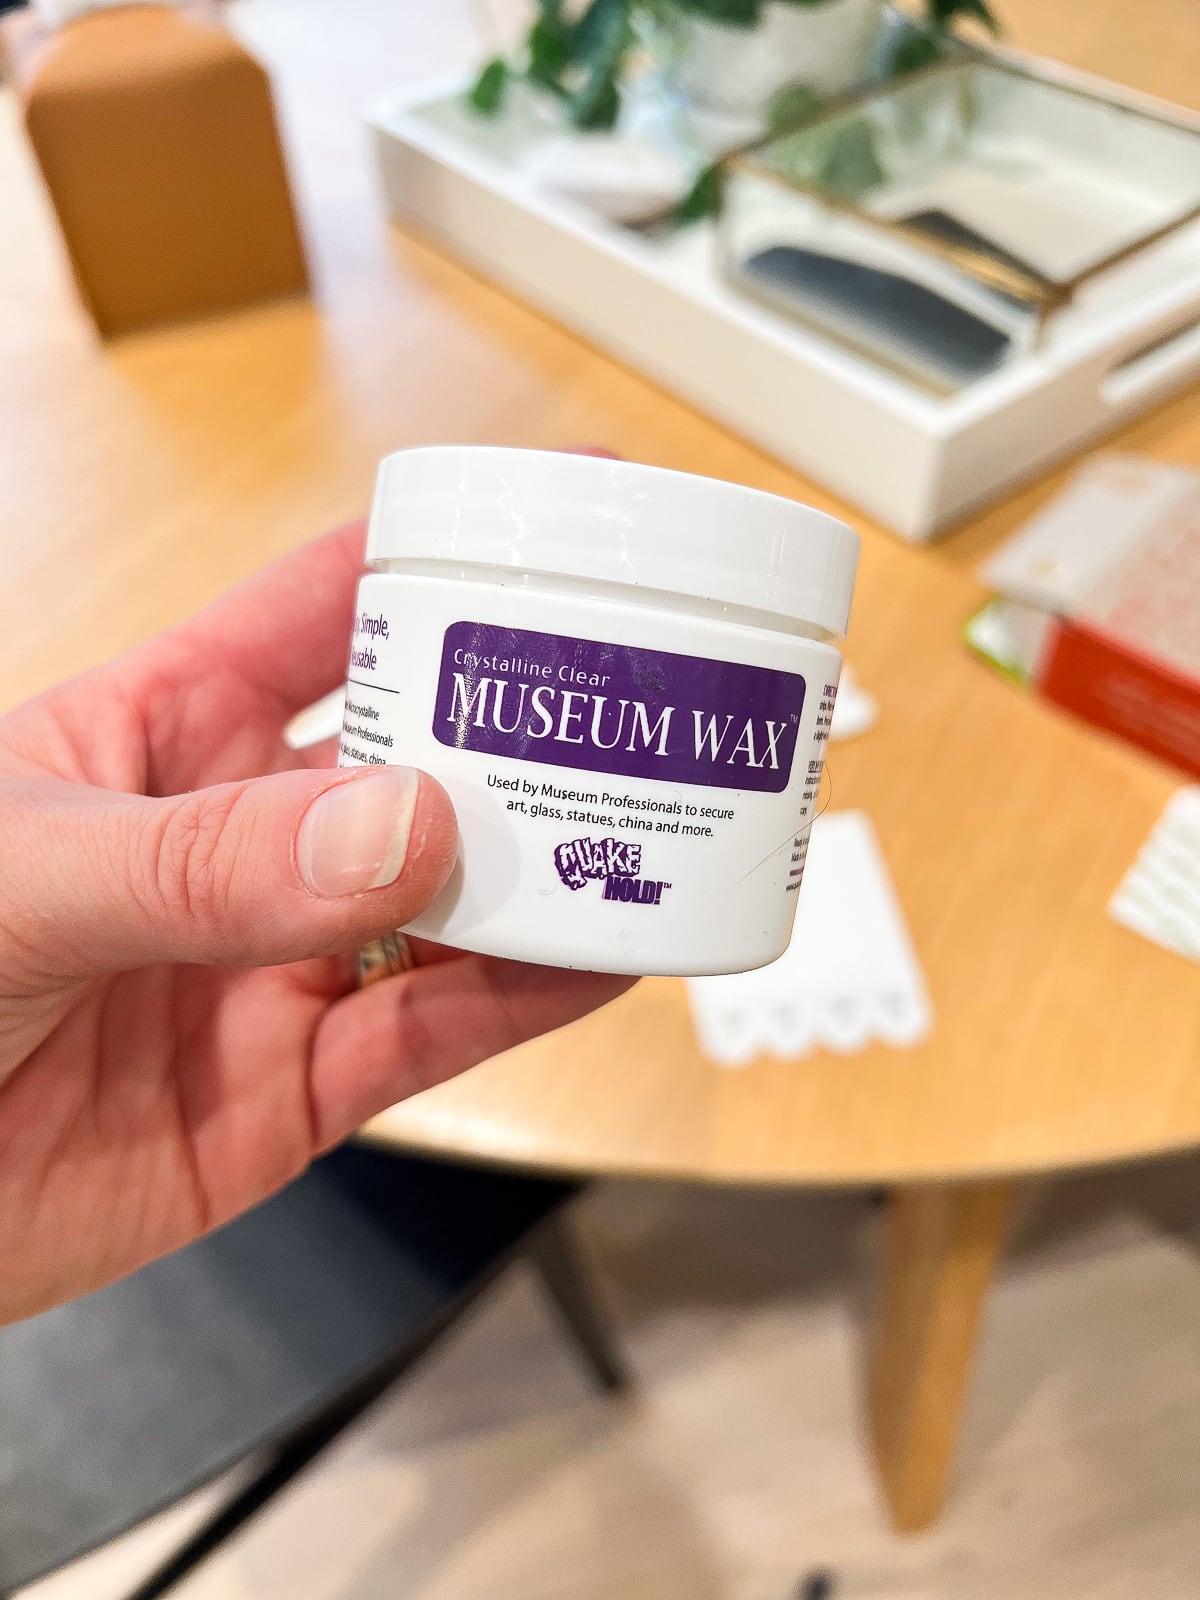
Next, museum wax is a lifesaver. They use this in museums to keep breakable objects like china, artwork, and statues from moving. You take a small bit, roll it between your fingers, and place it underneath the frame. I like to put it in the bottom corners so the frame doesn’t budge. Once it dries, it magically keeps the frame in place! It also won’t ruin your walls and can be scraped off if you want to adjust things down the line.
Okay, enough with the hanging tips. Let’s see my new stairway gallery wall!
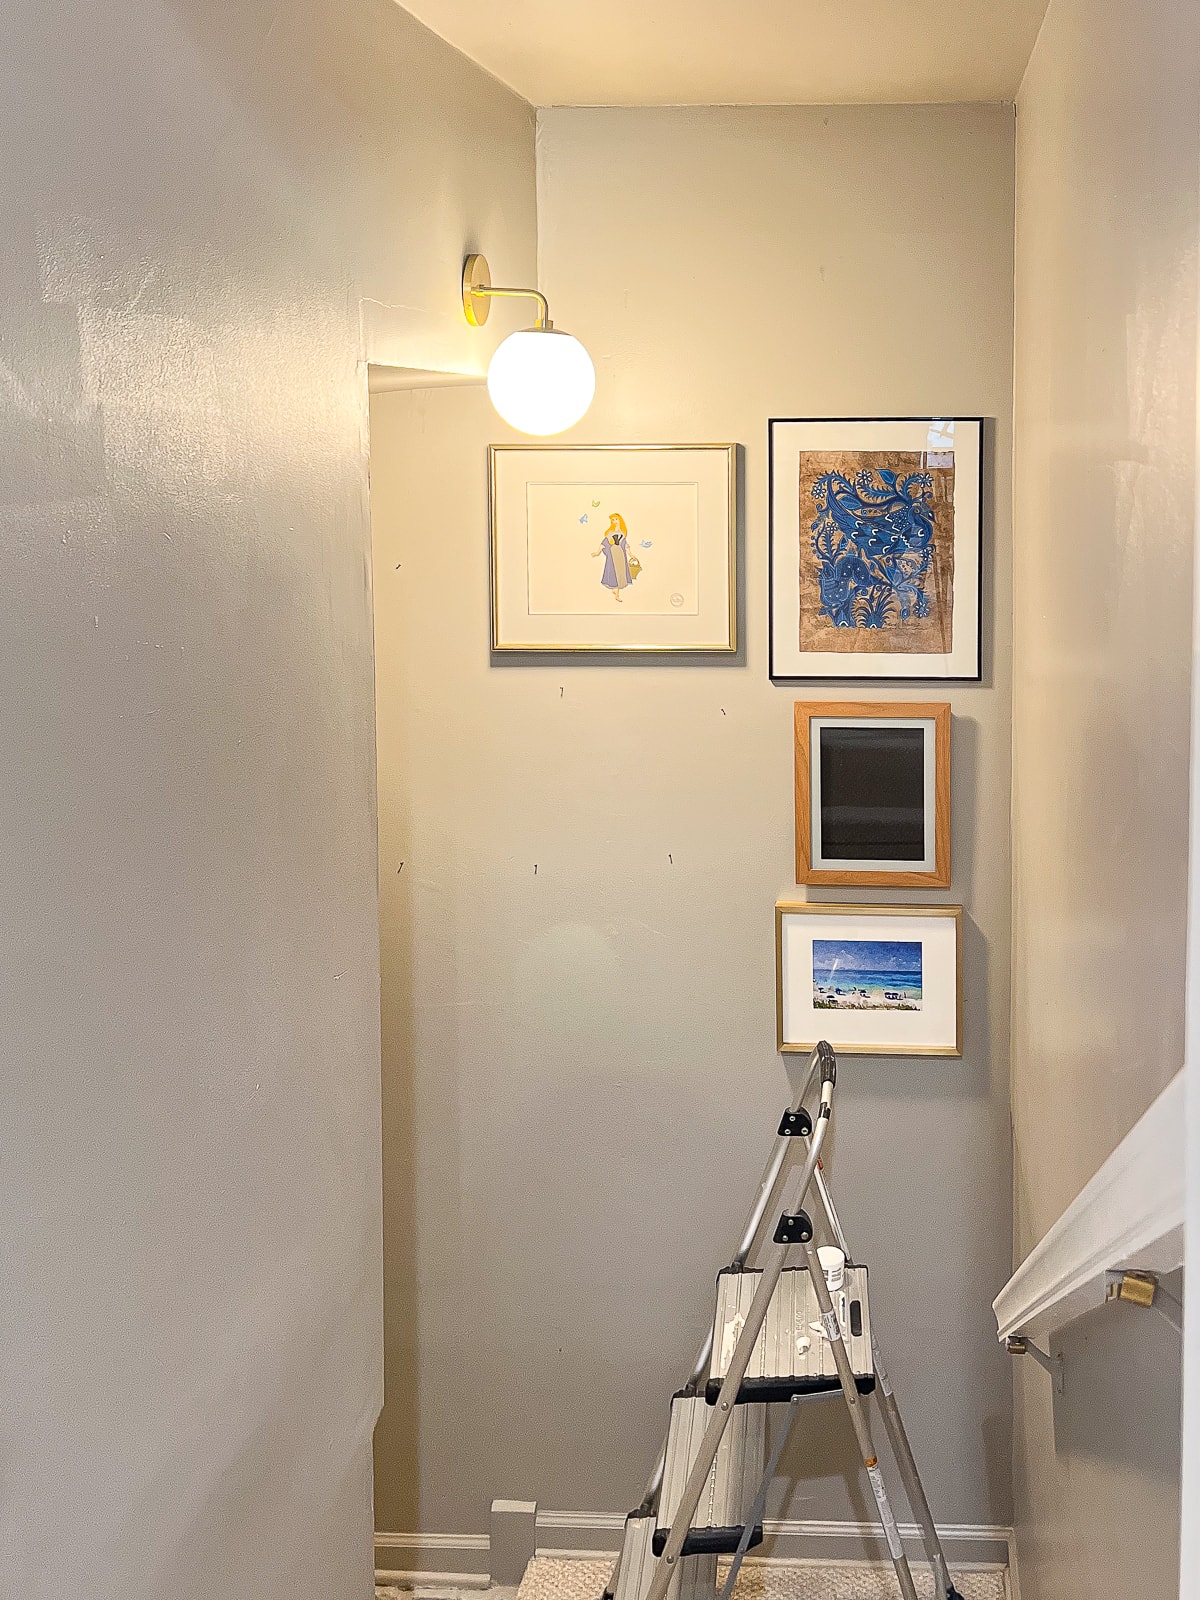
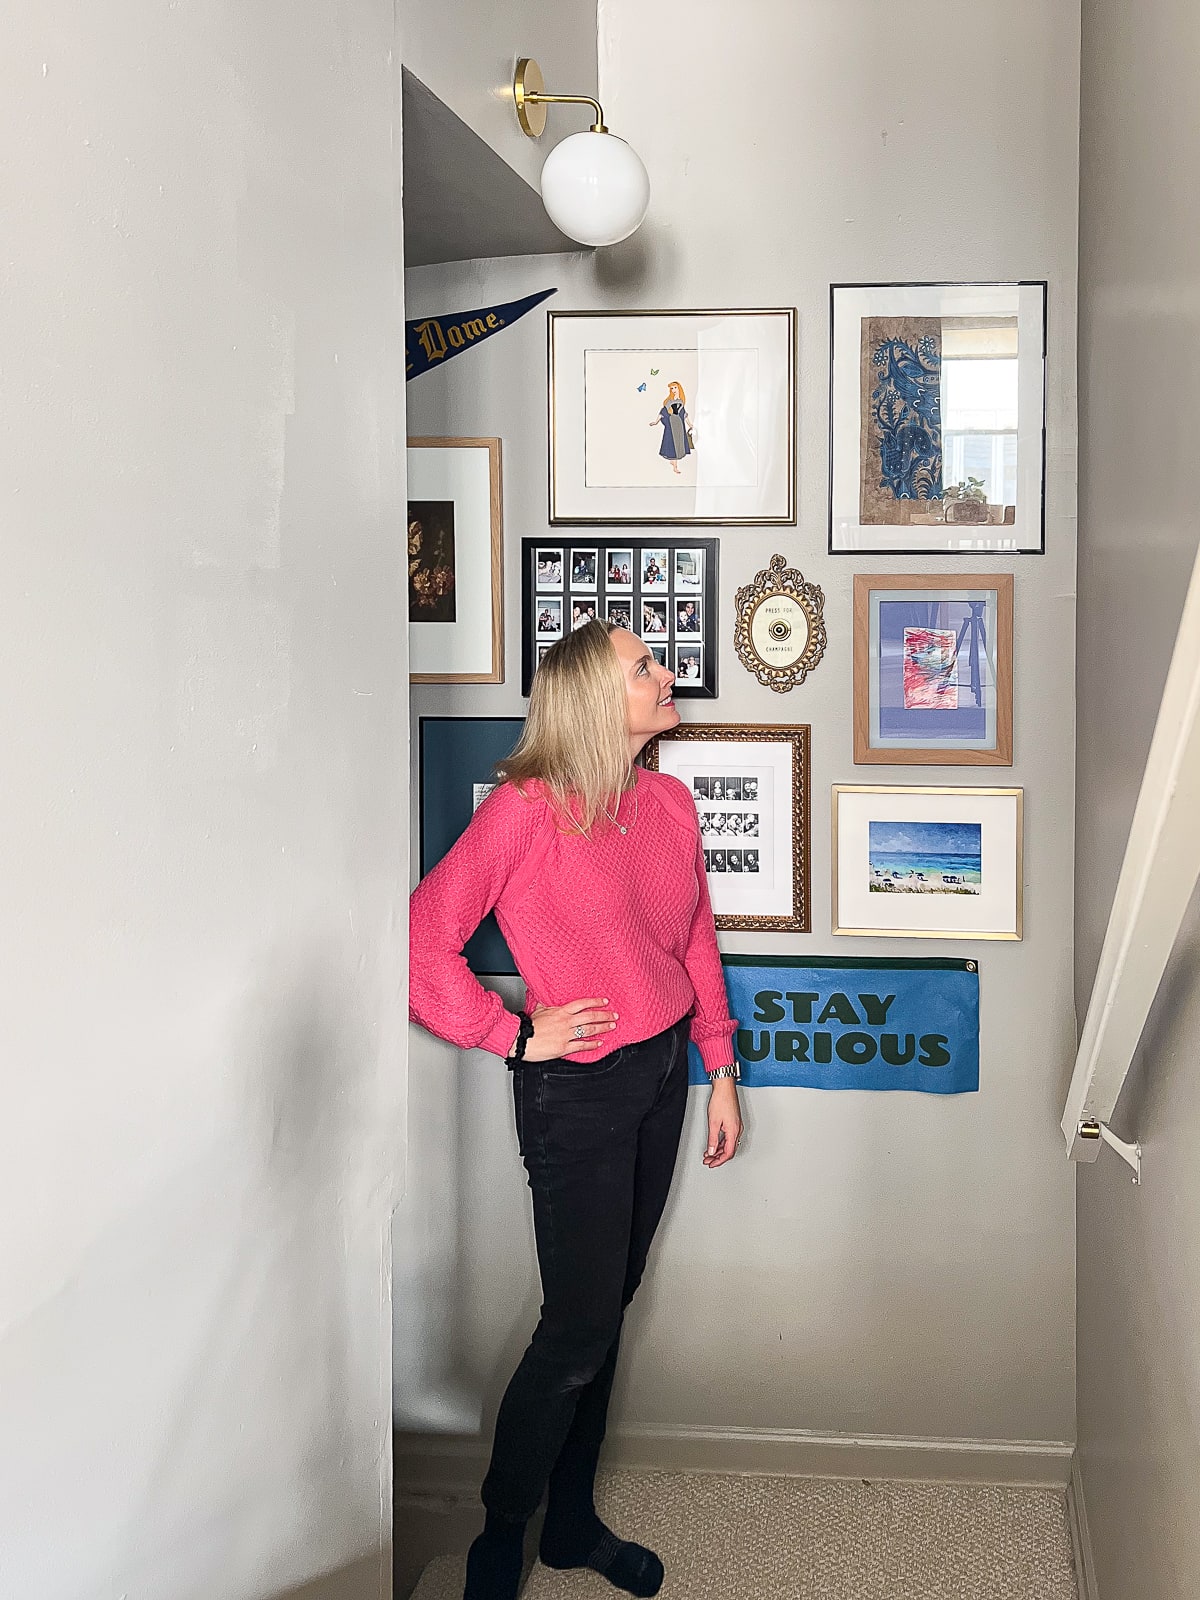
My New Stairway Gallery Wall
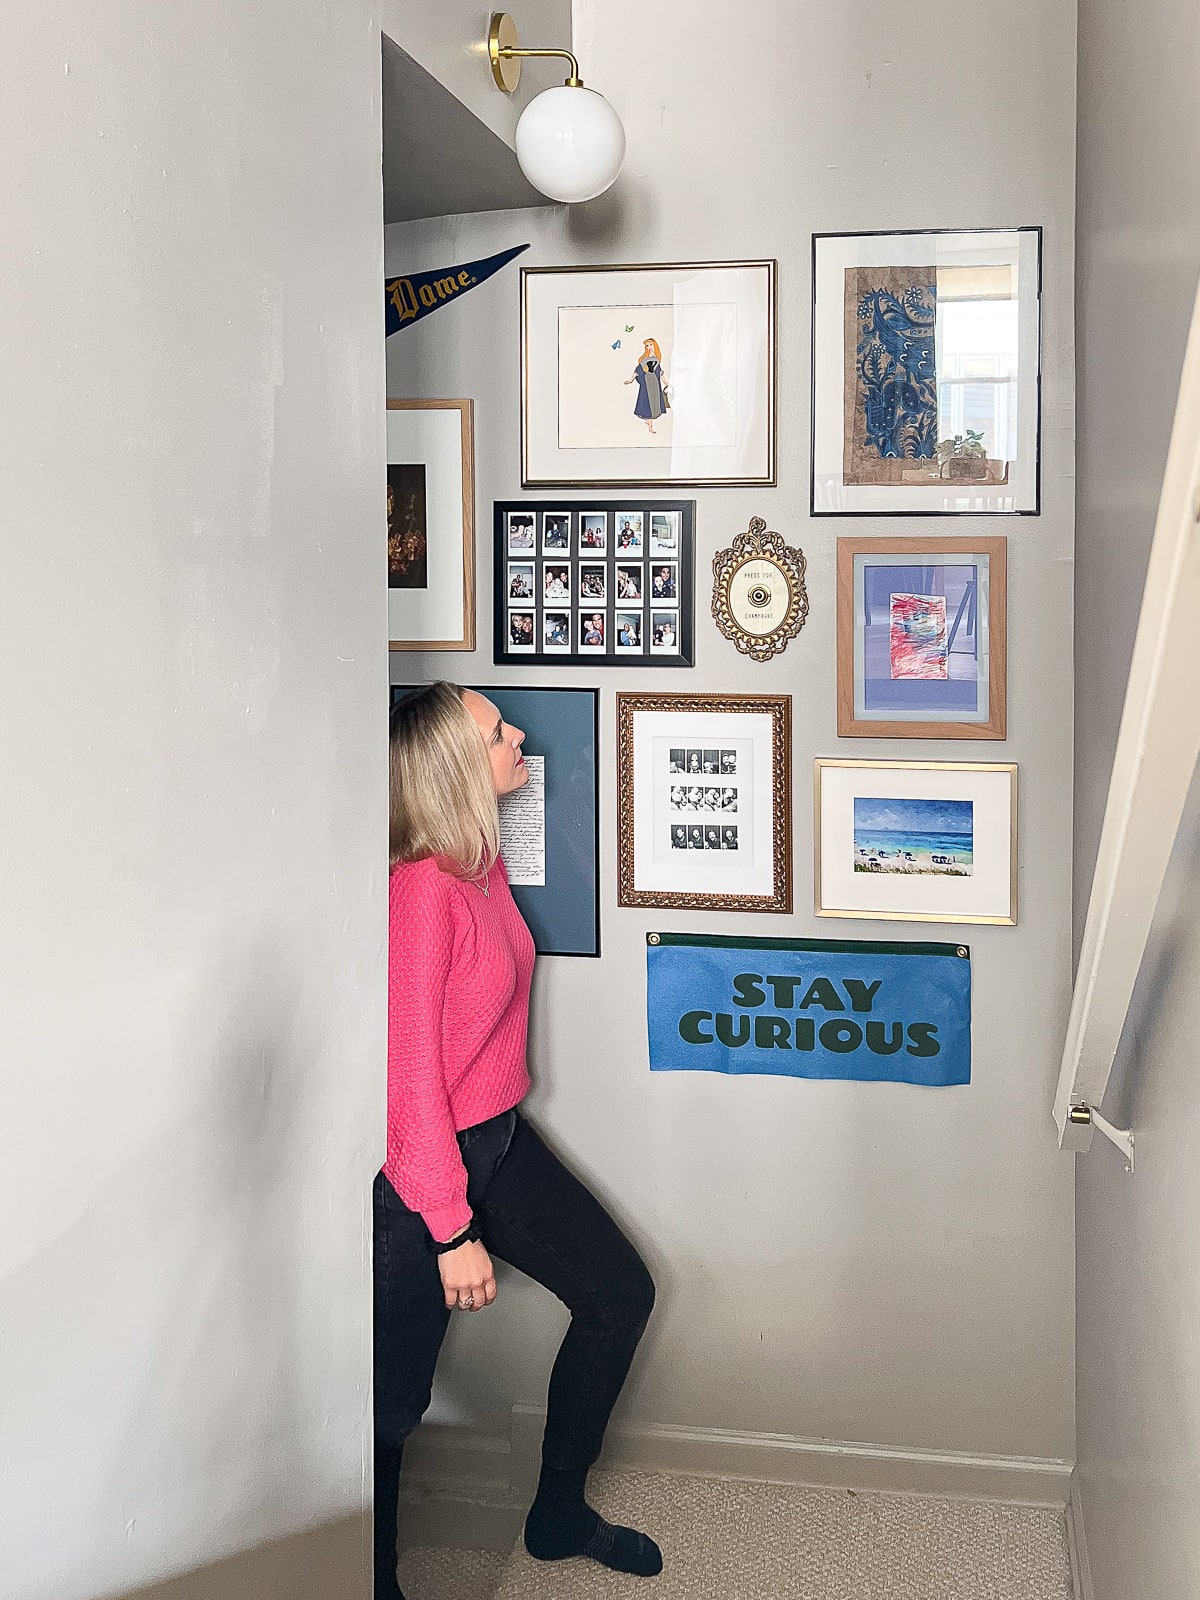

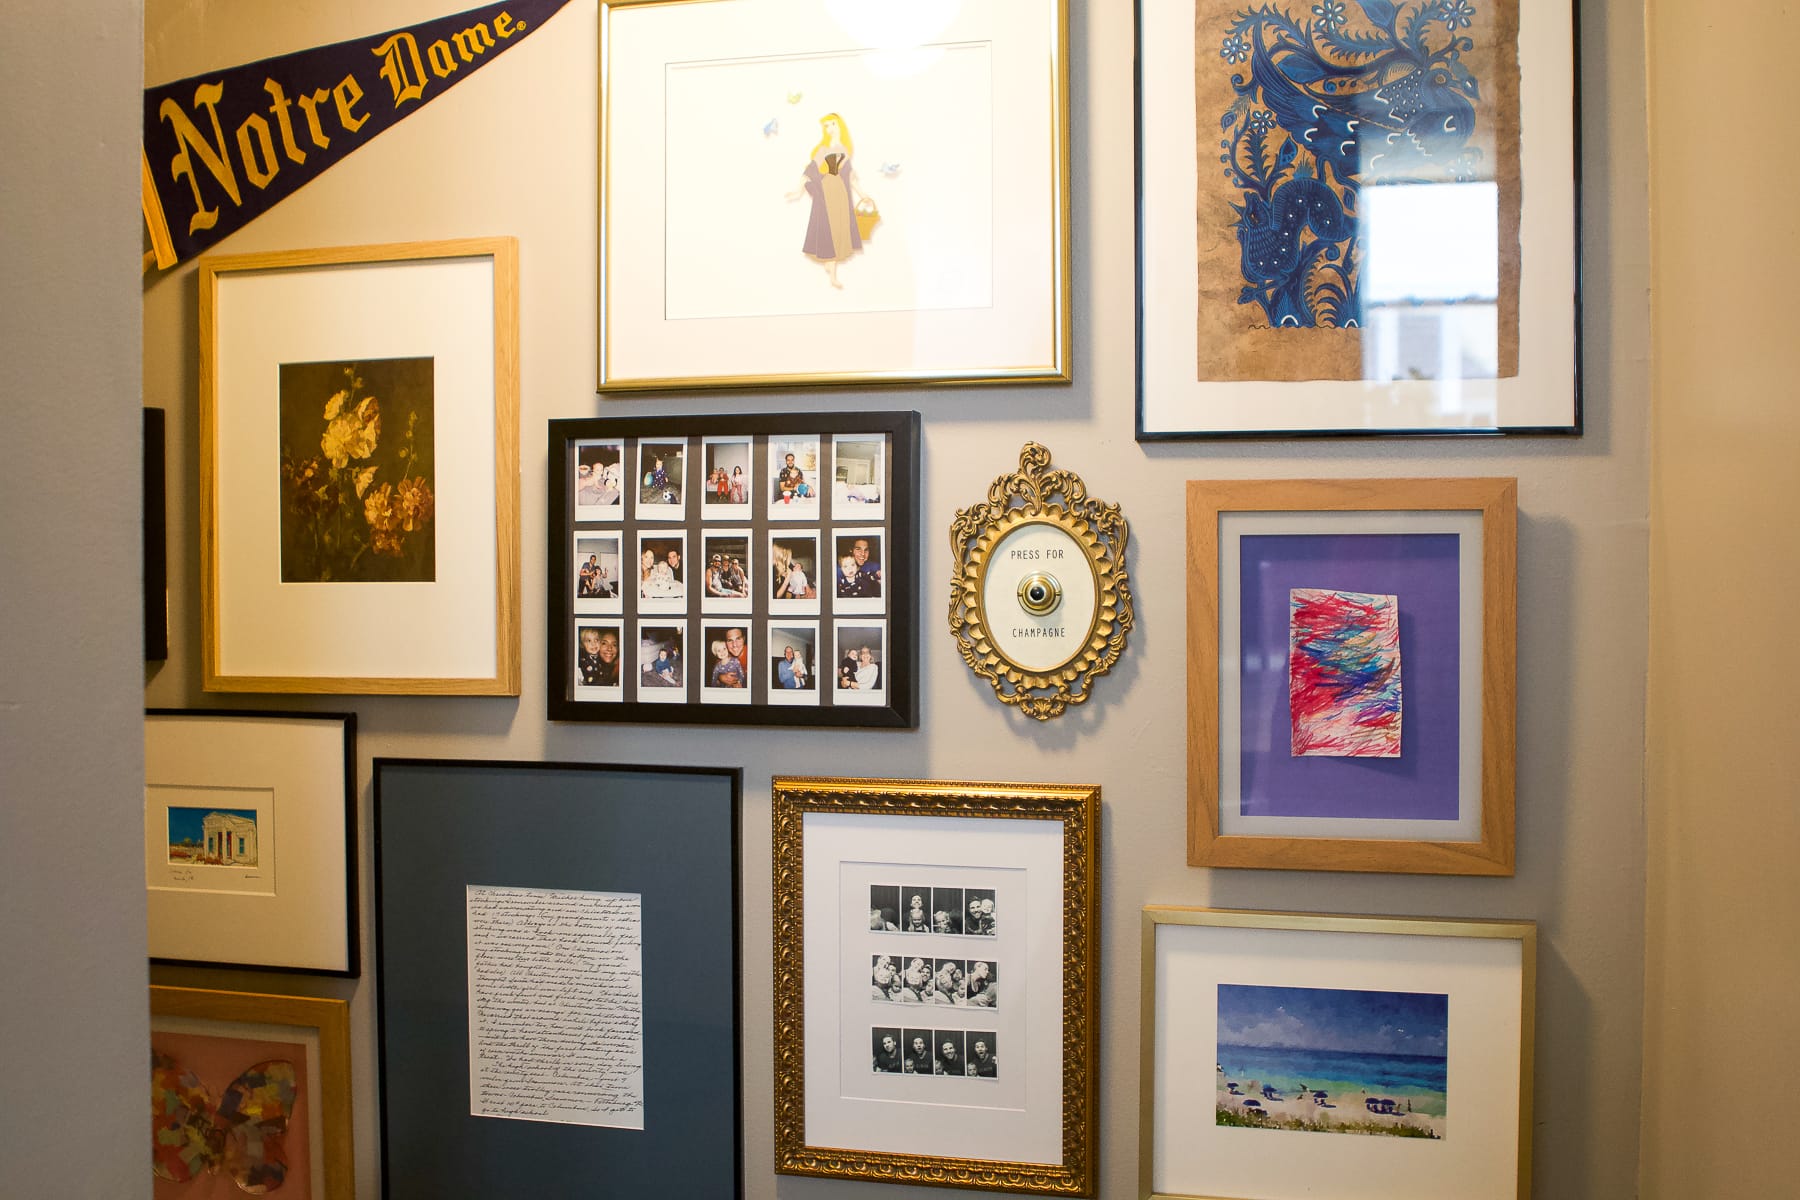
Isn’t it so fun?! I love the variety of frames, art, and special objects. Every piece up here has a special meaning to me and our family. The kids were so pumped when they first saw the new gallery wall, especially the different frames with their art displayed!
This eclectic look is the first thing you see when you open the basement door from the top of the stairs. It’s the best way to welcome people downstairs.
All Of My Favorite Pieces
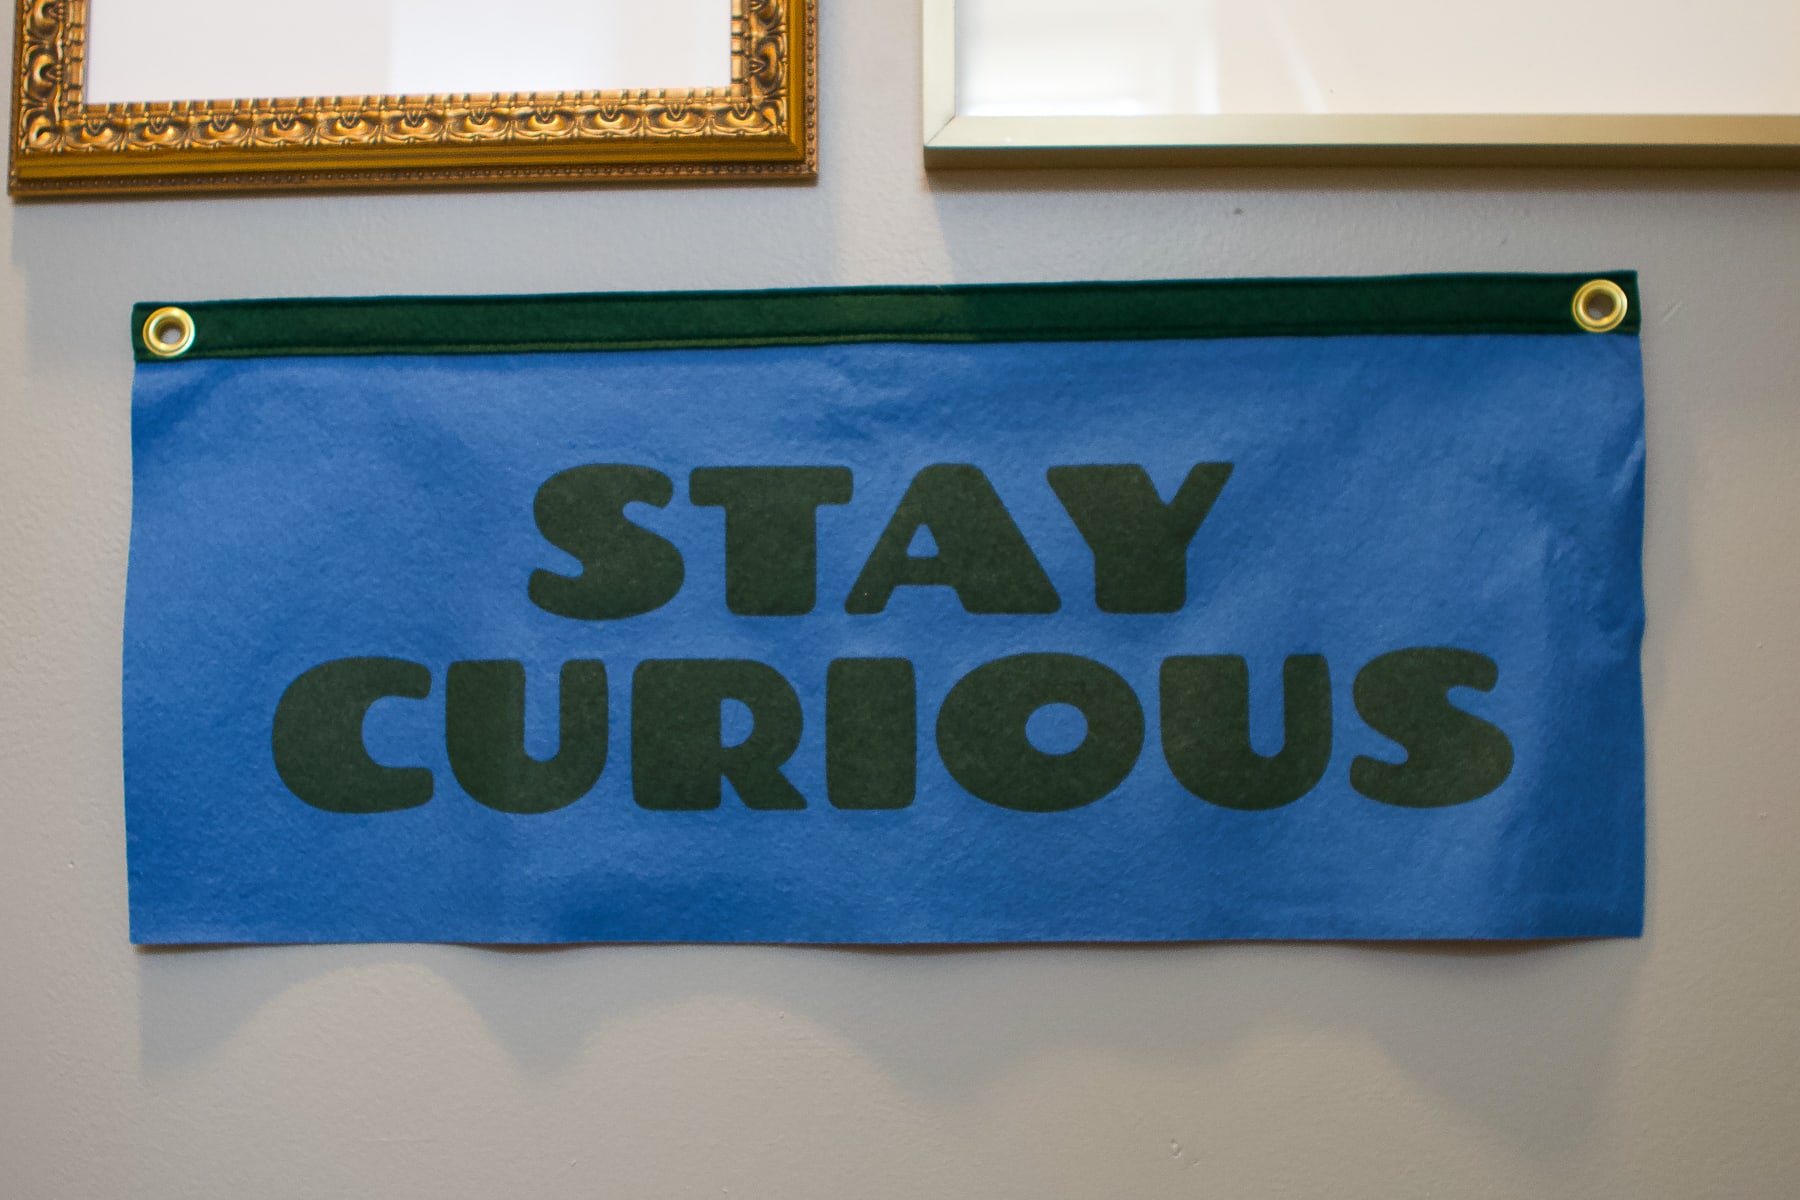
I knew I wanted to showcase both frames and other objects of all different sizes. We were visiting Mini Wonder a few weeks back with the kids (the cutest kids’ shop in Southport) and I saw their camp flag section. When I spotted this “Stay Curious” banner, I knew this large piece would be perfect for the wall space. It’s a phrase I want my kids to keep in mind when playing and having fun down here!
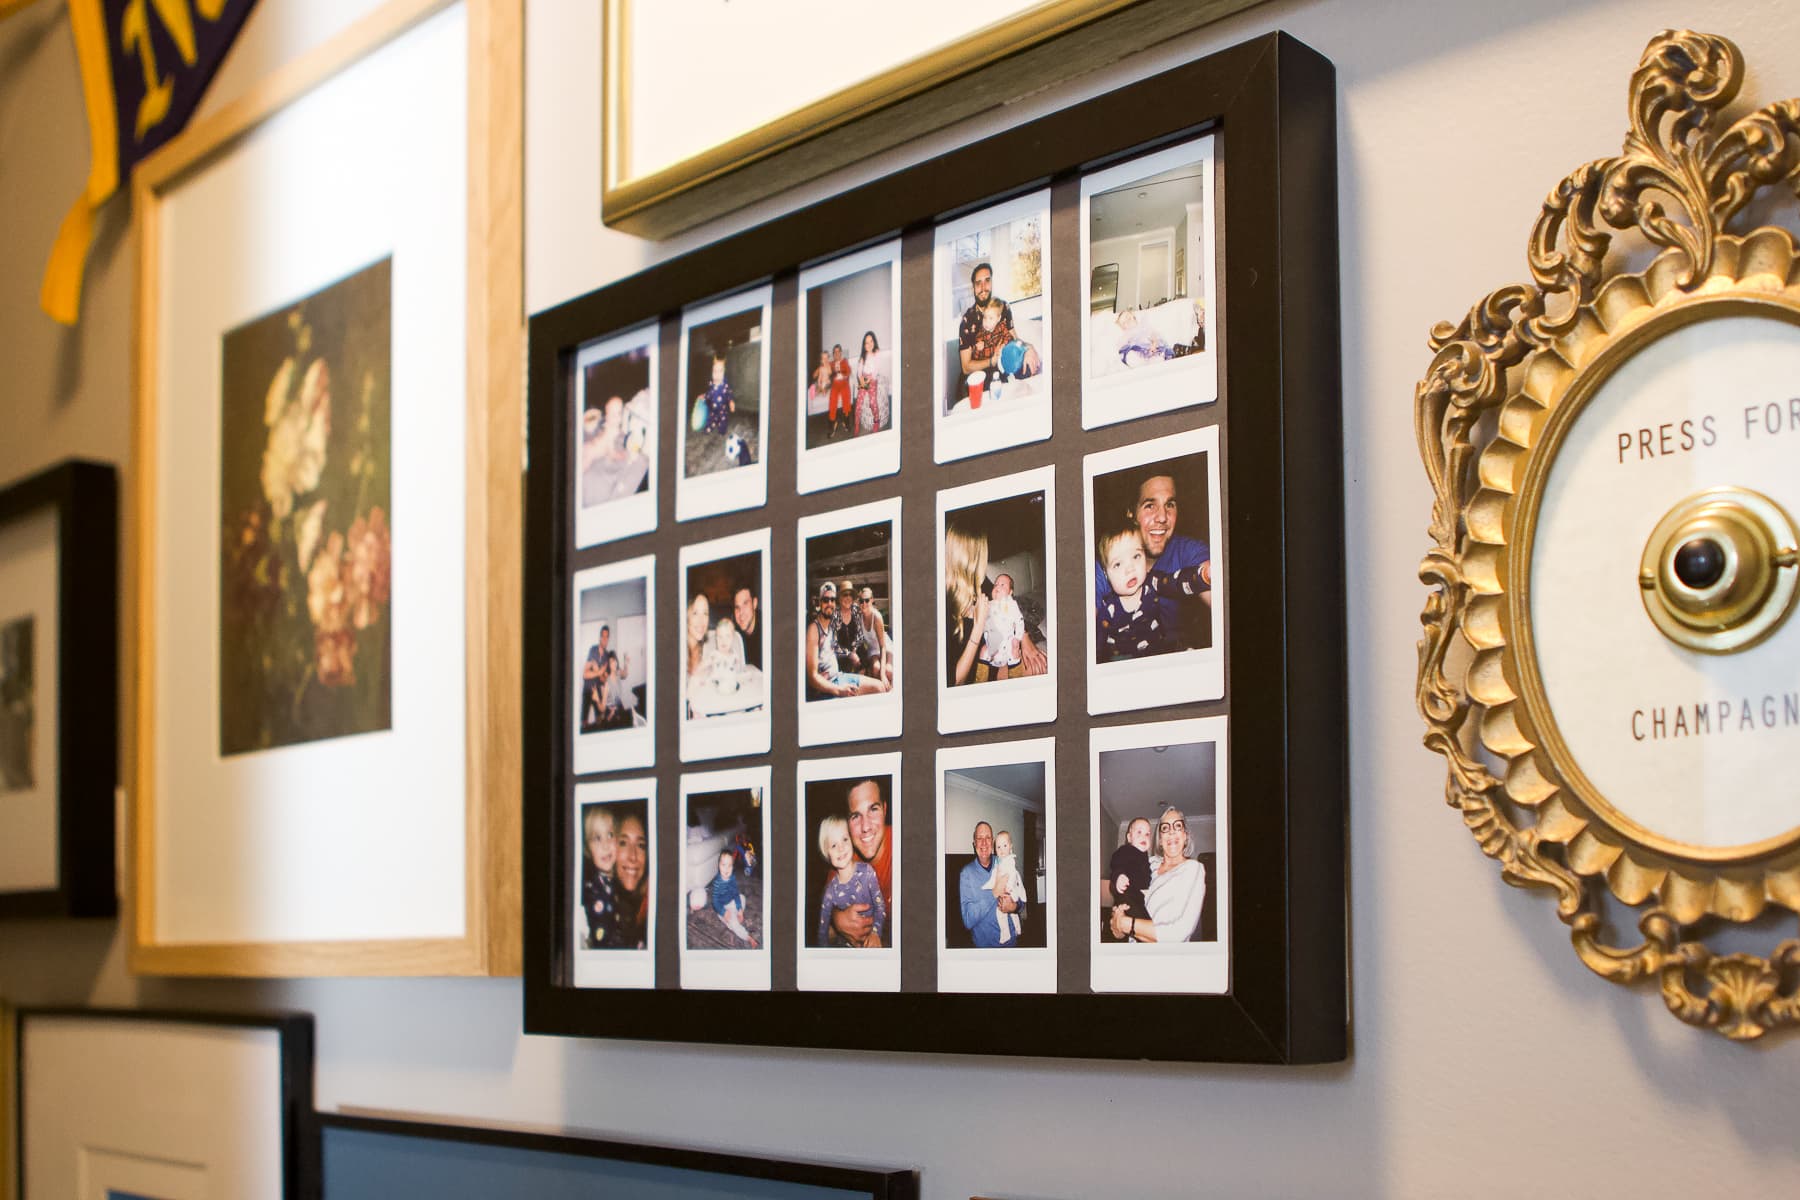
Every time our family gets together, I leave out our Instax camera and the kids have a ball taking pictures with their cousins. We get some of the best snaps during these times.

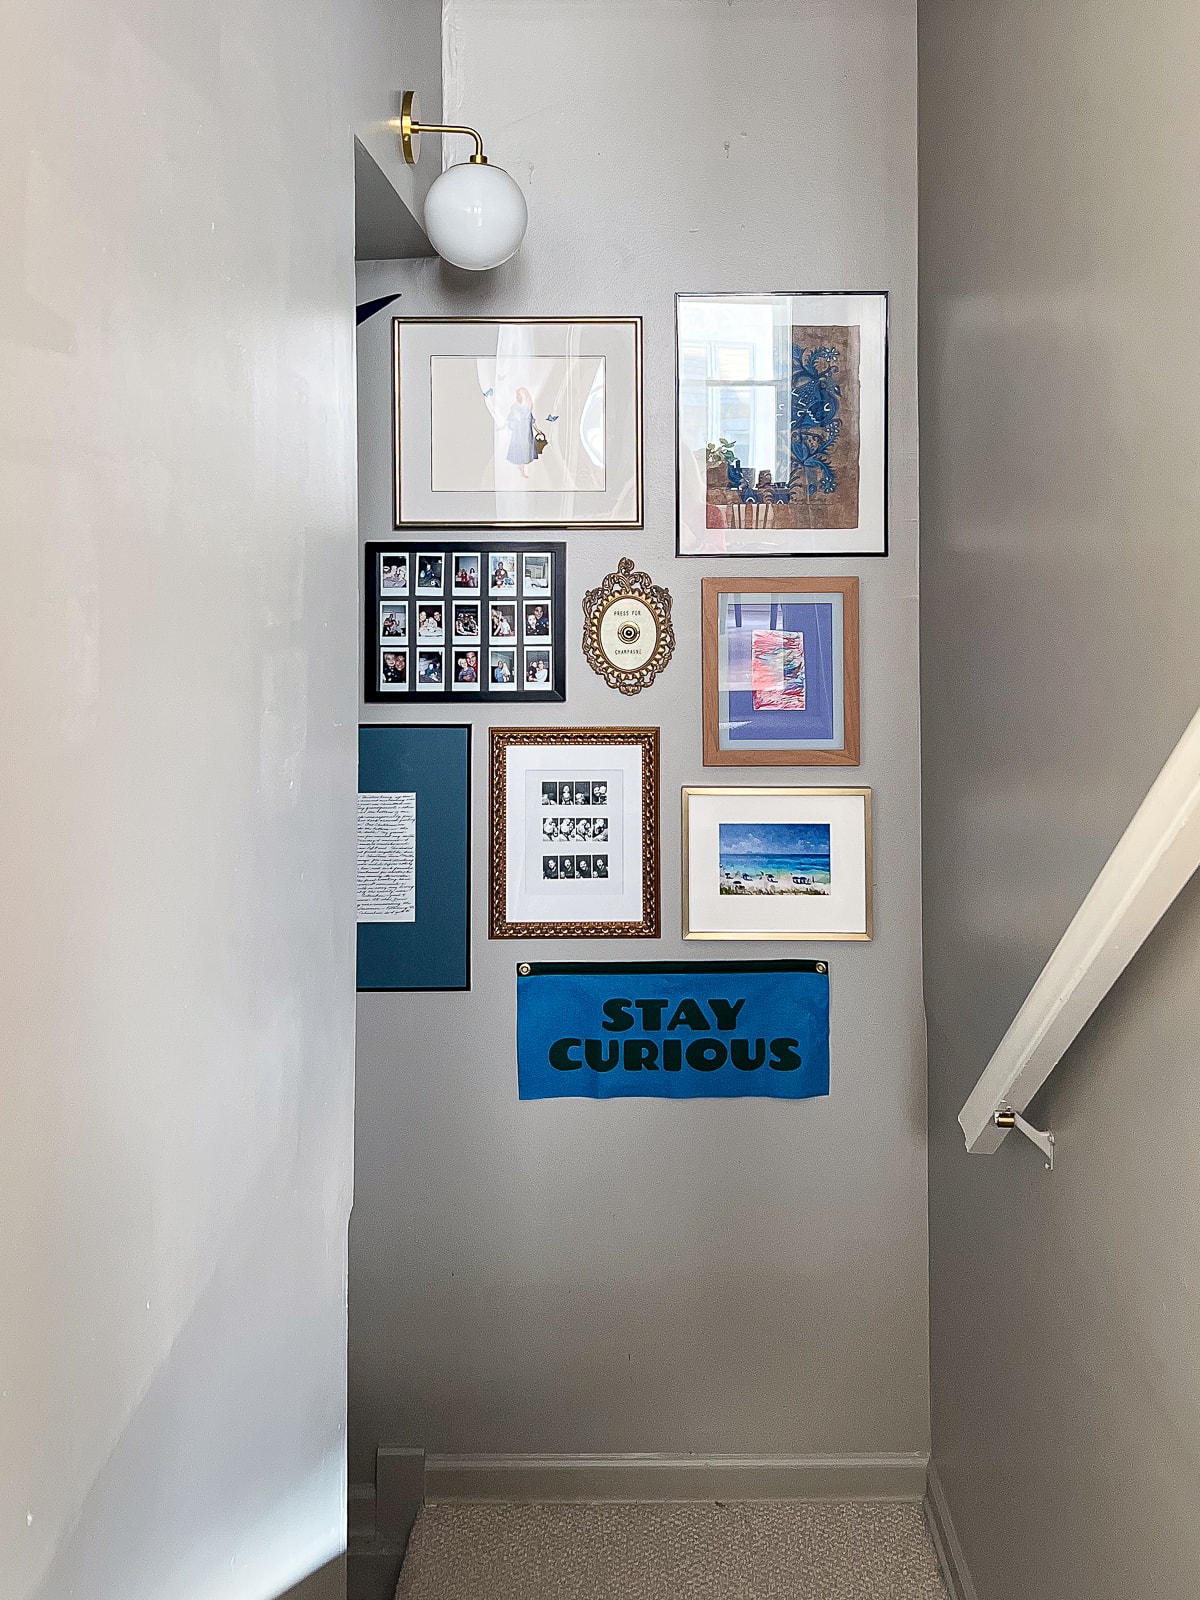
I looked through my big wooden dough bowl of pictures and decided to frame some of my favorite ones in a grid. These family photos make me smile and it’s a fun part of the gallery wall.
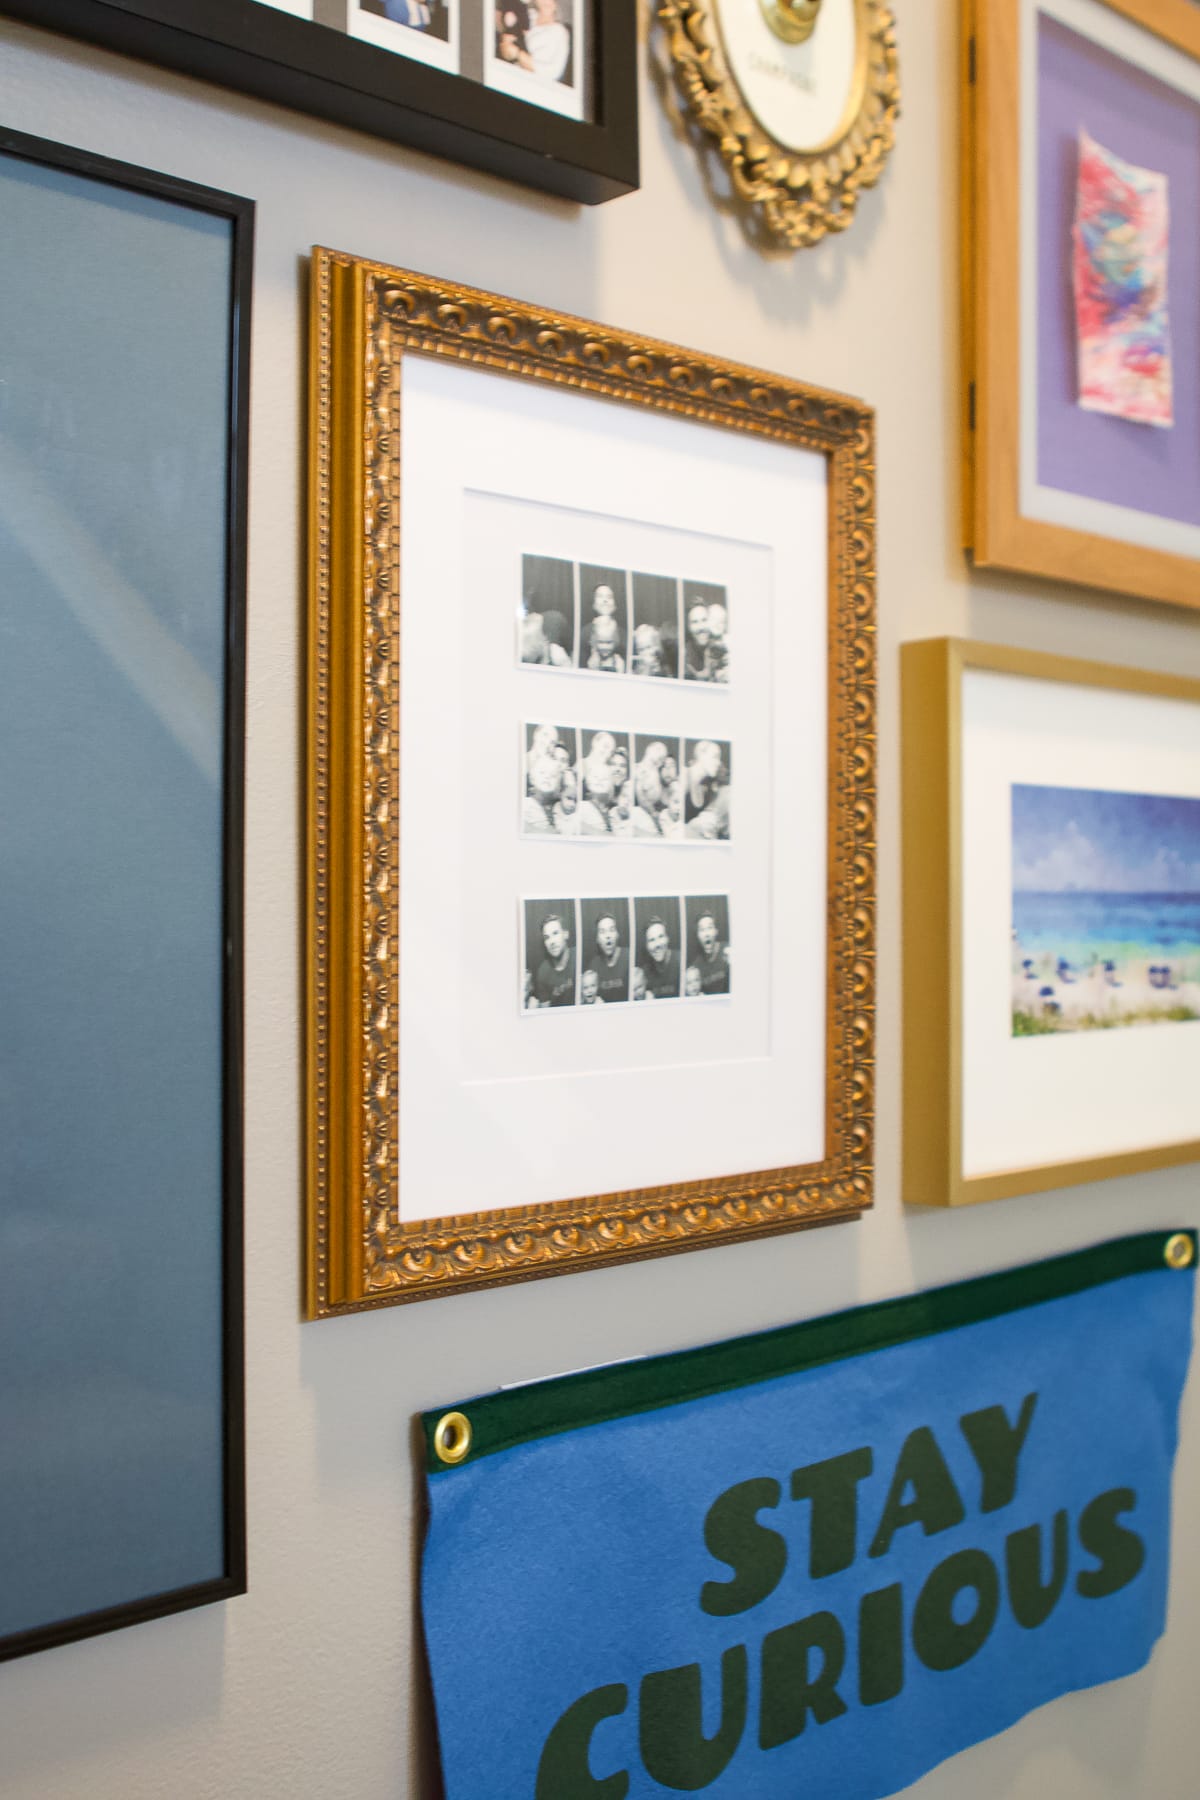
I also framed some of our family photo booth pictures in my favorite gold frame. It adds a personalized touch and I love how the thick white matting elevates the entire look.
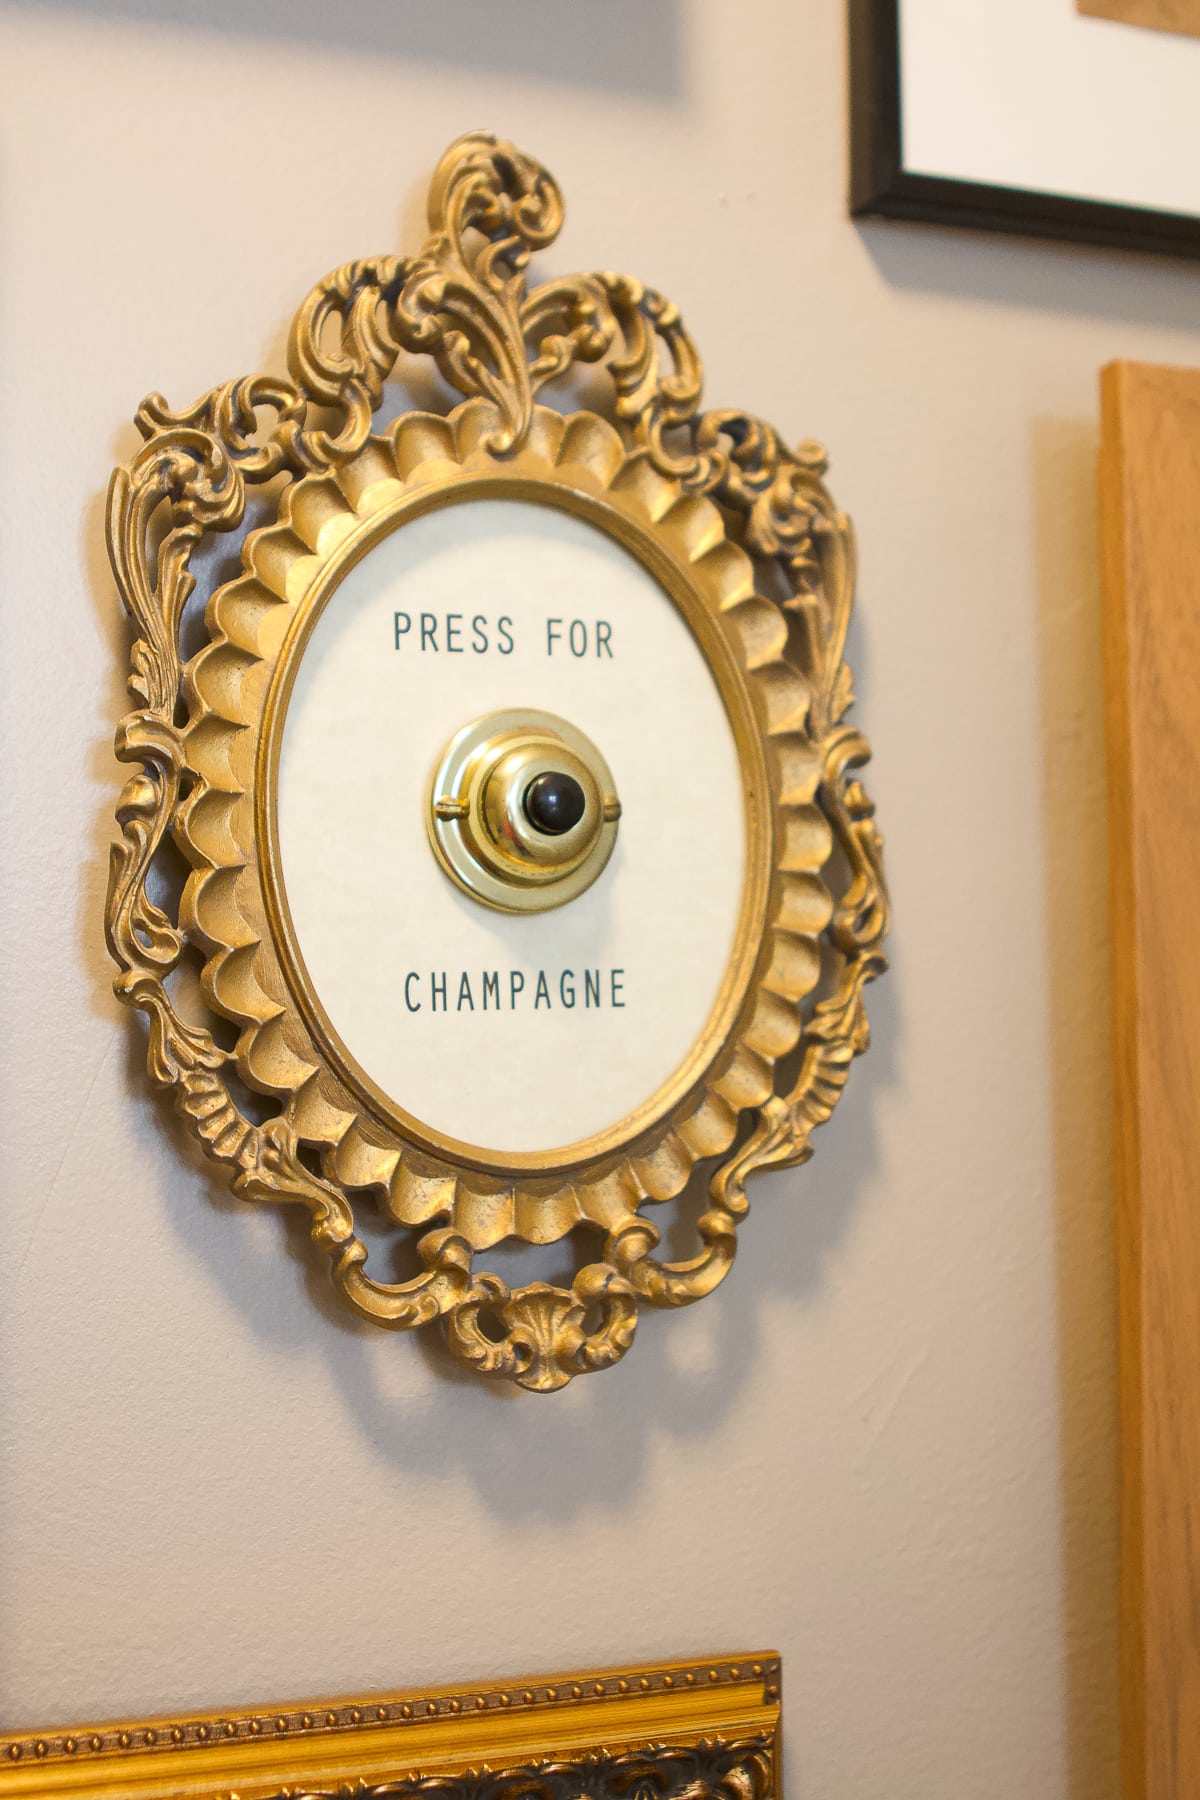
This “Press for Champagne” sign is always a fun one. It used to ring, but I need to fix it! The kids will get a kick out of that.

Next up, my kids’ favorite part of our staircase gallery wall – these frames to display their artwork. They open from the front and you can store dozens of art prints directly in the frame.
I hung one vertically and one horizontally, so I’ll always have a spot for the creations they bring home.

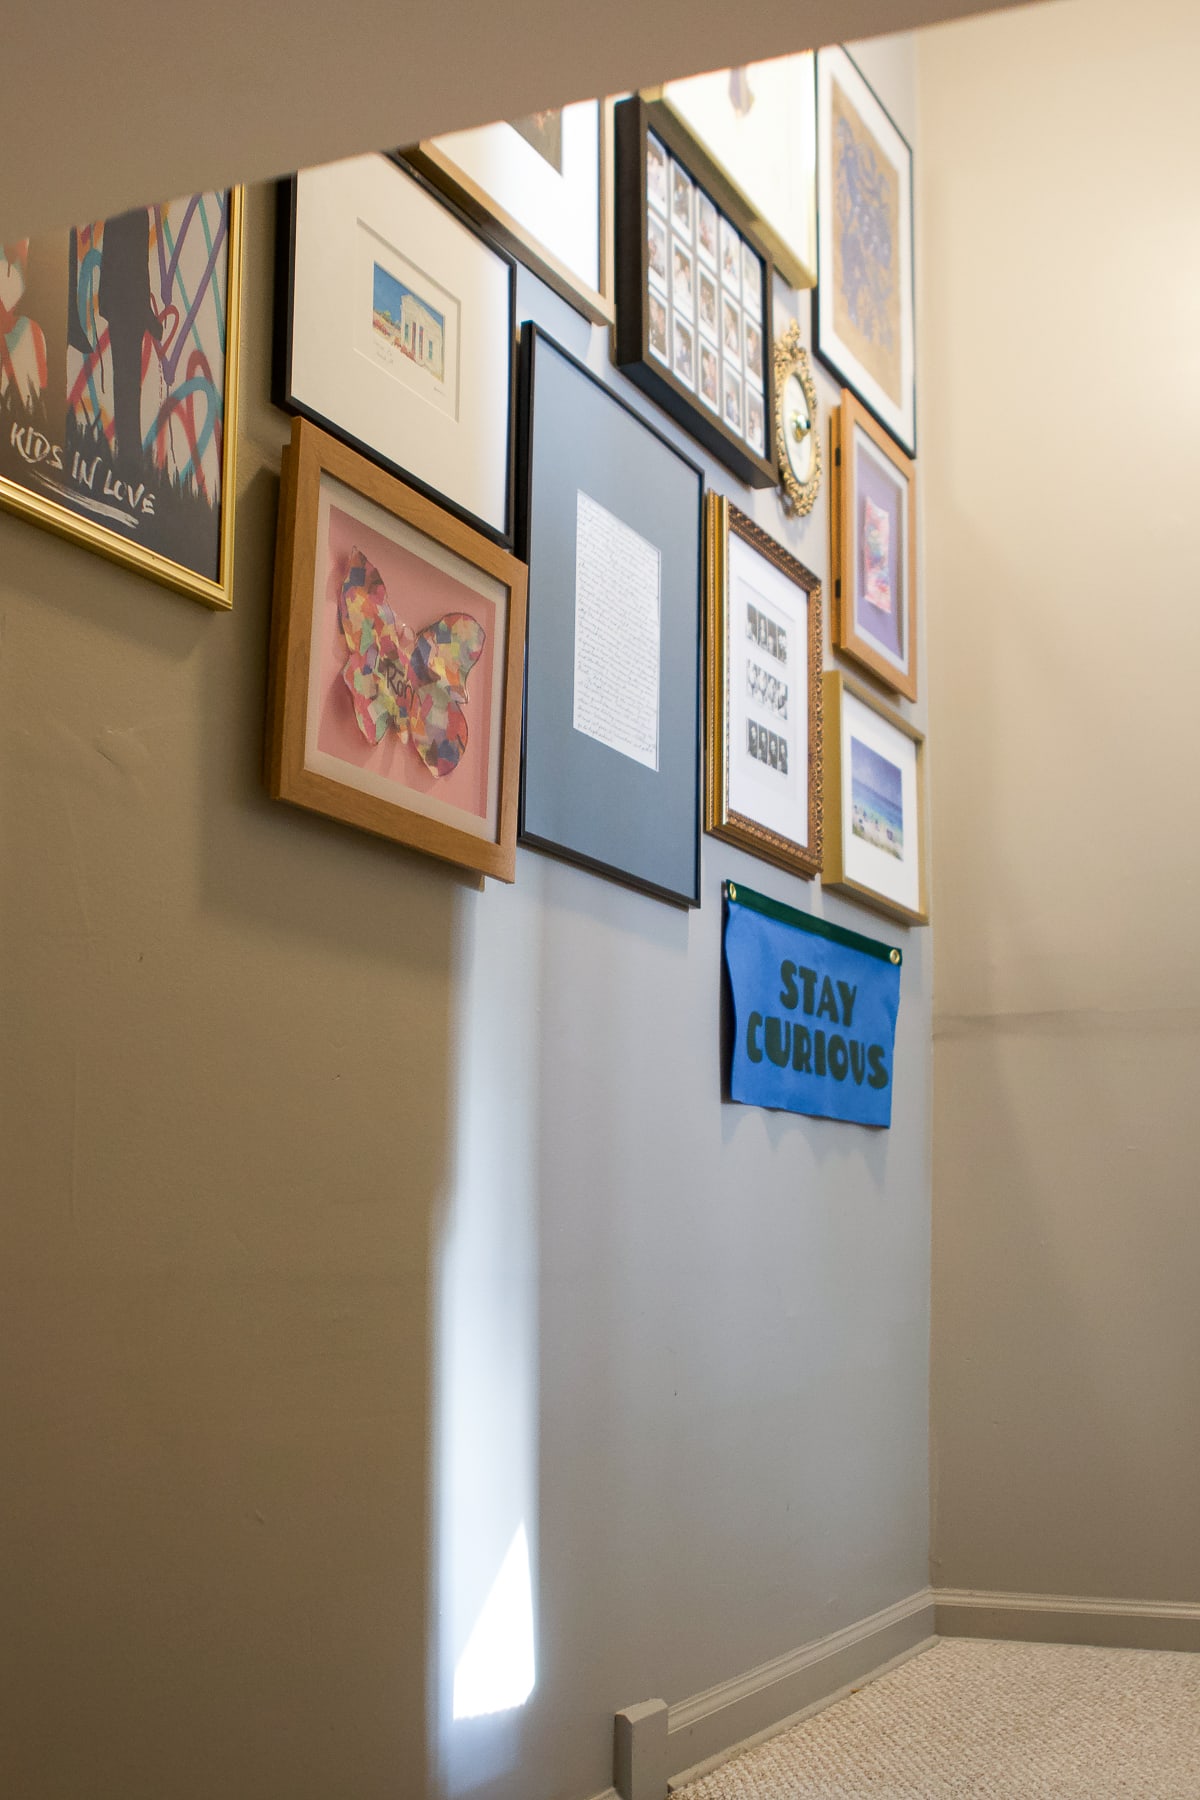
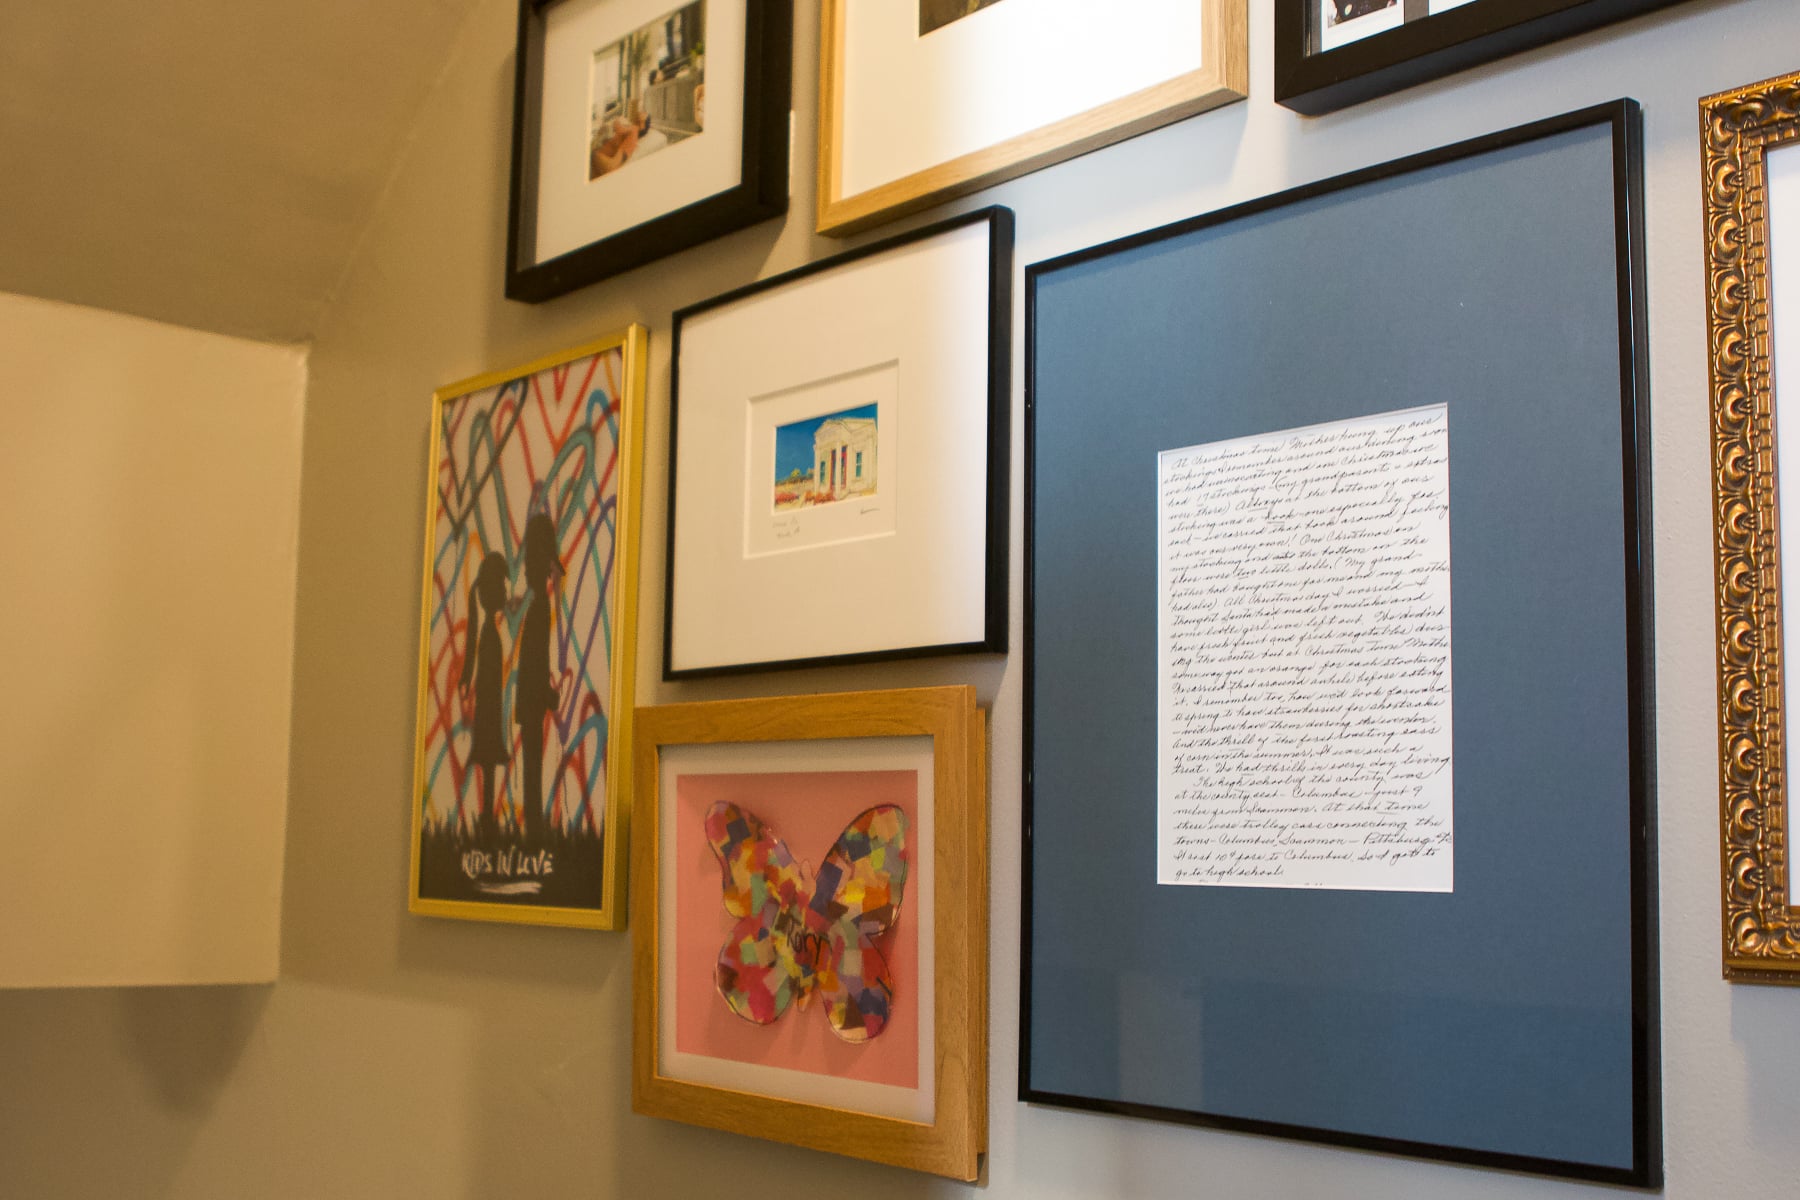
This large frame is probably my favorite piece in the entire gallery wall. It’s a handwritten letter from my great-grandmother. She wrote down lots of stories from her childhood and this one is talking about a very special Christmas when she received an orange in her stocking. It was such a big deal to get an orange and she carried it around for a few days, cherishing it, before she finally ate it. It makes me smile every time I walk by it!
Originally, this piece was in my favorite black frame with the thick white mat that comes with it. However, it ended up looking too stark white surrounded by the color photos. I ended up getting this thick mat in the color “antique blue”. If you need a new mat for a frame, I highly recommend this company. They did an outstanding job and it was budget-friendly!

Rory’s favorite part of the collection is the Princess Aurora print at the top. A friend gave this vintage print to me a few years ago, knowing that our daughter, Aurora, might like it someday. It’s been sitting in my office closet and I was so eager to get it hung. Rory noticed it immediately!
Staircase Gallery Wall – Sources
- Paint Color: Clare “Greige”
- Gold Light Fixture
- Blue art from San Miguelle de Allende: 11×14 Thin Black Frame
- Kid’s art: Wood Art Display Frame
- Seaside, FL watercolor: 8×10 Gold Frame
- Stay Curious Pennant
- Princess Aurora Print (came with frame)
- Press For Champagne Sign
- Photo booth strips: Gold Vintage Frame
- Polaroid pictures: Black Frame (it’s from Pottery Barn and comes in various sizes)
- Great-grandmother letter: 11×14 Thin Black Frame
- Notre Dame pennant
- Floral Art: 11×14 Wood Frame
- Seaside, FL postcard: 8×10 Thin Frame
- Kid’s artwork: Wood Art Display Frame
- Family photo: 8×10 Black Frame
- Kids in Love Poster: 12×18 Gold Frame


I Adore Our Great Gallery Wall
I always say that a gallery wall is a great way to add personality and fun to your home. This one definitely accomplishes that. I smile every time I see these family photos and special pieces of art. And the best part? I still have room for more frames. I have a feeling this will be a continuous work in progress!
More Gallery Wall Inspiration