How To Tie A Bow For Presents With Ribbon (Easy Tutorial)
Wrapping gifts. It’s just a part of the holiday season, isn’t it? I’m definitely guilty of just plopping gifts into the appropriately themed gift bag, and calling it a day. Sometimes gift wrapping and creating a pretty bow is just too time-consuming, especially when you’re not very good at it.
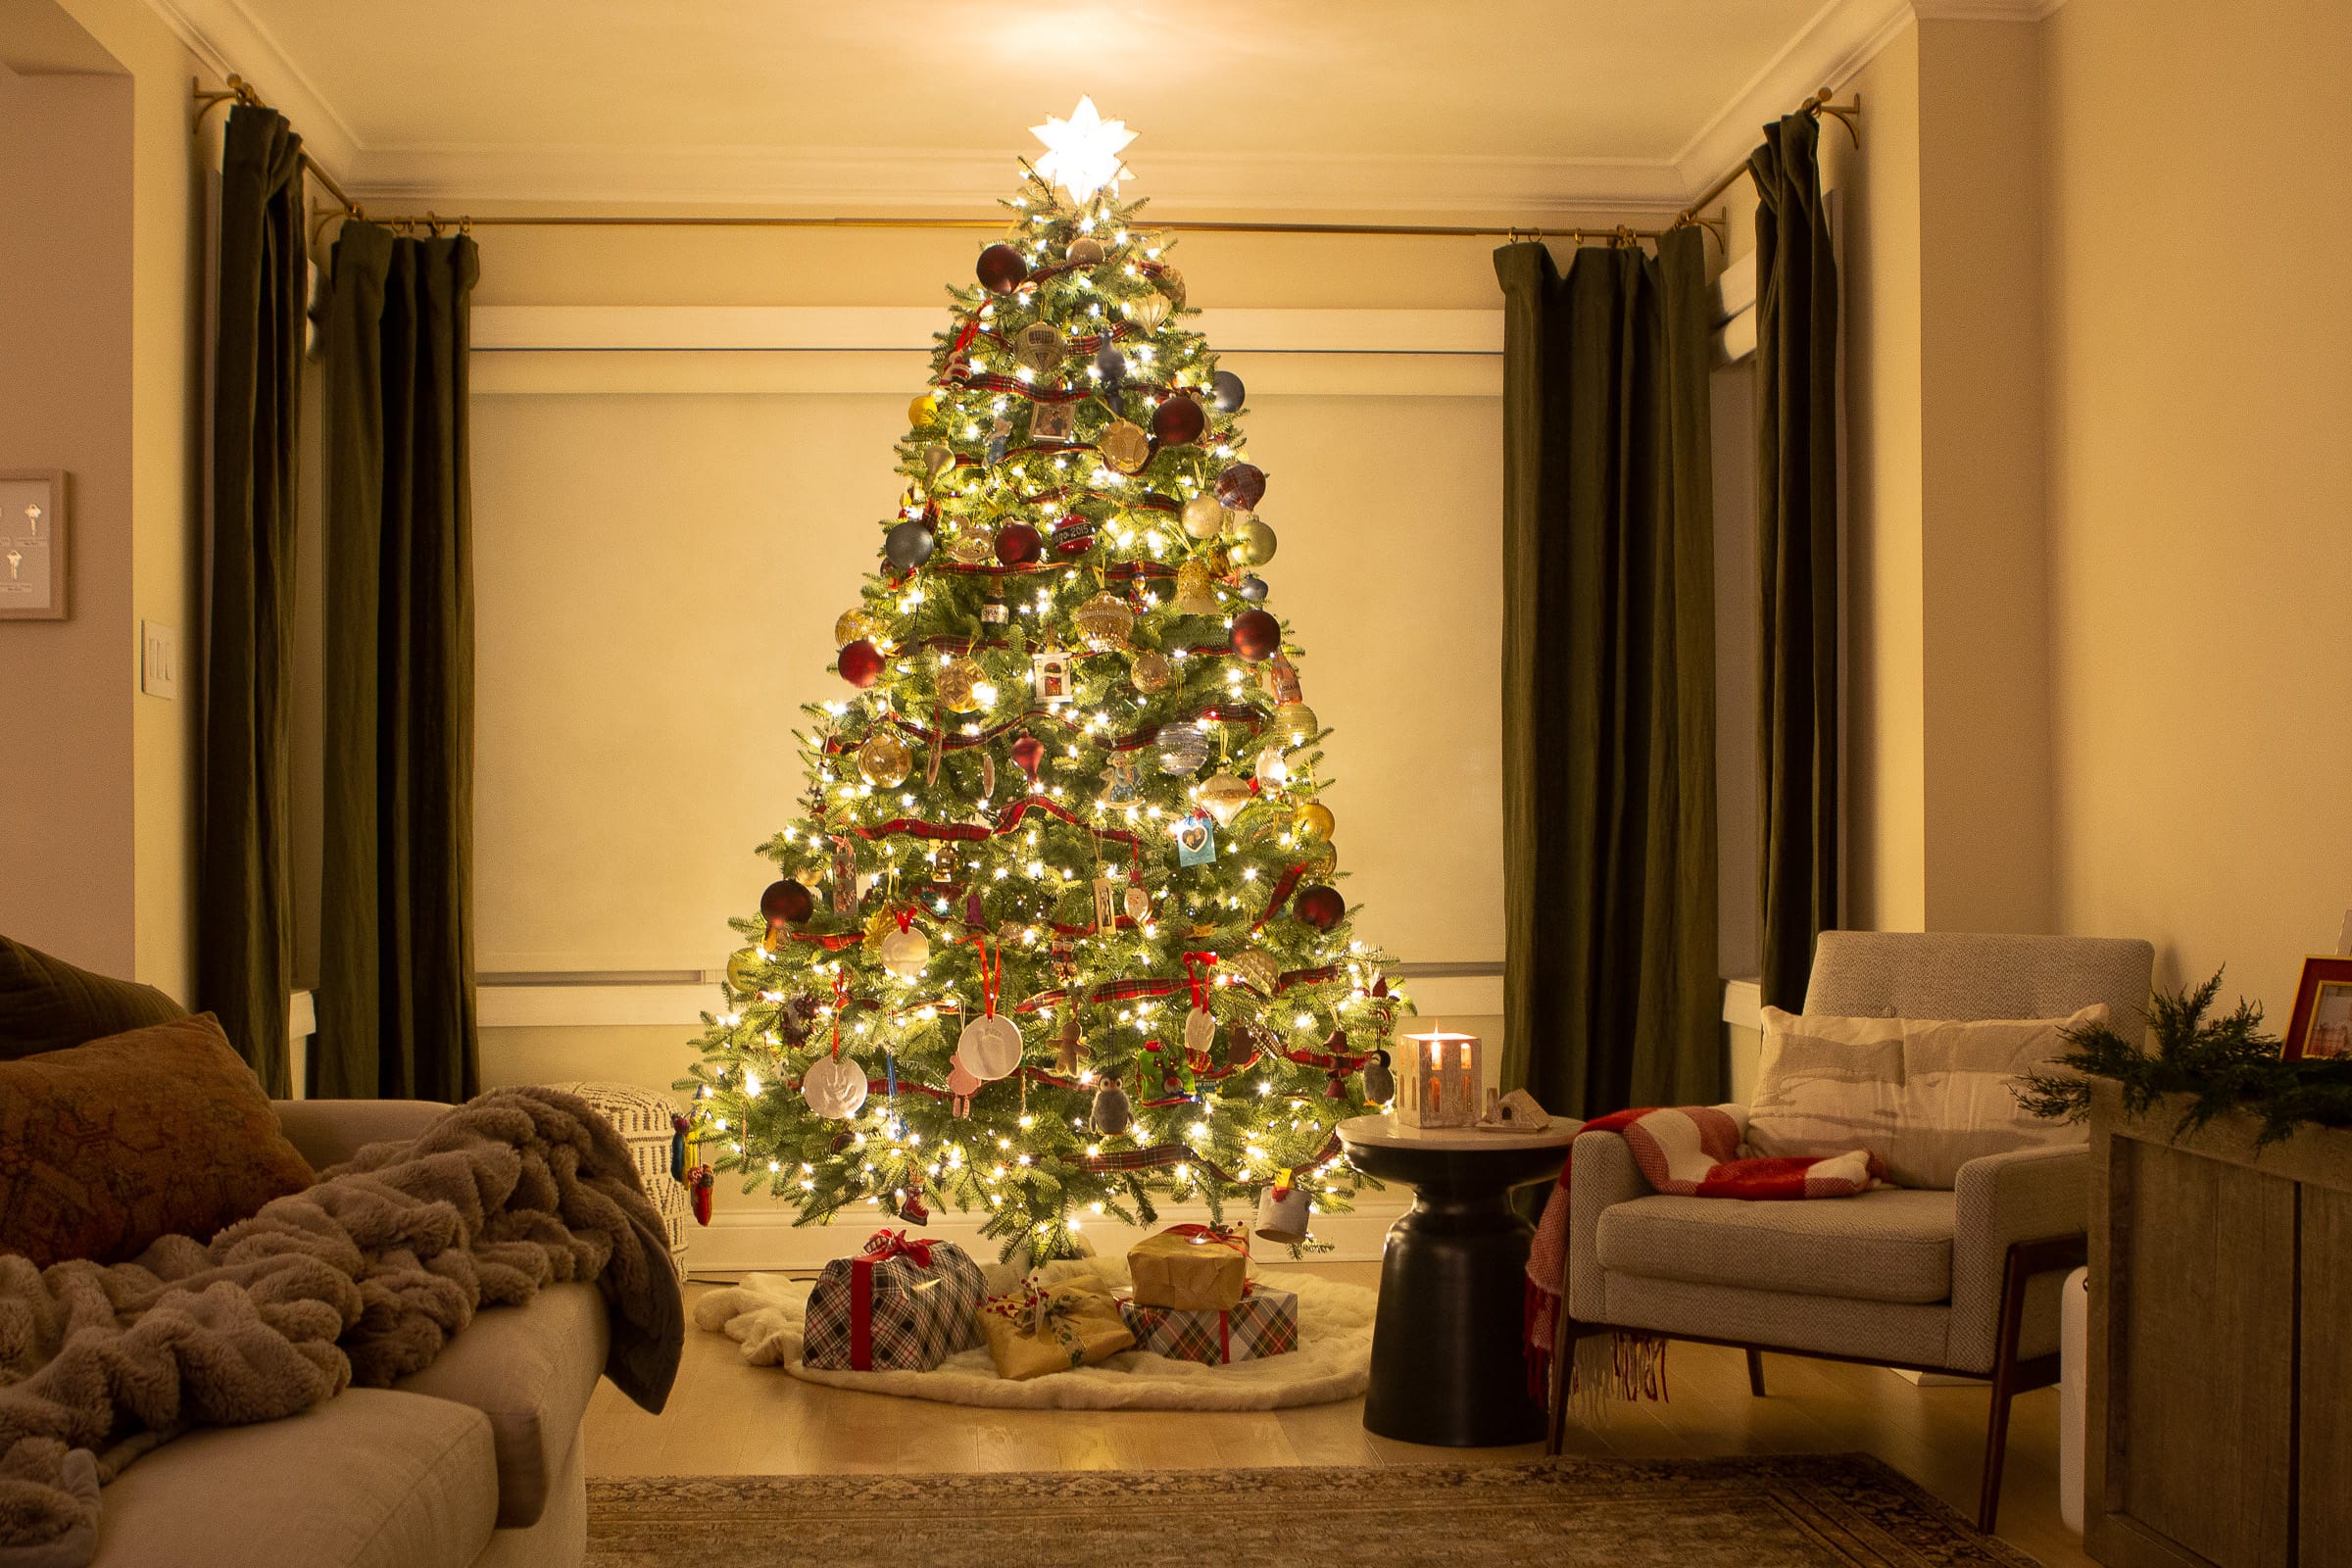
However, I like to look at the gifts under my Christmas tree as an extension of my holiday decor. I’m thoughtful with the wrapping paper and ribbon I choose so that they coordinate with the colors of my Christmas decorations. A bunch of gift bags under the tree isn’t the prettiest sight.

My mom’s presents are next level. She meticulously chooses her wrapping paper, ribbon, and tags and is an expert at making “fancy bows.” Her gifts look like they’re wrapped by a professional, specifically because of her fancy bow technique.
Asking An Expert
Today, I’m enlisting Jan’s help. She has already shared her wisdom on the best way to wrap a gift back in this blog post. But I thought it was time for her to share how to tie a bow for a present. Her ribbon bows are extraordinary and many people are known to save them (and re-use them) when they receive a gift from her. It’s kinda her signature thing.
So take it away Janimal, here’s how to tie a beautiful bow for presents.
How Jan Learned This Bow-Making Technique

I became interested in making bows by watching my good friend, Denise, make bows for her flower shop. She would grab a bunch of ribbon and before you knew it, she would have the most gorgeous bows ready to decorate a flower arrangement or a gift.
She didn’t know it at the time, but I watched her closely and practiced whenever I had a chance. Over time, my bows became better and better but I still believe Denise deserves the master bow maker title. So, thanks, Denise!! You were a great teacher!

The reason I love making my own bows is because it dresses up my gifts and makes them look gorgeous and inviting. Even if I have an unoriginal, boring gift inside the box, once it’s dressed up with beautiful wrap and ribbon the recipient of my gift is usually pretty excited to open it up! It truly is the perfect finishing touch.
Cutting Down On Costs

Believe it or not, wrapping gifts this way is much less expensive than buying pre-made bows.
I would suggest buying big spools of ribbon from Costco. They carry ribbon all year long, in various widths and colors. Each spool holds 50 yards, so for $6.99, you get 150 feet of heavyweight, beautiful ribbon. That can make a heck of a lot of bows for your beautiful gifts!
Grab Your Wrapping Supplies
The ribbon with wire along the edges is much easier to work with, especially for a beginner. It holds its shape better and it is easier to “fluff”. I would suggest starting your bow-making experience using this type of ribbon if you can find it. I typically like to choose a ribbon that is 1.5 to 2.5 inches thick and I like using a satin ribbon. Here are some different ribbons that could work with my tutorial…

- Craft Paper or Wrapping Paper
- Assorted Wired Ribbon
- Scissors (make sure you grab a sharp pair of scissors!)
- Clear Tape
- Gift Tag
How To Tie The Perfect Bow (Step-by-Step Instructions)

Once your package is wrapped (again, you can find my best tips for wrapping right here), you will want to wrap the ribbon around the package and tie it in a knot.
I just unroll some of the ribbon from the spool and wrap it around the gift to get an idea of how much I will need before I cut it. Make sure to pull the ribbon from back to front and front to back. (You will be wrapping the ribbon around the package both horizontally and vertically.)

To get an idea of how much ribbon a normal-sized shirt box requires for this step, I measured it and it was about 7 feet long. Usually, I don’t measure the ribbon. Instead, I just eyeball it and it works, but do whatever feels right to you.

So, go ahead and cut the ribbon and push the spool aside. Whenever I cut the ribbon, I like to fold the ribbon in half and cut it at a 45-degree angle. This results in a nicer end and a more polished look.
Tying the First Knot

Now, you will flip the package over, top-down, and slide the long strand of ribbon under it. Pull on the ends of the ribbon to make sure that they are equal in length.
Bring the ribbon ends toward one another and crisscross it. Flip the package back over so that the top of your gift is up and bring the ribbon together. Simply tie it in a knot at the top of the box, leaving the ends relatively long.
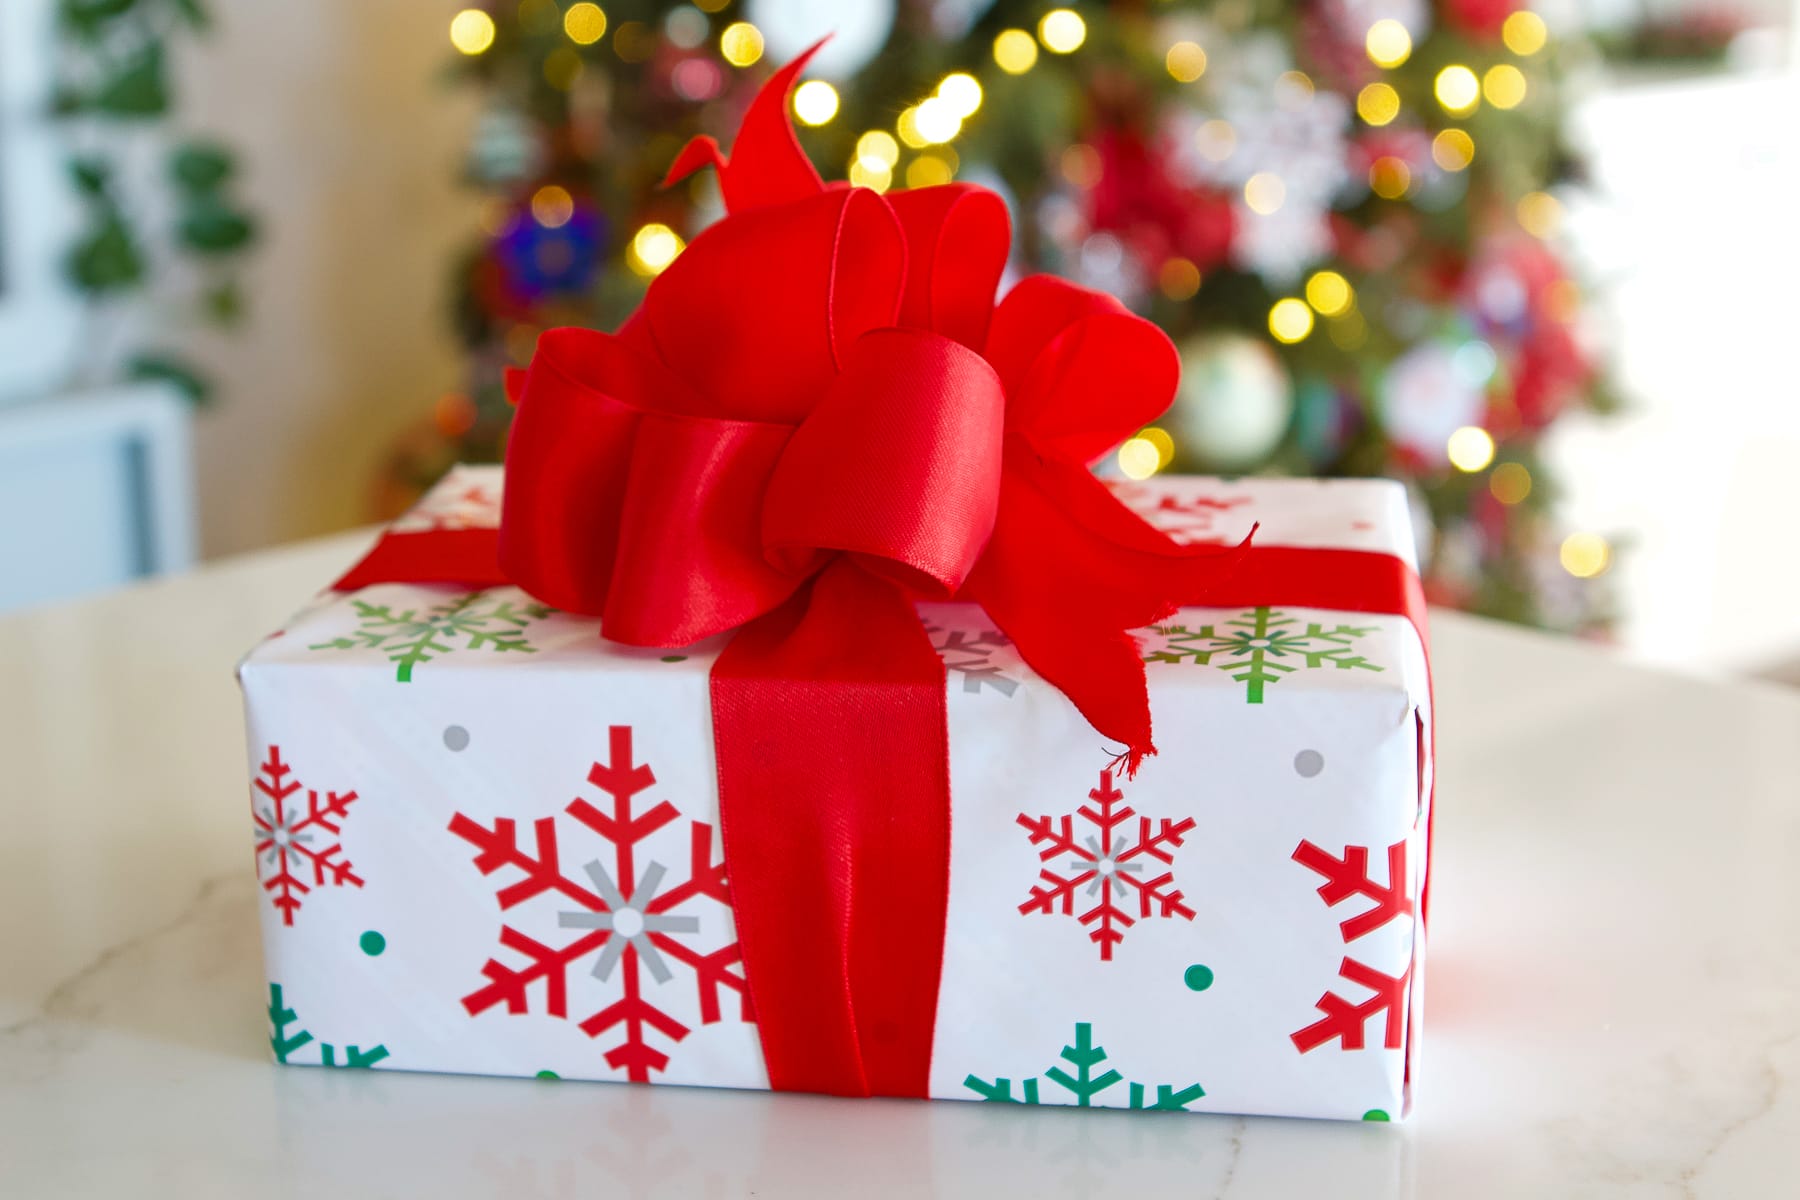
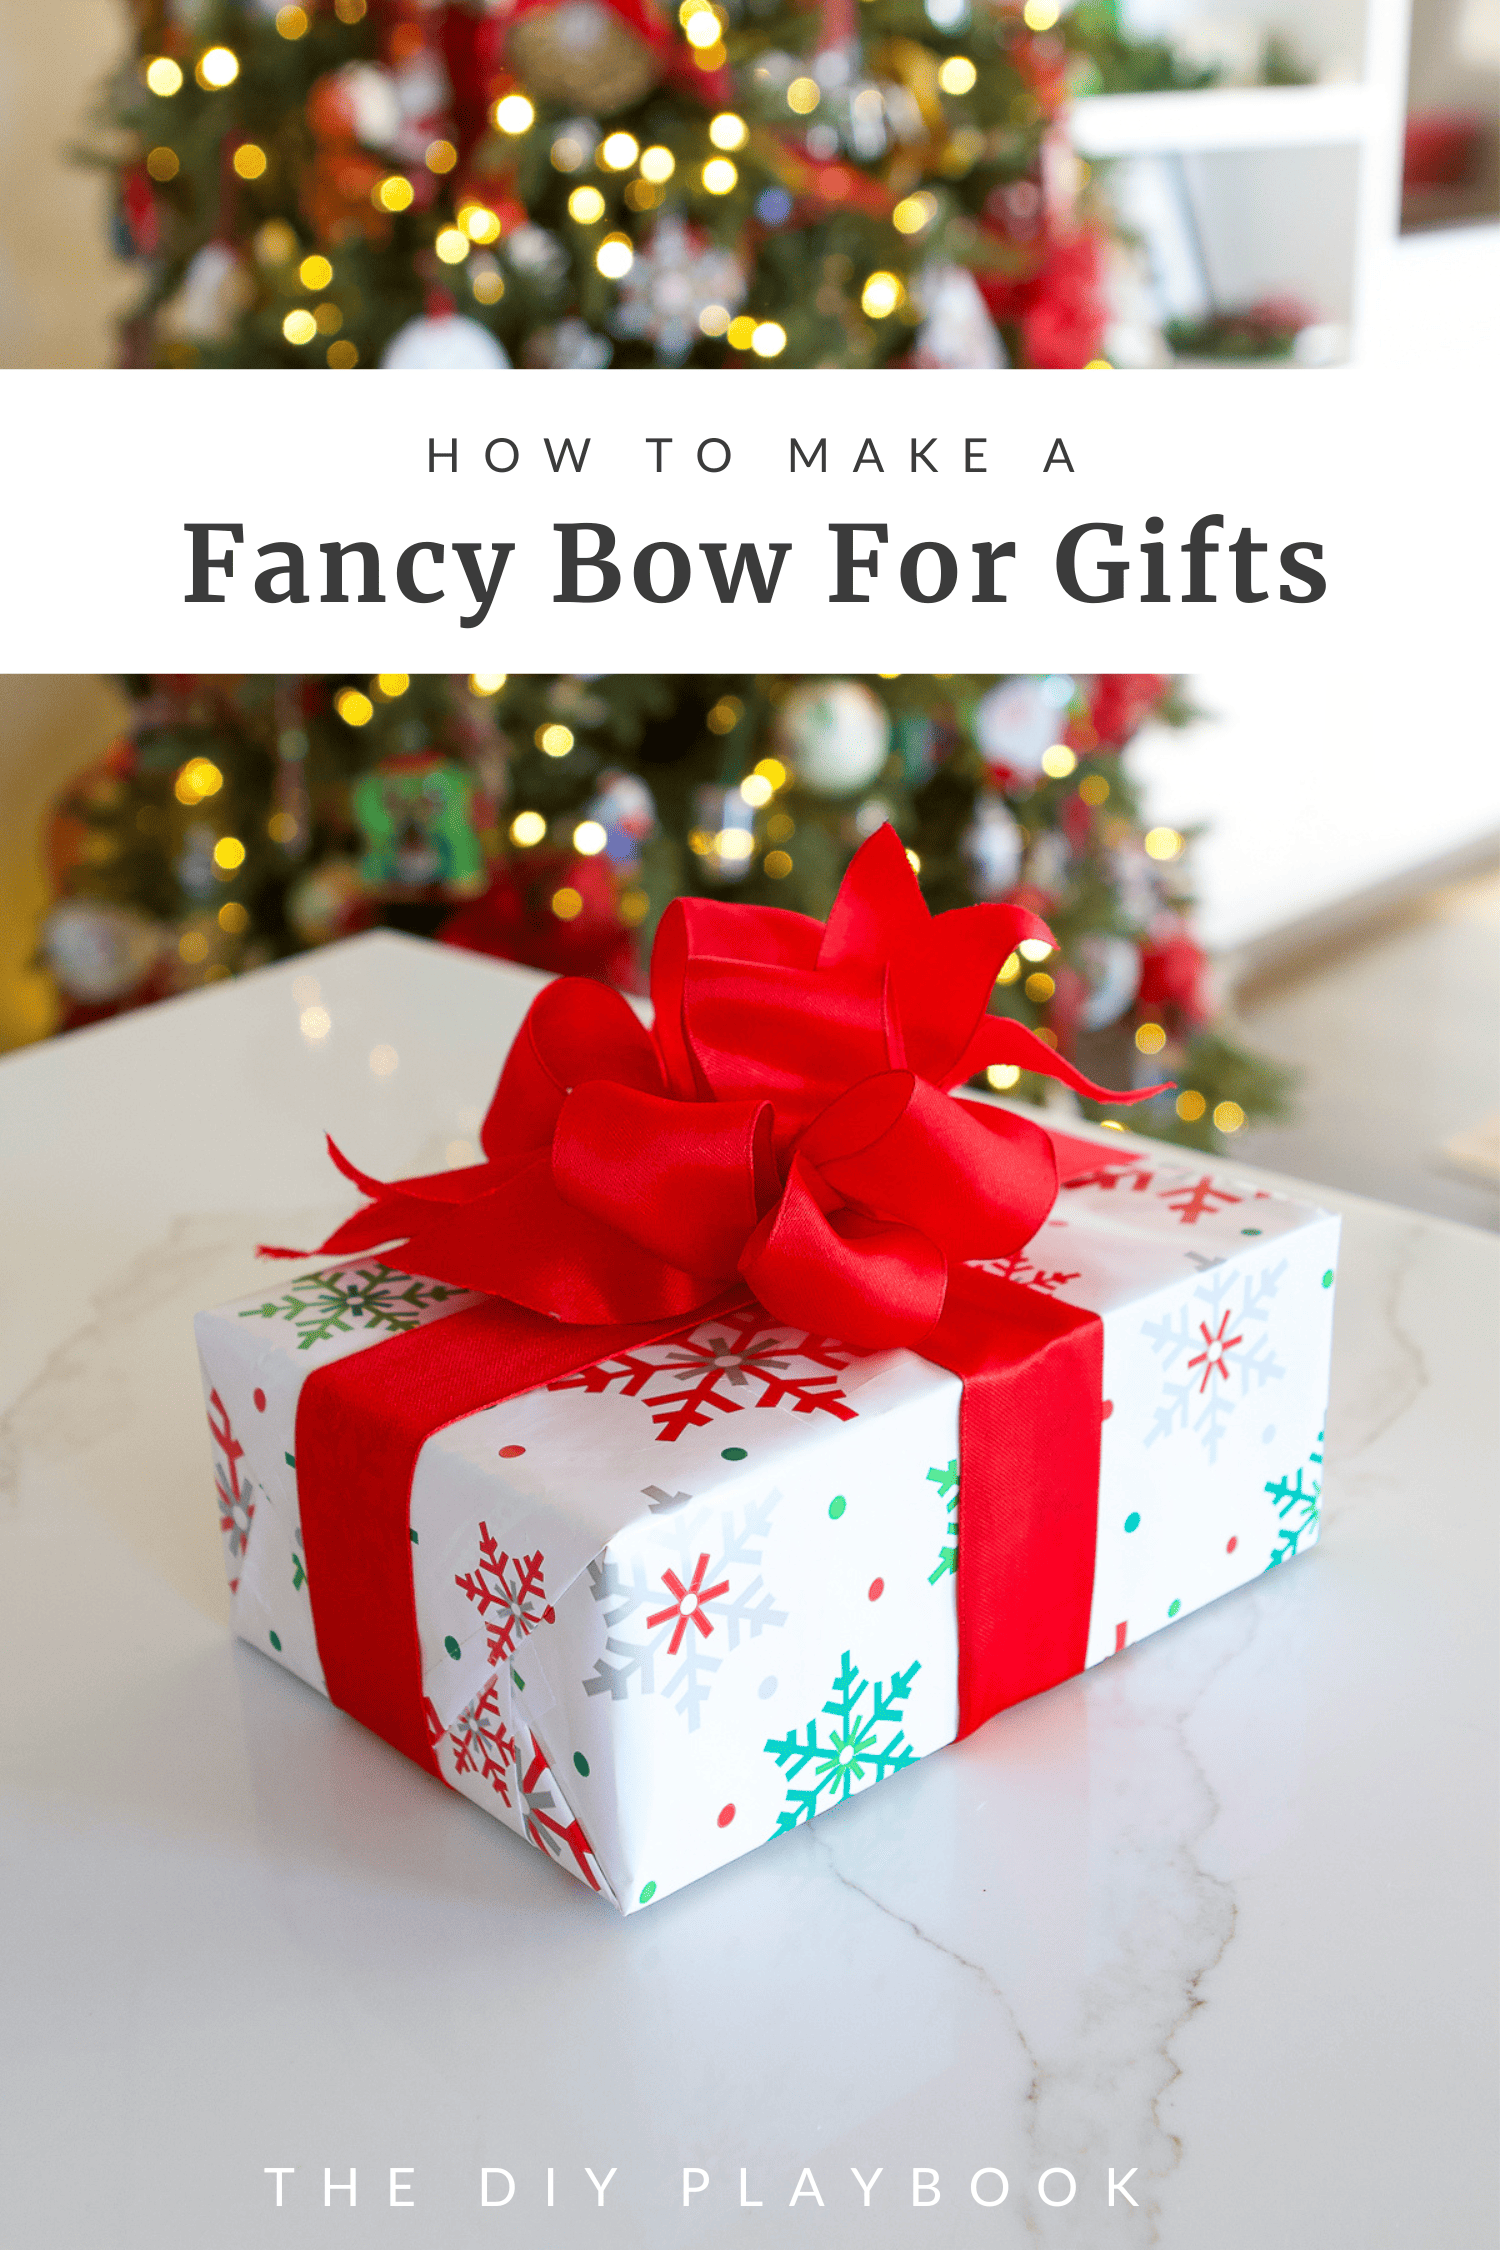
The “base” of the package is done and now you can make the fancy bow!
Starting the Large Bow On Top

Unwind a bunch of the ribbon from the spool and start by making “loops” of equal size on each side, pinching the middle of the ribbon together. The size of that first loop depends on the size of the gift. I usually make the loops of the bow a few inches long.

Pinch it tight and keep adding the same-sized bow loops to each side. I like to have four loops on each side (eight total) to make a nice, big, poufy bow.
Once you have yours to your liking, go ahead and cut the ribbon off the spool.
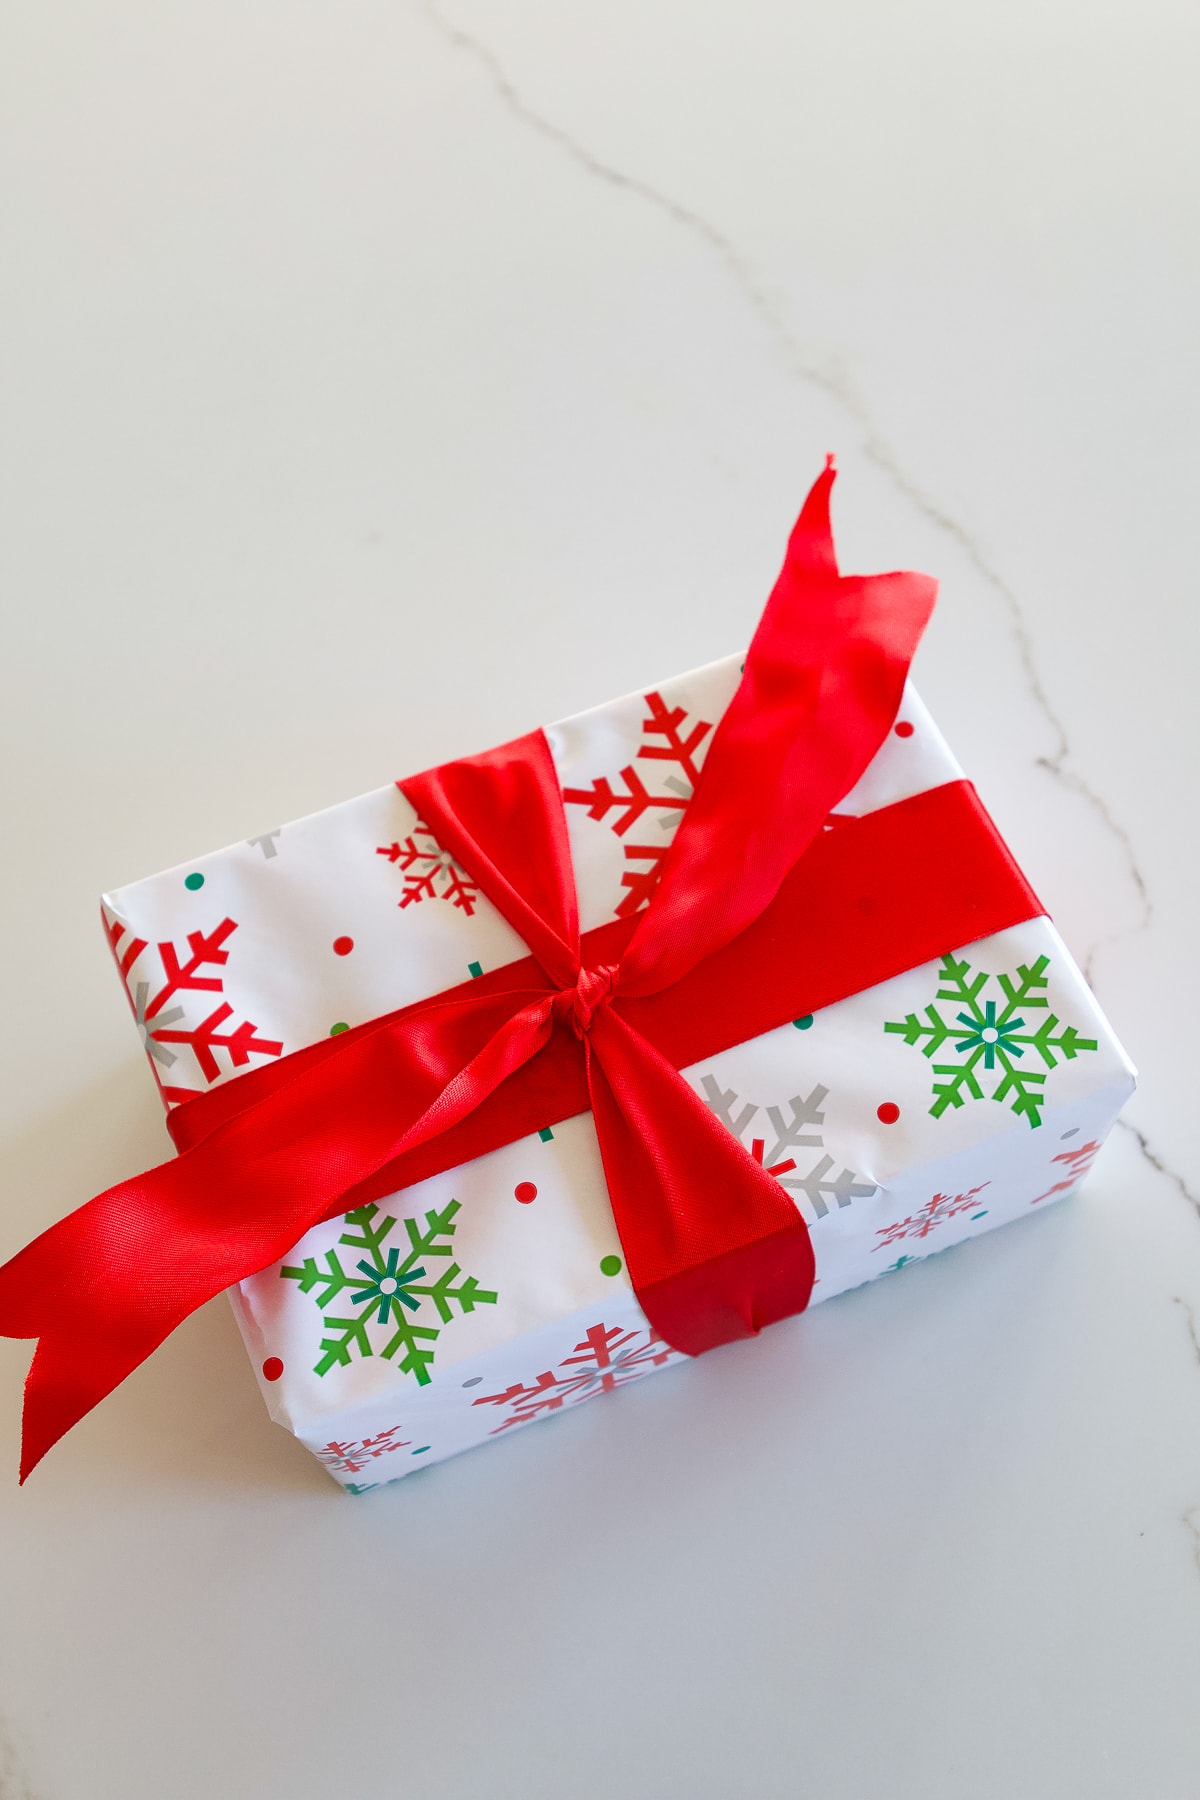
Attach The Bow To The Base
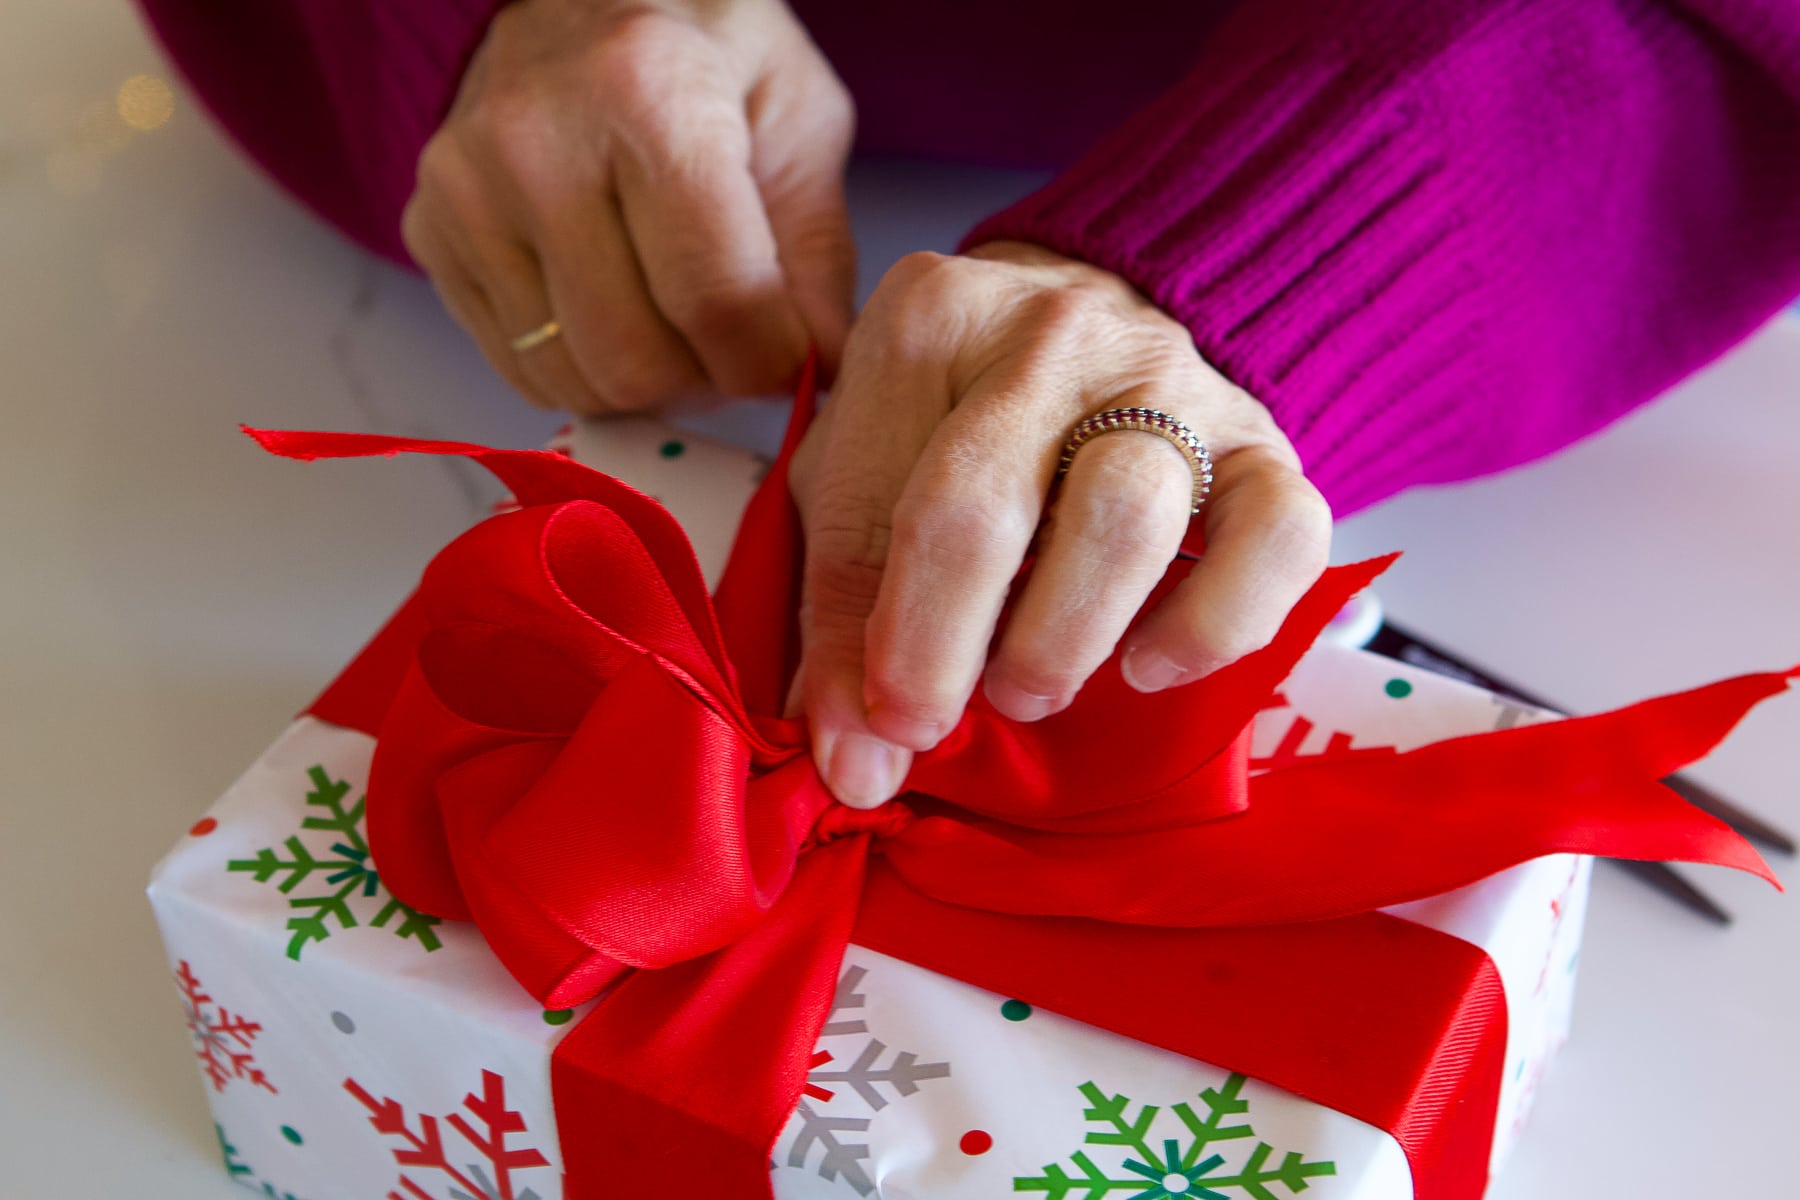
Set down your bow in the center of the box, take the long ends of the “base”, and tie them into a knot in the middle of the package. Then, snip the excess ribbon on the base (cut at an angle) so they’re not too long.
Side Note: It’s tough to keep the ribbon pinched in the middle and tie a knot around it all at the same time and all by yourself. After all, you only have two hands! So, if you are a novice, you might want to ask a helper to tie the knot around the ribbon while you keep the middle pinched nice and tight. I promise, that with some practice you will soon be able to do it all by yourself, so don’t be discouraged if you need a little help in the beginning!
Fluff, Fluff, Fluff!

Now it’s time to fluff!! This is the fun part, if you ask me, and the more you “fluff”, the prettier the bow! You will want to grab each individual loop and pull it out away from the middle. Start at the bottom and pull the bottom loops to each side.
Next, take the loop on top of the bottom one and pull it to the other side. Keep going until all of the loops are pulled away from one another and the bow looks fluffy, poufy, and gorgeous. You can keep fluffing and tweaking until you are happy with your finished bow.
How Much Per Gift?

I measured out the amount of ribbon and for a medium-sized gift box I used about 14 feet, total, for the base and the fancy bow. That means that I can wrap about eleven shirt boxes with one spool of ribbon, for a total of $.65 per package. That’s much less expensive than buying pre-made fancy bows!
Make Some Gorgeous Bows This Holiday Season

So, there you go! I hope my directions are clear but if not, I would suggest you just grab a package, and a roll of ribbon, and start experimenting. When I first tried this, my bows were a hot mess, but eventually, they started looking pretty amazing!
All it takes is practice, practice, practice! I promise the Christmas gifts under your tree will be the envy of the family. And don’t be surprised if they look so inviting that some of your recipients try to get a “sneak peek” of what’s inside!
These steps will help you make the perfect gift bow, but you can also follow them to make decorative bows for your Christmas tree or to add to your garland or holiday decor. You can just make a larger bow following this same step-by-step guide.
Thanks, Jan!
A big thanks to Jan for taking the time to share her bow-making tips on the blog today! I certainly need to practice a lot to get to her bow-making level. I suppose it’s time to say goodbye to those gift bags for good…
Check Out My Holiday Gift Guide

Need some gifts to wrap? My 2025 Holiday Gift Guide is packed full of ideas for everyone on your shopping list.
Casey


