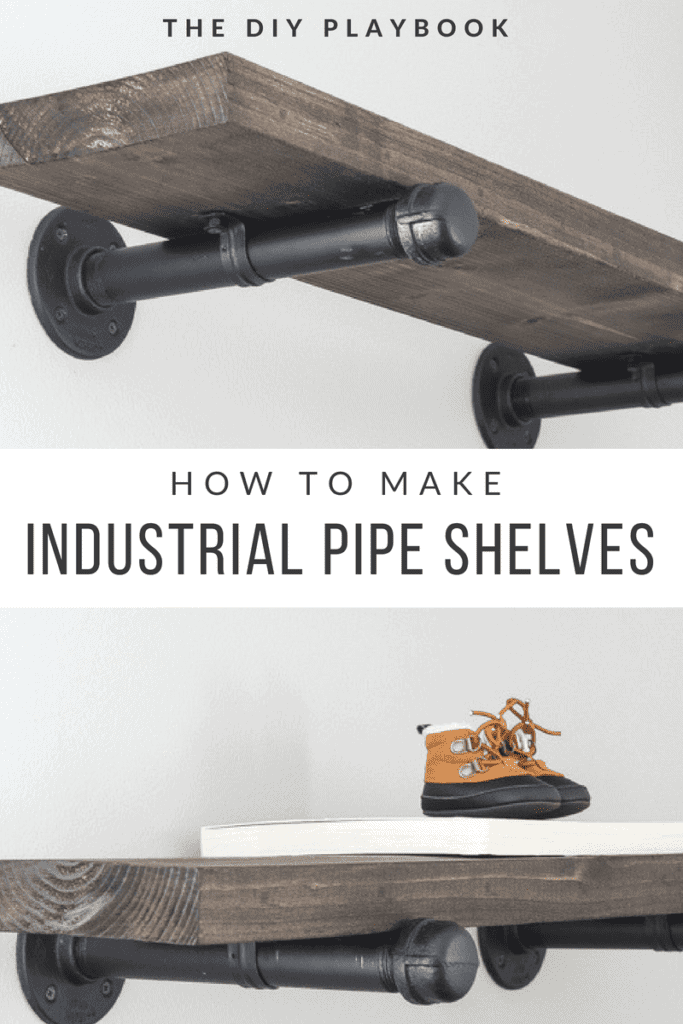
How to Build DIY Industrial Galvanized Pipe Shelves
Has anyone seen these Restoration Hardware knock-off shelves on Pinterest? I remember seeing industrial pipe shelving a few years ago and instantly thought they looked like a great way to add storage to a small space, along with some character.
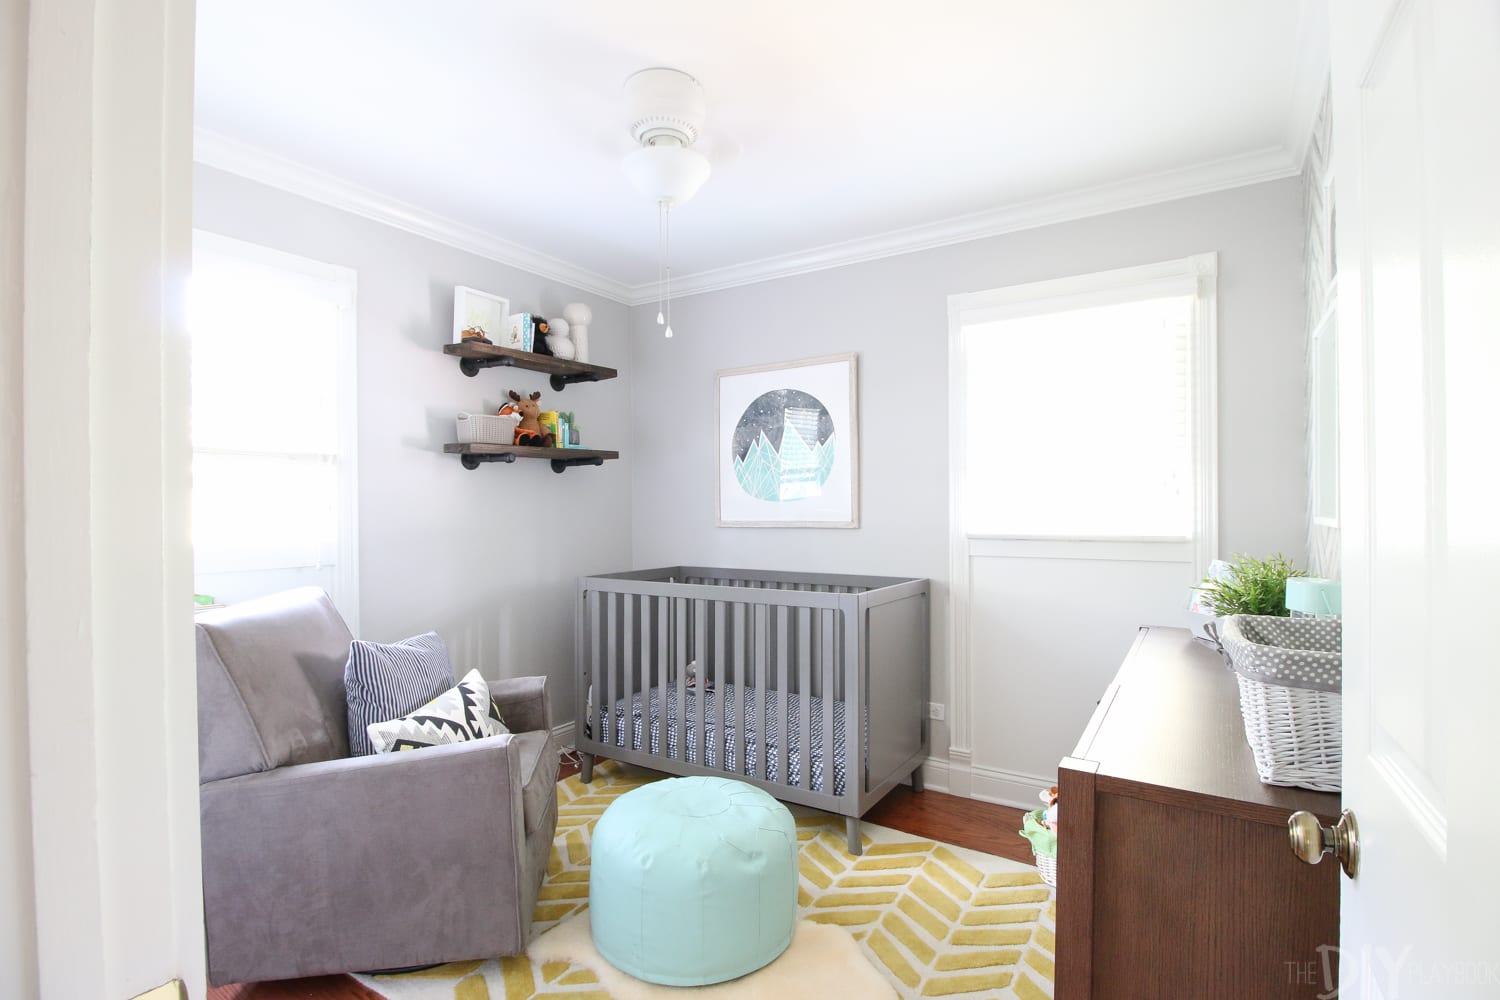
I wanted to recreate this look for a farmhouse-style baby nursery I’m working on for my nephew. I knew new shelves were a must for this space to add a bit more storage and a place to display cute home decor. Plus, that industrial style will complement the other aspects of this cool nursery.
Let’s Make Some DIY Industrial Shelves
We knew we could DIY these industrial pipe shelves without spending a ton of time or money and that’s exactly what we did. This is definitely an easy weekend project that anyone can do. But, we definitely learned a few tips and tricks along the way, so with our instruction your project can go even more smoothly than ours.
DIY Pipe Shelves, The Cost
Although we LOVE the look of these shelves, we do want to warn you that this DIY project was NOT dirt cheap (which was a surprise to me).
The materials themselves were about $50, so I would not recommend this look if you’re DIY-ing this specific shelf to save money. Just a heads up so you’re not as shocked as I was.
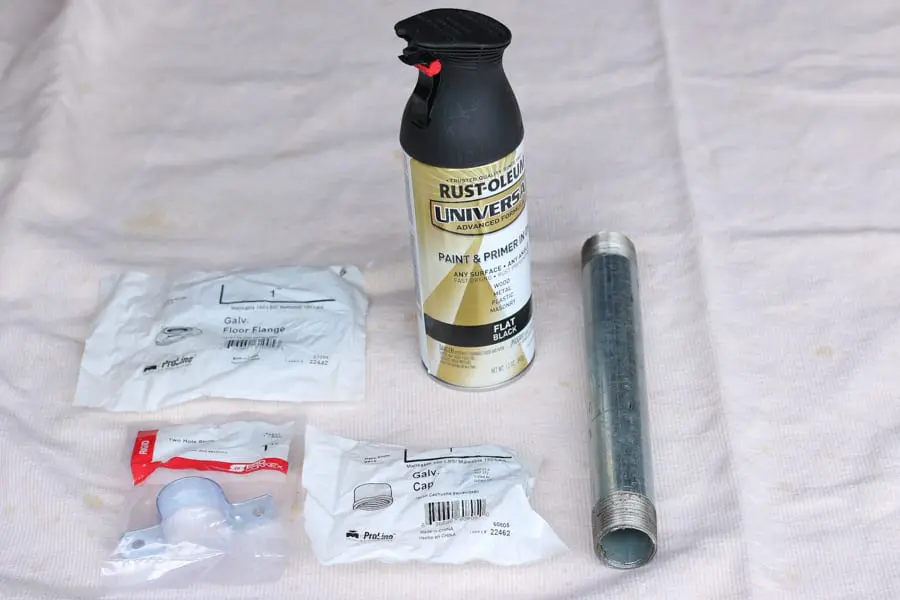
Supplies for 2 DIY Pipe Shelves
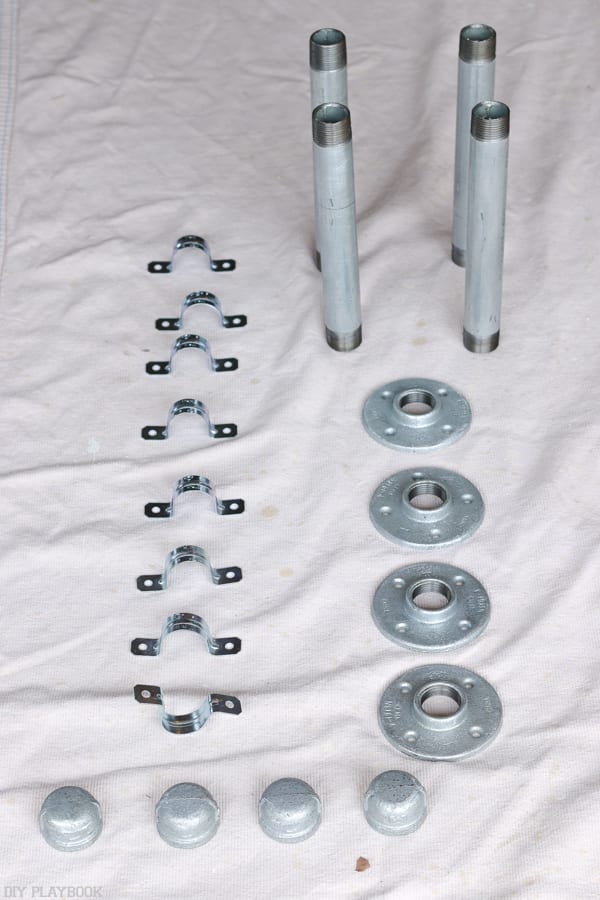
- 4 iron pipes cut to size (1-inch diameter)
- 4 caps (1 inch)
- 4 galvanized floor flanges (1 inch) This is where most of the cost comes from at almost $10 each
- 2 wooden boards (I went with pine boards)
- Sandpaper
- Stain (color of your choice) + rags
- 1 bottle flat black spray paint
- 4 two-hole straps (1 inch), may need 8 dark nuts + 8 dark washers to hold straps onto pipes
- Dark screws
- 16 drywall anchors (if you don’t hit a stud)
- Power drill
DIY Industrial Pipe Shelves, Step-by-Step Tutorial
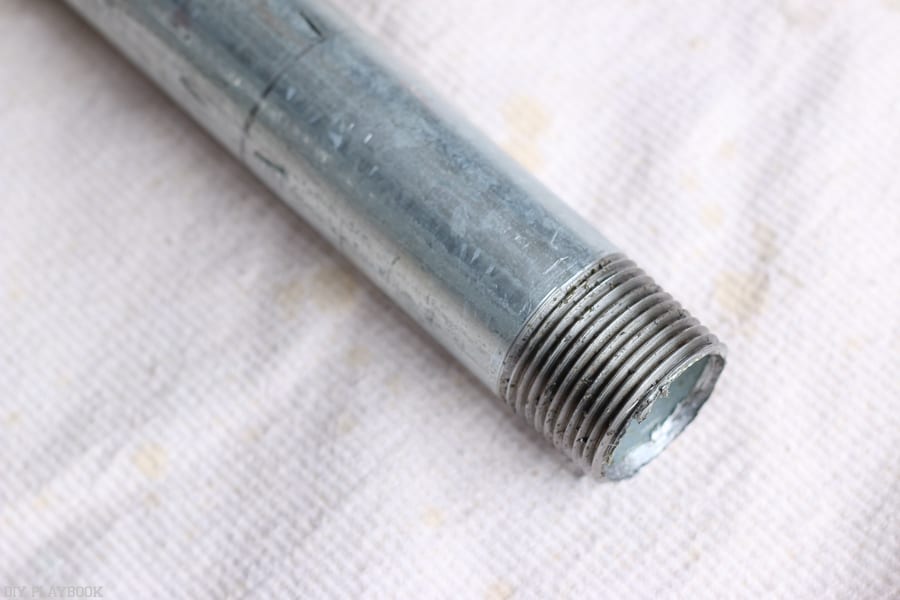
The first step is to get your pipes cut down to size. For the actual pipes, the only prep work we had to do was to have the pipe lengths cut to size. You can get this done at your local hardware store, usually for free! The one large pipe was cut down into four equal-sized pieces.
Sand & Spray Your Pipes
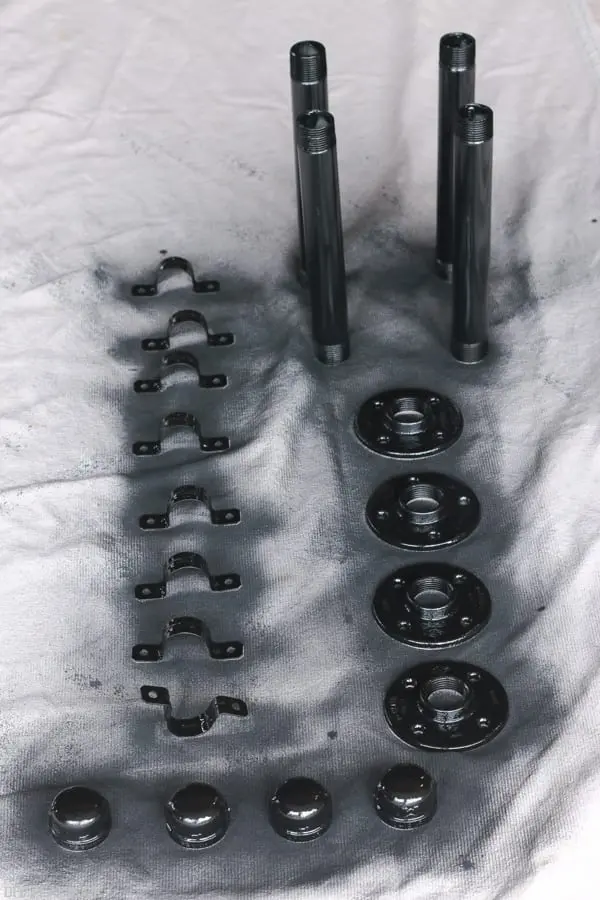
We always like to give pieces a light sanding before using spray paint to paint the pipes. It helps it adhere better and we knew we wanted this to have a long-lasting finish. We wanted black pipes, so we used a flat black spray paint color. I always recommend at least two coats of paint.
DIY Tip: Note in the picture there are eight straps to hold the wooden shelves into place, but we actually only ended up needing four for this DIY project. Also, you may need to spray paint a couple of times to get some of the areas that you missed the first time (i.e. the bottom of the safety clips). The paint did adhere to the pipes, but be super careful not to scratch any of these parts on each other. It can be scratched off until it’s fully cured.
Money & Time Saving Tip: If you want black iron pipes (like ours) you can also search for galvanized pipe for gas lines. It’s already painted black and would save you a step!
Prep & Stain Your Wooden Shelves
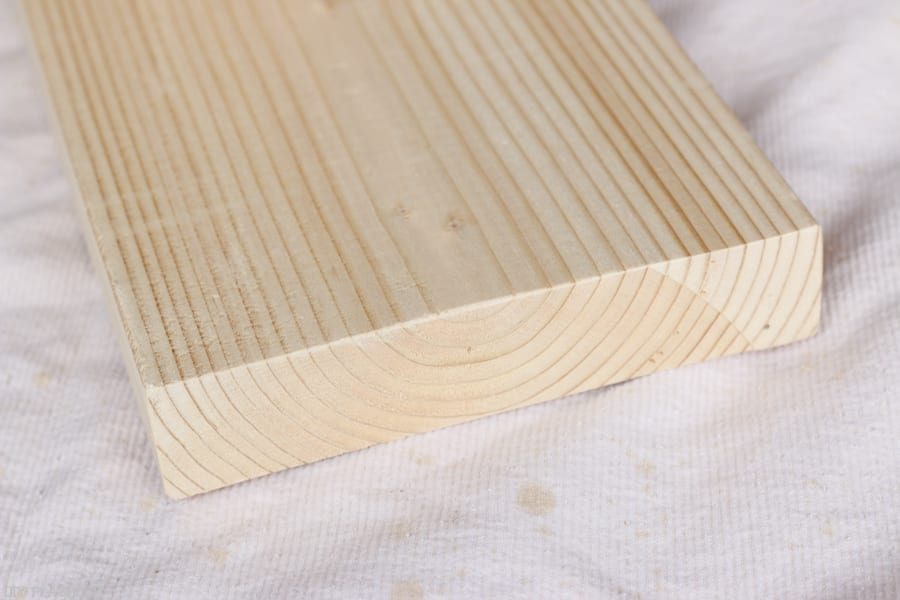
Now, let’s chat about the wood shelves. Literally, any type of wood will work for this. We wanted the shelves to look pretty thick, so we went with a thicker piece of wood.
Once we decided on the wood, we bought one long piece and brought it home to cut it to size using a miter saw.
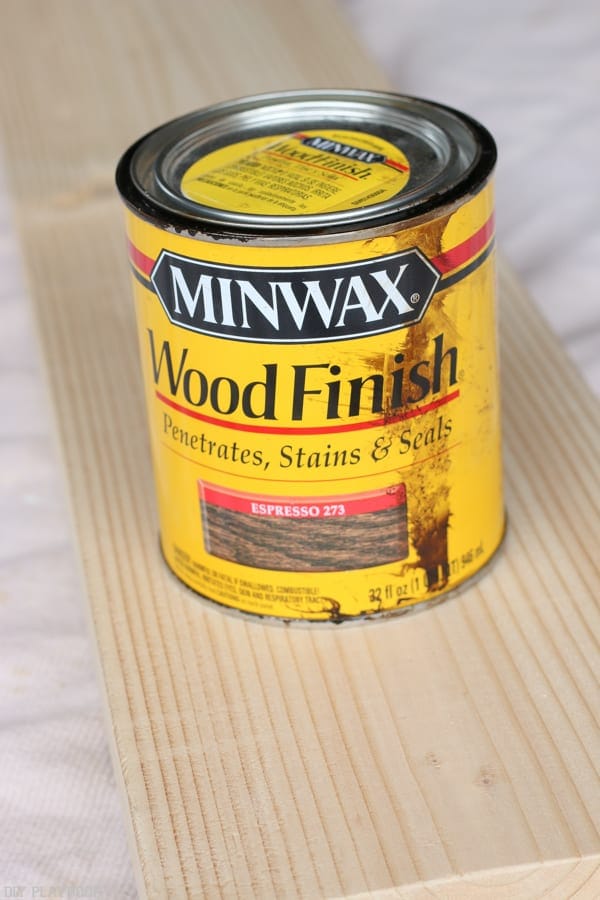
Then we used a stain we had lying around (the color “espresso”) and put a coat of stain on each shelf. After the stain and the spray paint on the pipes were dry, we were ready to start hanging!
How to Hang Your DIY Shelves
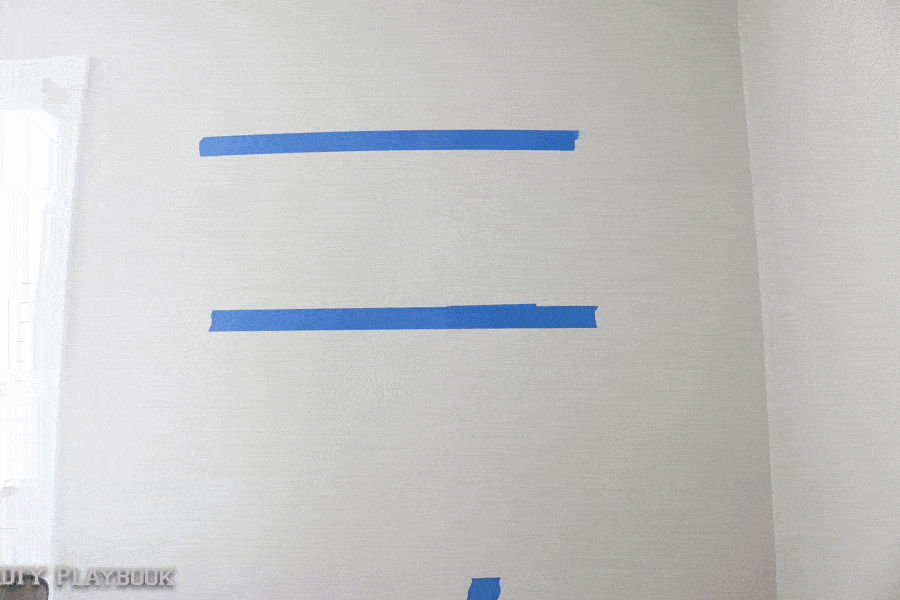
Here’s a GIF of exactly how we did this. The painter’s tape helped us identify a level line and gave us an idea of where to hang each shelf.
We used a stud finder and found that we weren’t drilling into any studs. So to make these extra secure we knew wall anchors were a must! We used four drywall anchors for each floor flange and then inserted dark screws so that the screws would camouflage with the dark paint. We started with the bottom shelf and then secured the top shelf last.
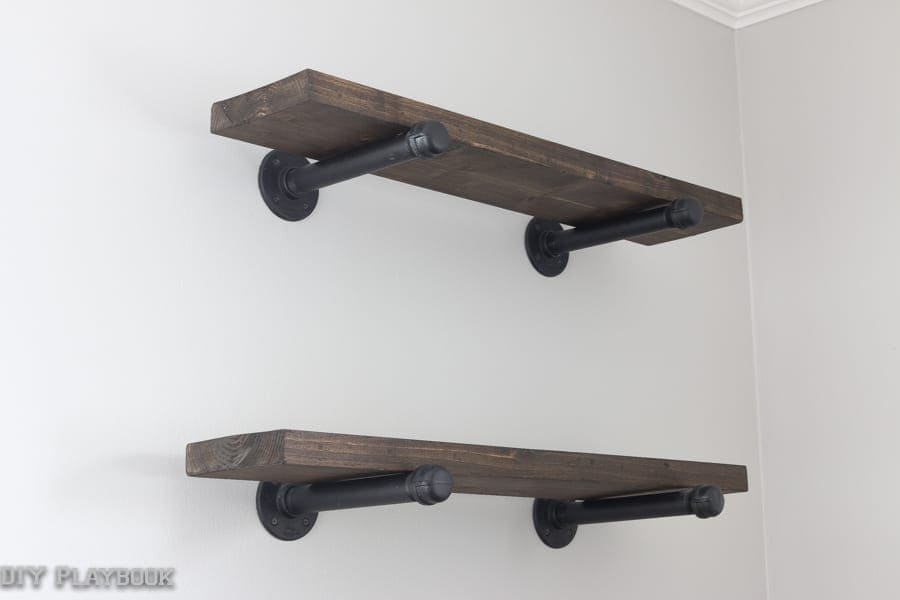
After each of the flanges was secured to the wall, we screwed in the pipe, then screwed on the caps, and placed the shelf on top of the pipes. Pretty darn easy, right?!
How to Secure The Shelf On Top

But there’s still one more step that is a must! You need to add straps underneath the wooden shelves to connect the piping to the wood. Without the straps, the shelf can easily move around on the pipes. Once we added the straps (they were only about $1 each), the shelf was extremely secure on the pipes.
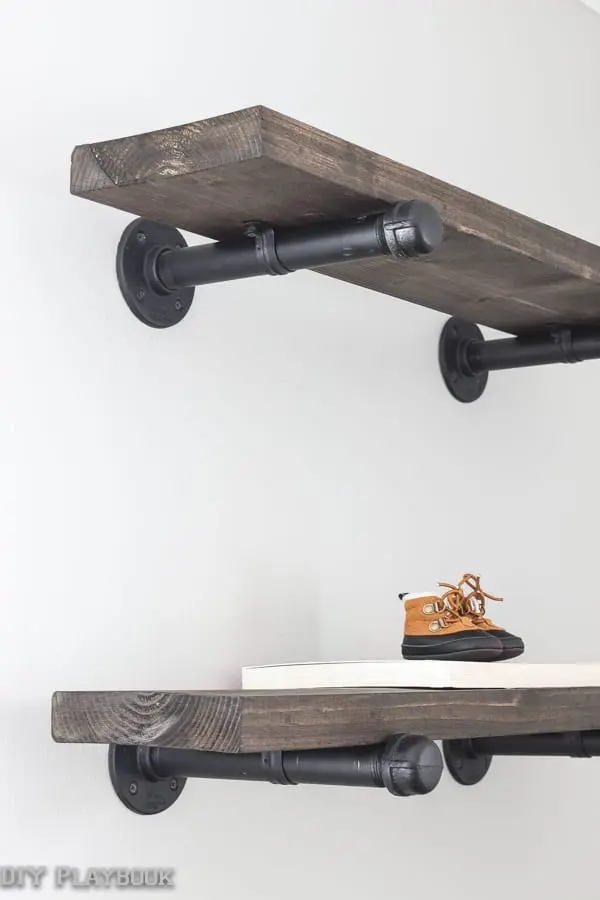
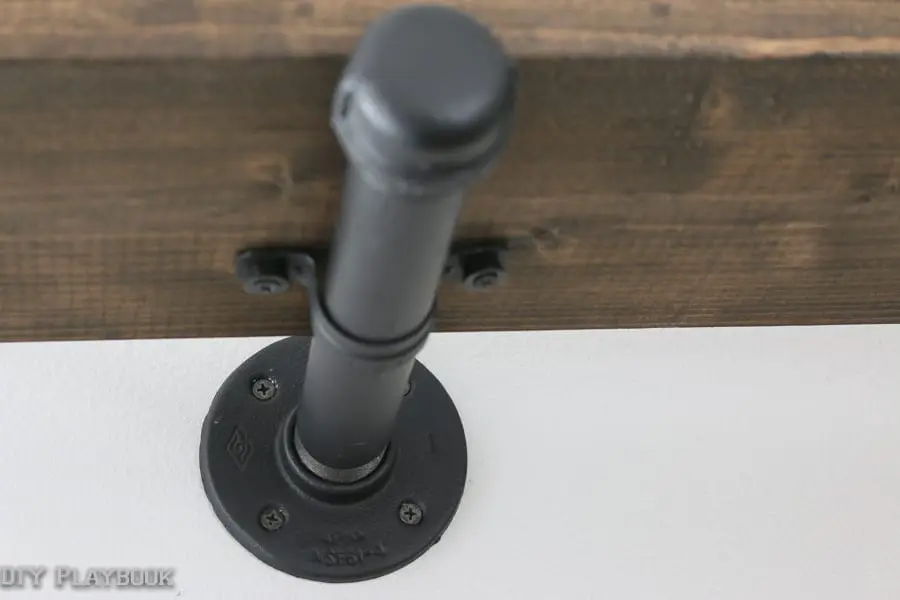
We screwed them in with a dark nut and dark washer halfway down the pipe. You can see it in the picture above. I personally think that extra detail makes the shelves look even better. Safety + Style = one happy mom-to-be.
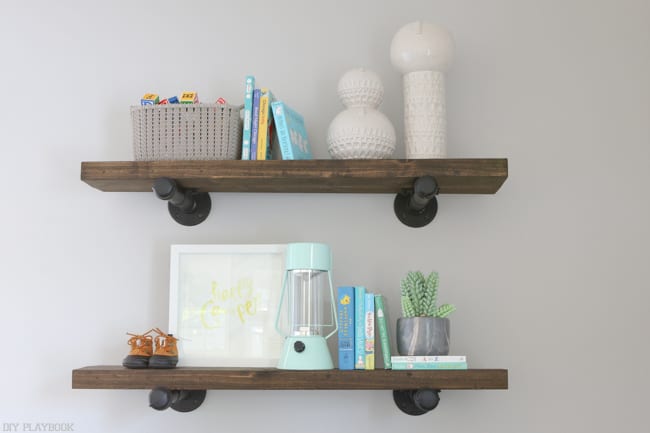
I love the industrial look of these functional shelves and they just might be the best part of this cute room!
Don’t Worry, These Are Kid-Friendly!
Since this is a children’s room, let me address the process my sister and I went through to make sure that the baby will NOT be able to reach them even though they’ll be near the crib.
When the baby is a newborn, the mattress in the crib is on the higher end, which is a tad close to the shelves but since the baby will NOT be standing in the crib when the mattress is at this level, we will not have to worry about the baby ever being able to reach the shelves.
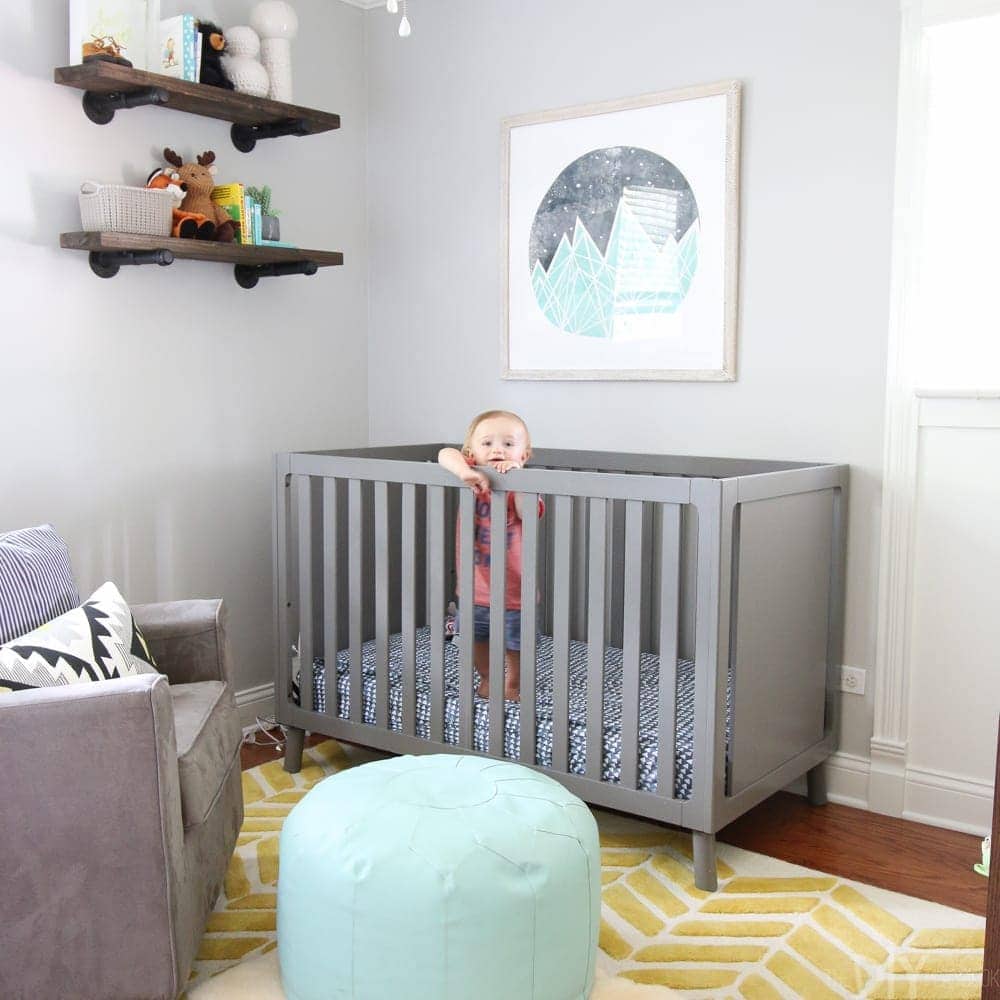
When the baby is old enough to start standing up in the crib, my sister will lower the mattress and the baby will have to be able to reach OVER 4 1/2 feet high to touch the pipes of the shelves. And by the time the baby is over 4 and 1/2 feet, I have a feeling those shelves will be long gone. I mean, we hung them practically to the ceiling!
So rest assured that we are taking safety very seriously in this makeover to ensure that this space is not only stylish but most importantly, very safe.
Our next step in this makeover is to safely hang lots of gorgeous art (more details here) & then you can check out the full reveal of this room here!
Bridget


