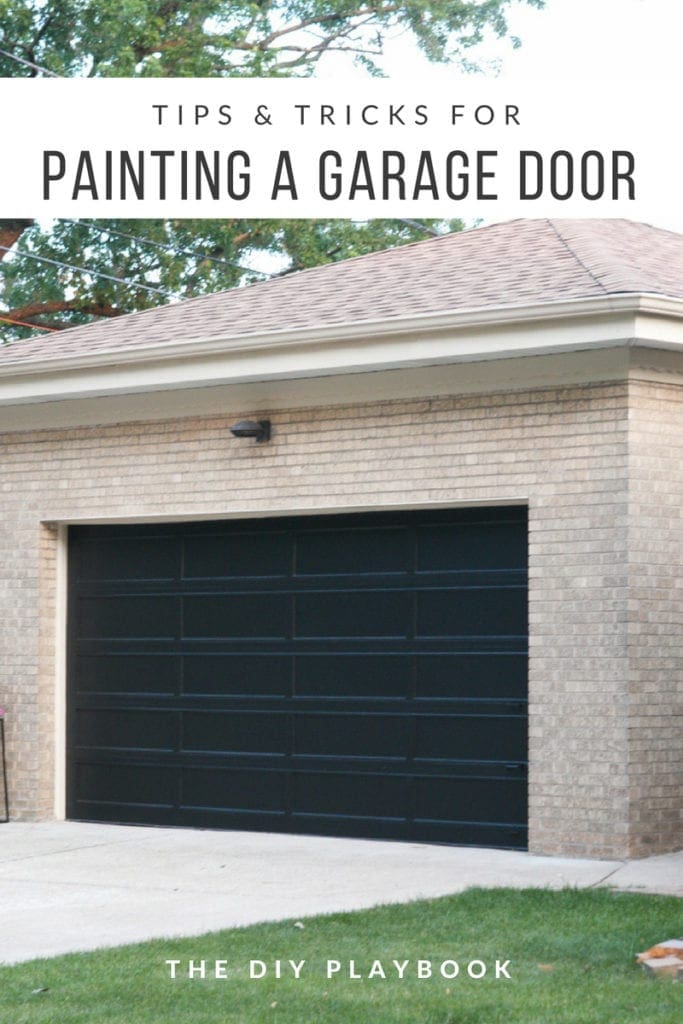
How To Paint A Garage Door
As a part of our recent landscaping overhaul, we’ve been checking as many outdoor DIY projects off of our to-do list as we can. But since I’ve been trying to share the landscaping details in as close to “real time” as possible, I’ve been a little behind in sharing the tutorials for the outdoor DIY projects. Slowly but surely, I’m trying to catch up, which brings me to today’s topic — how to paint a garage door.
It’s Not As Scary As It Seems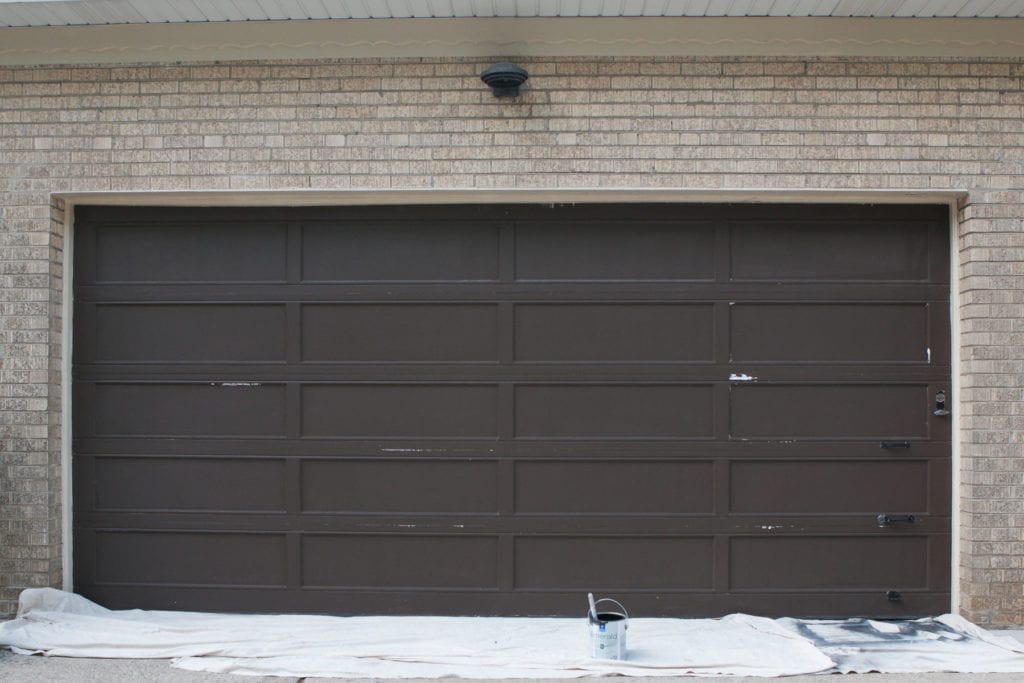
I enlisted the help of my dad to help me paint our old, brown garage door. Although it’s always nice to have a professional on site, I’m happy to report that this project was SO much easier than I anticipated. I don’t know why I built it up to be so intimidating because it wasn’t nearly as complicated as I thought it would be. 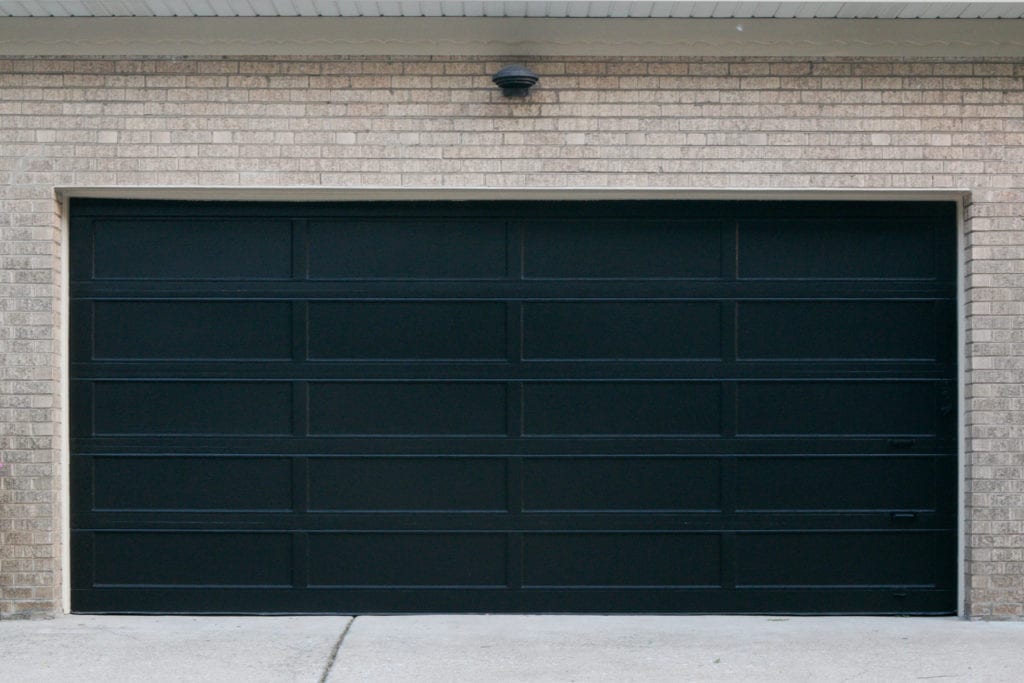
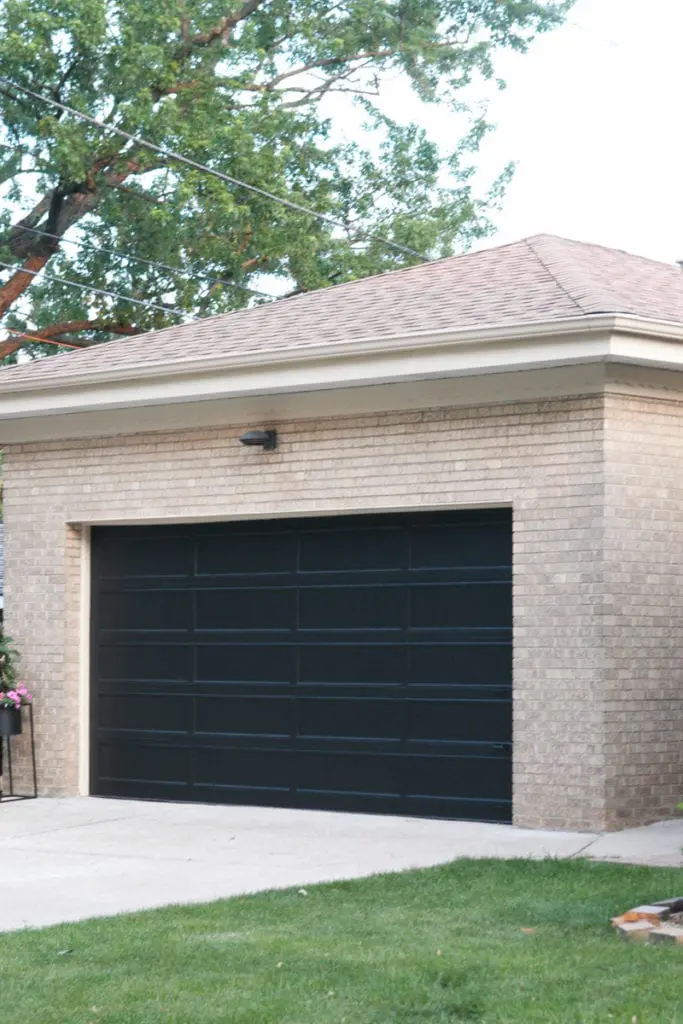
If you are also considering painting your garage door, I promise you can do it! And you should do it because it’s definitely a project that can instantly upgrade your curb appeal. I mean, can you even believe what two coats of fresh paint (and a new color) did to ours?! Such a difference!
How To Paint A Garage Door
Here’s a step-by-step tutorial on how you can re-create this project without investing a ton of time or money. We spent a few hours one morning finishing the entire door and it only cost us the price of the paint. We had half a gallon of exterior paint leftover from another project, so I only needed to buy one gallon. Depending on the size of your garage door, and how many coats you need, I’d recommend only buying one gallon… you can always go back for more.
Power Wash
The first step in this process is power washing the garage door to get all of the heavy dirt/dust off of it before painting it. I rushed to get this step done after Ben’s bed time one night and totally forgot to grab my camera and document it.
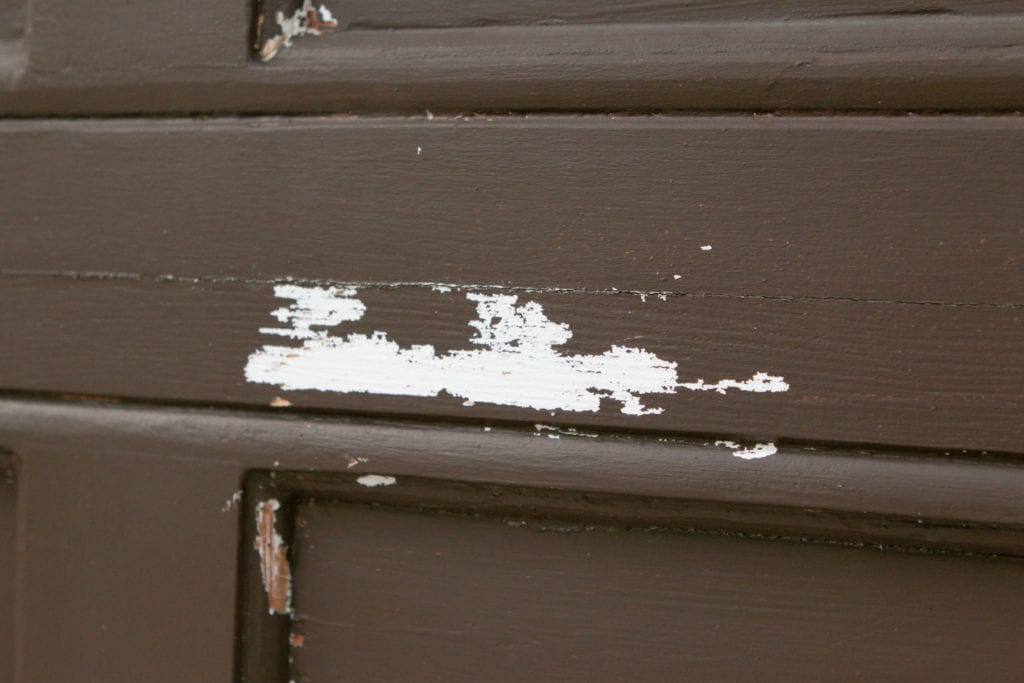
One mistake I made is that I power washed a little too close to the door and chipped off some of the existing paint. Just power washing all of the heavy dirt/dust off the door is plenty. You don’t have to go so close that paint starts chipping off.
But if you accidentally do (like I did), go ahead and take a scraper to these sections and scrape off the excess paint. Once you have a smooth surface, you can leave it alone and move on to the next step!
Paint


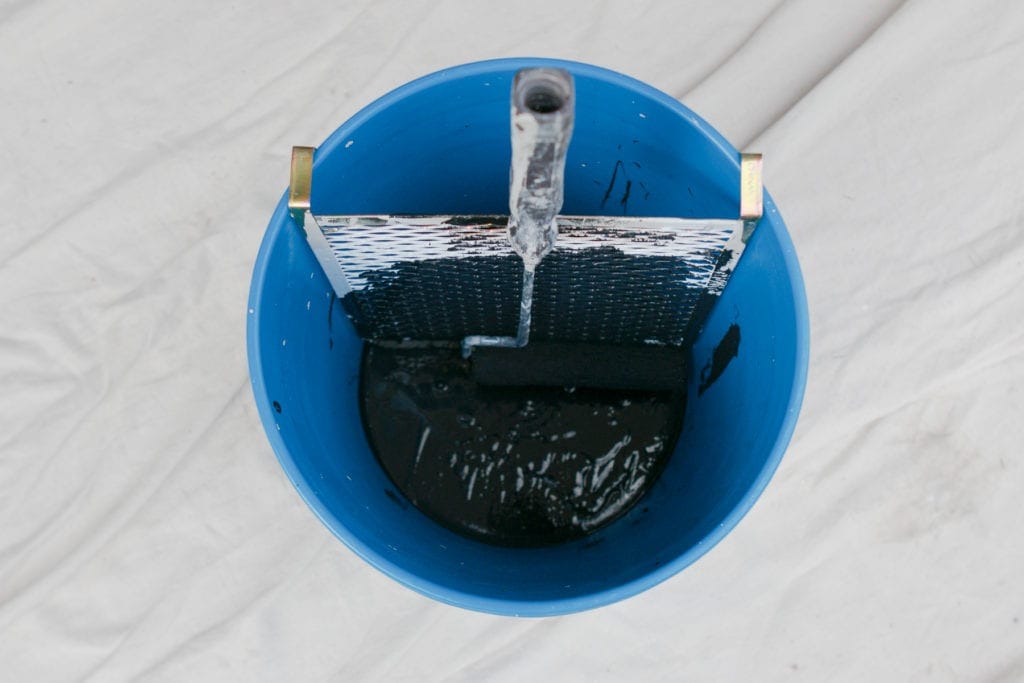
It’s important that you use exterior paint for this project. I went with Sherwin Williams Tricorn Black, the same color we used on the mudroom doors. You also want to make sure you have a paint brush on hand and a roller (with a rolling pan). You’ll use both of these tools throughout the project.
Step One: Painter’s Tape
I personally skipped this step (which is why I don’t have any photos), solely because my dad was with me. He’s a professional, so he can cut in without taping. However, if I was tackling this project solo, I would DEFINITELY tape around the garage door so the black paint wouldn’t get on the cream siding or brick.
Step Two: Paint Each Square With a Brush

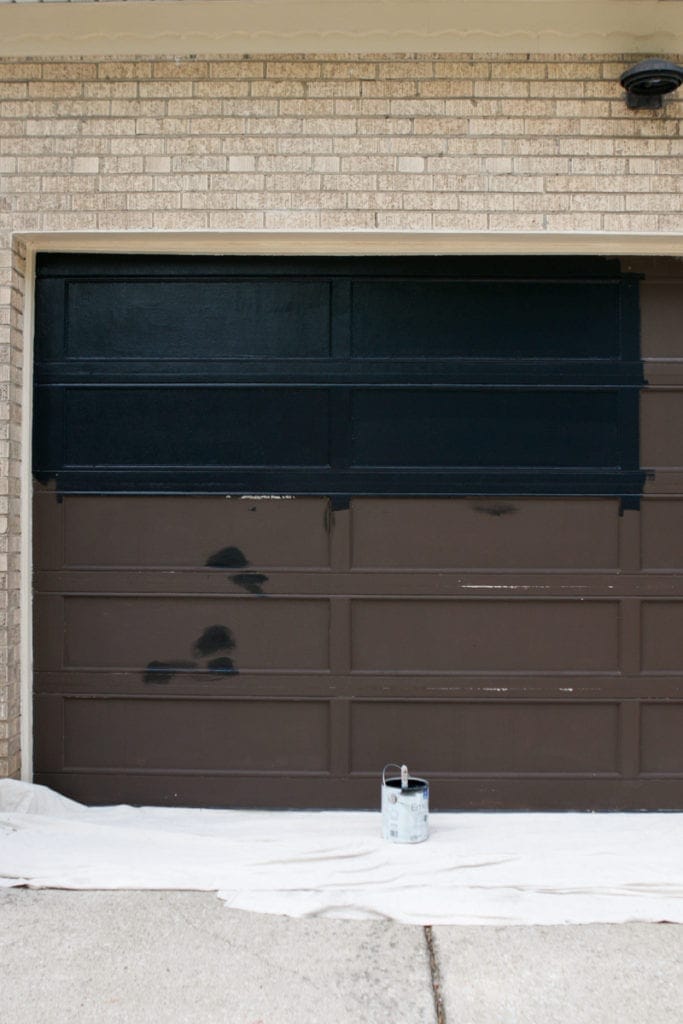
It was a hot day outside when we tackled the garage door, so we painted section by section so that the paint on the border of each “box” didn’t dry before it was time to roll the middle of that “box”. Going square by square also helped me figure out which squares had been painted with a second coat and which still needed one.
After we brushed the border (so that the paint covered the nooks and crannies of the border), we rolled the inside of that box. 
If you have a more flat garage door, you can probably roll the entire thing after you cut in the border. Mine is obviously not flat, so I opted for the brush and roller combo in each section.
Like I said, we worked box by box…
… until the entire thing had TWO coats on it.
Tip: Your garage may not need two coats, ours covered pretty well after the first one. But since there were a few spots that needed a bit more paint, we decided to give the entire thing another coat for full coverage. And by the time we were done with the first coat, the place where we had started painting was already dry. We were able to start at the top right away. Both coats took about an hour or hour an a half TOTAL.
Painting The Inside
…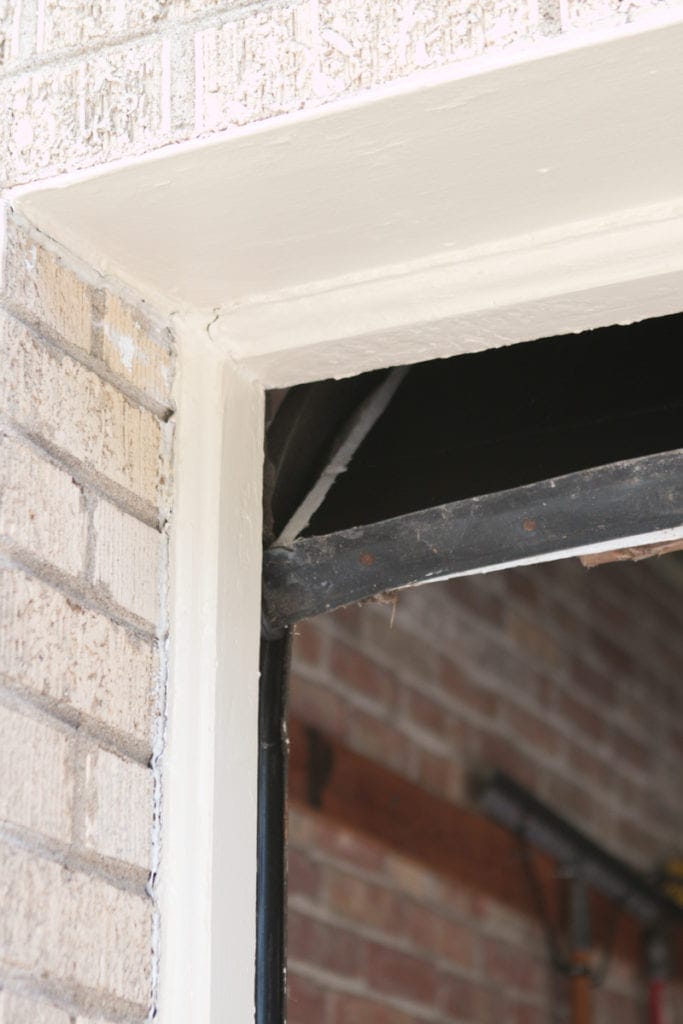
This picture is extremely close-up so it may be hard to tell. But this picture shows our garage door open. You see that tiny strip of white? That’s the door’s original color and as you can tell, the people who painted it brown never painted this section of the garage. It’s not necessary to paint it but it does ensure that when you close your garage, the color will fully cover it.
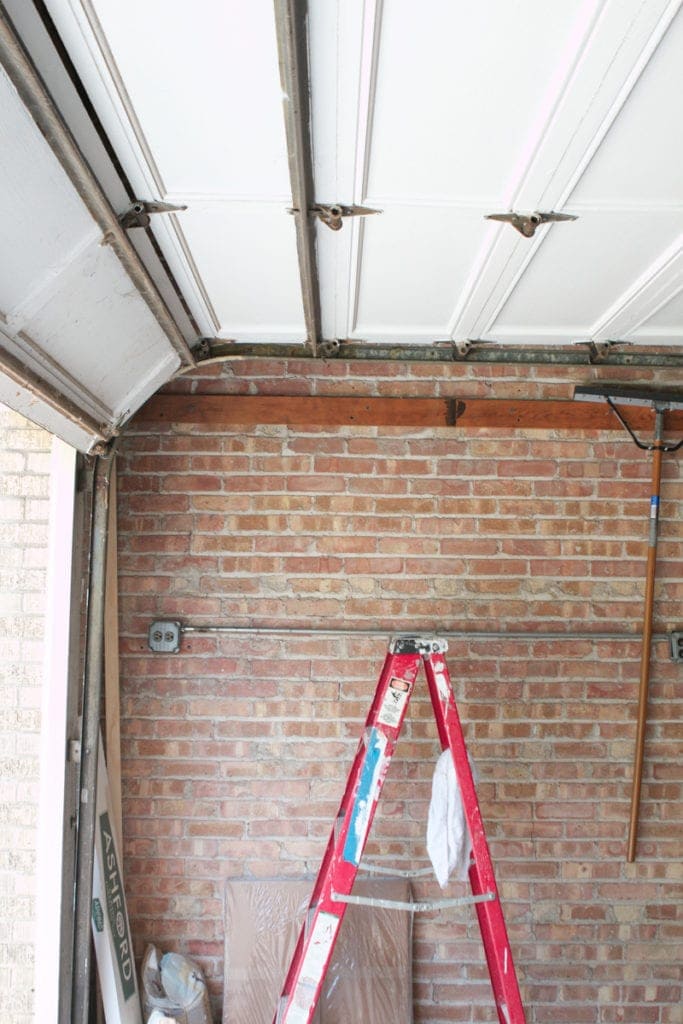
The good news is that this step only takes a few extra minutes. Honestly, the hardest part was the awkward position your body needs to be in to paint up there in such tight quarters. 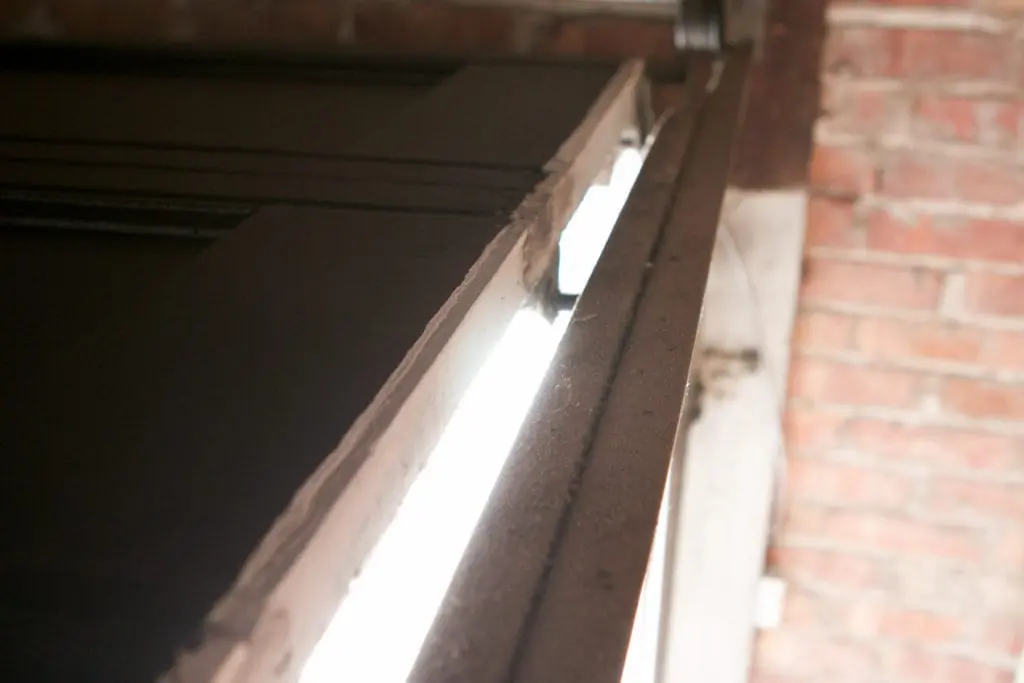
Here’s another shot of me on the ladder looking at the painted garage. I simply wiped off the dust (gross!) and then took my roller and painted that strip of white. Again, not necessarily a mandatory step, but one you may want to consider.
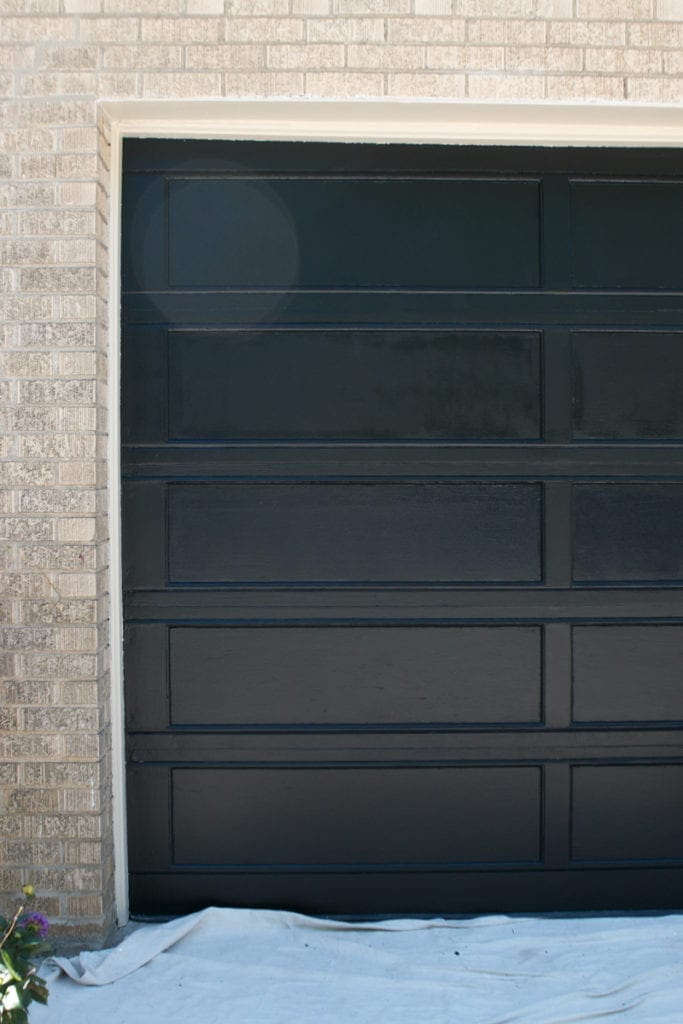
I let that dry for a bit and when I closed the garage, ta-dah! A new and improved look that completely transformed our curb appeal.
You Can Do This!
This project was way easier and less time-consuming than I ever could have imagined. It was similar to painting a wall. Before you dive in, which I know you will because you can totally do this, here are a few last-minute tips.
More Tips to Paint a Garage Door
- We used a satin finish. I figured a flat would be too hard to maintain/clean and I didn’t want the finish to be super shiny, like semi-gloss. Satin seemed like a happy medium.
- Make sure to use exterior paint so it will hold up to the elements.
- I chose not to paint in between the cracks of the door (like when it opens) and I’m happy I didn’t because that would have been a lot more time-intensive for very little reward.
- Make sure the weather is conducive for outdoor painting before tackling this project. You don’t want it to be super hot and you don’t want any rain in the forecast that day.
- We had an old (but tiny) handle on the garage door. I chose to paint over it because it was in such bad shape. But feel free to tape off these items before painting, especially if they’re in good shape!
I hope these last-minute tips help! Good luck and happy painting!
Bridget


