How to Plan a Small Bathroom Remodel
Disclaimer: This post is sponsored by Lowe’s Home Improvement. All opinions and photography are our own and are not influenced by Lowe’s Home Improvement. Thanks for supporting the brands that support this blog.
Well, guys, the time is FINALLY here! We are tackling our guest bathroom renovation. This has been on our home to-do list for far too long, and I’m thrilled to get this project underway, and more importantly, have a good lookin’ guest bathroom space! I’ve talked about gutting our bathroom since we moved in, and so many of you mentioned that when that time came, you wanted a complete breakdown of the entire space.
So here’s the plan. I’m going to share a bathroom post on the blog every single Tuesday from now until that space is 100% complete! That way you can get a step-by-step look at what actually goes into remodeling a bathroom. Of course, it’s always satisfying to see a dramatic before & after…but if you actually want to DIY your own bathroom you need all of the scoop on the in-between. That’s what I hope to provide you with our small bathroom remodel.
I’ve Never Done This Before…
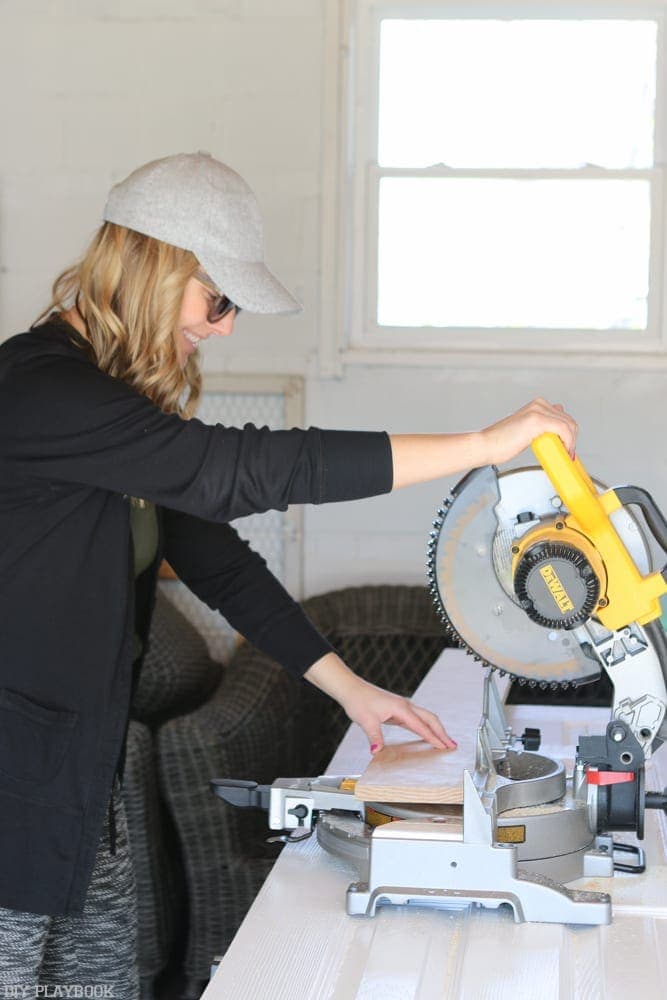
But here’s the thing, I’ve never tackled a bathroom before! Sure, Bridget & I have tiled, we’ve installed a toilet, we’ve installed faucets & light fixtures…but we’ve never done all of those projects all at once. Until now.
So I want you guys to remember that if I can do this…anyone can do this! I’m not a professional contractor and I don’t have a handy husband or dad doing a majority of this work. Instead, it’s just me, Finn, & Bridget figuring this out as we go!
Now that we’ve gotten that out of the way, let’s take a look at the space we’re working with…
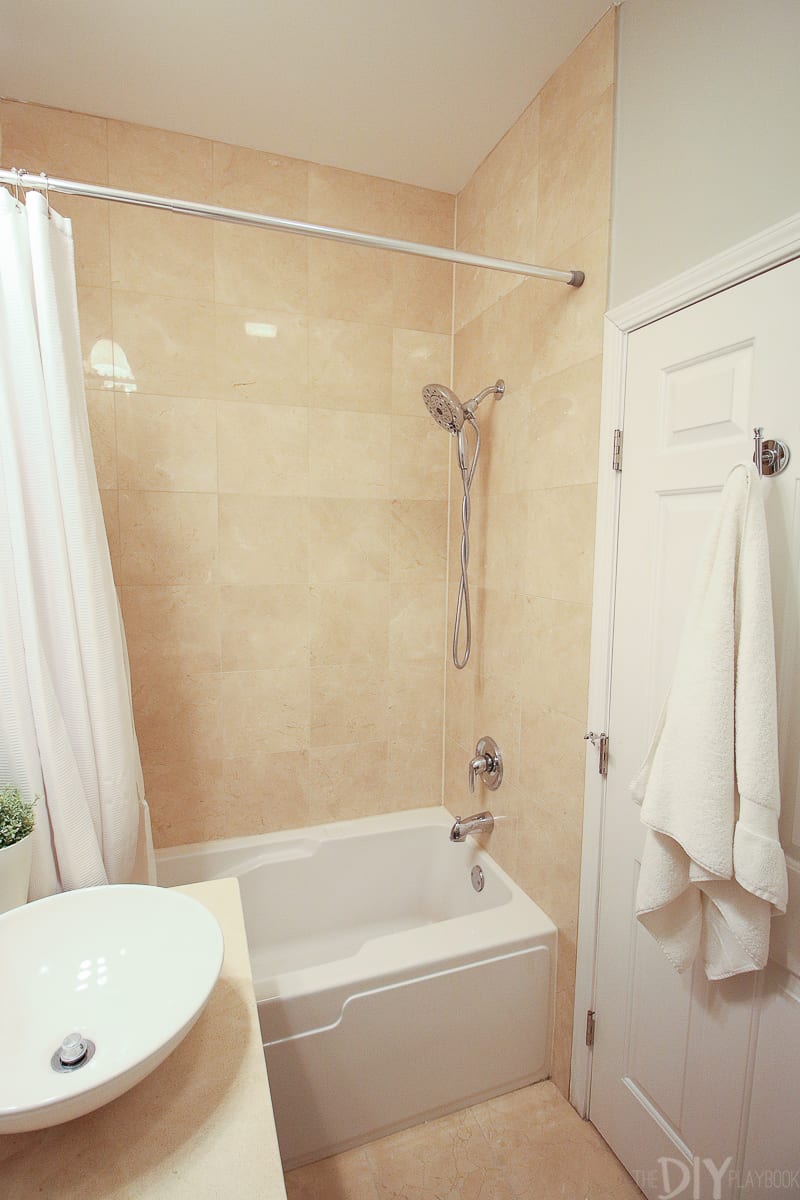
The Before Photos
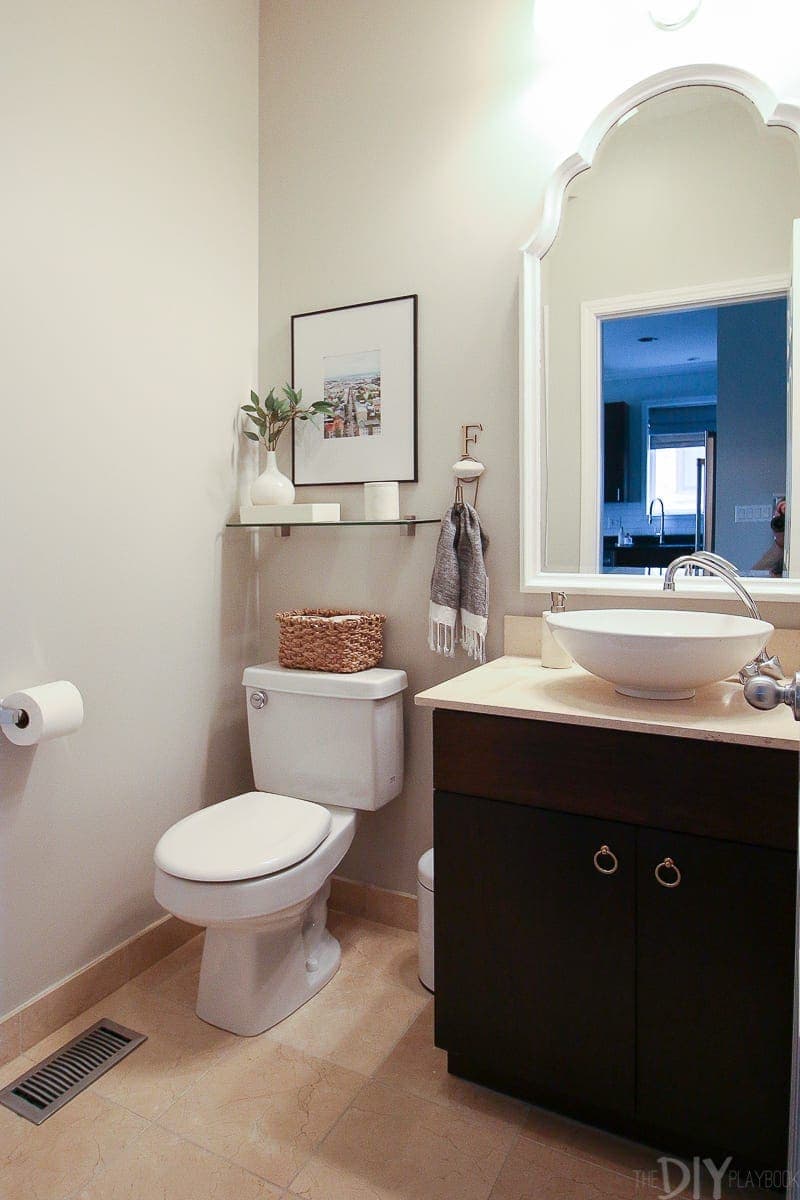
It isn’t the largest bathroom in the world, but it does have a toilet, vanity, and tub-shower combo. I’ve made the most of what we’ve had for the past 3 years, but it’s finally time to really make it our style! I’m not gonna lie, I rarely even use this bathroom. Finn takes his showers and stashes all of his toiletries in the vanity in here. Most of the time we have our shower curtain closed, which makes the room seem a lot smaller than it really is. The problem is the vanity bumps up directly next to the tub (what is that about?!), so the shower curtain gets stuck in the gap every.single.time. Ugh.
I’m eager to get rid of some of those daily annoyances, and overall just make this space look a lot better!
How to Plan a Small Bathroom Remodel
It’s easy to say that you want to renovate a space, but taking that first step is a little scary. And that’s probably why I’ve been putting this off for so long! Where do you even begin?! Like any big project, you start slowly by making a plan.
Make a Wish List
Finn and I spent some time looking at our small bathroom together. We discussed what we wanted to change in the space and our goals for the final look. It’s so important to get on the same page from the start, so if you’re about to take on a large project, don’t skip this conversation with the other members of your household!
Here’s what we decided we wanted to come out of our small bathroom remodel…
- Get rid of beige look and make the space brighter
- Remove tub and change to standing shower
- Add niche in shower for toiletries
- Use sliding glass door to make room appear bigger
- An overall feeling of cleaner, whiter, & brighter!
- Maximize every square inch of space to keep it functional
- Swap out vanity to one without a bowl sink (so annoying to clean!) and one with more storage
- Replace toilet, mirror, lighting, and all tile in the room
Figure out the Floor Plan
Because this space is so small, I wasn’t sure if we could change the floor plan of the room. Not to mention, moving plumbing and electrical can be costly and I wanted to avoid that as much as possible. But I’m not a professional and I didn’t know if our current layout of the toilet, vanity, and shower was the best use of this small space. So, I decided to hire a professional to help me with the floor plan.
I actually found her after reading this post from our friends Kim & Scott. They used a local designer here in Chicago to help them create blueprints and a floor plan when they renovated a portion of their house. I reached out to the same designer and hired her to help with our project.
While a designer can help with sourcing items and figuring out the look of the space, we only hired ours to look at the flow and floor plan and create renderings of the space. This cost us about $400, but it was worth every penny! After sending her a few photos and measurements, she provided me with these drawings of our bathroom…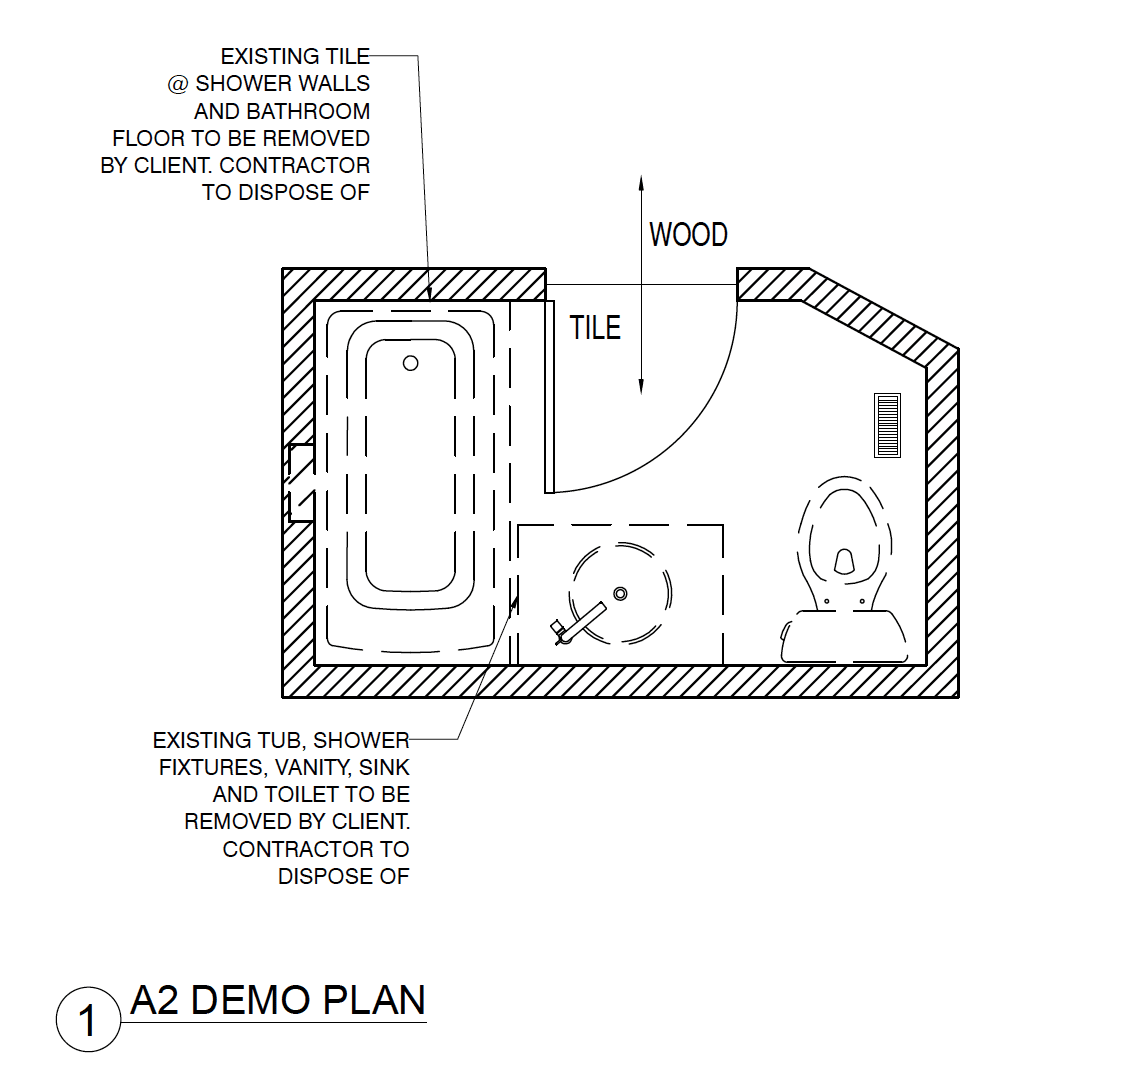
Here’s the existing layout of the space, along with notes to the contractor on what we would need him to do vs. what we planned to do ourselves. Here’s the gameplan for what we want…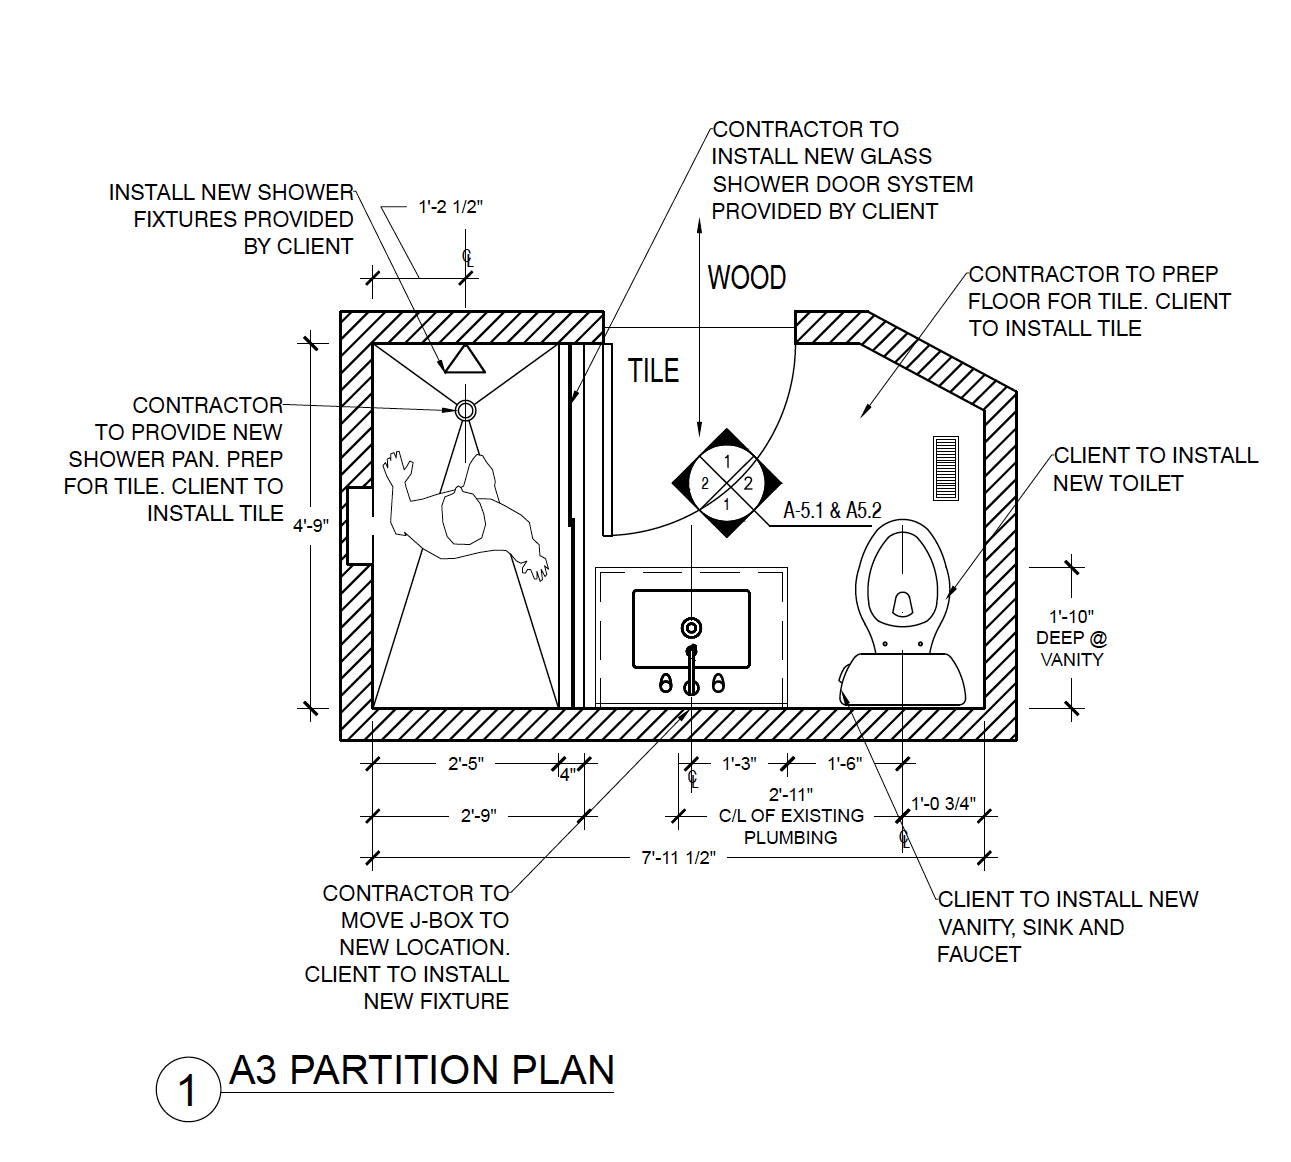
The designer ensured us that our current layout was the only functional layout for the space, but that it was indeed possible to change the tub to a standing shower. She also suggested moving the light fixture and vanity a few inches over to the left to make the shower as large as possible. The renders also included exact measurements for the contractor on where to move the plumbing and fixtures when they go in to do the work.
I also gave her a list of the products I was considering and she was able to ensure that my picks would fit in the space. I’ll share those renderings next week when we chat about the products and mood board for the room.
Flex your DIY Muscle
Now that I had a design plan all ready to go, it was time to make a gameplan for the actual work. I’m using this project as a chance to improve my DIY skills and learn a few new things along the way, so I wanted to DIY as much as possible. Here’s what we’re planning to do ourselves.
- Demo Entire Bathroom
- Tile Floors, Walls, and Shower
- Install Vanity
- Install Toilet
- Install Faucet
- Hang Mirror
- Install New Light Fixture
- Paint Entire Space & Ceiling
You can check out this post for more tips on when to DIY vs hire out a project. Ultimately, you want to stay safe and leave some of the bigger jobs to the professionals, while also challenging yourself and learning new skills!
Finding a Contractor
While we are taking on a ton of the projects ourselves, there are still a few items where we’ll need a professional to come in. The designer provided me with a few recommendations for local contractors and I called and setup consultations with each one.
This post outlines some amazing tips for working with contractors. It can be tricky to find the right one for you, so I highly recommend taking the time to meet them in person and review the project together. I went with someone who was very encouraging about us doing a majority of the work ourselves, who was very responsive with calls and emails, and who had availability to come in and get the job done!
Know What to Hire Out
Advanced plumbing and electrical work are skills that we certainly do not possess. So it was a no-brainer to hire out some of those really big tasks. At the end of the day, I want a bathroom that looks nice…but it must also be a safe place! The last thing you want to do is renovate a bathroom and then have a leak or an electrical problem. Knowing that, we made a to-do list for our contractor.
- Dispose of Old Items (i.e. tile, toilet, vanity, etc)
- Move Plumbing for Shower Head, Handle, and Drain
- Install Shower Pan
- Move Electrical Box
- Install Cement Boards in Shower
- Create Shower Niche for Toiletries
- Prep Floor for Tile
- Install Glass Shower Doors
And just to keep things completely transparent, the contractor estimates $3300 for the project. Which I think is well worth it to have some of these advanced projects done correctly and safely.
Make a Schedule

The final (& most important!) step is to actually schedule this sucker. I feel like I’ve been chatting about this bathroom renovation forever, but it wasn’t actually going to happen until I sat down and put it on our calendars. Finn and I looked at the month of May and realized we didn’t have a whole lot happening for the month. Right then and there we reserved every single weekend to devote to working on the bathroom. I made google calendar invites for each step (2 days for demo, 5 days for tiling, etc) and put it on both of our calendars.
I also chatted with the contractor to check out his availability and to get an idea of how many days his portion of the work would take. With this all mapped out, we now had an actual start date for our small bathroom remodel. Yikes!!
With the layout chosen, the tasks distributed, and the schedule set, it was time to order product! I’ll go into detail on that process next week and also show you our design plans for the space. Let’s just say that we will officially be saying bye, bye to the beige and hello, to classic black & white!
Casey
Catch Up on the Bathroom Renovation
- Bathroom Planning
- Bathroom Mood Board
- Our Demo Weekend
- Bathroom Progress Report
- Tiling the Floor
- Adding Subway Tile
- Choosing a Dark Gray Paint Color
- Painting the Bathroom
- How to Install a Vanity
- How to Hang a Mirror
- Bathroom Renovation – Reveal
- Storage Solutions for Small Bathroom
- What We Learned Renovating Ourselves