How To Add Board And Batten To A Blank Hallway
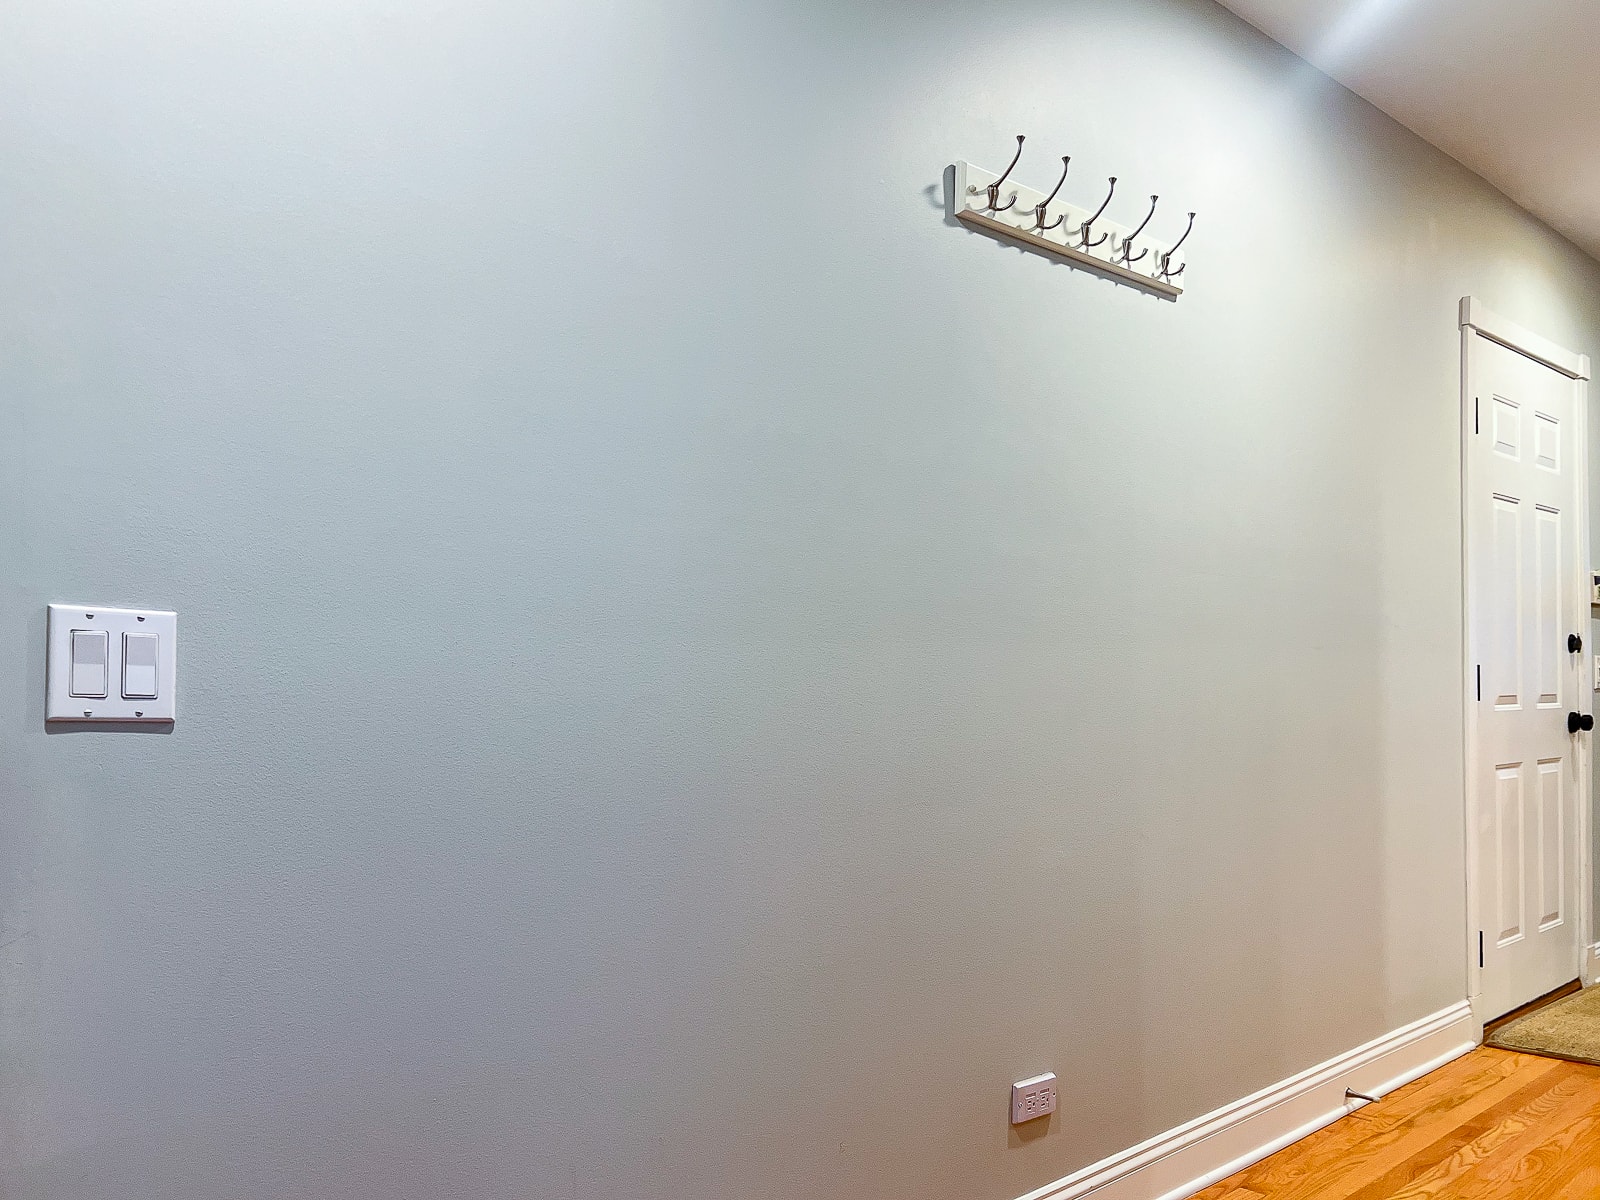
A few weeks ago, I introduced you to my sister, Liz, and her small blank entryway. Well, the time has come to finally give this hallway some TLC with a board and batten wall DIY project!
As I mentioned in this blog post, Liz is a total newbie when it comes to home improvement projects. I’m usually the one heading over to her house to hang a mirror or fix something. I thought this project would be a fun opportunity to spend some time together doing something new. Plus, I promised that I would teach her a few things along the way. We set a date and geared up for our first day of this project.
Find Your Wood

The first step is to get the wood for this project. I knew I wanted a thicker board for my top horizontal board and thinner pieces of lattice for the vertical battens. I ended up sourcing this from 84 Lumber. They have tons of stores nationwide and specialize in building materials.
In the past, I’ve gone to my local hardware store to get woodworking supplies, but they don’t always have exactly what I need in stock. Plus, you have to use their tiny handsaw to cut down the 16-foot boards in-store. It takes forever!
I went into 84 Lumber and showed their manager, Tedra, – she was a sweetheart – the project I was working on and she helped me find the right wood for the project. They even have a miter saw right on hand and will cut down the pieces for you to fit in your car! They also offer delivery services if your boards are super long. I’ve had so many instances where I’ve bought tons of lumber and then can’t fit it in our SUV, so I’ll definitely be using them again!
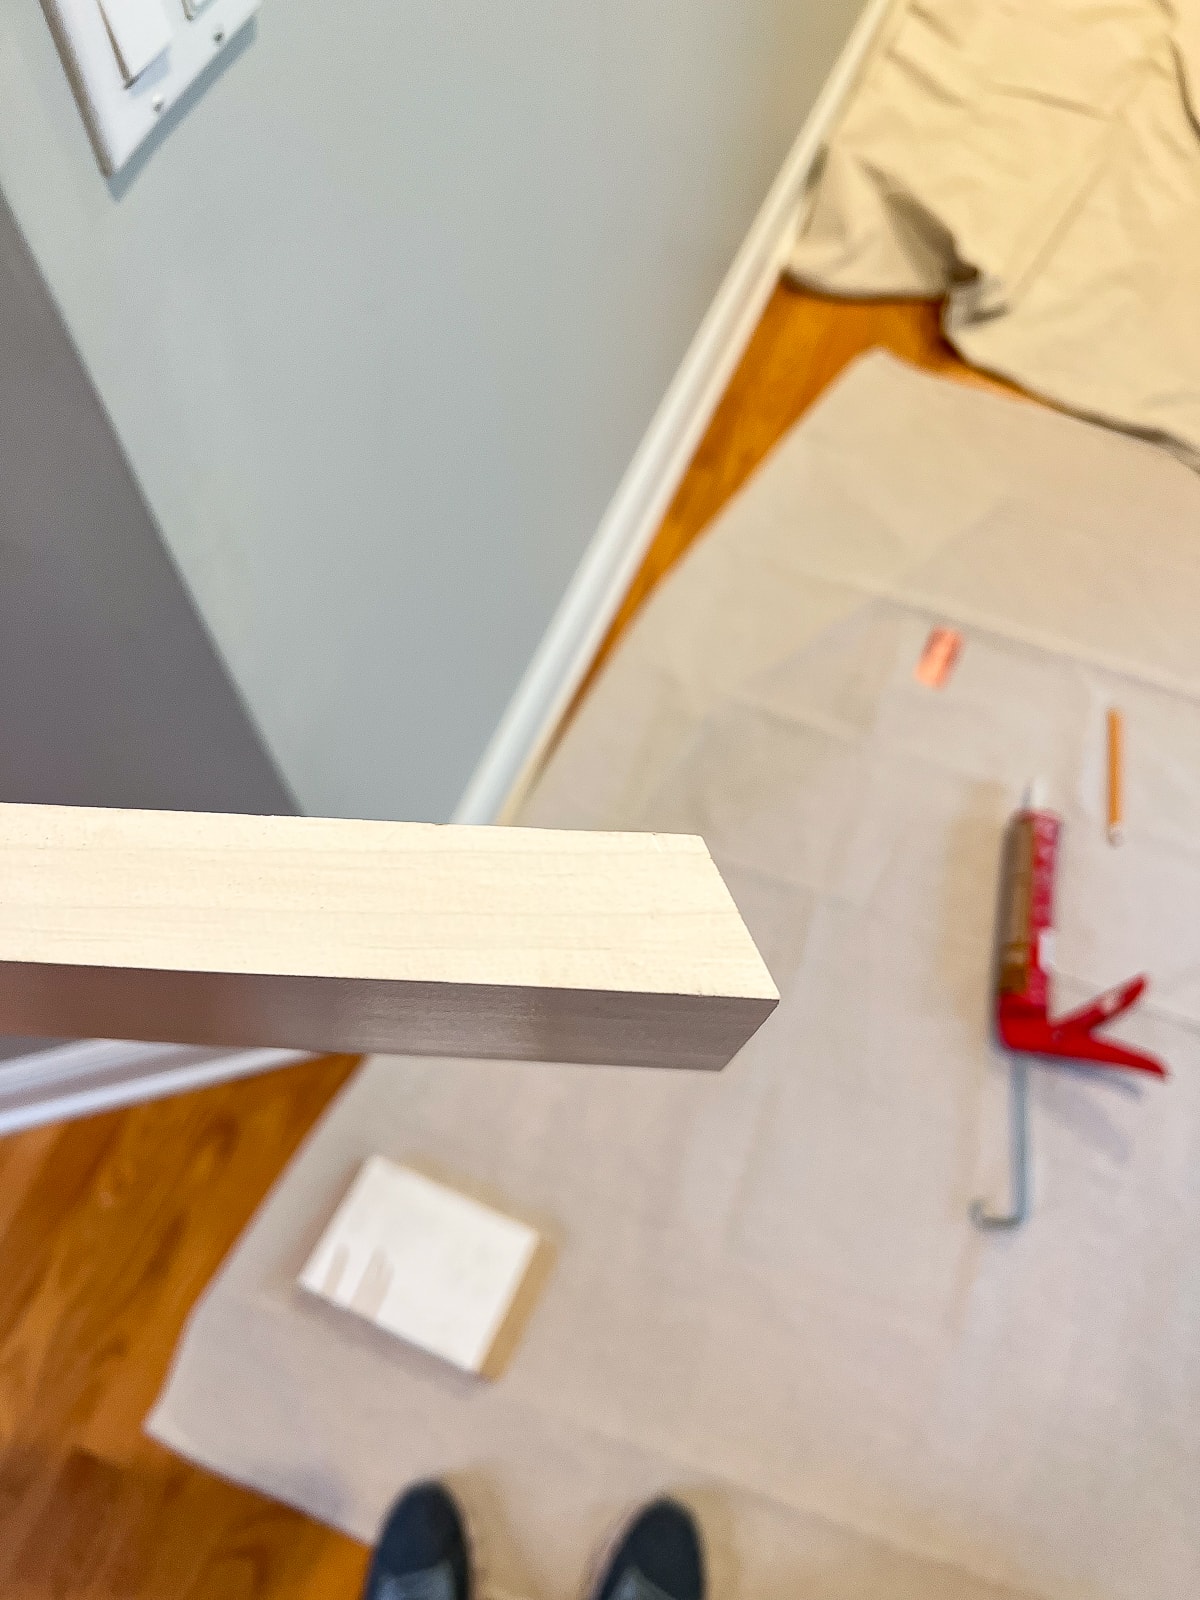
I ended up getting this 5 1/2-inch primed pine and this 2-inch pine lattice.
What If I Have Textured Walls?
One thing to address before we get started. I often get the question about doing wood wall treatments on textured walls. I’ve never done it before because all of the walls in the homes I’ve worked on have had smooth drywall. If you have wall texture (often called orange peel), you can attach a 1/8″ panel board (like plywood or hardboard), cut to the size of the wall. These come in 4×8 sheets. Once your entire wall is covered, then you can proceed with the accent wall on your new smooth walls.
Board and Batten Wall DIY – Supplies
I’m used to doing a majority of my projects at my own home where I have all of my tools and supplies on hand. For this, I had to load up my car and make a few trips to my sister’s condo to drop off my saw, nail gun, and all of the accompanying tools and supplies for the job. Here’s everything you’ll need for this board and batten wall DIY project.
- 5 1/2 inch Pine Boards
- 2-inch Pine Lattice
- Safety Gear
- Tape Measure
- Spirit Level
- Power Drill & Bits
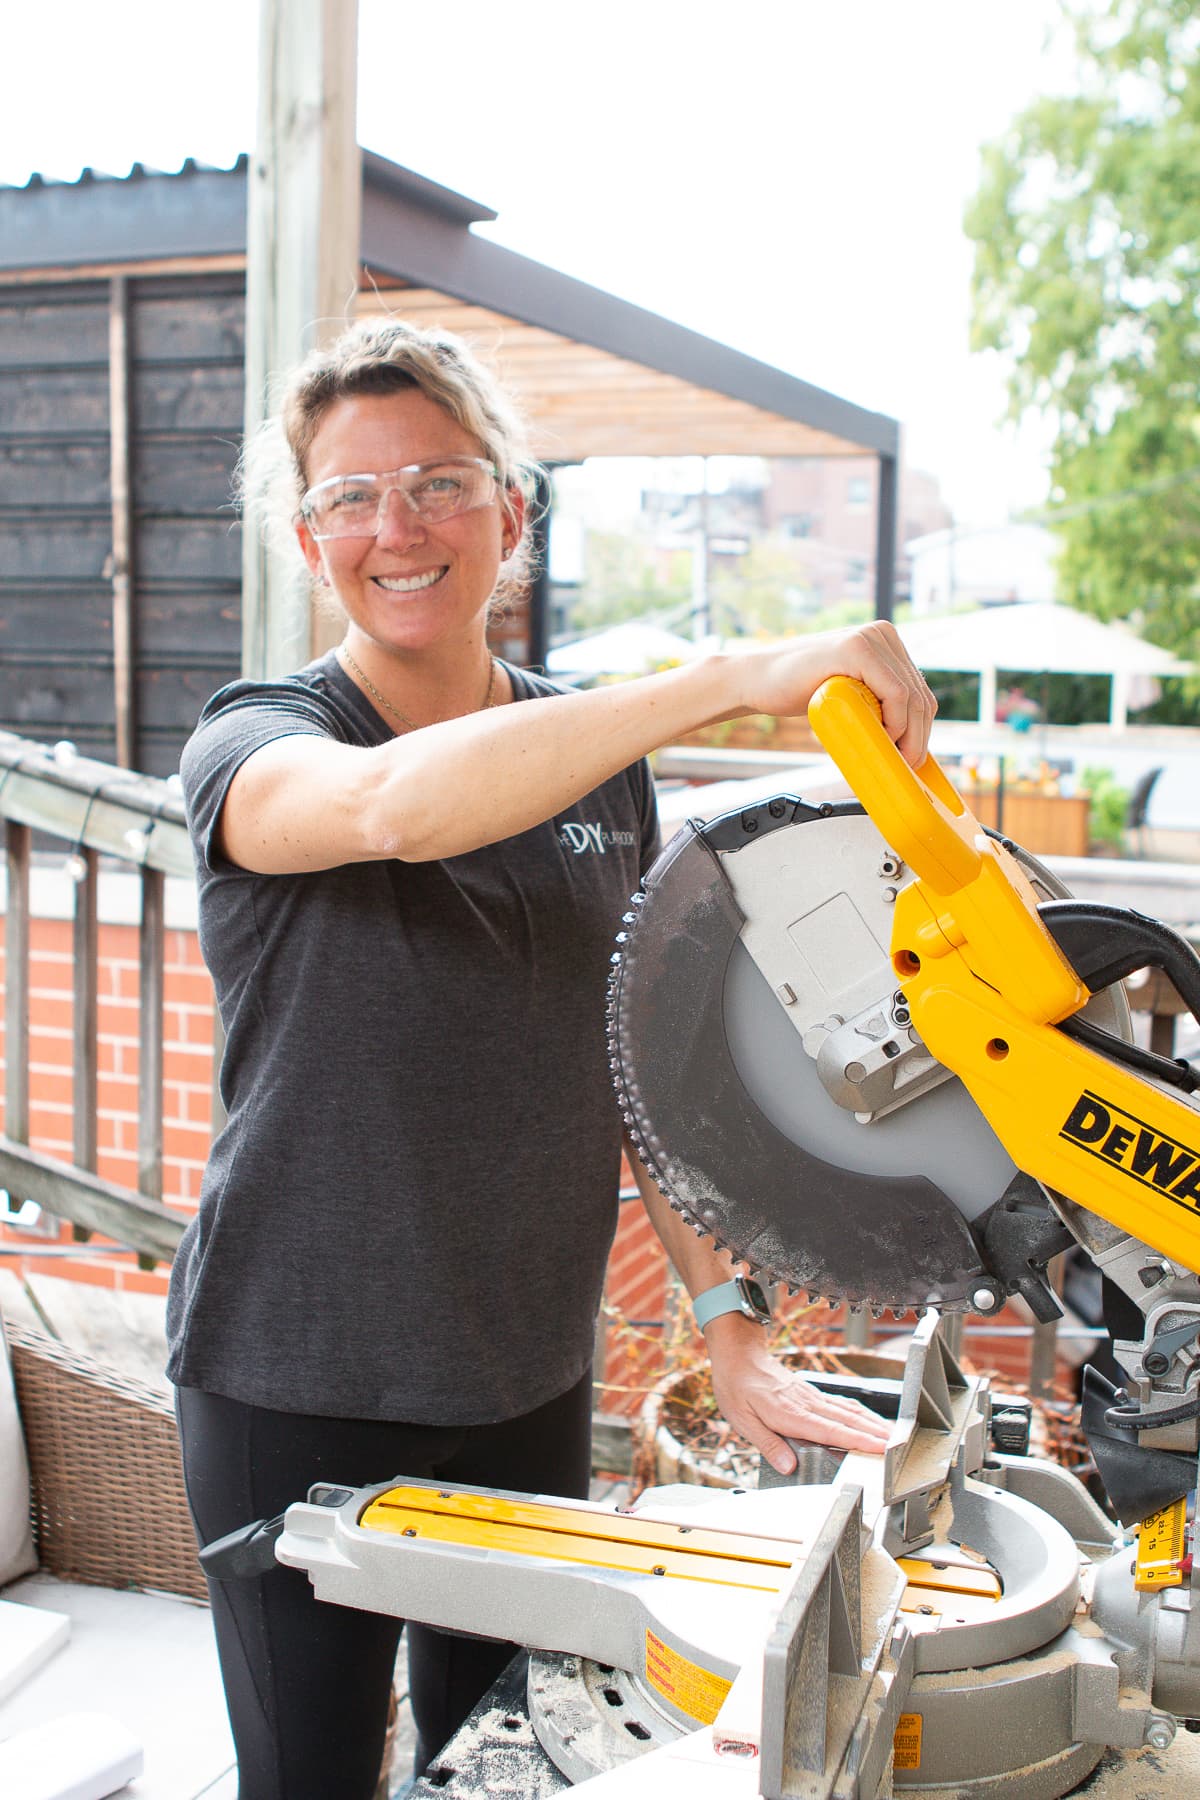
- Miter Saw & Stand
- Cordless Shop Vac
- Protractor
- Stud Finder
- Paintable Caulk (white)
- Liquid Nails
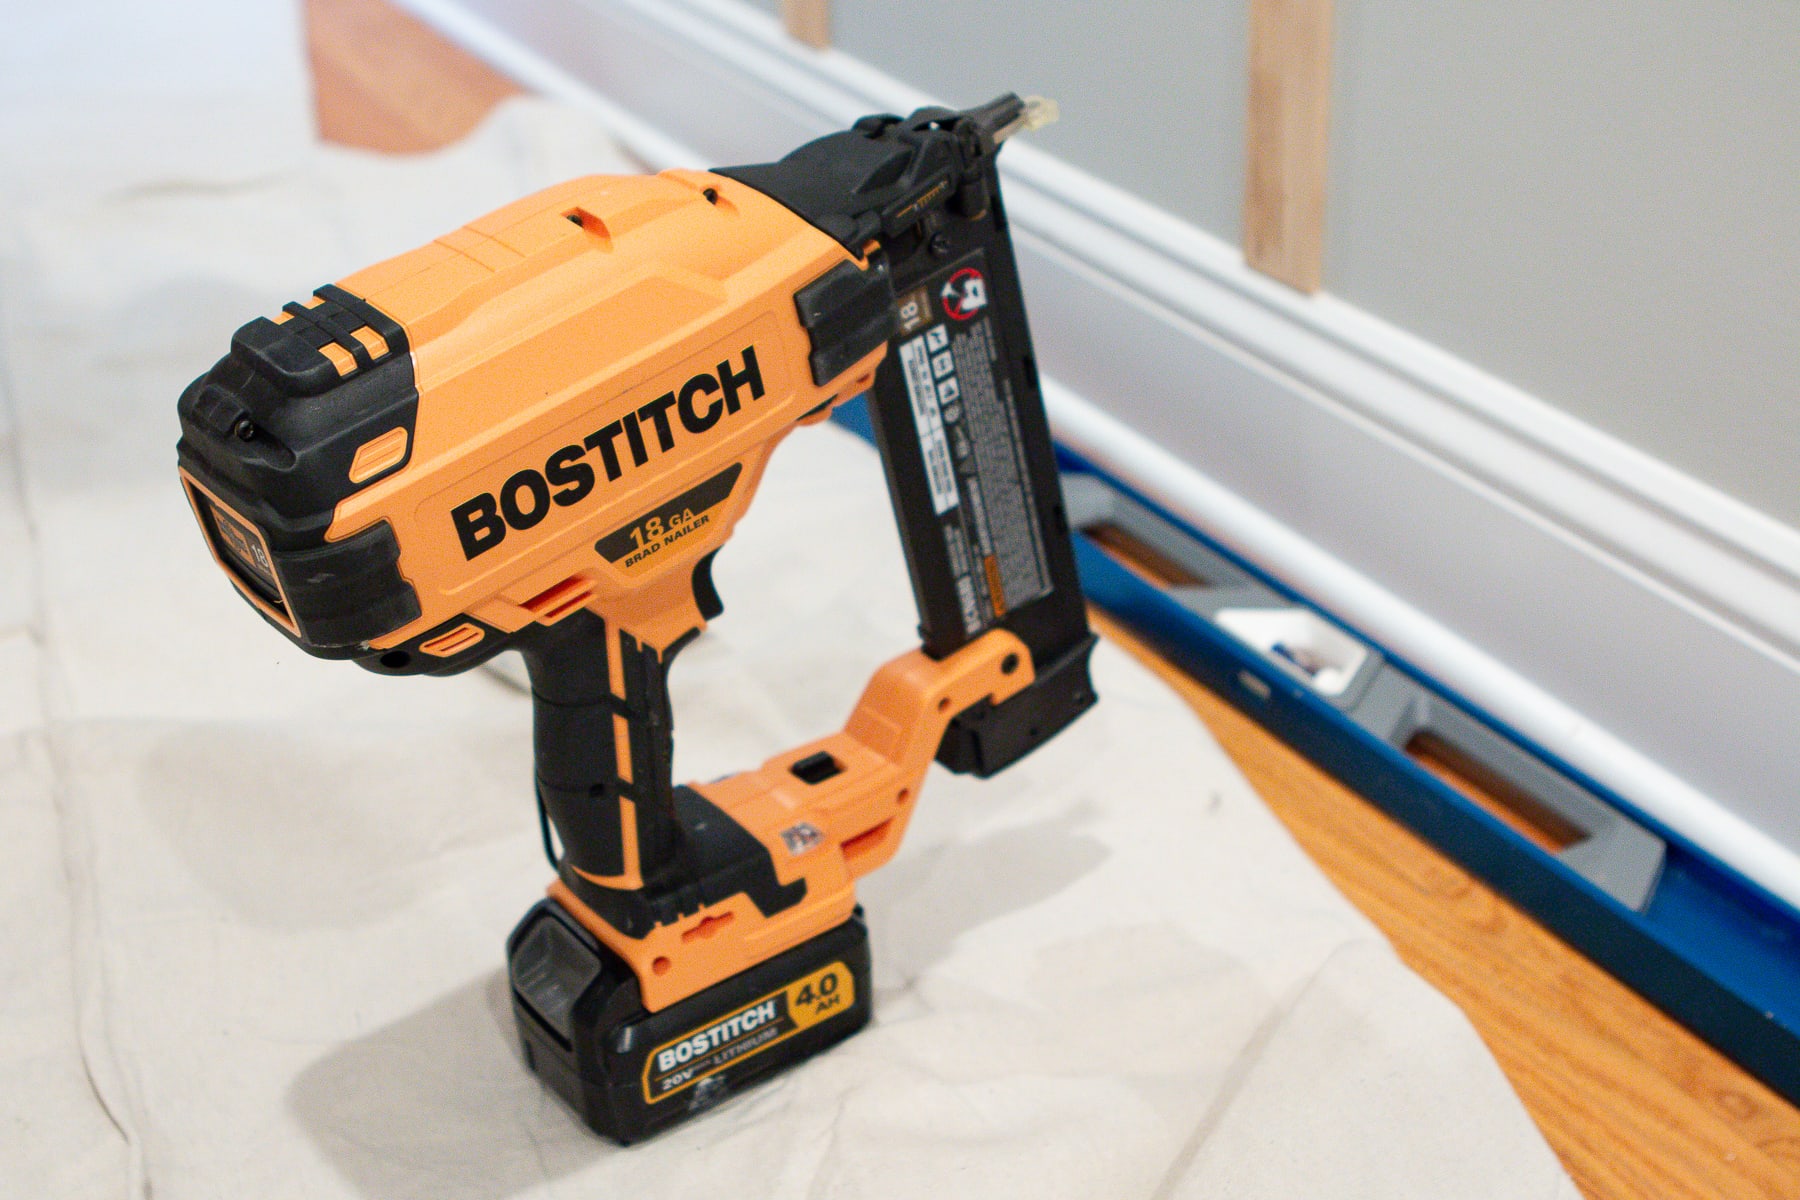
- Brad Nailer
- Brad Nails (I went with 2″)
- Caulk Gun
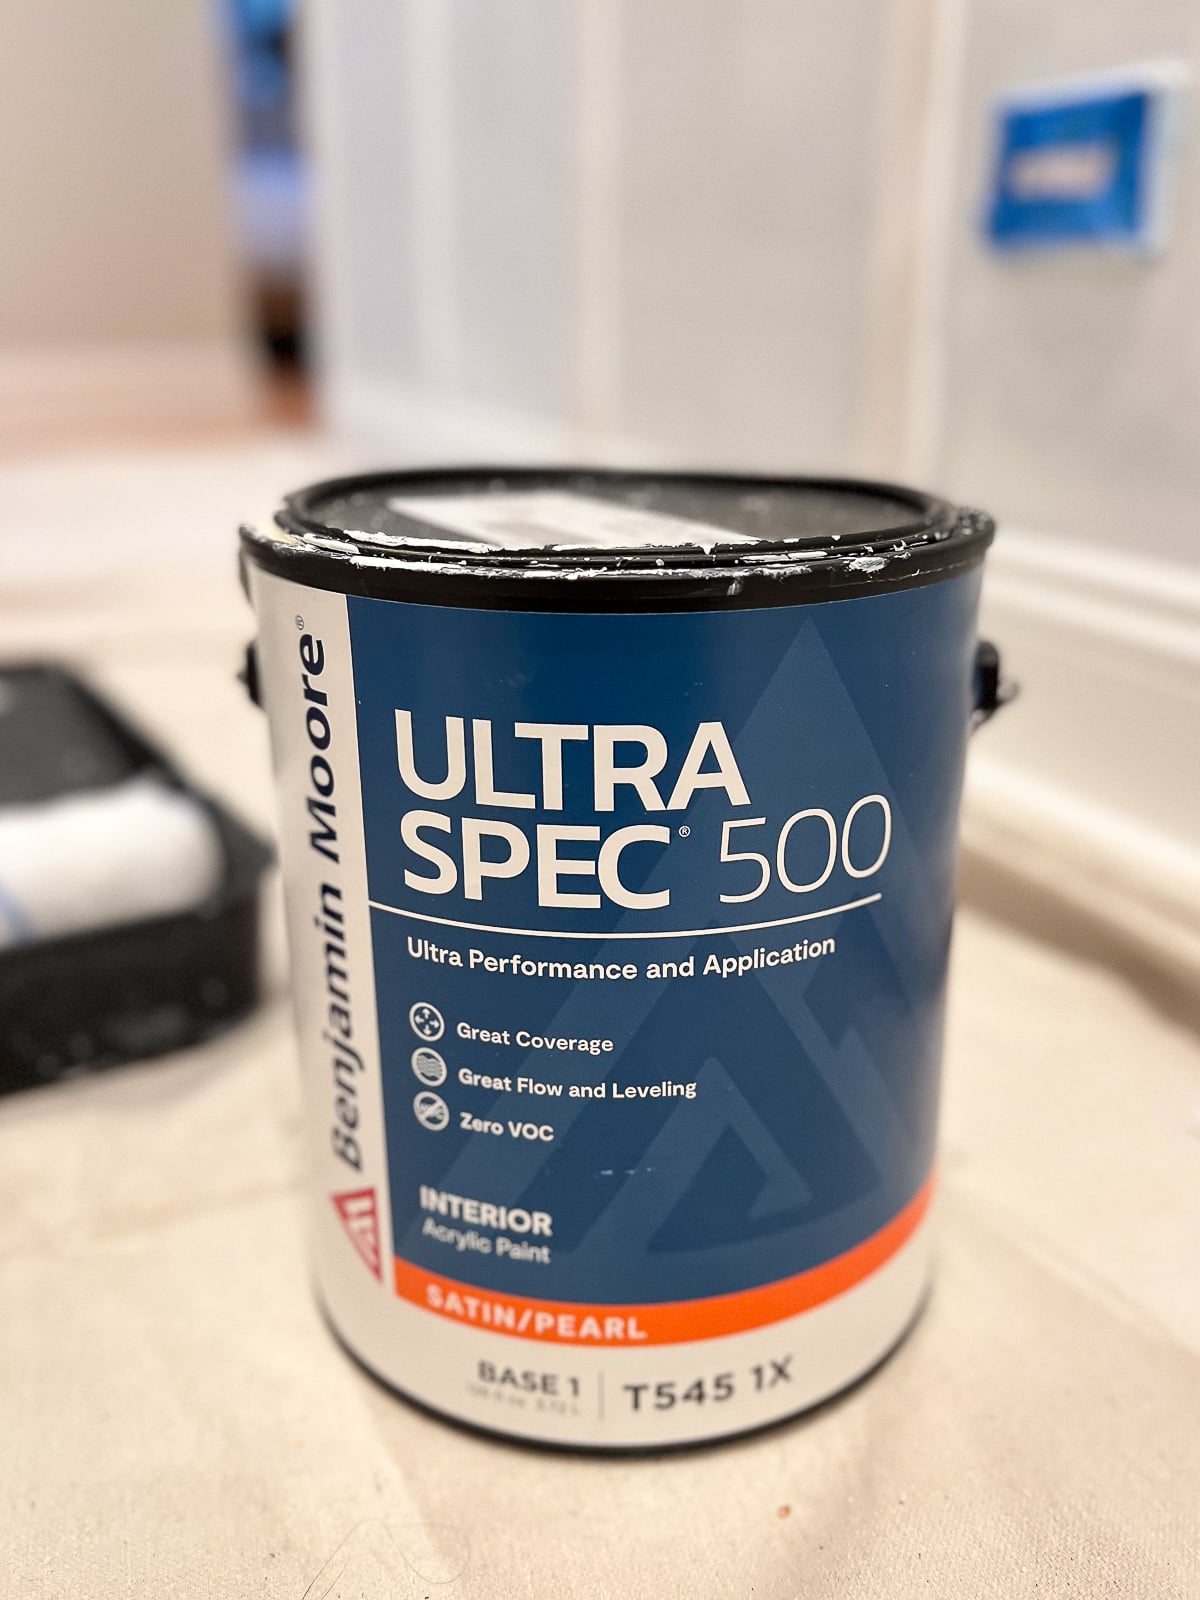
- Primer
- Painter’s Putty
- Paint (I went with Benjamin Moore’s “Simply White” in a satin finish)
- Purdy Paint Brush
- Paint Roller & Tray
- Pelican Paint Pail & Liner
- Painter’s Tape
- Drop Cloths
- Speed Square
- 5 Hooks
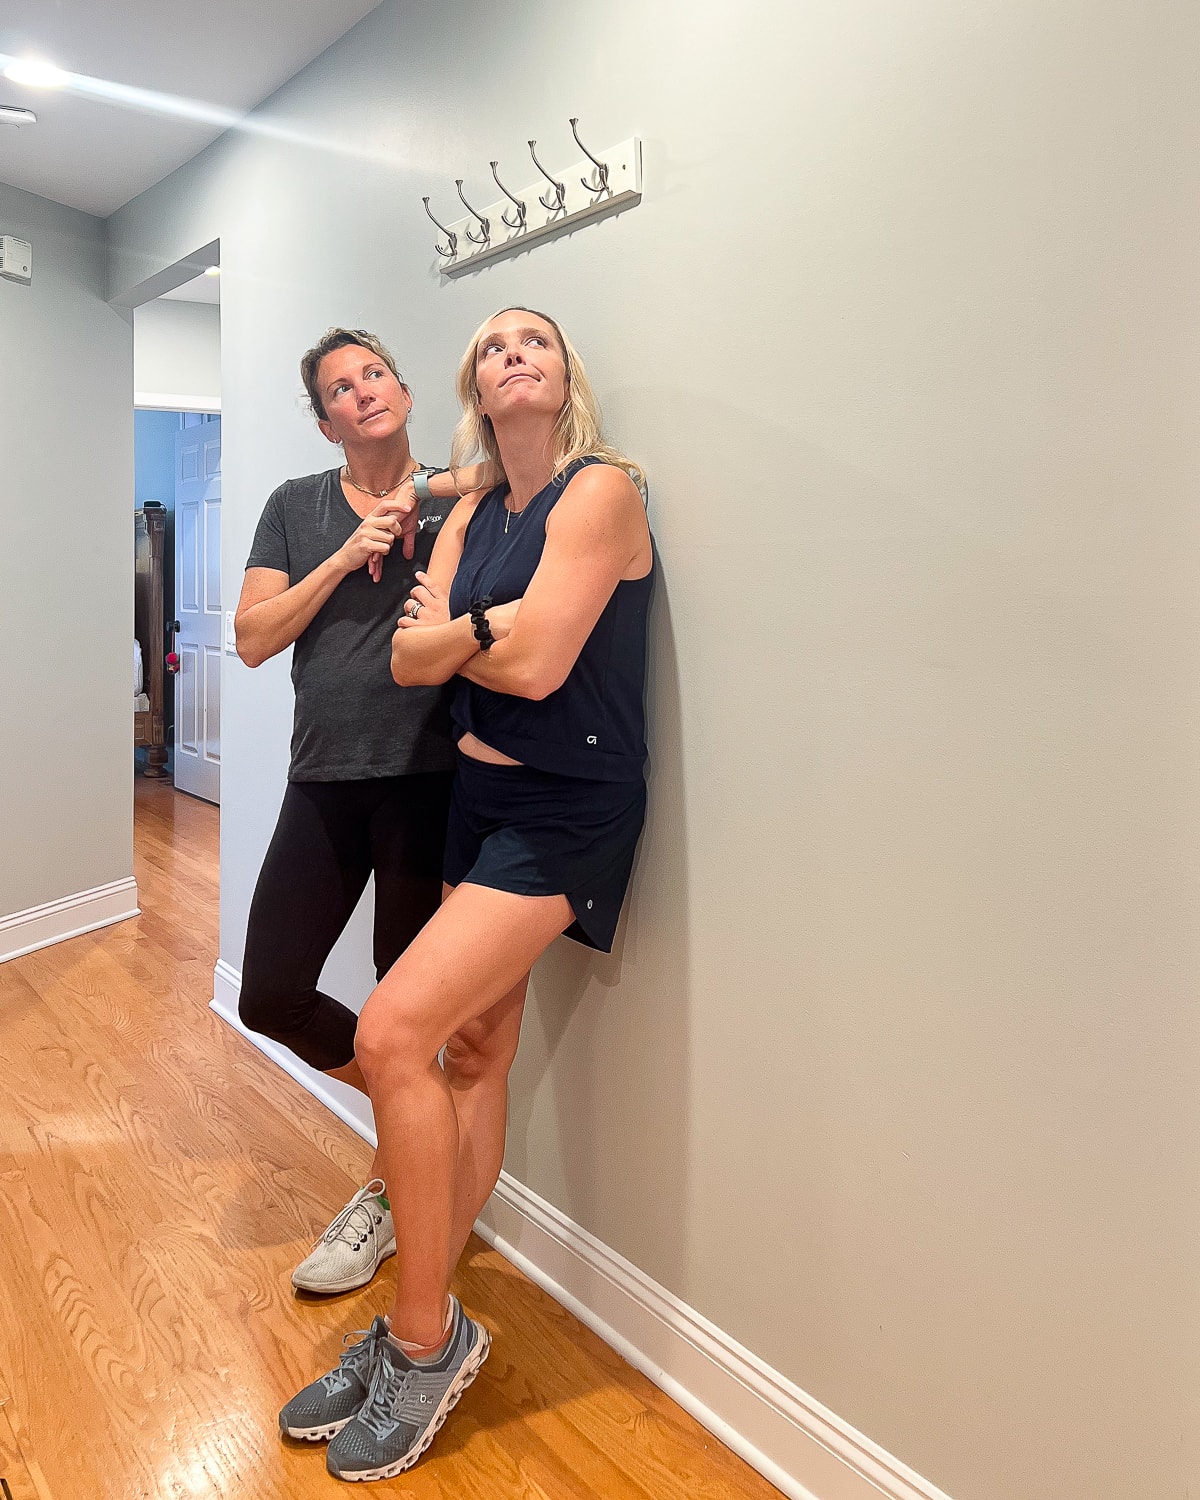
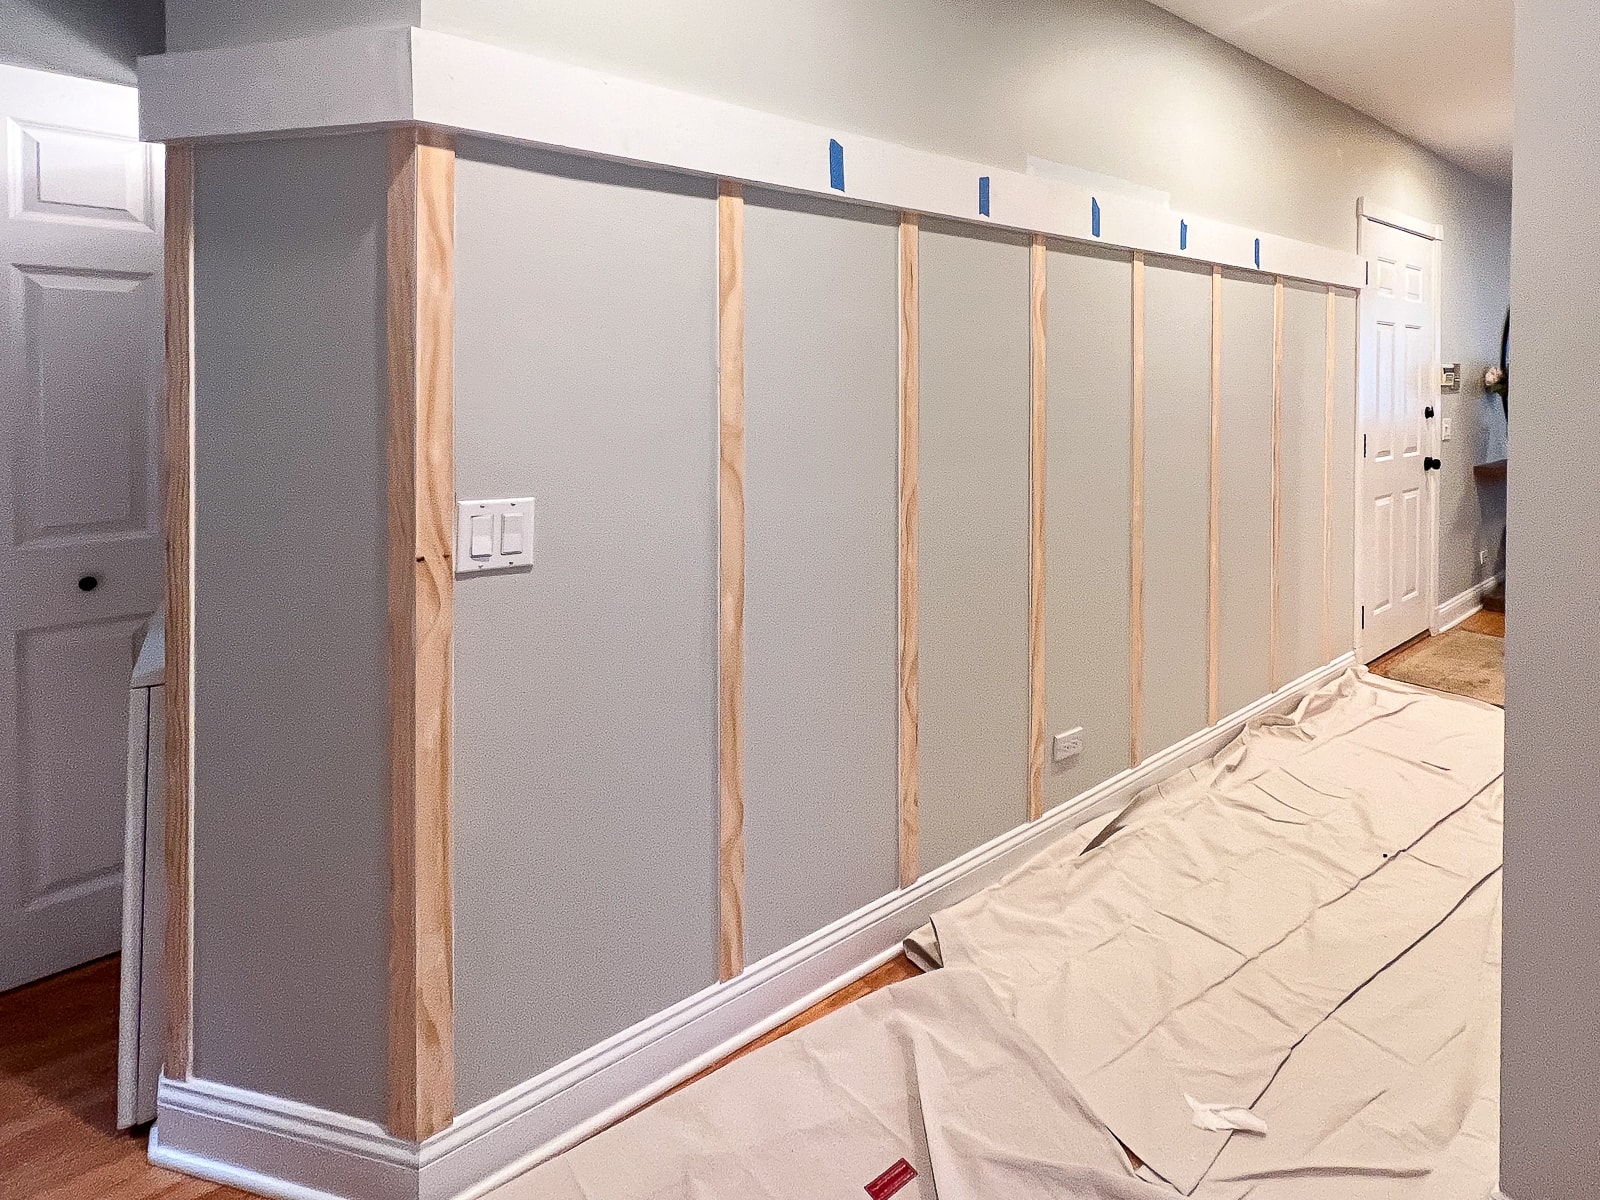
Day 1 – Get All Of The Wood Up!
Our goal for the first day of this project was to get all of the wood up and on the wall. I had high hopes for us to get it done pretty quickly, but as you’ll soon see, we did run into a few snags along the way.
Make Your Design Plan

My original vision was to re-create this hallway board and batten from our old condo. It had two horizontal pieces of MDF and vertical lattice pieces all the way across.
But once we got our thick pine boards in the space, we realized it was going to look too clunky with two horizontal boards. And since there’s no right or wrong way to do this, we scrapped the original idea and ended up going with one singular board across the top. We also decided to keep the existing baseboard and just have the vertical battens meet right up with the top of the baseboard.
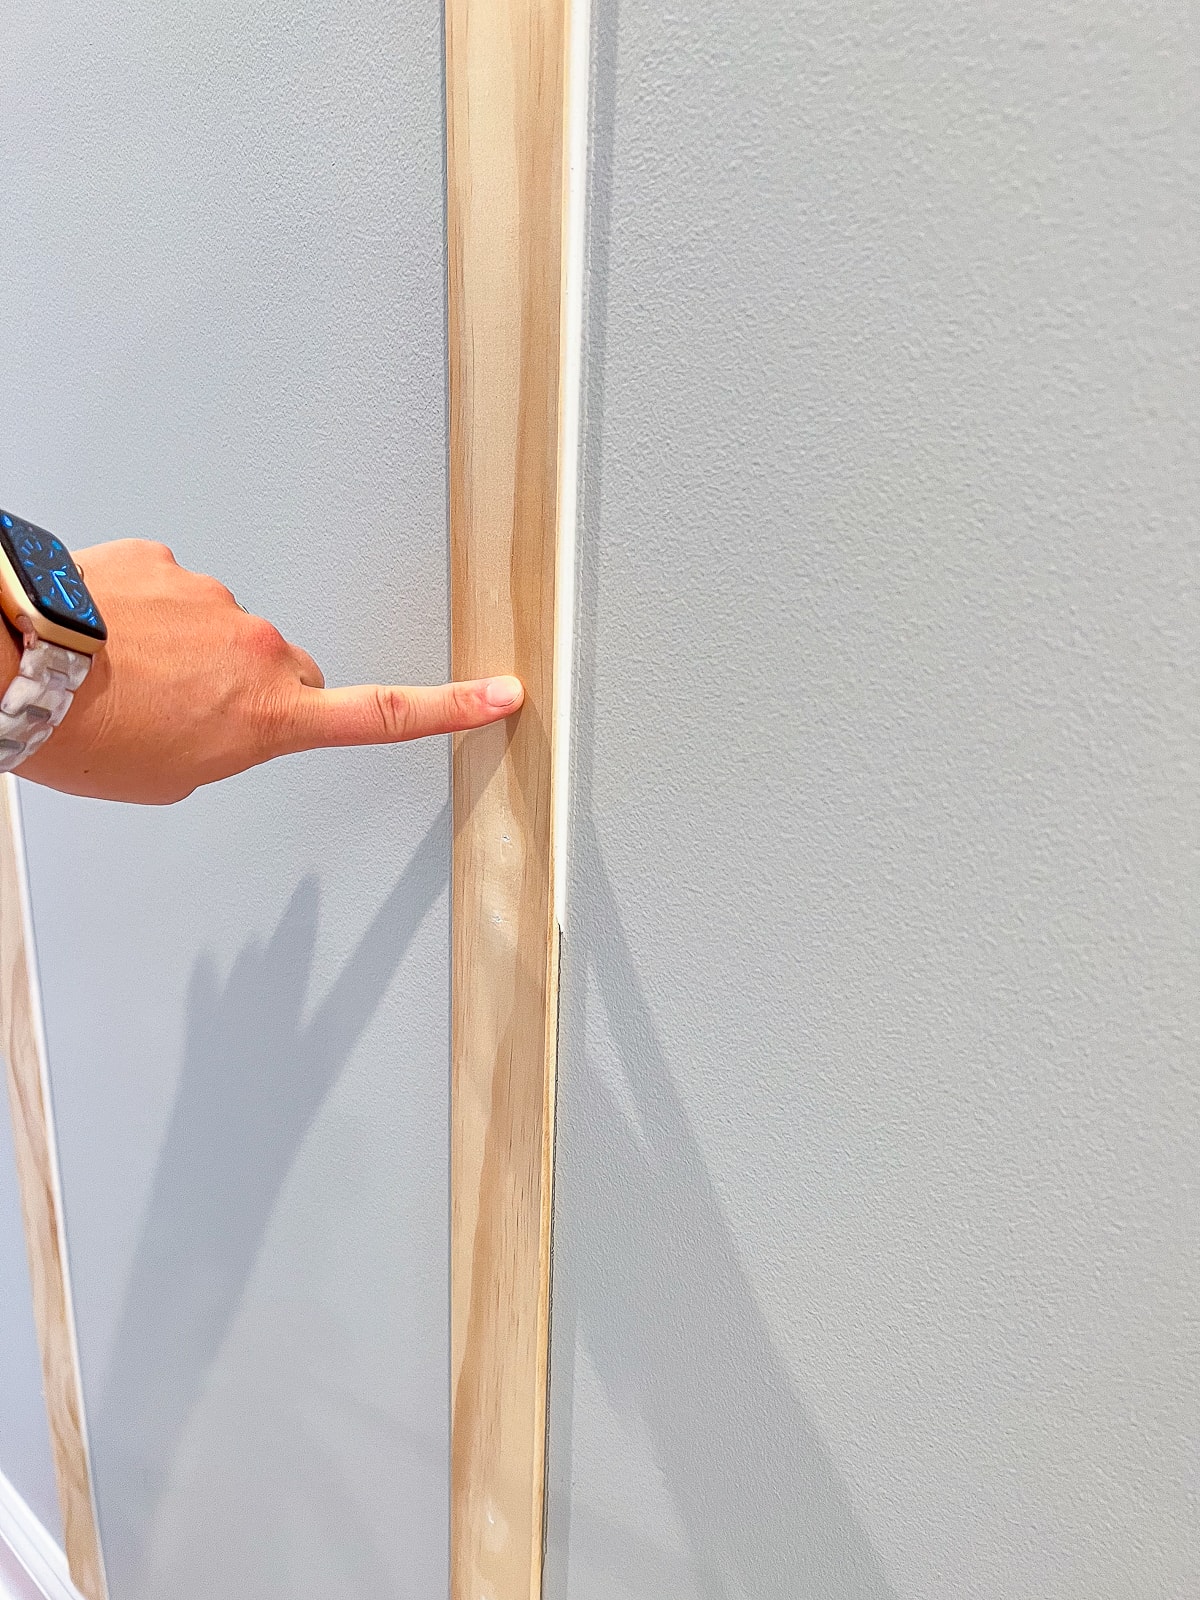
We decided to wrap the wall around the outside corner and up to Liz’s laundry closet. We figured it would look too strange if we just abruptly stopped our board and batten on the edge of the wall.
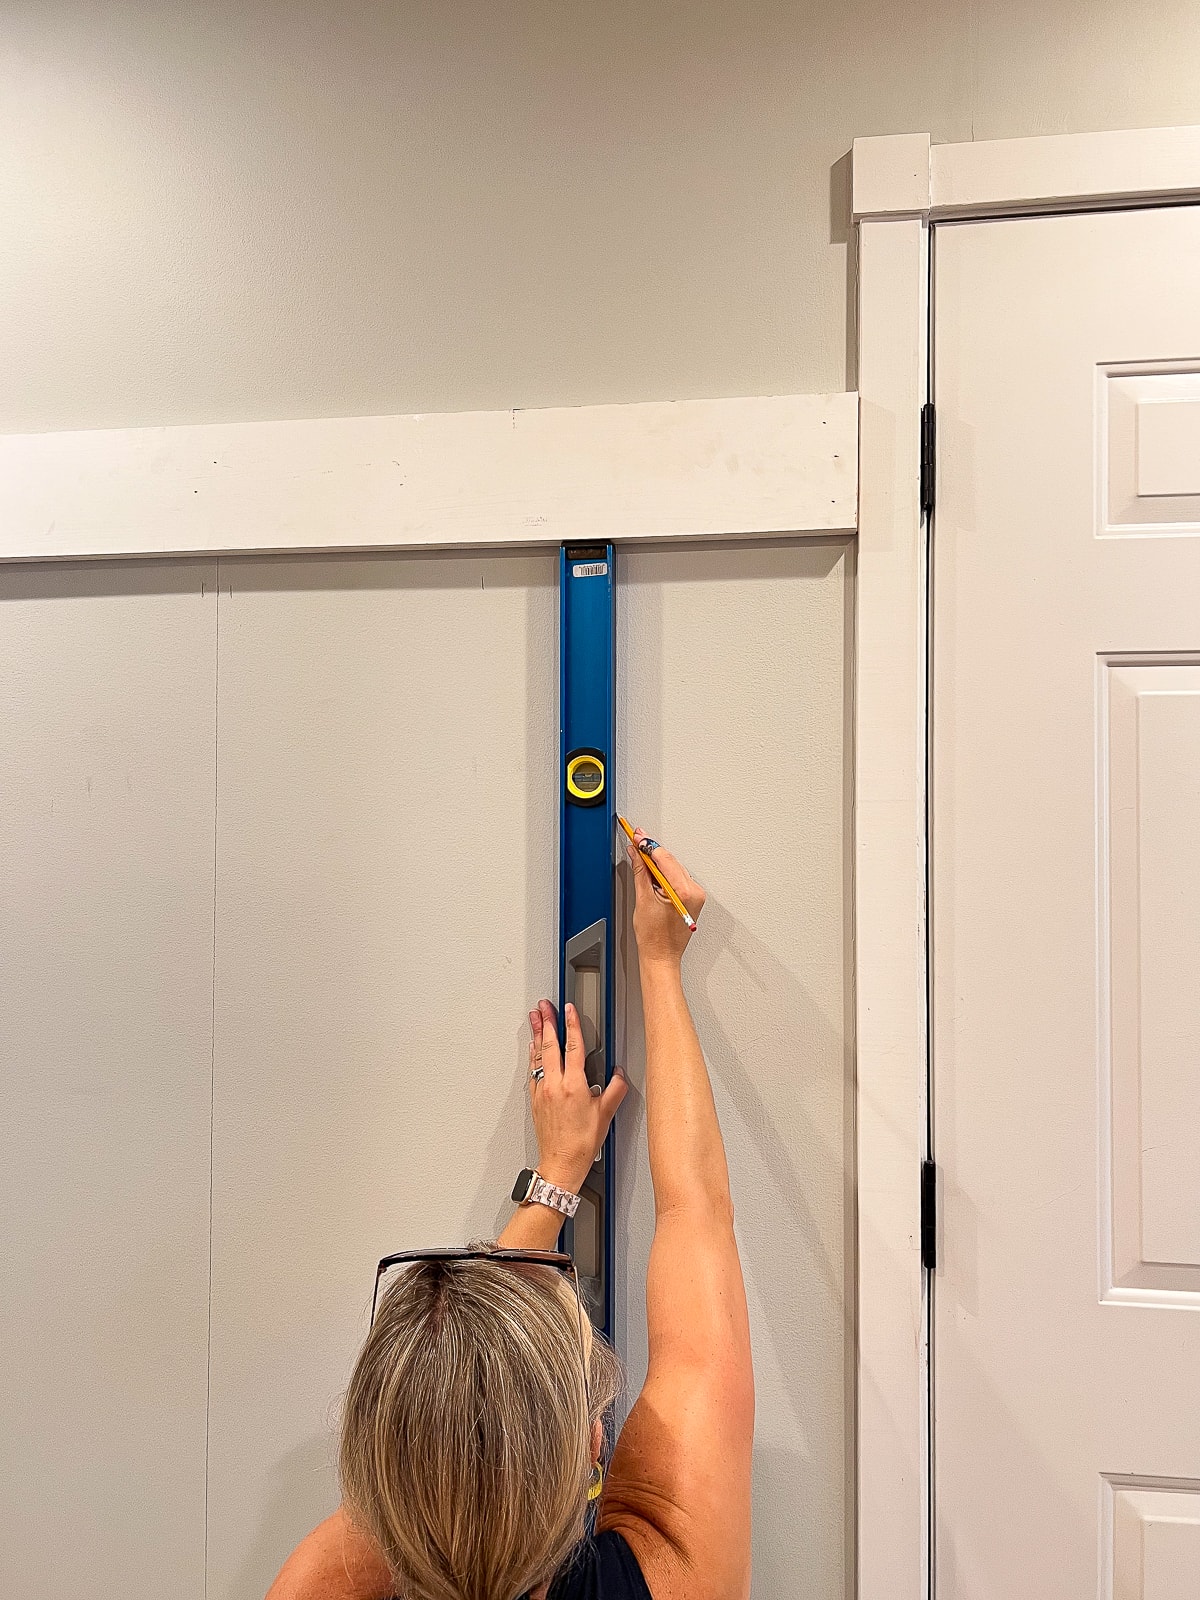
Mark Your Studs & Draw A Level Line Across
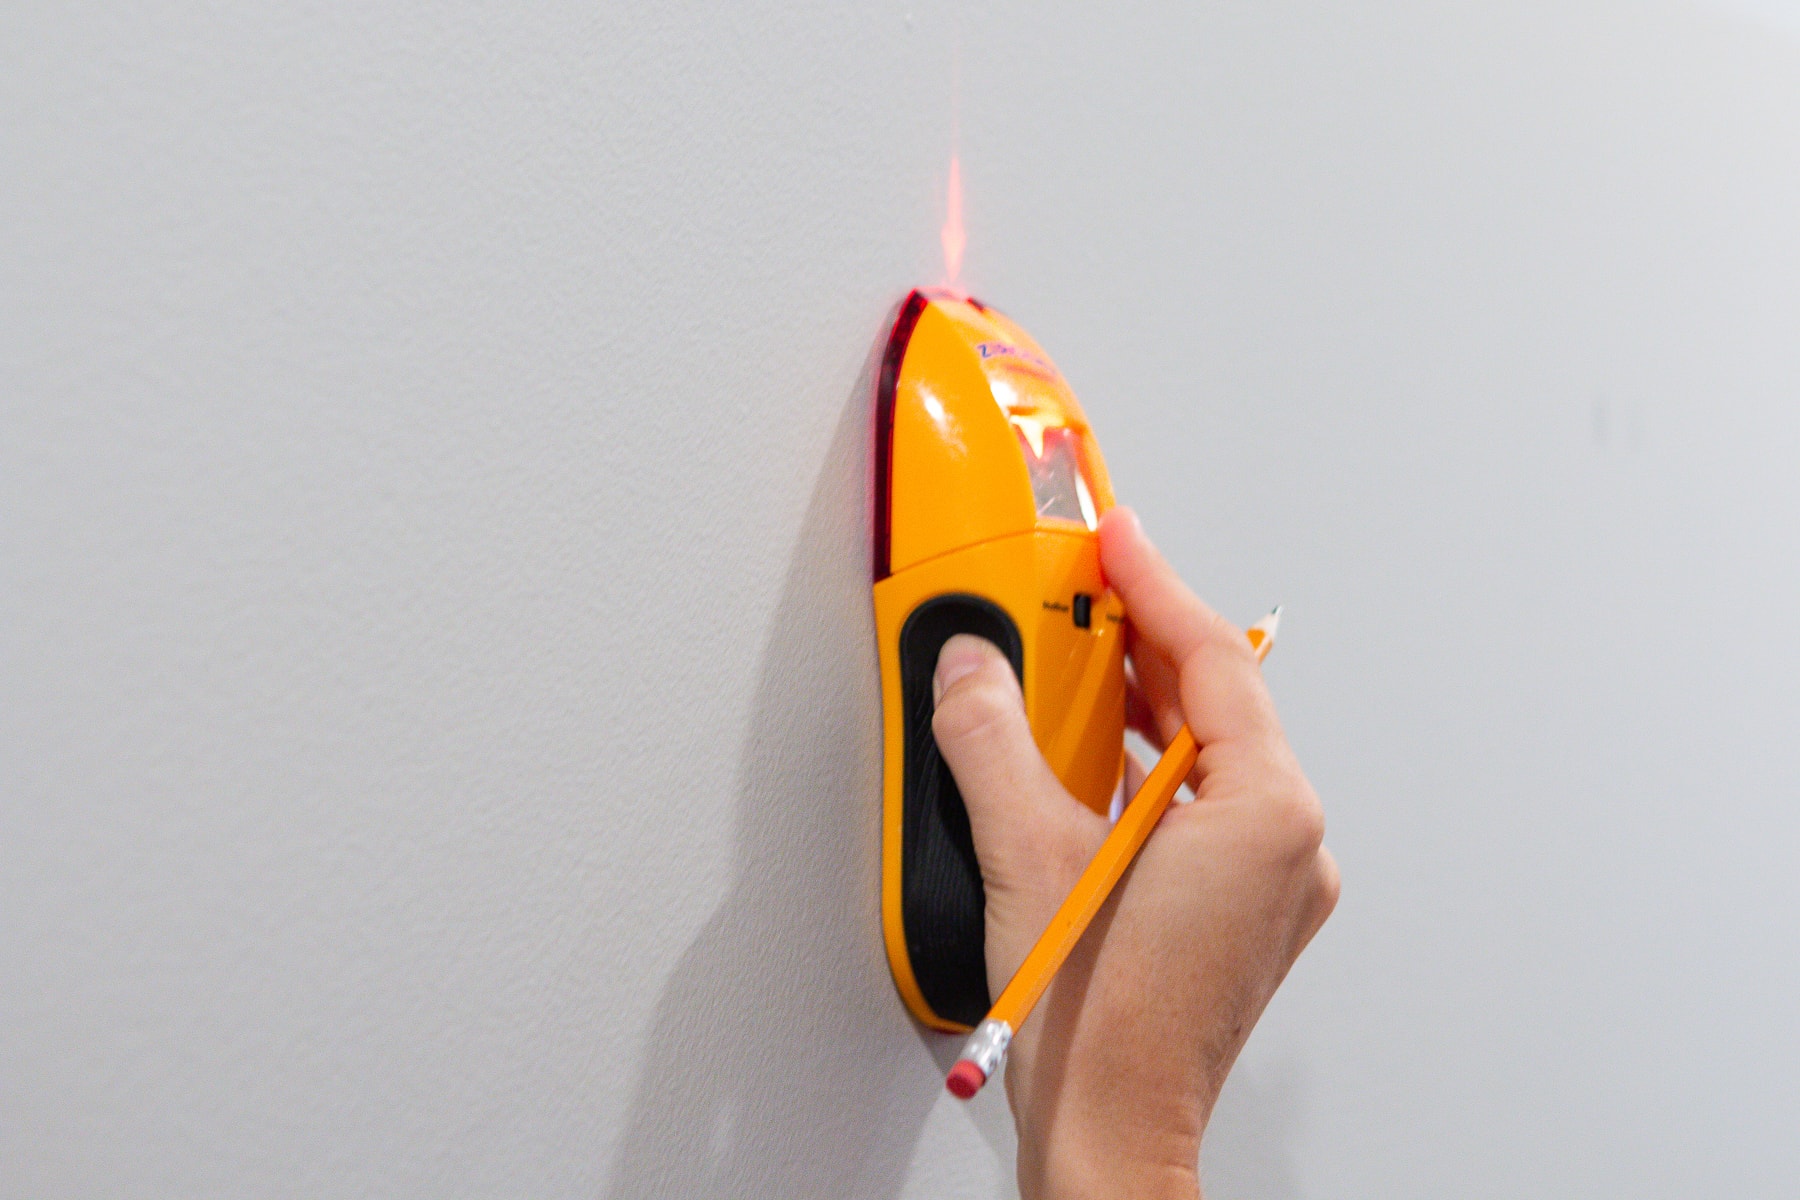
You want to install your horizontal piece into the studs, so it’s strong and secure. Use your stud finder and slowly move across the drywall, marking each stud along the way. Then, decide how high you want to hang your horizontal piece. We decided to line ours up with a horizontal area on the door, which ended up being about 72 inches off the ground. Choose whatever you think works best for your space. Again, there’s no right or wrong way to do this!
Once we had that position marked, we took a long spirit level and drew a level horizontal line across the wall and around the corner.
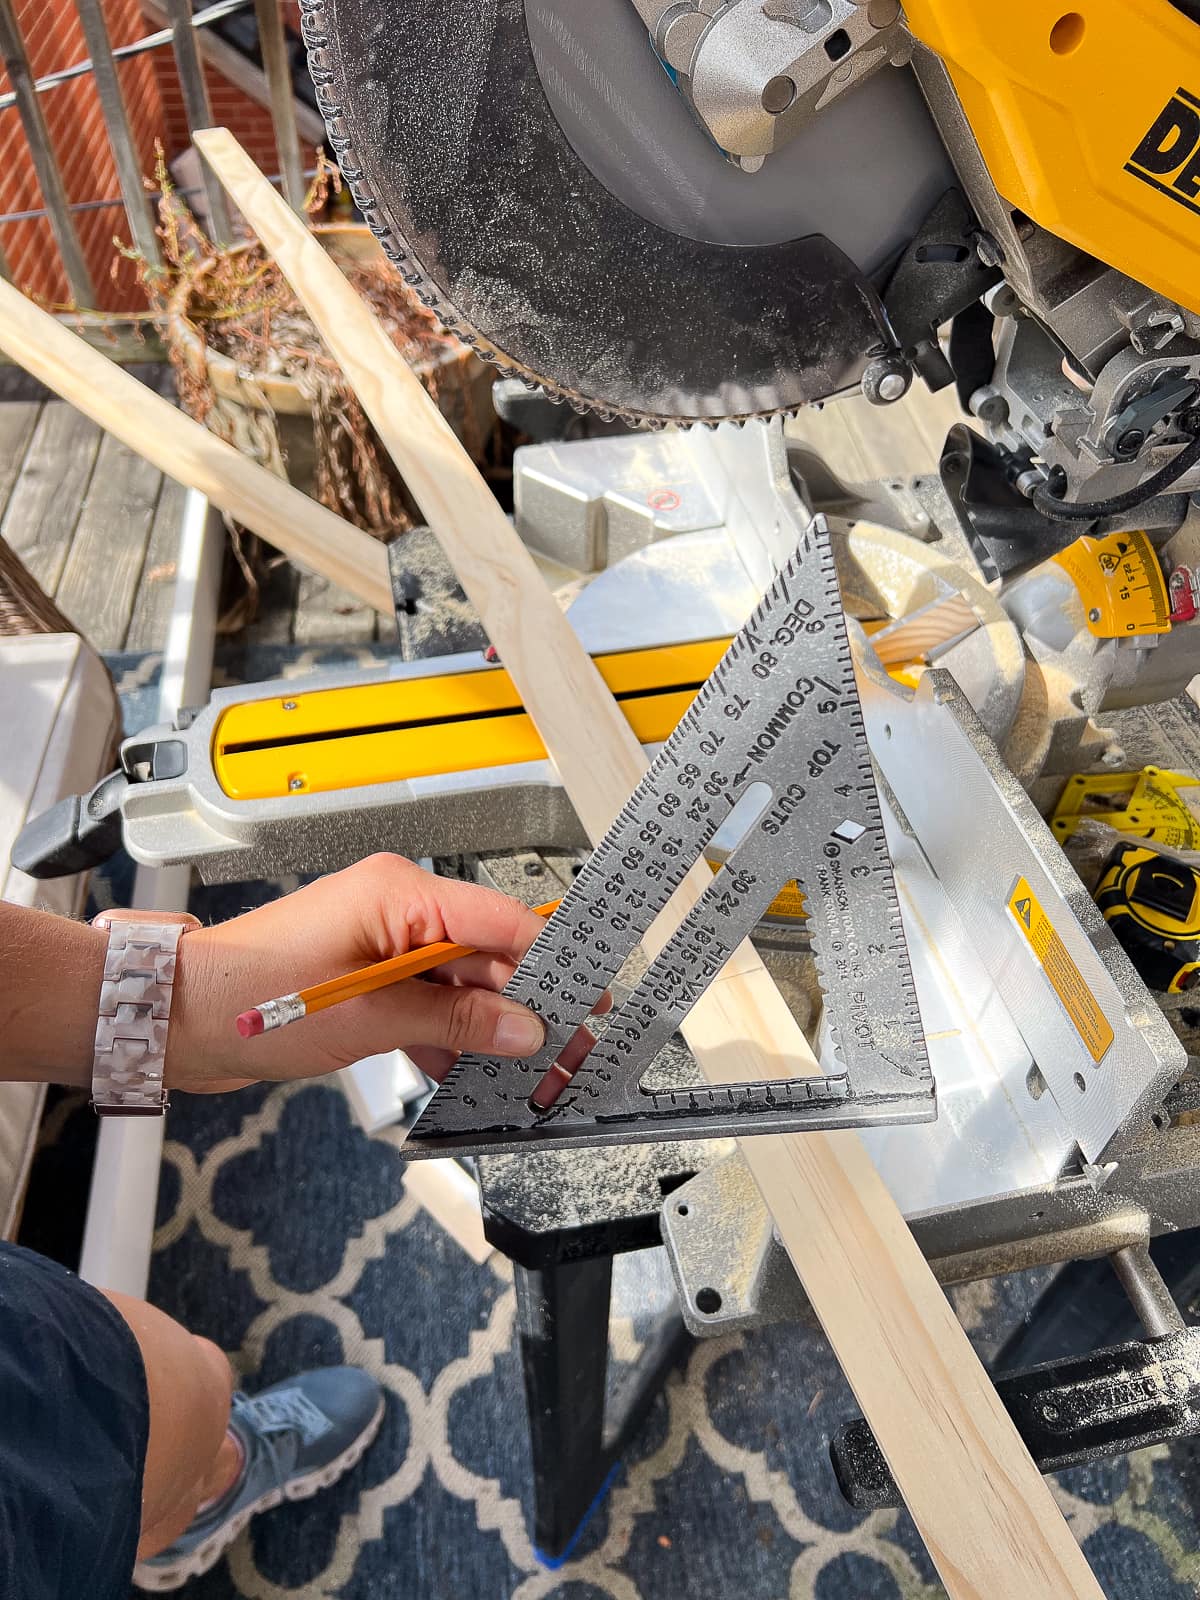
How to Measure For An Outside Corner
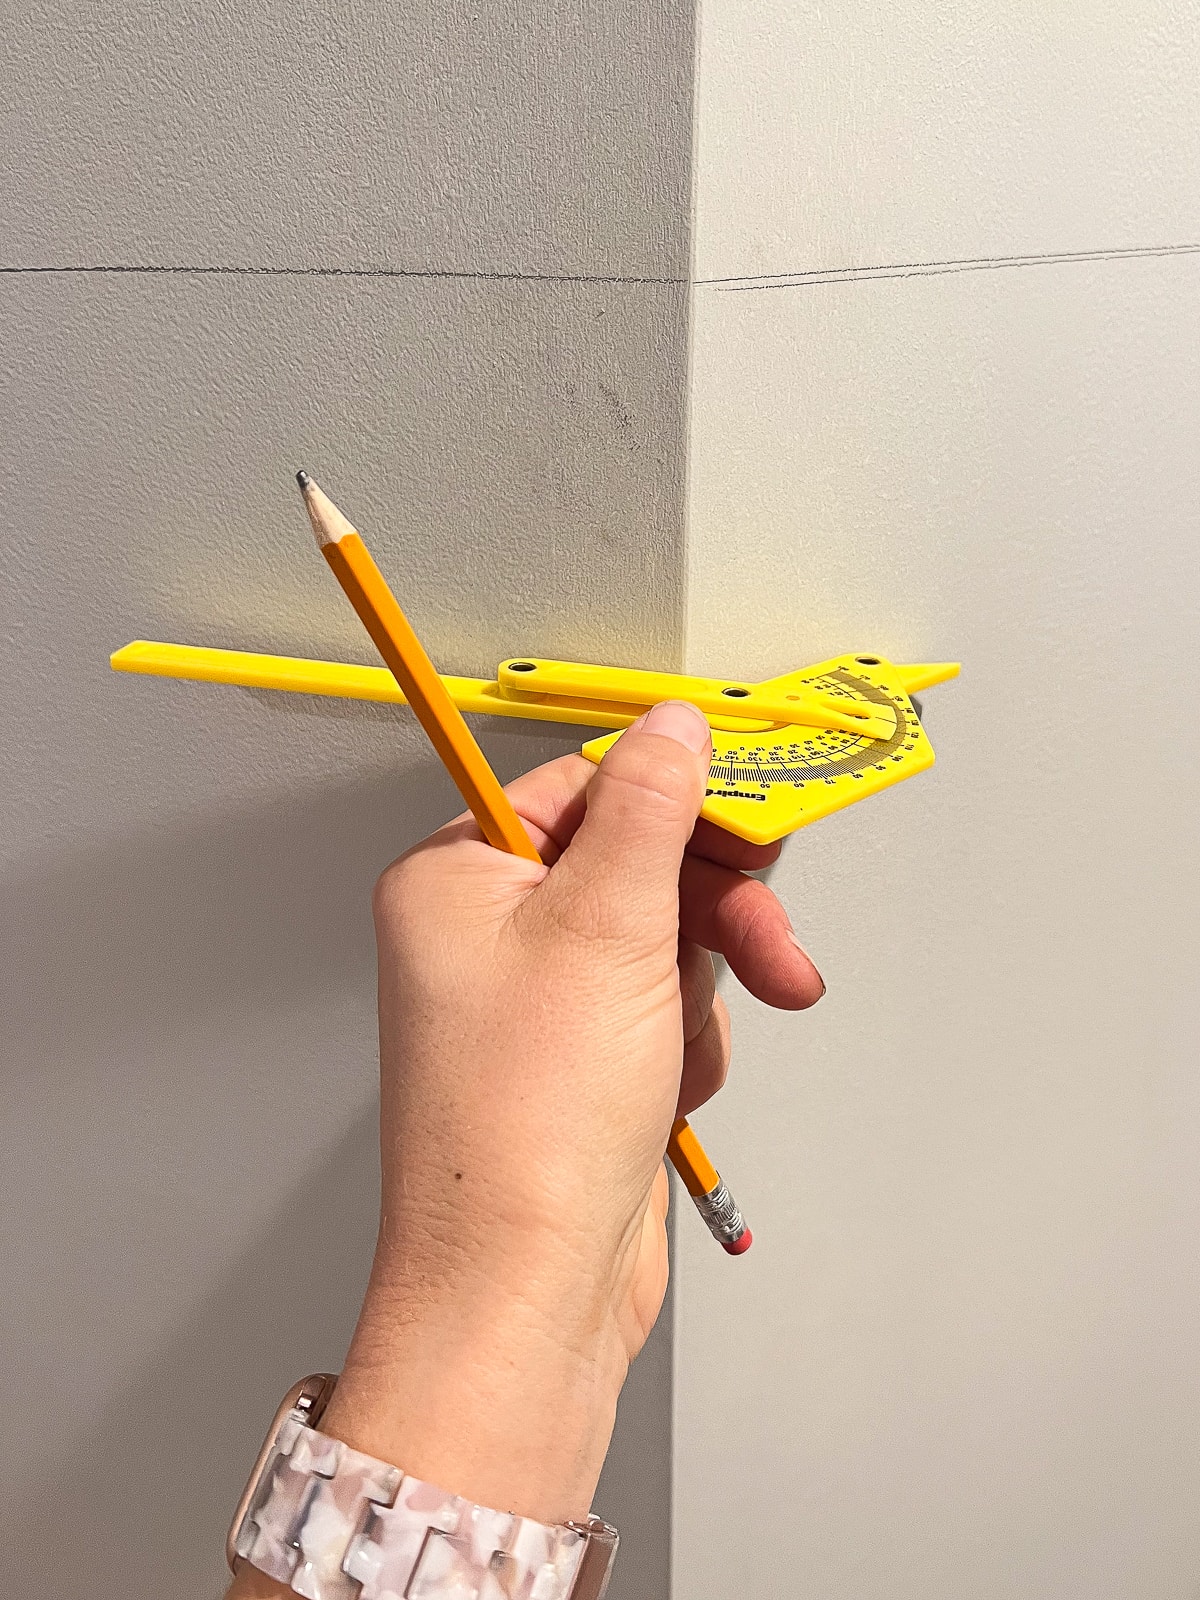
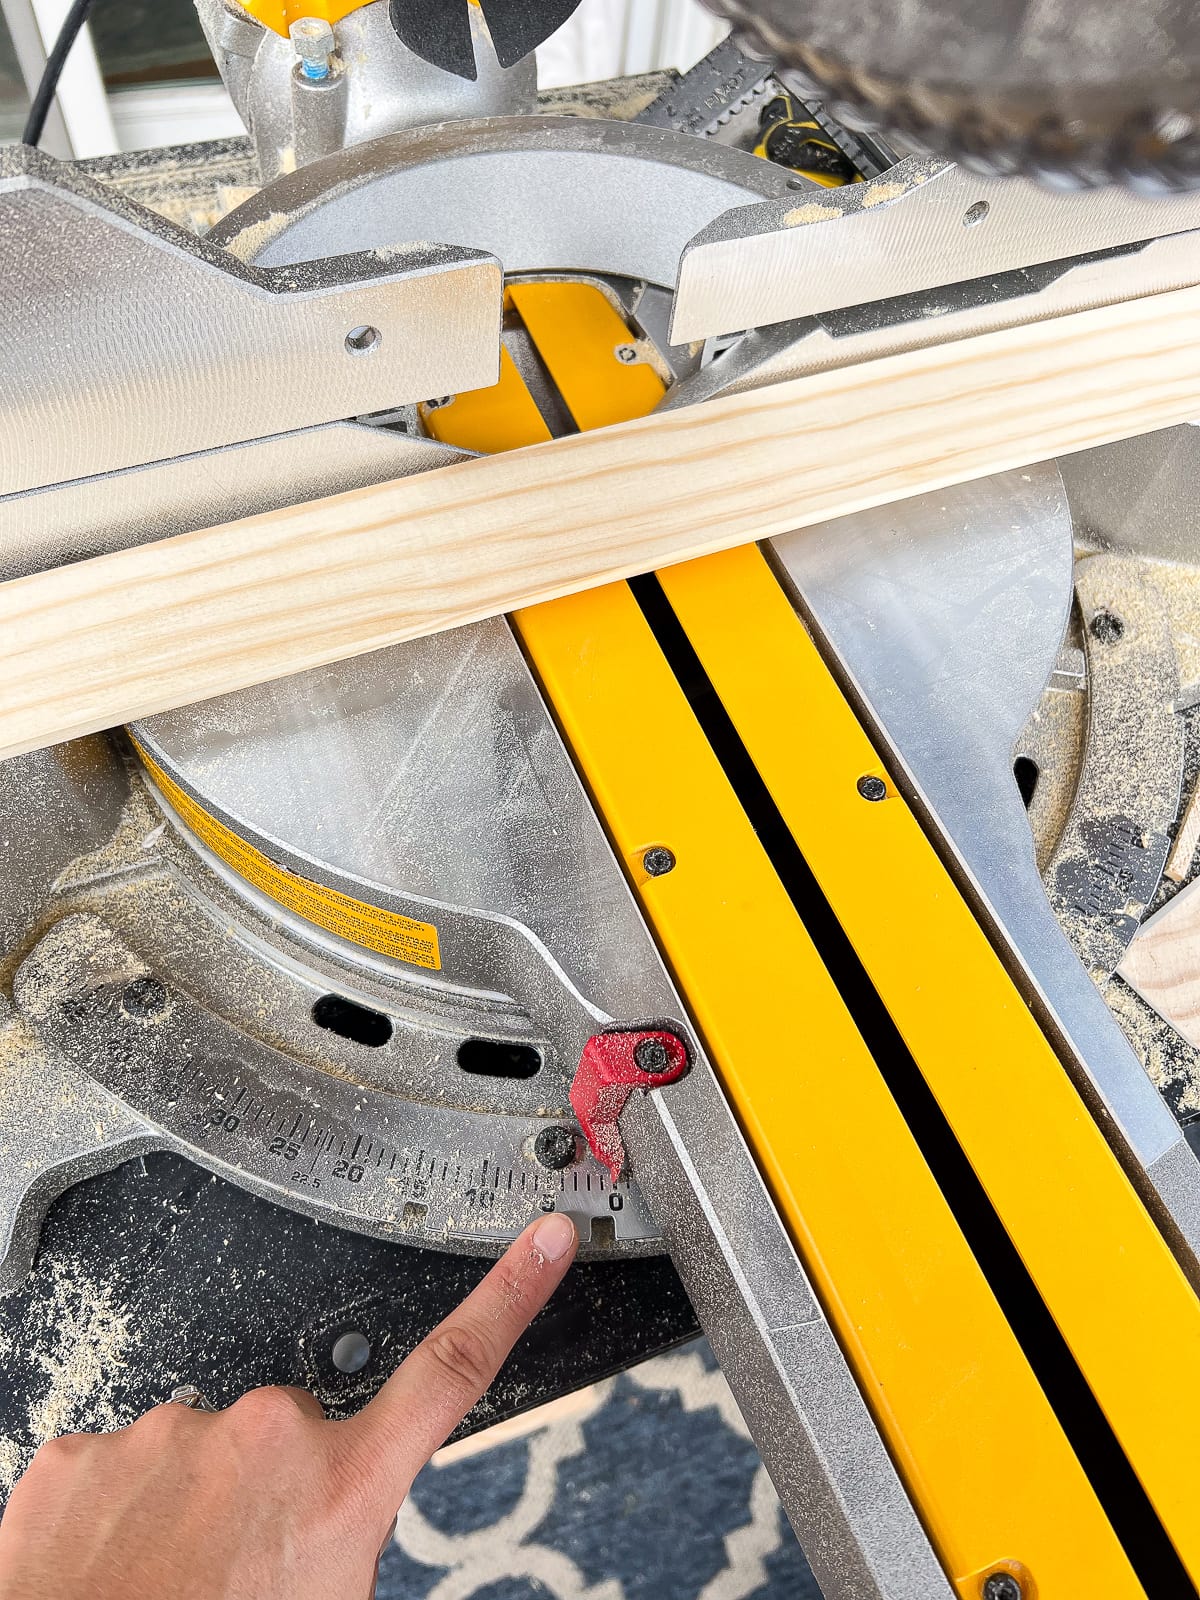
If you are adding board and batten from one wall to another, then you can just measure your board and make a straight cut on the end. Boom. Easy! Since our board was going to wrap around the outside of the wall, our first cut was going to require some math to get the correct angle for our cut.
Lucky for me, Liz is great at math and was super helpful for this portion of the project. We took our protractor and pushed it against the outside corner. That came to 126 degrees. You subtract 126 from 180 and you’re left with 54 degrees.

Since we will have two pieces of wood connecting on this outside corner, we divided 54 by 2 to get 27 degrees. That’s the number we took to the saw for our very first cut.
To review…
- Measure your outside corner
- Subtract that number from 180 degrees
- Divide that number by 2
Running Into An Issue…
We took our 5.5 inch board to the saw to be cut and I immediately realized that my small 10-inch miter saw was not going to work to cut this thick piece. At 5.5 inches, the board was just too thick for my saw and there was no way to cut the angle. My saw can only cut a piece vertically at 4.25 inches.
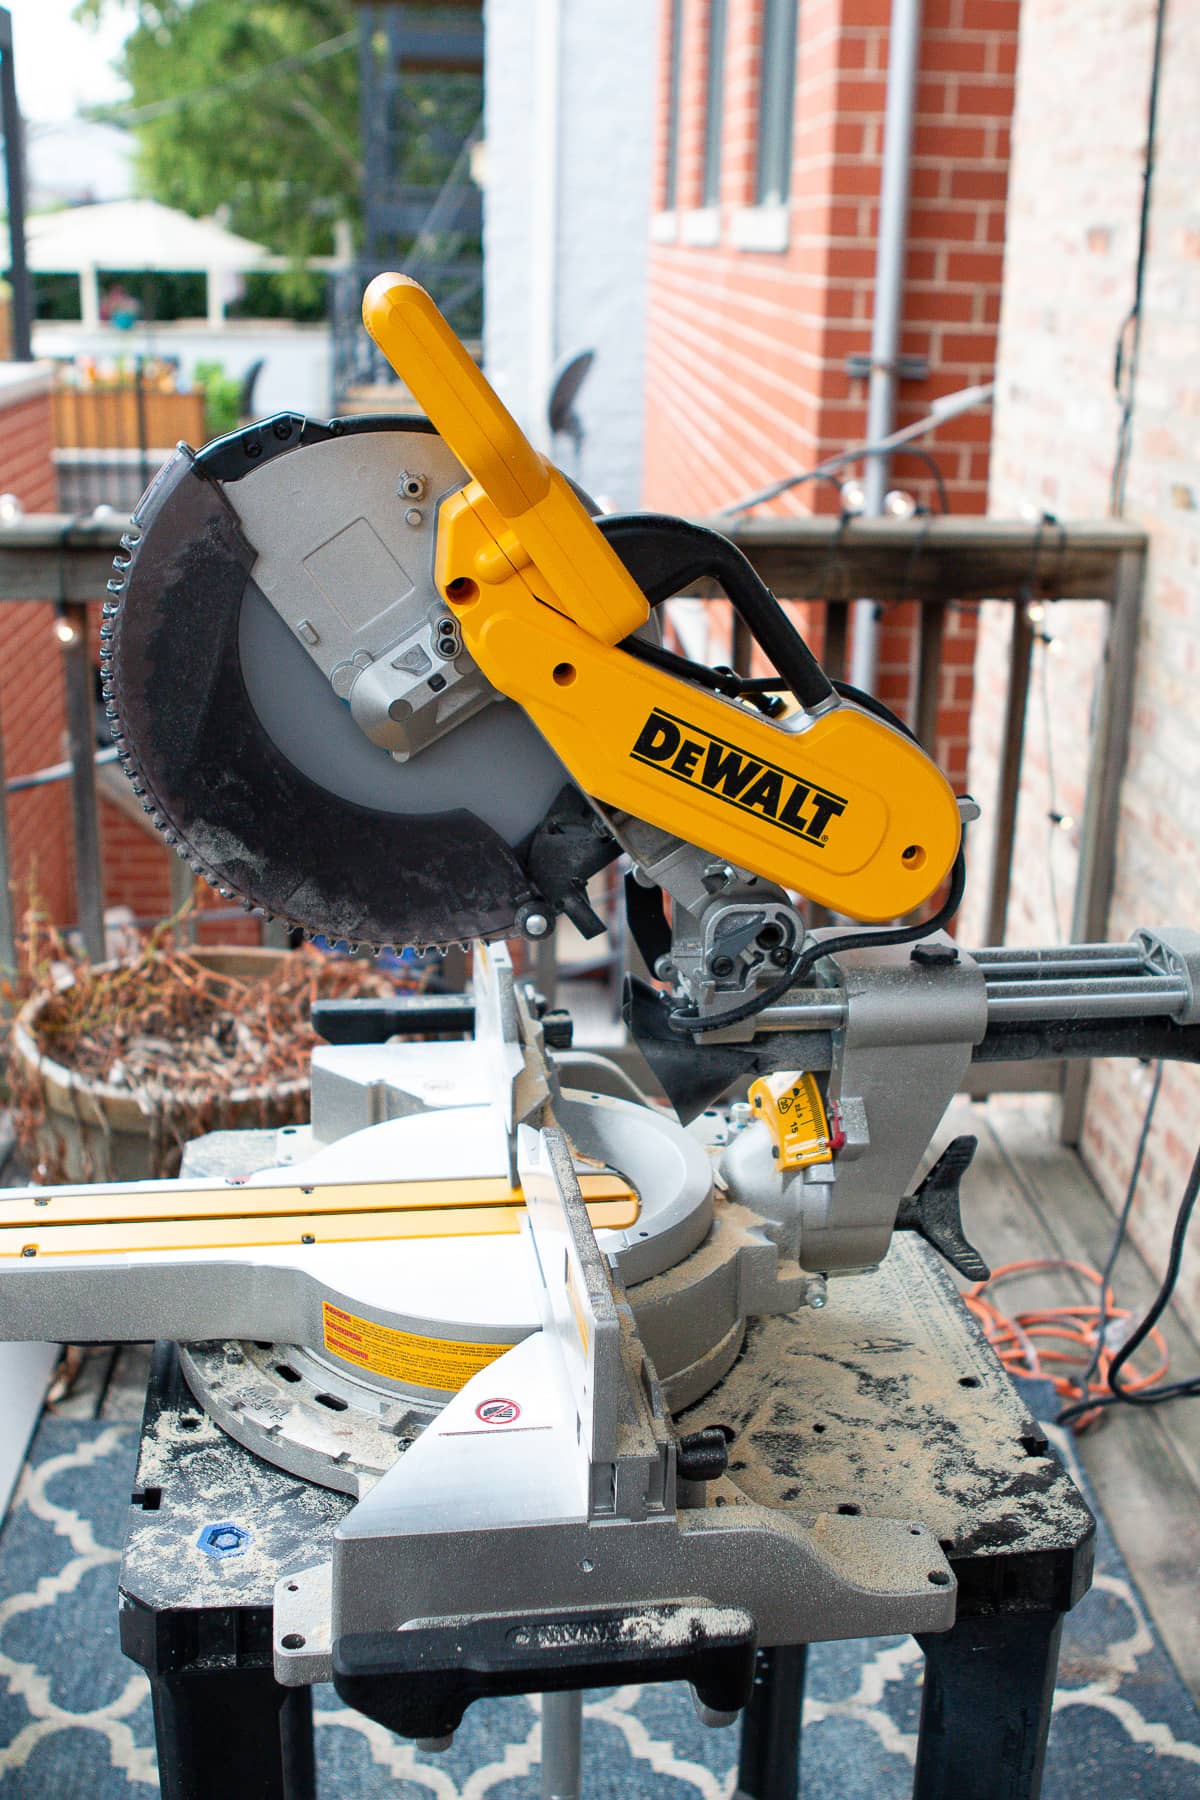
I’ve actually run into this issue before with my saw and buying a larger one was on my to-do list. Not wanting to slow down our project, I headed to Lowe’s and bought this ginormous 12-inch miter saw! Guys, it’s huge but also super cool! I was secretly pretty pumped to buy this bad boy and get it set up back at Liz’s house.
Make Your Cuts
With my new saw in place, I was able to set my saw at a 27-degree angle to make that first angled cut. We took the angle back to the wall to ensure that it was correct and once we gave ourselves the green light, we marked the other side of the board to get the perfect length.
Cutting Tip: I usually recommend making the angled cut on your board first. Then, go back and cut it down to the right width of the wall. It’s a lot easier to make that straight 0-degree cut on your board once your angle is all finished.
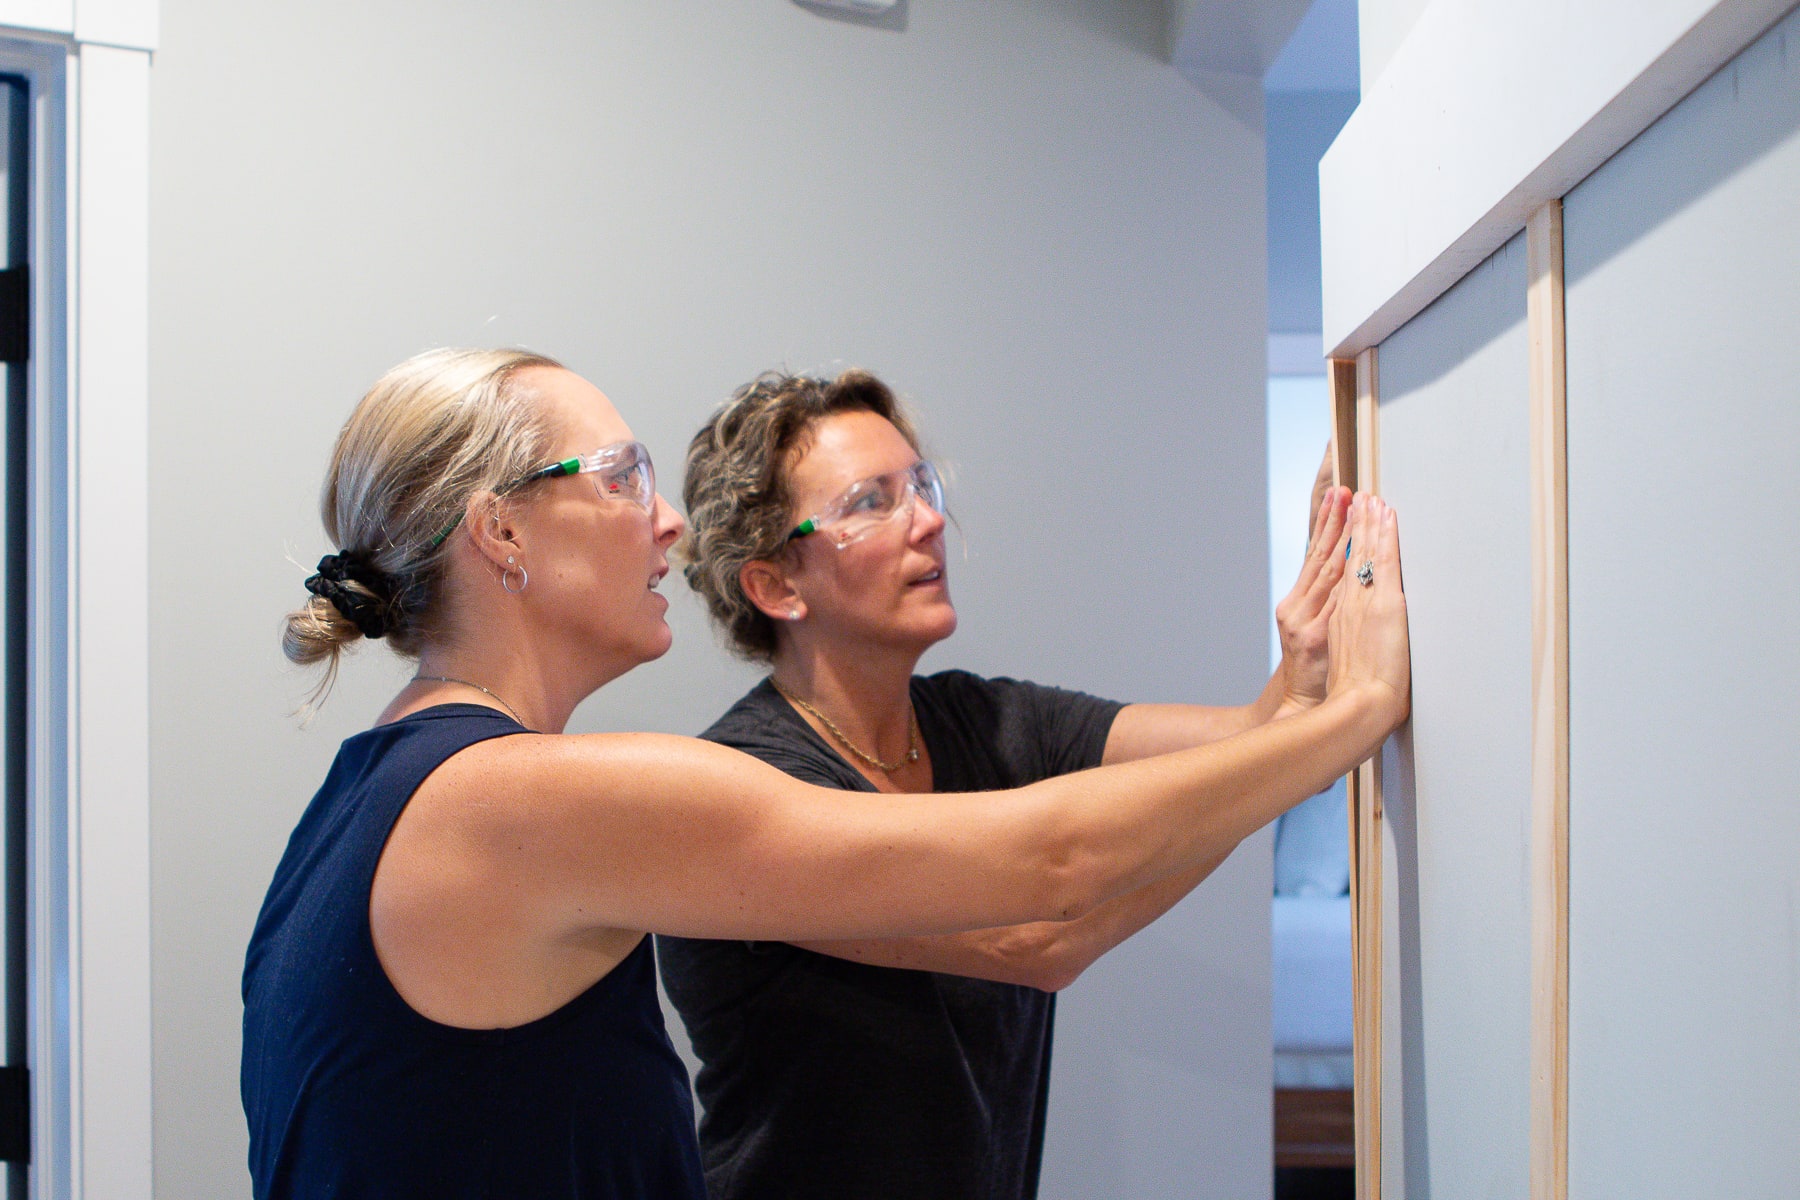
Install Your First Horizontal Piece
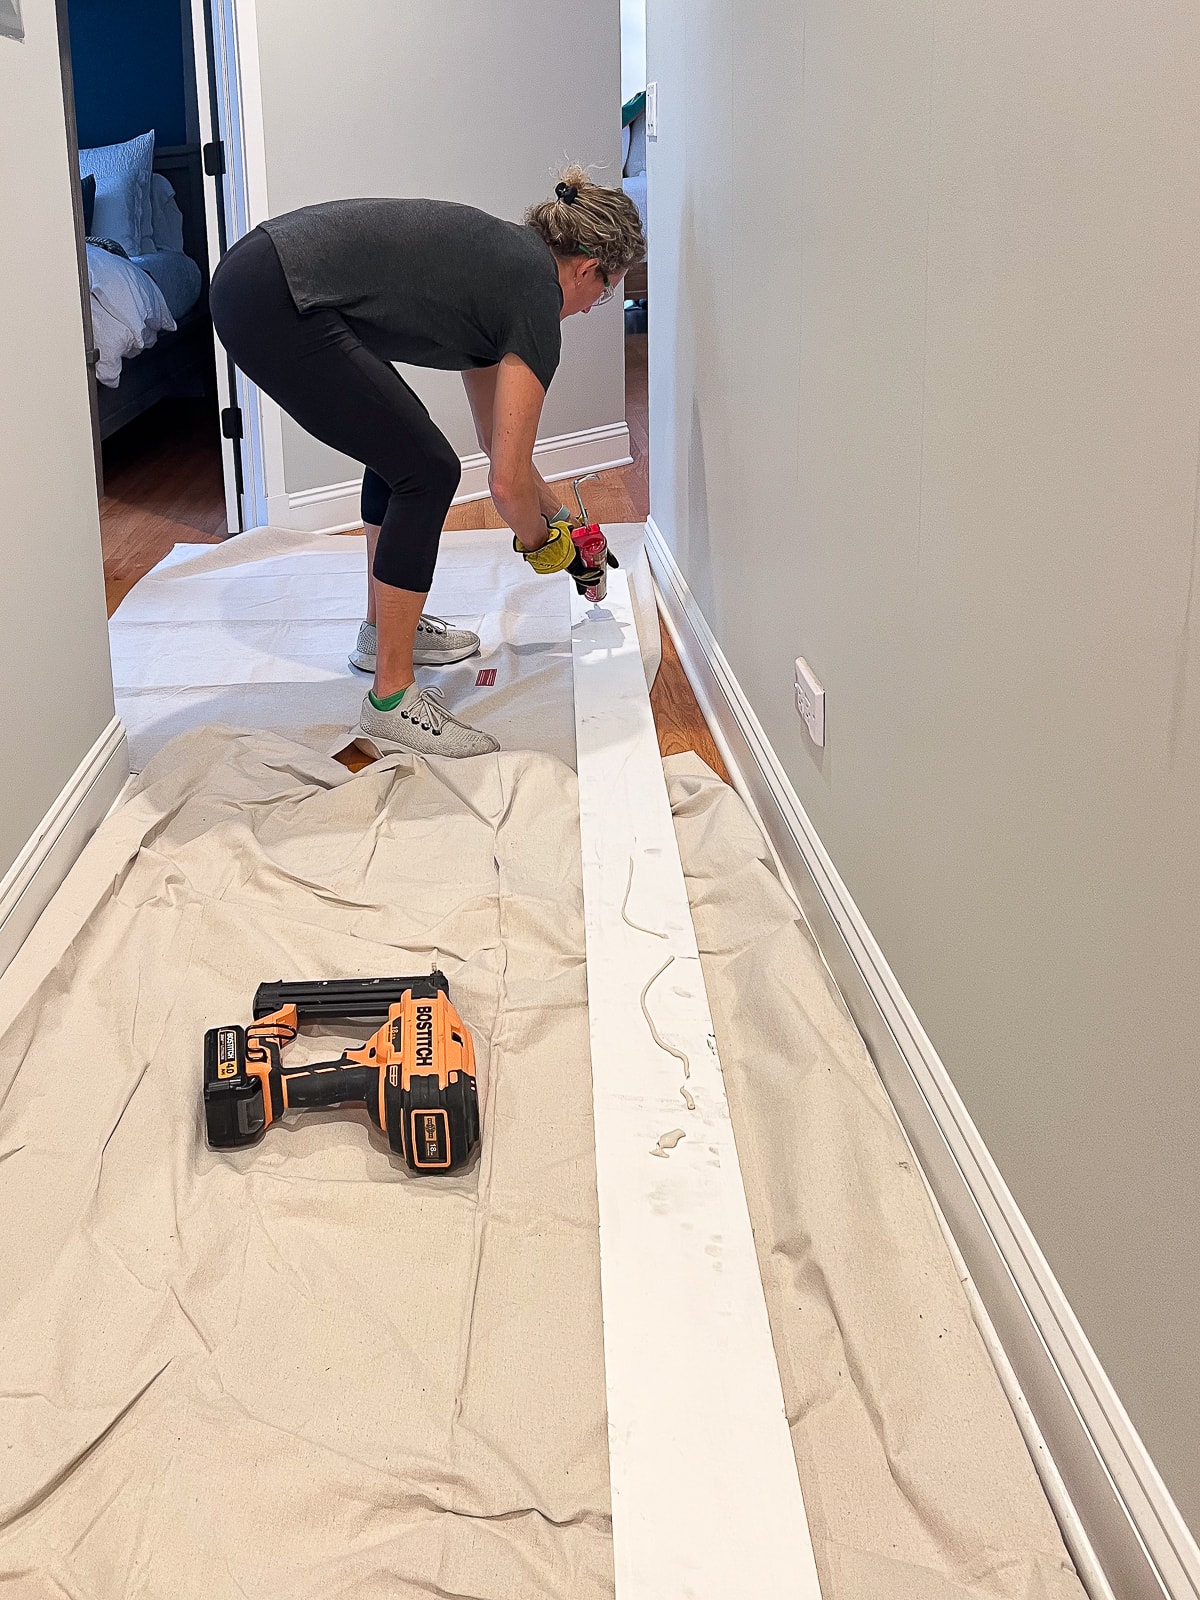
Our horizontal board was ready to go and it was time for the next step! I had Liz add liquid nails to the back (any sort of construction adhesive will work) and then we used the nail gun to secure it directly into the studs. With a board of this size, it’s definitely a two-person project. You want to hold it level across, as you secure it into the studs.

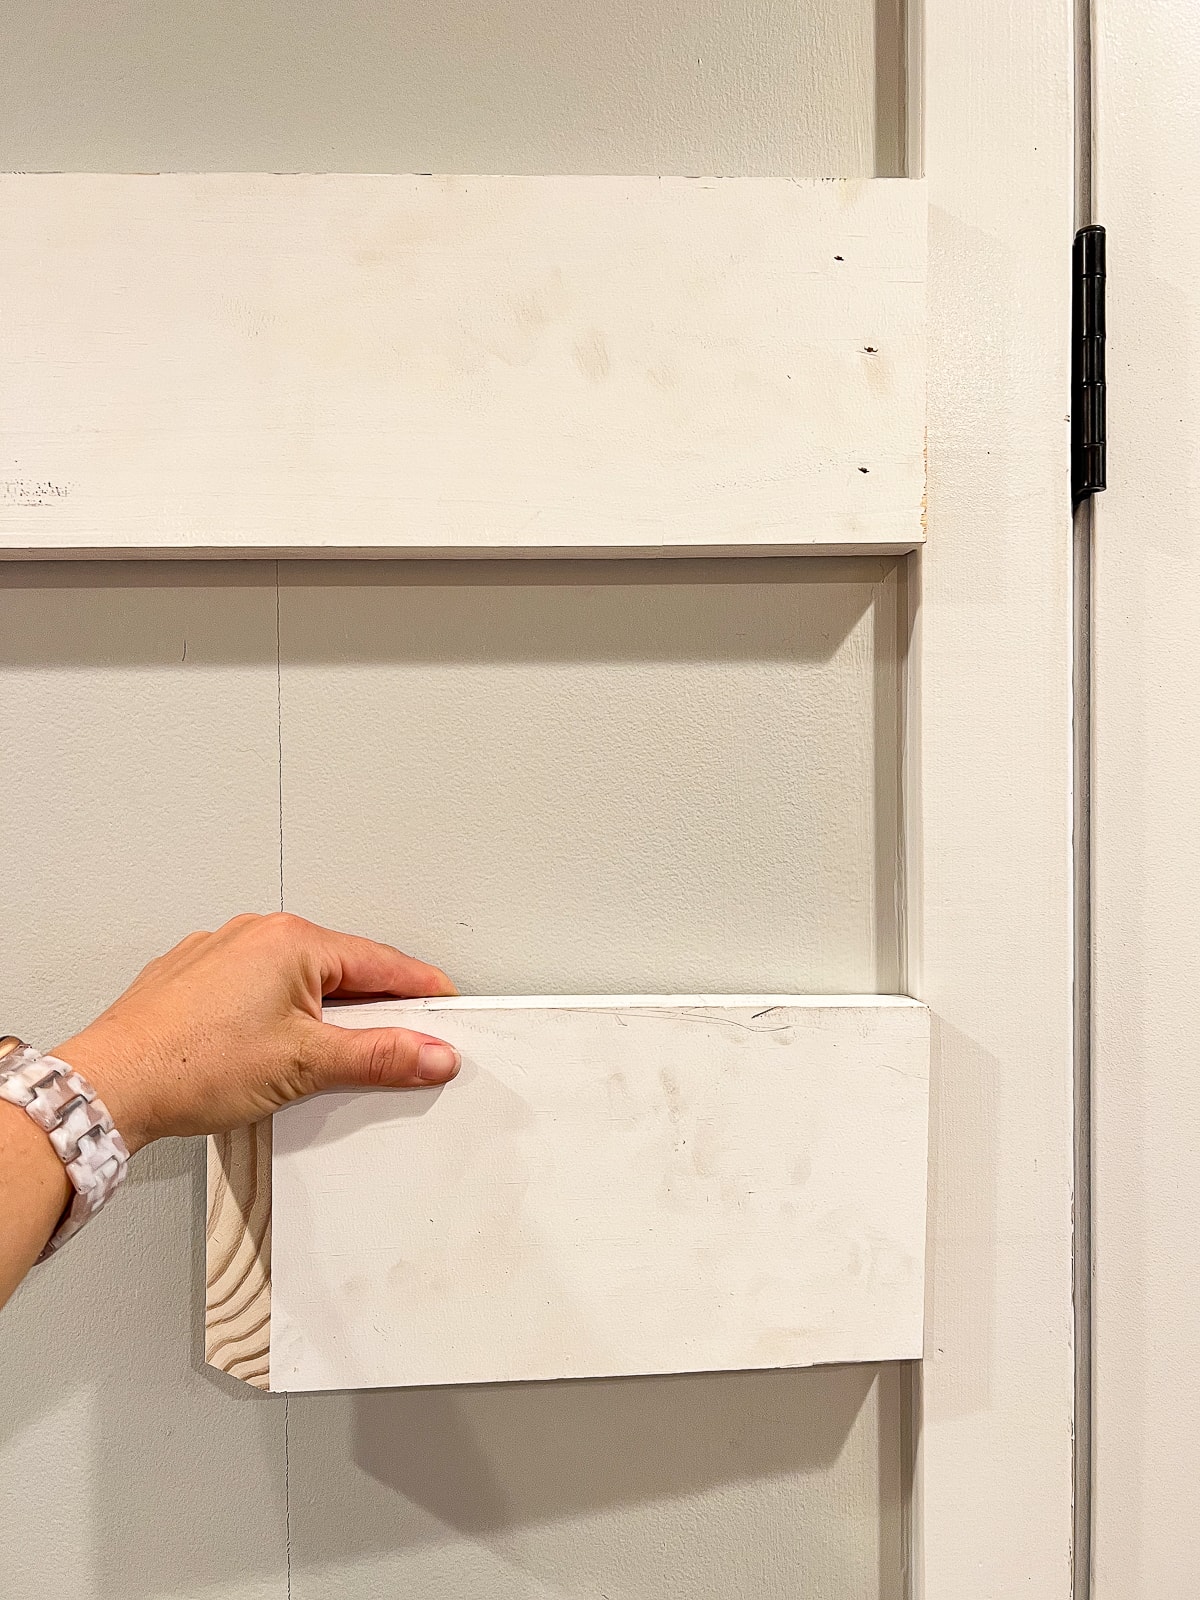
Once that first piece was up, we felt so much better! Now, we only had the much smaller side piece to figure out. For this next board, we made that same 27-degree cut on the saw, but in the opposite direction. Those two pieces then meet up on the outside corner.
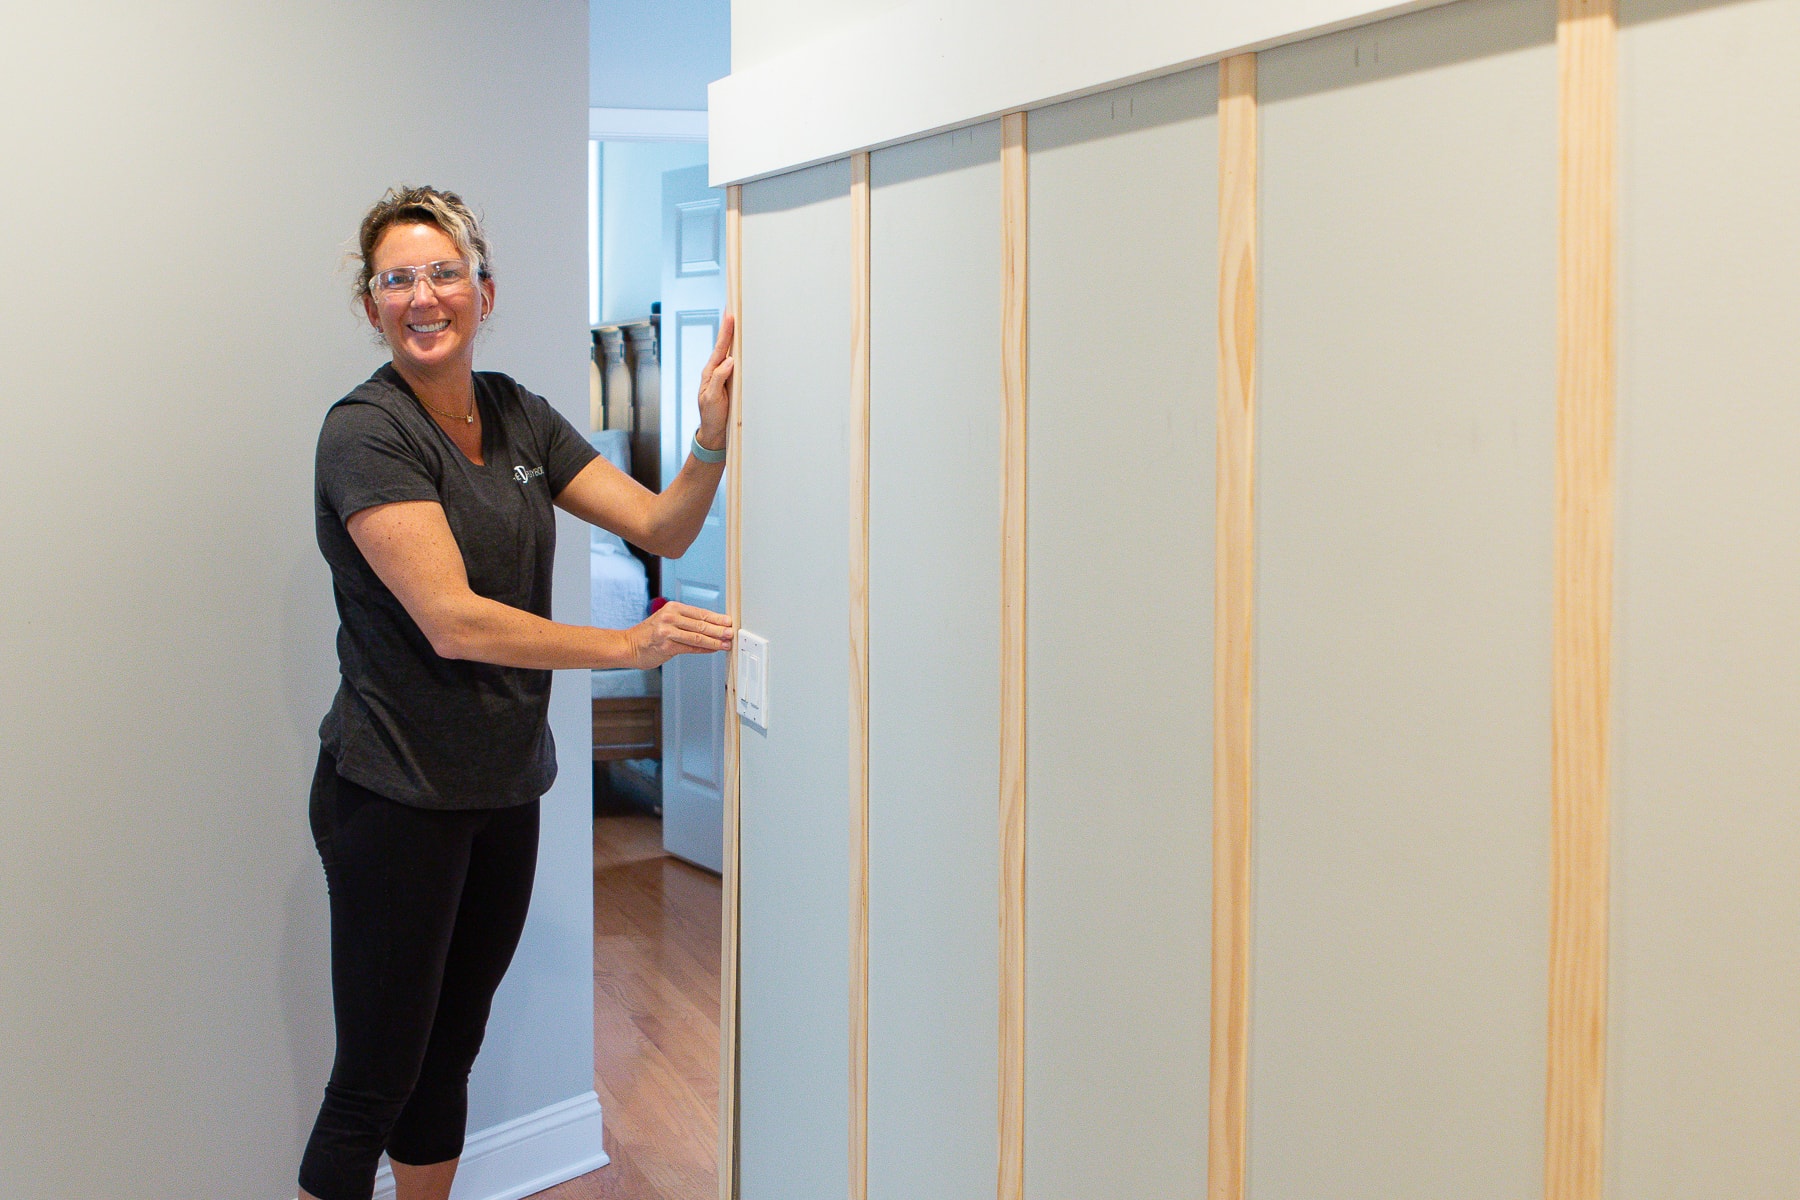
Figure Out Your Vertical Boards
With our horizontal board up, it was time to figure out the placement of the vertical battens. The distance between these is a personal preference. I would take a look at your wall and see if there are any obstructions before you start marking things up. We had a wall outlet and a light switch to deal with, so we figured out our design plan based on those.
In the end, we decided to place our 2-inch lattice strips every 16 inches. Mark a plumb line straight up and down for each lattice strip, so it can act as a guide when it’s time to install. If you have a really large space, you can always cut a spacer board the same distance as your vertical pieces to cut down on the constant measuring.
Cut Your Lattice
These cuts will be so much easier than those horizontal boards because they’re all straight cuts with the saw set at 0 degrees. While it may be tempting to just measure from the board to the baseboard and then make all of your cuts at once, I advise against it. It’s unlikely that your floors are perfectly level, so each board may have tiny measurement differences. Going slowly will ensure that you get exact measurements.
I usually cut one piece at a time and then take it inside to make sure it fits perfectly. To draw a straight cut line on your lattice strip, I always recommend a speed square. It’s my favorite tool to have near the saw to get straight cuts every time.
Attach Your Vertical Pieces
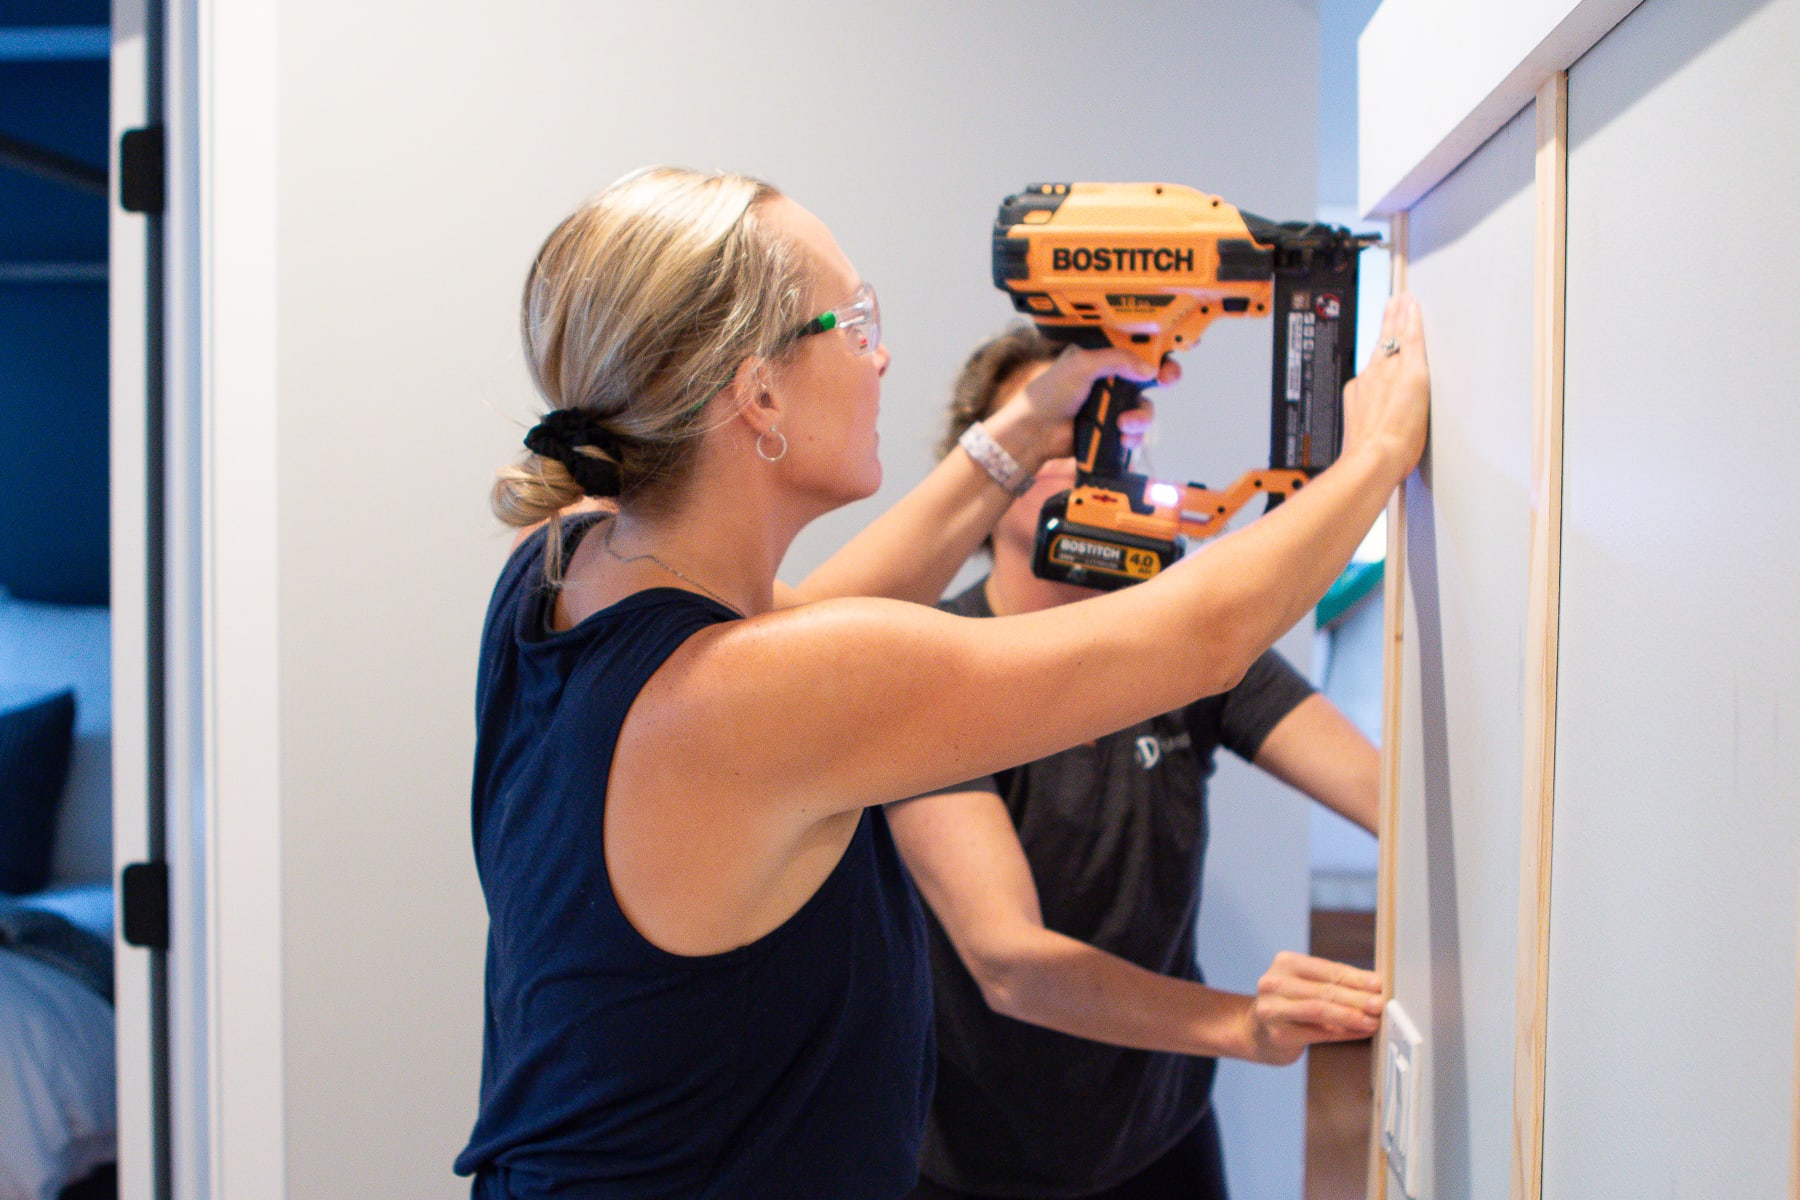
With everything cut, we then got to work installing the vertical battens on the wall. First, add some liquid nails to the back, and then grab your Brad nailer.

It’s unlikely that you’ll be hitting studs for all of these, so I always recommend placing your Brad Nailer at an angle when nailing it into the drywall. If you just go straight in, the wood can easily be pulled off of the wall. I like to go at an angle up and then an angle down, to lock the nails in place behind the drywall.
Fill Nail Holes & Caulk Your Seams
Once all of the wood was up, we were in the home stretch. I think Liz was secretly pretty happy that all of the power tools could be put away for the remainder of this project. Ha!
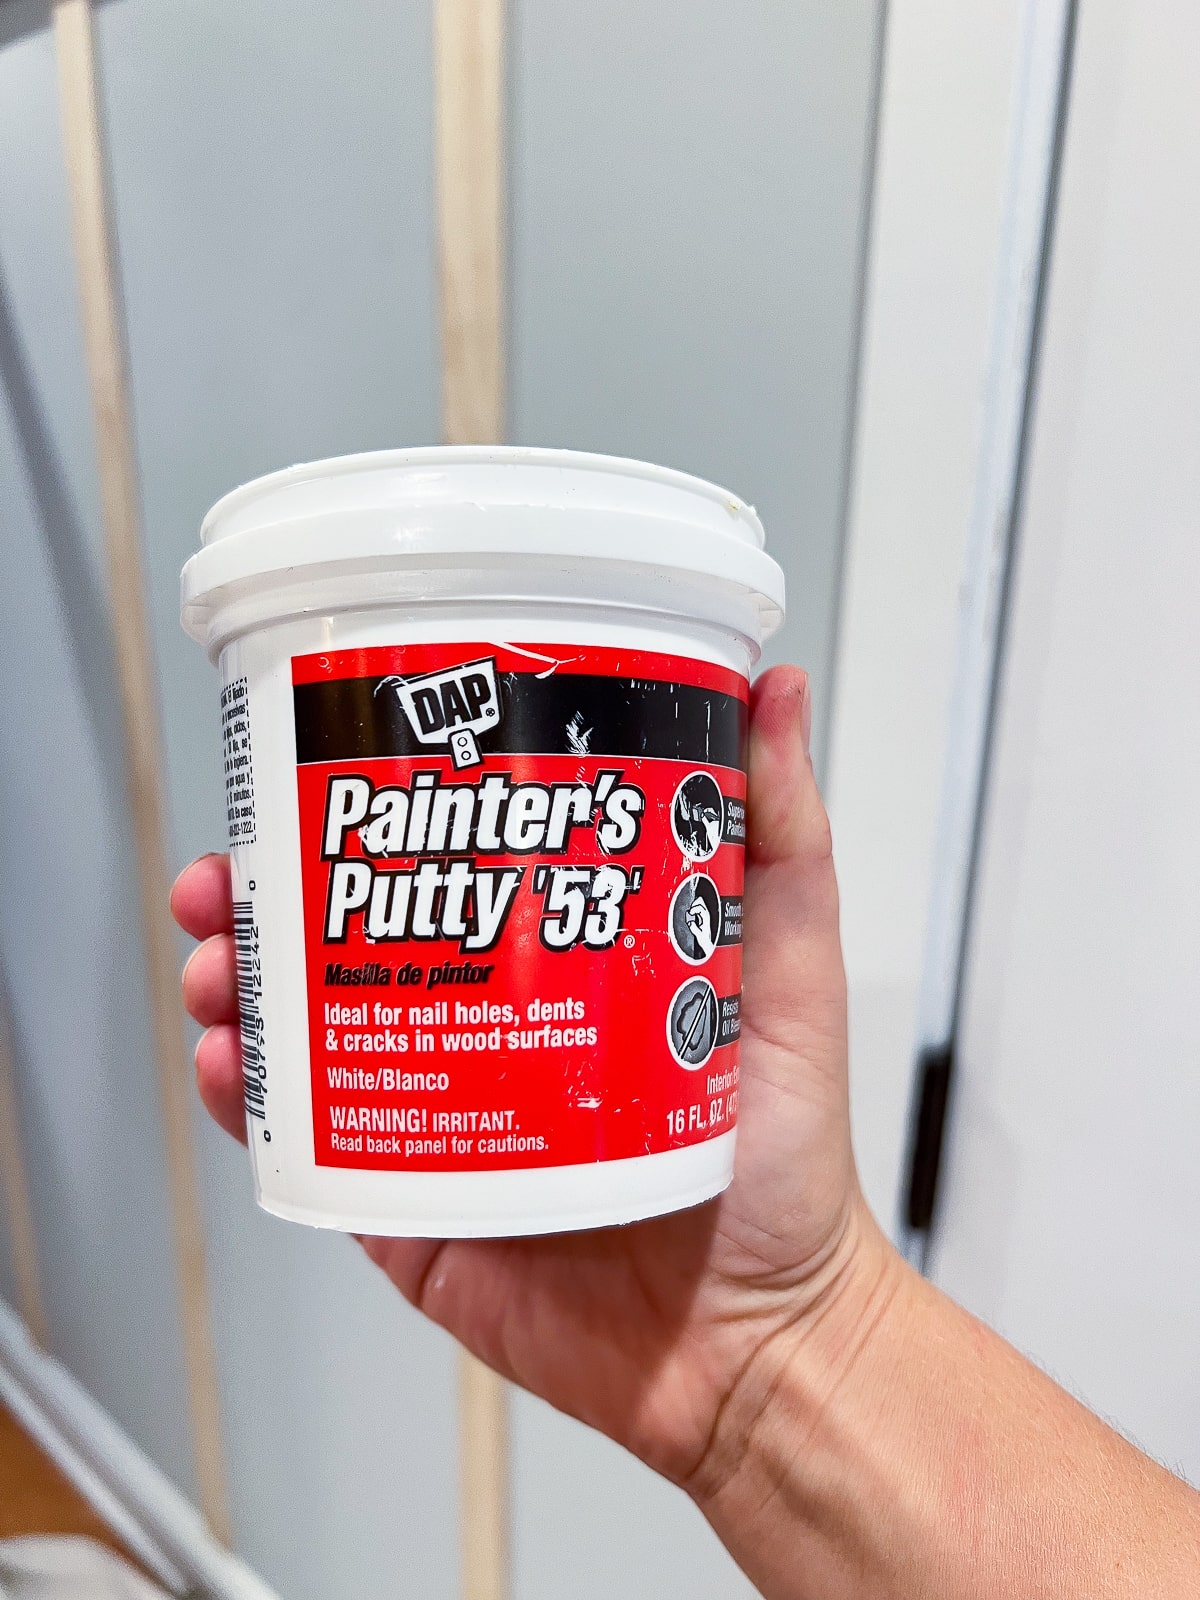
To fill nail holes, I always like to use Painter’s Putty. Just roll it up into a little ball between your hands and then press it into each nail hole. I go back and forth over each hole as if I’m using it as an eraser. This fills it nicely. You can then let it dry, sand it, and fill more if needed.
Caulking is my favorite step in any woodworking project. It’s tedious, but hides any imperfections and really makes things look seamless. This was Liz’s first time caulking, but she got the hang of it quickly. I have an entire blog post with all of my best tips for caulking. Give that a read before you caulk.
Day 2 – Let’s Get This Painted
With the heavy lifting done, day two of this project was going to be a breeze. I always recommend letting your caulk dry for at least 8 hours, so it’s fully cured before you paint it. We got our painting clothes on and got right to work.
Prime Your Walls
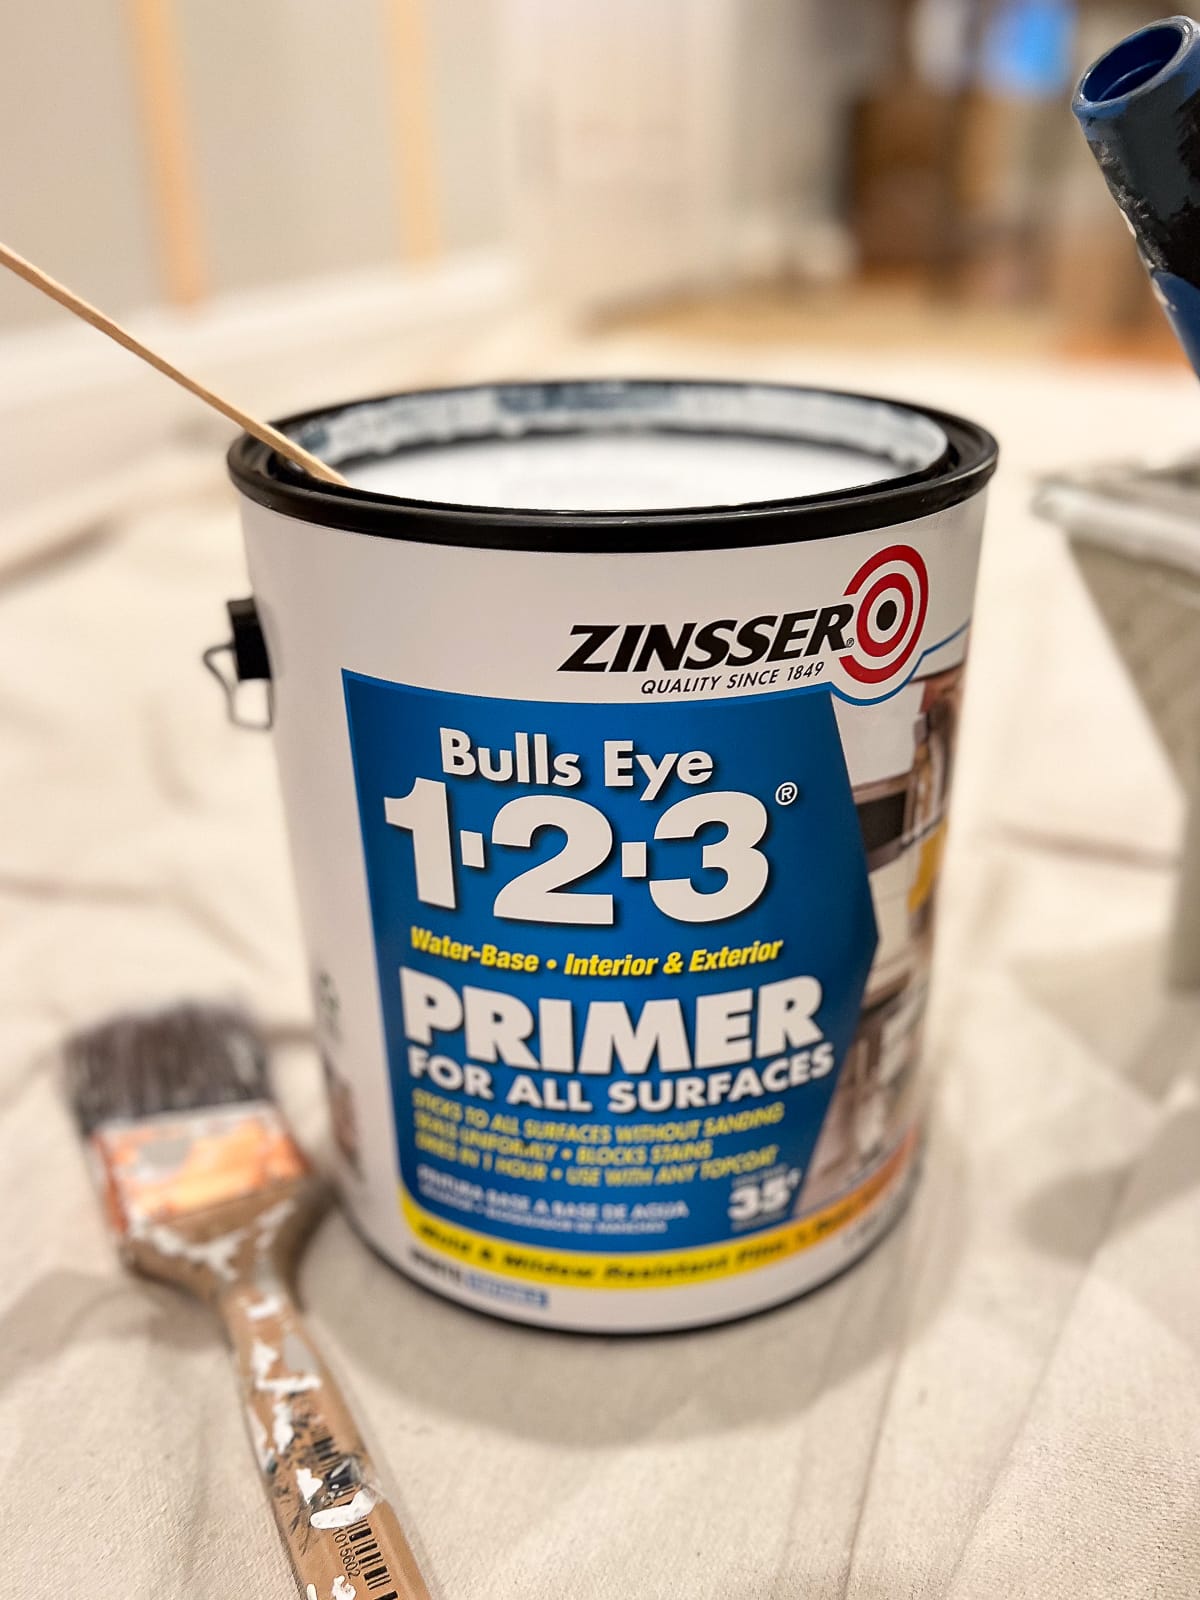
Our top board came pre-primed, but the rest of the wall and wood needed some primer. Since I was dealing with three different surfaces (pre-primed boards, wood, and drywall), I knew primer was a good idea to make everything uniform before painting.
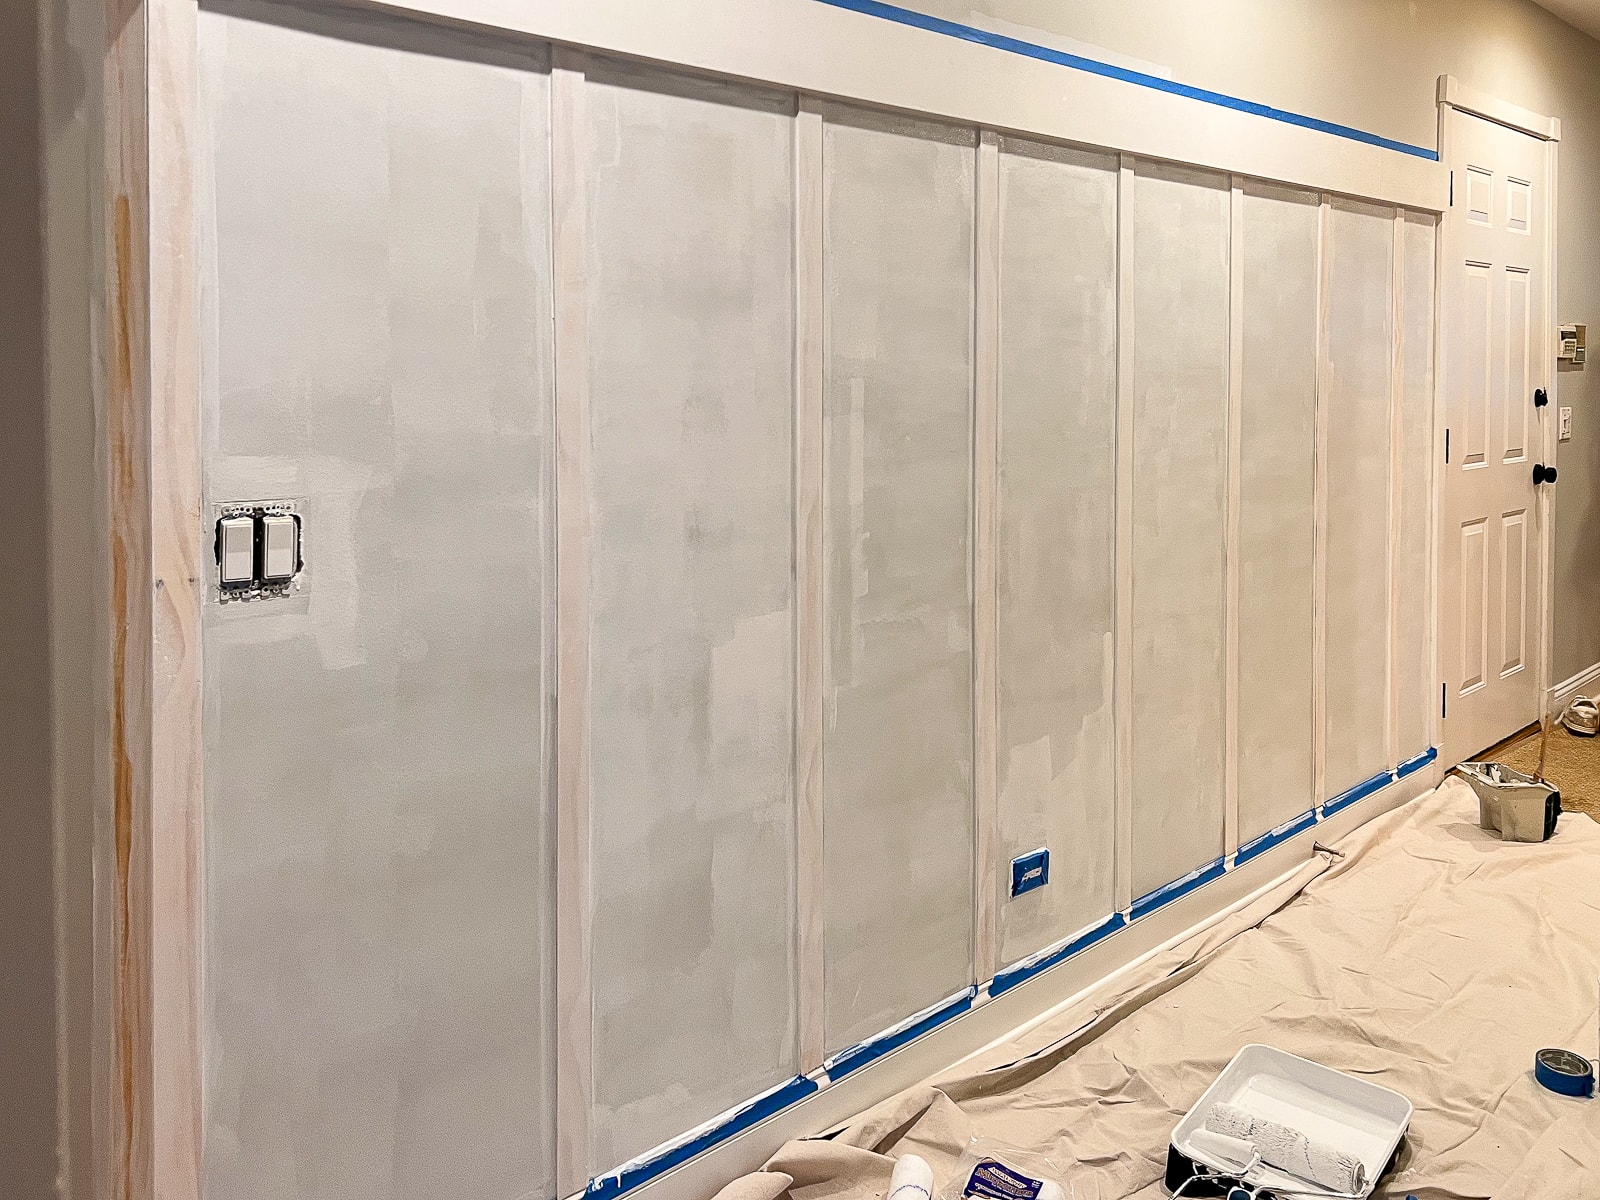
Zinsser is my favorite drywall primer and we gave the entire area one light coat of it.
Time to Paint!
Finally, we’re getting to the finish line. Once our primer was dry to the touch (about an hour), we were able to start painting. For this, we went with Benjamin Moore’s “Simply White” in a satin sheen. This color matches the rest of the trim and doors in Liz’s home. You can choose any paint color for this. We liked the idea of a seamless transition between Liz’s front door and her new entryway area.

When you’ve got two people painting, I always like split up “cutting in” and rolling. Cutting in involves using a brush to reach all of the places that your roller can’t reach – like the seams, underneath the wood, and tight corners. I always recommend cutting in first and then having the next person roll right after.
If you let the paint start to dry before you roll, you can pull it up as you go, which leads to a big mess. I had Liz cut in and then I followed behind her, rolling all of the larger areas.
In the end, we needed three light coats of paint to get everything completely covered.
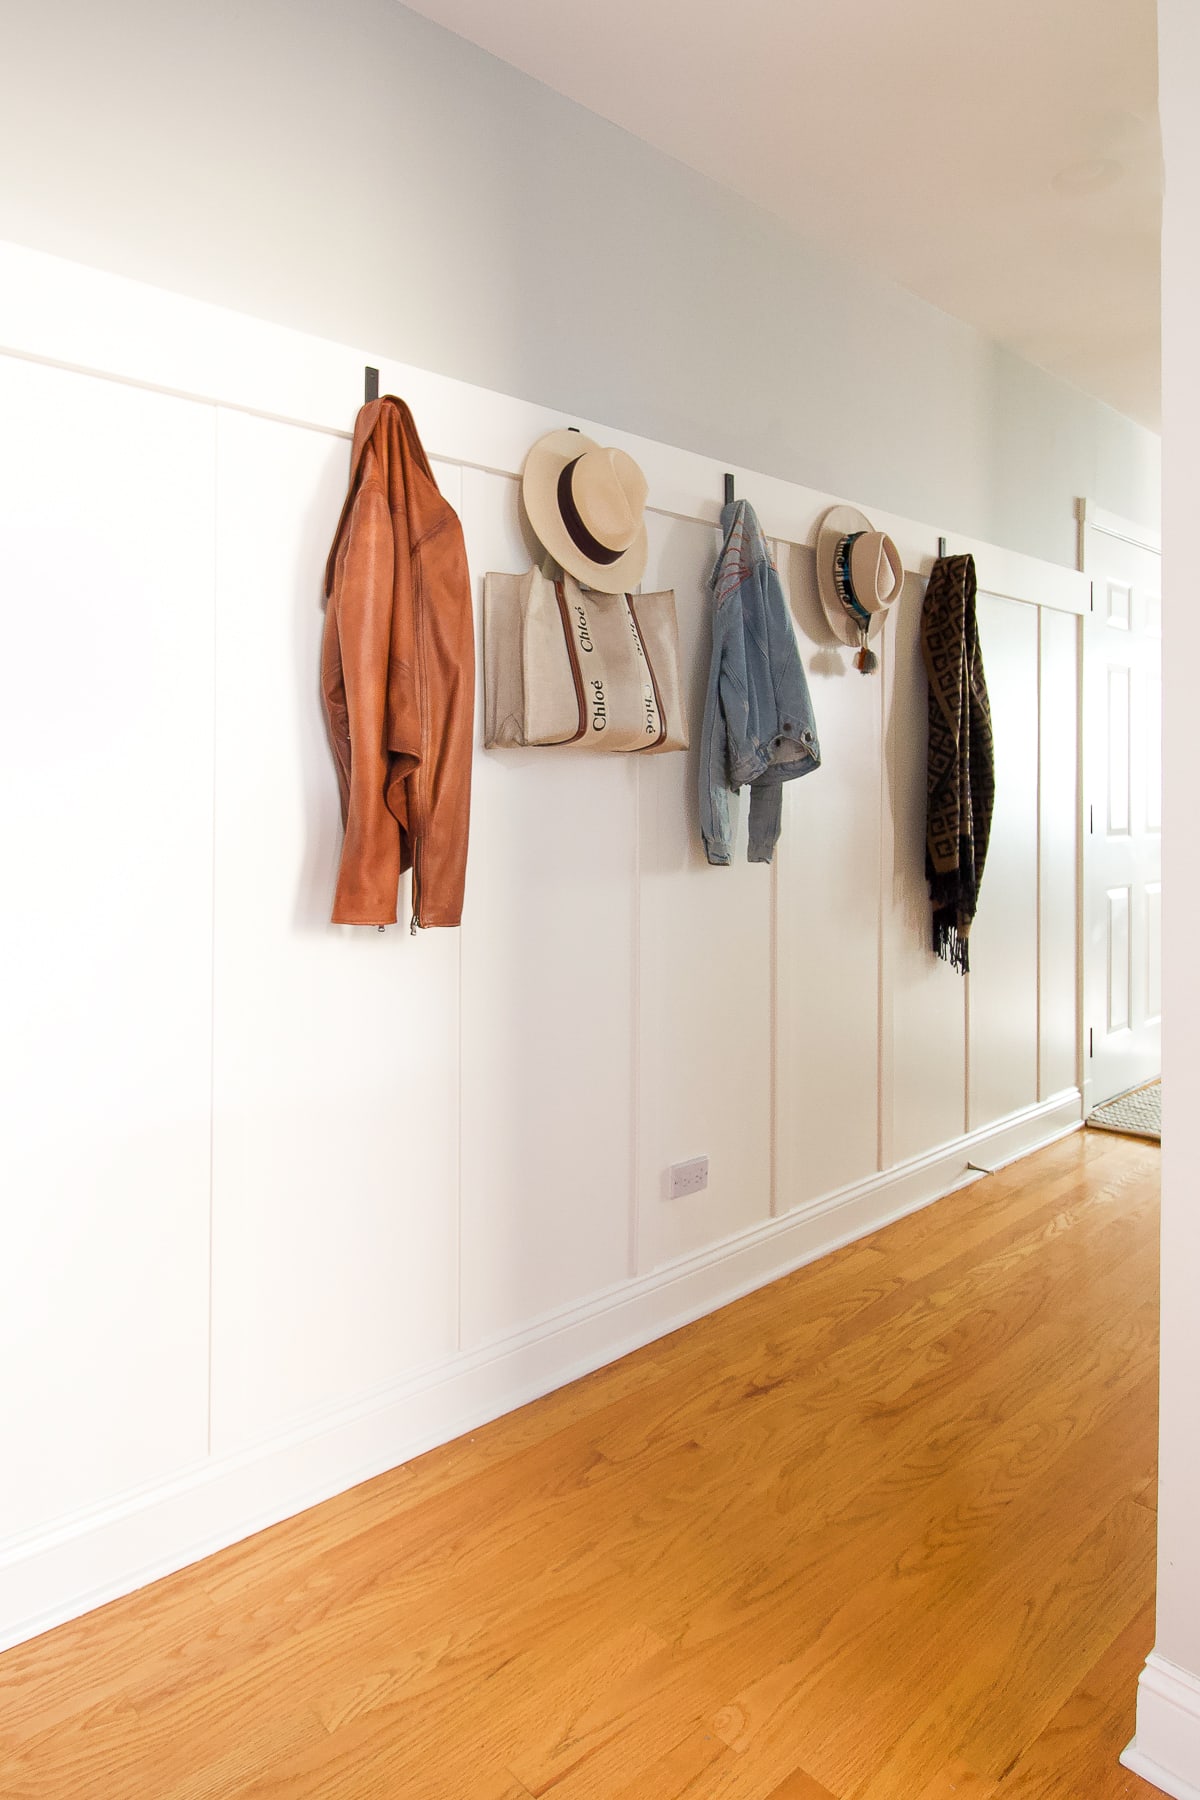
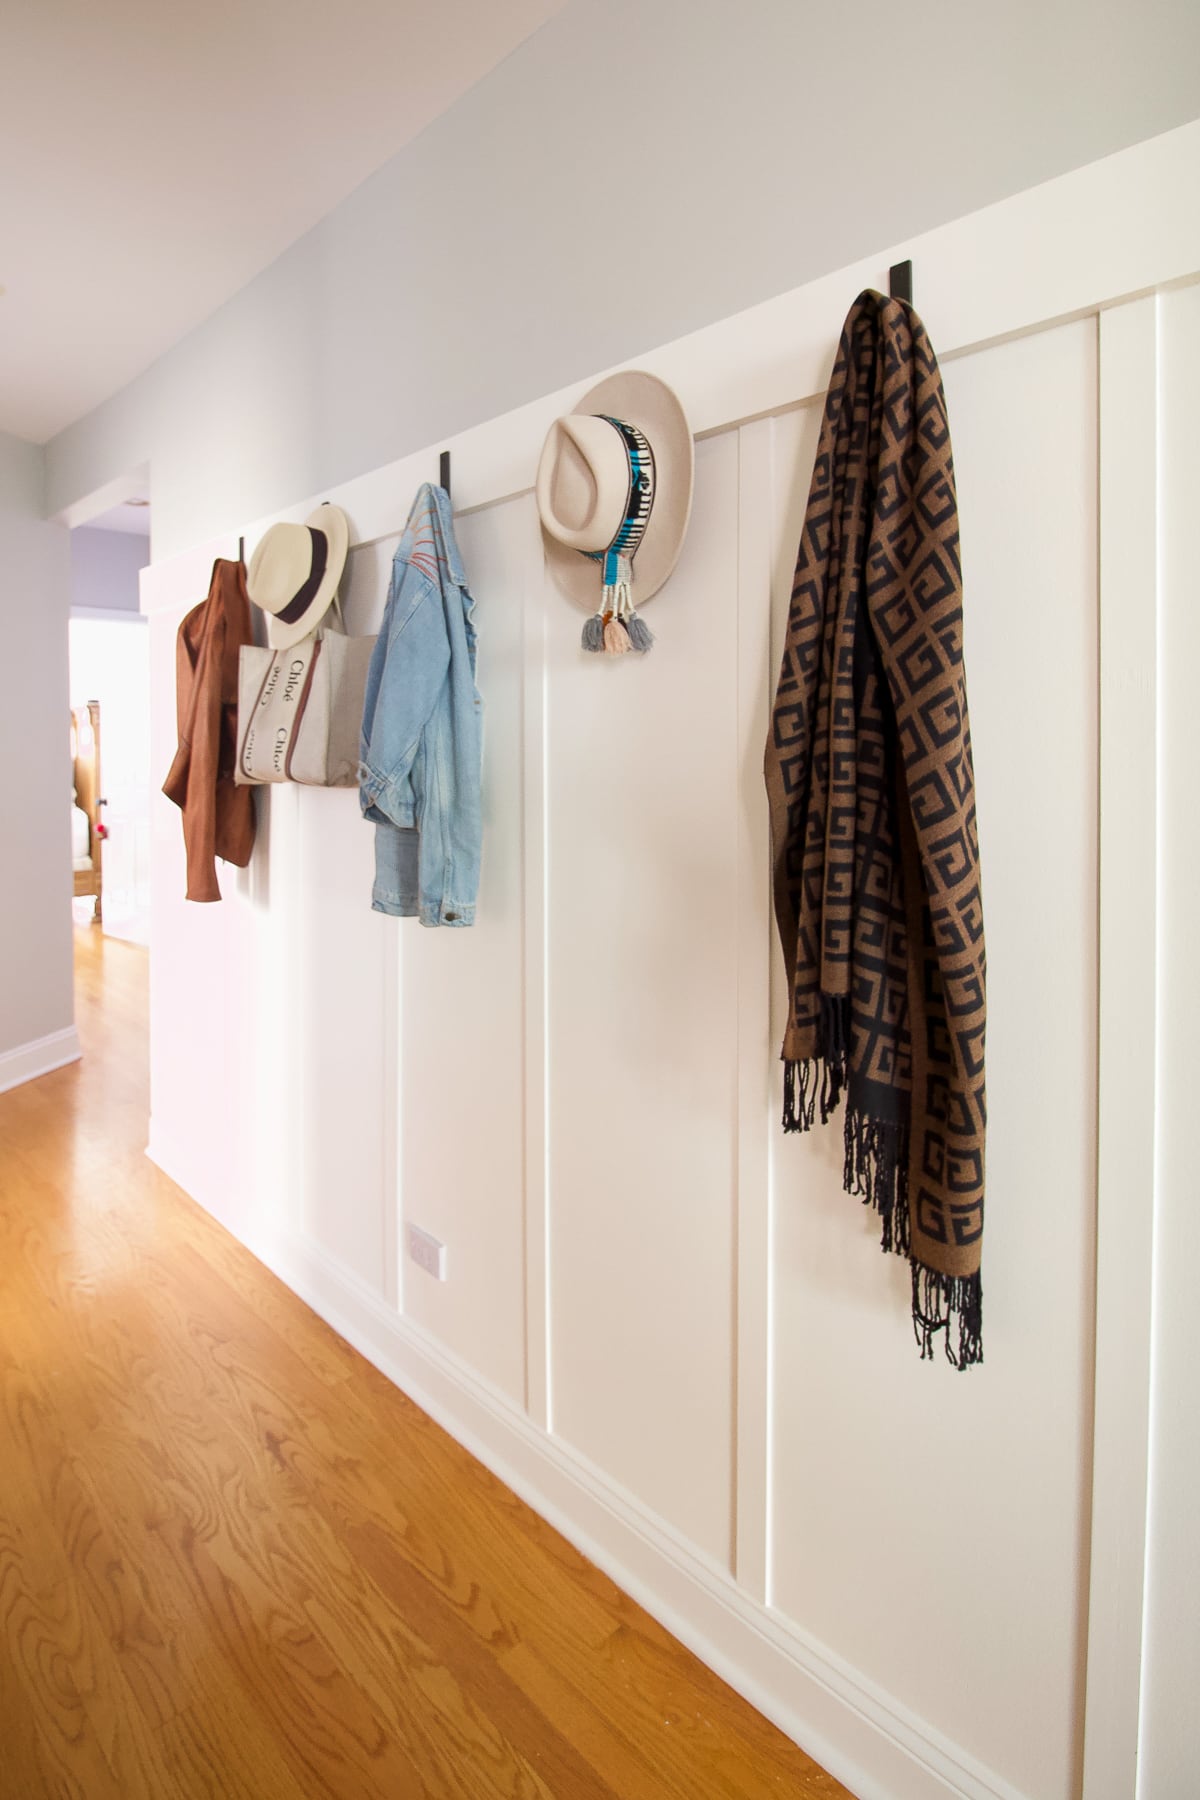
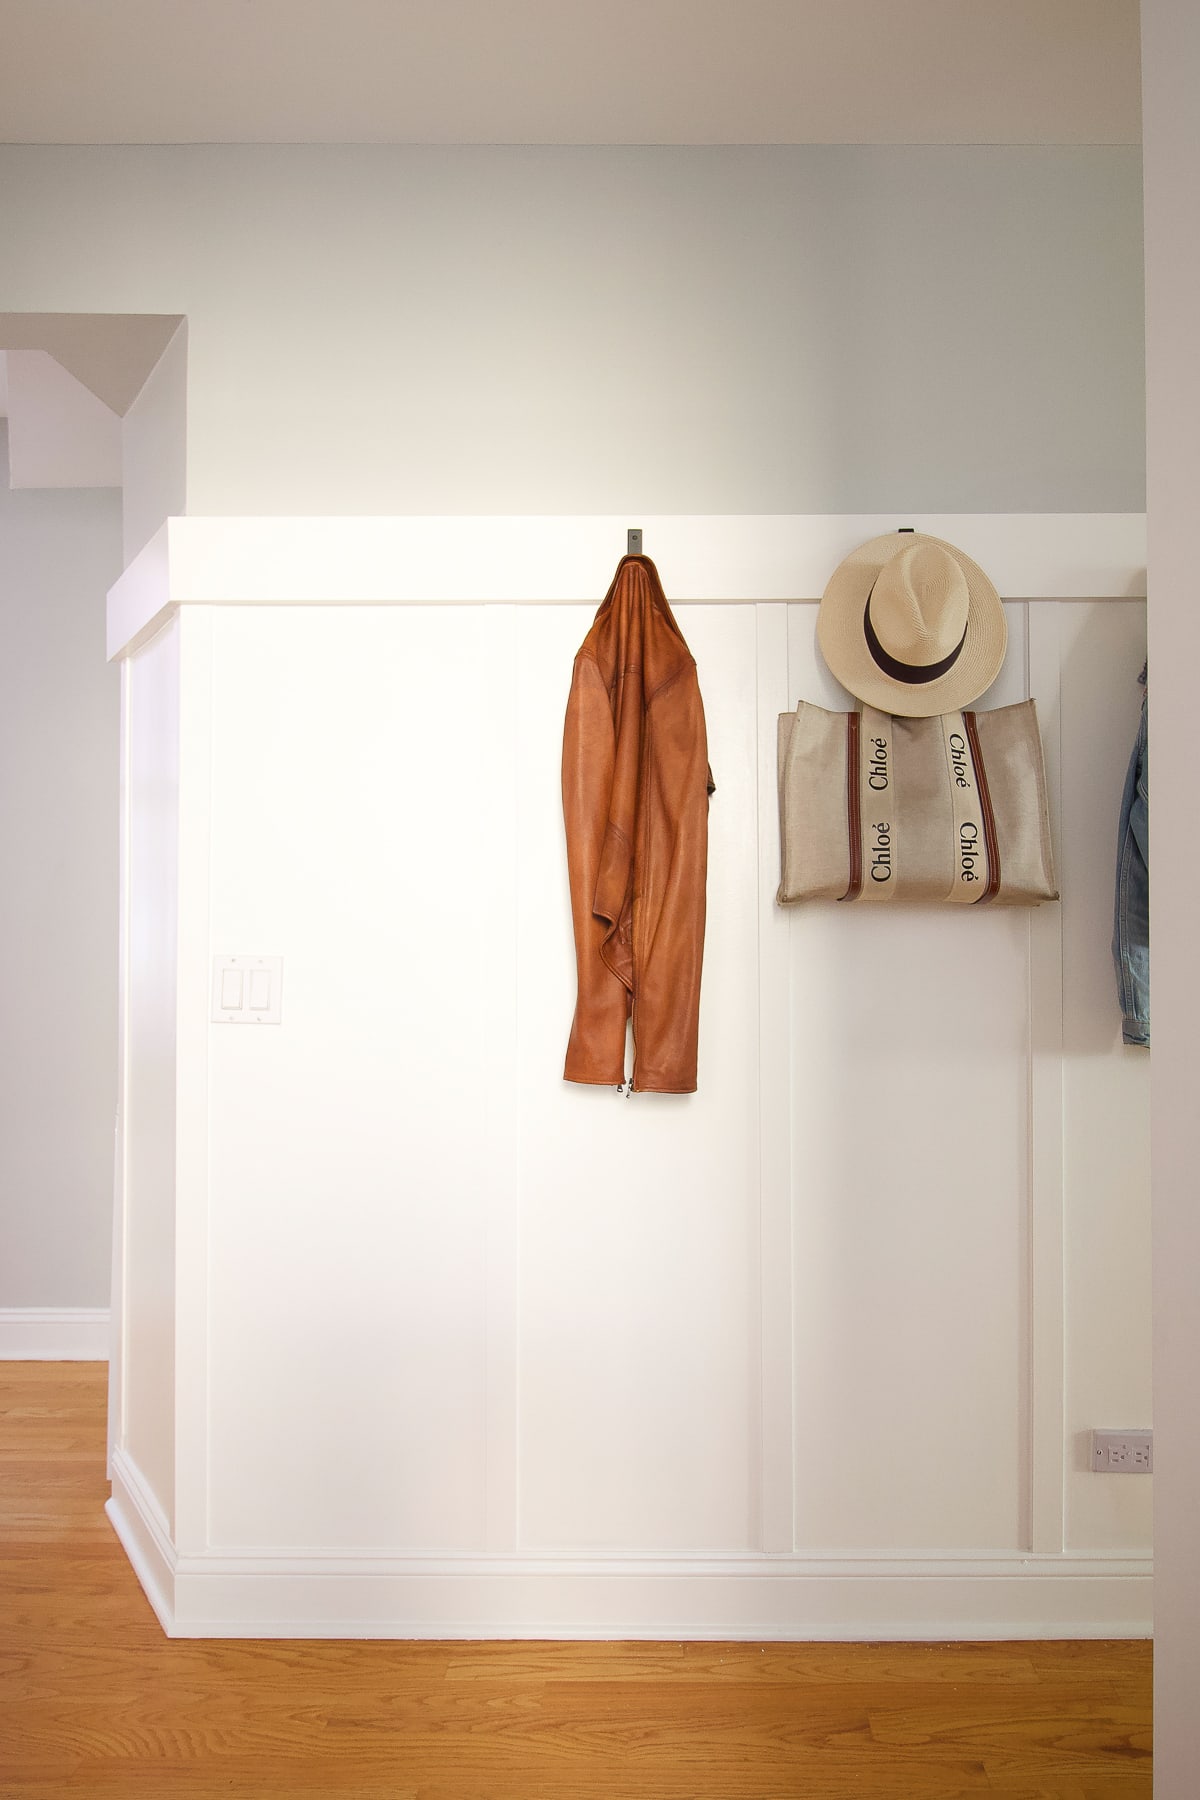
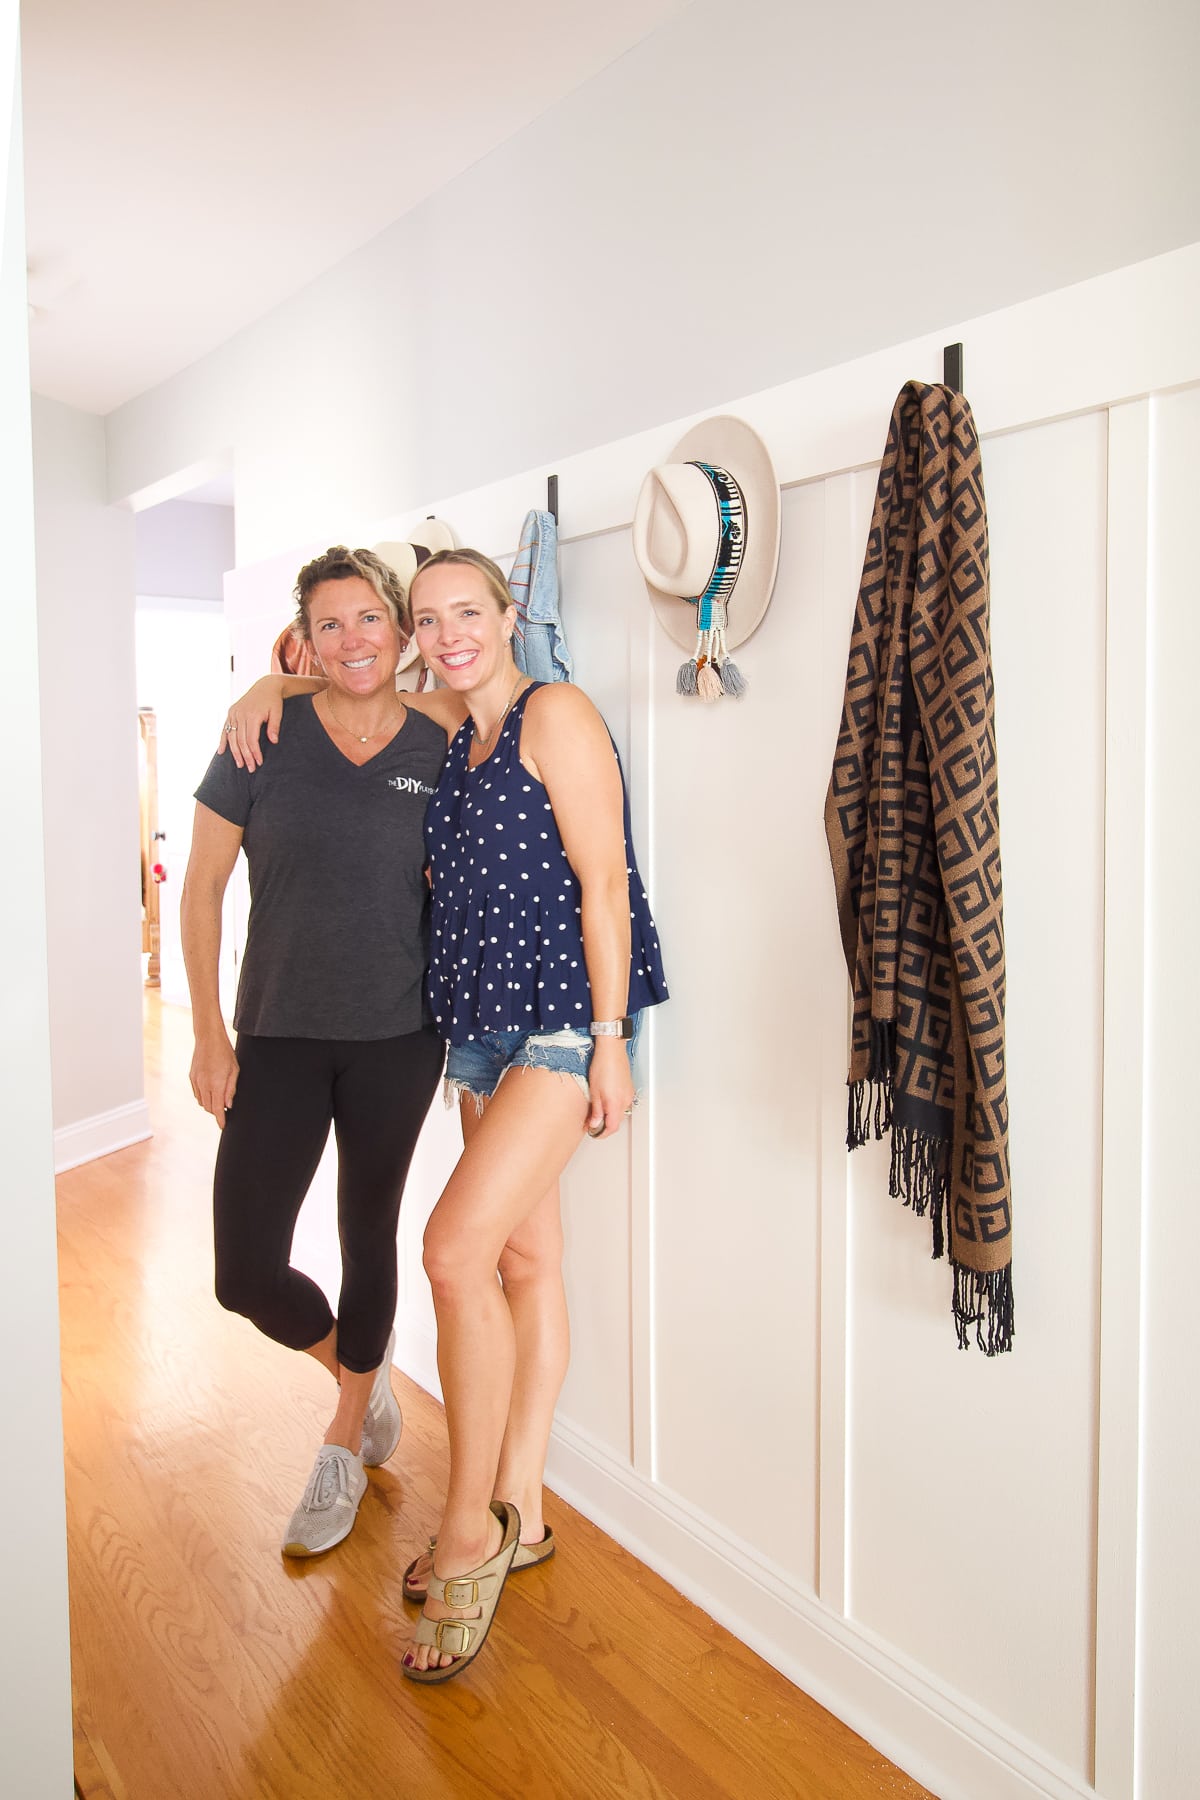
Add Your Hooks

We decided to go with five of these black hooks for Liz’s hallway. She wants this to be a functional entryway where she can hang her coats, bags, and umbrellas. I always recommend grouping in odd numbers and five was the perfect amount for this large span of wall.

When installing, first create a pilot hole in the wood and then drill in the screws. This will make it a lot easier to get the hooks in place. Aren’t they gorgeous?
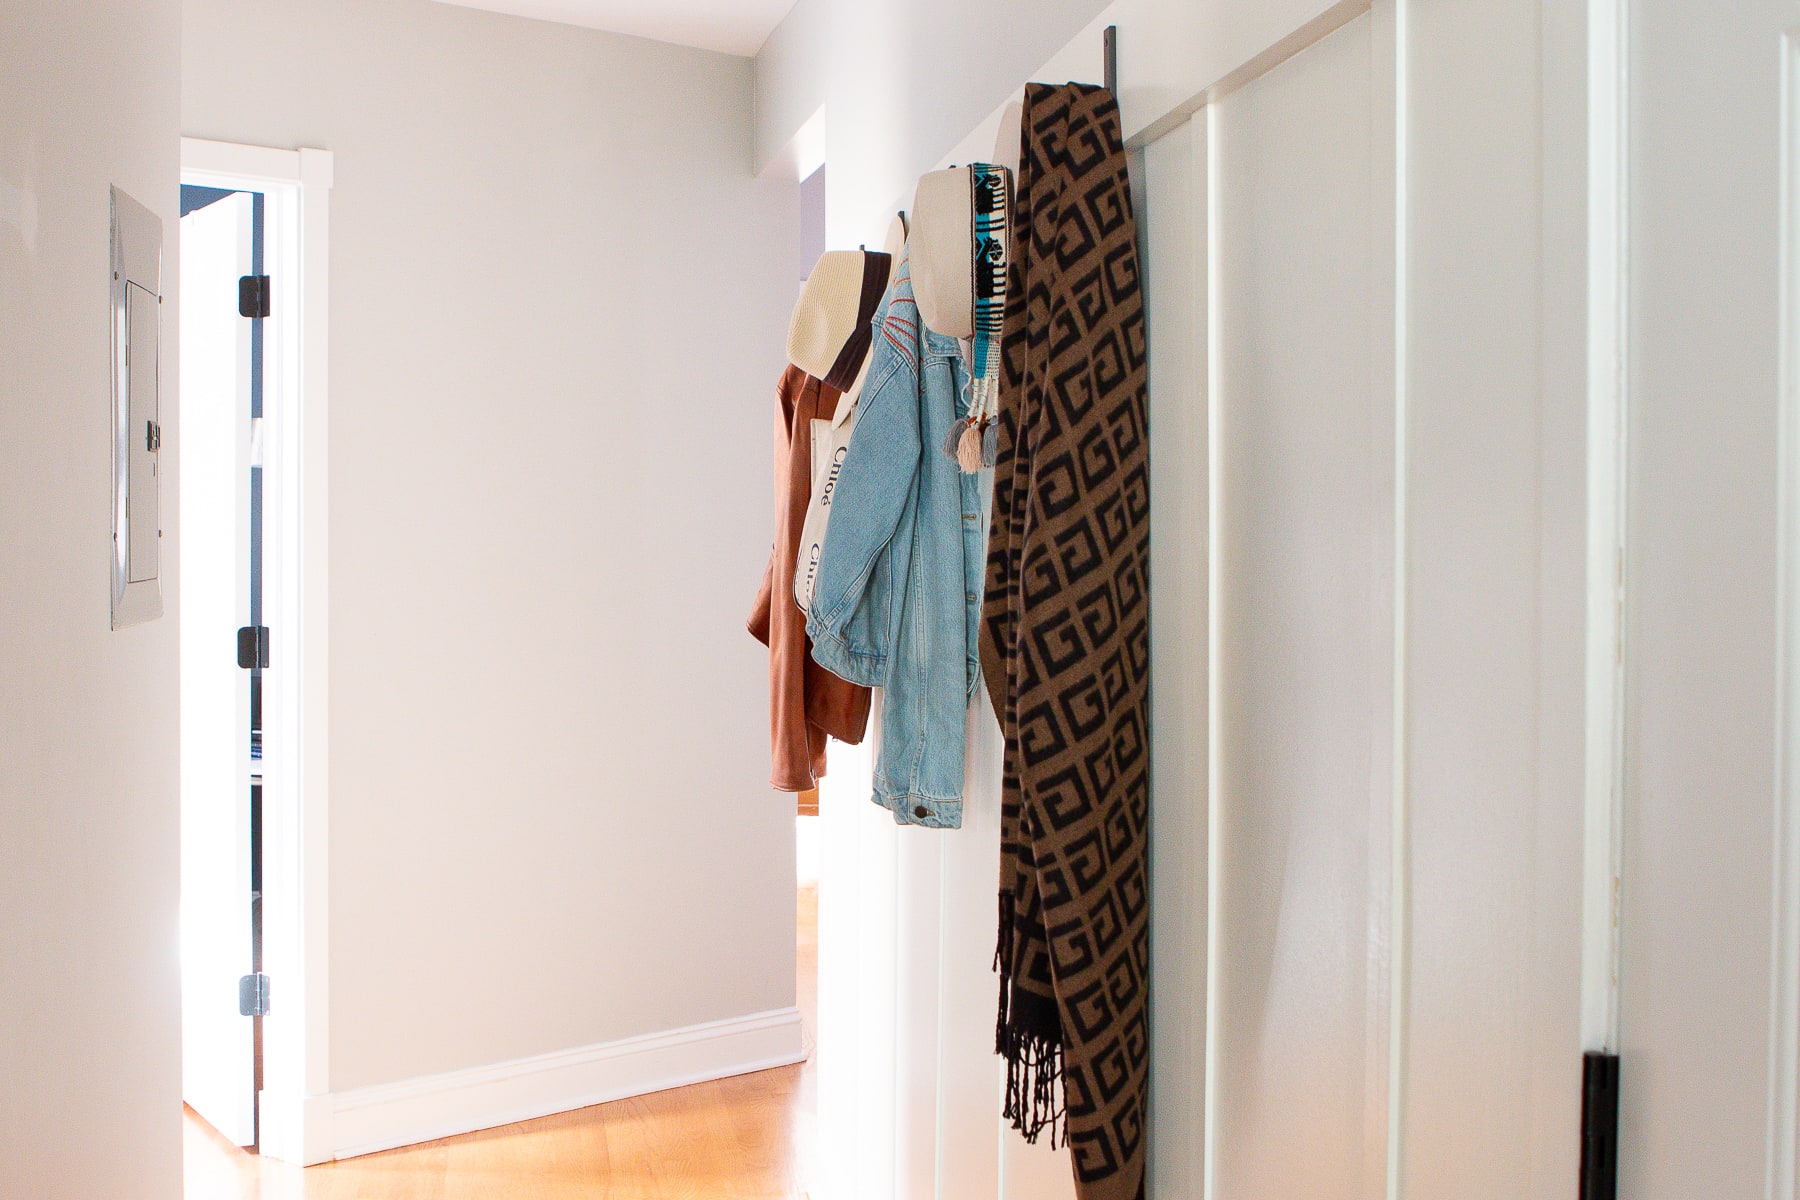
Liz’s Entryway – Before & After
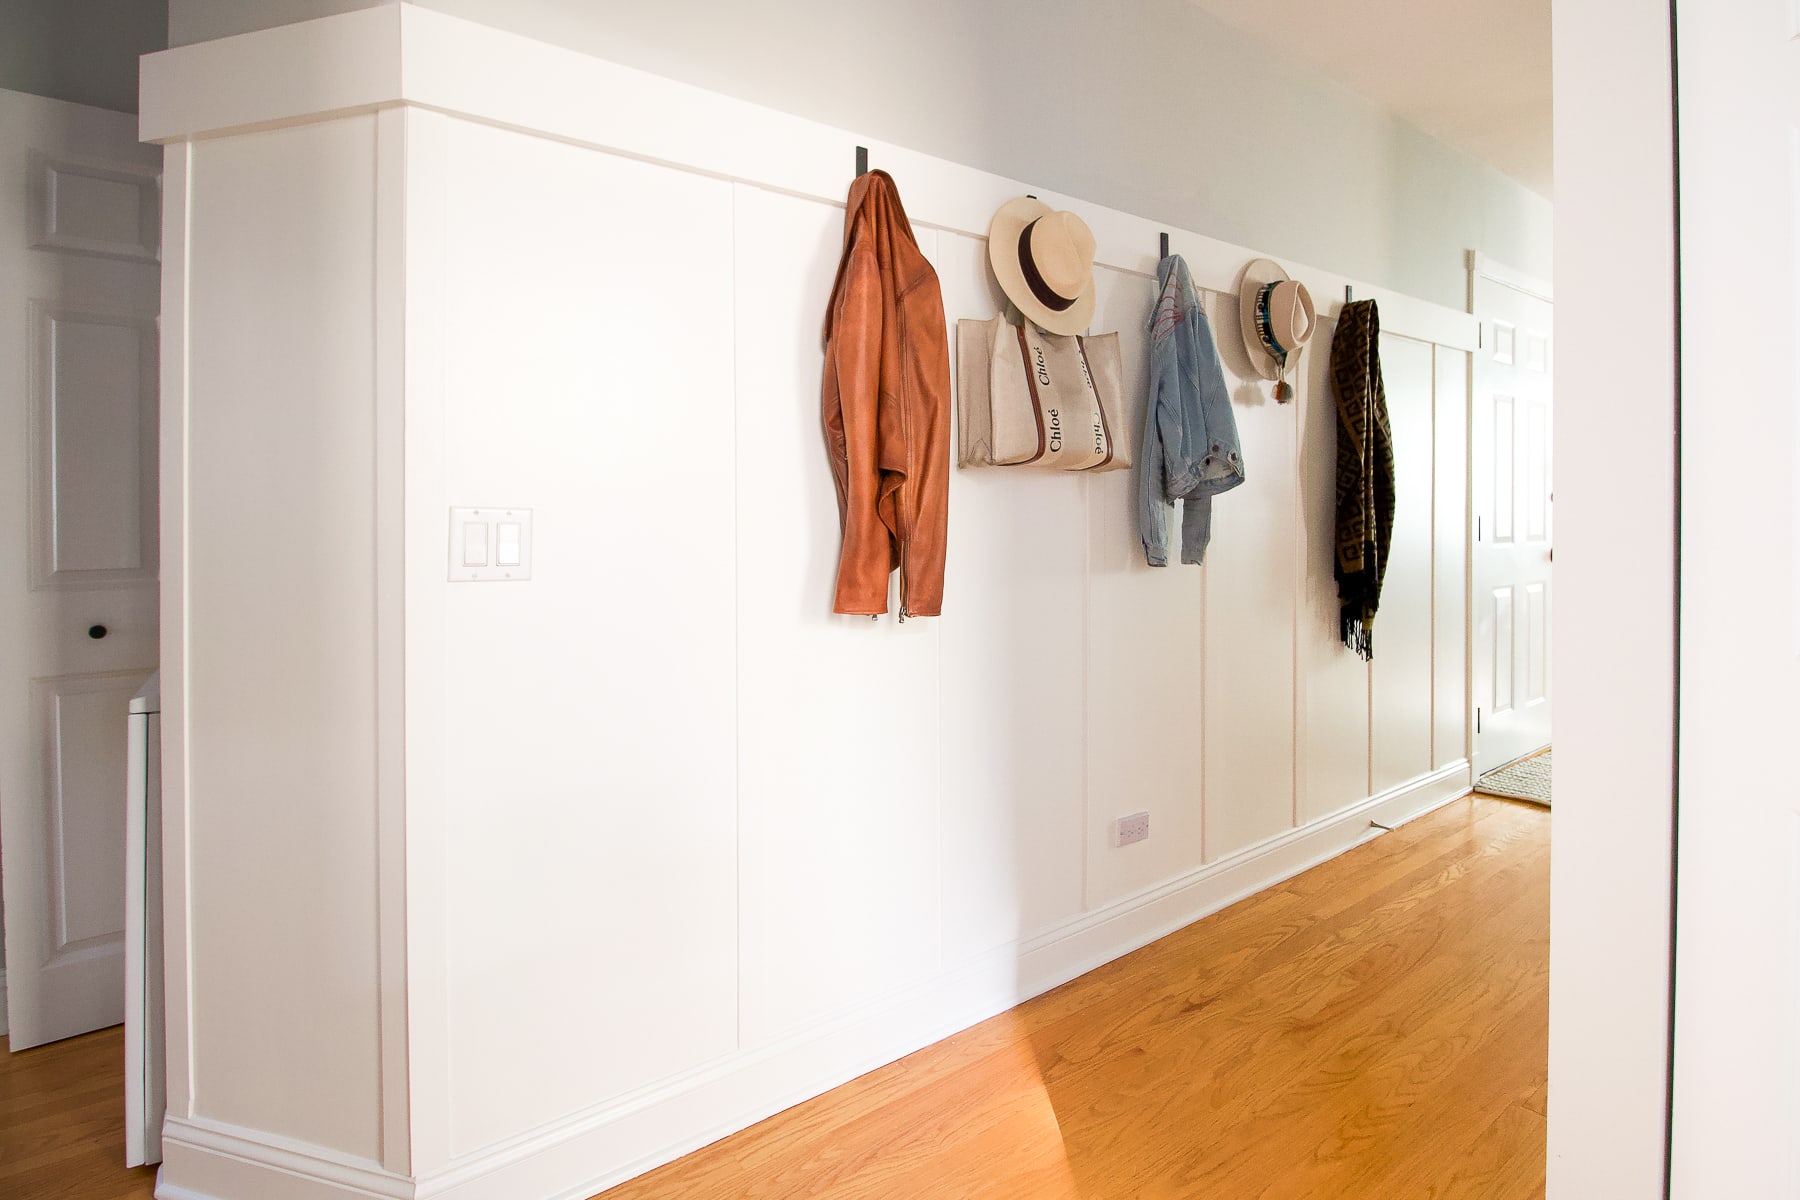
This board and batten wall treatment is a great way to liven up any space.

The hallway before was pretty boring and this adds so much visual interest to an often neglected area.

Plus, it really is an affordable way to make your home look more high-end.
Liz’s New Functional & Stylish Hallway

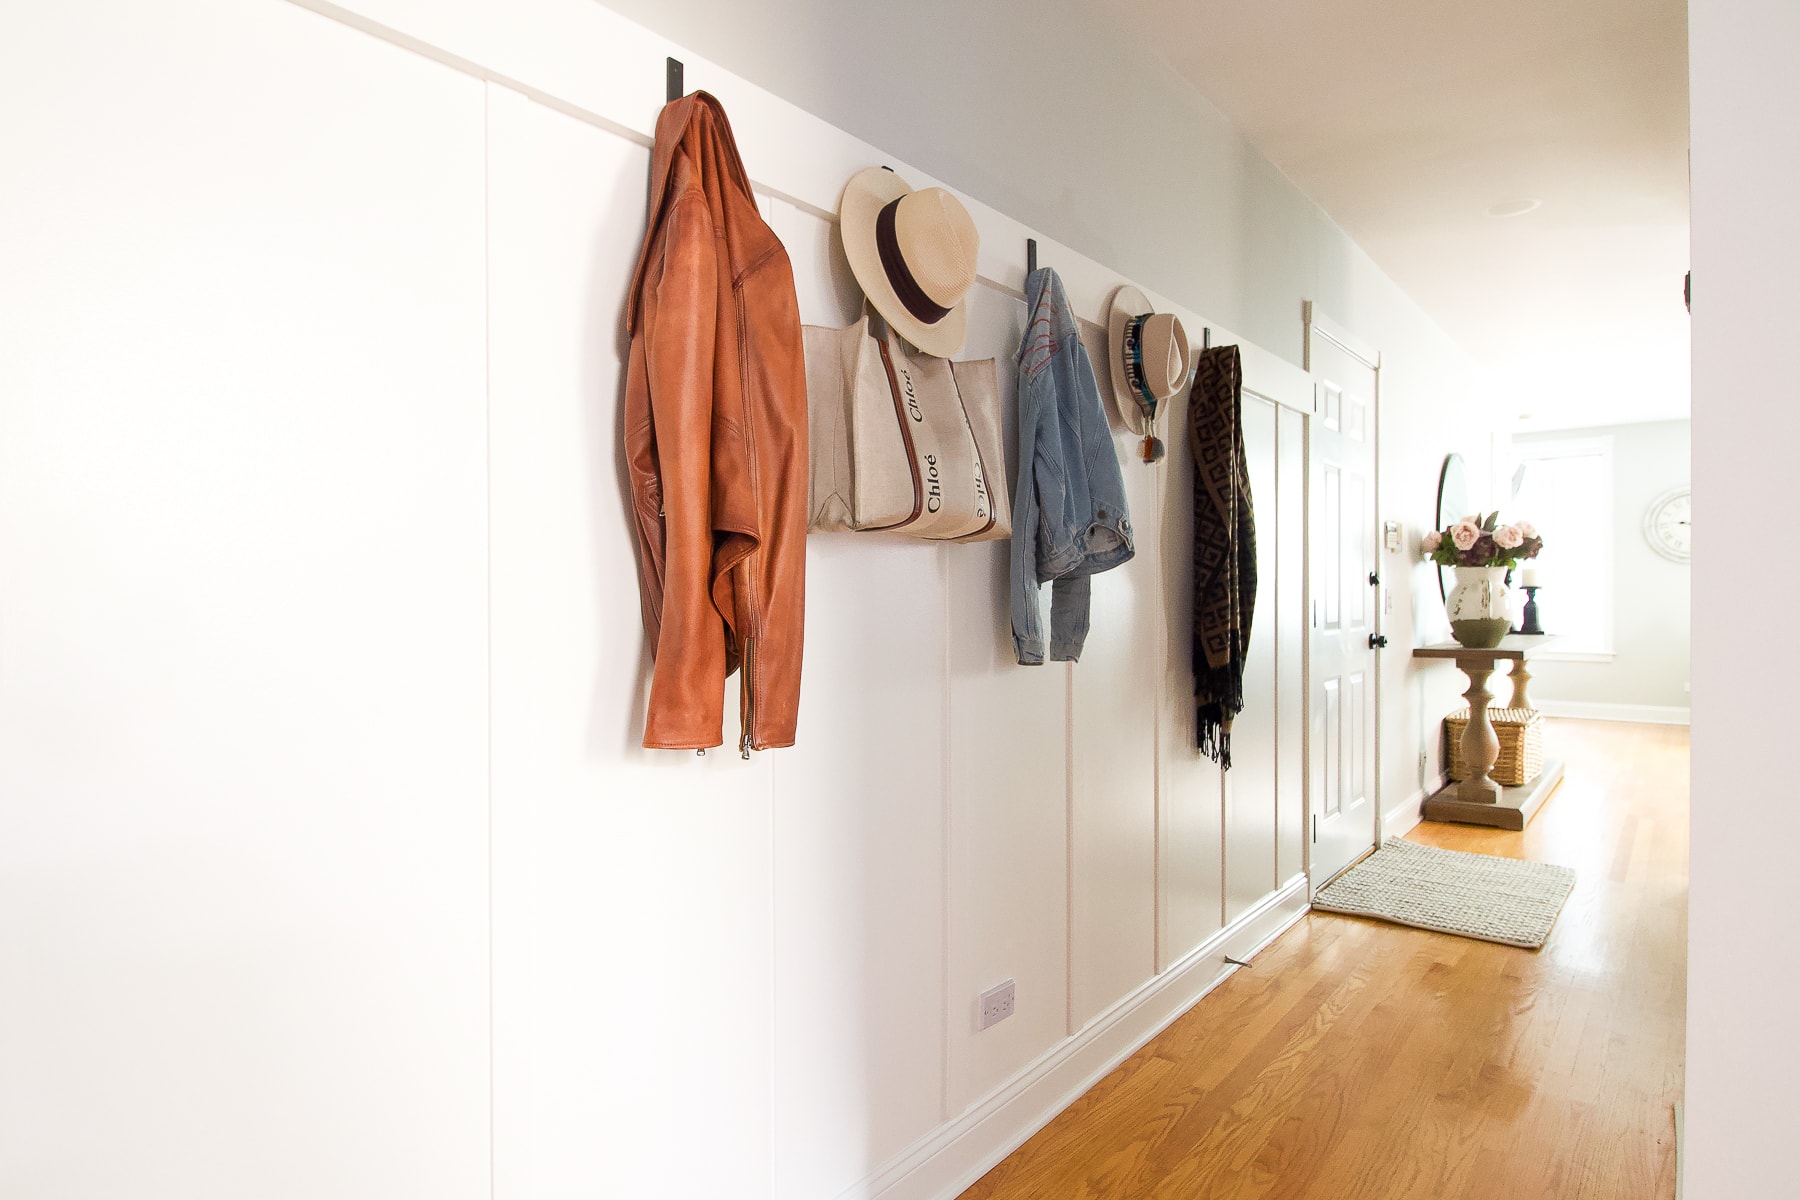
My mom, Liz, and I kept chatting about how much bigger this hallway feels and looks with this new inexpensive wood wall treatment. Instead of just being a boring passageway from room to room, it’s a stylish and functional part of Liz’s condo. I’m a big fan!
So Proud Of Liz
I am so incredibly proud of Liz for tackling this board and batten project right alongside me. She wasn’t afraid to get right in there and get her hands dirty and we were laughing the entire way.
I’m not so sure she’ll be DIY’ing everything around her condo from now on, but it was fun to show her that she is capable of a lot more than she realizes.
My motto is “everything is figure-outable”. With a little hard work (and sometimes a bit of Googling), you can get just about any project done around your house!

Now, I hope this DIY boot camp has inspired you to tackle your own woodworking project. It’s such an inexpensive way to add charm and character to a builder-basic space.