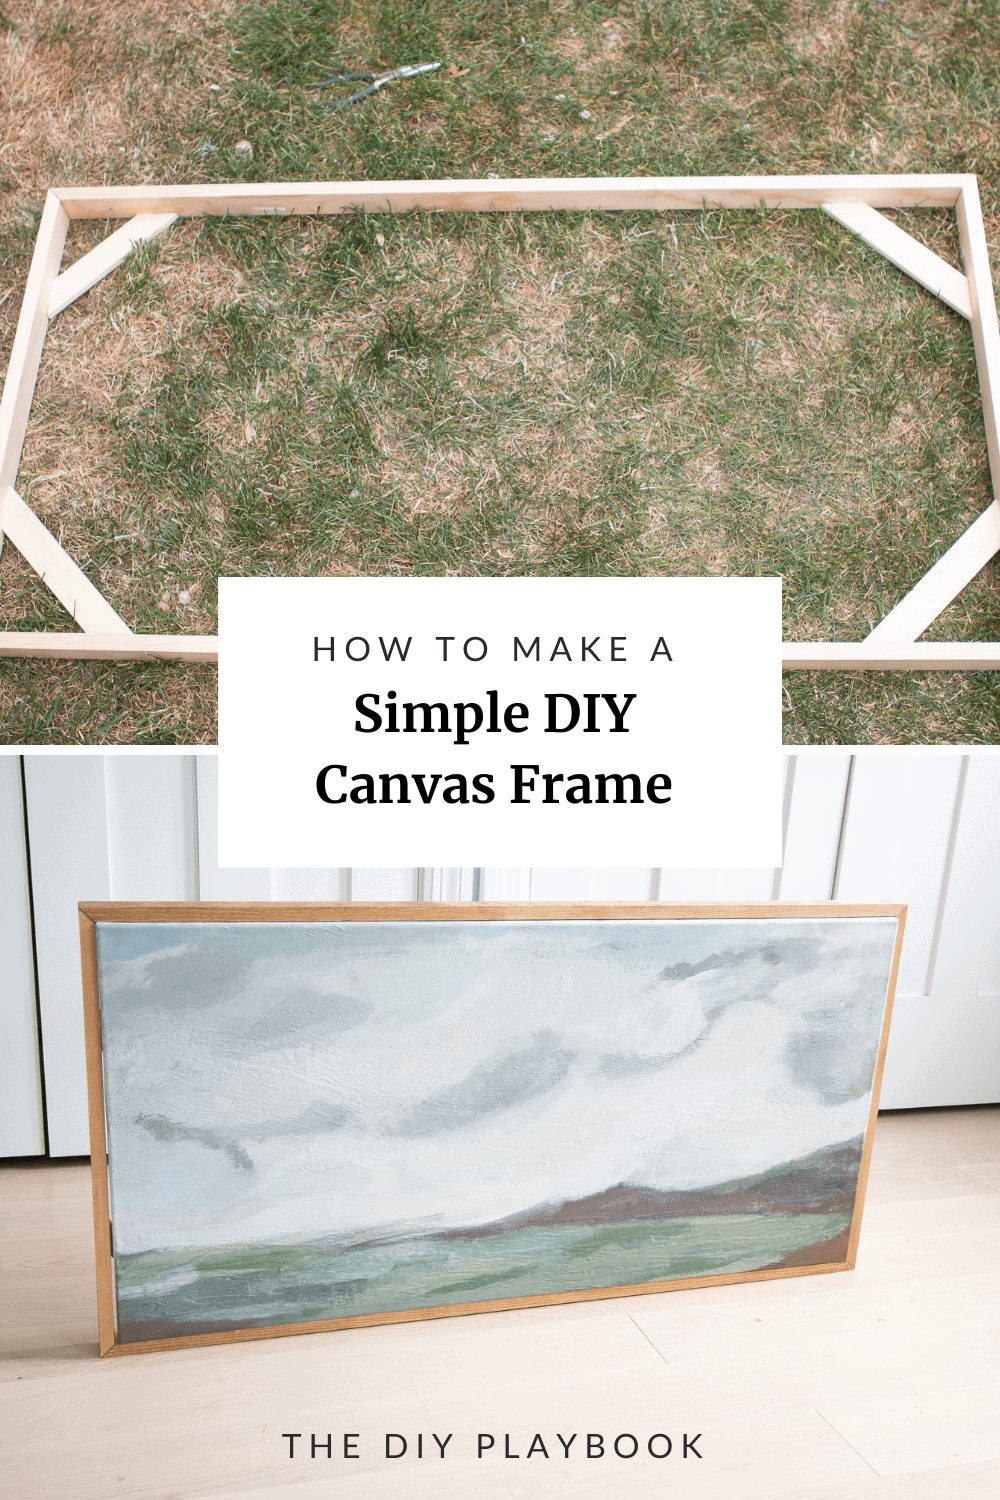
How to Frame a Canvas
Last week, I showed you the abstract art I created using an old canvas frame from my mom’s bathroom. I’ve gotta say, I’m actually pretty proud of it! With the art done, I knew I wanted to take it to the next level with a DIY canvas frame. That way it would look like a “legit” piece of art and the edges of the canvas would be hidden.
I’ve always wanted to learn how to frame a canvas, but somehow, over the last eight years, I have never gotten around to doing this project. Until now! I’m excited to share my step-by-step tutorial for this beginner-to-intermediate DIY project.
DIY Canvas Frame – Supplies
- Miter Saw
- Miter Saw Stand
- Pine Wood (I used 1x2x8)
- Scrap Wood (I used leftover pine that was about 1/4 inch thick)
- Brad Nailer
- Wood Glue
- Corner Clamps
- Tape Measure
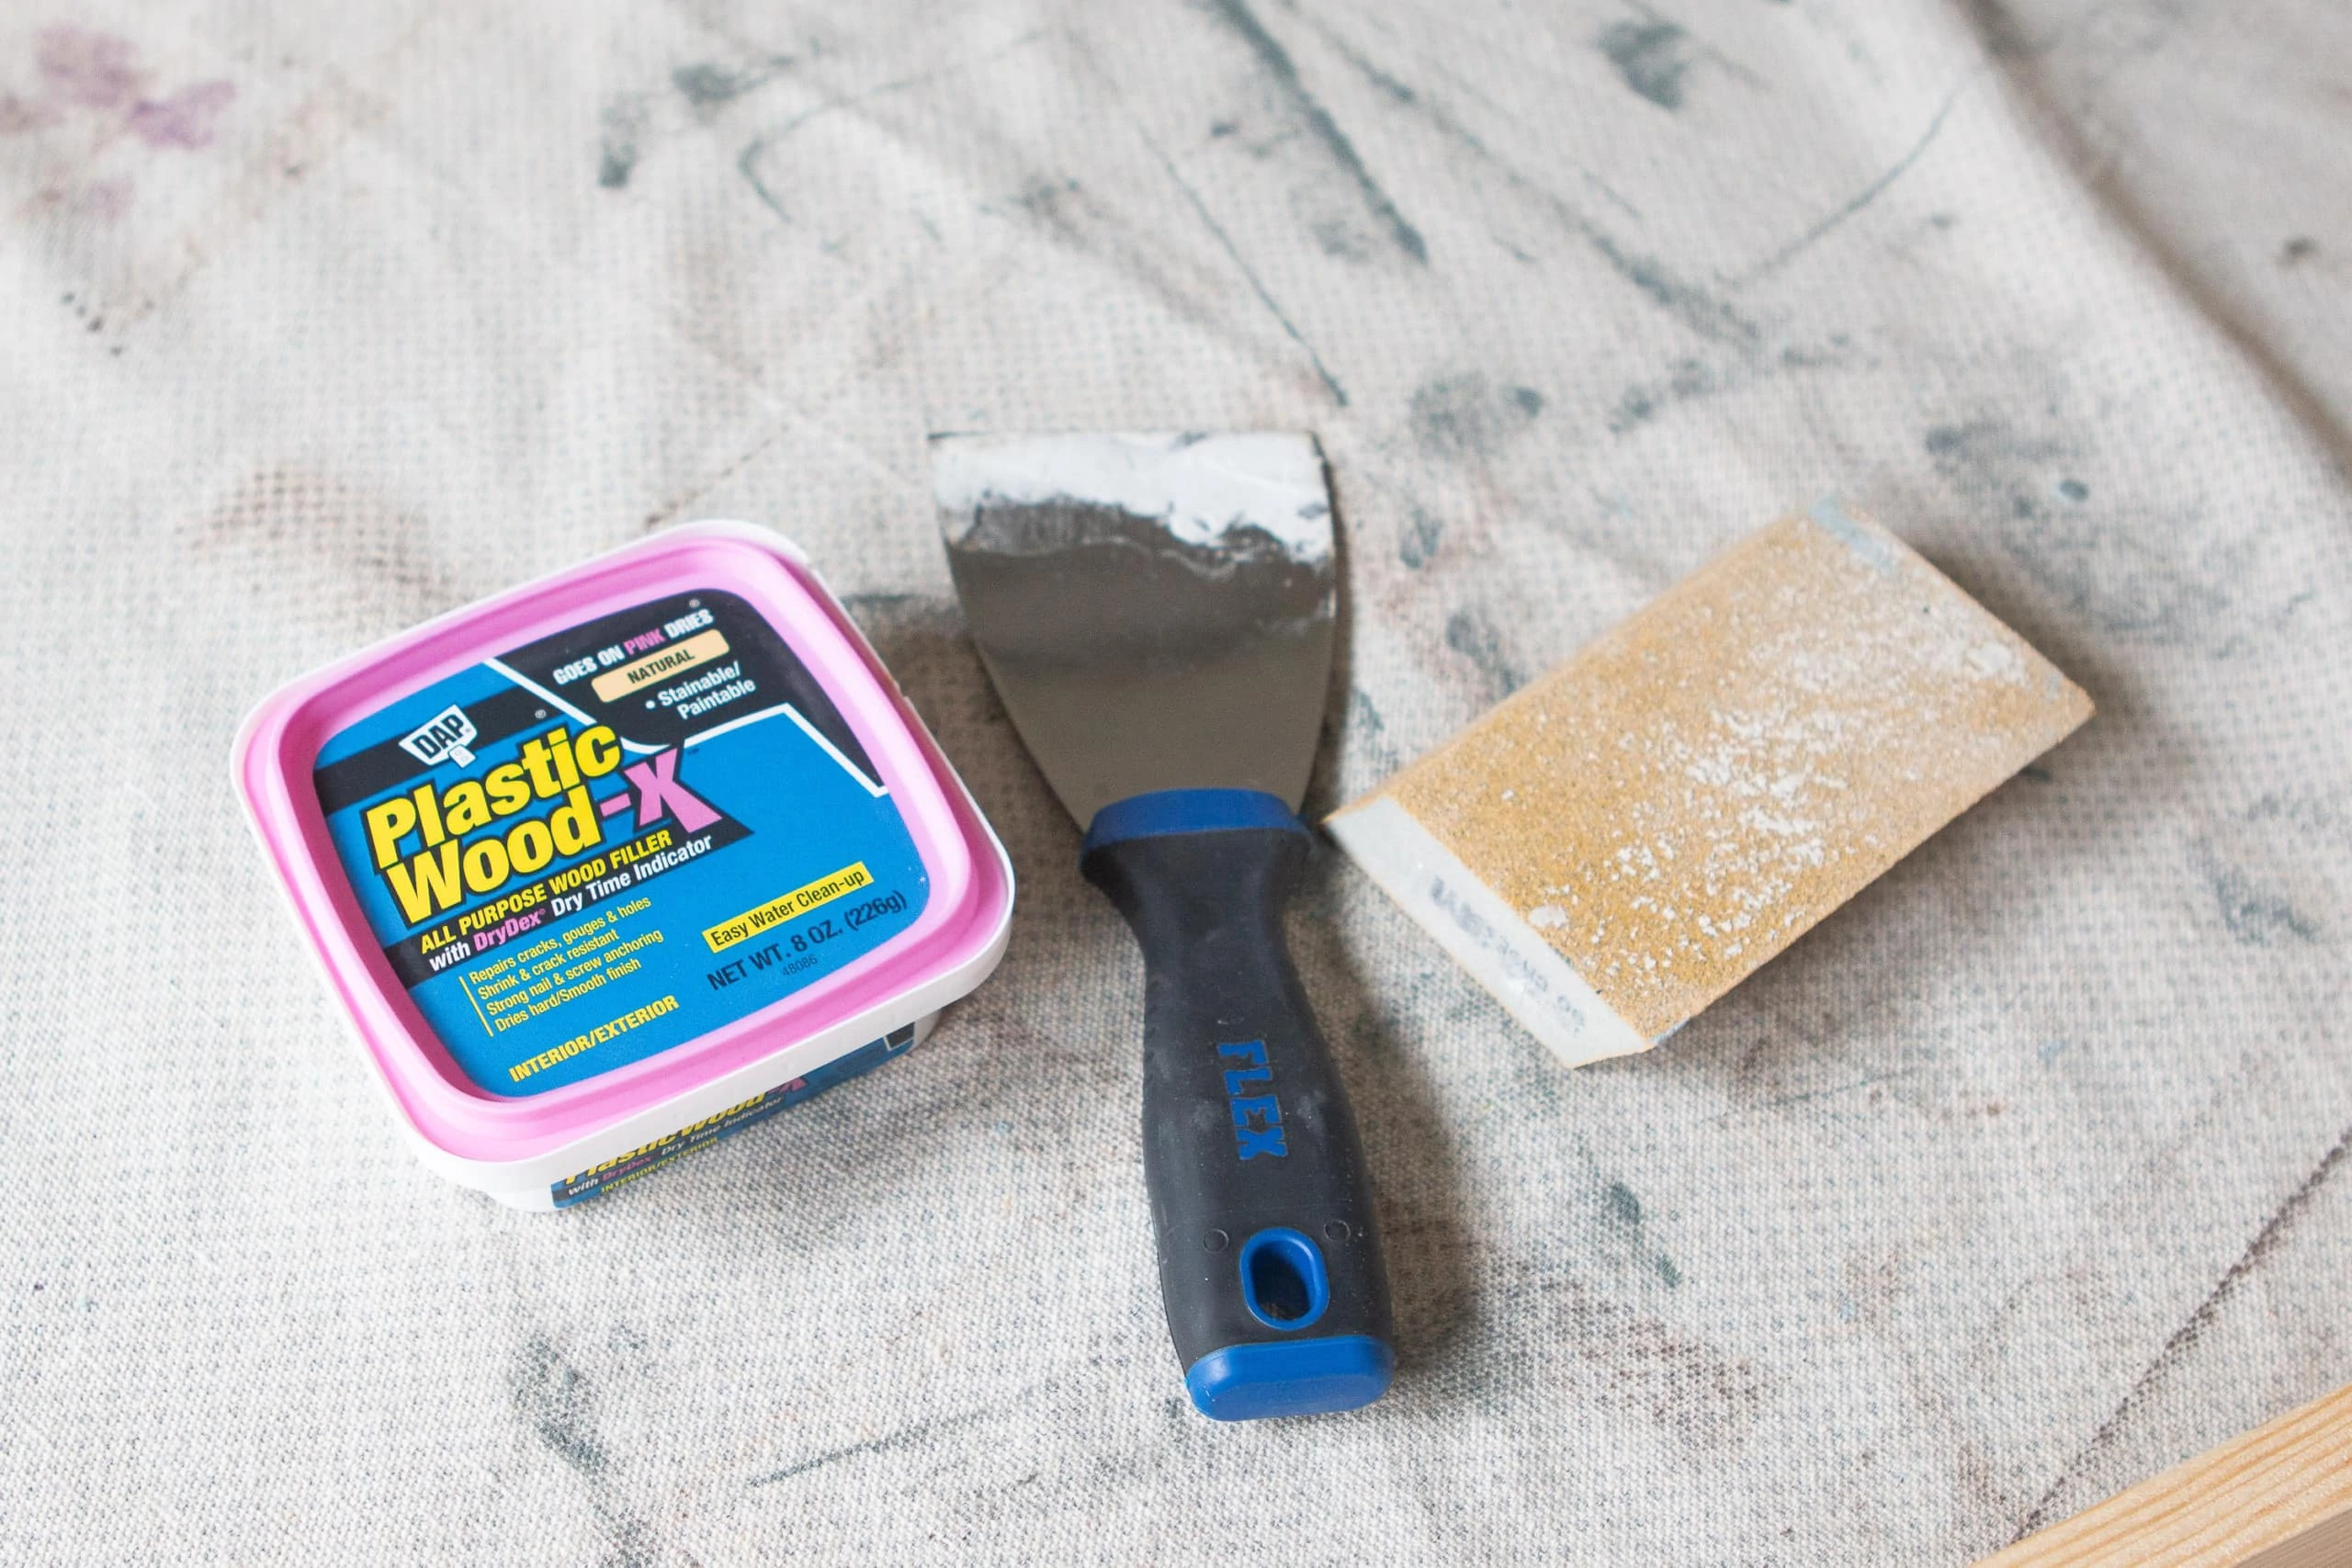
- Plastic Wood and Putty Knife
- Sanding Block
- Wood Conditioner
- Wood Stain
- Scott Paint and Stain Cloths
 The most important supply for this project is the actual wood. I ended up using 1x2x8 pine to cover my 20-inch by 40-inch canvas. I like pine because it’s easily available at most hardware stores and it isn’t crazy expensive. But because it’s a soft/porous wood, there are some things to keep in mind when staining it and I’ll share those below.
How to Frame a Canvas – Steps
I was able to get this project done over the course of two of Rory’s nap times. (That’s the way I judge projects these days..ha!) During the first nap, I was able to make all of my cuts and build the actual frame. During the second nap, I was able to do the final steps of filling the holes, conditioning, and staining the frame. All this to say, it isn’t a super time-intensive project.
Cut Your Four Pieces
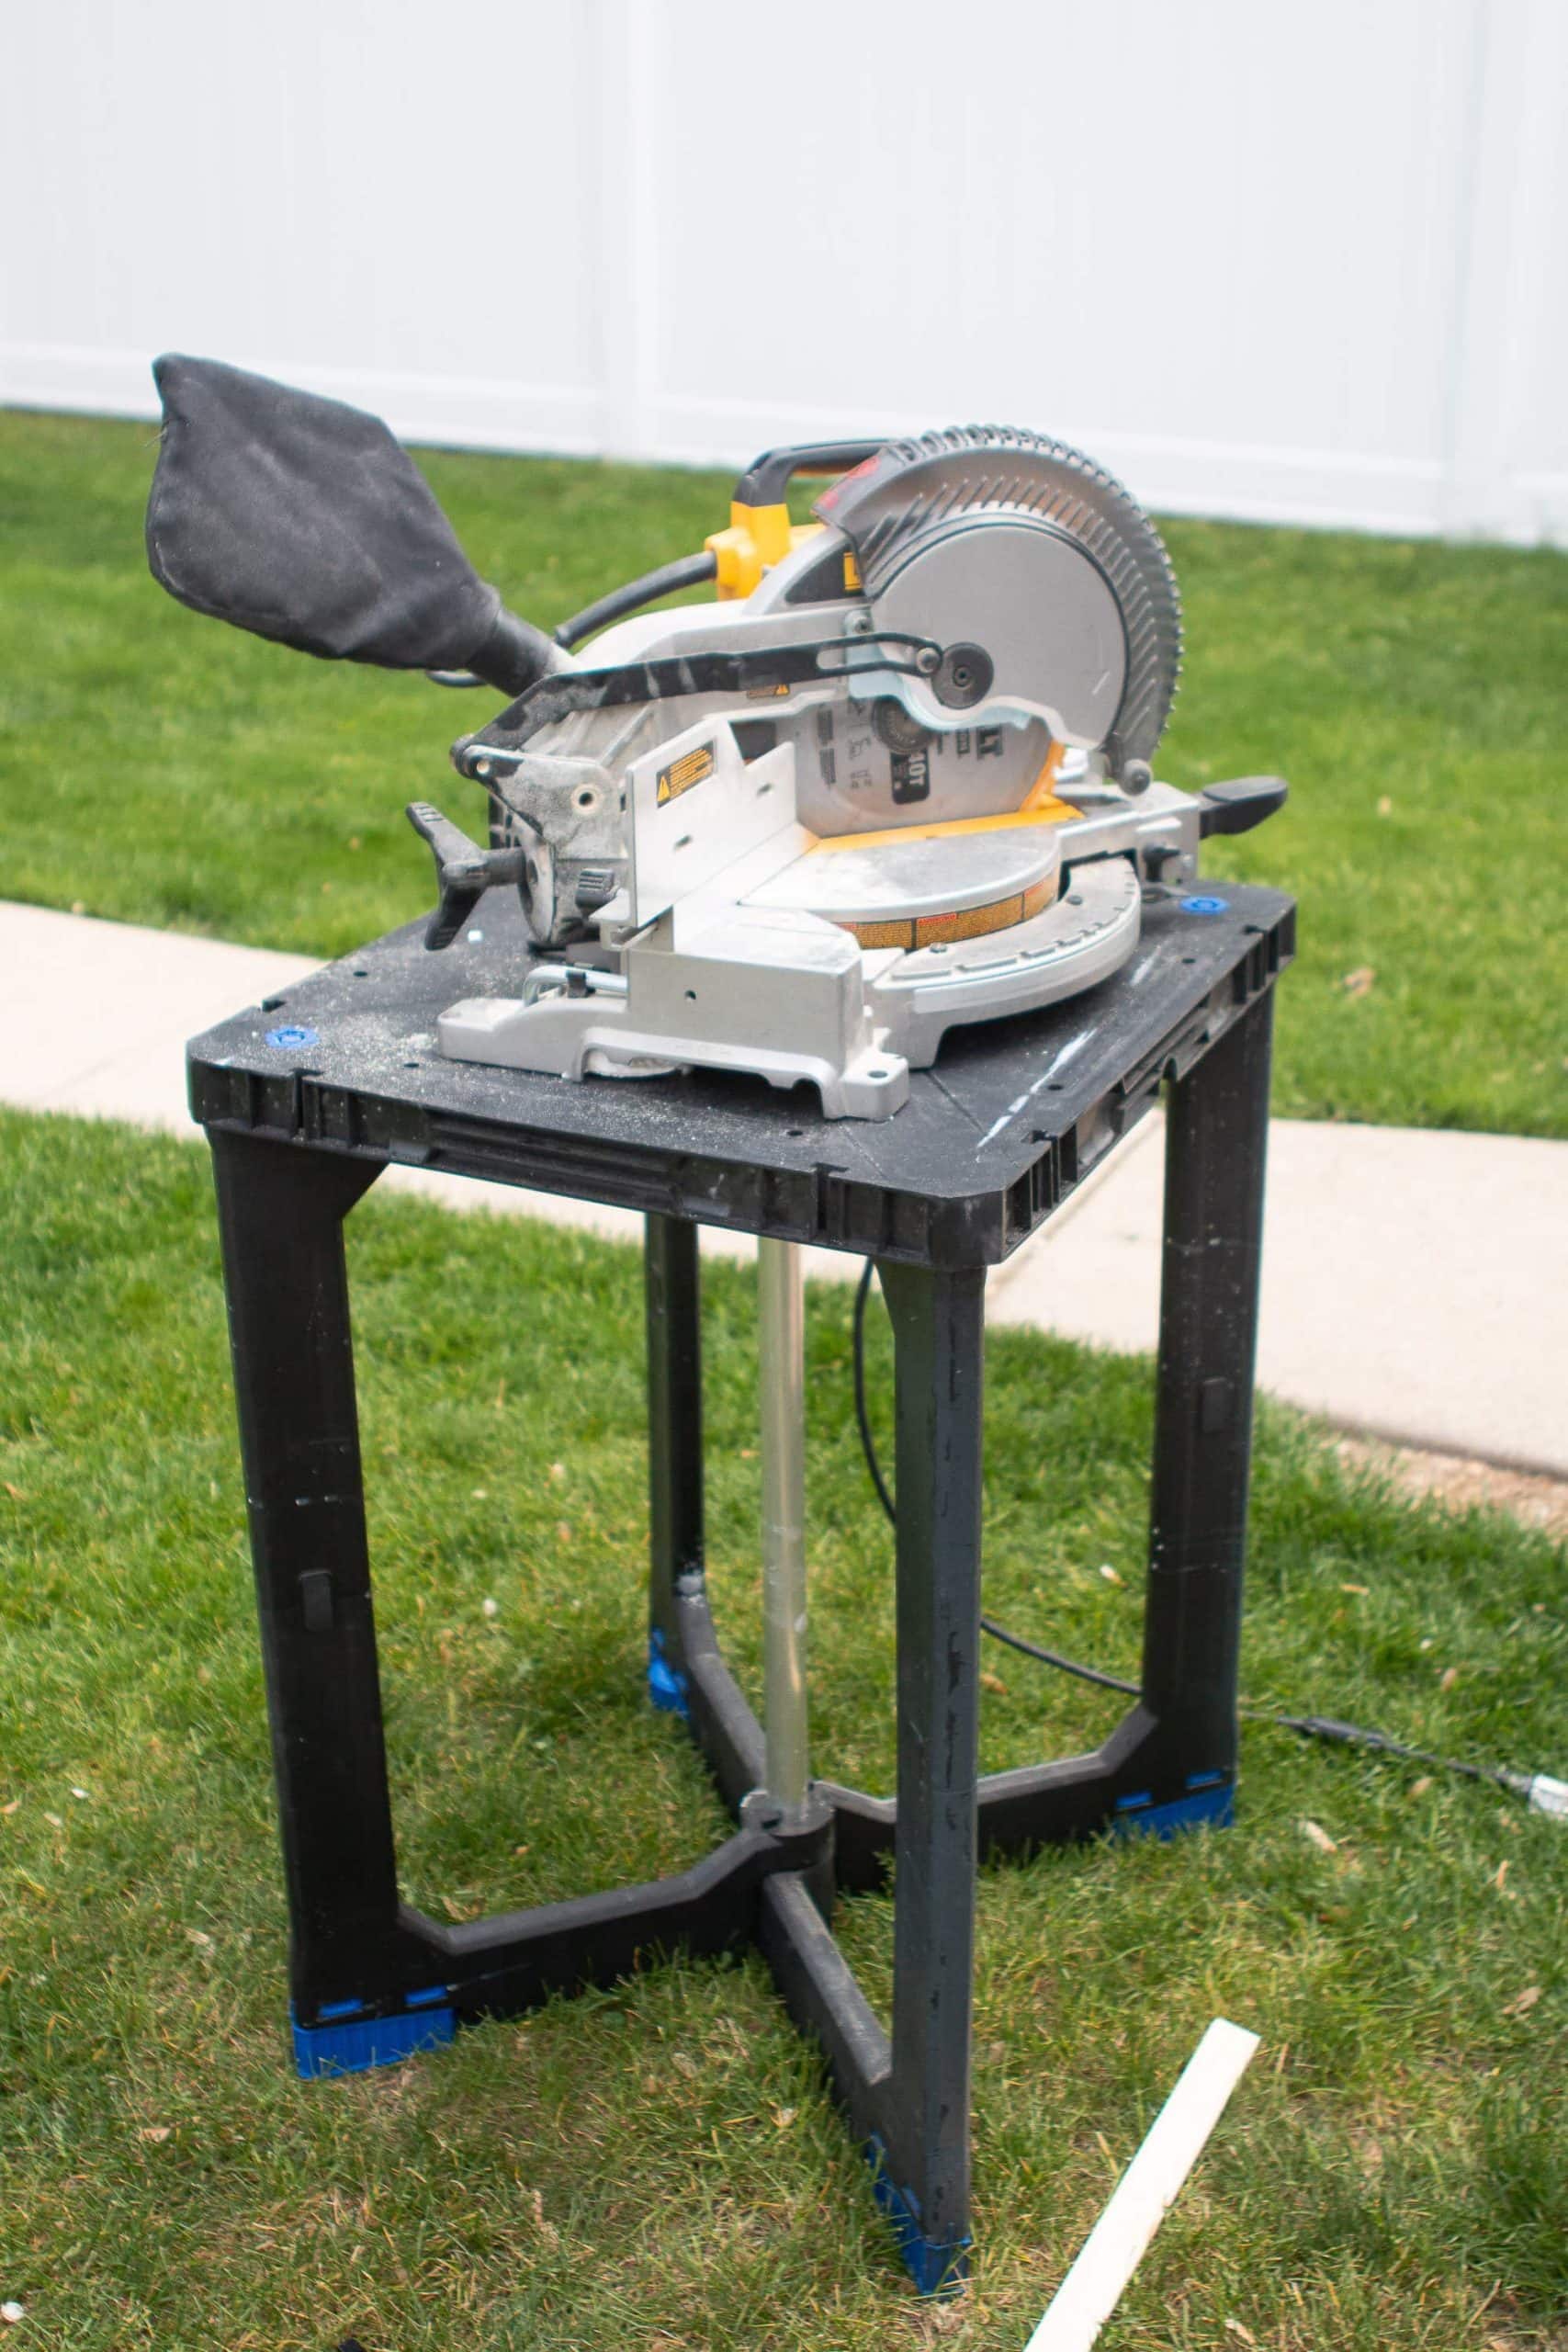
A miter saw is key for a project like this. Yes, you could technically use a hand saw, but it will take a loooong time to make these cuts. The miter saw is a good power tool to invest in because it can be used for so many projects. (More about my favorite power tools here.) And if you get one, be sure to invest in a good saw stand too. We have this one (similar) and love it.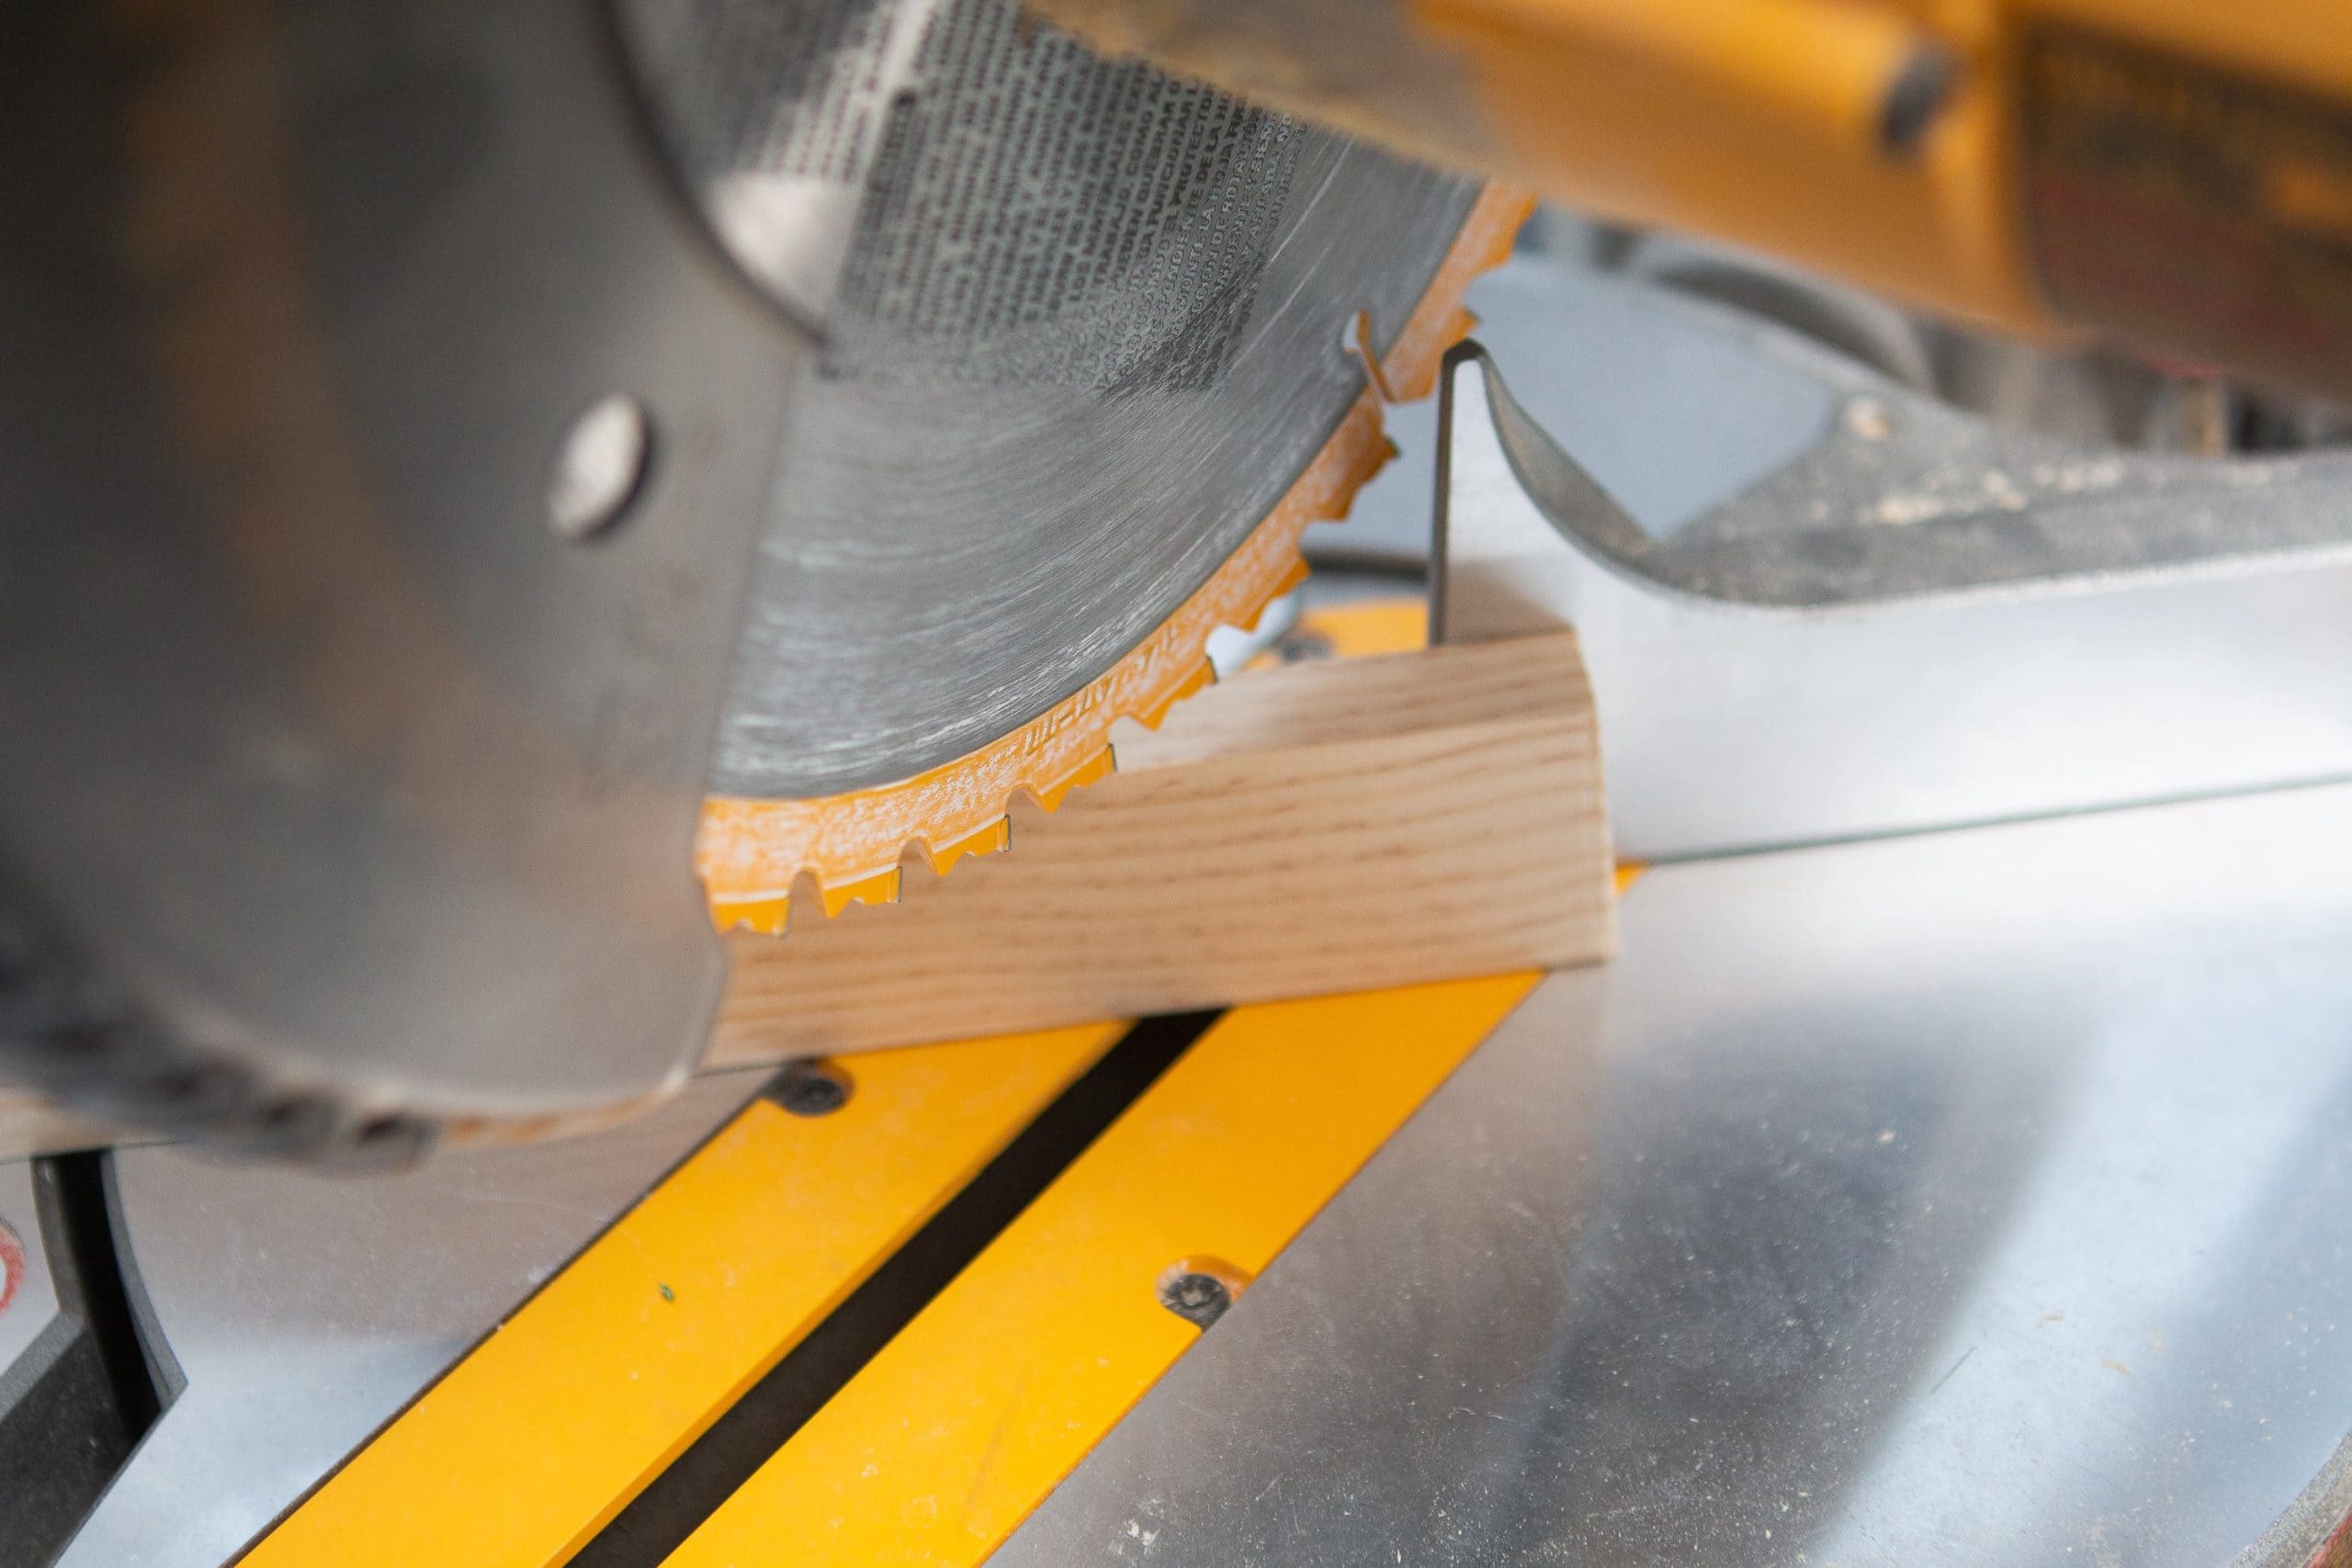
I wanted the corners of my frame to be mitered, so I cut each end at a 45-degree angle. I cut two pieces at about 20 1/4″ (from the shortest end) and two pieces cut at about 40 1/4″ (from the shortest end). This gave me 1/8 inch on each end to allow the canvas to fit inside.
When you’re making the cut on the saw, be sure to really pay attention to your angles. Sometimes it’s easy to get going fast and make your cuts on the same 45-degree angle when they need to be opposite. There is no shame in going over to the canvas and putting an arrow on the piece of wood so you make the cut the correct way.
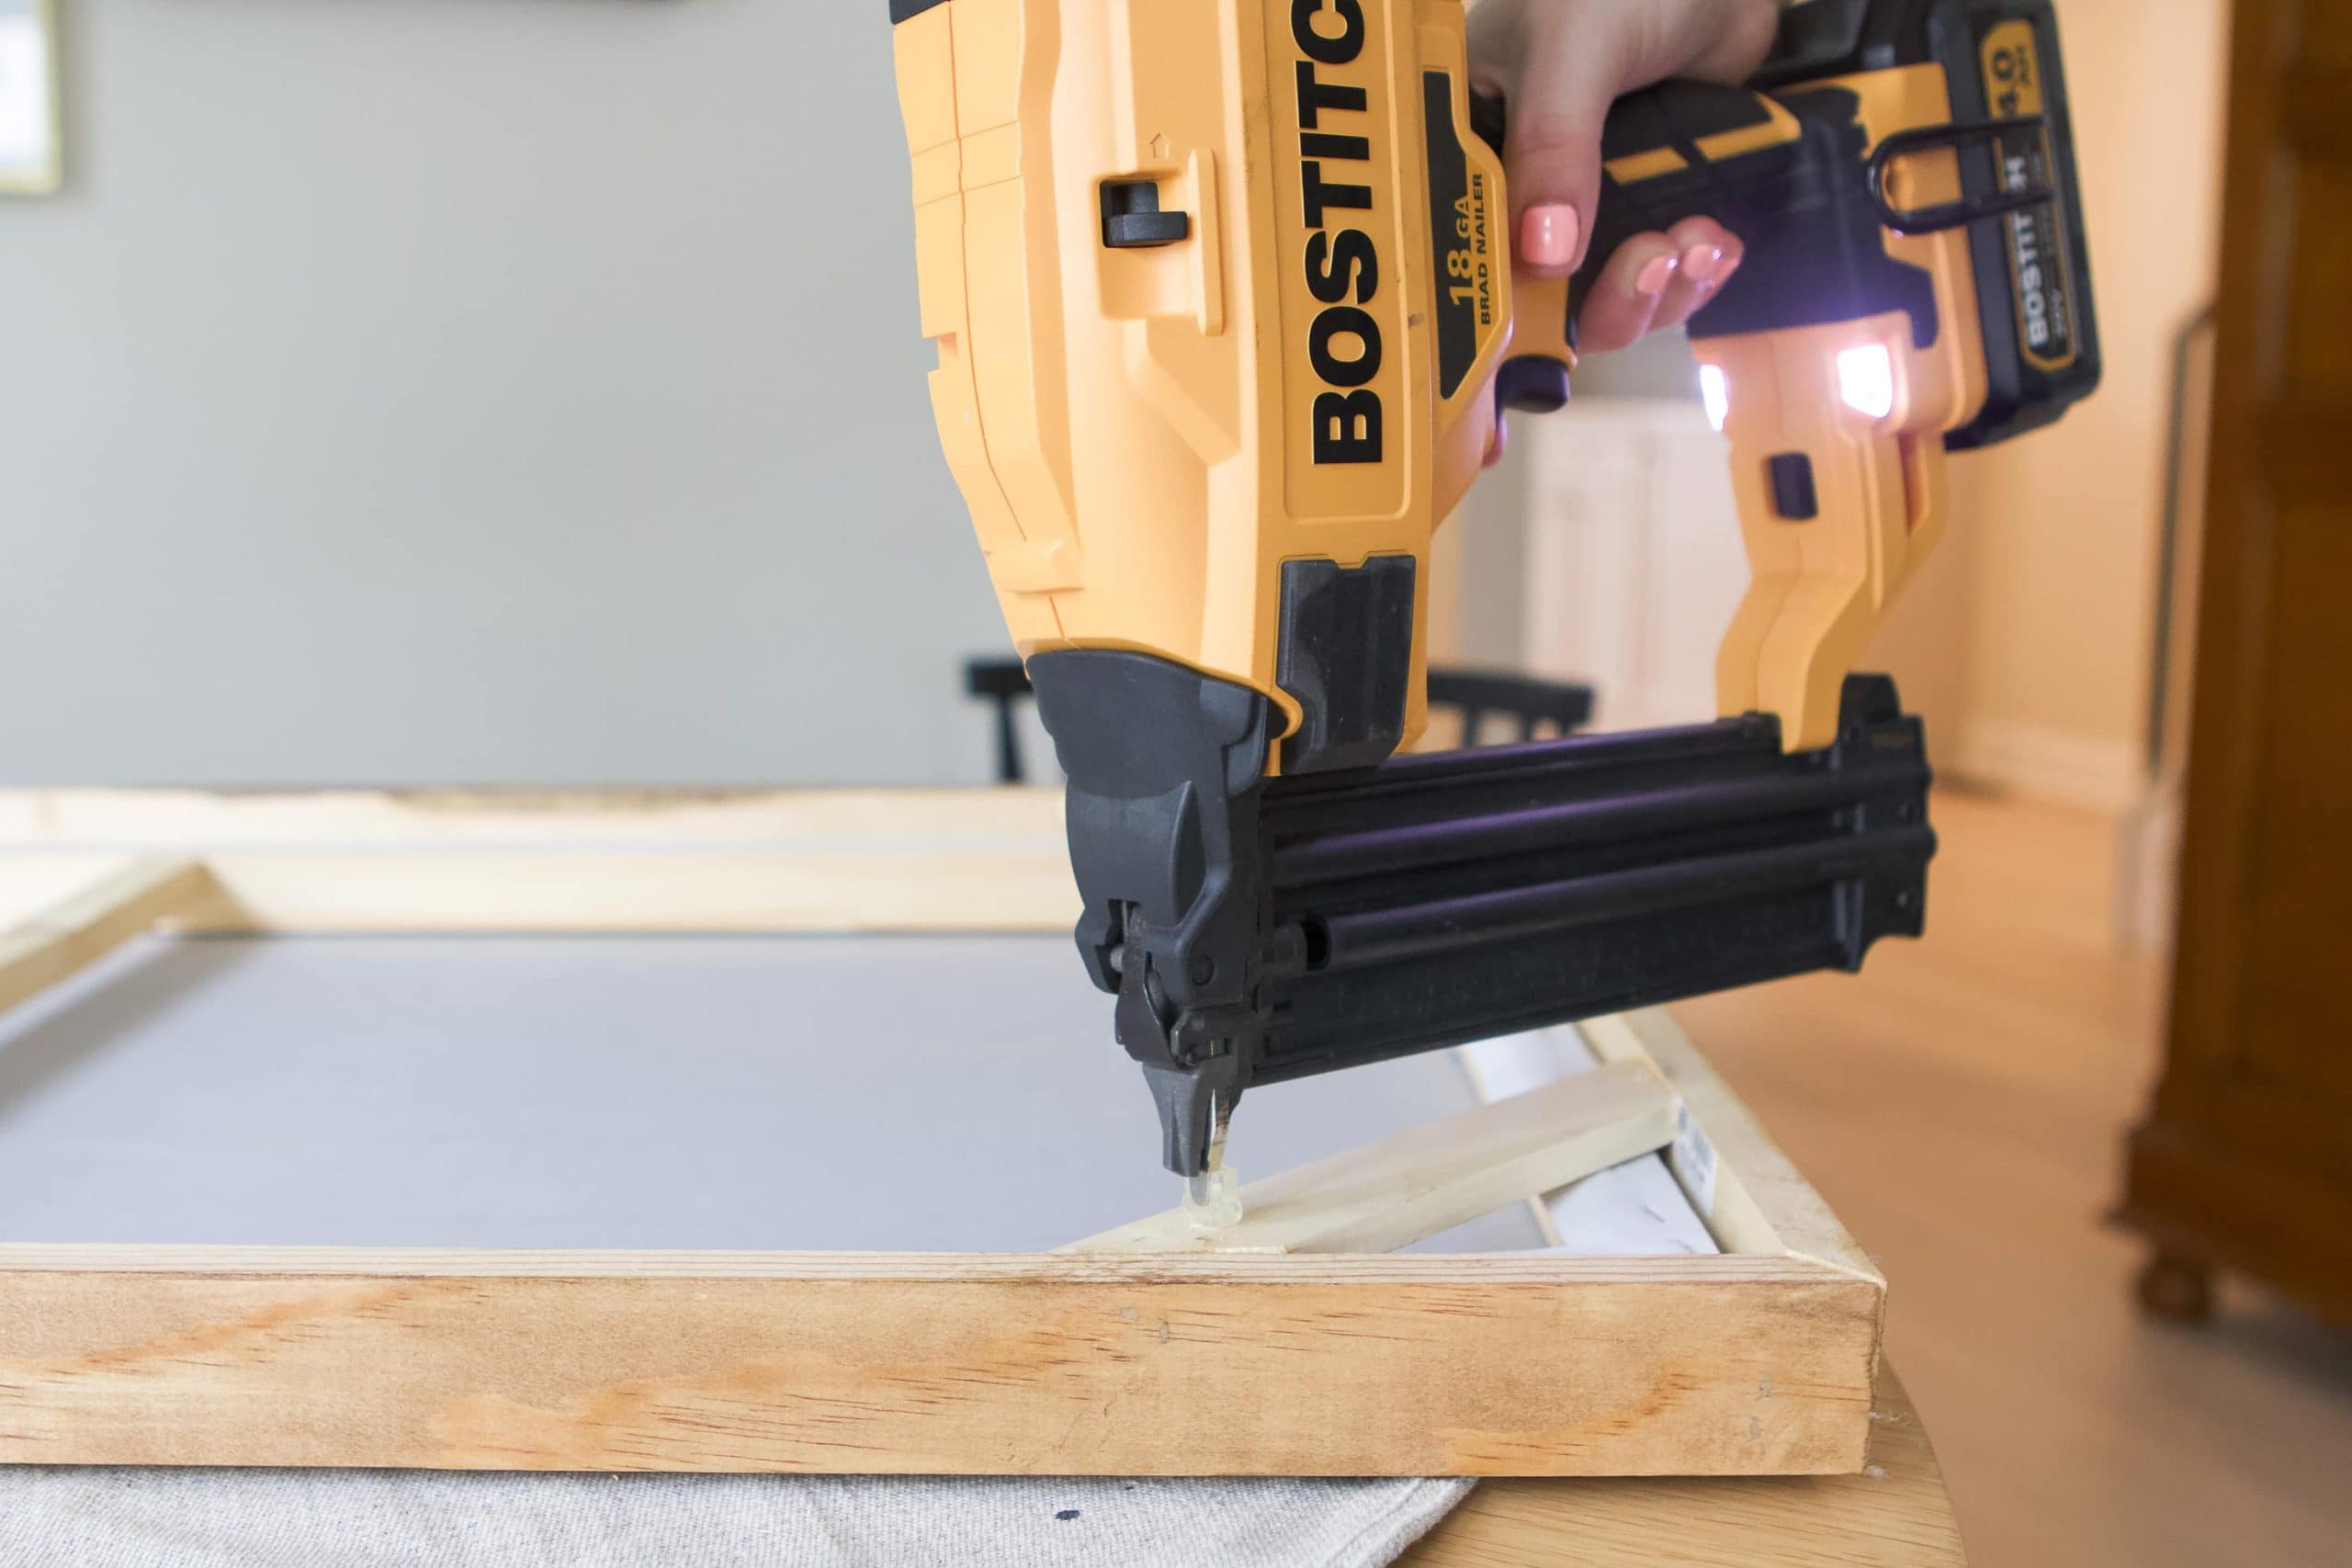
Attach with Wood Glue and Nails
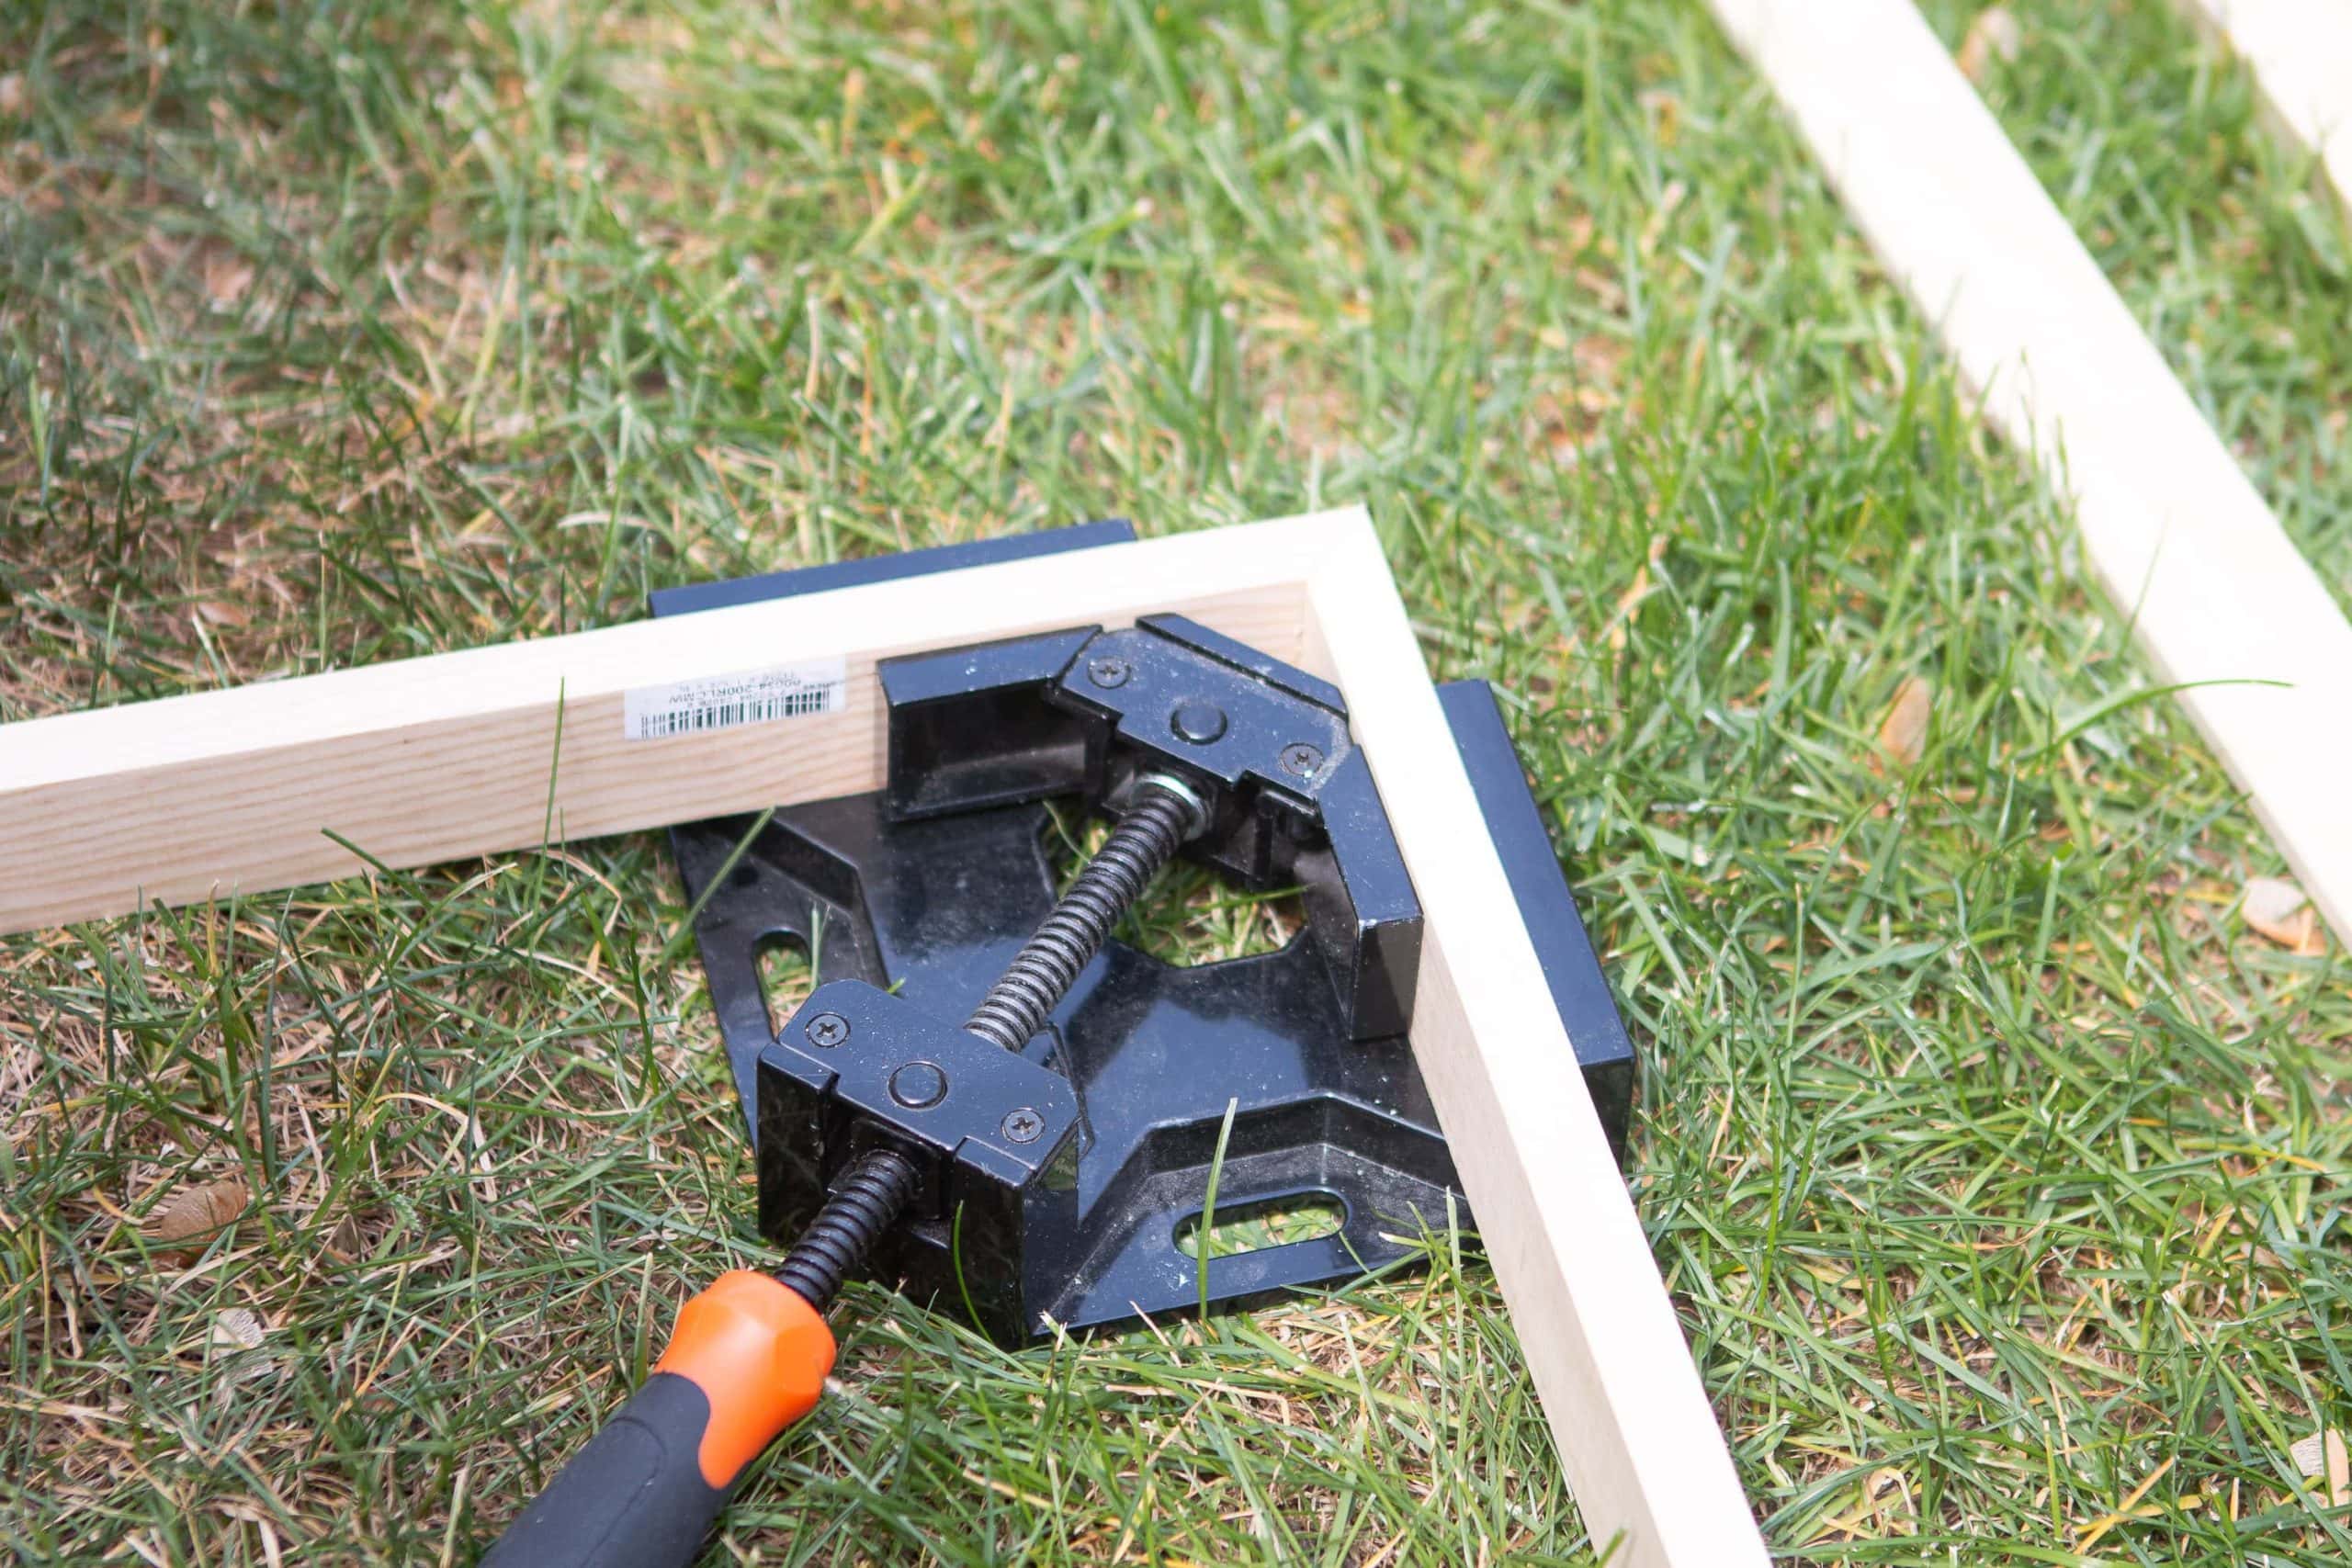
I tested out my four pieces around the canvas and success…they worked! Then it was time to put the frame together. For this, I grabbed wood glue, my brad nailer, and corner clamps. We bought these corner clamps for our built-ins project and they were so handy during that intense DIY. They came in handy for this project too, but if you don’t have them you might get away with just using normal clamps to hold your ends together.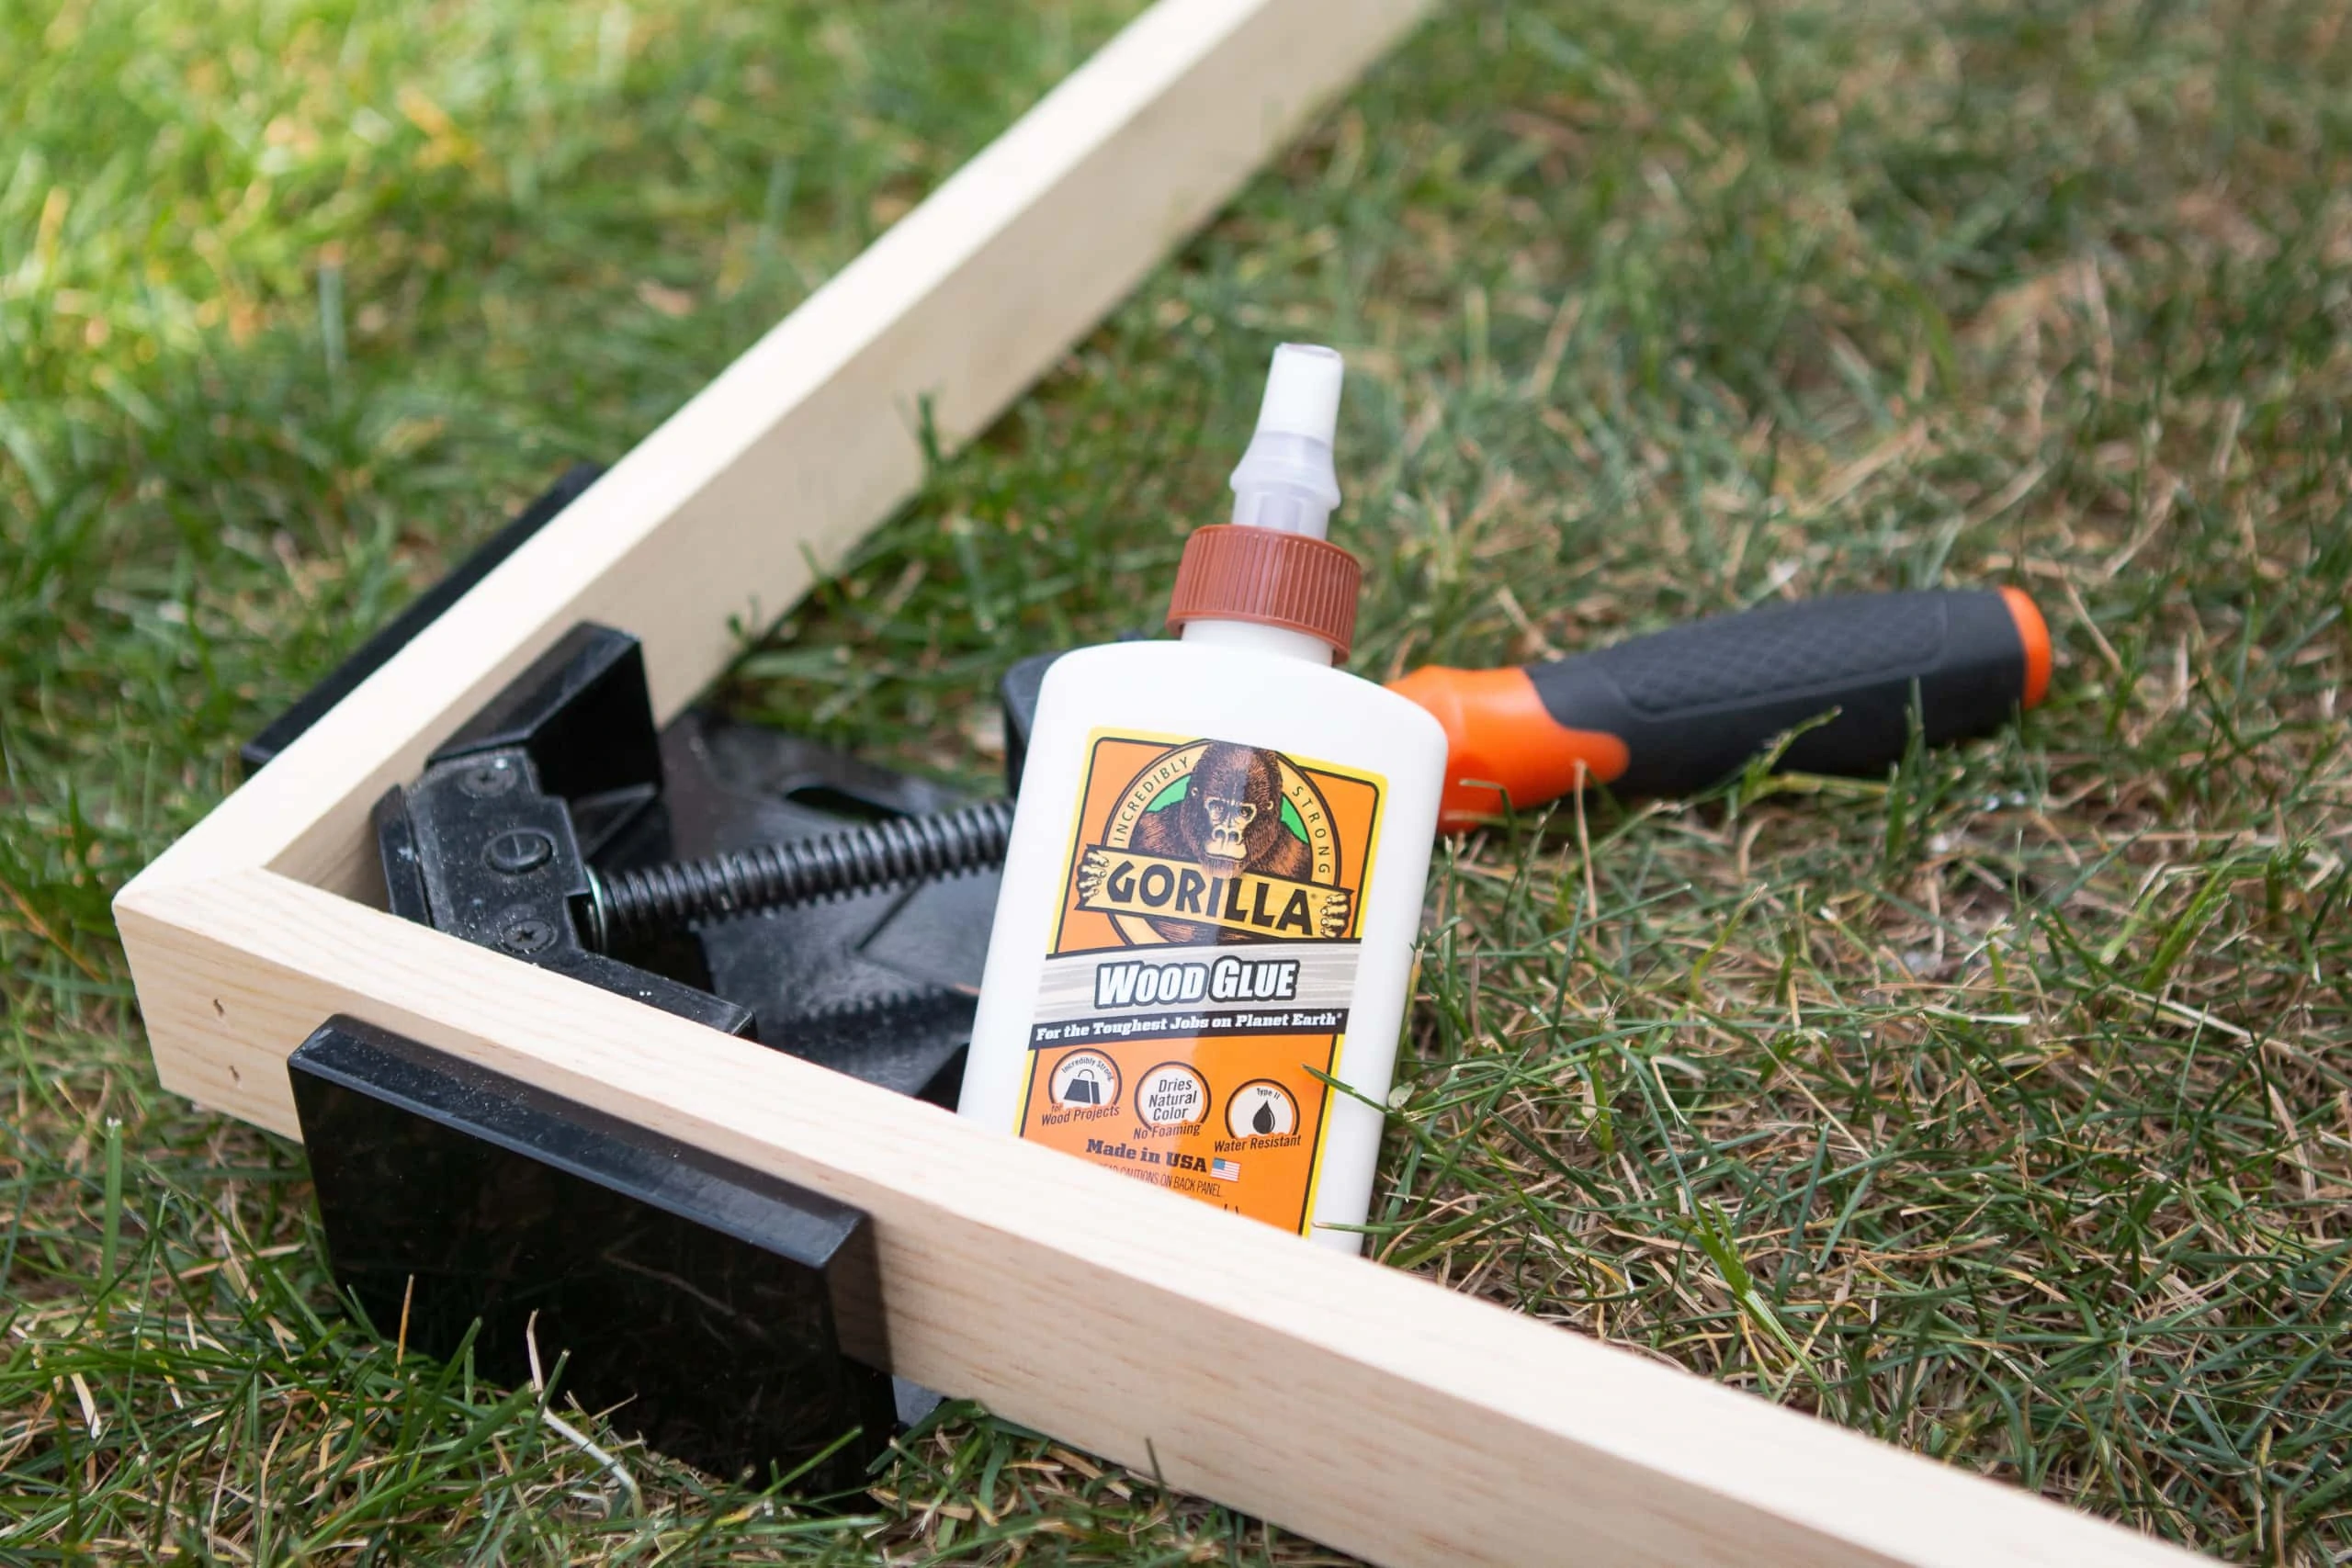
I put a thick line of wood glue in between the corners, clamped it together, and then shot two nails through each corner to attach the frame together. The wood glue might get a little messy and come out the sides, but that’s okay. Just have a cloth ready to go to clean up any excess.
Cut and Attach Scrap Pieces
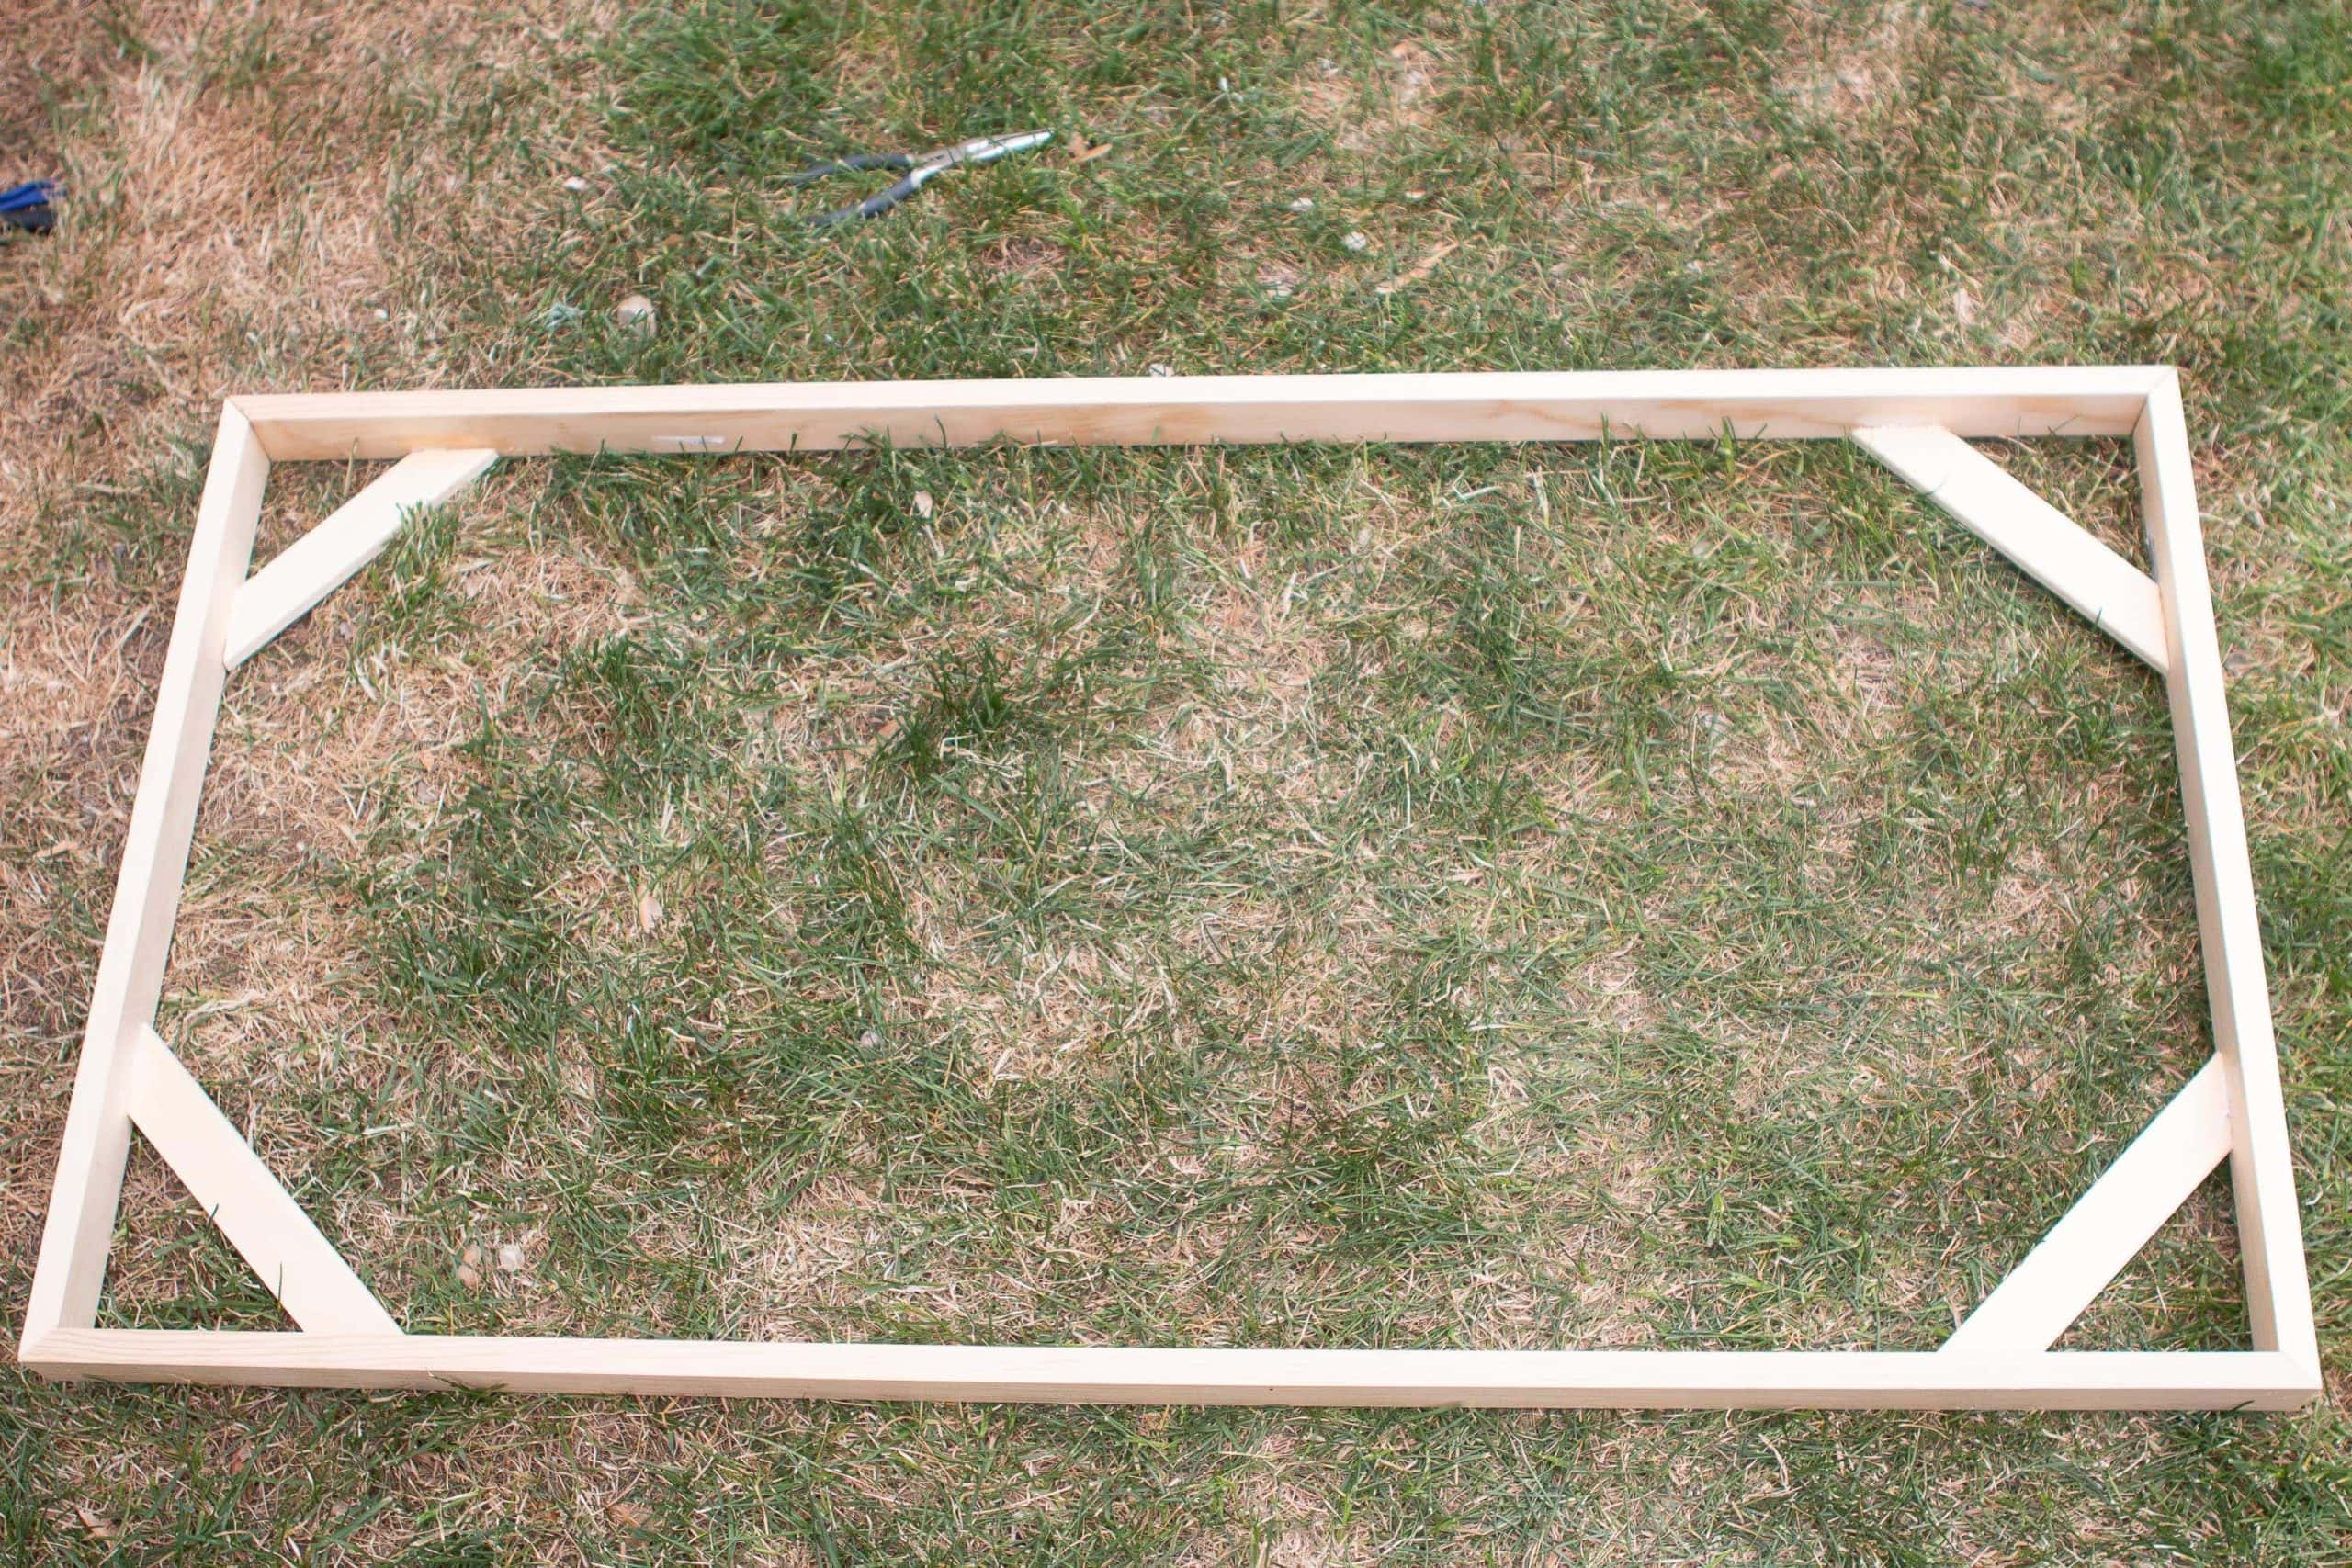
So the frame was built, but I needed to add some additional pieces of wood to the frame that I could use to attach the canvas. You’ll want these to be thinner than your frame so they don’t bump your canvas out too far when you put it all together. My scrap pieces were about 1/4 inch thick.
I then went ahead and cut four scraps all at a 45-degree angle on the ends. I didn’t even really measure these and kinda eyeballed them to be about 5-7 inches. I then attached them to the four corners of the frame using wood glue and nails.
Fill Your Nail Holes

Next, I brought my frame inside to work on the finishing touches. Because I used my brad nailer to attach the pine together, I had some visible nail holes to patch up. 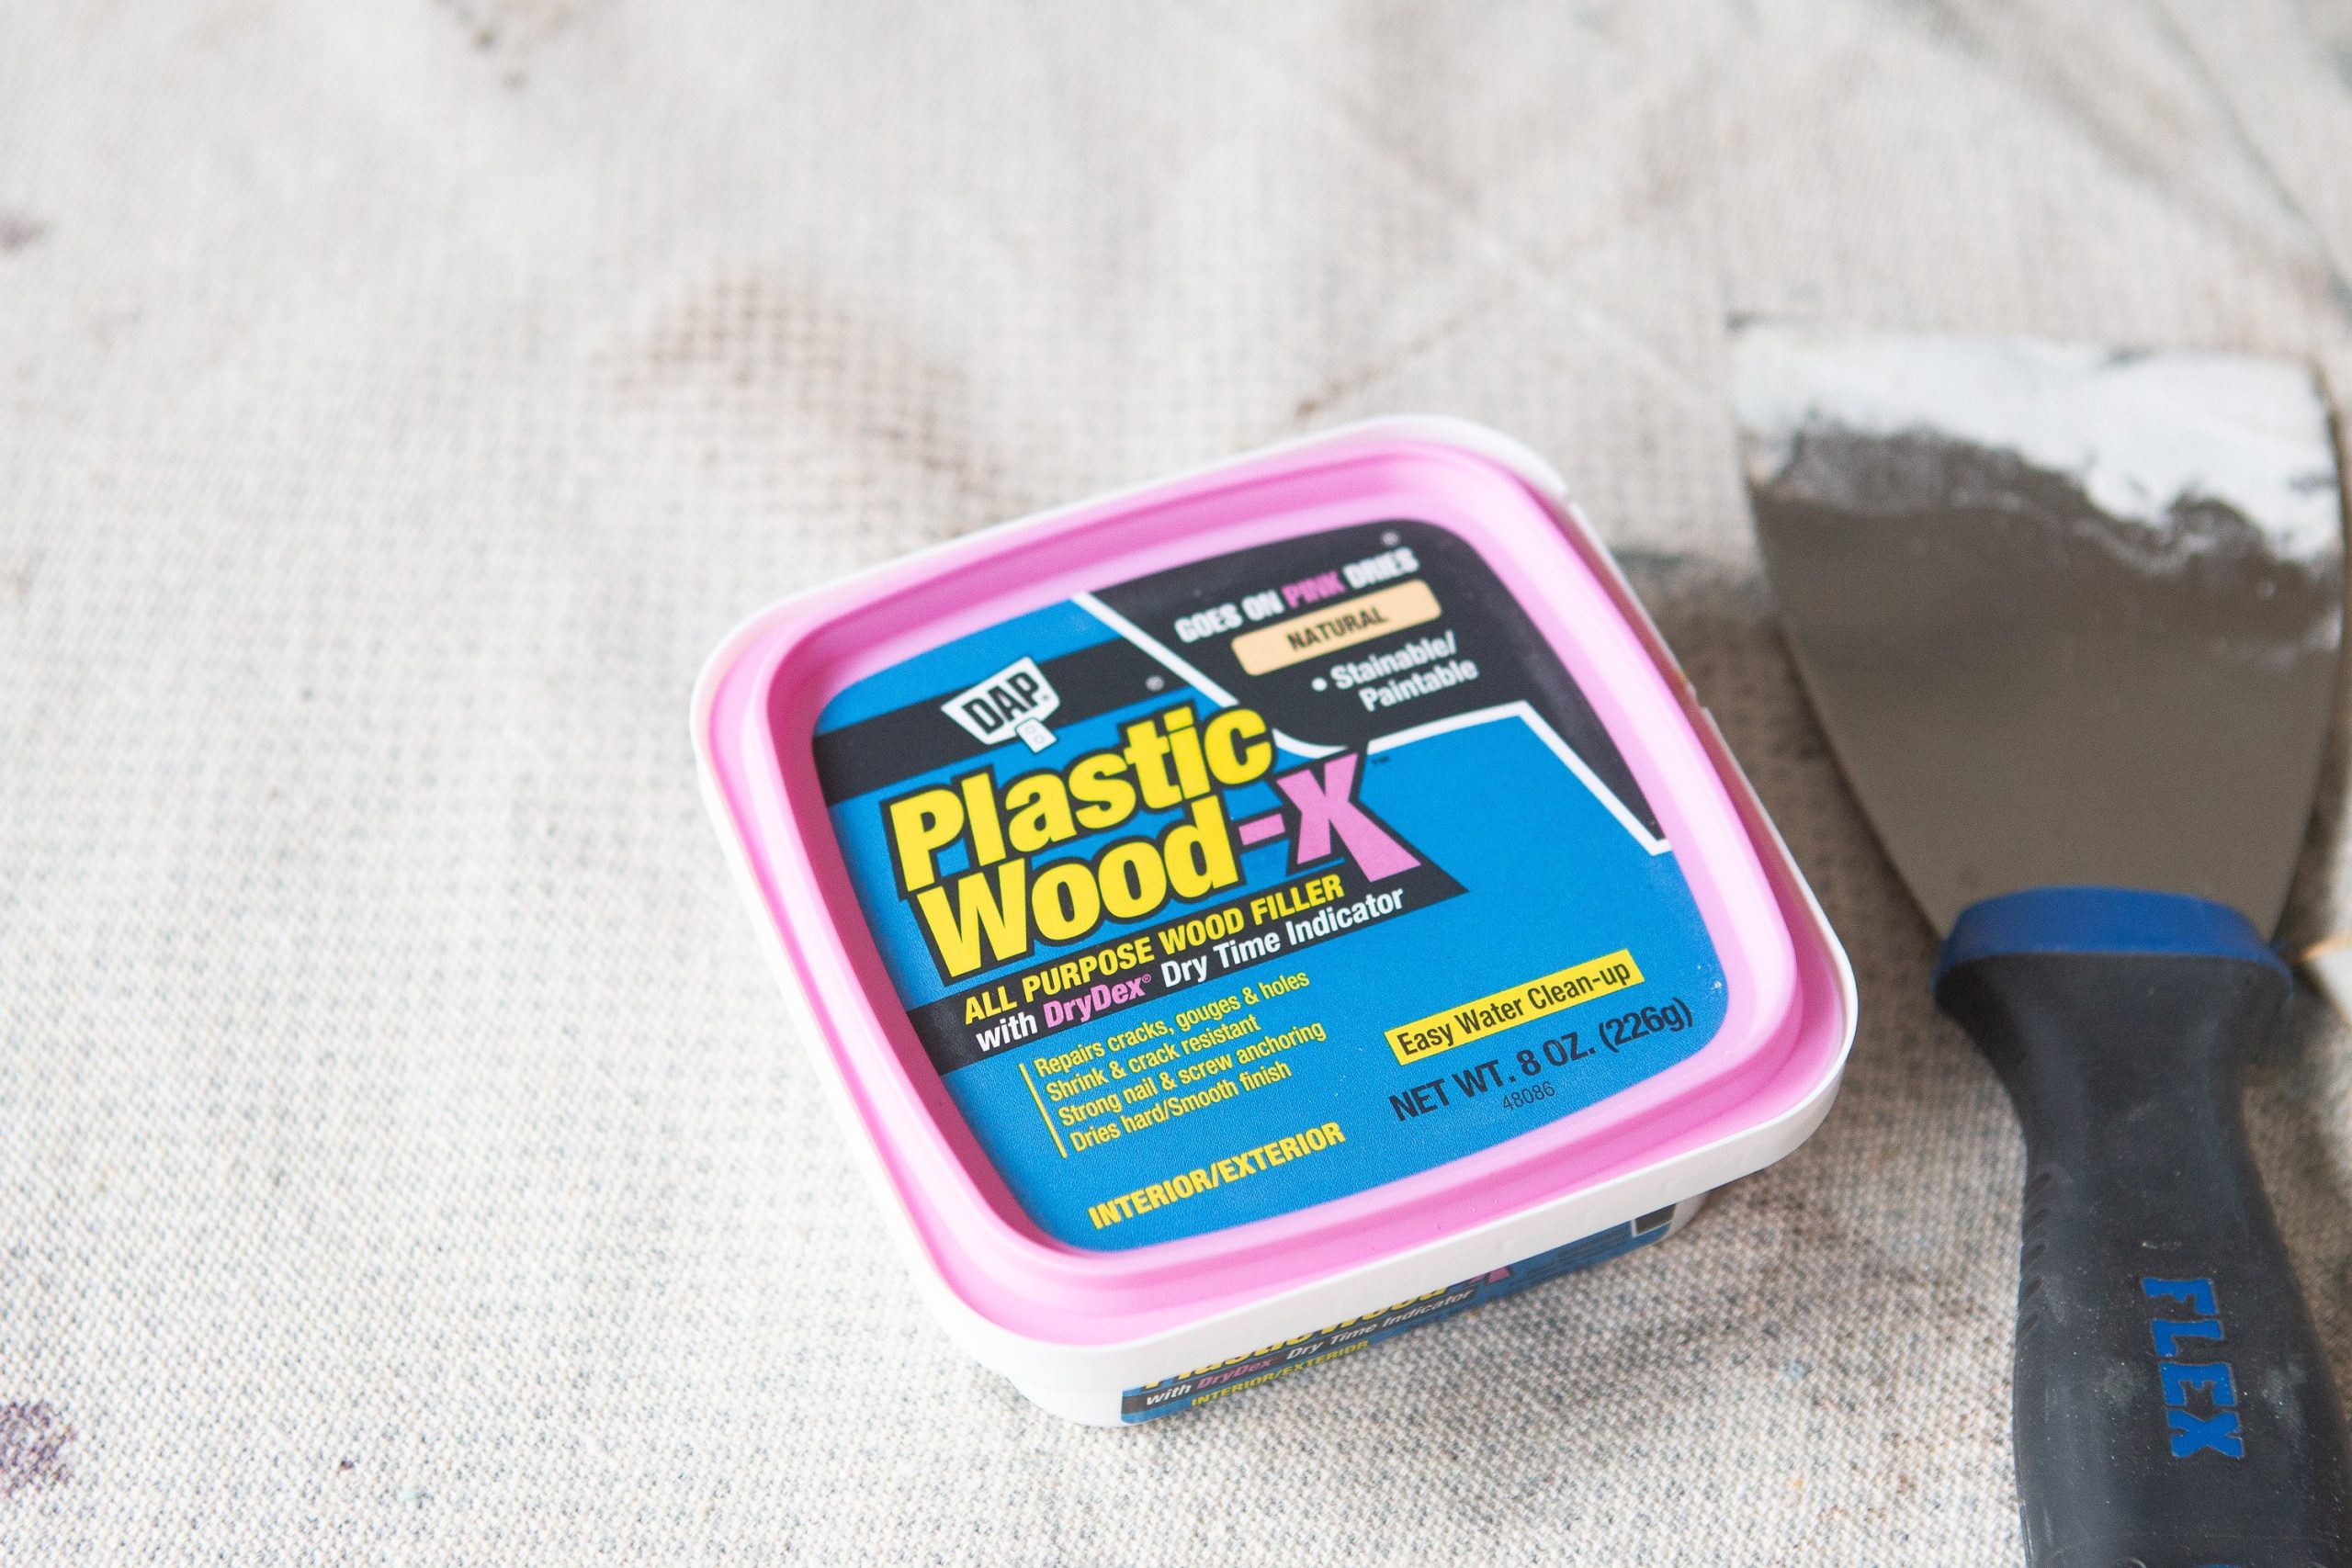
I used plastic wood and a putty knife to fill the holes with the pink wood filler. Just scrape it on there and let it dry. 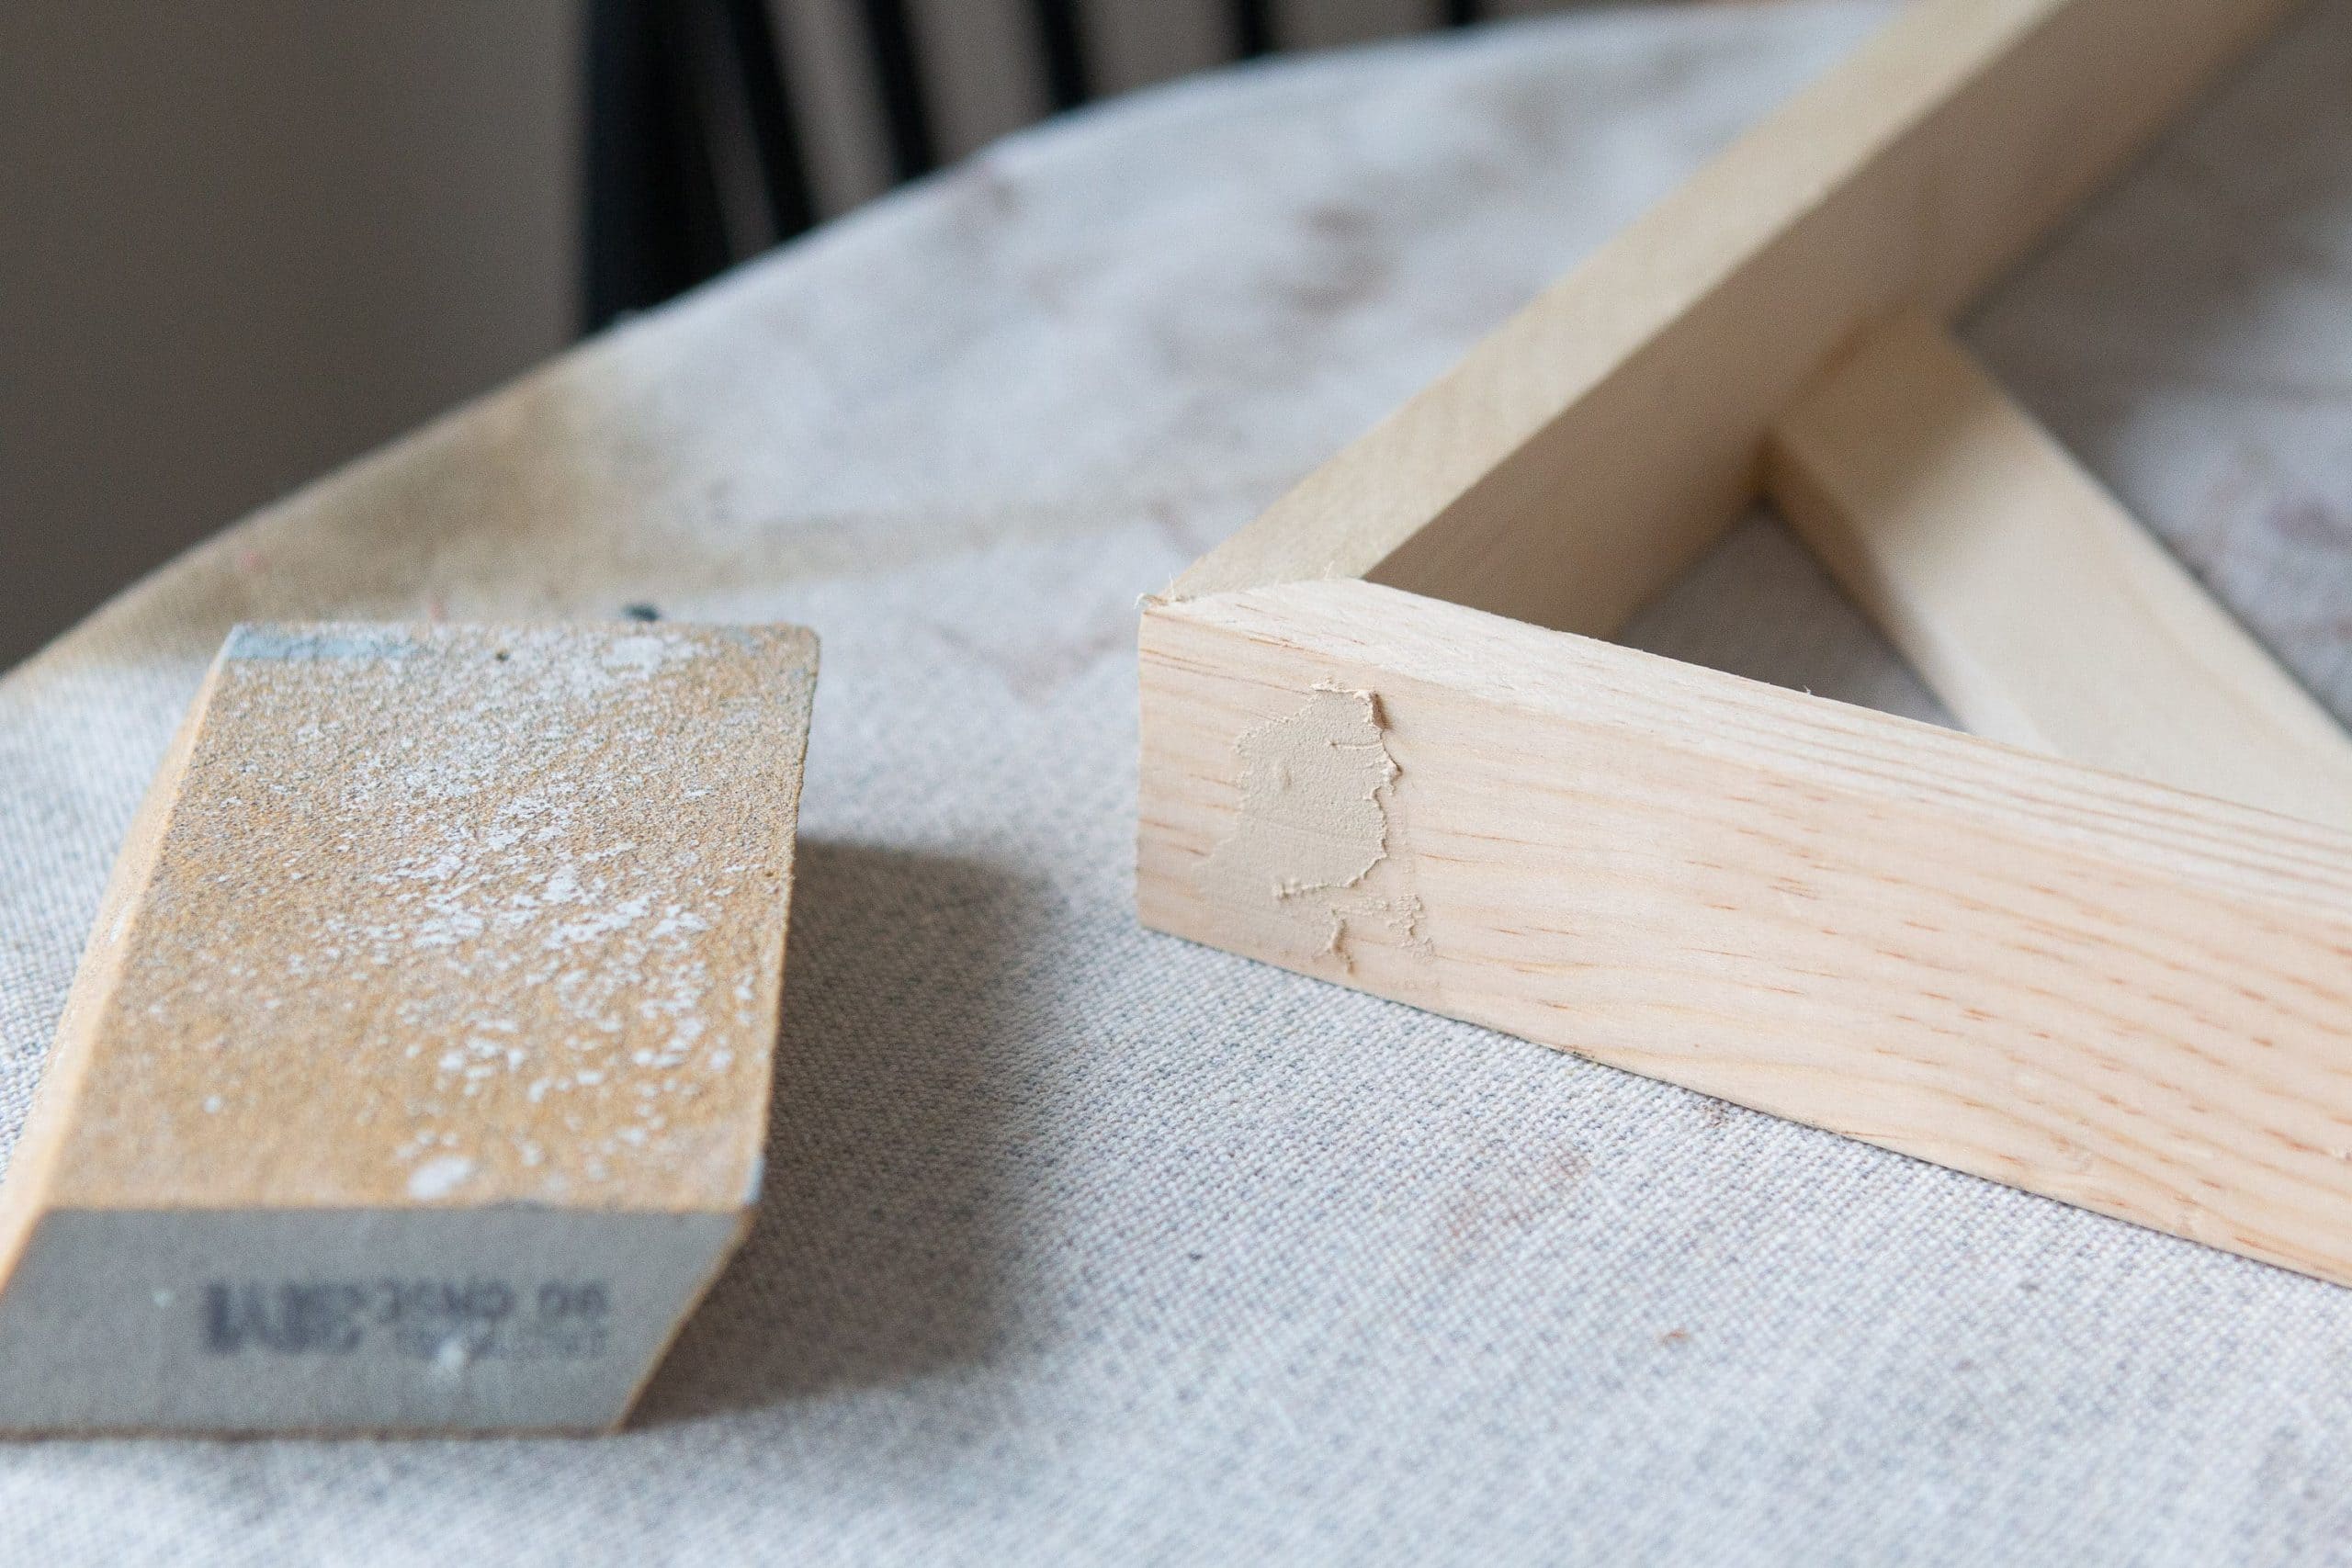 You’ll know it’s dry when the pink wood filler turns beige! Then, you can sand away any excess.
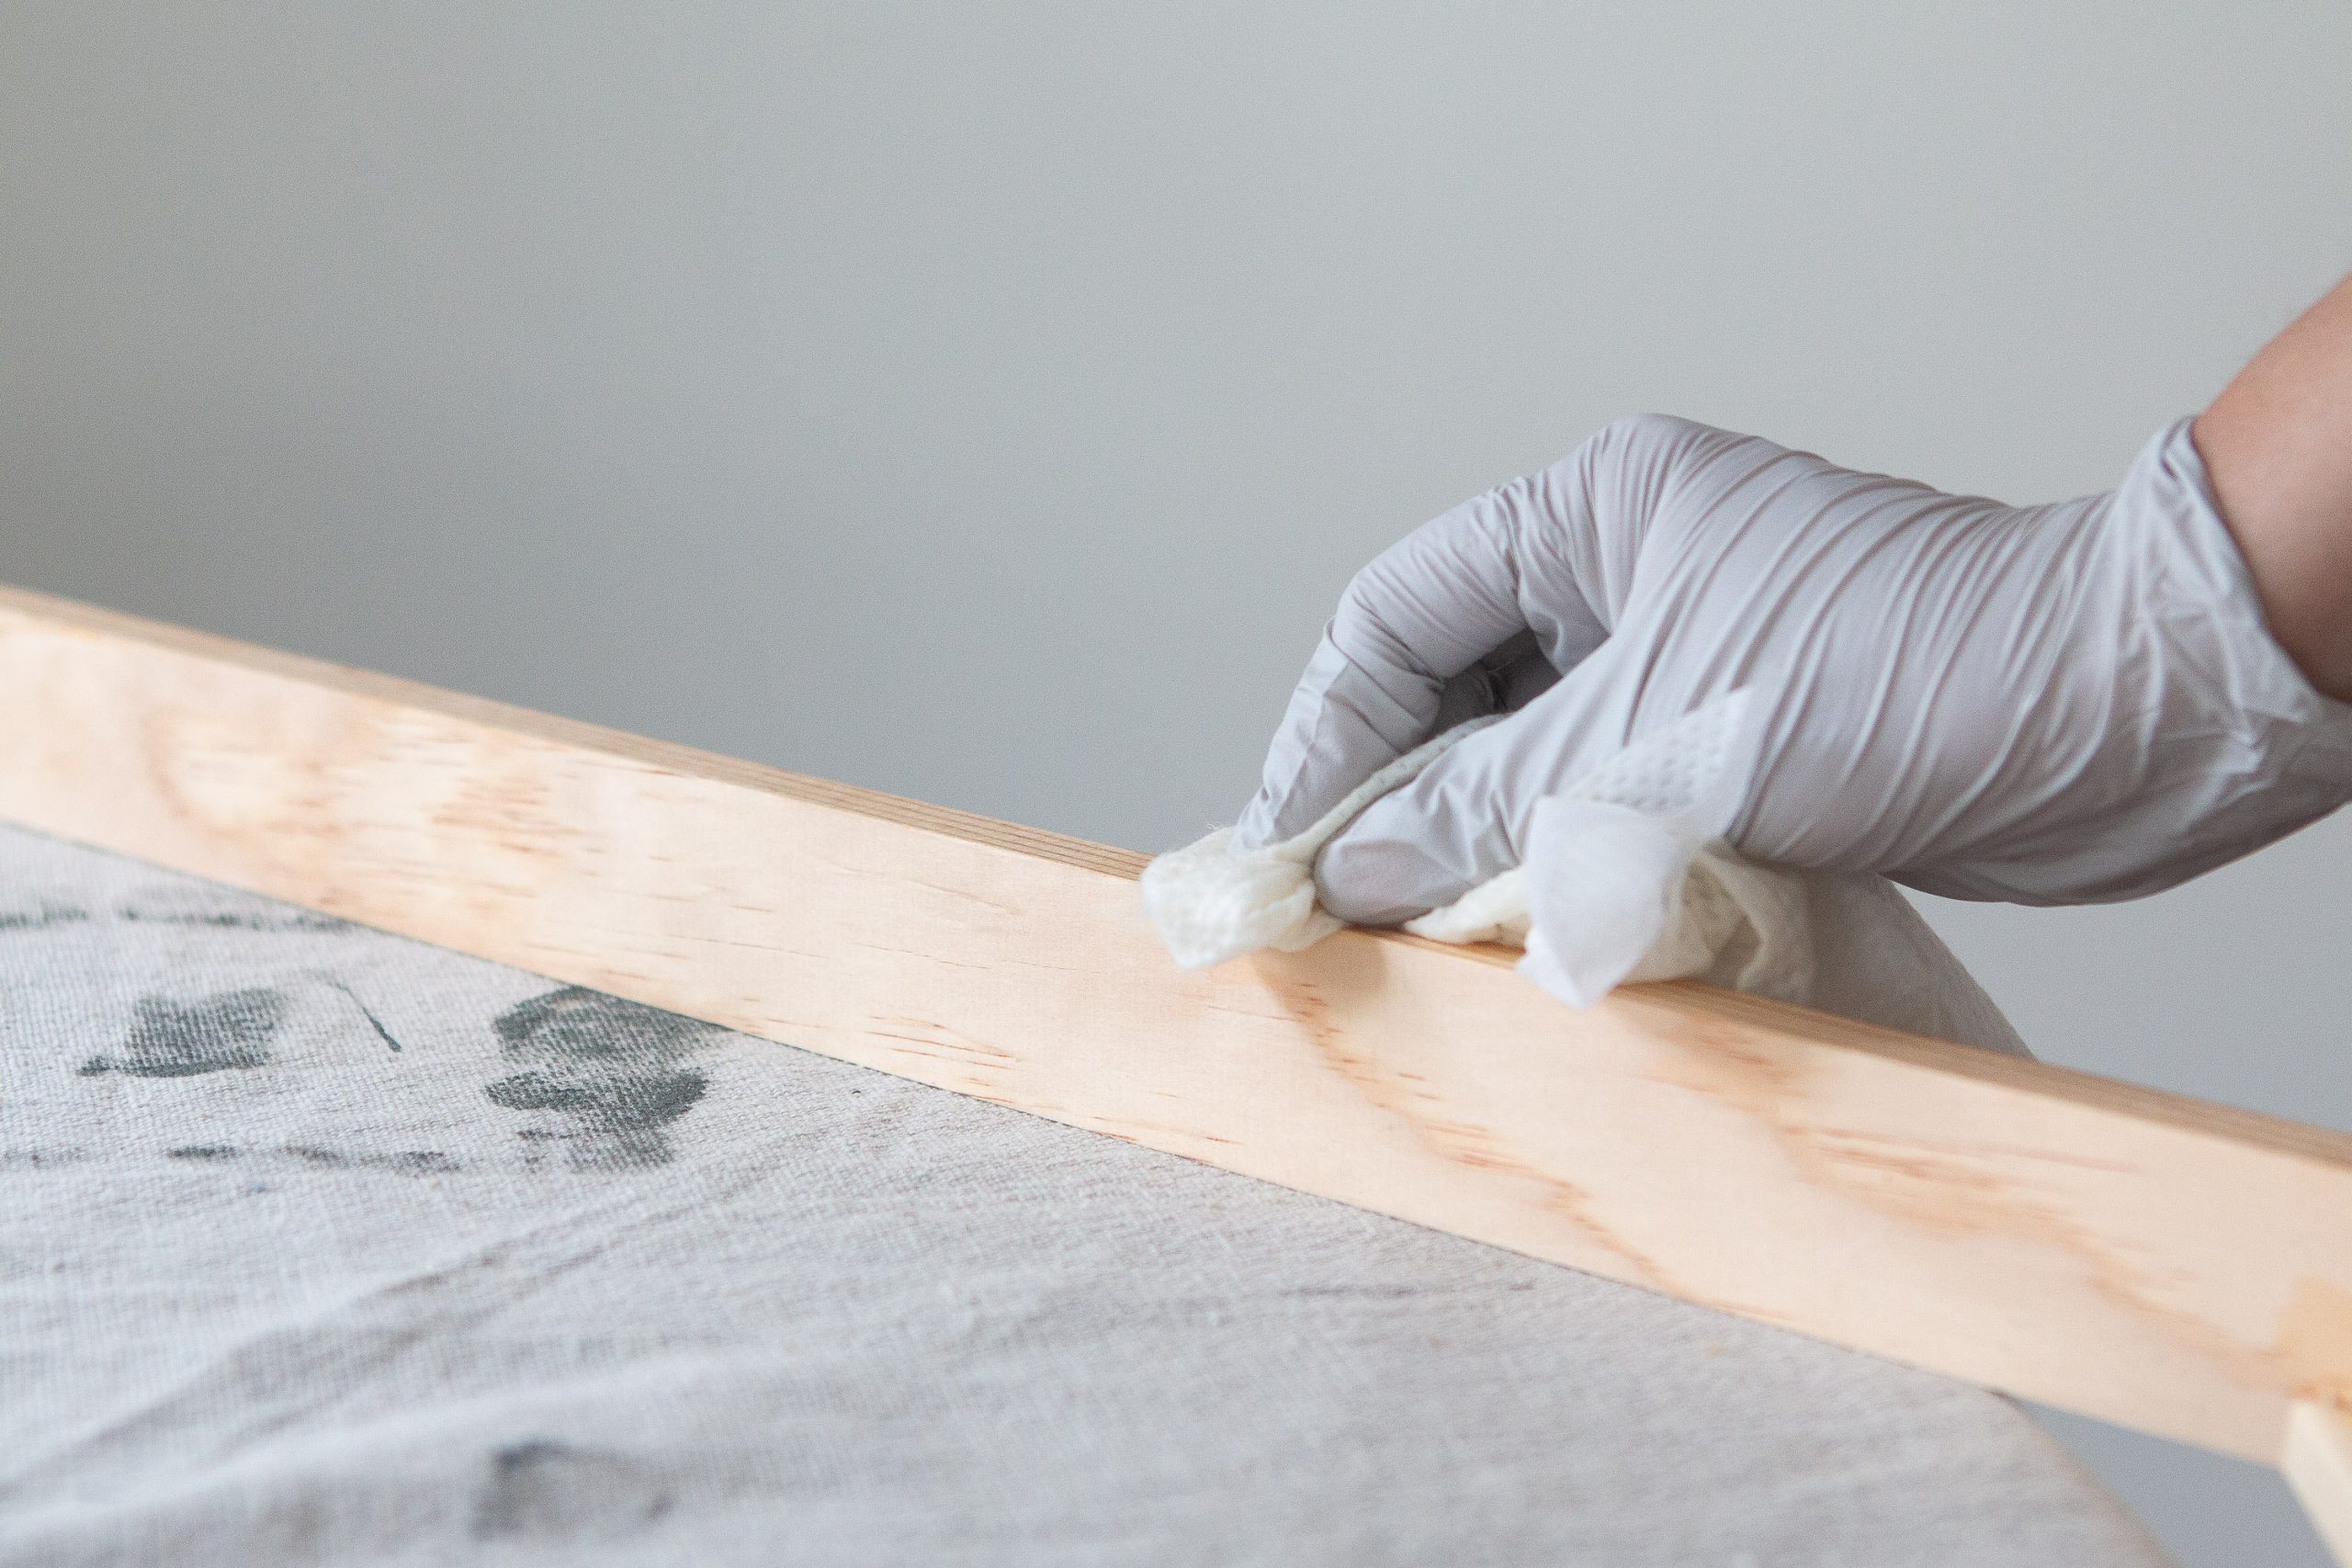
Use Wood Conditioner
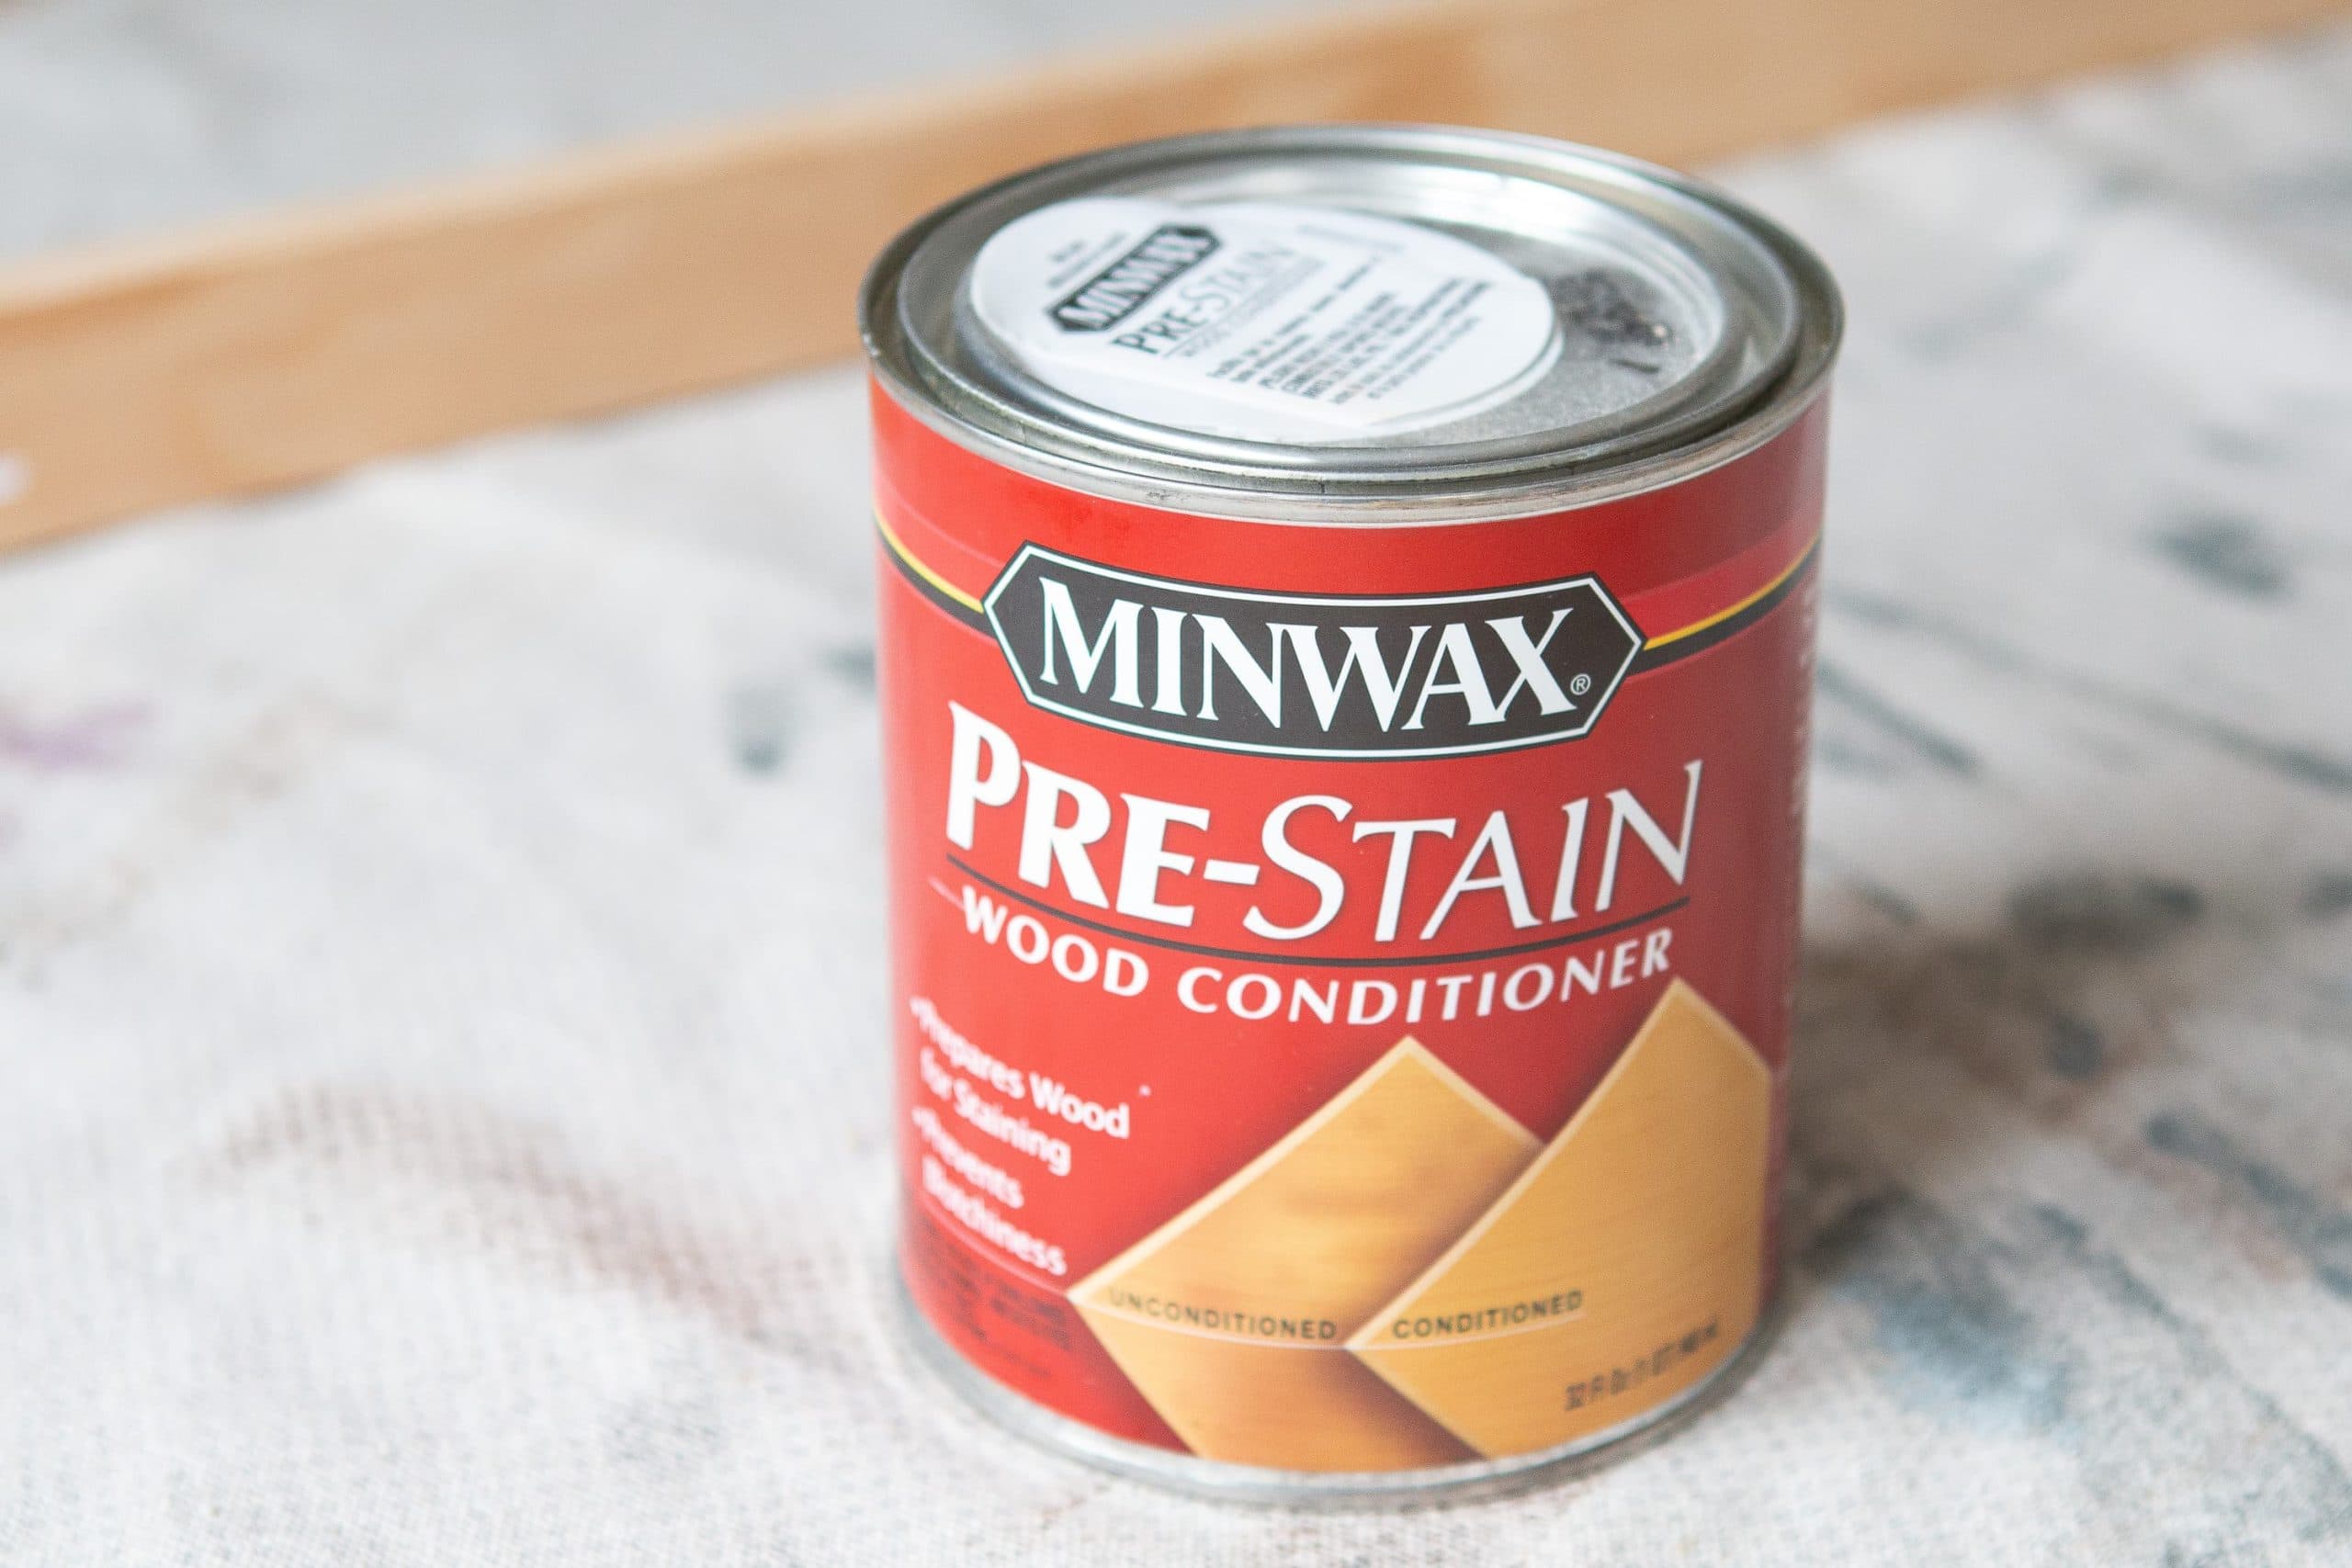
Because pine is very soft and porous, it’s important to use a wood conditioner. If you skip this step, the wood will soak up the stain differently and it can result in a splotchy finish. To use a wood conditioner, just dip a cloth right into it and wipe it all over the wood. I always have these cloths on hand for painting and staining projects. They are good for cleanup and for the actual staining. Once your wood conditioner is on there, use a clean cloth to wipe up any excess.
Stain Your Wood
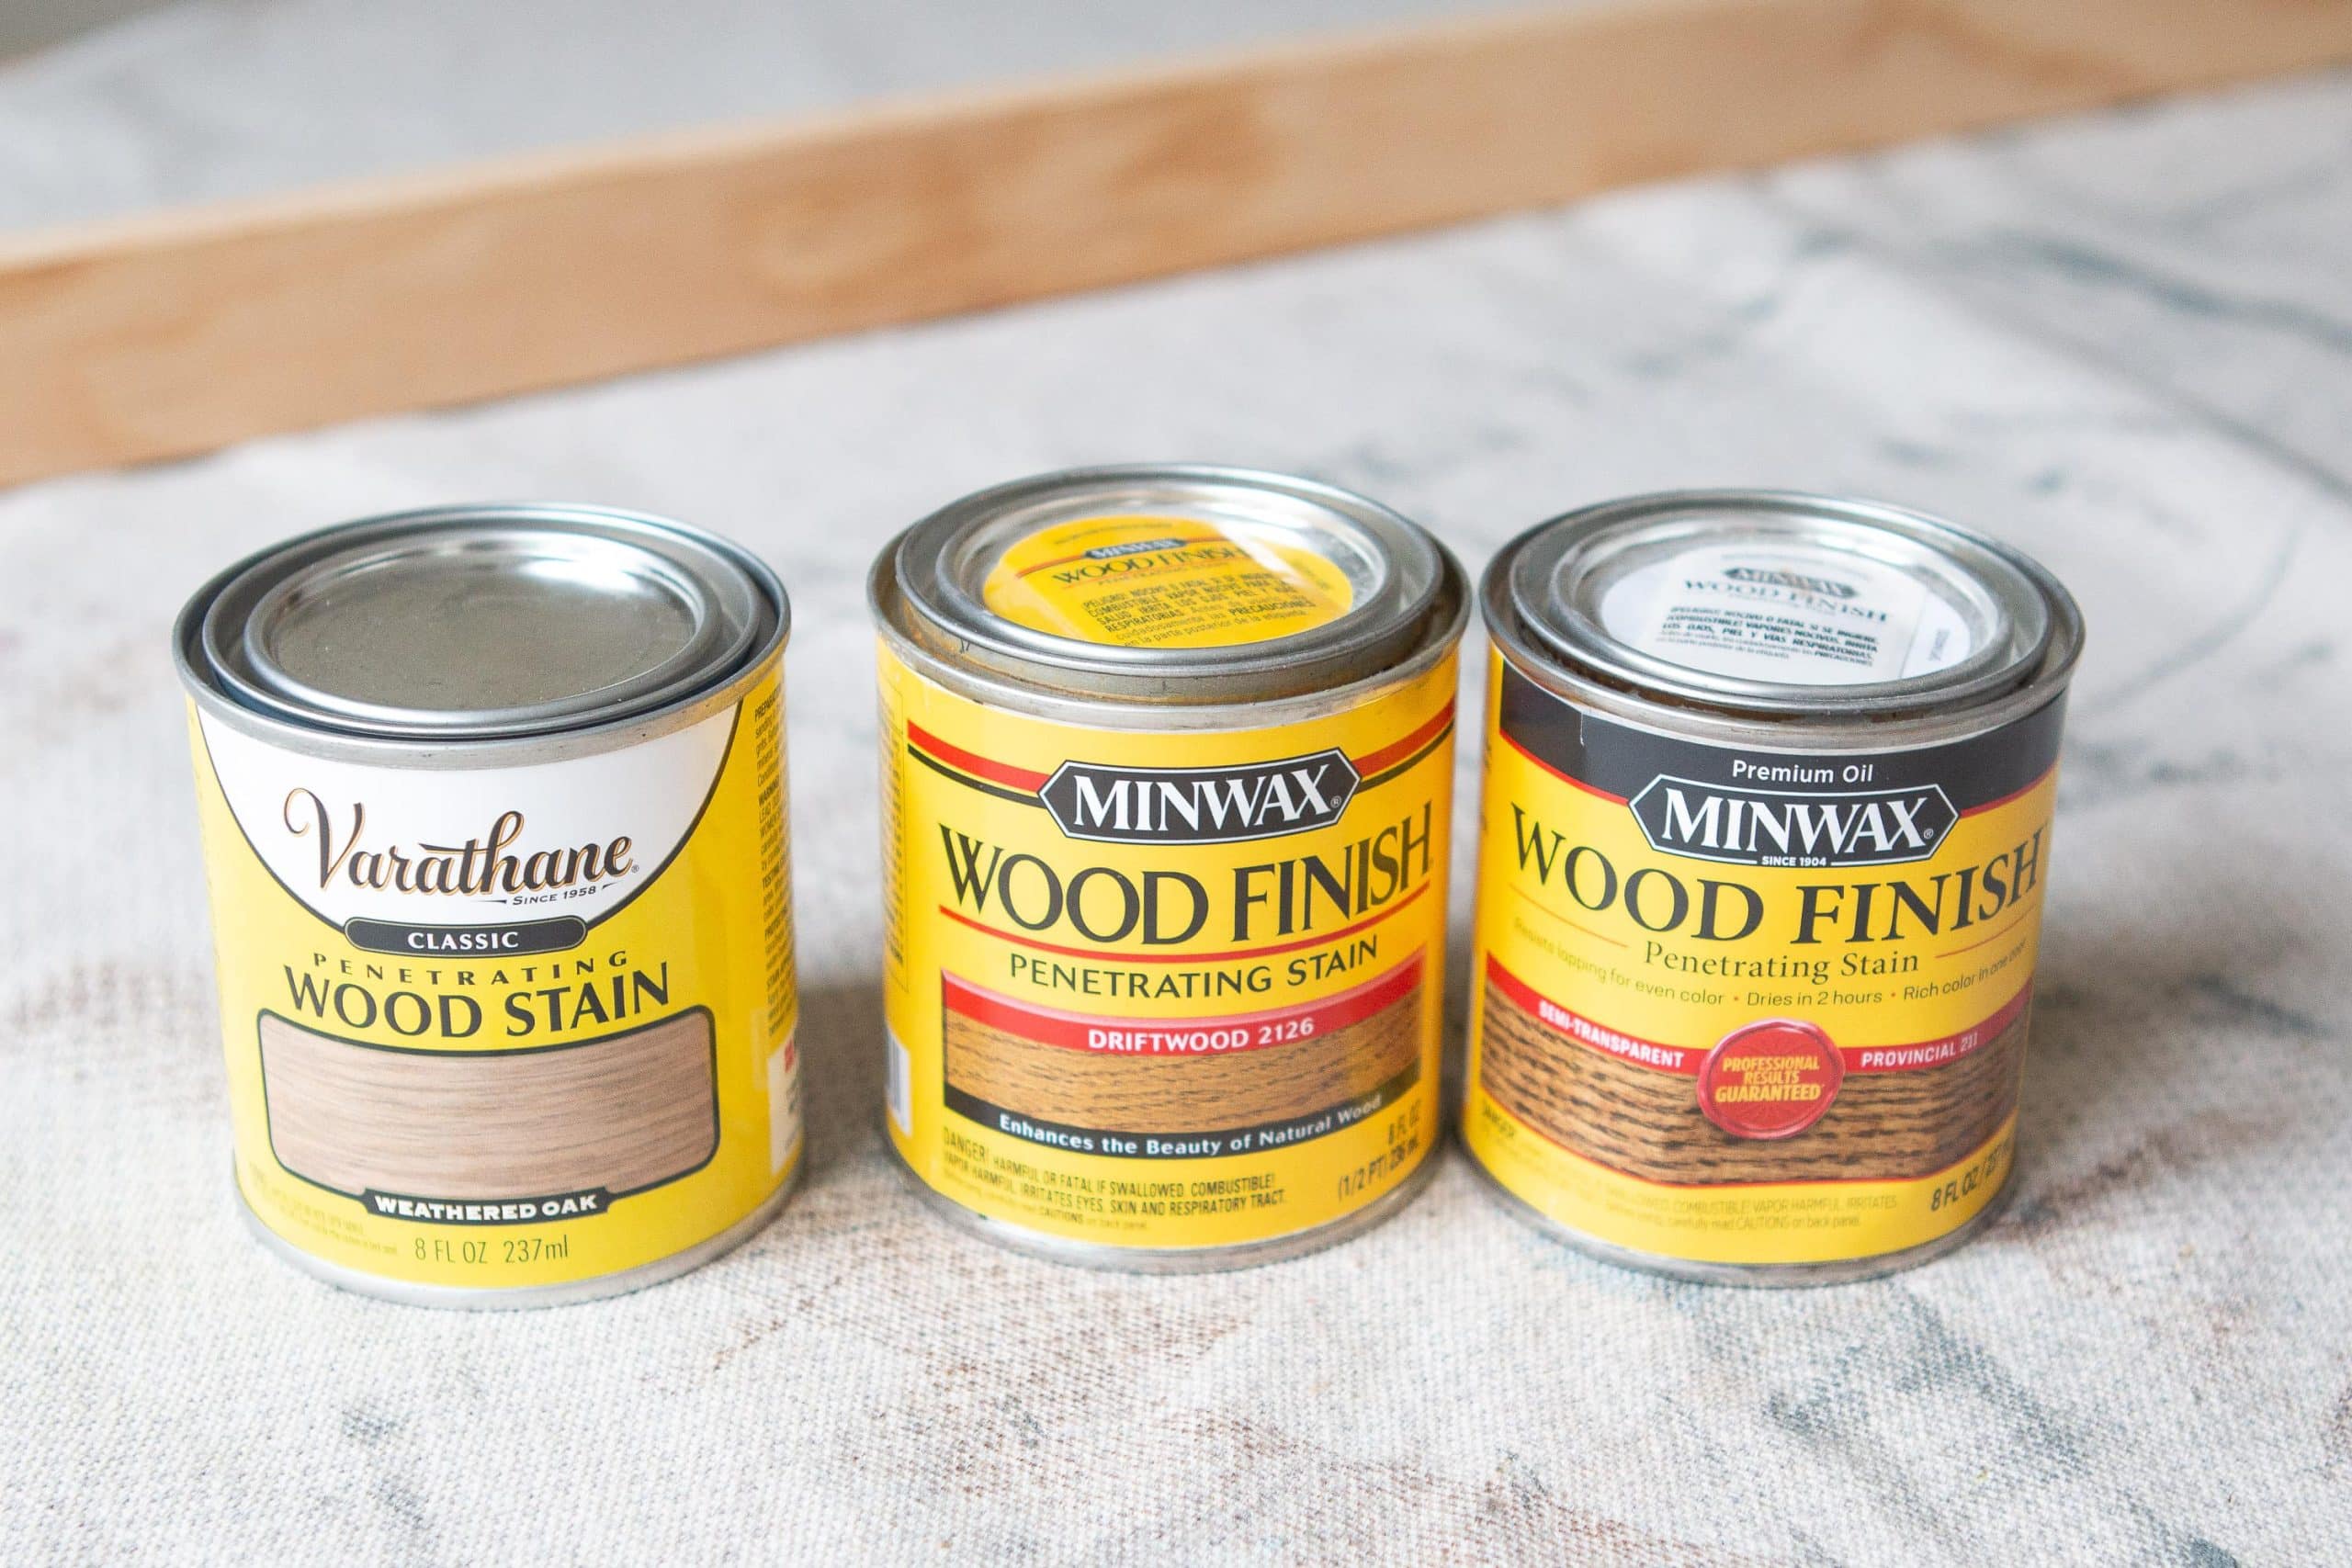
I have a lot of stain leftover from previous projects, so I got out a few cans to see what might work well for my framed canvas. Since I don’t even really know where I’ll end up hanging my final creation, I didn’t have my mind set on a specific wood stain. Instead, I tried a few of them out on the back of the wood to see what they looked like.
From left to right, I have “driftwood”, “provincial”, and “weathered oak”. The first and third barely gave the wood much color at all, since they’re semi-transparent stains and the wood conditioner had soaked in. Yet, the provincial felt a little too dark.  In the end, I decided to do a layer of the driftwood followed by the provincial. That way the wood soaked up most of the stain from the first lighter color, and didn’t absorb as much from the second darker stain.
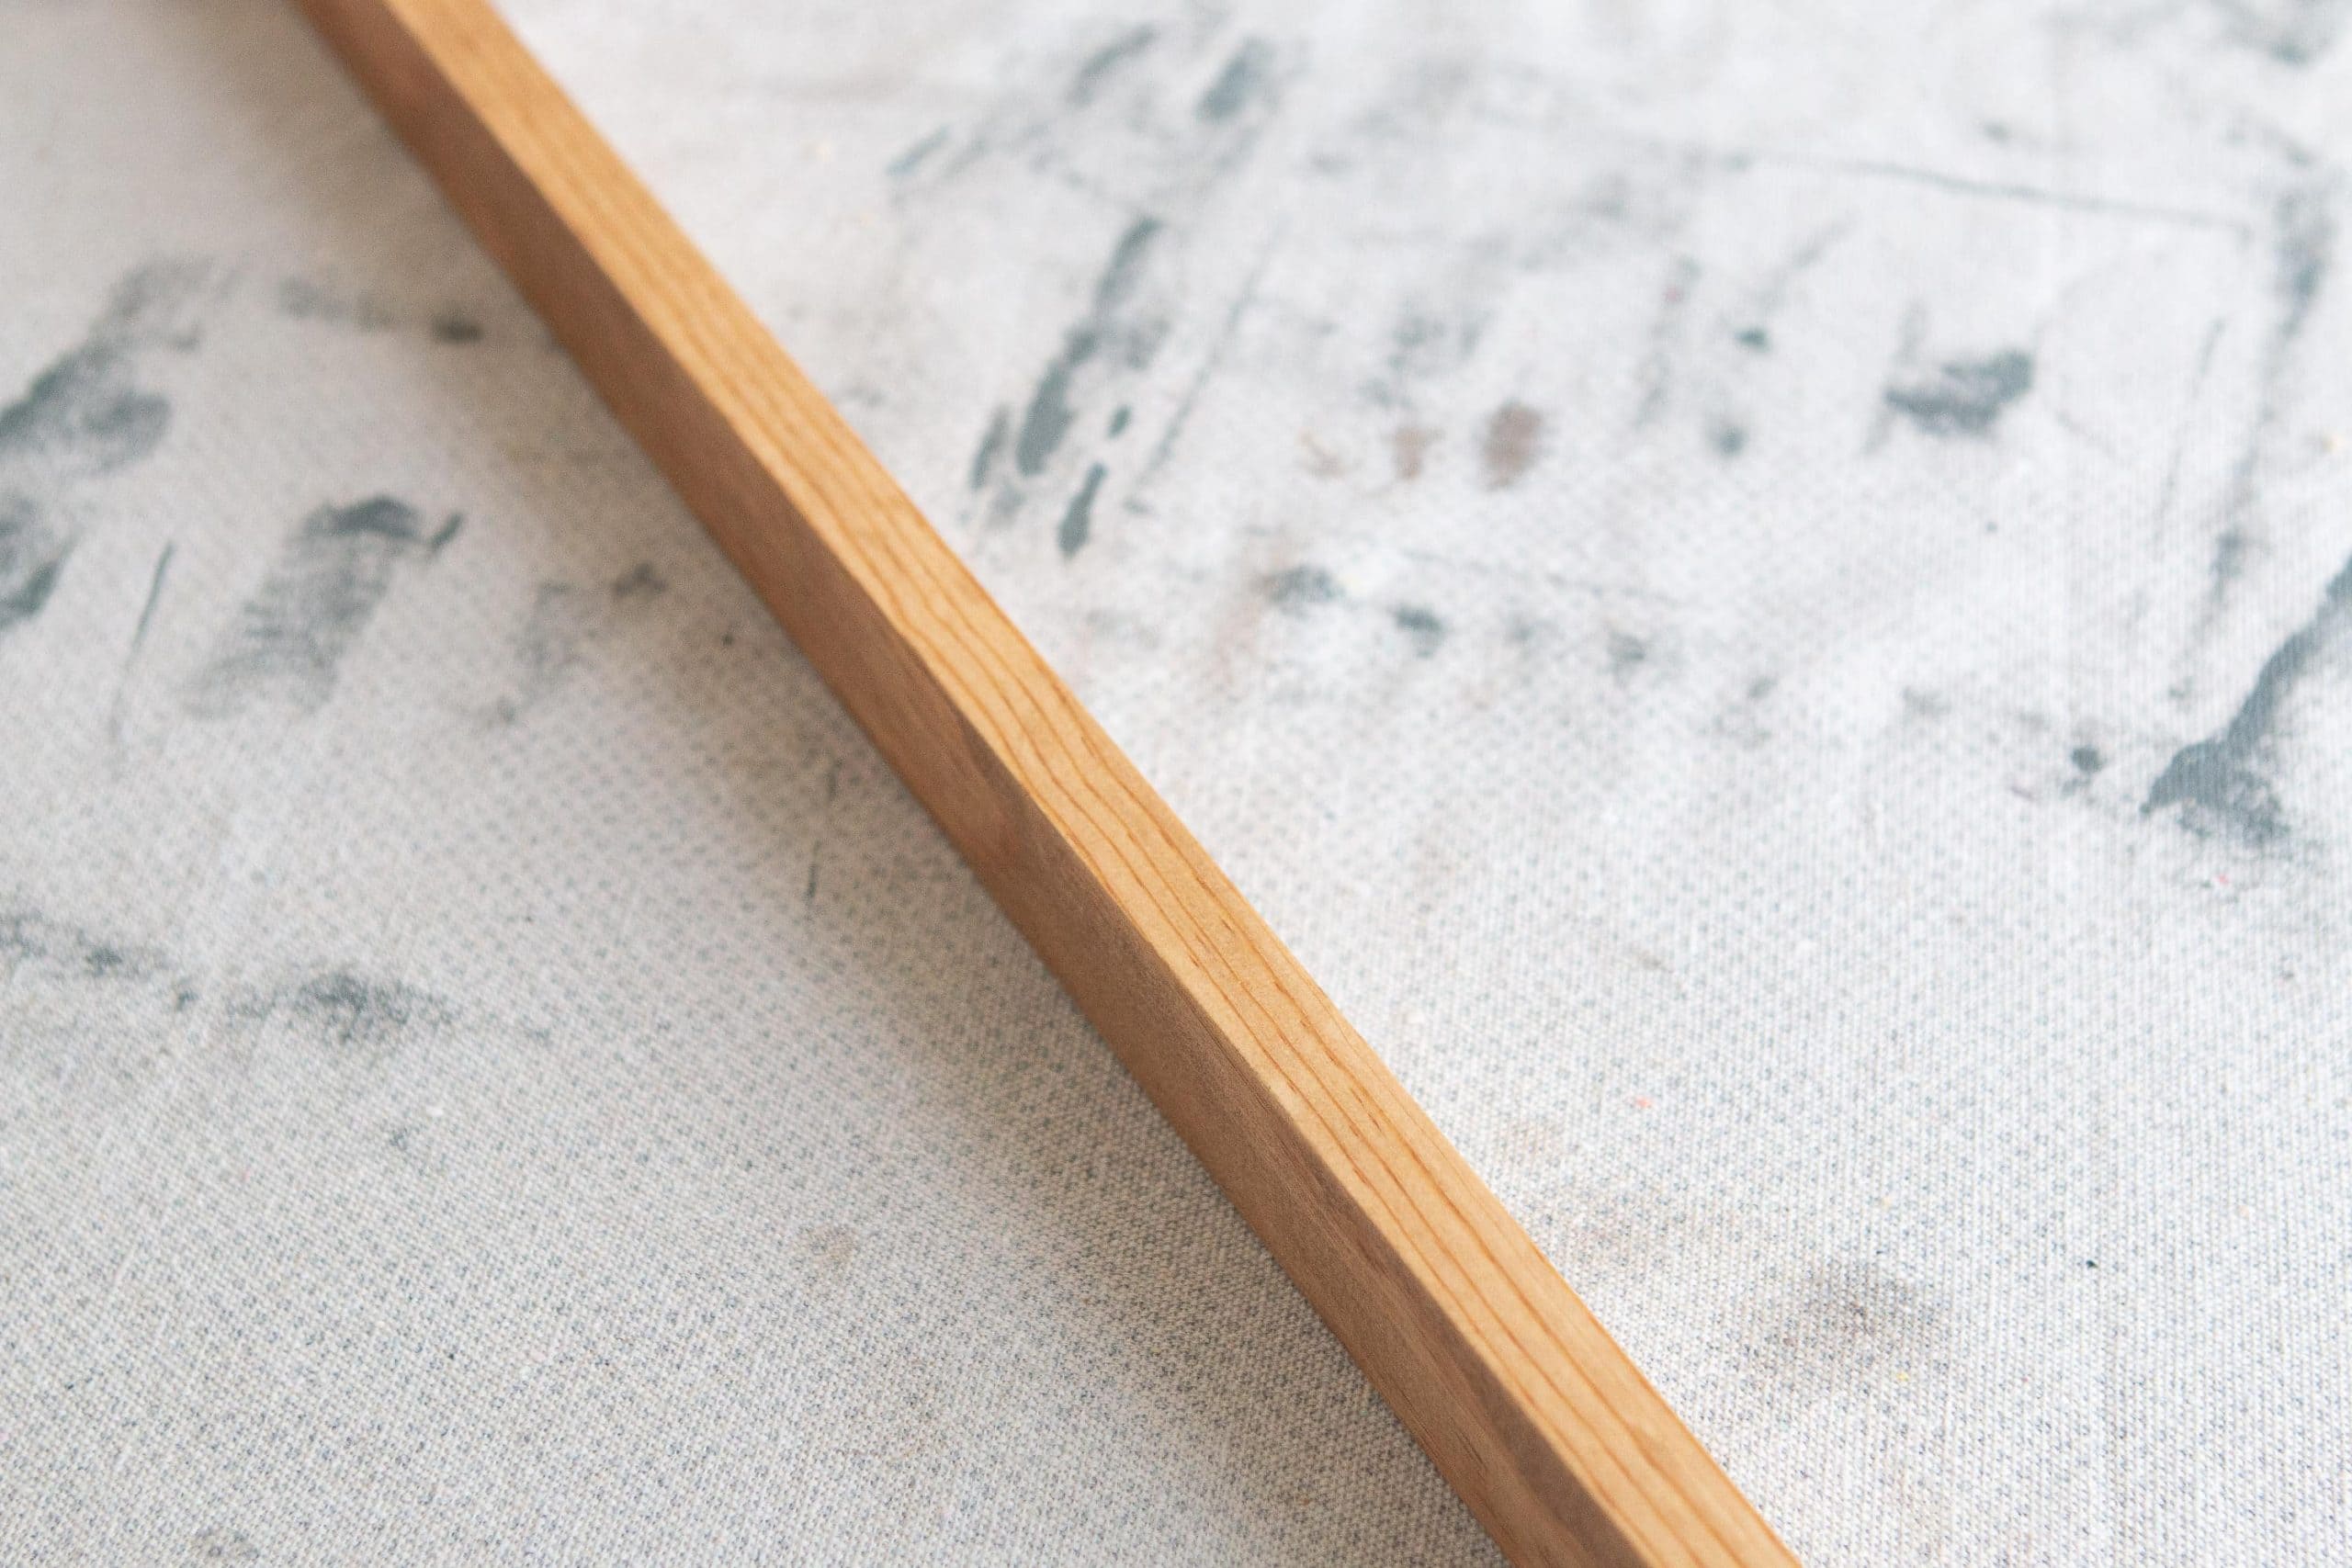
In the end, I had a nice light brown color that let the yellow undertones of the pine shine through. To apply stain, just use a rag, dip it in the stain, and wipe on your wood. Be sure to wear gloves as it can get pretty messy!
Assemble Your DIY Canvas Frame
With the frame built and stained, it was time to actually attach the canvas. I popped it into the frame and then used my brad nailer to nail through the scrap pieces of wood into the canvas. This only took a few minutes and it was super secure.
My DIY Canvas Frame
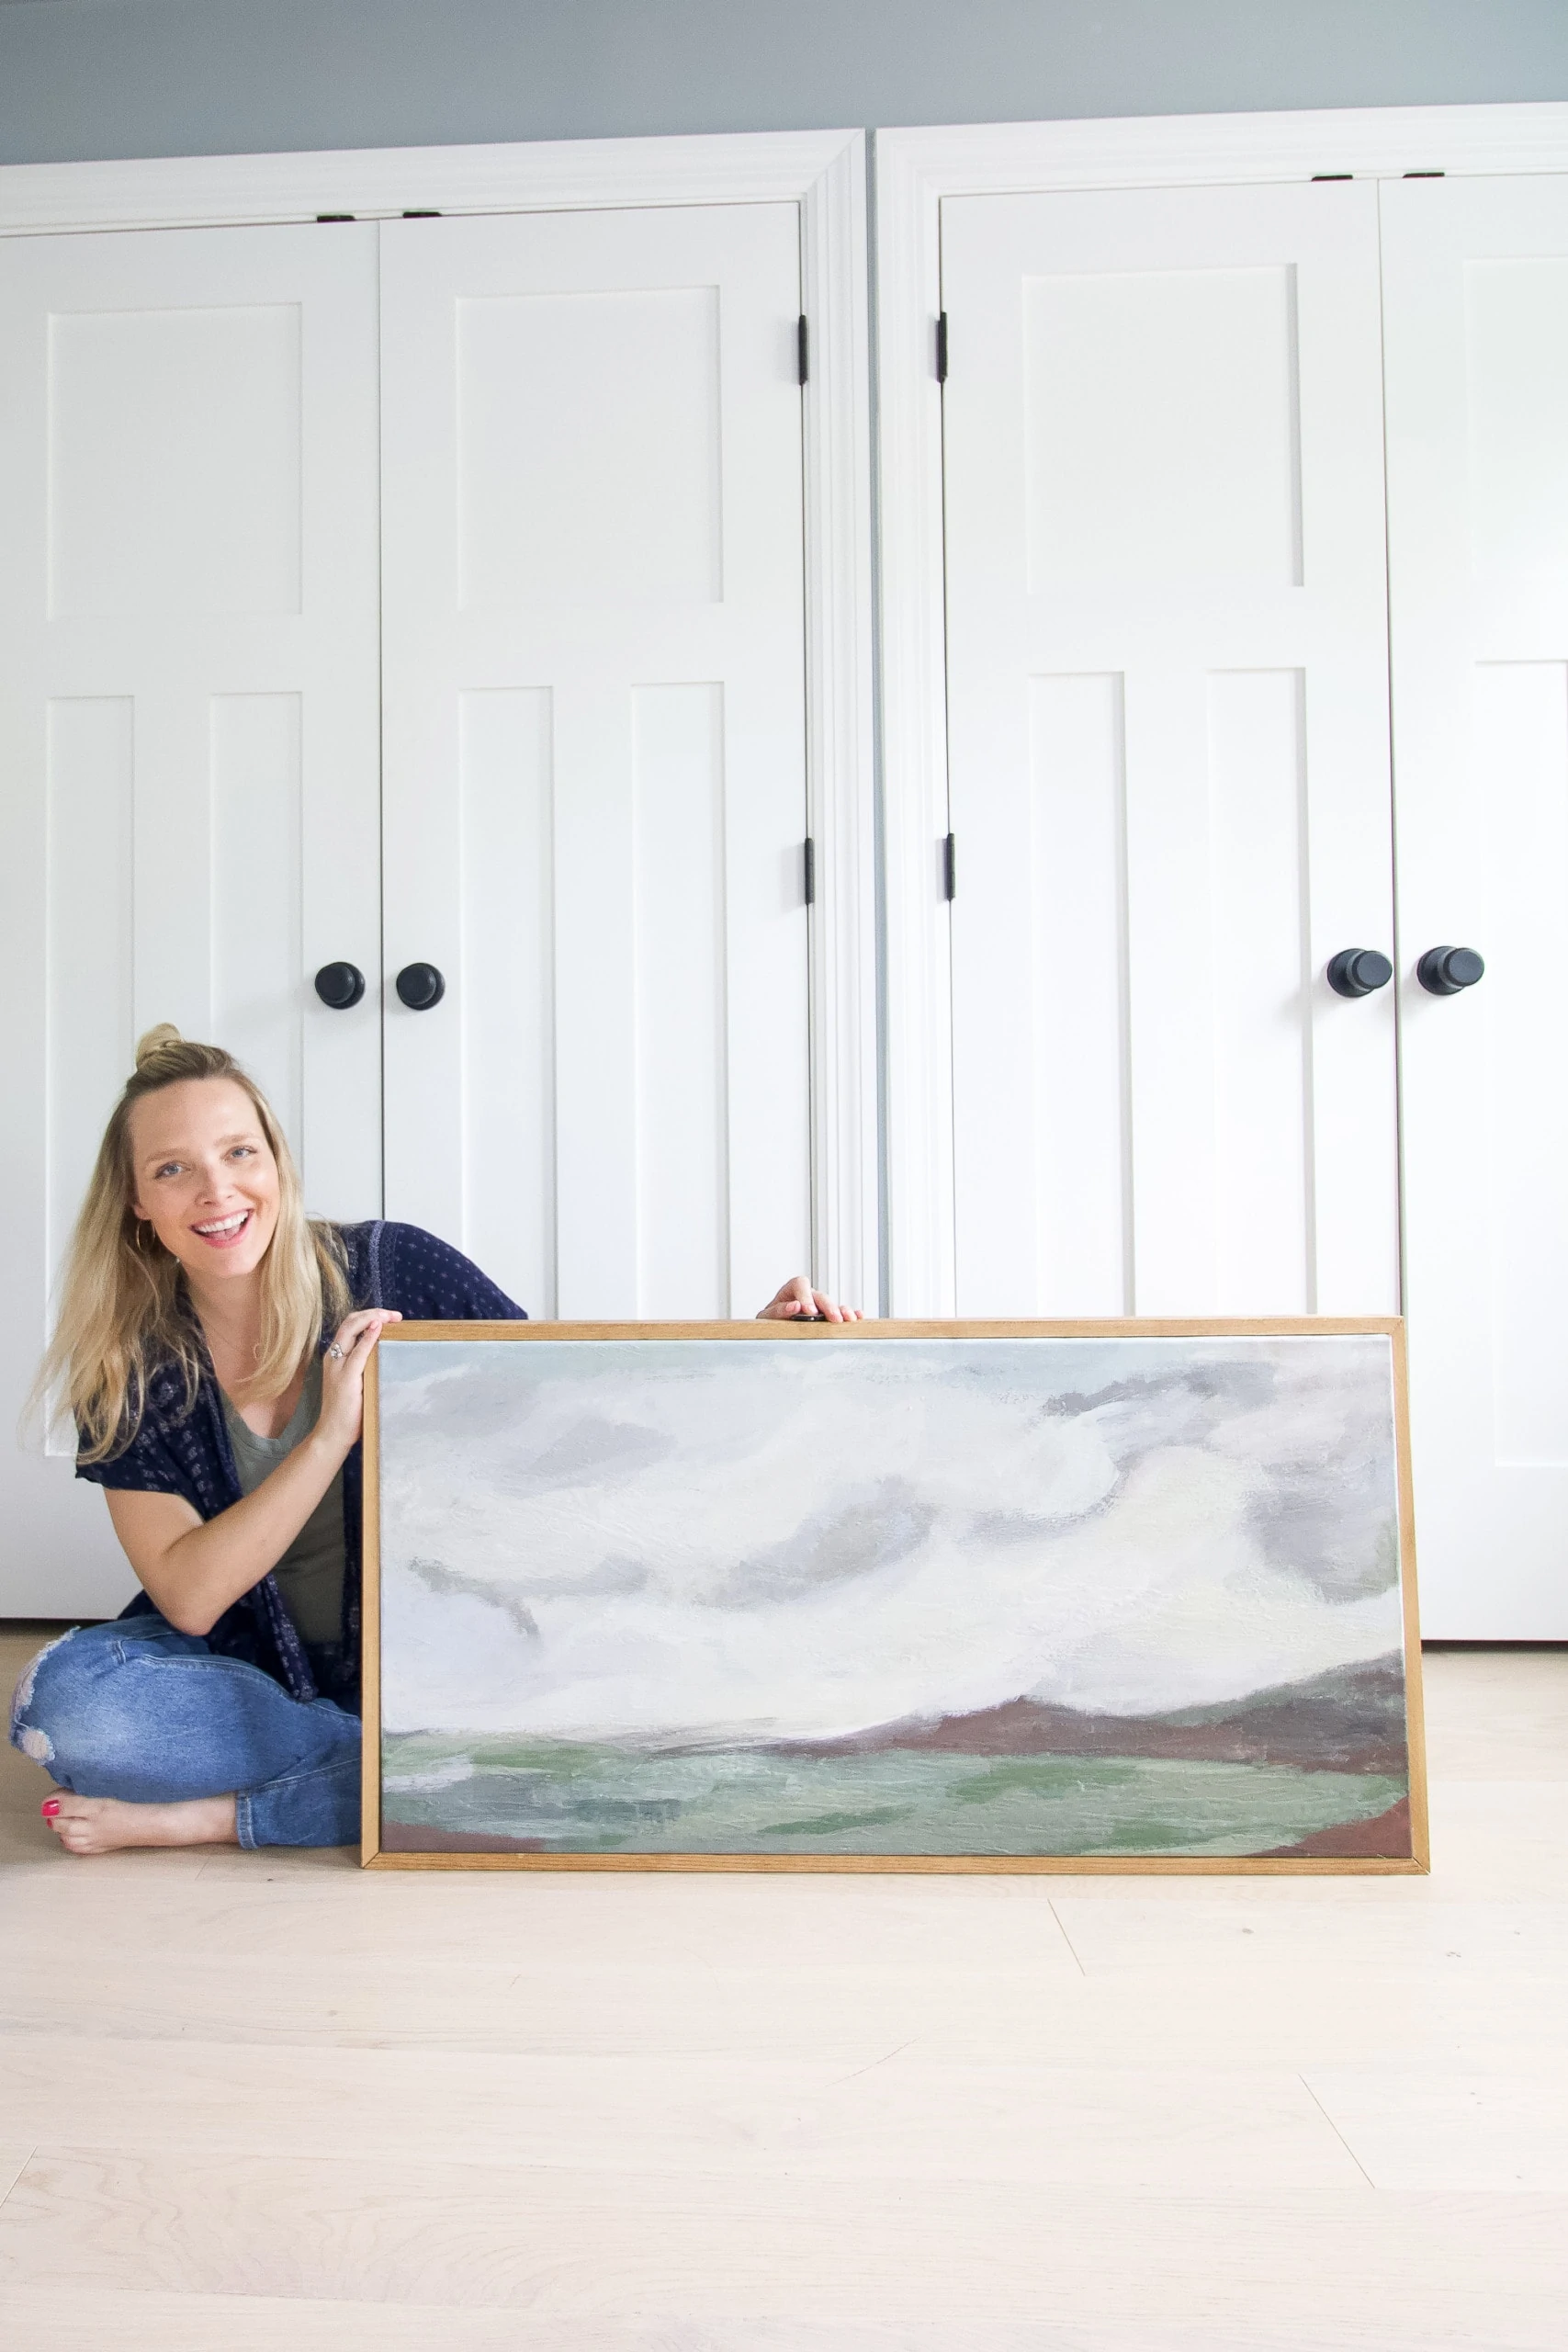
This was a really satisfying DIY project that I thoroughly enjoyed! I can hardly believe how much better my piece of art looks with a custom frame. It looks legit!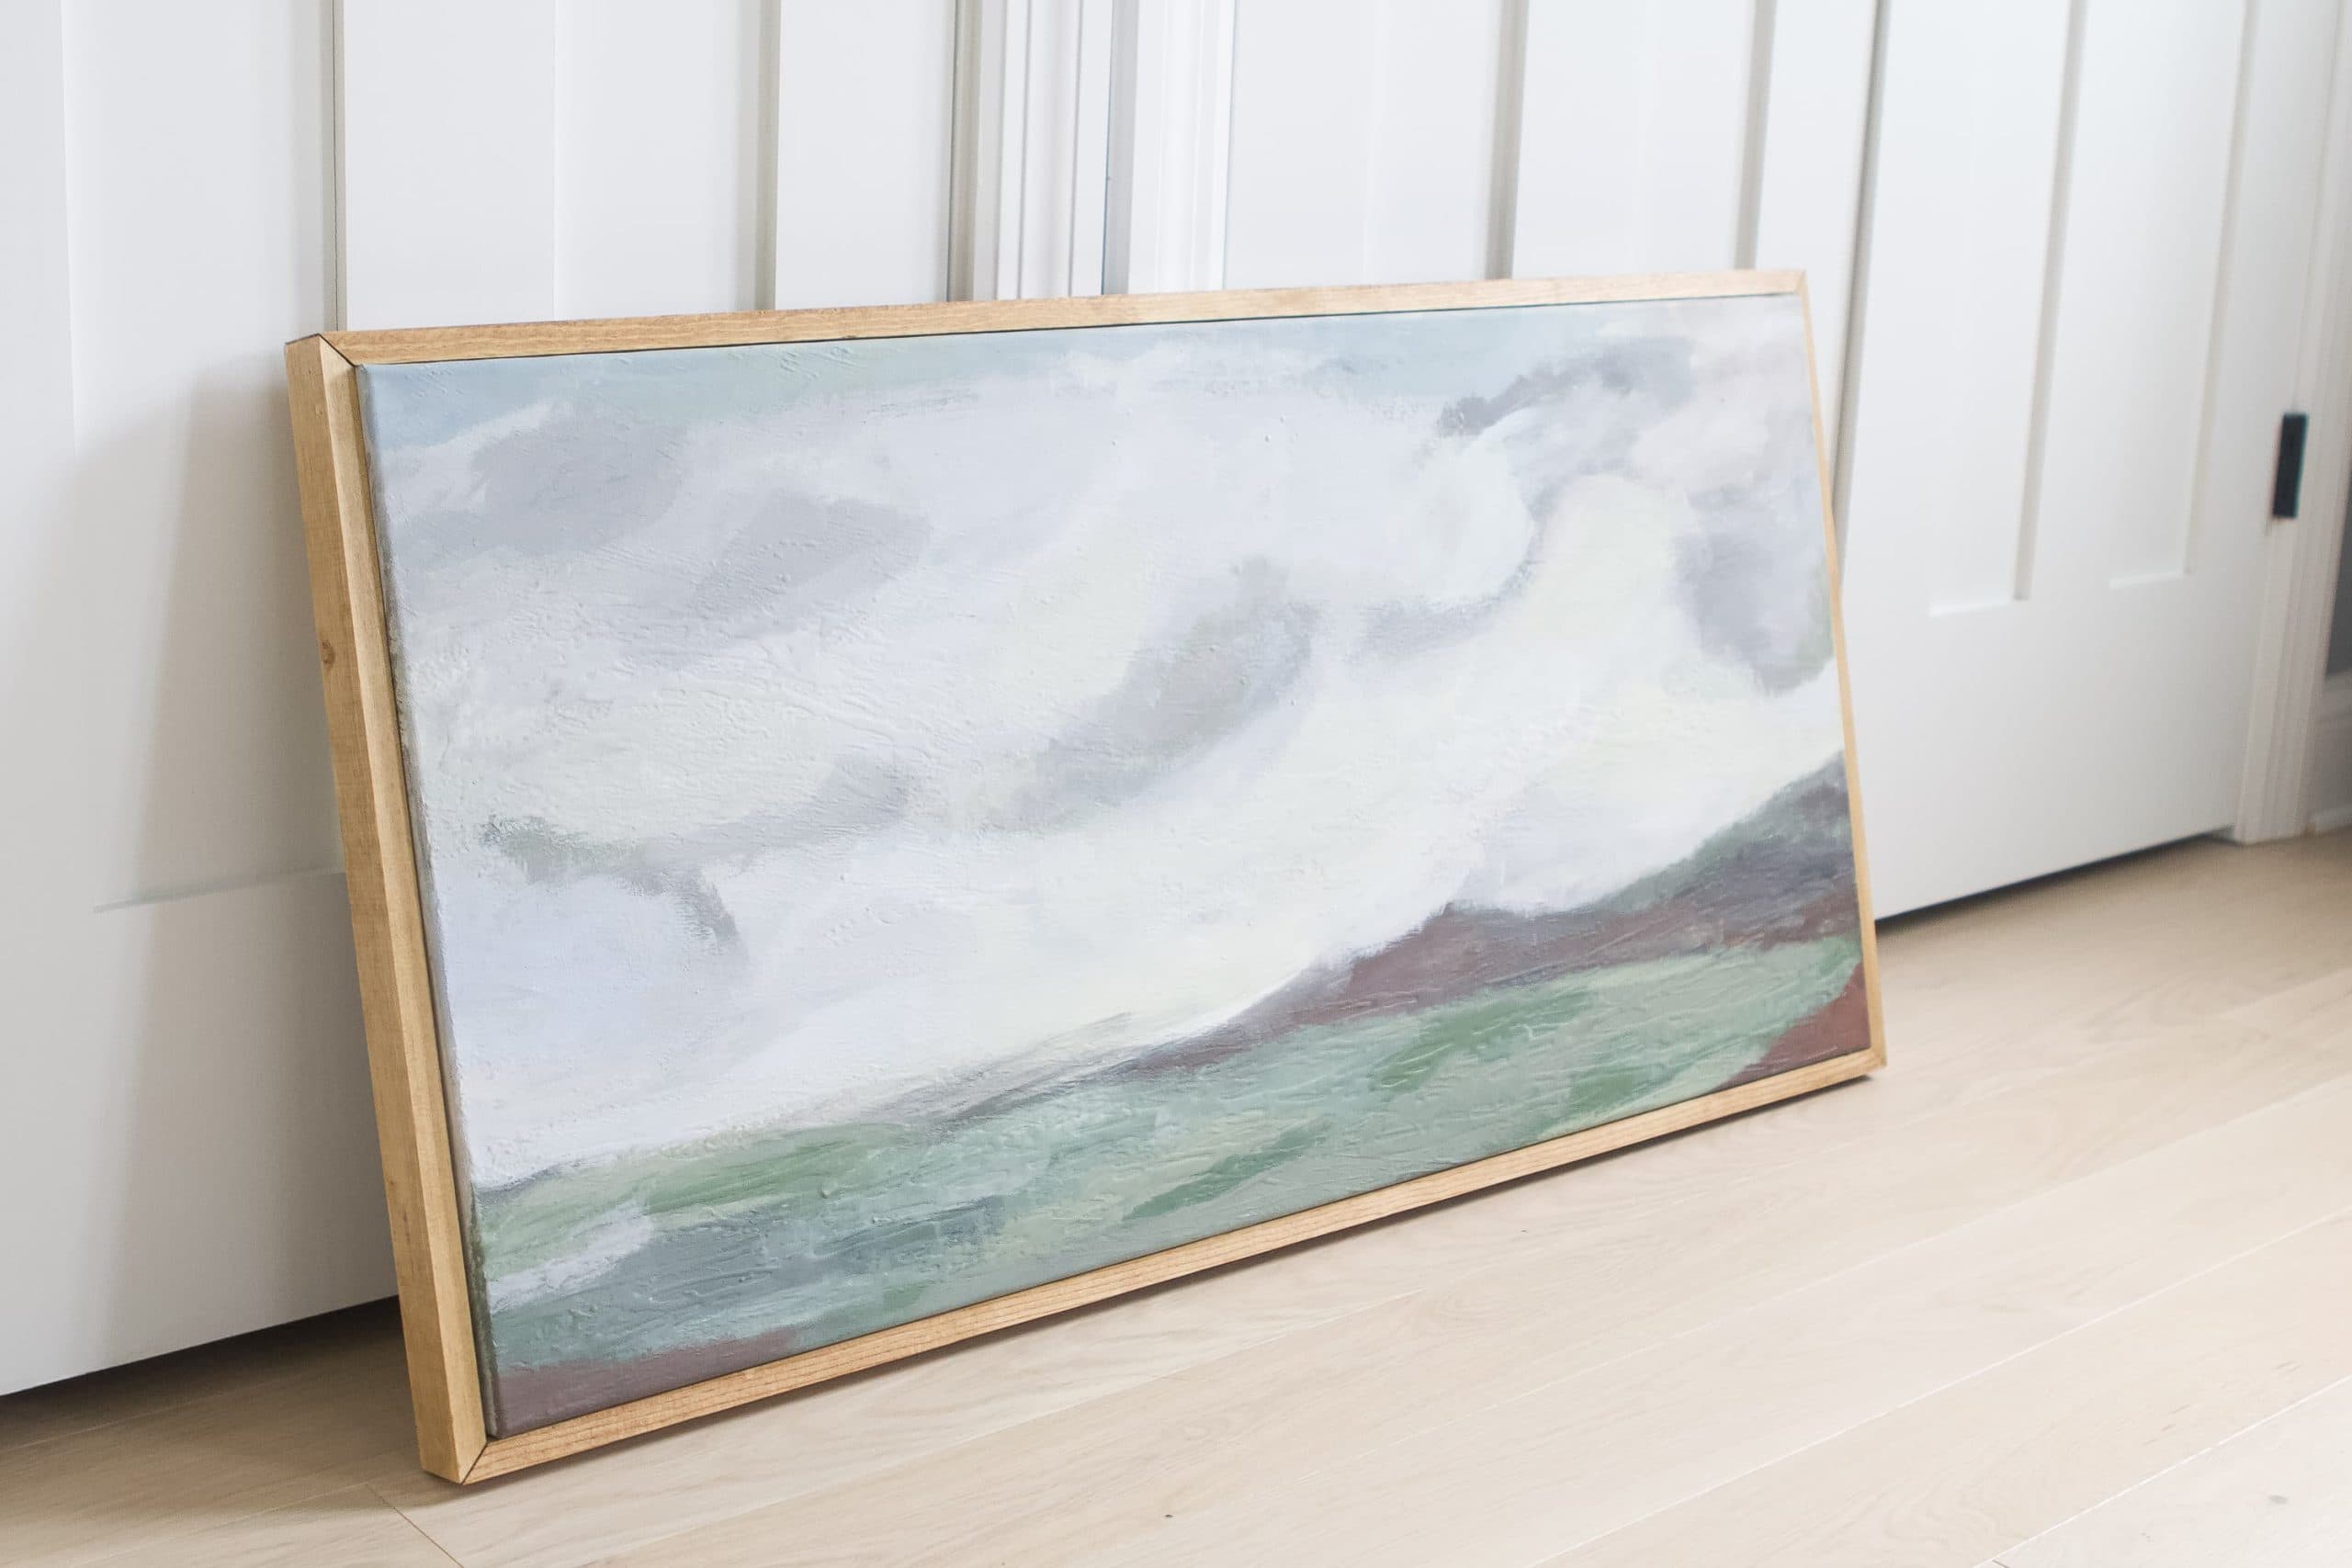
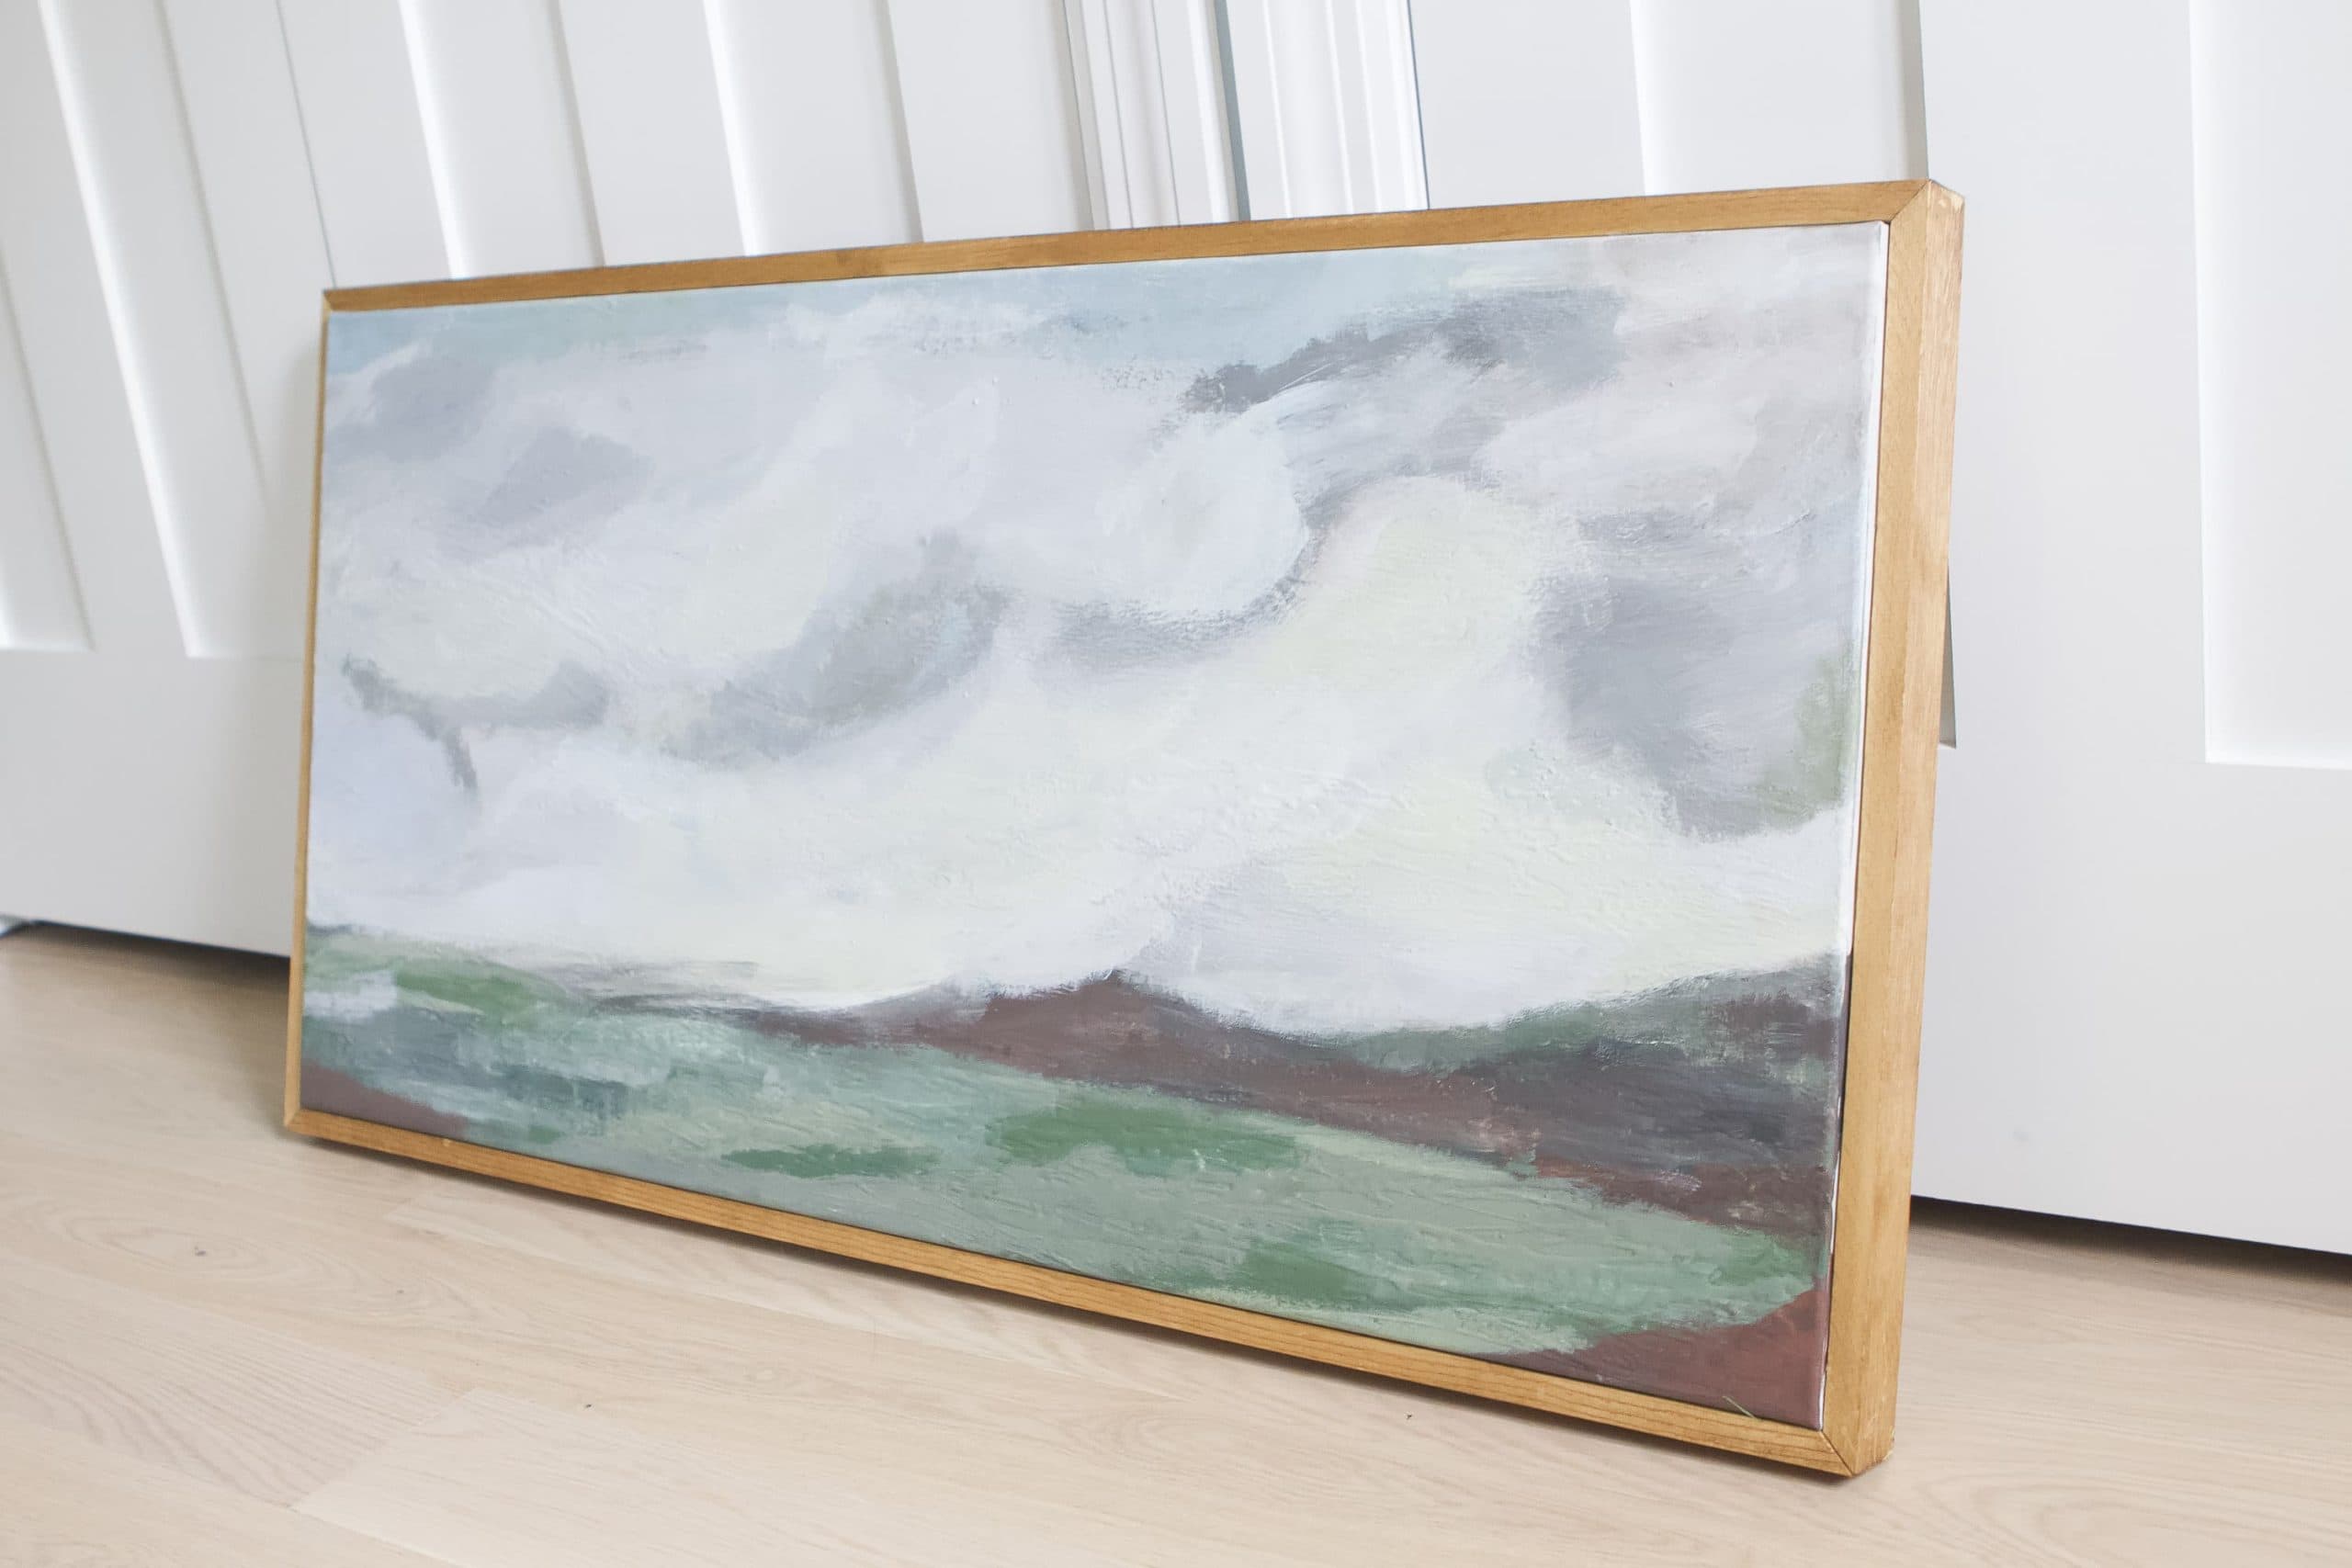
The only thing that I need to do is paint the edges of the canvas a bit. It sticks out about 1/4 inch past the wood and you can see the white edges where I didn’t paint. I wish I would have just painted the edges when I painted the piece, but I’m always learning something! It shouldn’t be too tough to mix up a bit of paint and get those edges looking good. 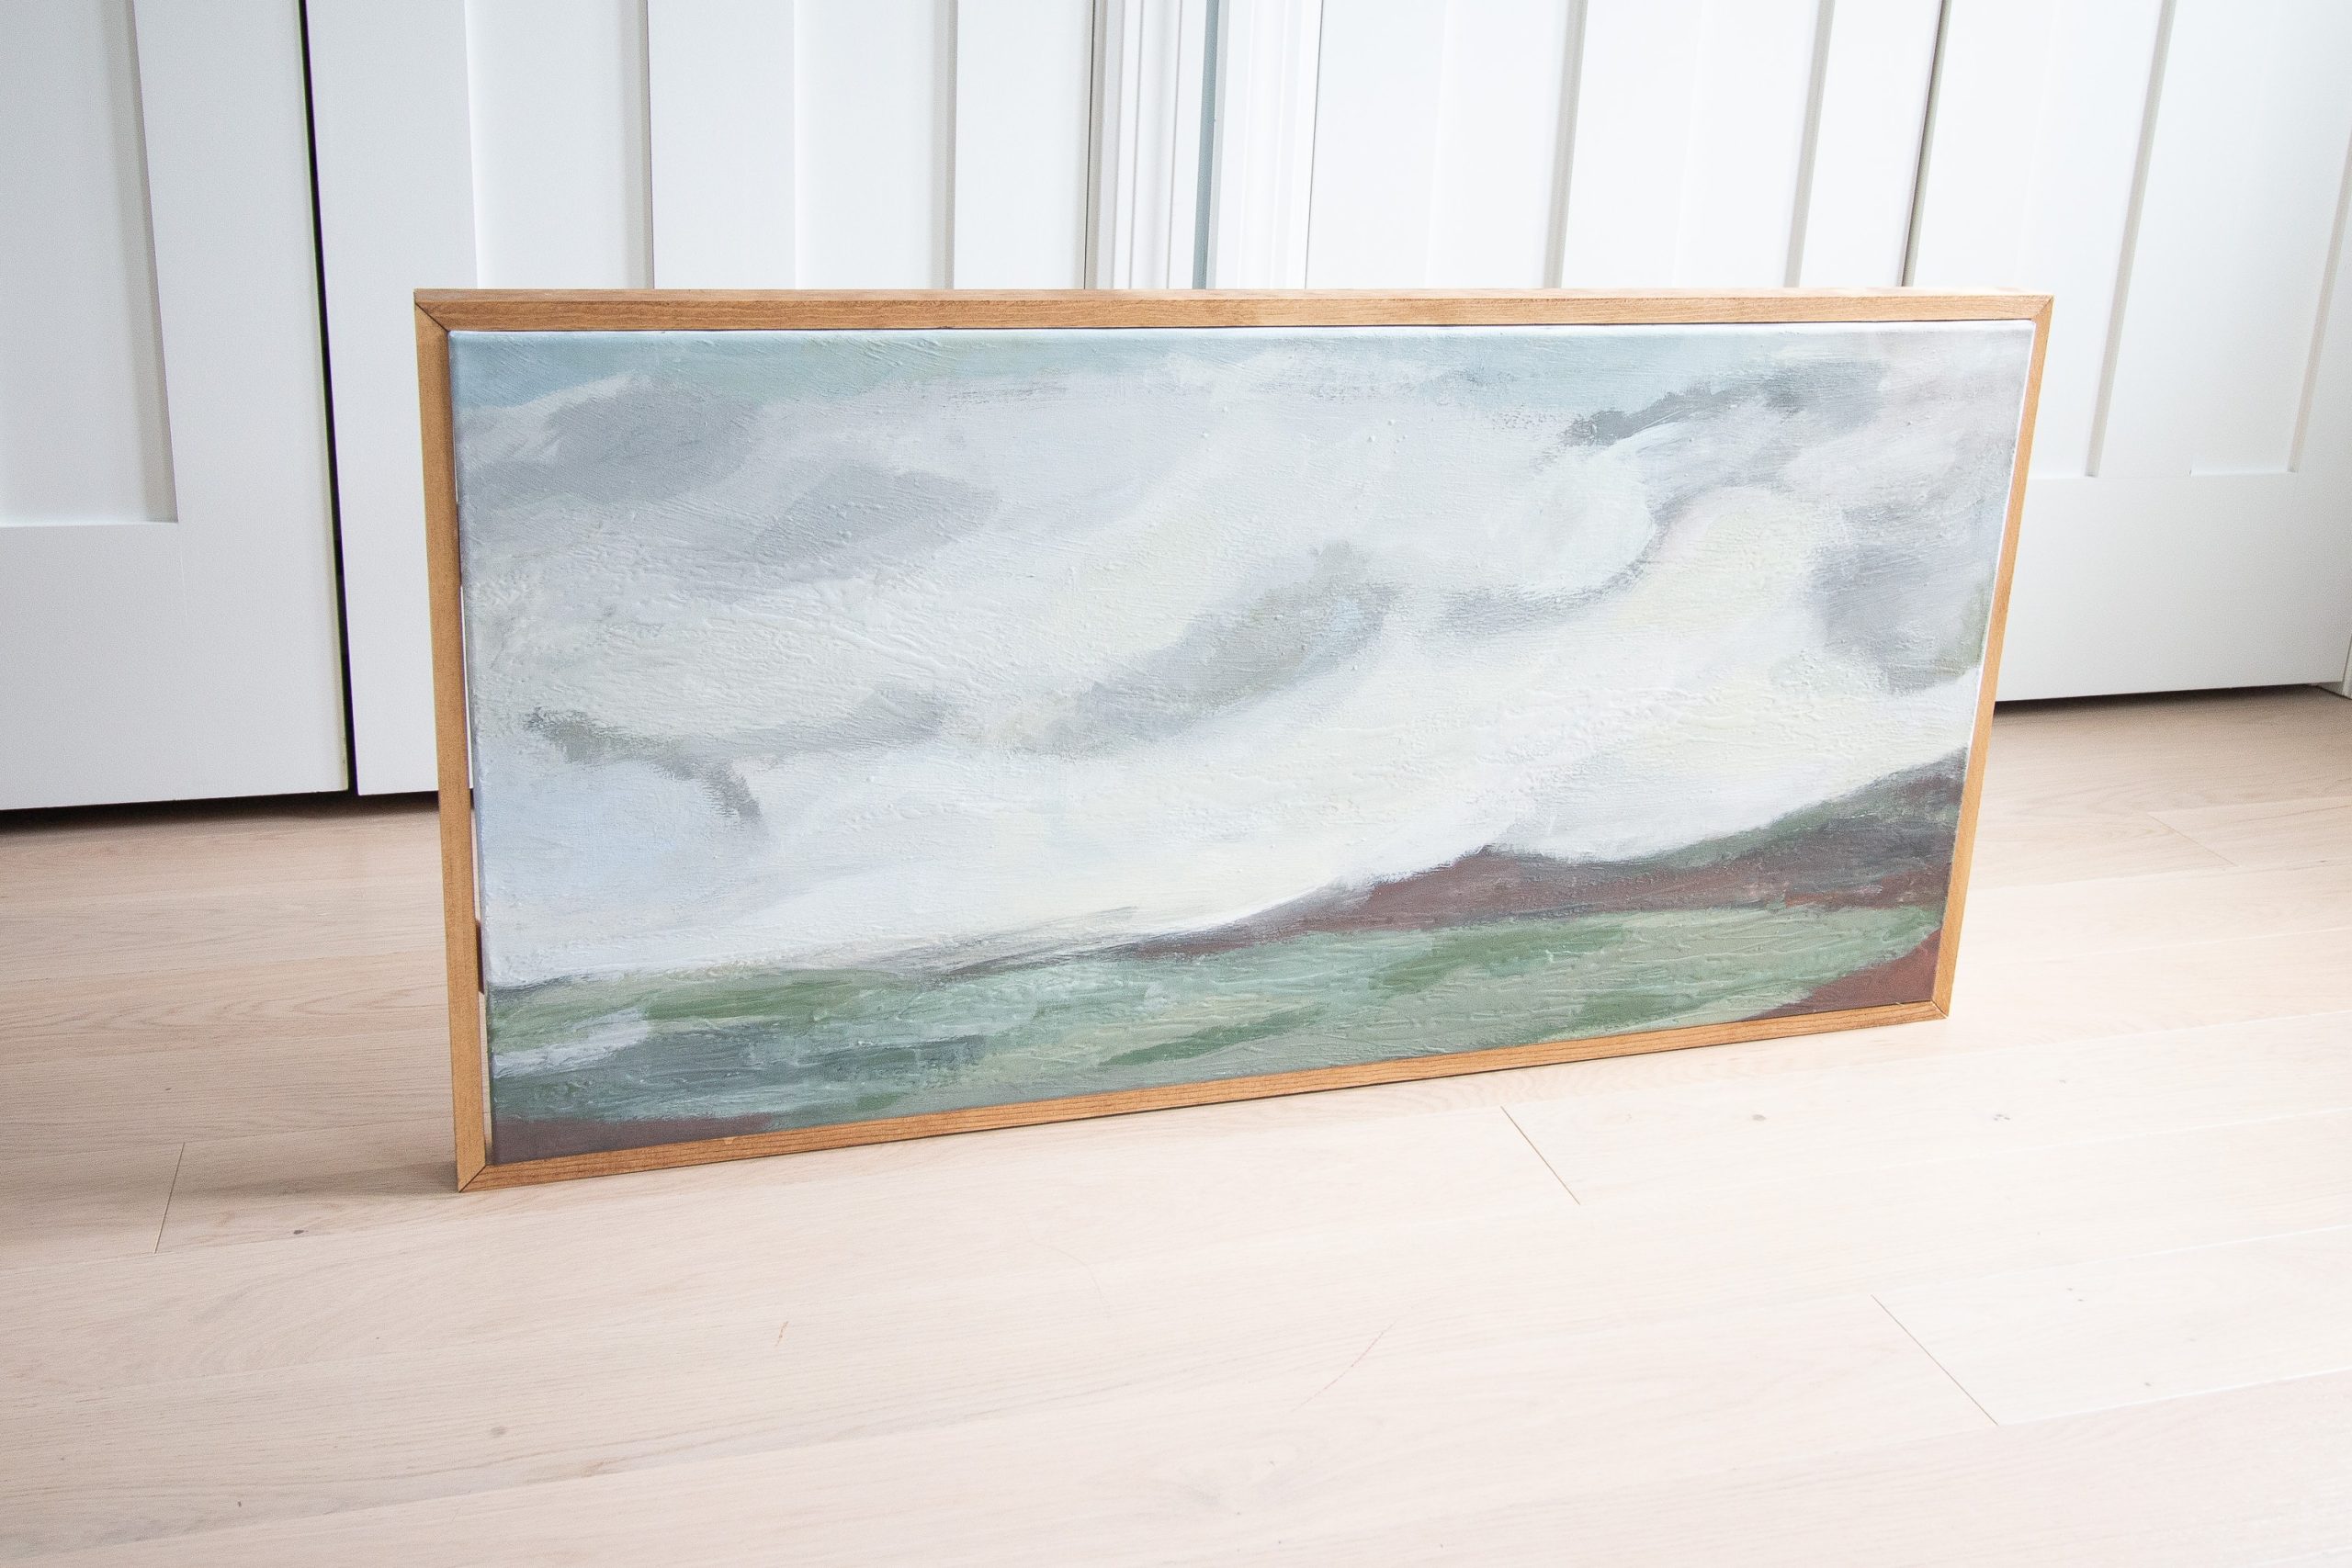
I’m still not really sure where I’ll hang my creation. Perhaps in baby boy’s nursery? We’ll see if it fits with the design plans as I start to get that room together. 
Now, if you have any unframed canvases around your home, I urge you to give this DIY project a try. You can completely customize the wood and stain color and I promise your piece of art will look ten times better.
Casey