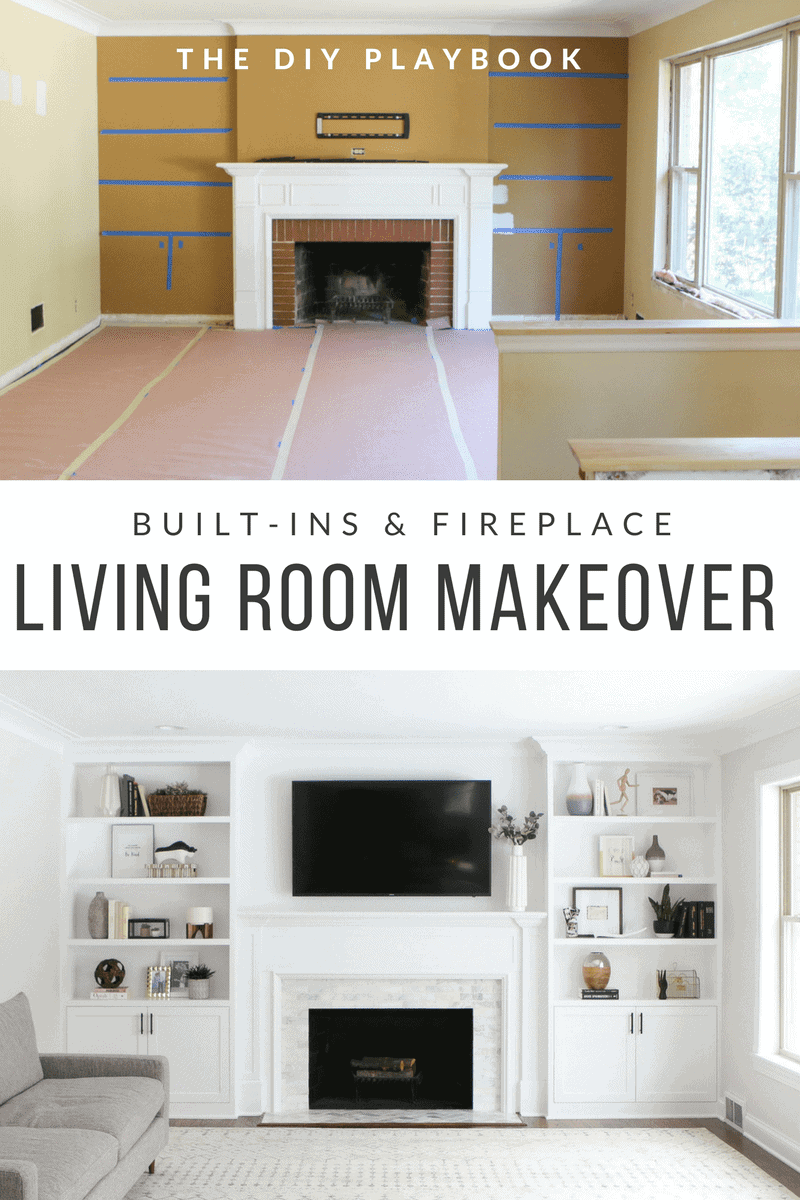
White Built-Ins Around the Fireplace: Before and After
Every step of our renovation process thus far has been SO exciting. Slowly but surely, we’re transforming our interior spaces to better reflect us, and we’re putting a slightly more modern touch on our new home (catch up about how we sold our house in 48 hours and see our new 1950s ranch here)!
It’s been really fun to make so many design decisions. Even the smallest changes have had me giddy because let’s be honest – progress is progress! But today’s transformation may be one of my all-time favorites. The white built-ins on the fireplace wall have been installed and you guys, I can’t even. They have become such a stunning focal point in our main living space. I’m literally obsessed and I can’t wait to finally catch you up on ALL the details.
Then & Now
So where shall we start?! I guess the beginning is probably the best place. Remember what our living room looked like when we first moved in?
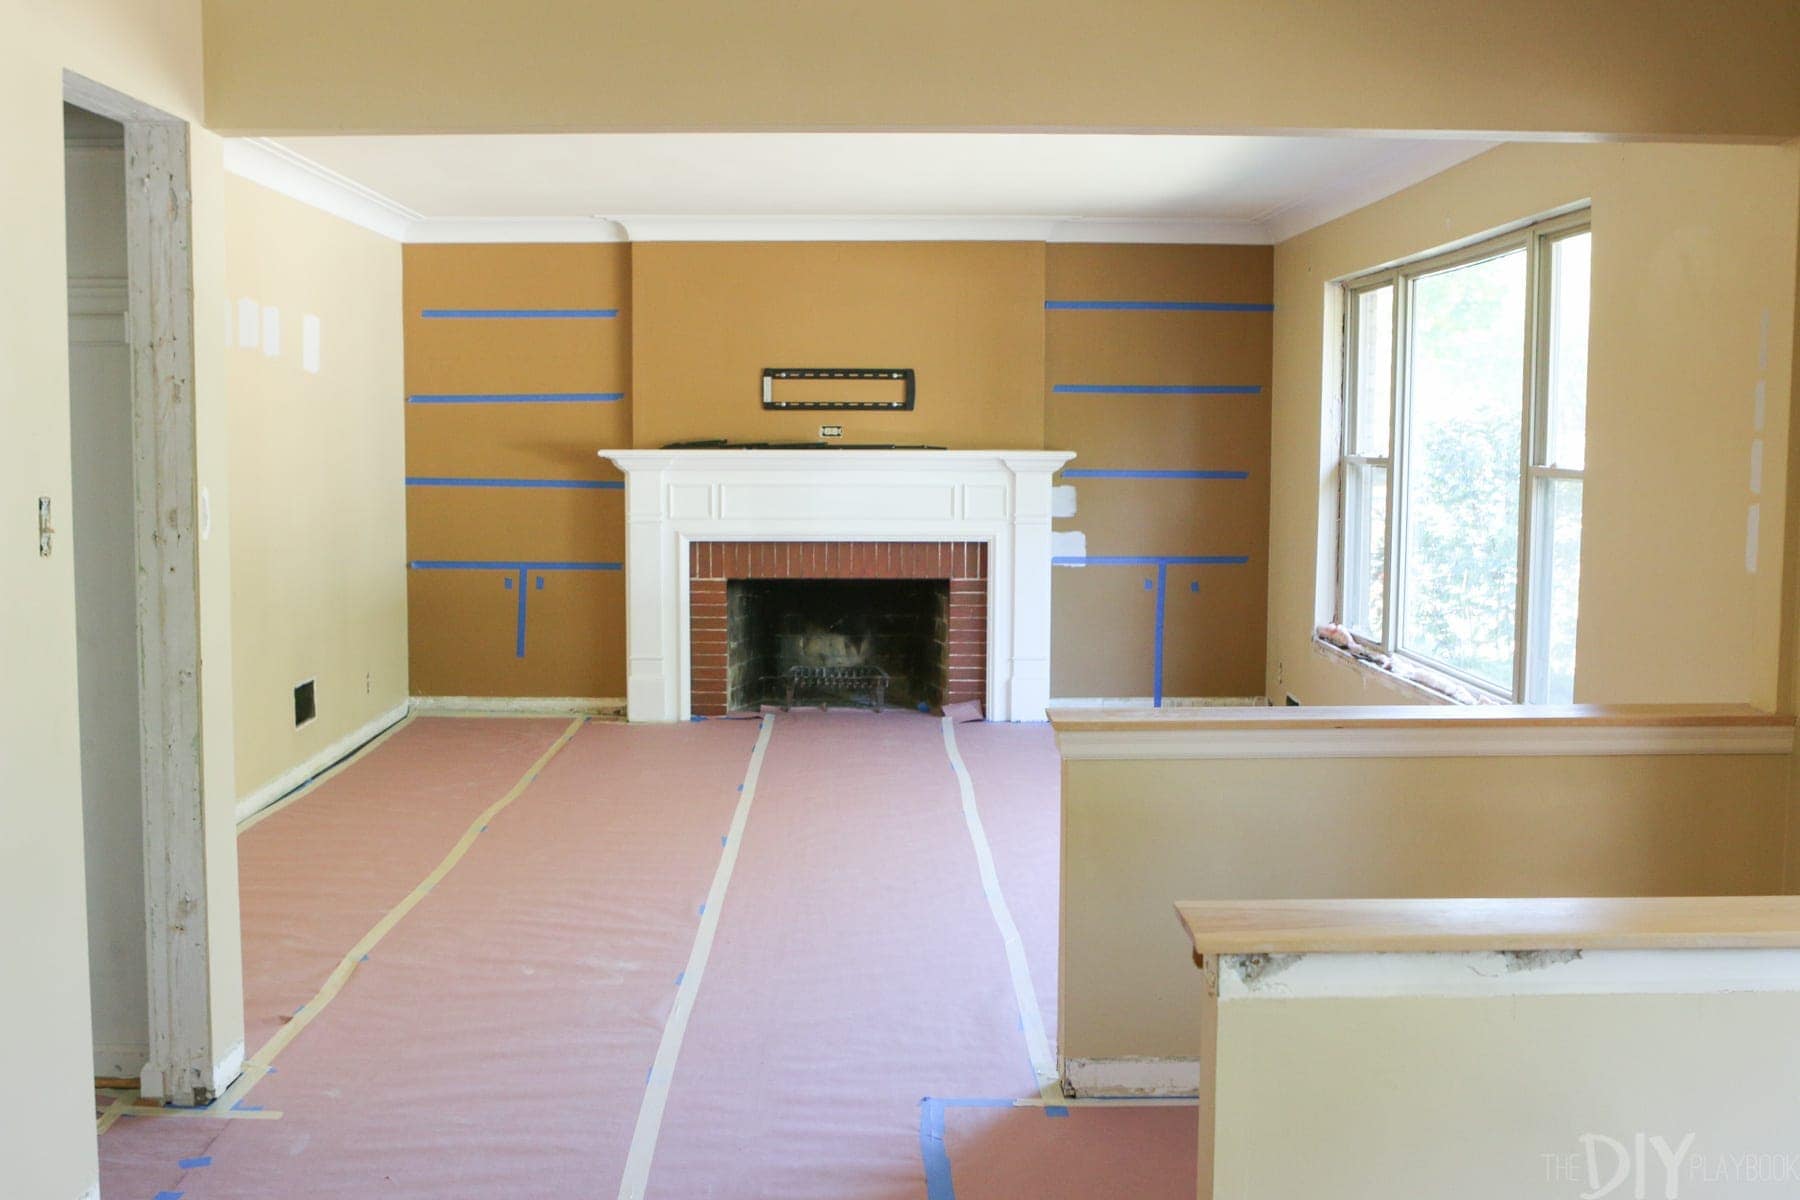
The blue painter’s tape on the wall was the vision I chatted through with the carpenter who built these gorgeous fireplace built-ins. Fast forward a few months, and check out what this wall looks like now…
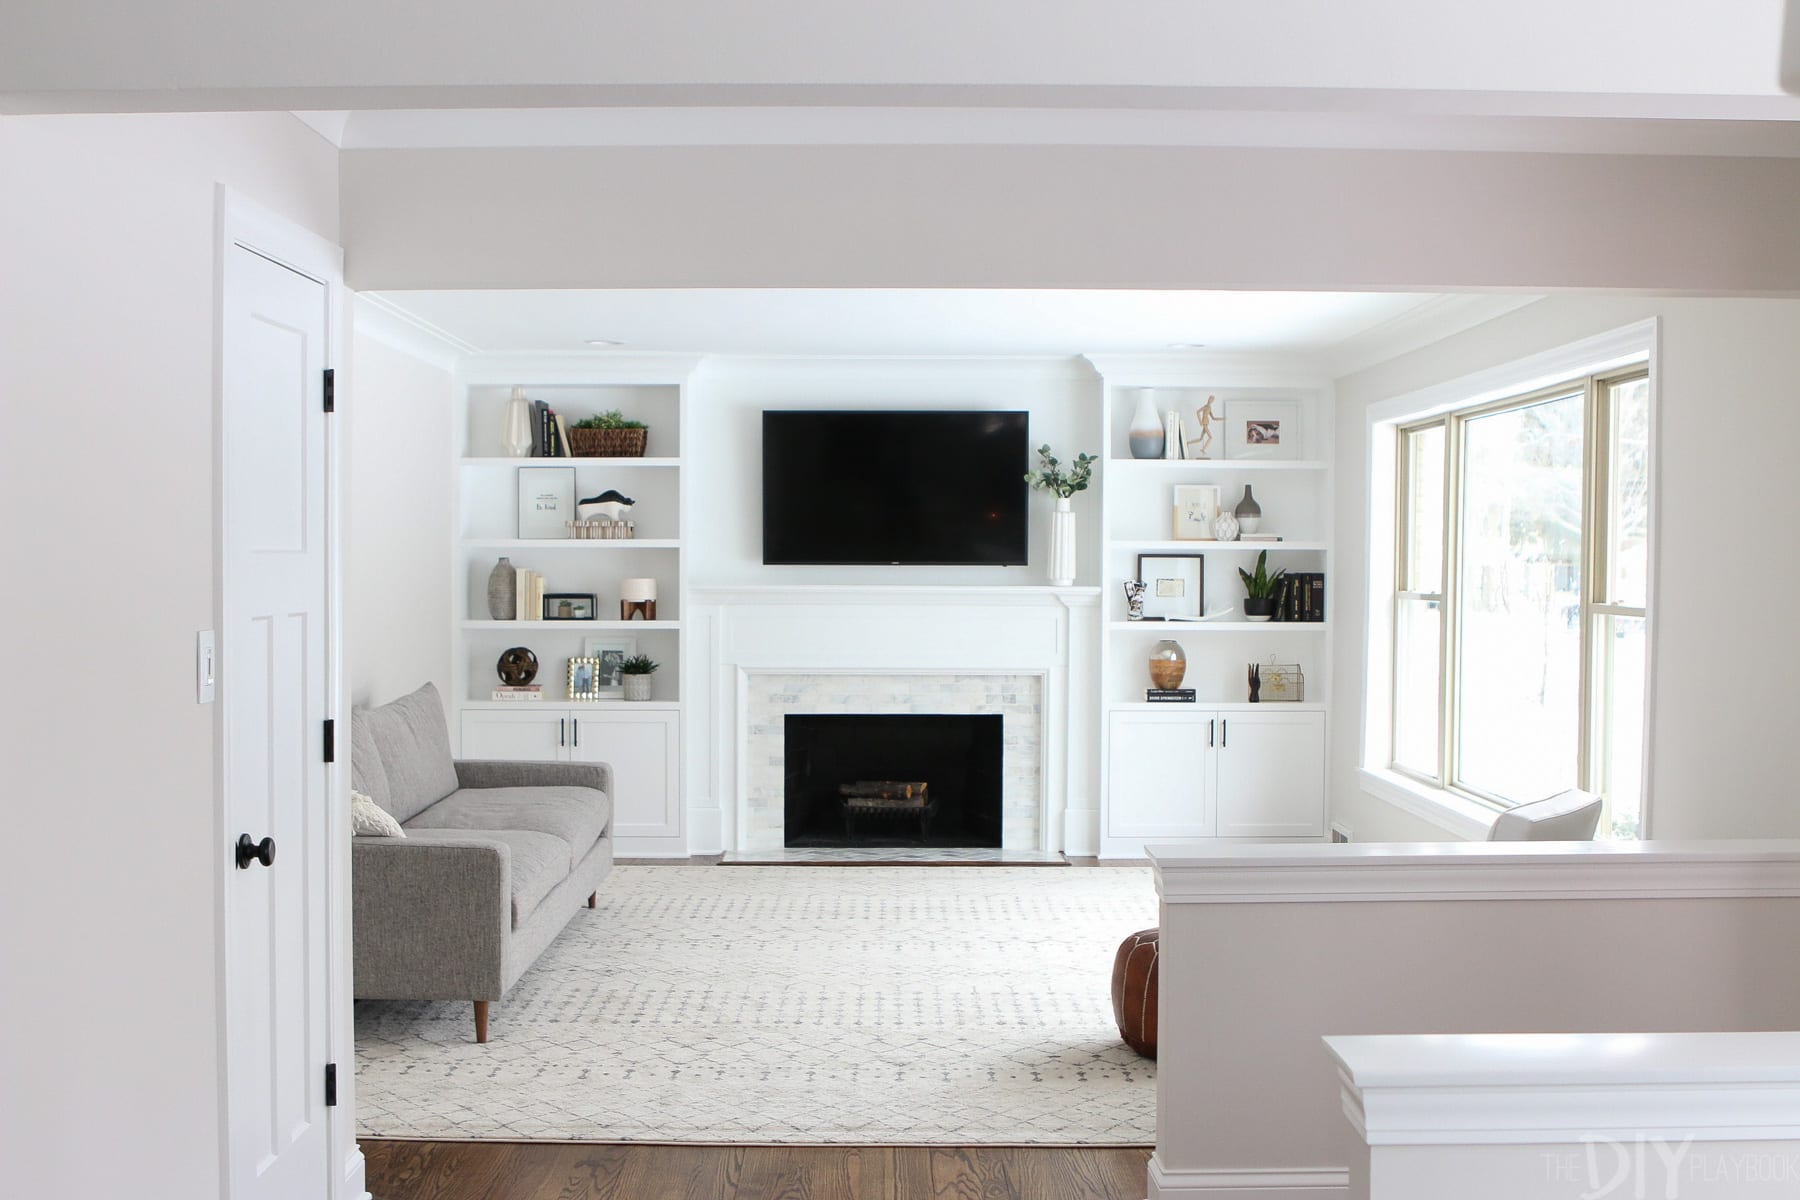
Can you see why this update is my favorite?! I swear I find myself just sitting in here staring at this gorgeous wall far too often.
It’s everything I had hoped for and way, way more. But how exactly did we get here? Today I’m taking you step-by-step through the process of how these white built-ins around the fireplace came to be.
First, Fireplace Updates
The very first thing we did was update the fireplace surround, swapping out the old red bricks, for marble tile. This post has all of those details. That update made such a big impact right away.
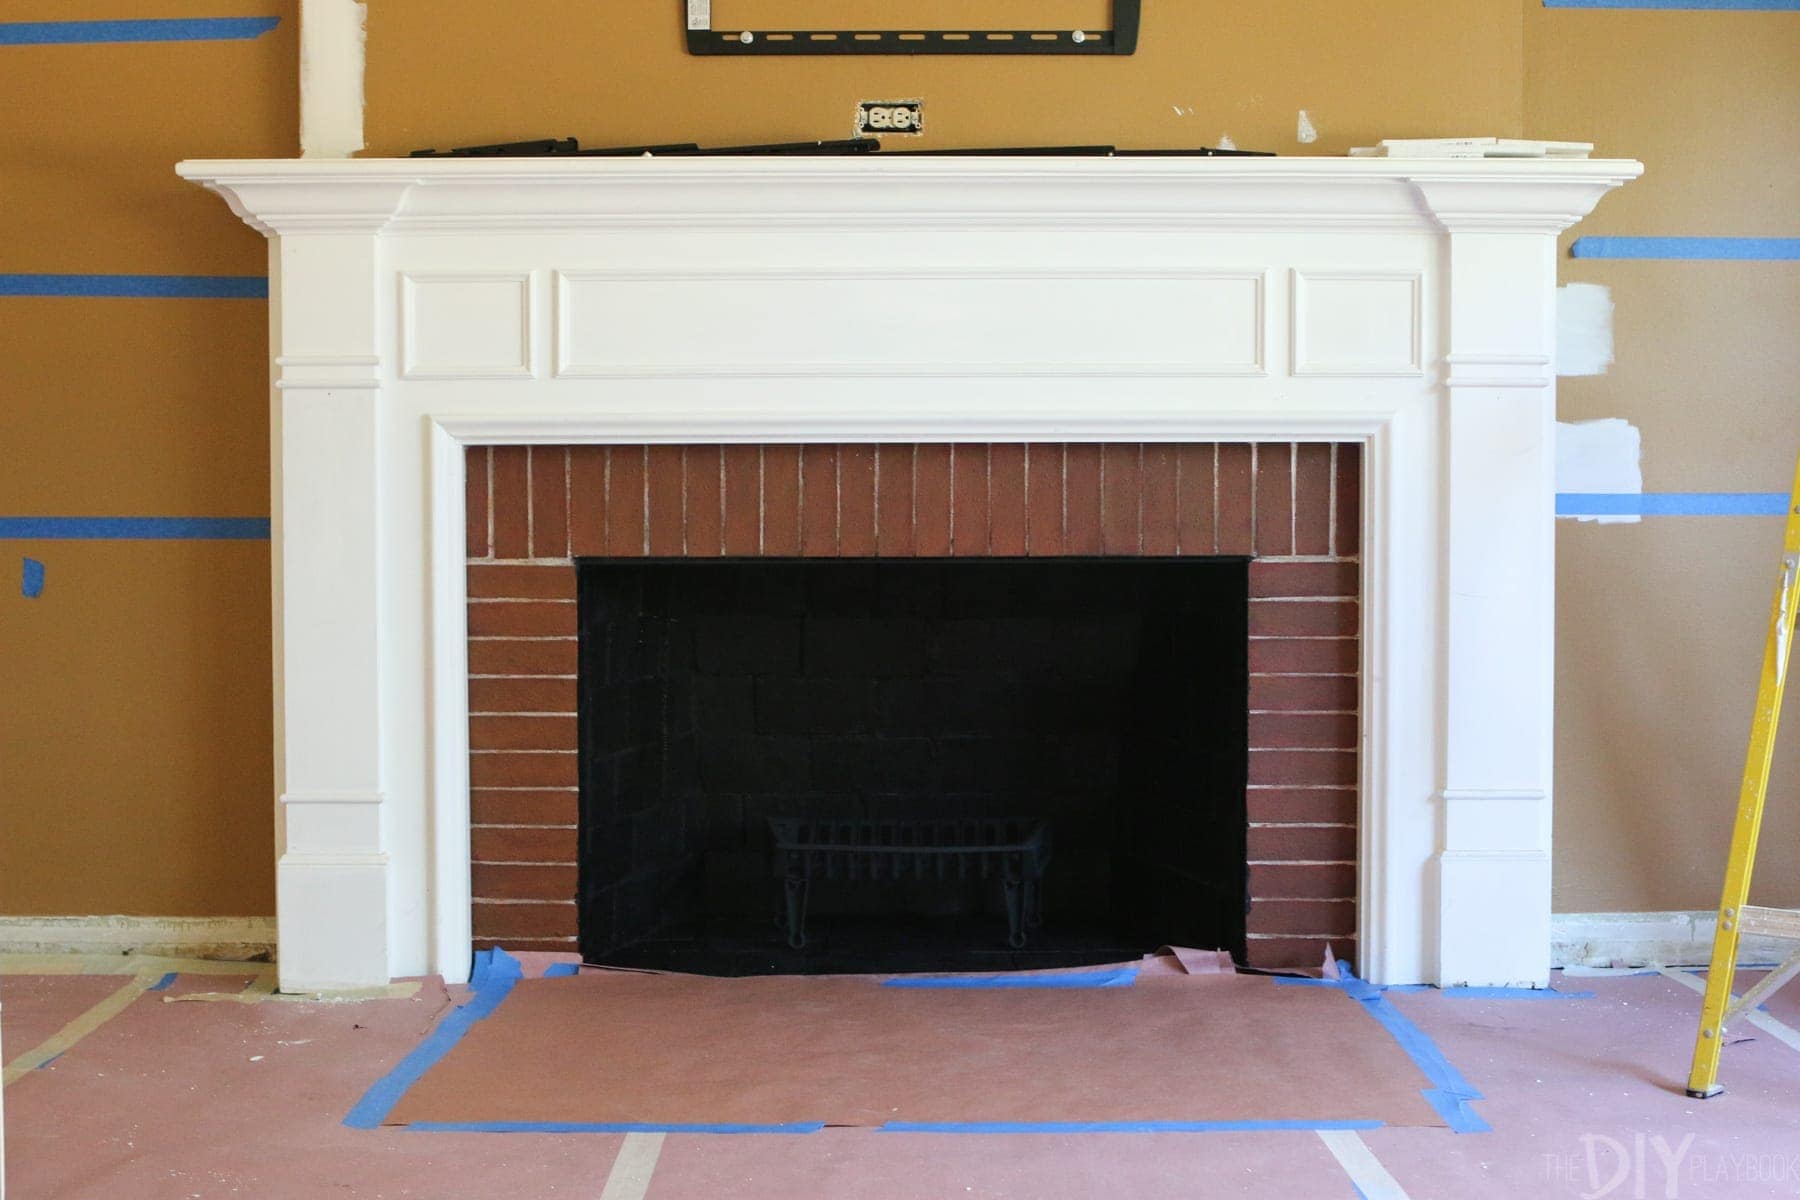
Then, we decided that we wanted to alter the facing of the fireplace. Do you guys remember when we updated all of the doors in our house to these white, Craftsman-style doors? Well if you notice, the wood detailing on these doors is very plain and the angles are very straight. Simple, clean lines.
The wood on the “original” fireplace wasn’t super detailed, but it was definitely more ornate and felt fancier than the Craftsman-style doors we now have. So, I decided that while we were working on the built-ins, I would have the carpenter also replace some of the wood trim pieces on the fireplace, to reflect the same design elements as our doors (and the built-in cabinet doors).

Above are the pieces he brought over to replace the old stuff. I loved the simple, clean lines that tie all of these wood elements together. He popped off the old trim detail no problem, sanded it down, and brought over some more plain wood pieces to update the look.
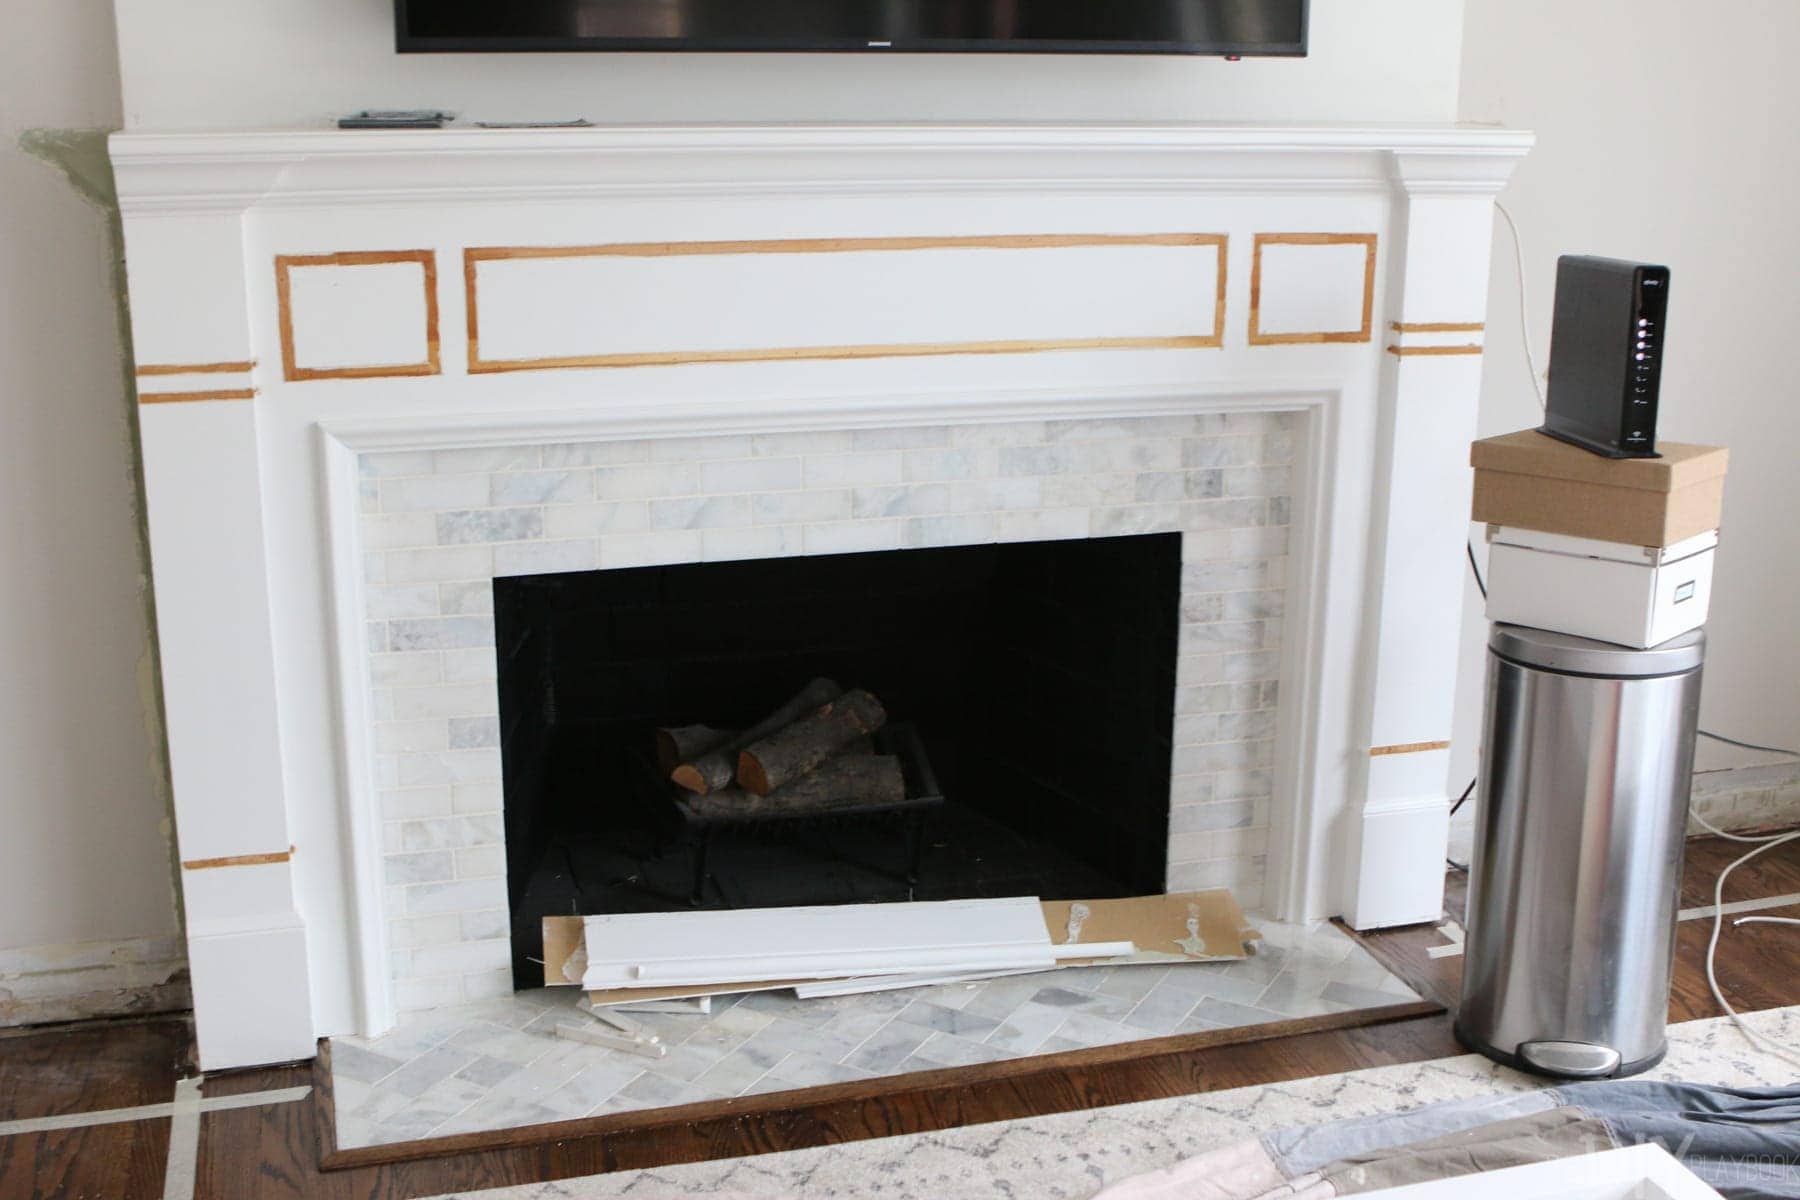

Instantly, it was like the fireplace got a major facelift! Then, we went on to paint the walls, finish the trim throughout the house, and eventually re-stain the floor.
Building the Built-ins
After all that excitement, this blank space sat dormant for the next few months as our contractor worked his magic.
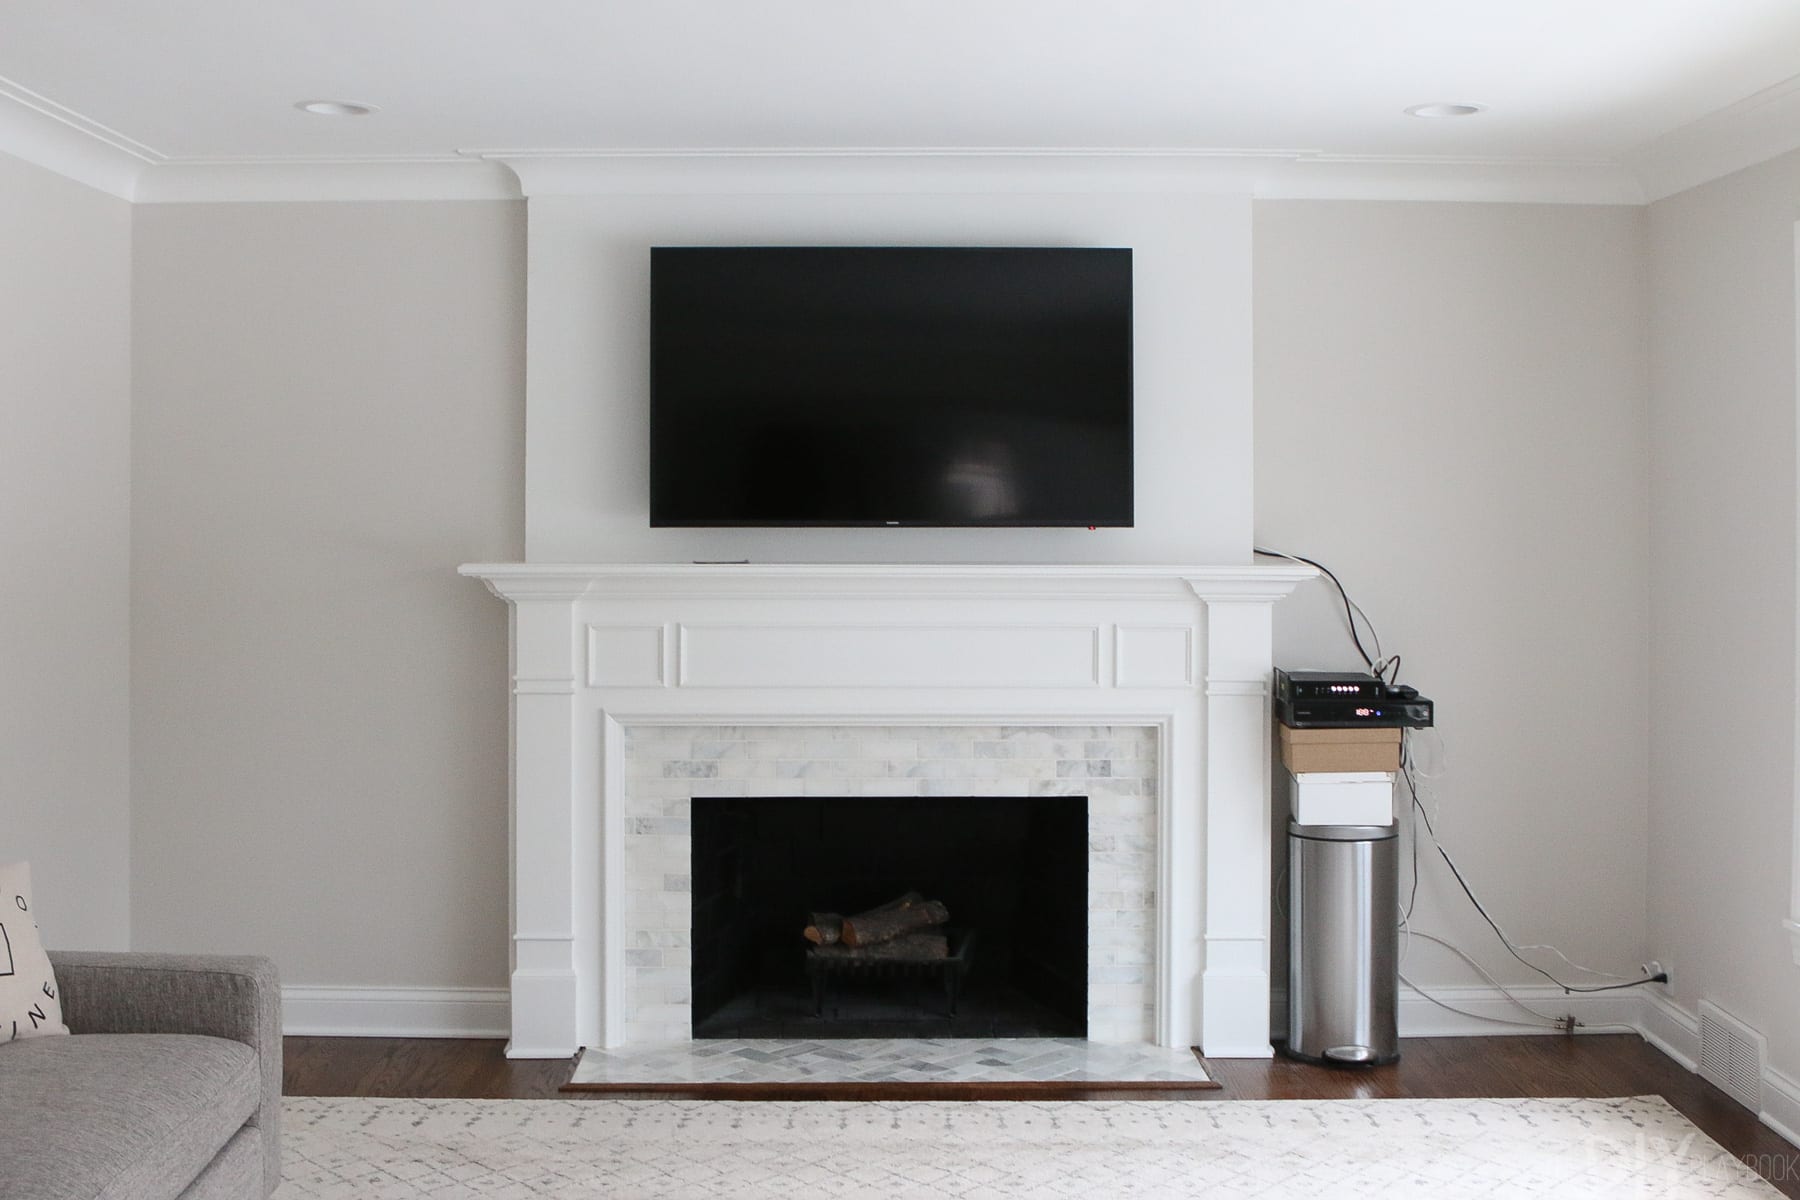
We mounted the TV, bought a rug, got a couch delivery and then just waited. Every day I would look at that trash can tower of cords and wonder when the shelves would be done. That was until I finally got a call in mid-January that after 4 months of building (and crazy life situations that delayed the contractor), the shelves were ready!
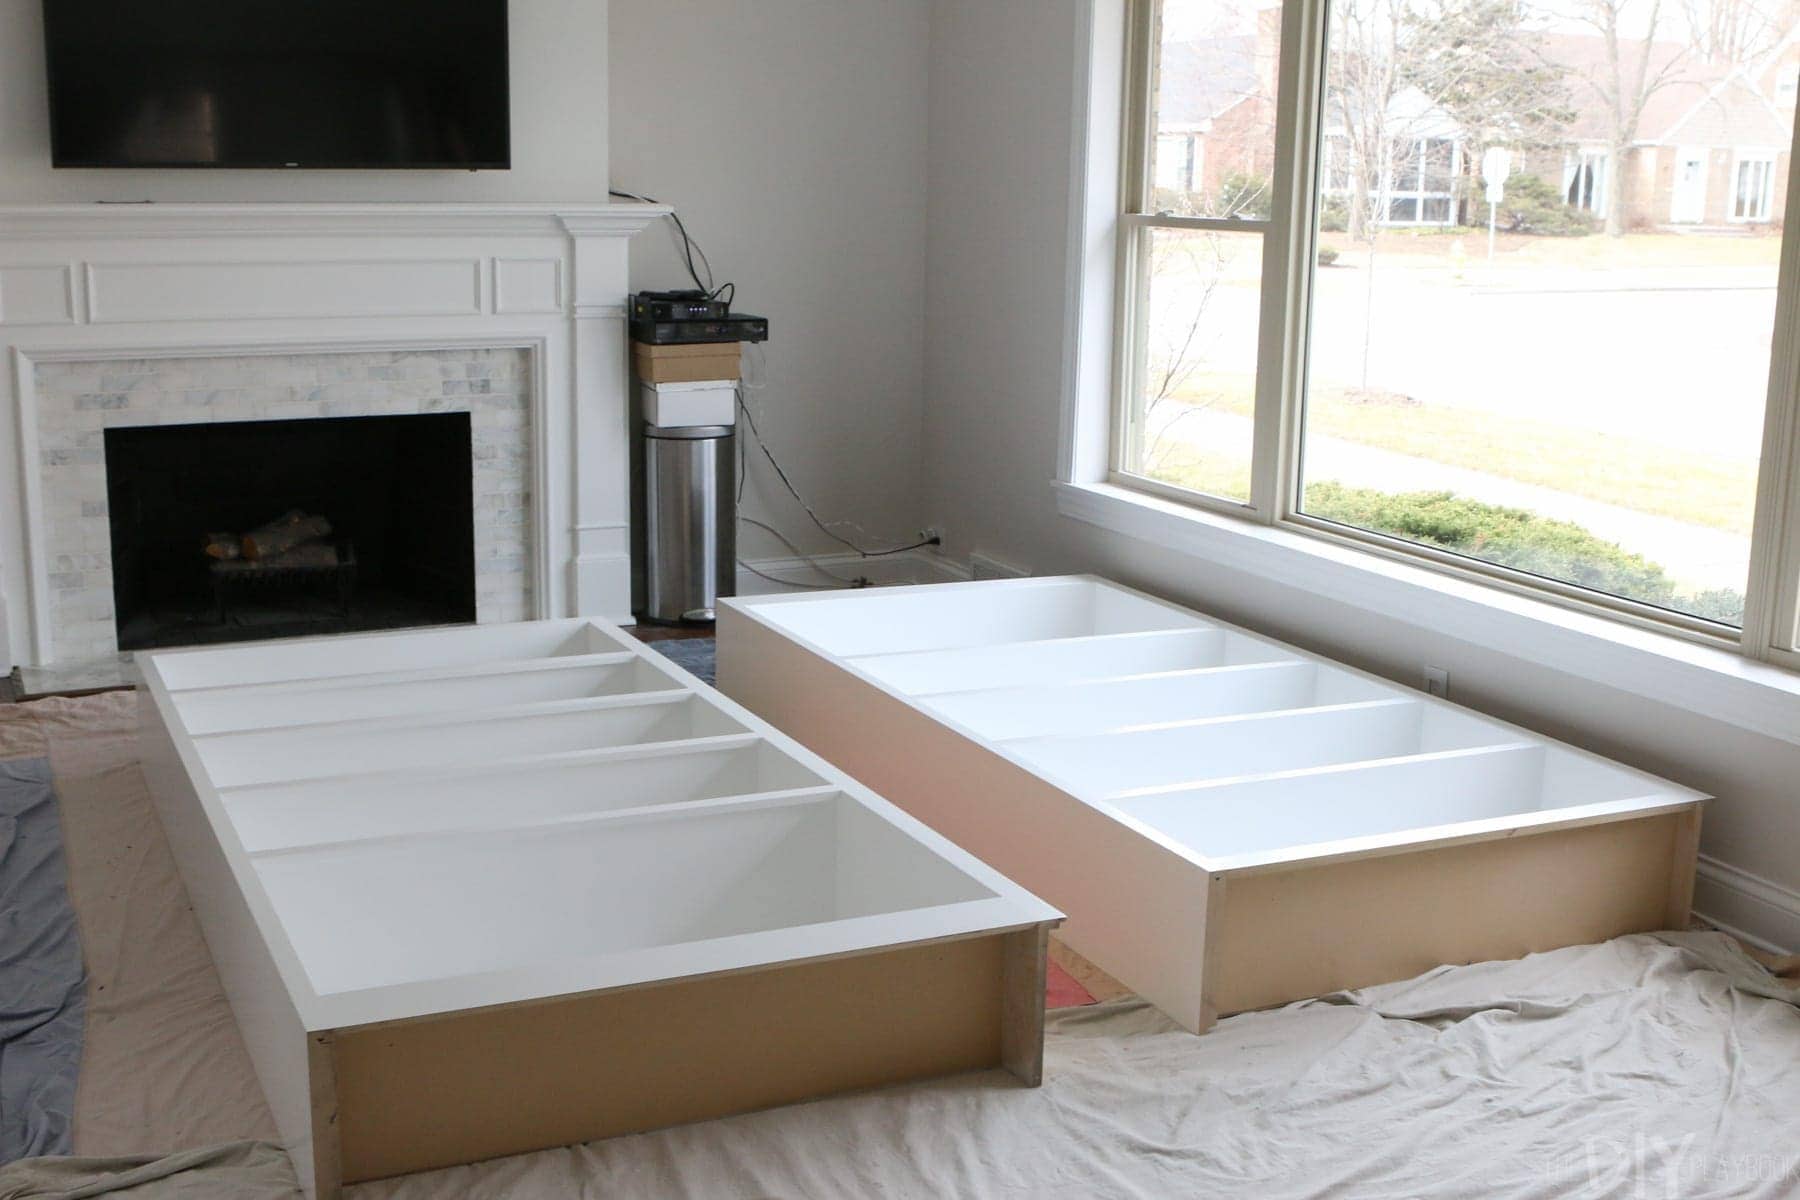
He brought them over and I was already in love – even without seeing them on the wall yet! It was crazy to me that some tape on a wall months ago could eventually translate to these beautiful pieces. How do these amazing carpenters do it?!
Cutting Down the Fireplace
In order to get a clean fit, our carpenter had to give our mantle a bit of a haircut…yikes! He trimmed the sides of the mantle so that the shelves would fit into the wall cleanly.

This was actually a great perk because it allowed us to pull the cable and TV wires through the mantle and hide them in the bottom cabinets of the built-ins (more on that in a second). Doing this extra step made the fireplace and mantle fit seamlessly into the built-ins. It gave them a more finished look that I really love!
Built-In Installation
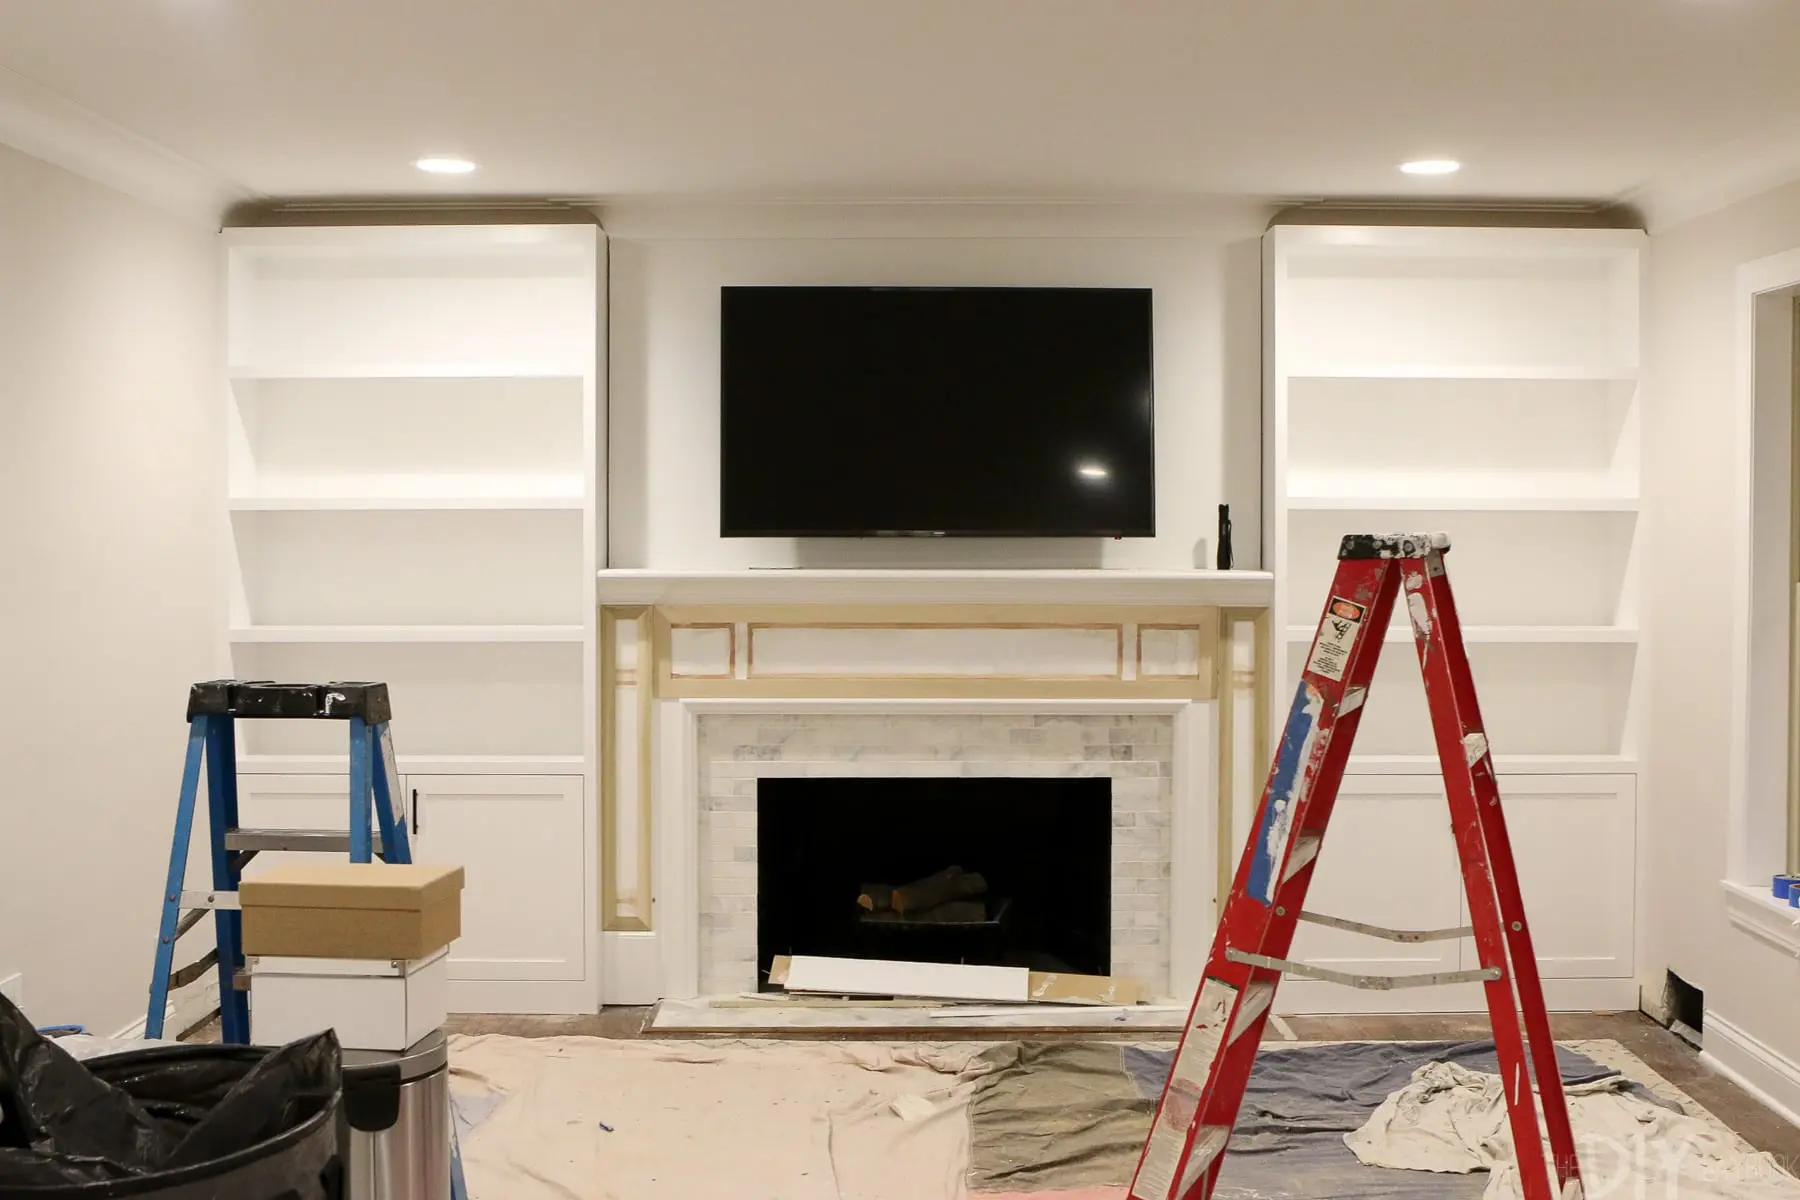
After the fireplace details were in order, the carpenter secured the two shelving units on both sides of the fireplace.
They looked pretty amazing… even without the paint done, or crown molding installed. But, it was those last two components that brought this look to the next level.
The Crown Molding
The next step was something I was nervous about. This room’s crown molding is PLASTER – not uncommon for older, traditional homes. Plaster crown molding means that it couldn’t be replicated on these built-ins, which had me feeling super hesitant about what to expect.

But SOMEHOW our amazing carpenter created pieces of wood that blended into the plaster crown molding almost perfectly! I mean, pretty amazing right?! Once the crown molding was painted, you would probably never notice that it’s not the same crown molding (heck, not even the same material!).

These are the details that make this custom built-in so worth the price tag.
Paint!
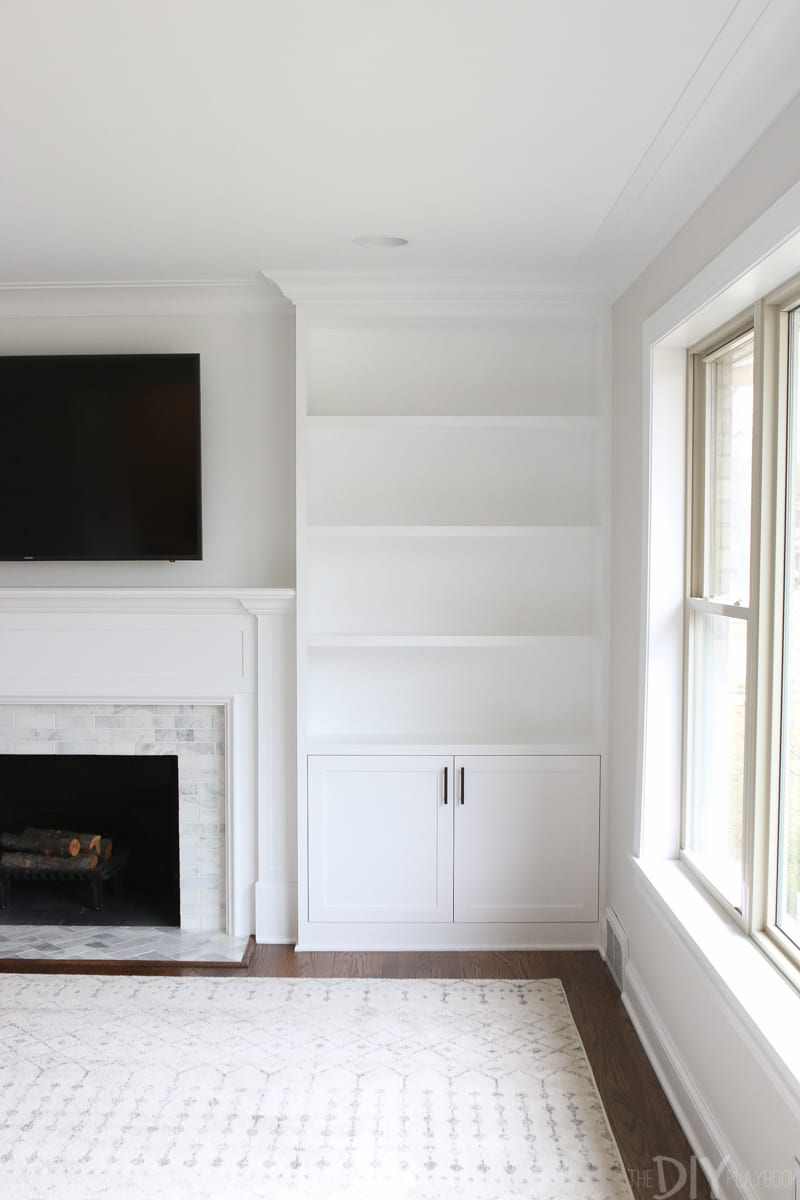
Finally, my amazing dad came over (again!) and prepped, primed, and painted the last few pieces. He used pre-mixed Benjamin Moore “White” to match the existing wood with the built-ins. My jaw dropped when the painting was all done. I couldn’t even believe how much this built-in changed the whole feel of the space.
The Cabinets
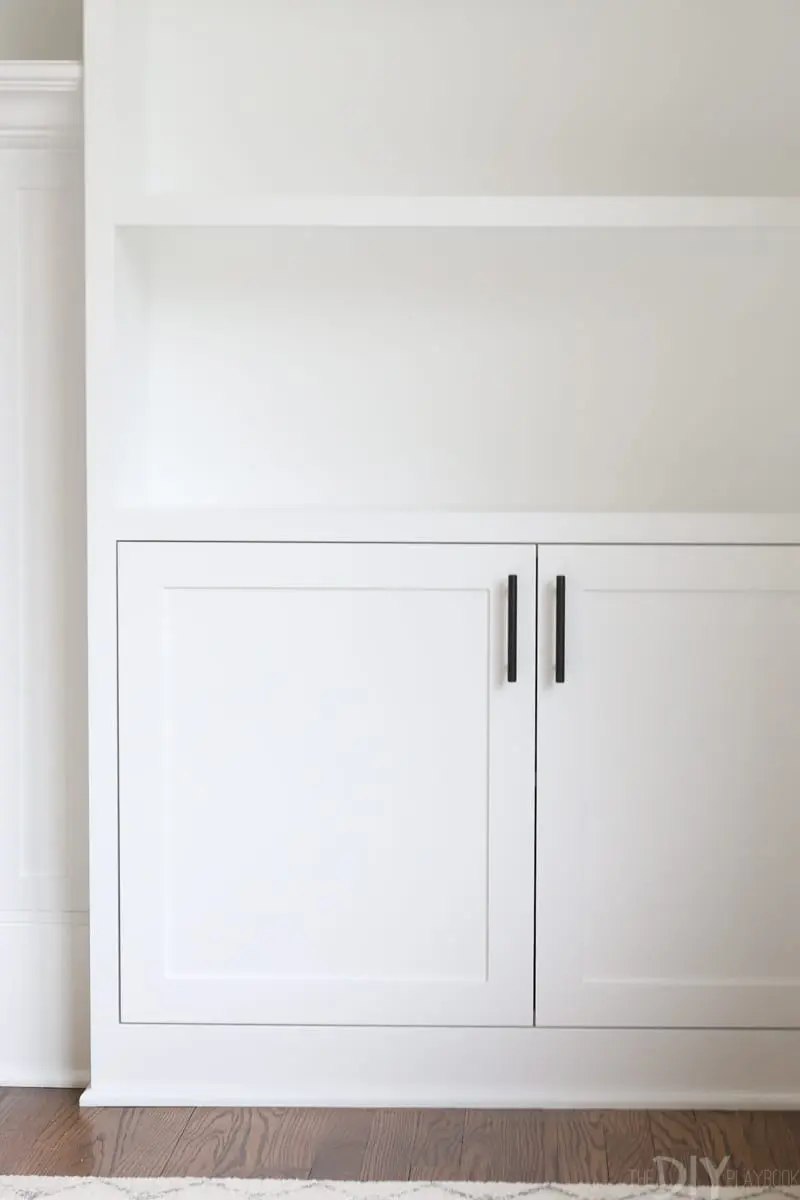
The depth of the walls on either side of the fireplace isn’t very deep, so the shelves and base cabinets of the built-ins are only 12 inches deep (and 14″ high). This depth doesn’t give us a lot of functional storage; but honestly, we have plenty of storage in our home, so I’m not super concerned.
The good news is that the shelves are deep enough to hold and hide all of the cable, internet, and TV cords. The last thing we want is to take any focus away from our gorgeous living room built-ins with a spidery mess of wires! I’m sure we’ll be putting this extra storage to good use soon enough – once I find some bins to help me organize. I mean, can you really ever have enough closed storage spaces??
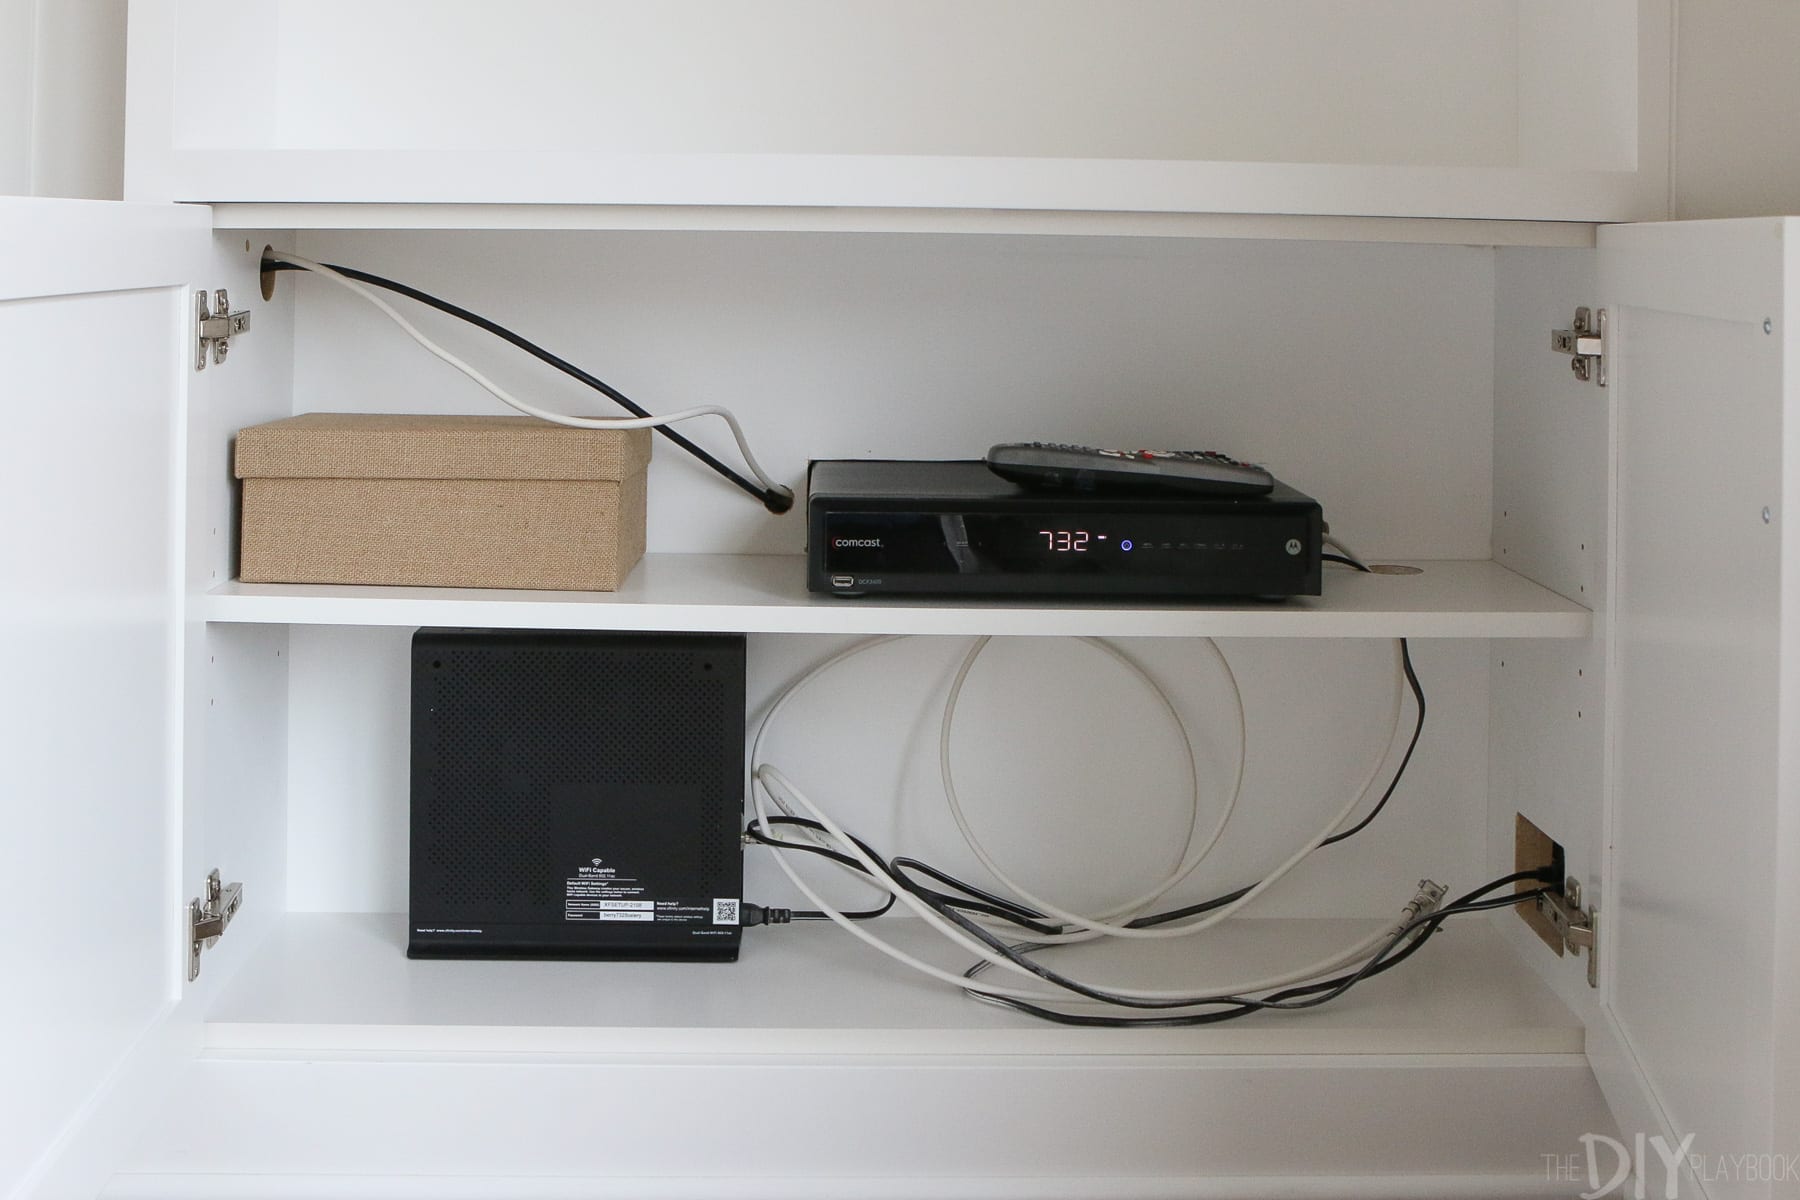
Hidden behind the cabinets we have a bit of a hot mess of wires that I hope to address in the near future. But for now, the fact that all of our boxes and cords are HIDDEN is a big win for us. We also have to work on the fact that as of now, we have to open the one cabinet to change the channel on the TV. Not the worst thing ever, but a dilemma I’d like to solve.
I found out that it should be an easy fix after some investigative work. All we have to do is change the cable box to radio frequency and then the signal from the remote should travel right through the cabinets! But it seems as though our cable box is a bit too outdated for this adjustment, so I’m working with the cable company on getting that changed soon. I’ll keep you guys updated when I figure it all out.
The Dimensions for Our Space
I’ve gotten a lot of inquiries about the dimensions for everything in this space, so I figured I would write it all down for you.
- Ceiling Height = 8 feet
- Cabinets = Pre-built standard kitchen cabinets (36 inches wide & 34.5 inches tall)
- Shelf Depth = 12 inches
- Mantel = 80 inches (it’s 4 feet from the ground)
- The firebox (including tile) = 5 ft wide & 52″ high
The Final Touches
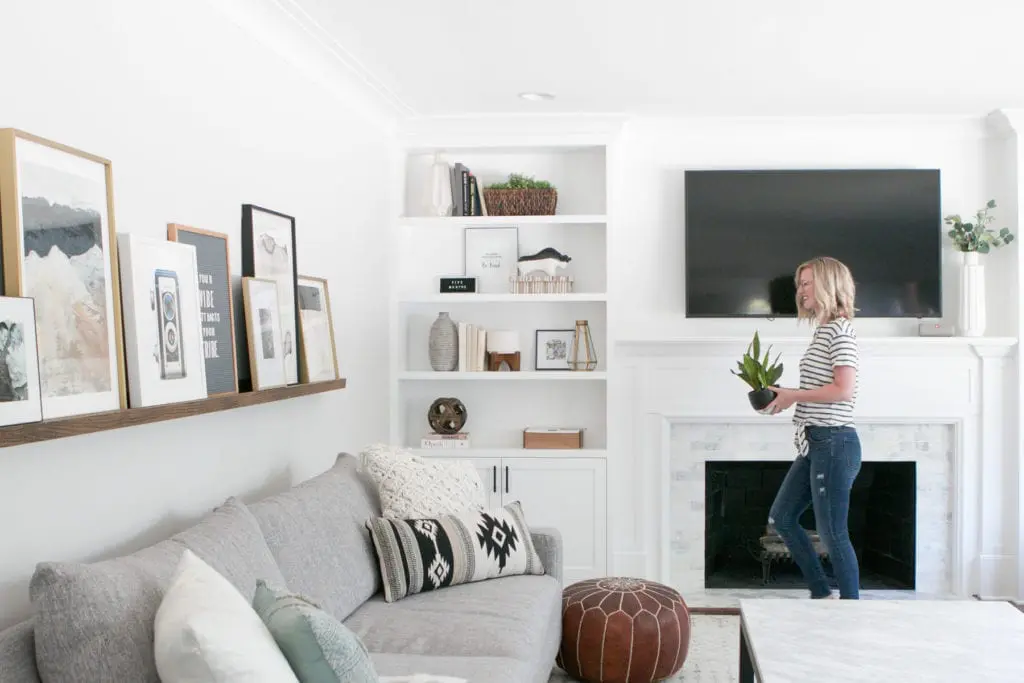
This open shelving is such a great way to display my special, decorative items, and they add so much character to our home. You can see how I styled these beauties in this blog post, along with tips to decorate your own shelves.
Definitely, Worth it
At $3,500 for these custom built-ins, this was definitely a large investment for us. But, Matt and I agree that the entire thing was well worth it (also considering the resale value in the long-run). Plus, buying two large units to flank this space would have cost us some money (definitely not $3,500), but that does make us a feel less guilty about the large price tag.
Thanks so much for your patience in seeing these white built-ins around the fireplace finally come to life. I hope the family room transformation was worth the wait, I know it was for me! Sitting here with the natural light streaming in, and a cup of coffee in hand, is pure heaven. You can see the finished look of the built-ins (and all of the sources and design details) in my final home tour right here.
Bridget

Want to build your own built-in shelves? I have a full tutorial to build these yourself and save lots of money!


