Power Tools 101 – The First Tools You Should Buy
Disclaimer: This post is sponsored by Lowe’s Home Improvement. Thanks for supporting the brands that support this blog.
Last week, we dove deep into the basics of building a homeowner’s toolbox. It was awesome to hear that so many of you already have most of those tools and you’re planning to add the few you’re missing to round out your arsenal. There’s nothing like a well-stocked garage full of tools! If you’re itching to try a few bigger projects around your house, you’ll want to add some power tools to the mix.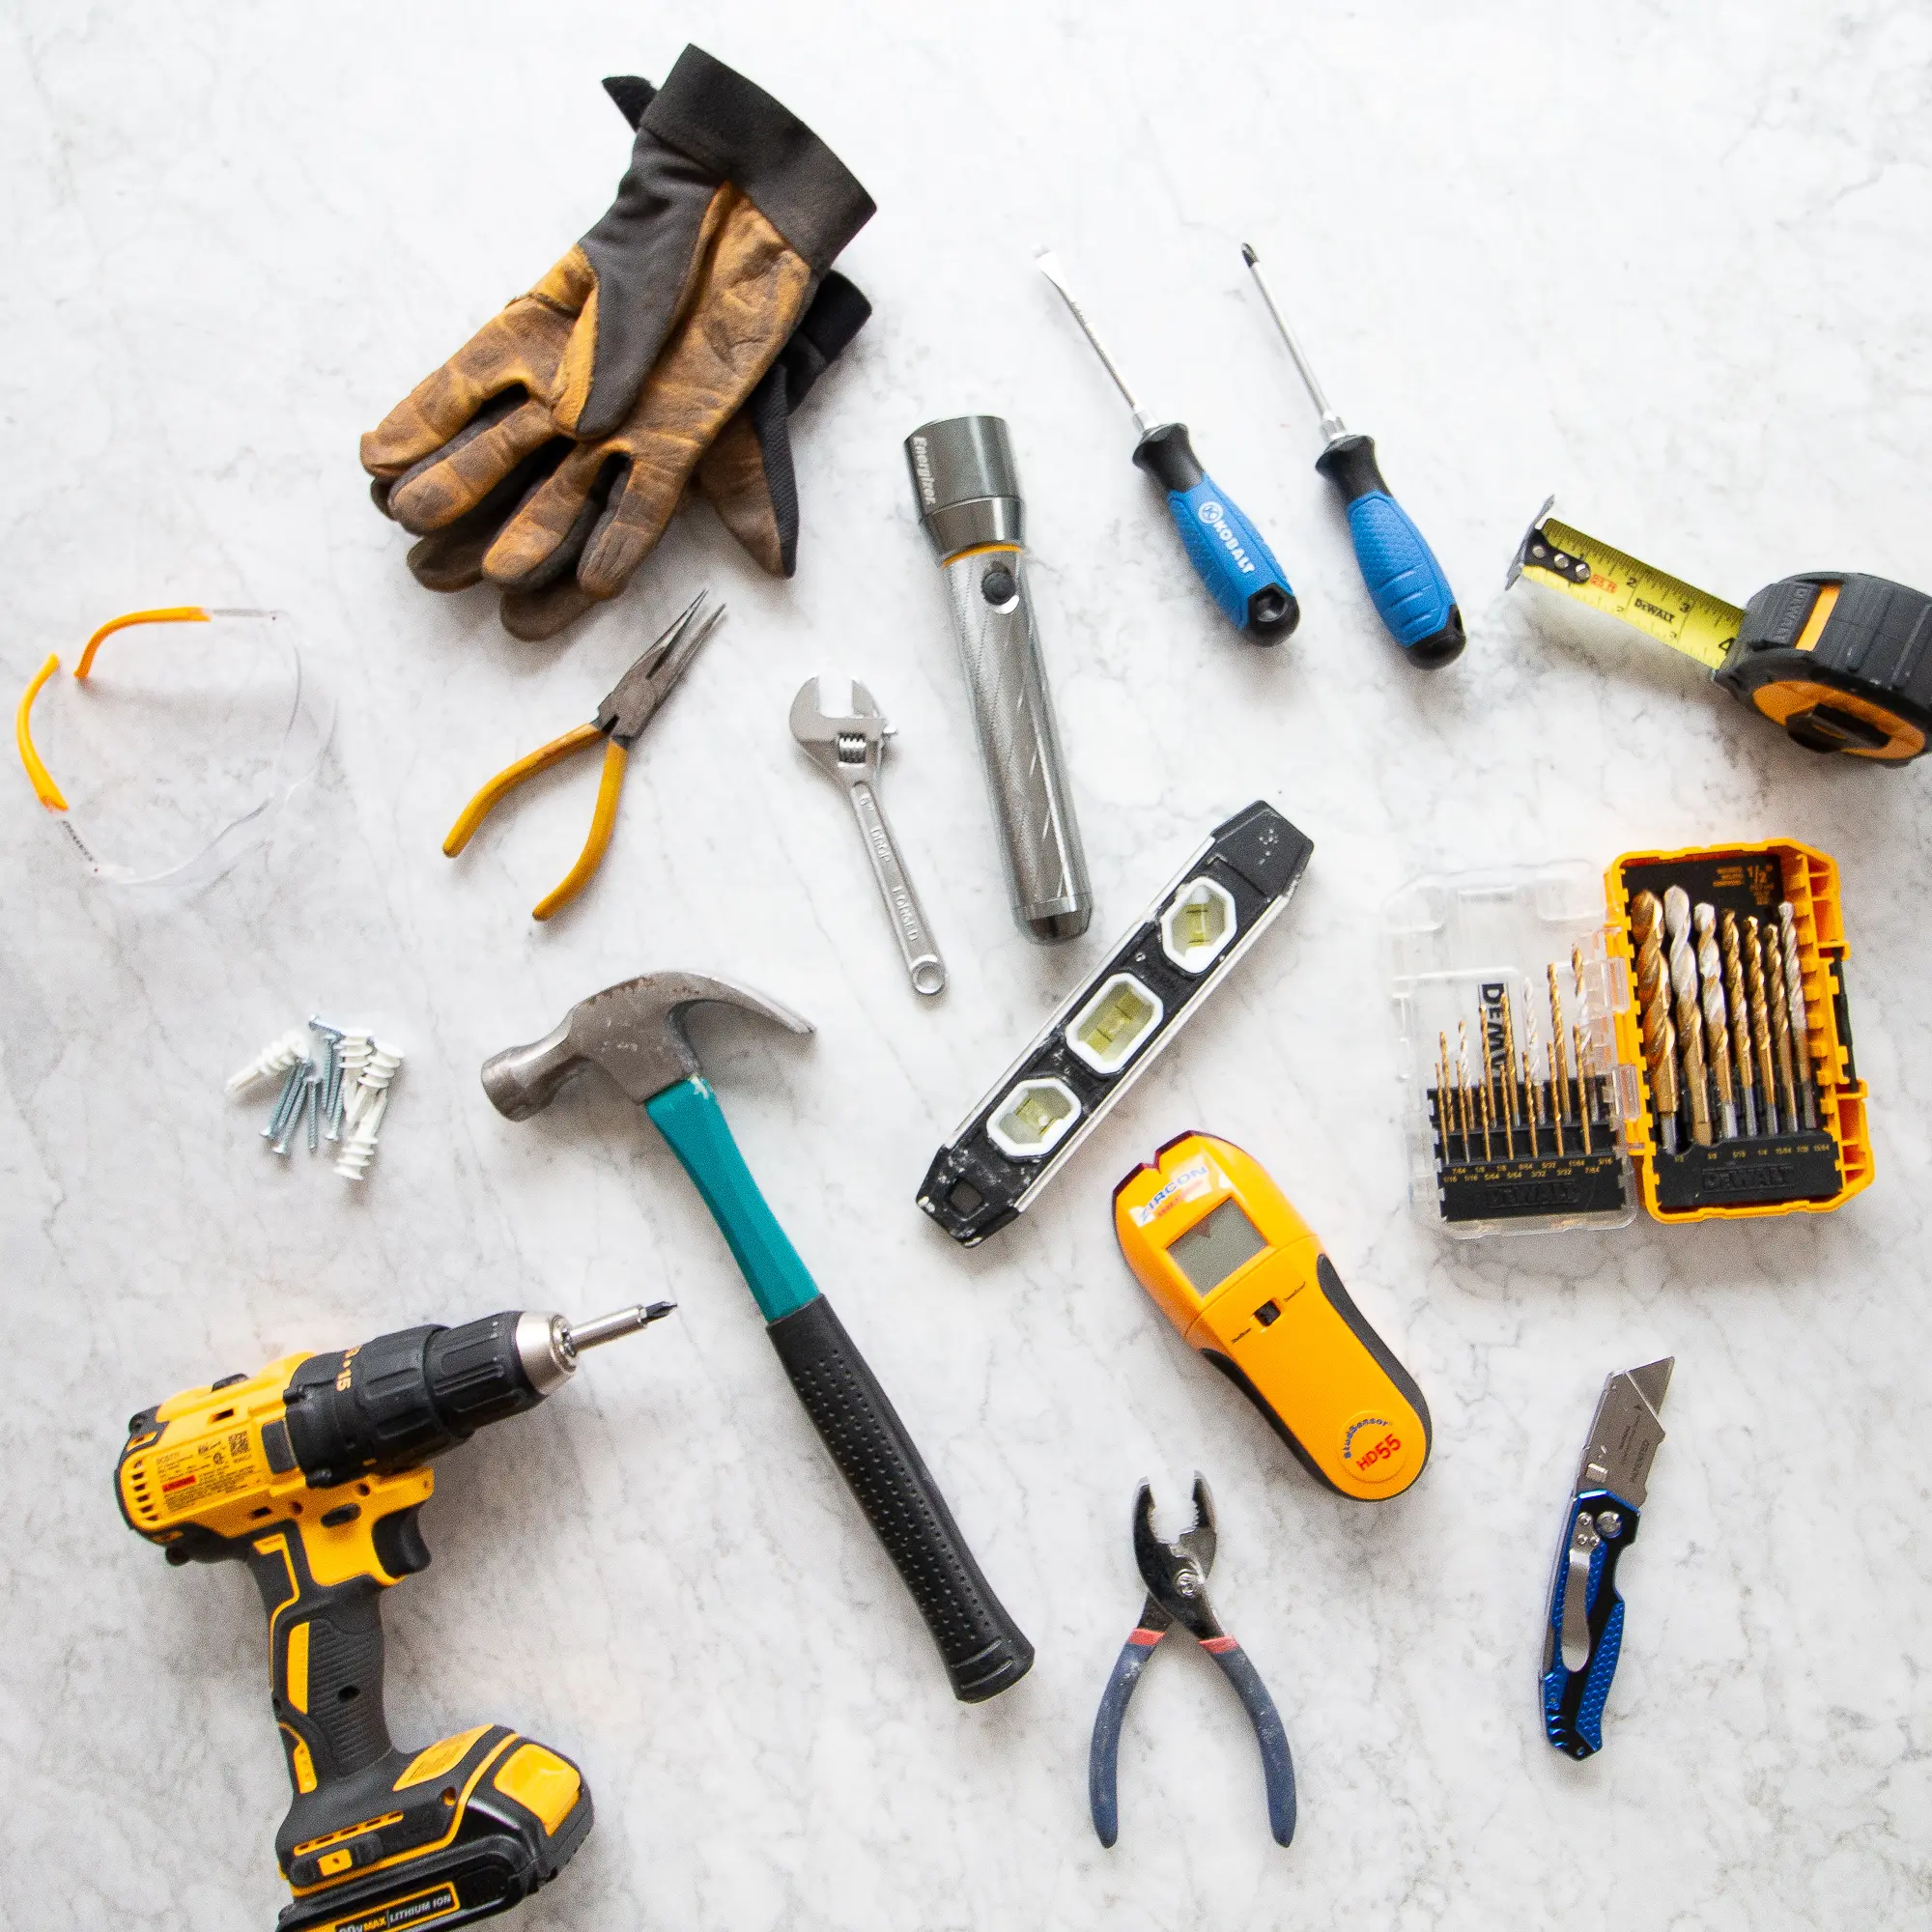
Today, I thought it would be helpful to dive into Power Tools 101. We’ve slowly accumulated tools as we’ve tackled projects around the house. We certainly didn’t go out one day and buy them all at once. Instead, we have accumulated them slowly as we’ve needed them. That way, we could do our research, learn how to safely use each tool, and practice with each one as we go.
I thought it might be helpful to share our power tools in the order that we acquired each one of them. We started with our miter saw and the last tool we bought was our circular saw. I’ll also include DIY projects we’ve done with each tool so you can get some ideas on how to use those new gadgets!
Power Tools 101
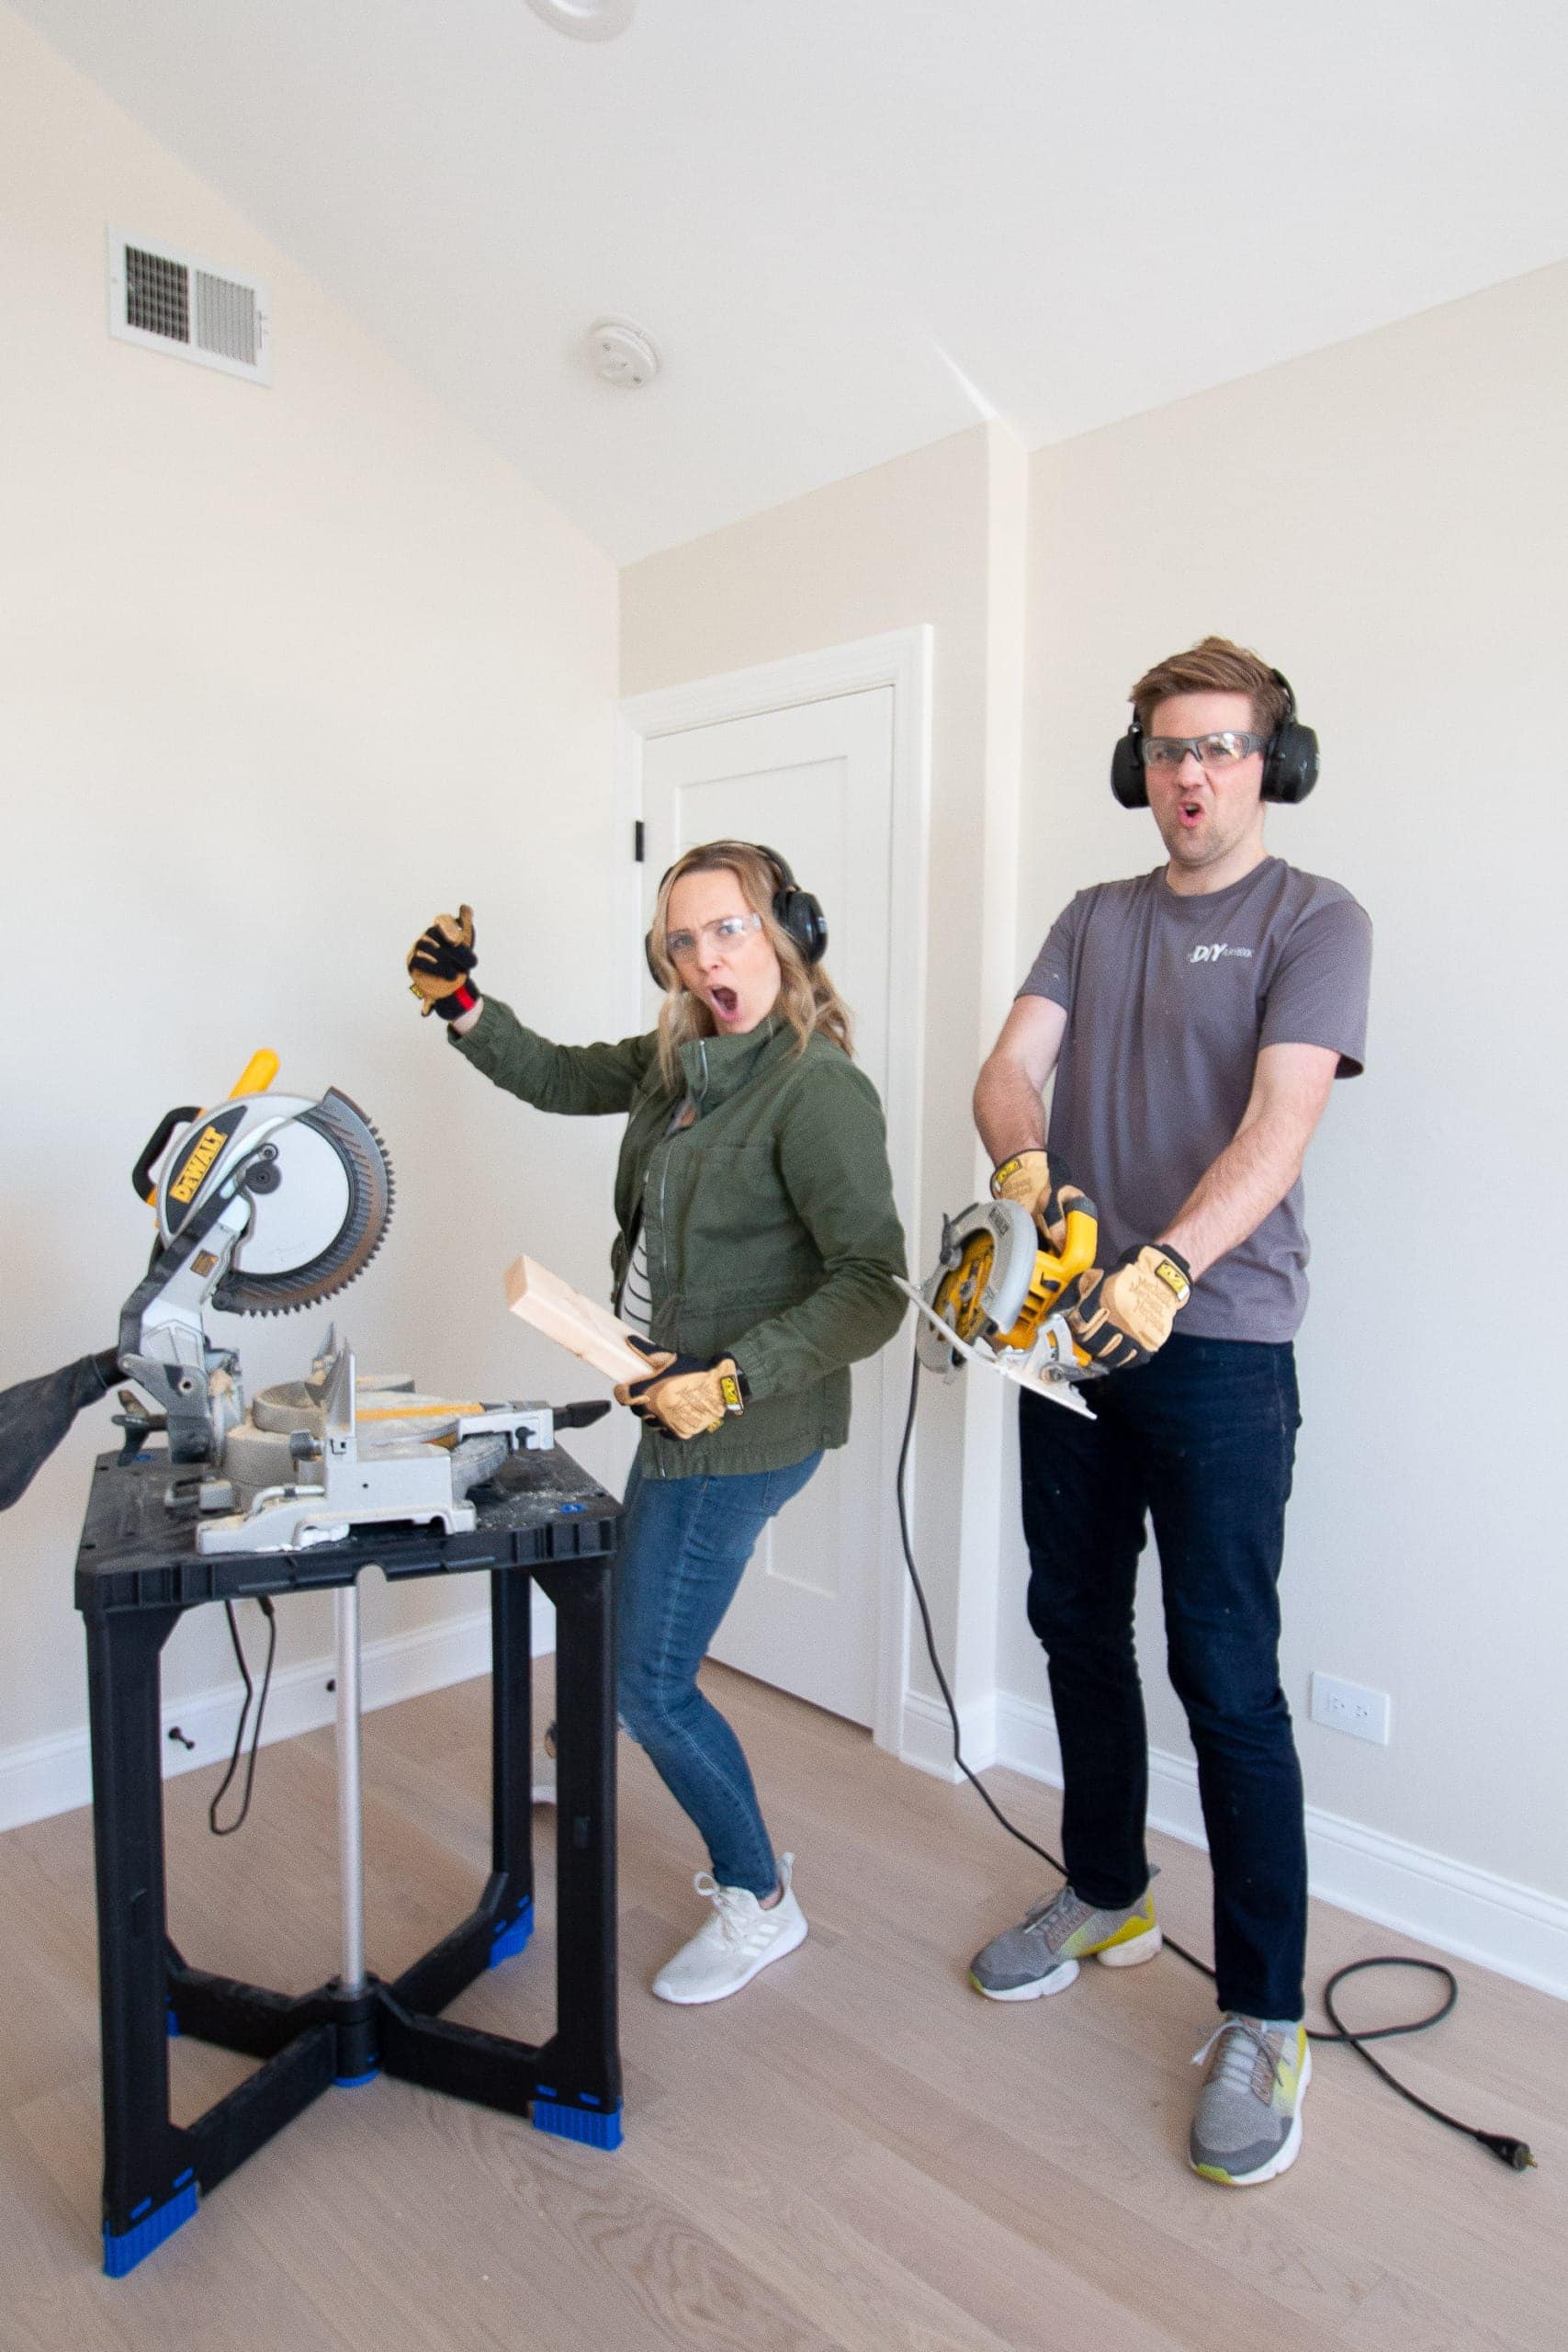
When it comes to power tools, safety is the name of the game. Please, please, please be safe when using these. Whenever we get a new power tool, we both thoroughly read the manual so we know we’re setting up and using it correctly. To be honest, I find that the “scariest” times using a tool are when you’re super comfortable with it and you don’t follow the same safety steps as you did when you were first learning. That’s when mistakes can happen! So just be vigilant, wear your safety gear, and set up a good work environment.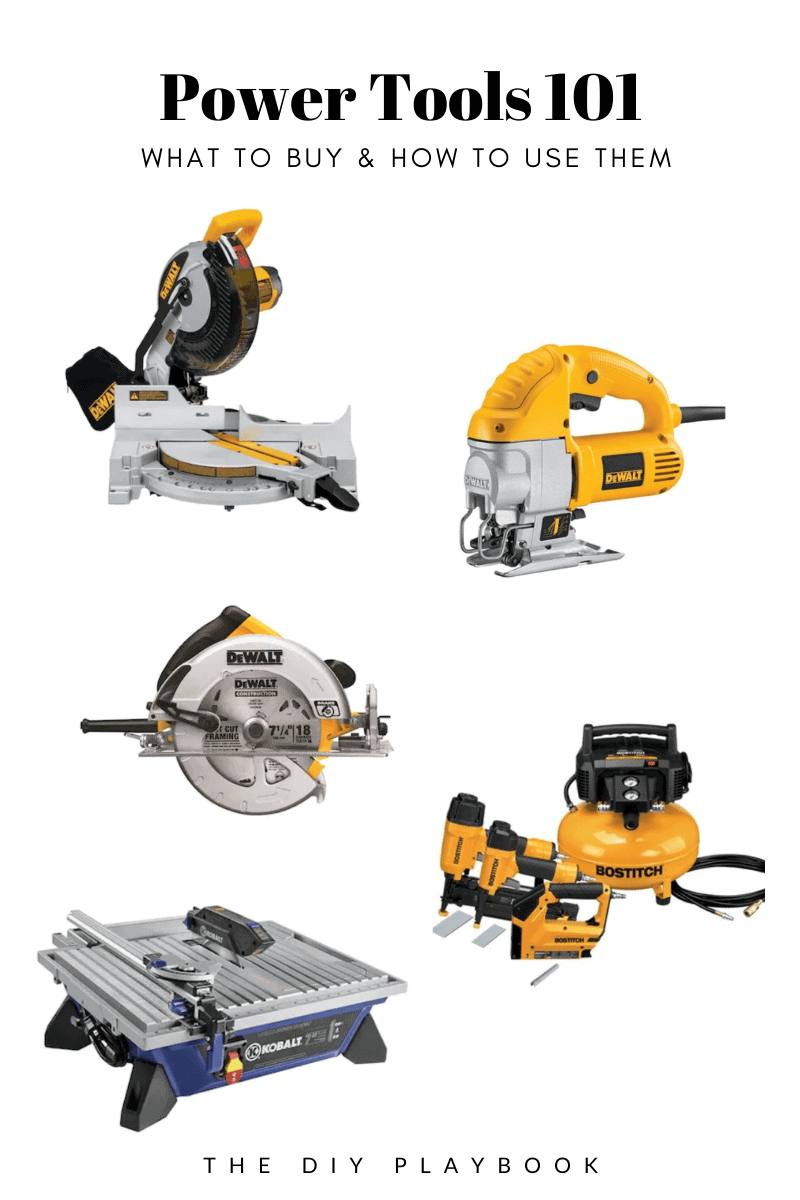
Not to throw Finn under the bus, but I need to mention that I used all of these tools long before he ever did. Besides the circular saw, (which we bought together), I’ve taught him how to use all of our power tools. I know a lot of you ladies think that you have to have a handy husband in order to use power tools, but that’s just not the case. My best friend, Bridget, and I learned how to use these tools together and tackled tons of DIY projects side-by-side. So, don’t let the “lack of a handy hubby excuse” stop you from accomplishing things around the house.
Miter Saw
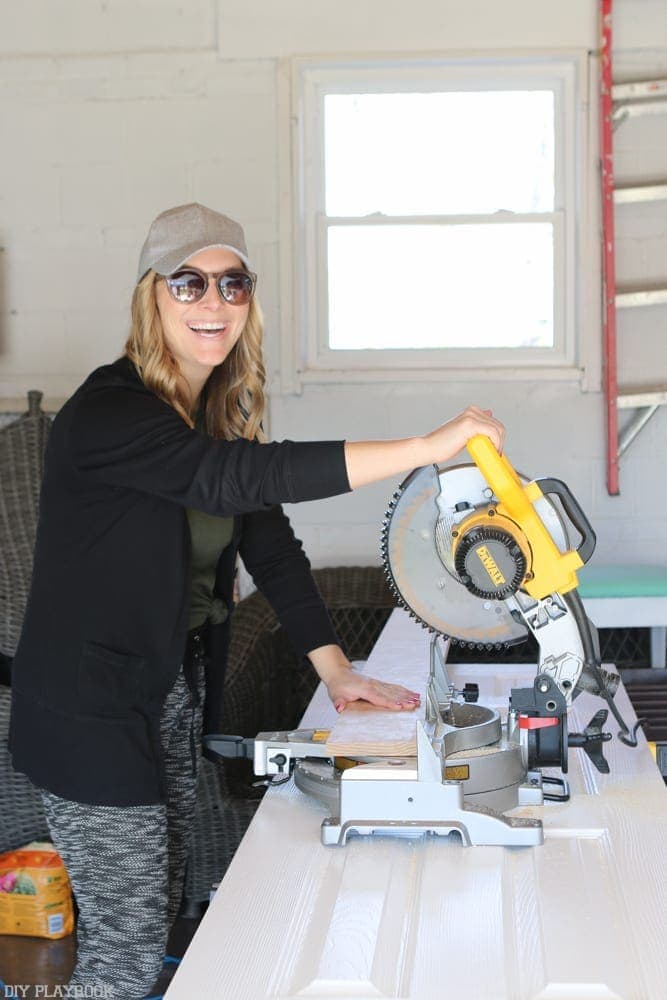
The One We Own: Dewalt 10-inch 15-amp Compound Miter Saw
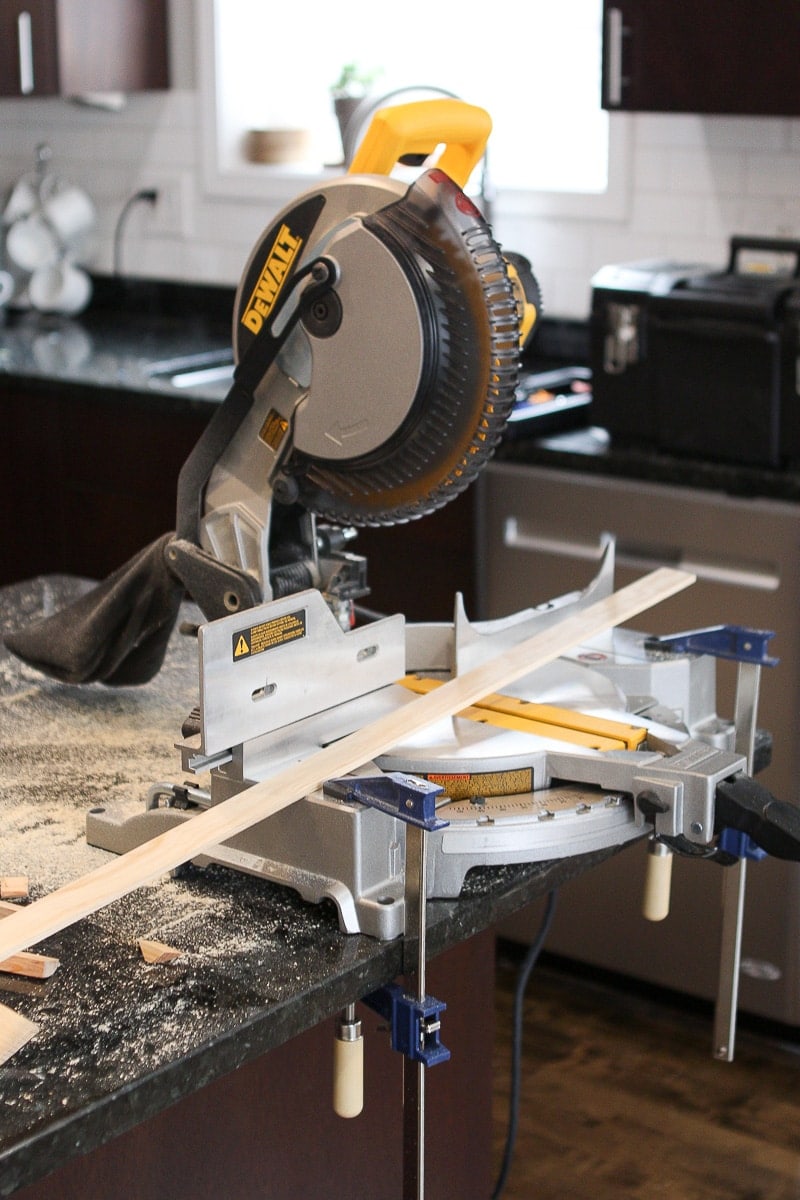
Why Buy It?: This was the first power tool I bought and it was the coolest feeling ever using this bad boy for the first time. The miter saw is great for straight or angled cuts on long thin boards. It’s a must for just about any woodworking project (in fact, I think I used it for just about every woodworking project on this list). 
Tips: You’ll need a spot to place your miter saw. We use two sawhorses and a piece of plywood to make a work station in our garage. Oh, and always wear eye protection when using this (and really any saw!). 
DIY Projects:
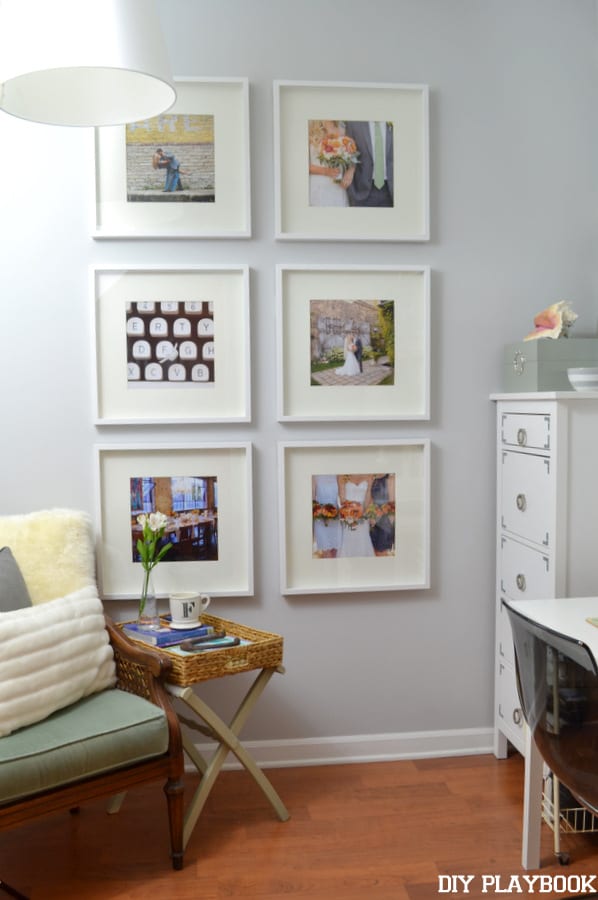
- Installing Baseboard (or any trim work)
- Board & Batten
- Decorative Wall Molding in the Bathroom
- Shiplap
- Wood Accent Wall in the Guest Room
- Wood Trim on Bifold Doors
- DIY Book Ledges
Pneumatic Air Compressor with Nail Gun

The One We Own: Bostitch 6-gallon Air Compressor (it looks like they don’t sell the exact one we bought anymore, but this one seems better because it has three tools in it!) 
Why Buy It?: When you’re cutting all of that wood, you need to attach it to the wall somehow. A pneumatic air compressor with a nail gun is the easiest way to do just that! The air compressor provides the pressure to shoot the nail out with enough force to pierce a wood board and attach it to the wall. We also recently used this same air compressor with a staple gun for our stair runner installation and it worked beautifully. 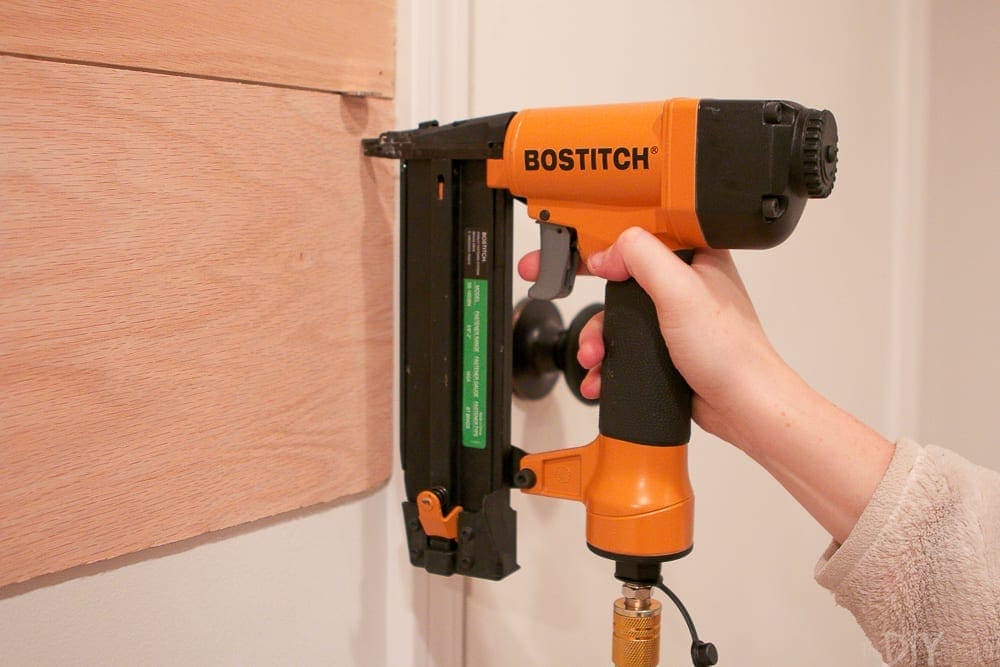
Tips: Finn was scared of this one in the beginning, but it’s really not that scary. A nail doesn’t just fly out if you pull the trigger…the nose of the gun has to be depressed for it to shoot. So, that means it has to be pushed against a wall (or a stair) for it to work. Also, make sure you buy the correct length and size of nails for your project. 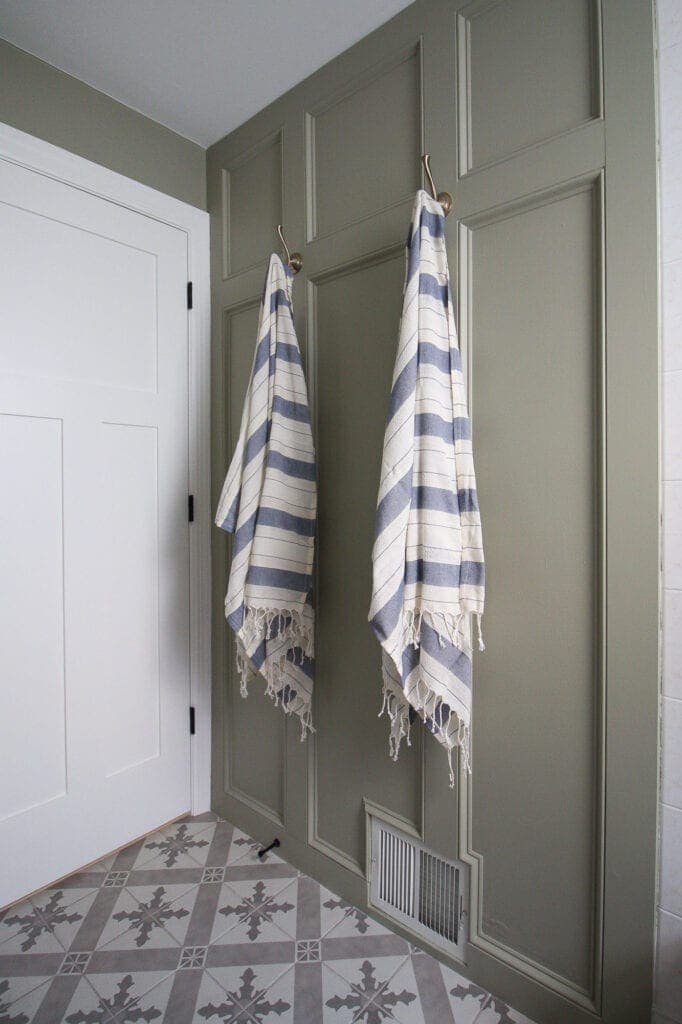
DIY Projects:
- Stair Runner Install
- Any Woodworking Project
- DIY Picture Ledges
- Board & Batten
- Decorative Wall Molding in the Bathroom
Jigsaw
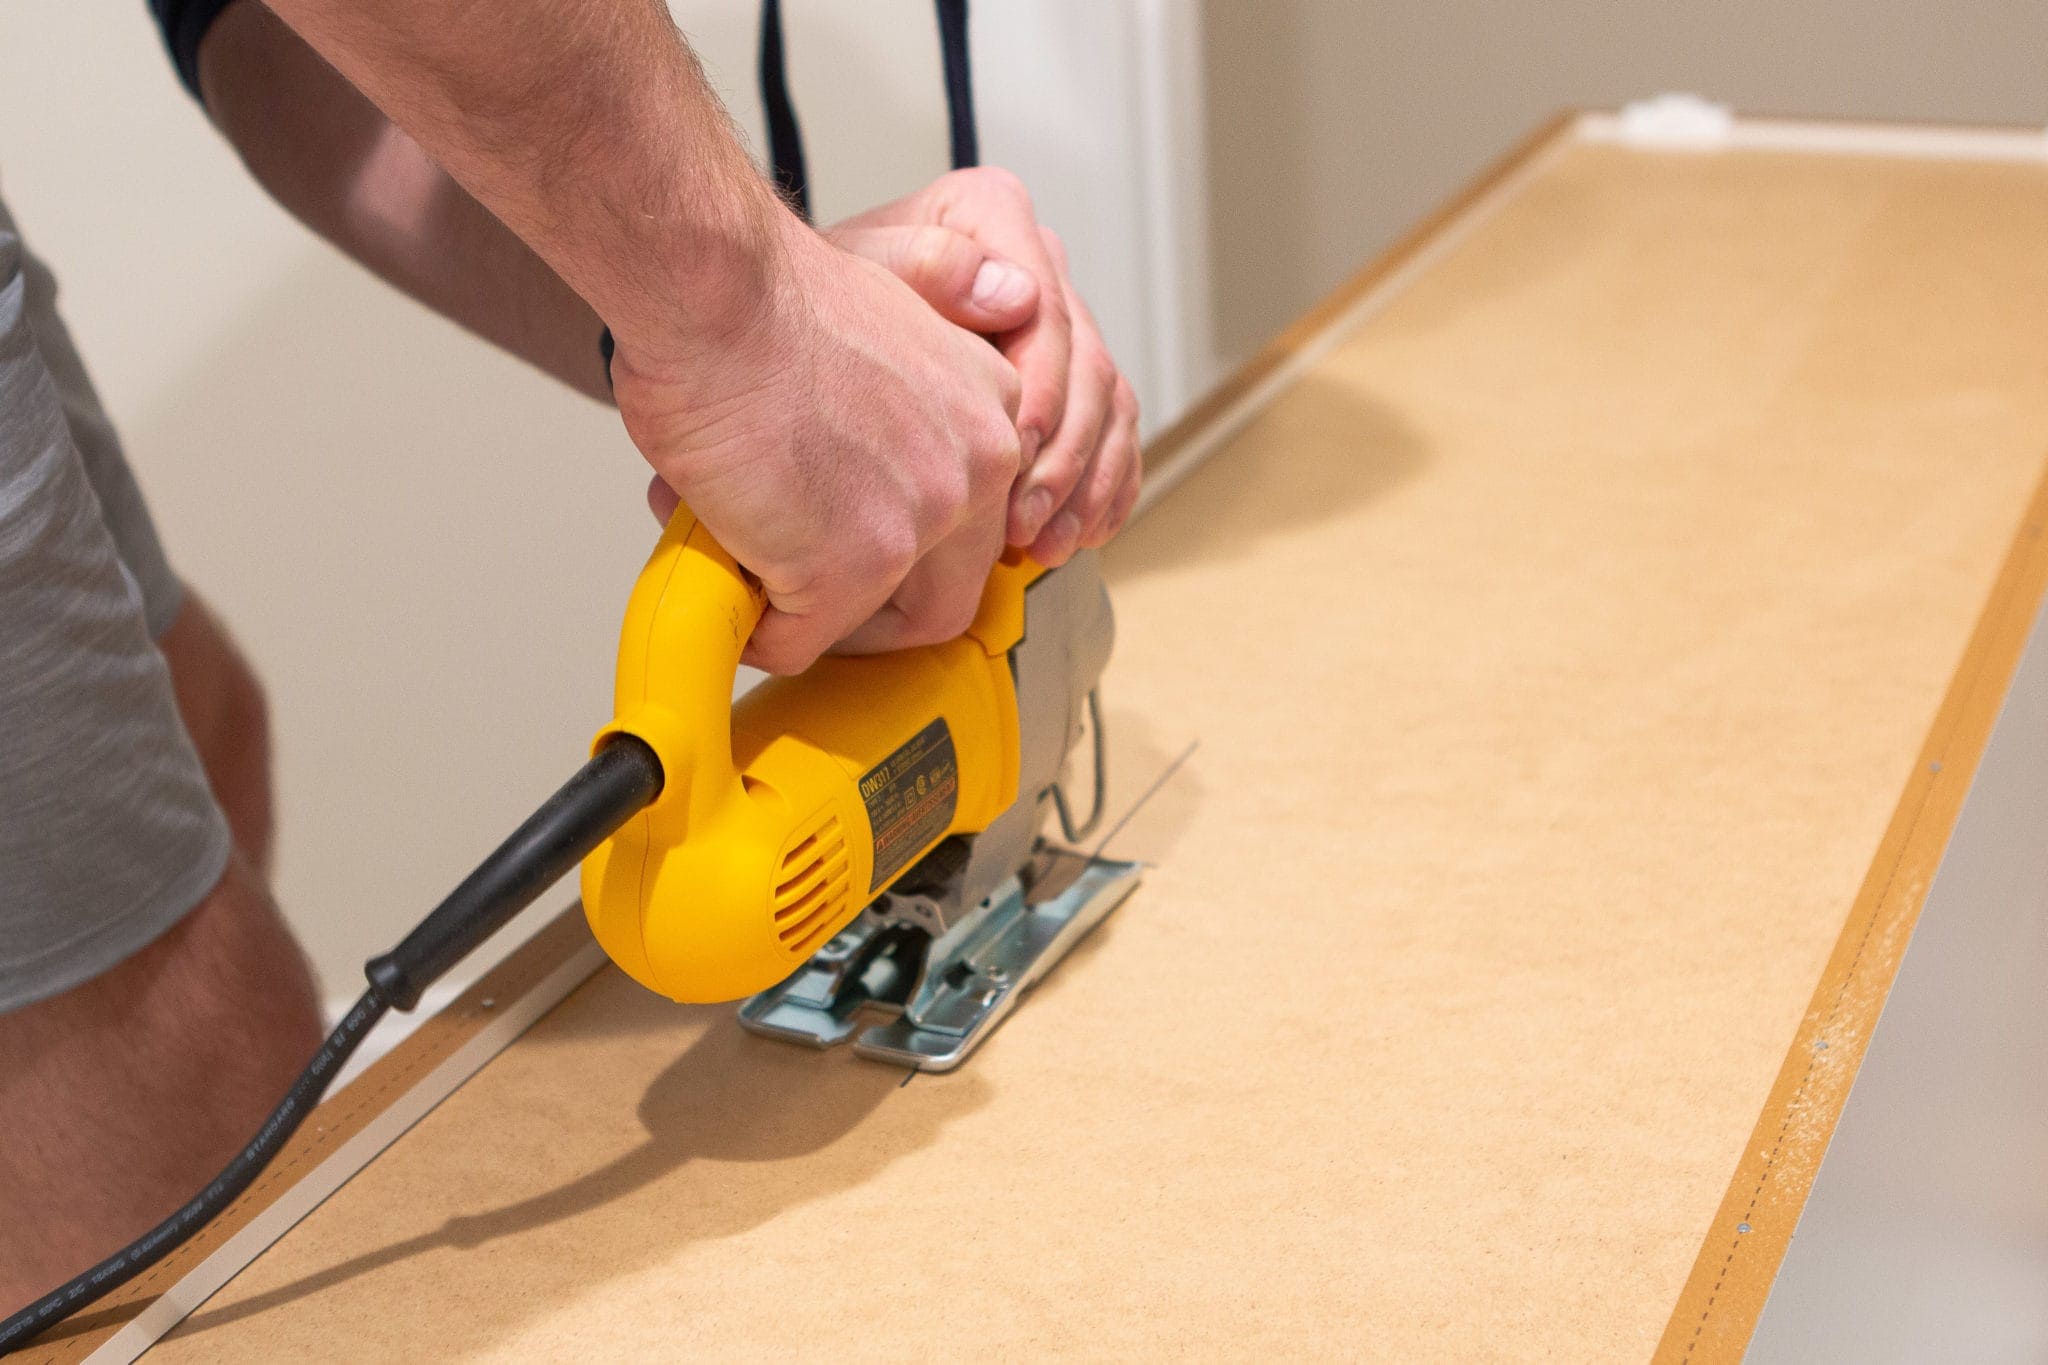
The One We Own: Dewalt Corded Jigsaw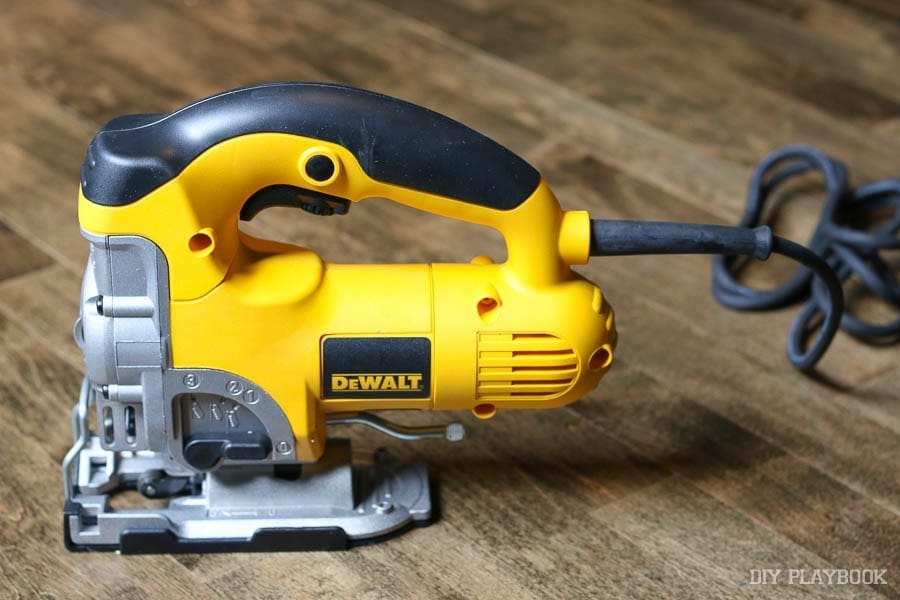
Why Buy It?: While the miter saw can cut straight lines, a jigsaw has the ability to create curved cuts (along with straight ones!). For us, it has really come in handy for projects where we needed to cut a strange shape out of a piece of cabinet or wood (like cutting out the shape of an outlet in the back of our laundry room cabinets!). This tool is relatively inexpensive, so it’s a great addition to your toolbox.
Tips: Make sure you buy additional blades that fit your jigsaw. 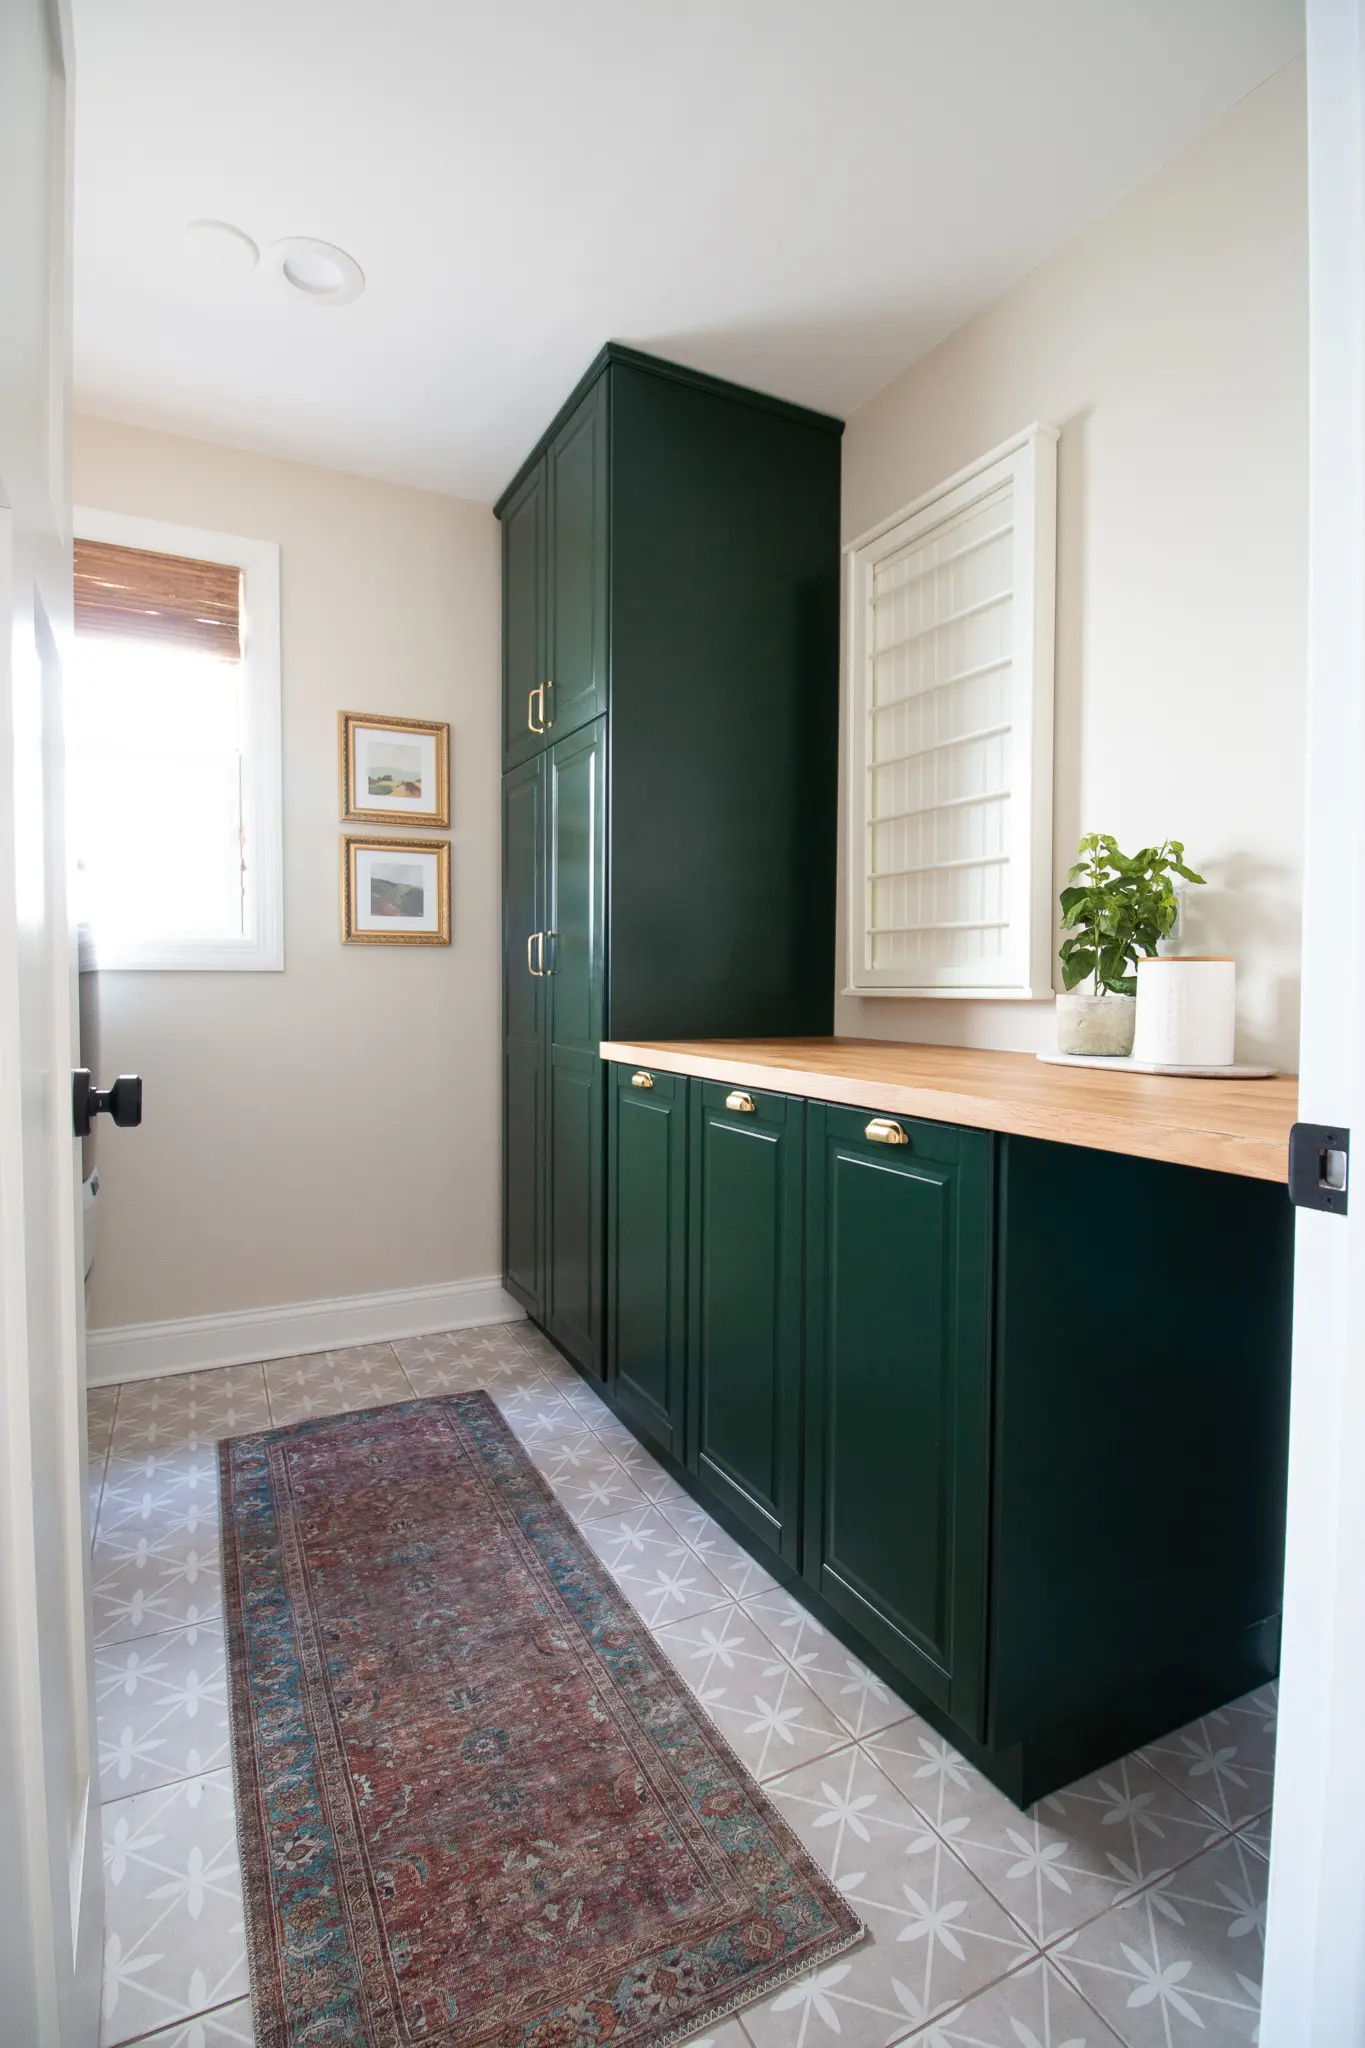
DIY Projects:
Wet Saw

The One We Own: Kobalt 7-inch Tabletop Tile Saw
 Why Buy It?: You’ll need a wet saw for any tiling project. Yes, you can rent a wet saw at Lowe’s Home Improvement. And if you can get your tiling project done in one to two days and you don’t have another tiling project planned, then renting is probably the way to go! However, if you have a big tiling job or want to tackle multiple spaces, you’re probably better off buying a wet saw.
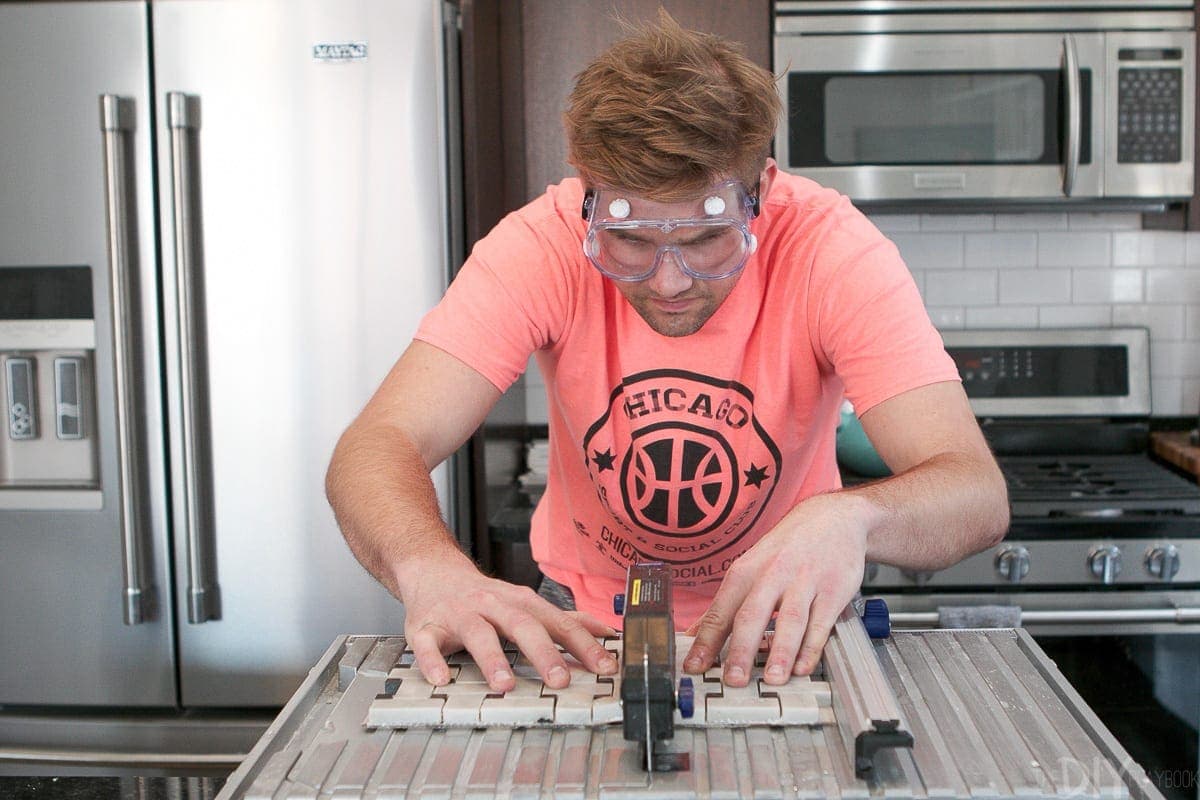
Tips: At first, the spinning blade is super scary when you’re pushing tile through. But you quickly realize that the blade is actually pretty dull (it won’t chop a finger off!). Yes, you need to be careful, but it’s okay if your fingers get close (because oftentimes they’ll have to get very close when cutting small bits of tile). Oh, and be prepared to be wet! These tools are aptly named and our shirts usually end up soaked.
 DIY Projects:
- How to Install Bathroom Flooring
- Tips for Subway Tile
- How to Install a Kitchen Backsplash
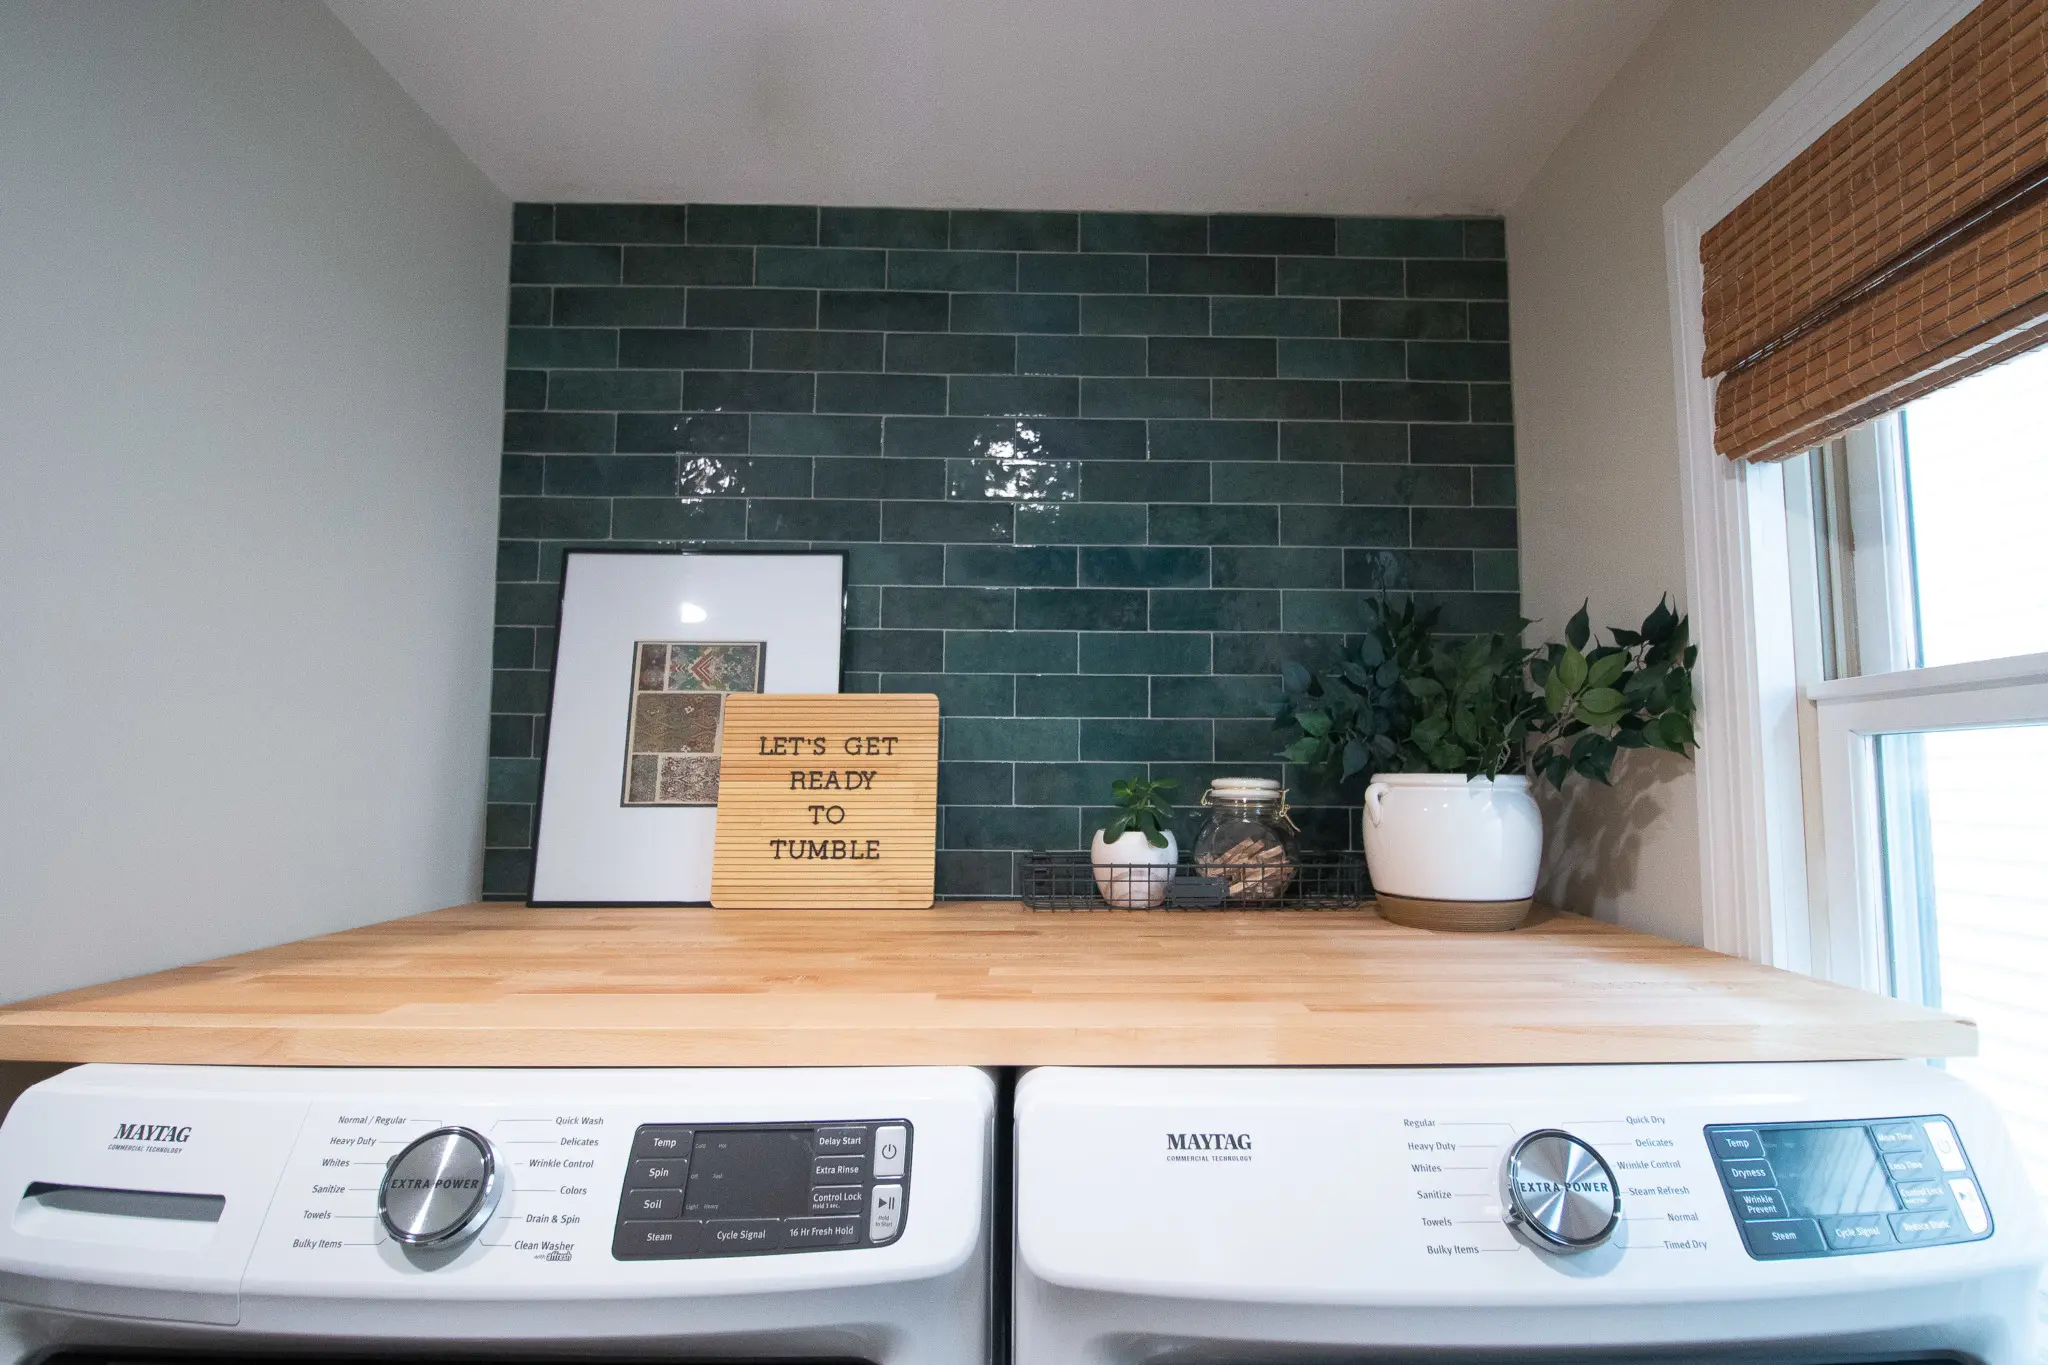
- Green Tile in the Laundry Room
- Our Marble Fireplace
Circular Saw
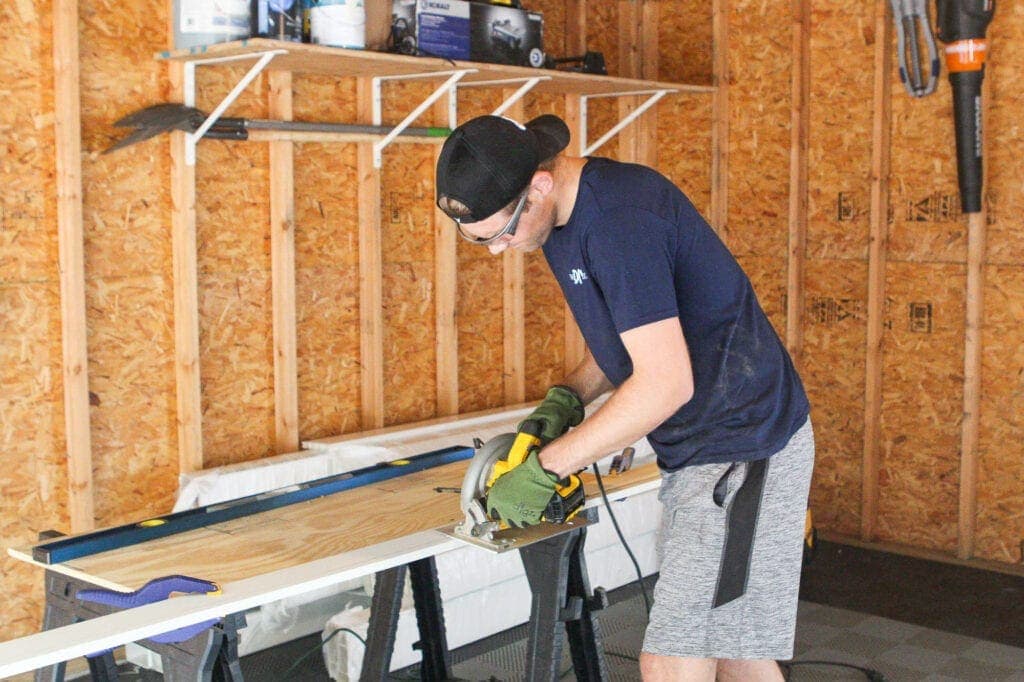
The One We Own: Dewalt Corded Circular Saw
Why Buy It?: We bought our circular saw last year when we were working on our DIY fireplace project. Our miter saw couldn’t cut boards with a long width, and we needed a way to make those cuts. We ended up getting a circular saw and it has come in handy so many times since then! It’s great for making long cuts, angled line cuts, and it works to trim down thicker boards. We even used it for our garage flooring project! 
Tips: You’ll want to use a straight edge when cutting with the circular saw to make sure you get a straight cut. We usually clamp down a long level and it works like a charm. 
DIY Projects:
Power Tools On Our Wishlist
With the DIY office built-ins underway, we need to add a few more tools to our garage. Here are two we are planning to buy to help us with that big project!
Table Saw
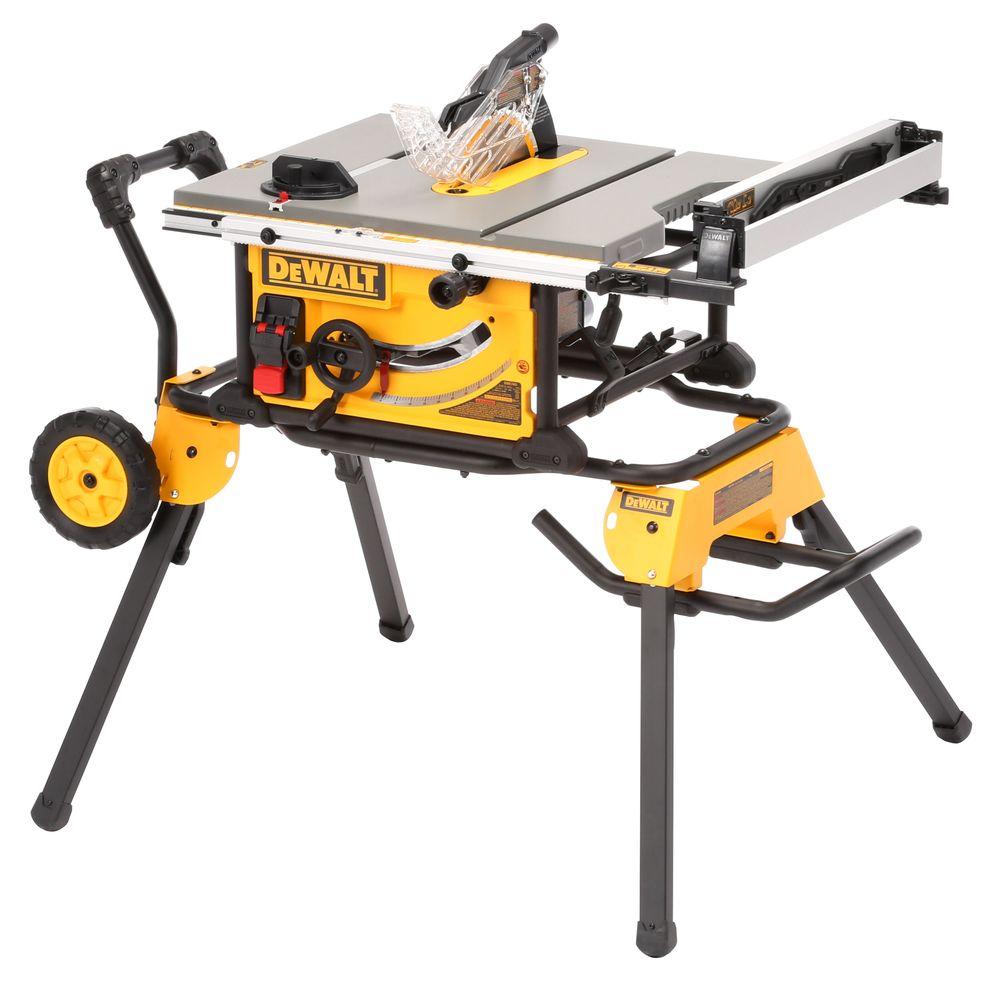
I’m a bit intimidated by the table saw because I’ve never used it before and it can be very dangerous. But, there truly is no better tool to cut wood and rip large boards. We’ll need this as we build the shelves on top of the built-in cabinets in the office.
Orbital Sander
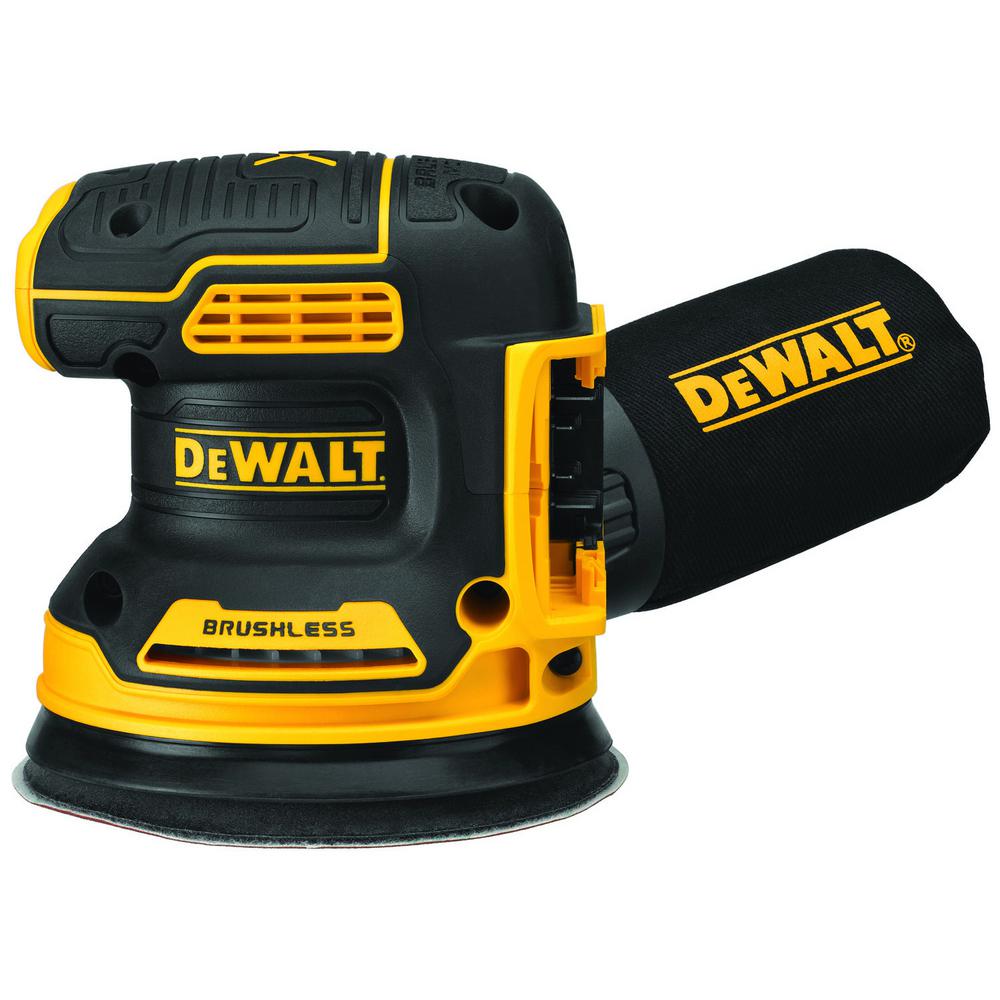
Here’s a basic power tool that would be good to add to the mix..a sander! I used to own one, but it got lost in a move at some point and I never replaced it. Since we’re painting the built-ins ourselves, we’ll need to sand them down so the primer and paint sticks to the unfinished wood. An orbital sander will save so much time as opposed to just using sandpaper or a sanding block. And I love that this one is cordless.
Other Supplies to Have On Hand

I mentioned a few other items you should have on hand when using the above power tools. Make sure you grab some of these…
- Safety Glasses
- Gloves
- Sawhorses
- Dropcloths
- Clamps
- Crow Bar (to remove baseboard)
- Long Level
So there you have it…Power Tools 101. I hope this list leaves you motivated and excited to try out a new project this year. As I always say, if I can do it…anyone can! Don’t be intimidated by the world of power tools. Start small and build up your collection as you go. Soon you’ll have everything you need to tackle any DIY project you want around the house!
Casey