How to Install Marble Basketweave Floor Tile
Disclaimer: This post is sponsored by Lowe’s Home Improvement. All opinions and photography are our own and are not influenced by Lowe’s Home Improvement. Thanks for supporting the brands that support this blog.
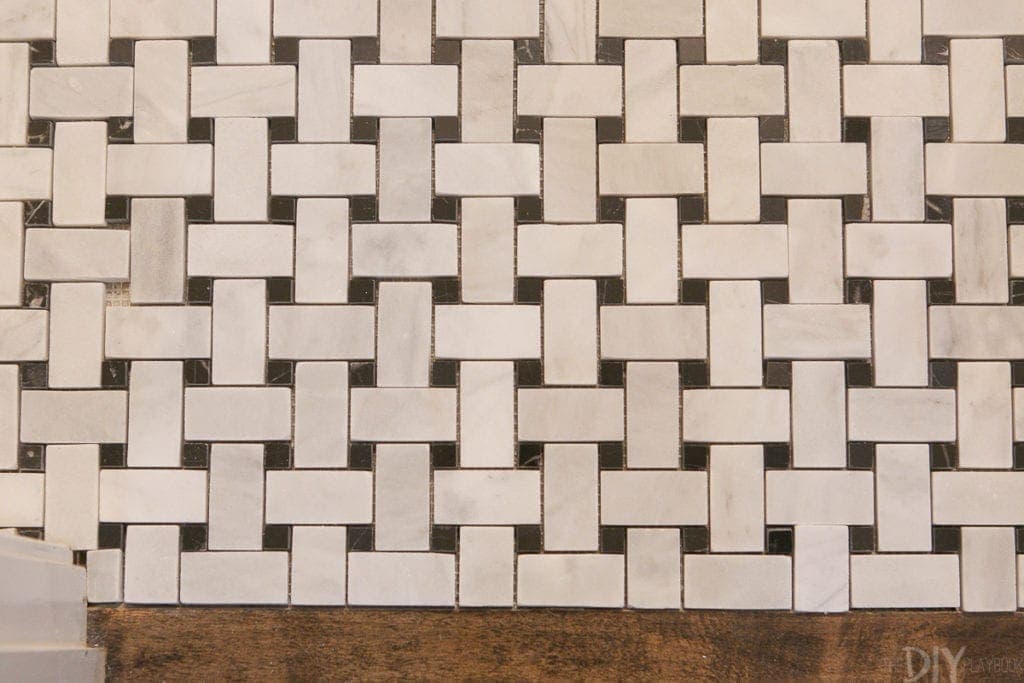
When I first spotted this marble basketweave floor tile on the Lowe’s website I knew that it would be the floor tile in our guest bathroom renovation. The marble, the cool pattern, the black and white classic look…yes, yes, yes! Then, when it arrived at our house I was even more smitten. Each piece of marble has so much character and the pattern is elegant, yet fun!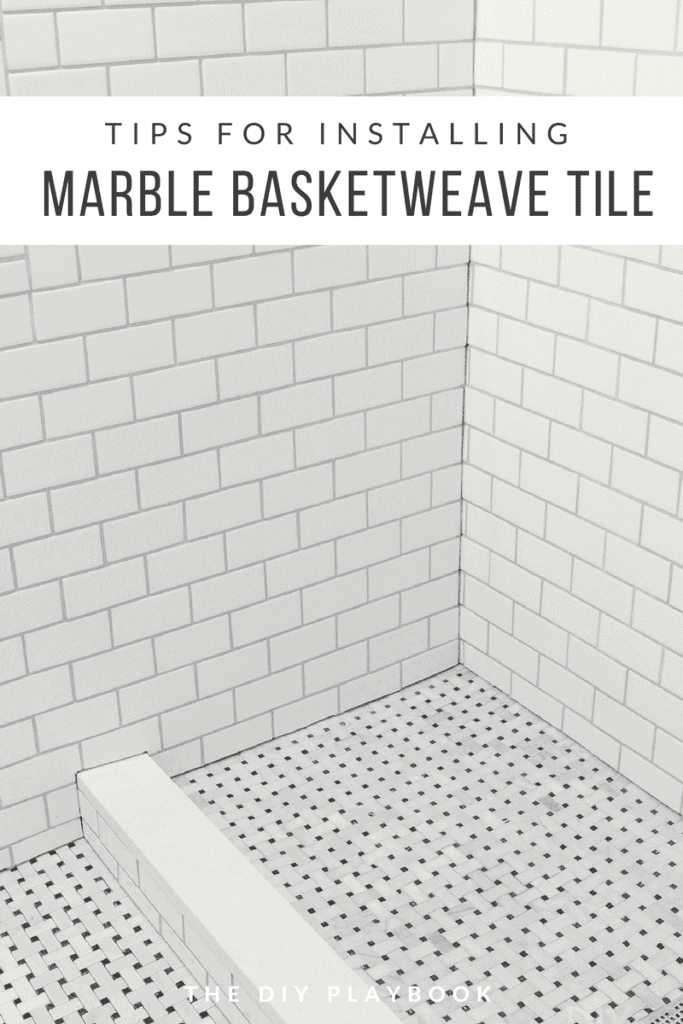
But even though I’m obsessed with the tile itself, installing it was a bit trickier than I anticipated. As I mentioned in last week’s post, because this tile has no straight edges you will be making quite a few cuts. Plus, marble can be more difficult to cut than porcelain or ceramic because it is so delicate…so you have to extra careful when cutting it. With this being my first big floor tiling project, I probably shouldn’t have chosen an advanced tile to get the job done.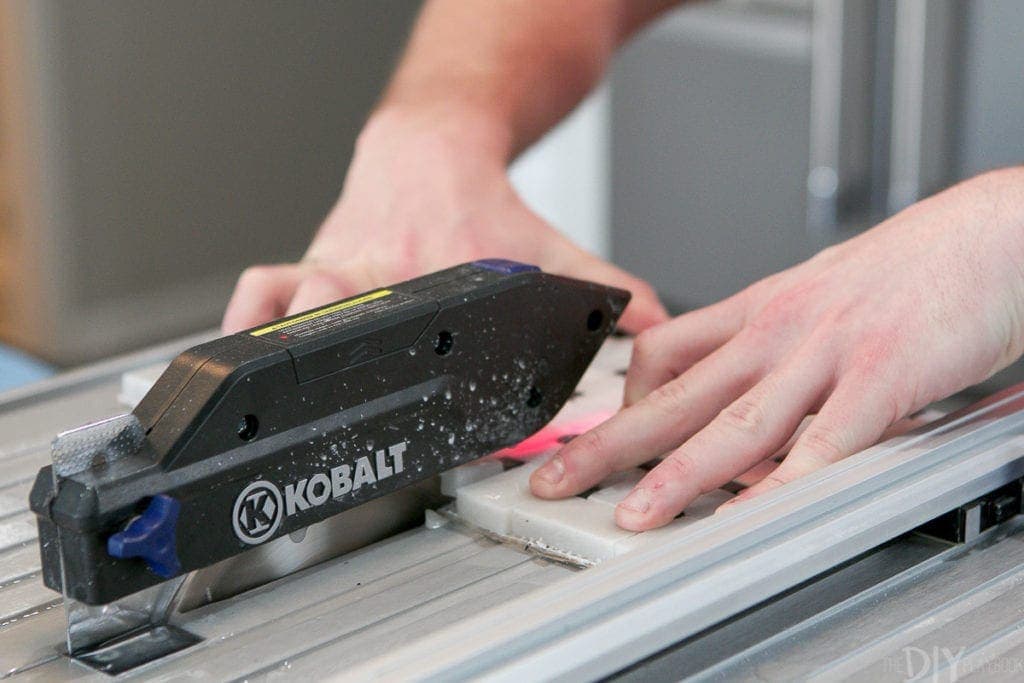
However, after lots of slow and careful work, we installed this marble basketweave floor tile and are now obsessed with the results! It took some time and patience, but it was well worth it. If you too want to install this floor tile, I’ve got lots of tips and tricks to make your tile job a bit easier.
Supplies to Lay Floor Tile
Because this was our first big tile job, Finn & I needed to buy lots of supplies from Lowe’s including a wet saw. But for our next tiling project, we’ll at least have all of the main tools to get the job done. Here’s what we picked up from the store.
- Tile (be sure to order at least 10% extra)
- Thinset Mortar
- 3/16″ trowel
- Spatula
- Buckets (get lots!)
- Wet Saw
- Safety Glasses
- Diamond Blade File
- Rags
- Kneepads
- Painter’s Tape
- Unsanded Grout (Color: Delorean Gray)
- Grout Float
- Sponges
- Unsanded Silicone Caulk (Color: Delorean Gray)
- Unsanded Caulk (Color: Delorean Gray)
How to Install Marble Basketweave Floor Tile

One thing that you’ll want to know from the start is that marble varies in color, so each piece of tile may not be exactly the same. I highly recommend unboxing all of your tiles and choosing from different boxes as you lay it all down. Some may be lighter or darker depending on the box, so it’s important to see all of the pieces laid out as you go.
Figure Out Where to Start
In our bathroom, we had 2 areas to tile…the main floor and the shower floor. In the main area, we first thought we would start on the farthest wall near the toilet and work our way out of the room. However, you want to hide your cuts on the walls that aren’t as noticeable (like under the vanity or behind the toilet). Therefore, we started on the area that is most noticeable…right when you walk in the room so we could guarantee that we would have good clean cuts on that edge.
Dry Fit The Tile
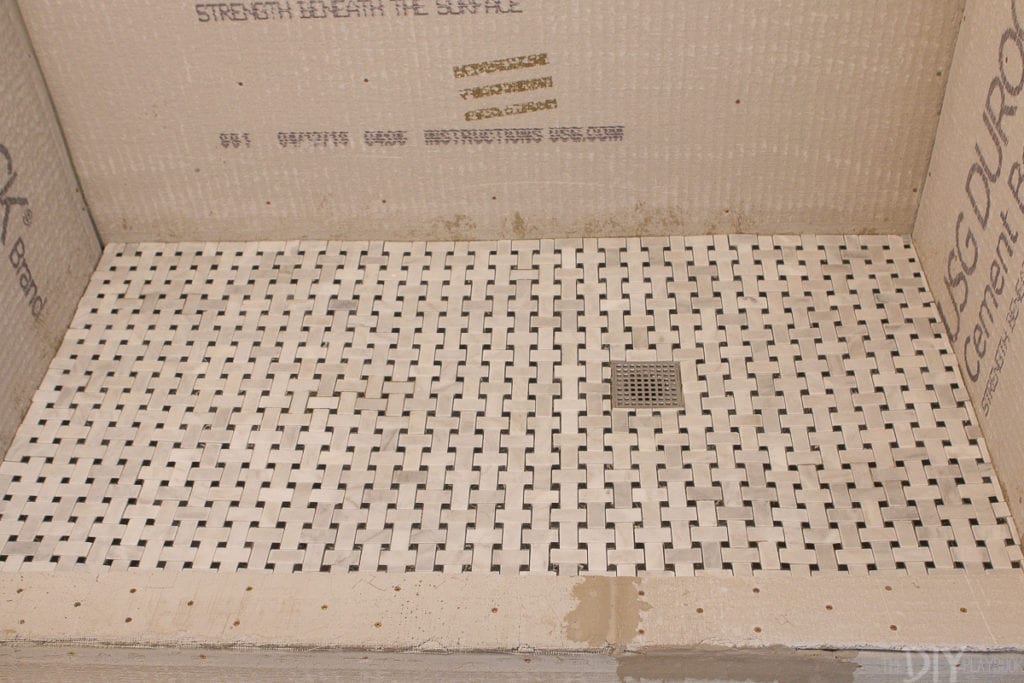
You’ll want to “dry fit” the tile first, which means you’ll be making all of the cuts for the space before you apply any thinset to the floor. We started in the shower area because we figured it would be easiest to tackle since it’s a small space. Because this tile doesn’t have any straight edges, we had to make cuts on every single edge piece.
I would take a full piece and use painter’s tape to mark where the cut line would be. I highly recommend doing this, because after looking at the pattern for so many hours your eyes may start to cross! I would then hand the piece of tile off to Finn who would cut it on the wet saw.
Use the Wet Saw for Cuts

Marble is a difficult stone to cut, so our first few cuts weren’t very straight and the edges were crumbly. Not good. But we learned some tricks along the way, and by the end of the project Finn was a pro on the wet saw with the marble basketweave floor tile. Here are some tips…
- Go slow!!! You need to go way slower than you would cutting any other material on the wet saw.
- Put the marble on a piece of cardboard to cut it. This helps because it gives you a good grip to push it through the blade.
- Dry off the tile as you go. Marble soaks up water, so be sure to dry off your pieces after all of your cuts.
- Wear eye protection. This is a must whenever you use the wet saw, but it’s especially important for this type of tile. We had small pieces of stone flying everywhere.
- For angled cuts, use painter’s tape as a guide.
- If you have more tile projects on your to-do list, consider buying a wet saw. This one wasn’t super expensive. Plus, with the amount of days we’ve been tiling, there’s no way we could rent one out for that long of a time period.

Even though this tile is 12×12, it still took a long time to make all of the cuts as we dry fit both the shower area and the main bathroom area. Just take your time so you don’t damage any tiles as you go.
Have a Plan for the Small Cuts
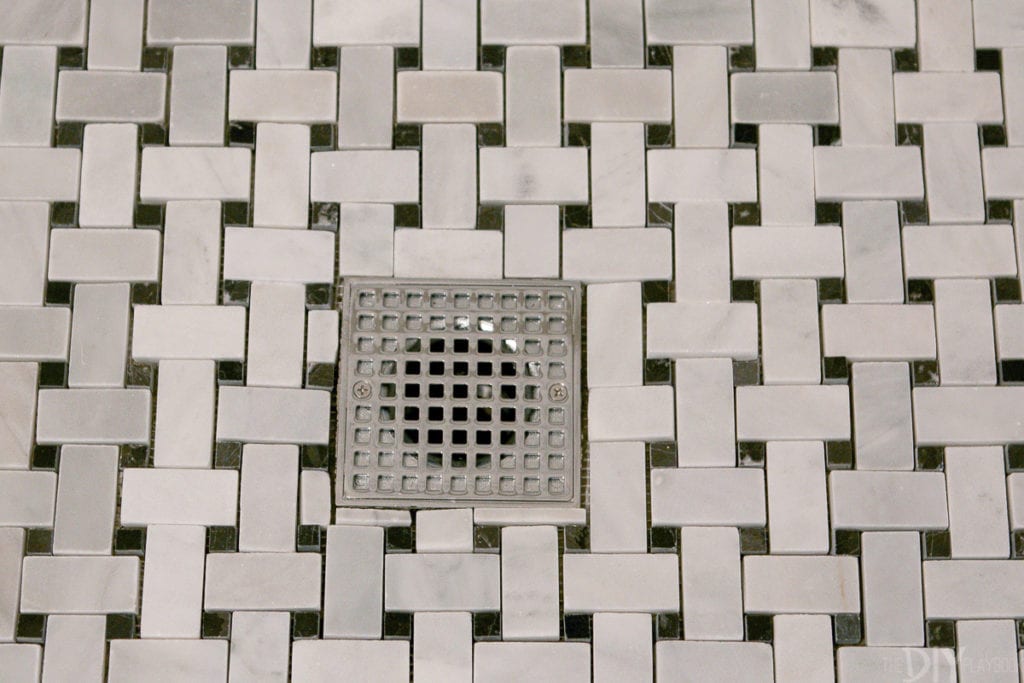
There were some instances where we couldn’t make a clean cut on the edge or around items like the shower drain and toilet flange. For those areas, you’ll need to use individual stones that are cut to fit the exact area. These cuts were often too small for the wet saw, so we used a handy dandy little tool to create the perfect pieces. 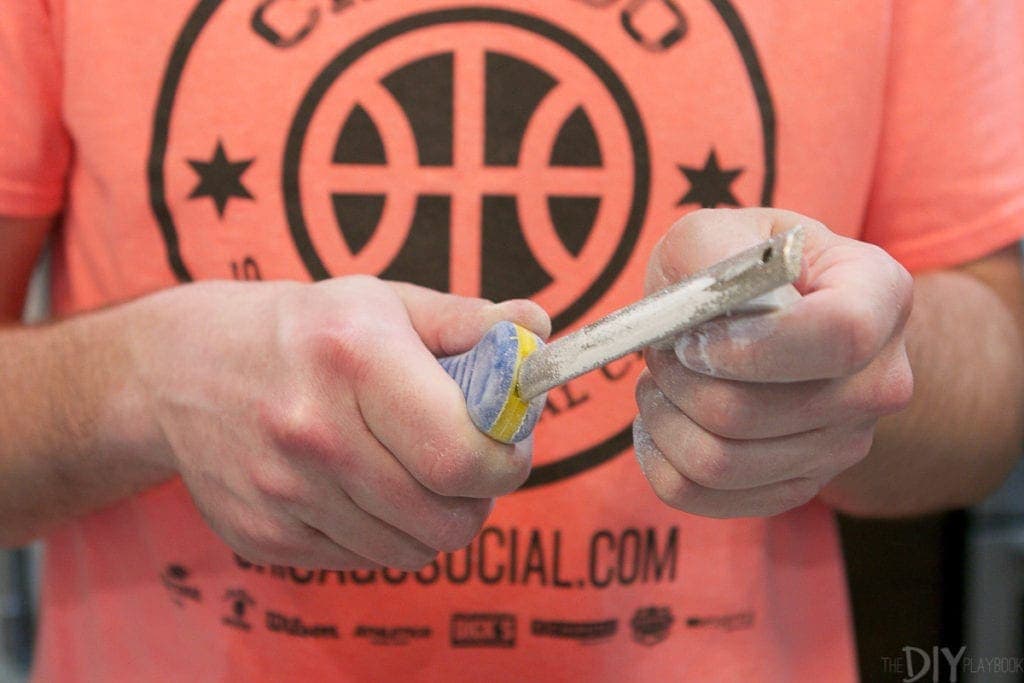
This little diamond blade file. It came in handy throughout the entire project and it’s a must if you’re working with a marble tile like this one. We could sand down pieces so they fit into corners and nooks perfectly, and we also used it to shave cuts that didn’t leave a perfectly smooth edge. It was the MVP of this project that’s for sure.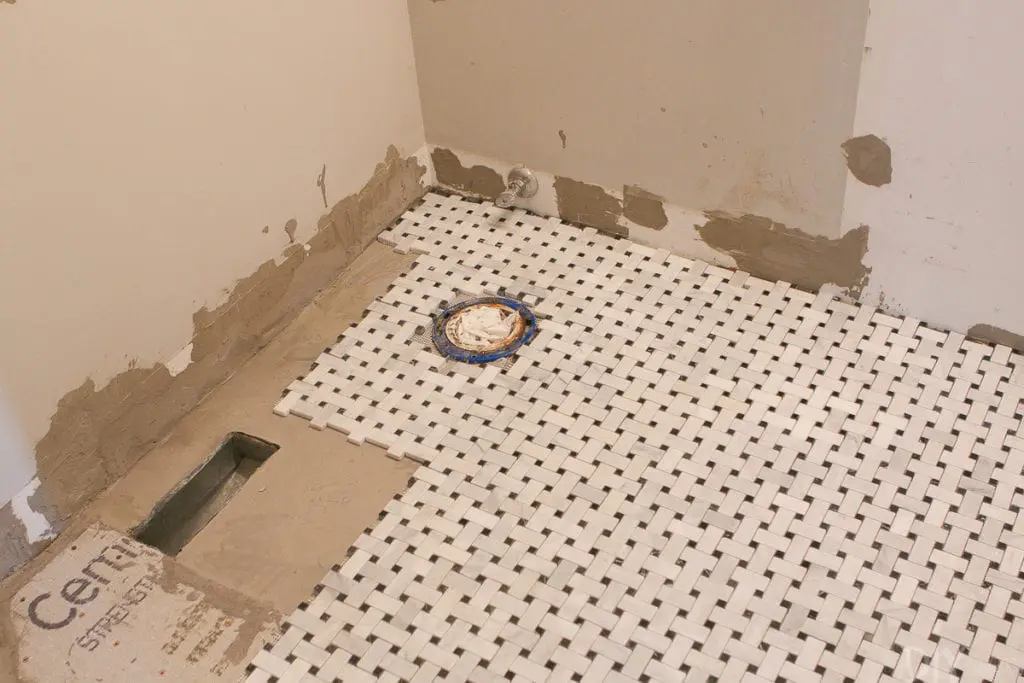
Once we had all of our tile dry fit, we carefully moved all of the pieces out of the room and into our family room. We made sure to line them up in the exact order in which we removed them (even the small little edge pieces), so we wouldn’t get them confused when it came time to re-install.
Mix your Thinset

It’s finally time to lay some tile! But before we get to that, you need to mix up some thinset. We found that using a small bucket from Lowe’s was way better than a large one because you’ll only want to mix up enough thinset that you can use in about 20 minutes. It dries out really quickly, and making a huge batch never worked well for us.
Our best technique was to always start with water first, then mix in the thinset powder, and stir until we got to the right consistency. And the consistency is a tough one to describe…some people say peanut butter, others say pancake batter…those seem like 2 very different textures to us! We would just mix until we could take it off the spoon and it would slop off slowly back into the bucket. Once it’s all mixed up, let it slake (rest) for 10 minutes before you work with it.
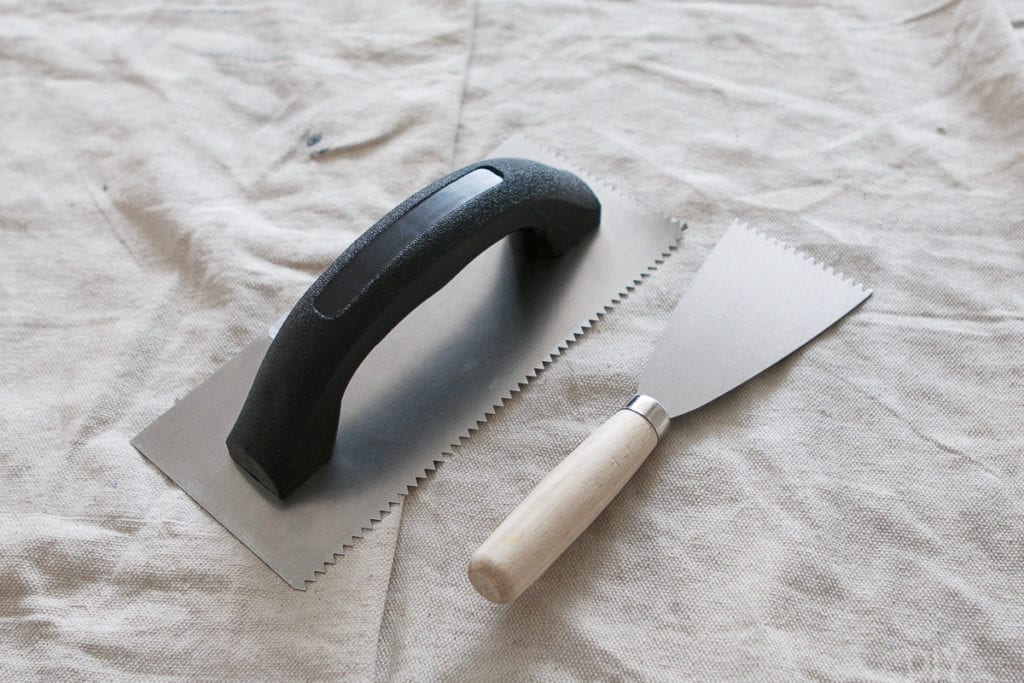
Use a Trowel to Apply Thinset

Take your thinset and spread some onto the ground using a trowel. The notch size of your trowel is dependent on the size of your tile, so make sure you buy the correct one for your project. In our case, we used a 3/16″ trowel.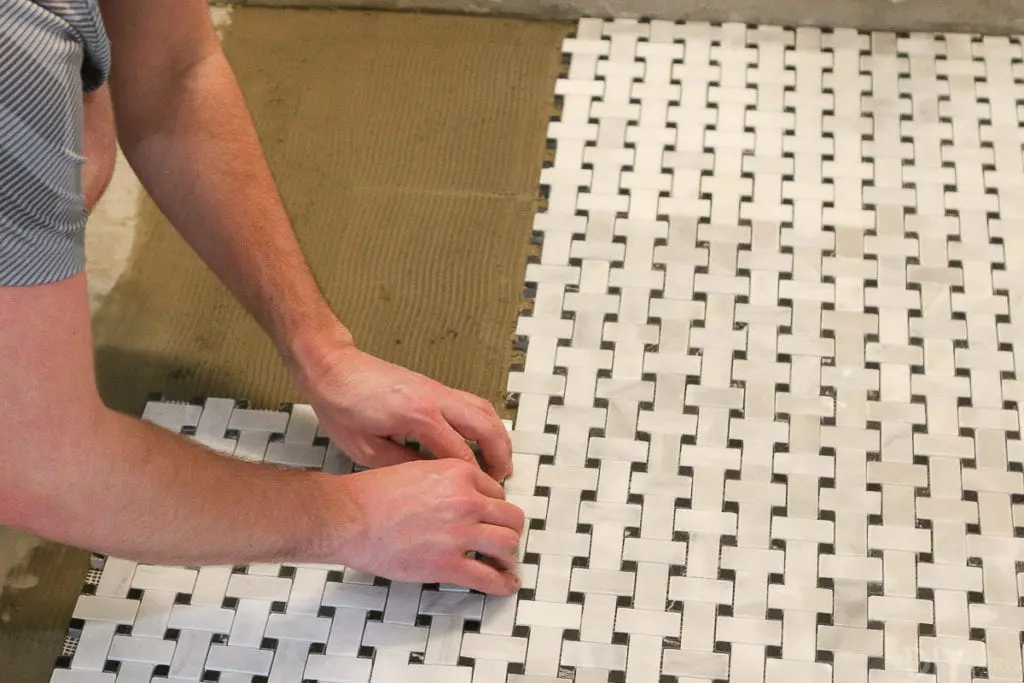
We worked in small sections at a time, laying a bit of thinset and then putting the tile right into it. We made sure everything looked flat and level as we went, and also used a grout float to push the tile down and into the thinset the best we could. 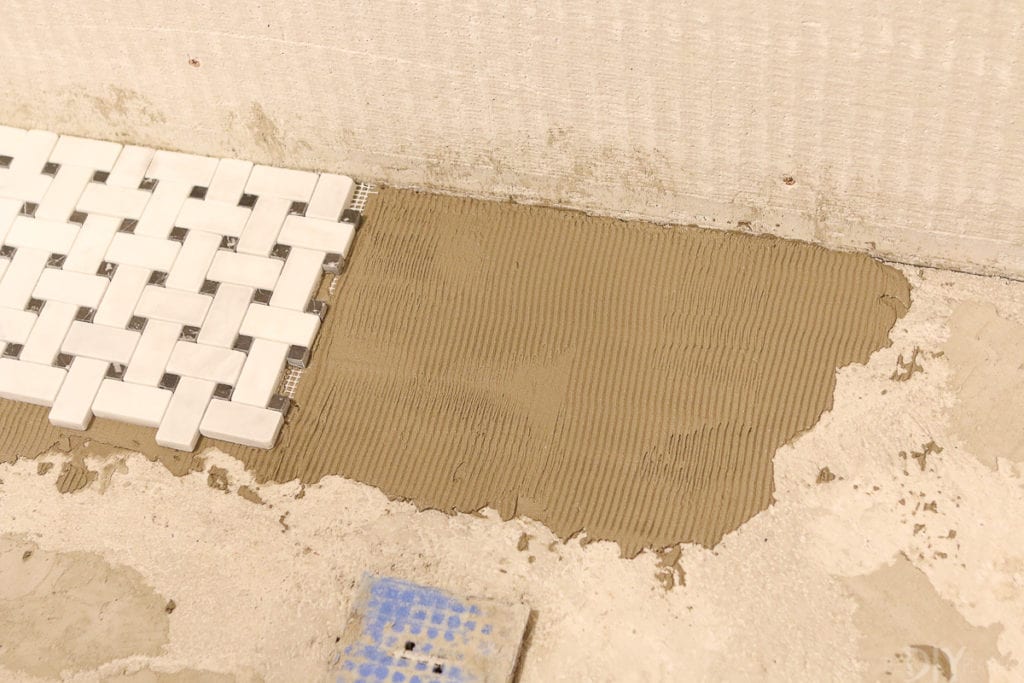
For small pieces, we would back butter each piece and push it into the floor. This is just when you take some thinset and put it on the back of your tile to make sure it gets enough adhesive on it. 
It’s important to keep the tiles clean as you go, or else the thinset will dry onto the tile and it will be super hard to get off. We kept toothpicks handy to get rid of any thinset that oozed through the spaces. It was tedious but worth it to keep things clean as we went. 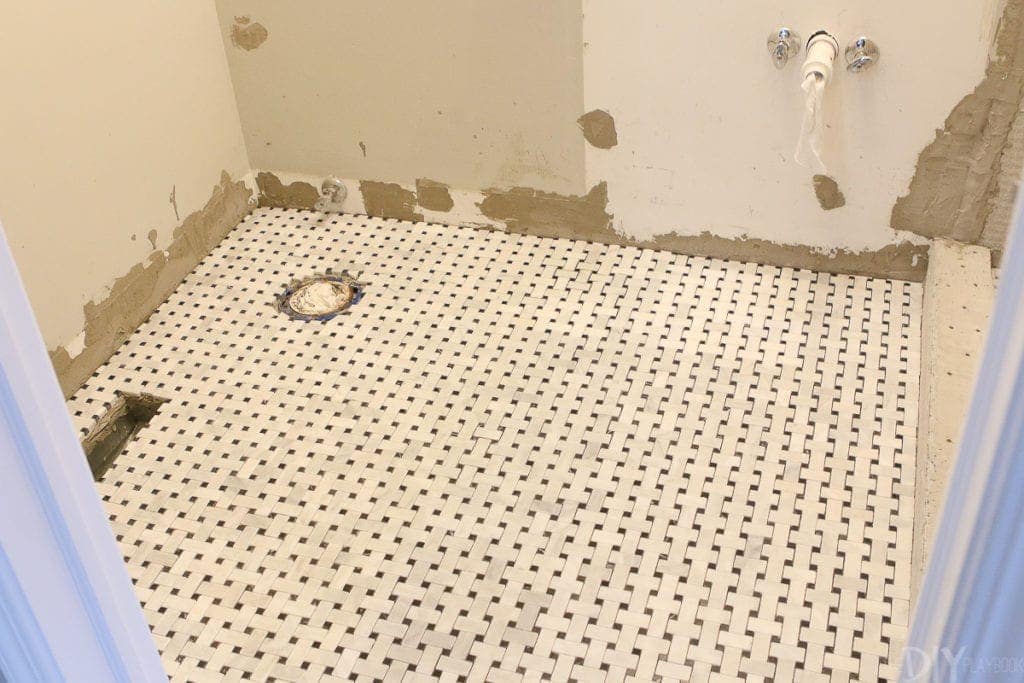
Laying the tile took a few nights of hard work, but we got it done! We then let it dry about a day (we needed a break anyways…) before it was time to grout!
Grout your Floor Tiles
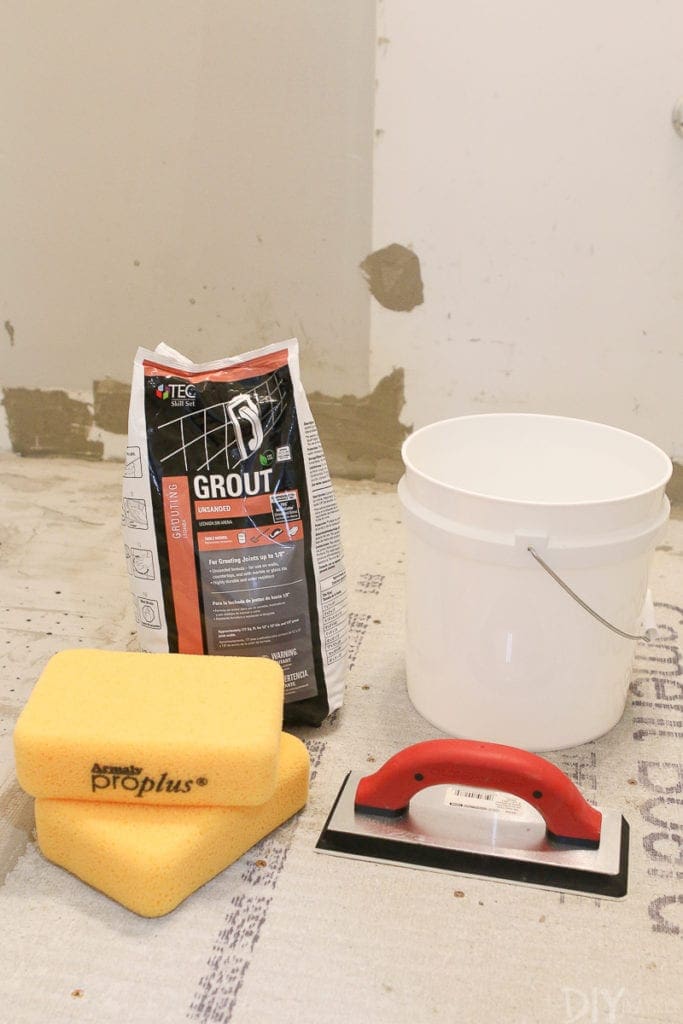
When it comes to grout, you want to make sure you get the right kind for your tile. Because our grout lines were small (1/16″) we went with unsanded grout. It’s also important to choose unsanded grout when you’re going with a stone like marble, because sanded grout can scratch it. 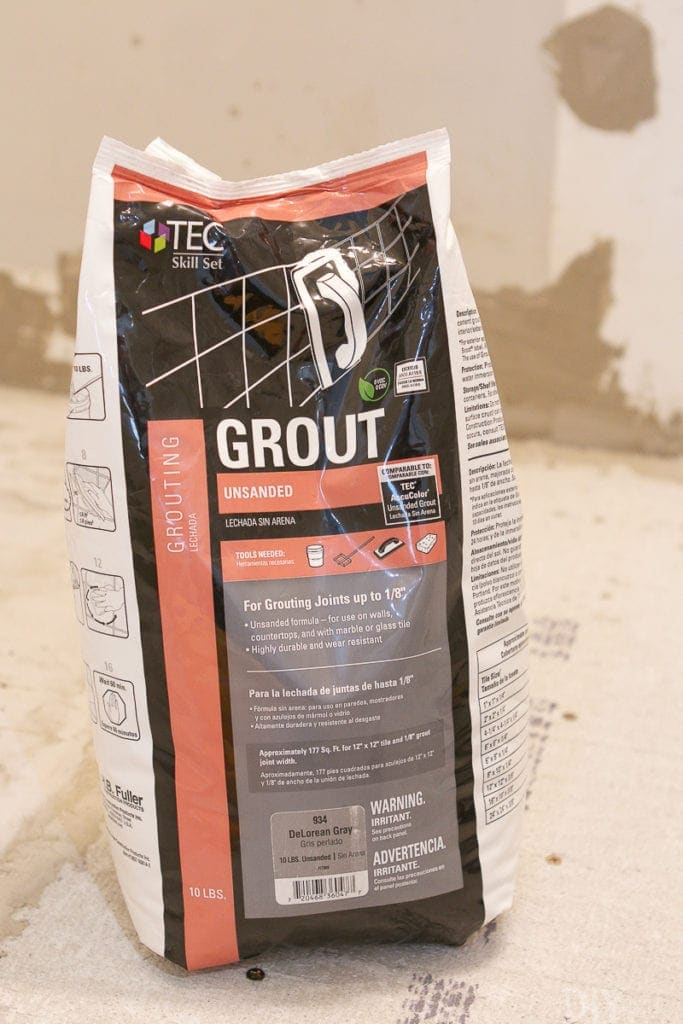
I chose unsanded grout in the color “Delorean Gray” and mixing it up is similar to mixing up the thinset. Again, only make enough that you can work with in about 20 minutes or so. I then took my grout float, mushed the grout into the cracks, and spread it out as much as possible. Make sure you get enough in there and check your work as you go. 
Grout sponges are key for this process too. Follow the directions on the back of your grout bag, and only wipe after the amount of time they recommend. If you wipe too early (or with too much water), you can mess up the final outcome. My recommendation is to have a bucket of clean water handy, and at least 2-3 sponges so you can keep swapping them out as you wipe. And reaallllly wring out your sponge so it doesn’t get too much moisture on your tiles.
Caulk All Seams
After letting our grout rest for 3 days, we were ready for our finishing touches. You’ll want to caulk any seams where 2 planes meet (i.e. perimeter of the room for floor tile). Be sure to choose caulk in the same color and texture as your grout. In our case, that was Delorean Gray unsanded caulk. We used silicone in the shower (for extra moisture protection) and regular caulk in the main room. Use a caulk gun, keep things as clean as possible, and you’ll be done in no time!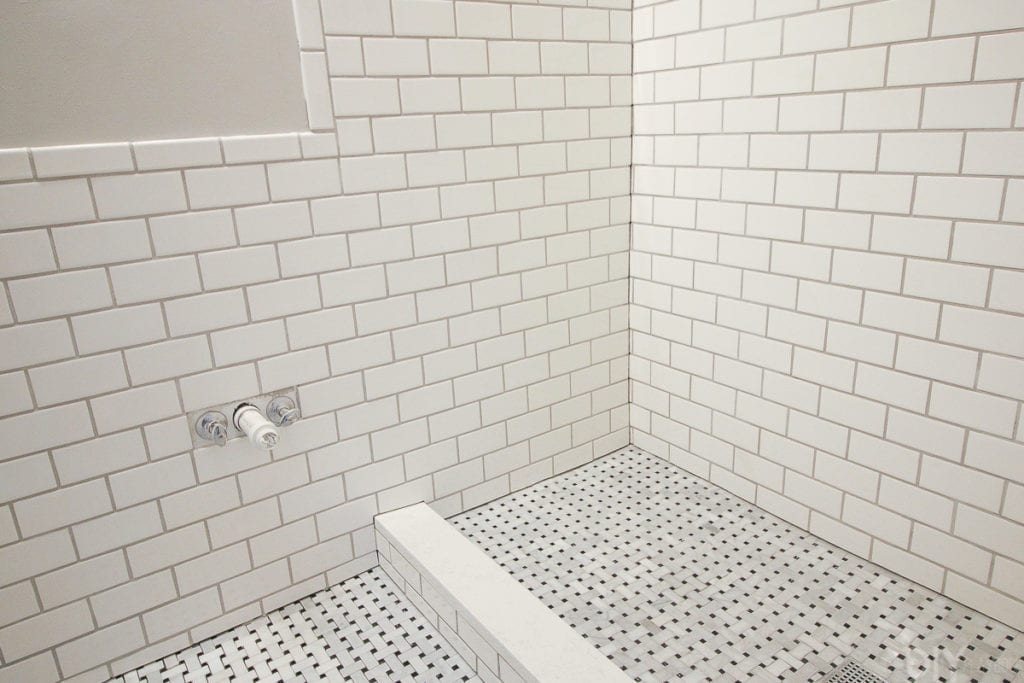
So there you have it. A detailed tutorial on how to install marble basketweave floor tile. It was a time-consuming process for us, but we are absolutely in LOVE with the look! Now I’ll always walk into this room and think about the crazy nights we spent in here working our butts off.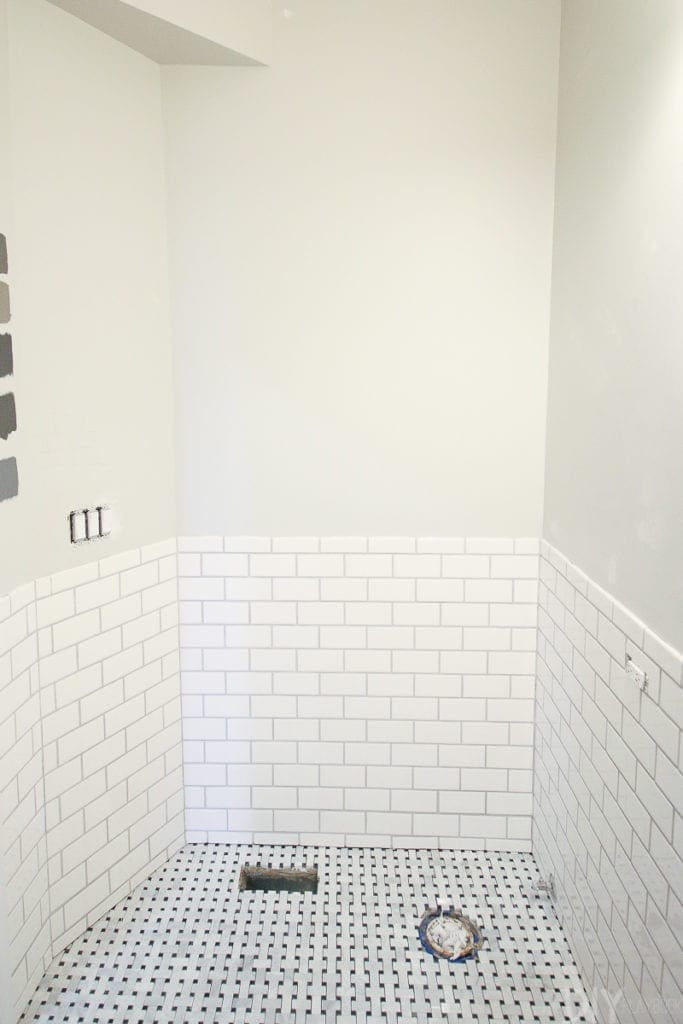
Next up…how we added subway tile to our walls. I’ll have all of the details (and lots of tips) for that big DIY project tomorrow on the blog!
Casey
Catch Up on the Bathroom Renovation
- Bathroom Planning
- Bathroom Mood Board
- Our Demo Weekend
- Bathroom Progress Report
- Tiling the Floor
- Adding Subway Tile
- Choosing a Dark Gray Paint Color
- Painting the Bathroom
- How to Install a Vanity
- How to Hang a Mirror
- Bathroom Renovation – Reveal
- Storage Solutions for Small Bathroom
- What We Learned Renovating Ourselves


