How To Install A DIY Carpet Runner On Your Stairs
Our staircase transformation was a big before and after of 2019.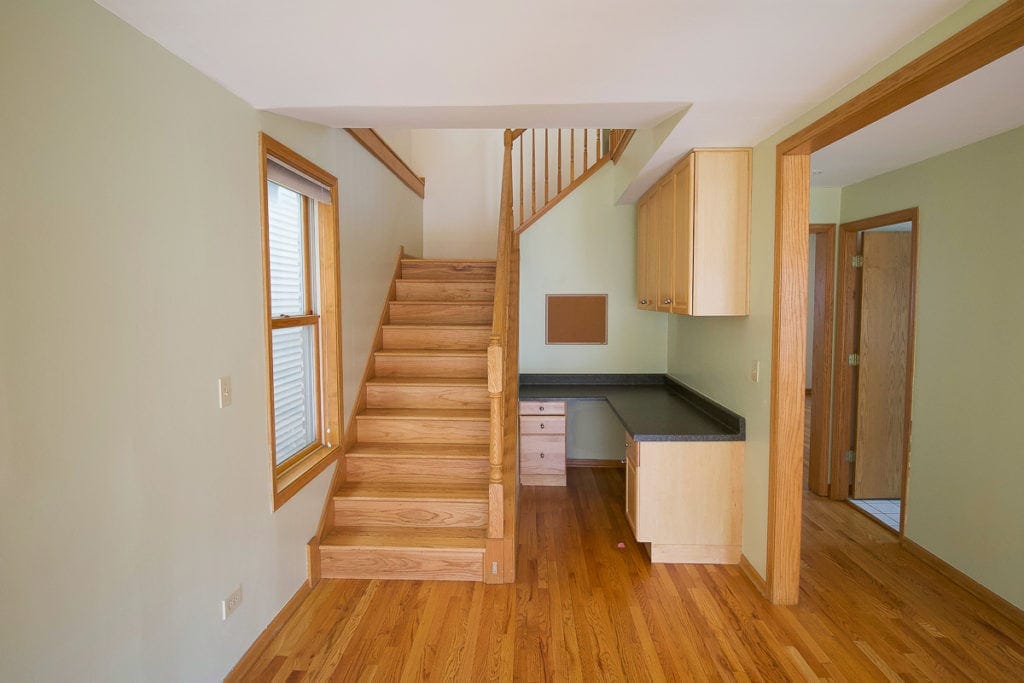
When we first saw the house, I knew that the little “office” setup near the stairs just wasn’t functional for our family. It was too tight to squeeze a body in there, let alone an office chair.
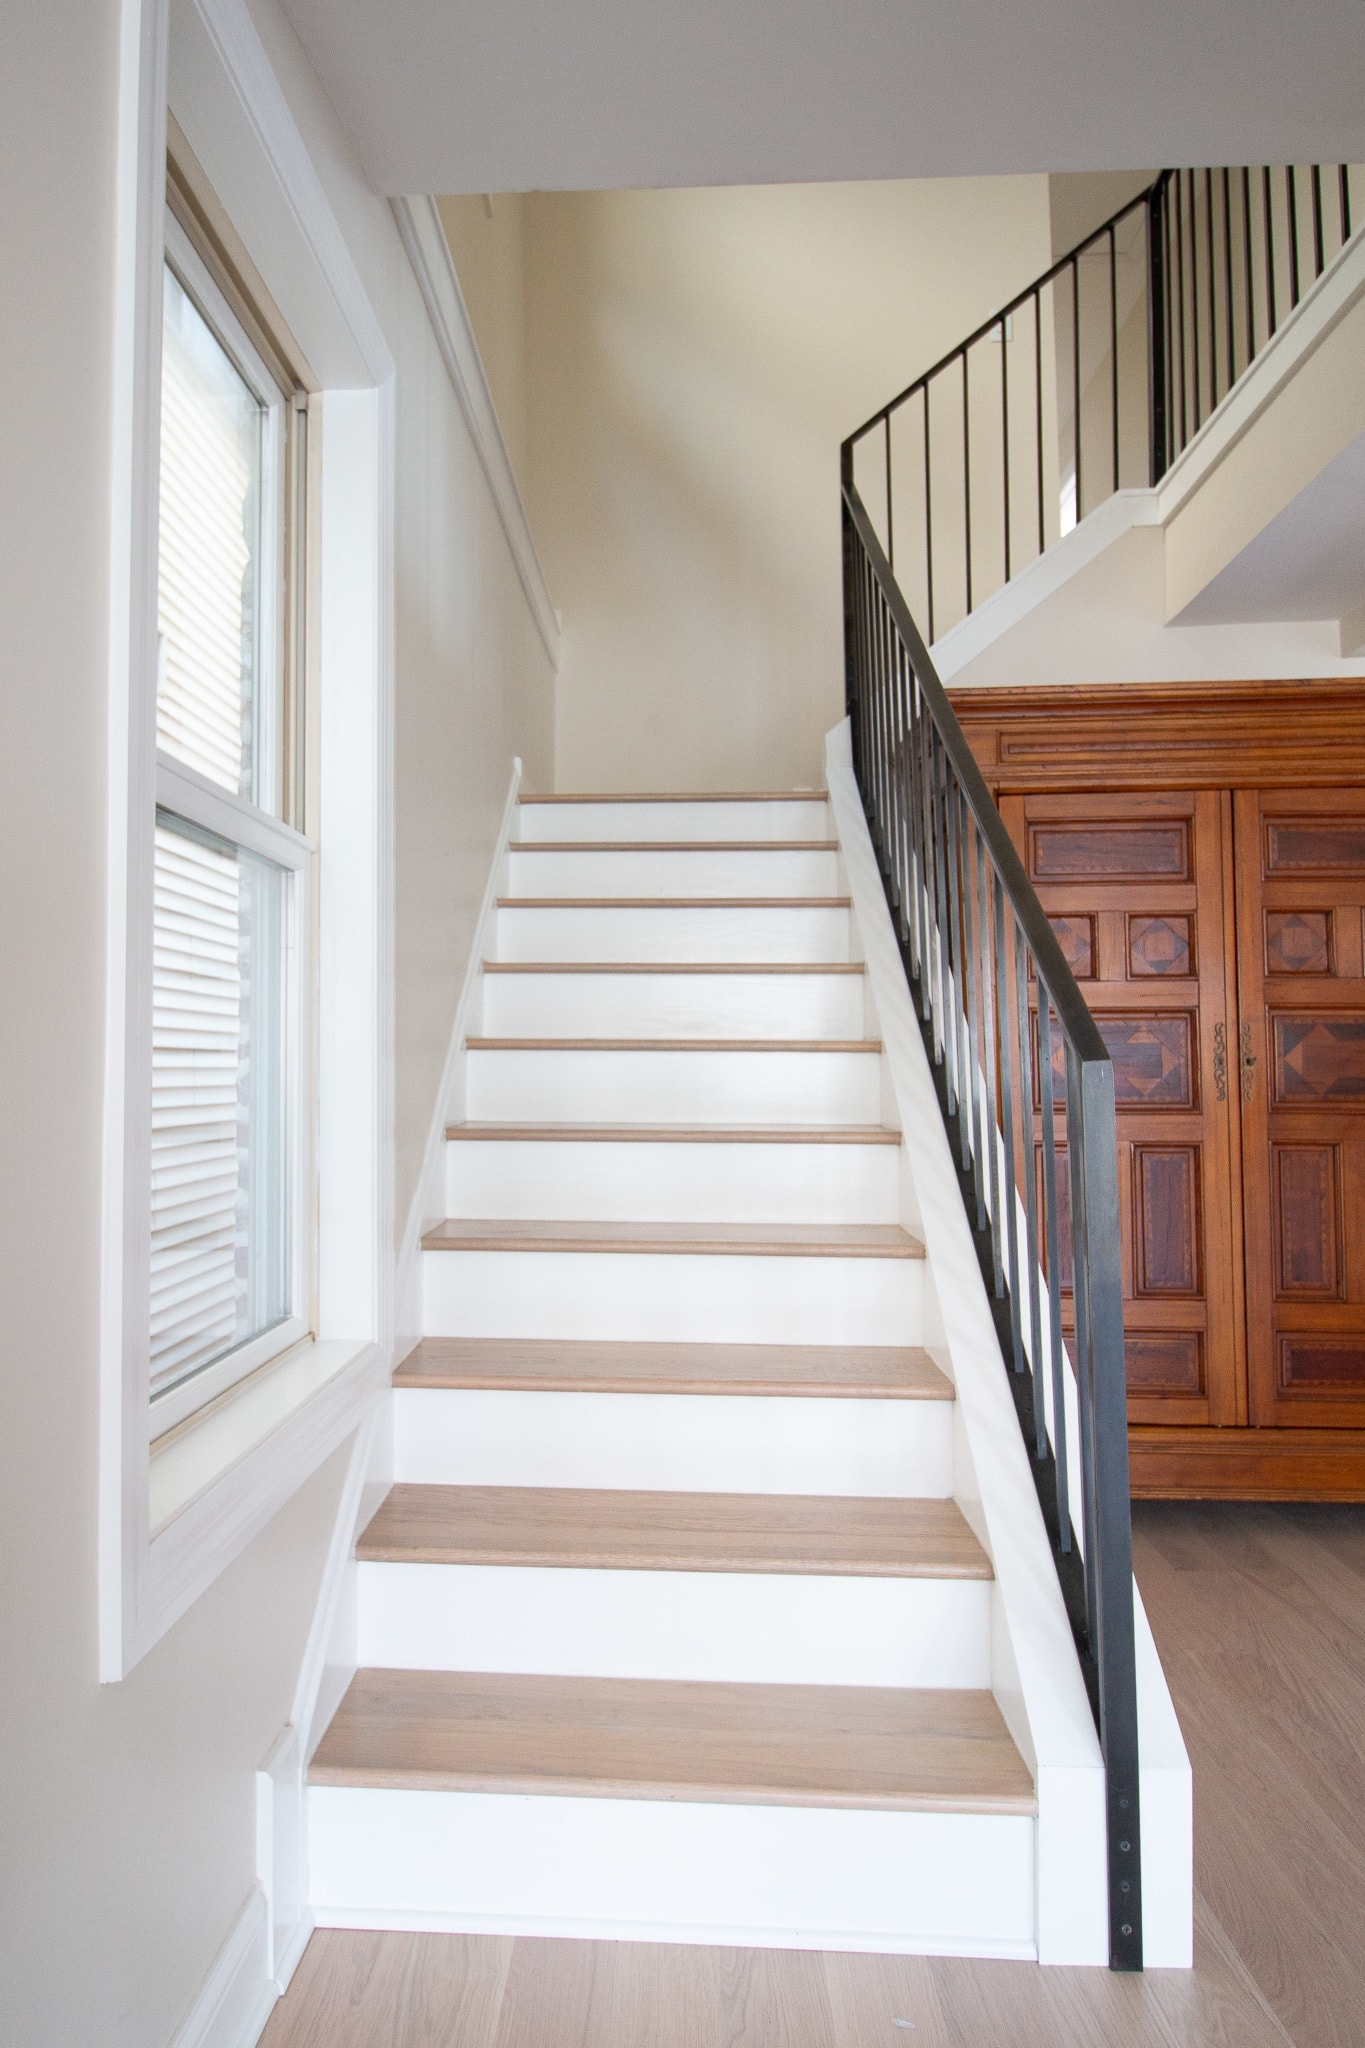
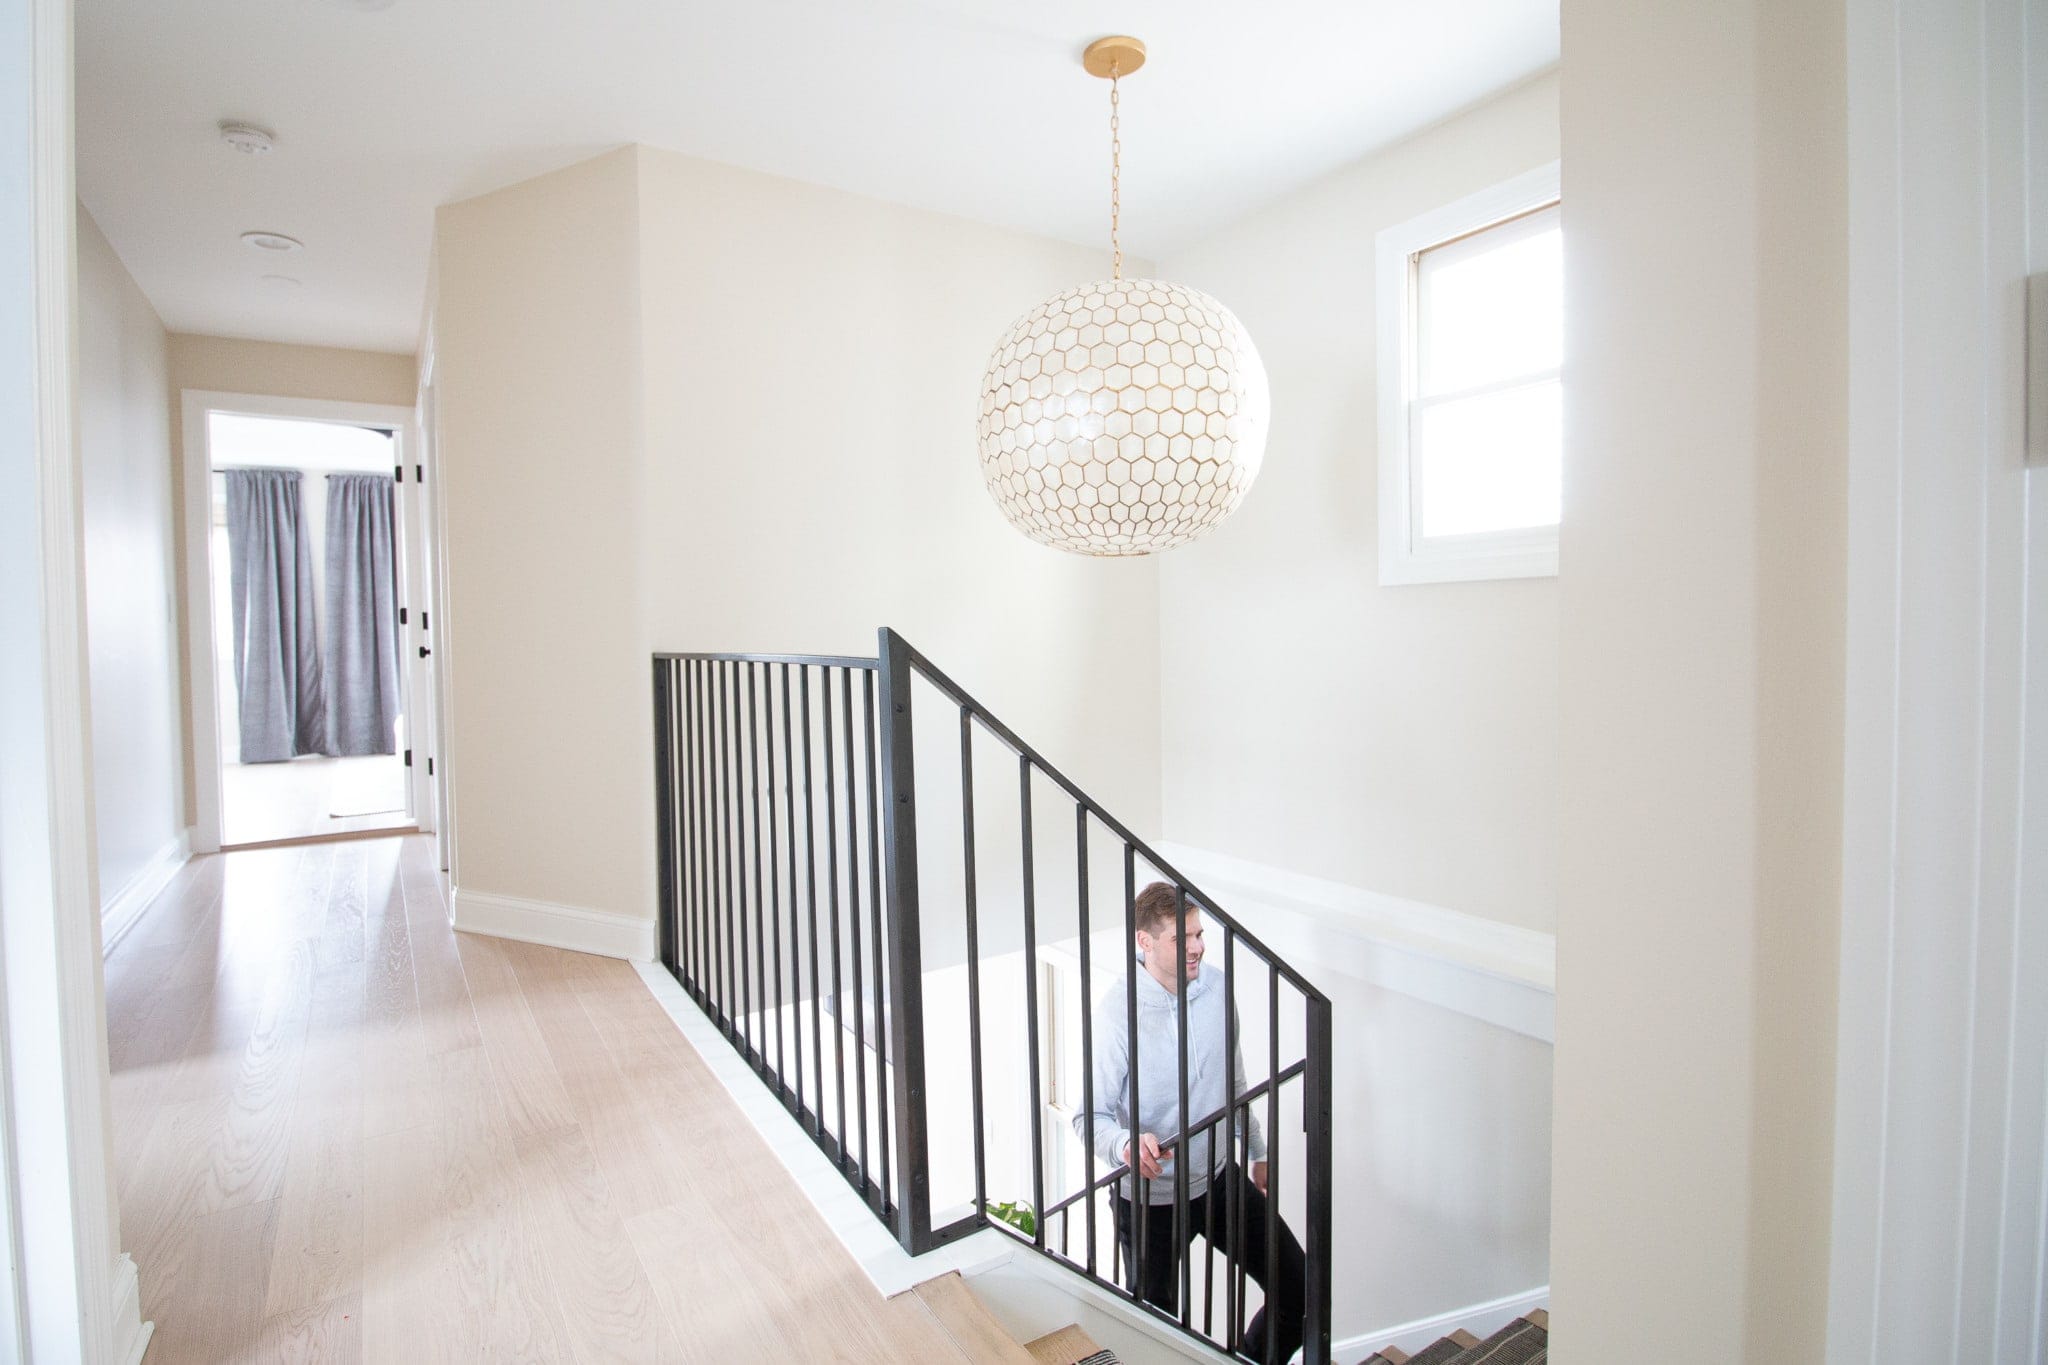
We decided to rip out the desk and that entire wall to open up the space. Then, with new floors, fresh trim, and a metal railing, it felt completely different.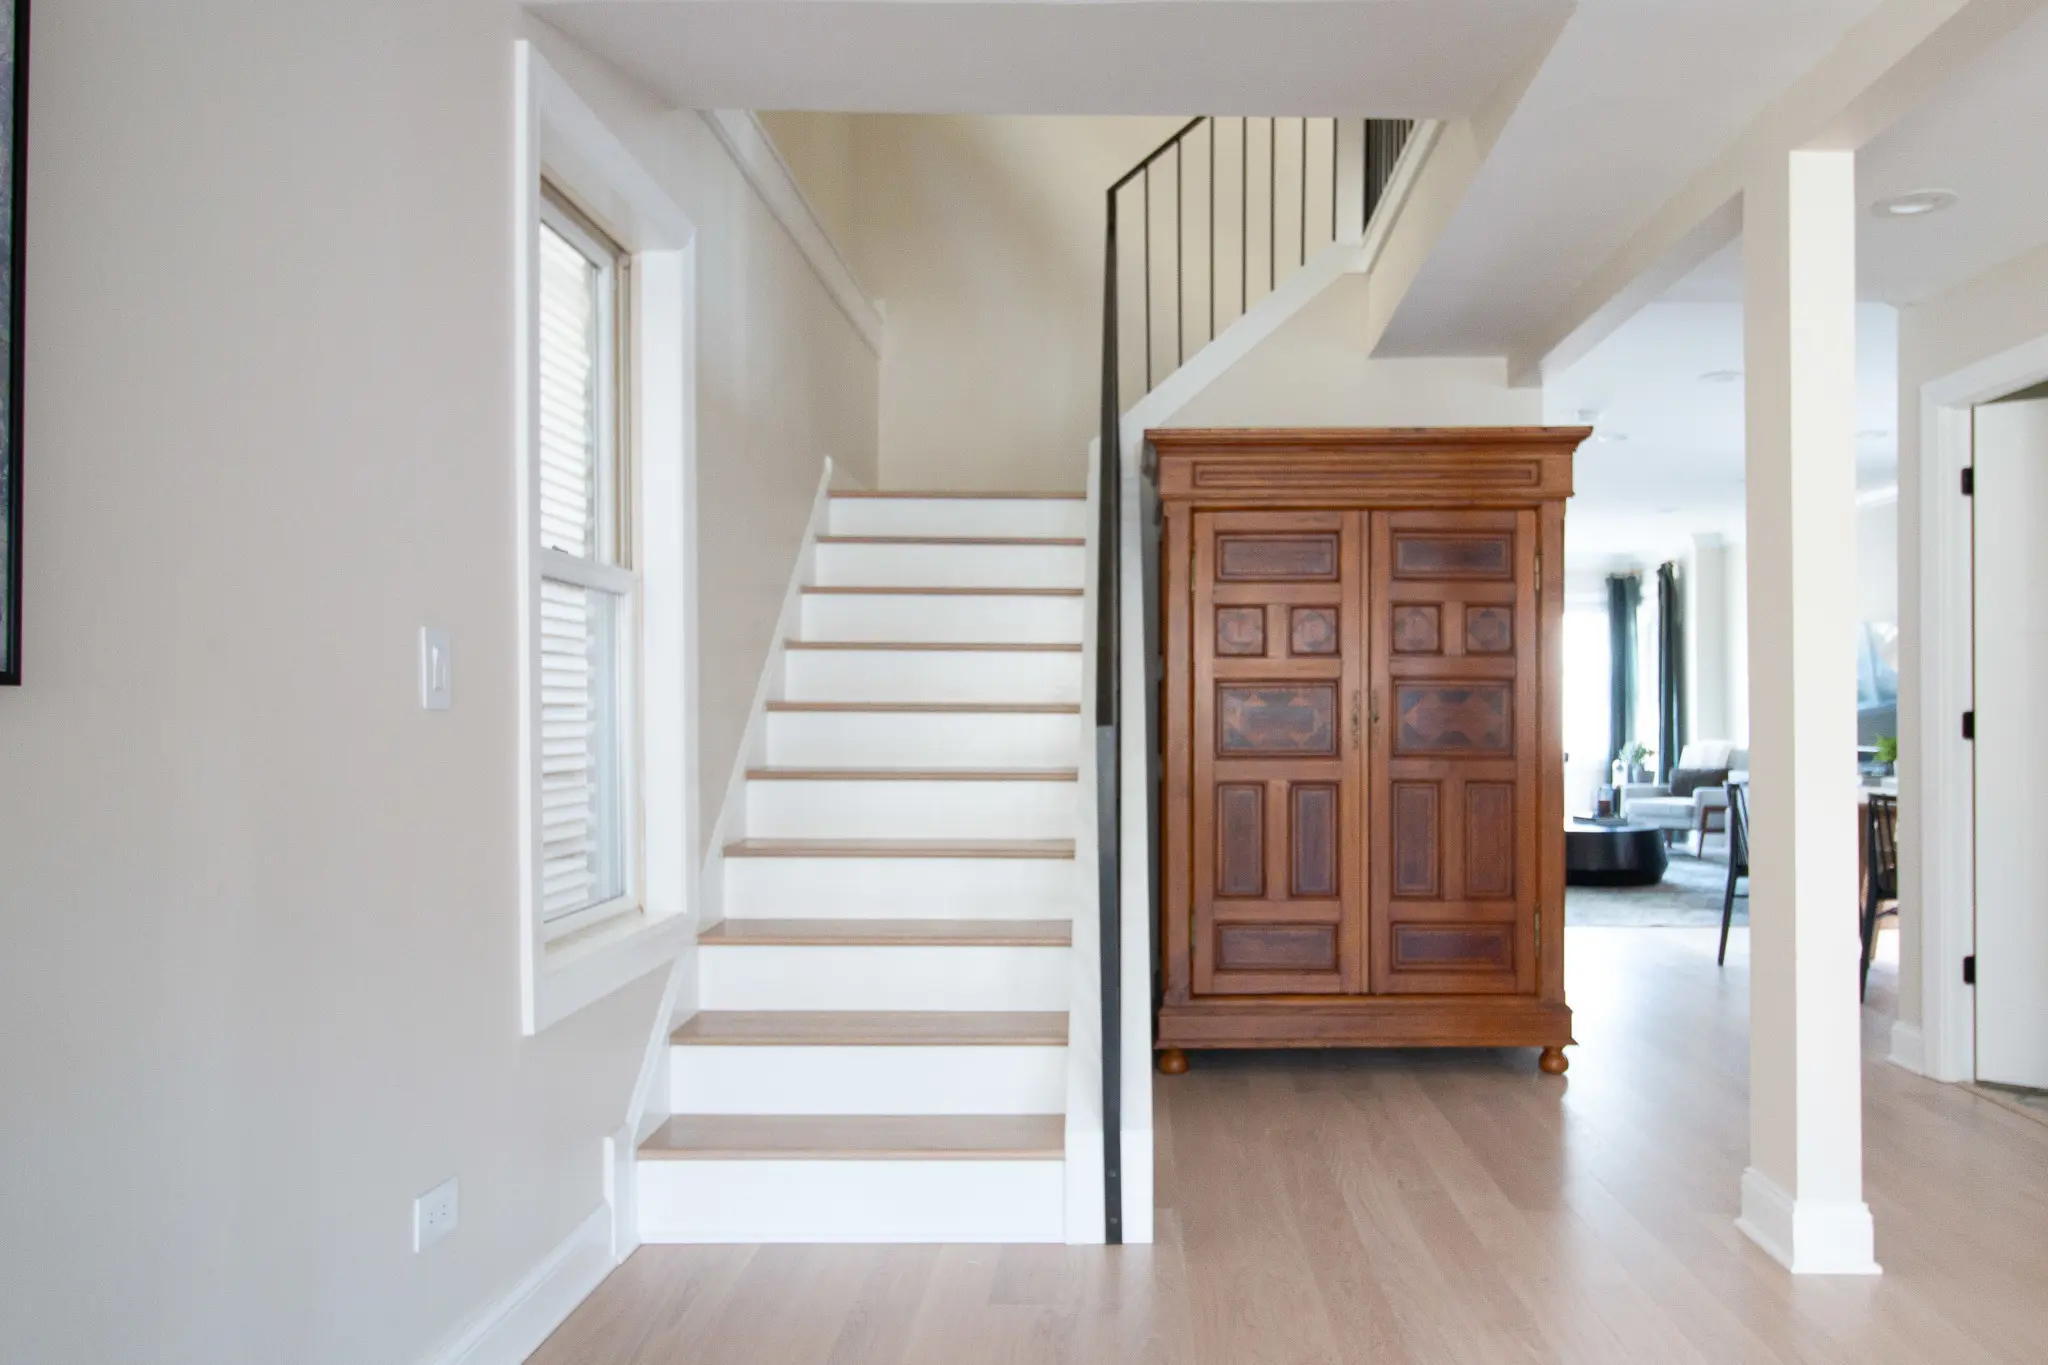
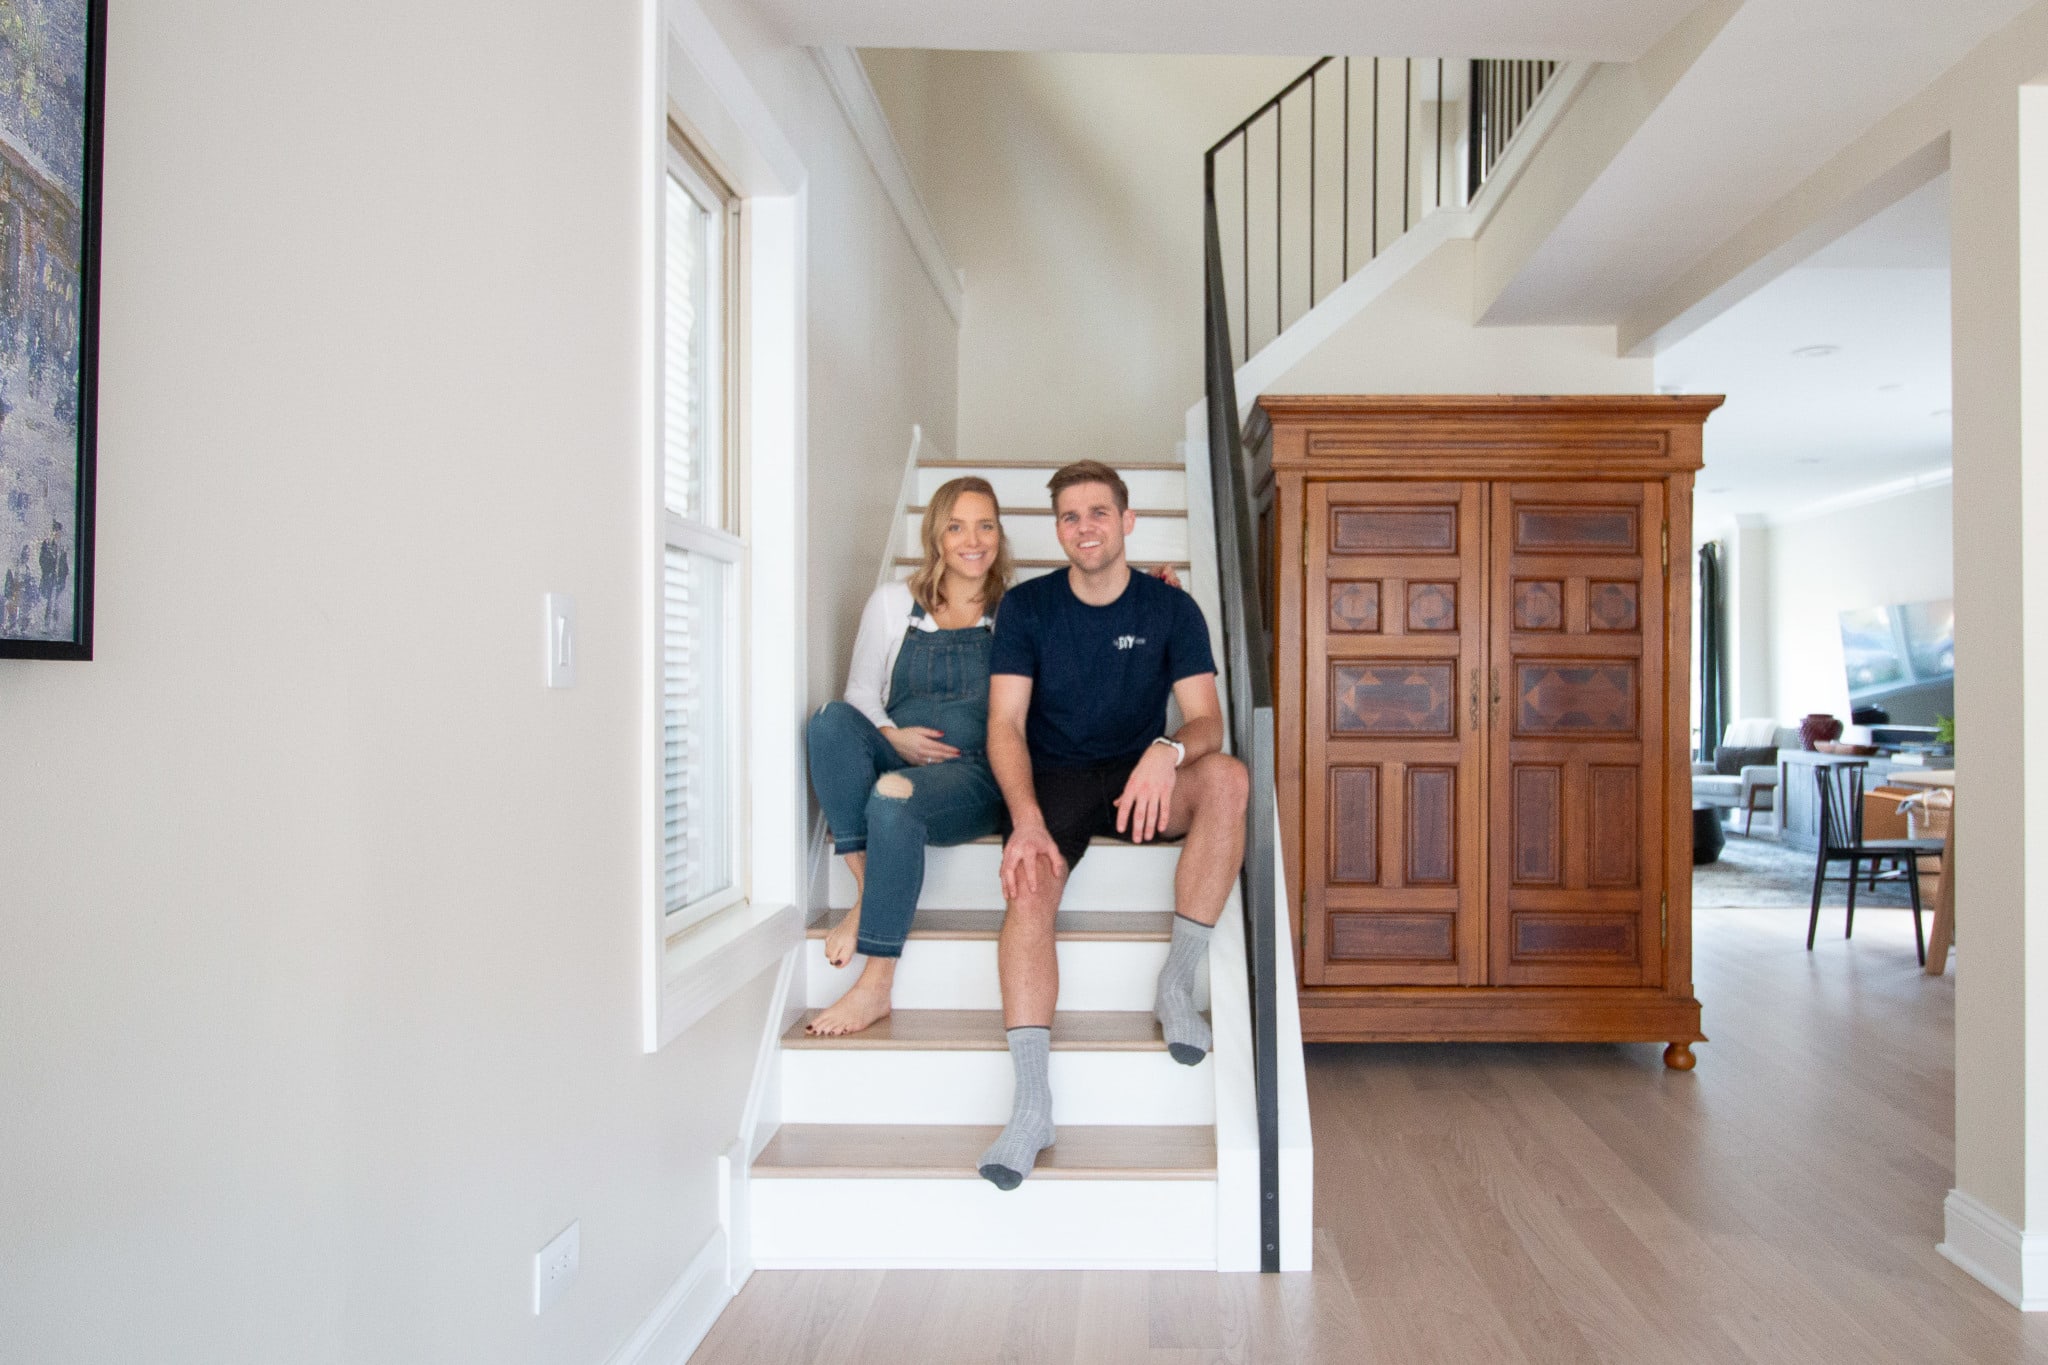
And this is how our staircase looked for the last four months – pretty, and updated, but still a tiny bit bare. I had always planned to tackle a DIY stair runner here (especially before the baby’s arrival), but it wasn’t on my immediate calendar – until Finn fell down the stairs! Don’t worry, he was a-okay, but he went all the way from the top of the stairs and fell to the landing with his work bag, air pods, and everything flying askew.
Luckily, I was home, heard the big thud, and helped the poor guy up. He had a bruise on his butt for a week!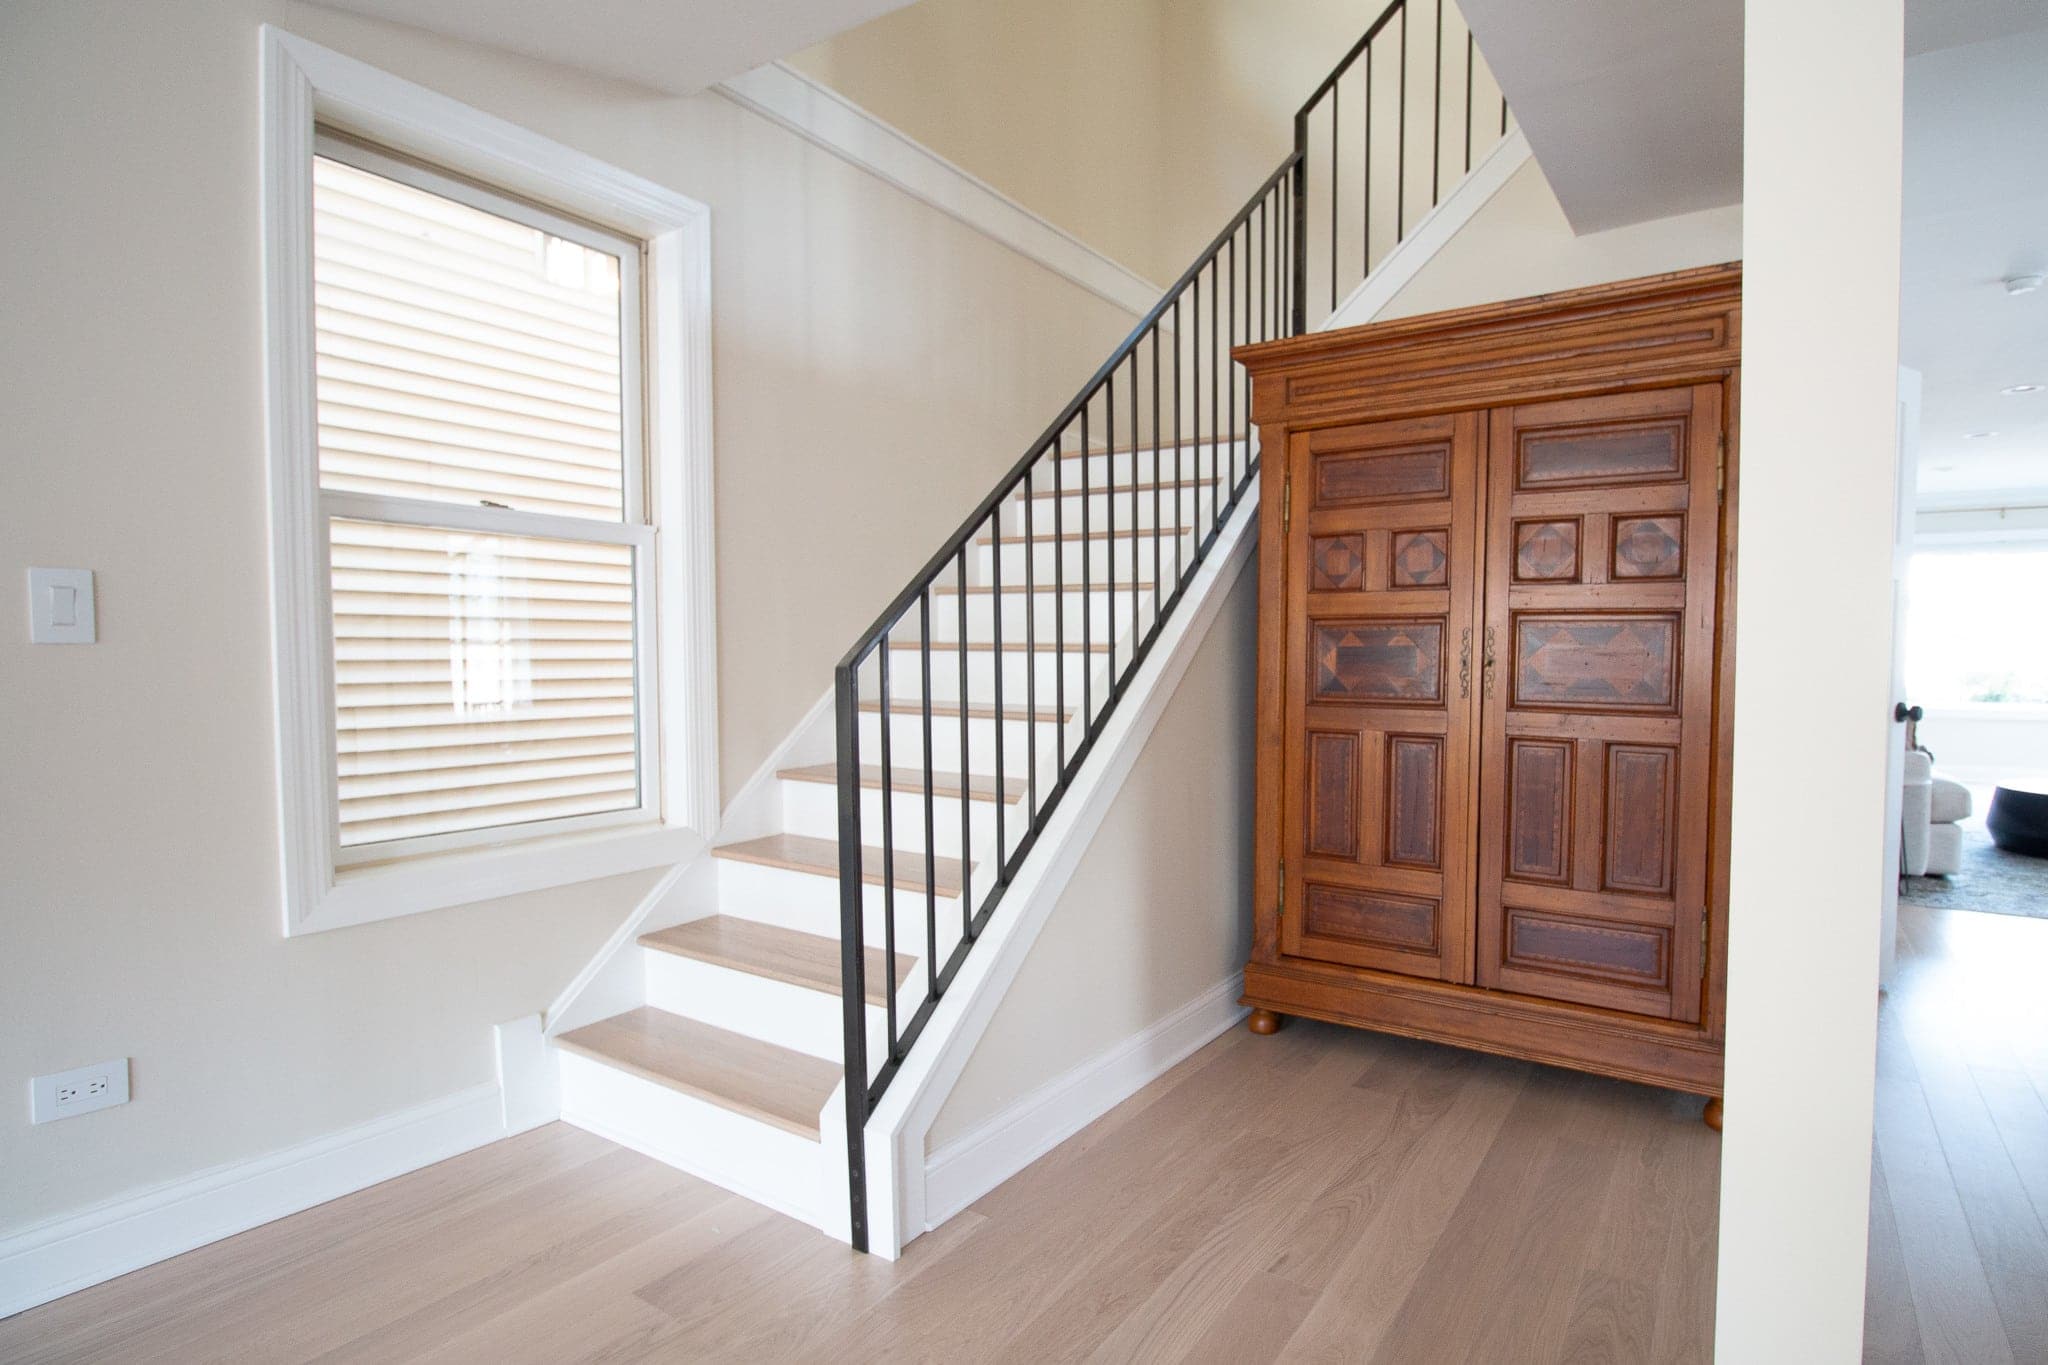
After his fall, I added “stair runner installation” to the top of our priority list. That day I went and ordered rug samples so we could get this project moving forward.
Choosing a Stair Runner
I had heard good things about rugs from Annie Selke, so I started there. My main goal was to choose a type of rug that was durable and would hide dirt well. We’re constantly going up and down these stairs and the last thing I wanted was to install a rug that would look dingy within a week.
I ended up mainly focusing on indoor/ outdoor rug options. Here are the ones I ordered…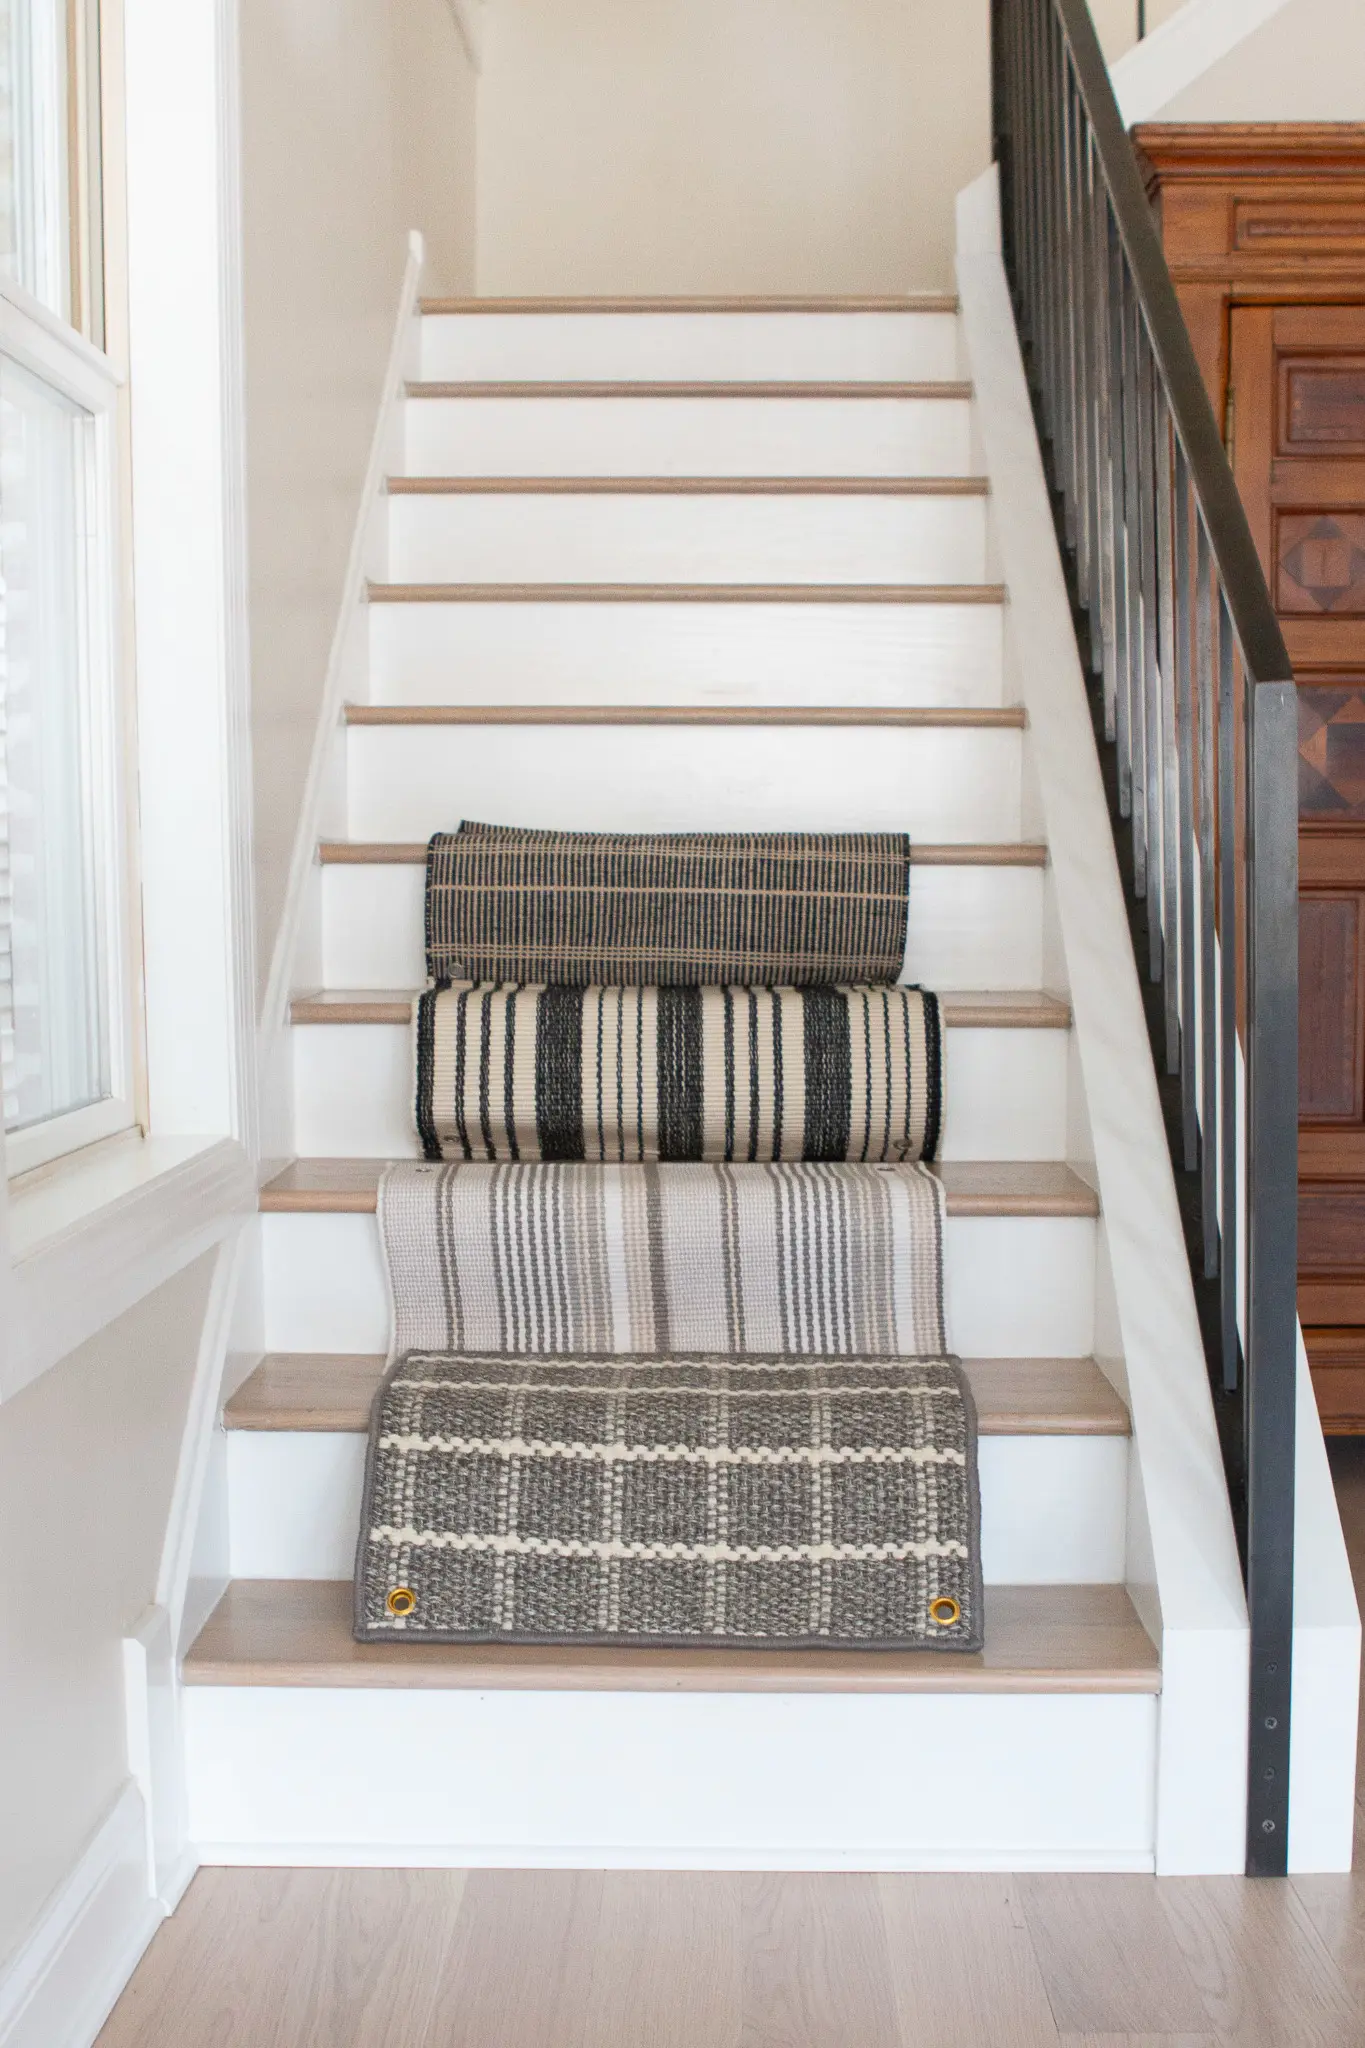
(From Top to Bottom): Black & White // Striped // Cream // Gray
Immediately, I knew that the cream sample was out. I didn’t realize it when I ordered but it’s a cotton fabric, not the indoor/outdoor fabric I thought it was. Cotton won’t hold up very well in the long-run, nor will that light color. So, immediately that was out of the running.
While I liked the gray, it was just a tad too “preppy” for our home style. I then narrowed in on the two black ones. I liked the one with the big stripes the best, but a few people on Instagram cautioned me from using it because they have it in their home and the white parts look dirty all the time.

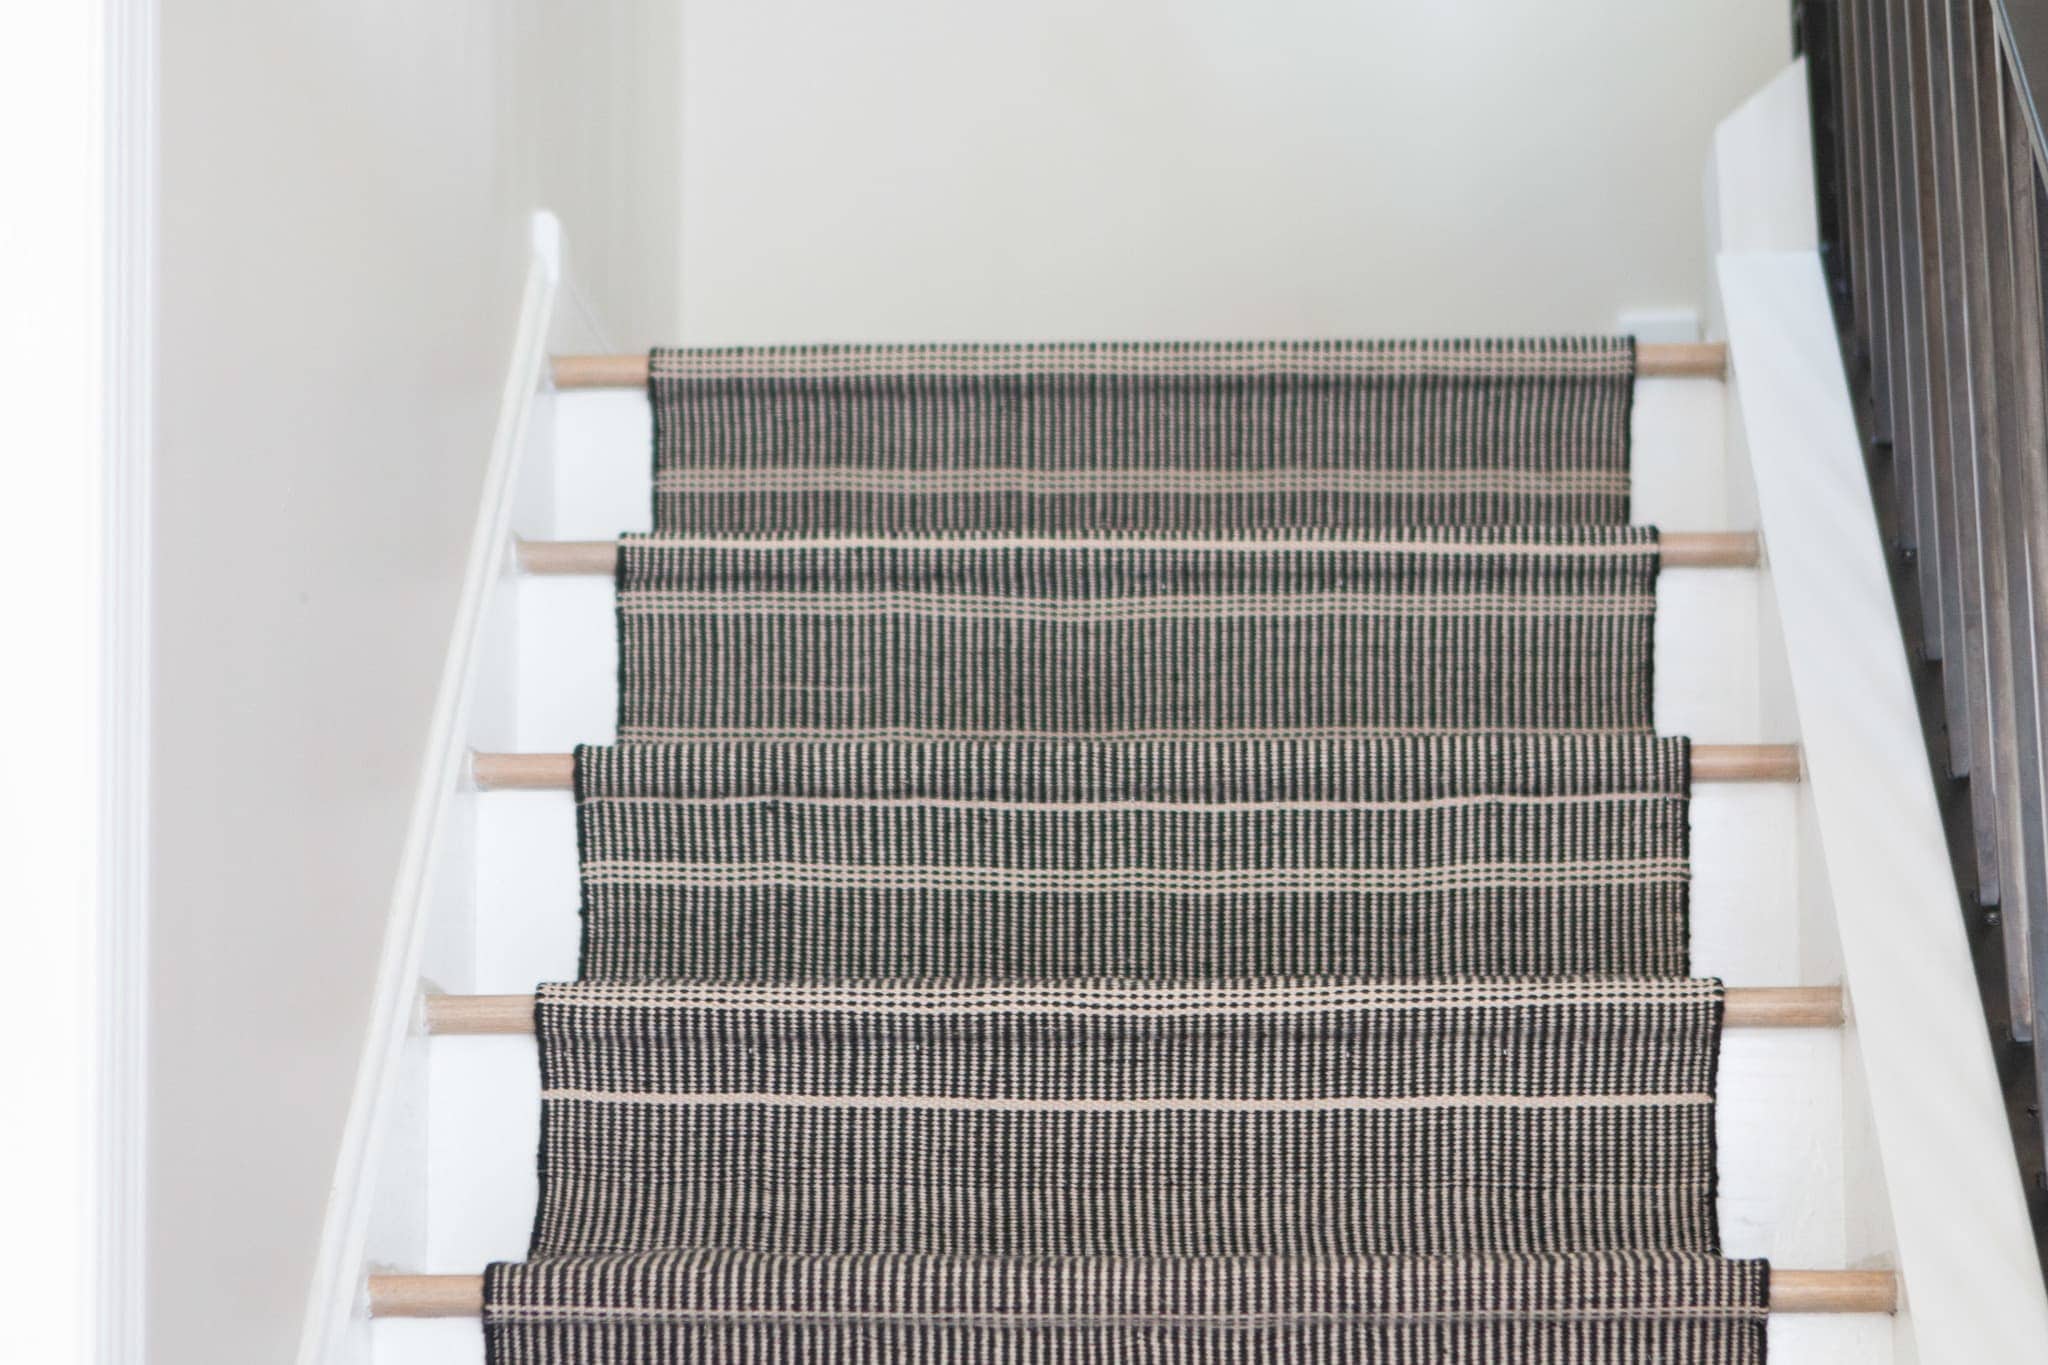
In the end, this fabric was the winner and I ended up finding it on Wayfair for less than Annie Selke!
The only thing I was nervous about was the horizontal stripe along the runner. When installing, it can be tough (almost impossible) to keep that line perfectly straight the entire time. This made me pause, but when I saw it installed on this fellow blogger’s staircase (and saw how pretty and organic it looked), I decided to take the plunge!
Supplies to Install a Stair Runner

- Stair Runner
- Rug Pad
- Fabric Cutting Scissors
- Carpet Tape
- Carpet Adhesive
- Staple Gun & Air Compressor
- 3/4 inch Staples
- Carpet Tucker
- Seam Ripper
- Tape Measure
- Iron
You’ll first want to make sure that you order enough fabric for your runner. To calculate this, measure the depth of the stair tread (where you step), the height of the riser (the vertical part of the stair), and the depth of the nose (the curved part of the stair).
Adding all of these together and multiplying that sum by the number of stairs will give you the total length (in inches) that you need to buy for your carpet runner. 
Because we have a landing, we had to include that area as well. In the end, I ordered four stair runners which would give me some extra fabric to work with.
Best Tips to Install a Stair Runner
This was the first time Finn and I had ever tackled a project like this, so we did a lot of research ahead of time and watched a step-by-step tutorial. Then we figured out our final supply list, and searched diligently for a good solution to add the stair runner to the landing (more on that soon).
We learned a lot along the way and I want to share my best tips to install a stair runner with you!
Do A Bit of Math
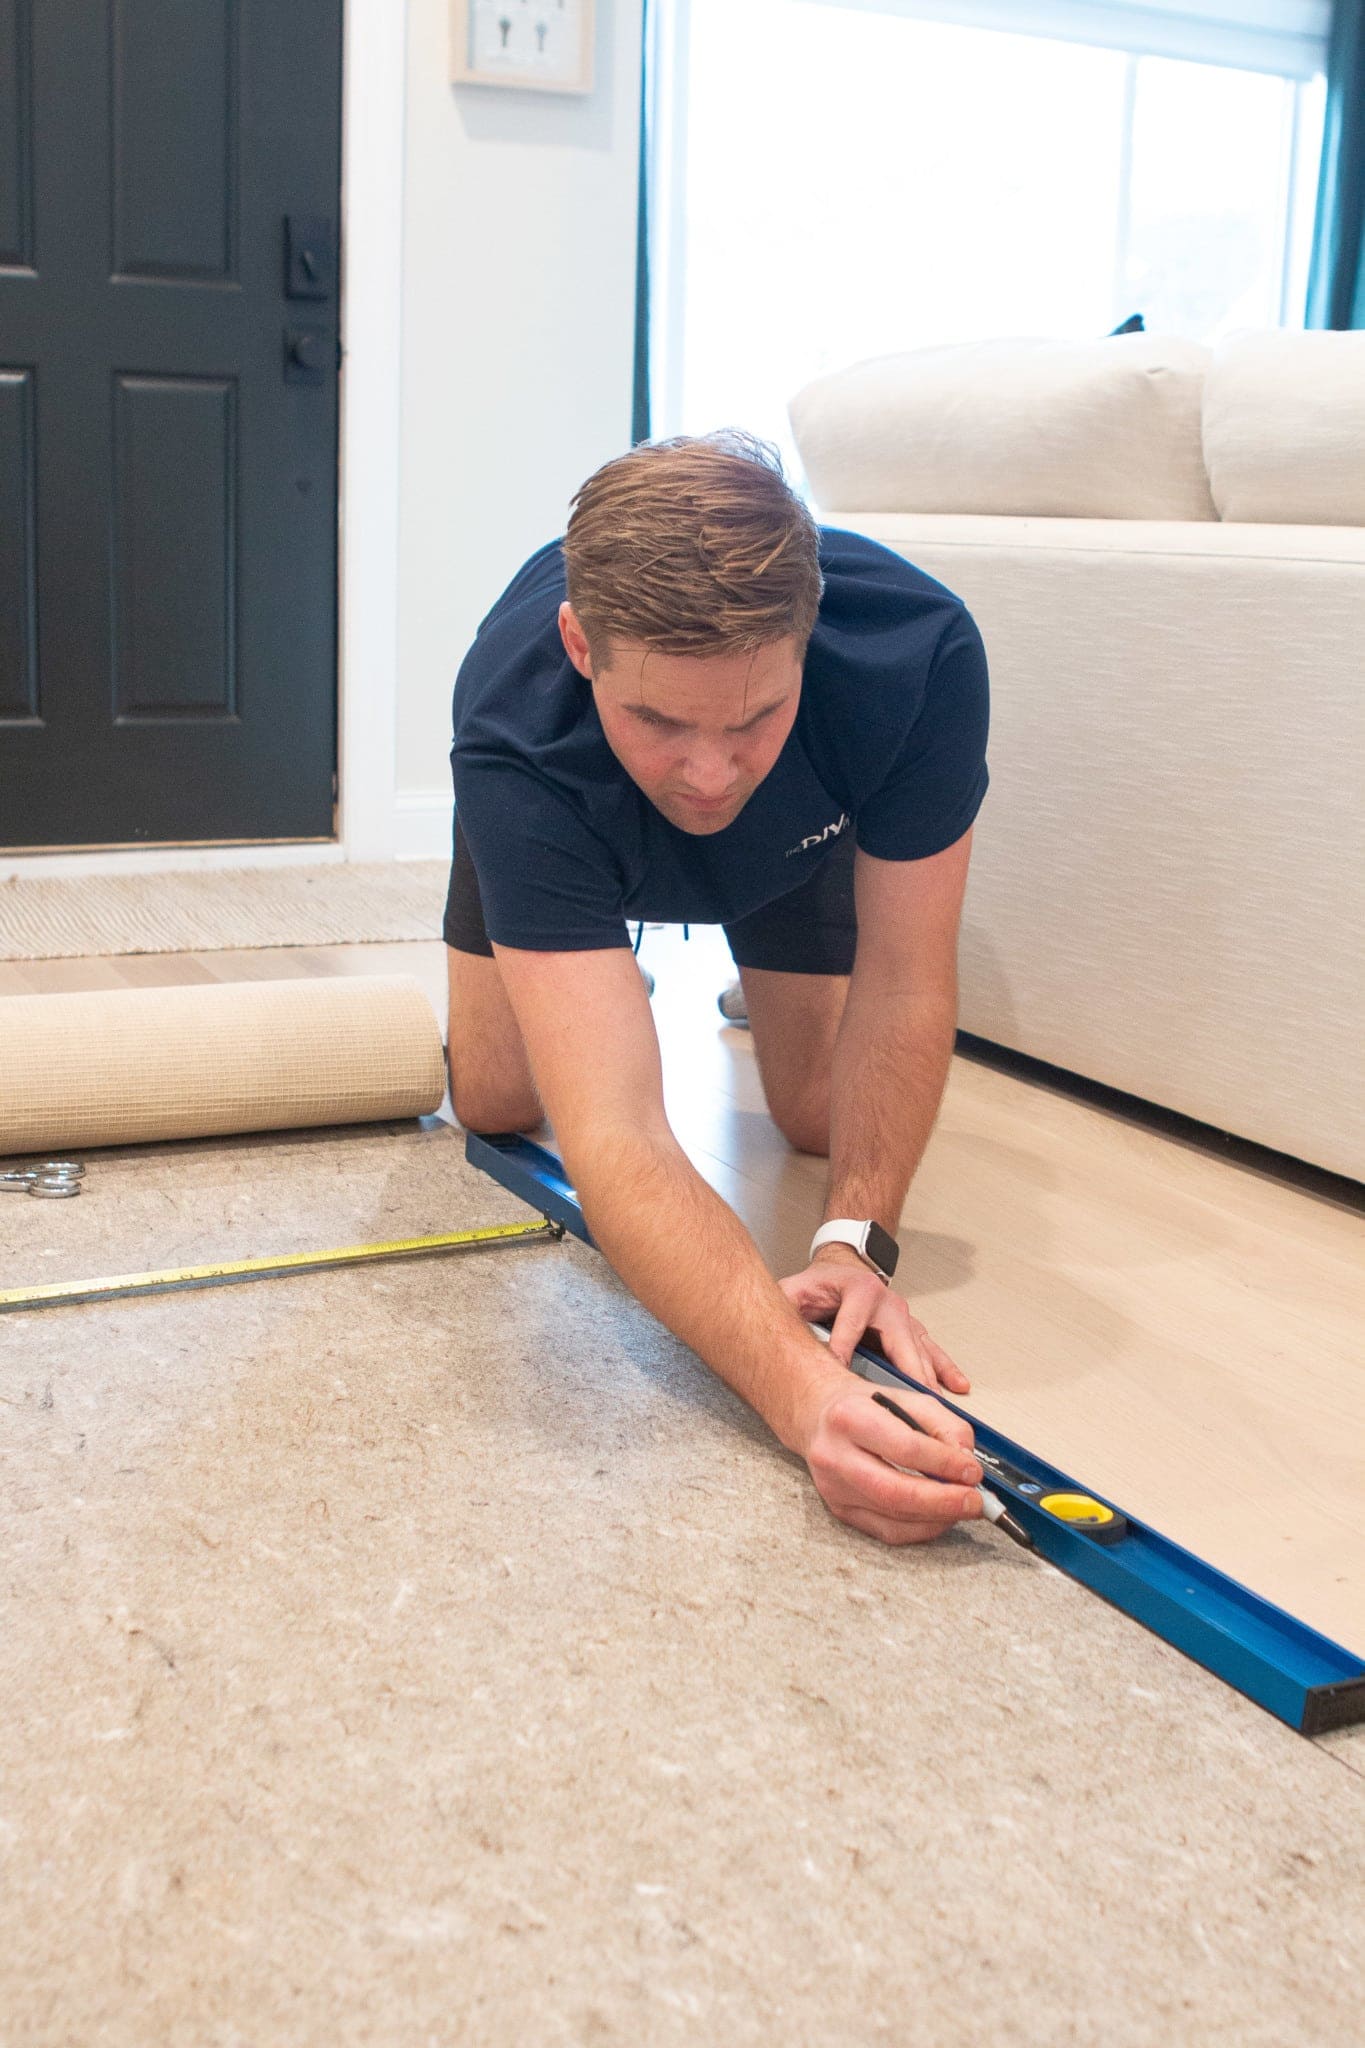
The first thing to do is to figure out the placement of the rug pad and runner. You’ll want each to be directly in the middle of the step.
We figured out the width of the runner as well as the stair tread, and determined that we would need three inches on each side of the runner when it was installed. For a clean look, we decided to bring the rug pad in about an inch in from the runner on each side, so that it wouldn’t peek out!
Cut Your Carpet Pad to Size
When I ordered the stair runner, I also ordered this carpet pad. Not only will the carpet pad make our runner a bit cushier for the little, bare feet that we’ll have running around someday, but it will also help keep the stair runner in place (a must!).
Through the many tutorials that I read, I learned that you don’t want to get a carpet pad that is too thick, or else it will look a little bumpy on the stairs. I ended up getting this one that is 1/8 inch thick. 
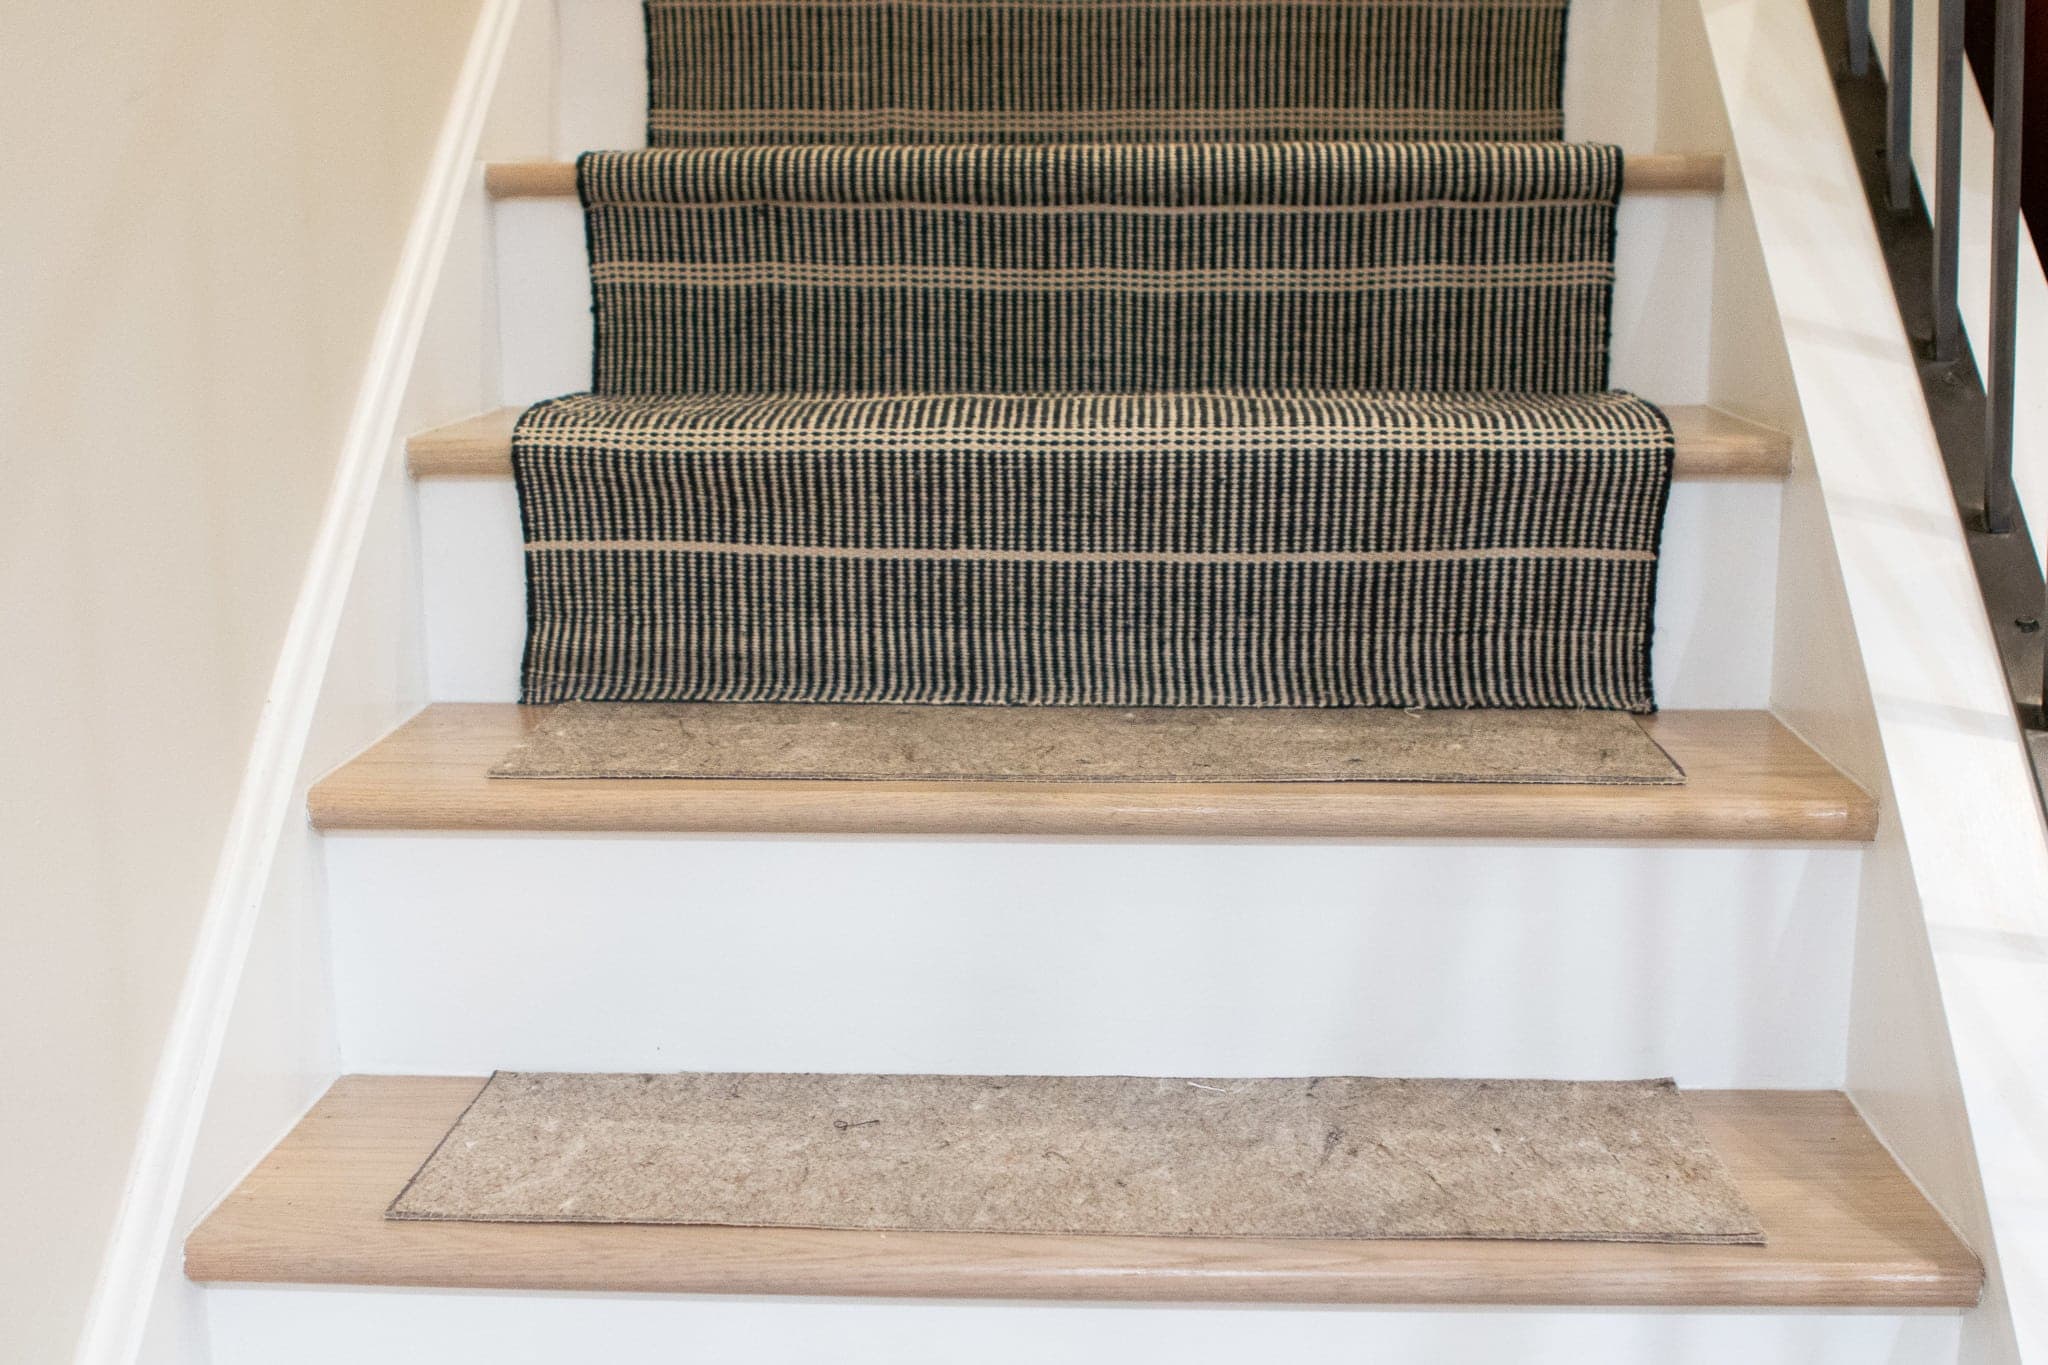
Our next step was to cut our rug pad to size, making strips for the top of each stair. 
I highly recommend picking up new fabric scissors for this project! You could probably use a utility knife, but it might not give you the same control and you definitely to get a clean cut line on the rug and pads.
Carpet Tape Works Wonderfully
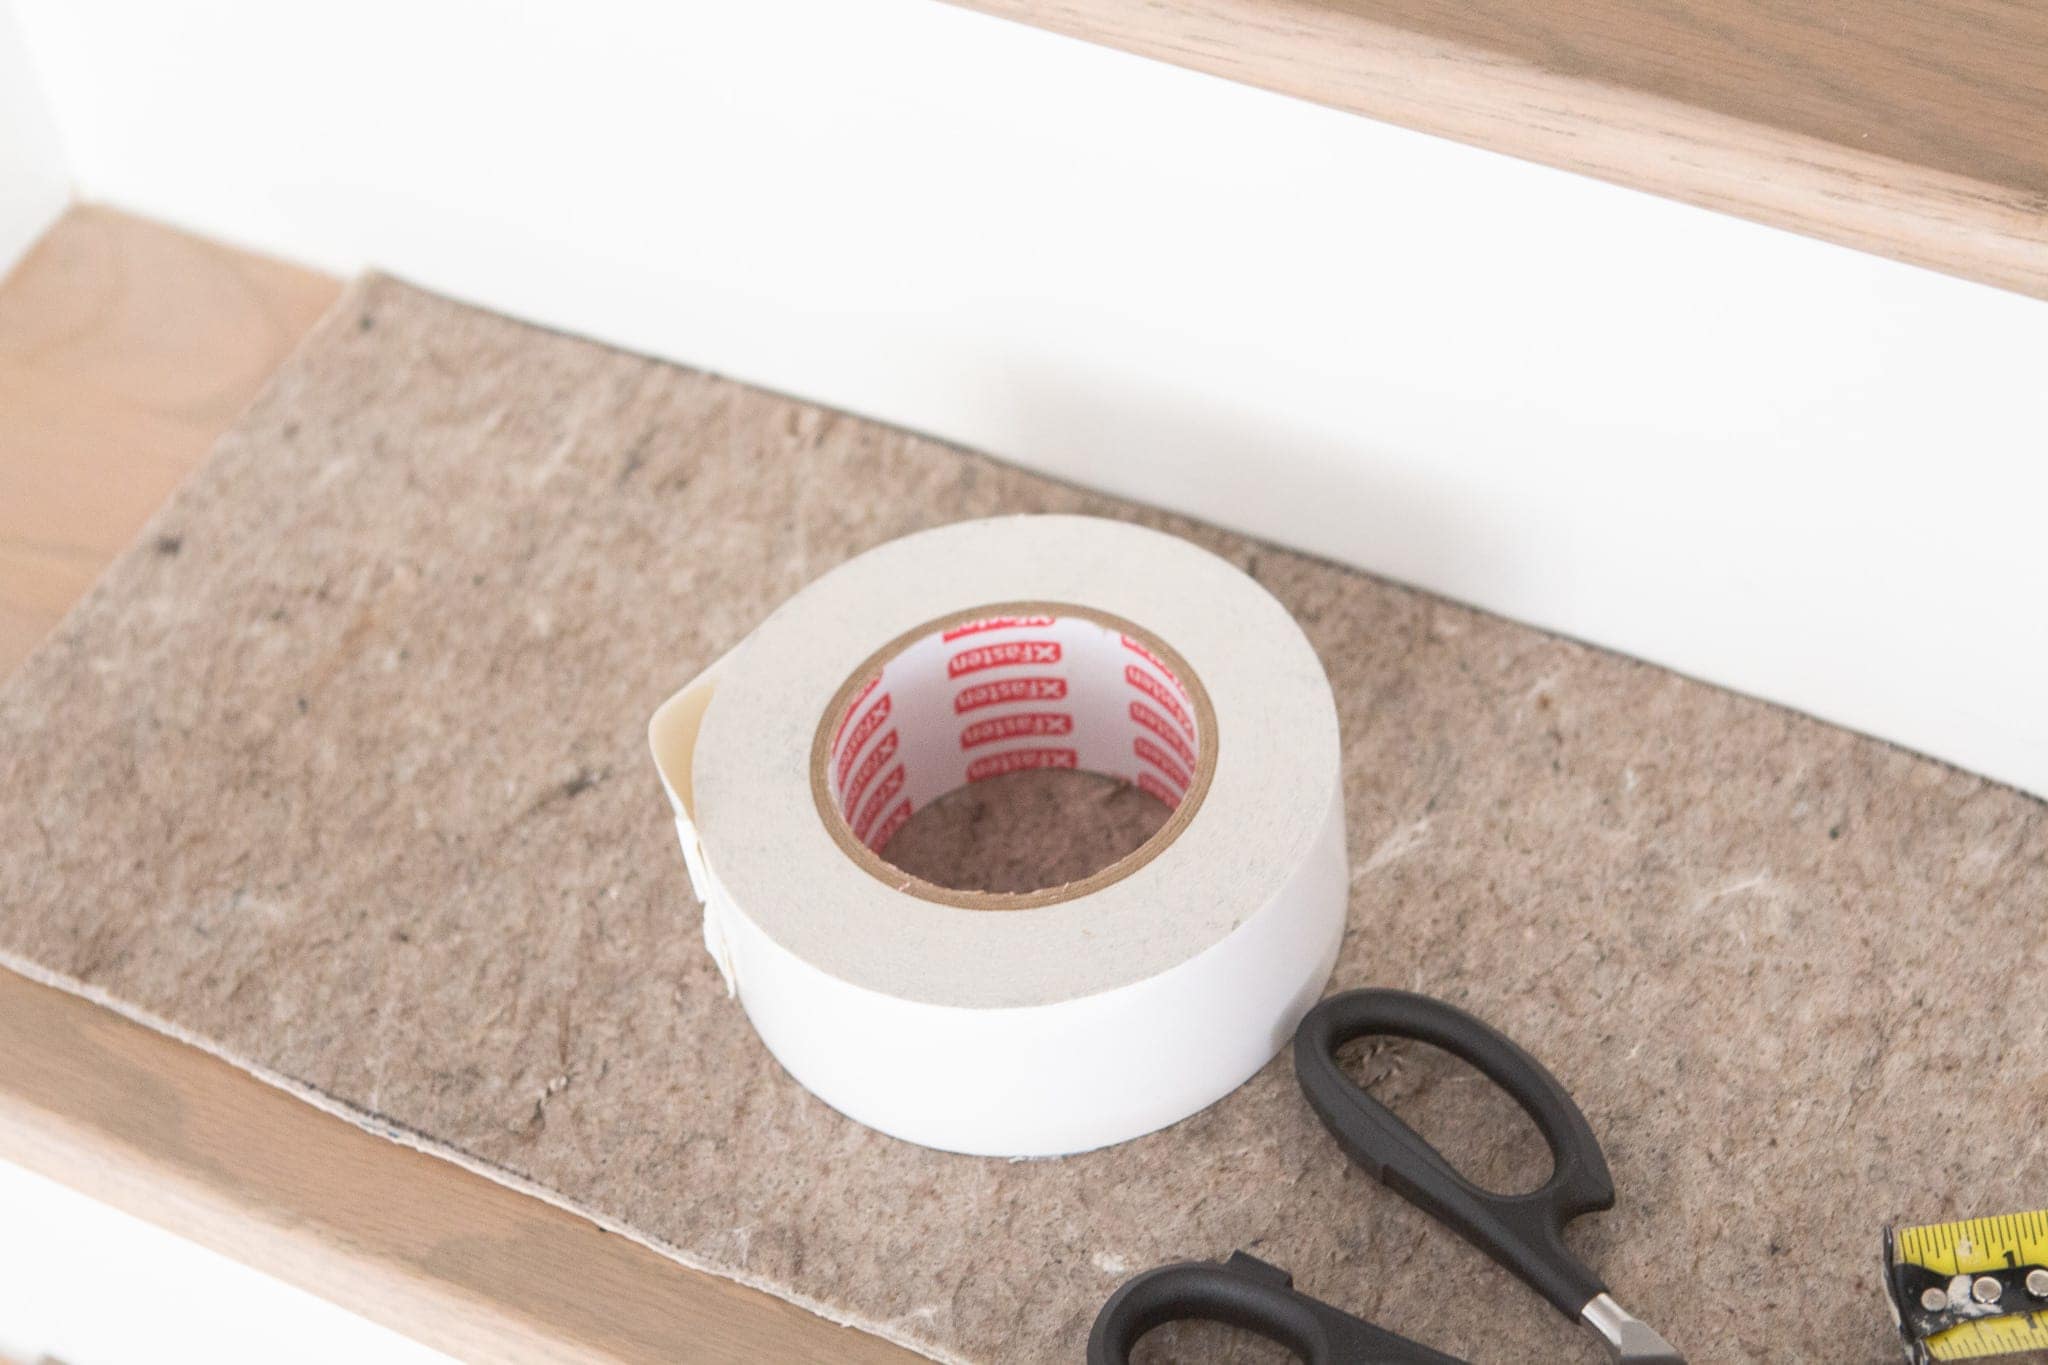
To attach each carpet pad to the stairs, I used carpet tape. Whoa, this stuff is sticky! At first, I tried to use scissors to cut it off the roll, but ripping it ended up working out way better! My scissors were just getting goo all over them, so it wasn’t a good idea. Do the rip instead! 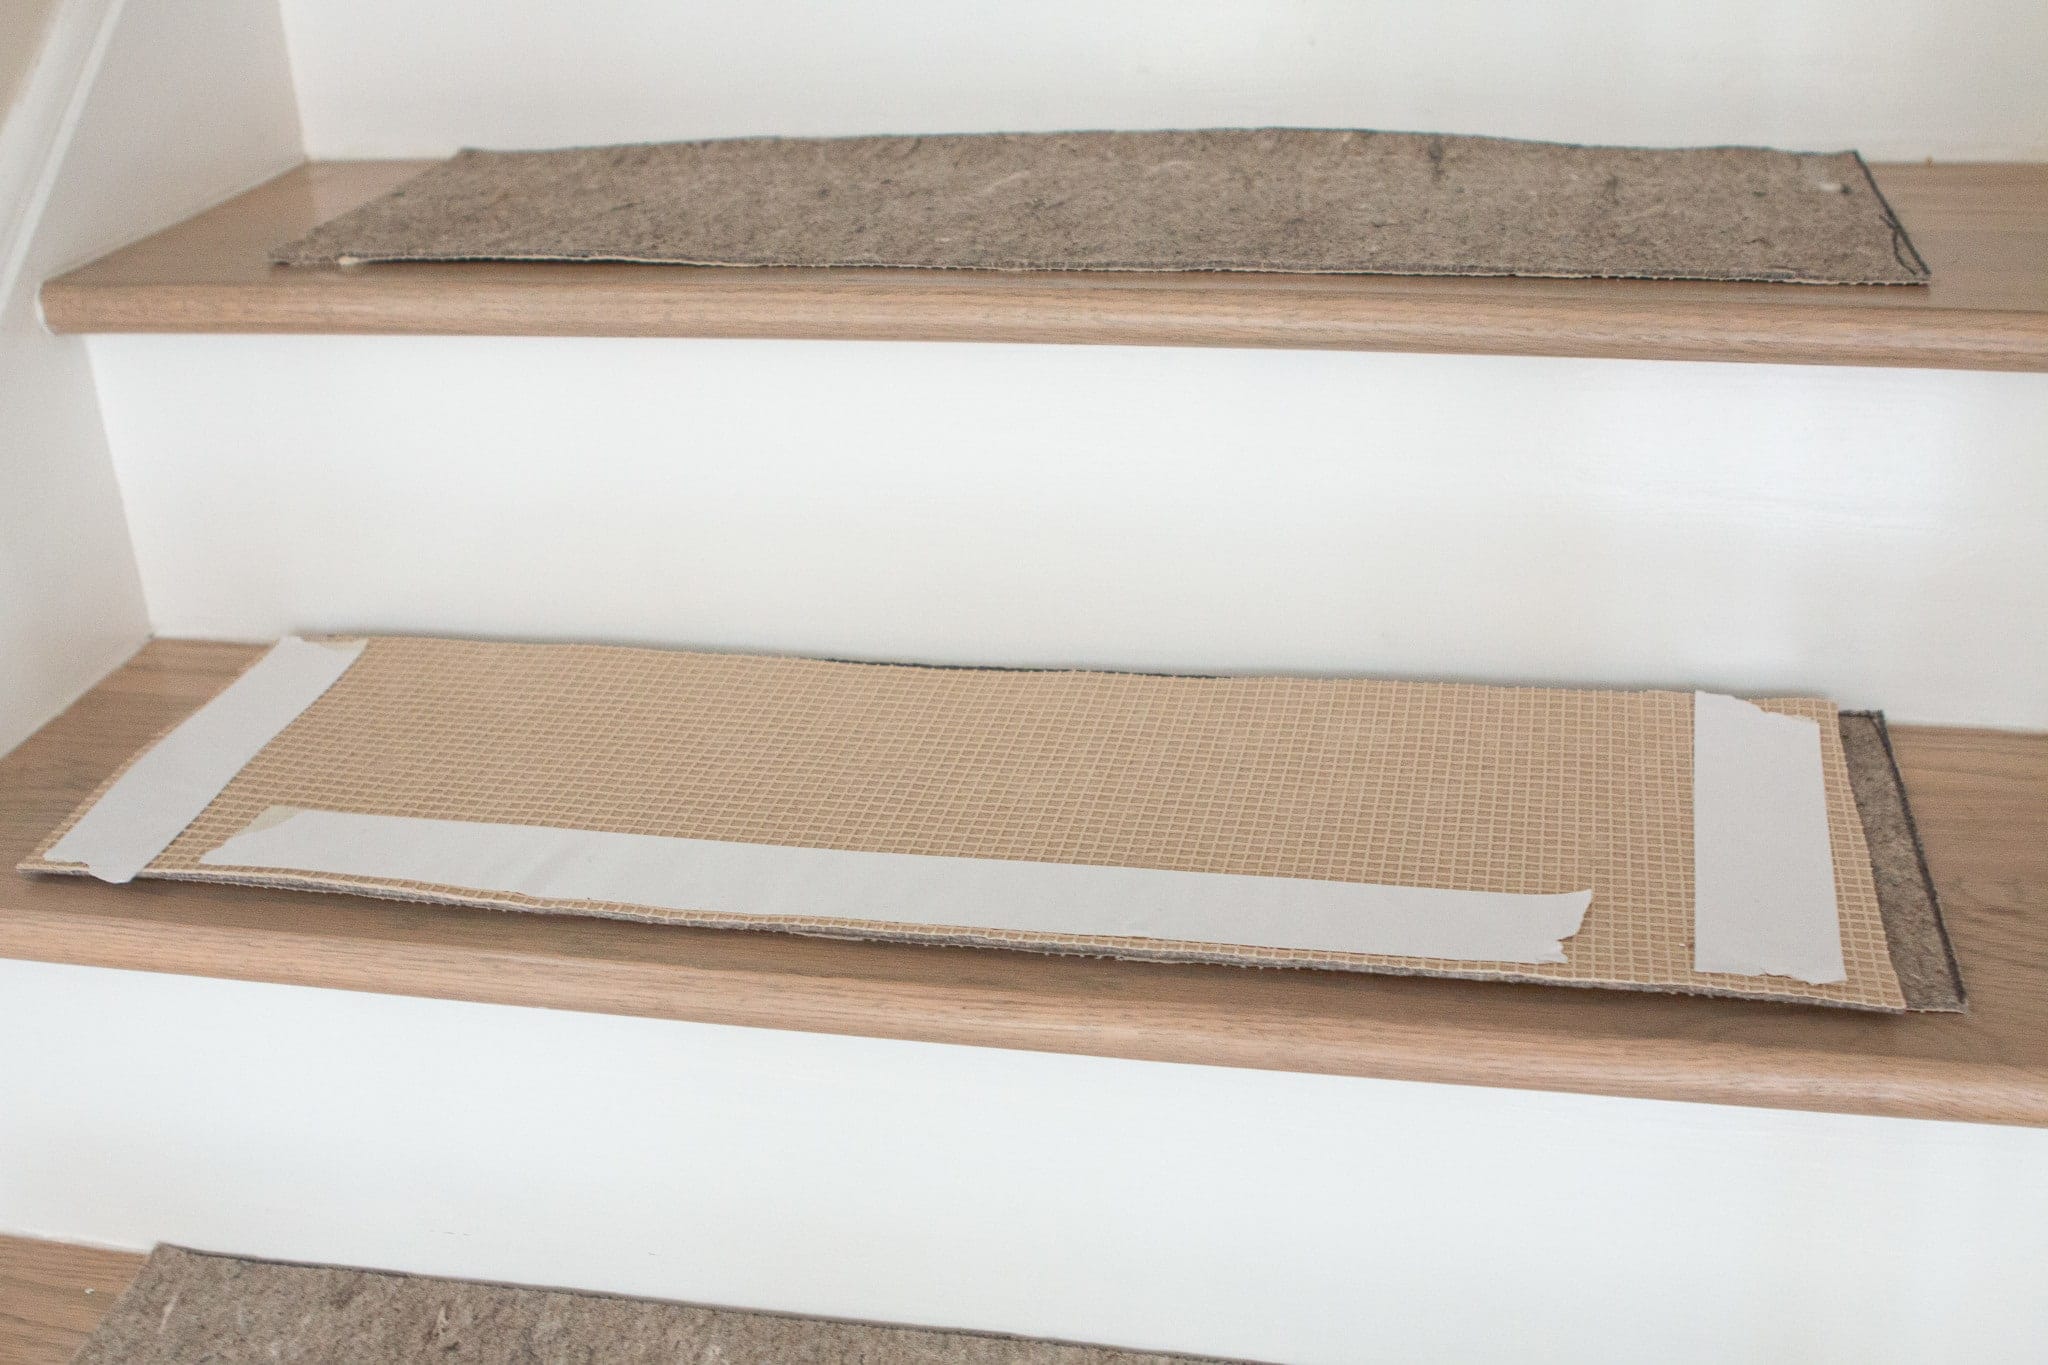
I placed the carpet tape on the sides and front of each carpet pad. We ended up pushing the rug pad to the back of the stair (touching the bottom of the stair riser), leaving about an inch at the front of each step. 
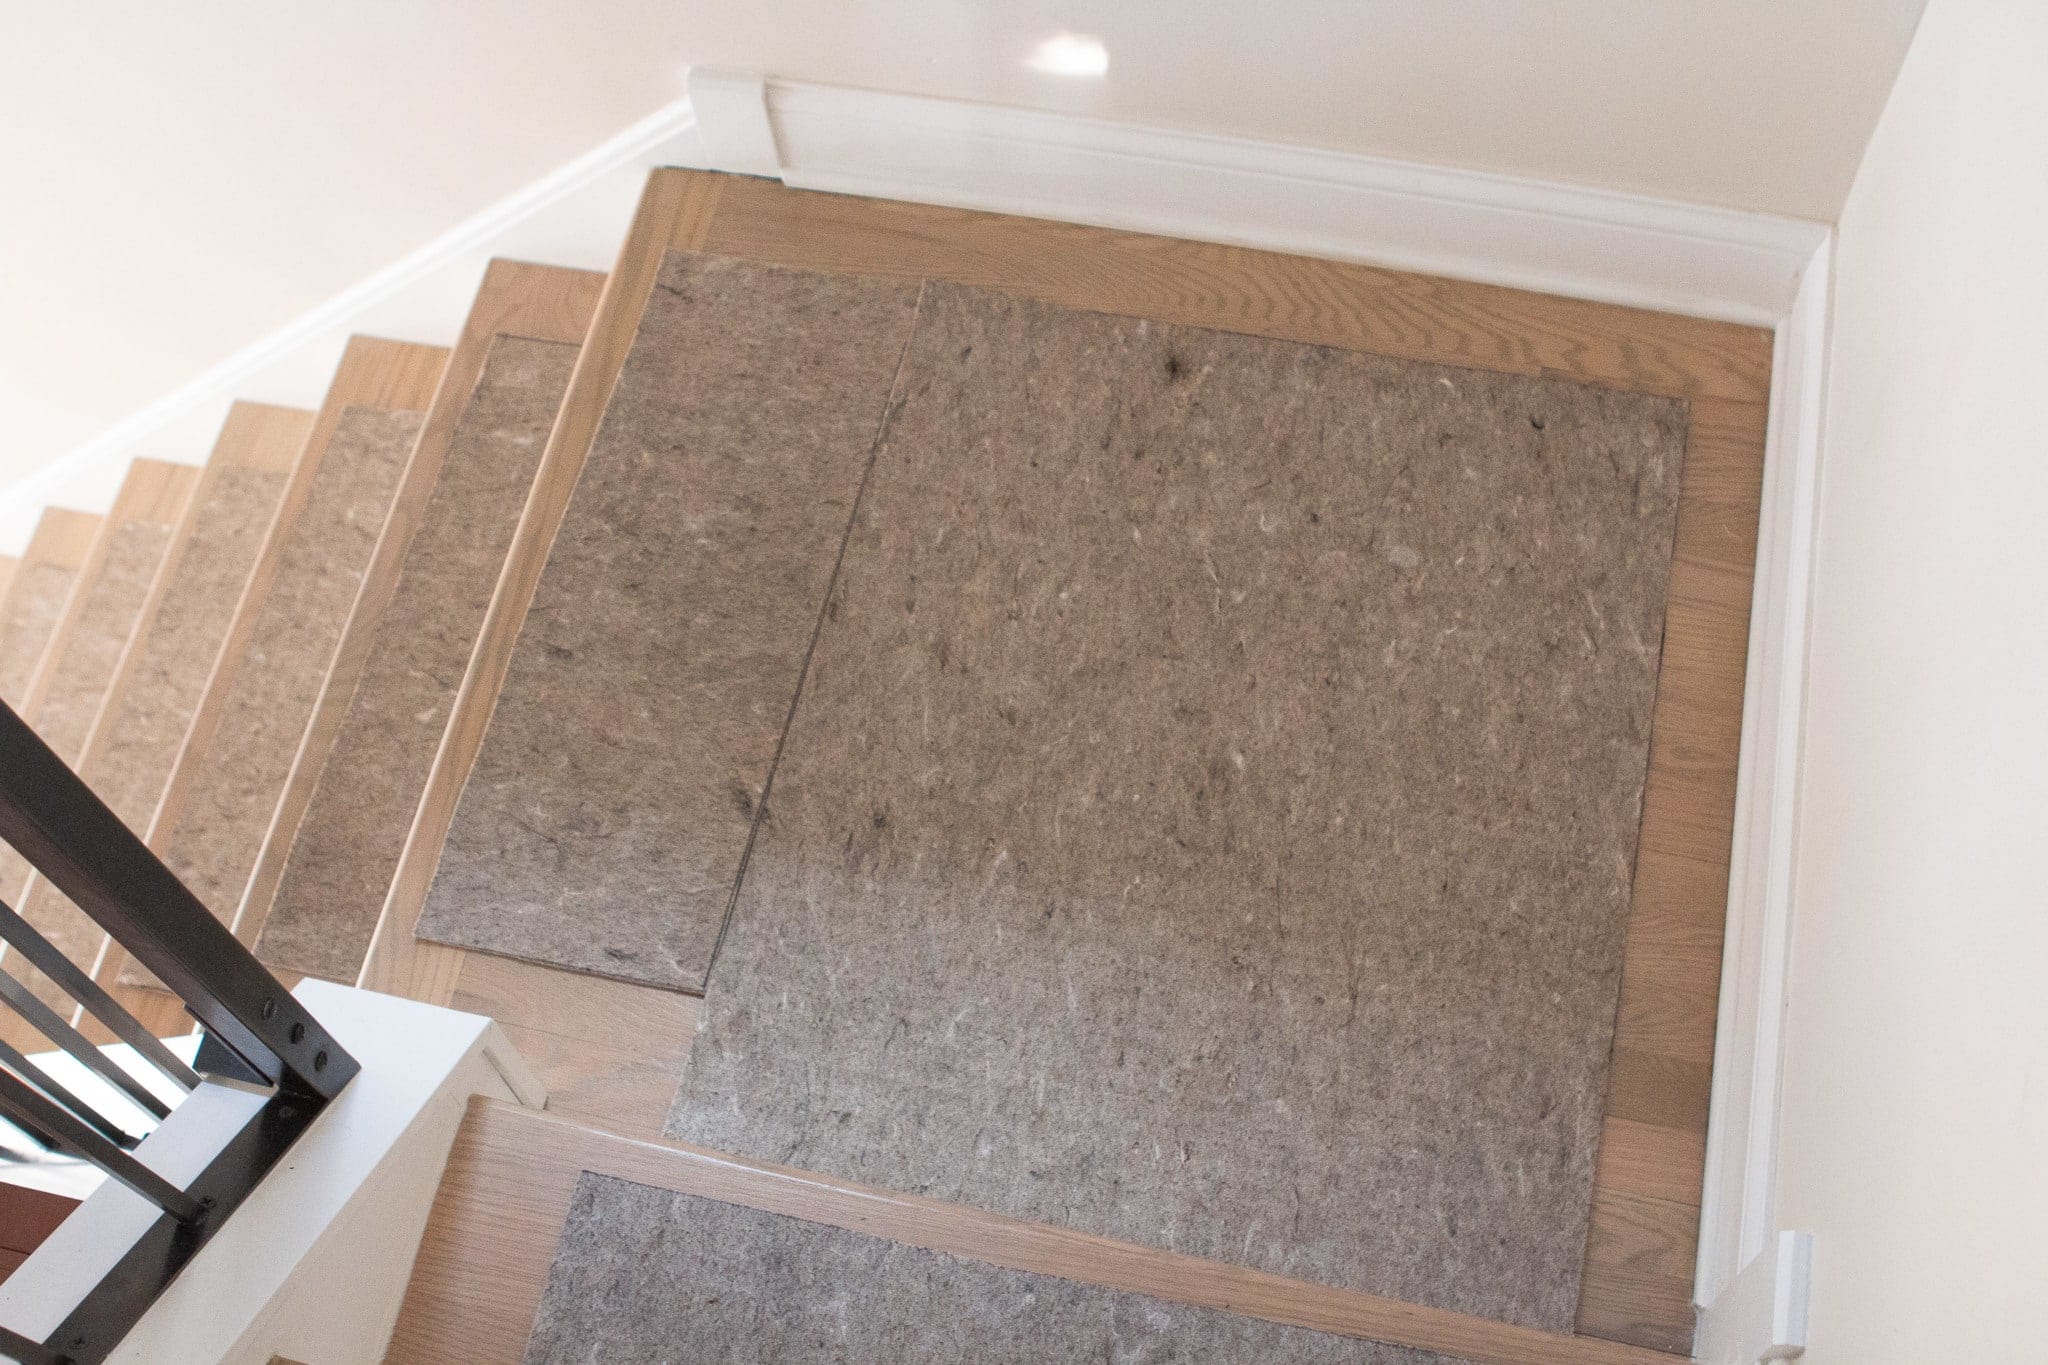
We also added the rug pad to our landing, using the same technique.
Figure Out Your Landing
Before we attached the stair runner, we had to figure out the landing. That dang landing was the scariest part of this project. If you have normal stairs with no landing, this should be a relatively easy diy project!
The landing ended up taking us an extra one to two hours because we wanted to get it just right. After doing lots of research (and practicing a little patience), we decided to miter our rug at a 45-degree angle and adhere it together to make the turn on the landing. Let me walk you through what that means. 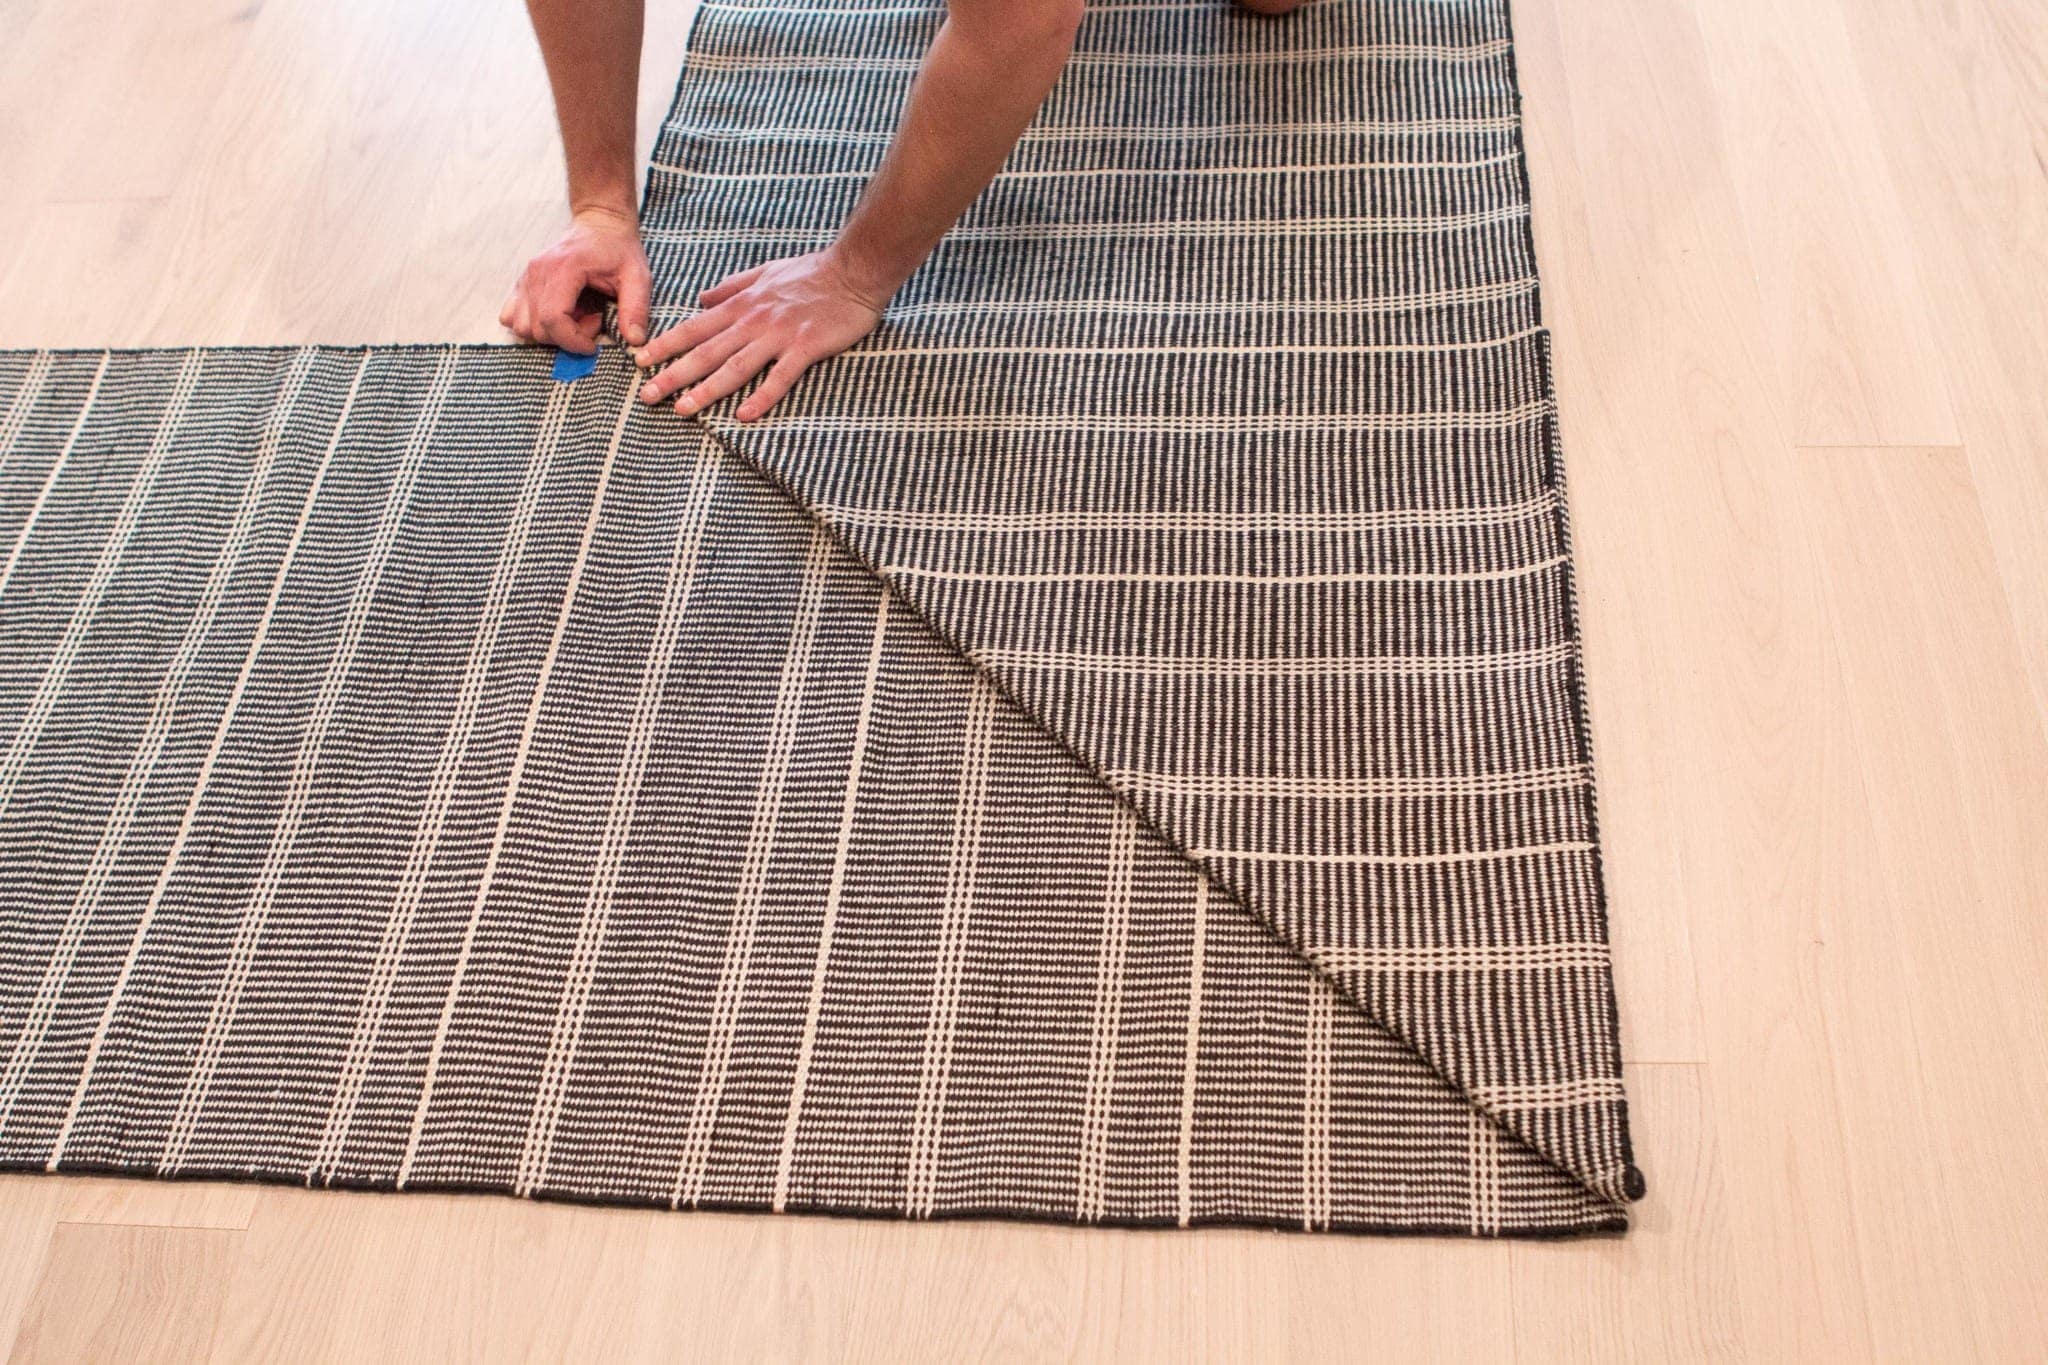
We took two stair runners placing them perpendicular to one another. We then folded in the ends at a 45-degree angle. This was tough with our particular fabric because we had to make sure the lines were all matched up.
It was at this point that we realized that our second runner was slightly different than the first runner! Full disclosure – I started to sweat a little here! We ended up opening up all four rugs to find the two that matched the best!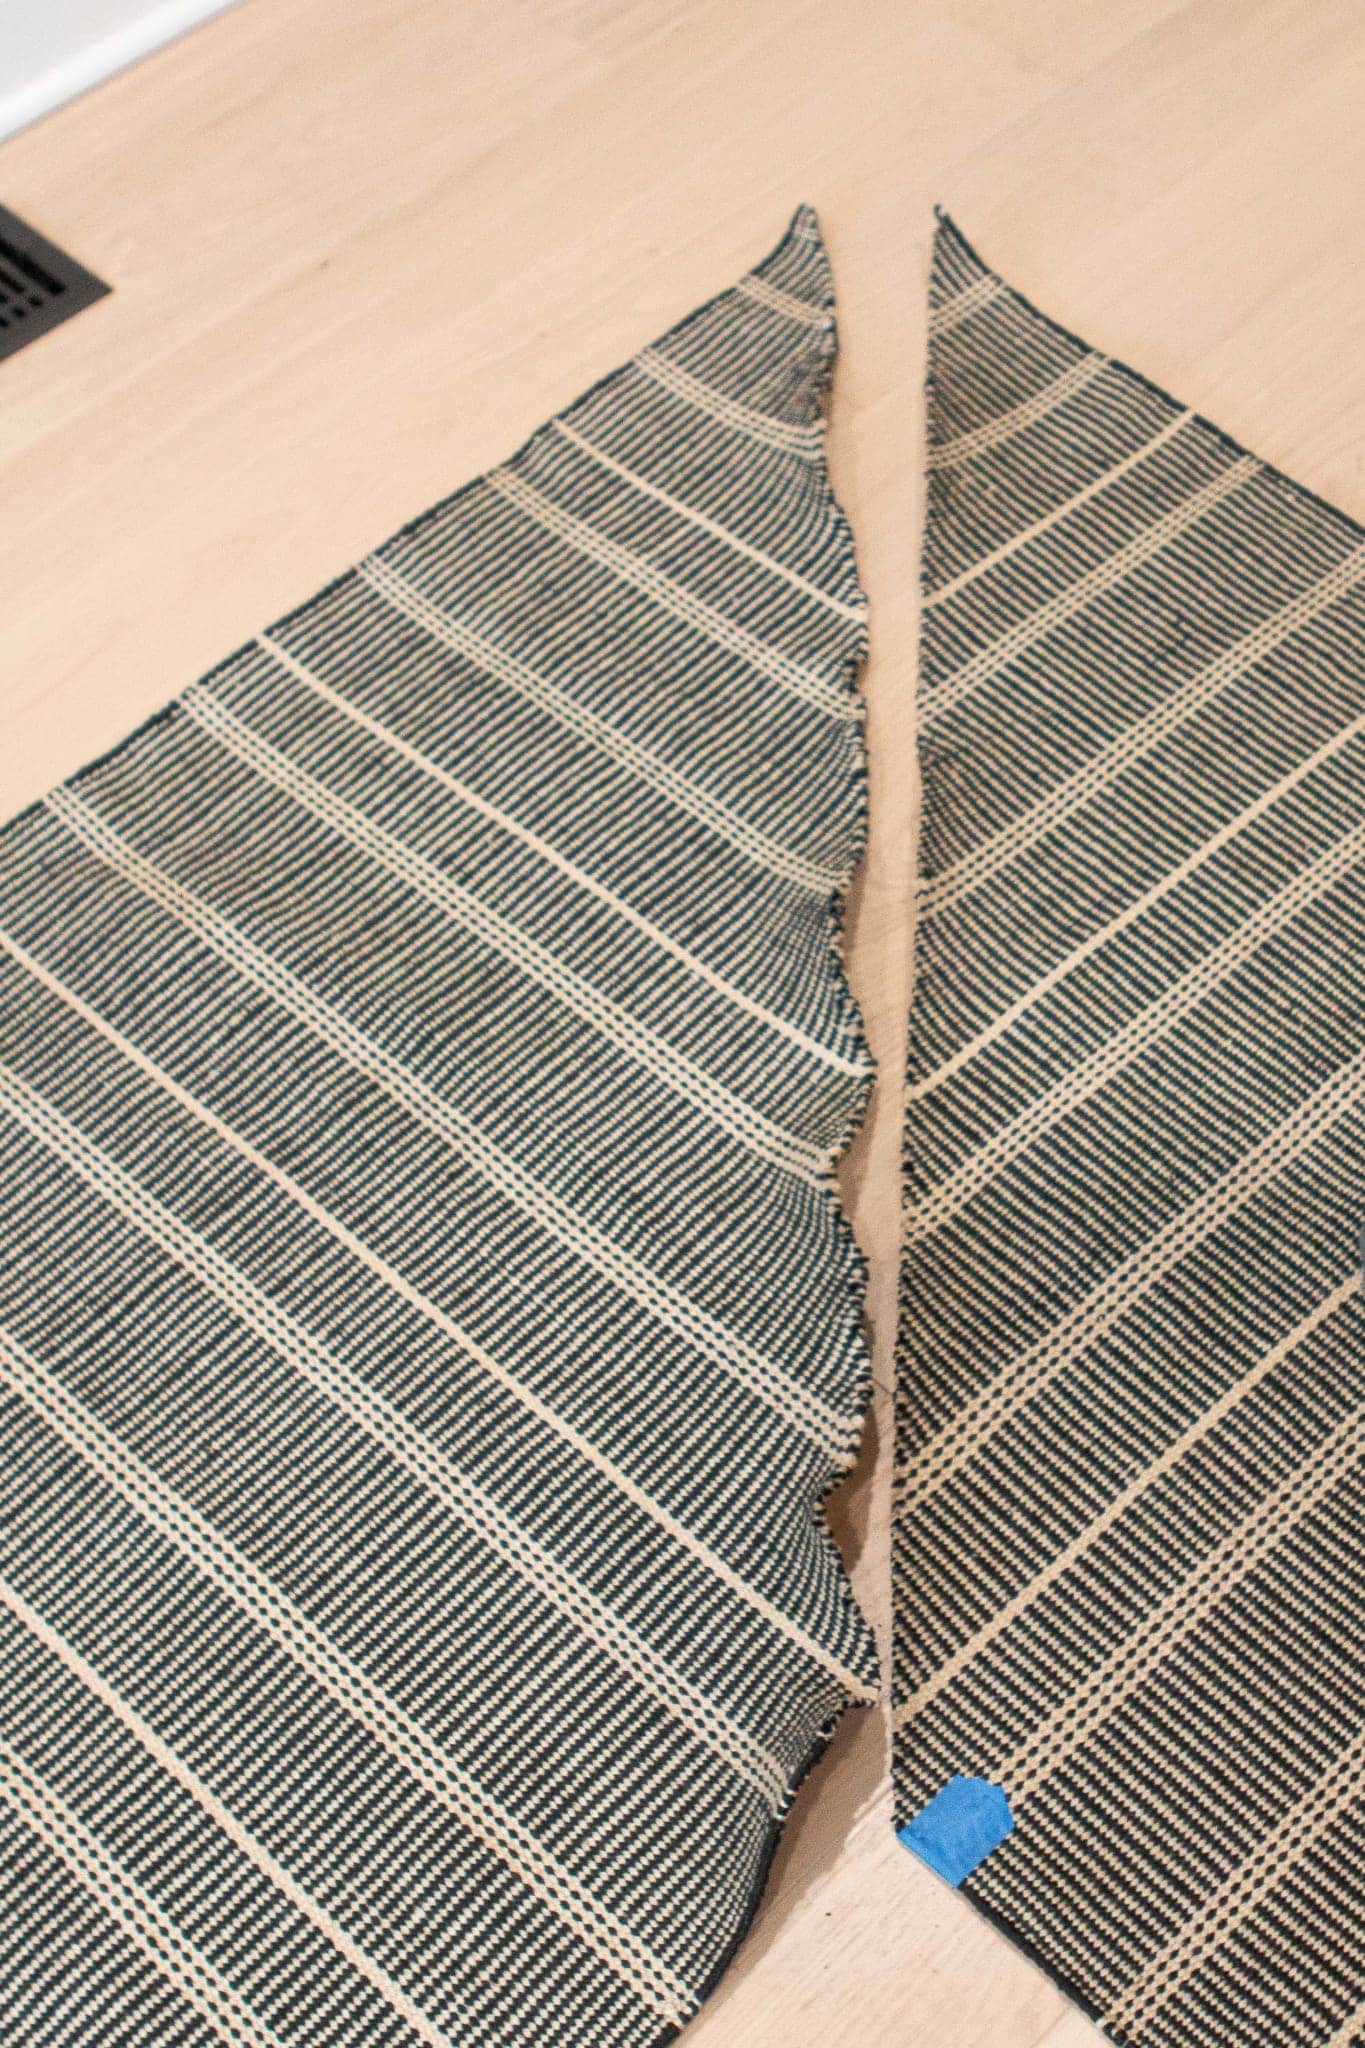
After lots of tweaking and painter’s tape to mark, we took the scary step and cut each rug on an angle. It was a terrifying cut, but we did it! 
Once those were cut, it was time to adhere them together. I bought this carpet adhesive for that step. 
We placed the adhesive under the cut line, again making sure the two pieces of fabric were lined up perfectly. Next, take an iron (on the hottest setting) and place it on a rag over the runner.
Note: It takes quite a long time for the adhesive to heat up and bond the two fabrics together. Leave your iron on each section for at least a minute and just move it up and down the entire length of the cuts. 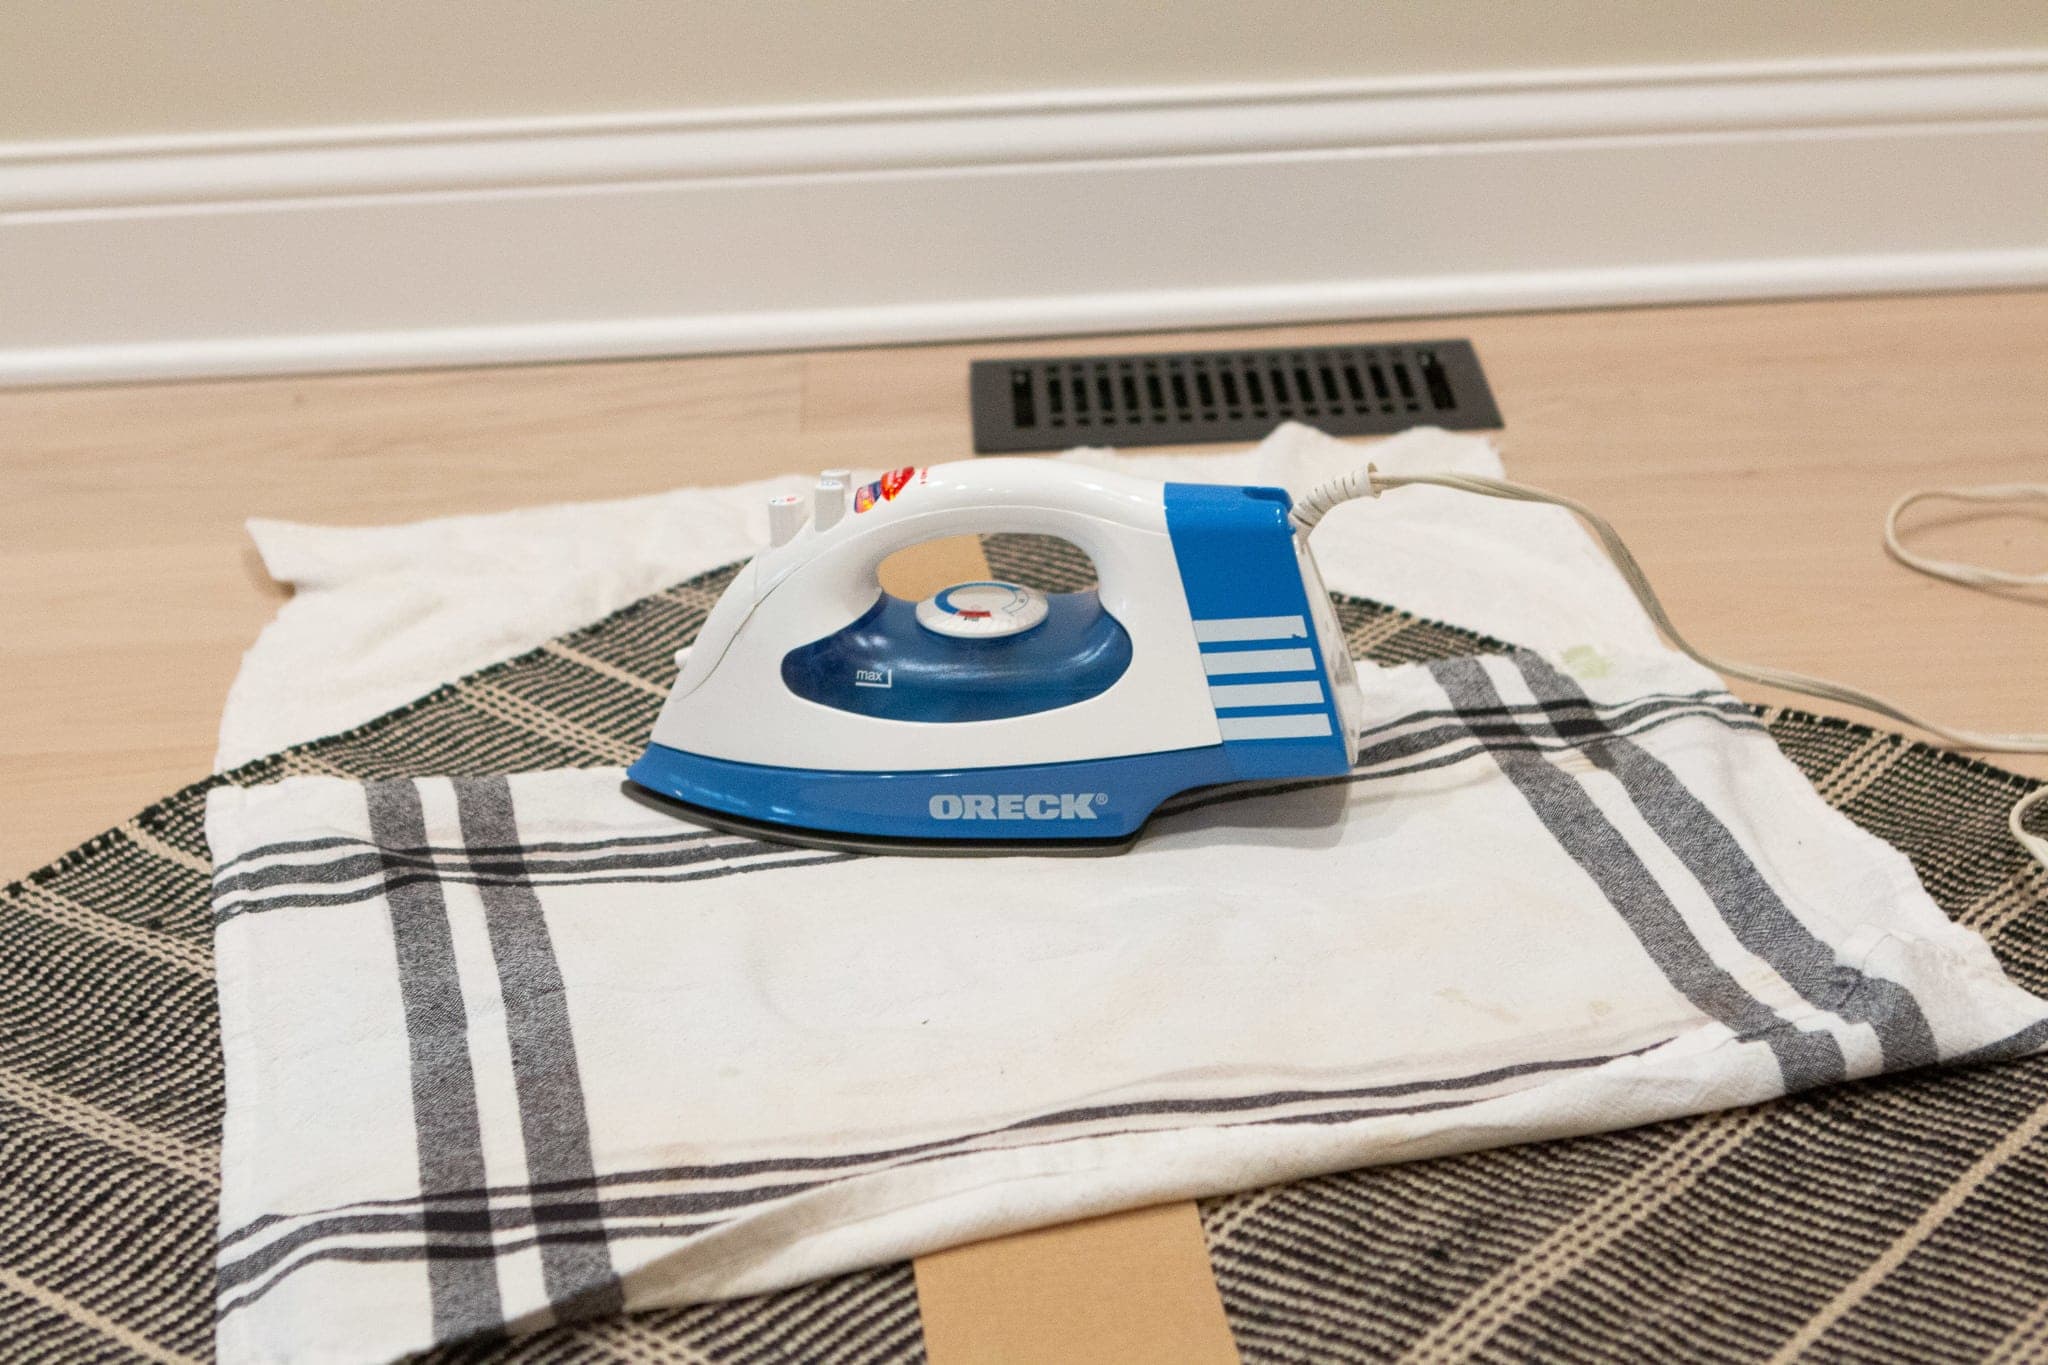
Once the front is bonded as well as possible, carefully (!!!!) turn everything to the backside and iron from there. Again, keep the iron on each section for at least a minute.
Even though we were timid every step of the way, this worked and we found ourselves with two pieces of stair runner adhered together!
Attaching the Stair Runner
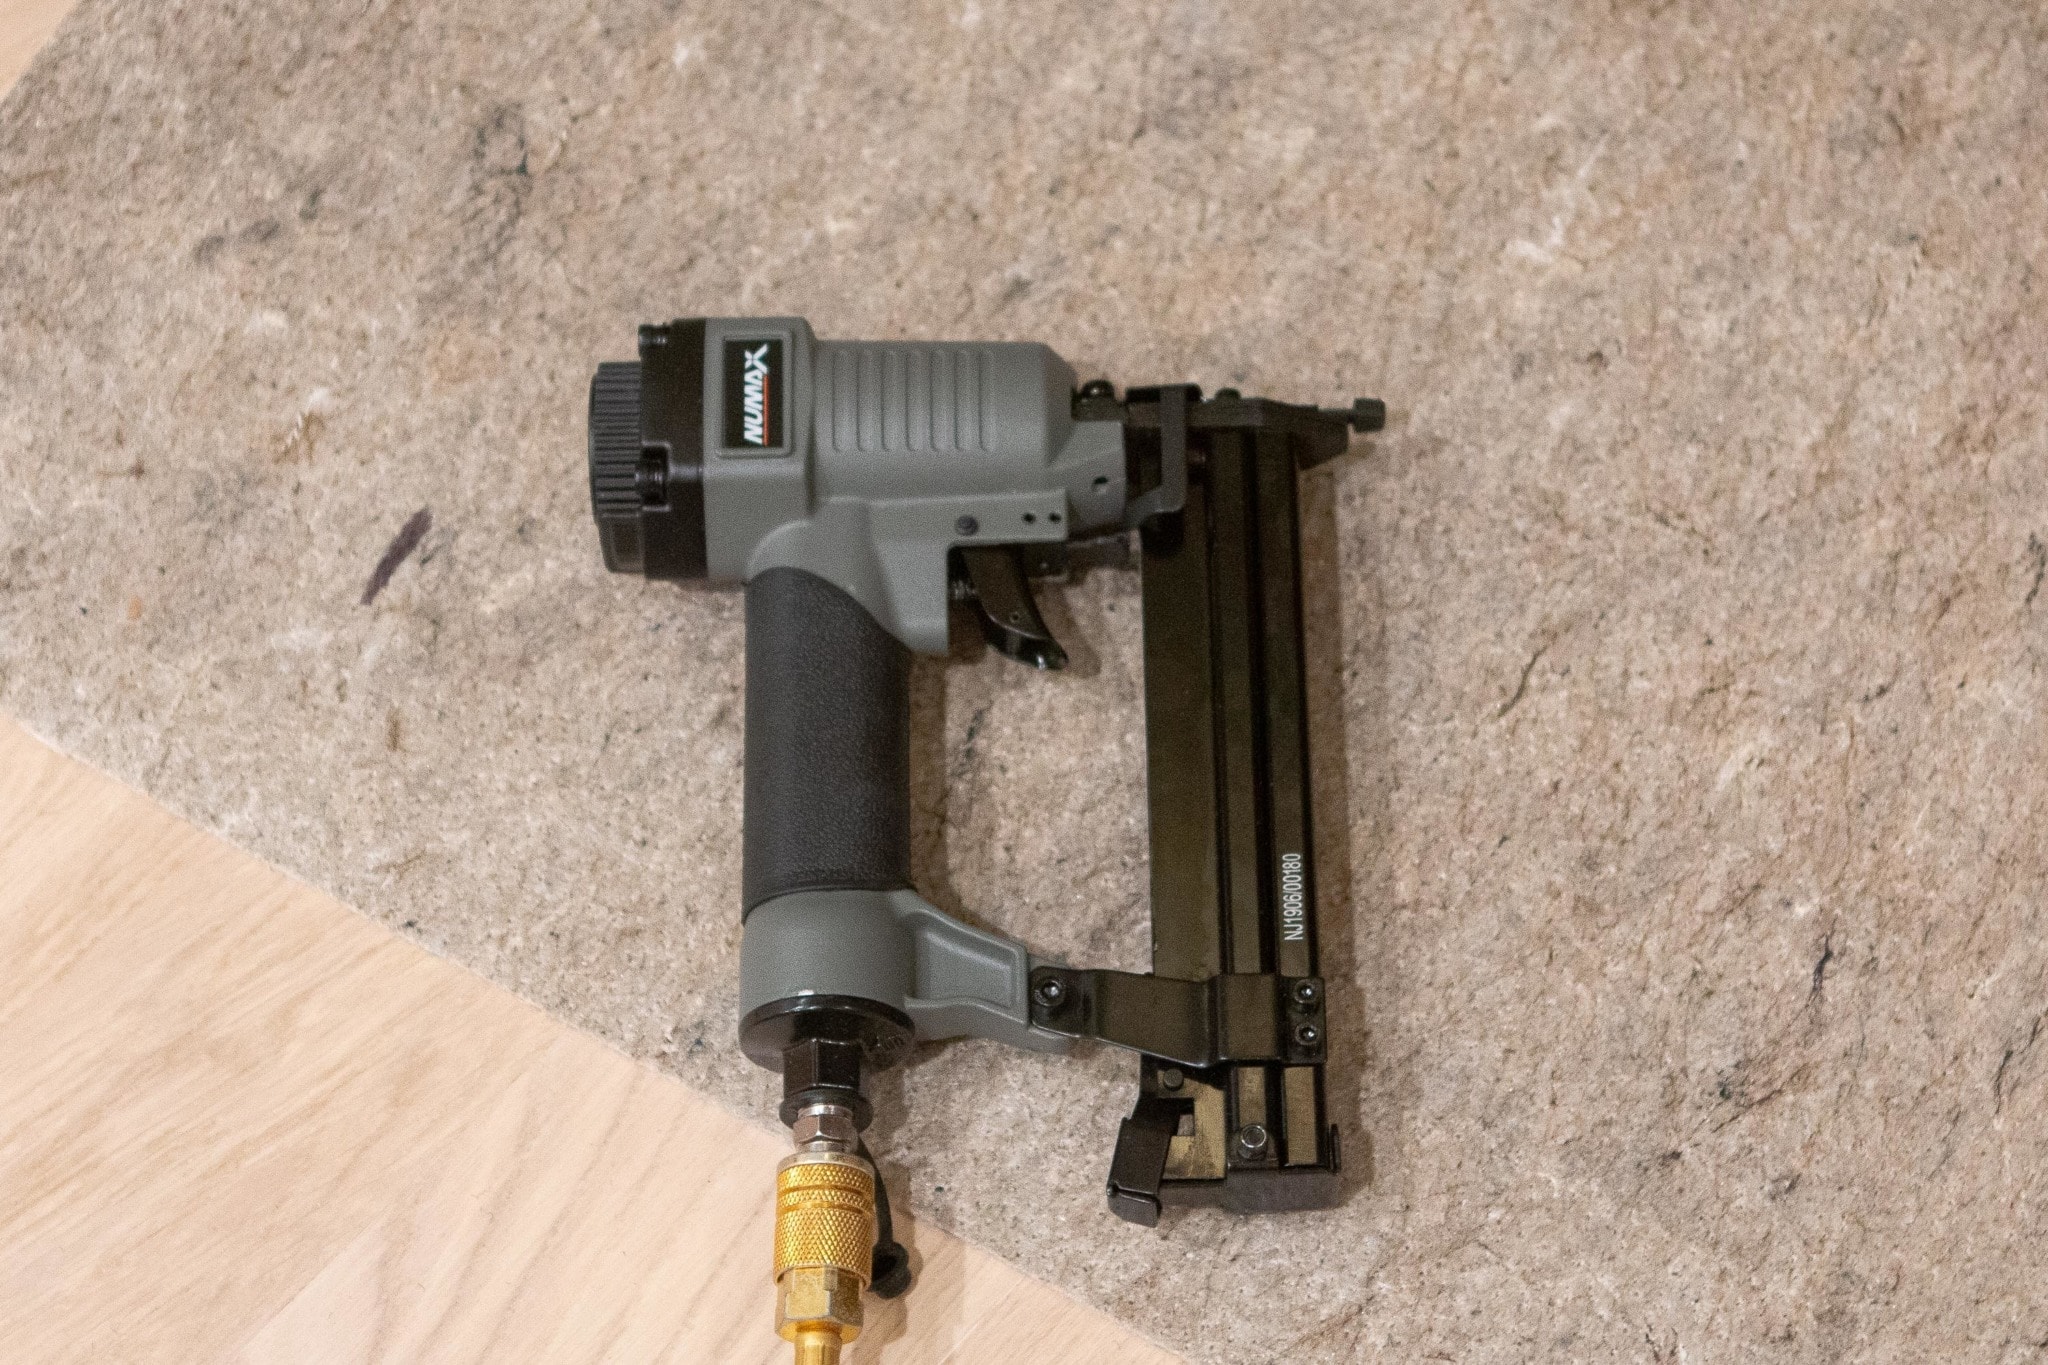
 I have a nail gun with an air compressor that we use for many projects around the house. I ended up buying this staple gun to use with that same air compressor for this project. It’s an inexpensive purchase and ended up working perfectly! However, you can typically rent these tools at Home Depot if you don’t have them available!
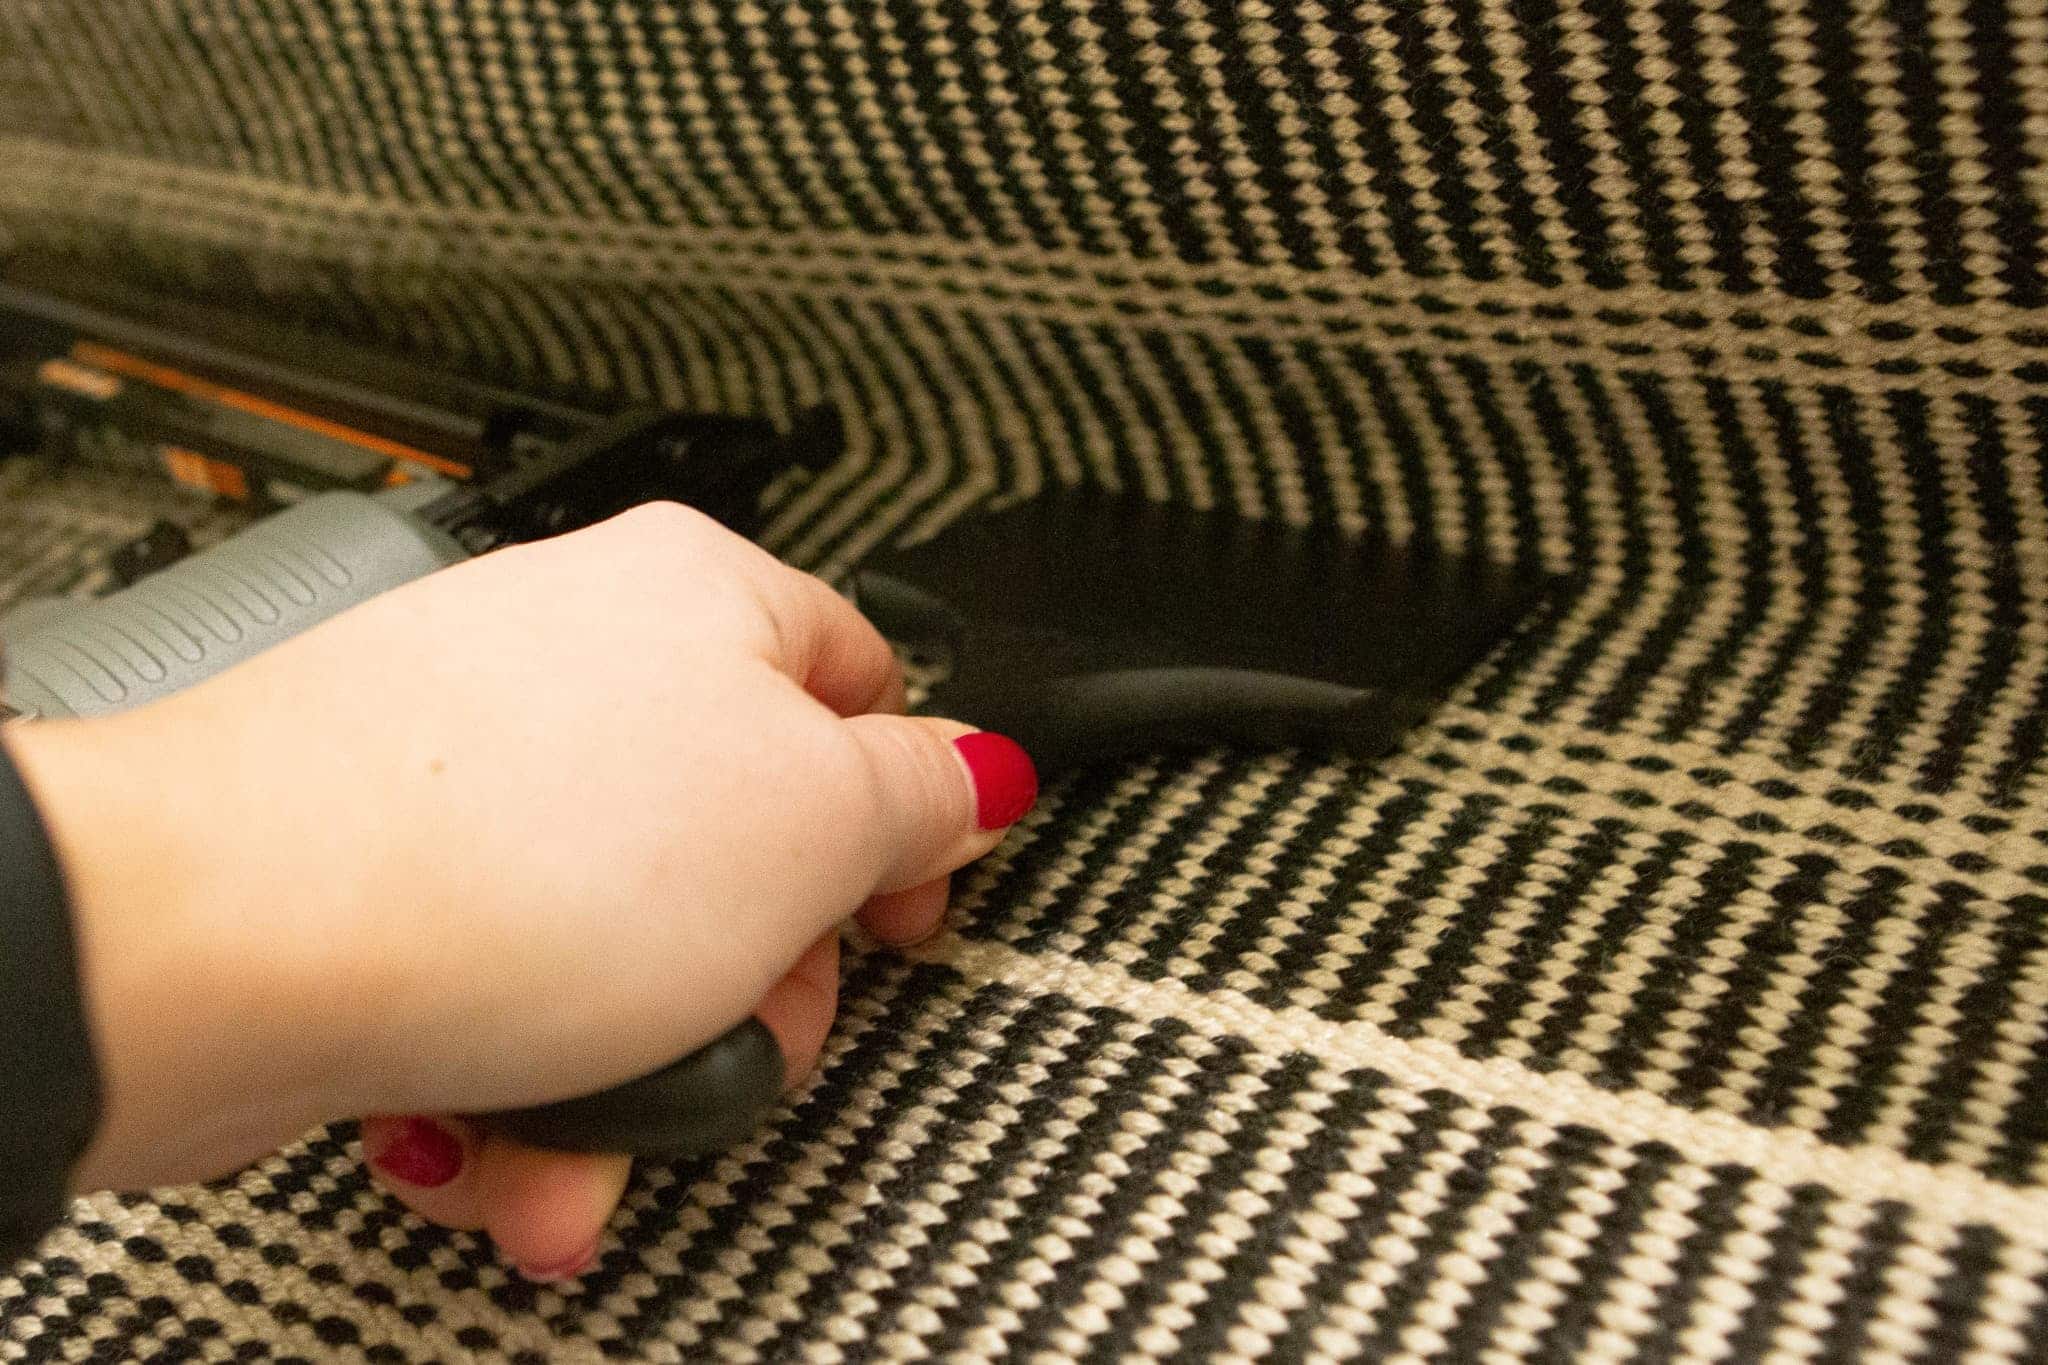 We got the runner placed perfectly on the landing before securing it onto the stairs. I then started stapling it on the lower portion of the stairs first. To do this, I used the carpet tucker to get the runner as tight against the stairs as possible.
 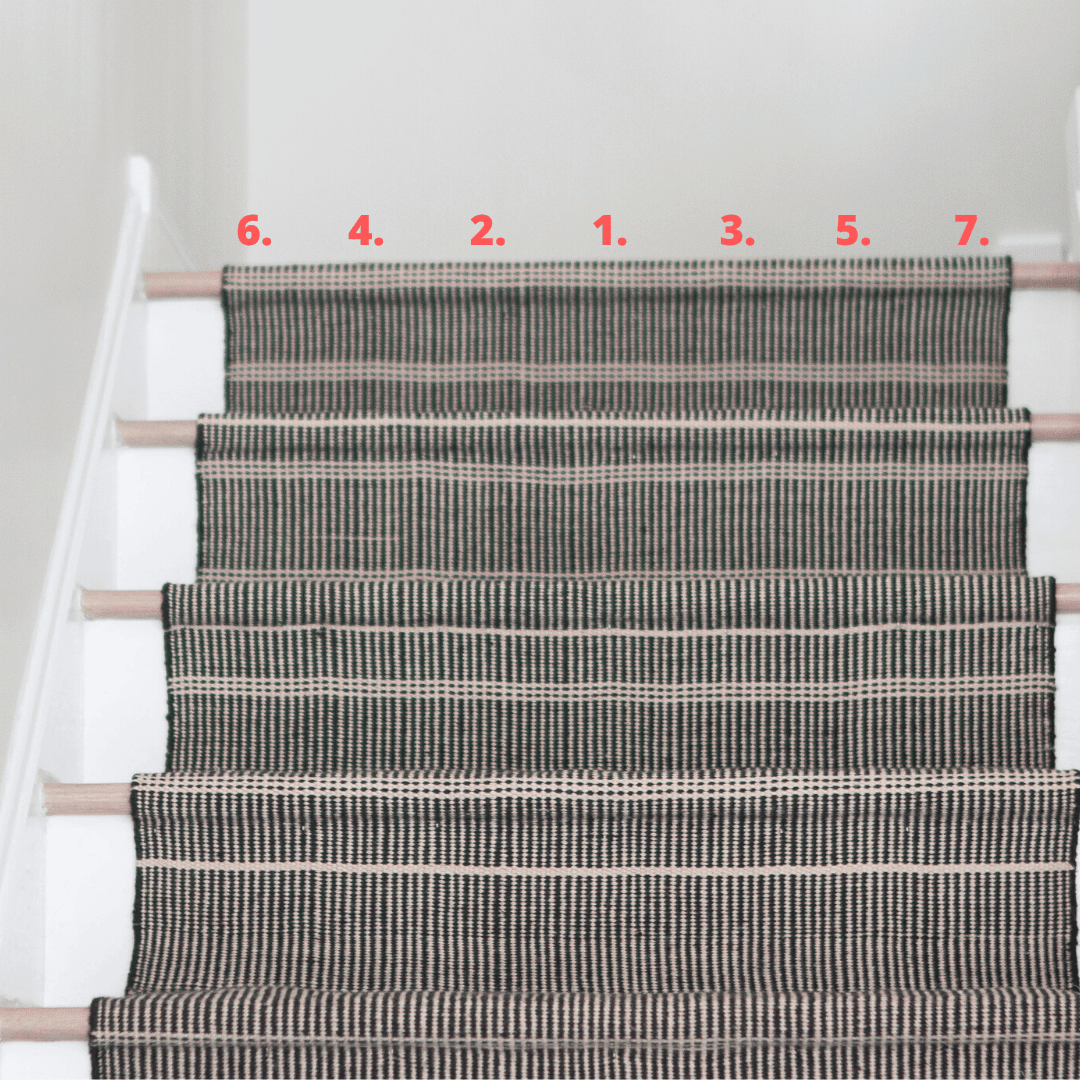 The above numbers show how I placed my row of staples. I placed a staple in the center underneath the nose of the stair, and then worked my way out to the ends every 3-4 inches. Once that was secure, I would use the carpet tucker to get it flat against the riser, and did the same at the base of the stairs. I stapled underneath the nose and then at the base of the riser for each step until I got to the end of the runner.
Note: Keep your stair runner as straight as possible as you go. You can use painter’s tape on your stairs so your runner stays within the correct lines. Or just keep a tape measure handy and make sure you have an even amount of wood showing on each end.
Adding More Length
It’s likely that your stair runner won’t cover all of your stairs and you’ll need to use multiple runners.
Because we wanted to hide the seam as best as possible, we cut the runner so it ended at the base of a stair. That way, we could place the next runner over it and the transition would be concealed in the nook of the stair. 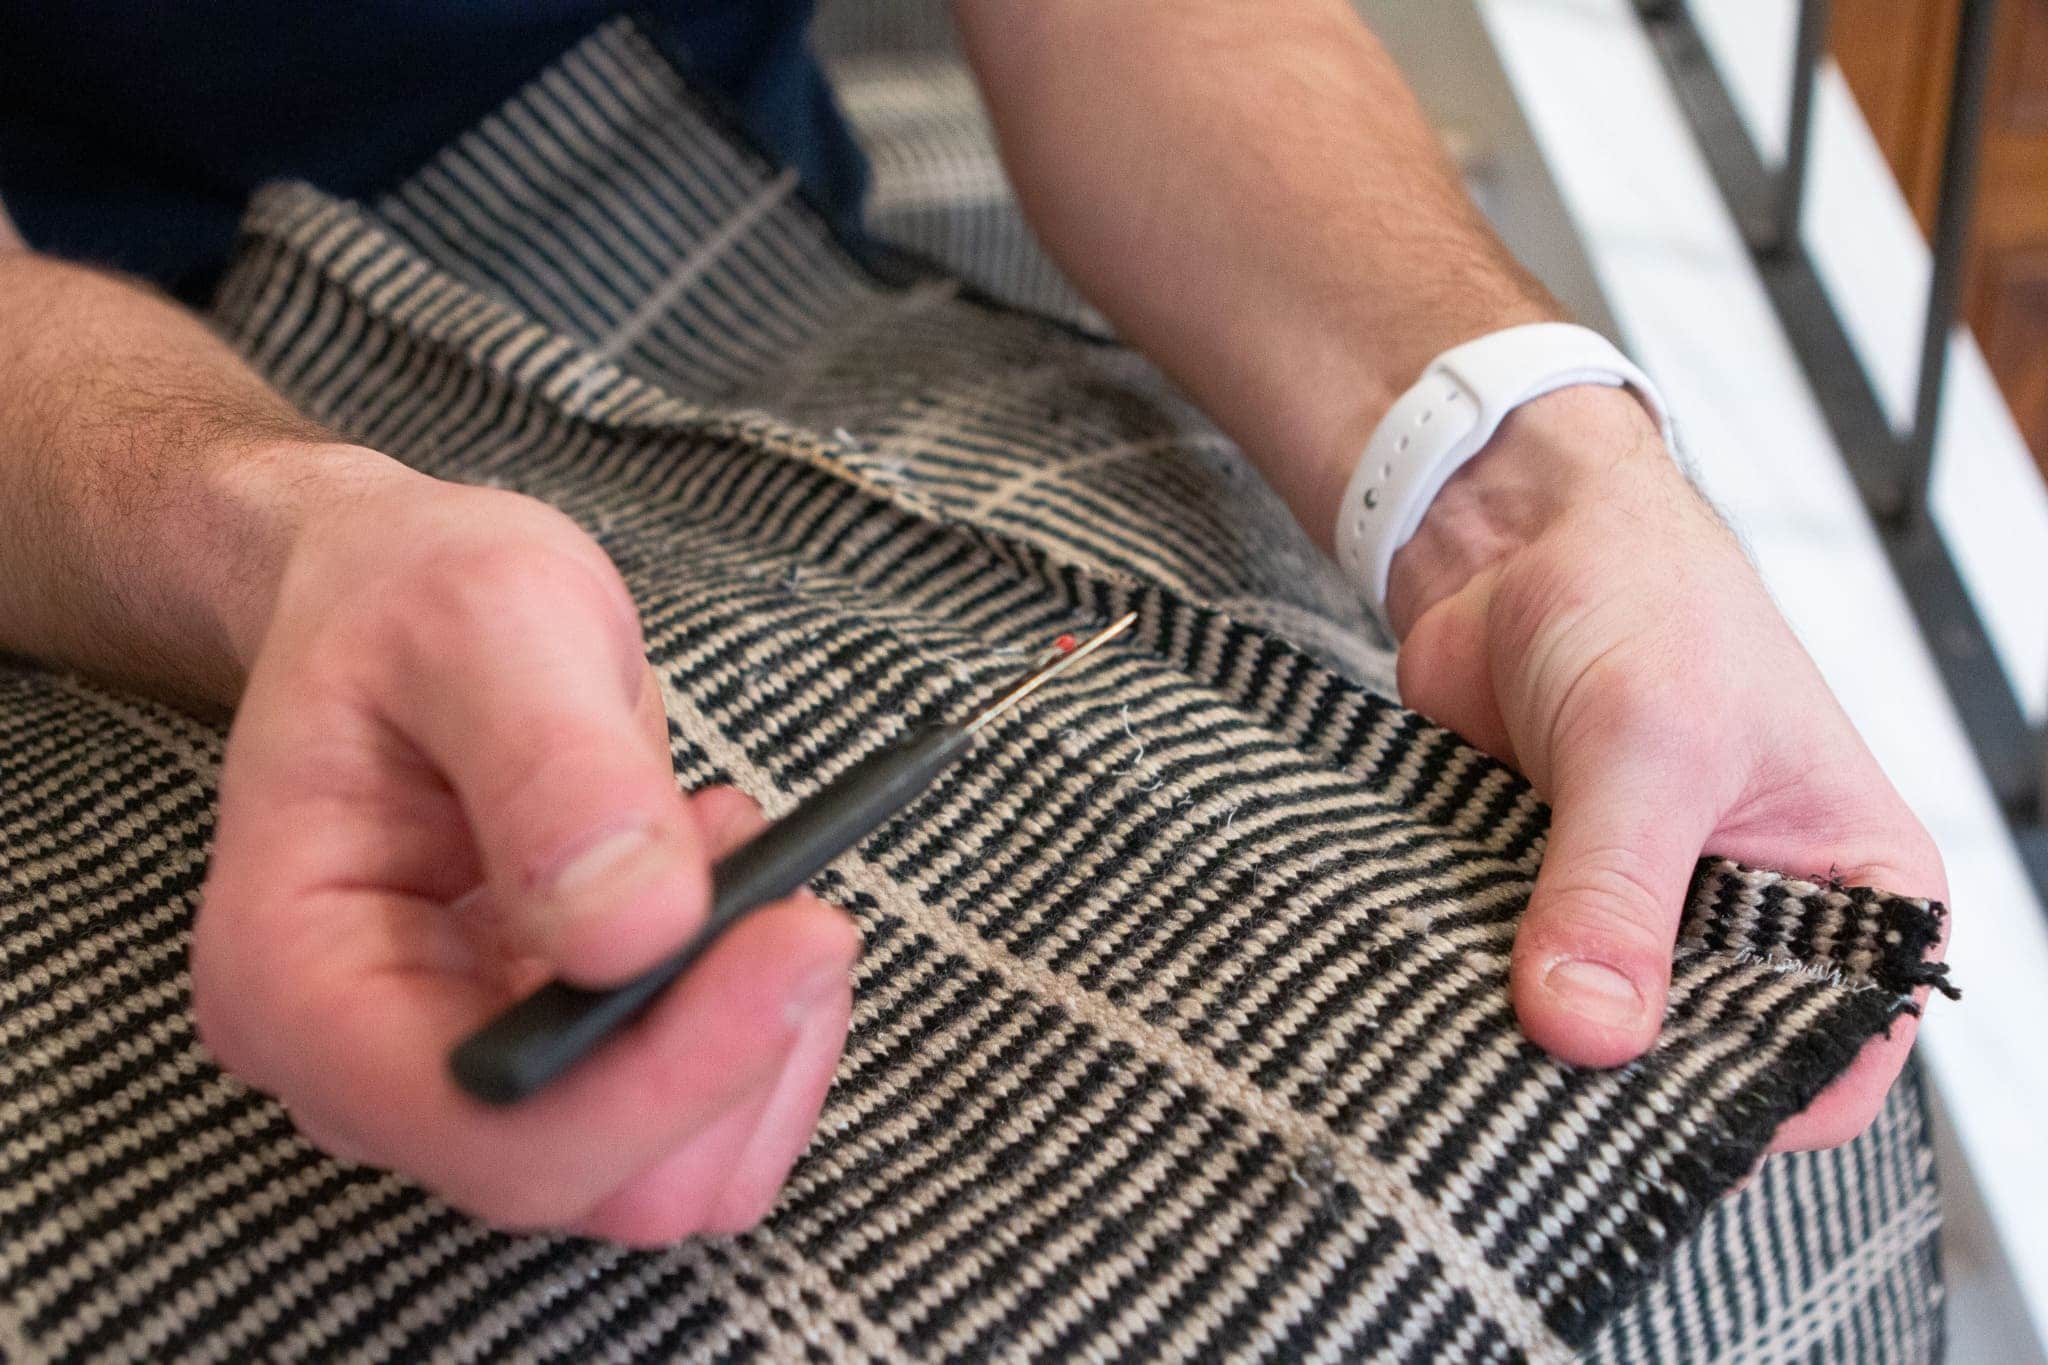
Our runner had a finished edge on the end, so we used a seam ripper to take the stitches out and get a flatter fabric. 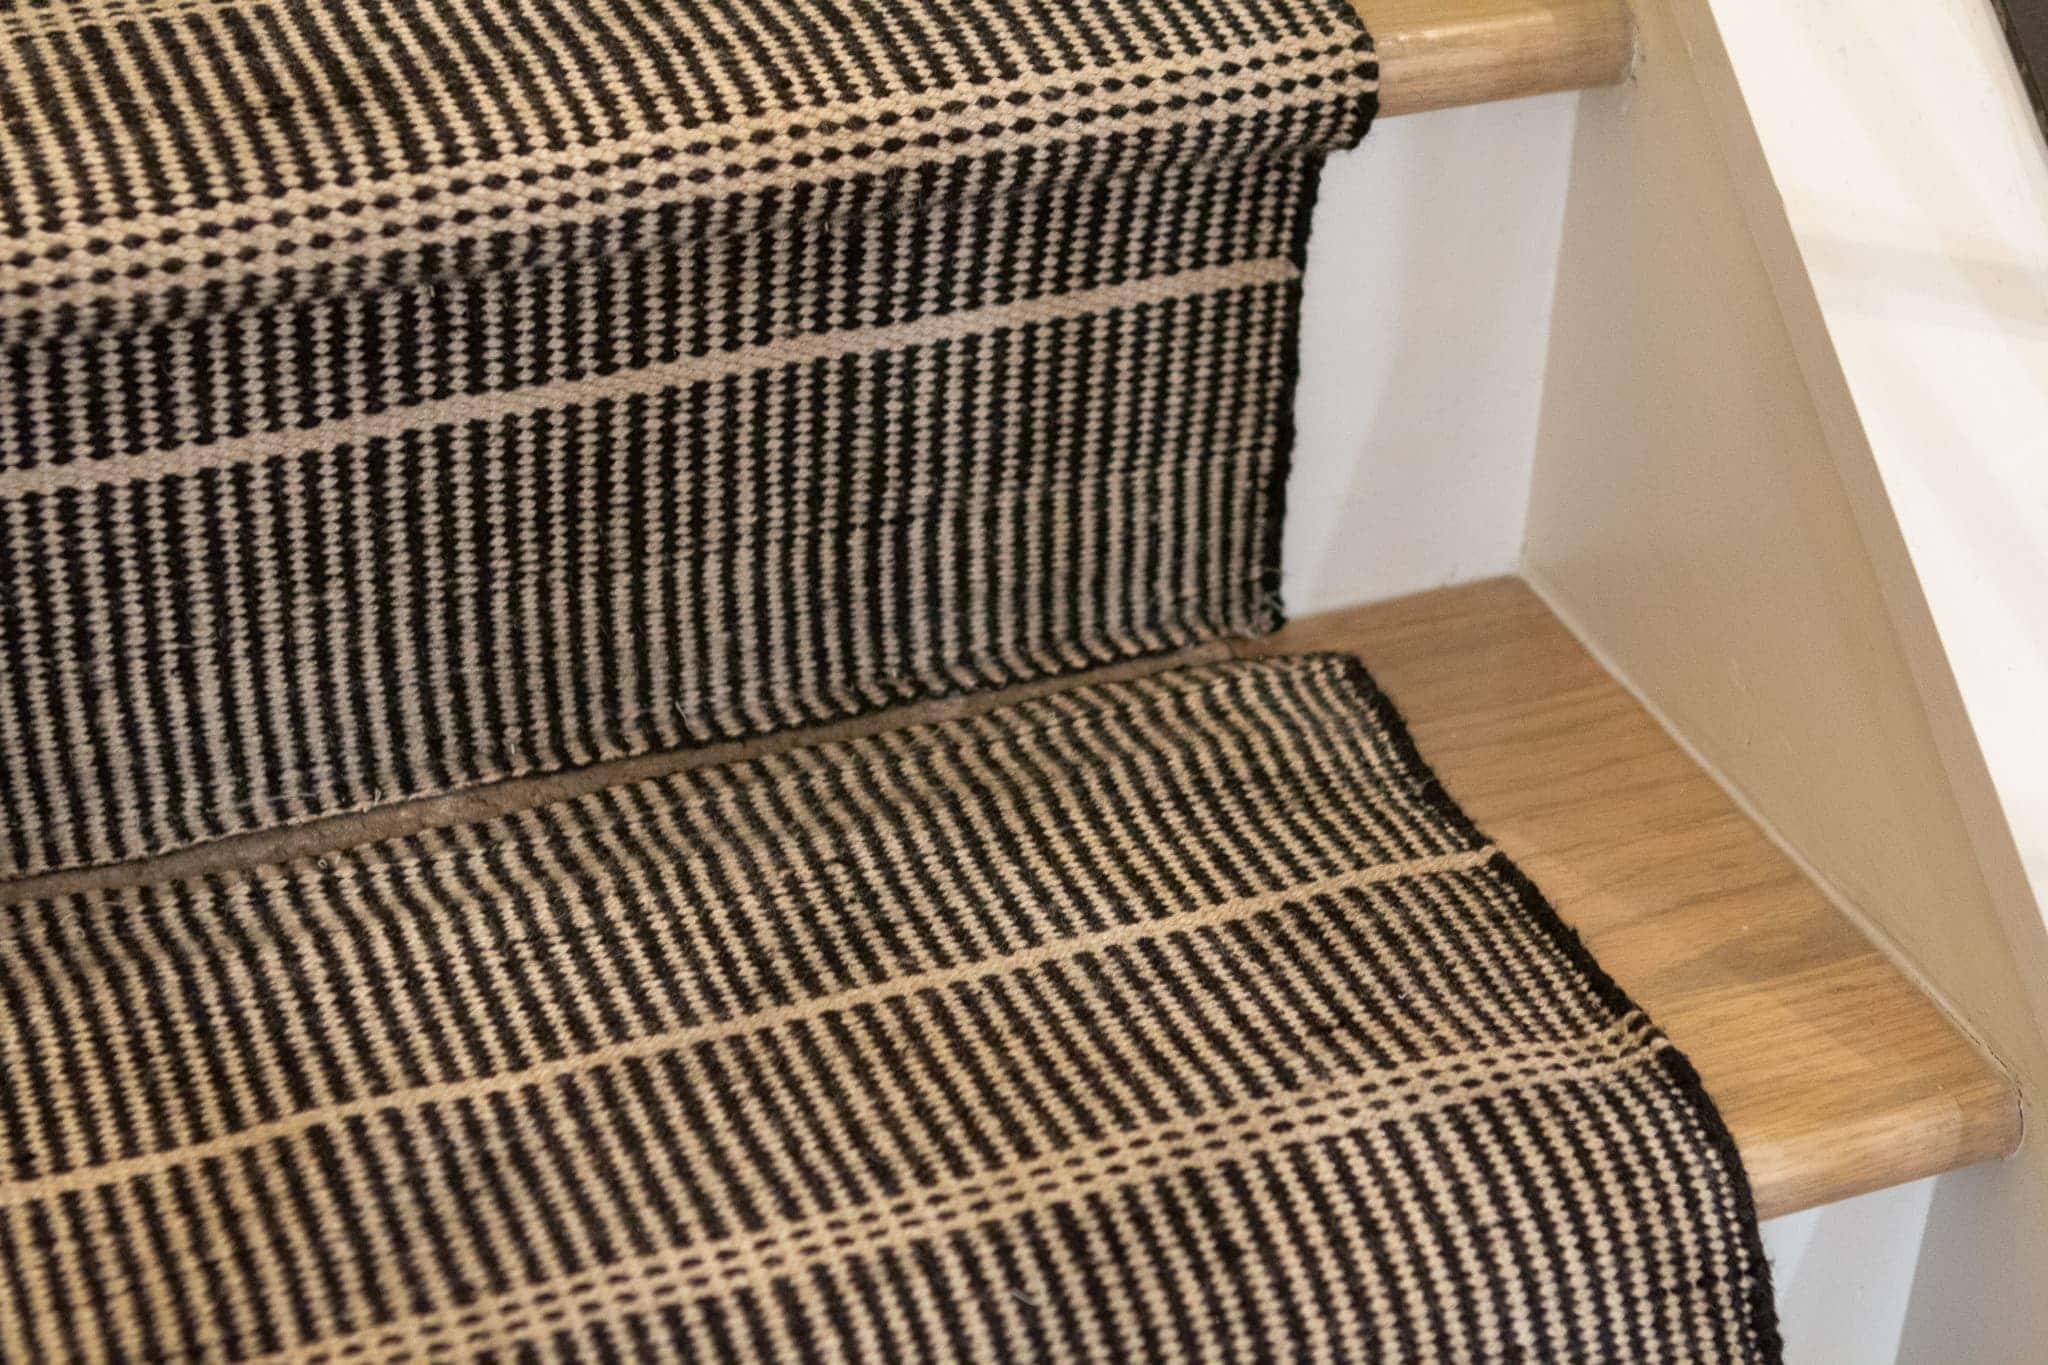 With it flat, we could then staple it over the old runner and continue attaching the second runner.
At the bottom of the stairs, we hemmed and hawed over where to stop it. In the end, we decided to take it down on the bottom riser, but we stopped before the shoe of the molding. We figured it would be too bumpy if we added it there. It ended up looking pretty good!

We repeated the same steps going up the stairs from the landing until everything was covered and secure!
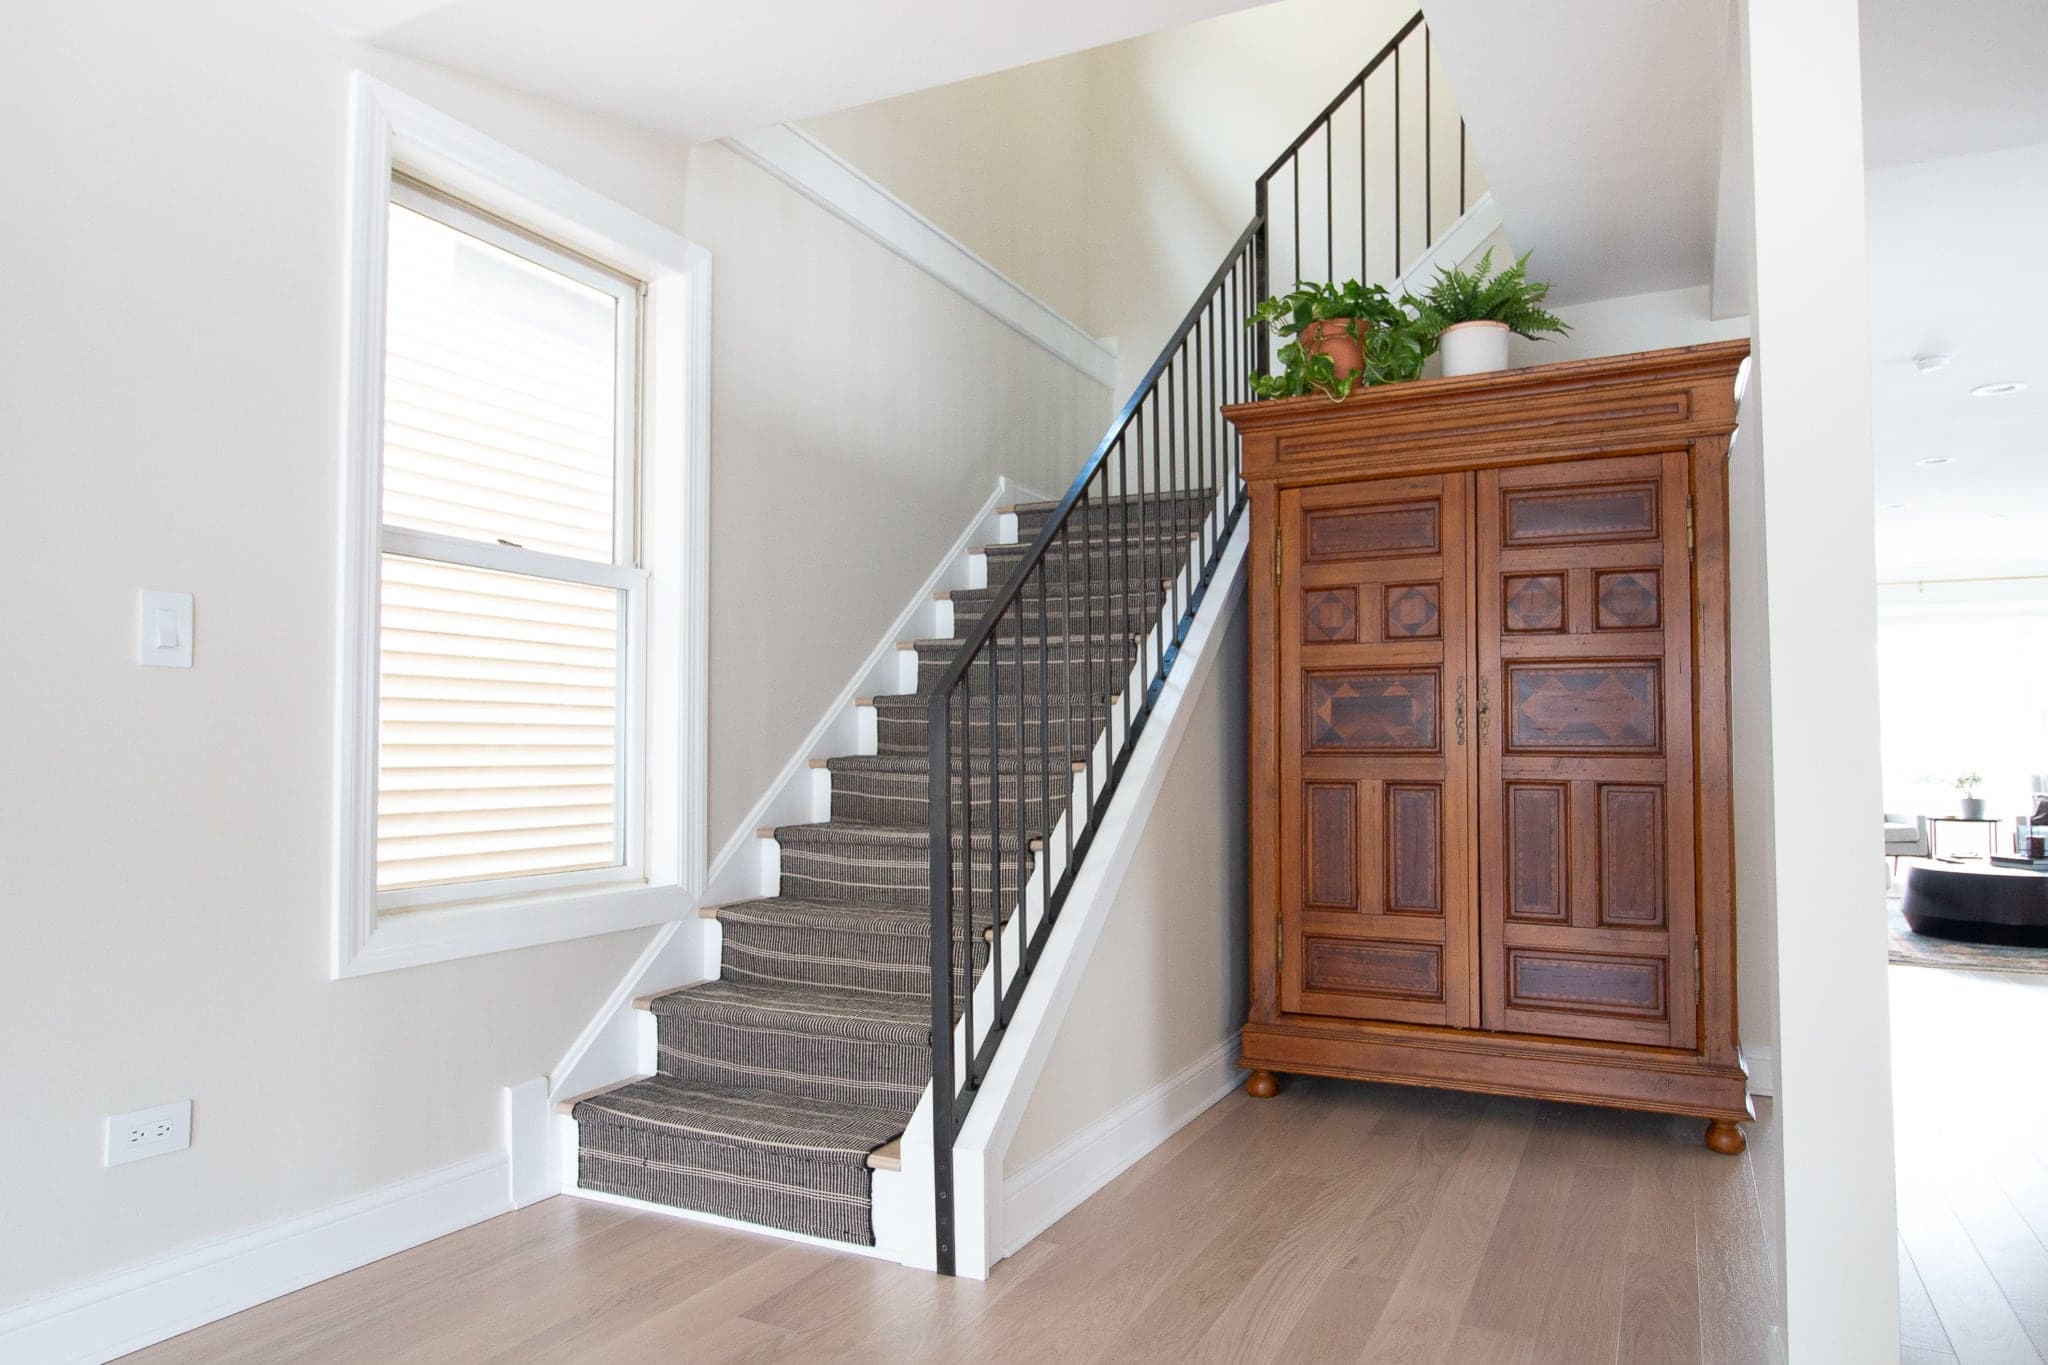
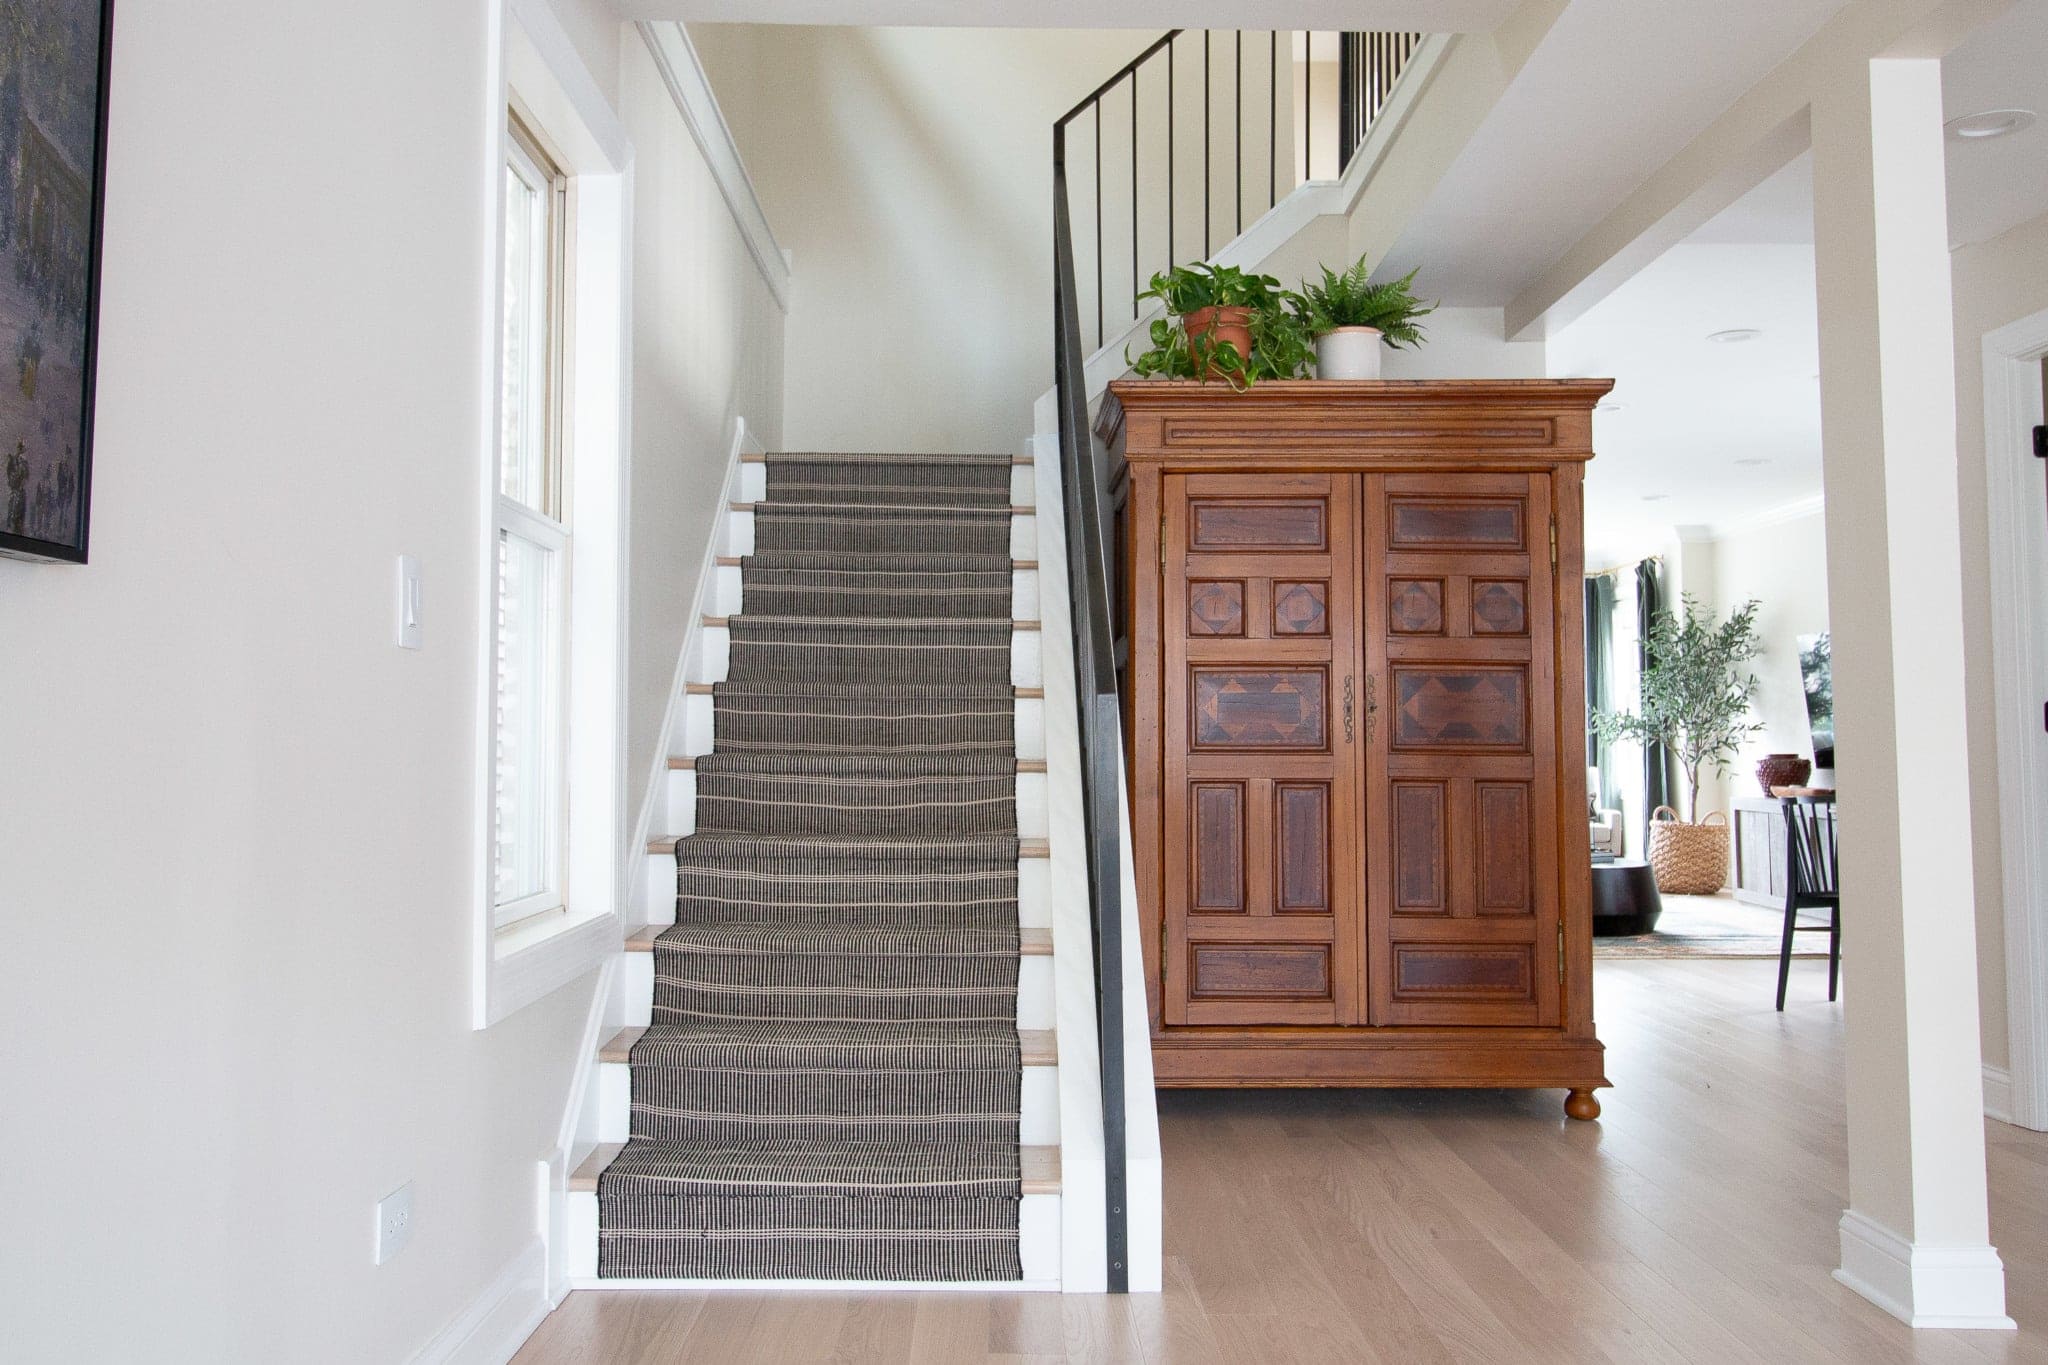
Our New Stair Runner
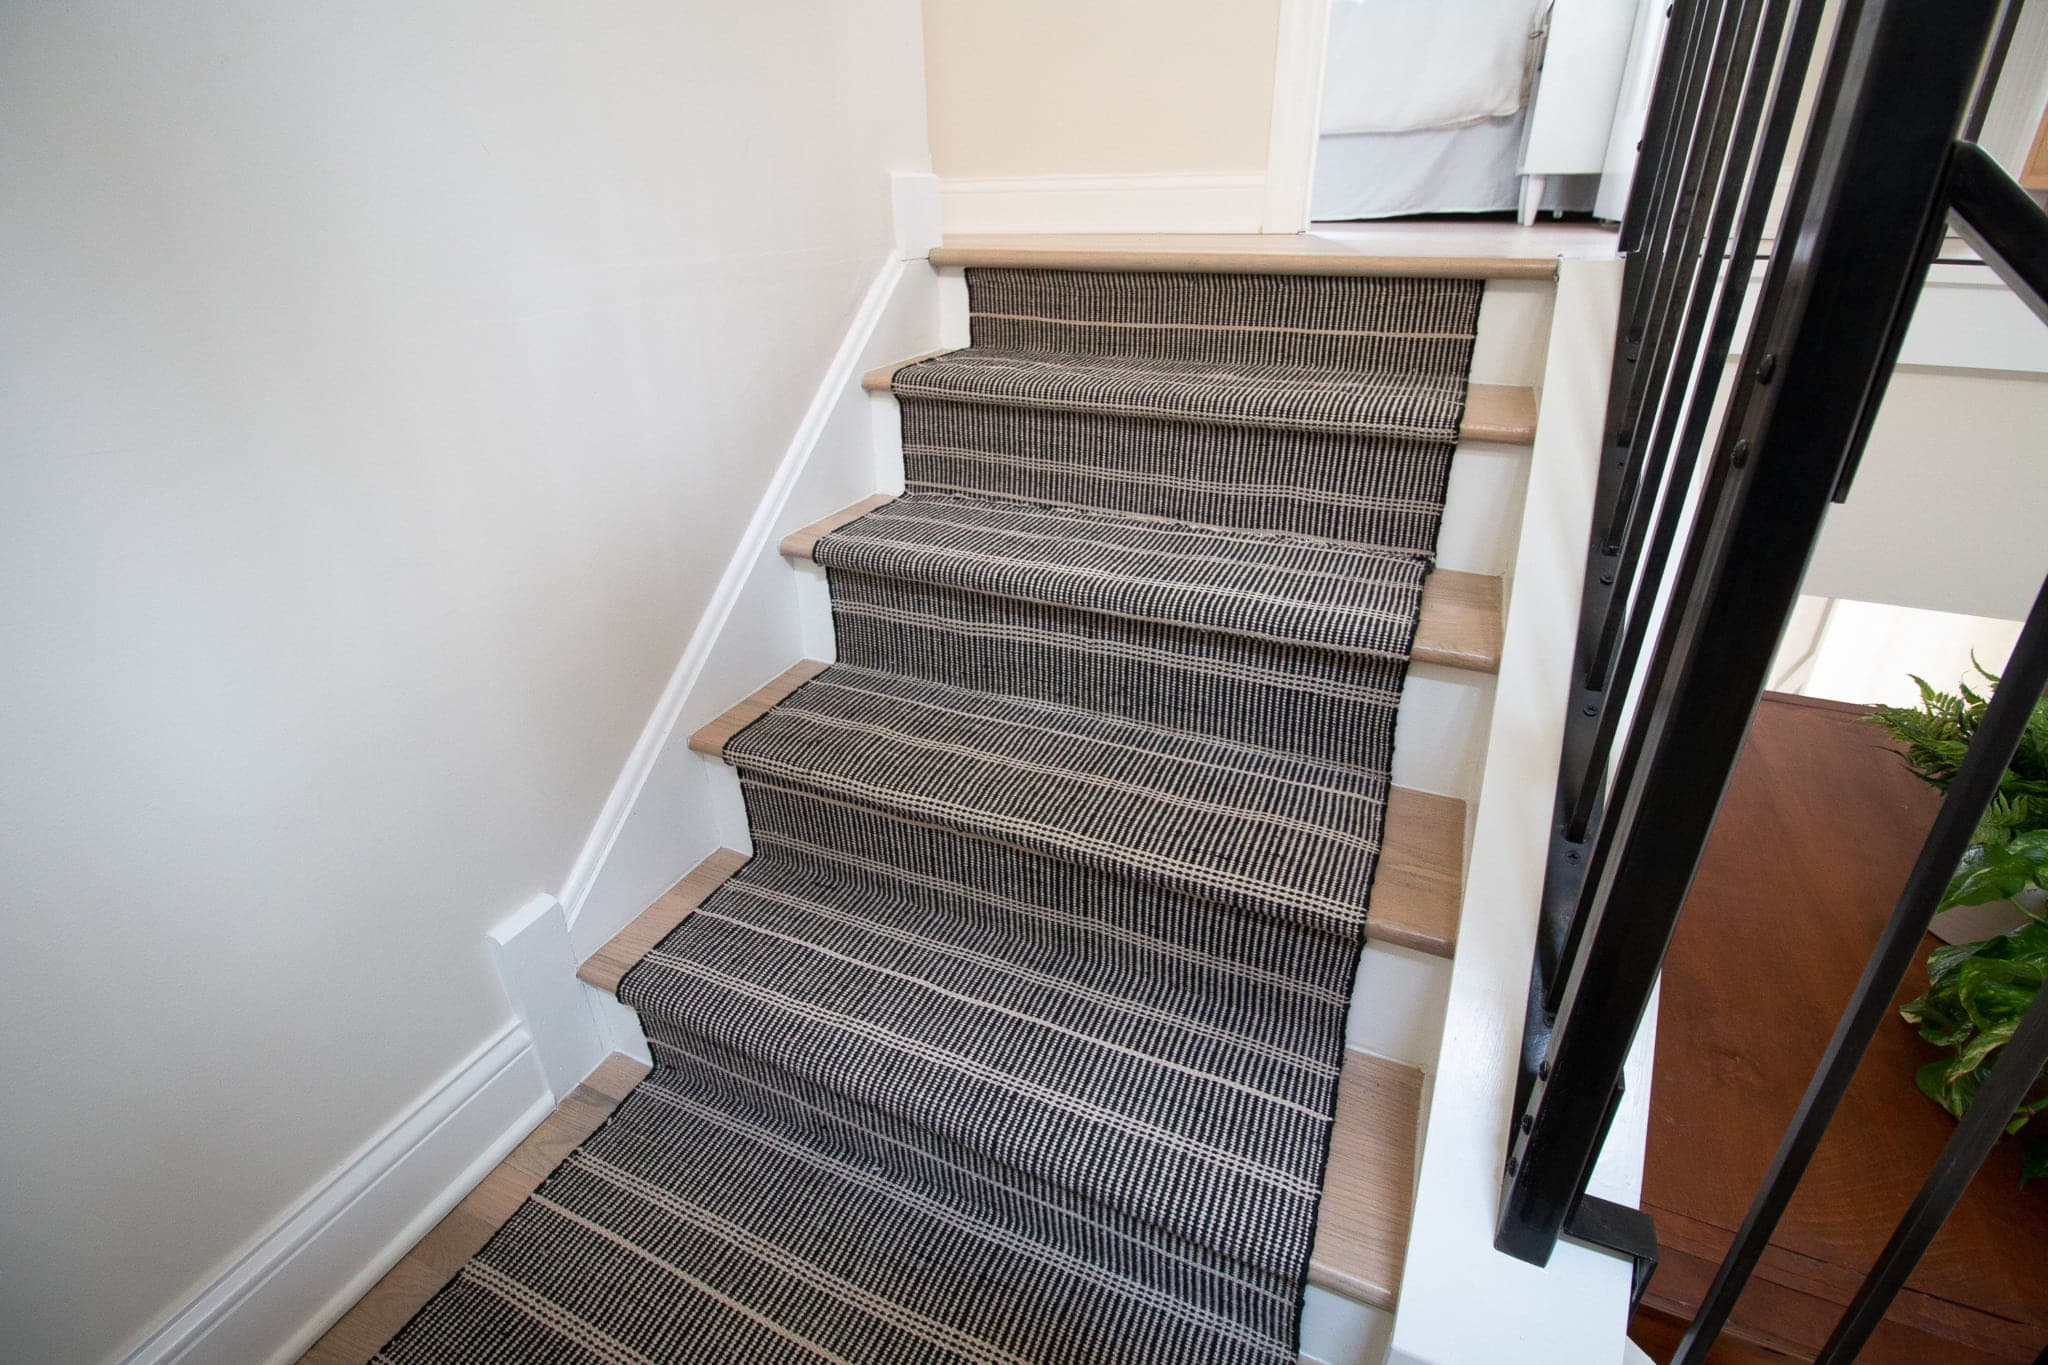
I really do love our new stair runner. Is it perfect? Not at all, but it looks great! It ended up being pretty tricky to get the horizontal lines of the rug perfectly straight on each step. This doesn’t bother us much, it just makes for a more organic and natural-looking staircase. 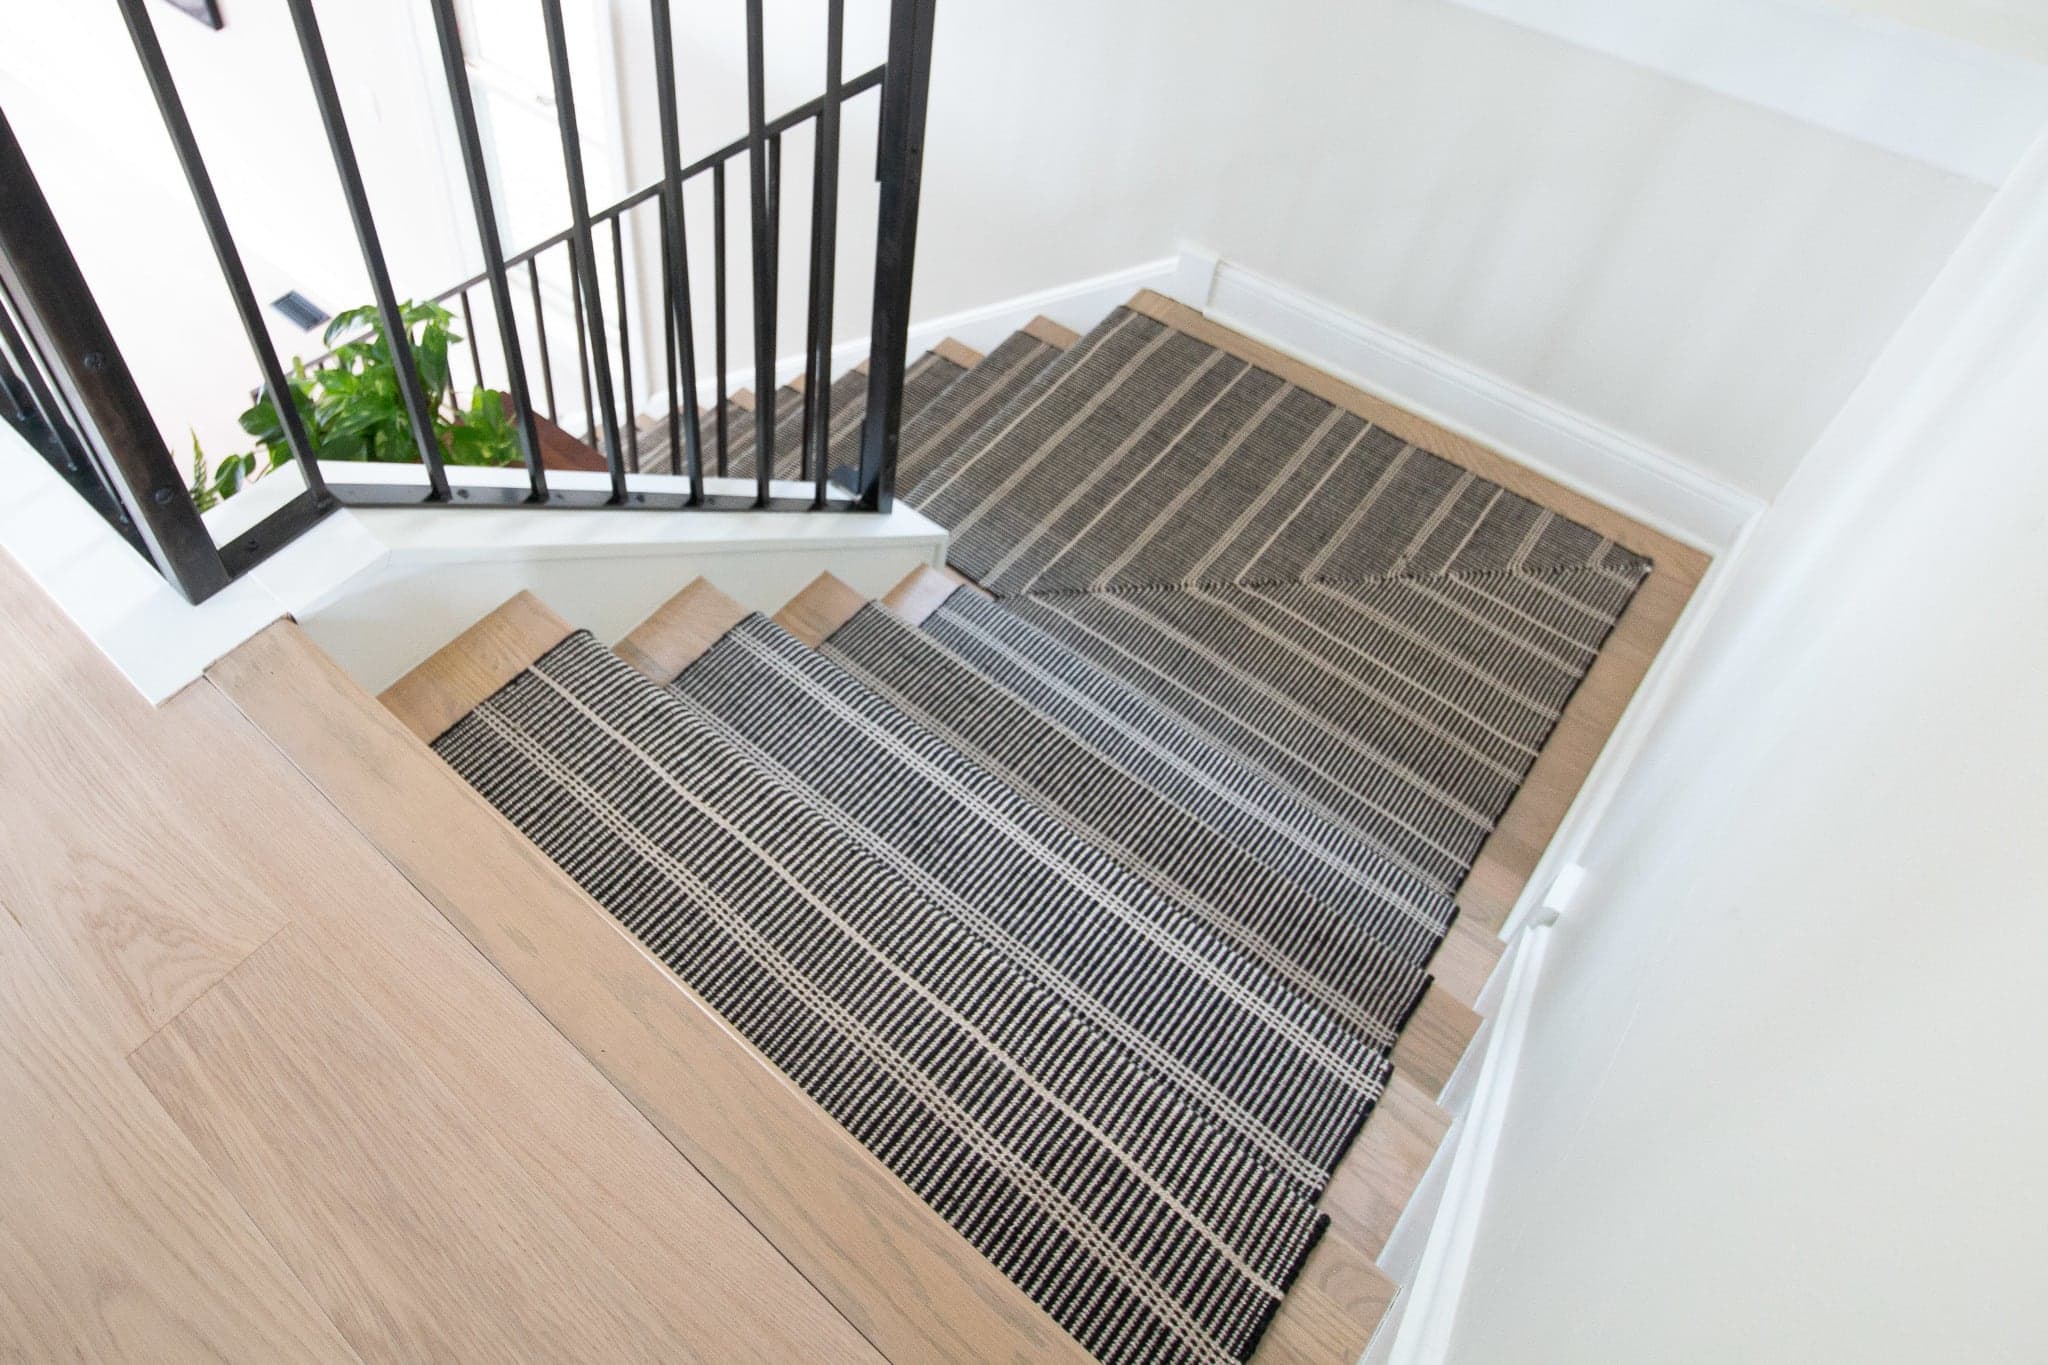
If it would bother the heck out of you, then I suggest going with a solid fabric for your house! 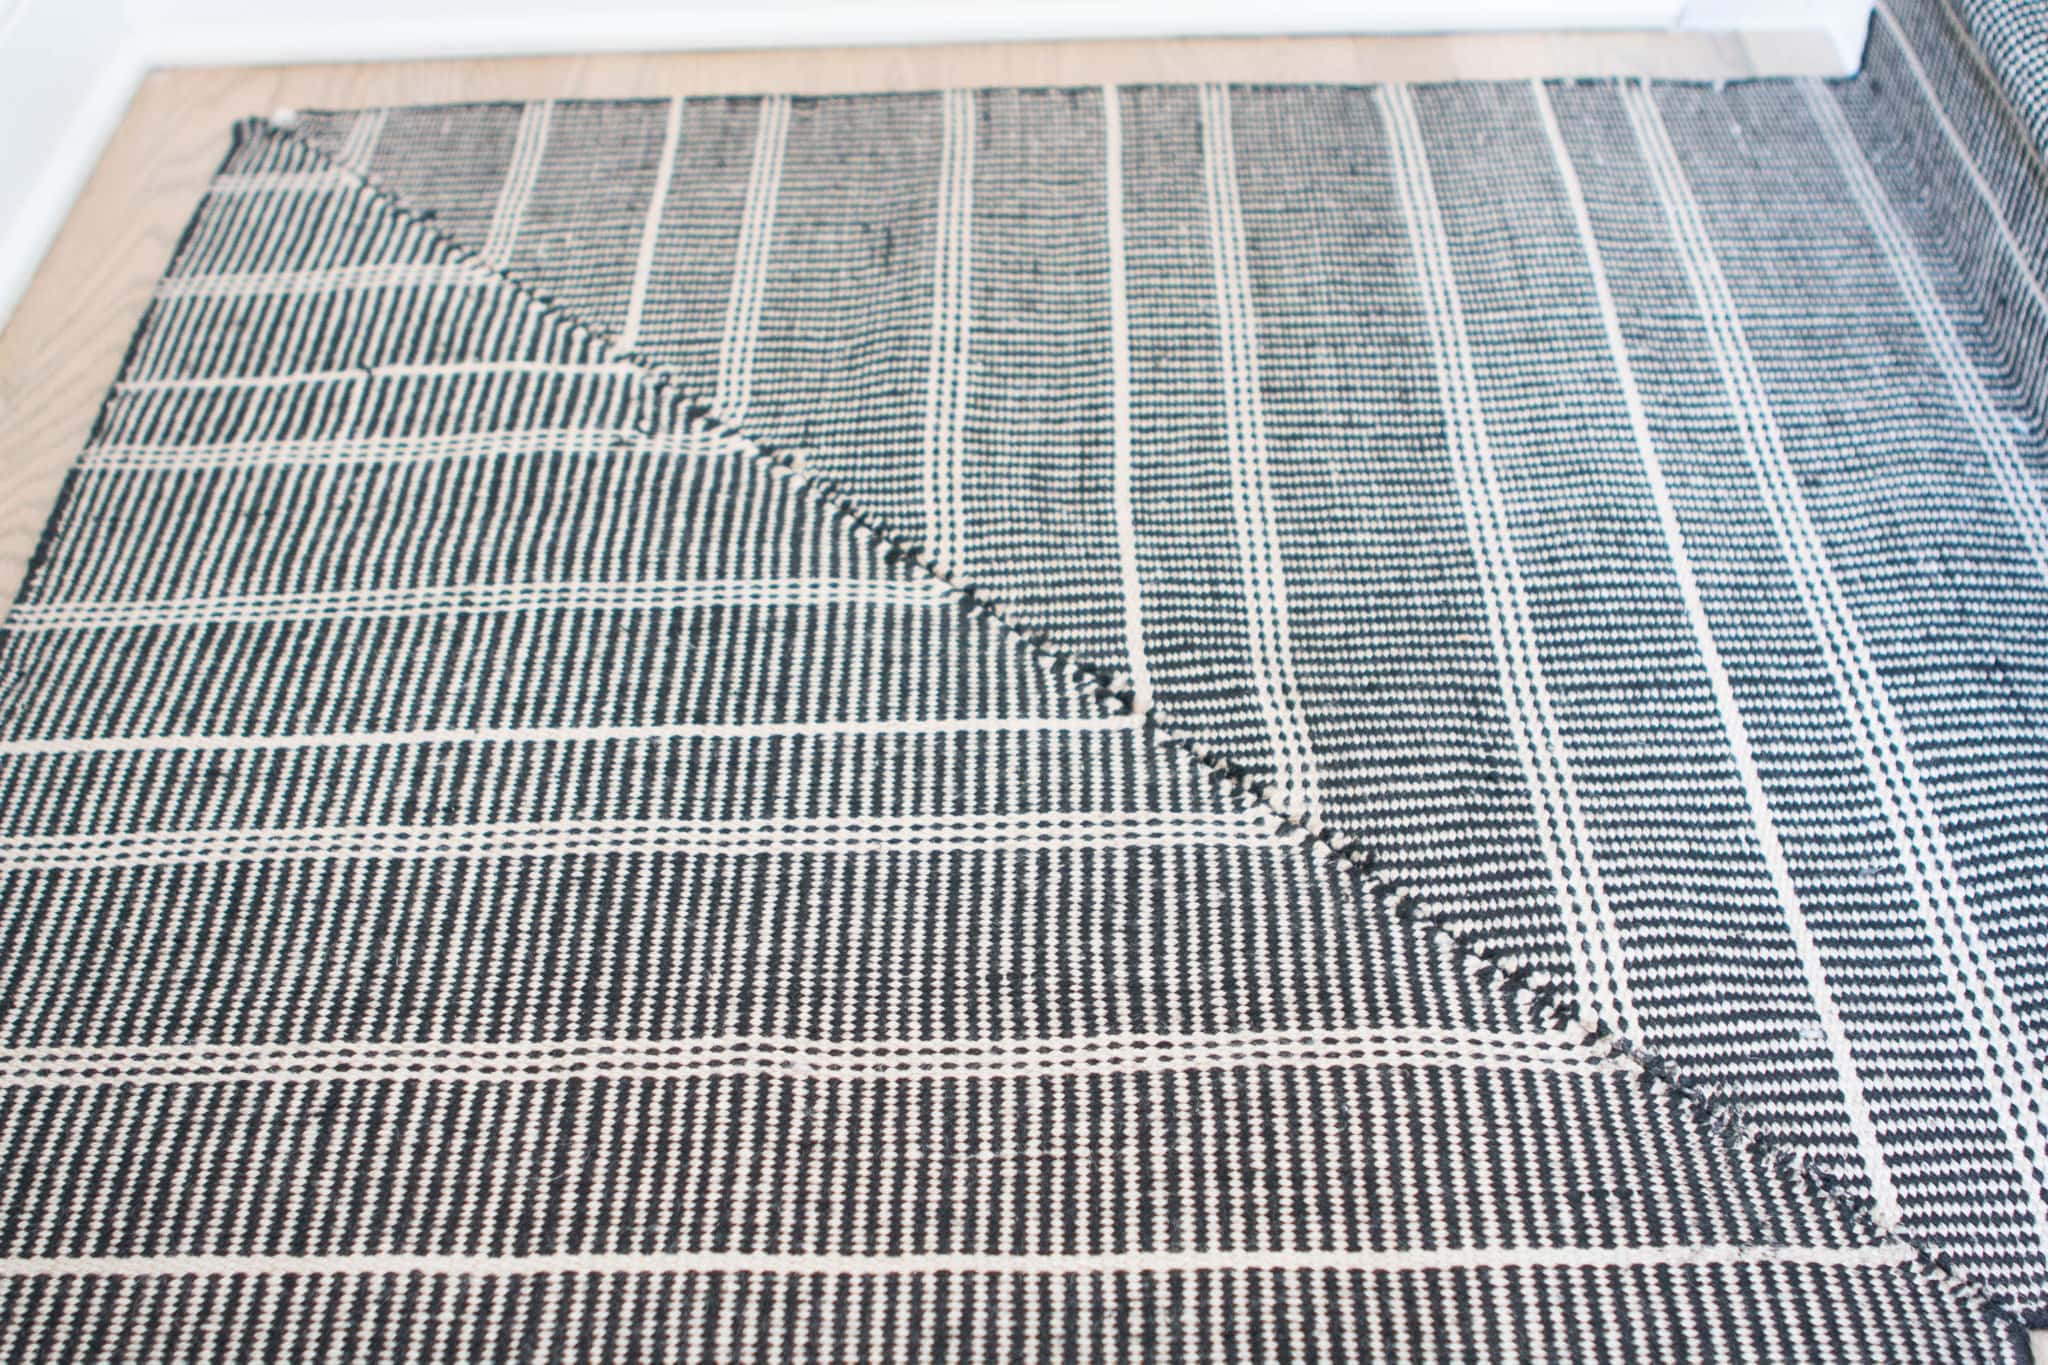
I’m so pleased with how our landing turned out because I was most nervous about this part of the project. That carpet adhesive really does work well to keep the fabric all stitched together! If we didn’t have the landing, this project would have been far easier, but it ended up being a fun challenge. 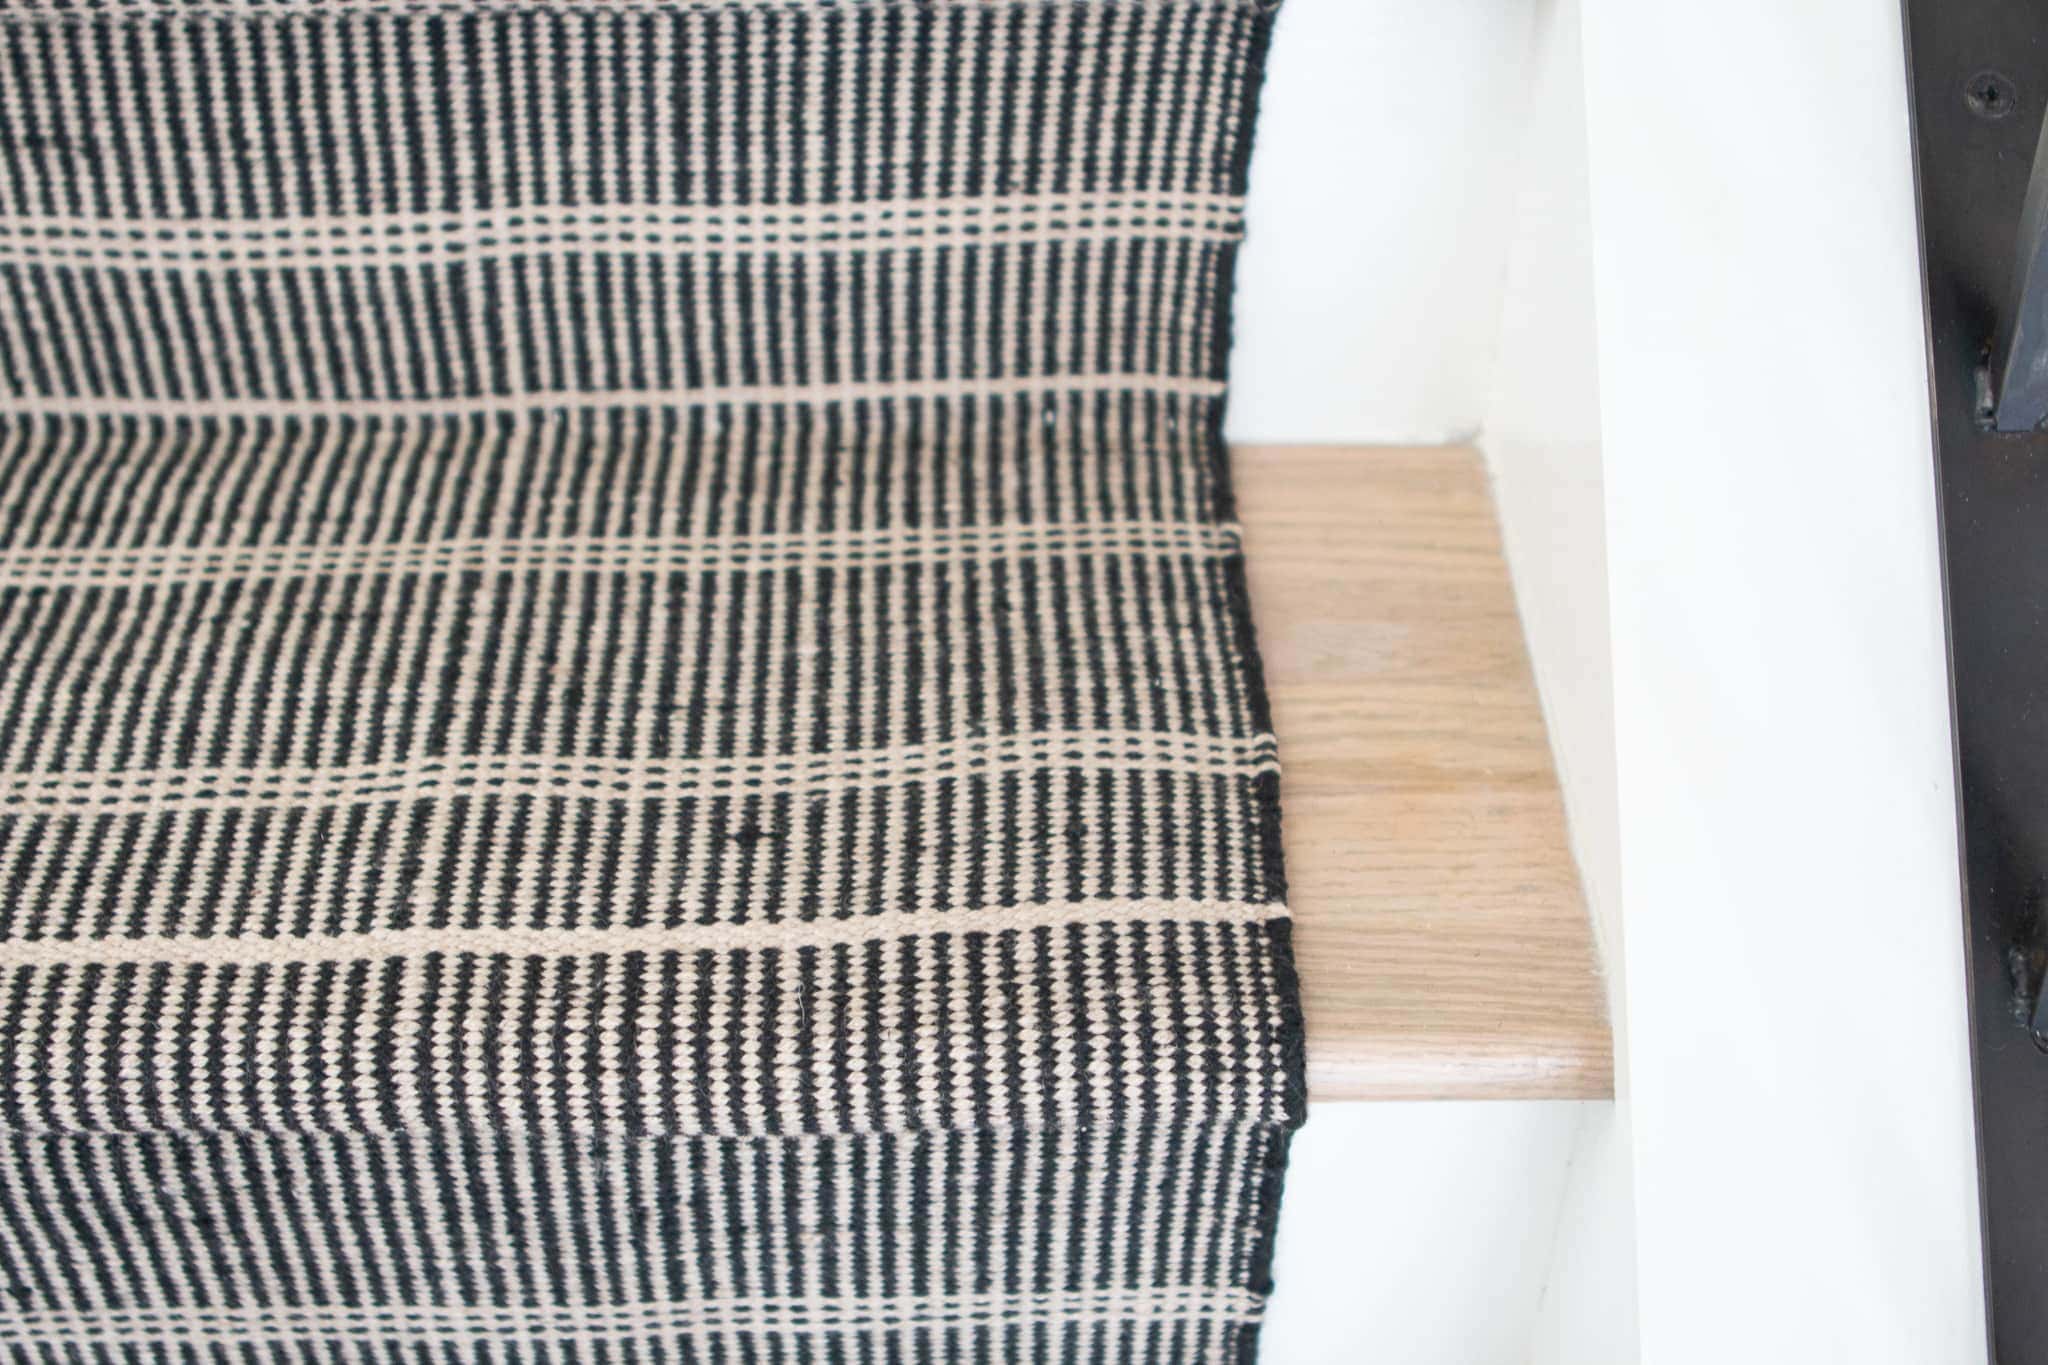
We’ve had the stair runner installed for about two weeks now and I fall more in love with the fabric every day. It’s very soft underfoot and I know the dark color and pattern will hide dirt well in the long-run.
This is a complete DIY project that anyone could do. It took us about six hours to tackle from start to finish, but without the landing, I bet you could get it done in less than four. Plus, Finn feels much safer walking up and down these stairs now. Ha!
 Let’s take a look at the before and after of this space!
Stair Runner – Before & After
An Update Almost Four Years Later

As you can see, the stair runner has maintained well and the fabric has done a great job of masking any stains.
However, over time, there are a few things I wish I would’ve done differently – but hey, that’s how we learn! Hopefully reading about my experience will make your DIY stair runner even more successful!
It’s funny because we learn these particular DIY skills and sometimes it’s a very long time before we ever get to do that same project again. However, having our system down made it much easier to do a touch-up nearly four years after the initial installation.
Over time, where I had originally bonded two of the rugs, the fabric became frayed and unraveled. I learned a lot about choosing the best fabric for the rug, the best type of pattern, and where/how to bond the runners to best avoid the unraveling- I shared it all here!
Stairwell Accent Wall

Now our stair runner is looking good as new and it certainly makes me happy to see when I go up and down the stairs! Since this project, I have also added an accent wall to the stairwell. It’s probably one of the projects I am most proud of – come take a look.
Casey