Stair Runner Mistakes To Avoid (& How To Fix Them)
In early 2020, while pregnant with my daughter, I installed a runner on our stairs. Finn fell down our slick hardwood stairs and with the baby on the way, I was determined to make our stairway safer for the entire family.
How to Install A Stair Runner (My 2020 Tutorial)

I shared a step-by-step tutorial for this DIY project at the time and I think it still holds up!

I walk you through the process of installing a stair runner when there’s a landing (it can be a bit tricky) and thankfully, our landing area is still looking great four years later.
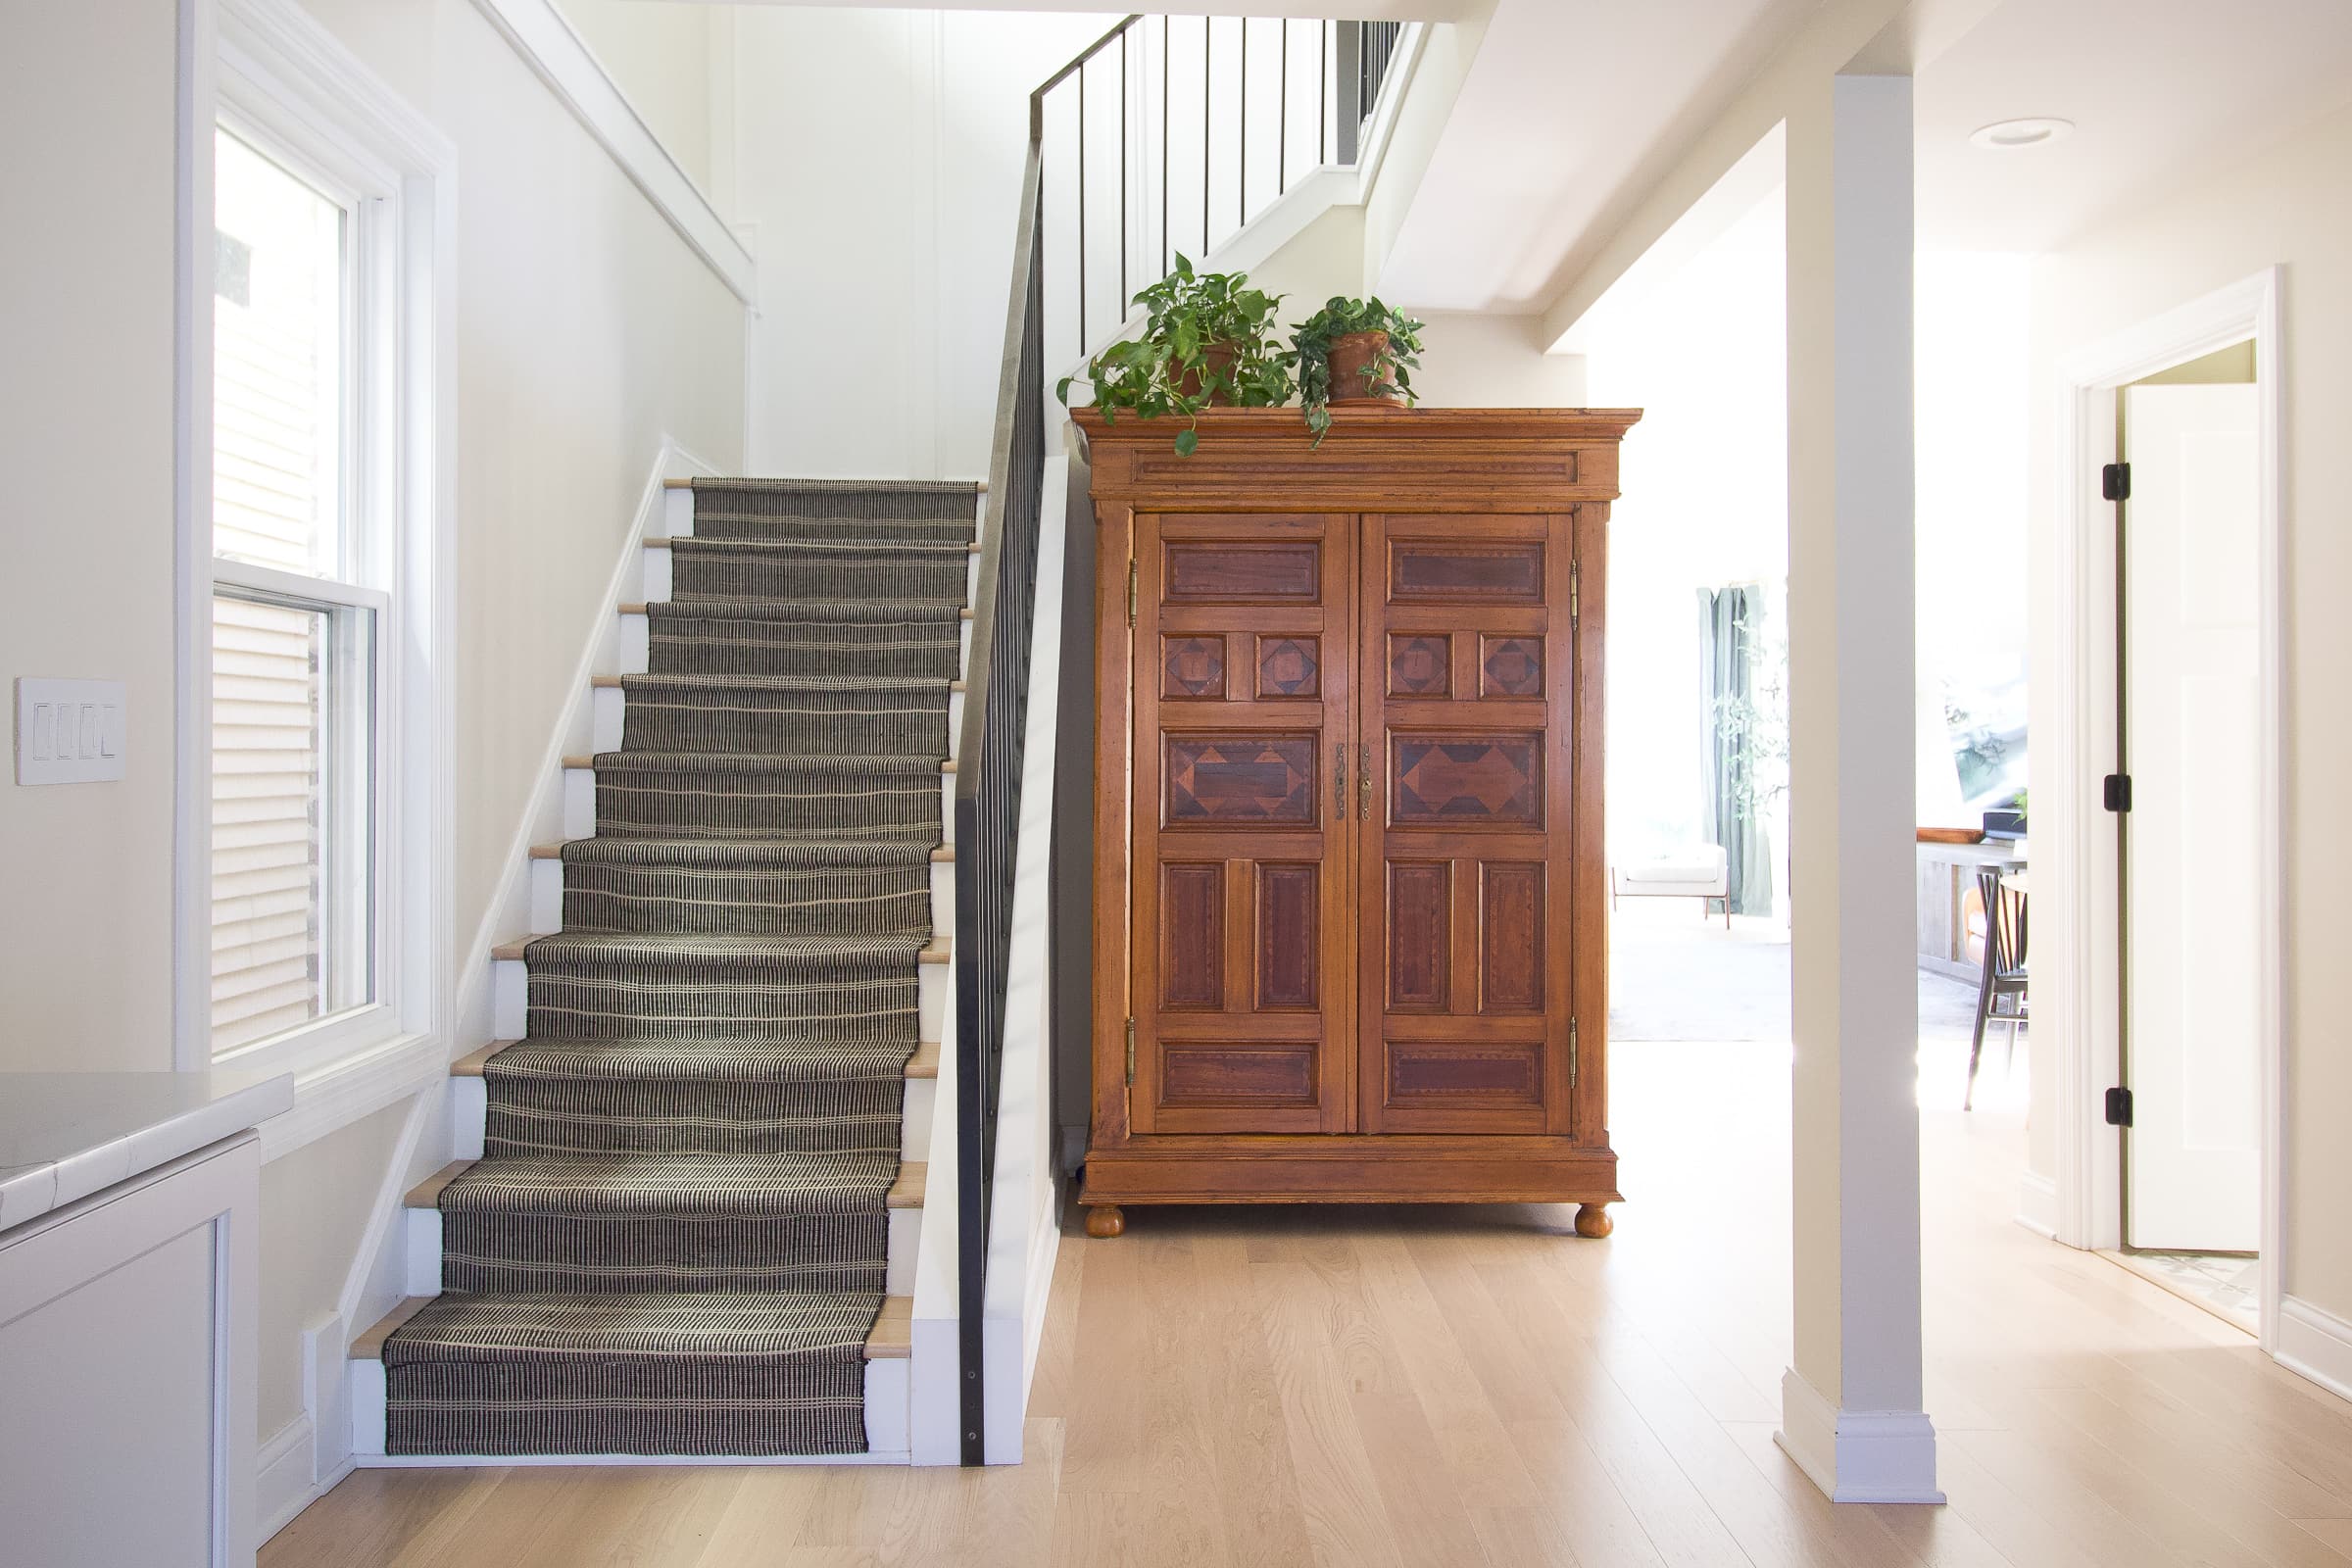
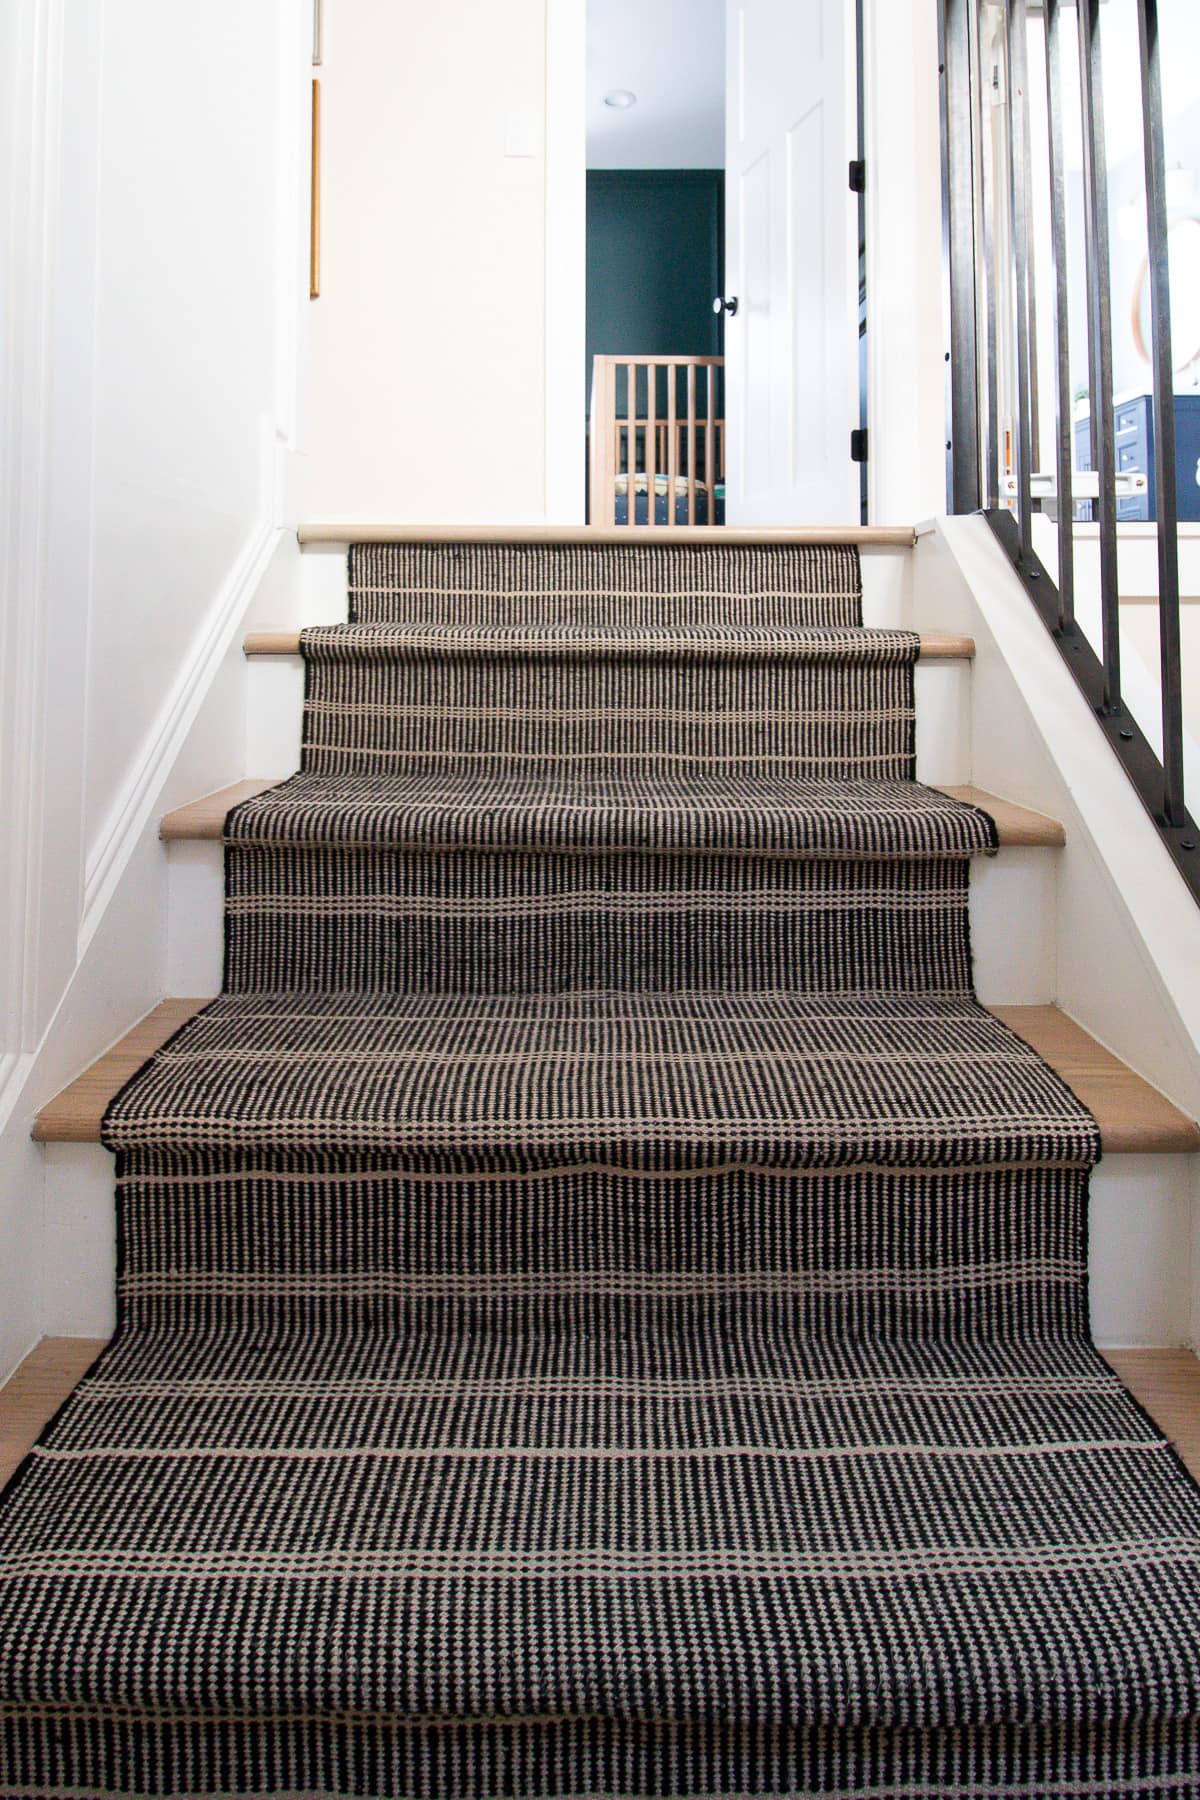
How It Looks Now
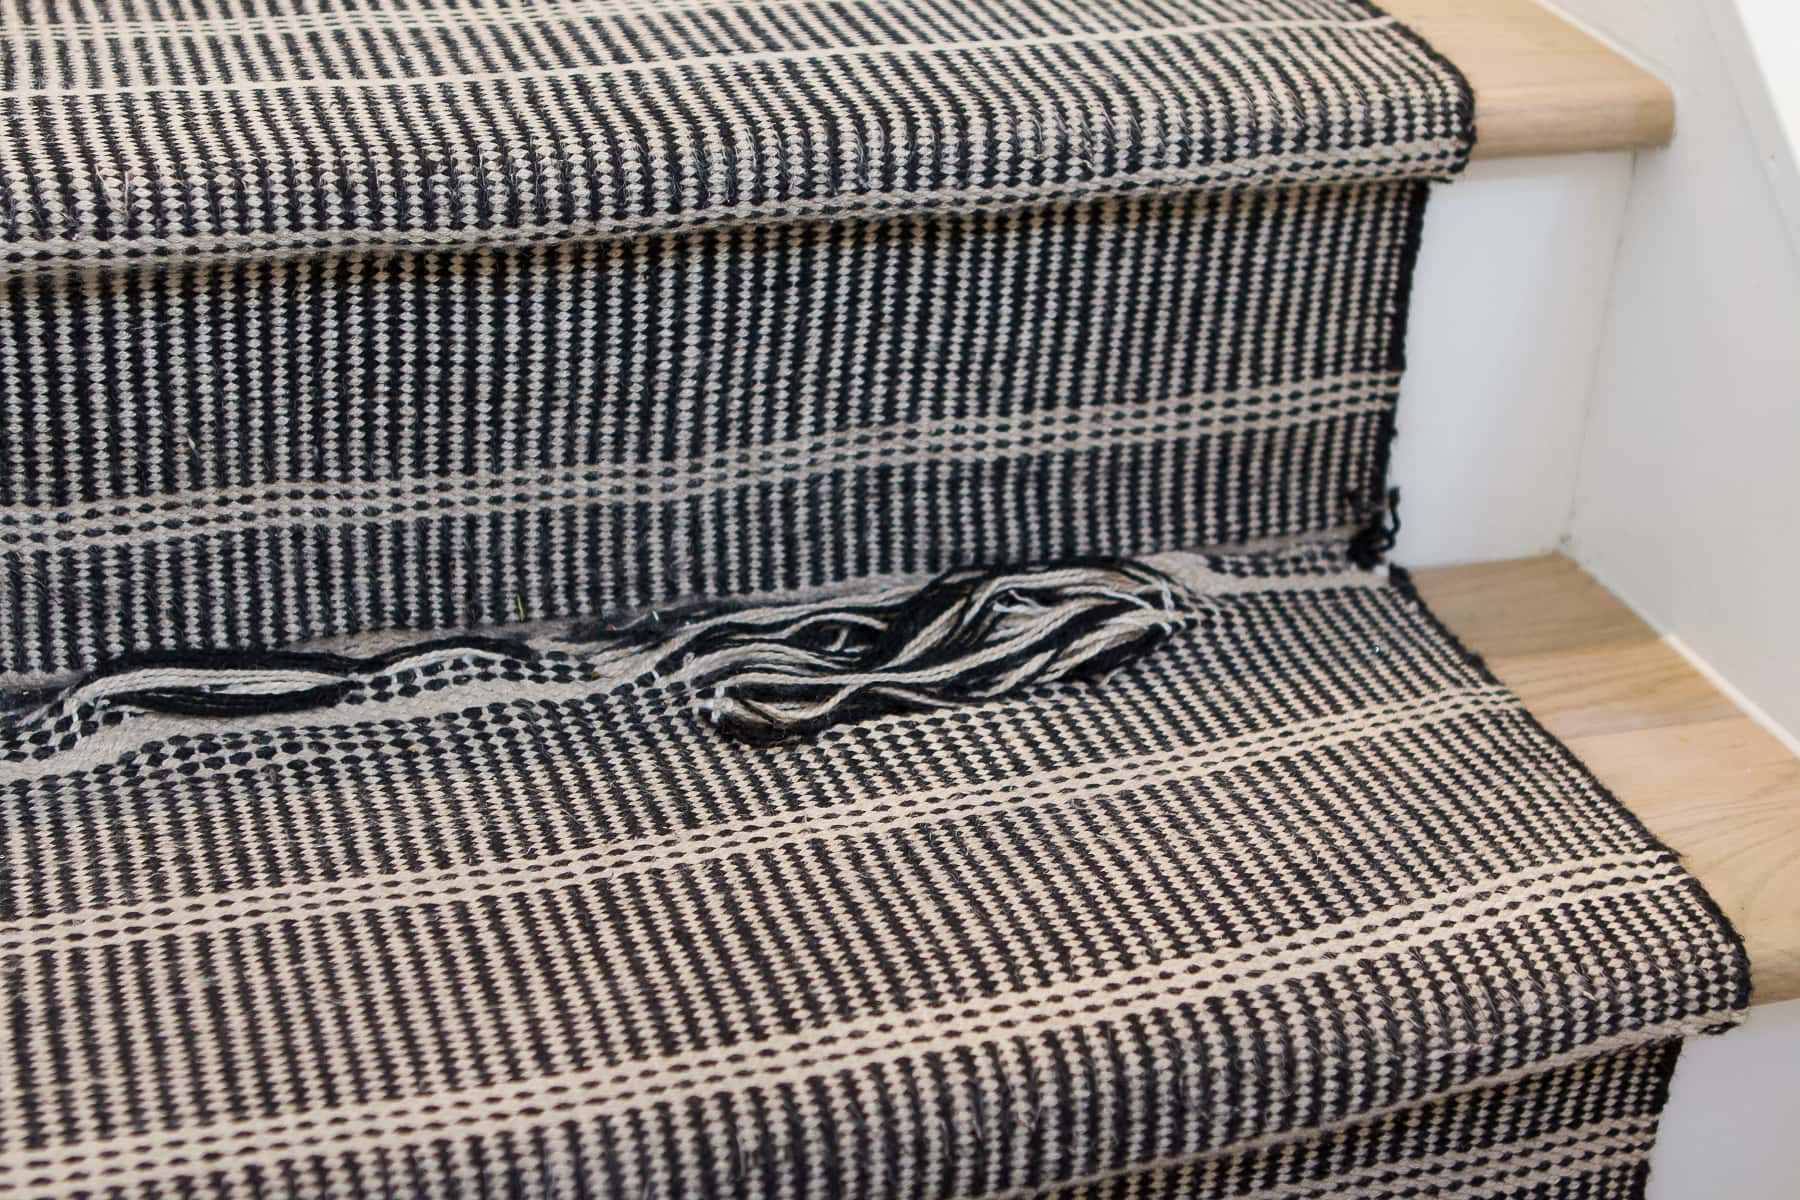
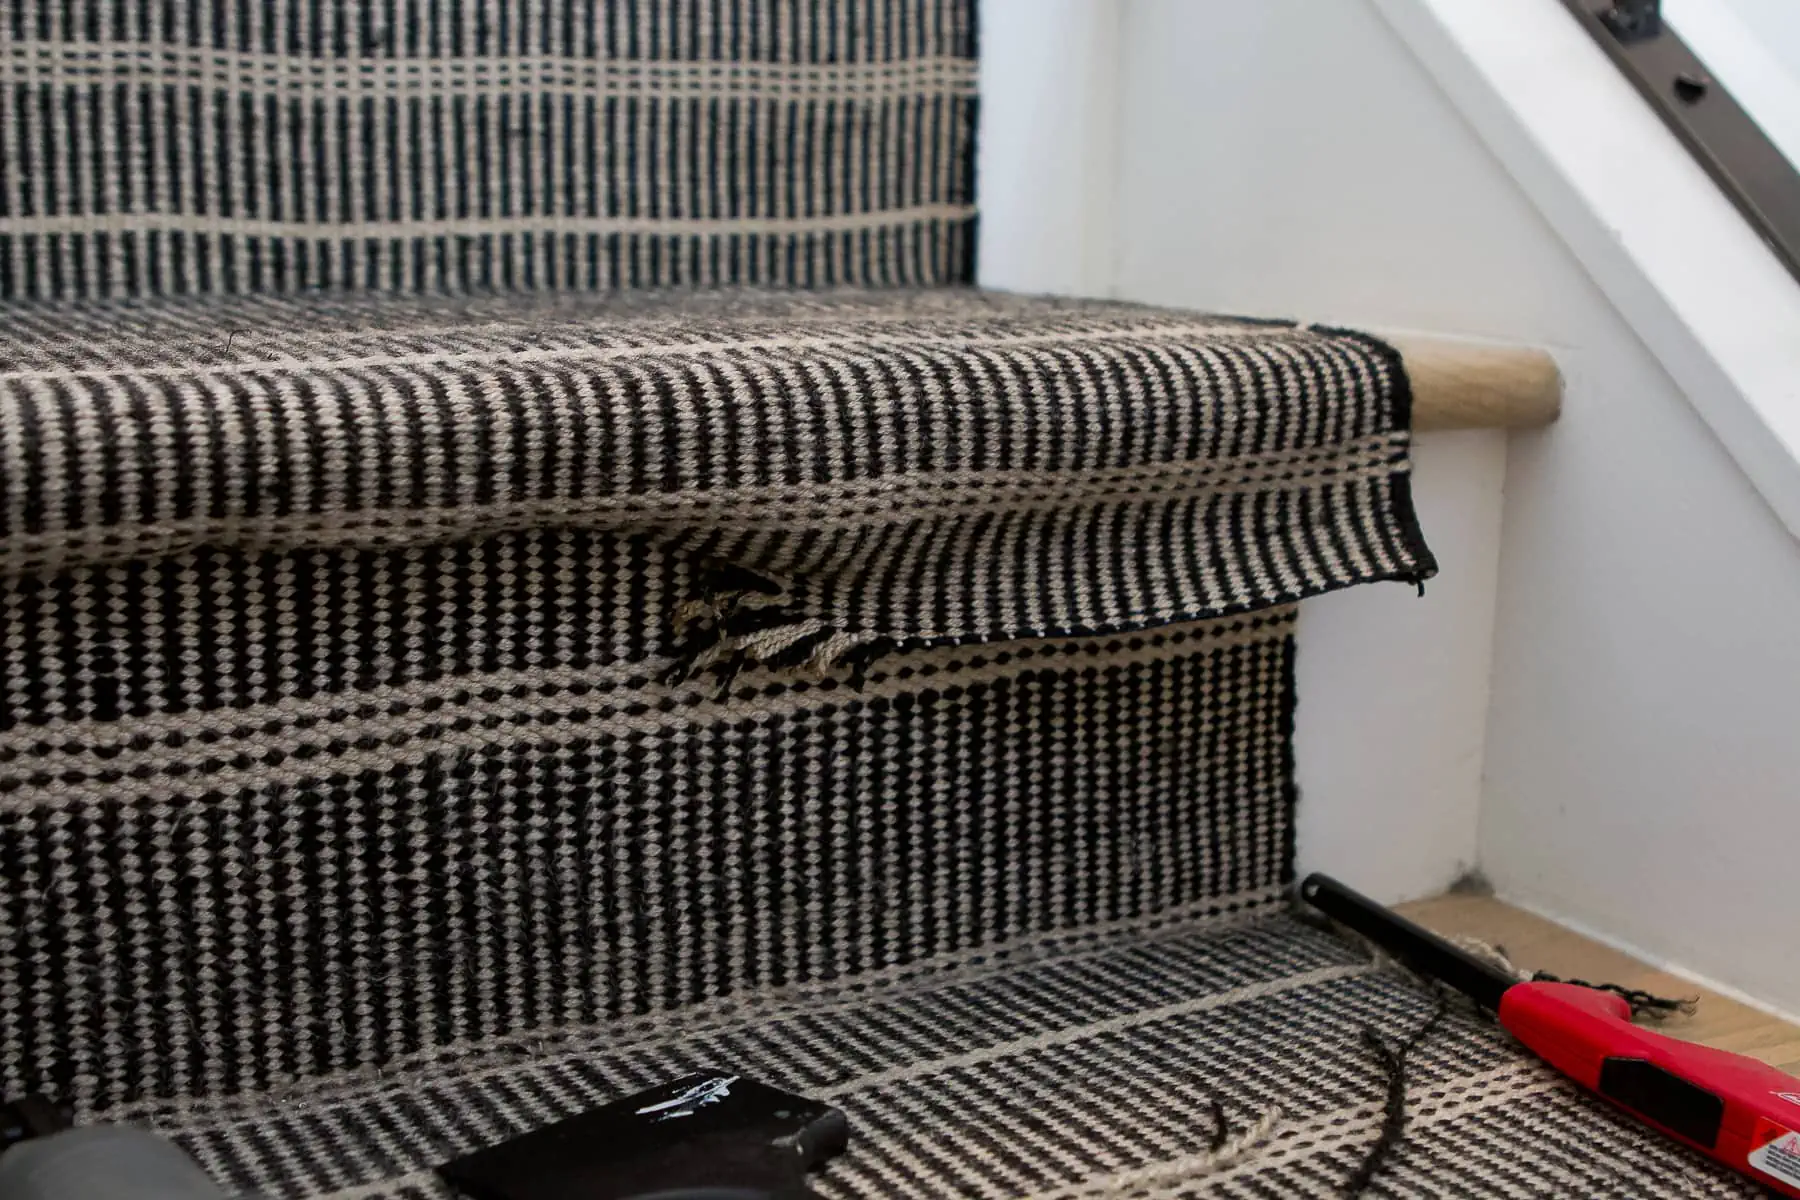
But we did have one area that was not looking so great. I had to use three runners joined together on our stairs and one area, where I cut the runner, was completely unraveling. I tried many things over the past four years to fix it – carpet glue, more staples, tucking it in better.
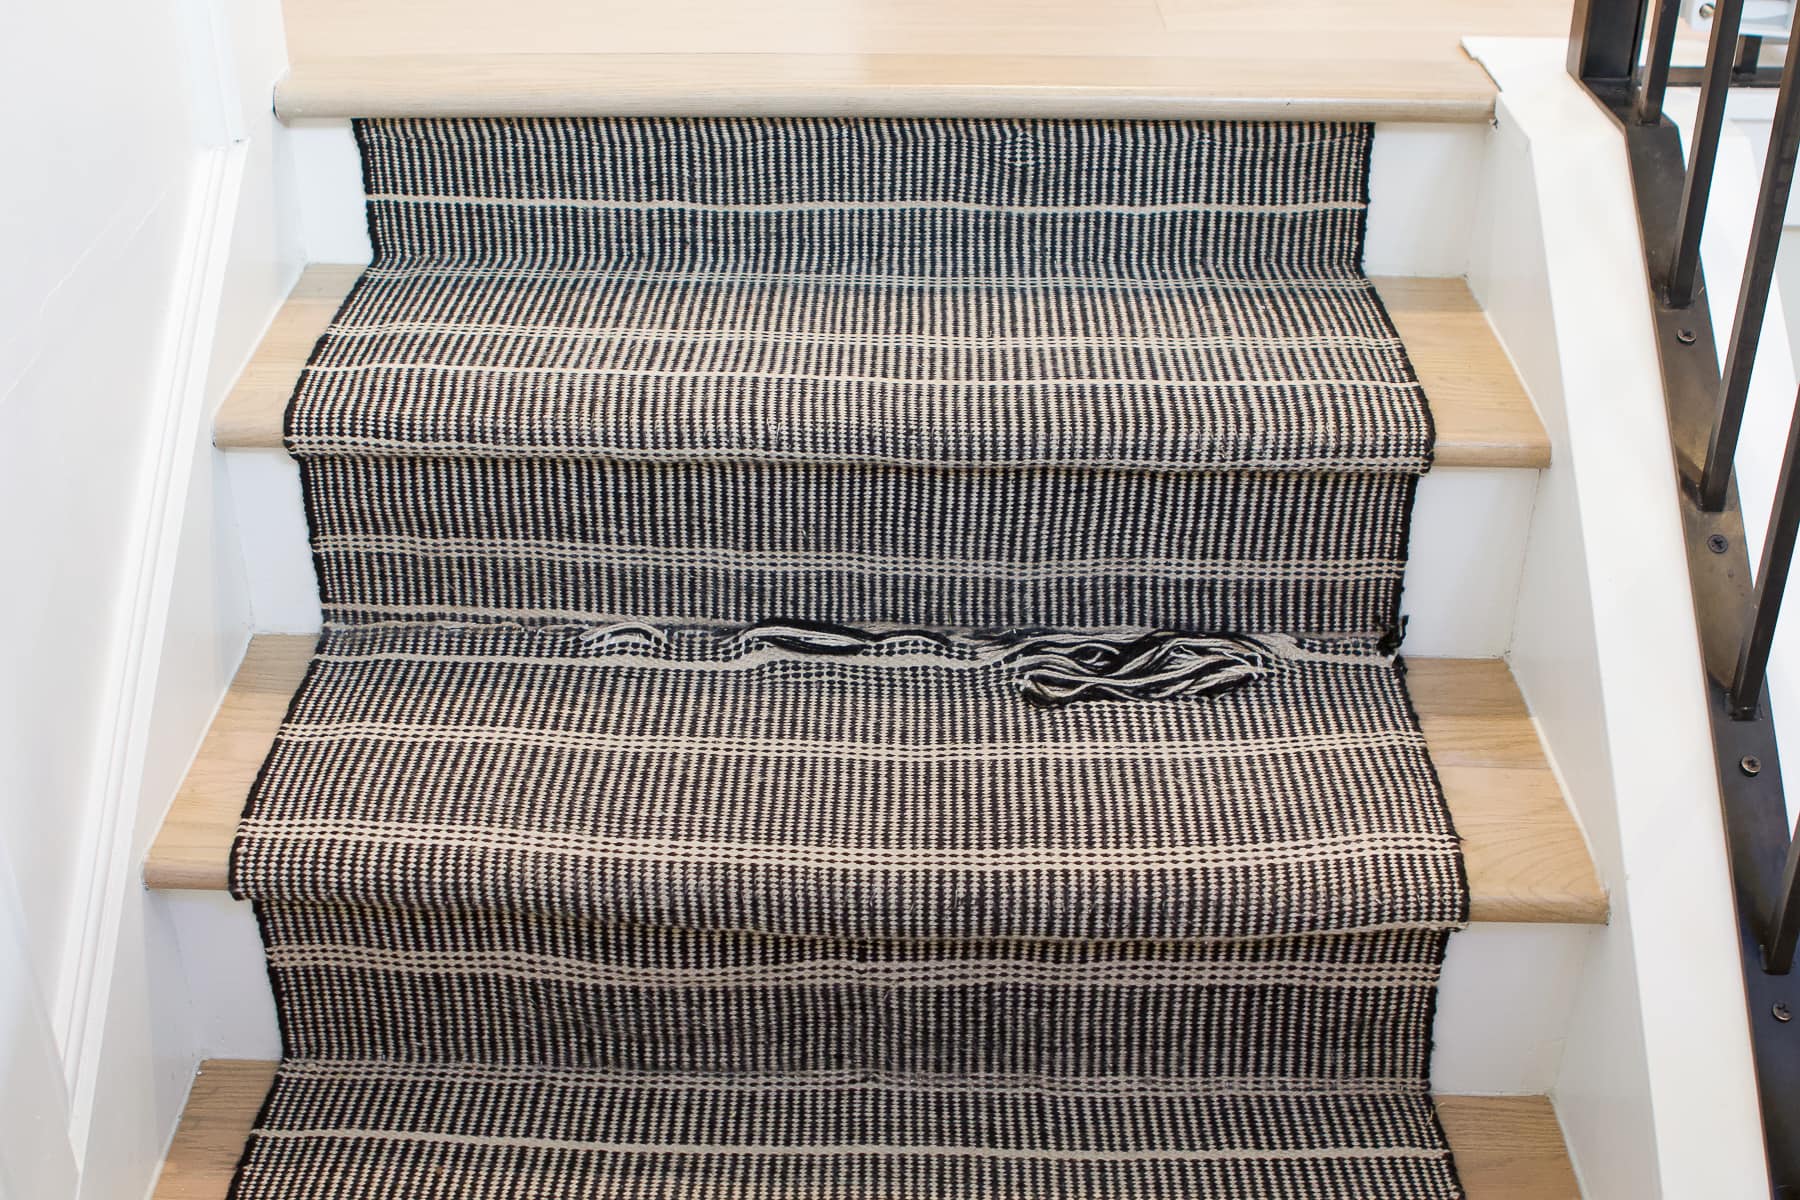
However, nothing worked and the area kept unraveling more and more. Every time I walked up those steps, I would look at this mess and think to myself, “Casey, you really need to fix that.” But, it was always at the bottom of my to-do list. Until today!
Stair Runner Mistakes To Avoid

Before we get to my tutorial on how I fixed this situation. Let’s talk about the stair runner mistakes I made in the first place. I wish I had done things differently four years ago, so I wouldn’t be in this situation. I’m hoping you can learn from my major mistakes before you embark on your DIY stair runner project.
Don’t Choose The Wrong Pattern
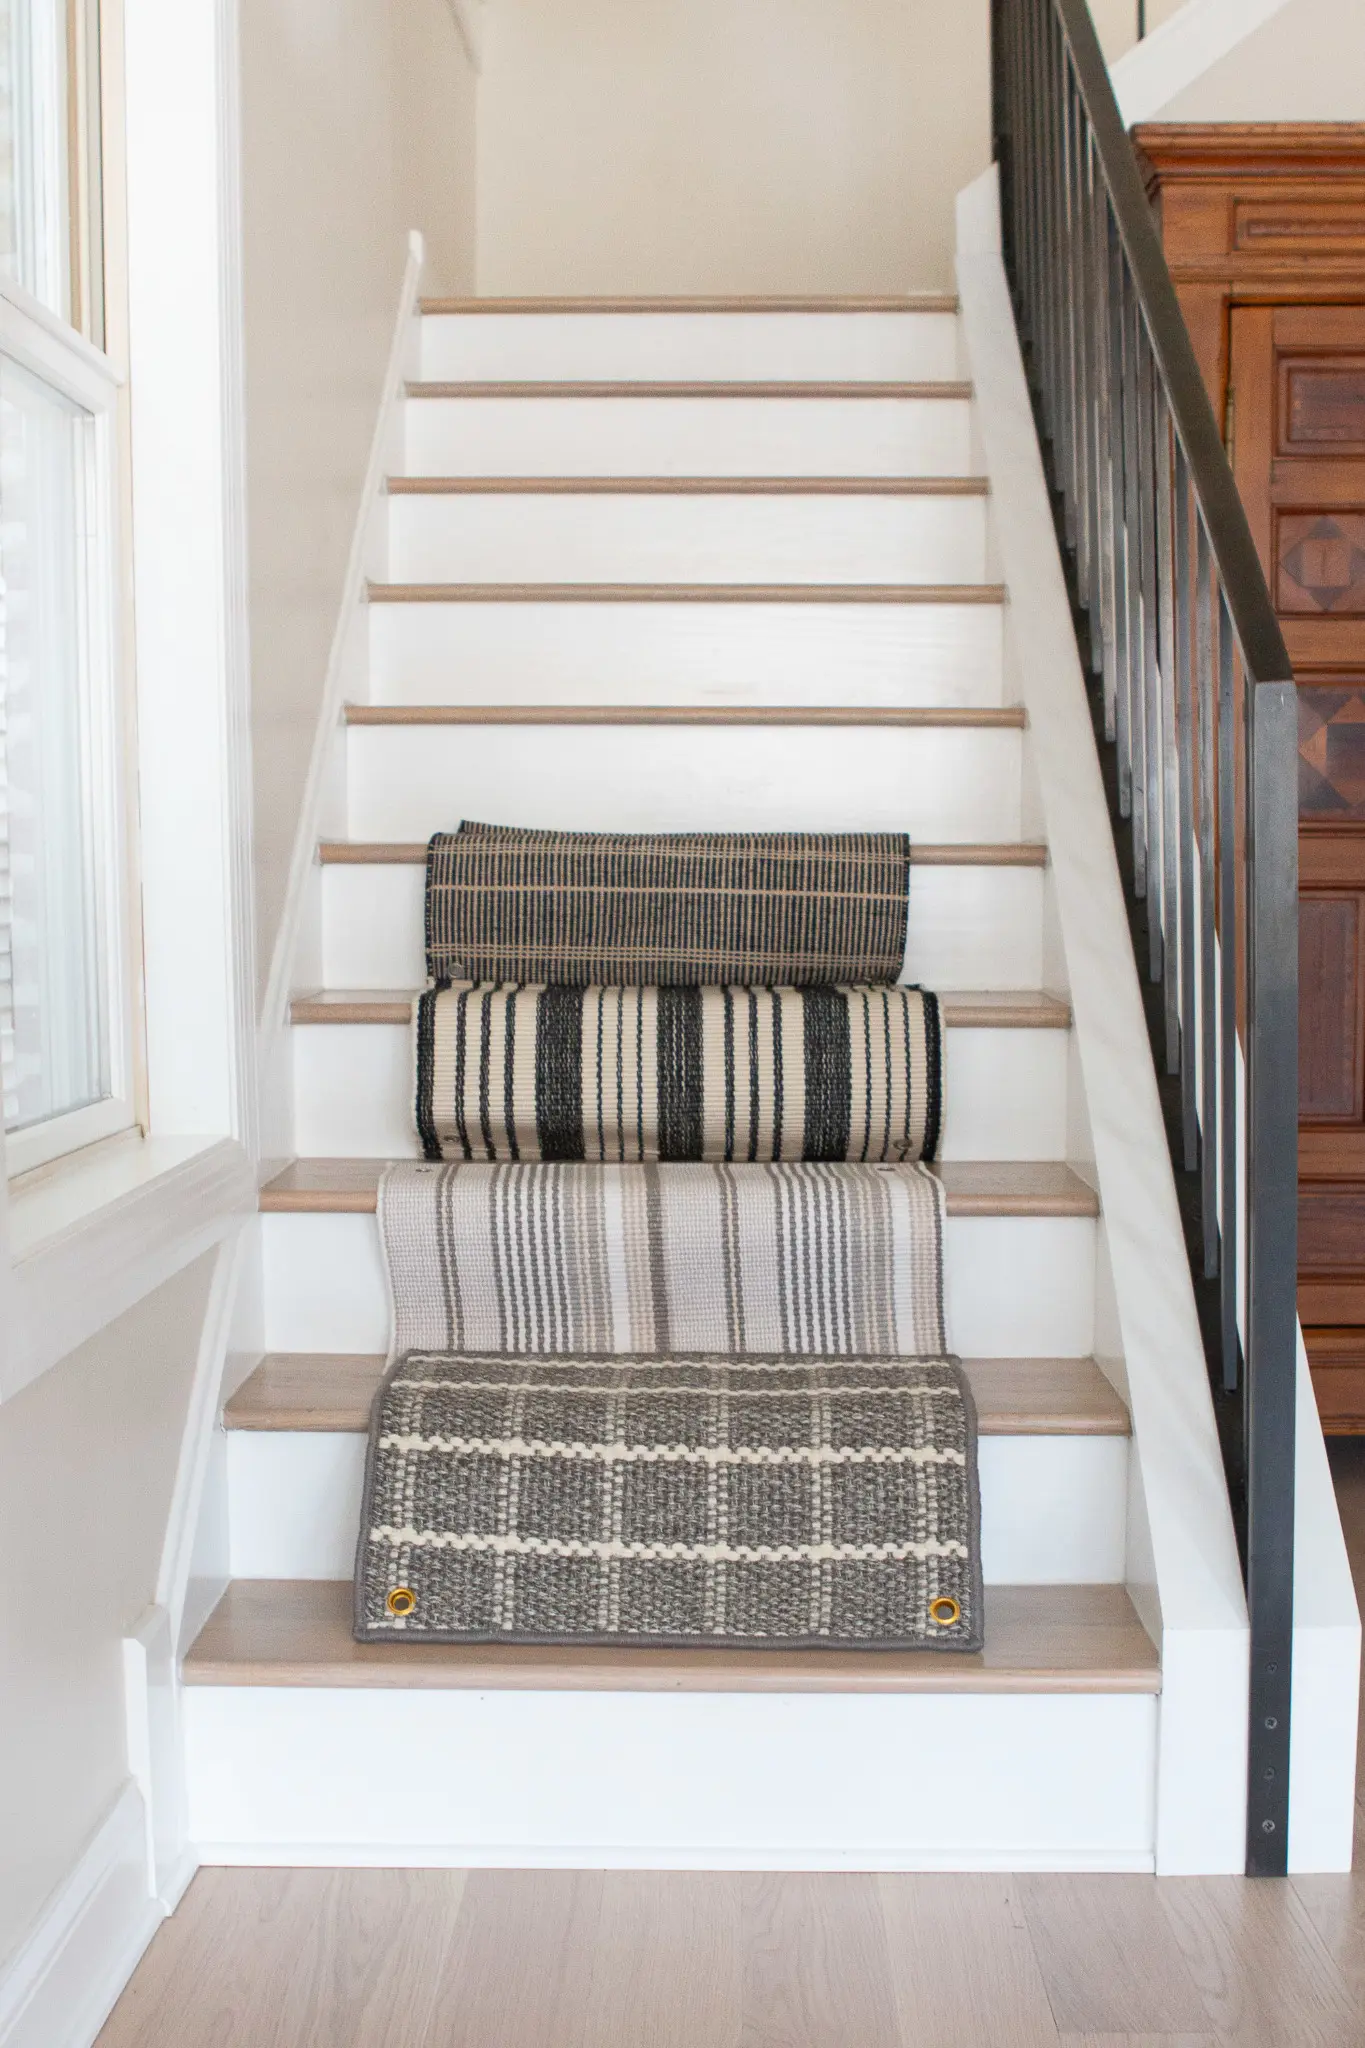
If I could have a do-over, I would have chosen a completely different carpet runner. Since I had never installed a stair runner before, I didn’t know that this horizontal pattern would be a nightmare to install. It was impossible to get the lines to match up correctly and the end result is far from perfect.
I think the horizontal pattern would be gorgeous for an area rug in a living space or for a hallway runner, but not for stairs. While I really like this rug, I would never choose it again when doing this project. Avoid horizontal stripes, my friends!
Don’t Choose The Wrong Material
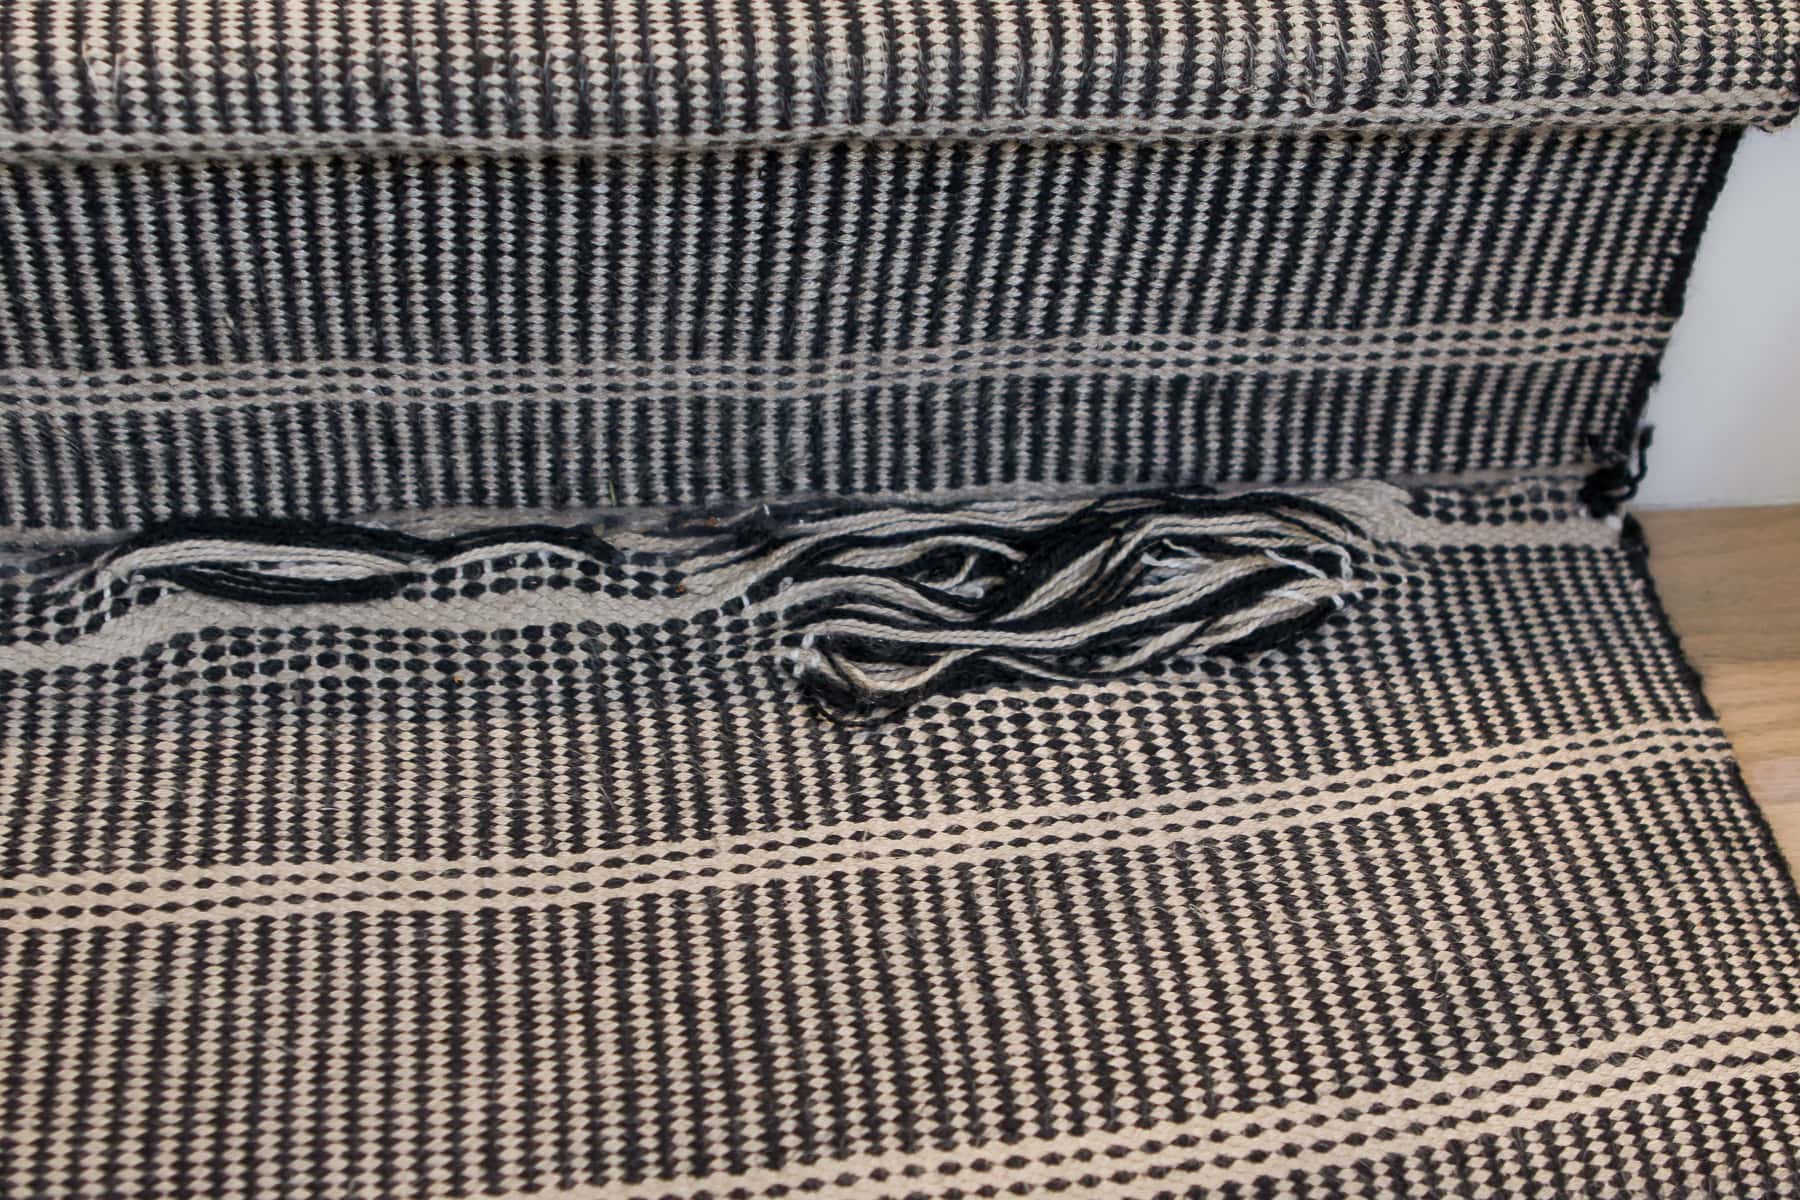
I also chose the wrong material for the runner. This is a flatweave looped material and when it’s cut horizontally, it starts to unravel. Not a great material to use for a stair runner that needs to be cut to fit just right. However, I do love that this material works well for high-traffic areas and easily hides stains.
I wish I had chosen a rug that had a backing, as opposed to this flatweave rug. I think if there’s a backing, there is less of a chance for it to completely unravel when cut. My friends, Kim & Scott, chose a custom-sized rug from Sisal Rugs Direct which could be another good option. I’m not certain there is a perfect runner out there, but look at lots of different options before committing.
Don’t Forget To Bind The Edges
Now, this is the biggest mistake I made when doing this DIY project and a common mistake that I see. I cut the rug, but I didn’t bind the edges. I used binding tape when joining the two rugs together on the landing, and that worked well. I wish I had used that same binding tape on the ends where I had to cut each rug to make a finished edge.
You can also use heat to “seal” the edges of the rug. I know many carpet installers use a heat gun during this step and it really helps to seal the edge. There are lots of different ways to do this and I wish I would have done something so it wouldn’t have unraveled like it did.
How I Fixed Our Stair Runner
Even though I’m not in love with the horizontal striped rug, I decided to keep it and just replace the frayed area. Fixing it, instead of replacing it completely, saved me lots of time and money. I bought this stair runner on sale over Labor Day weekend and it’s been sitting in my office just waiting to be installed!
I thought this little fix would take me an hour tops. I mean, I just had to remove the old carpet and replace it with the new runner one. How bad could it be? Well, the removal of the old rug took a heck of a lot longer than I anticipated.
Removing The Old Rug
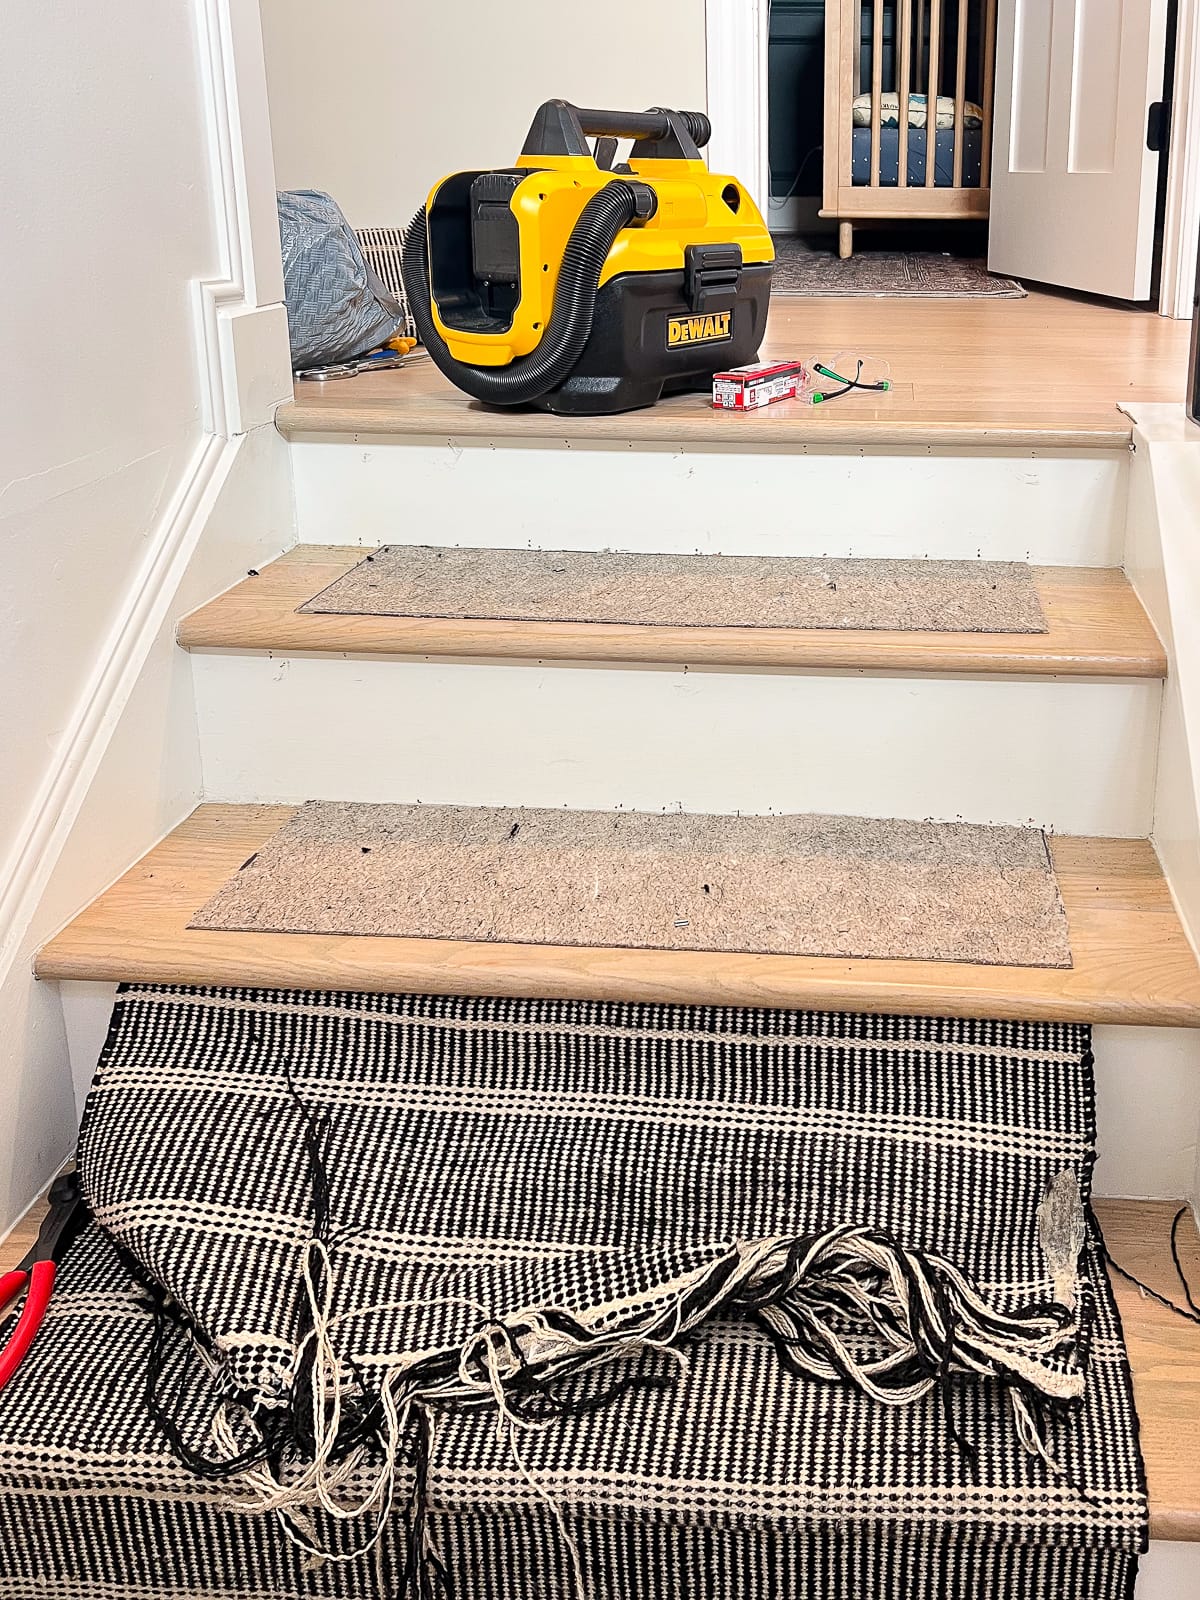
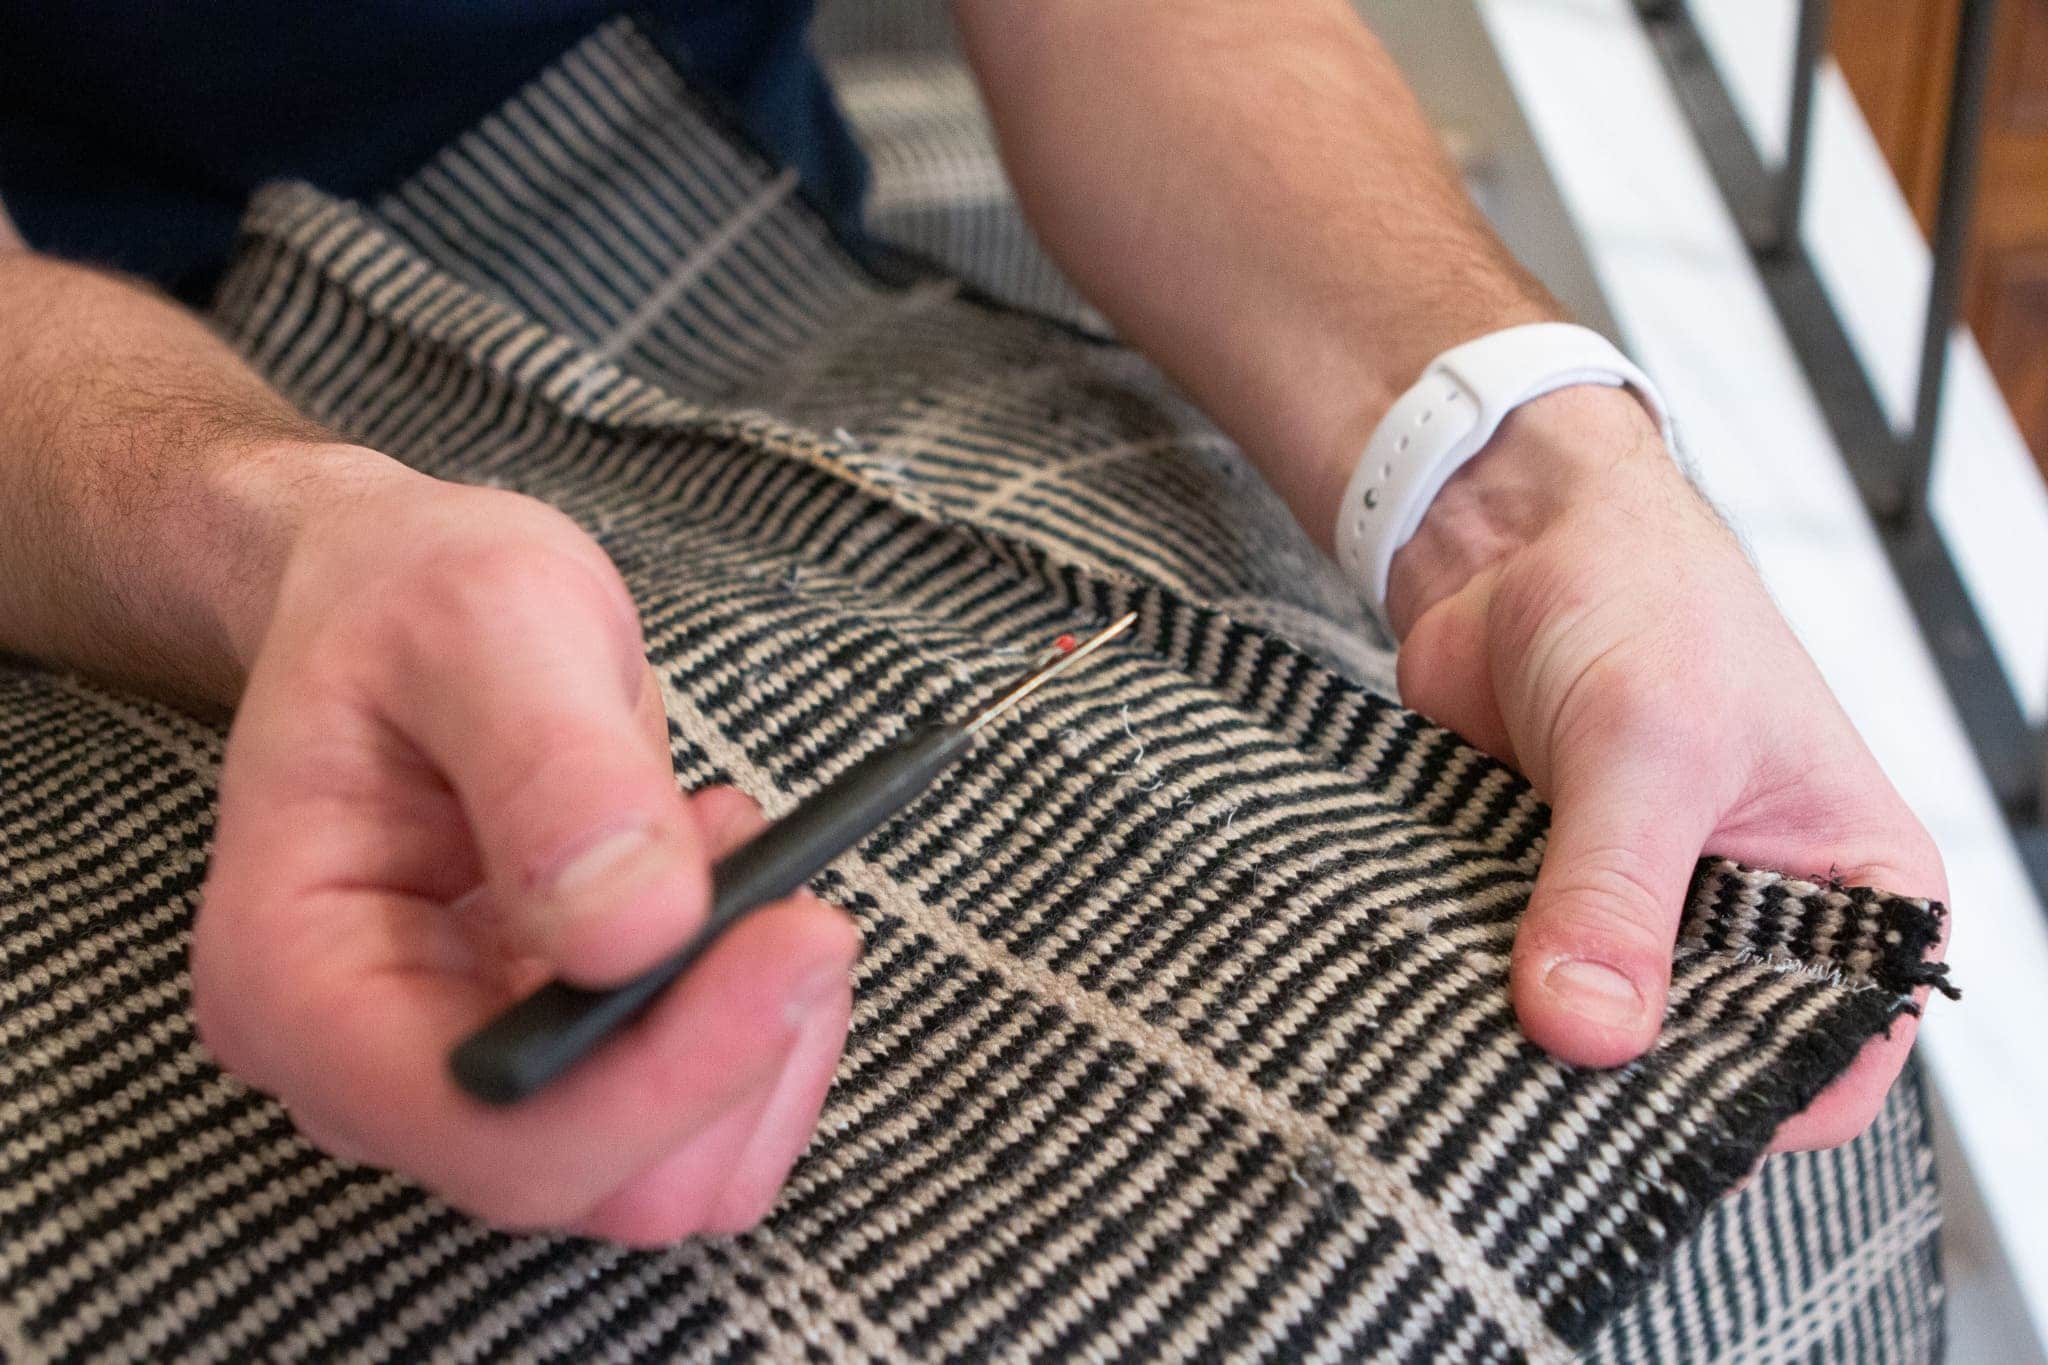
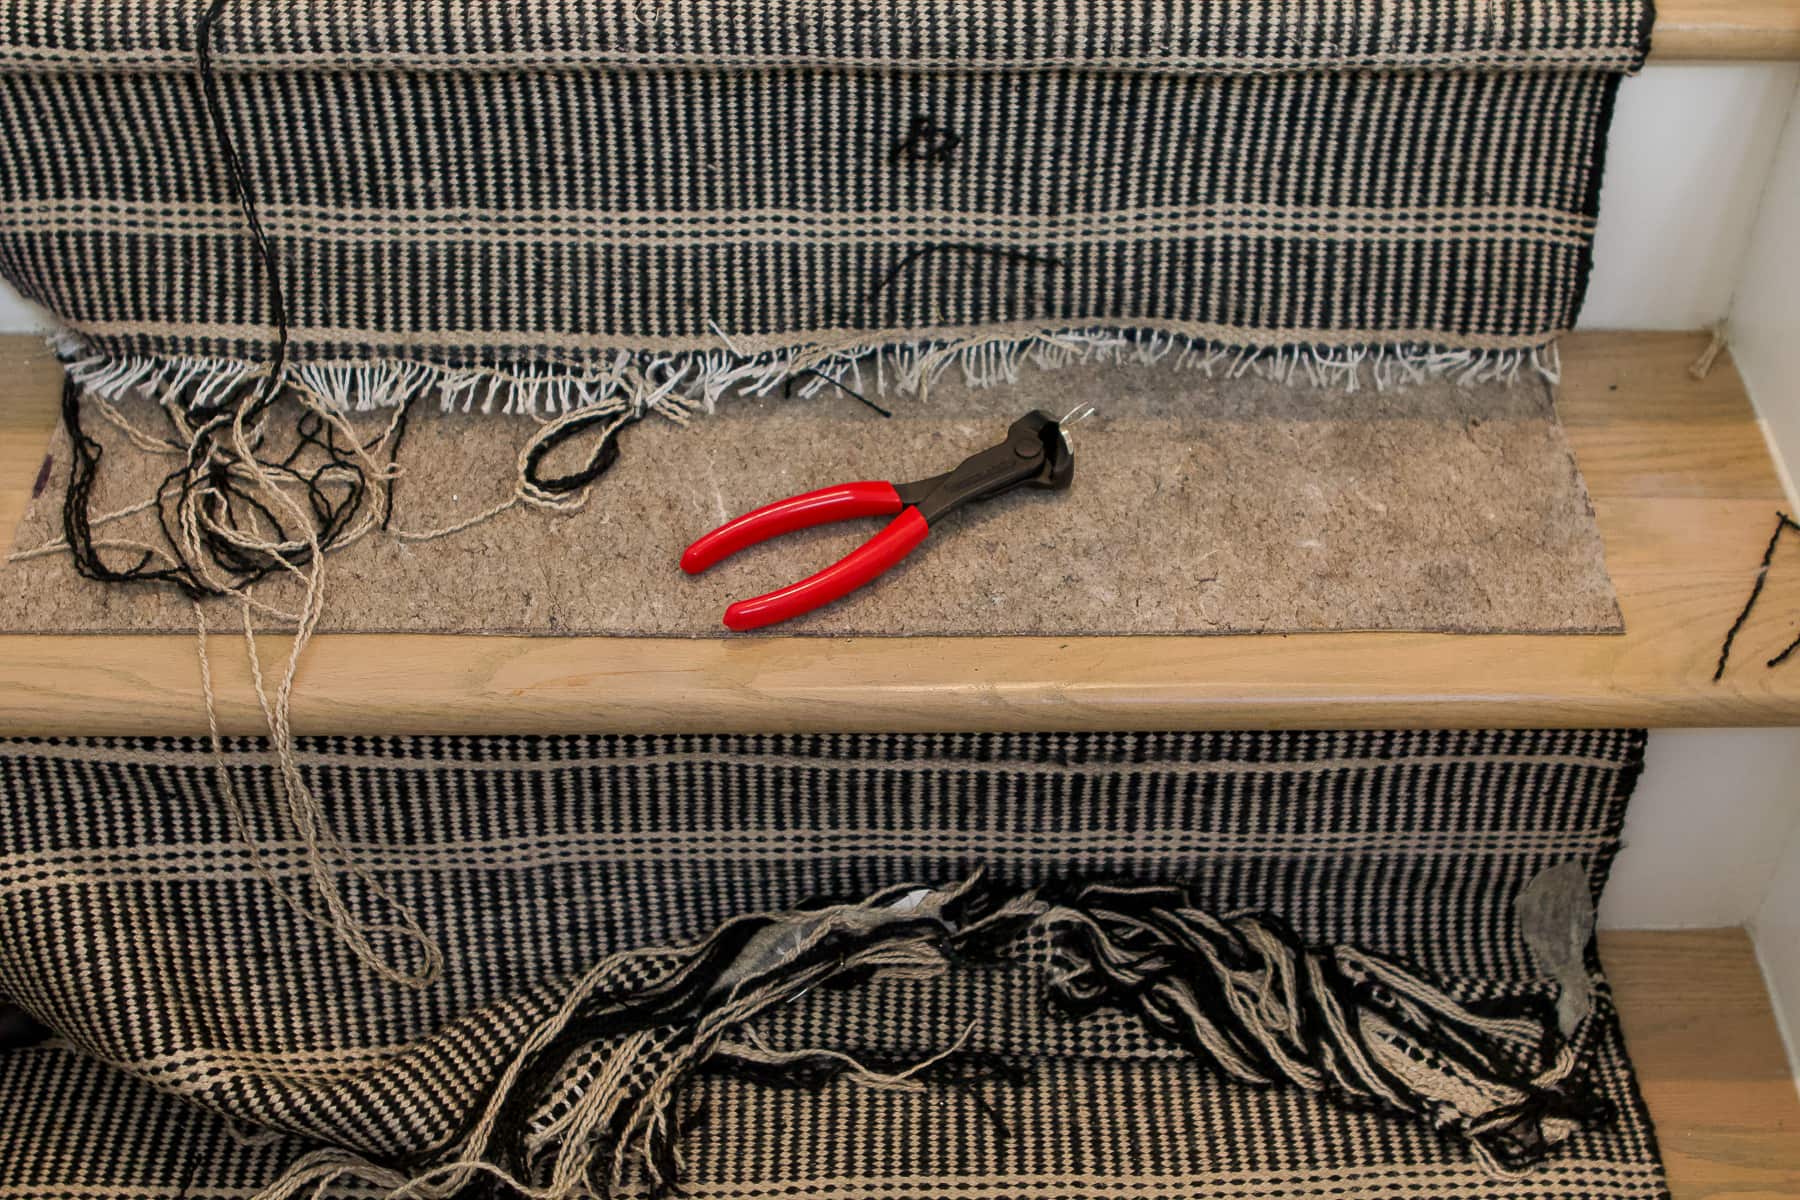
The first thing I had to do was remove the damaged portion of the rug. I thought I could just tug the old one off with a little bit of strength. It just goes to show how well we installed it the first time, because it didn’t budge.
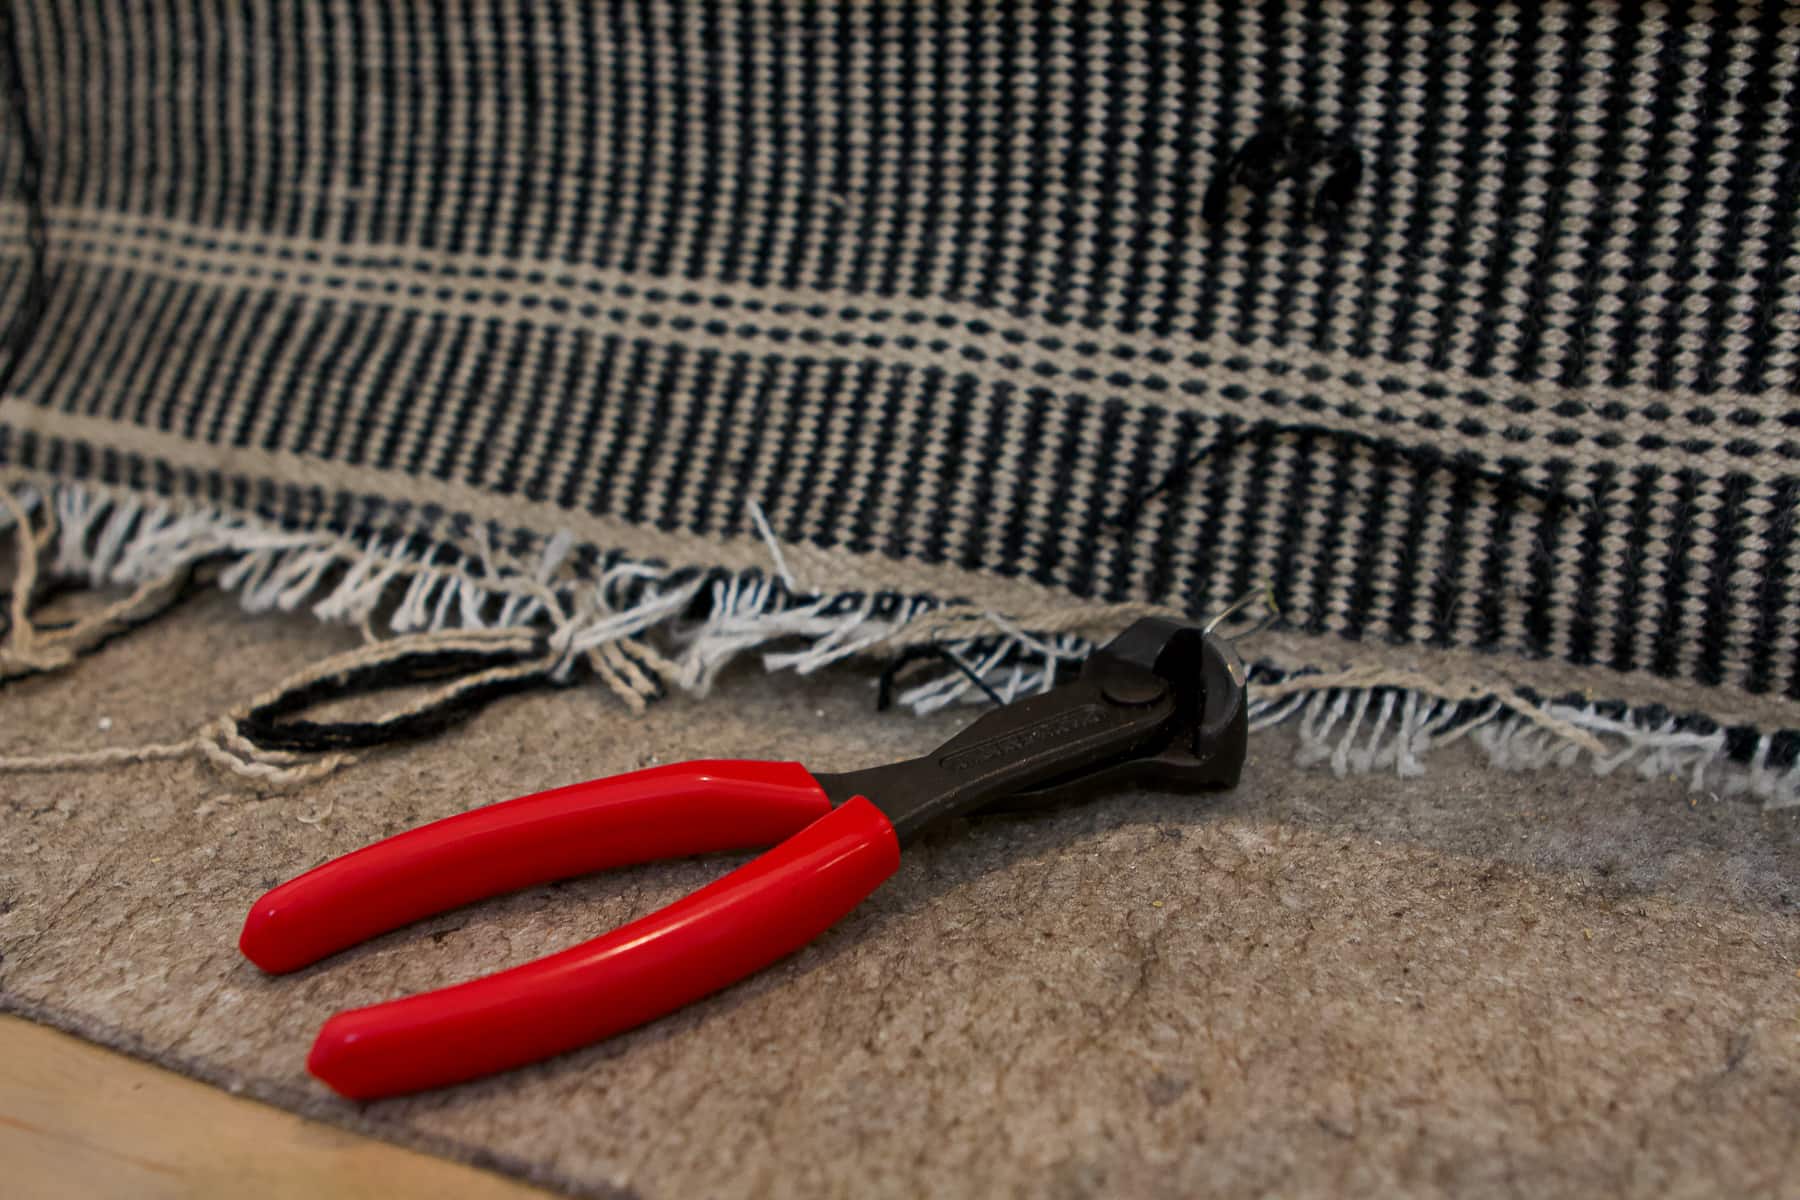
I had to use this nail puller to get each individual staple out as I went. Because the staples were hidden and often deep inside the rug fabric, it was tough to get my tool around each one. In those instances, I cut the rug with a utility knife so I could get the pliers closer to the staple to yank it out.
I would say that the removal process took over an hour. I was originally planning to replace the entire second flight of stairs from the landing up to the top of the stairs. But once I realized how difficult and time-consuming that would be, I decided to just remove the damaged carpet on the two top steps. I kept the rug pad underneath because it was still in good shape.
Add Carpet Tape
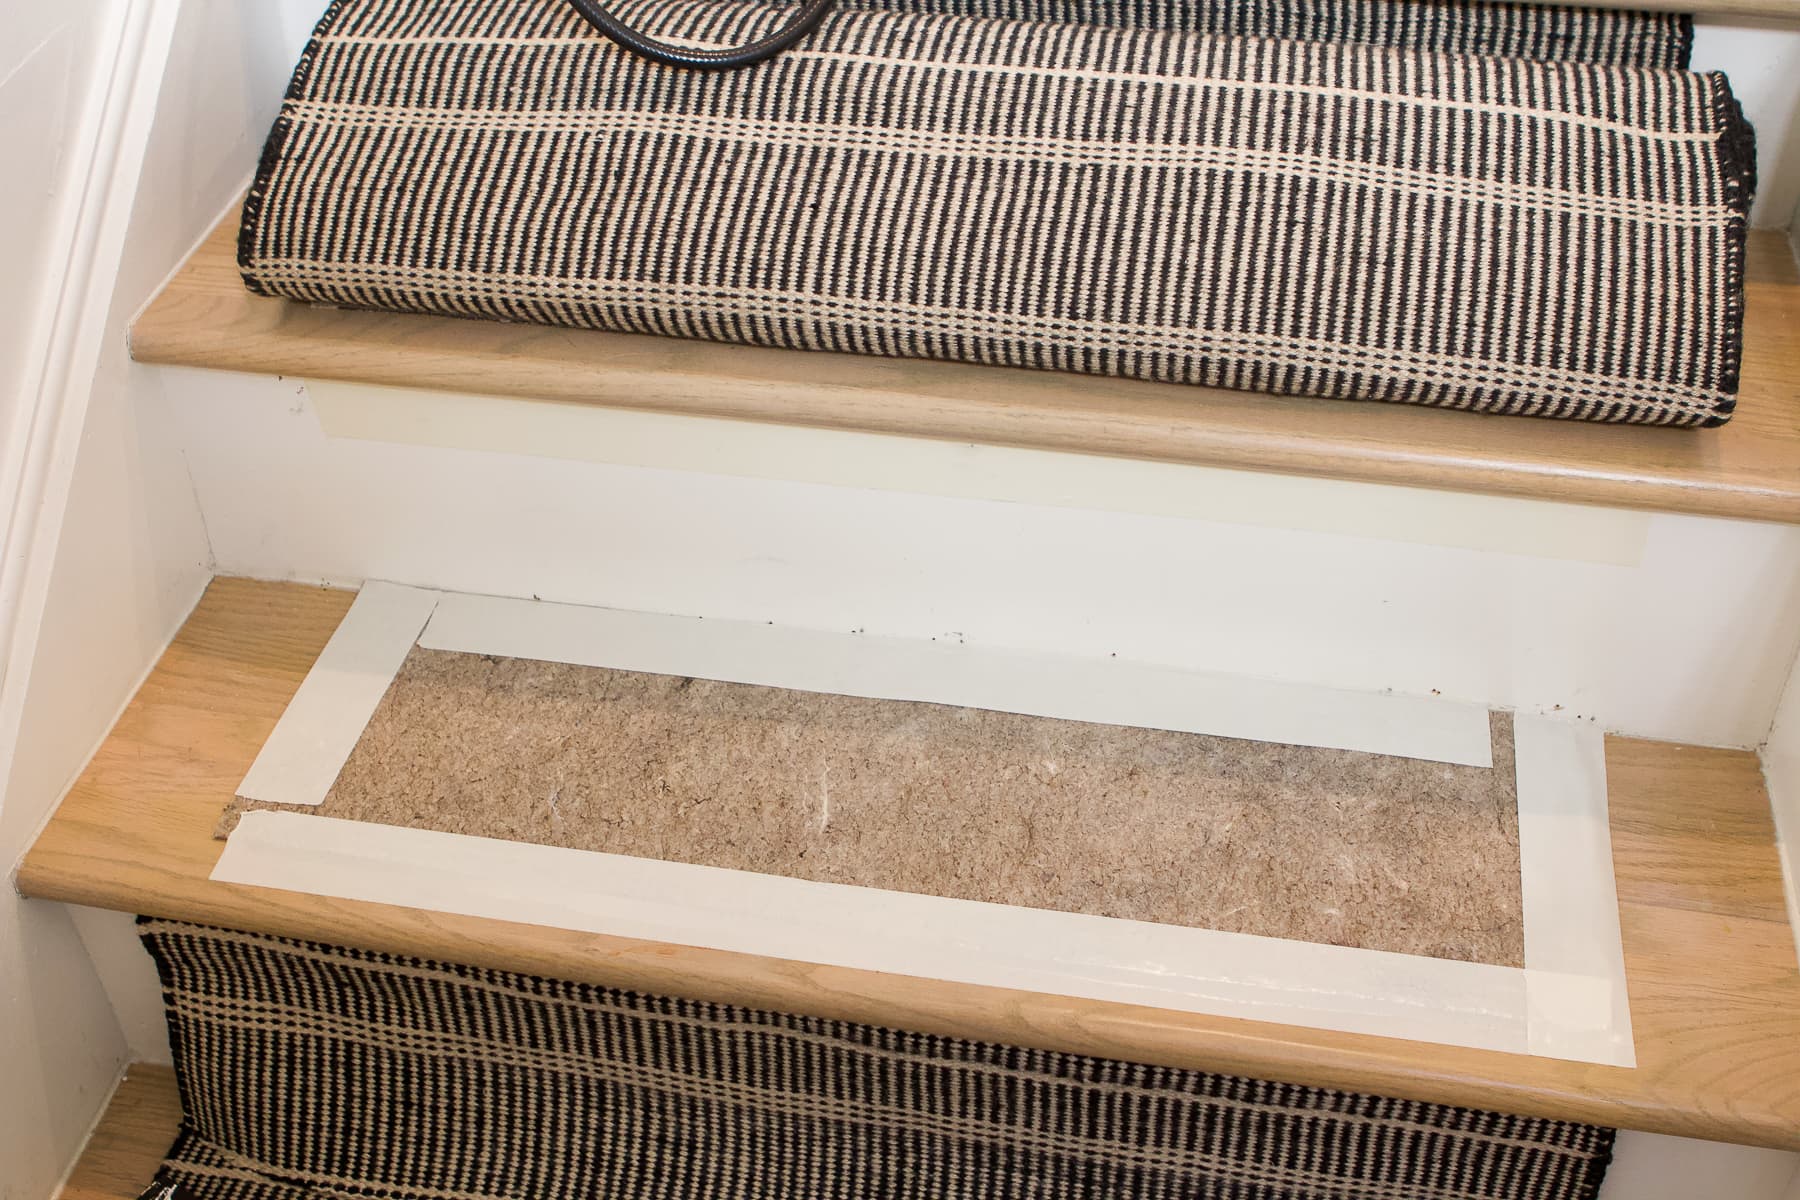
With the old carpet removed, I prepared the two stairs for the new carpet runner. I used my shop vac to get the area clean and then whipped out my favorite double-sided carpet tape. This stuff is super sticky.
This time around, I placed tape on the stair riser and on the stair tread on top of the carpet pad. I figured this would help keep things in place as I stapled everything in.
Secure With Staples
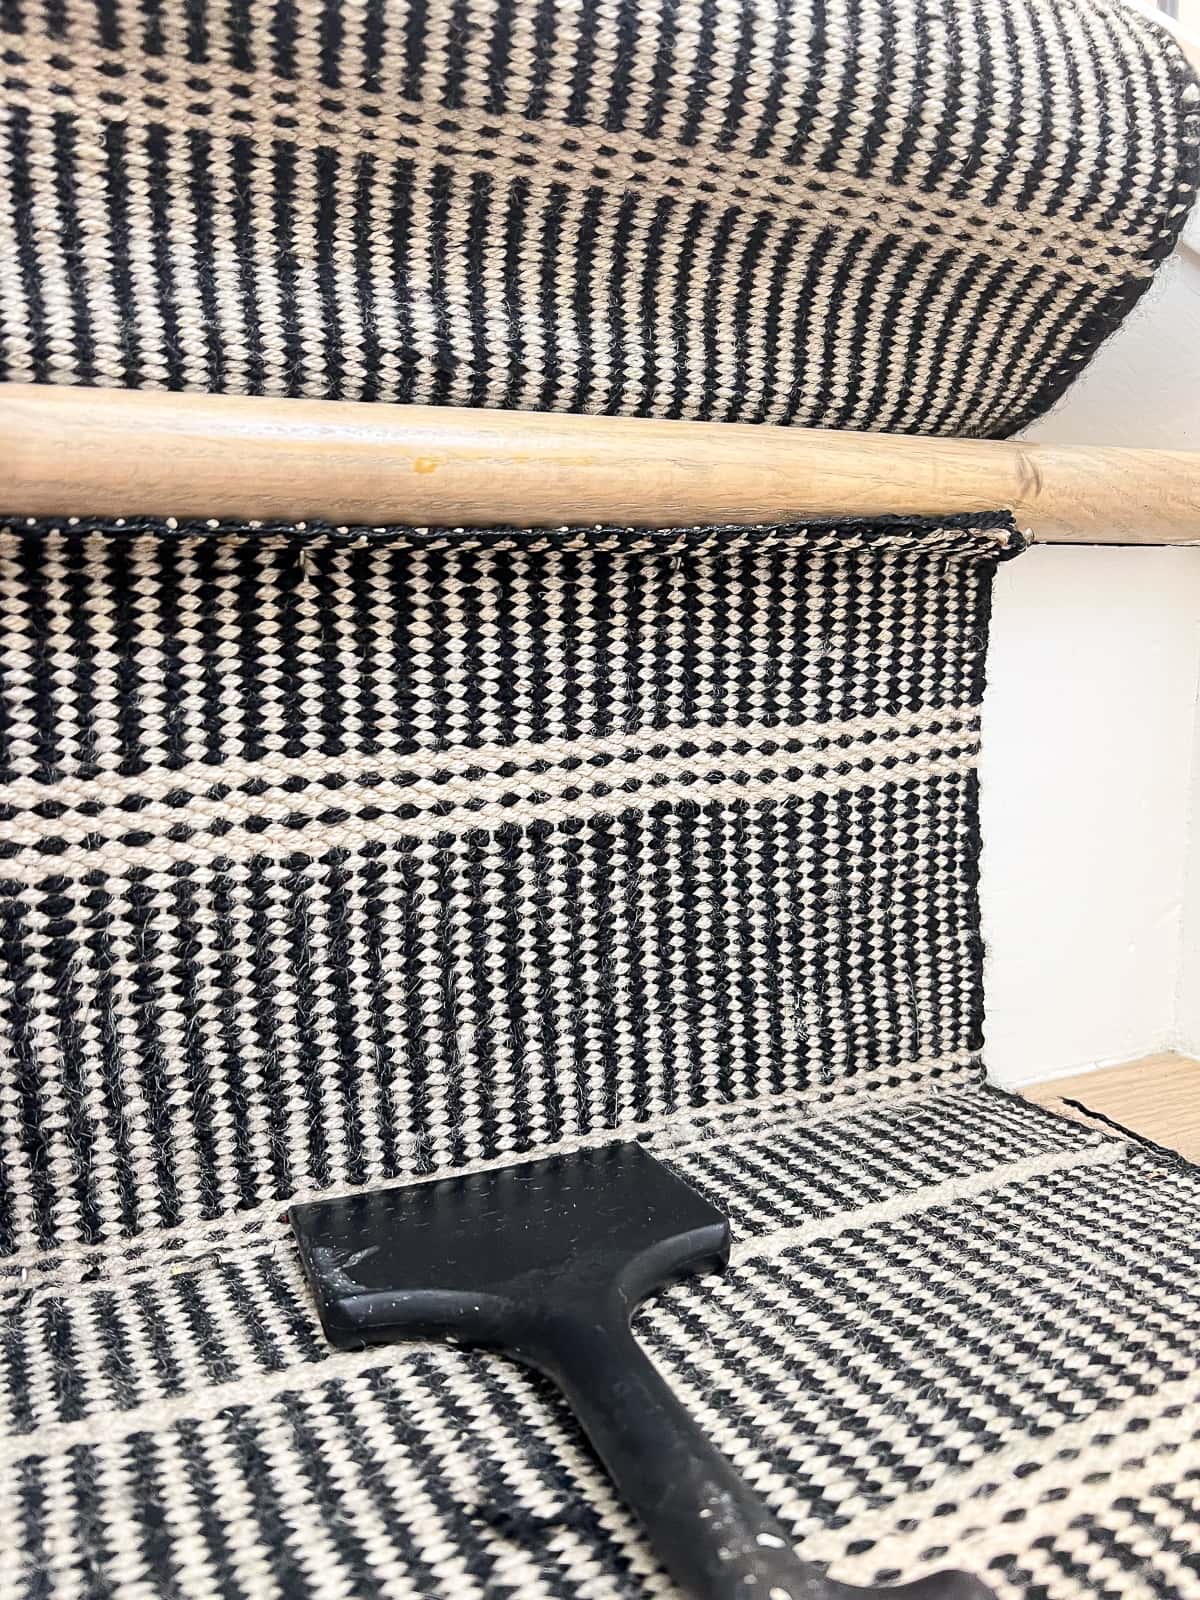
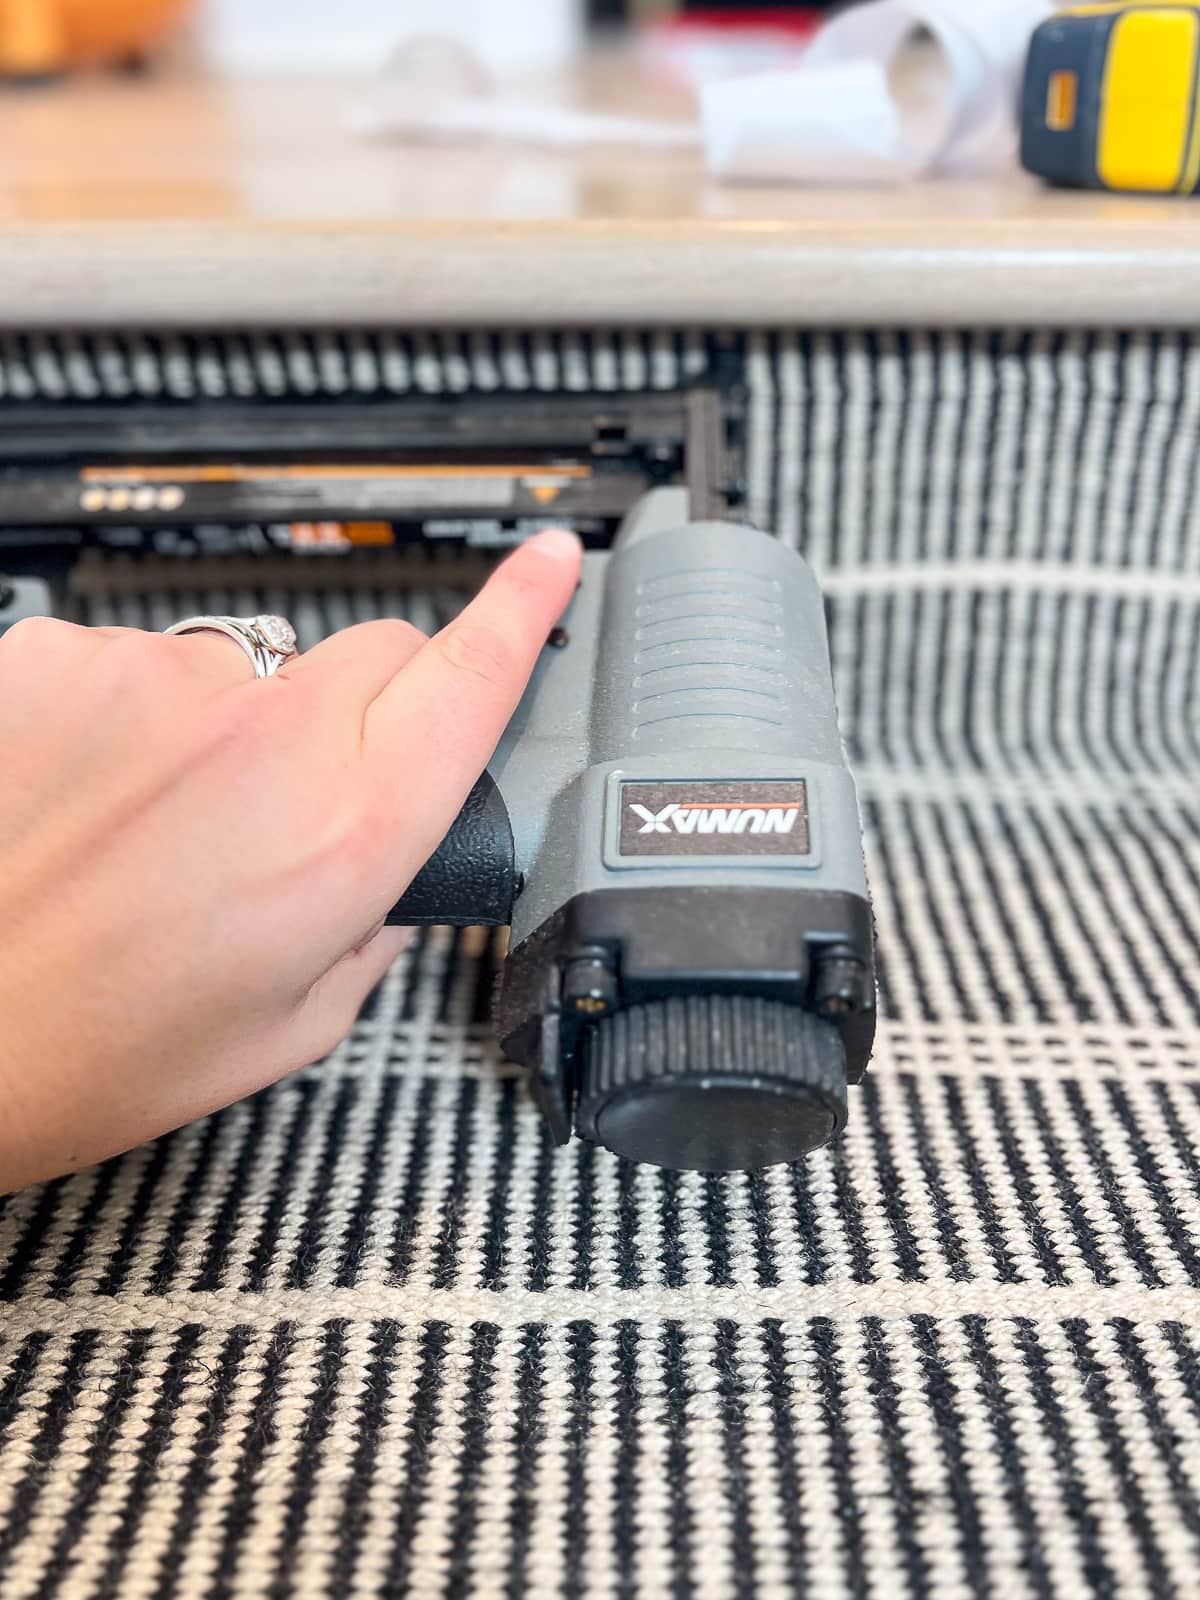
Just as I did when I initially installed this runner, I loved using this little carpet tucker. It works well to get the runner tucked nicely into the treads as I secured it with staples. I used my air compressor and a staple gun with 1/2 inch staples to secure the stair runner to the hardwoods.
I chatted more about the placement of the staples in my original post from a couple of years ago. I put ours at the base of the stairs and underneath the nose.
My Secret Cutting Tool
Installing carpet on those top two stairs went pretty quickly, but then I was left figuring out how to join the new portion with the runner on the rest of the stairs.
After a lot of back and forth, I decided to hide the transition under the nose of the second stair. That way the seam would be hidden. It also wouldn’t get stepped on and unravel, which happened in the first place, when the seam was placed at the base of the riser.
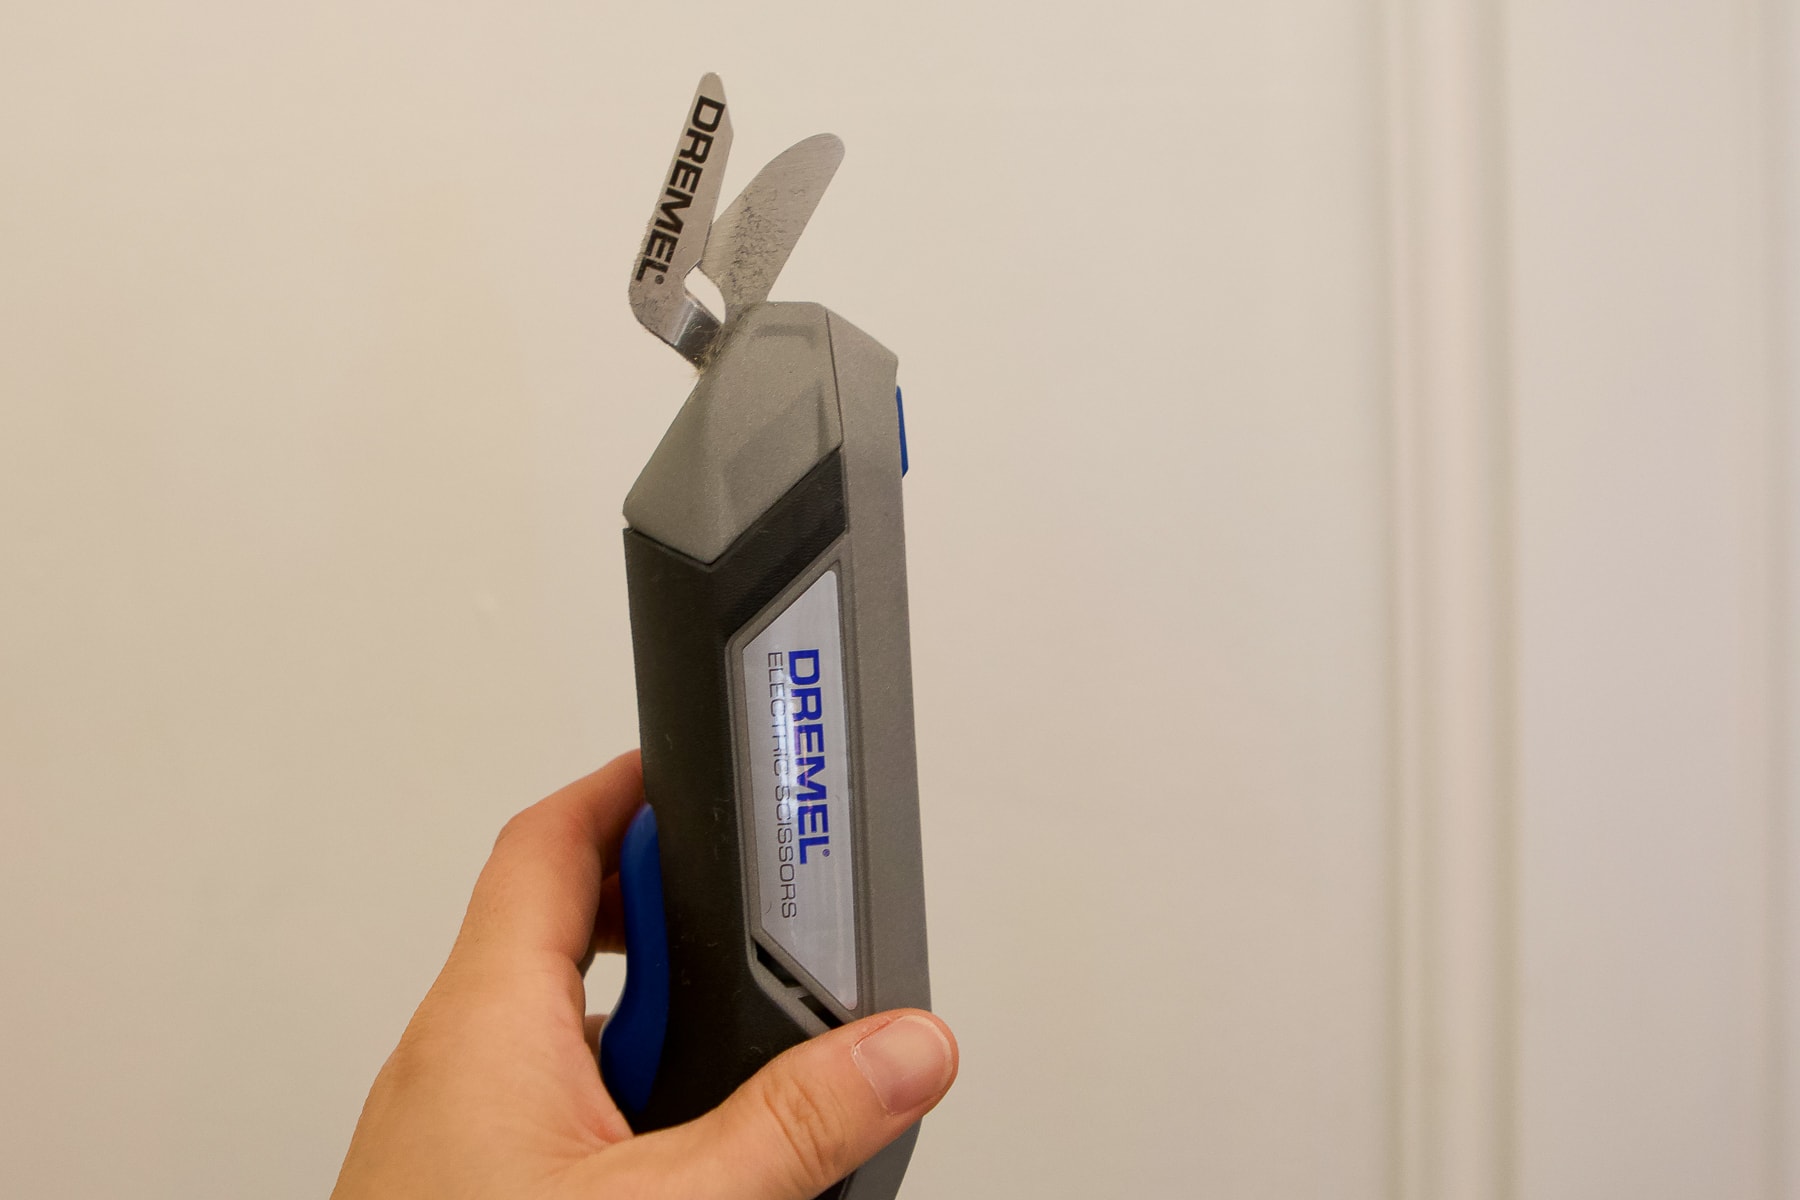
I’m a lefty and cutting is not my forte. I recently got these electric scissors and figured they would work well for this project. OMG, you guys. These things are amazing. They cut through the rug like butter and left me with a very straight line. I will be using these again whenever I have a lot of cutting to do! Lefties, I’m telling ya, you need these!
Burning The Edges
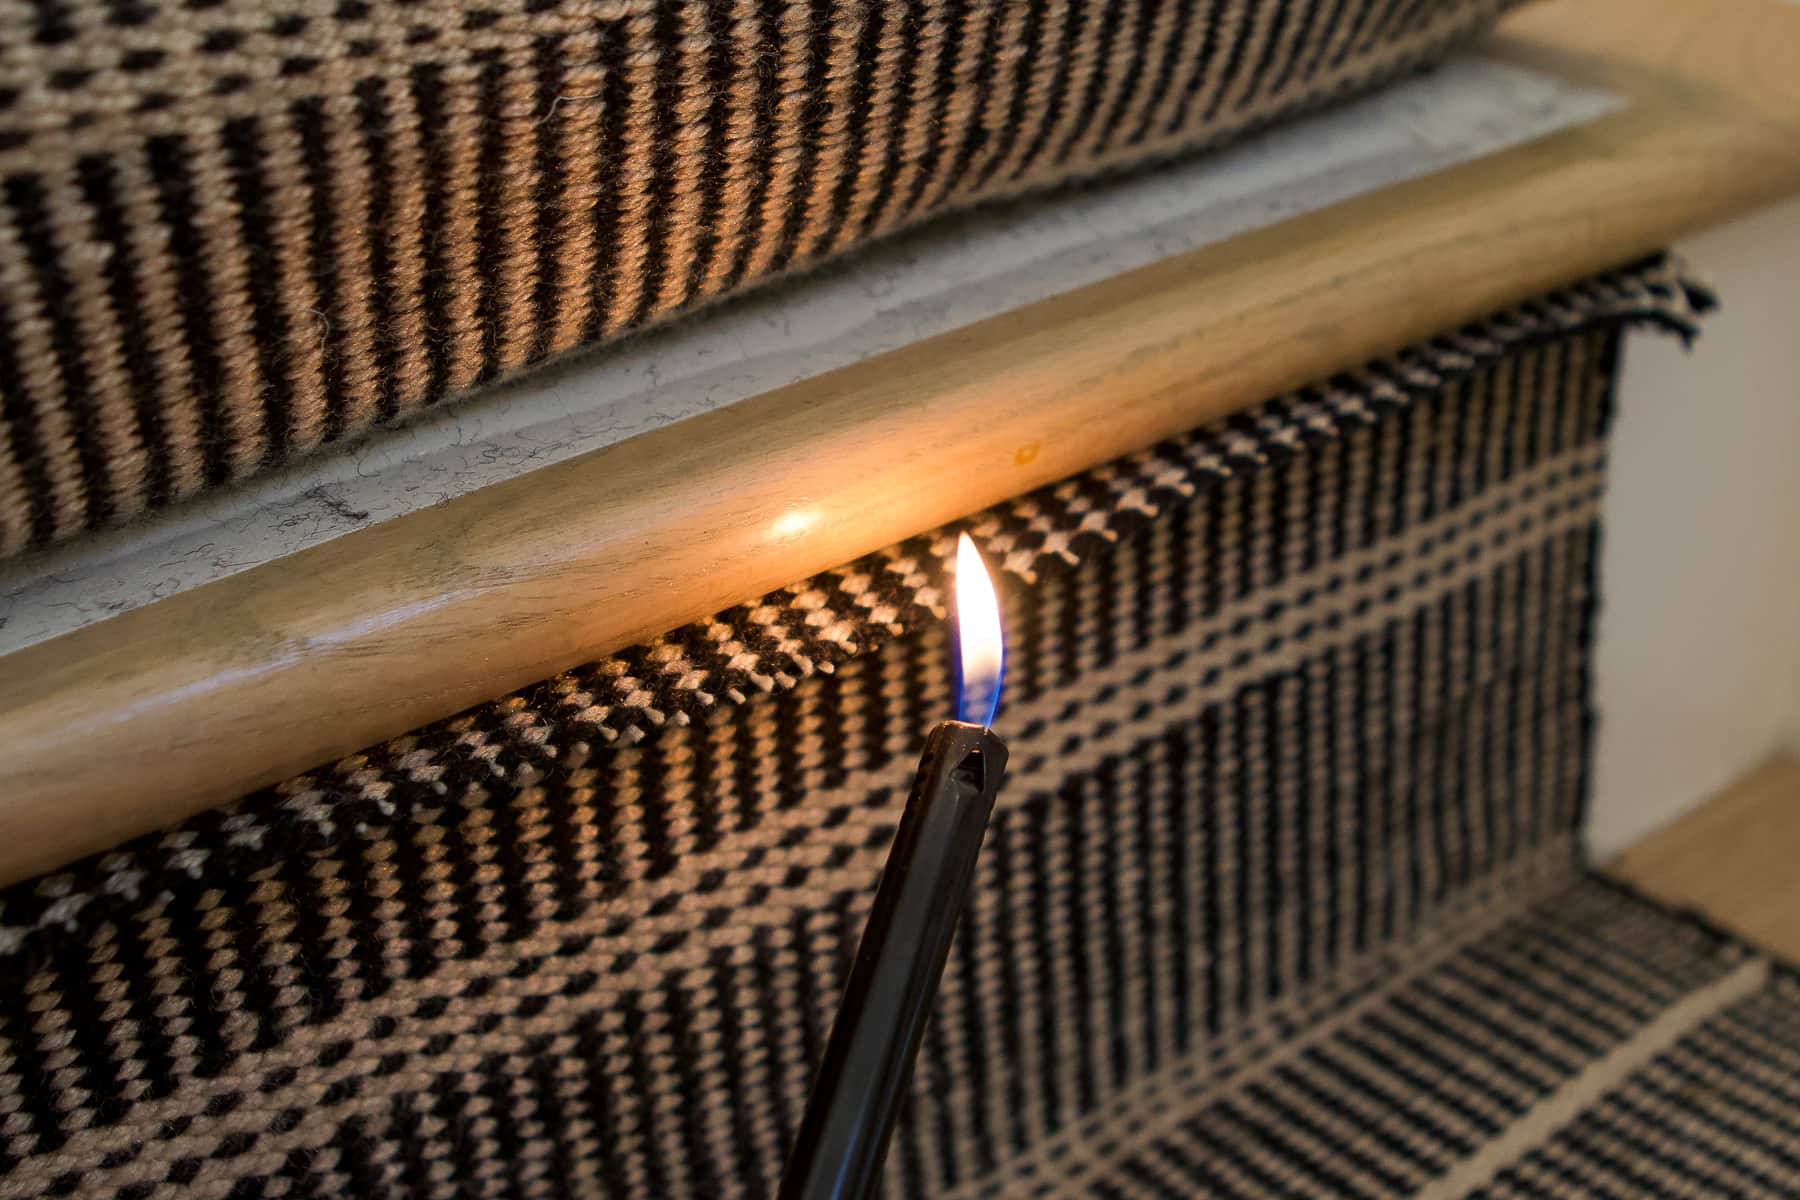
With the rug cut, I decided to burn the edges with a lighter. Yes, I was a tad scared doing this part because it’s a bit of a fire hazard and a heat gun would have been safer. The burning seals the edge and prevents further fraying. I kept the lighter far enough away from the rug that it didn’t catch it on fire, but close enough to heat up the edges.
This worked! I went up and down the entire width of the rug to seal the entire edge.
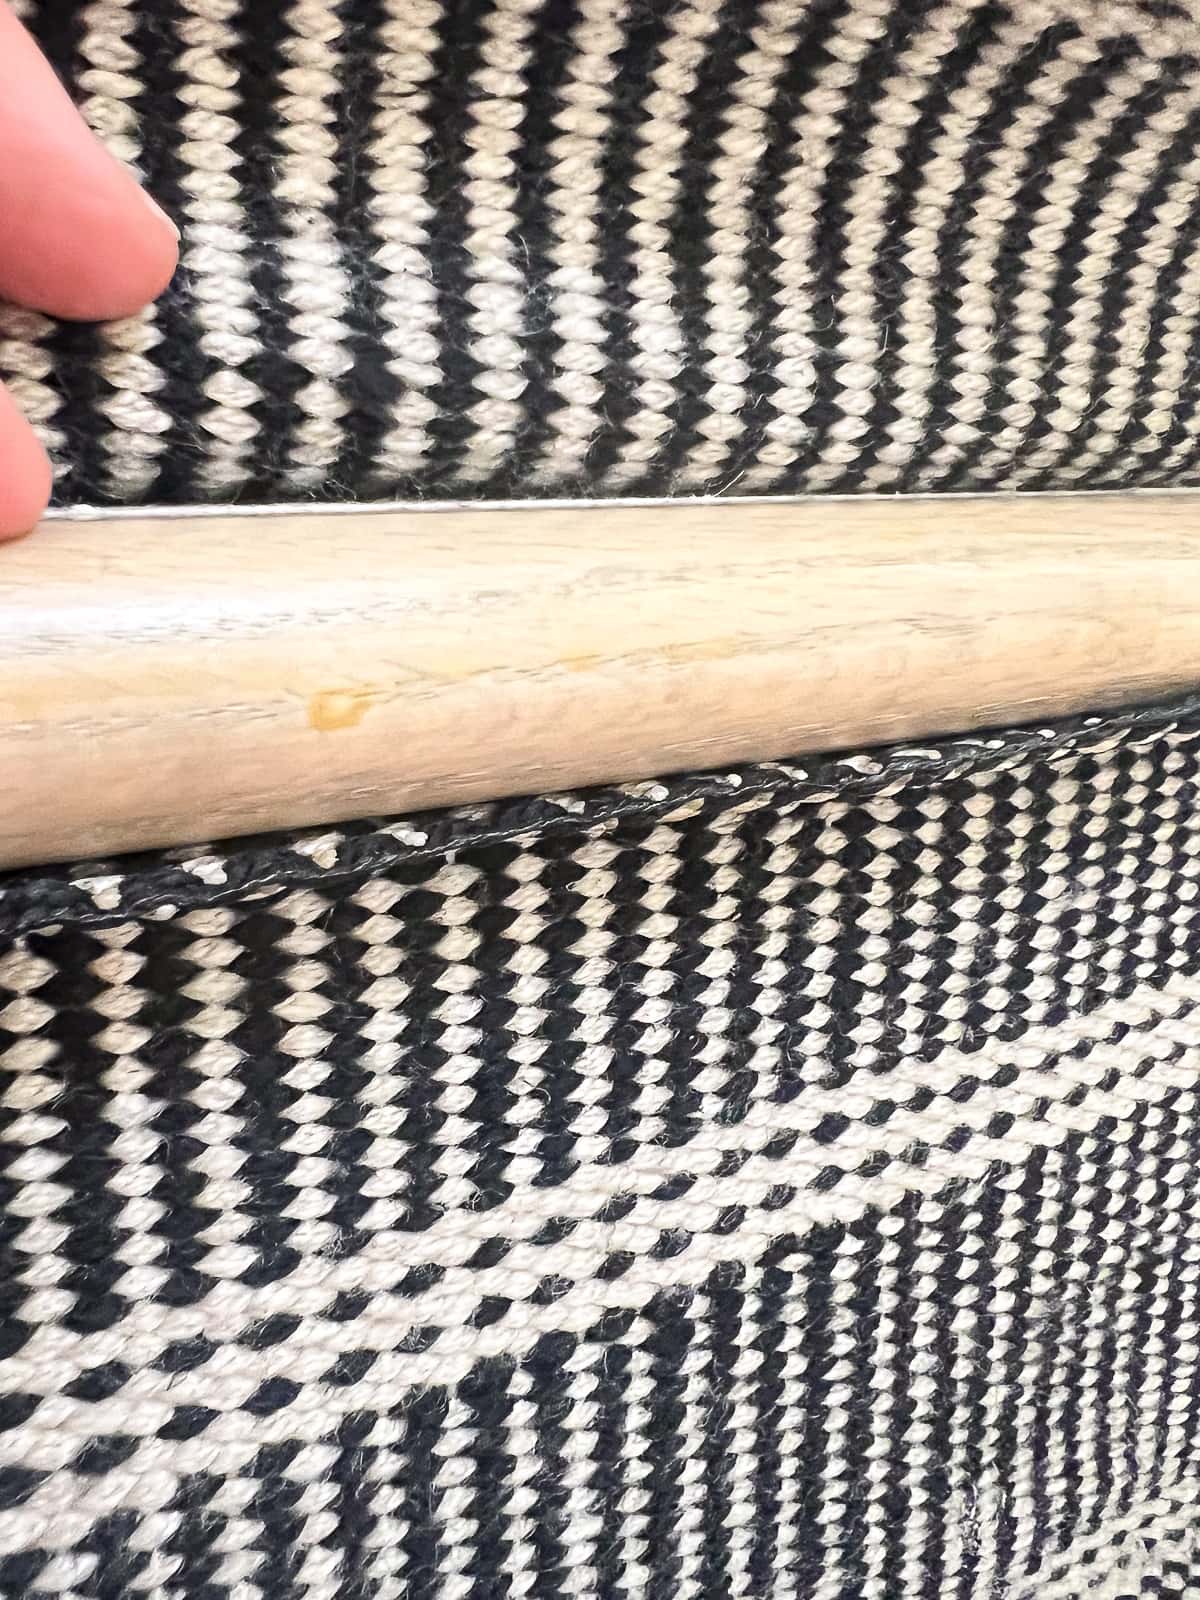
Hiding The Seam
I did my best to tuck the rug underneath the nose of the stair so that the edge would be hidden. I put more carpet tape on the nose and then secured it with lots of staples.
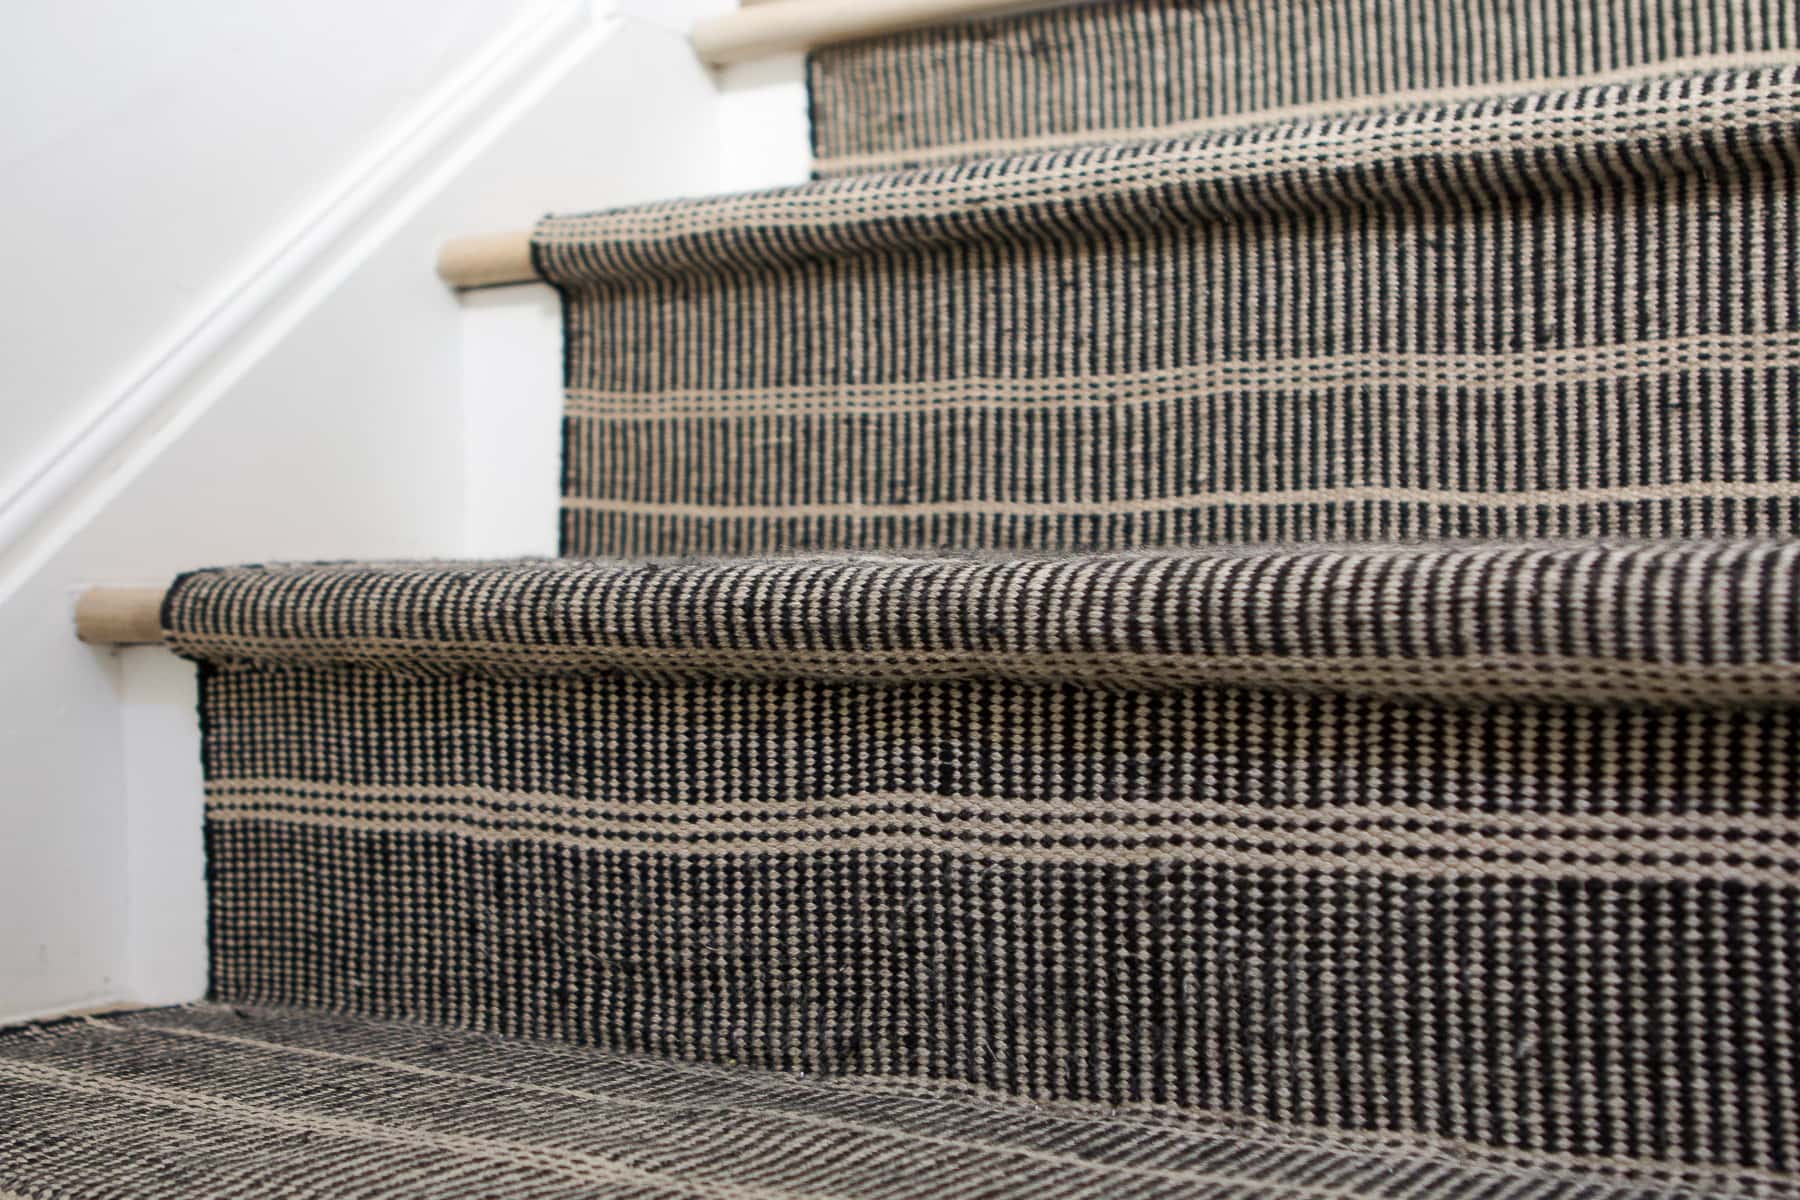
This ended up doing the trick and you can barely see the transition between the first and second runner.
One Little Mistake…

I did make one (more) little mistake when installing. I installed the new rug about a 1/2 inch too far to the right. When it came time to meet up with the existing rug, I could see that it was off.
I don’t think most people will ever notice this, but it was definitely something I noticed by the end of my project. Oh well. DIY is all about learning, right?! Next time, I’ll double-check with my tape measure before installing.
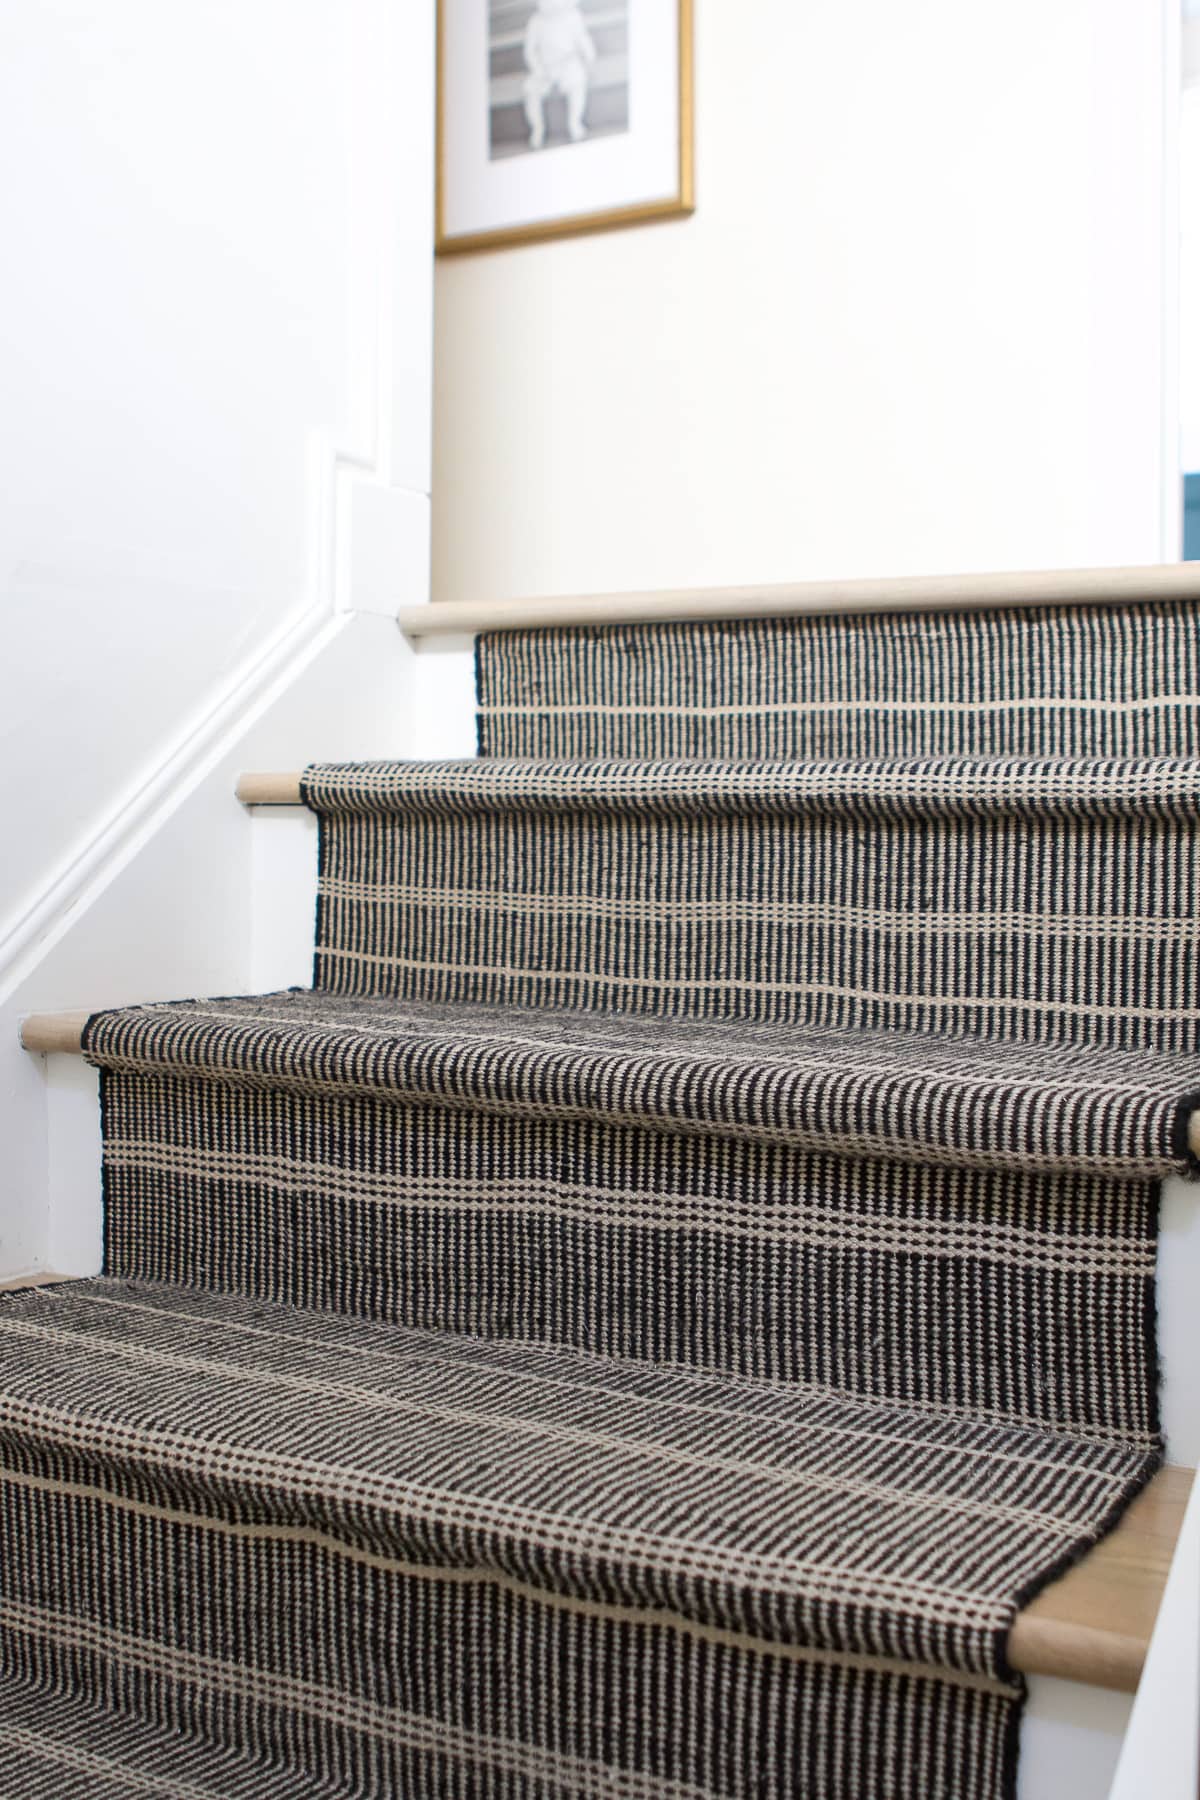
My New & Improved Stair Runner

Here’s a look at the new stair runner. I kid you not that no one in my house has commented on the fixed rug. I mean, this is something all four of us go by constantly, yet they haven’t noticed. Ha! I guess it was really only bothering me. But, I still think it was a good idea to finally fix this stair runner mistake.
Now, I hope you learned a thing or two from these stair runner mistakes. That’s the thing I love about DIY. You’re constantly learning new and better ways to do things. I’m sure my next stair runner install won’t be perfect, but it will be better.