DIY Outdoor Painted Rug(s)
Last month we got together at B’s house for a whooooooole day of blog work. In between computer time, we decided to take a break from that never ending to-do list and enjoy the gorgeous sunshine. But let’s be serious, these two Type A personalities are not going to waste a day that we’re together to just sit, relax and soak up some Vitamin D. Even though we need to do that far more often, we decided that this particular Saturday would not be the day. We still went outside to soak up the sun, but instead of just relaxing, we spent the afternoon outside in B’s front yard DIY-ing some outdoor painted rugs.  And when we say “rugs” we literally mean it…multiple rugs. Although we only bought one large rug (for $18!), we cut this bad boy up into three pieces so that it could live on 3 different patios. Nineteen bucks divided by 3 outdoor rugs = $6 per rug. Not a bad deal since most medium to larger sized outdoor rugs are WELL OVER six bucks.
  To cut the original rug into three, Casey did some measuring with a tape measure. She marked the back of the rug to indicate where we needed to cut the rug and actually drew a full line. She marked on the back of the rug instead of the front to ensure that
 if when the cutting wasn’t perfect, we would never be able to see the marks because they were on the back side. 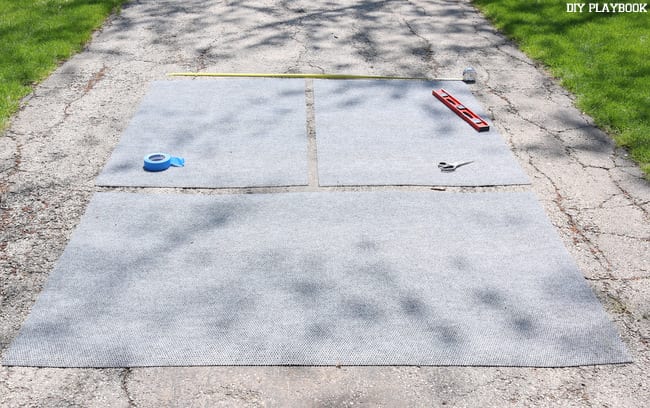 Before long we had 3 rugs — one large rug for Casey’s patio, one small rug for Maggie’s patio, and one rug leftover rug that we knew we could eventually put to good use.
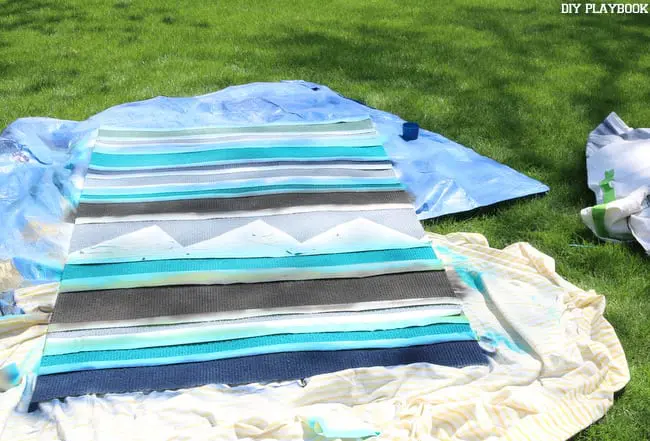
 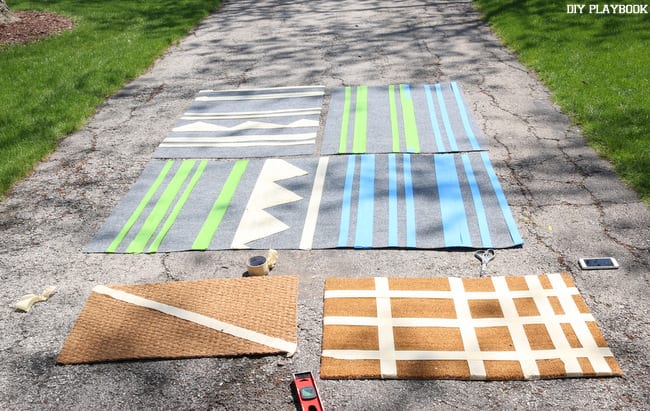 While we were out enjoying the sun, we also used this same method on some extra doormats we had laying around. All you have to do is make a design with painter’s tape and use spray paint to paint the rugs. For the three larger rugs, we went with a Kilim(ish)-inspired design (stripes + some triangular elements). If you have more time, you can add even more geometric elements to the rug or at least more detail than what we did.
  Really, Casey… Did you have to photograph this angle? Awkward. But based on that almost transparent pale skin, I was exactly where I needed to be — outside soaking up some much-needed rays. I actually got sunburn that day and you fellow pale peeps know what the first sunburn of the season is like. #ouch
Anyways… in between unflattering poses, all that was left to do was to spray paint these babies using a variety of colored spray paint we had laying around B’s garage.
 To be honest, this project is super low maintenance and pretty darn quick. However, we weren’t obsessed with how the paint covered the rug. If we were to do this project again, we would definitely go back to the method Casey used last summer on her outdoor rug. Since she previously used a “sponge painting” method, it took a lot more time to do, but allowed the paint to absorb much better into the rug creating a more vibrant look than this year’s creations. Ya live and ya learn, right?
  On the bright side we will take any DIY that is quick, painless and pretty freaking cheap. On that scorecard, this DIY Outdoor Painted Rug method turned out well. And since we don’t have a lot of time or money invested, we definitely won’t feel bad throwing these rugs away at the end of the season.
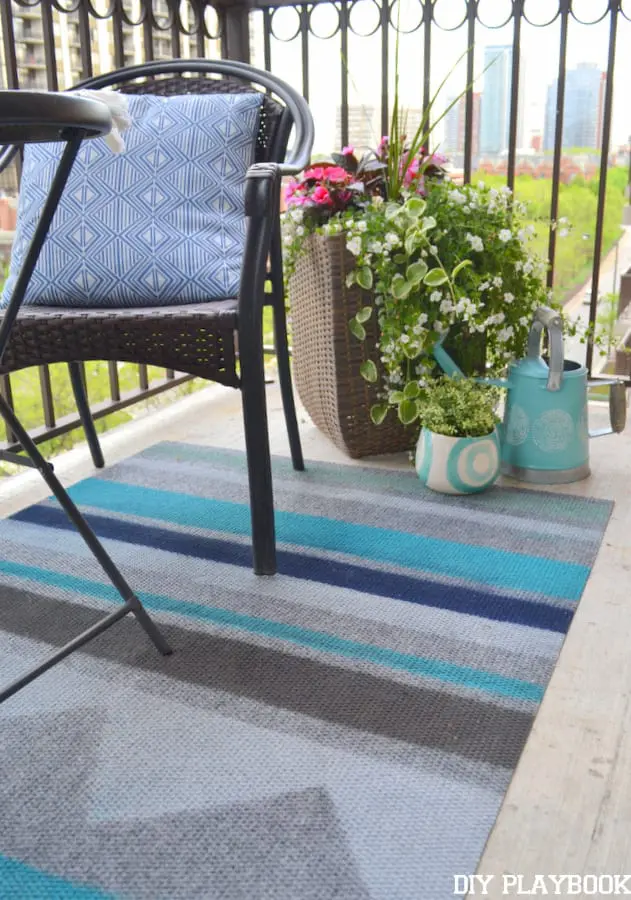
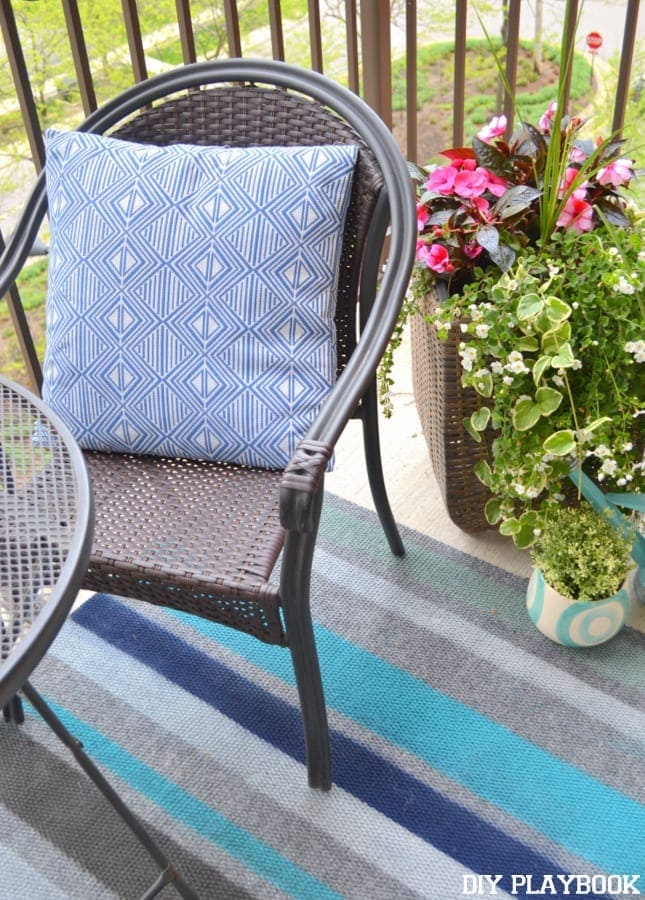
We are digging how this version of the painted rug adds a subdued pop of color to Maggie’s Condo balcony. It flows perfectly with the neutral decor of the whole condo.

 This cozy spot on her balcony is the perfect place for Maggie to enjoy her morning coffee and…… soak up this AMAZING VIEW of Michigan Ave:
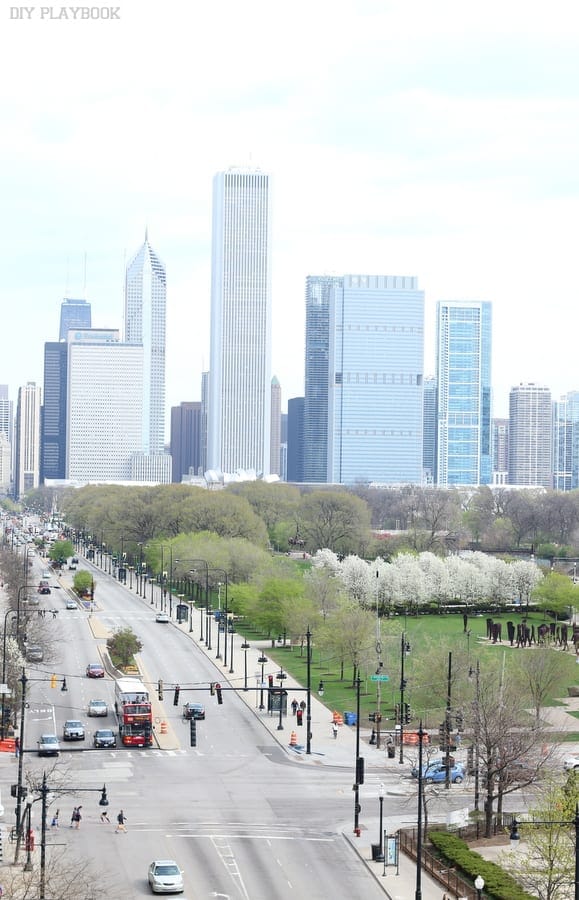 And only a half of block from here (literally), let’s check out Casey’s balcony + new painted rug.

 Real Talk: If we revisit the painted rugs next season (which let’s be honest, we probably will since they are $6 each!), we’ll probably go back to using this more time-consuming method that Casey mastered last year. But hey… we’ll take this quick yet still effective method as an excuse to get outside and DIY any day! In about a half hour, this rug could go from its package to a custom size and design– not bad in our Playbook.
One last tip if you do decide to spray paint instead of sponge paint — use BRIGHT colors, those definitely show up the best. The white, gold, and neutrals weren’t as clear as we anticipated on our rugs. #rookiemistake
![]()
Bridget&Casey