Turn Your Mood Board into a 3D Room Design with AI
Want to see your interior design ideas come to life before making a single purchase? In this post, I’ll show you how to turn a simple mood board into a realistic 3D room rendering using AI tools. It’s a game-changer for testing ideas in real life before making changes in your actual space!
One of the tools I use every single day for my business is ChatGPT. It helps me research faster, brainstorm ideas, and generally be way more efficient with my work. But when it came to creating images, I never had much luck. Things would just turn out so strange and wonky.

That changed when I was working on our mudroom project. I had already made a mood board in Canva to nail down colors and finishes, but it felt a little flat when I tried to explain it to my contractor.
So I uploaded a photo of the actual space, along with my mood board, and asked ChatGPT to create a rendering. Within minutes, I had a visual that felt so much closer to what I was imagining. After a few tweaks, it became the perfect tool to show both my contractor and carpenter exactly what I wanted.

Since then, I’ve also started using AI for my DIY on the Fly series. Readers send me photos of their homes, and it’s always been tricky to “show” my design suggestions without Photoshop skills.


Now, I can combine a mood board with their photo and use AI to generate a quick rendering. Is it flawless? Definitely not. Sometimes the results are a little… wonky. But it’s been such a helpful (and fun!) way to bring ideas to real life, and I knew I needed to share the process with you.
Concerned About AI & the Climate?

Before we dive in, I wanted to address this…
Some people avoid AI because of its environmental footprint. Running queries does use energy and water, and most data centers still rely on fossil fuels (ugh!). But here’s some perspective:
- 100 ChatGPT queries = the same energy as making one cup of almond milk
- 800 queries = the footprint of a single burger
- Thanks to efficiency gains, AI now uses a fraction of the energy it did just a few years ago
So while it’s not impact-free, AI might not be as bad for the planet as you think, and (hopefully!) it could even be part of the solution someday!
What You Need To Start Your AI Room Design
Before you start creating AI renderings, make sure you have a few basics ready. Luckily, it doesn’t take much to get started:
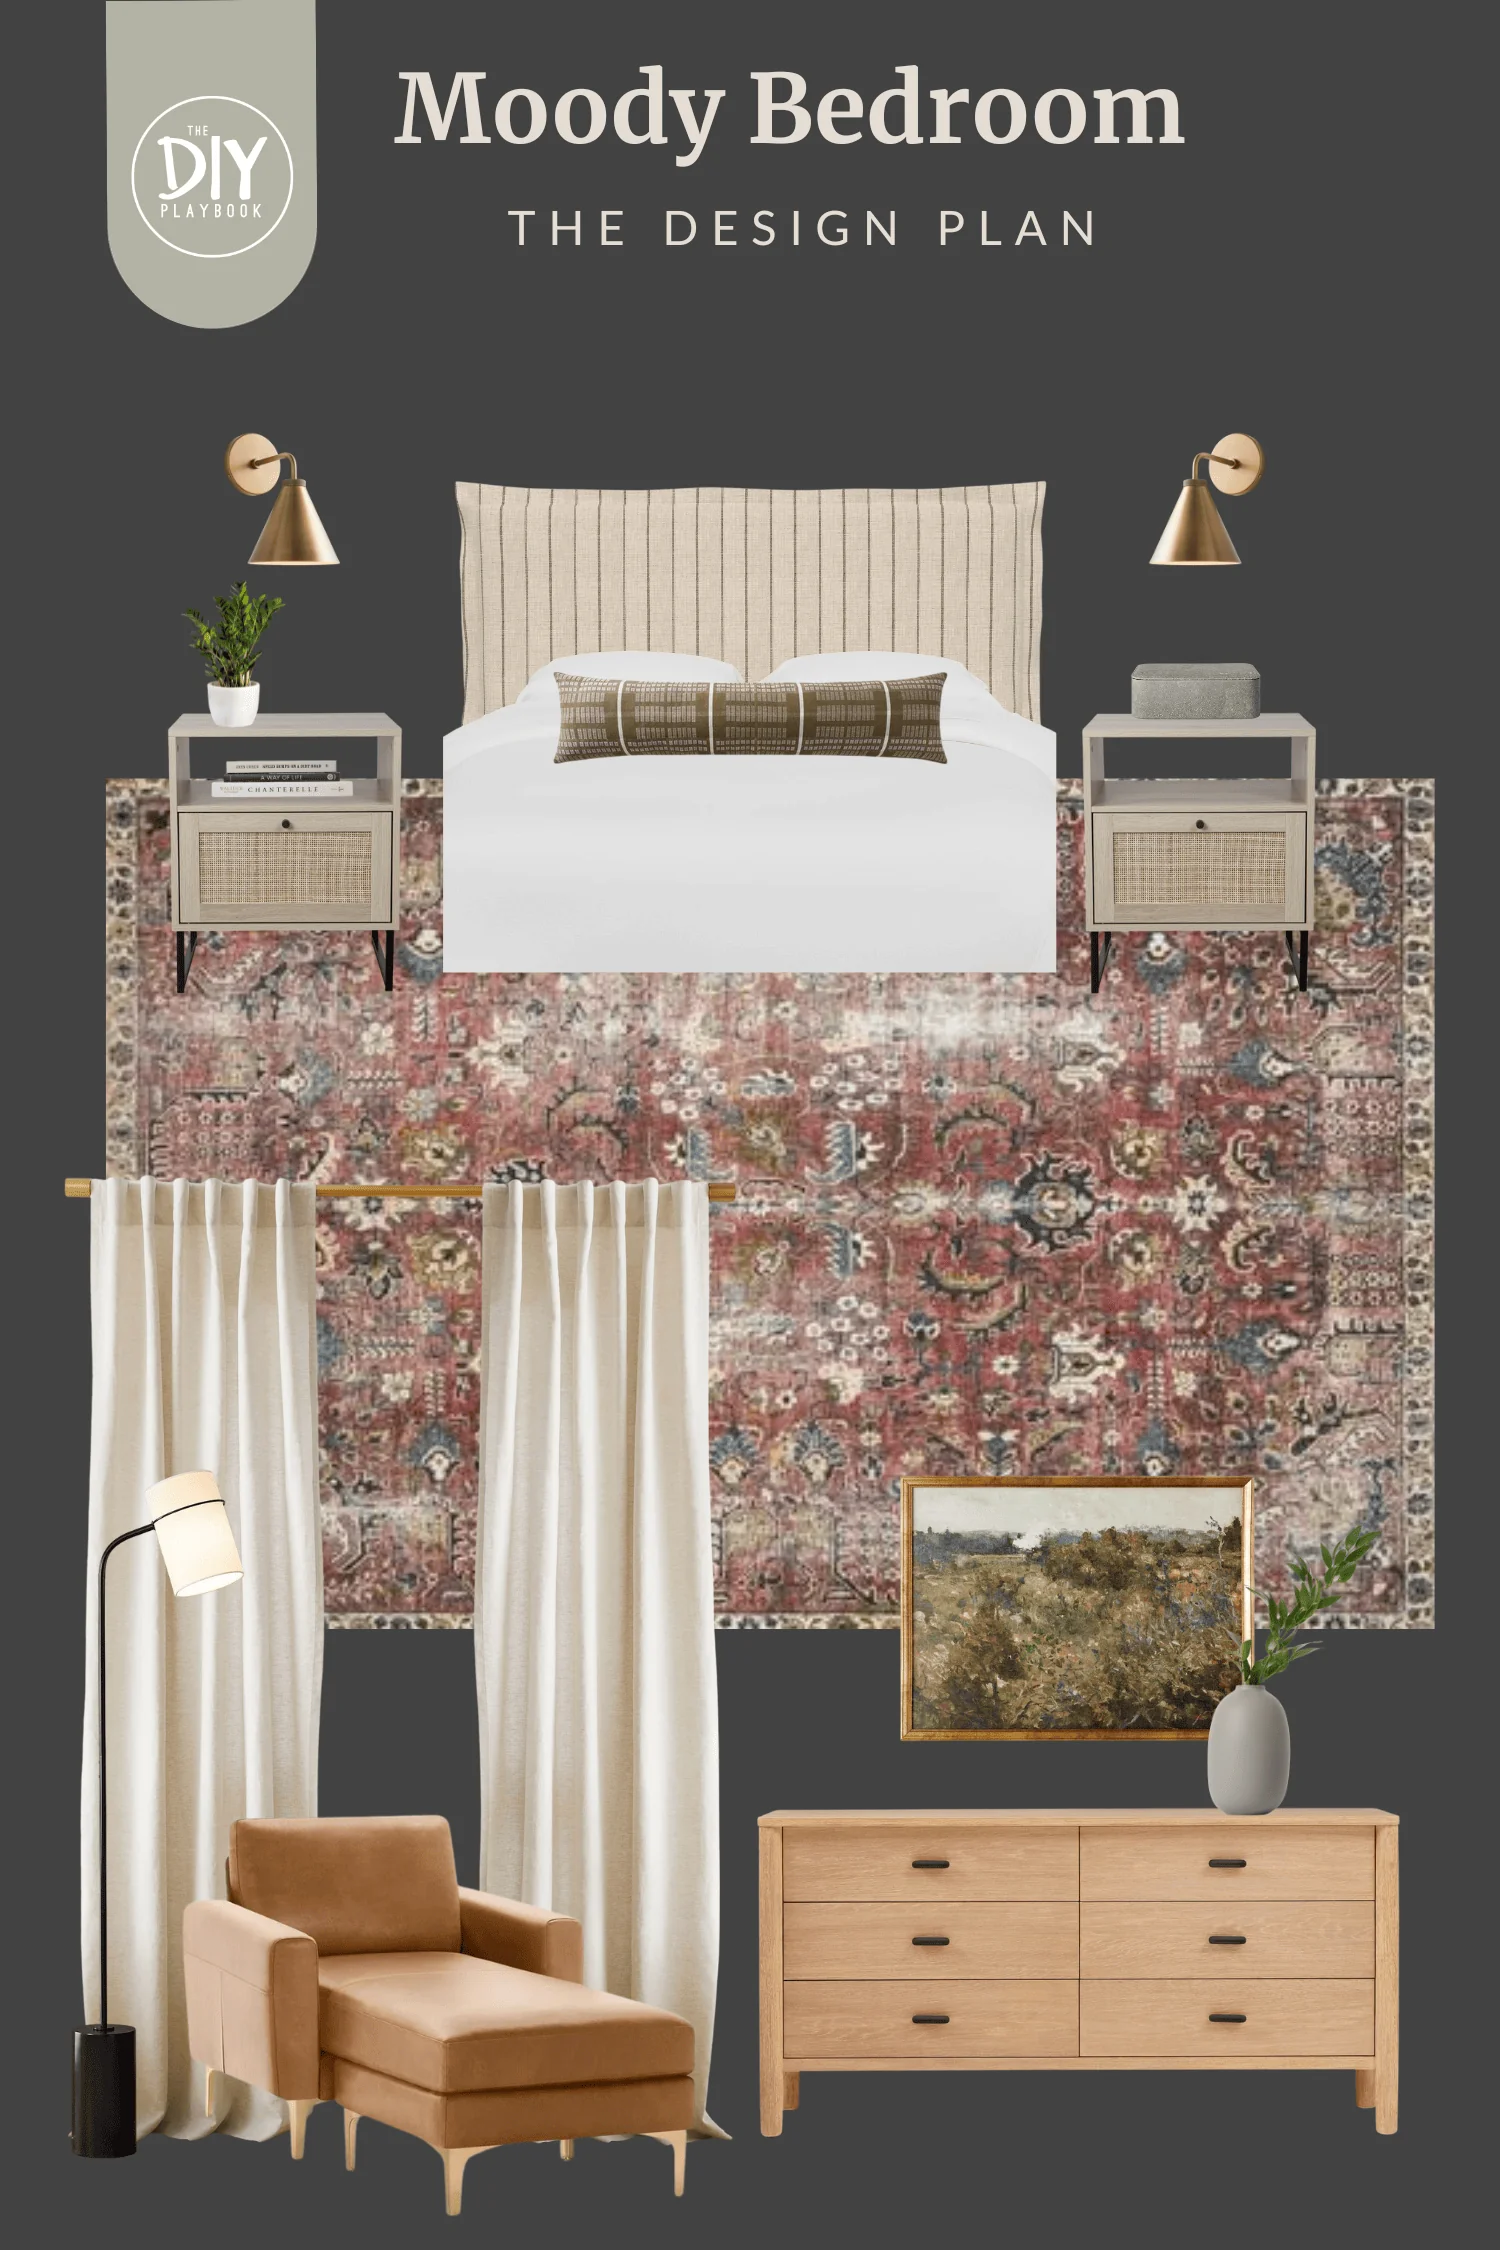
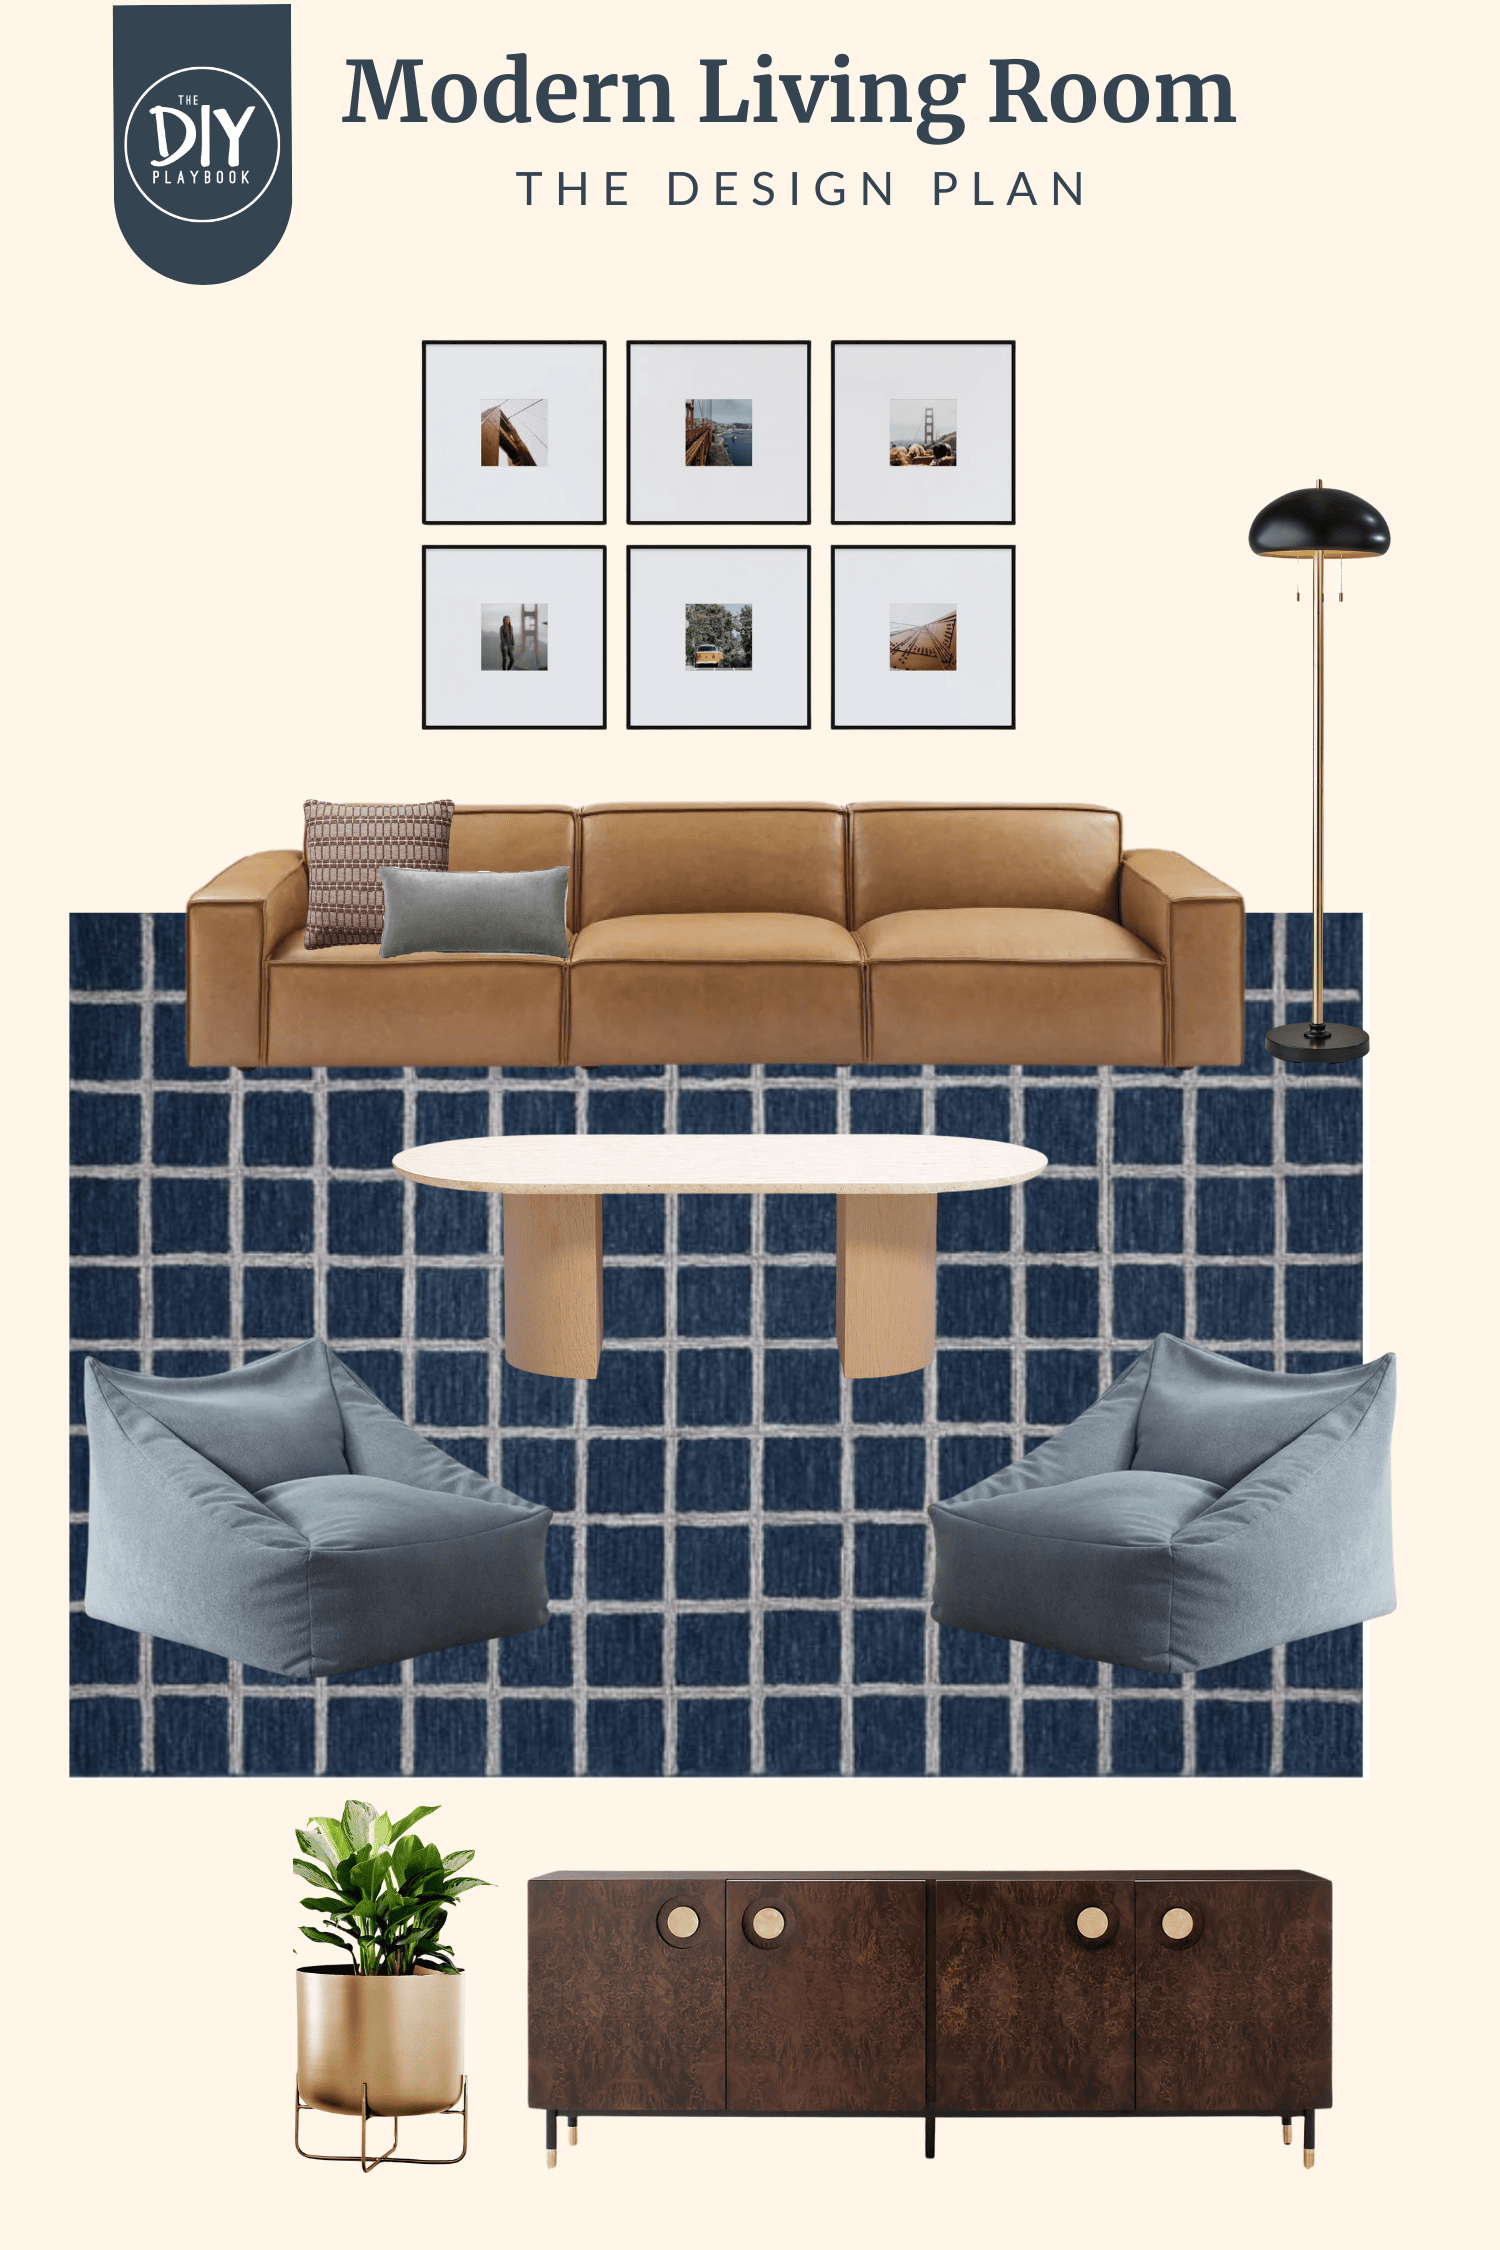
- A mood board – I recently walked you through how to create a mood board using a free Canva account. Just be sure to save yours as a JPG or PNG file.
- A ChatGPT account – The free version works if you want to experiment, but I use the paid plan for faster results and more advanced features.
- A clear idea of your room type and style – Think living room, kitchen, or bedroom, plus details like your color palette, preferred design style, or even specific furniture pieces you want to include.
- Optional photos of your real space – Uploading a photo of the actual room (in addition to your mood board) can help the AI engine generate more accurate photorealistic renderings that better reflect your home and design vision.
Step 1: Upload Files & Run Your First Prompt


Open a new chat in ChatGPT and click the “+” icon to upload your files. You’ll want to include your mood board (saved as a JPG or PNG) and, if you have one, a photo of your actual space.
Once your files are uploaded, type a simple prompt to kick things off. You’re just asking the AI to create a first draft of your room design.
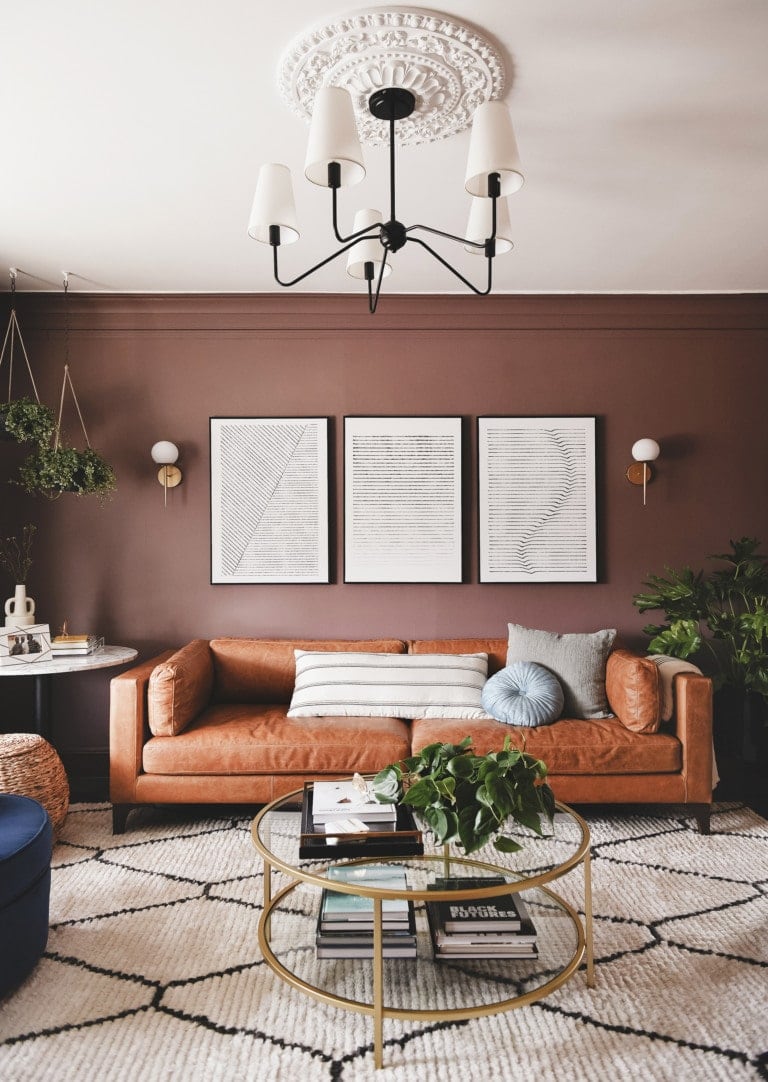
“Please create a 3D rendering of a living room using this mood board as inspiration. The style should feel bright and airy with neutral walls and a cozy, layered look.”
At this stage, keep your directions broad. The goal is to see how the AI interprets your mood board before you start fine-tuning in the next step.
Even if you don’t have a mood board ready, you can still use AI tools to kickstart your design process. Upload a photo of an empty space and ask the AI to suggest design ideas, room layouts, or even floor plans in different styles. It’s a quick way to spark inspiration when you’re not sure where to begin.
Step 2: Refine the Details
Once the AI gives you that first rendering, think of it as a rough draft. It probably won’t be perfect, but this is where the fun begins.
Here are some ways to refine your results and give it specific instructions:
- Furniture placement – “Move the two chairs to face the fireplace.”
- Wall treatments – “Add board and batten in white” or “paint the walls Benjamin Moore Tarrytown Green.”
- Lighting choices – “Swap the chandelier for a woven rattan pendant.”
- Color palette adjustments – “Make the rug a natural jute instead of gray.”
- Style direction – “Keep the layout, but shift to a more modern look with bold colors.”
This step is all about layering in specifics so the AI moves from a generic room to something that actually reflects your style and design plan.
There’s definitely a learning curve with these AI design tools, but once you see a few different options side by side, it gets easier to guide the AI toward your preferred design style.
Step 3: When to Restart Your Room Design Rendering

Here’s the truth: the more tweaks you pile onto one rendering, the stranger the results can get. Sometimes the AI will randomly add elements you didn’t ask for, or distort the layout in ways that don’t make sense.
That’s why it’s often better to start fresh with a new prompt rather than endlessly editing the same image. Think of it like asking your contractor for a brand-new sketch instead of erasing and redrawing on top of the same one.
- If you only need small changes (like swapping a rug or adjusting paint colors), refine the existing rendering.
- If you’re making bigger changes (like rethinking the layout or shifting to a different style), restart with a clean prompt that includes all your updated instructions. You can also download the last image it created and use that in your new chat.
This saves you time, keeps your results more accurate, and avoids those “wonky” renderings that make you wonder wtf just happened!
Step 4: Save & Put Your Rendering to Work
Once you’re happy with the result, go ahead and save it to your computer or phone. Just right-click the image and download it like you would any other photo.

From there, your rendering becomes more than just a pretty picture…it’s a tool you can actually use in your design process:
- With contractors or carpenters – Show them exactly what you’re envisioning instead of trying to describe it. A picture really is worth a thousand words.
- While shopping – Keep the rendering on your phone so you can quickly compare pieces in-store to your planned room design.
- For partner buy-in – If your spouse/roommate has a hard time visualizing, this makes it so much easier to get them on board.
- As part of your design process – Treat it like a virtual staging step before making real (and costly) changes in your home.
I’ve found this to be especially useful in my own projects, from working with my mudroom contractor to creating visuals for my DIY on the Fly series.
Other AI Tools for Interior Design
I’ve personally only used ChatGPT for these renderings, but there are other AI-powered tools and interior design apps made for home projects. They may have more advanced tools to create detailed room designs.
If you’re curious, it might be worth testing a few different platforms to see which one works best for you. Some offer a free plan or free trial, so you can test their advanced tools without committing.
AI in Interior Design: My Take

I’ll be honest, I’ve definitely felt the effects of AI in ways that haven’t been so fun. It’s changed how people search online, and that’s impacted my blog numbers and ad revenue. That part really sucks. But at the same time, I’m trying to find ways to use it to make my own job and life easier.

AI in interior design isn’t here to replace human designers — it’s just another tool to help test design choices quickly and visualize different aesthetics before committing in real life.
Change is always a little scary, especially with a technology that feels this big. But AI isn’t going anywhere, and I think the best thing we can do is learn how to work with it instead of fighting against it. For me, turning mood boards into renderings has been a surprisingly helpful way to visualize ideas and communicate them more clearly.

No, it’s not perfect. Sometimes the results make me laugh out loud. But even with its quirks, it’s an incredible tool for test-driving design ideas without spending money or making permanent changes.

If you’ve been on the fence, I’d encourage you to just try it…upload your mood board, run a quick prompt, and see what comes back. Who knows? It might help you see your space in a whole new way.