How To DIY Book Ledges
Lowe’s Home Improvement sponsored this project! All opinions, photography, and instructions are our own. Thank you for supporting the brands that support this blog.
I’ve always loved seeing nurseries where books are displayed. These displays are not only functional, but they double as adorable decor that any little one can enjoy for years to come! I’ve seen so many adorable ideas across the internet (remember these $4 bookshelves?) but when I finally decided to incorporate DIY book ledges into our nursery, I had a hard time finding a super detailed tutorial.


After some additional digging, I figured out how to DIY book ledges and today I’m here to share a super detailed tutorial for others who may be looking to recreate this look in their own space. And just for the record, these book ledges aren’t just for nurseries.
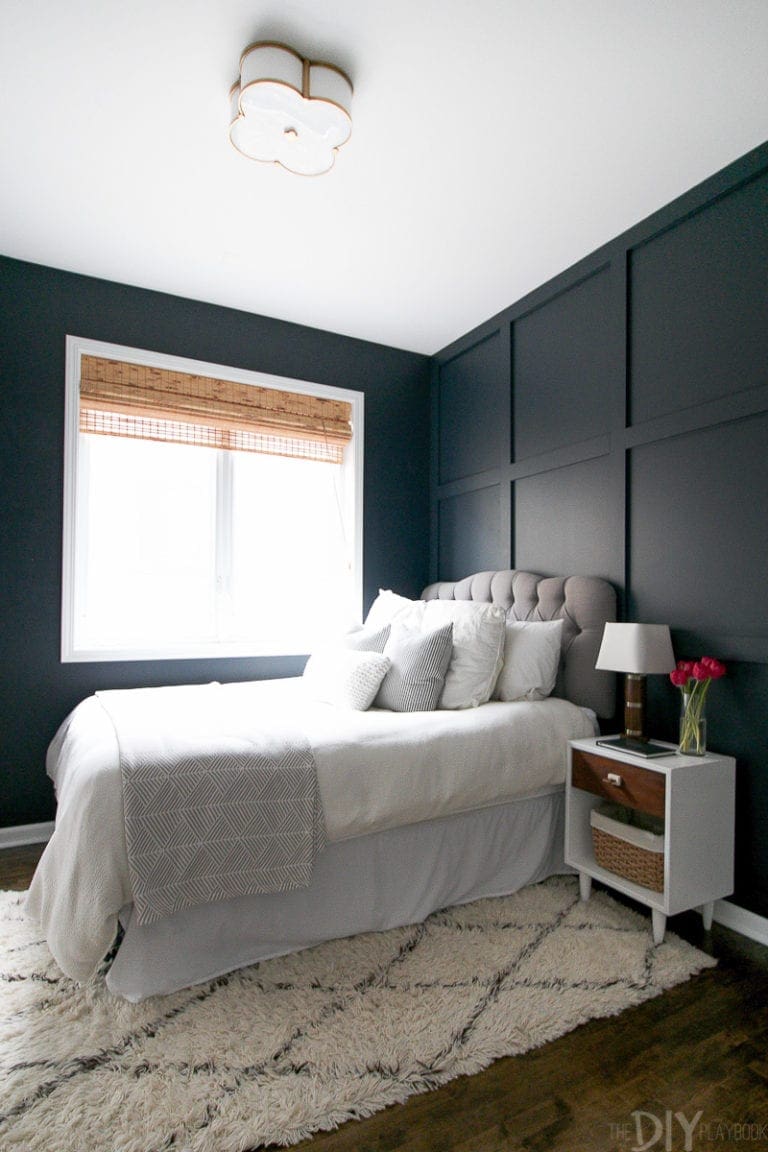
We love them in just about any space and even love that you can use them as DIY picture ledges too, like Casey did above her desk. This step-by-step tutorial will work for both projects and the best part is that they’re easy to create and super affordable!
Supplies to Build the DIY Book Ledges
- 2 wood or MDF pieces of 1″ x 3″ per self (these shelves are each 3 ft long)
- 1 wood or MDF piece of 1″x 2″ per shelf
- Miter Saw (Optional)
- Nail Gun + Nails (Optional)

- Wood Glue
- Wood Clamps
- Stain or Paint (Optional)
- Safety Razor

Supplies to Install the DIY Book Ledges
- Drill
- Pilot Drill Bit
- Phillips Drill Bit
- Countersink Bit (I used a 3/8″ countersink bit)
- Wood Screws (I used #10’s, 2″ long)
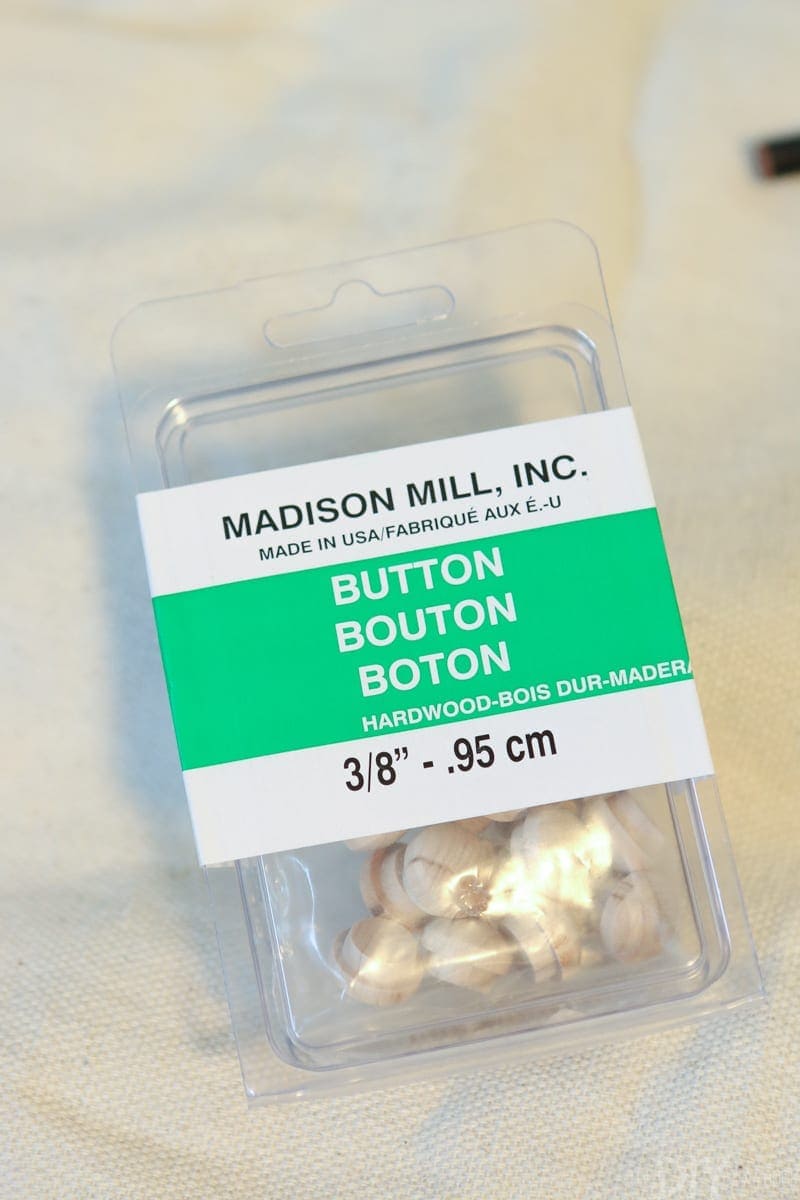
- Wood Buttons (I used 3/8″)
- Level
- Stud Finder
- Drop cloth (Optional)
- Pencil
- Painter’s Tape (Optional)
Building the DIY Book Ledges
So now that we have our supplies all set, are we ready to get started building these ledges?
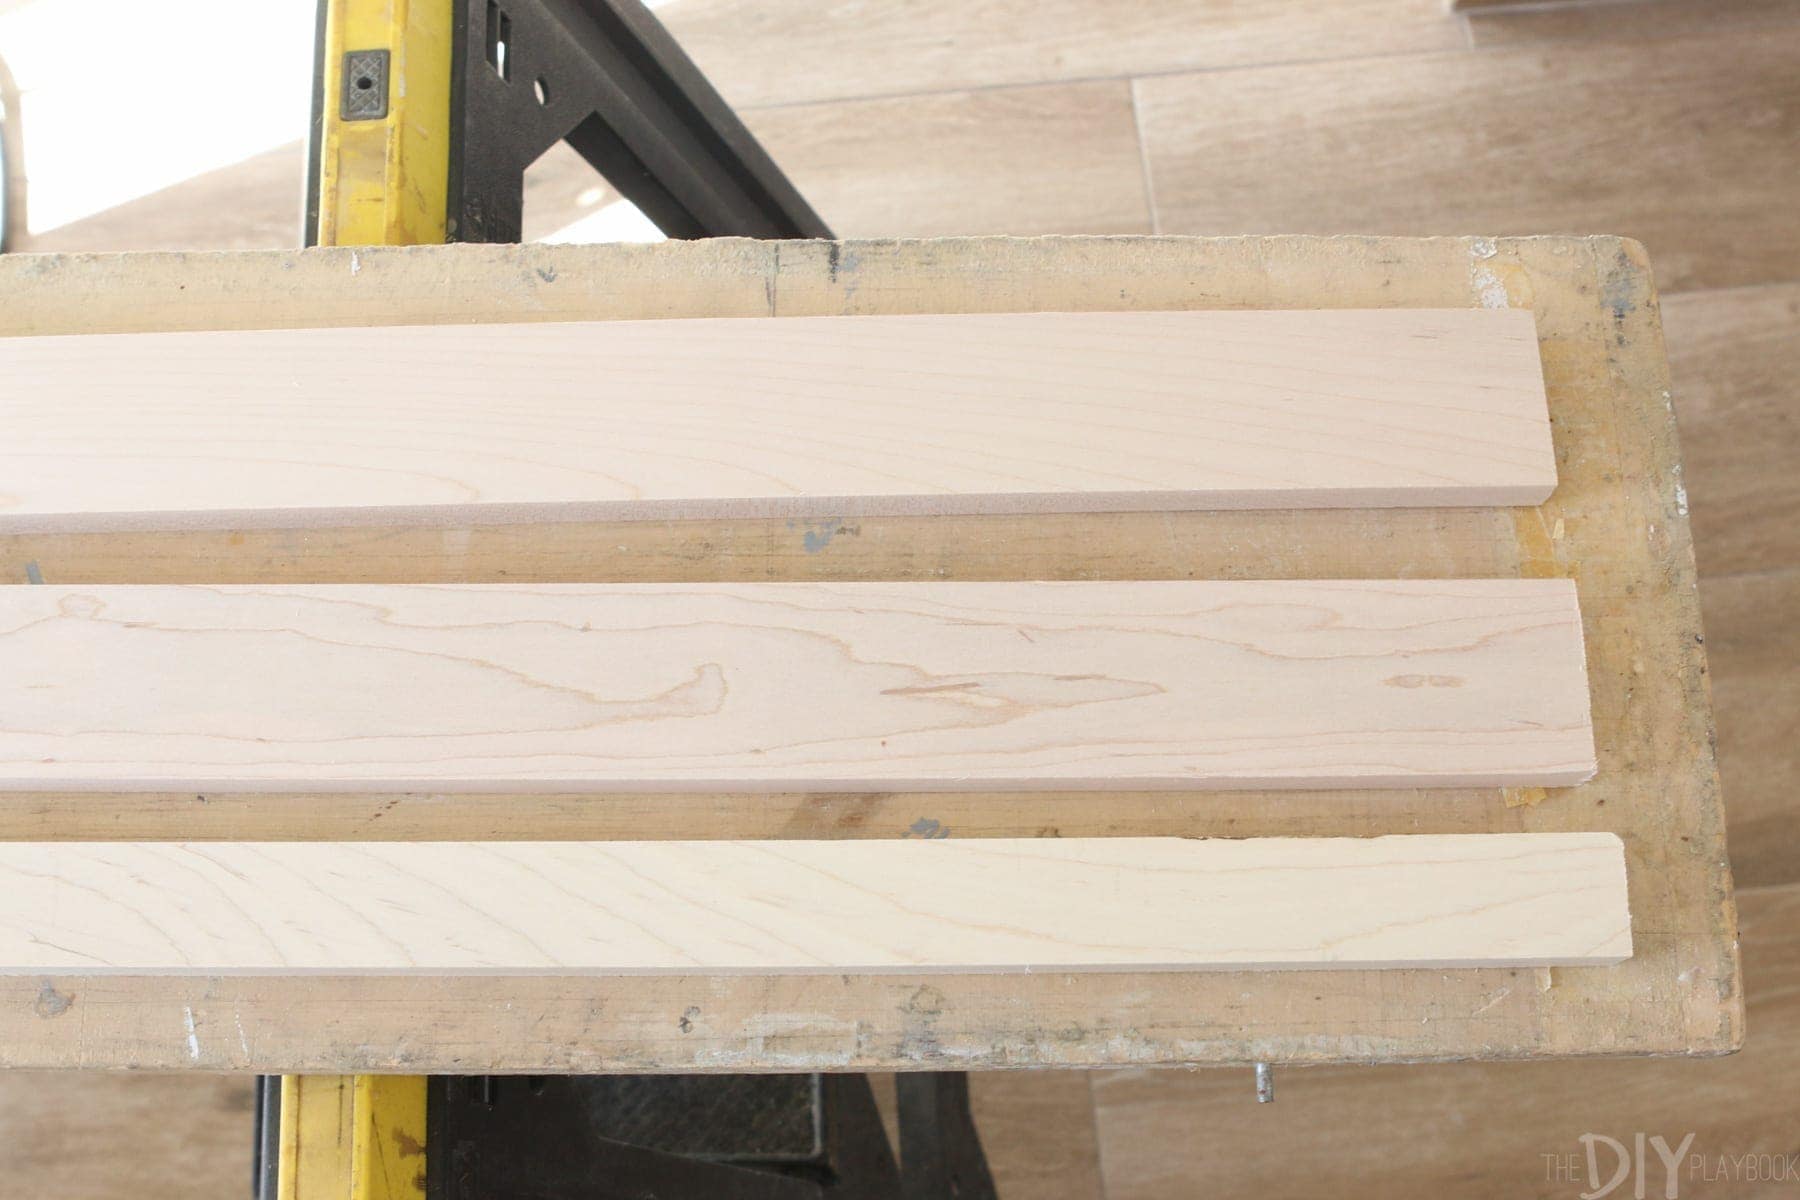
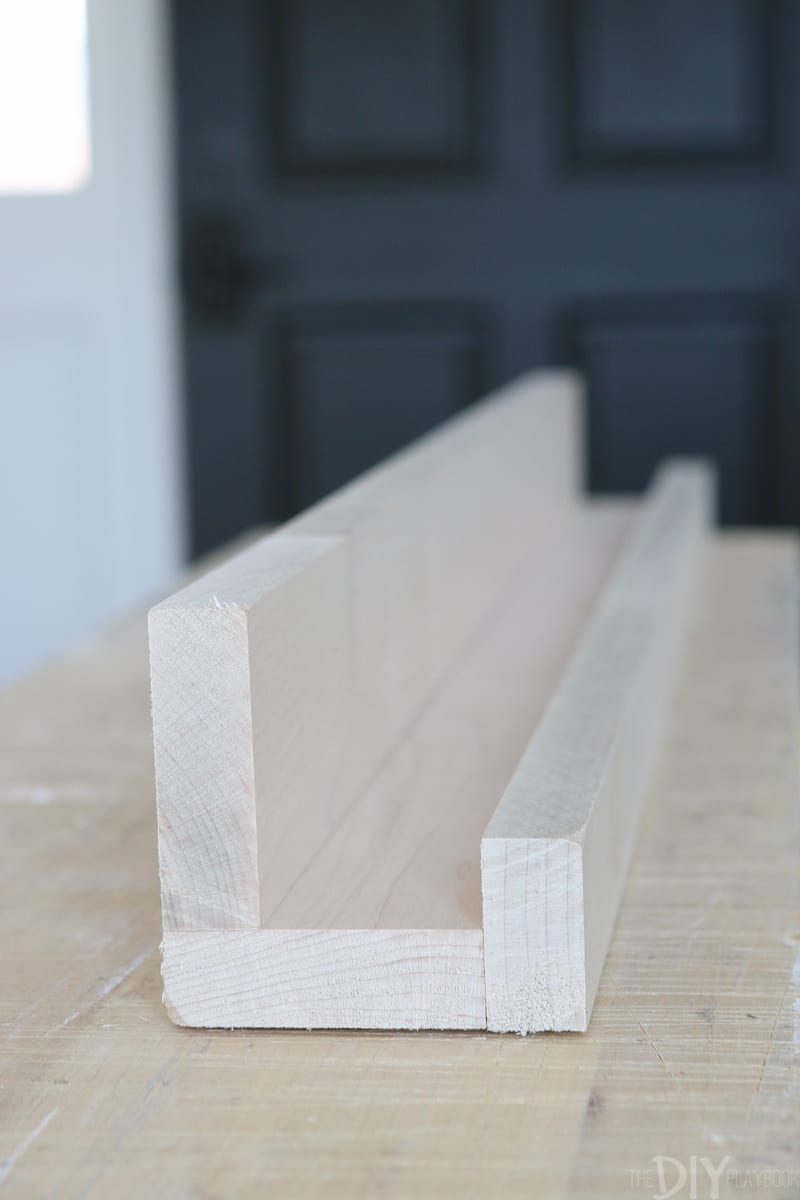
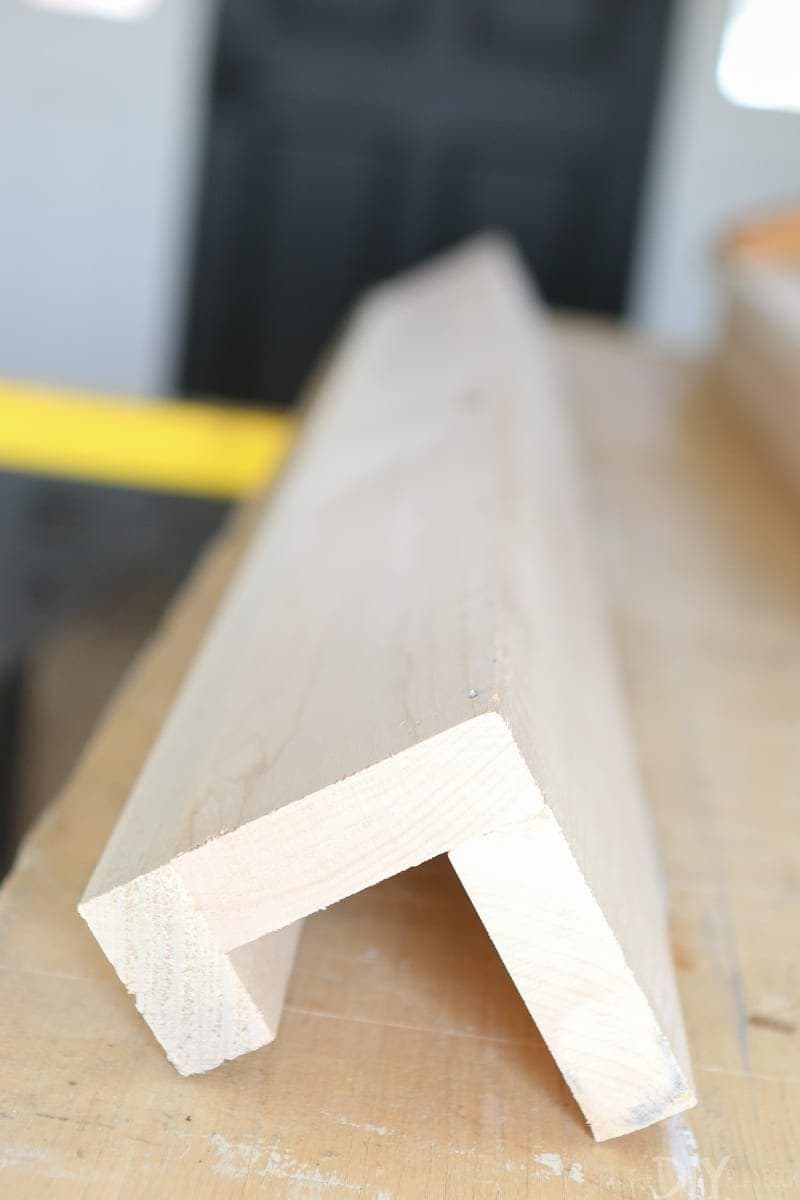
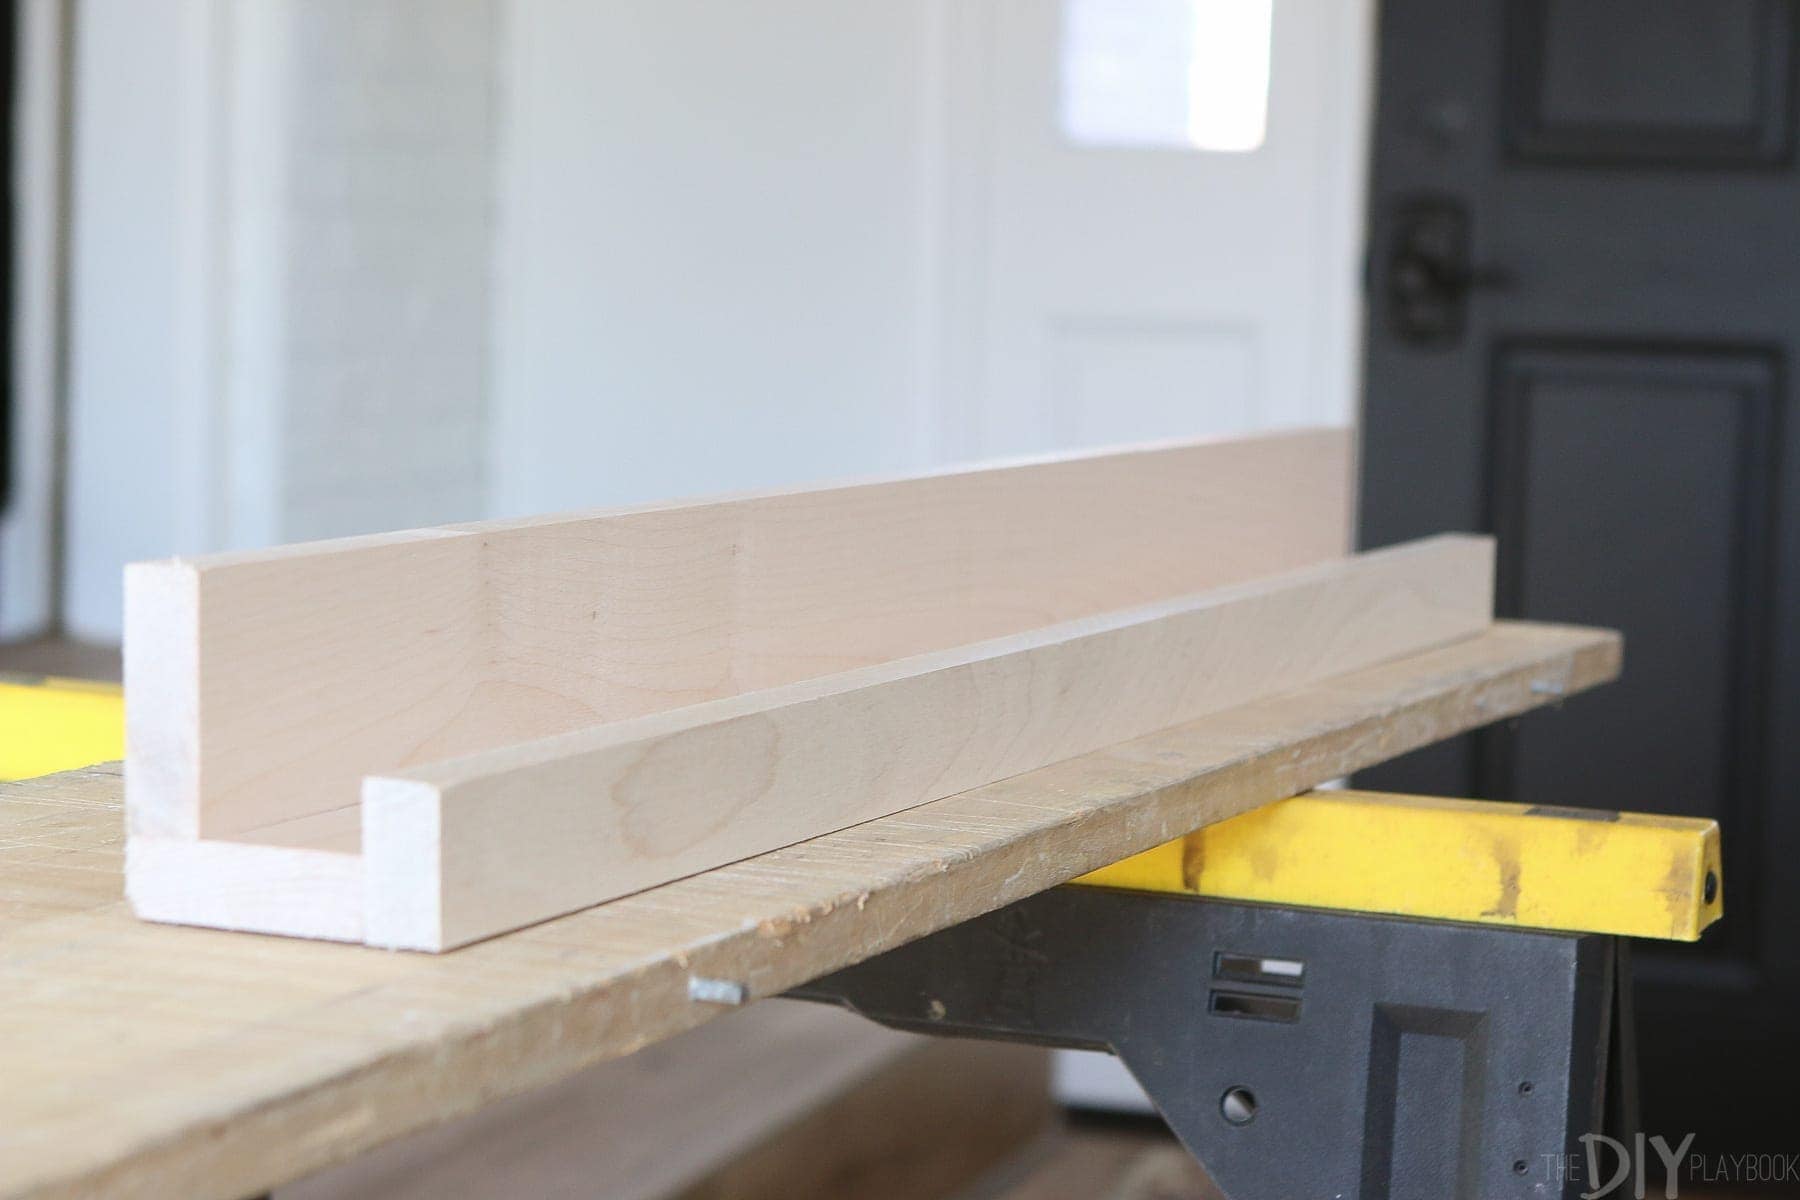
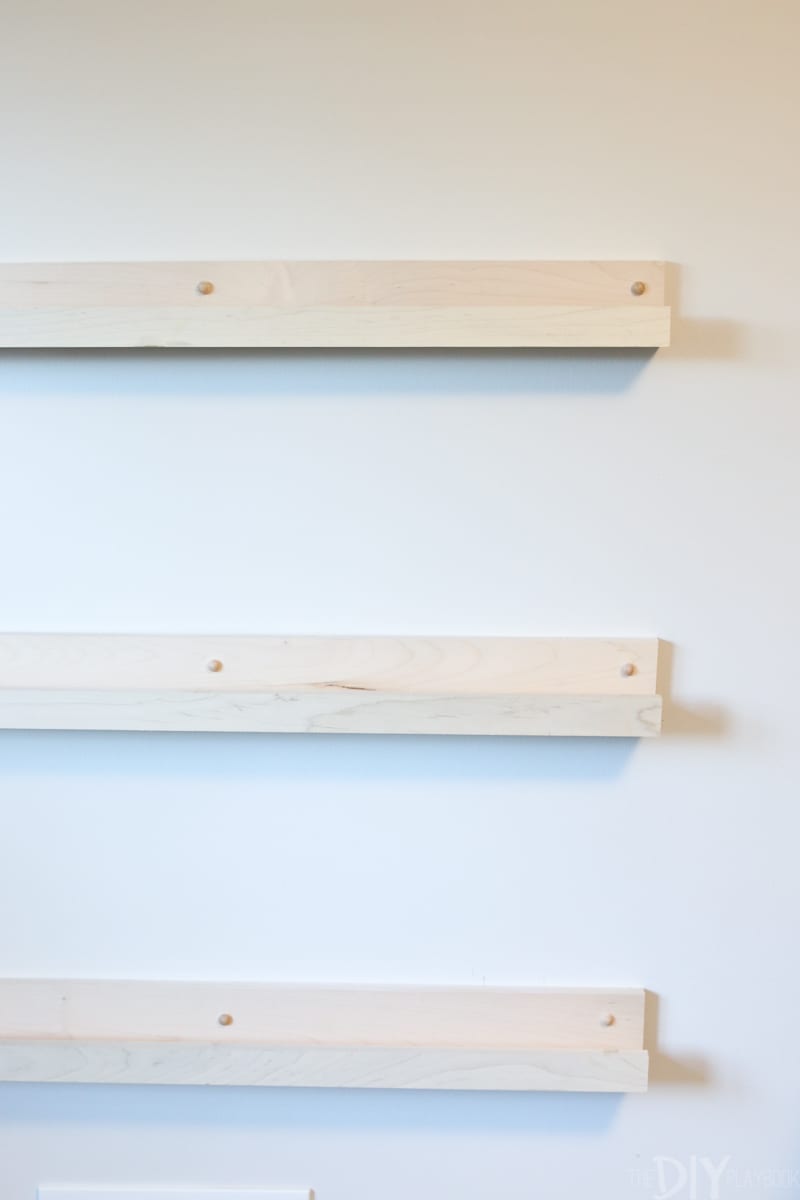
Let’s start by chatting about the wood. We went with natural raw wood for my ledges, but you can choose to stain or even paint your wood (or MDF) before you get started building. I also had my pieces of both 1×2″s and 1×3″s cut down in stores at Lowe’s Home Improvement (for free!) so that they were ready and bought enough wood to make three 3ft ledges. All of my pieces were cut down to 36 inches long and I was ready to get started right when I got home. Here’s a picture to show you how each piece fits in relation to the others. The base is a 1×3″, the front piece is a 1×2″, and the back piece is another 1×3″. But since the back piece sits on top of the base, the back looks a tad taller than 3 inches.
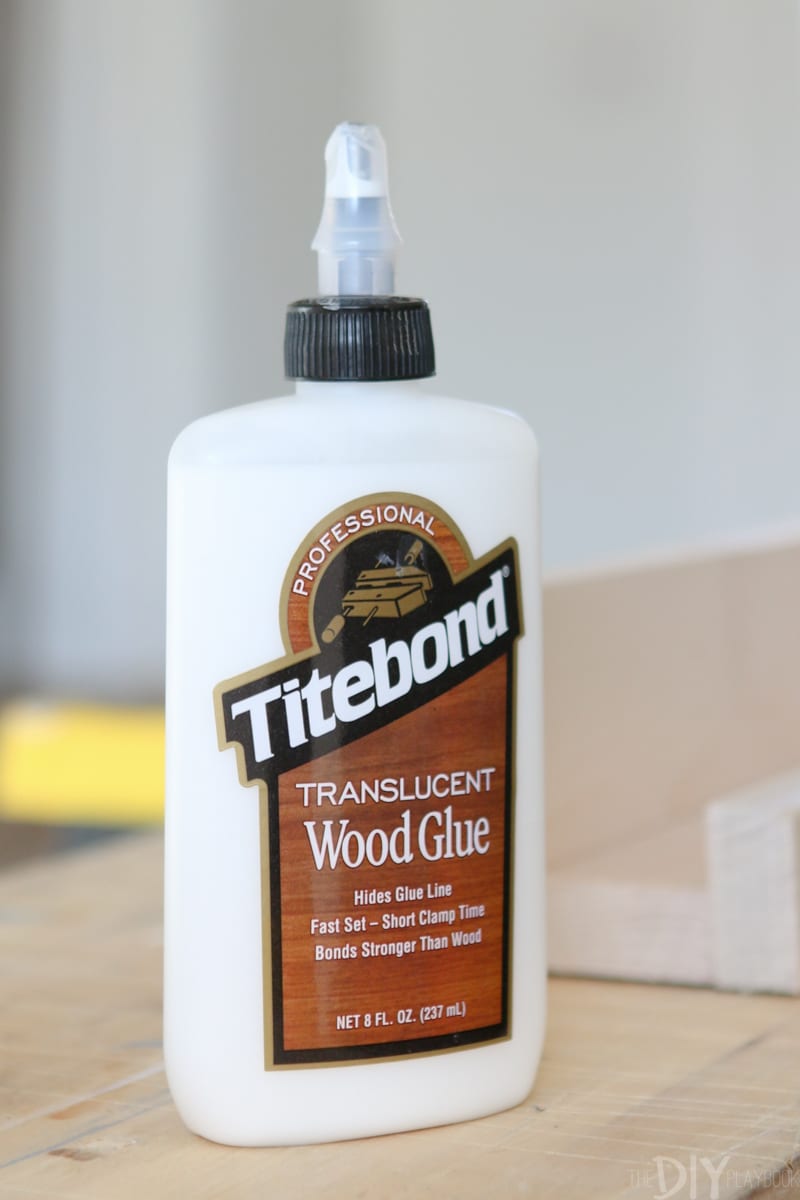
Time for Glue
Each piece needs to be glued together and I preferred to start the gluing by attaching the front 1×2 to the base. But before gluing these two pieces together, I used a safety razor and scored both edges. This step isn’t absolutely necessary, but I find scoring both surfaces help the glue adhere just a bit more.
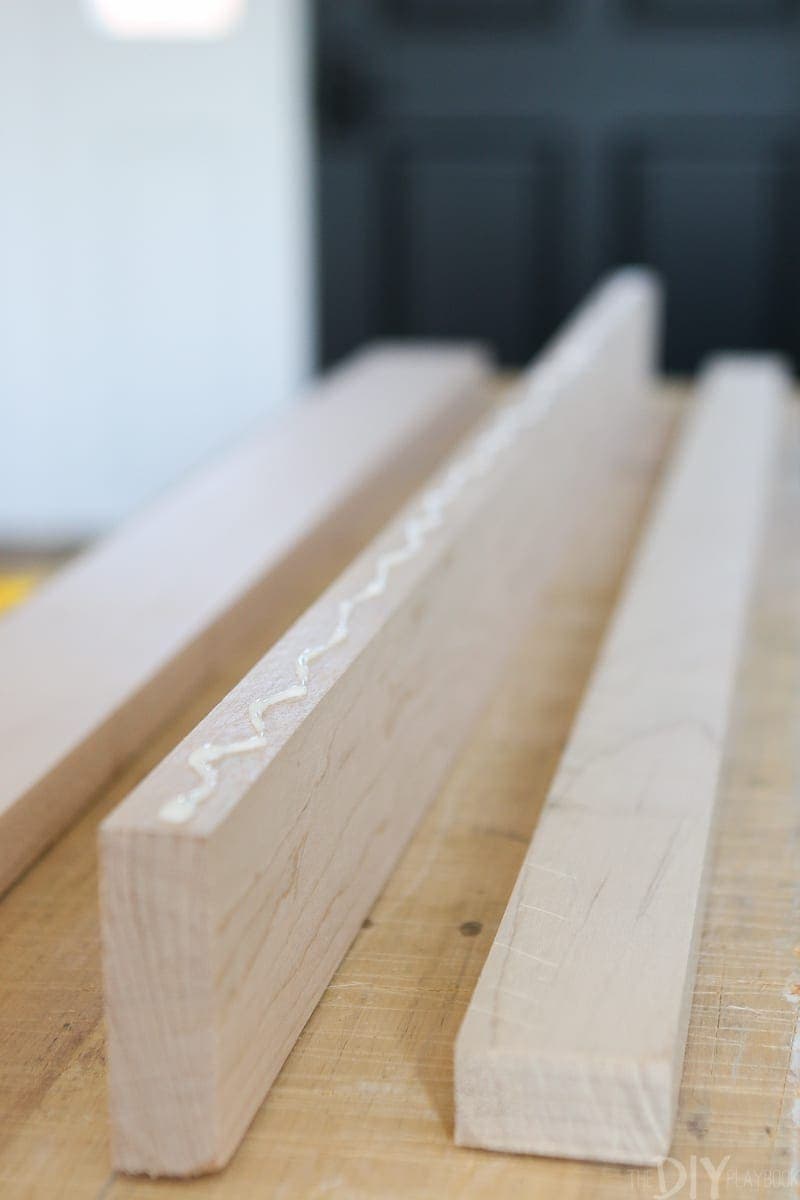
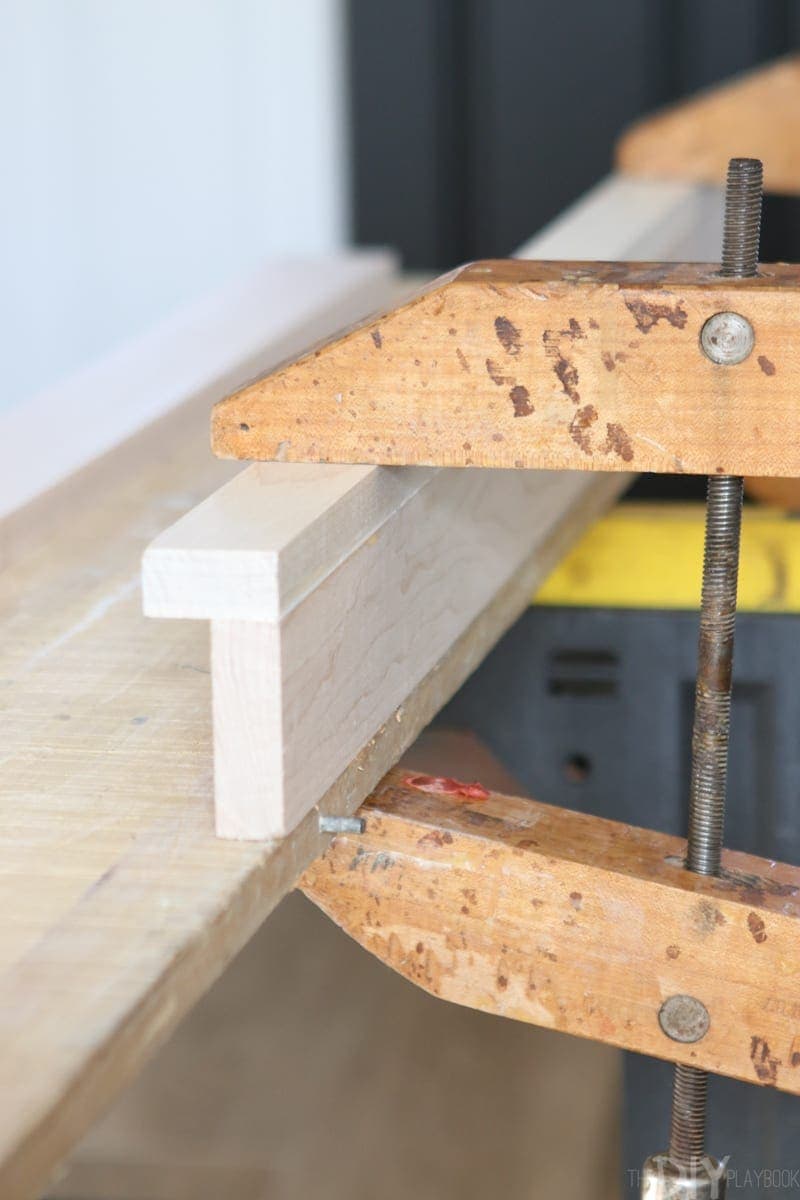
Now it was time to start gluing. I bought a bottle of wood glue, which works just like the glue you would do a craft with but this time you’re gluing two pieces of wood together.Simply add glue (not too much!) to one of the edges you already scored and then place it firmly against the other pieces.


Wood clamps are helpful to keep these pieces in place while the glue dries. The directions advise that the clamps keep the wood secure for at least 30 minutes and then you allow an extra 24 hours for the glue to permanently dry. That’s exactly what I did on all 3 of my ledges.
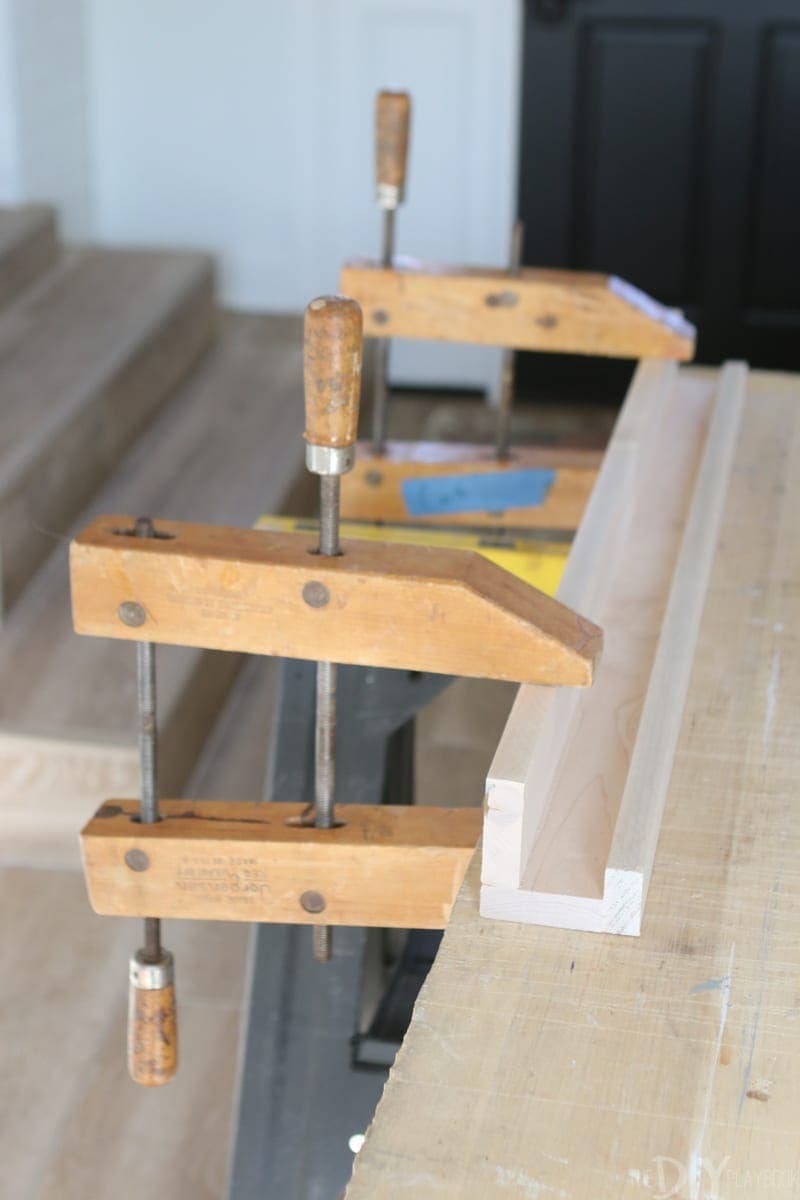
After that side is dry, it’s time to repeat this same exact process but this time on the back piece of wood (the 1×3″).Score, glue, and clamp the back piece and then once again, make sure you give it plenty of time to dry.
Technically you can probably stop there and your DIY book ledges are done! But I wanted to take an extra step to make sure the wood could hold enough weight without compromising the glue’s bond.That’s when I decided to use my nail gun and insert a few nails into the bottom of the ledges to reinforce the glue even more.
Adding Reinforcement Nails
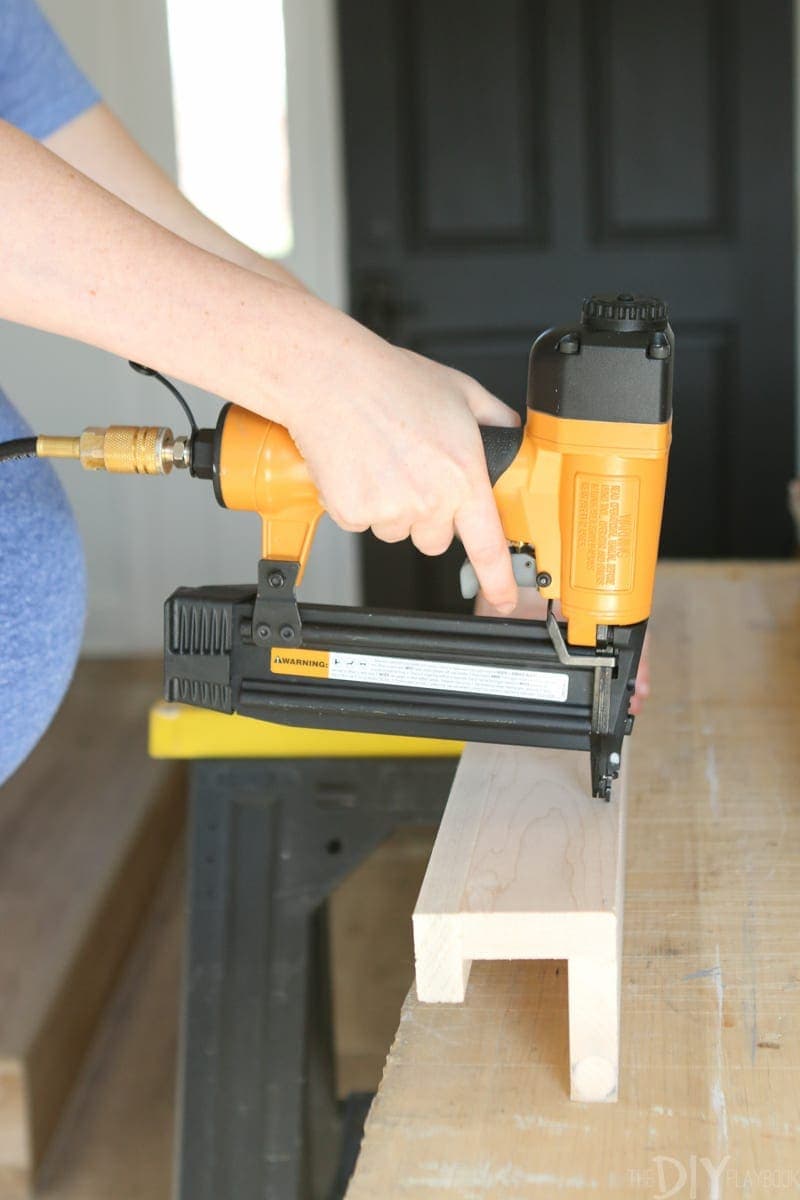
I simply flipped the ledges over and put a few nails into the book ledges for that extra reinforcement. You could do this on the front pieces too, but since I decided to keep my book ledges unfinished, I didn’t want the tiny nail head to be exposed on the front. If you’re staining or painting your ledges, feel free to add a few nails to the front of your ledges as well.
An Optional Step For a Clean Edge
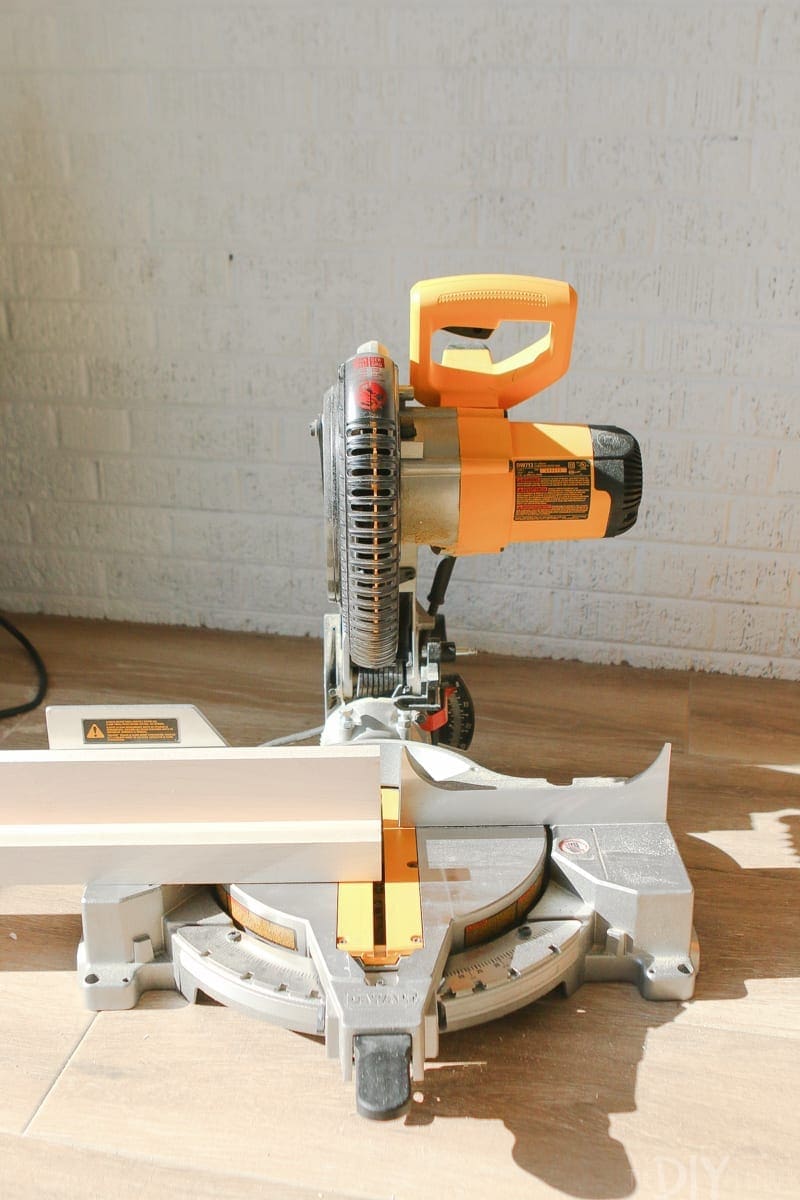
This step is another completely optional one. Like I mentioned before, all of my wood pieces were cut to size at Lowe’s free of charge. They all were 3 feet long, but after gluing the pieces together some of the edges were a tiny bit “off”. They were super close and others would probably never notice, but I figured a quick cut (more like a shave) with the miter saw would ensure that the edges of each ledge were absolutely perfect.


I put the whole book ledge under the miter saw and shaved just a tiny bit off to make the edges super clean, flush, and absolutely perfect.
In most cases, you probably won’t even have to do this but I wanted to include it just in case you are looking for that perfect edge.
Hanging the DIY Book Ledges

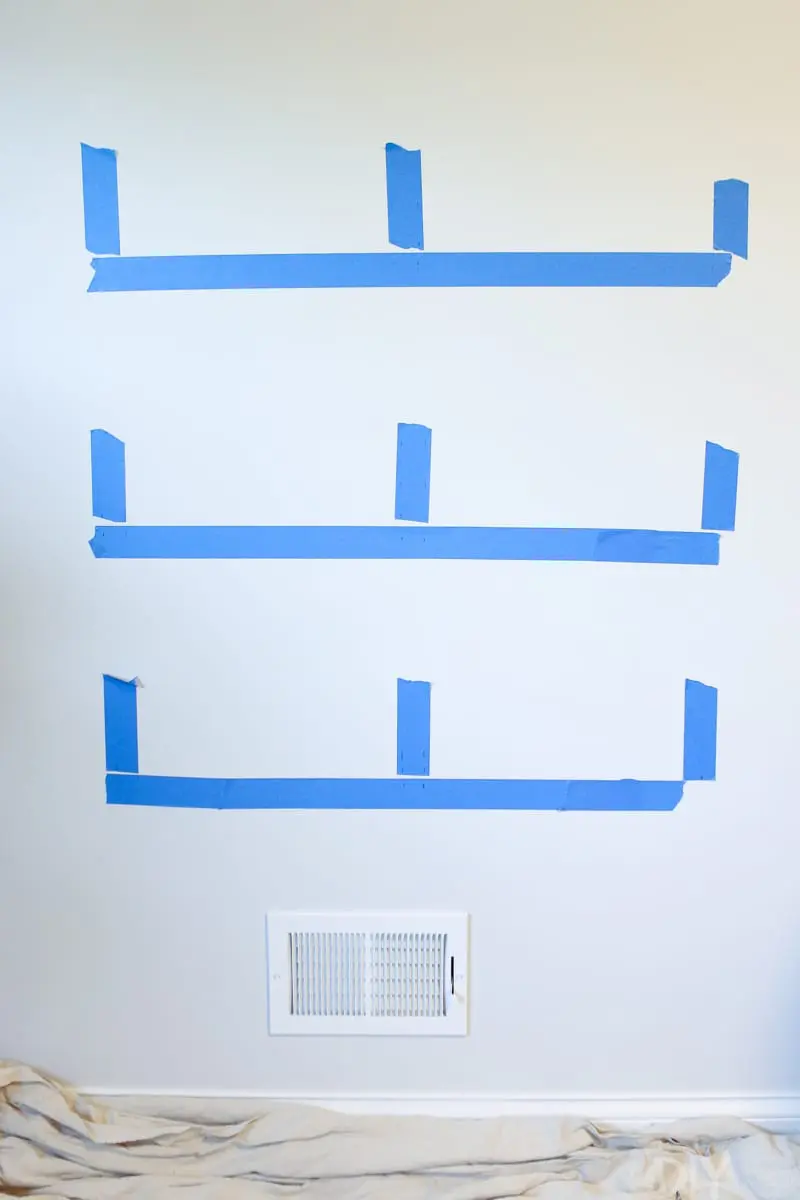
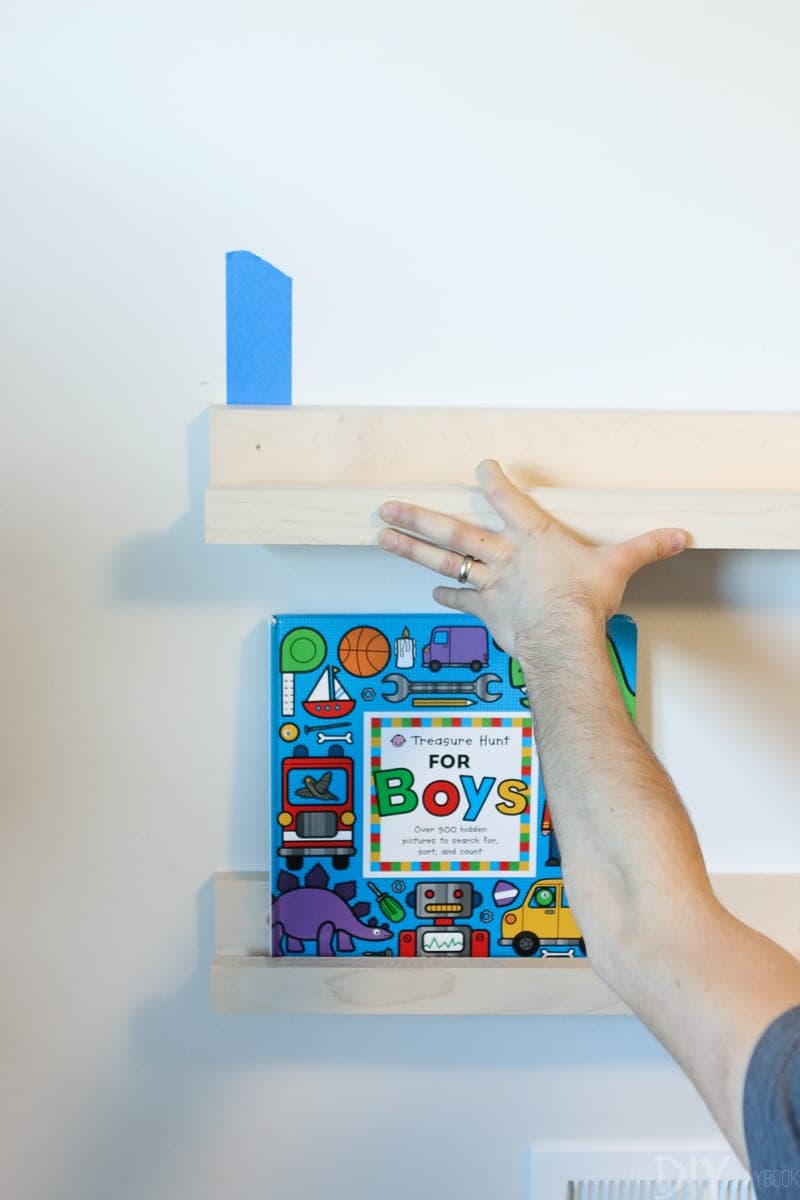
Okay now that the ledges are built (easy enough, right?!), it’s time to hang them!I used painter’s tape to do all of the measuring and spacing prior to hanging the ledges. This gave me a good idea of the overall look without putting any permanent marks on the wall. For your reference, I hung these shelves 11.5″ apart.
After confirming the spacing, I used a stud finder and painter’s tape once again to identify where the studs were on my wall. I wanted to hit as many studs as possible so that these ledges were nice and secure and somehow the DIY Gods were smiling down because I was able to hit 3!
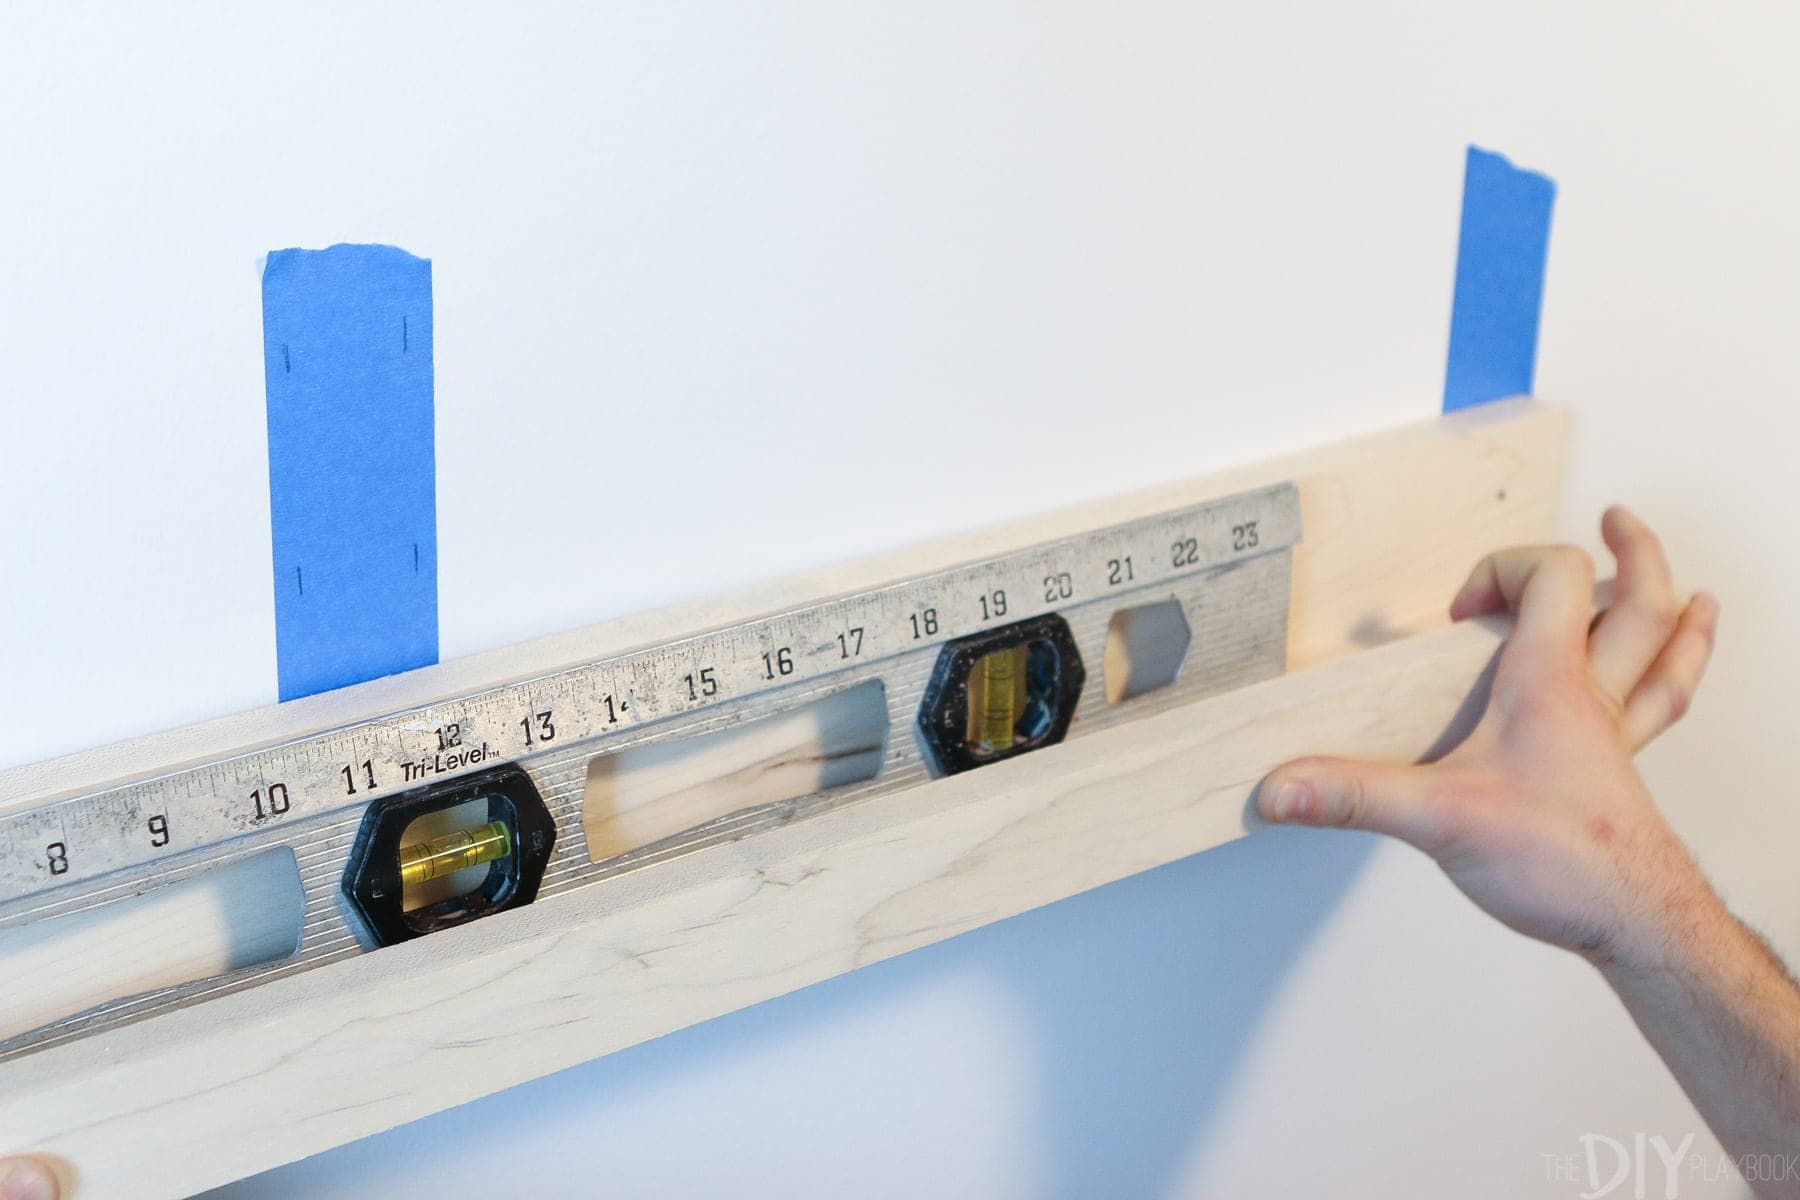
This part is a two-person job. I had Matt hold up the DIY book ledges while I checked the level and made a pencil mark at the studs on the back piece of the book ledge. These pencil marks were my guide for the pilot holes I was about to drill. But before the pilot holes, I needed to add a countersink hole in hopes to hide the screws by the end of this project.
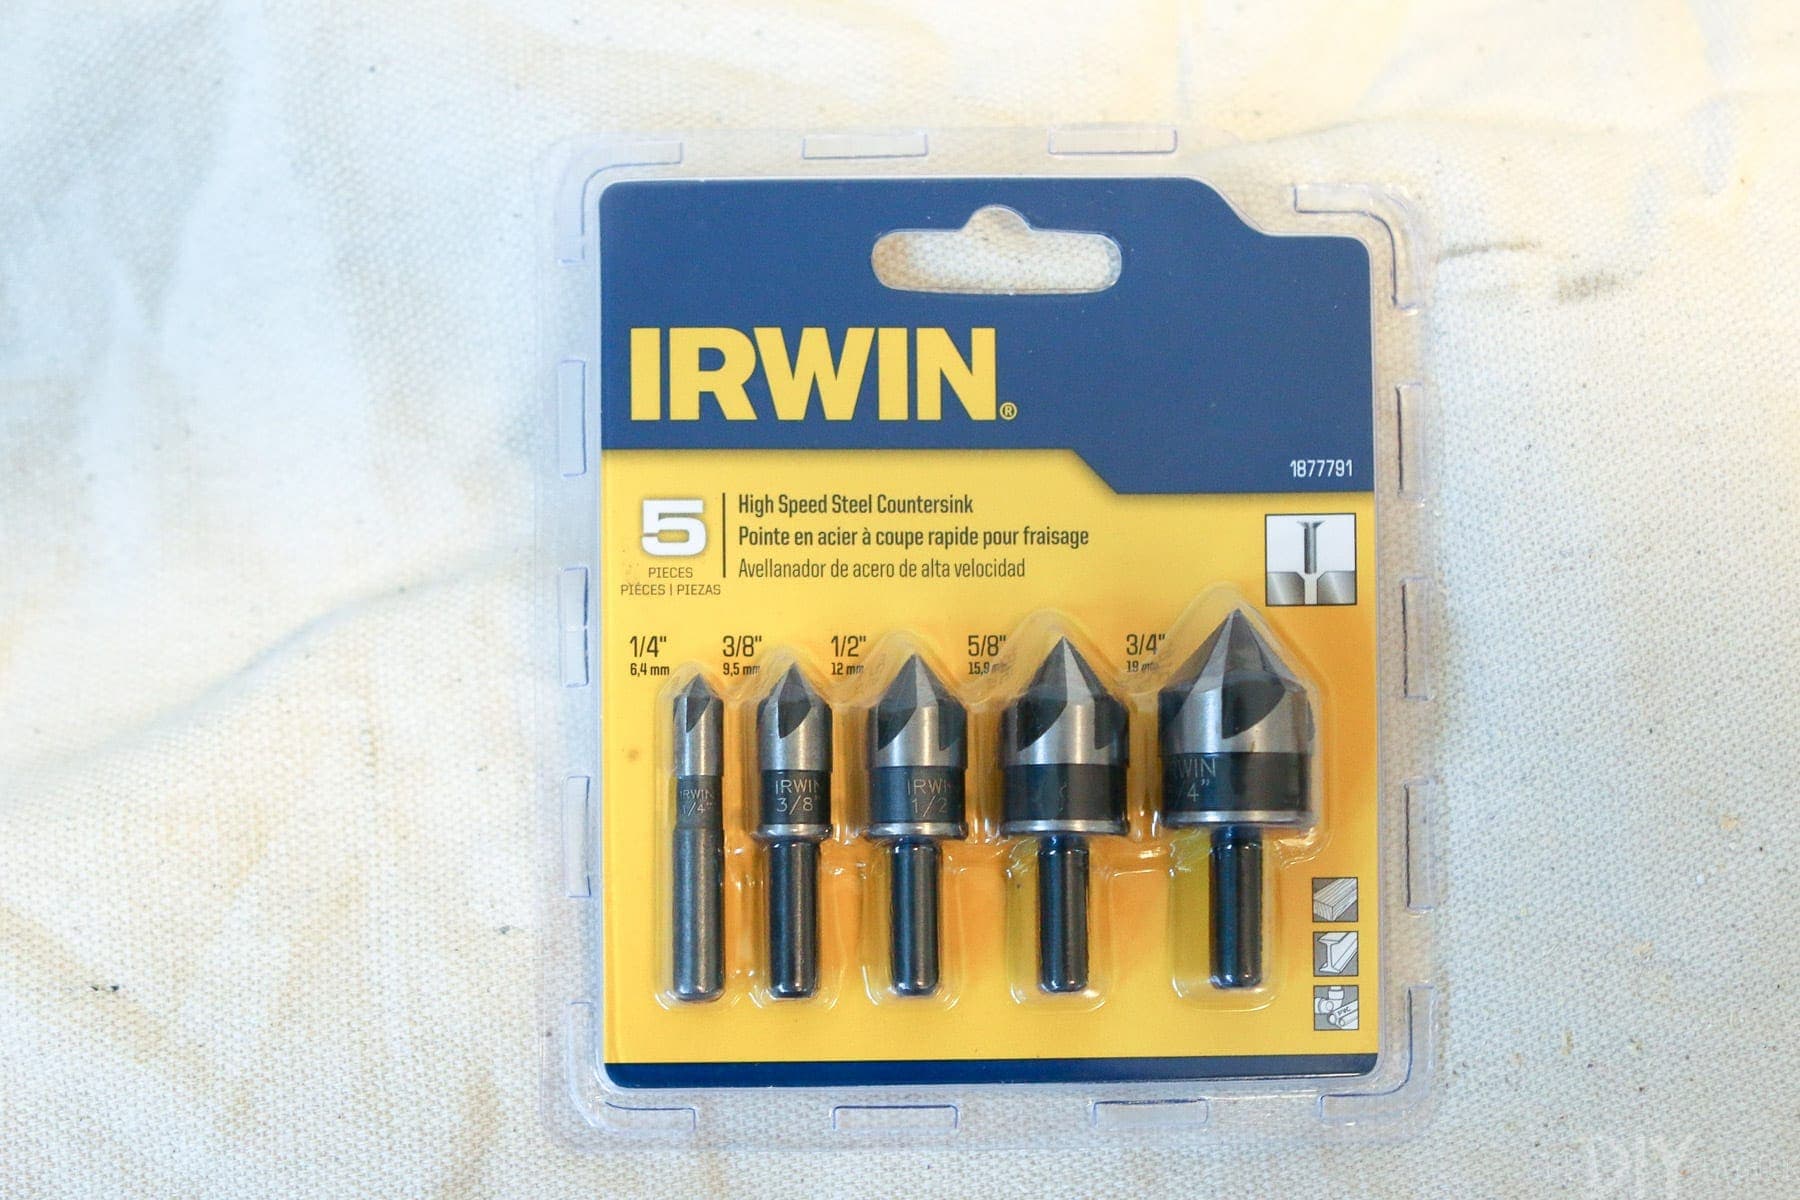
Countersinking


I bought a 3/8″ countersink drill bit at Lowe’s (something I’ve never used before) because I wanted the head of the screw to lay deeper in the wood so that I could conceal it with a wood cap. This step actually turned out to be a lot easier than I expected!
Usually, I would jump right into making a pilot hole but if you’re going to countersink your screws you need to drill the countersink hole first. I did that for each of the three marks on this ledge.

Then I added a pilot hole in the middle of that countersink hole. It’s important to drill the pilot hole after the countersink hole so that you avoid any chipped wood at the surface.


Then Matt held up the ledge once more and we drilled pilot holes through the wood holes and into the studs in the wall. It was then time to secure the wood screws into each of those holes with a Phillips drill bit. The head of the screw is able to travel a little further into the wood thanks to the countersinking. Instead of seeing the screw exposed on the back of the ledge, I added these wood buttons from Lowe’s (which you can stain or paint to match your ledge) and the whole look is a bit more “finished”.
Pretty fancy, right?! You can always skip this step, especially since the books (or frames) will most likely hide your holes but I liked the finished look. I was also happy that the buttons fit securely into each of the holes so I won’t have to worry about a future toddler pulling them off and trying to eat them. If this is a concern of yours, feel free to skip this step — no big deal!
Three-peat
We followed those same steps for each of the remaining book ledges. But one tip I could provide you after hanging the first ledge is to add a few books on the ledge just to be sure you like the spacing of the second and third ledge. You want to make sure that the tall books (or frames) have enough room to fit adding a few and adjusting the painter’s tape accordingly will save you a lot of headaches in the long run!

We finished hanging all three ledges and could not be more excited about the new look!
These DIY book ledges were a lot easier than we ever thought, which is why I’m really considering making one large ledge to display frames in our family room! And I didn’t have to buy many new supplies for this project, which allowed this to be a very budget-friendly look.
Filling the DIY Book Ledges

Time to fill these DIY book ledges with lots of books! So many of our family and friends have already gifted Baby Mac the most adorable and thoughtful books and having them on display in his nursery makes me so happy. I can’t wait until he’s old enough to choose one himself so we can sit and read it together. I know that’ll be a while though!

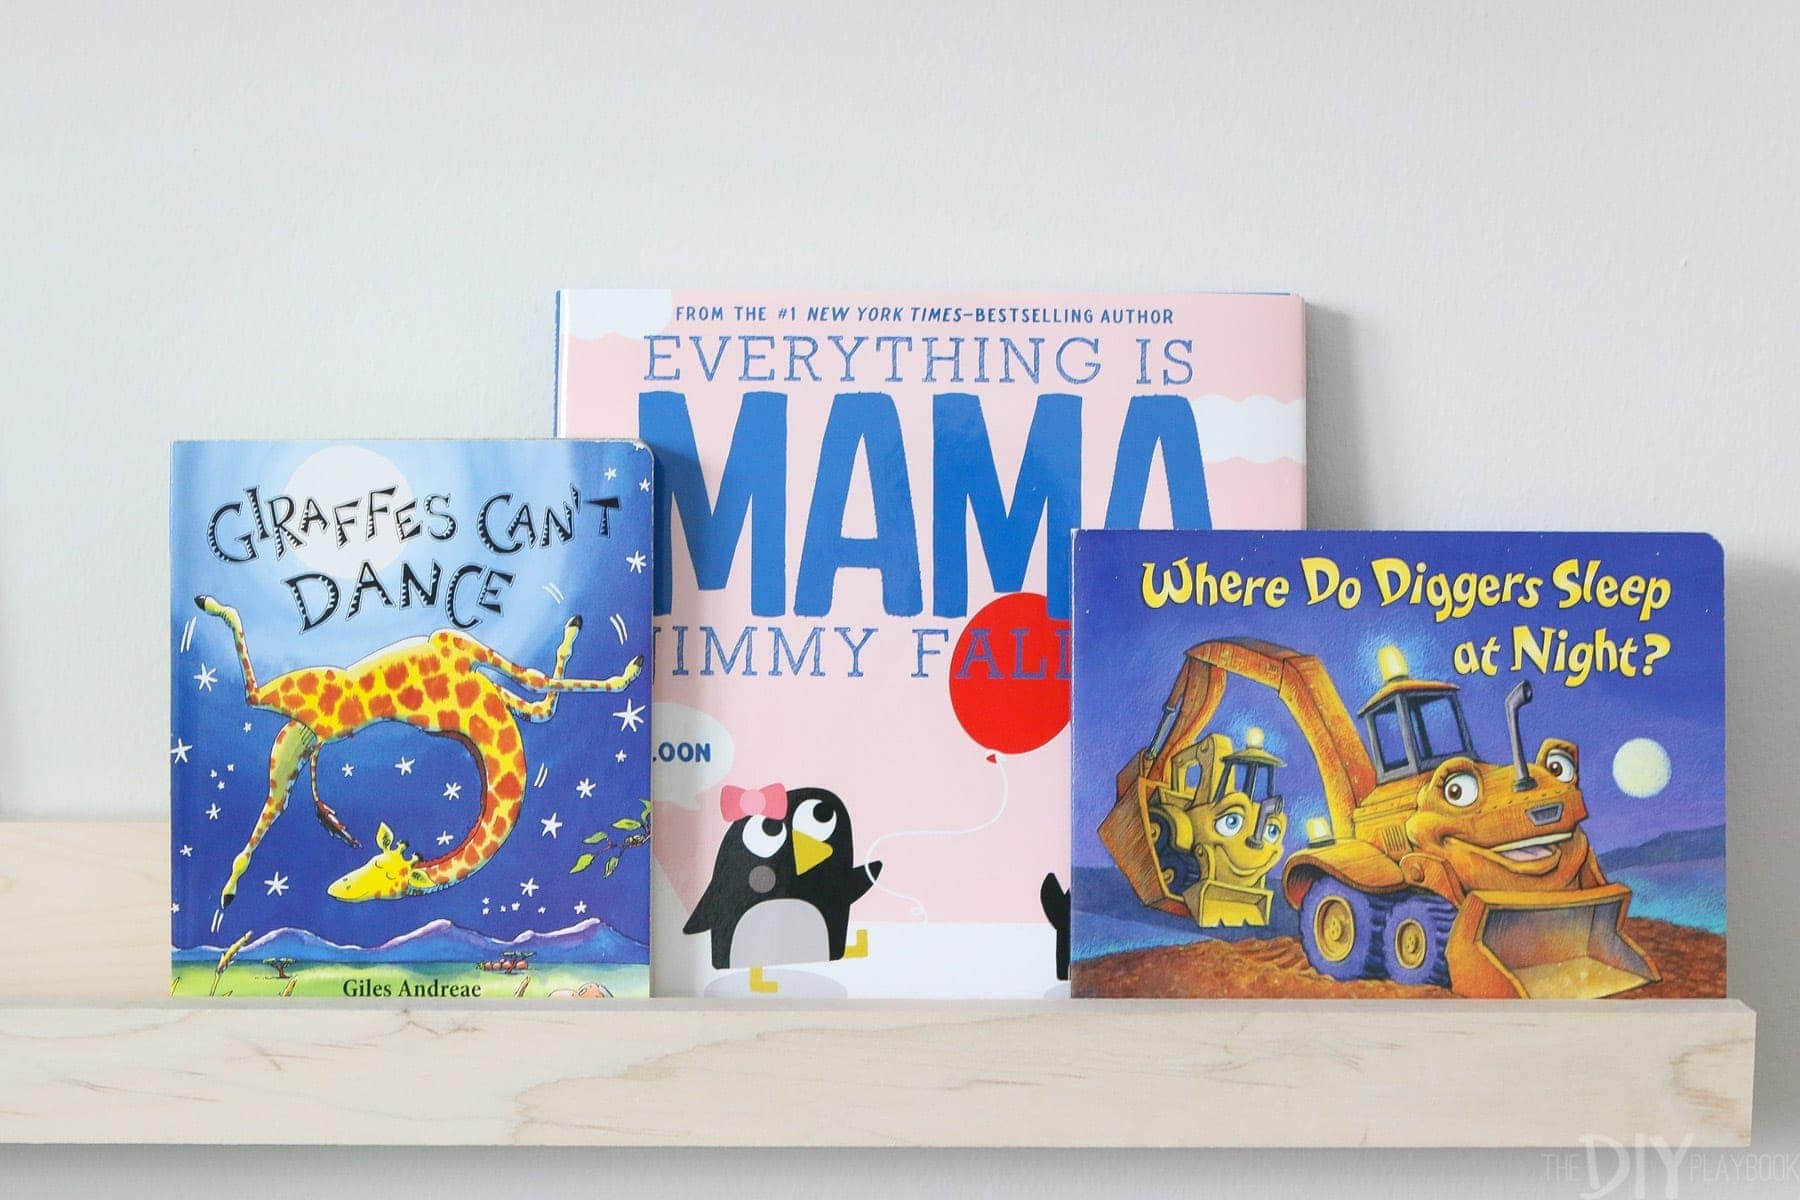

I guess until then I can’t help but look at this collection of books and smile! I know this is a project that will grow with this little guy for years and years to come.
Bridget