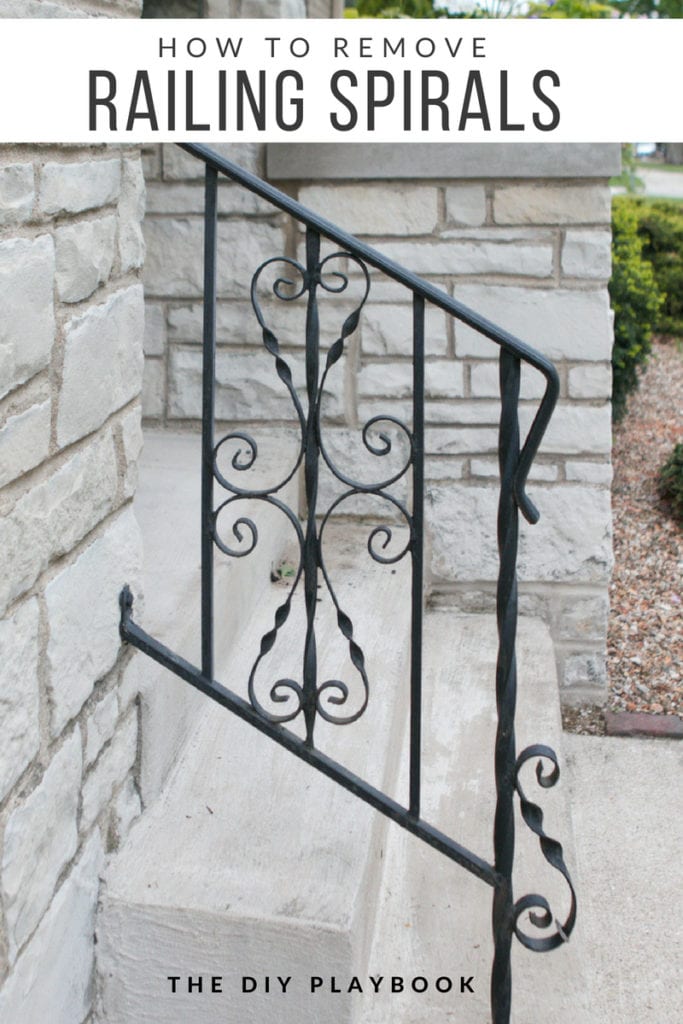
How To Remove Spirals On An Old Railing
Back When Spirals Were Cool


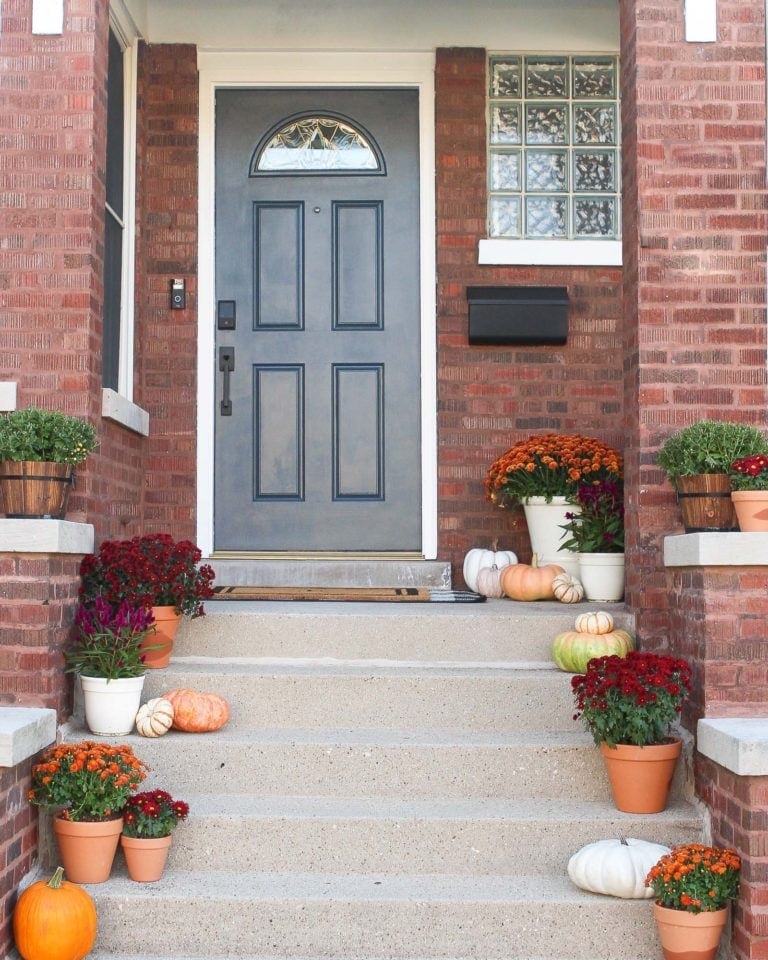
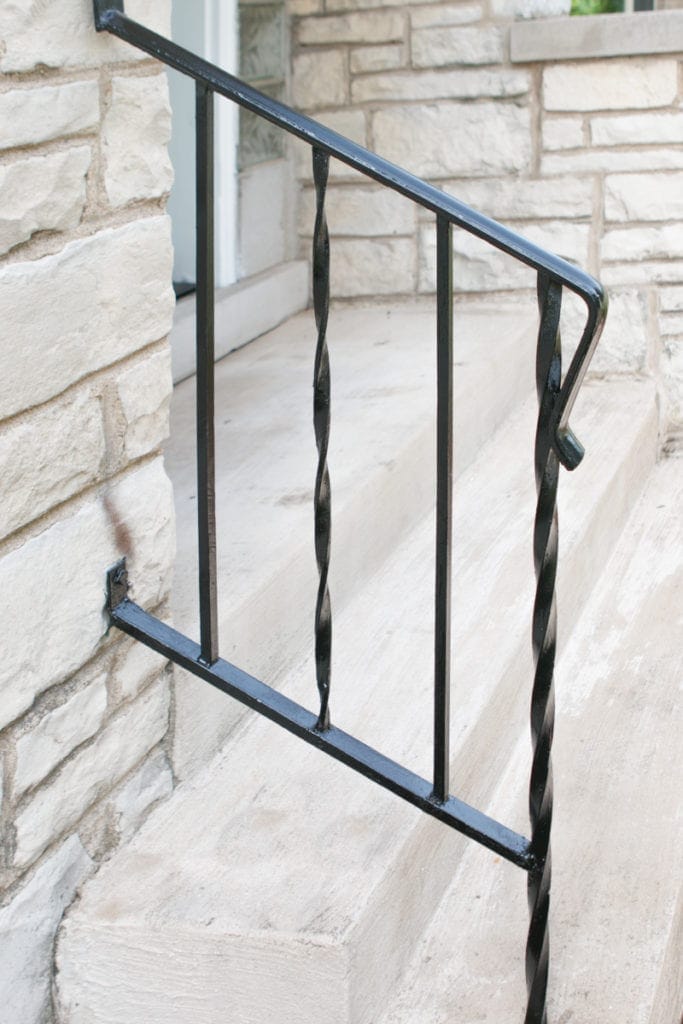
I grew up in a house with spirals on the front porch handrails. And quite frankly, that’s not too surprising because there are spirals on about 99.9% of the homes in most Chicagoland neighborhoods, including ours. Apparently those spiral details were quite the trend 50+ years ago! And just like the people that will look back at our home decor decisions in 50+ years, I’m left scratching my head wondering…. whyyyyyyyyy was that ever cool?! But it was, and our 1950’s ranch has evidence to prove it.
Best Idea Ever
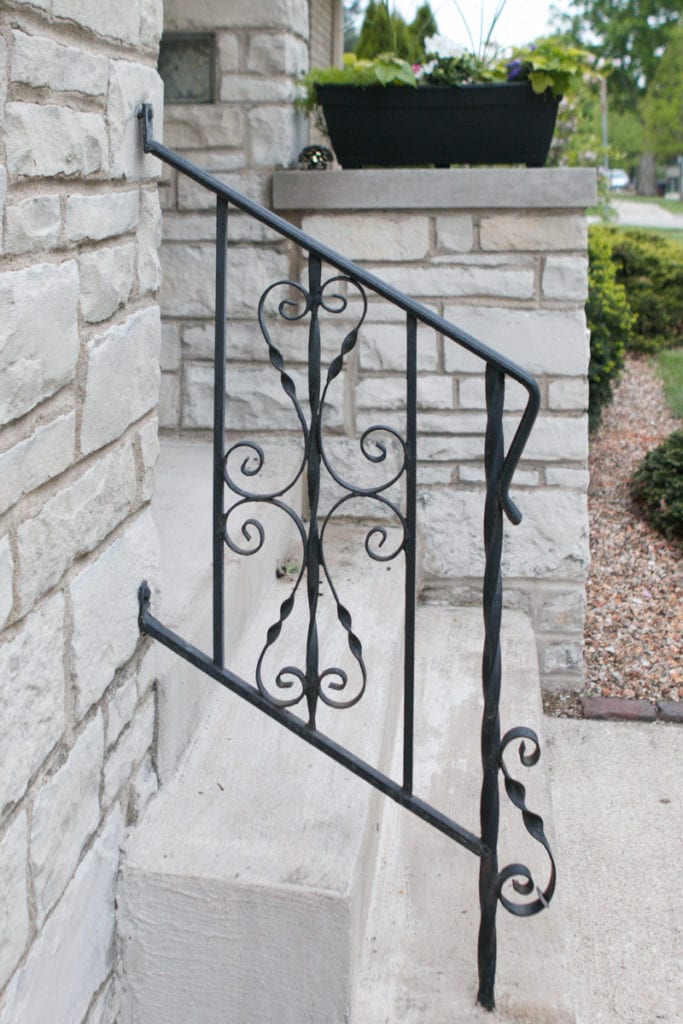
When I initially made my outdoor to-do list, I had plans to someday update our railing by completely removing it and replacing it with one that, well…. didn’t have spirals! But that project wasn’t going to happen for awhile since a new railing was not a necessity. That was until a reader reached out (hey Alli!) and shared the idea of removing the spirals but still keeping the railing. Ummm… genius!!!! Why didn’t I think of that?!

Alli’s husband tackled this project in two houses they’ve lived in, so she immediately sent me some pictures and tool suggestions. I was officially SOLD. Getting rid of those darn spirals quickly moved to the top of my list. To say I was excited was quite the understatement (I still owe you big time, Alli!)
Today I’m diving into the details on how to remove spirals on an old railing. This project is extremely inexpensive and almost immediately brings the railing out of the 1950’s and into the 21st century.
How to Remove Spirals On An Old Railing
Supplies Needed
- Side grinder and several blades
- Face Shield & Gloves (pants and closed-toe shoes)
- Hammer
- Steel Files
- Sander
- Rustoleum Primer
- Rustoleum Paint
- Paint Brush
- Roller + Sleeve
Step One: Grind Away Spirals
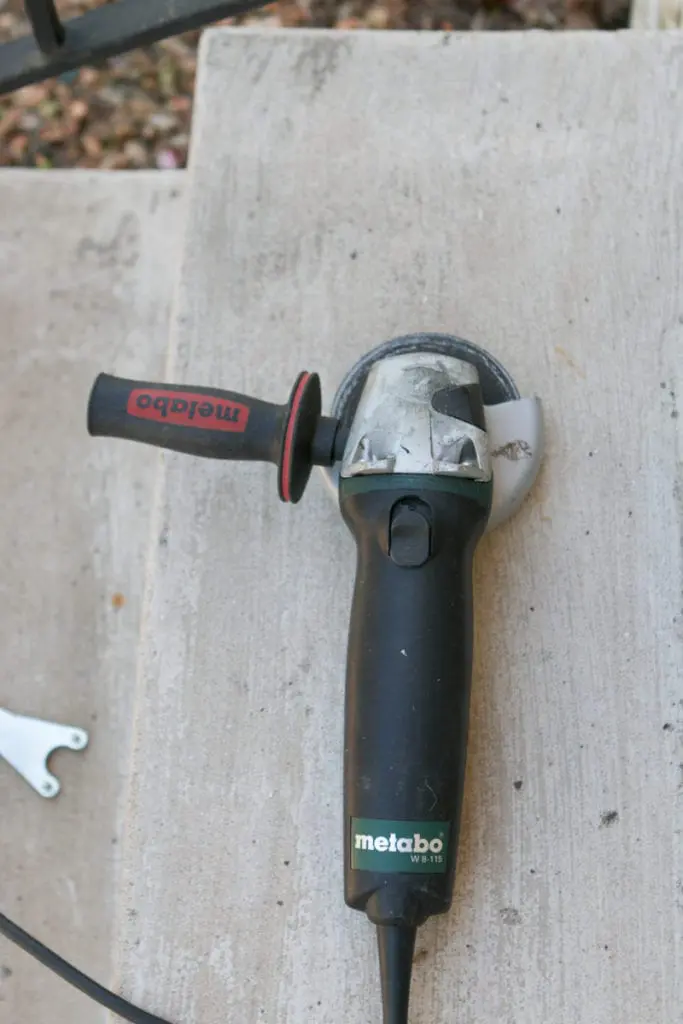
The side grinder is just like it sounds, a handheld power tool that slowly grinds away metal. It’s a bit intimidating because when it makes contact with metal, sparks fly all over the place. This is why we recommend wearing gloves, closed-toe shoes, pants, and even a face shield to protect yourself.
You’ll want to slowly grind the points where the spirals meet the vertical spindles. It’s important that you don’t grind away the vertical spindles since you’ll want to keep those intact.
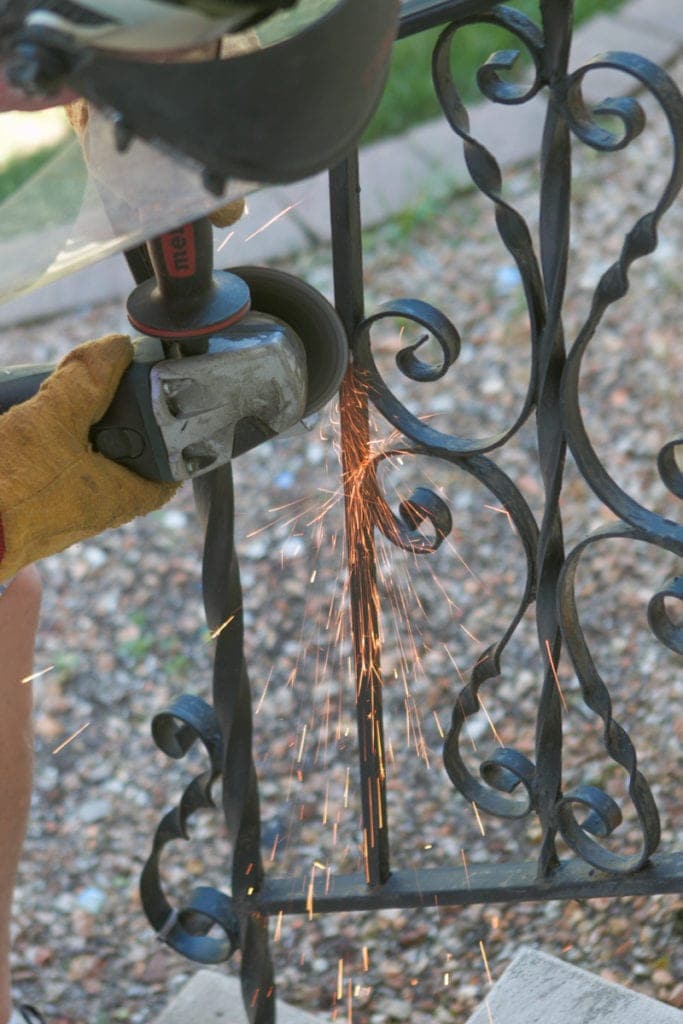
I called in my uncle, who is a master of all things DIY, because this was my first time using a side-grinder. If you know someone who has a bit more experience, you may want to call them over for supervision. The side grinder can be a bit dangerous if you don’t know what you’re doing, so please be careful!
Because this blade is grinding metal, you’ll probably need to replace the blades a few times throughout the project. But before you know it, the contact points where the spirals meet the rest of the railing will be ground down and very loose. That’s when you know it’s time to move onto step #2.
Step Two: Hammer Off Loose Spirals

You can go ahead and hammer the spirals off the railing once they are loose from the side grinder. This is the best part because… NO MORE SPIRALS!!
Step Three: File Down Steel


You’ll probably be left with rough spots where the spirals used to be connected to the railing, this is where the steel files come into play. You use these literally just like you would file your nails.
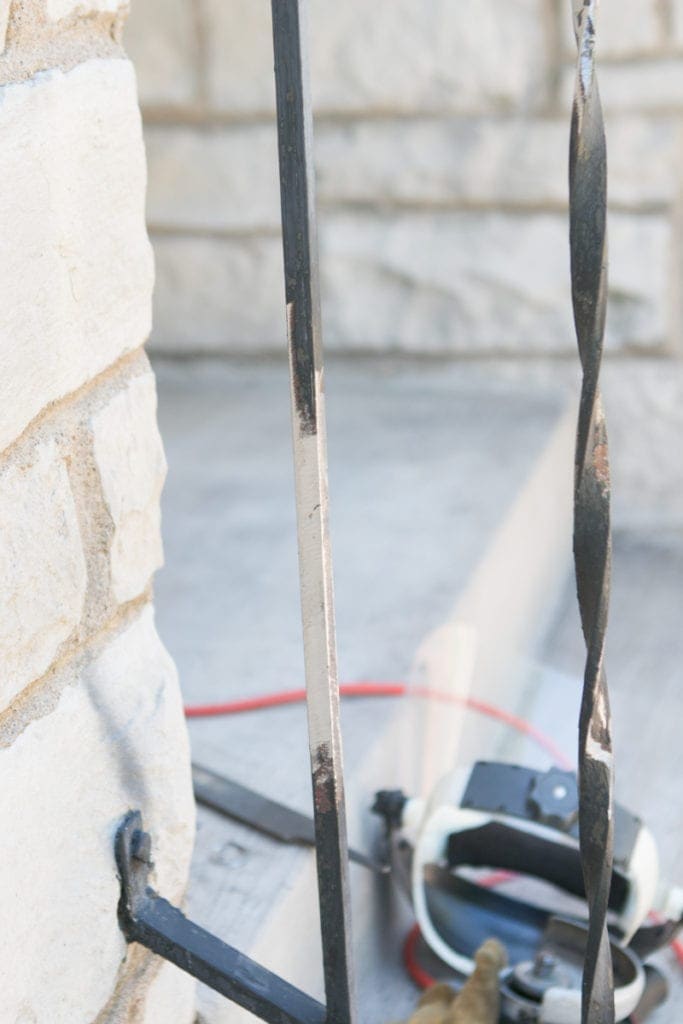
Continue to file down the spindles until they are nice and smooth.
Step Four: Sand and Prime Exposed Steel
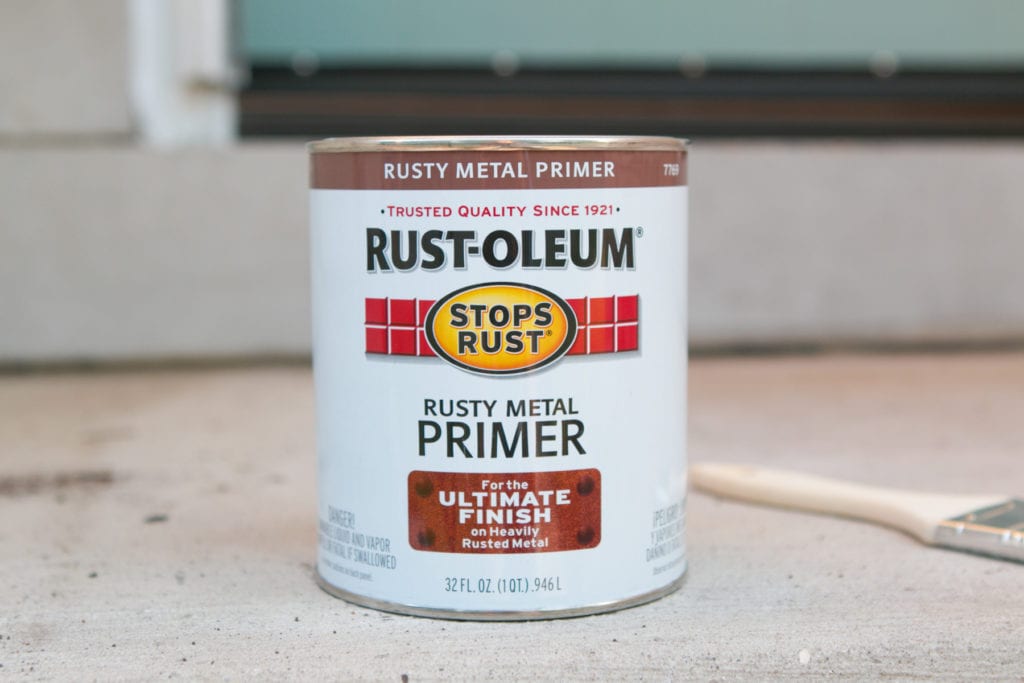 Filing down the spindles will leave you with some exposed steel, which is only a problem if you don’t prime it right away. According to my research, this exposed steel can begin to rust in less than 24 hours so you’ll want to spot prime the exposed spots as quickly as you can.


You don’t have to prime the entire railing with the Rustoleum primer but you definitely need to prime the spots that were bare steel. Thatway you will ensure the railing won’t begin to rust until you’re ready to paint it.
Step Five: Paint
Finally, it’s time to paint the railing!

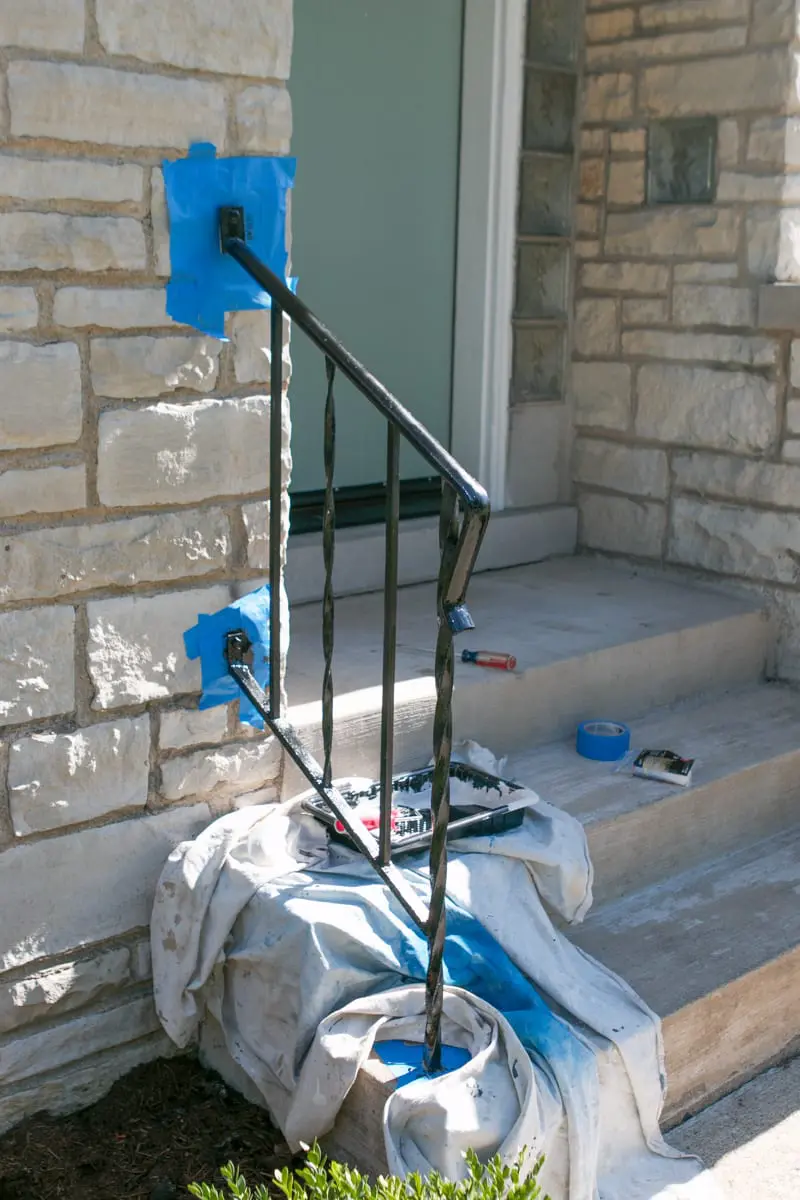
With a small roller, paint brush and some Rustoleum paint (I used Black Satin), you can clean off the railing and give it a fresh coat (or 2) of paint. Before you know it, your railing will be looking clean, updated and so much more modern!
Removing Spirals for a Fresh New Look
Can you even believe this is the same railing? I love that this project was so inexpensive yet looks like a brand-new railing! The side grinding is a bit intimidating, but once that part is over, this project is super easy (and quick!). The entire project took me less than two hours… outside of the drying time, of course.
Before & After


Thank you again, Allie, for the brilliant idea! I am forever grateful. And for everyone else tuning in today, I want to apologize in advance. Because if you’re anything like me, it’s going to be impossible for you to unsee these spirals everywhere you go now! Unless this was only a “thing” in the Chicagoland area?! Our readers outside of Chicago will have to let us know.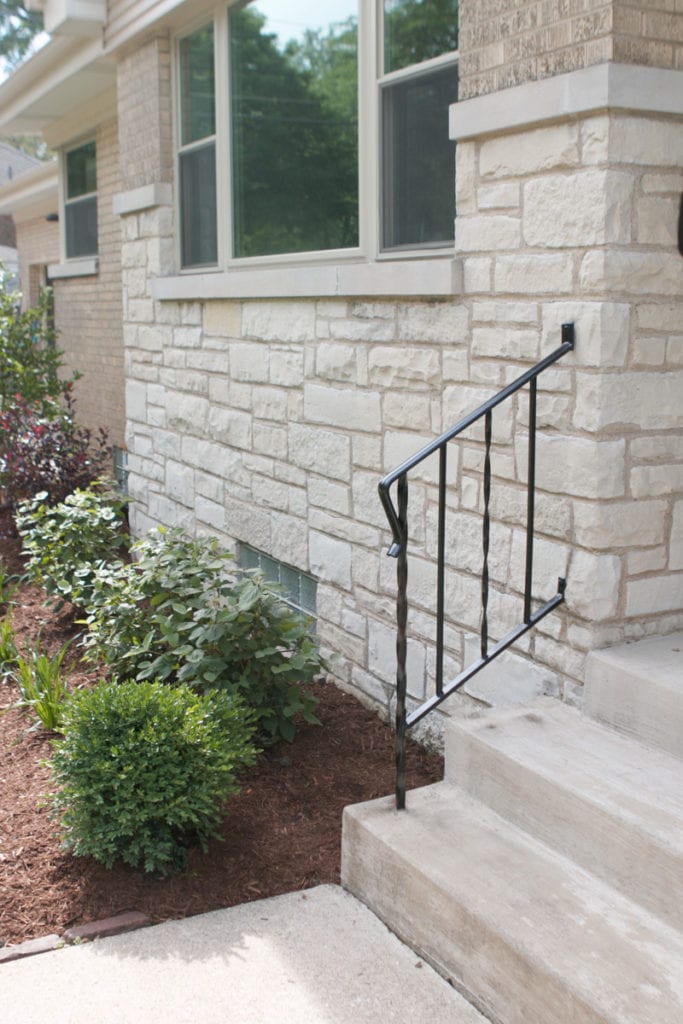
Bridget