IKEA HACK Jewelry Tray
There’s nothing like a good IKEA hack, right? These makeovers are affordable, personal aaaanndddd super unique, which is pretty much the perfect mix of everything a DIY lover appreciates. For those IKEA hack newbies, allow me to explain this phenomenon that is affectionately referred to as an “IKEA HACK”.
An IKEA hack is unofficially defined as a piece of merchandise bought from IKEA that is manipulated (usually in a DIY fashion) to make that specific piece unique and custom to your space & your style. Today, we are doing just that… on a small, $3.99 scale.

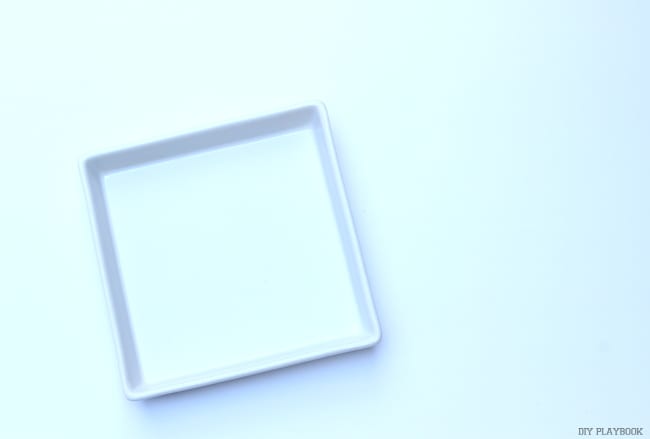
IKEA Merchandise: White Porcelain Tray
Price: $3.99
Hack: Add a personalized message/graphic
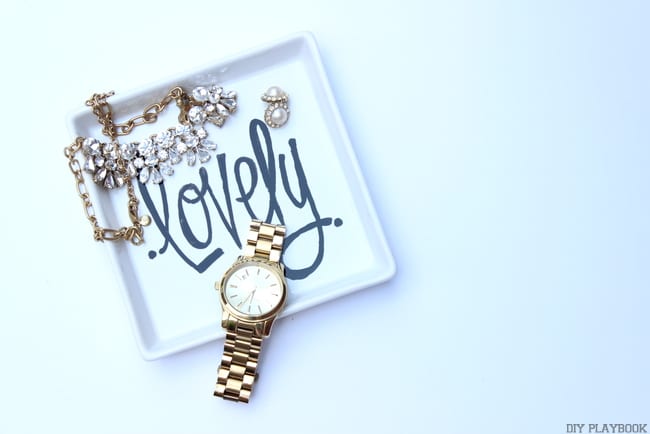
IKEA Hack: Glamorous Jewelry Tray
This Jewelry Tray is pretty self-explanatory & can be created using your very own message or design to fit your style and your space. Although the steps are simple to follow, I did learn a few things along the way that may help my fellow jewelry tray hackers.
1. Clean your tray before you start. Make sure all finger prints are off of the tray before you use the glass marker. This will cut down on the smudges/imperfections.
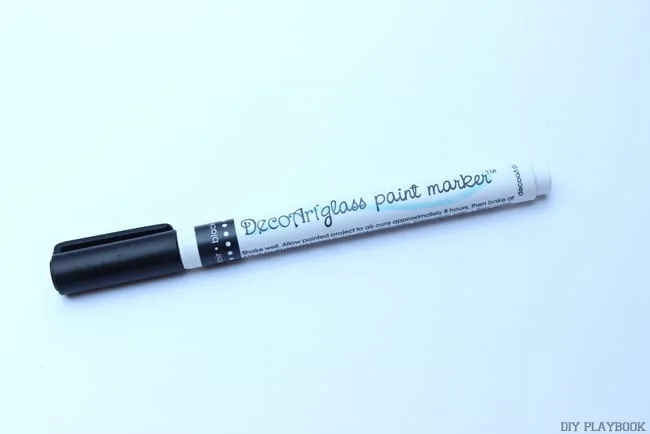 2. I used this DecoArt glass paint marker, only because I had it around the house and the pen’s directions explained that it would work on this tray. I’m sure other glass/porcelain pens would work just as well.
  3. I free-handed my little tray with a cursive-ish “Lovely”- but it took me a few tries & lots of erasing to get this exact look. Super helpful hint… the marker is NOT permanent until after you bake it. With a simple wipe (add a little vinegar for even extra eraser power), you can keep erasing and re-writing until you have the look you love. Make sure you erase really well though, any smudges left behind will bake on there permanently!
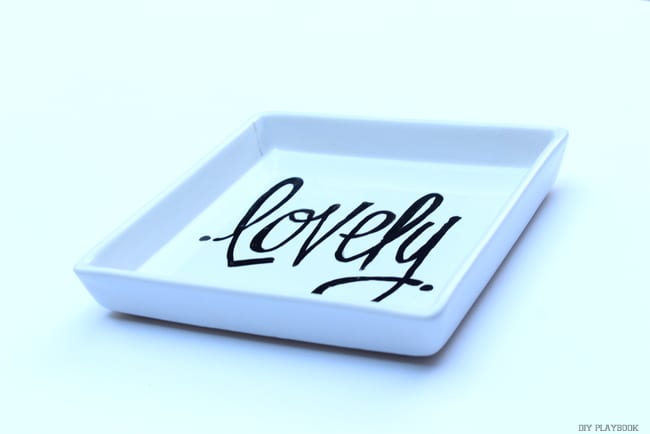
It really is just that easy – Clean, Write, Wait, and Bake. 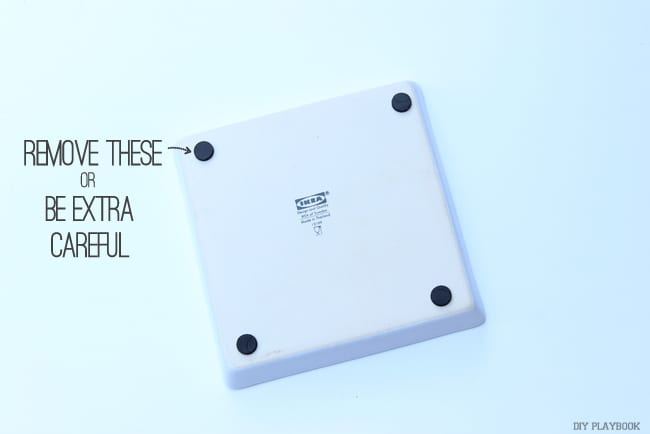
But before we get to that last part, let’s first chat about some safety precautions. I know, I know… who would think there needs to be safety precautions taken while making a Jewelry Tray?! I hear ya. I thought the same thing, but I guess this jewelry tray DIY can be filed under the label, “the things we do for beauty”.
The IKEA tray comes with a rubber padding in each corner and you don’t want these to come in contact with the stove when you bake the marker permanently on the tray {insert the smell of burning rubber here & every time you use your oven after that}. To avoid this mess, either take the rubber pads off the tray before baking and replace them with new ones after the baking process. Or just be very careful when baking and make sure the rubber does not directly touch the oven.
 I went with the second option and watched the baking tray super closely (if only I watched everything I baked that closely… I’d probably be a lot more successful in the baking department). I also made sure to bake the tray upside down so the rubber didn’t touch the pan. As you can kinda tell in the picture, the rubber shrunk a bit but other than that, Plan B worked well. The rubber is still intact and doing its job perfectly, plus the baking was super successful because my “lovely” design is very permanent now.
For more specific instructions on baking your design, check the directions on your marker. Your marker will tell you exactly what you need to do to make your design permanent.

Then all that’s left to do is dress this baby up with all of your favorite jewels! 
I use mine for jewelry that I wear most often; typically the stuff I take on and off on an everyday basis. The tray offers a cute drop zone and gives these pieces a place to call home. 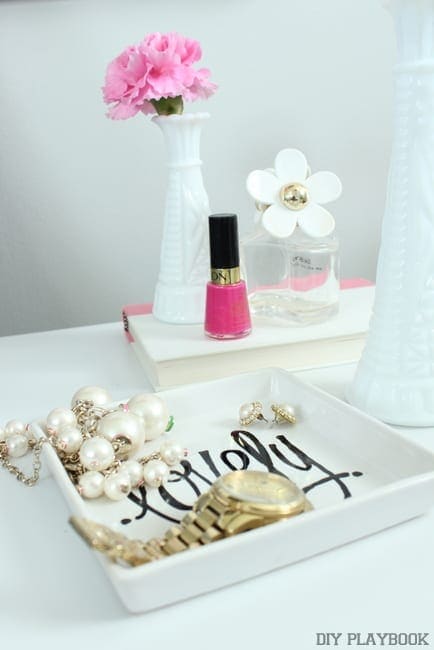
I can totally see this simple IKEA Hack as a bridesmaid gift, a girls’ night project, mother’s day gift, grandparent gift made by those adorable grandkids, or even a festive holiday piece! The possibilities of this $3.99 tray are ENDLESS!!
Bridget{/signature]
So tell us… what would you write or draw on your jewelry tray IKEA Hack?!


