Laundry Room Upgrades
[Disclaimer: We have partnered with Maytag to bring you this post. All opinions are our own and are not influenced by Maytag. Thanks for supporting the brands that support this blog!]
I’ve made some big progress on our “laundry room” to-do list! If you guys remember this post, then you know we’ve been meaning to make some upgrades to our small closet that holds our washer & dryer.
Let me give you a little refresher on how the space used to look…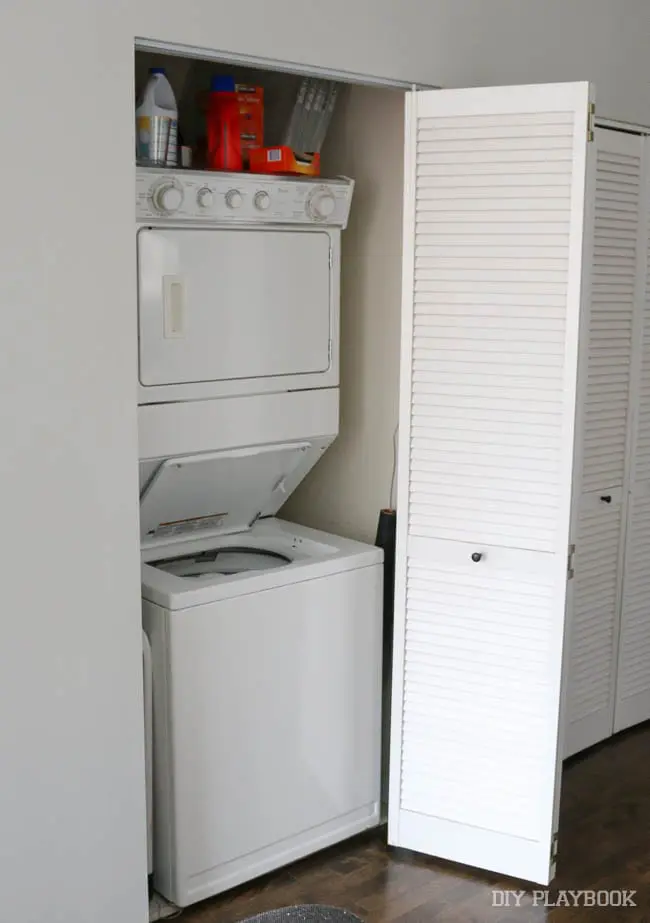
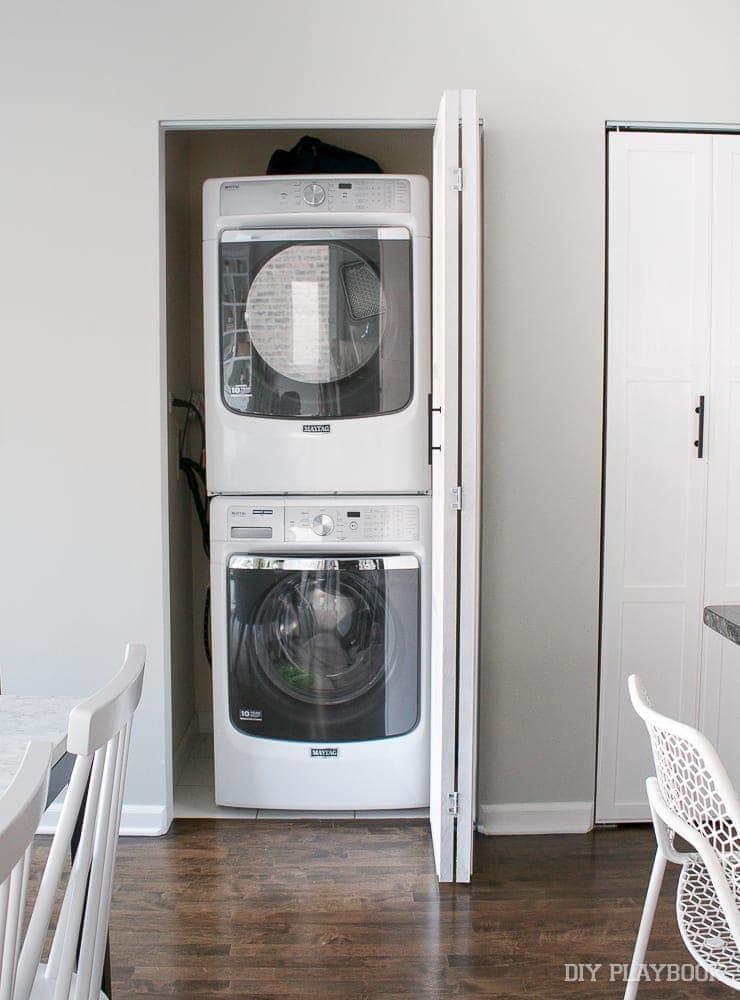
Luckily, we quickly crossed the first item off our list and got rid of our old appliances.  We replaced them with this new washer & dryer from Maytag that look so much better, but (more importantly) function much better!
 Now that we’ve been using the washer & dryer for the past few months, I love them even more. The units are so much larger than our old ones, and I can get our laundry done so quickly.
  I used to have to do multiple loads of towels and bedding. Now I can throw them in and get them done in no time at all. The drums are big and hold so much all at once.
 The Fresh Hold option (where the washer tumbles loads and circulates air with a built-in fan) has been a lifesaver too!
  Sometimes when I’m multi-tasking during the week, I throw in a load of laundry and then get wrapped up in other tasks and forget about it. Since the machine keeps my clothing fresh for up to 12 hours even after the wash cycle ends, I no longer feel like I need to re-wash when I inevitably forget I was in the middle of doing laundry. <— Please tell me I’m not alone in this?! I feel like it happens just about every single time #laundryfail
 While the new appliances made a big difference in the look of the space, there was still work to be done.
From the start of this mini makeover, I knew I wanted to replace the doors. The louvered doors just weren’t cutting it and really took the entire look of the space down a notch. After seeing the dramatic transformation on the closet doors in our fall makeover, I knew that I wanted to do the same in this space.
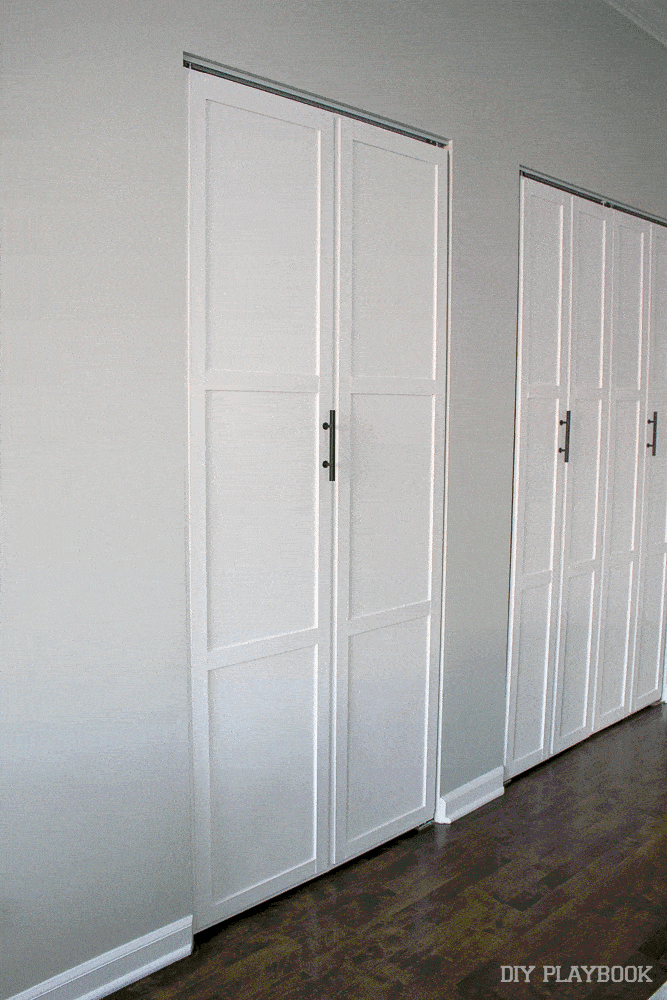
And instead of just doing the laundry room doors, I decided to do all of the closet doors in this open space. Because as long as you’re getting all of the tools out, you might as well get ‘er all done at once!
Here’s how they looked before the DIY began…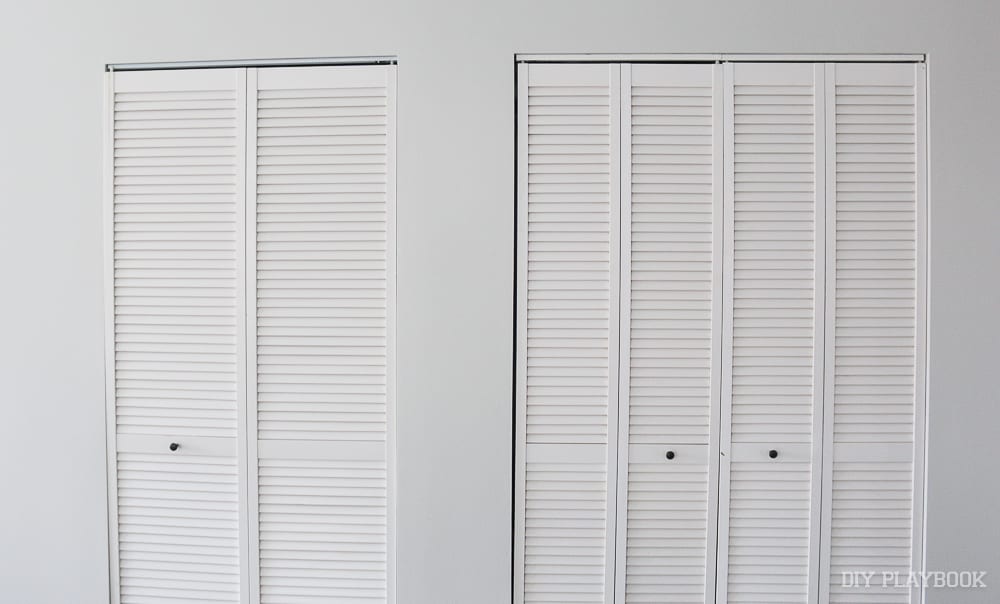
And here they are now!
I’ll have the full tutorial on this DIY project tomorrow on the blog, but I couldn’t help but share the dramatic difference!
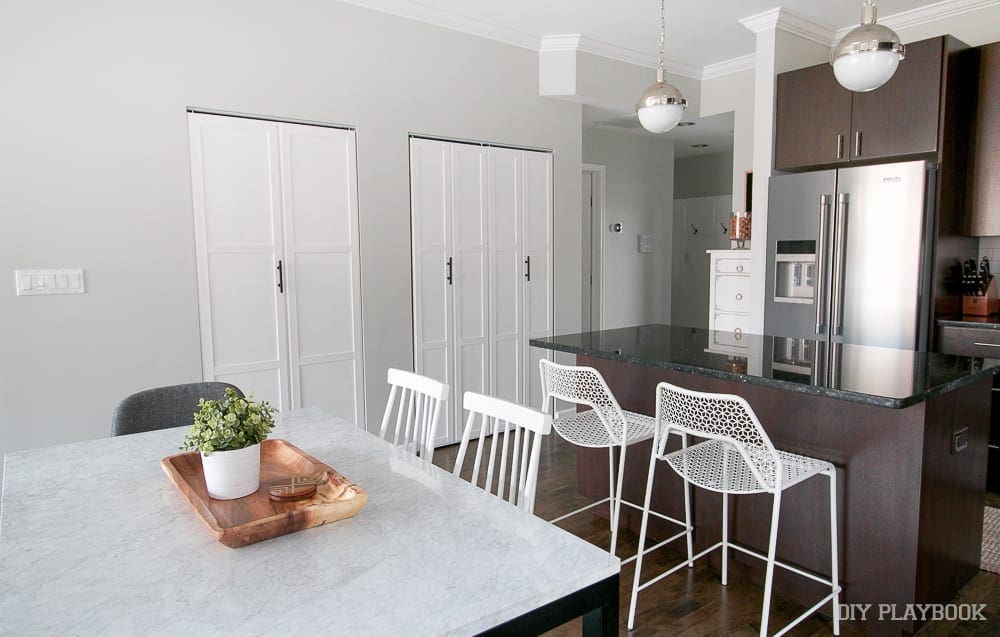
So much better, right?! It took the look of the entire main room up to the next level and I’m so happy I finally got this project off my to-do list.
Speaking of that laundry room to-do list…
Laundry Room To-Do List
New Washer & Dryer(You can read all about them right here)Replace Closet Doors(All done & looking fabulous!)- Trim out Door (This is next on the to-do list. I’m planning to add molding around the perimeter of all of these doors. It’s going to be quite a DIY project as I’ll have to remove the baseboards and replace them)
- Organize & Add Storage
 Let’s talk about that final task on my list. I’m not really sure what I can do to make this space as functional as possible. My original thought was to put a slim cart on wheels right next to the washer, but now that it’s in there isn’t enough room for one. I also thought I might be able to put a basket on top, but since the dryer is tall it’s hard to fit one up there. Any ideas for me? I’m all ears!
Casey


