How to Install an Ikea Kitchen Faucet
I’m gonna start this post by saying that I didn’t really think I had the DIY skills to tackle a plumbing project.
Installing shelves? Sure! Painting furniture? You betcha! Installing a new kitchen faucet? Hmmmm…not so sure about that.
Yep, I went into this thinking that I might as well give it a try, and if needed I could always call a plumber. That is if I didn’t flood our new home…
I’m happy to report, no frantic call to the plumber took place. Instead, this is actually a very easy DIY project and after doing it myself, I’m confident that each and every one of you can do it too! 
Here’s the faucet that was in our kitchen when we bought our condo. It wasn’t bad, but it wasn’t great either. When you hit the spray mode, water sprayed out in all different directions. The pull-out function wasn’t performing very well, and to be perfectly honest…it was pretty crusty & gross. Yuck.
 My mom told me she would buy us a new faucet as a housewarming gift (Thanks Janimal!), so I picked out this faucet from Ikea. I liked the look of it (so sleek & sophisticated). I liked that it only had one hole (our current faucet was a 1 hole faucet). And I liked that it had a pull-out so you could easily clean pots and pans.
In preparation for the faucet installation, I watched at least a dozen Youtube videos to get comfortable with the process. I also read blog tutorials and step-by-steps on various DIY websites…anything that simplified the process and made me feel a bit more confident in my DIY skills. Once I felt good to go, I grabbed my supplies.
Project Supplies
- Adjustable Wrench
- Towels
- Teflon Tape
- Flashlight
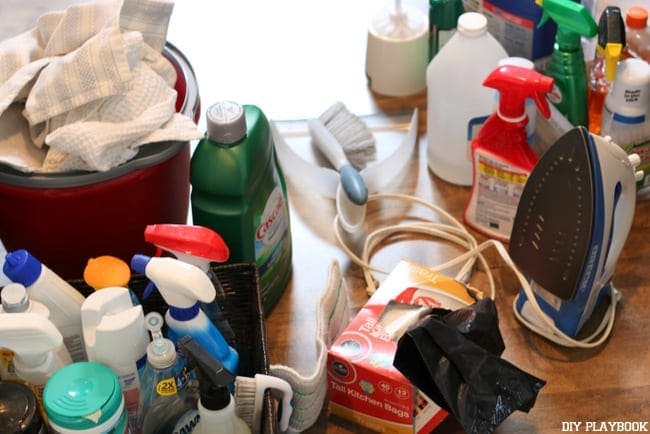
Step 1: Take out everything from underneath the sink. Yes. everything. Here’s my big pile of cleaning supplies we store under our kitchen sink. Big mess.
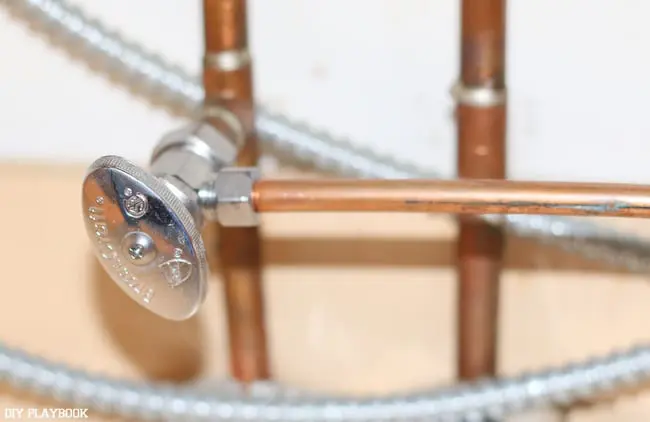
Step 2: Turn off the water supply. There will be hot and cold valves underneath your sink that look like the picture above. Simply turn them all the way clockwise until they don’t turn anymore. Then turn on your faucet, and make sure no water comes out. Keep the faucet on & open to relieve pressure. Your water is officially off & you can proceed to the next step! 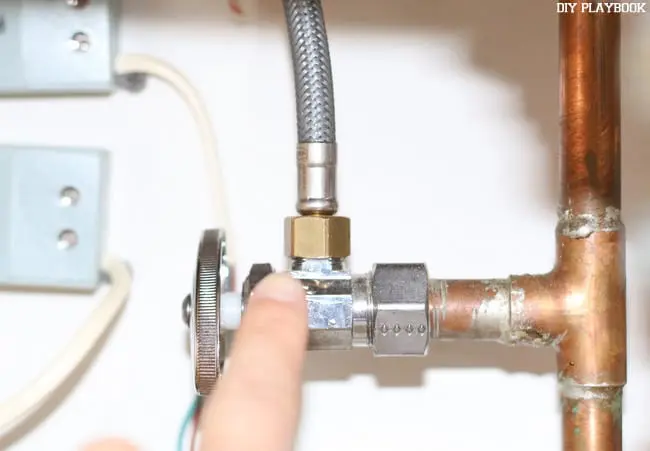
Step 3: Unscrew the hot & cold water supply lines. You will probably need to use a wrench for this to loosen them, and then you can unscrew them with your hands. Do both the hot & cold water supply lines. Some water that was left in the pipes may trickle out, so be sure to have some rags or towels on hand. 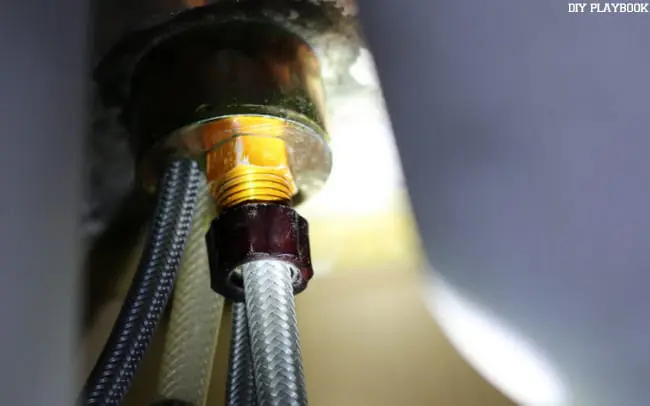
Step 4: Now it’s time to unscrew your current faucet from underneath the sink. This was by far the hardest step for me because I couldn’t get a good angle to get my wrench up there to loosen the nut. After struggling for 10 minutes, I asked Finn to try to get his hand up there to loosen it. He was able to get the nut unscrewed and we were in business! 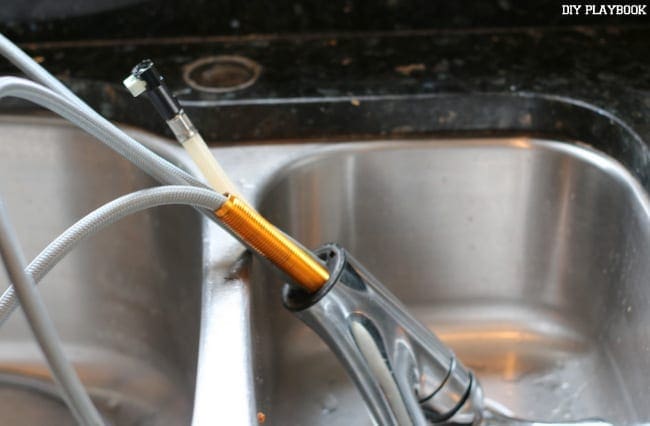
Step 5: Pull your old faucet through the top of the sink and out. Hooray, your old faucet is gone!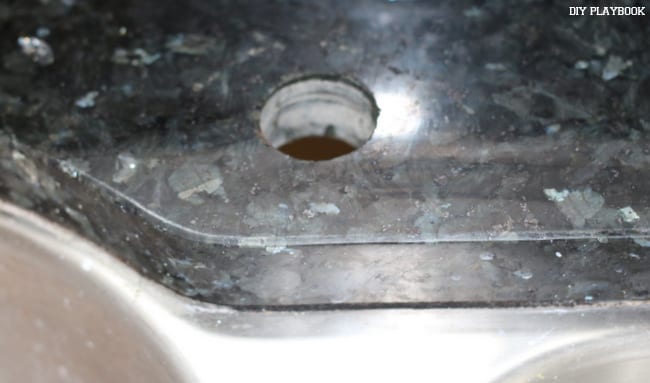
Step 6: Now is a good time to clean the sink hole. You’re never gonna be able to get it this clean again with the new faucet on there, so shine it up real nice and get rid of any gunk that formed around the hole.
Step 7: Now it’s time to follow the directions that come with your particular faucet. This one came with Ikea instructions…you know the ones with the little guys on there and the wordless instructions? Yep, not fun. But seriously, this is the easiest part. It’s just a matter of threading the new faucet through the top of the faucet hole, tightening it on the bottom, and then hooking up the hot & cold water valves.
(Rookie Tip: Wrap all your threaded pipes in a few thin layers of teflon tapes to make sure your connections are secure and leak free!)
But wait…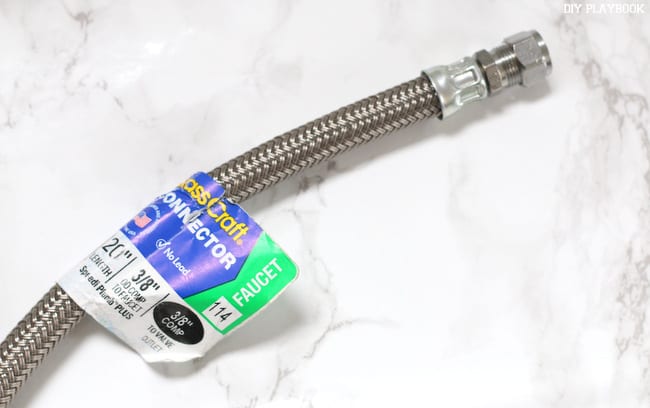
I thought I was in the home stretch and I was just about finished with this DIY, when I went to connect the cold water supply and it wouldn’t reach. The hose that came with the Ikea faucet was too short! Grrrr. I was mad. But wanting to be done with this DIY project, I hopped in the car, headed to the hardware store, found a salesperson and got an extender in about 10 minutes. They knew exactly what to give me and after paying less than $10 for the part, I was on my way home. 
After connecting the hot & cold water supply lines & turning the water back on…I officially had a new, working faucet! This is a good time to make sure there is no water leaking from any of your connections. Get that flashlight and check them all to make sure your work is tight & clean!
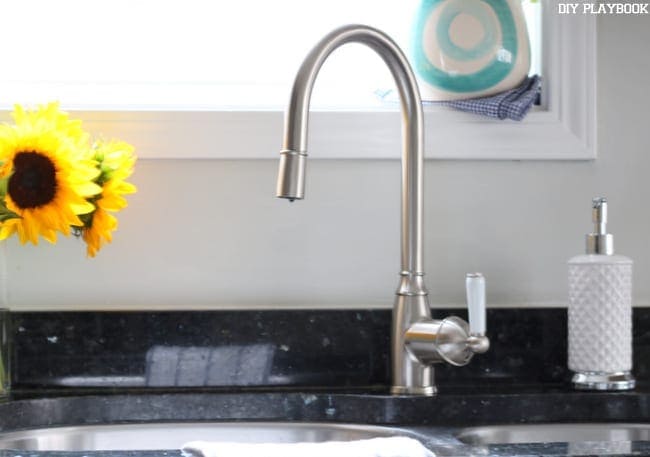
Here’s my new shiny faucet in all of her glory. 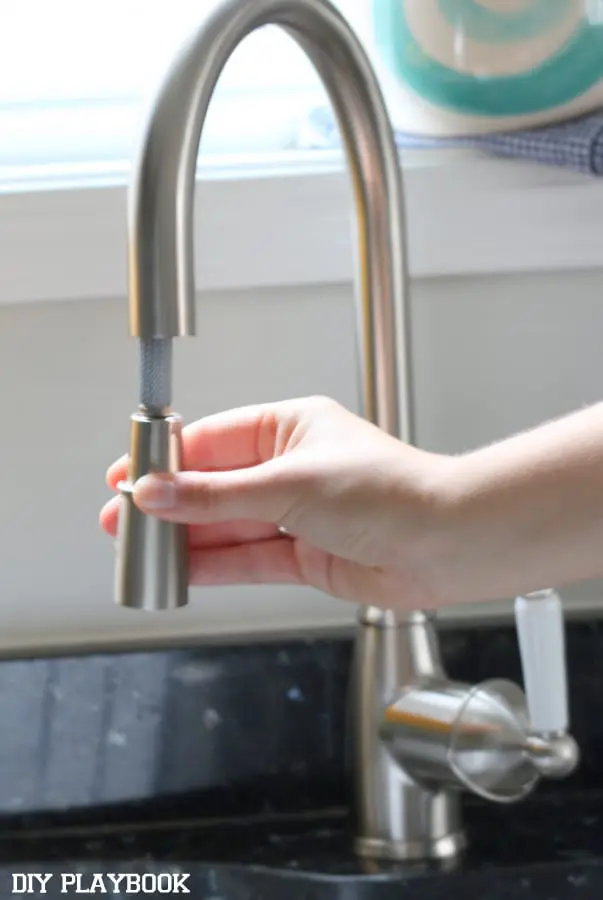

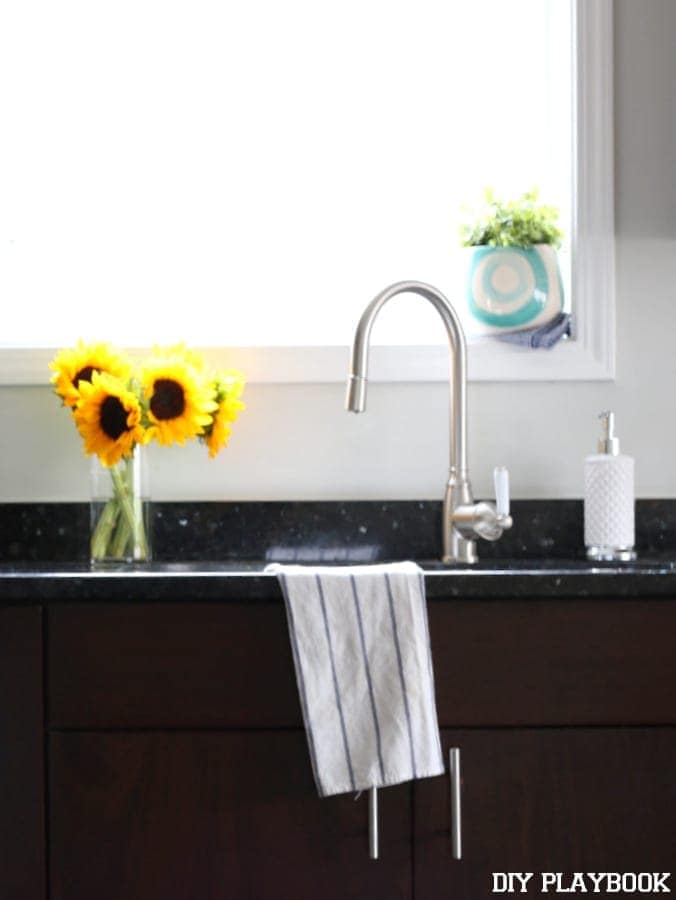 Finn & I love our new faucet. It completely upgrades our kitchen and it works so well. But even though I’m happy to have a new faucet, I’m even more excited that I tackled my very first plumbing project. Every time I use the faucet, I feel like a total badass, and I’m fairly certain I’ll brag to everyone who comes over that I installed it all myself.
So my challenge to you is to try a project that is a bit outside of your comfort zone. You are capable of more than you think, and remember we always have your back.
Casey


