Tips to Wallpaper a Nursery Closet
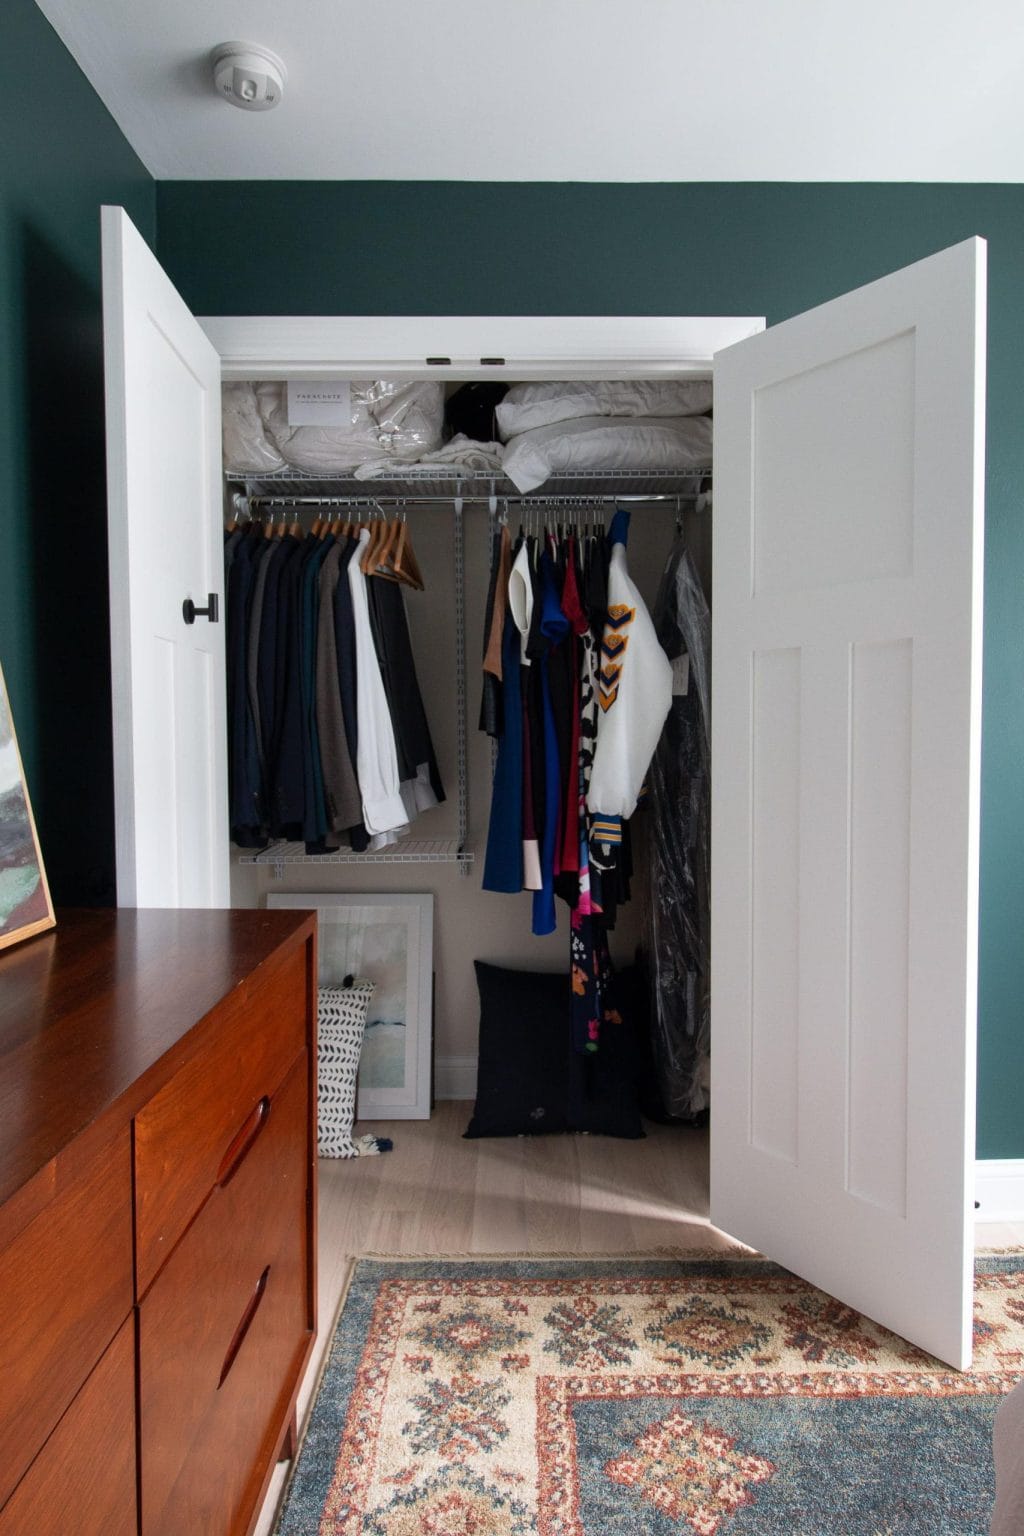
Last week, I showed you the design plan for baby boy’s nursery. Today, I’m back with our first official DIY project in here – wallpaper! I knew from the start that I wanted to wallpaper his closet because I absolutely adore the look of Rory’s wallpapered closet.
It’s just such a fun sight when I open the door to get her ready for the day. A cute pop of color and pattern and it makes me smile every single time. For her space, I went with a feminine paper with rose gold and trees. Here, I wanted to make a bolder statement.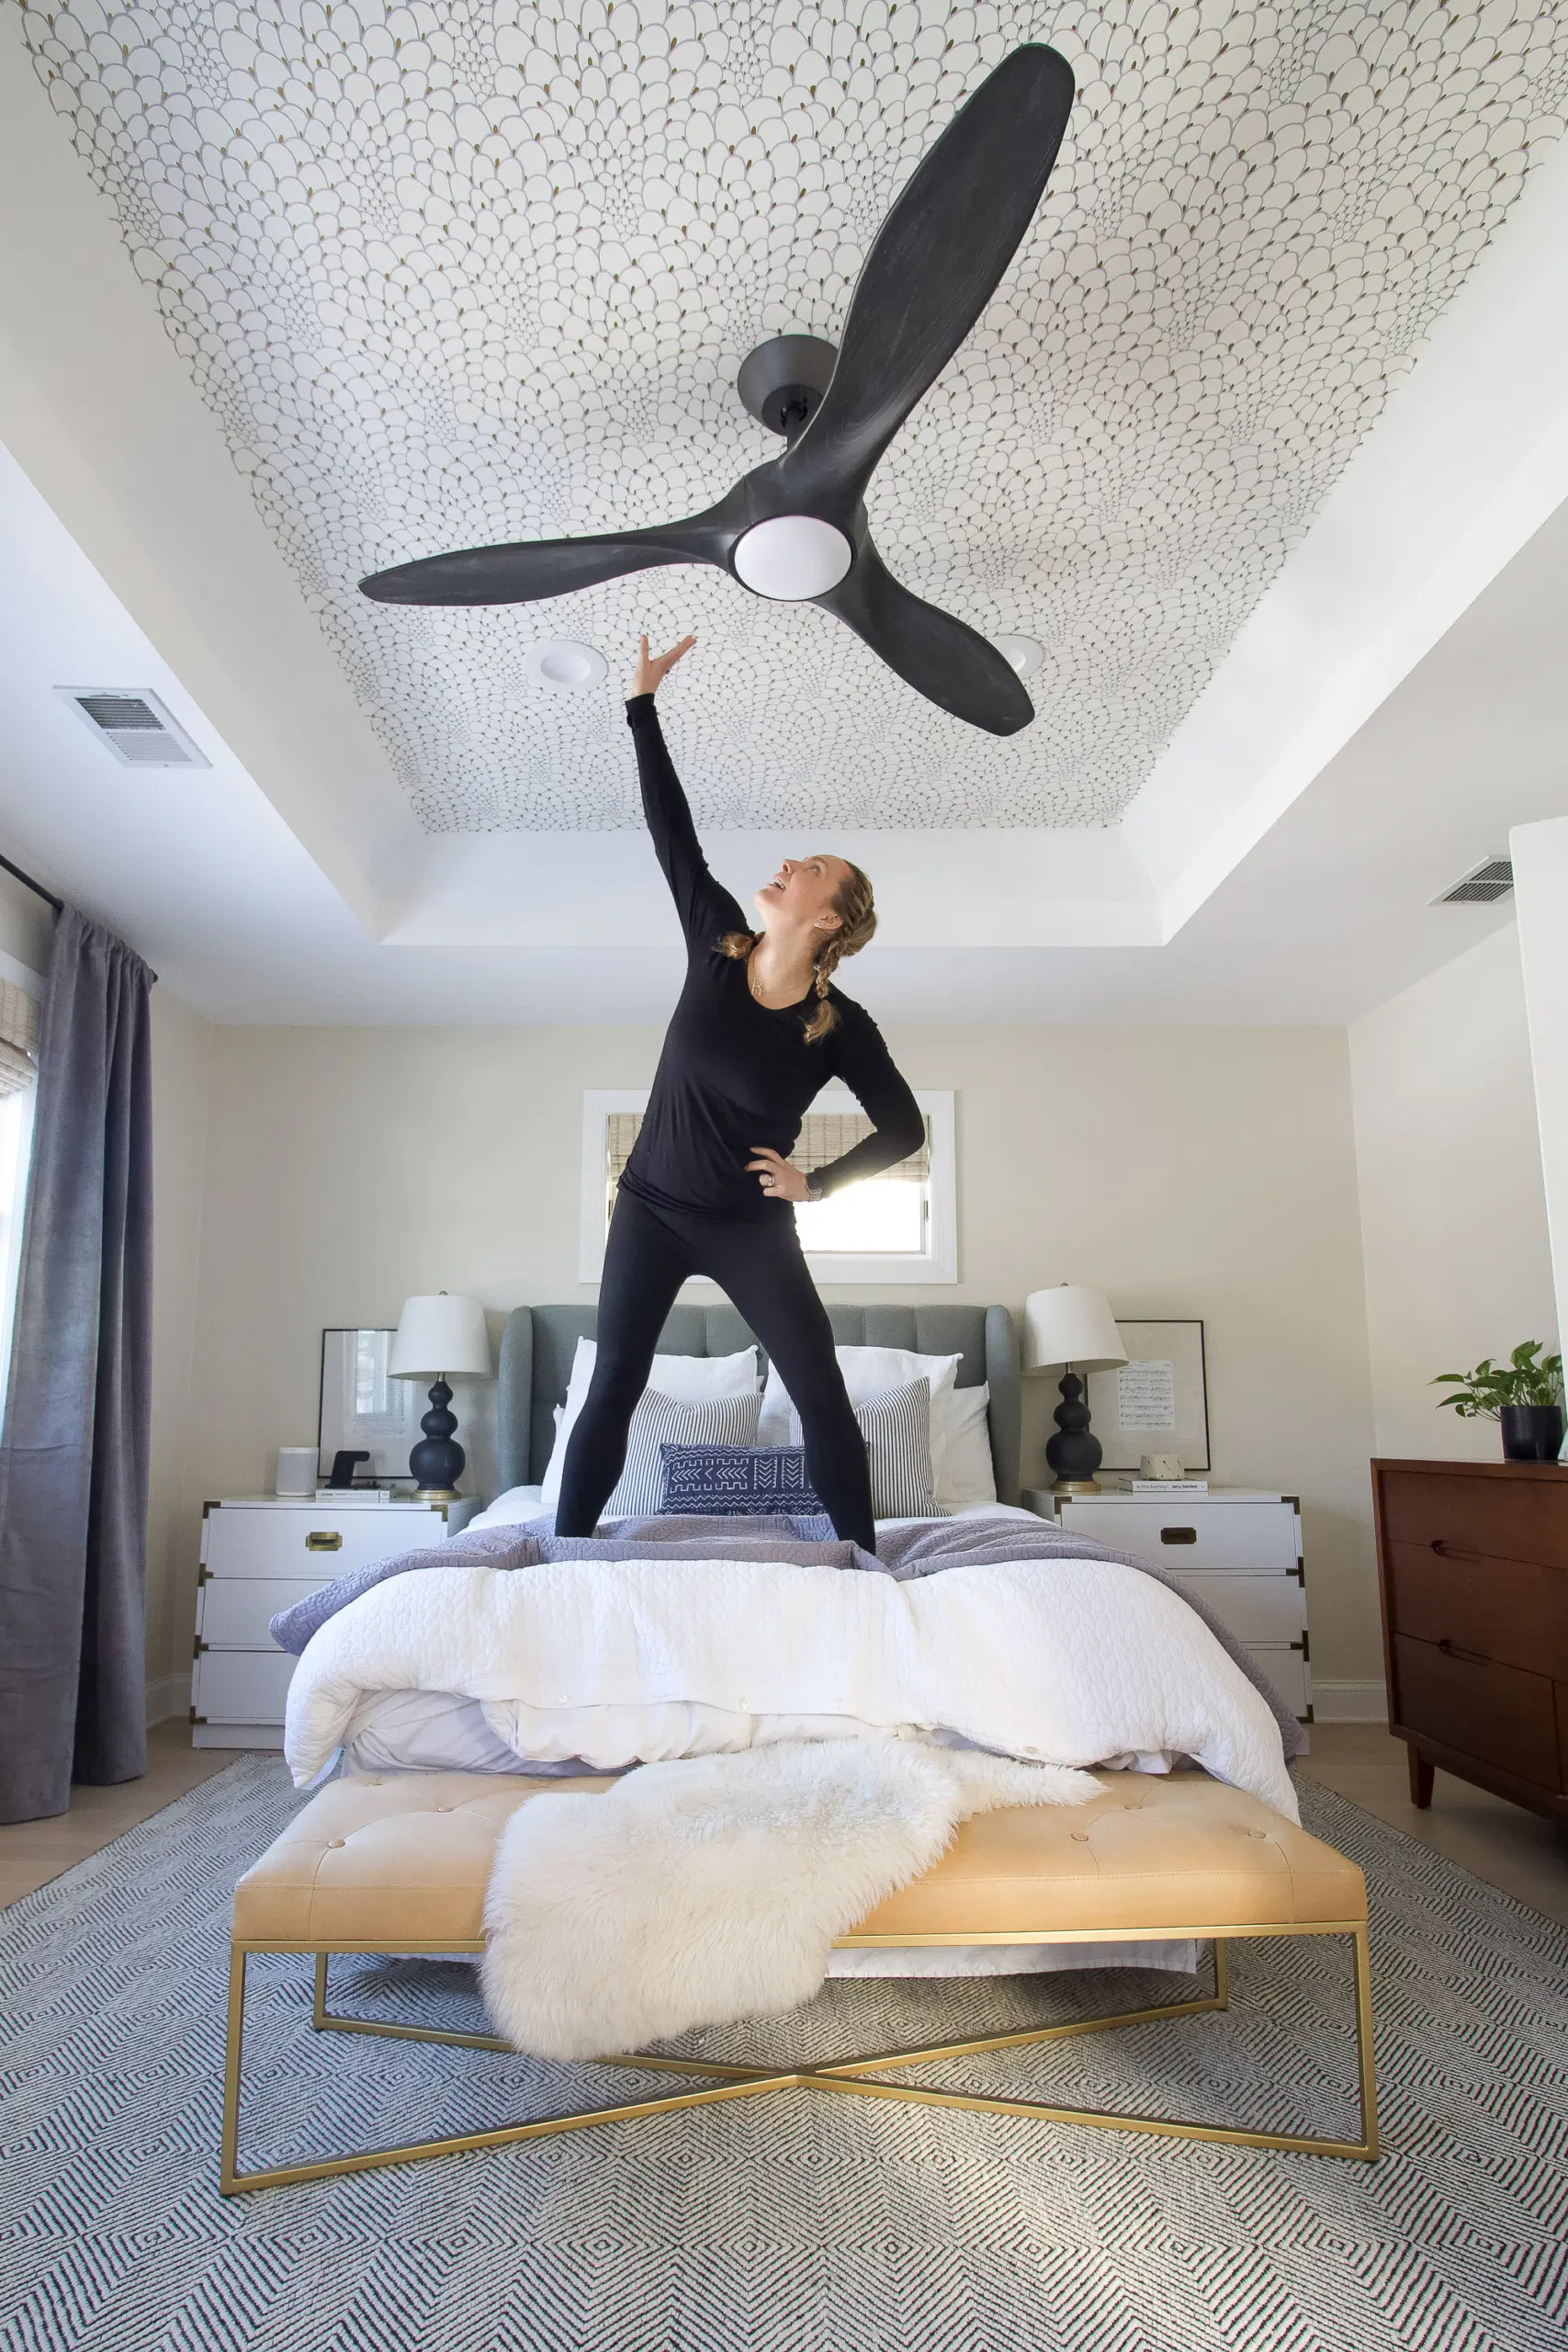
This is not my first go at wallpapering. Most recently, I wallpapered the ceiling in our main bedroom. Not gonna lie, that was quite the DIY project and it took three people all day to get it up. But wow, it was so worth it in the end! For the bedroom project, my friend, Erin, founder of Relativity Textiles, came to help Finn and me get that wallpaper on up. Thank goodness we had Erin to guide us through that advanced wallpaper project. We would have quit immediately if not for her!
Choosing the Perfect Wallpaper

When I decided to wallpaper the nursery closet, I knew that I would again use paper from Relativity Textiles. Erin’s designs are so stunning. She is a true artist and hand paints all of her designs. How amazing is that? My mom was watching Rory on the day that we installed the paper and her jaw hit the ground when Erin told her she painted the wallpaper design. She is so talented.
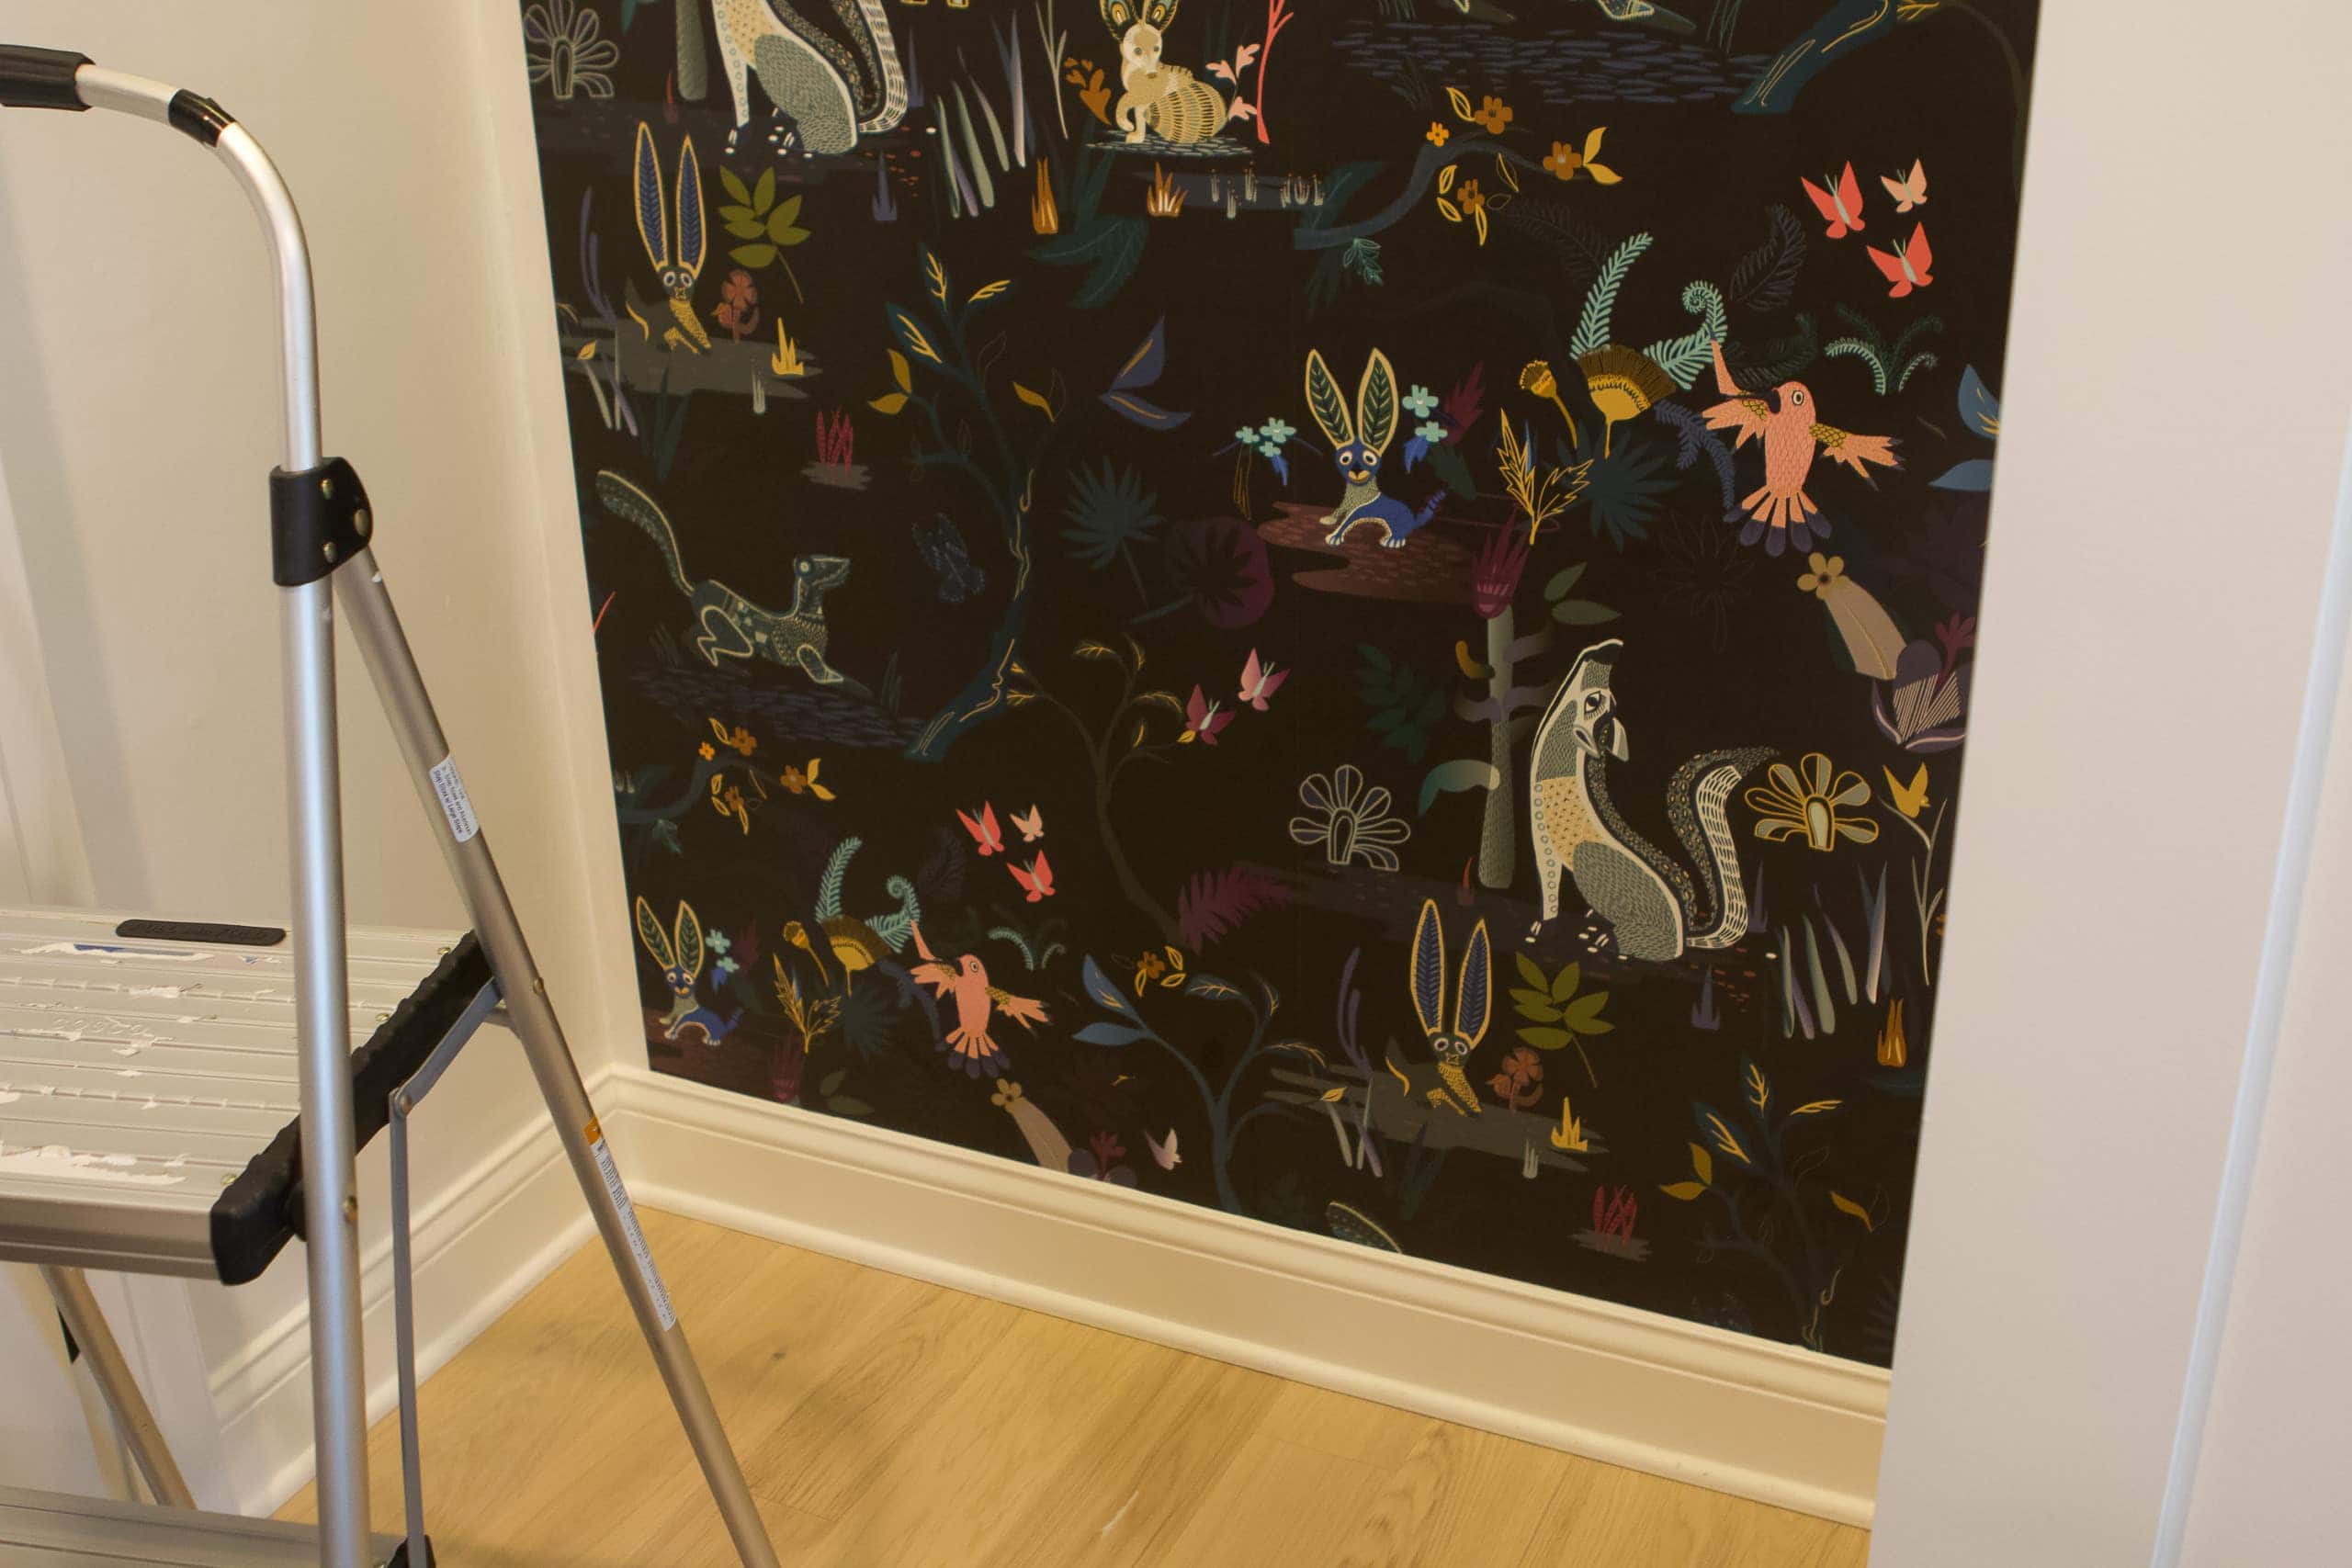
Before making my final decision, I kept going back and forth between this black and gold design and this whimsical one. In the end, I decided to go bold and chose this one called Alebrijes. Erin was inspired on a trip to Mexico by all of the cute little creatures she saw. She then came home and created this!
Wallpaper Supplies
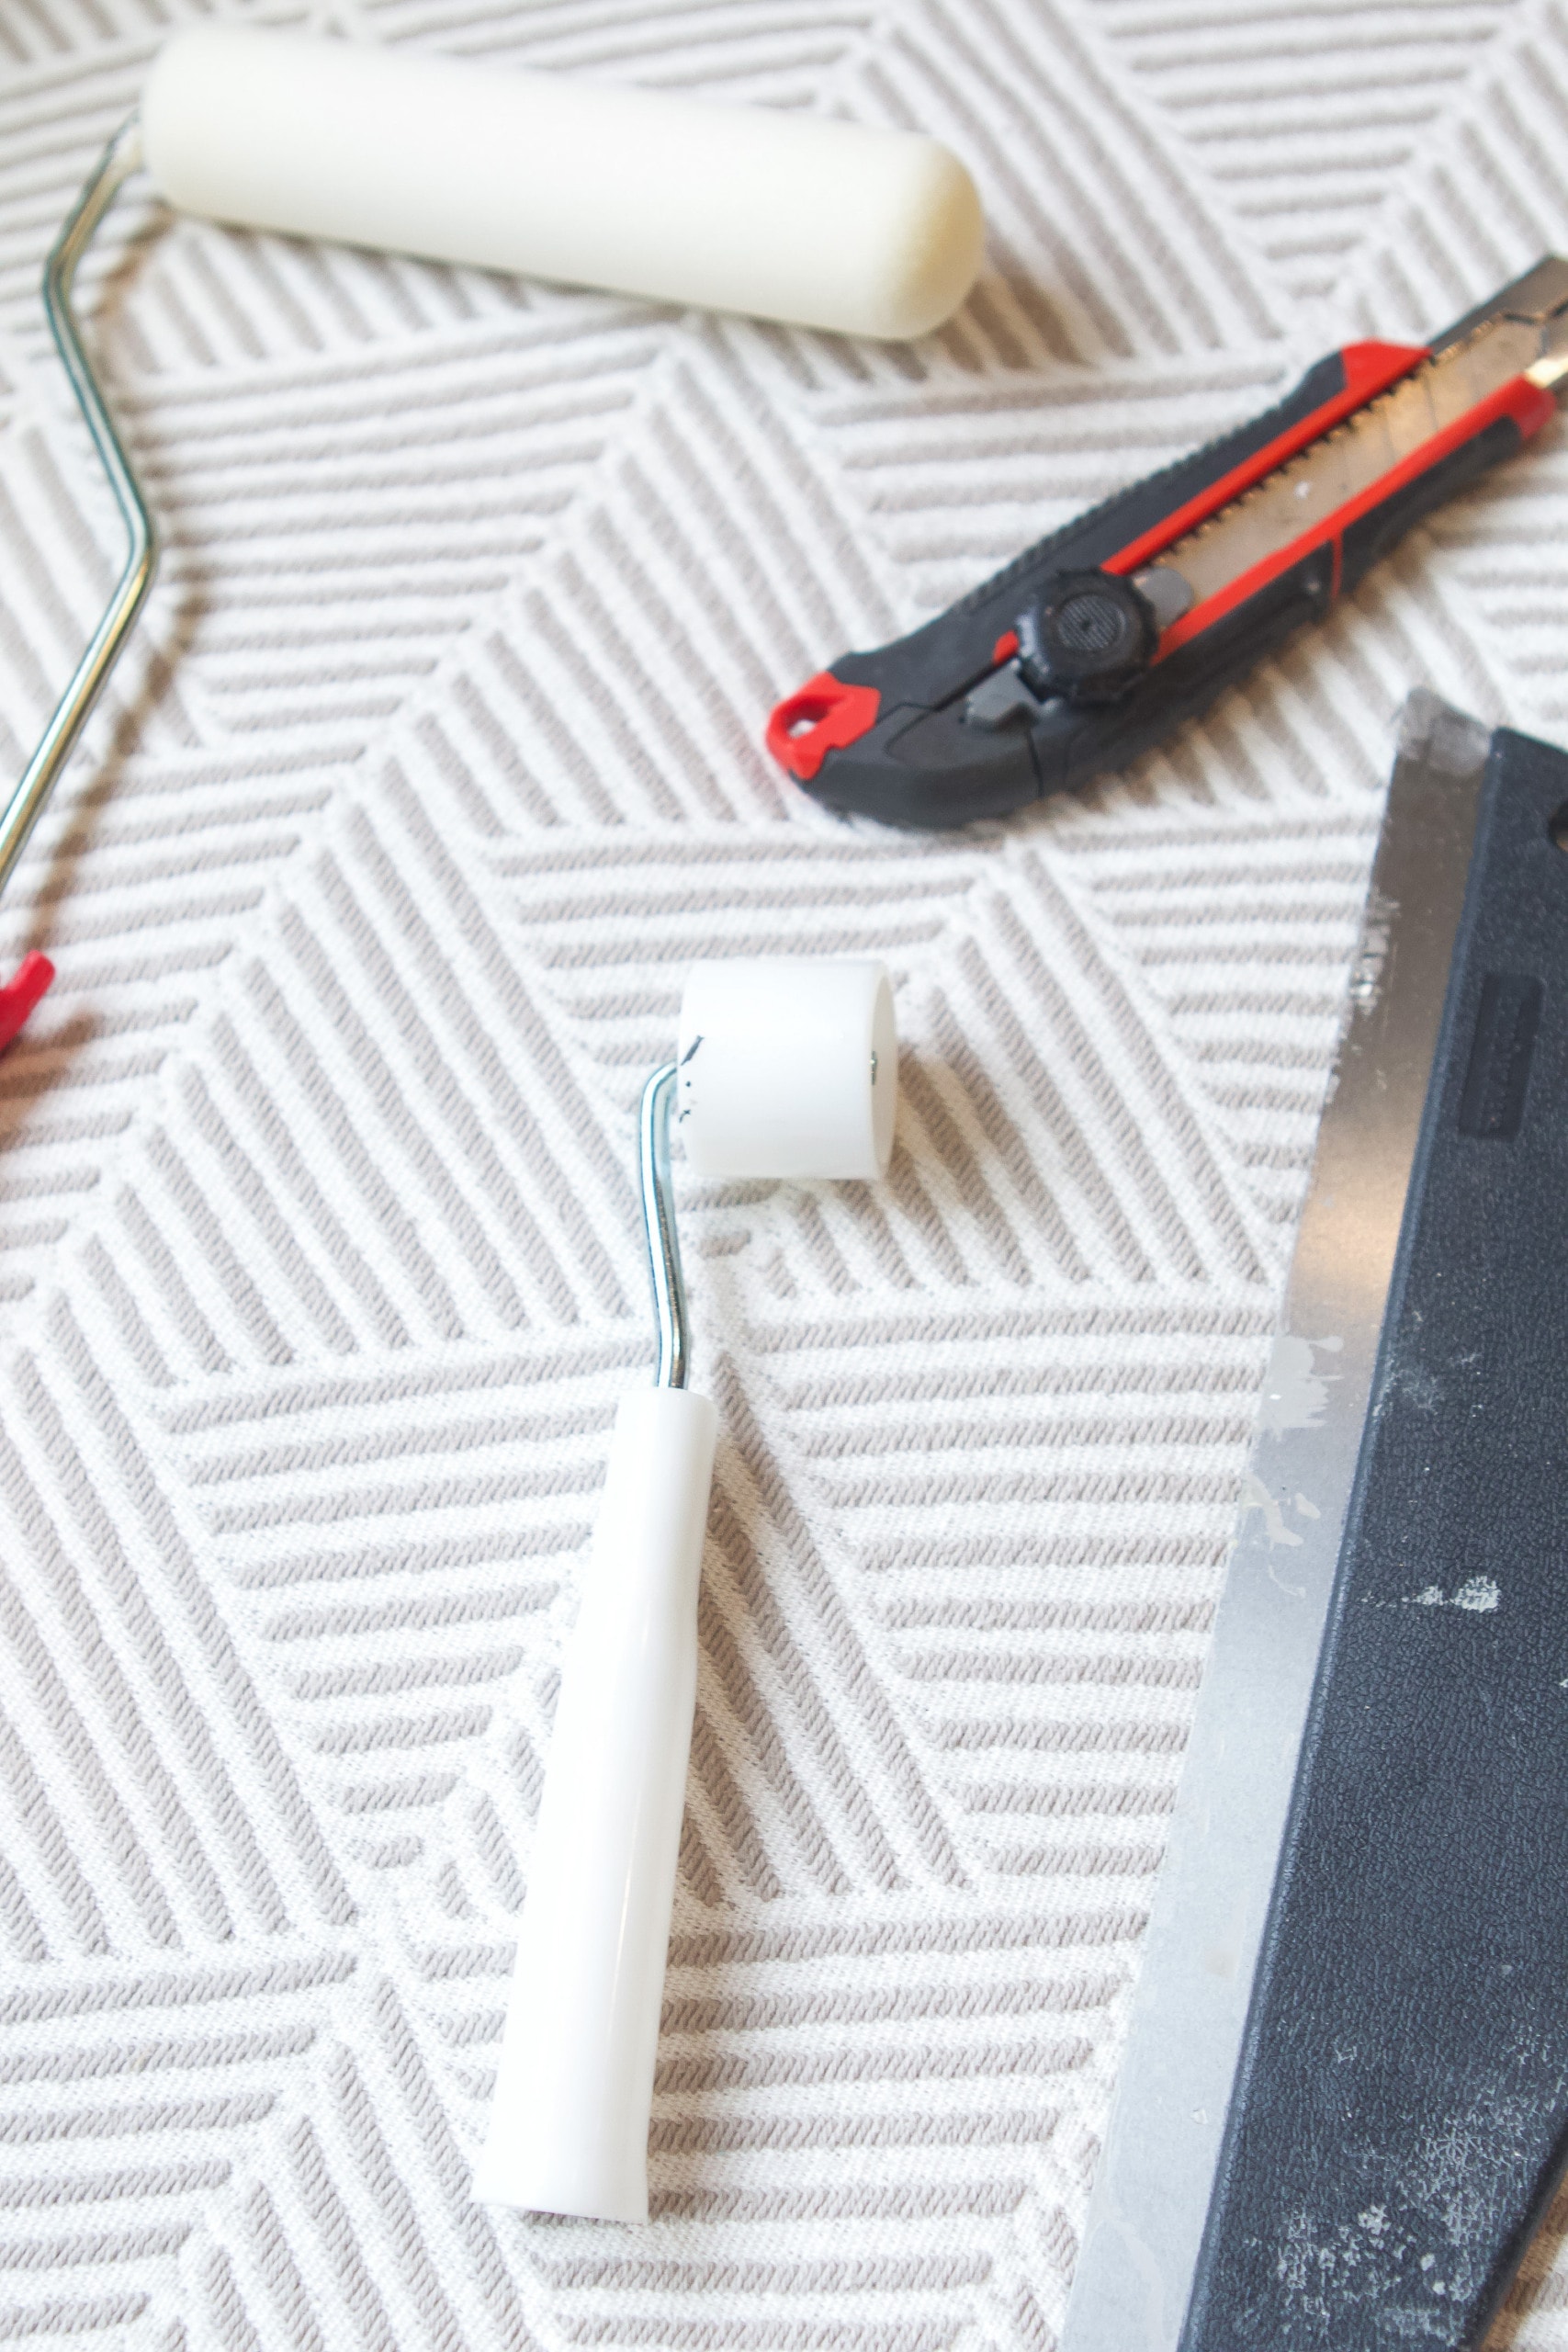
So here’s what you’ll need on-hand to wallpaper a closet.
- Wallpaper
- Wallpaper Adhesive
- Tray & Roller
- Paint Brush
- Tape Measure & Pencil
- Level or Laser Level
- Plastic Smoothing Tool
- Metal Smoothing Tool
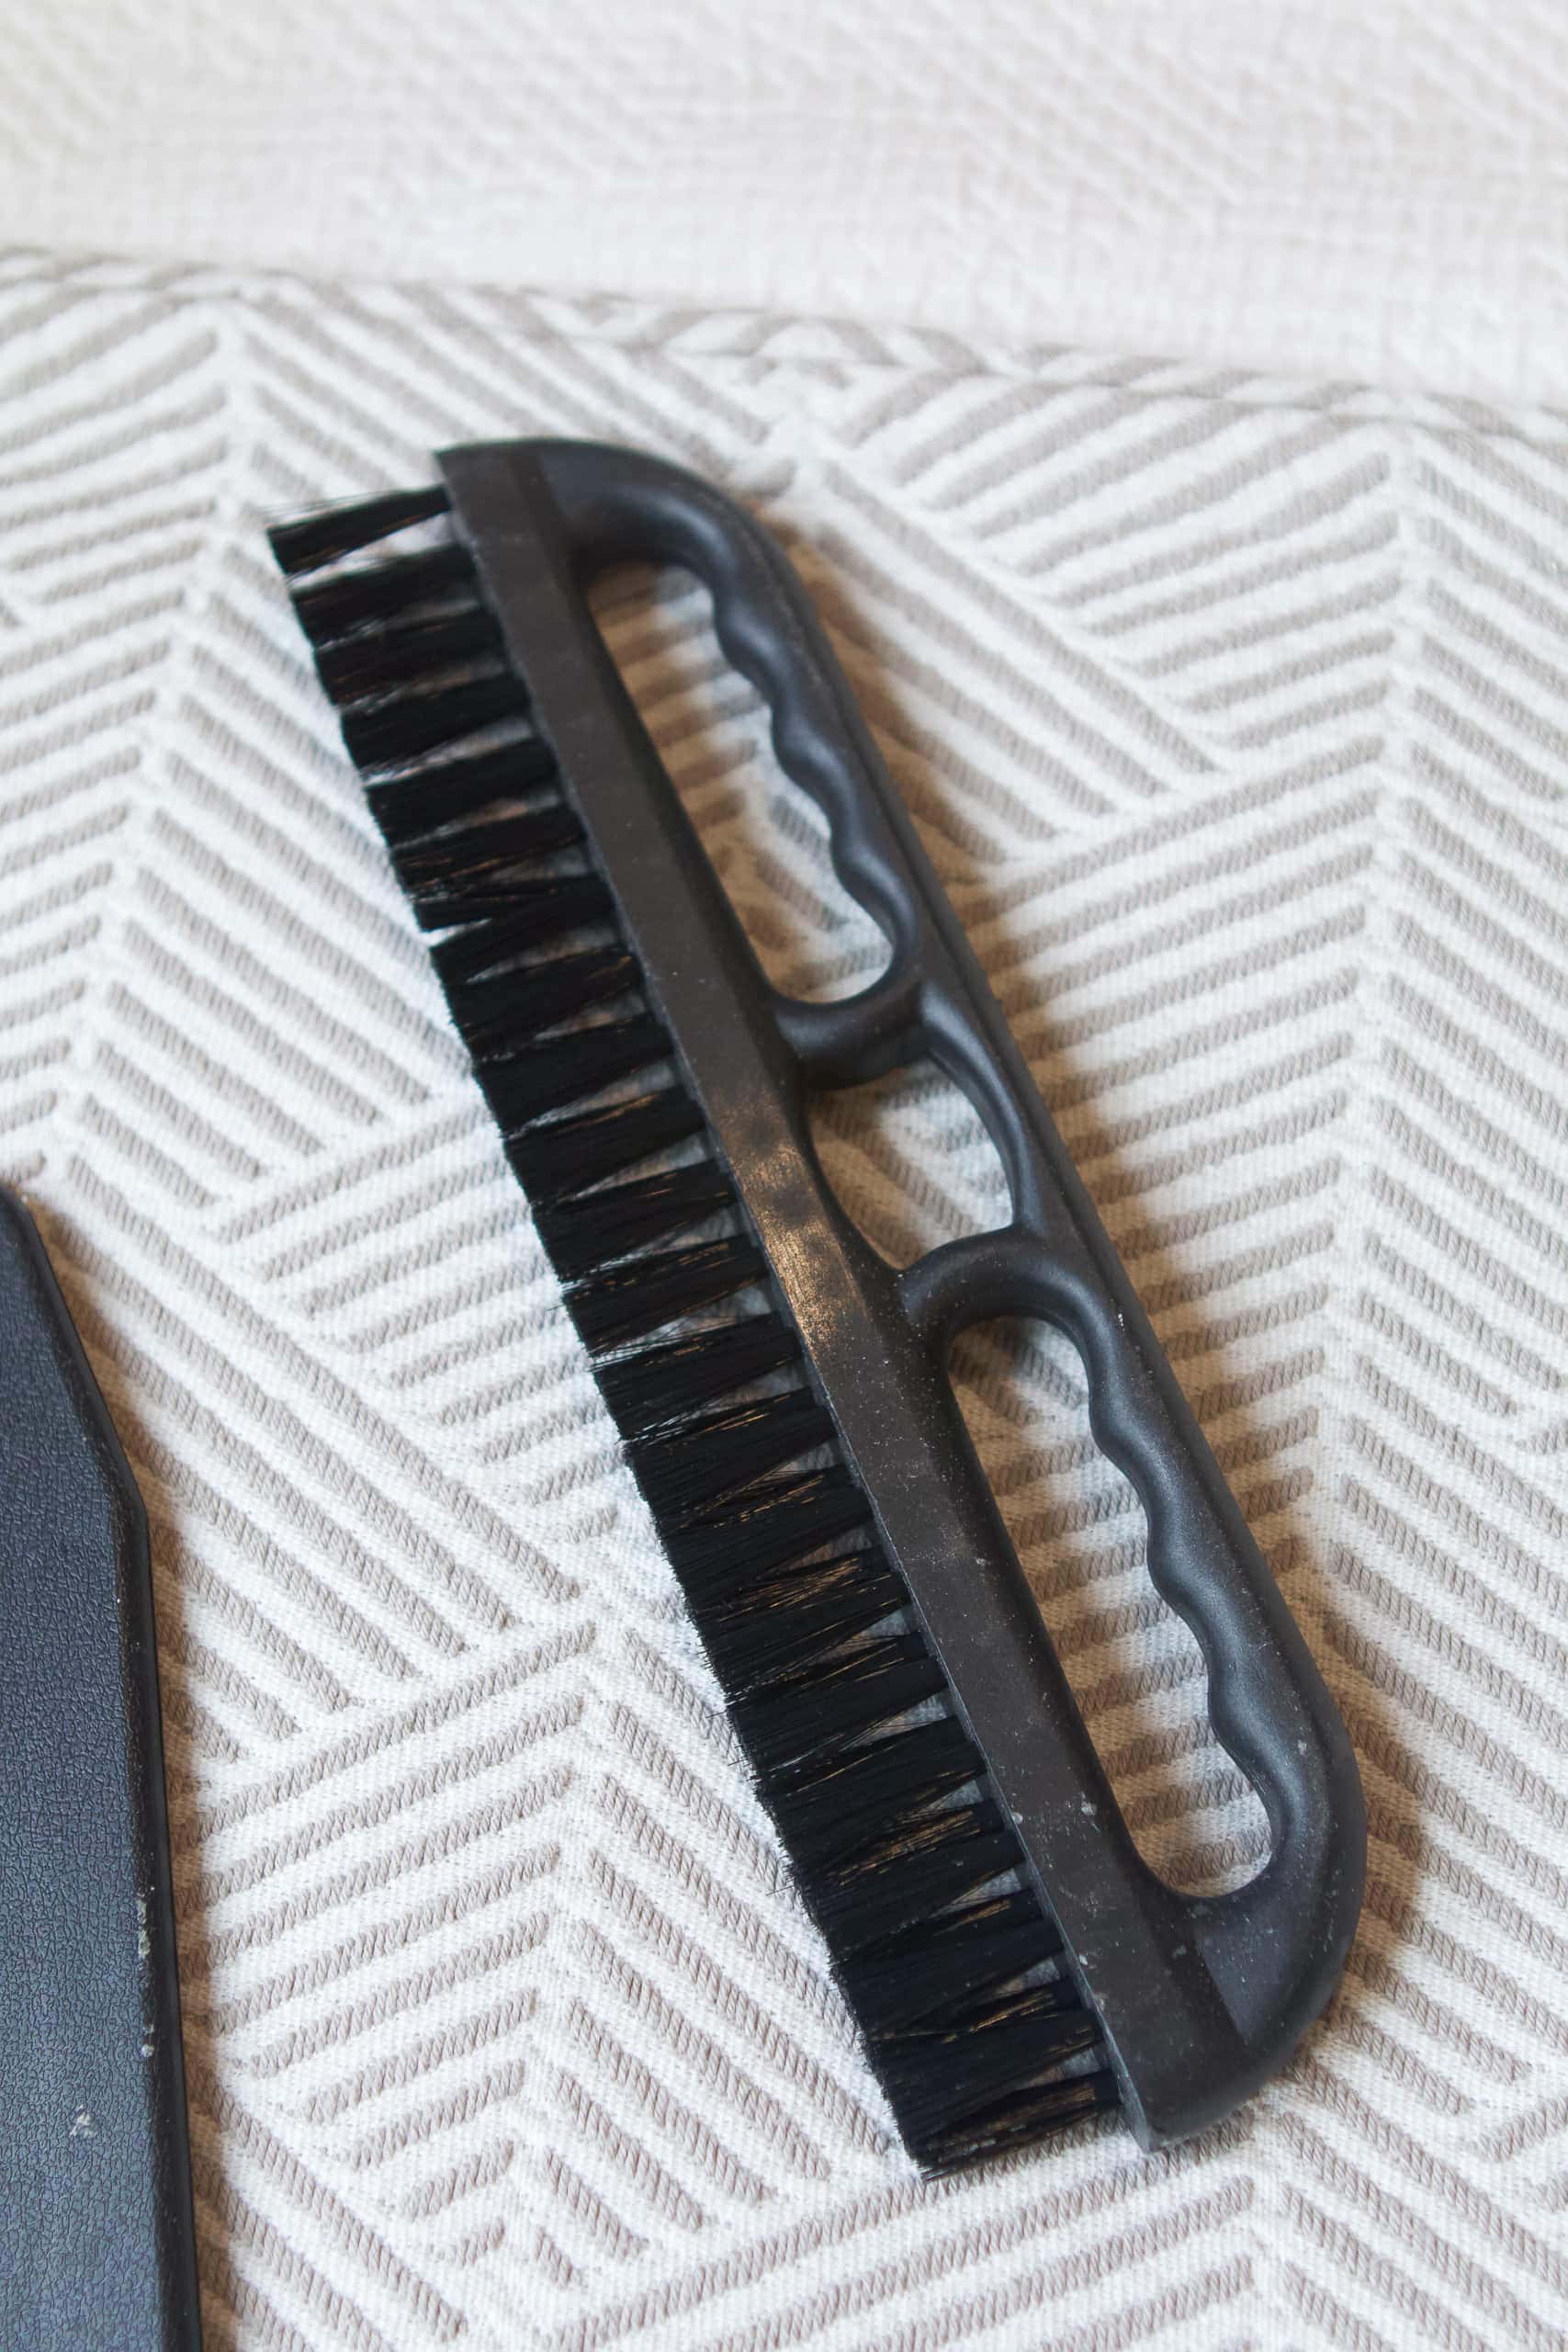
- Wallpaper Brush
- Snap-Off Utility Knife
- Sponge & Bucket
- Seam Roller
- Step Ladder
- Primer
Tips to Wallpaper a Nursery Closet

First, you need to buy the wallpaper and buy enough of it. Keep in mind, there will be waste from having to match up the patterns. So you’ll need more than you think. This is a great wallpaper calculator that can help you figure out how much to buy.
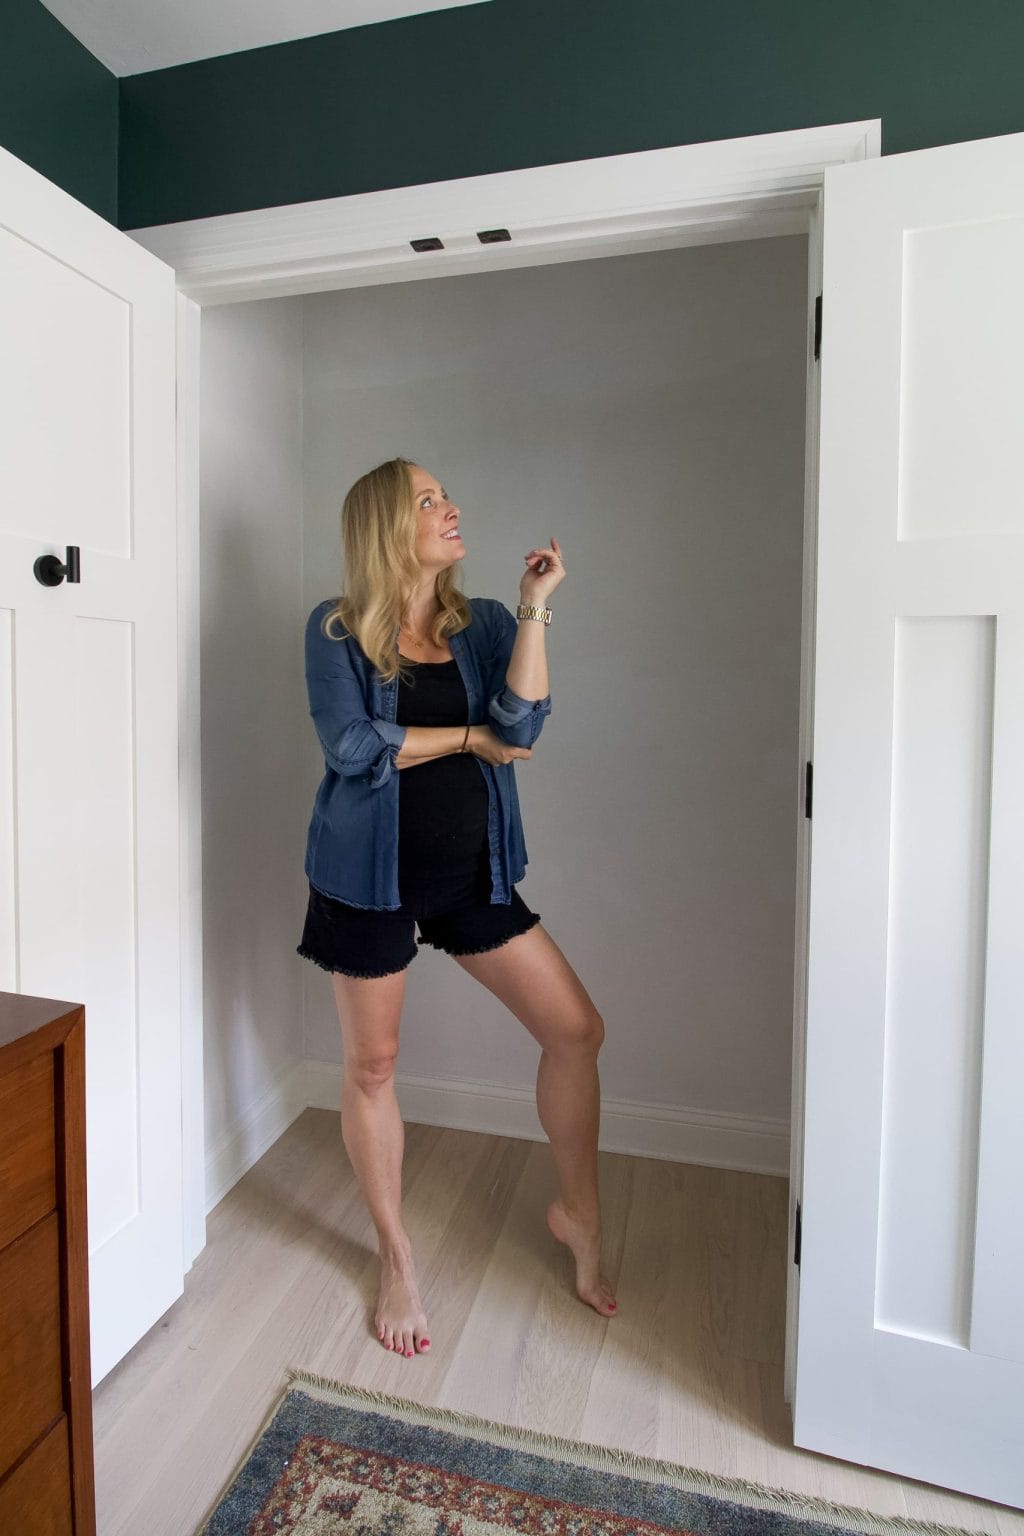
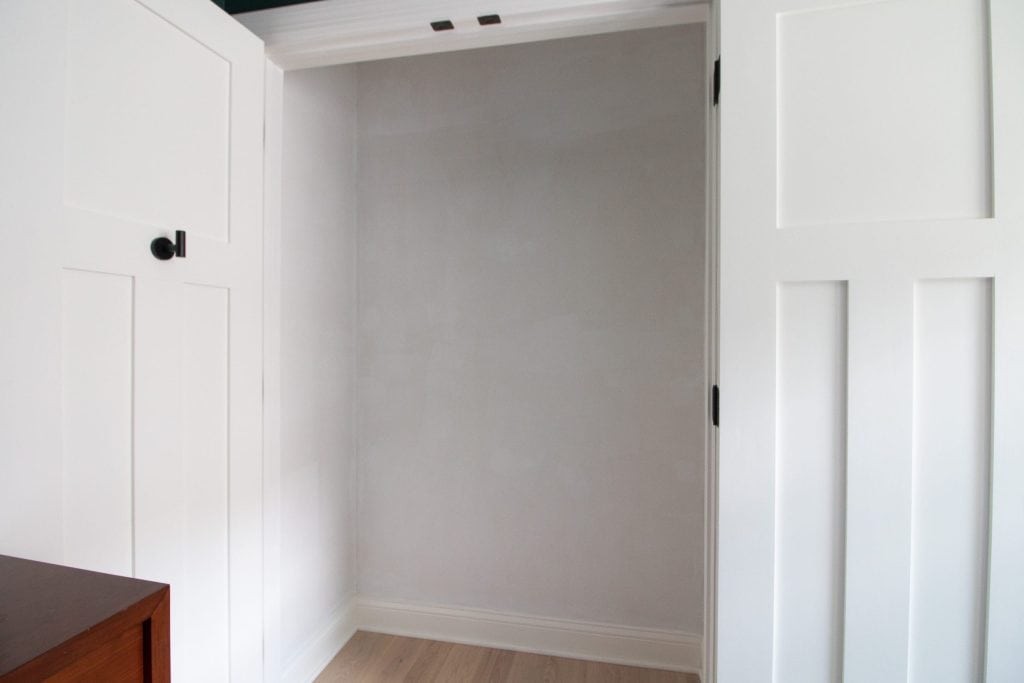
Prep the Walls
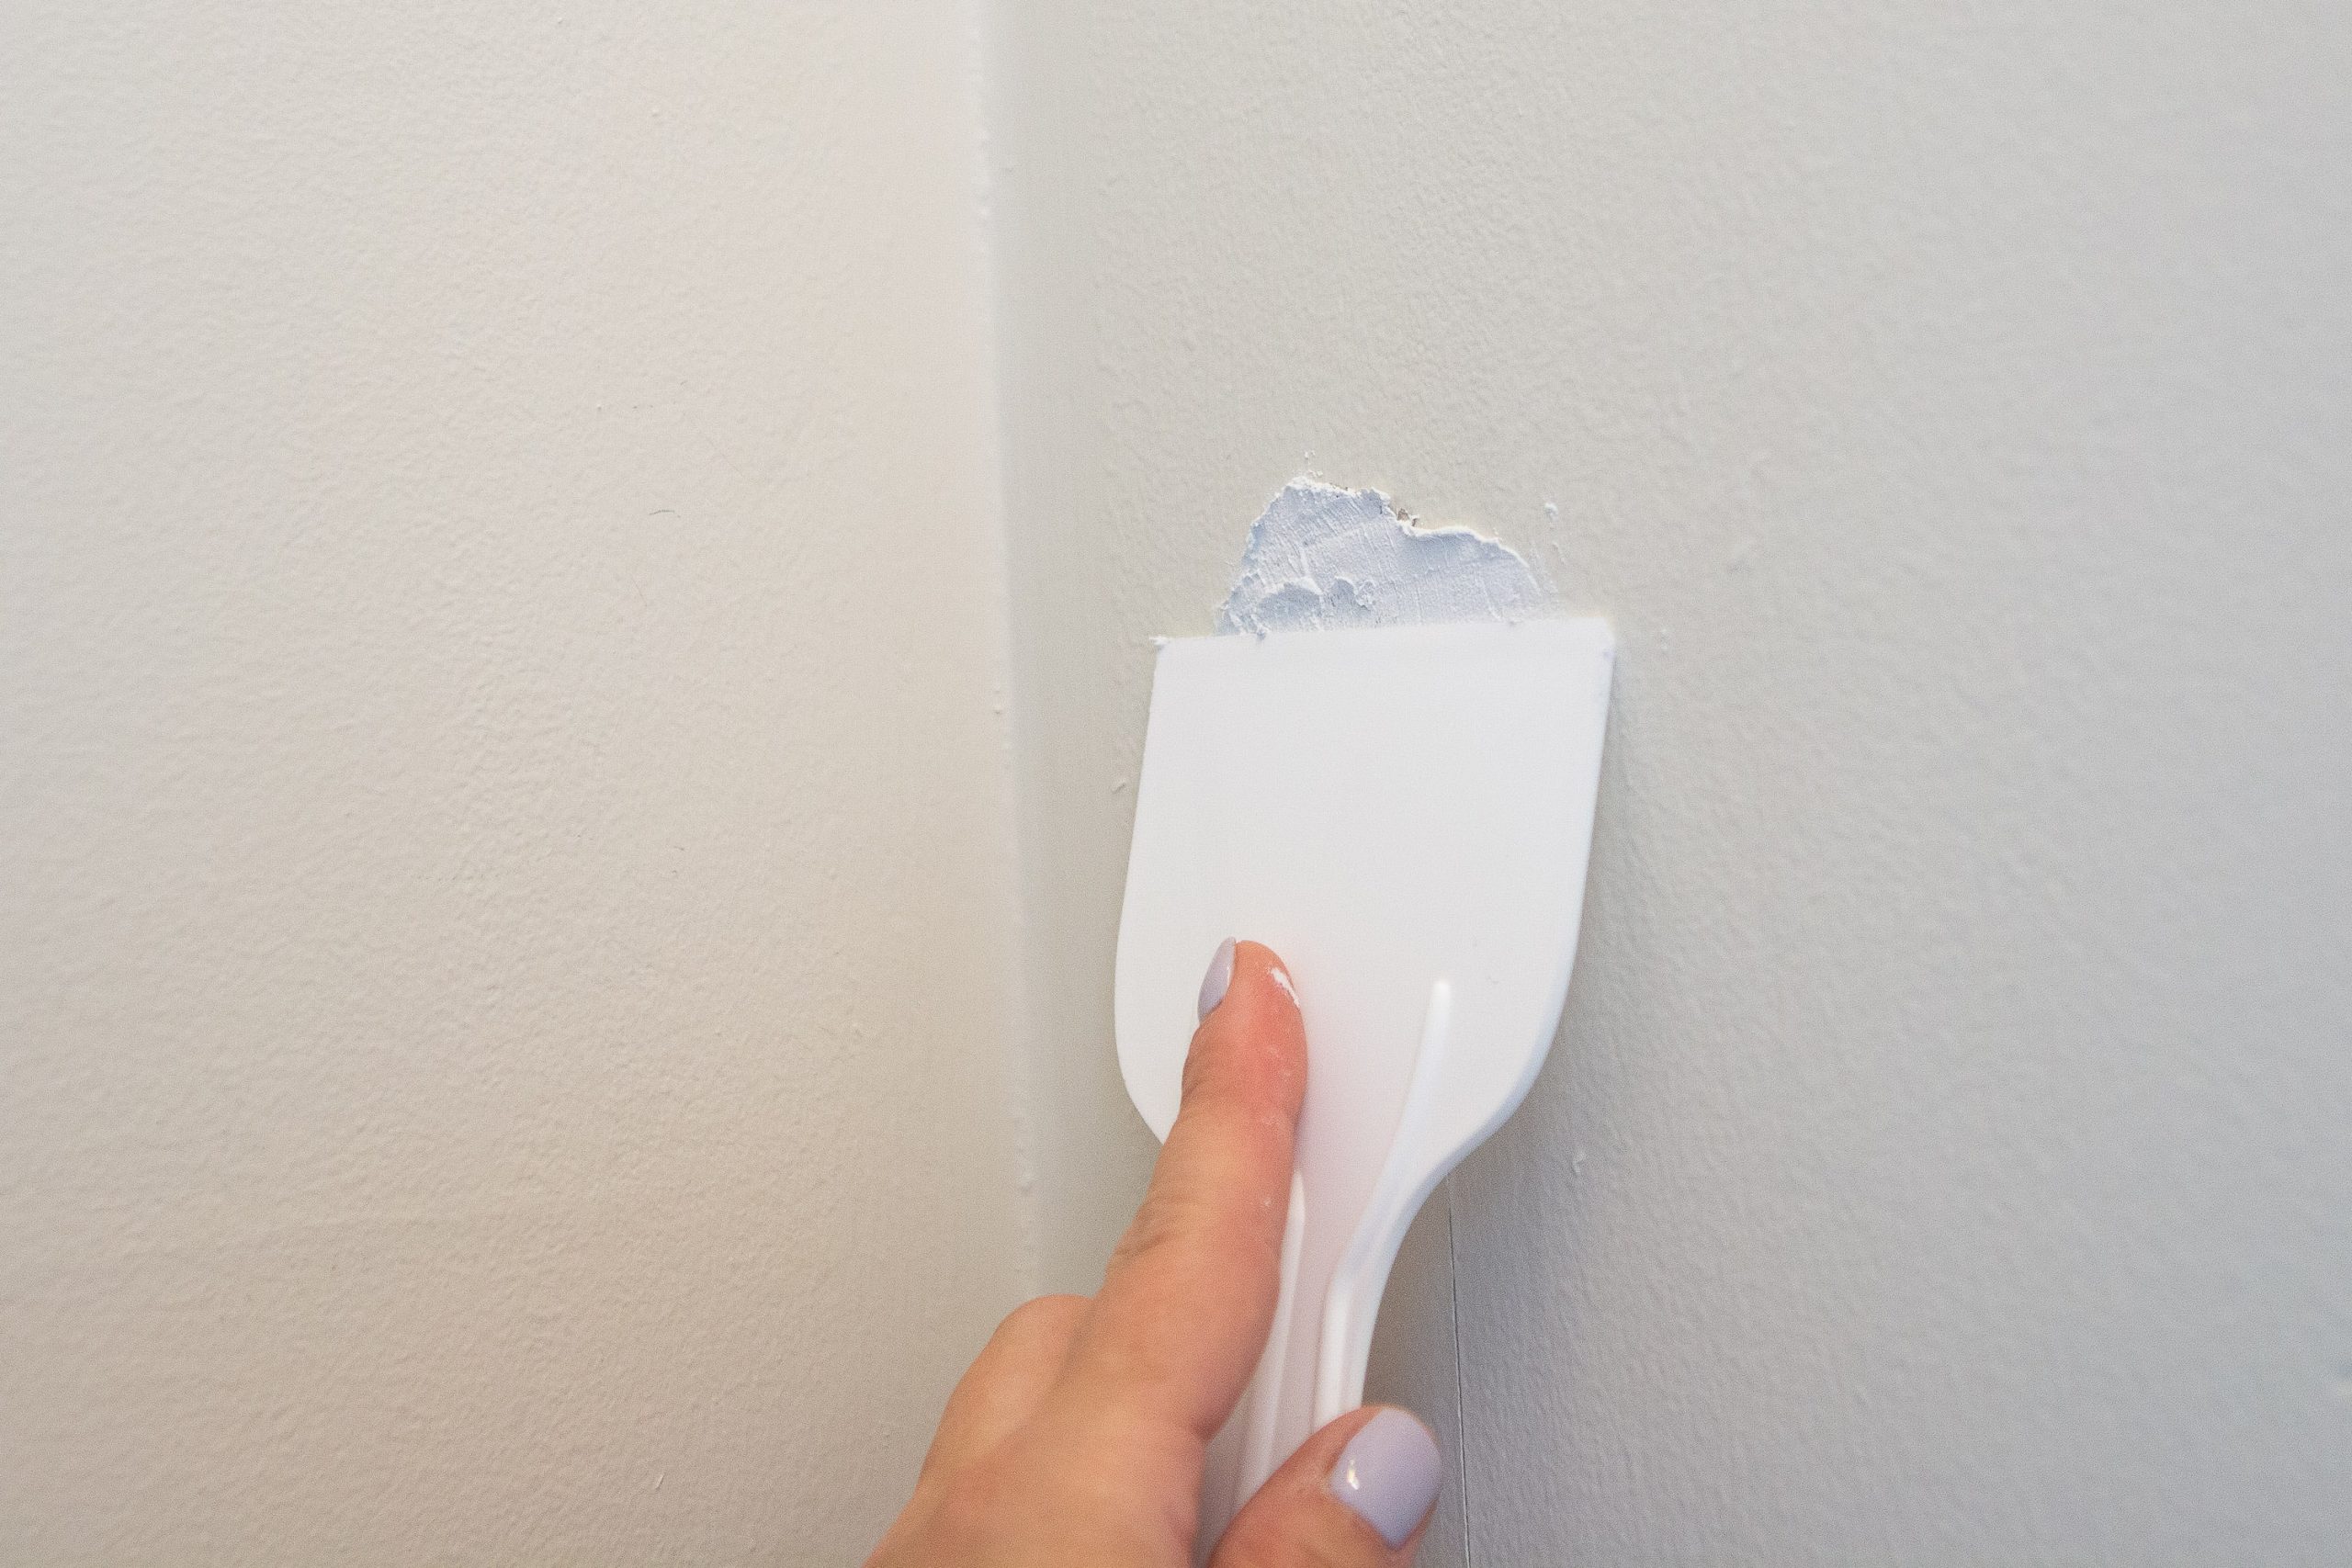
This closet used to have a closet system in it to hold our overflow of clothes and linens. I removed it all and patched the seventeen (!!) holes in here a few weeks ago. You can find that step-by-step tutorial here. It’s a must to patch any holes before wallpapering, so you have a smooth surface. 
I also used this specific primer on the walls. This helps the wallpaper stick and creates a smooth surface for the paper to adhere to. I painted this closet about a week before our wallpapering day! The primer is super thin and clear, so it doesn’t take long to apply!
Have a Buddy
It’s so much easier to wallpaper with a partner….trust me! When you’re up on that ladder and you need more glue or you need to grab a sponge, your friend is right there to hand it to you. Having a partner makes for a lot less up and down on the ladder! Can you wallpaper by yourself? Yes! But if possible, I’d find a friend to join in on the fun.
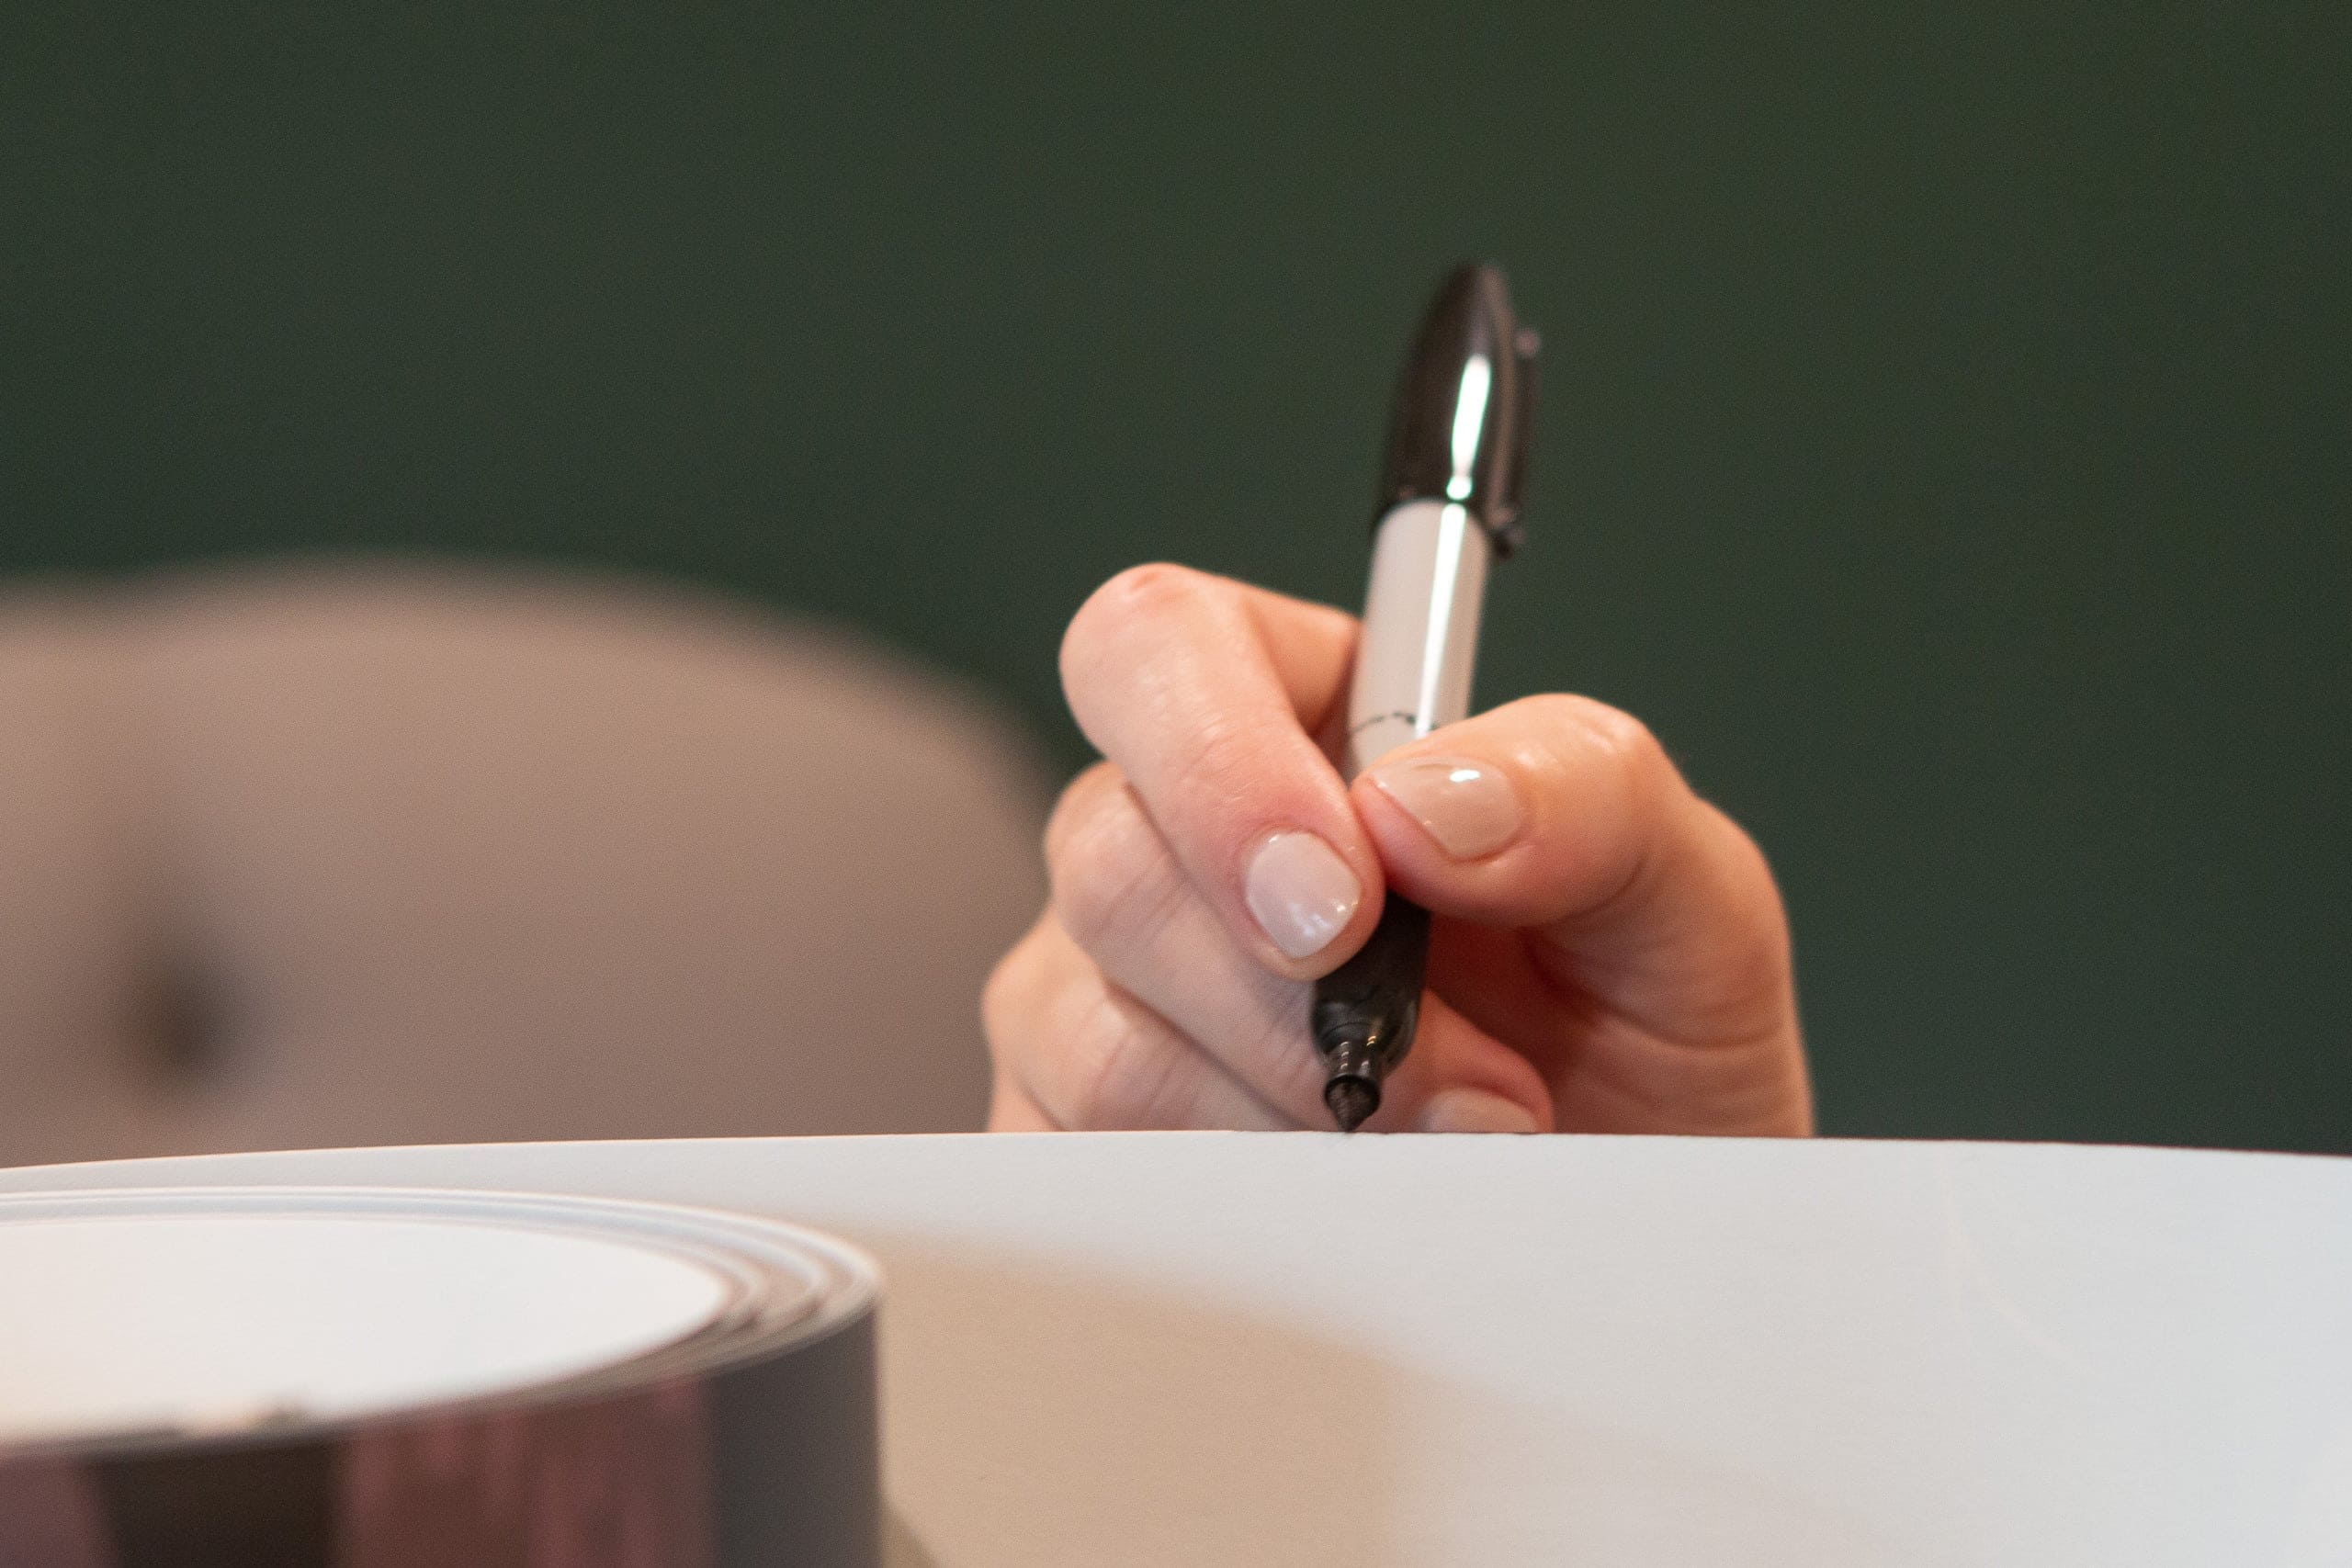
Draw a Level Line in the Middle
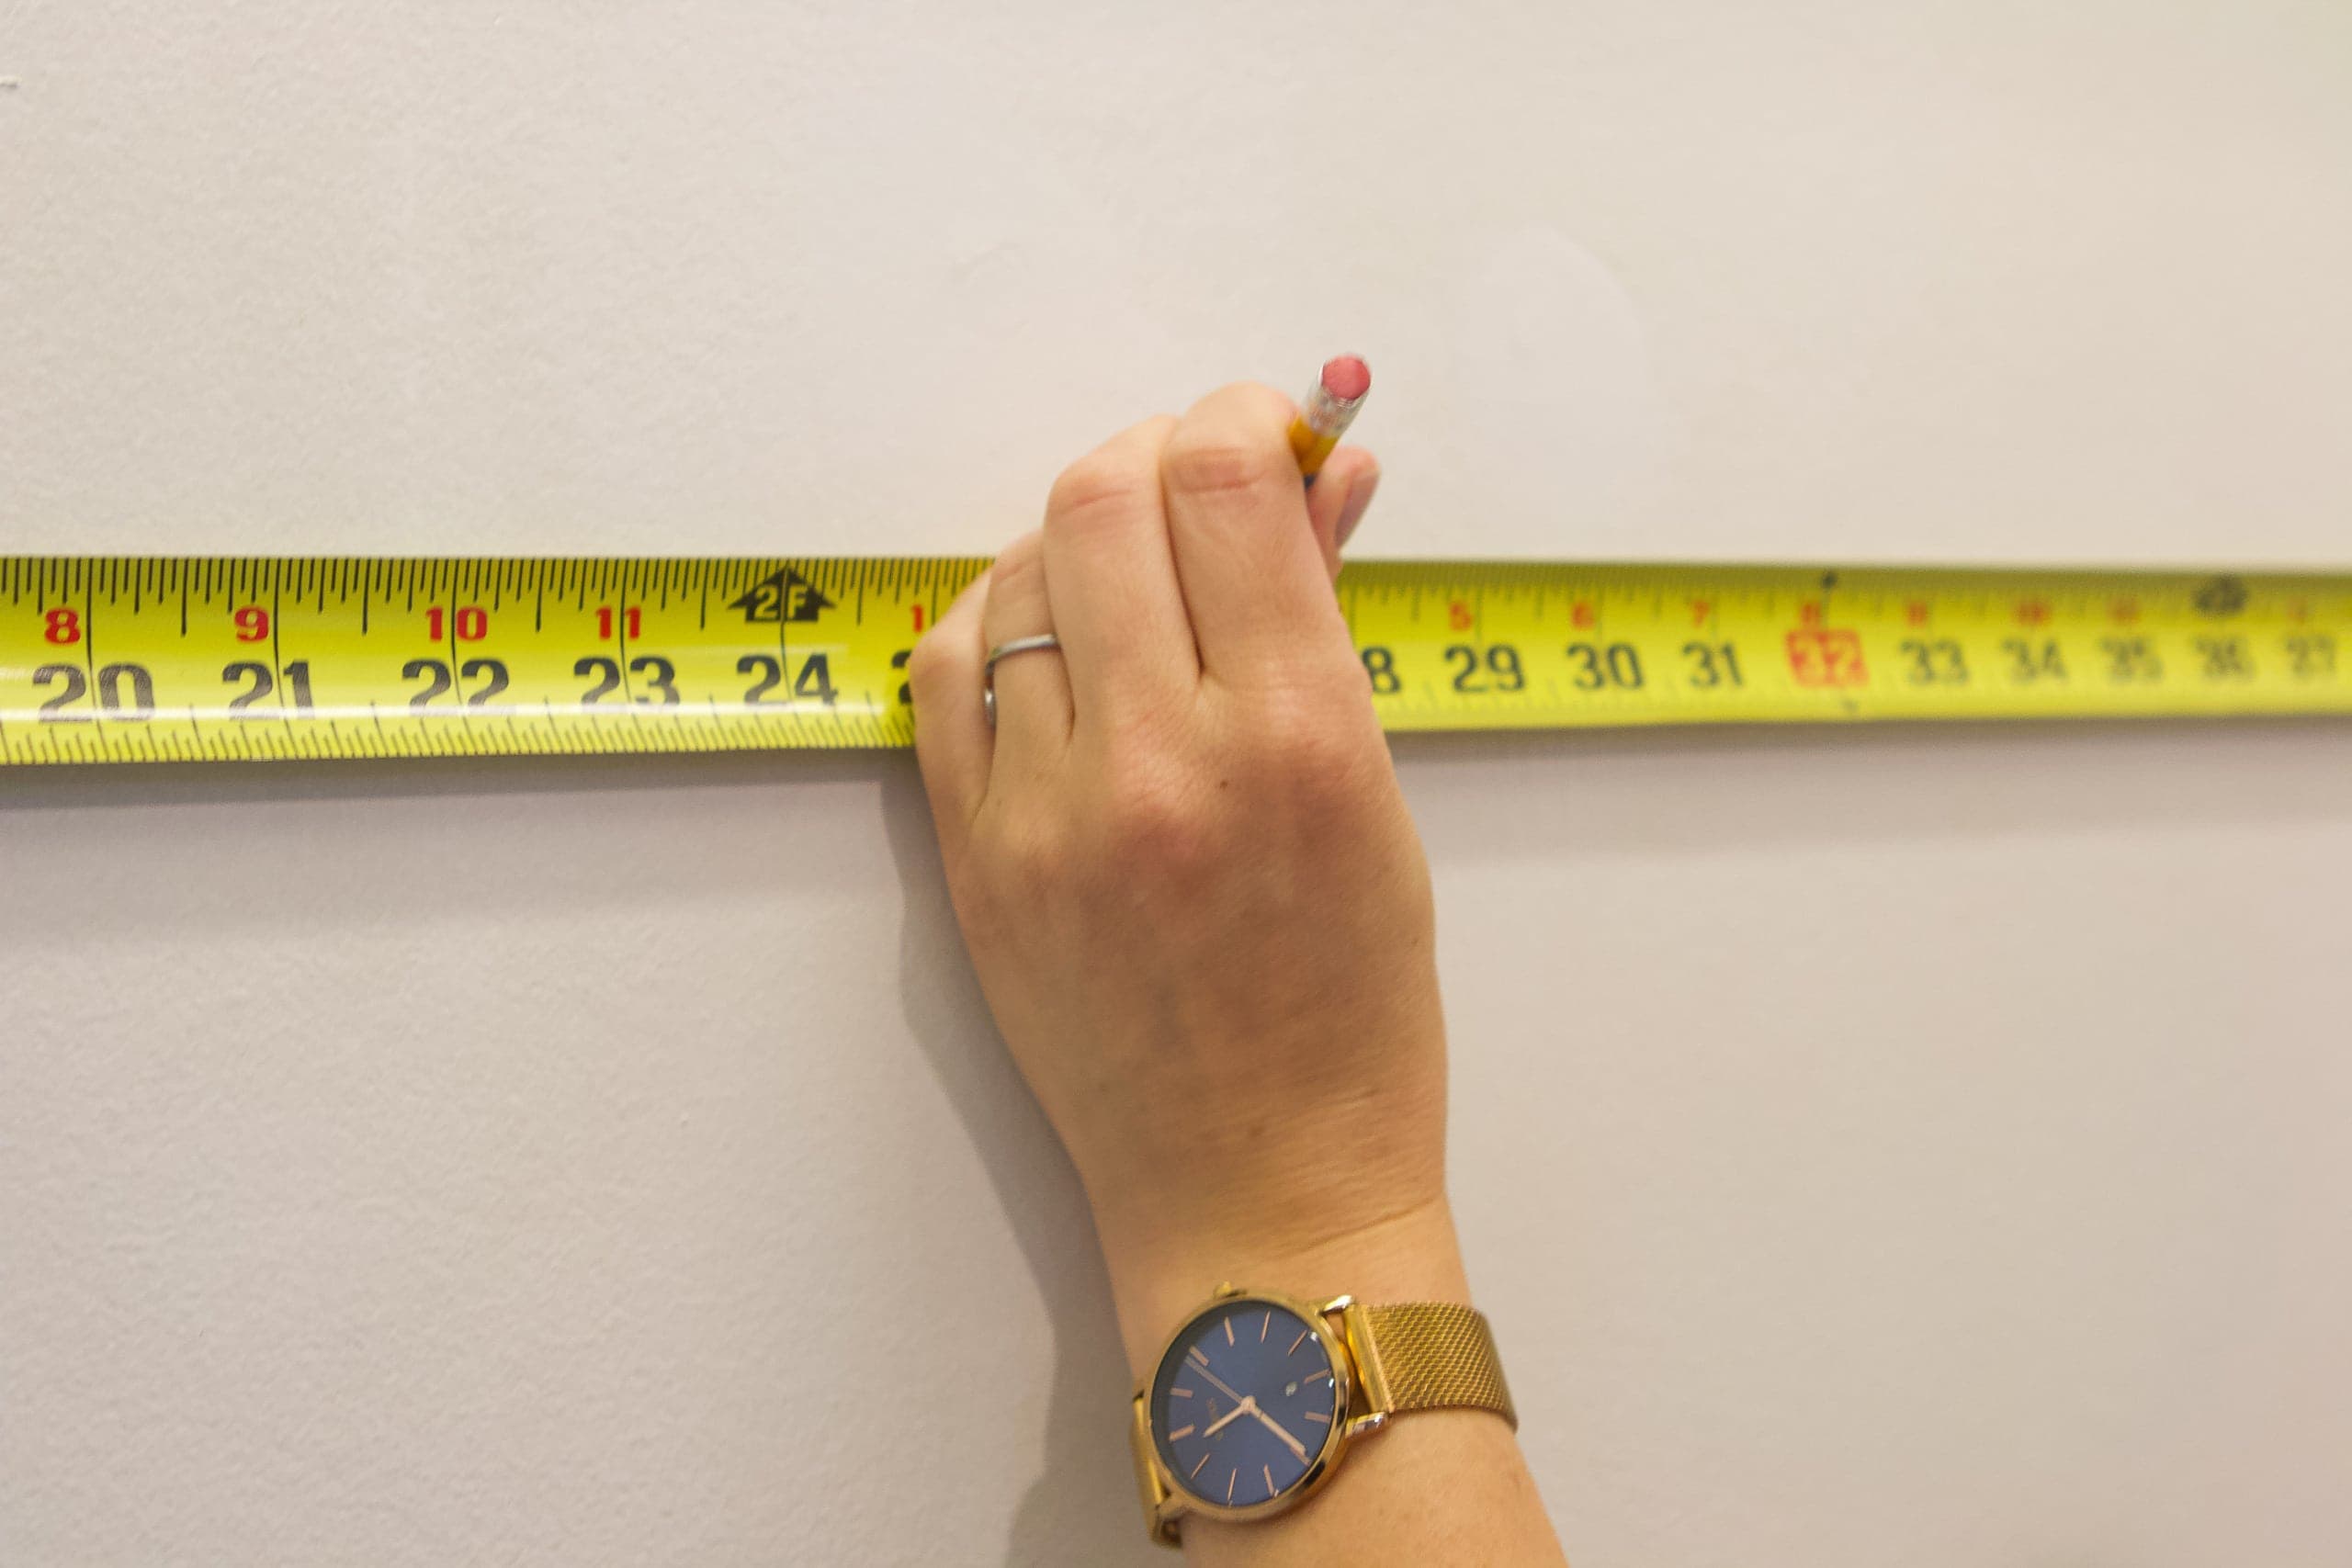
Okay, so the first official step is to find the middle of the back wall of the closet. Use your tape measure and mark that spot.
Then take a level and draw a vertical line from the ceiling all the way to the floor right at the middle point. All of the wallpaper will be lined up based on this line, so make sure it’s very straight!
Water Down the Glue

This is the glue Erin recommends for wallpaper projects. I got it at my local Benjamin Moore paint store or you can buy it online. Its consistency is, for lack of a better word, goopy! Erin likes to water it down a tiny bit before applying it to the walls. About 1-2 tablespoons per three cups of glue will do the trick. There is no need to be super specific with it, but just ad some water into the paint tray, mix it all up, and then apply it to the walls.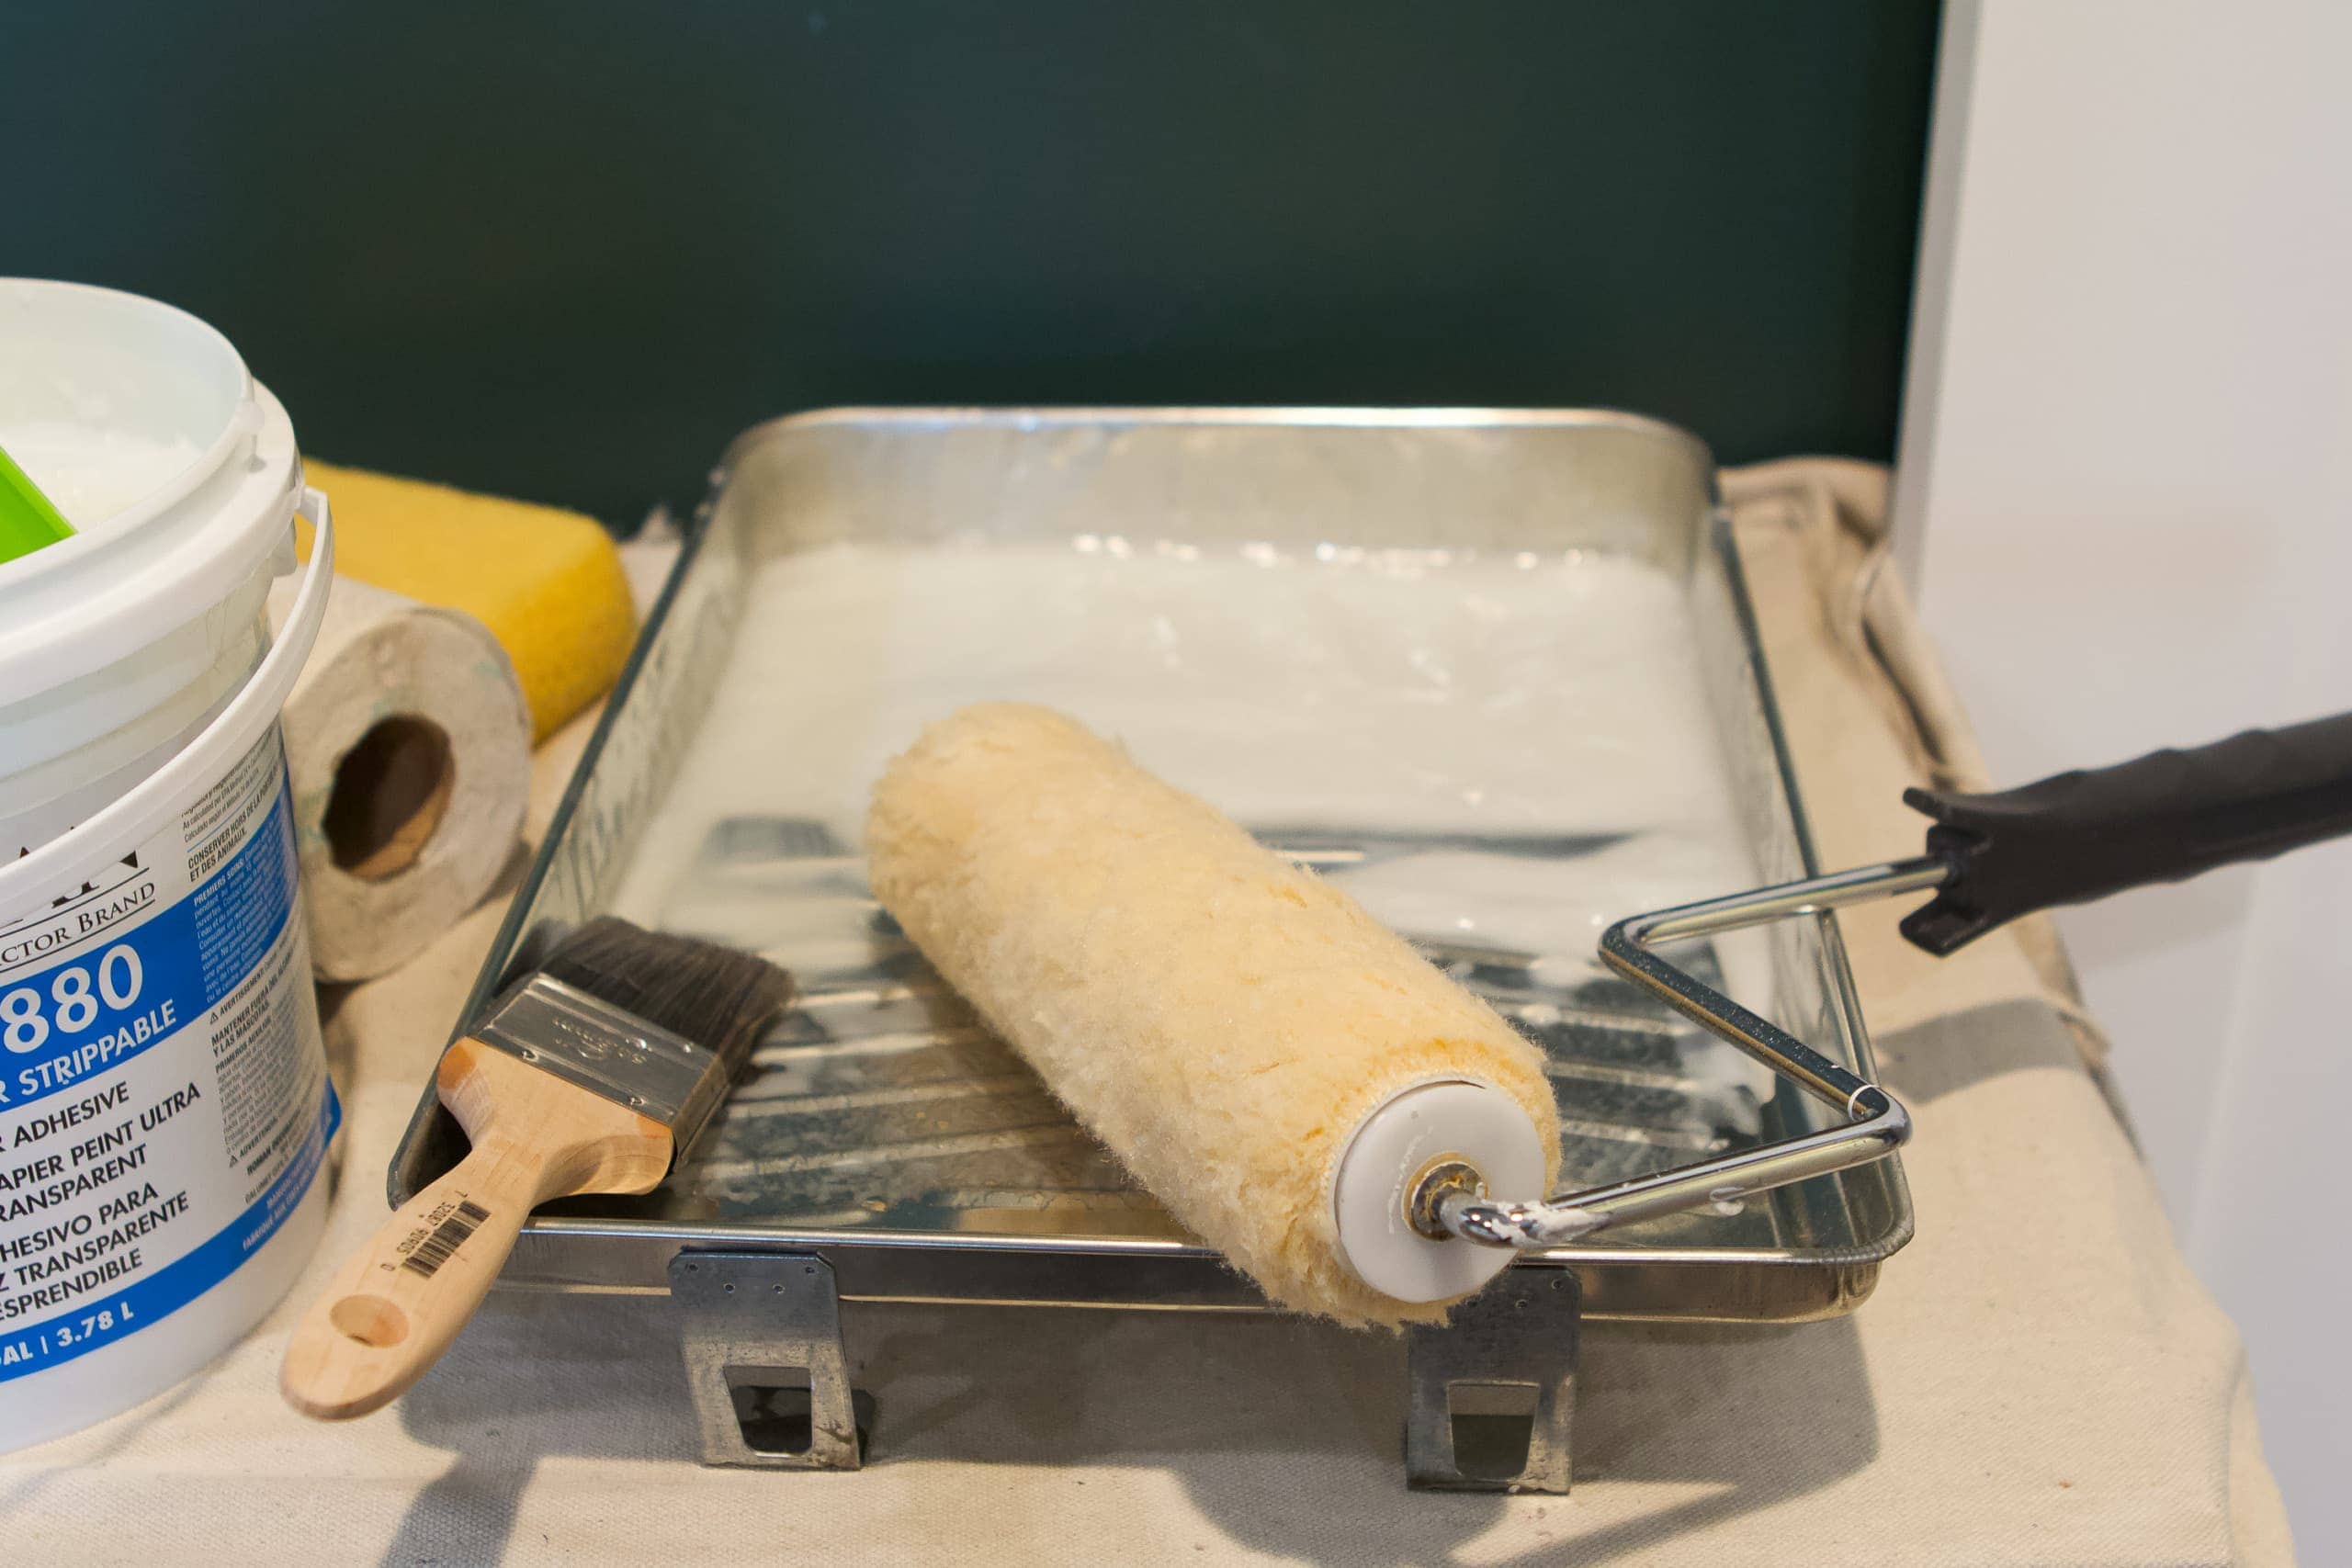
We used both a brush and a paint roller to apply the glue to the walls. We pasted our first strip to the left of that vertical line, so we applied glue to the entire wall, almost to the corner of the closet. You can use a brush at the ceiling and floor so you don’t get glue everywhere.
When we wallpapered the ceiling, we did a “paste the paper” method where you have to “book” the paper. For this paper, Erin said it’s a-okay to paste the wall and then add your wallpaper. I think that’s a bit easier, so I was happy to hear that!
Apply Your First Strip
Now, time to apply the wallpaper! Because this pattern is so unique and features so many cool characters, we figured out which ones we wanted to be eye-level, and then we based our placement off of that.
Start at the straight line – don’t worry about the other side yet – and make sure the wallpaper is straight from the ceiling all the way down to the floor. Once it’s all matched up and secured to the wall, take your brush and start to brush it out towards the opposite side, up, and down. It’s important to really work that glue and get any air bubbles out as you glue it to the wall. If you find that you have a crease somewhere or it’s not straight, you can easily peel it back and reposition. That’s the best part about using real wallpaper – it’s easy to move around when the glue is still wet!
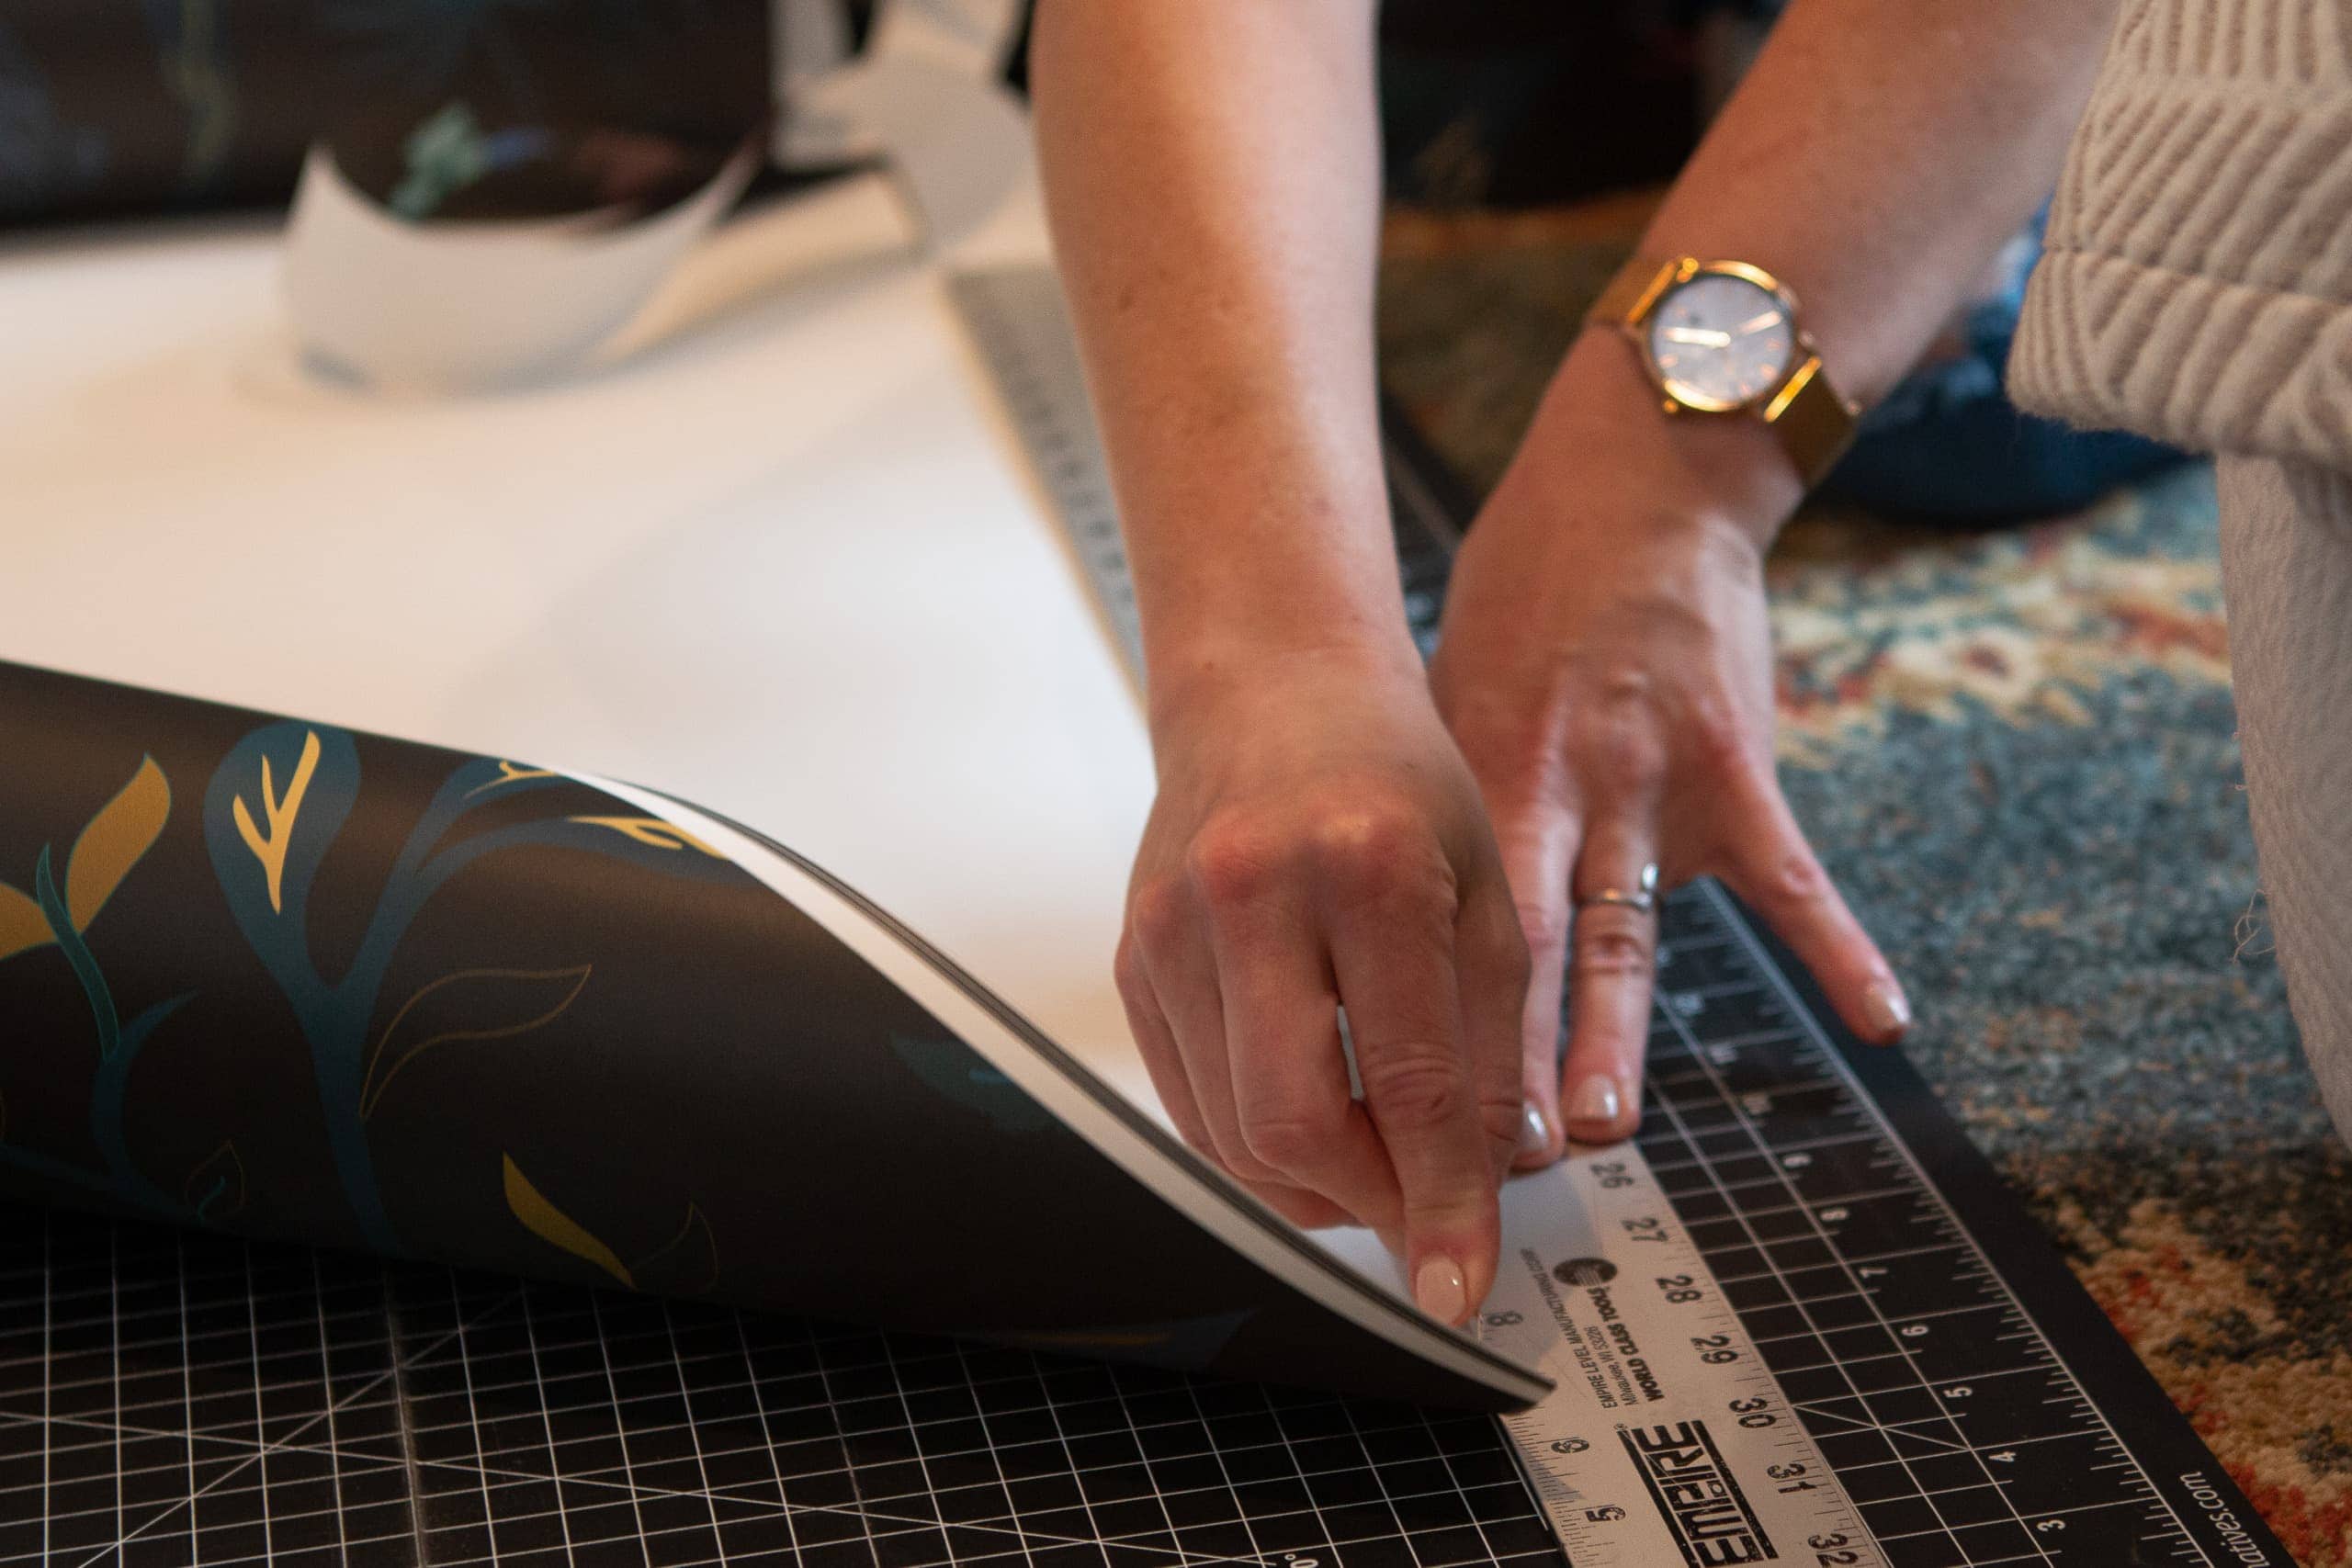
Use a Metal Edge to Cut
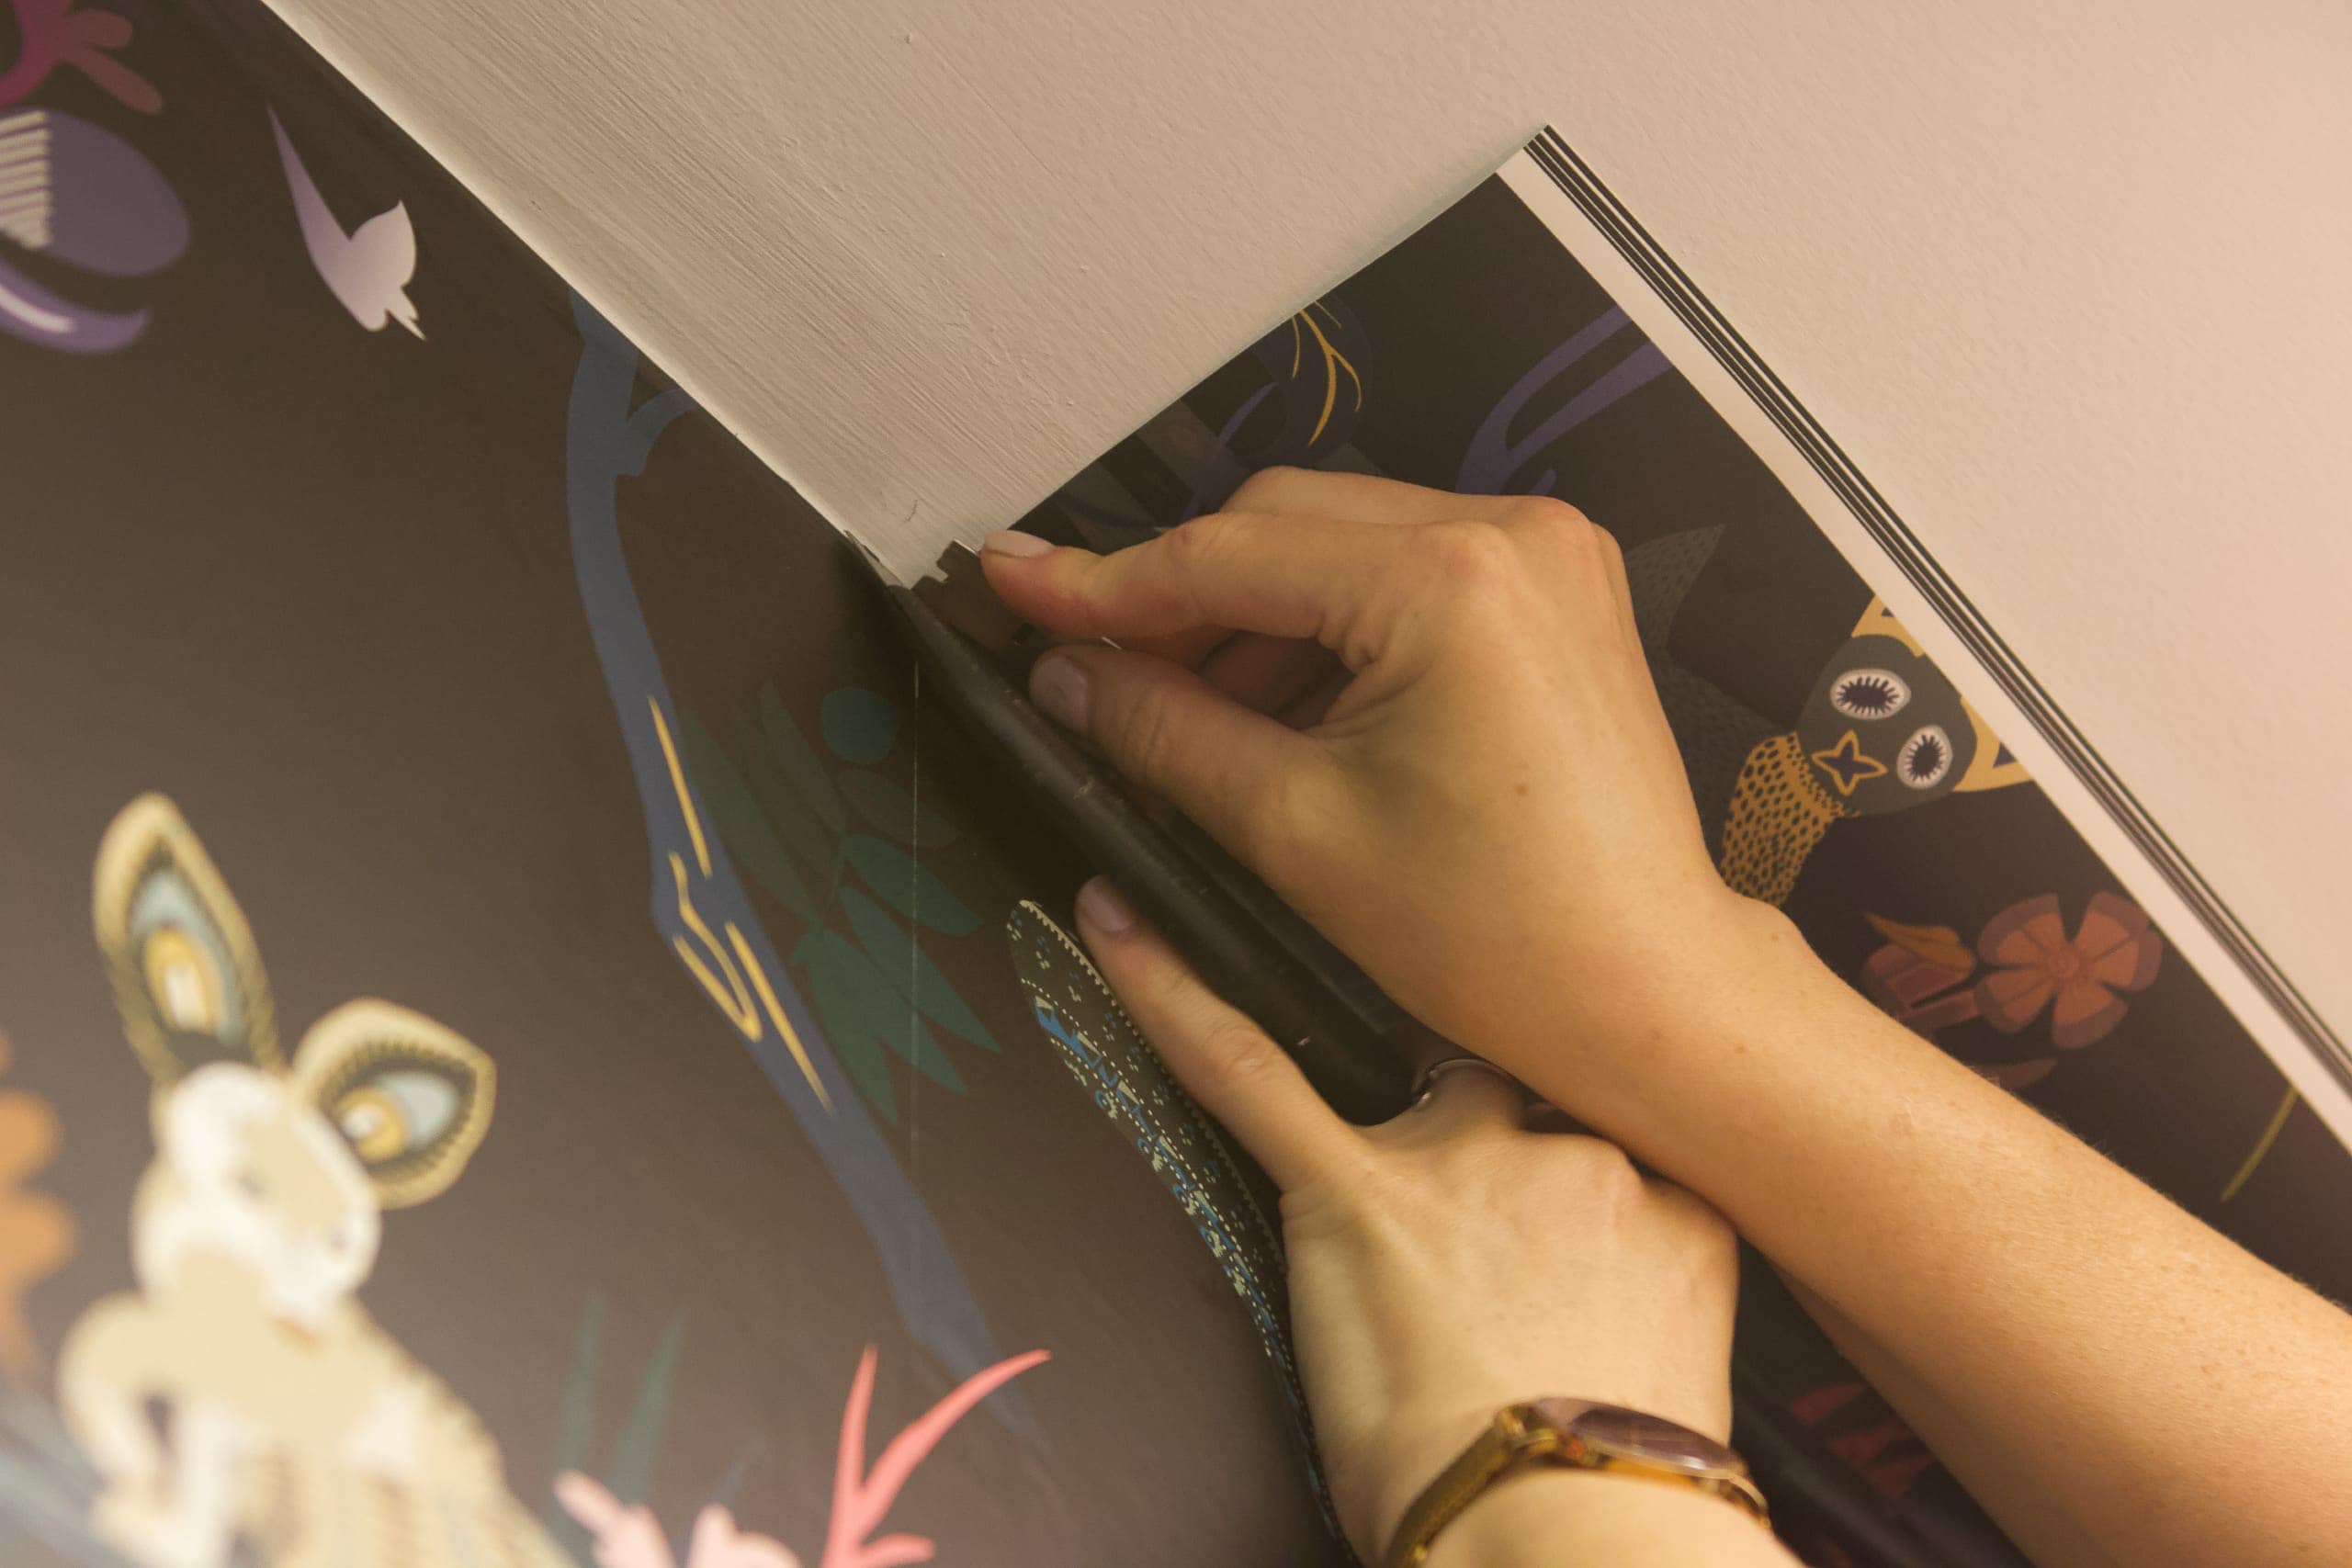
Once your wallpaper is officially on and where you want it, you’ll need to trim the excess at the top and bottom. Use a metal straight edge for this, along with a utility knife. Erin likes to use little razor blades, but they kinda intimidate me, so I’ve opted to use a snap-off utility knife in the past. You’ll want a fresh blade for every panel you install, so a snap-off utility knife is a good option!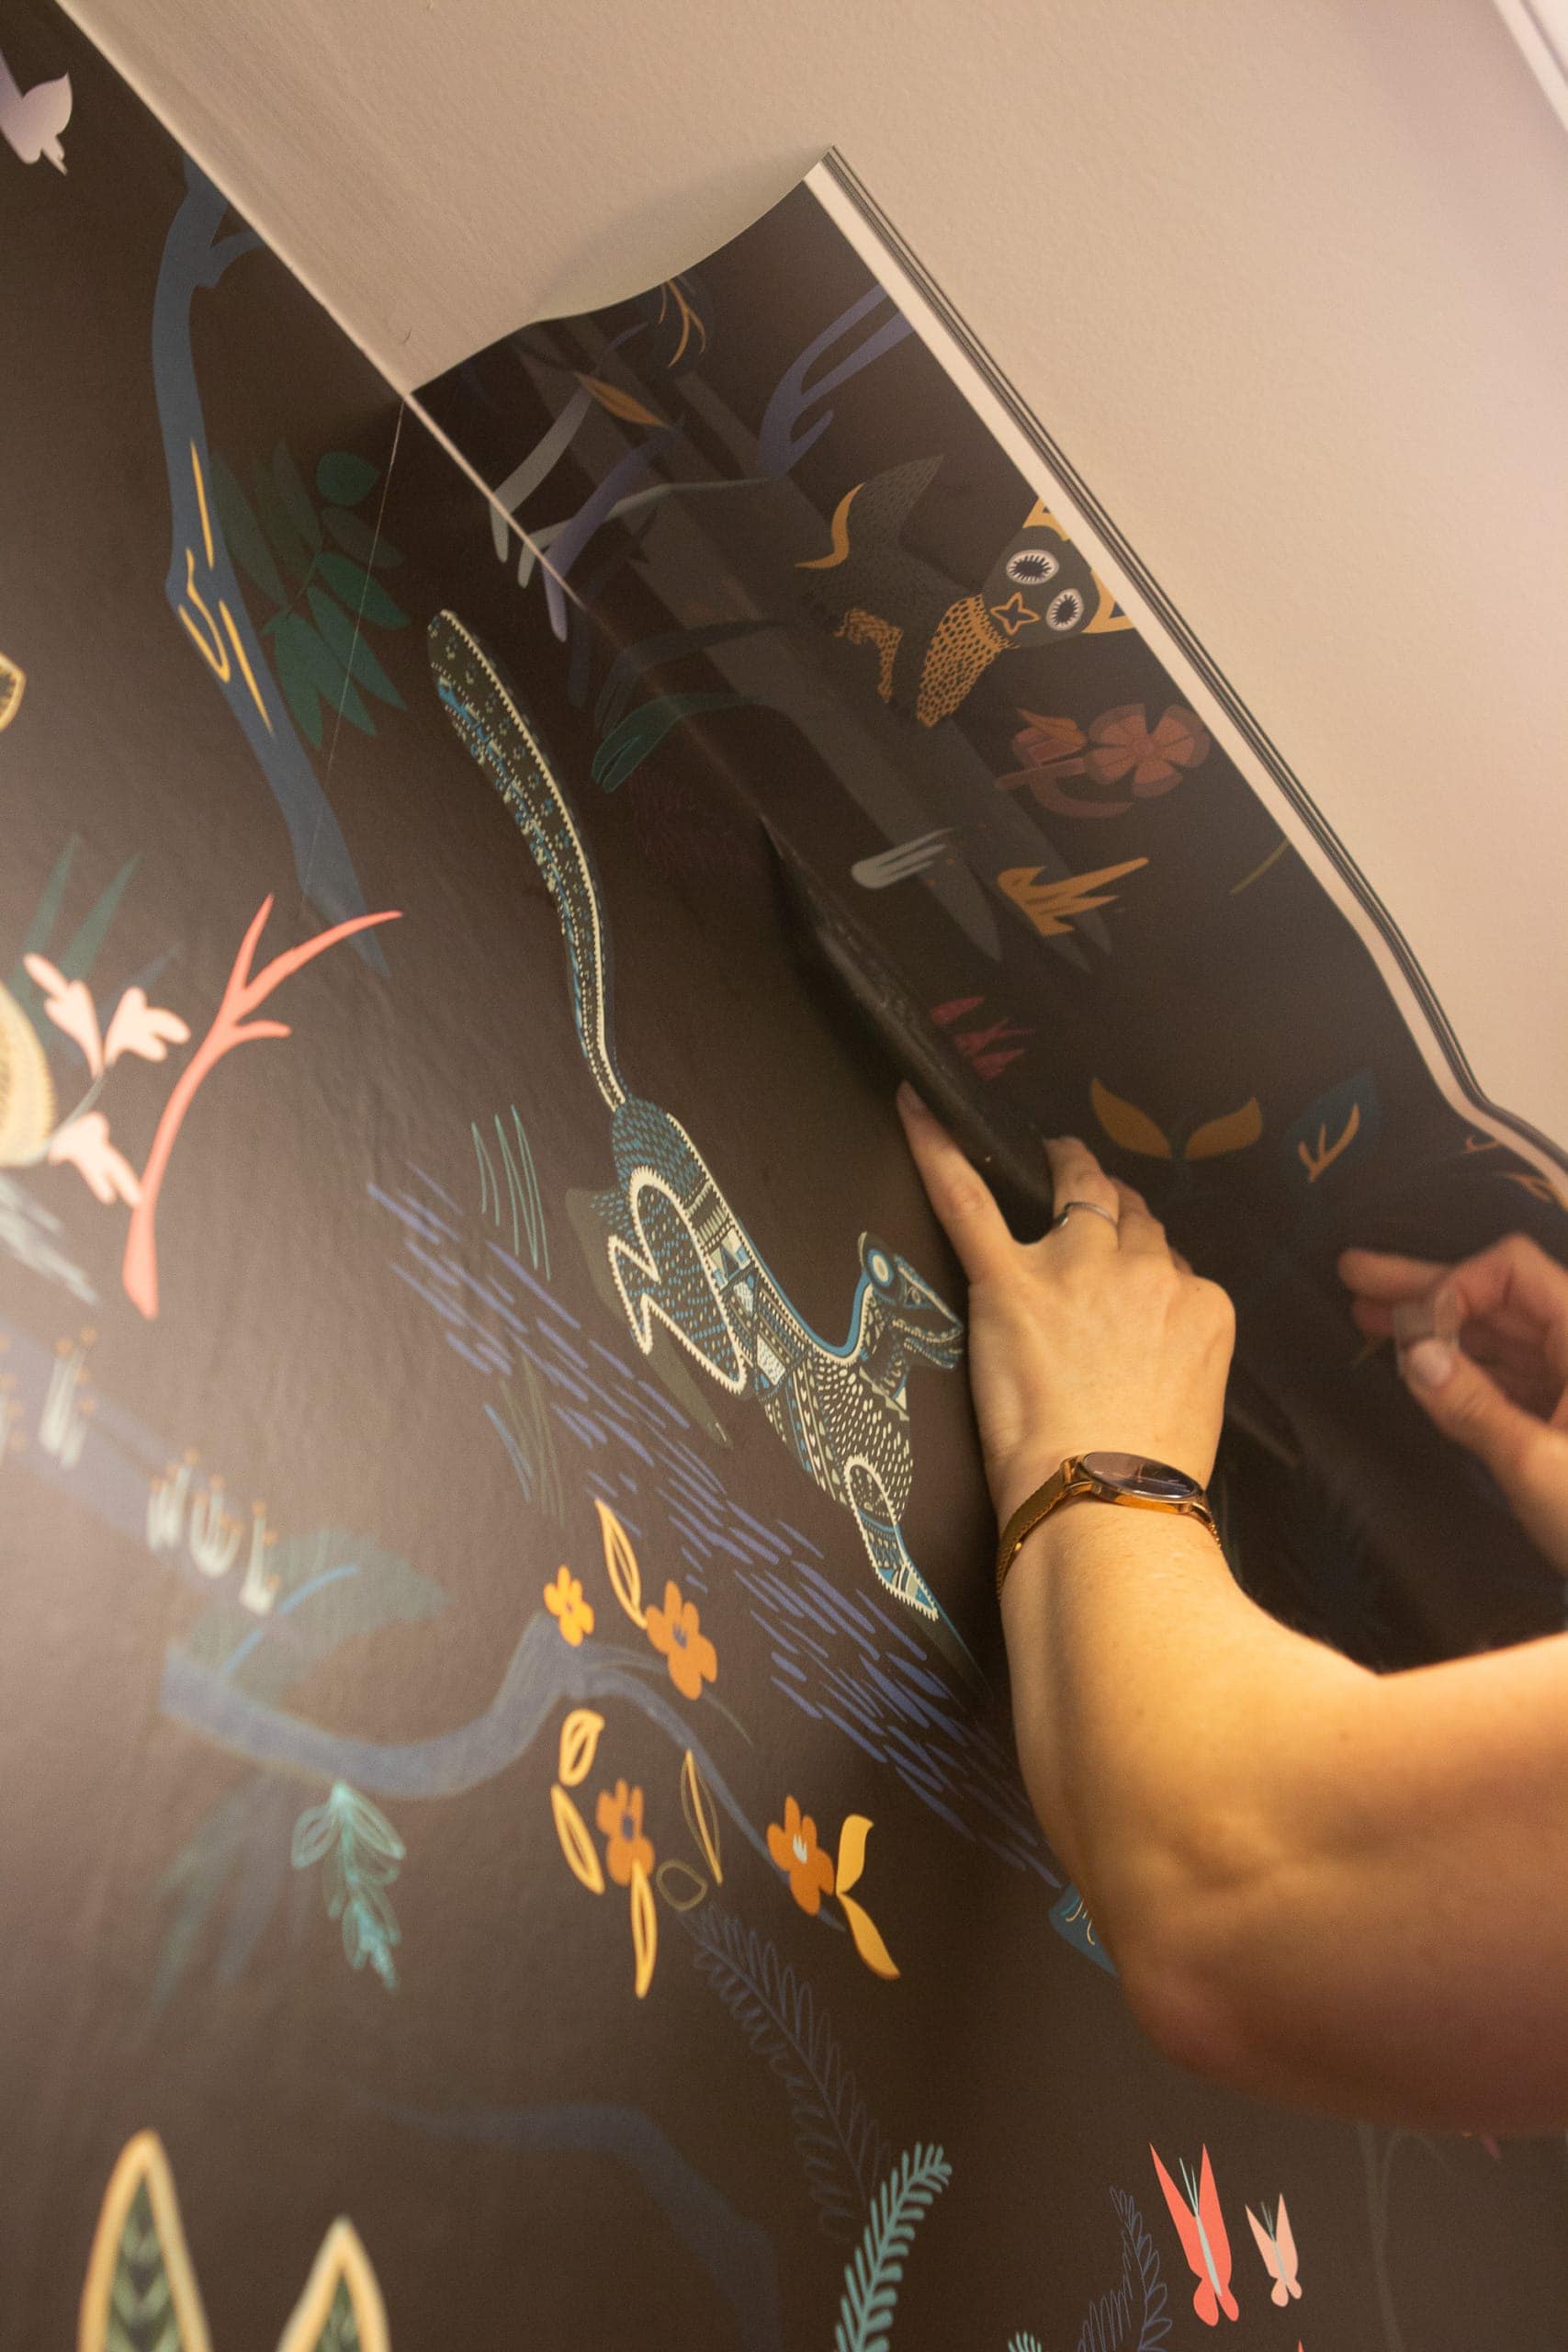
Push the metal straight edge into the corner, take your blade, and move both together along the line to trim the excess.
Wipe Down With a Sponge
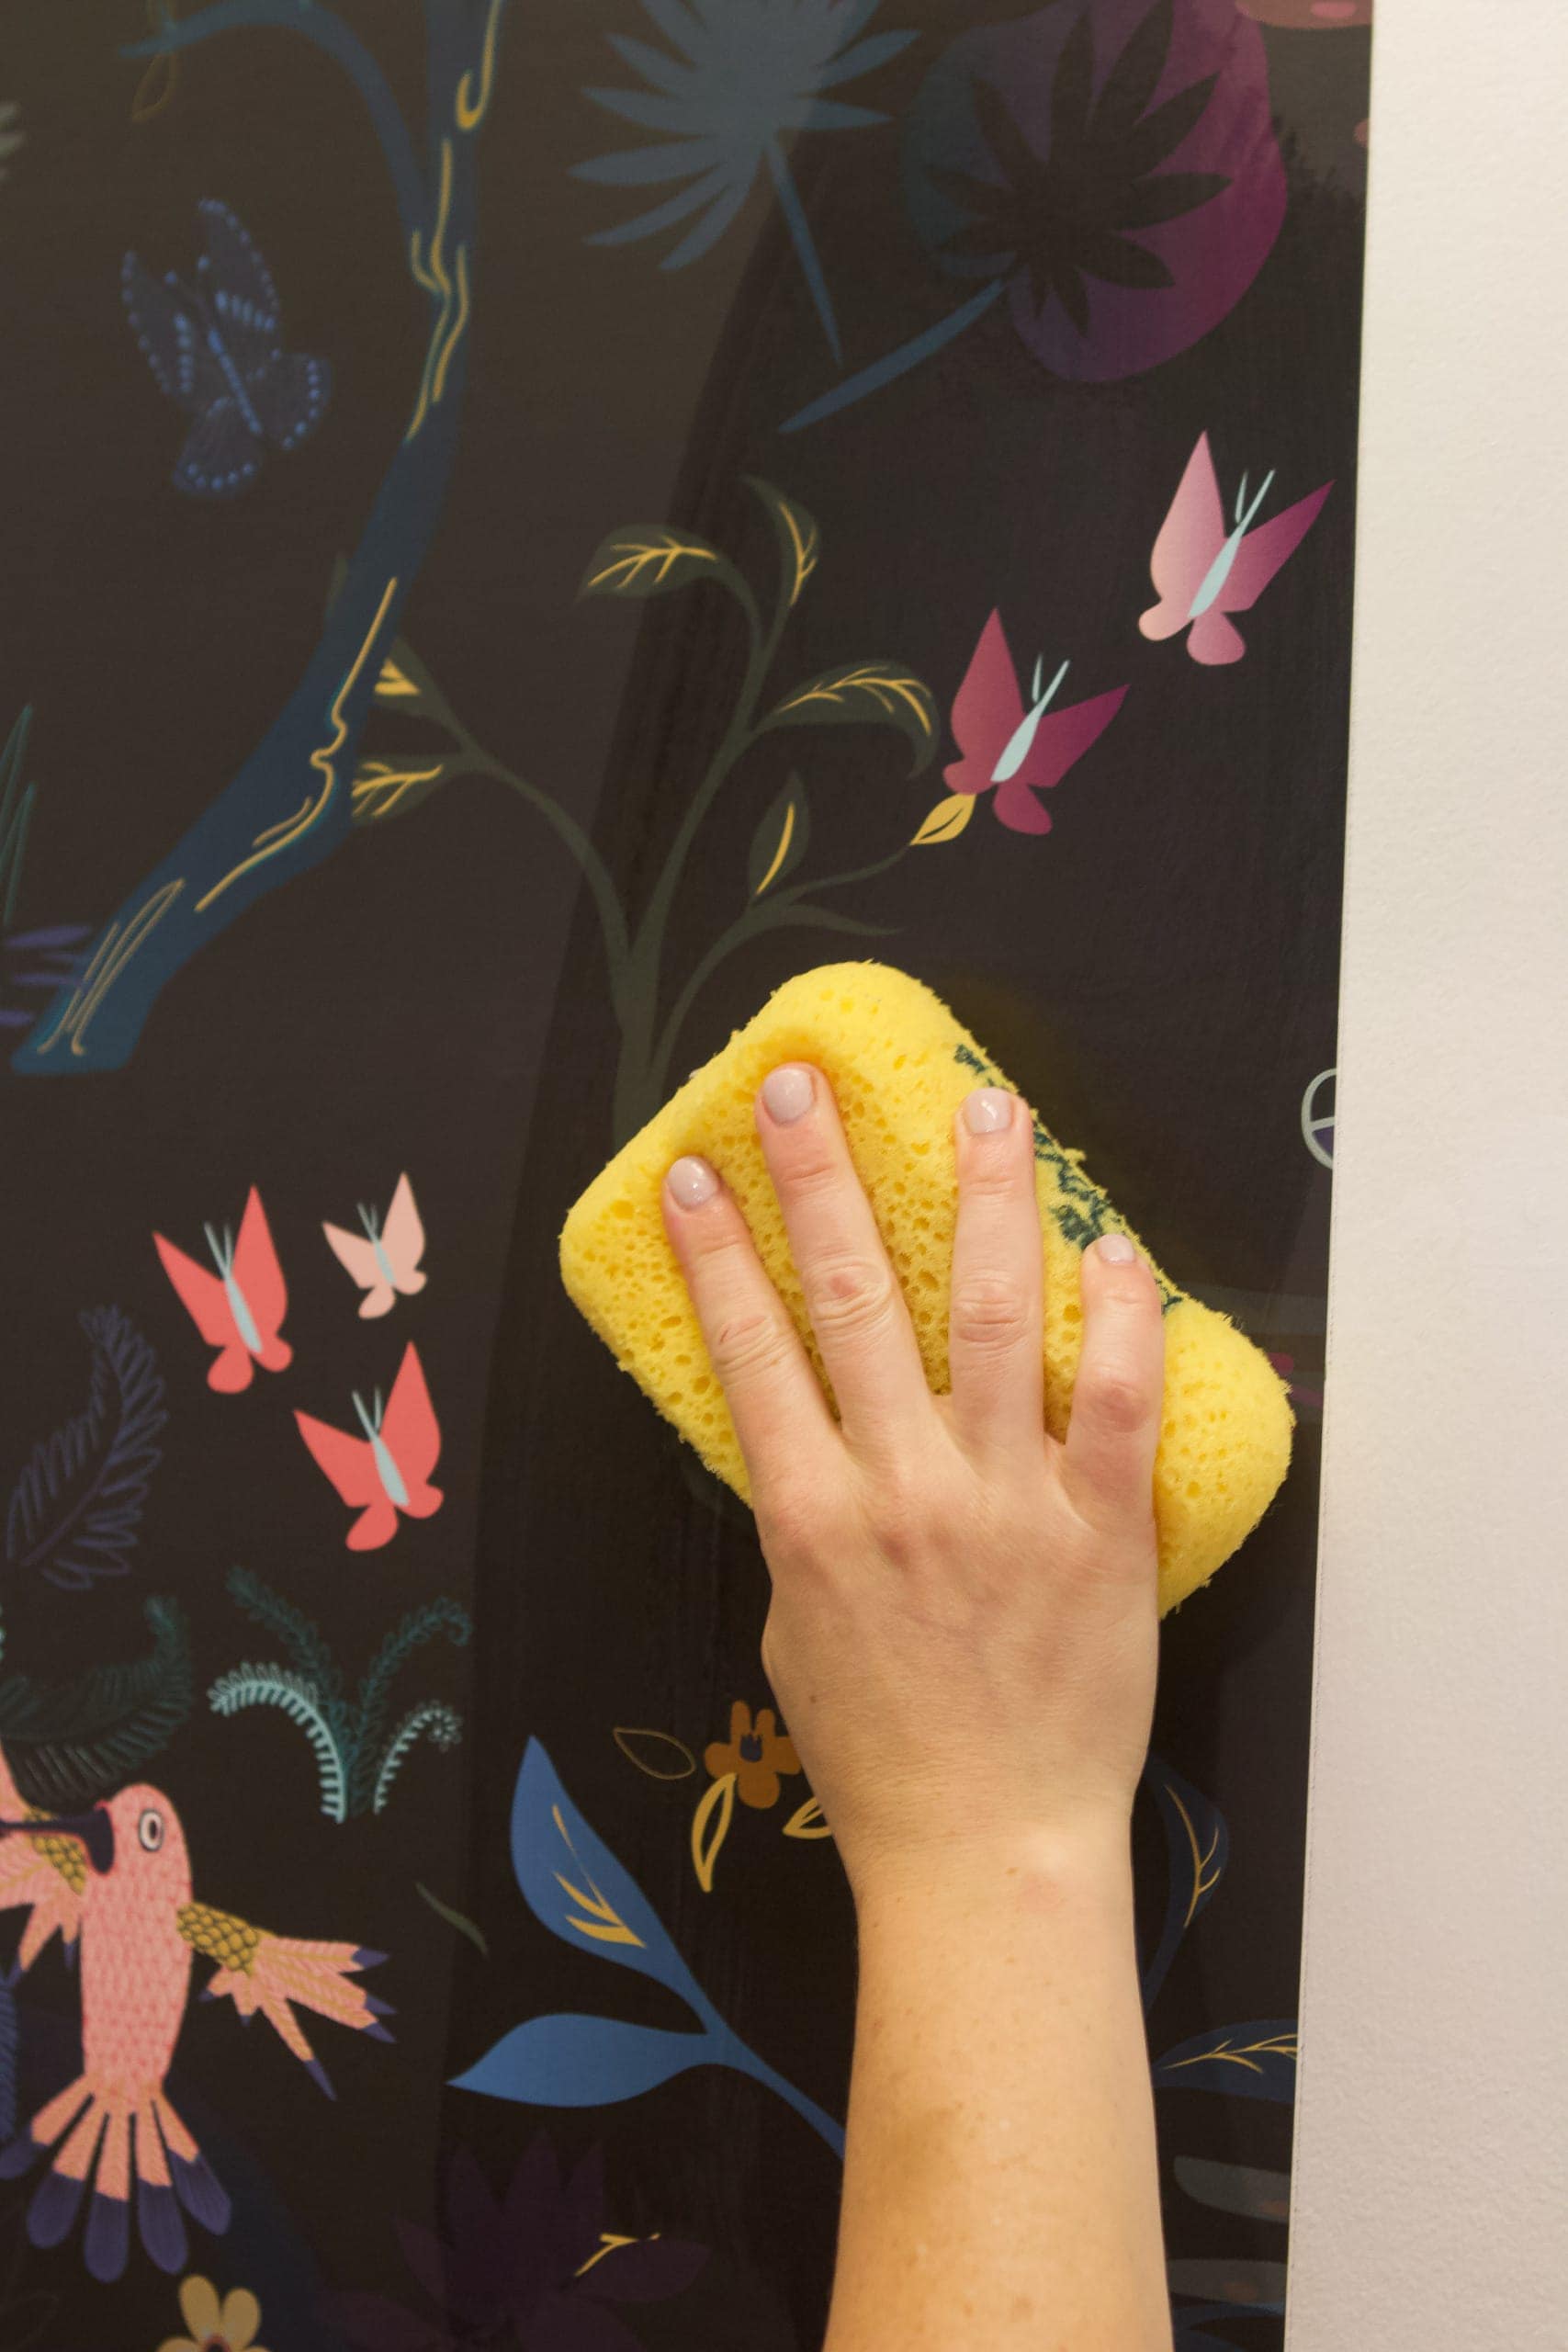
With your first panel installed, you’ll want to wipe off any excess glue. Just take a damp sponge and go over the entire panel to remove the glue. It’s much easier to do this now than if you wait until you’re done and it’s all dry. The sponge also comes in handy if you need to reposition the paper. Keeping the paper wet will make it more manageable as you get it into position.
Use a Sharpie or Marker
Here’s another fun tip I learned from Erin. If you’re using a dark paper on a white wall (like me!) then you may notice some white peeking through where your panels meet, if you don’t line it all up perfectly. To combat this, you could paint the wall a dark color first or take a sharpie, or marker, and color the edges of your paper so they’re not white. That way if the edges peek out, they’ll be dark and will blend in. Genius!
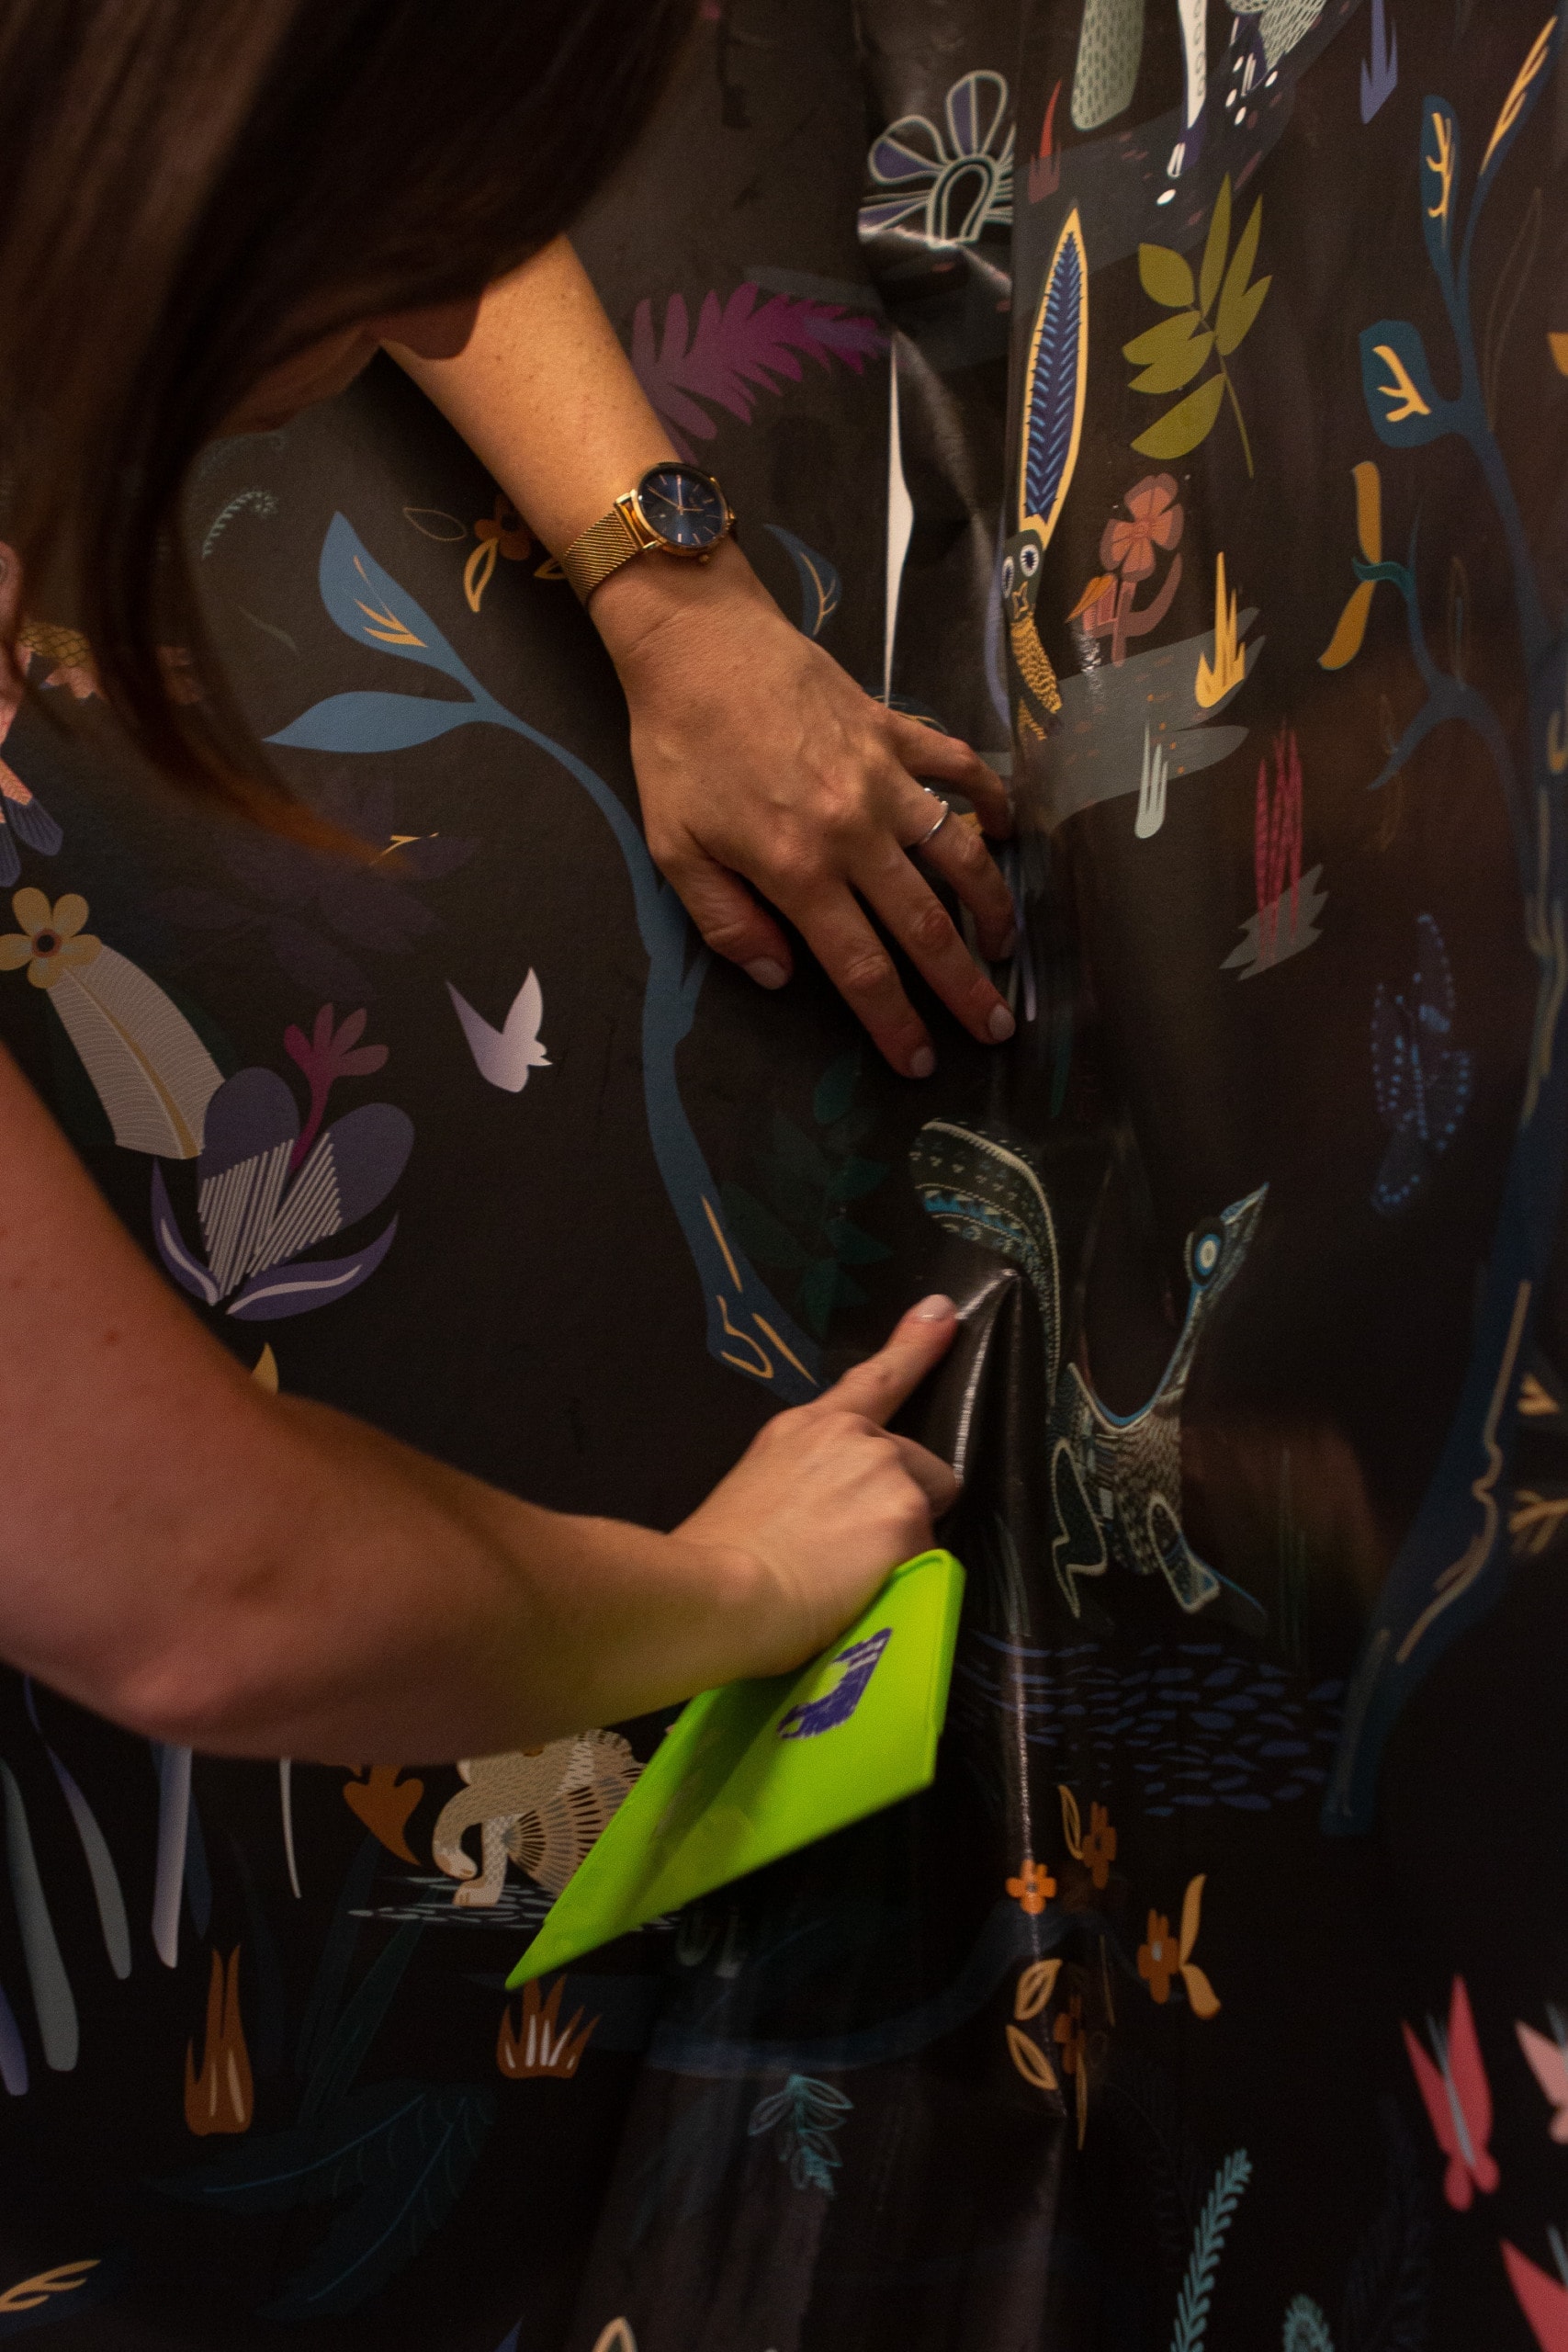
Line Up Your Pattern
With a wallpaper like this one, you’ll have to take a look at the design and find where you can match things up for your next panel. (We went with the panel to the right of the straight line for our second panel.) With this pattern, it was finding an ear or a leaf and going from there. With the second panel up, you can use your seam roller to really press those seams down so there is no gap between.
Do the Folded Corner Method
So those dreaded corners are the trickiest part about installing wallpaper! There are two methods you can try, and we did them both so we could share with you! First, you can take the full panel and fold it into the corner so it’s on the back wall and also extends to the side wall. This is nice because you won’t have a gap in the corner. But it can be a bit tricky to line it up, fold it into the corner, and then get the paper on the other wall. There is just a lot of paper going on!!
With this method, wetting down the wallpaper with a sponge is a must! It will make the paper more pliable so you can use your hands to push it into place. Once it’s on there, trim the top and bottom like you normally would.
Or Cut a Smaller Strip
The second method for a corner is to cut a smaller strip for the back wall and then use the rest of the panel on the side wall. The most important thing to do for this method is to cut a strip that is large enough! If you measure the space from the paper to the corner and it’s 2 inches at eye level, it might be 2.5 inches at the floor and then 1.5 inches at the top (most walls aren’t straight!). Because of this, you’ll want to find the largest area and make sure that your strip is cut wider than that. The worst thing would be to cut a too small strip and then have to try to get the side panel to fill in the open space. 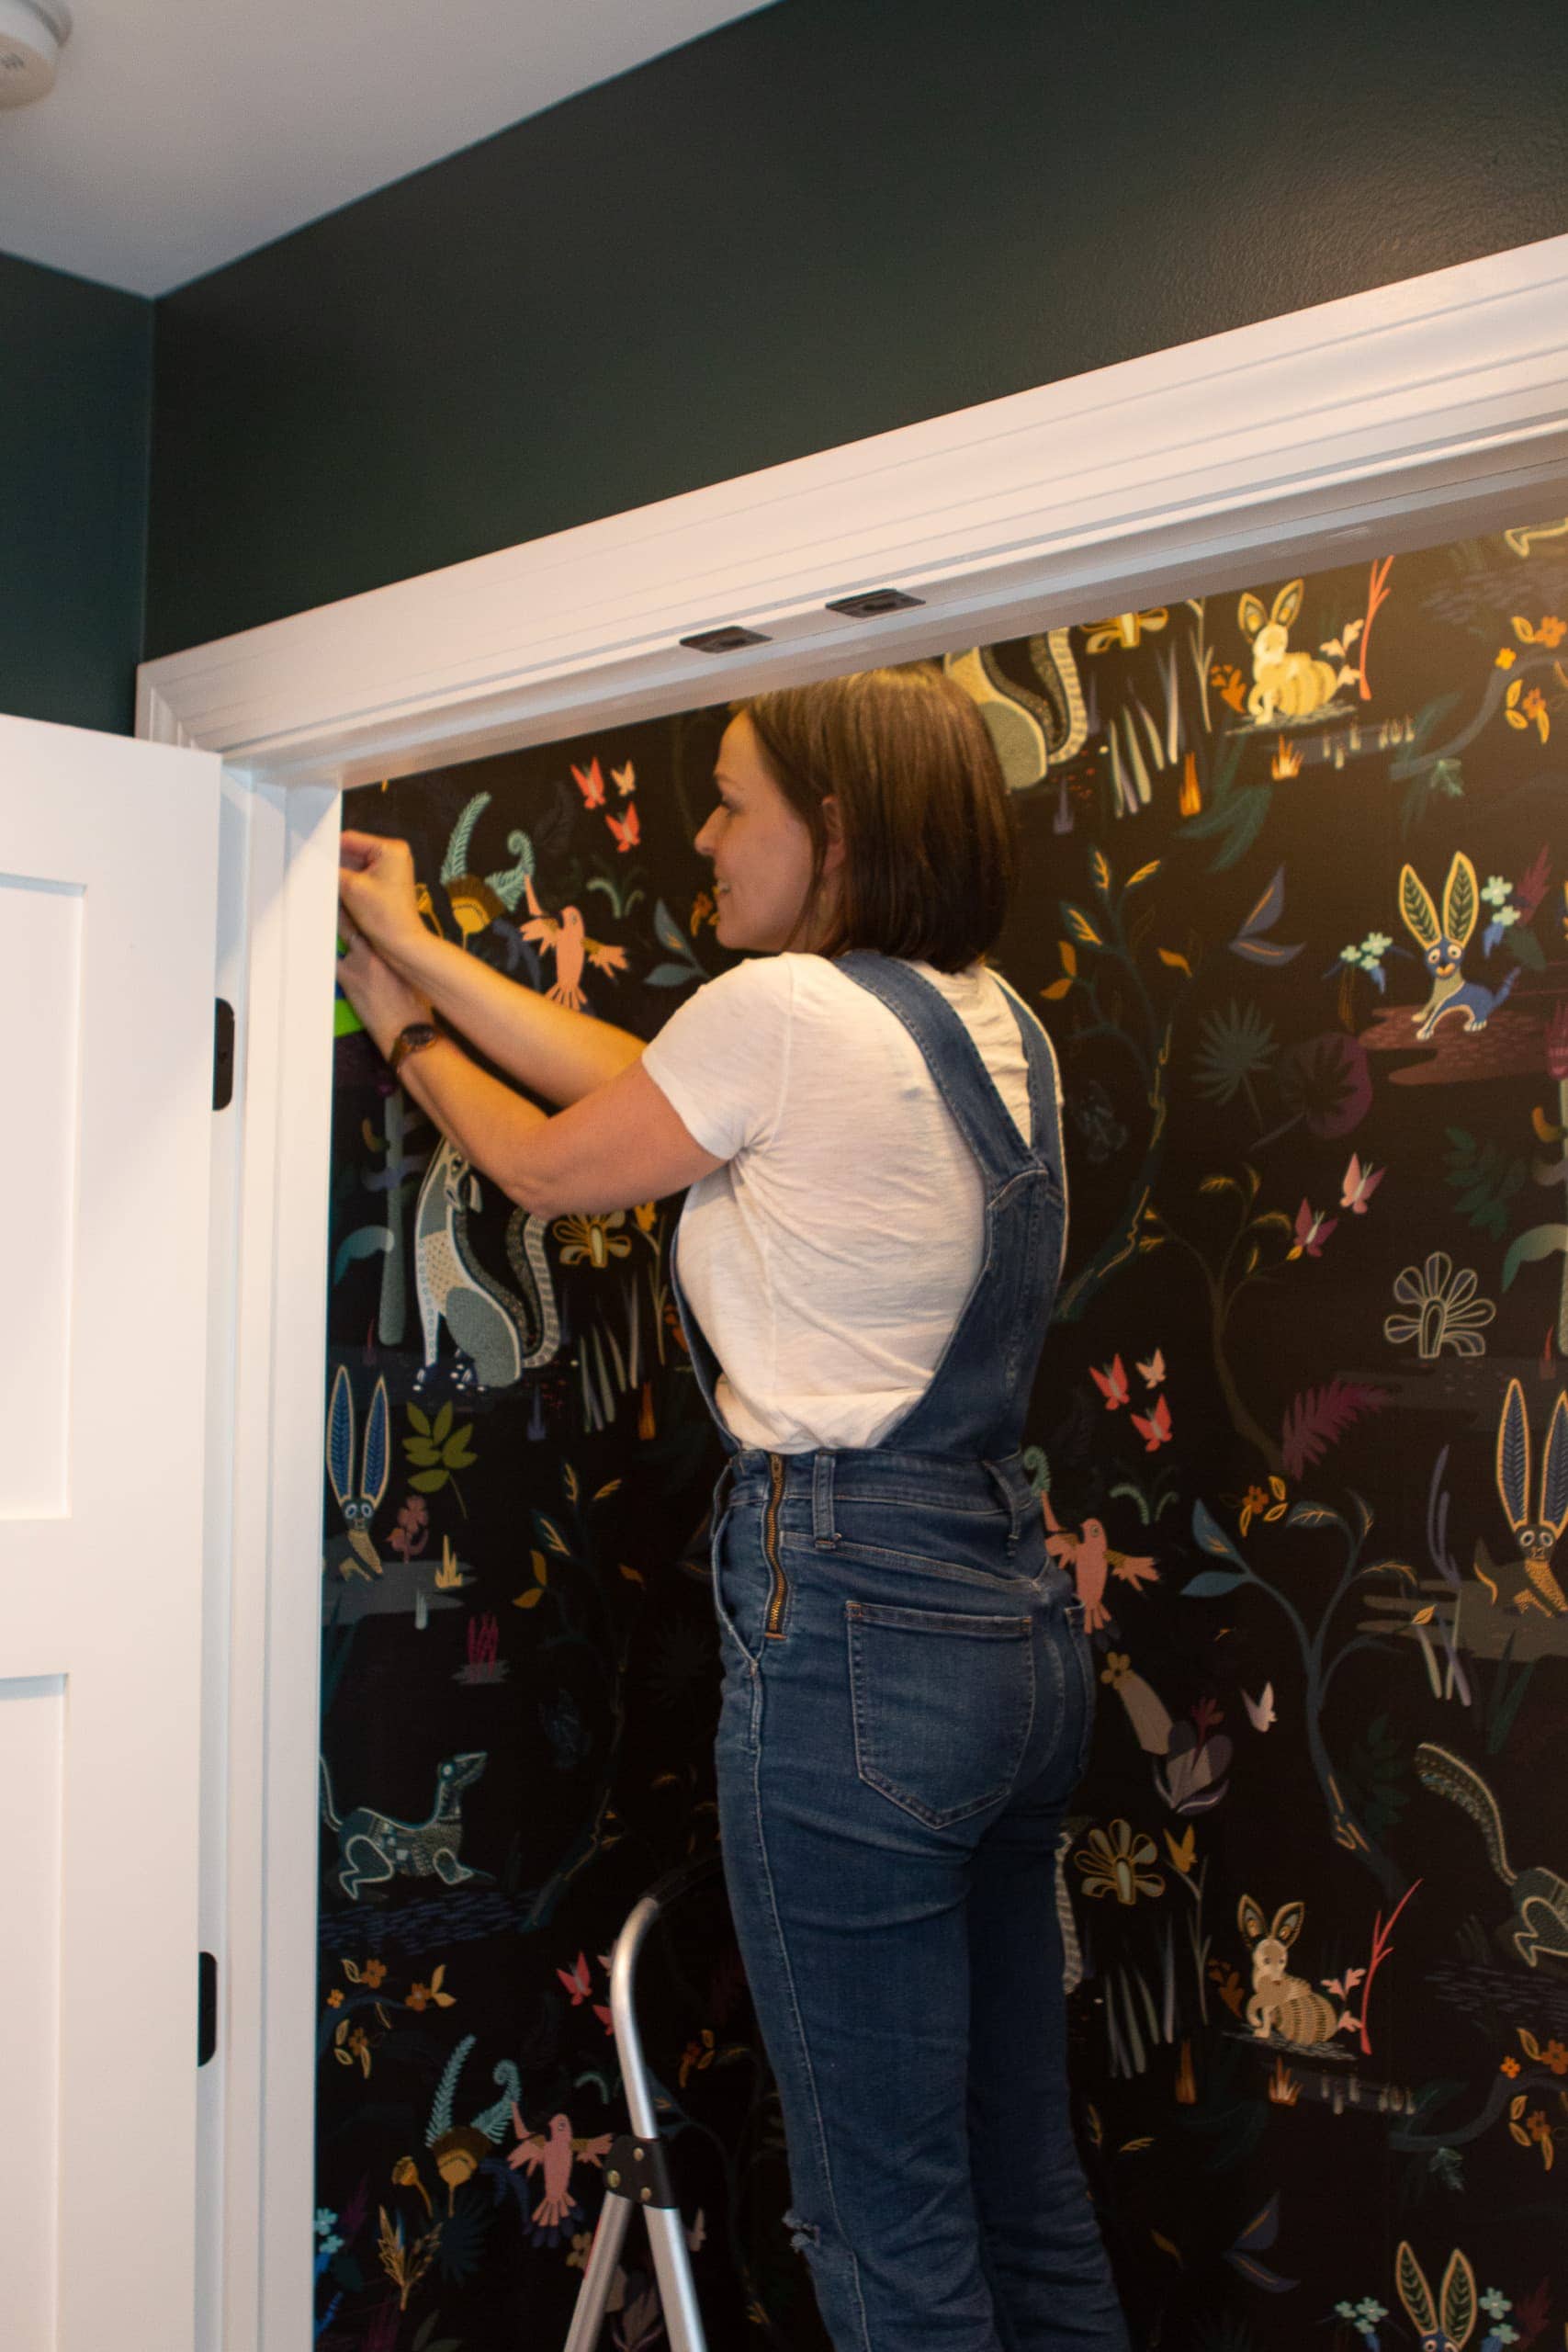 Once your small strip is on, you can take the remaining panel and apply it to the side wall like normal.
Don’t Be Intimidated
I know many people are really nervous about installing wallpaper. I get it! Wallpaper can be expensive and the last thing you want to do is ruin it while attempting to DIY a project. But I promise that this is a project that you can do yourself. I recommend starting small, with something like a closet, so you can gain some confidence and learn as you go. A closet is also nice because any imperfections will be hidden and out of sight!
If you do want to hire it out, Erin says the best rule of thumb is that the install will typically cost as much as the wallpaper. So if your wallpaper costs $300 then you can expect to pay $300 for the install.
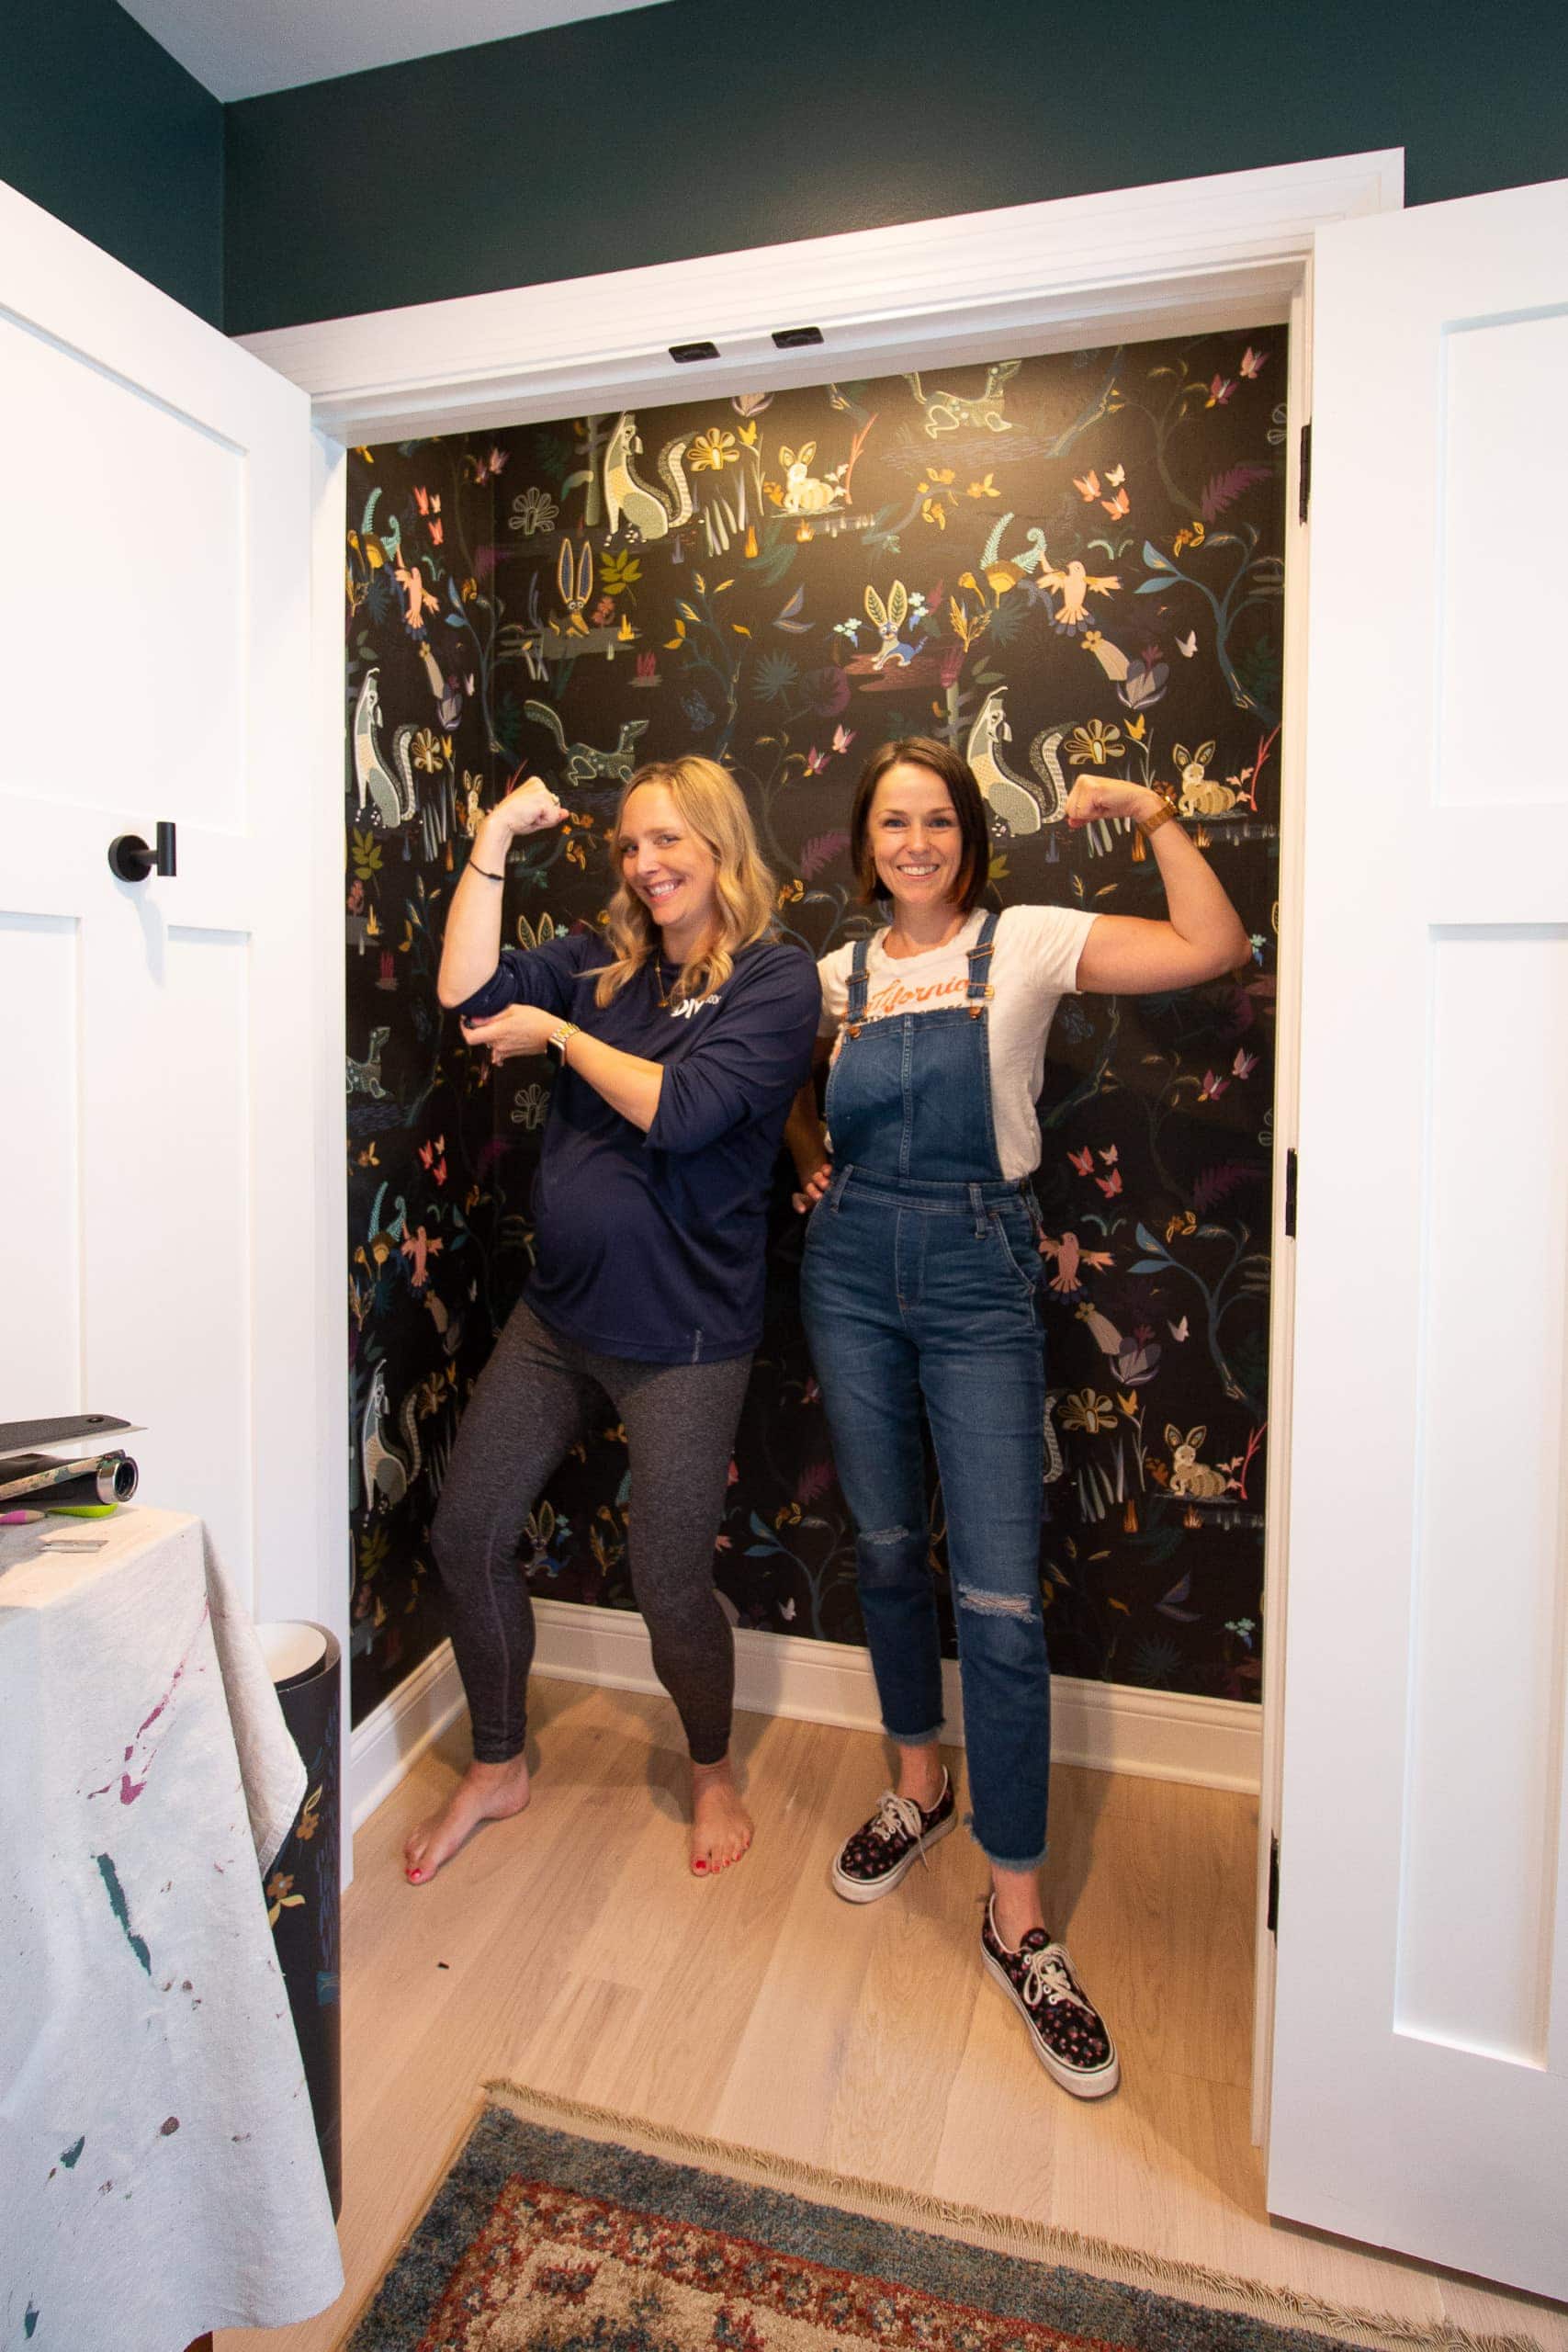
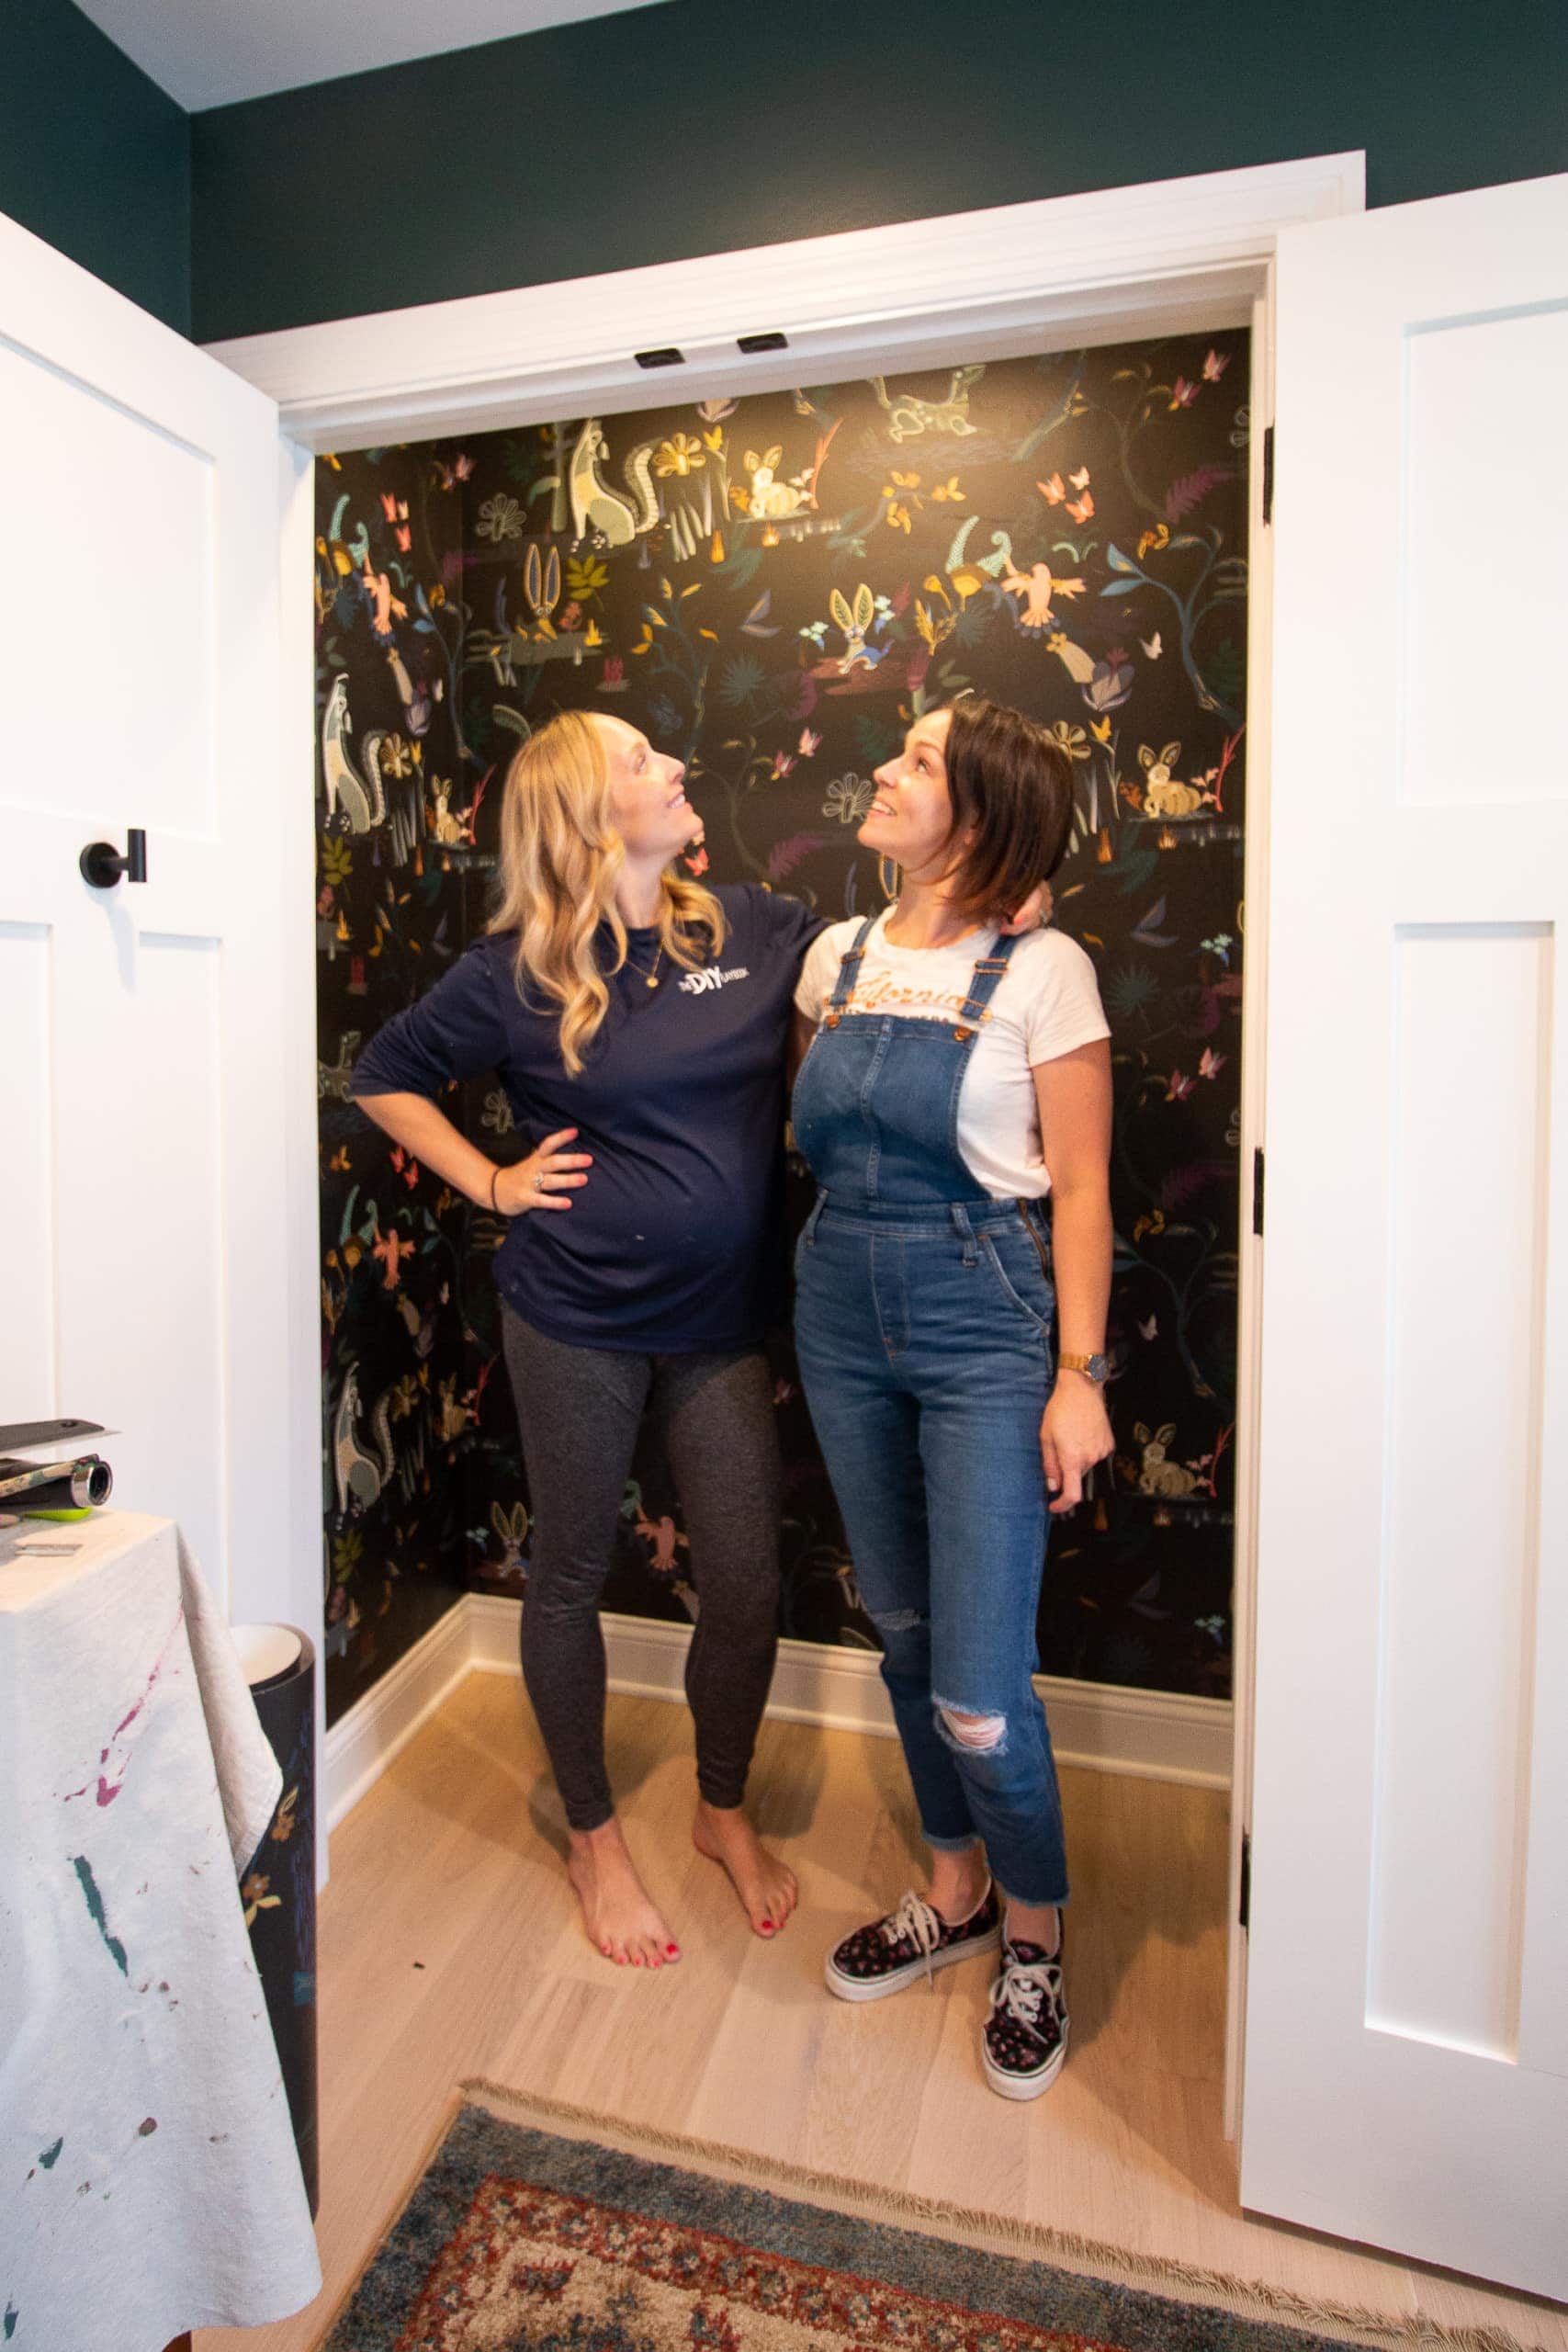
Nursery Closet – Before & After
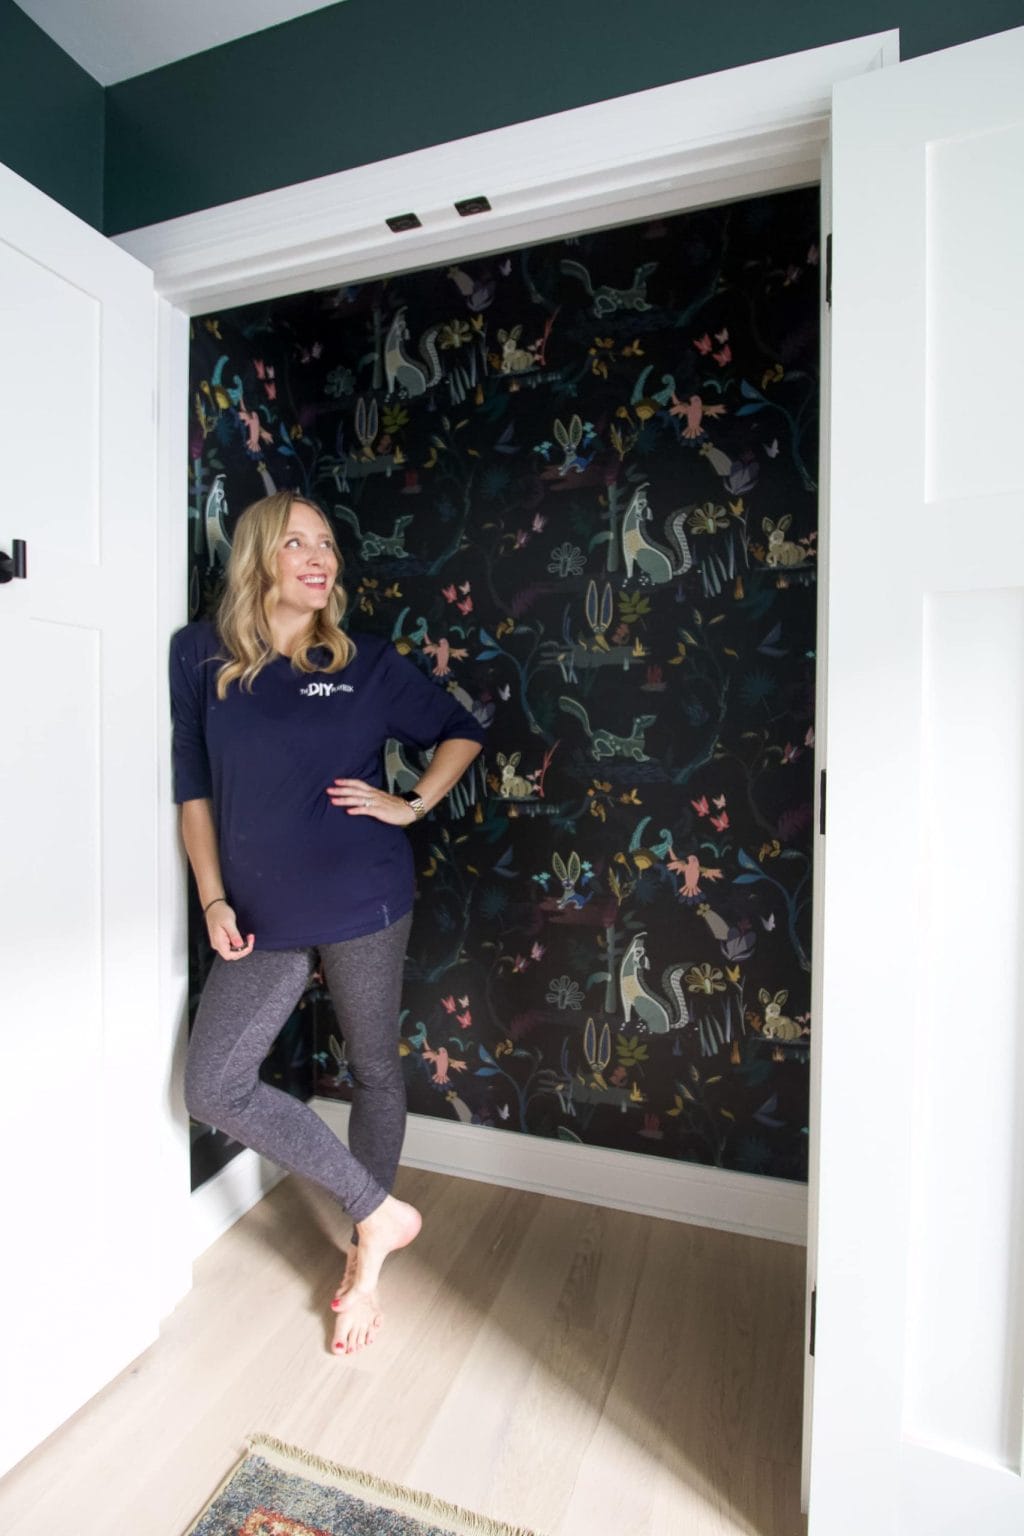

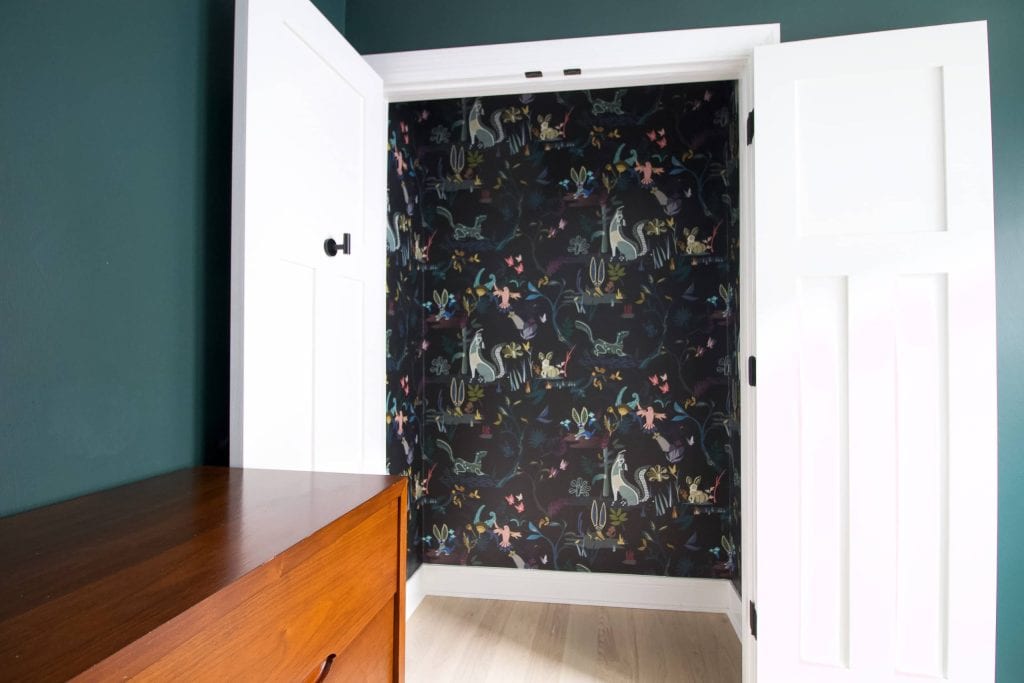
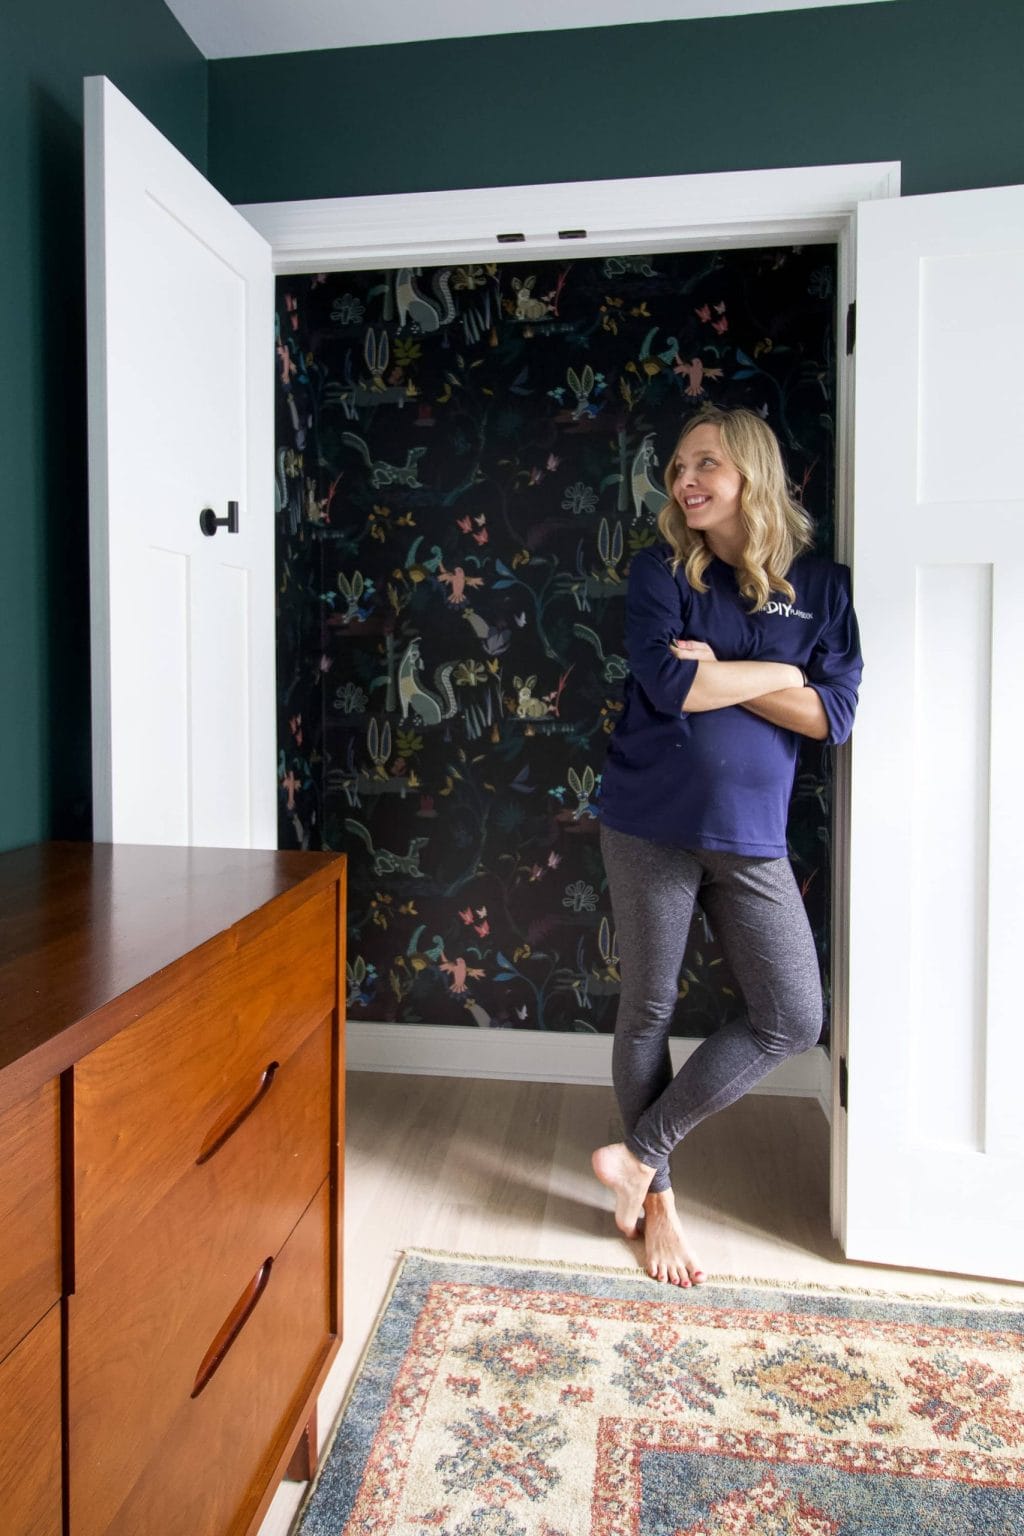
I mean, how fun is this?! I am so happy I went with this whimsical wallpaper. It’s moody, yet bold and I love the colors throughout. Erin even sells 8×10 prints of the cute creatures in the wallpaper, so my plan is to get a few and frame them for the room to tie it all together!
What’s Next?
Next, we’ll make this a functioning closet! I already have the IKEA parts all ready to go, so it’s just about finding a day to build it. My plan is to get the closet done and then I’ll be able to move onto the rest of the nursery…
Casey