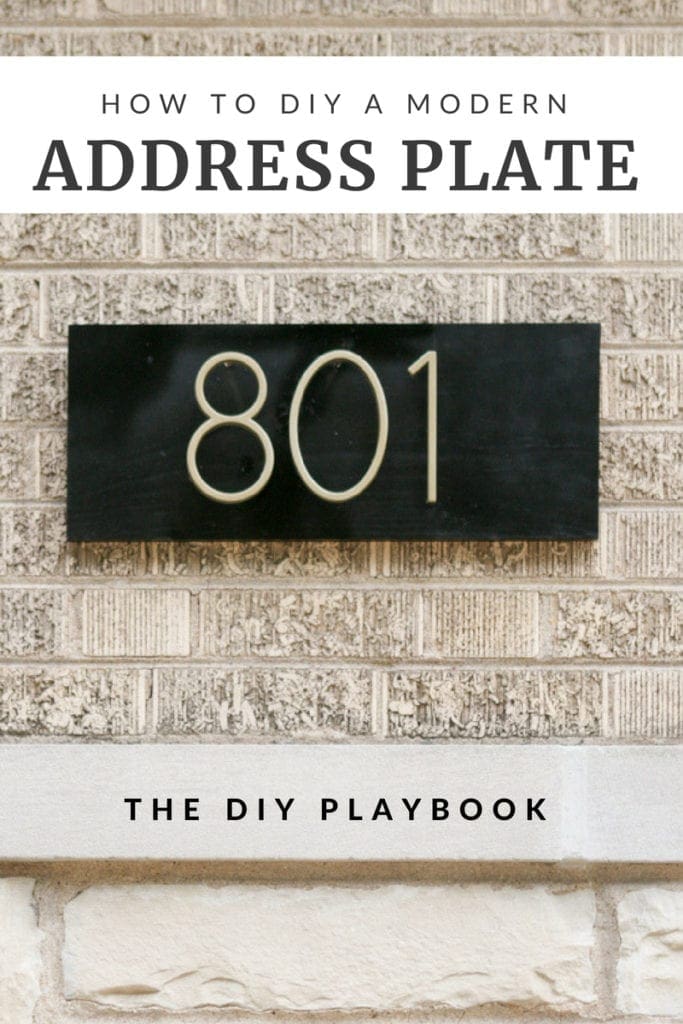
Modern DIY Address Plate
A modern DIY address plate was the last project on my to-do list for the front door entry this summer. Matt and I tackled this same project in my old house and loved how much it instantly updated the look of our home.


I can’t believe it took me so long to finally “address” that outdated plate because this modern DIY address plate only took about an hour (plus dry time). I should have swapped it out so much sooner now that I know what an easy fix it turned out to be. Plus, it looks great with our newly painted door!
Modern DIY Address Plate
Supplies Needed:
- A piece of wood cut to size (mine is a 2 ft piece of pine, but any size would work)
- Black Spray Paint, Gold Spray Paint
- 5″ Floating Address Numbers (I used these ones)
- Clear Silicone
- Picture Hangers
- Drill with Pilot Bit
Step One: Spray Paint
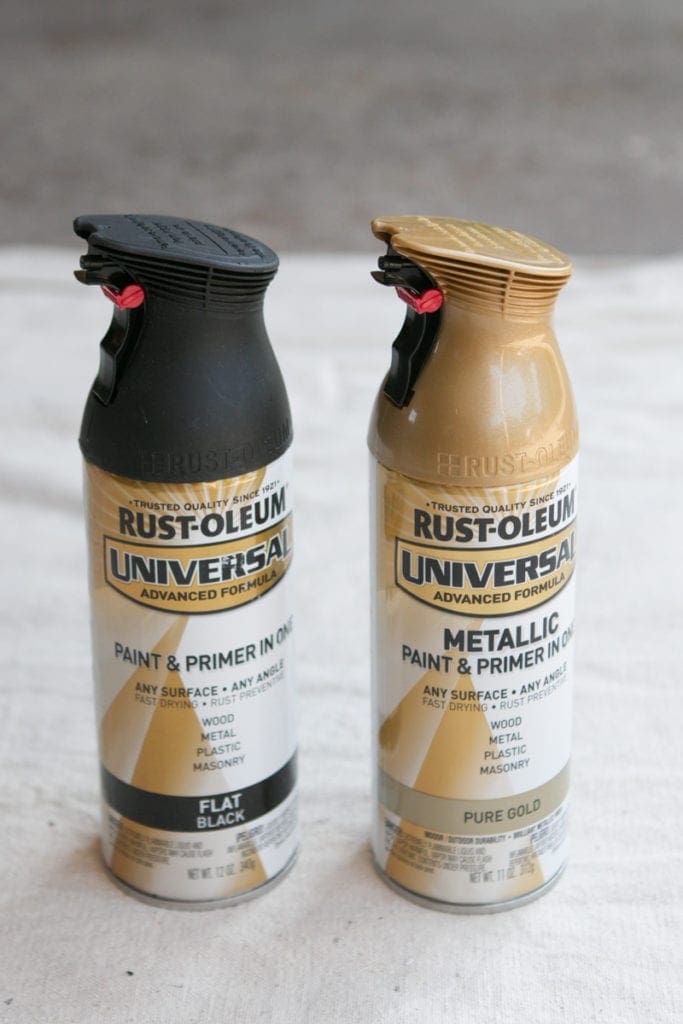
Because the accents on our house (like the shutters and garage door) are black and the hardware is brass, I went with black & brass spray paint for the address plate.

The numbers, which are very affordable, only come in black and silver. But since I loved these and their price so much, I stuck with them and opted to spray paint them brass to match the hardware on our door. 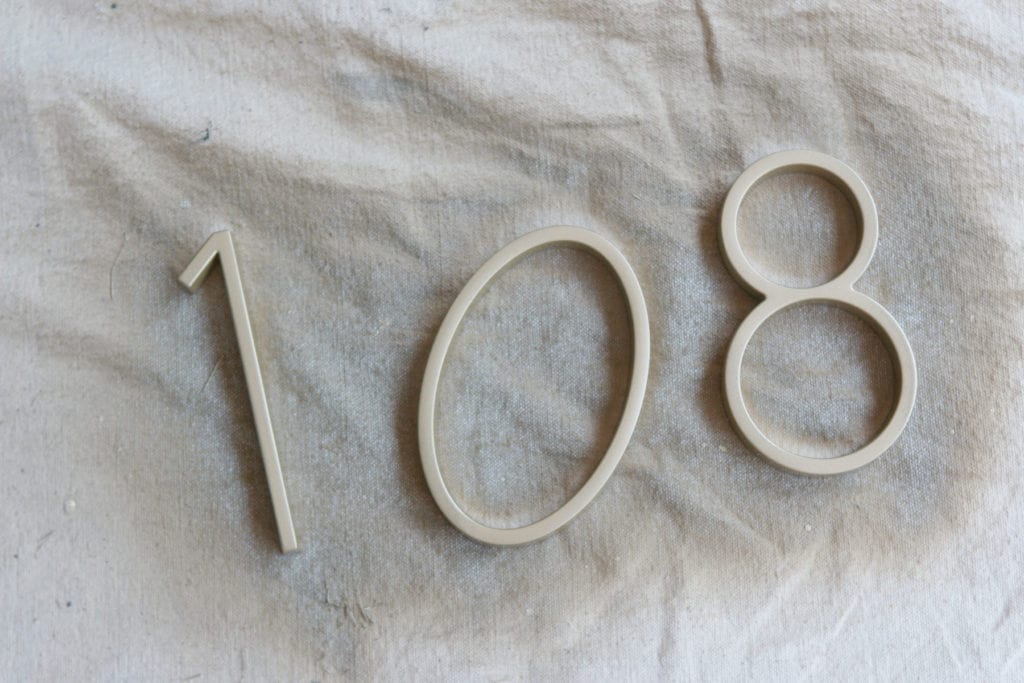
They covered well in one coat, but I added a second just to be safe!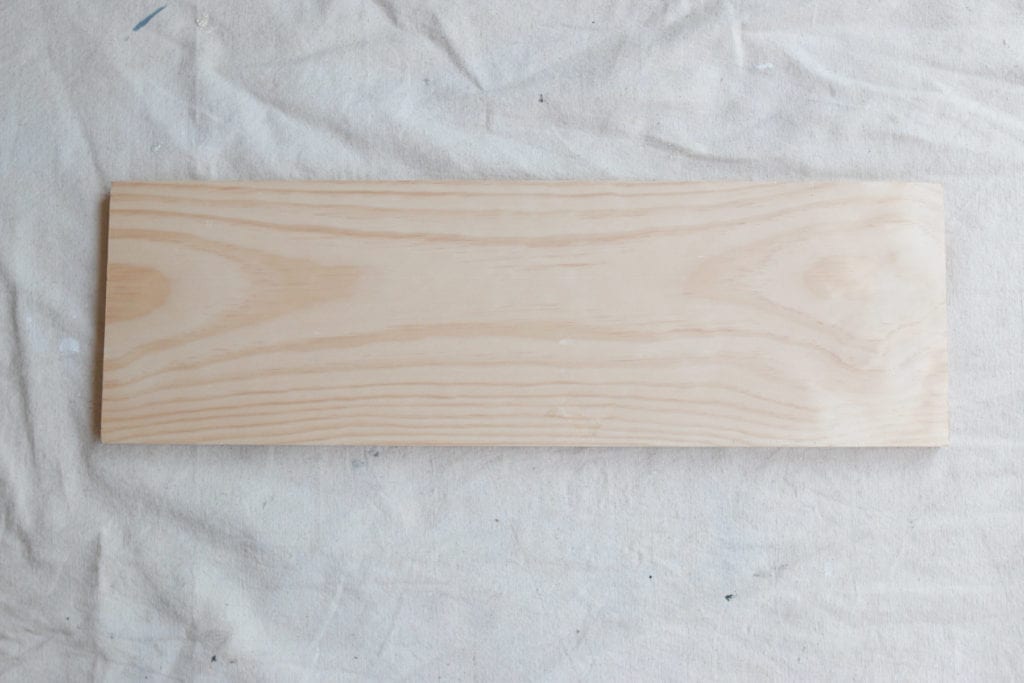
I stained my last address plate because the accent on our red brick house was a bit more in the brown family, but decided to go with a black base this time around. 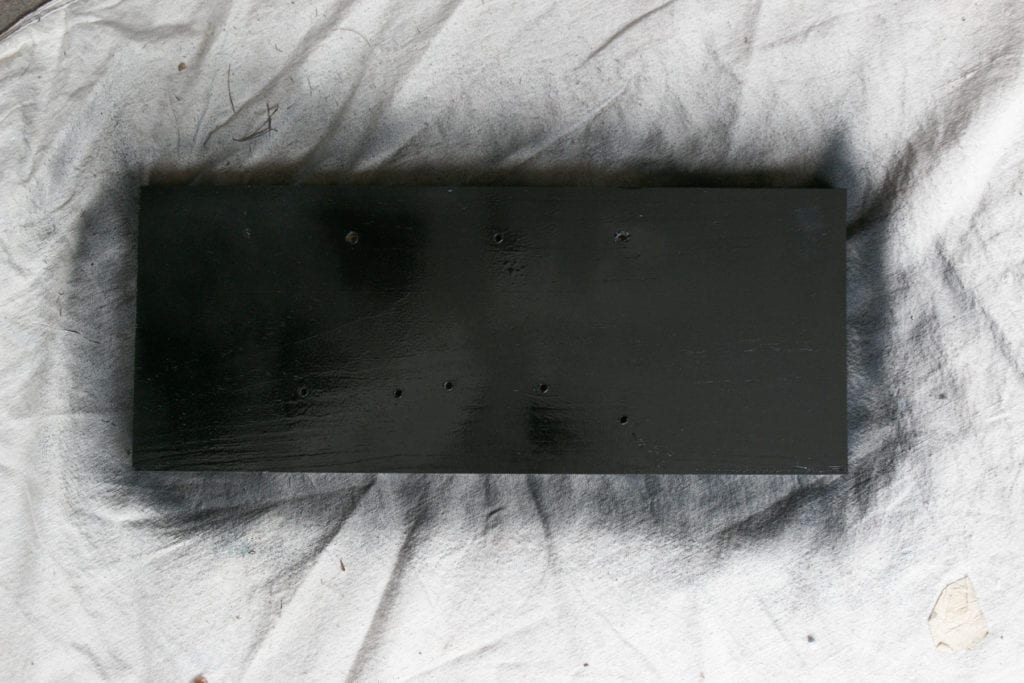 I gave this piece of wood two coats of the black spray paint. I snapped this pic right after I spray painted so it looks a lot more glossy than how it looks dry.
Step Two: Drill Pilot Holes

Now, this part may seem a bit confusing, but the directions that come with these numbers are pretty detailed and will most likely answer any questions you may still have after reading this. 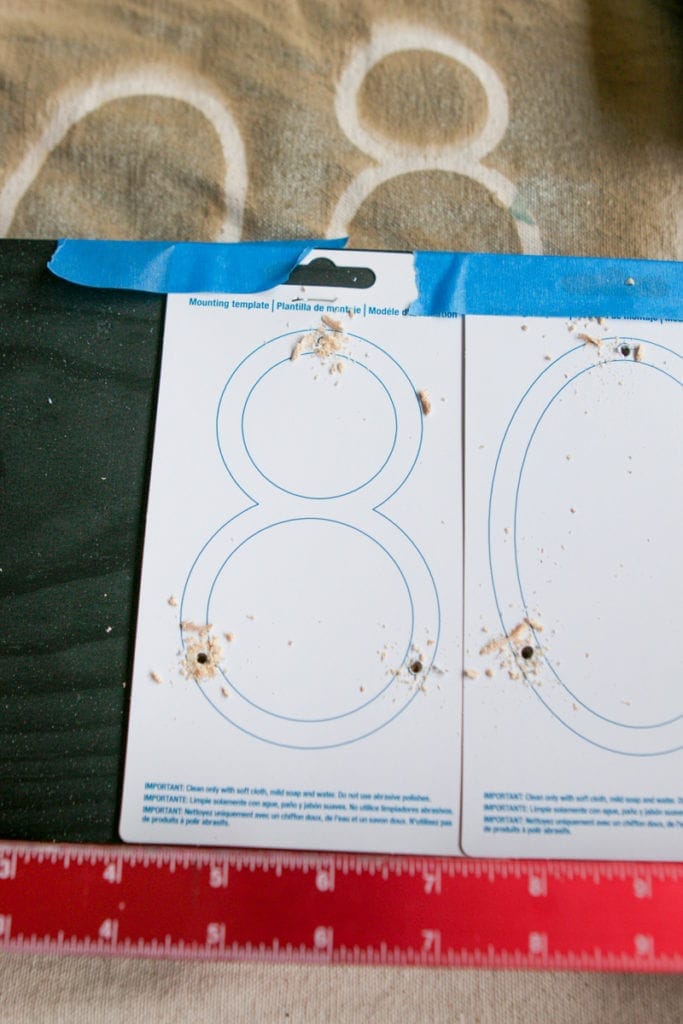
I simply lined up the templates that came with each number, taped them on the board, and drilled the pilot holes for each number. This part seems a little scarier than it actually is. Once you get the hang of it, it’s really a breeze. And the templates make this DIY project so much easier!
Step Three: An Extra Coat of Spray Paint

Now that the front of the numbers is dry, it’s time to attach the screws and spray paint those. The entire screw won’t be exposed but parts of it will, so covering it with an additional coat of spray paint is a safe bet.
I did the same thing with the black wood after I drilled the pilot holes. Because some tiny areas of raw wood became exposed during that process, I went ahead and gave the wood one last coat of black and let all of that dry before moving onto step #4.
Step Four: Add Hardware
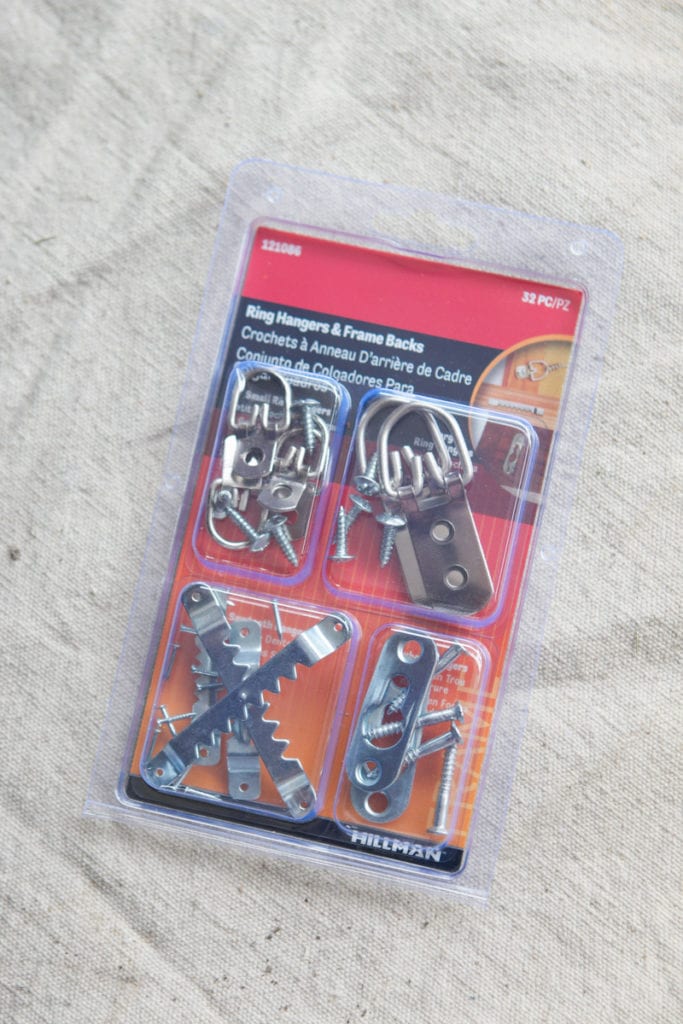
Now before you go ahead and secure the numbers to the front of the board, it’s a good idea to add some type of hardware to the back so that you can hang your address plate on your house. 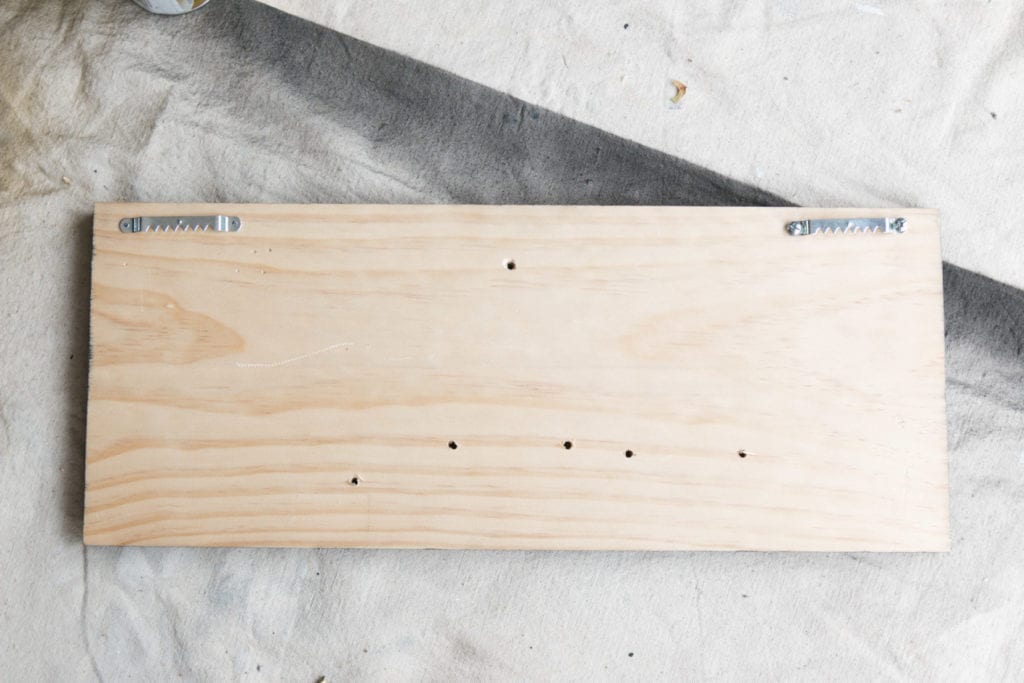
I used the existing screws (and screw placement) from the original address plate as a guide for me to add picture hanging hardware. I simply attached it on the back of the wood so that I could easily hang this plate on the brick, right where the old one was. Easy enough, right?!
Step Five: Glue In Numbers
Last but not least, it’s time to add the numbers into the pilot holes you previously drilled. The directions have lots of details, but essentially all you need to do is squeeze clear-drying silicone into the pilot holes.

Then you stick the numbers right into the holes and let them dry. Once the silicone dries clear, you are all set to hang this Modern DIY Address Plate on the house!
Step Six: Hang & Enjoy!

Excuse the inconsistent black paint in this picture, I actually took photos of my new address plate before it was completely dry because I was just so excited about the new look!
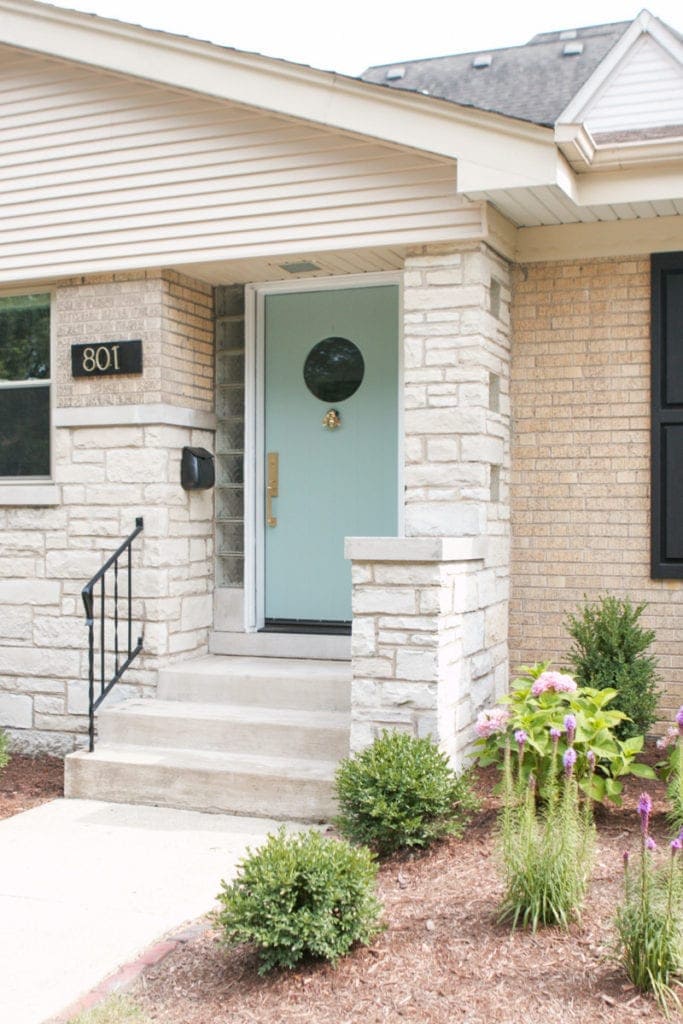
But can you even believe the difference?! Such a simple DIY project that made a huge impact on our curb appeal. Love little projects like that! If you want to check out the other modern address sign we made for my first house (using paint sticks!) check out this post.
And here’s a blog post showcasing our entire landscape plan and patio before and after.
Bridget