Why I Always Choose Paste The Wall Wallpaper
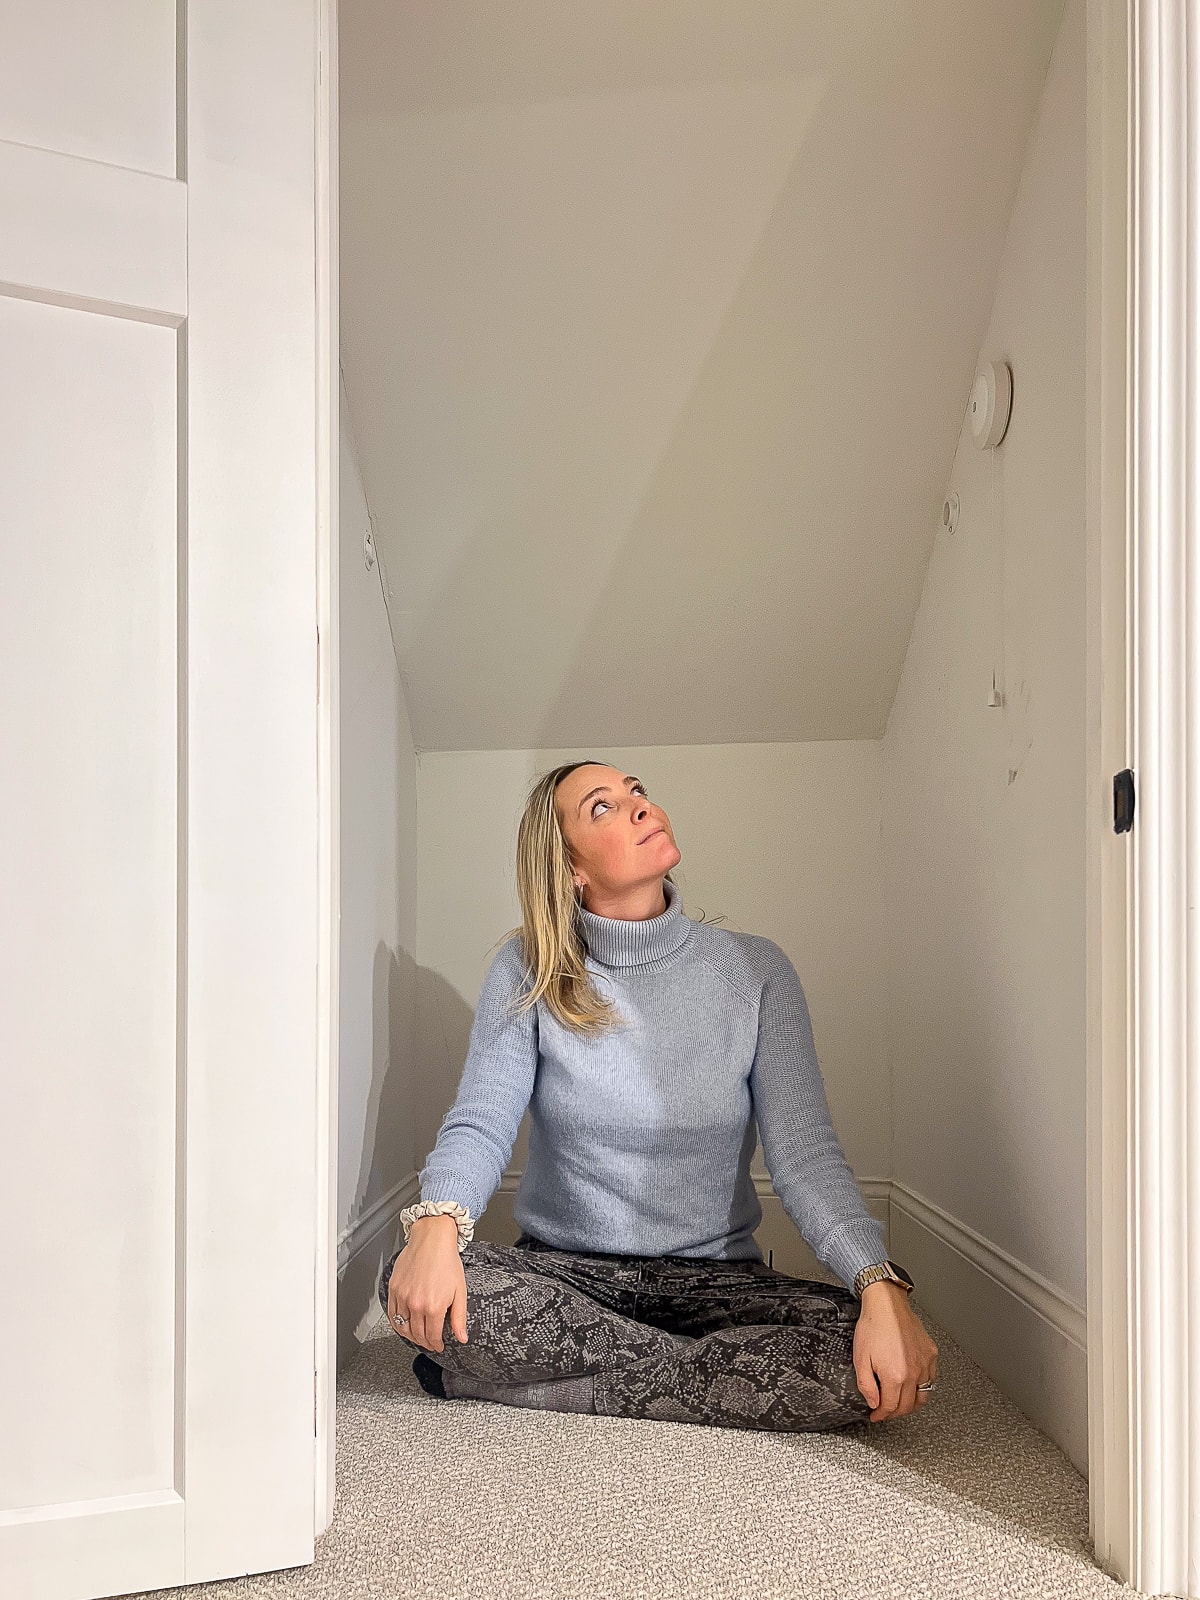
Last month, I revealed my next fun project in our basement. I’m working on an under-the-stairs playroom for our kids and turning it into a space-themed spot for them to get creative. The first step on my mission is to get the walls in that little white closet feeling like outer space.
I considered painting it and stenciling on some stars. But in the end, I knew that wallpaper was the way to go!
I have done about a dozen wallpaper installations and learned so much from all of these DIY projects. The biggest thing I’ve learned is that paste the wall wallpaper is the easiest installation. When possible, I always try to choose a wallpaper that is installed with that method.
Wallpaper Installation Types
Here are the various wallpaper installation types and my thoughts about each method. I’ve ranked them from most difficult to easiest, in my personal experience.
- Peel & Stick: This has a sticky backing that you peel off as you add it to the wall. I’ve found this to be the most difficult to install because you don’t have much wiggle room. It can be difficult to adjust as you go. I know this is often a renter-friendly wallpaper project because it’s touted as being removable. I’ve never removed it before, so I’m not sure how well it works!
- Pre-Pasted Wallpaper: The wallpaper paste is already on the back of this wallpaper and you dunk the paper in water to activate it. I’m not a huge fan of this one either, because it’s often very messy with lots of water drips!
- Paste The Wallpaper & Book It: This wallpaper comes without any paste on the back, so you add it yourself. Once the paste is on, you fold the paper paste-to-paste to “book it”. This allows the paper to relax before you apply it to the walls. I had to do booking when I added wallpaper inside picture frame molding.
- Paste The Wall Wallpaper: The back of the wallpaper is bare. You simply add paste to the wall and hang the wallpaper up. For me, this is the easiest type of wallpaper, with minimal mess.
Also, it’s important to note that wallpaper cannot be installed on walls with texture. We have smooth drywall in our home, so I’ve never had to deal with textured walls. However, from my research, I know that you can skimcoat your textured walls so you have a smooth surface for a project like this. It’s pretty time-consuming, but worth it if you want the wallpaper look!
Past Wallpaper Projects To Peruse

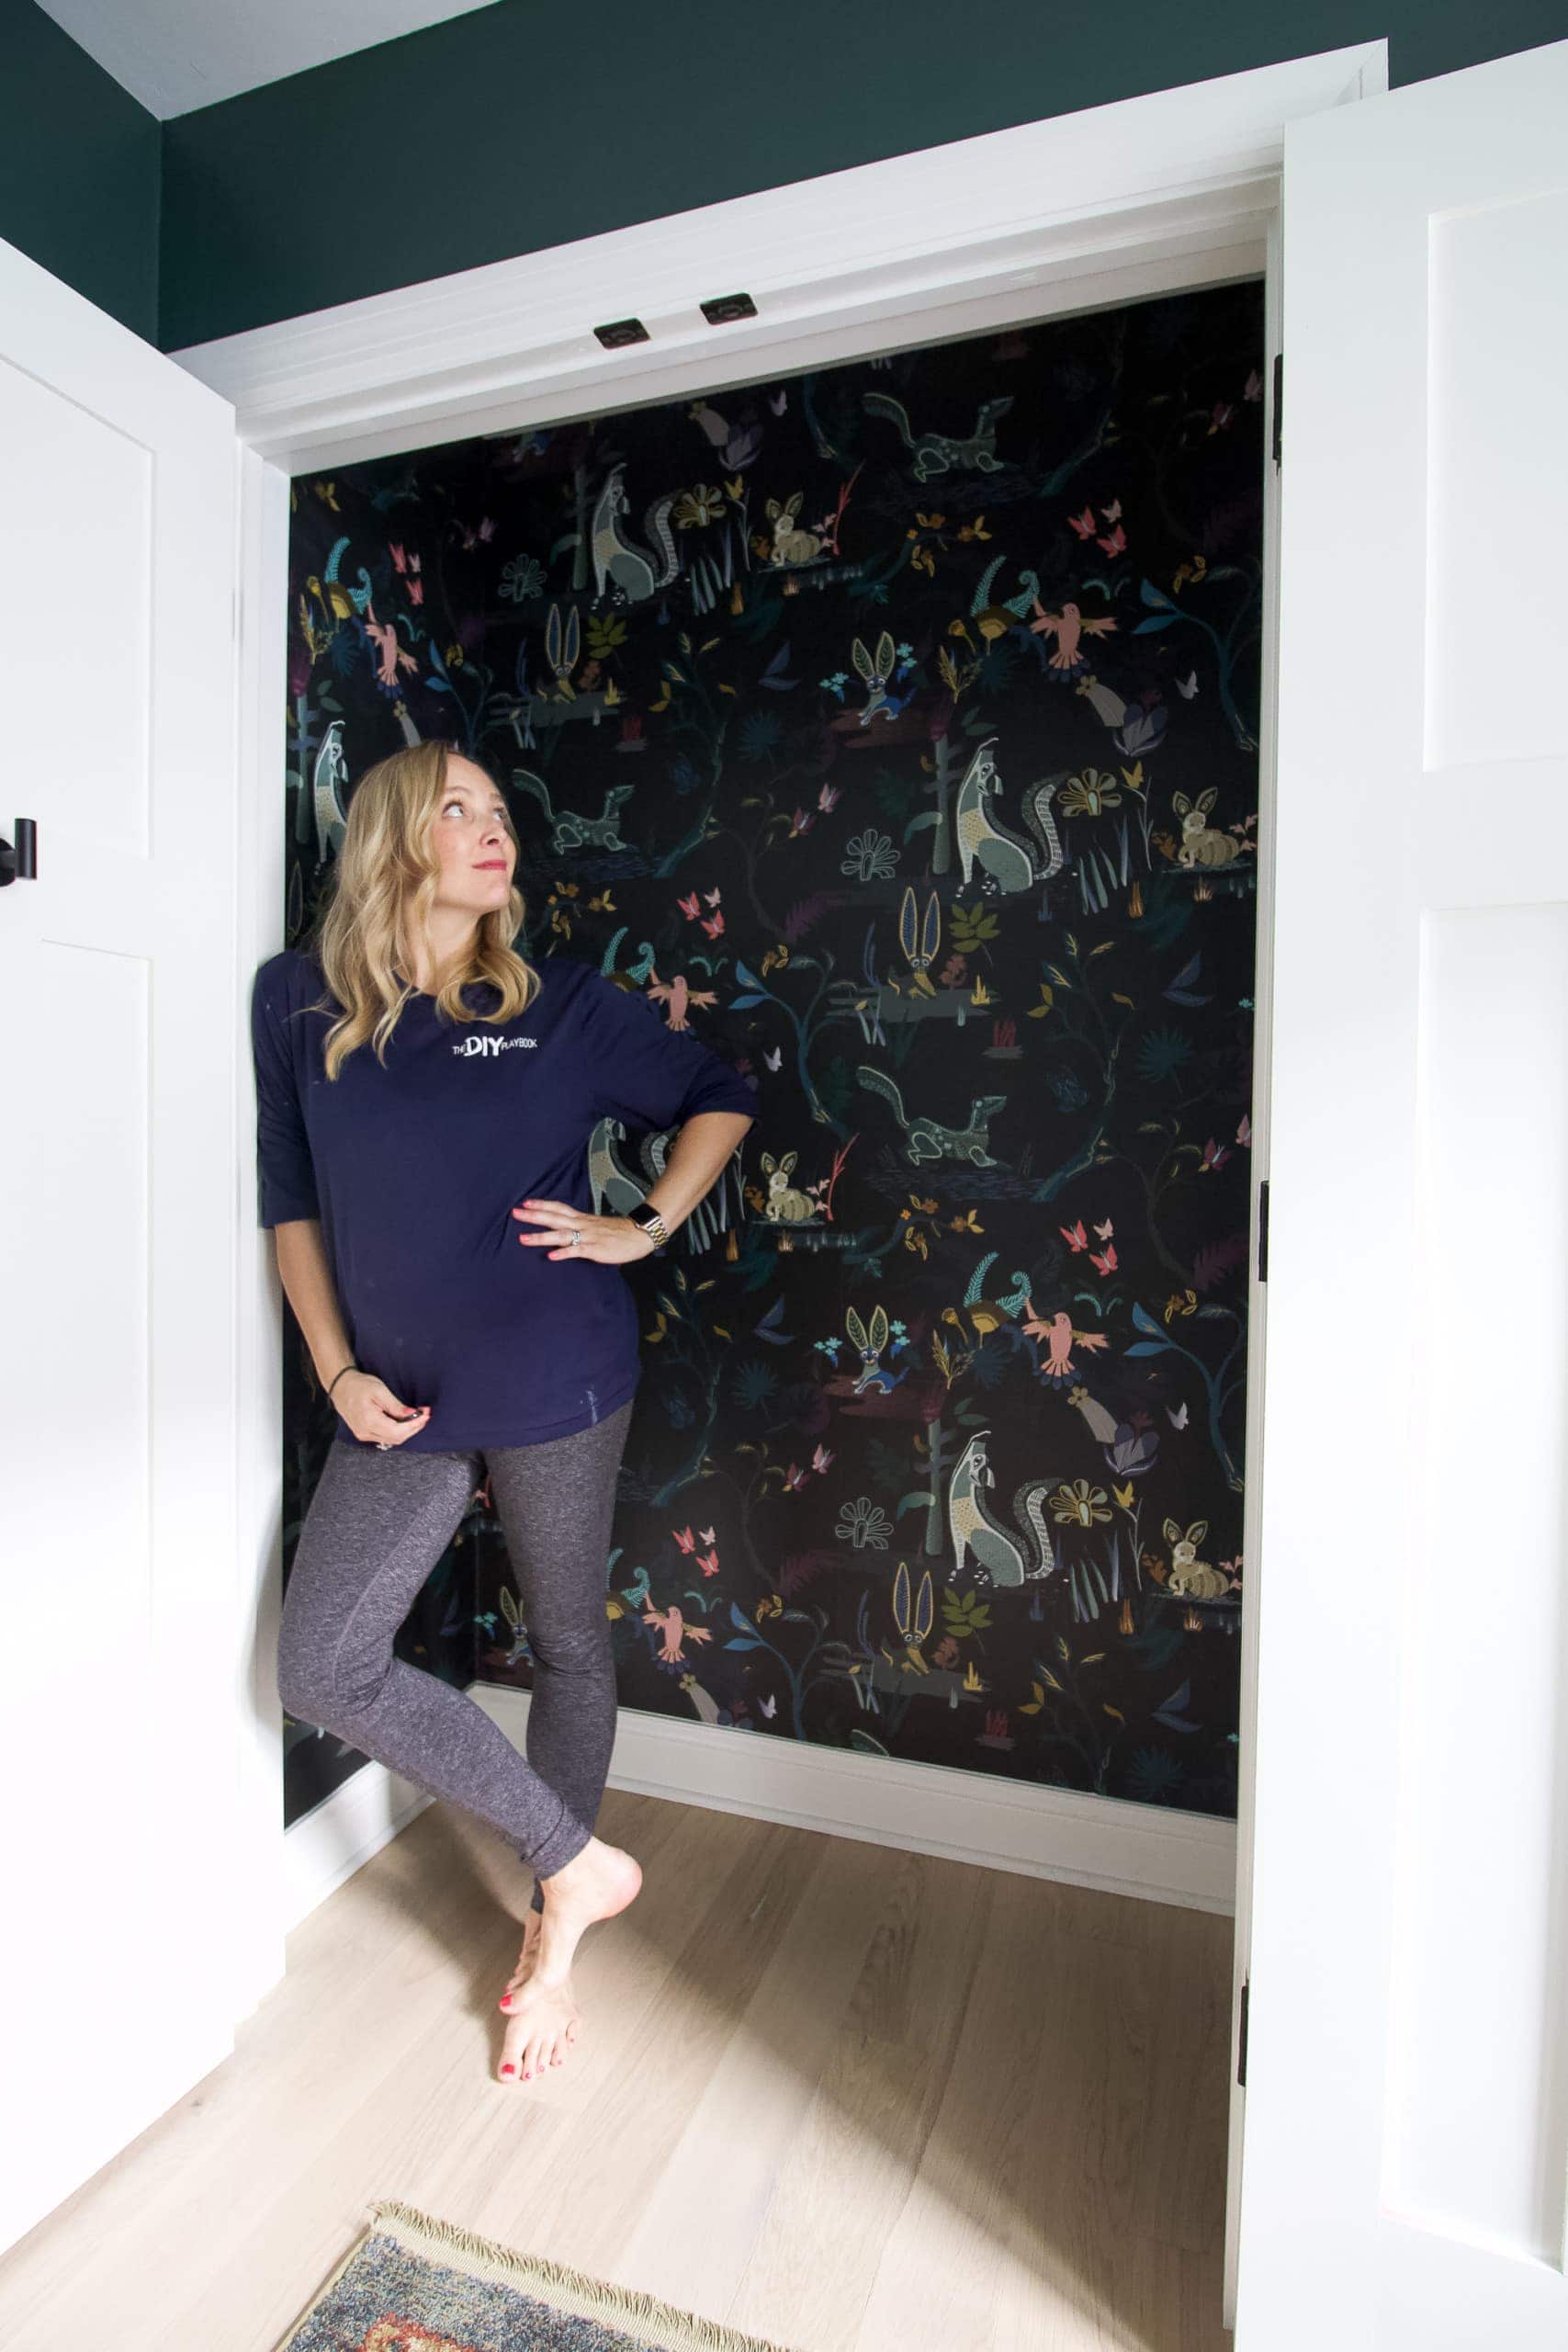
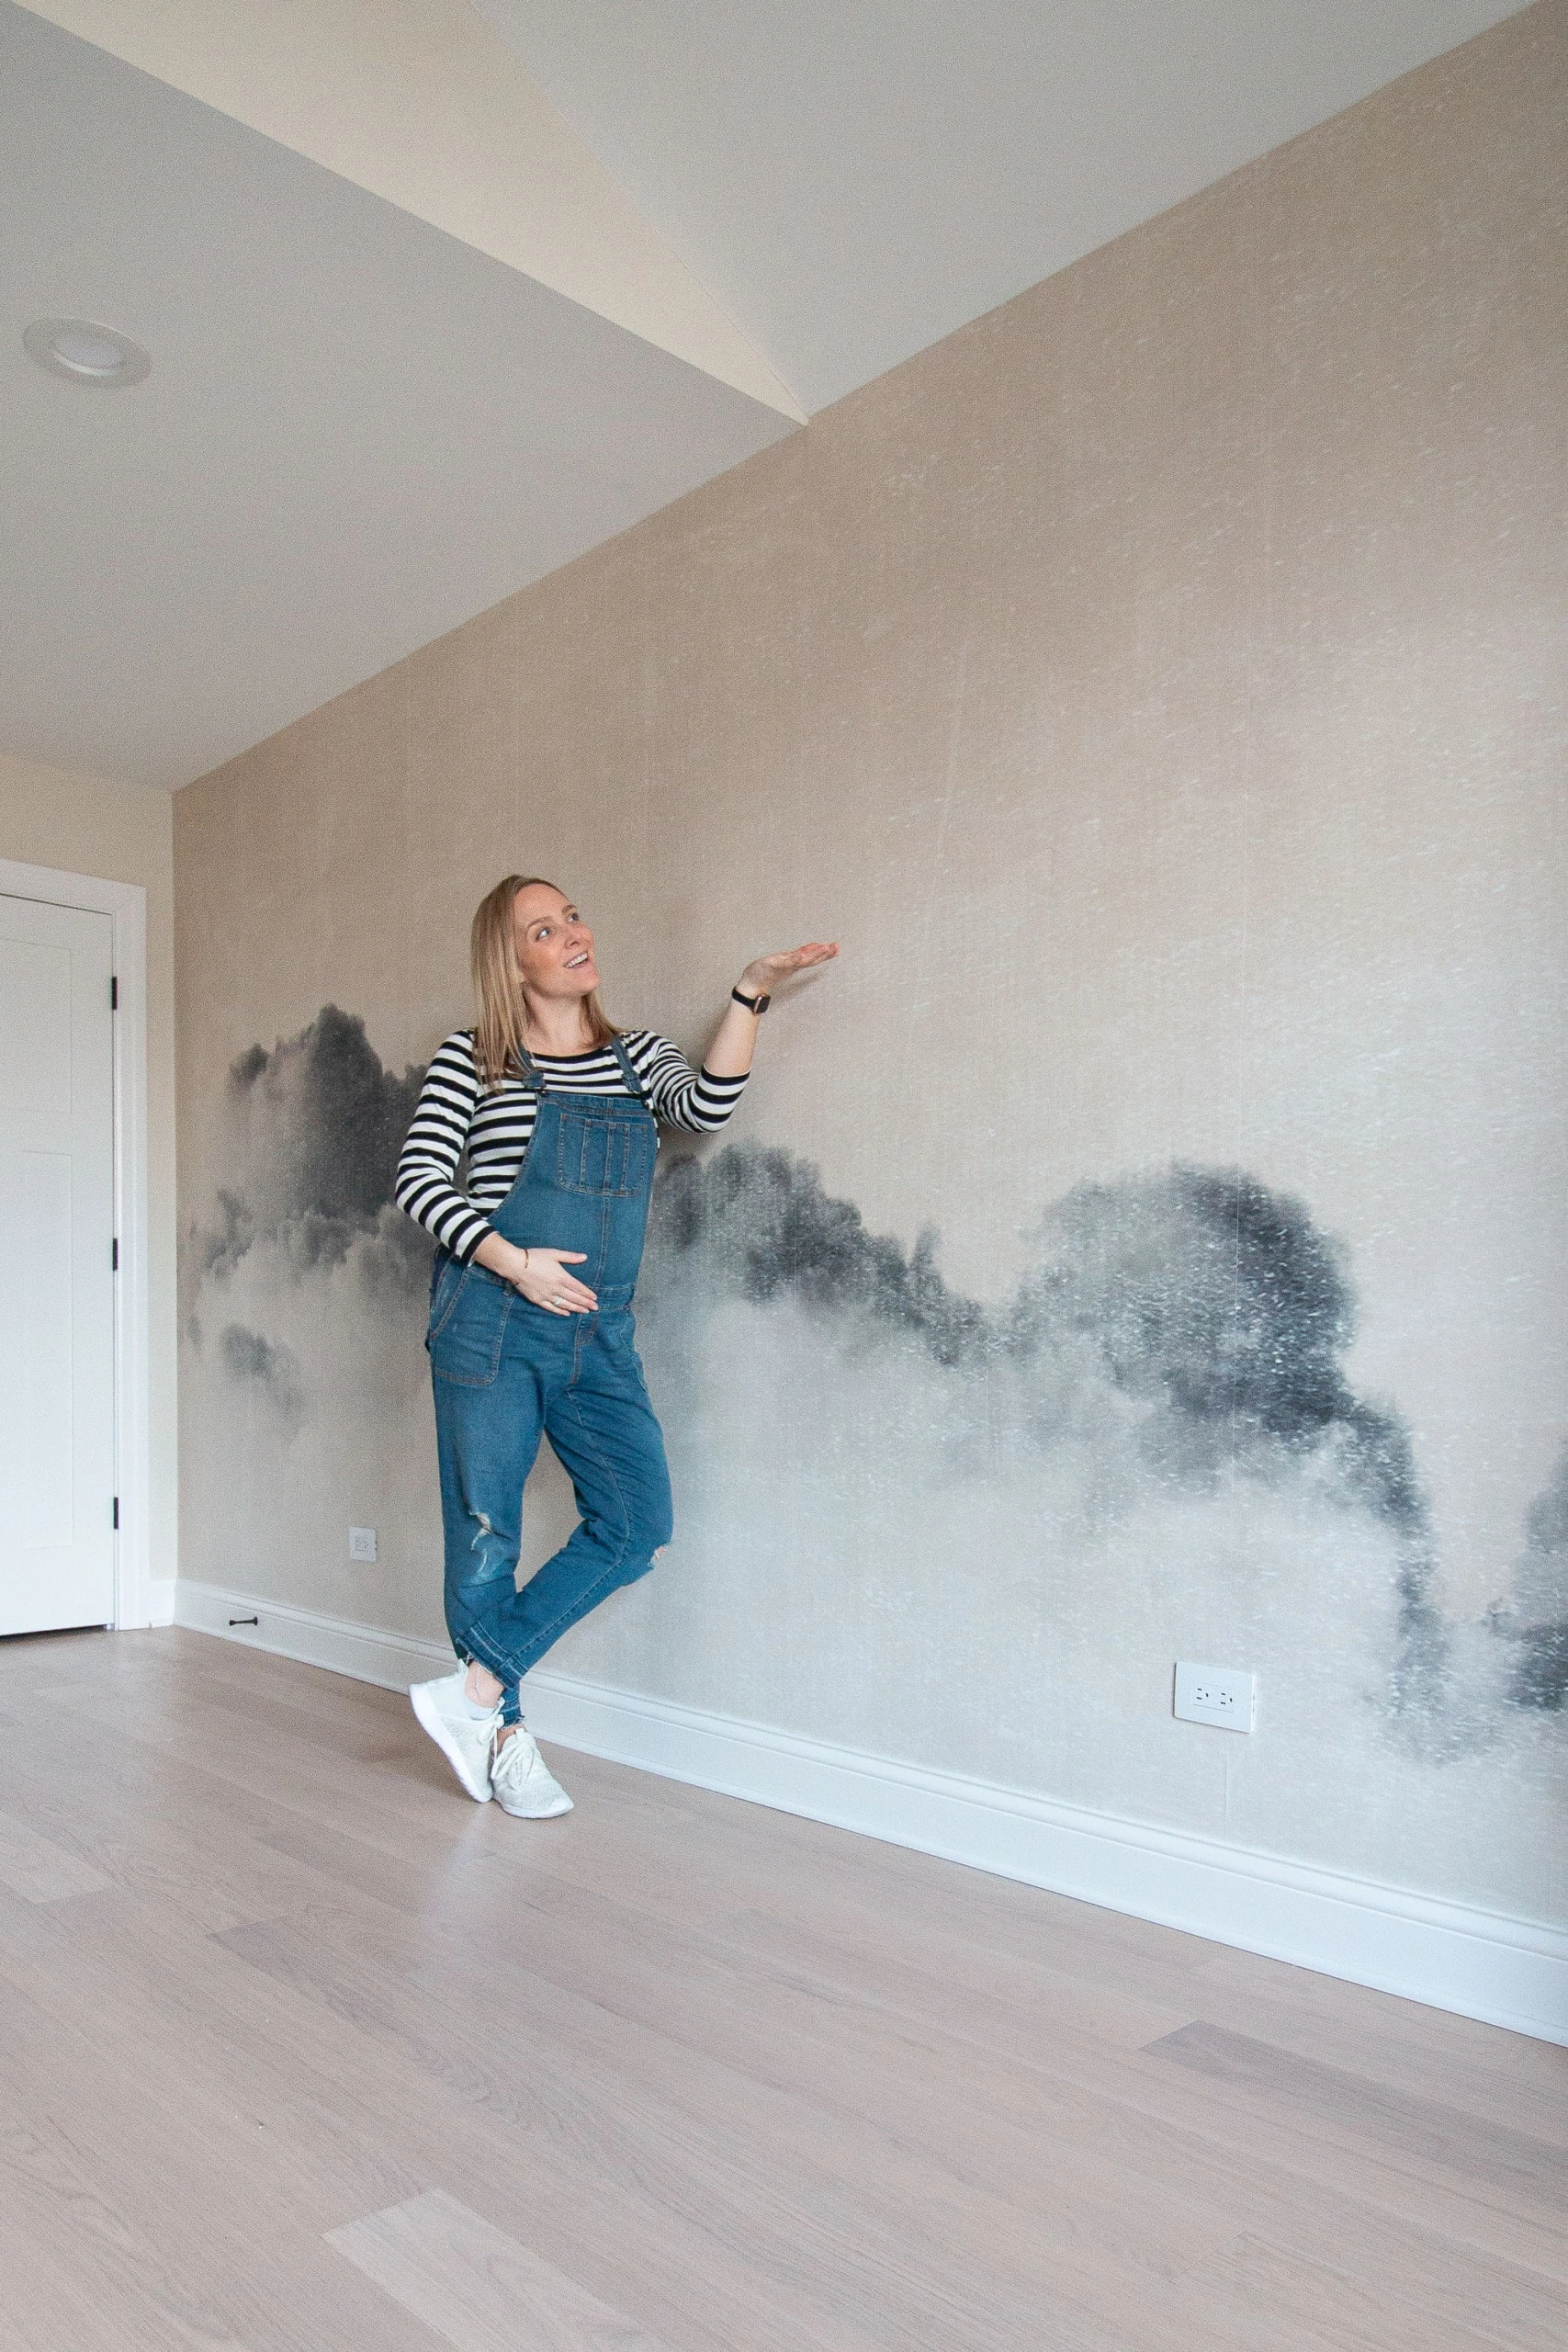

This isn’t my first rodeo when it comes to wallpaper. All of these blog posts offer a step-by-step guide for installing these wallpapers along with my best tips.
- Peel & stick wallpaper
- Rory’s nursery closet
- Mural in my home office
- Ellis’ nursery closet
- Wallpaper on our bedroom ceiling: This was an advanced project, but wow, it was worth the effort!
- Panoramic mural in our basement
- How to remove wallpaper (I promise, it’s not that bad!)
The first time, I was terrified. What if I ruined the wallpaper? I’ve since learned that this is a very doable DIY project! Wallpaper has lots of wiggle room, so if it’s not in the correct spot, you can always peel it back and shift it around before the glue dries. Don’t be afraid to give this DIY project a try. Trust me!
Finding A Space-Themed Wallpaper For The Closet
Now that you have a better understanding of why I only consider paste the wall wallpapers for my DIY projects, let’s discuss how I chose the perfect space-themed paper for this closet.
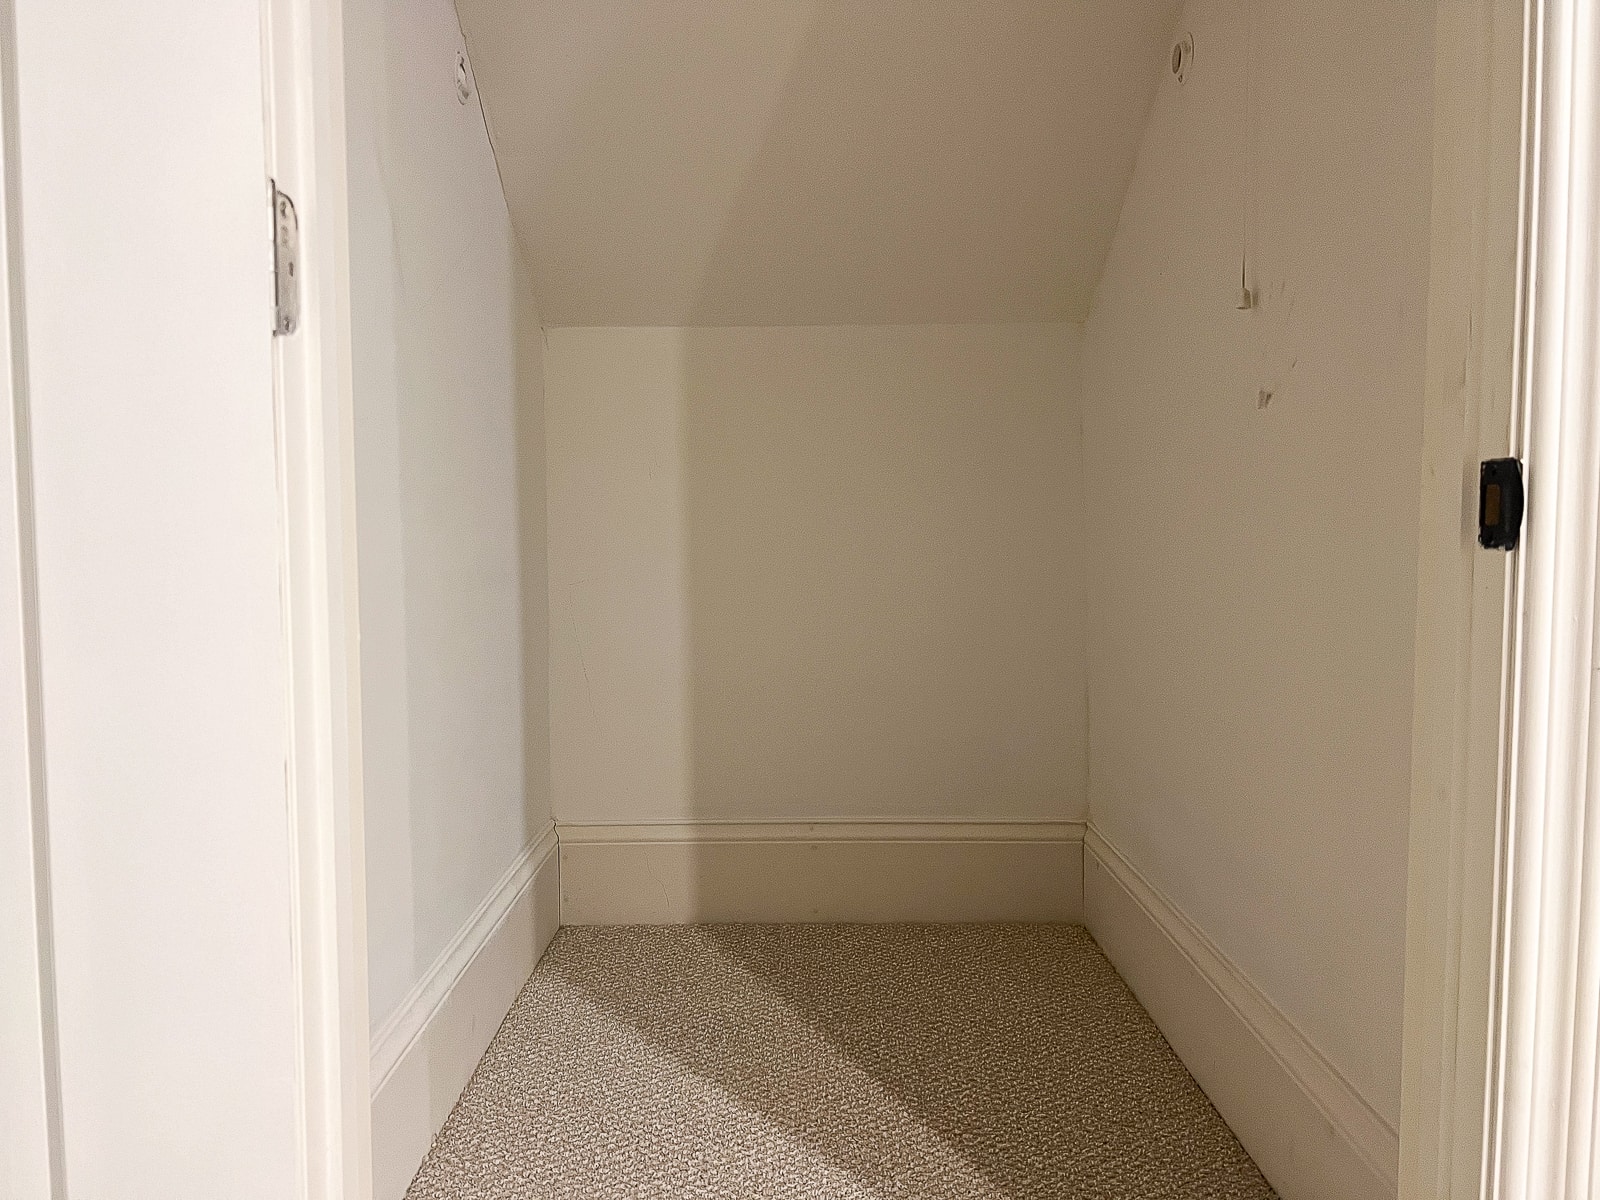
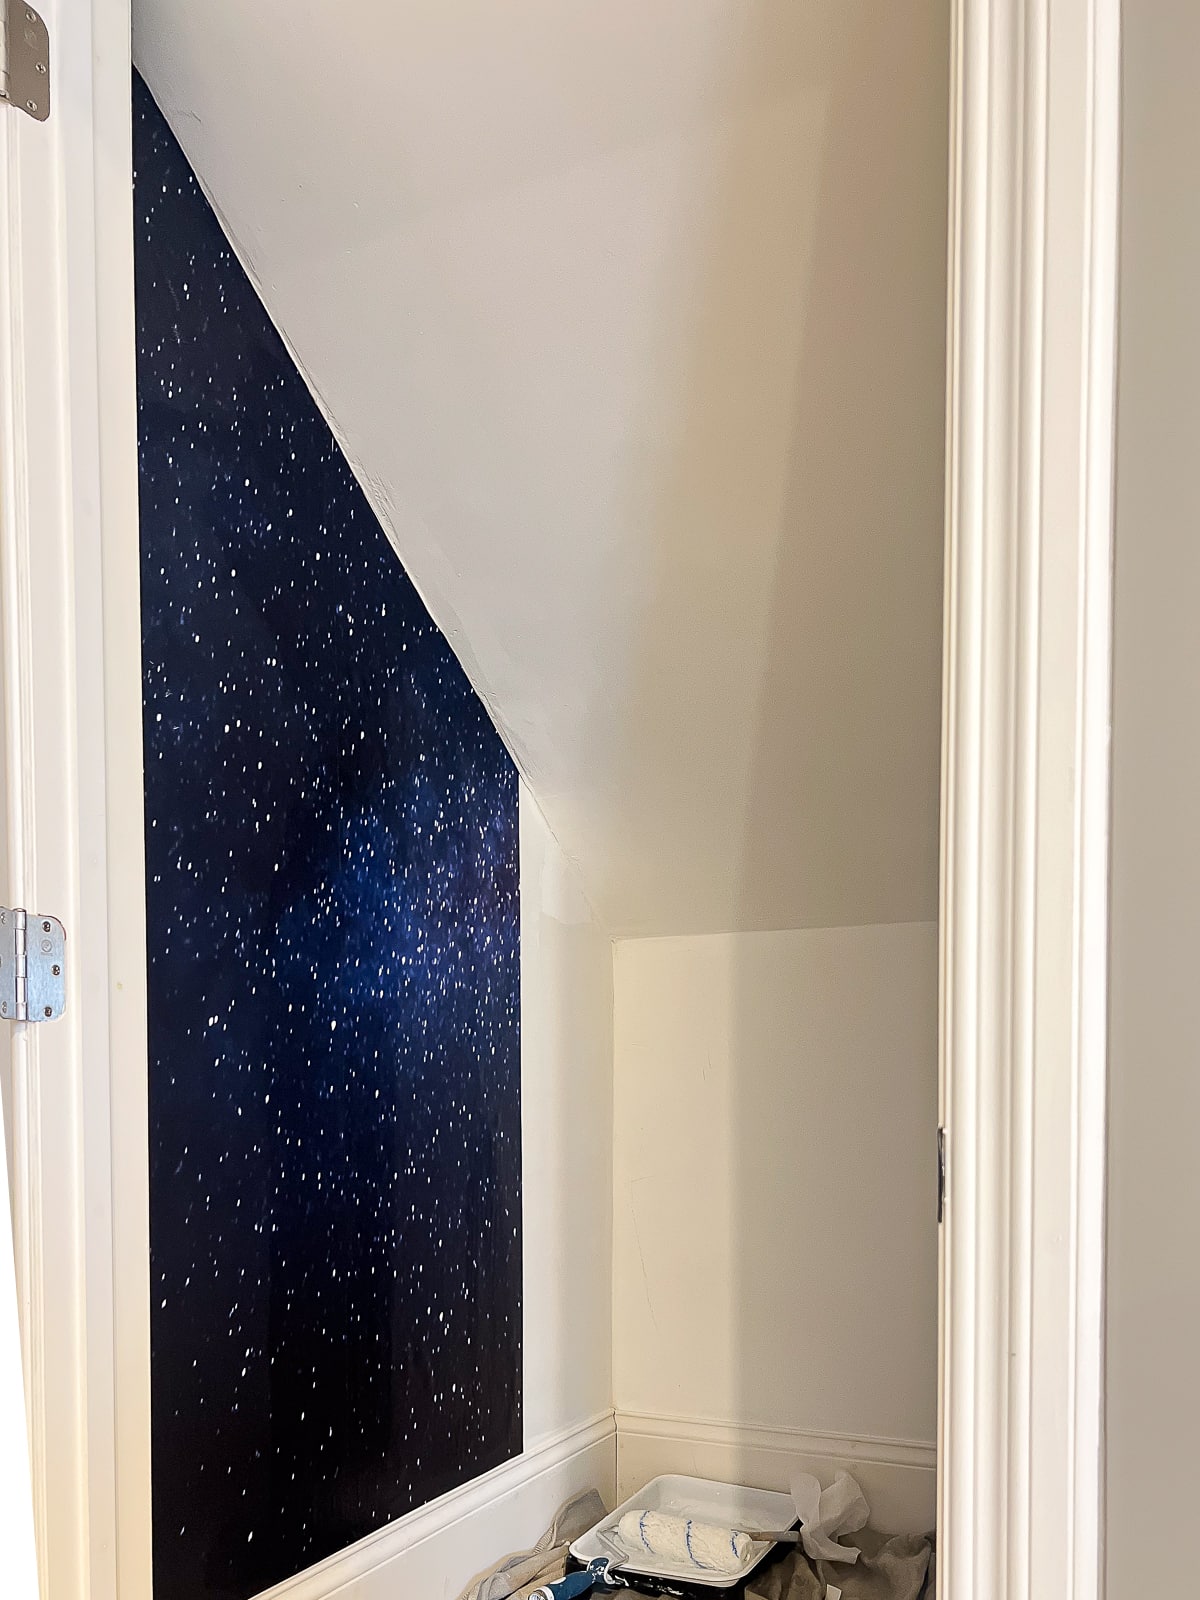
If you take a look at the closet, you’ll see that I have three walls to work with. Before ordering, I had to figure out how I was going to incorporate the slanted ceiling into the wallpaper design. It would have been easier and less expensive if I only wallpapered the three bottom walls. However, I knew that the ceiling was the perfect opportunity to showcase some gorgeous stars in this space-themed room, so it had to be covered too.
I considered some traditional wallpapers with a pattern repeat but I, was unsure of how the seams would look from the side walls to the ceiling, with the pattern not lining up. In the end, I decided that a mural was probably my best bet to make it look seamless. I would do the pattern on the left, the back wall up the ceiling, and then the right wall. This is the one I chose!
When ordering a mural, you put in the dimensions for the entire span of the wall. Here, I had to go with one that was 10 feet tall because of that middle portion going from the lower wall up the ceiling. This added to the price and meant I would have quite a bit of excess wallpaper. But, I knew that it was the only way to achieve the best look in the closet.
Most companies have a wallpaper calculator right on their site that helps you determine how many rolls you will need for your particular space.
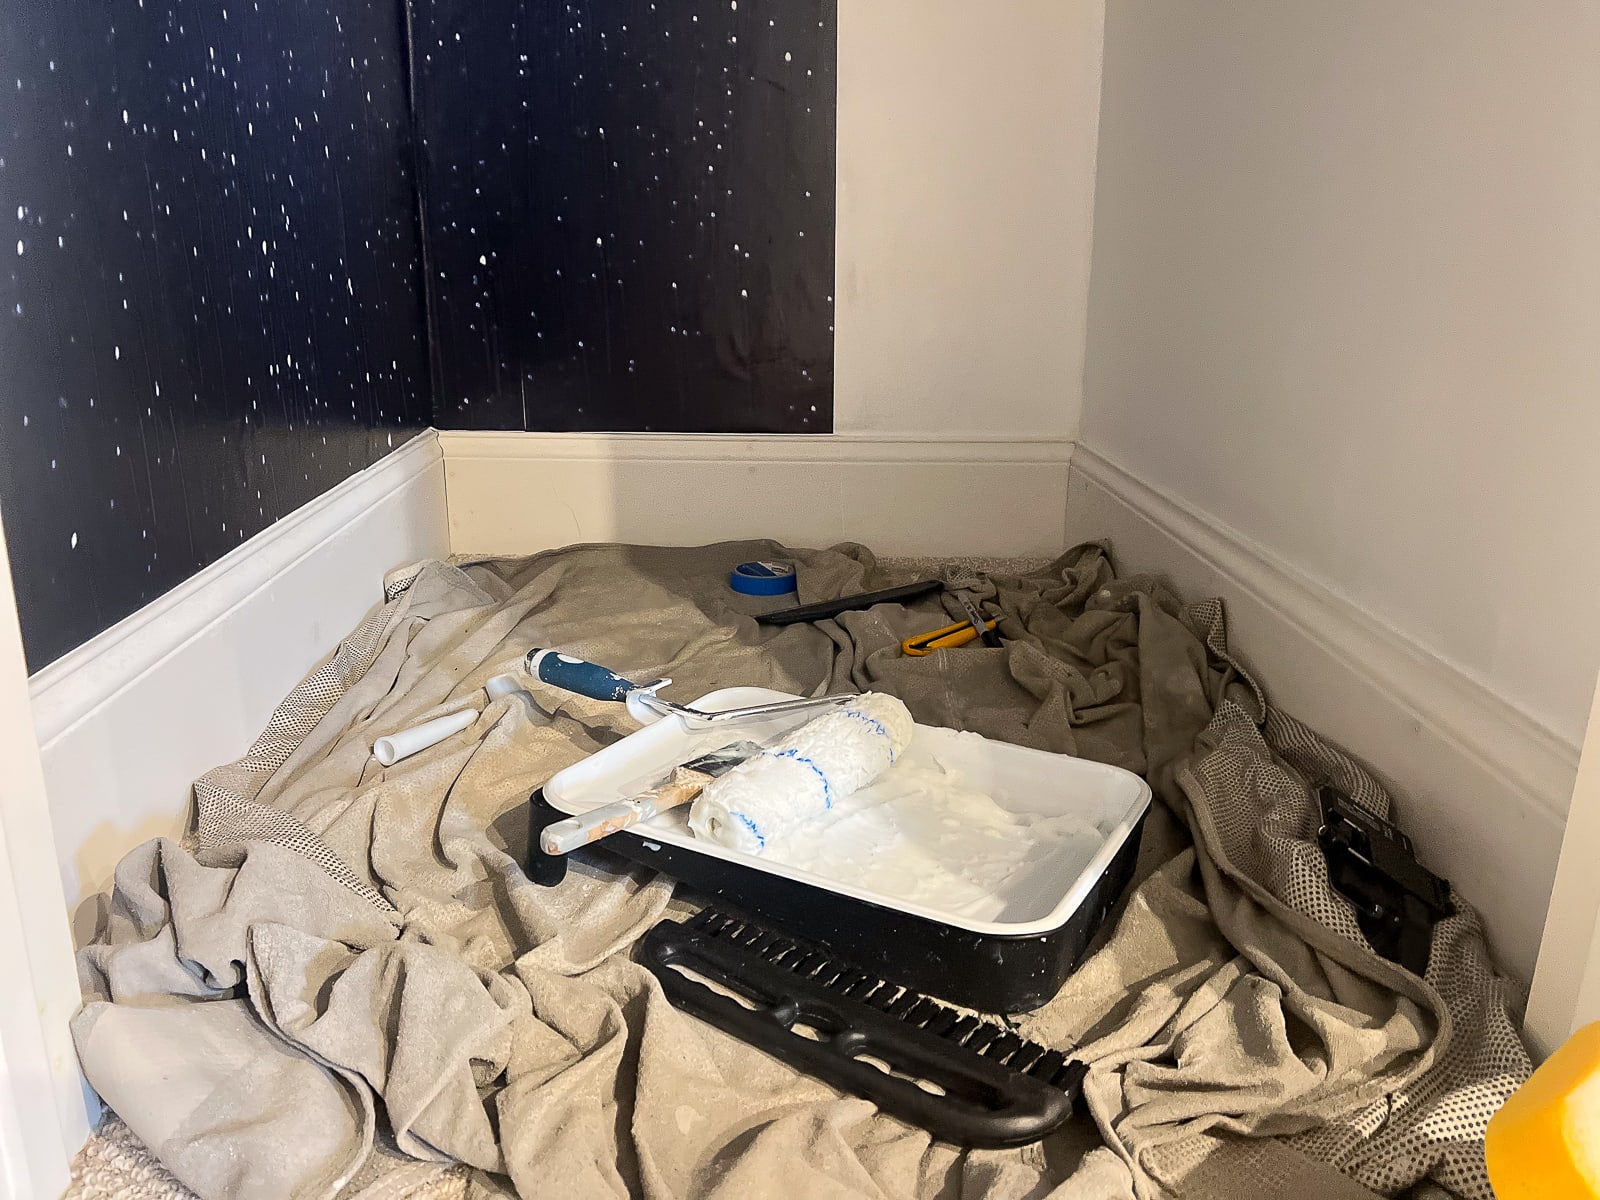
Supplies You’ll Need
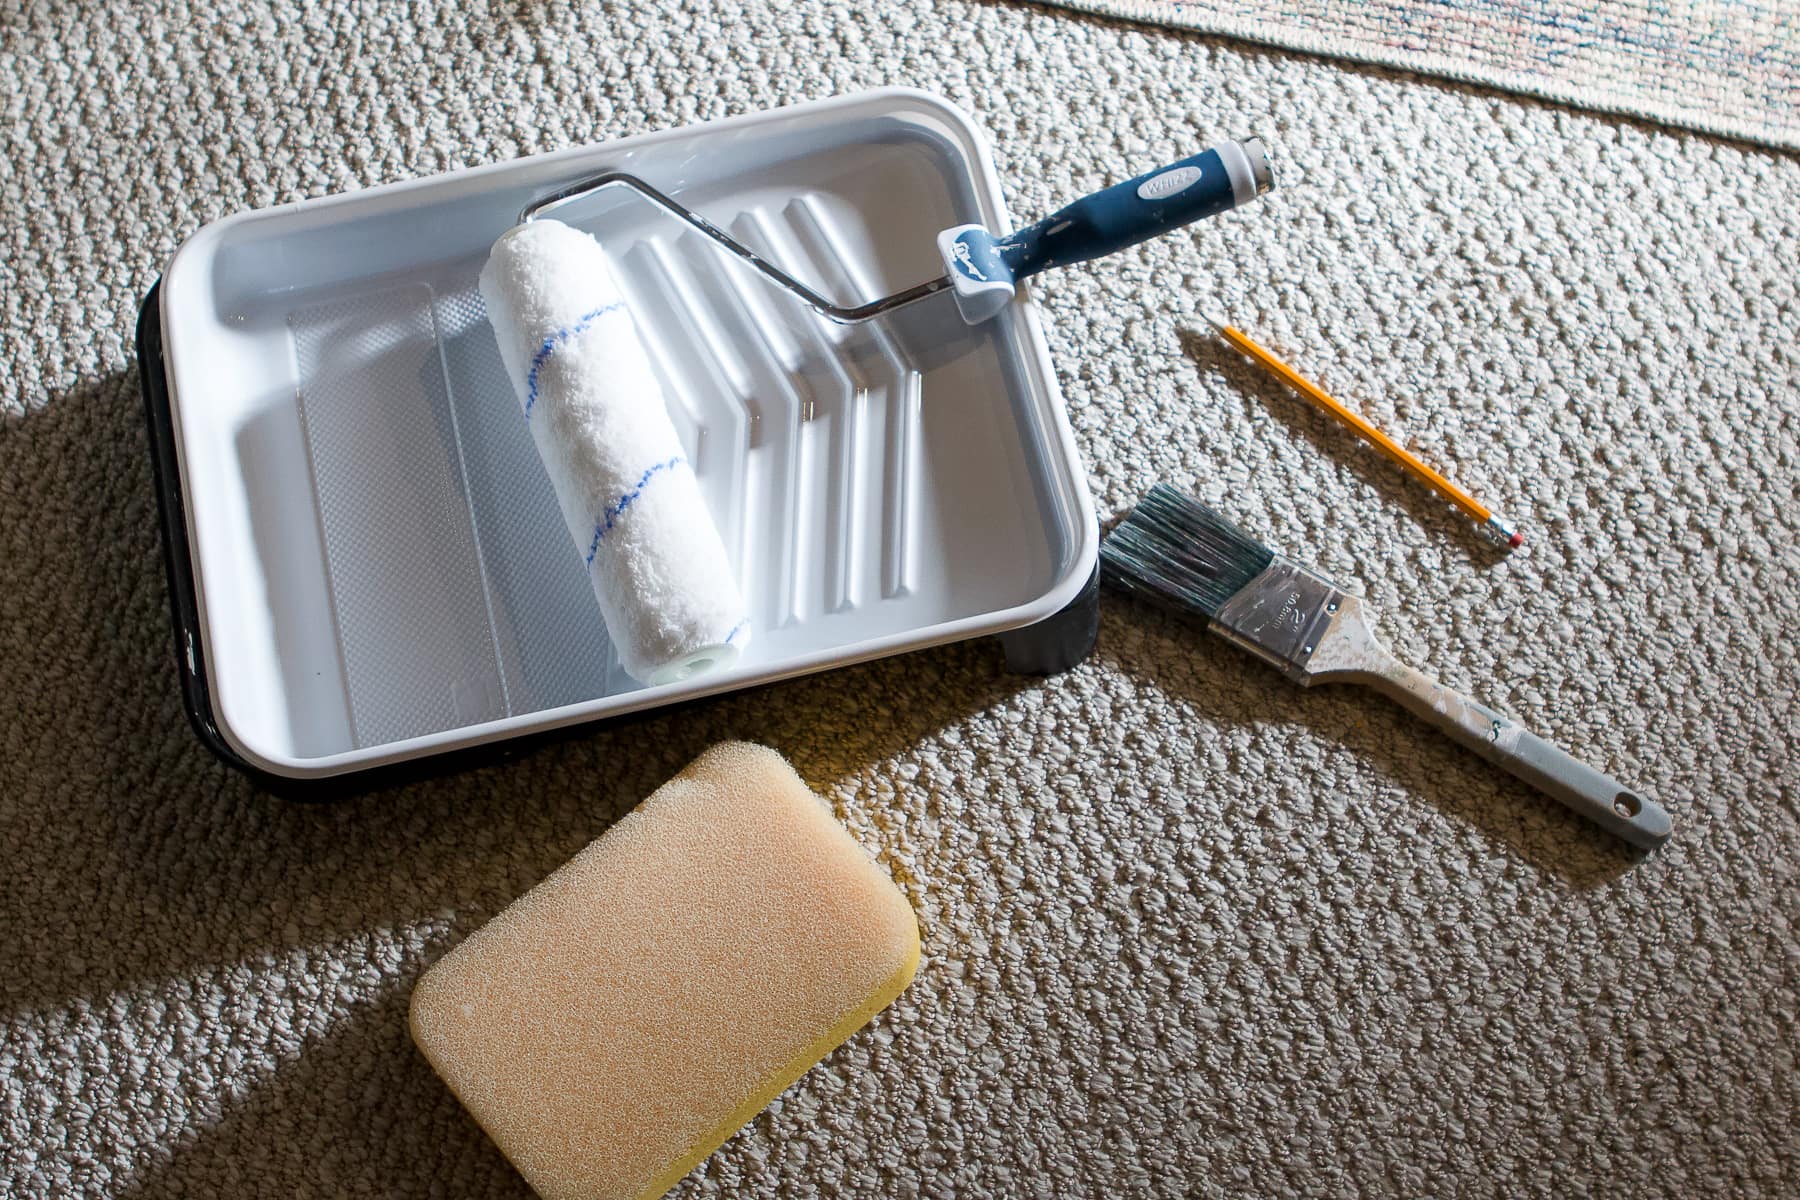
Here’s a list of the necessary tools you’ll need to grab. It may seem like a lot, but when you do one wallpaper project you’ll have all of these supplies on hand the next time you do it.
Affiliate links used.
- Wallpaper
- Wallpaper Adhesive (My mural came with paste, but this is the one I recommend.)
- Paint Tray & Roller
- Paint Brush
- Tape Measure & Pencil
- Spirit Level
- Metal Smoothing Tool
- Wallpaper Brush
- Snap-Off Utility Knife
- Sponge & Bucket
- Seam Roller
- Primer
- Scissors
- Drywall Spackle Kit
Prep Your Walls
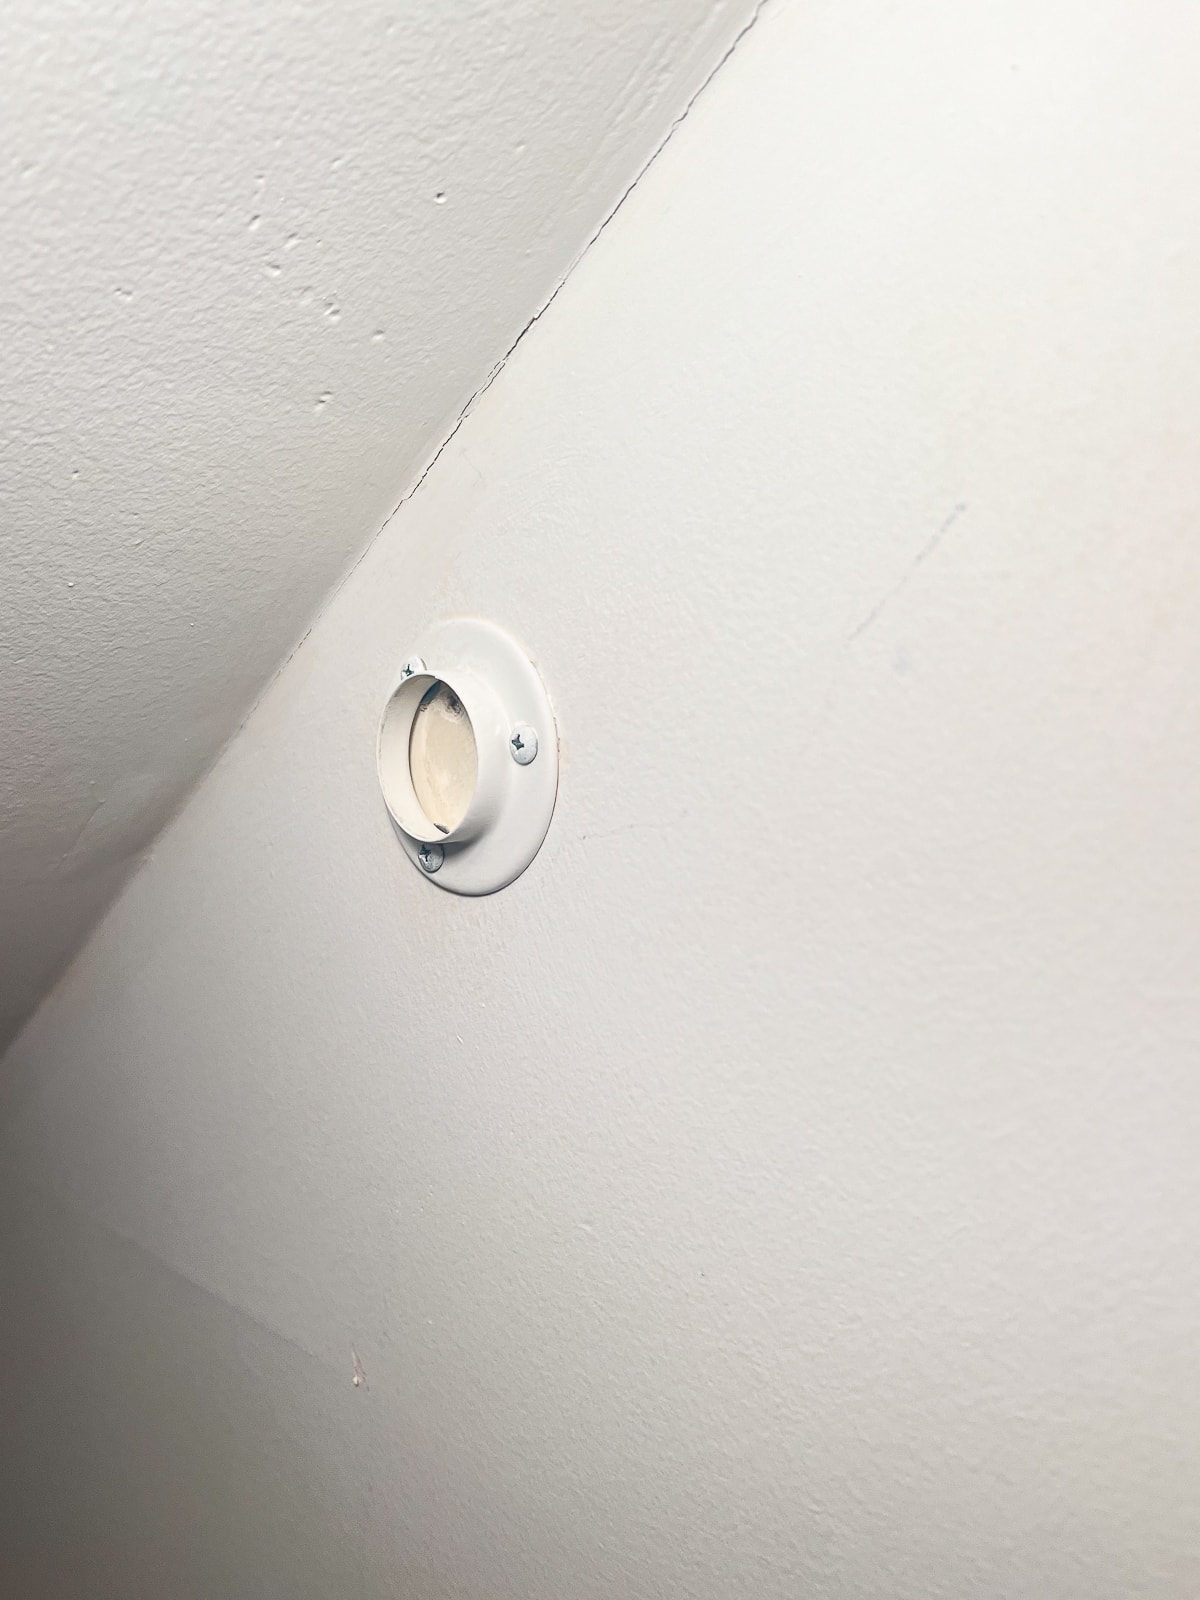
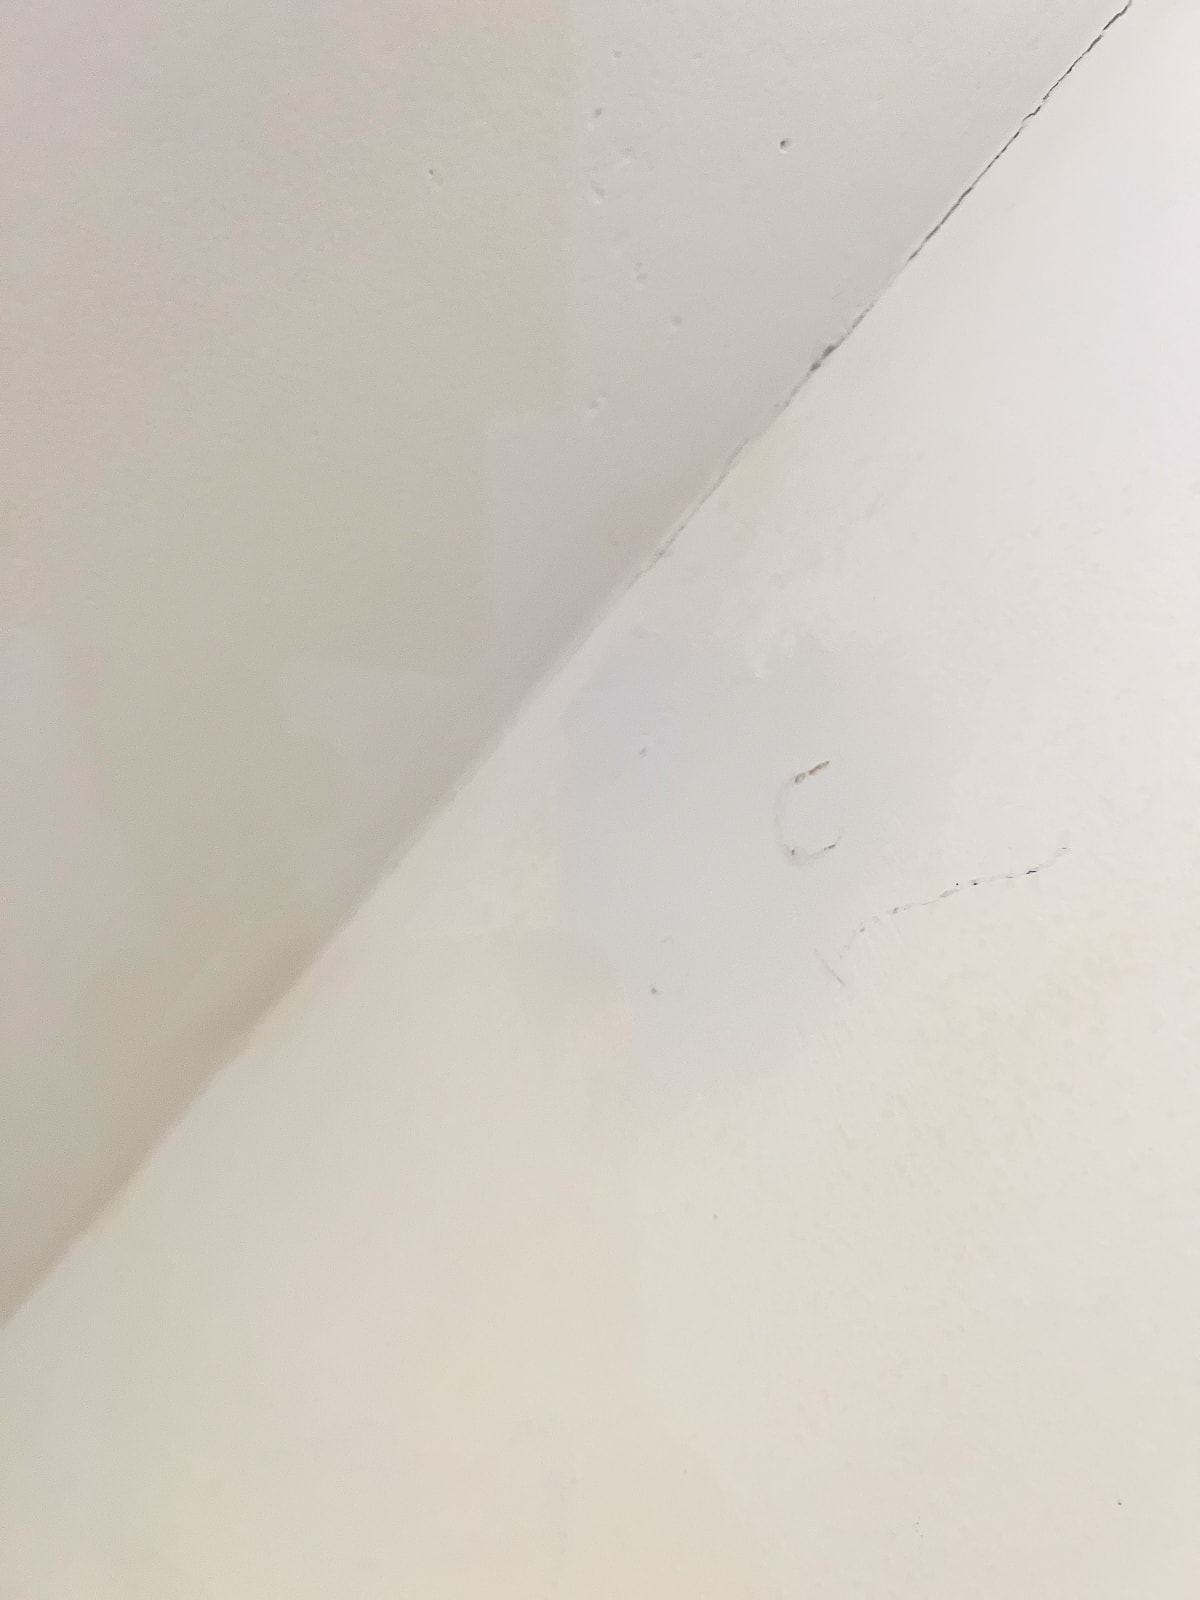
You want your walls to be smooth, clean, and dry before you put any paste on them. Two days before I wallpapered, I removed the closet rod hardware and patched up holes in the space. I used my favorite drywall spackle for this and sanded it down smooth when everything was dry.
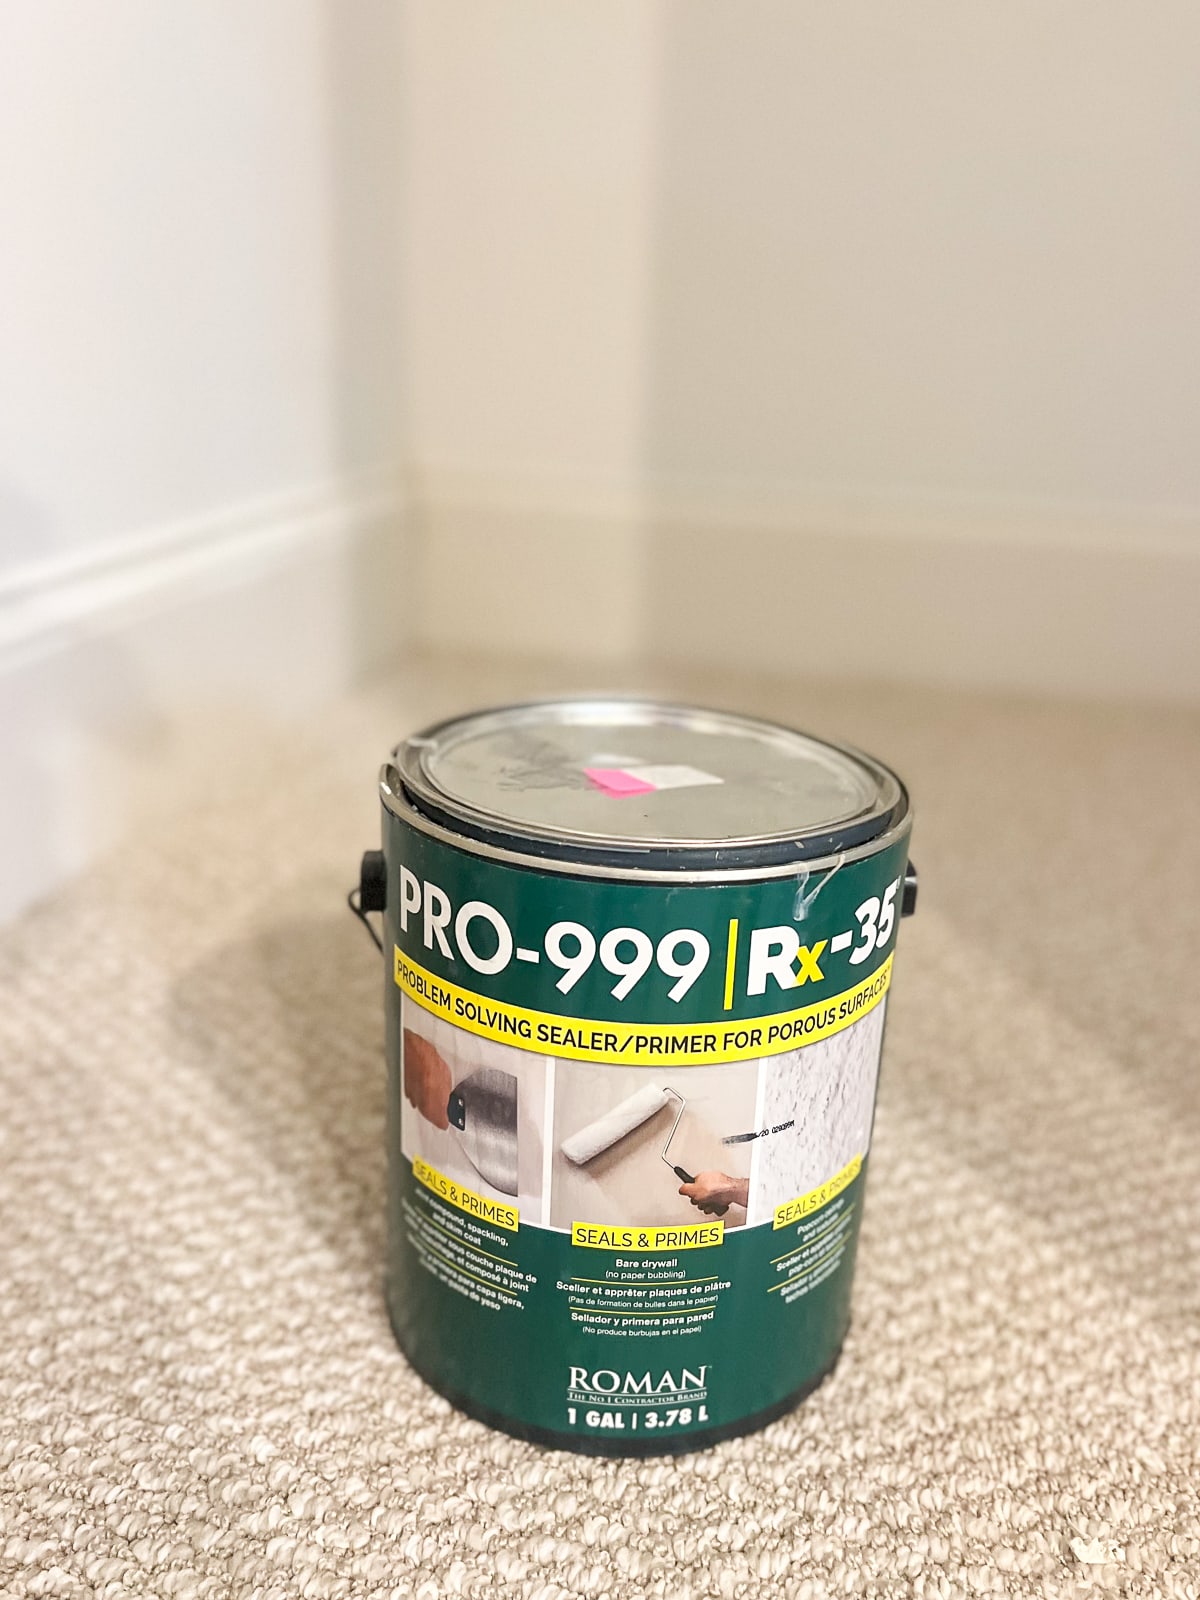
The next day, I used this wallpaper primer to prep the surface. This helps the wallpaper adhere and ensures that you’ll get a good finish. It goes on clear, with a roller and brush, and makes your walls look a tad shiny. It should only take a few minutes to get your walls covered. I then let mine dry for about a day before wallpapering. Don’t skip this step. It really helps!
Here’s one step I wish I had done for this project. Because I chose such a dark wallpaper color, I wish I had painted the walls a dark color before priming and adding the wallpaper. When the walls are white, it’s easier for any imperfections to show against the dark wallpaper. Next time around, I would paint ahead of time!
Mix Your Glue
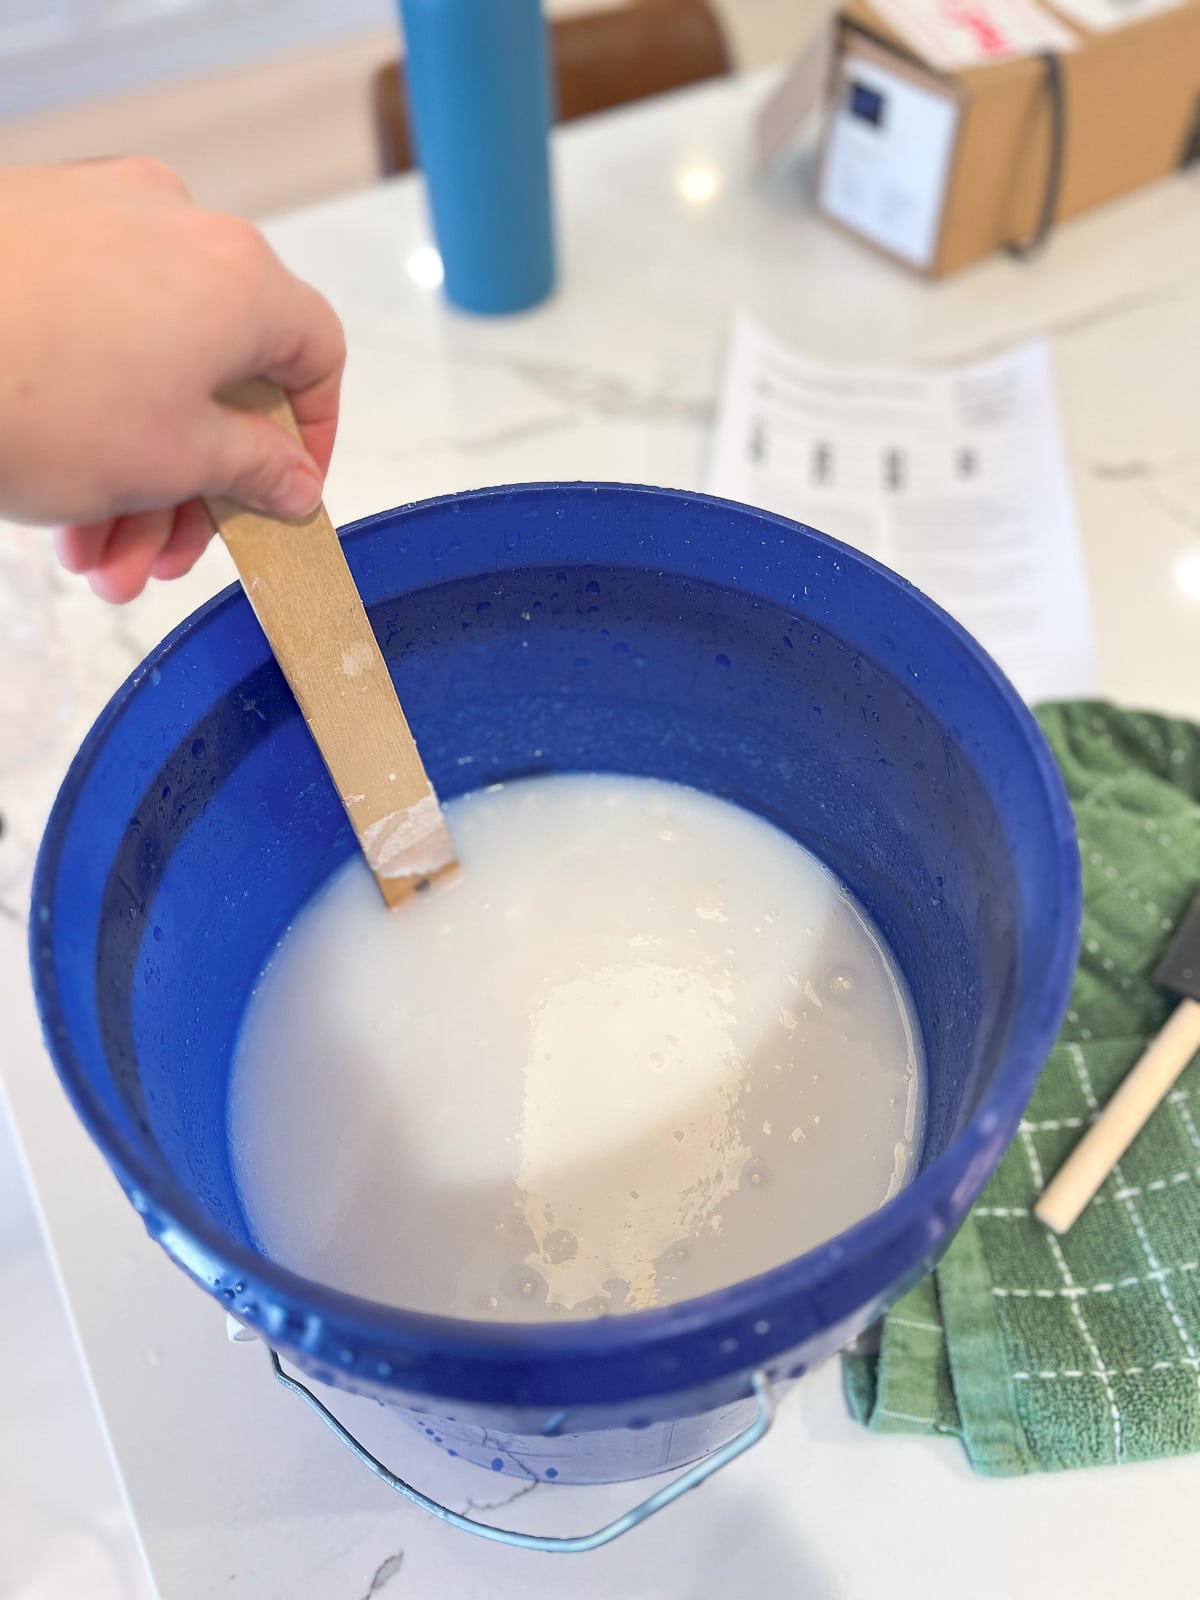
This particular mural comes with its own paste. It comes in a powder and you mix it with cold water to create a glue consistency. At first, it will seem very watered down, but it firms up in about five minutes or so.
If you have to buy your glue, I usually go with this wallpaper adhesive. It works well and I’ve had this same bucket of glue for multiple projects.
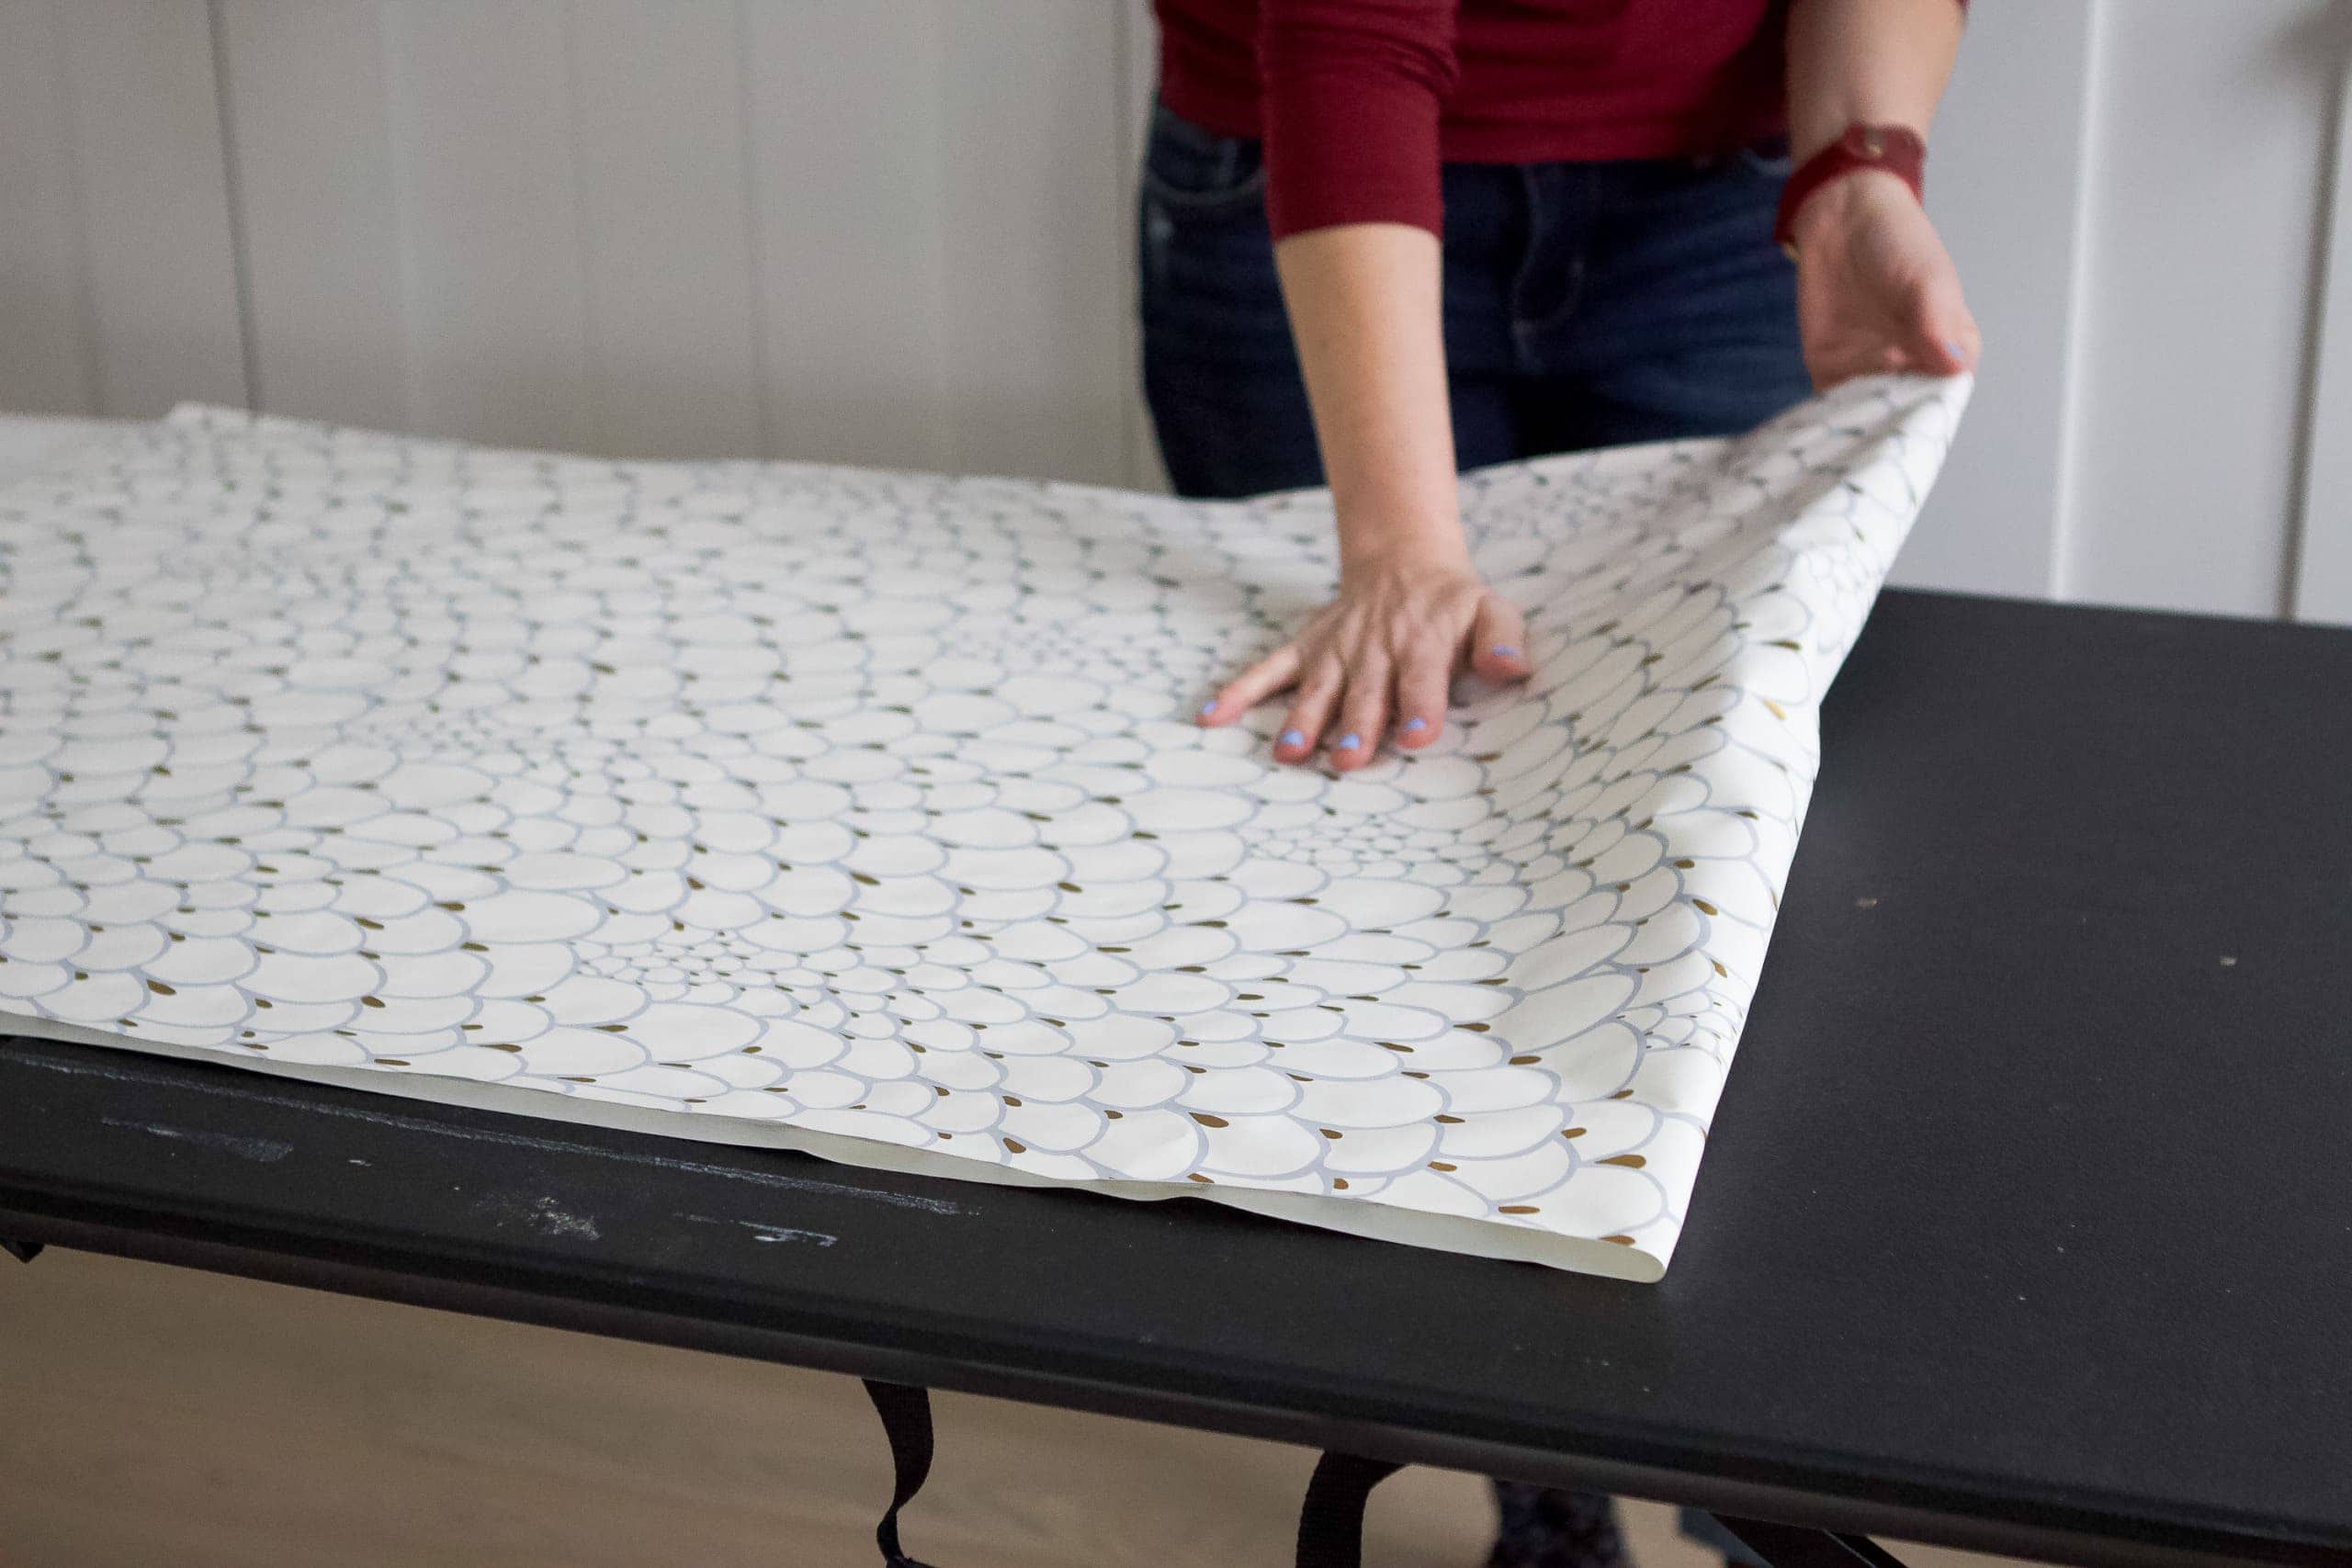
Measure The Width Of Your Paper & Draw A Plumb Line
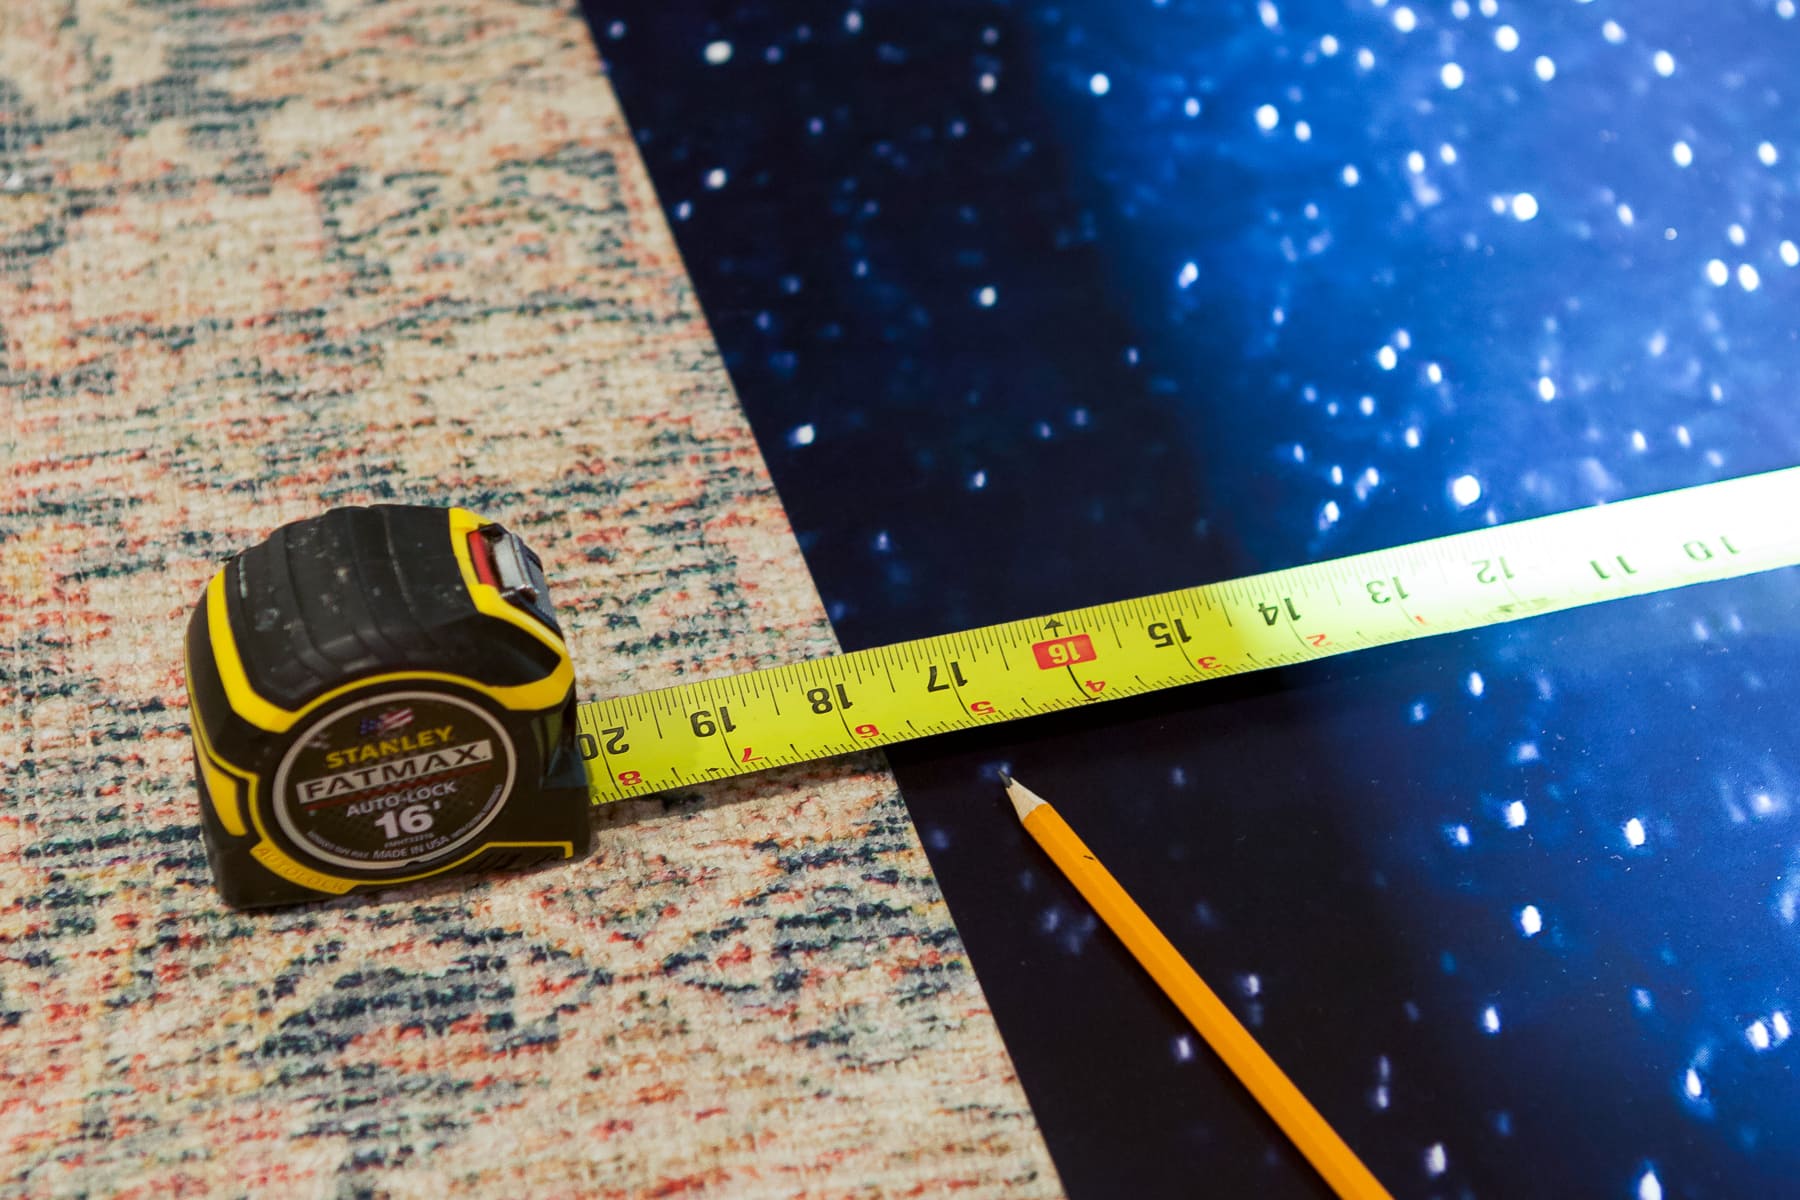
The wall mural is to be hung from the left to the right, so the first thing I did was measure the width of the wallpaper and then mark that measurement from the left corner out.
If your home is old and far from level (like mine), you will want to cheat this mark about a 1/2″ to the left. This ensures that the edge of the paper covers the corner even if your walls aren’t straight.
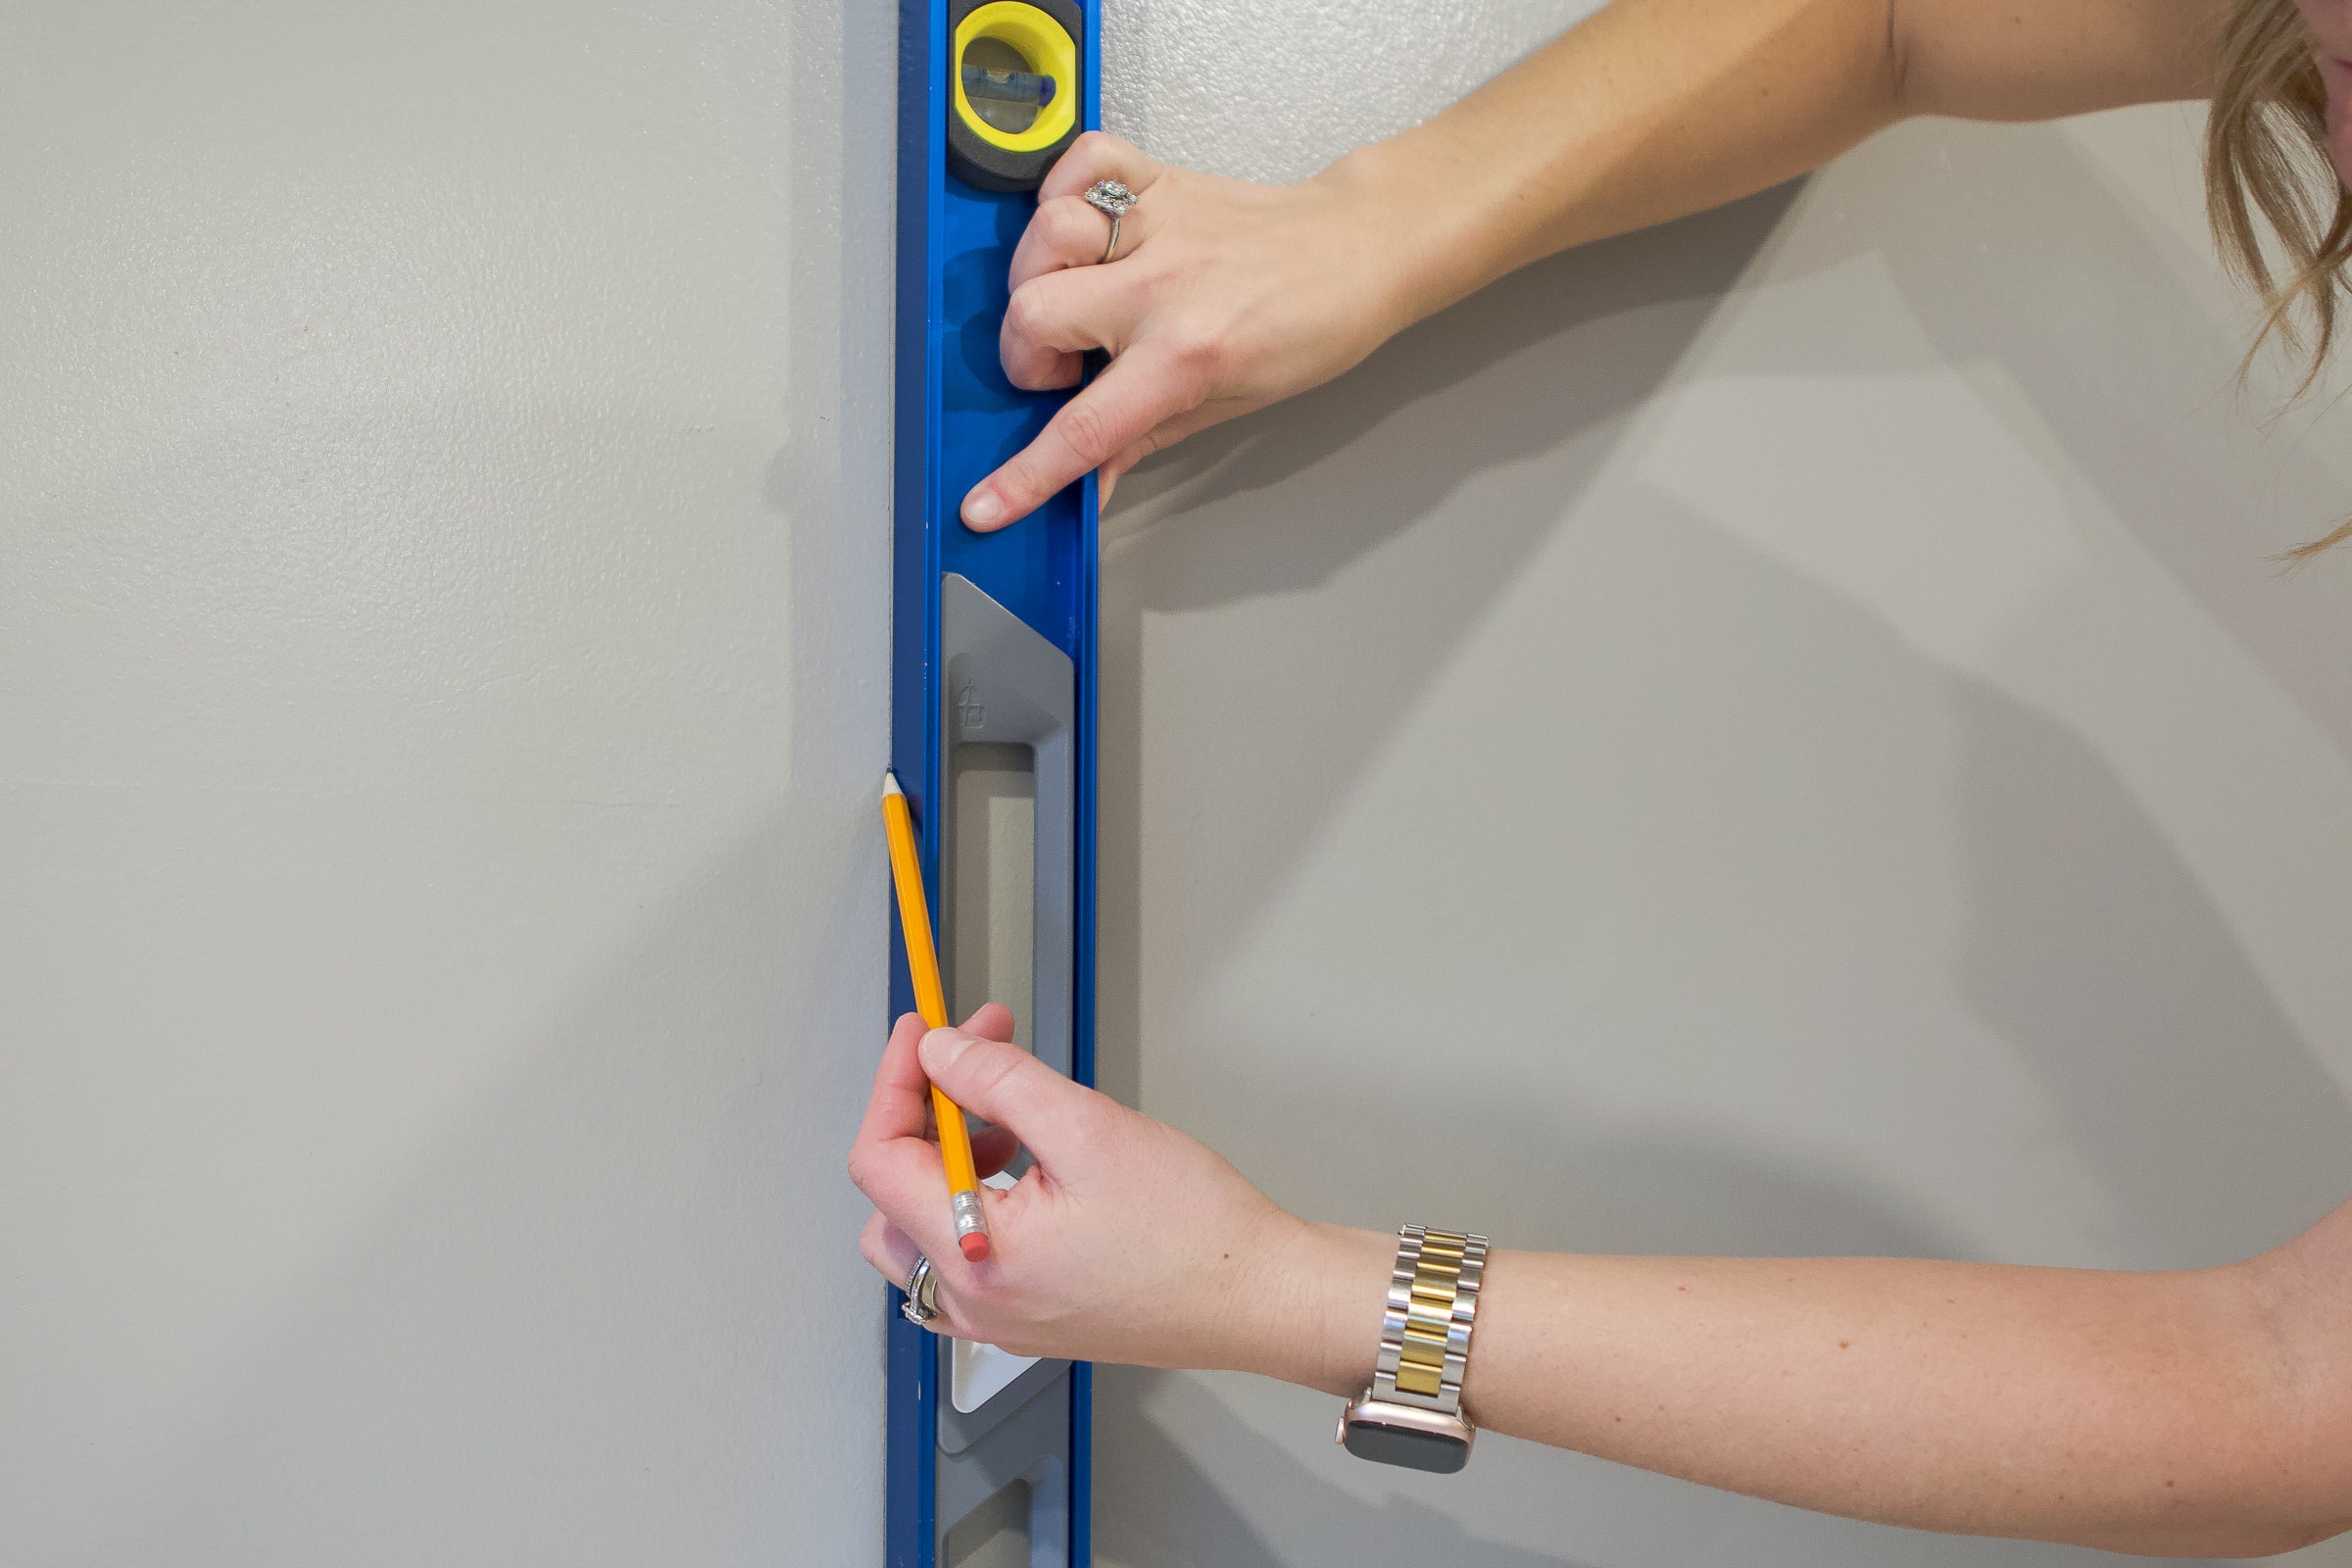
I then took a level and drew a vertical straight line down the entire length of the wall. Getting this line straight is important because the rest of the paper will follow that first strip.
Paste The Wall

The next step is to paste the wall. I like to keep a paint brush and paint roller on hand for this. I saturate the roller in the glue and then roll the entirety of the wall. I use the brush to get along the corners and edges.
The key is to apply A LOT of paste. You especially want enough paste in the corners. You want the wallpaper to move around easily, as you get it straight and in place, and the excess paste will help with that.
Hang Your First Panel
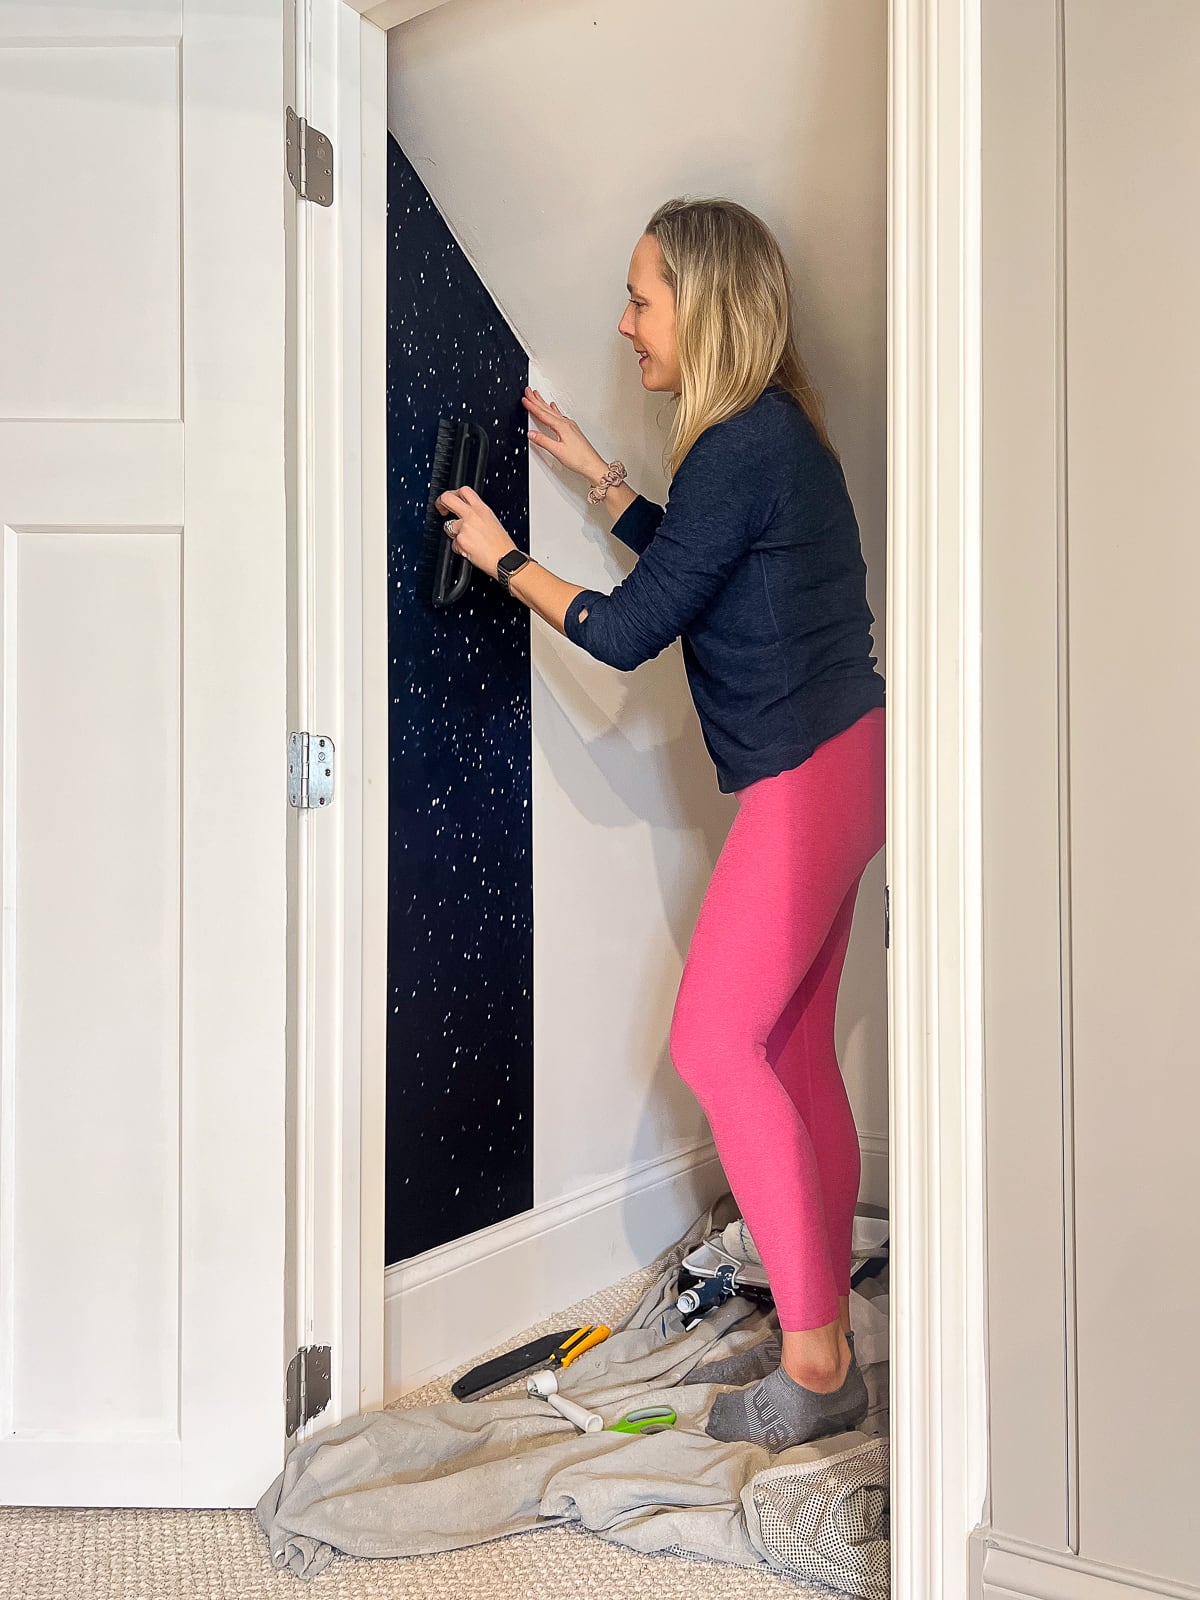
Now, take your first strip of paper and line it up with the vertical line. I like to work my way from top to bottom using the smoothing brush to get out air bubbles as I go.
If things are askew, simply lift the paper and start that spot over. As you smooth the paper down and into its final place, check that it lines up perfectly with your vertical line. Remember, this first strip of wallpaper is the most important!
Trim Excess Paper
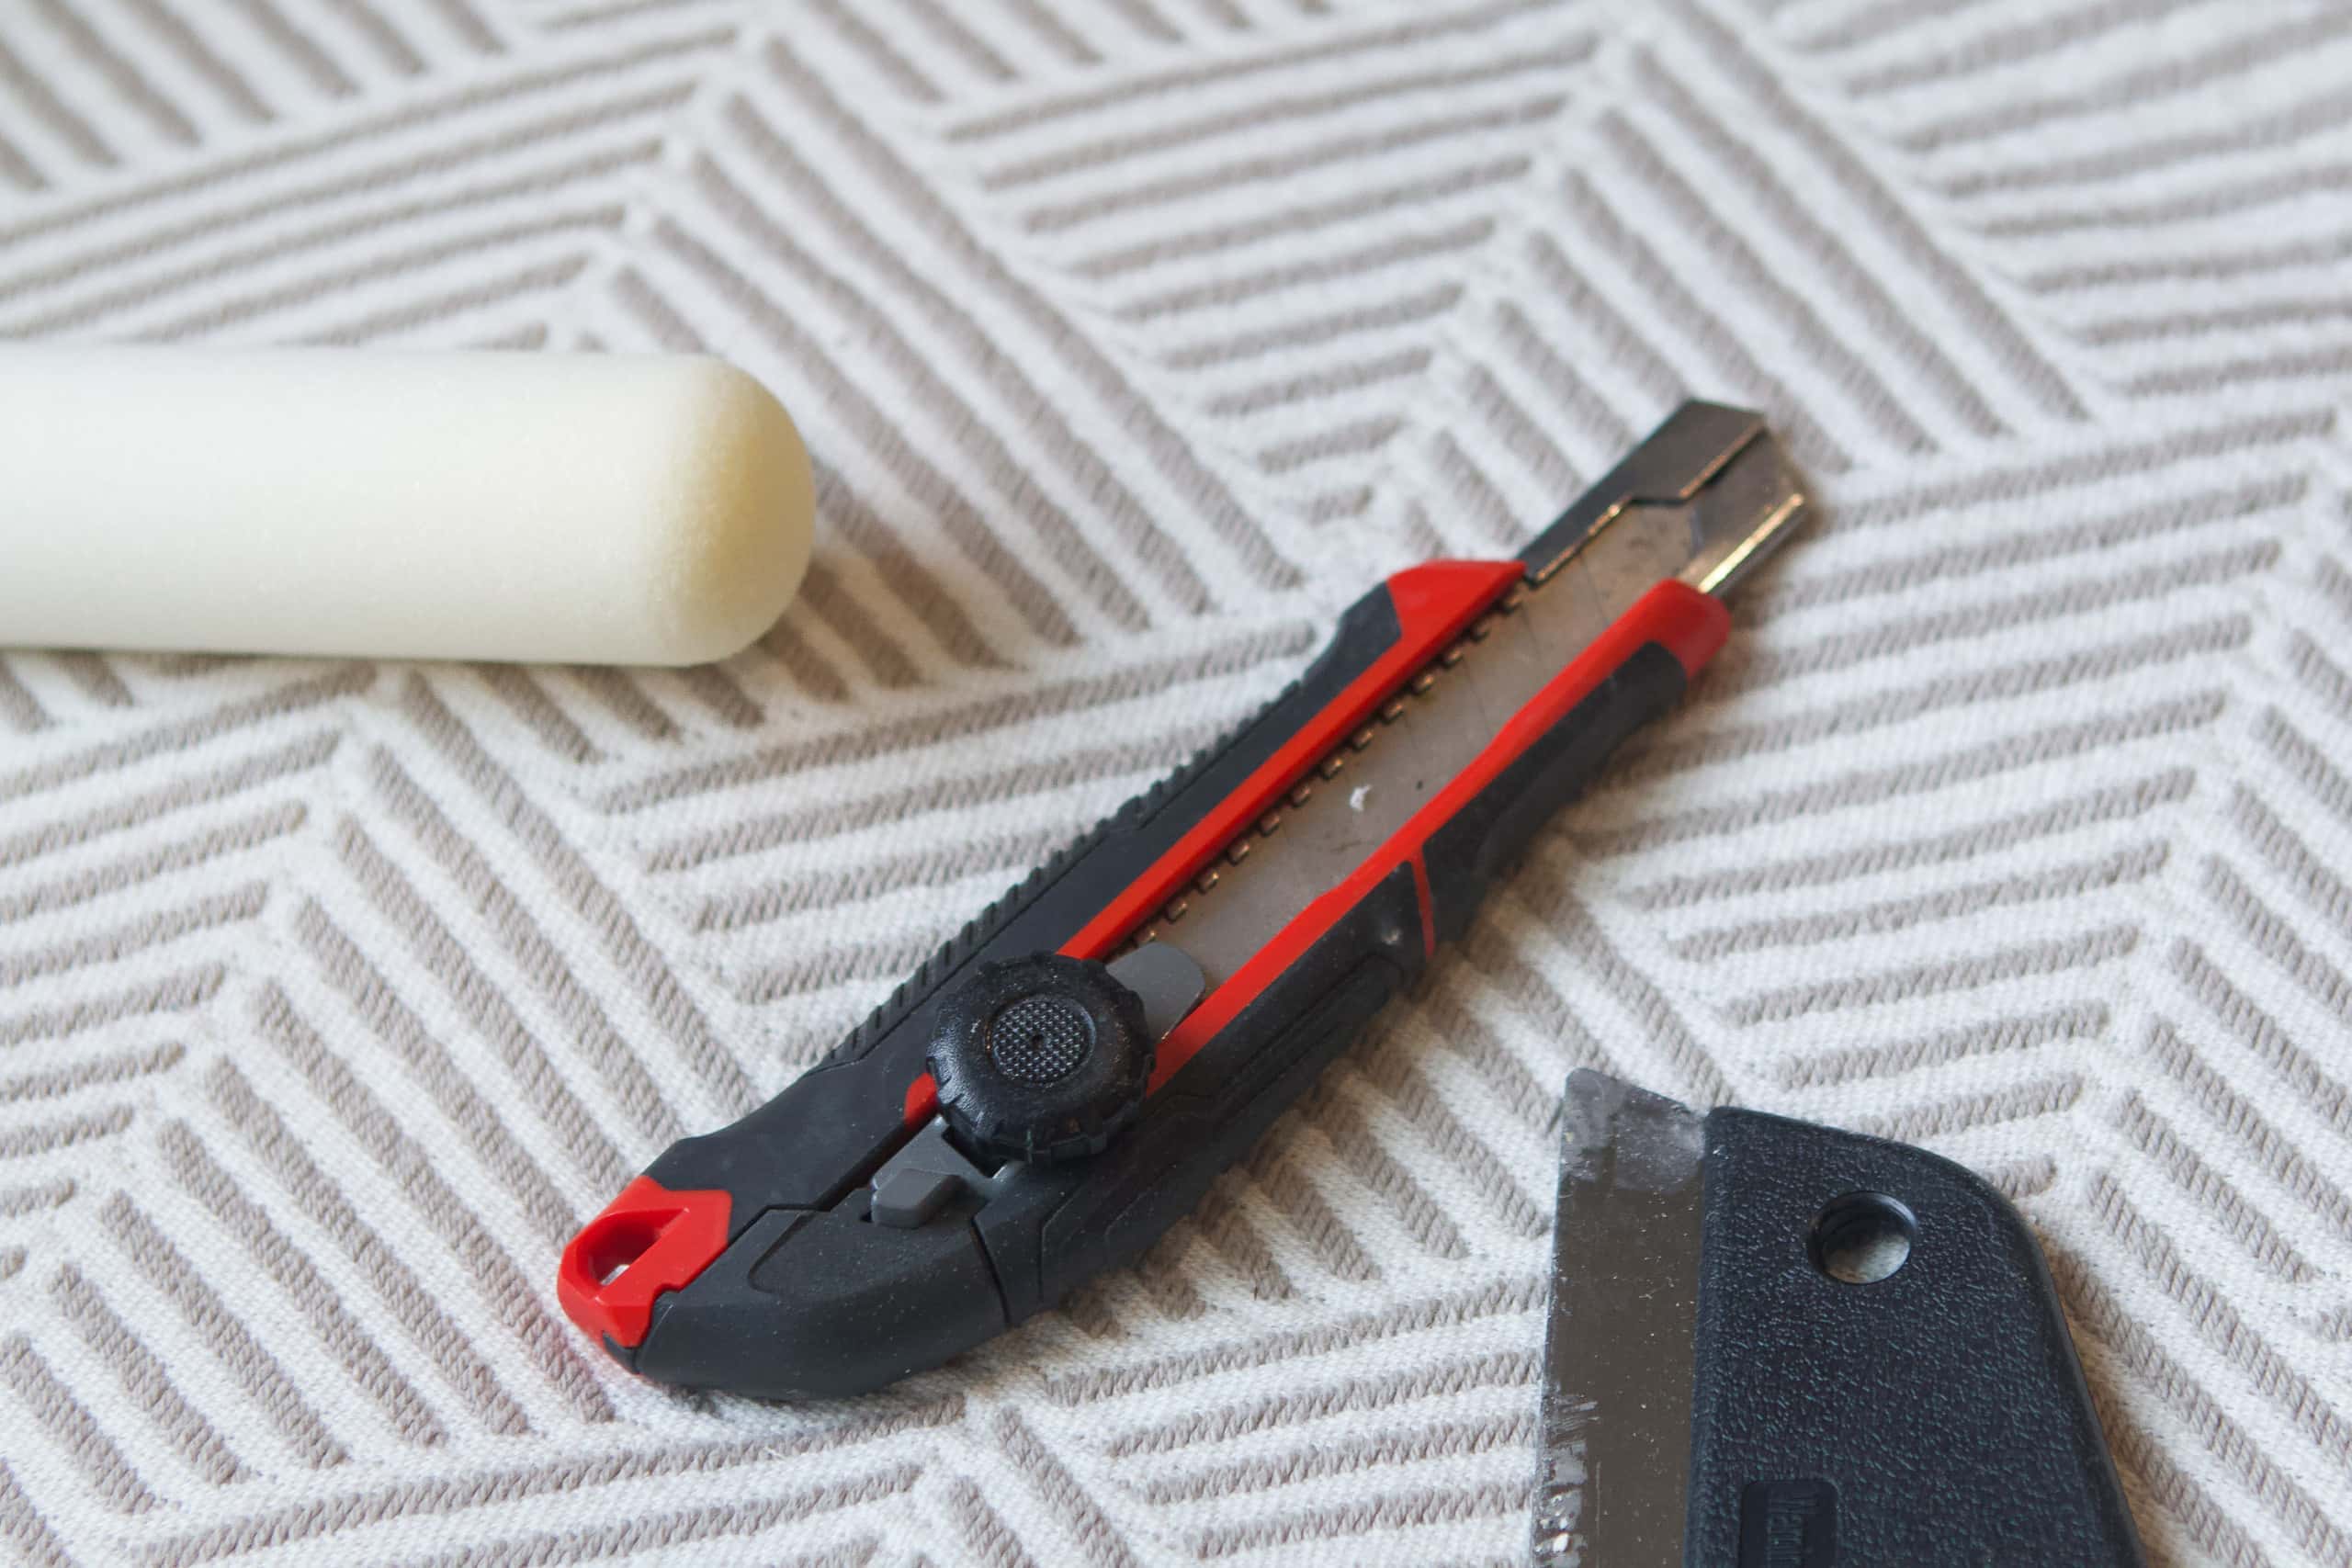
Because my paper was so long, I had a lot of excess to trim off of the top, bottom, and side. For this, I recommend using a metal straight edge and a snap-off utility knife. Your blade must be fresh and sharp! A dull blade on wallpaper makes things much more difficult. I would swap out the blade every few panels. Take your straight edge and put it up into the groove then slide it along the corner as you swipe your sharp blade across.
I didn’t have any light switches or outlets in this closet. If you do, you can use the utility knife to cut around it carefully.
Match Your Pattern For The Second Panel
I’m not gonna lie, it was very hard for me to match up the pattern with this wall mural. especially since I was taking so much off the top of the mural with the slanted walls. I did my best to match the pattern and luckily I didn’t notice any imperfections in my starry scene.
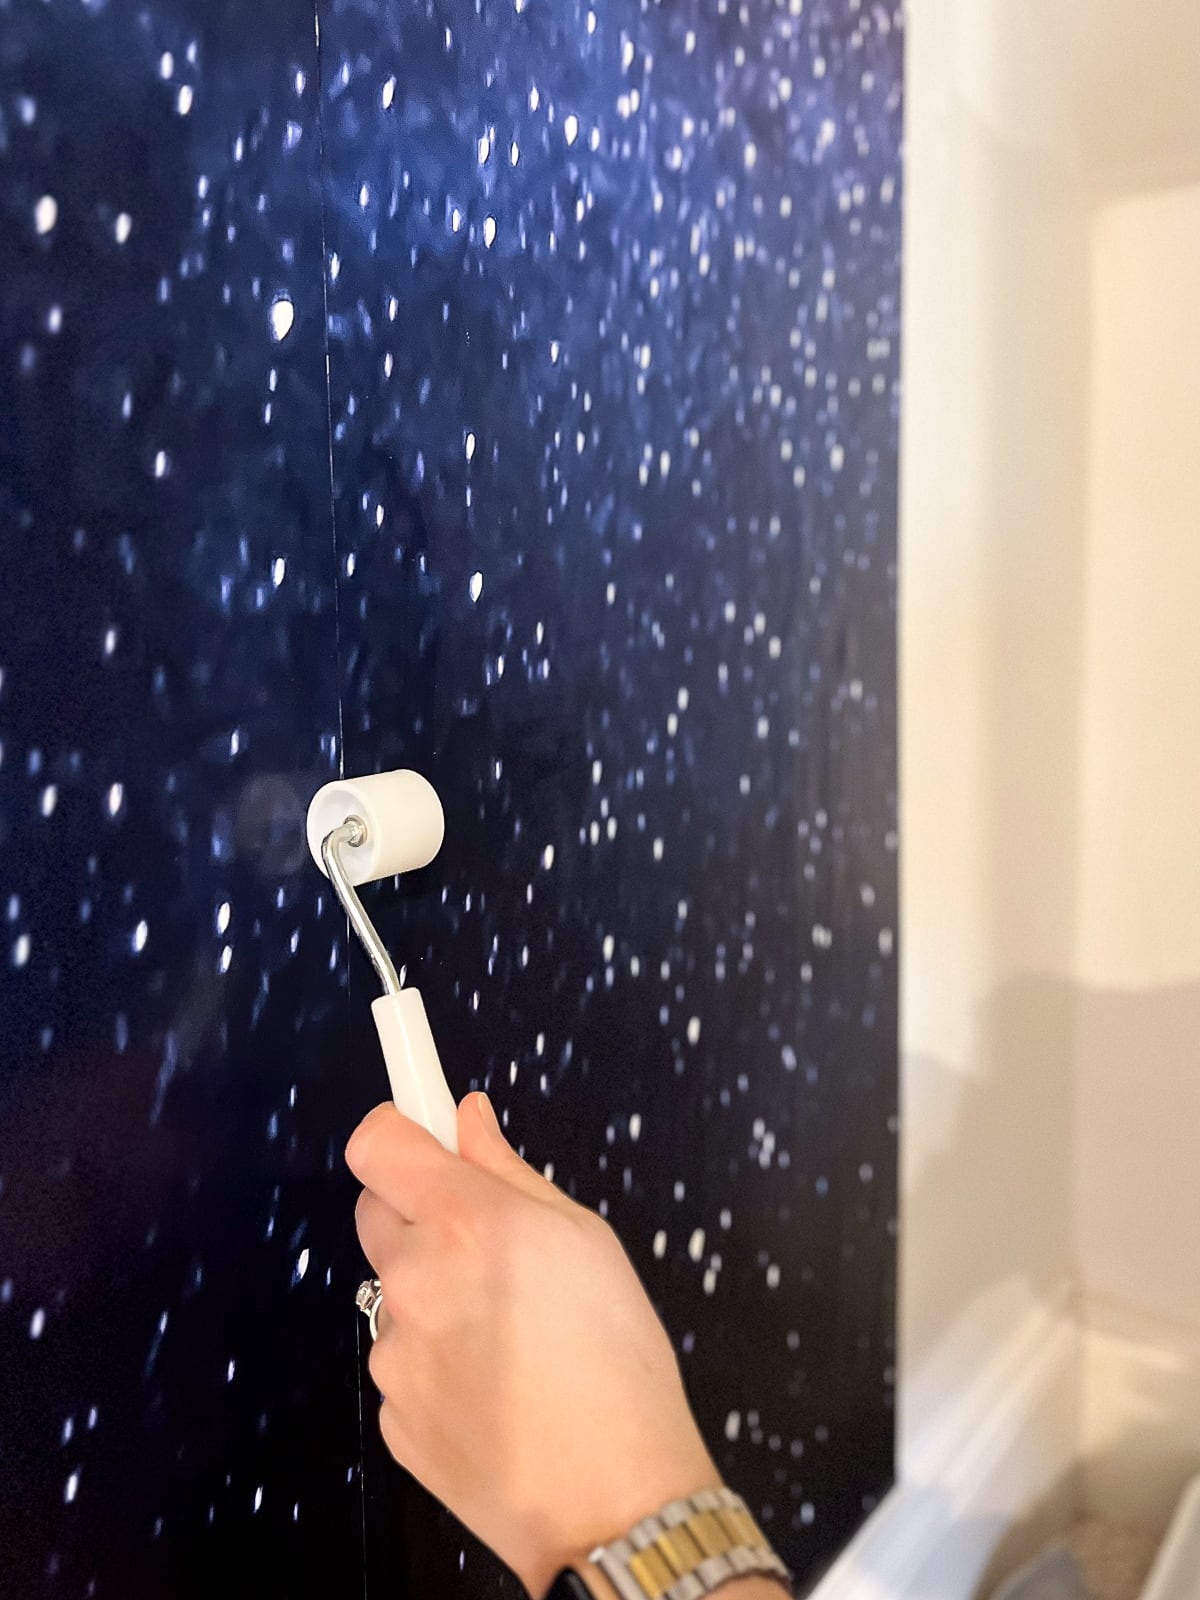
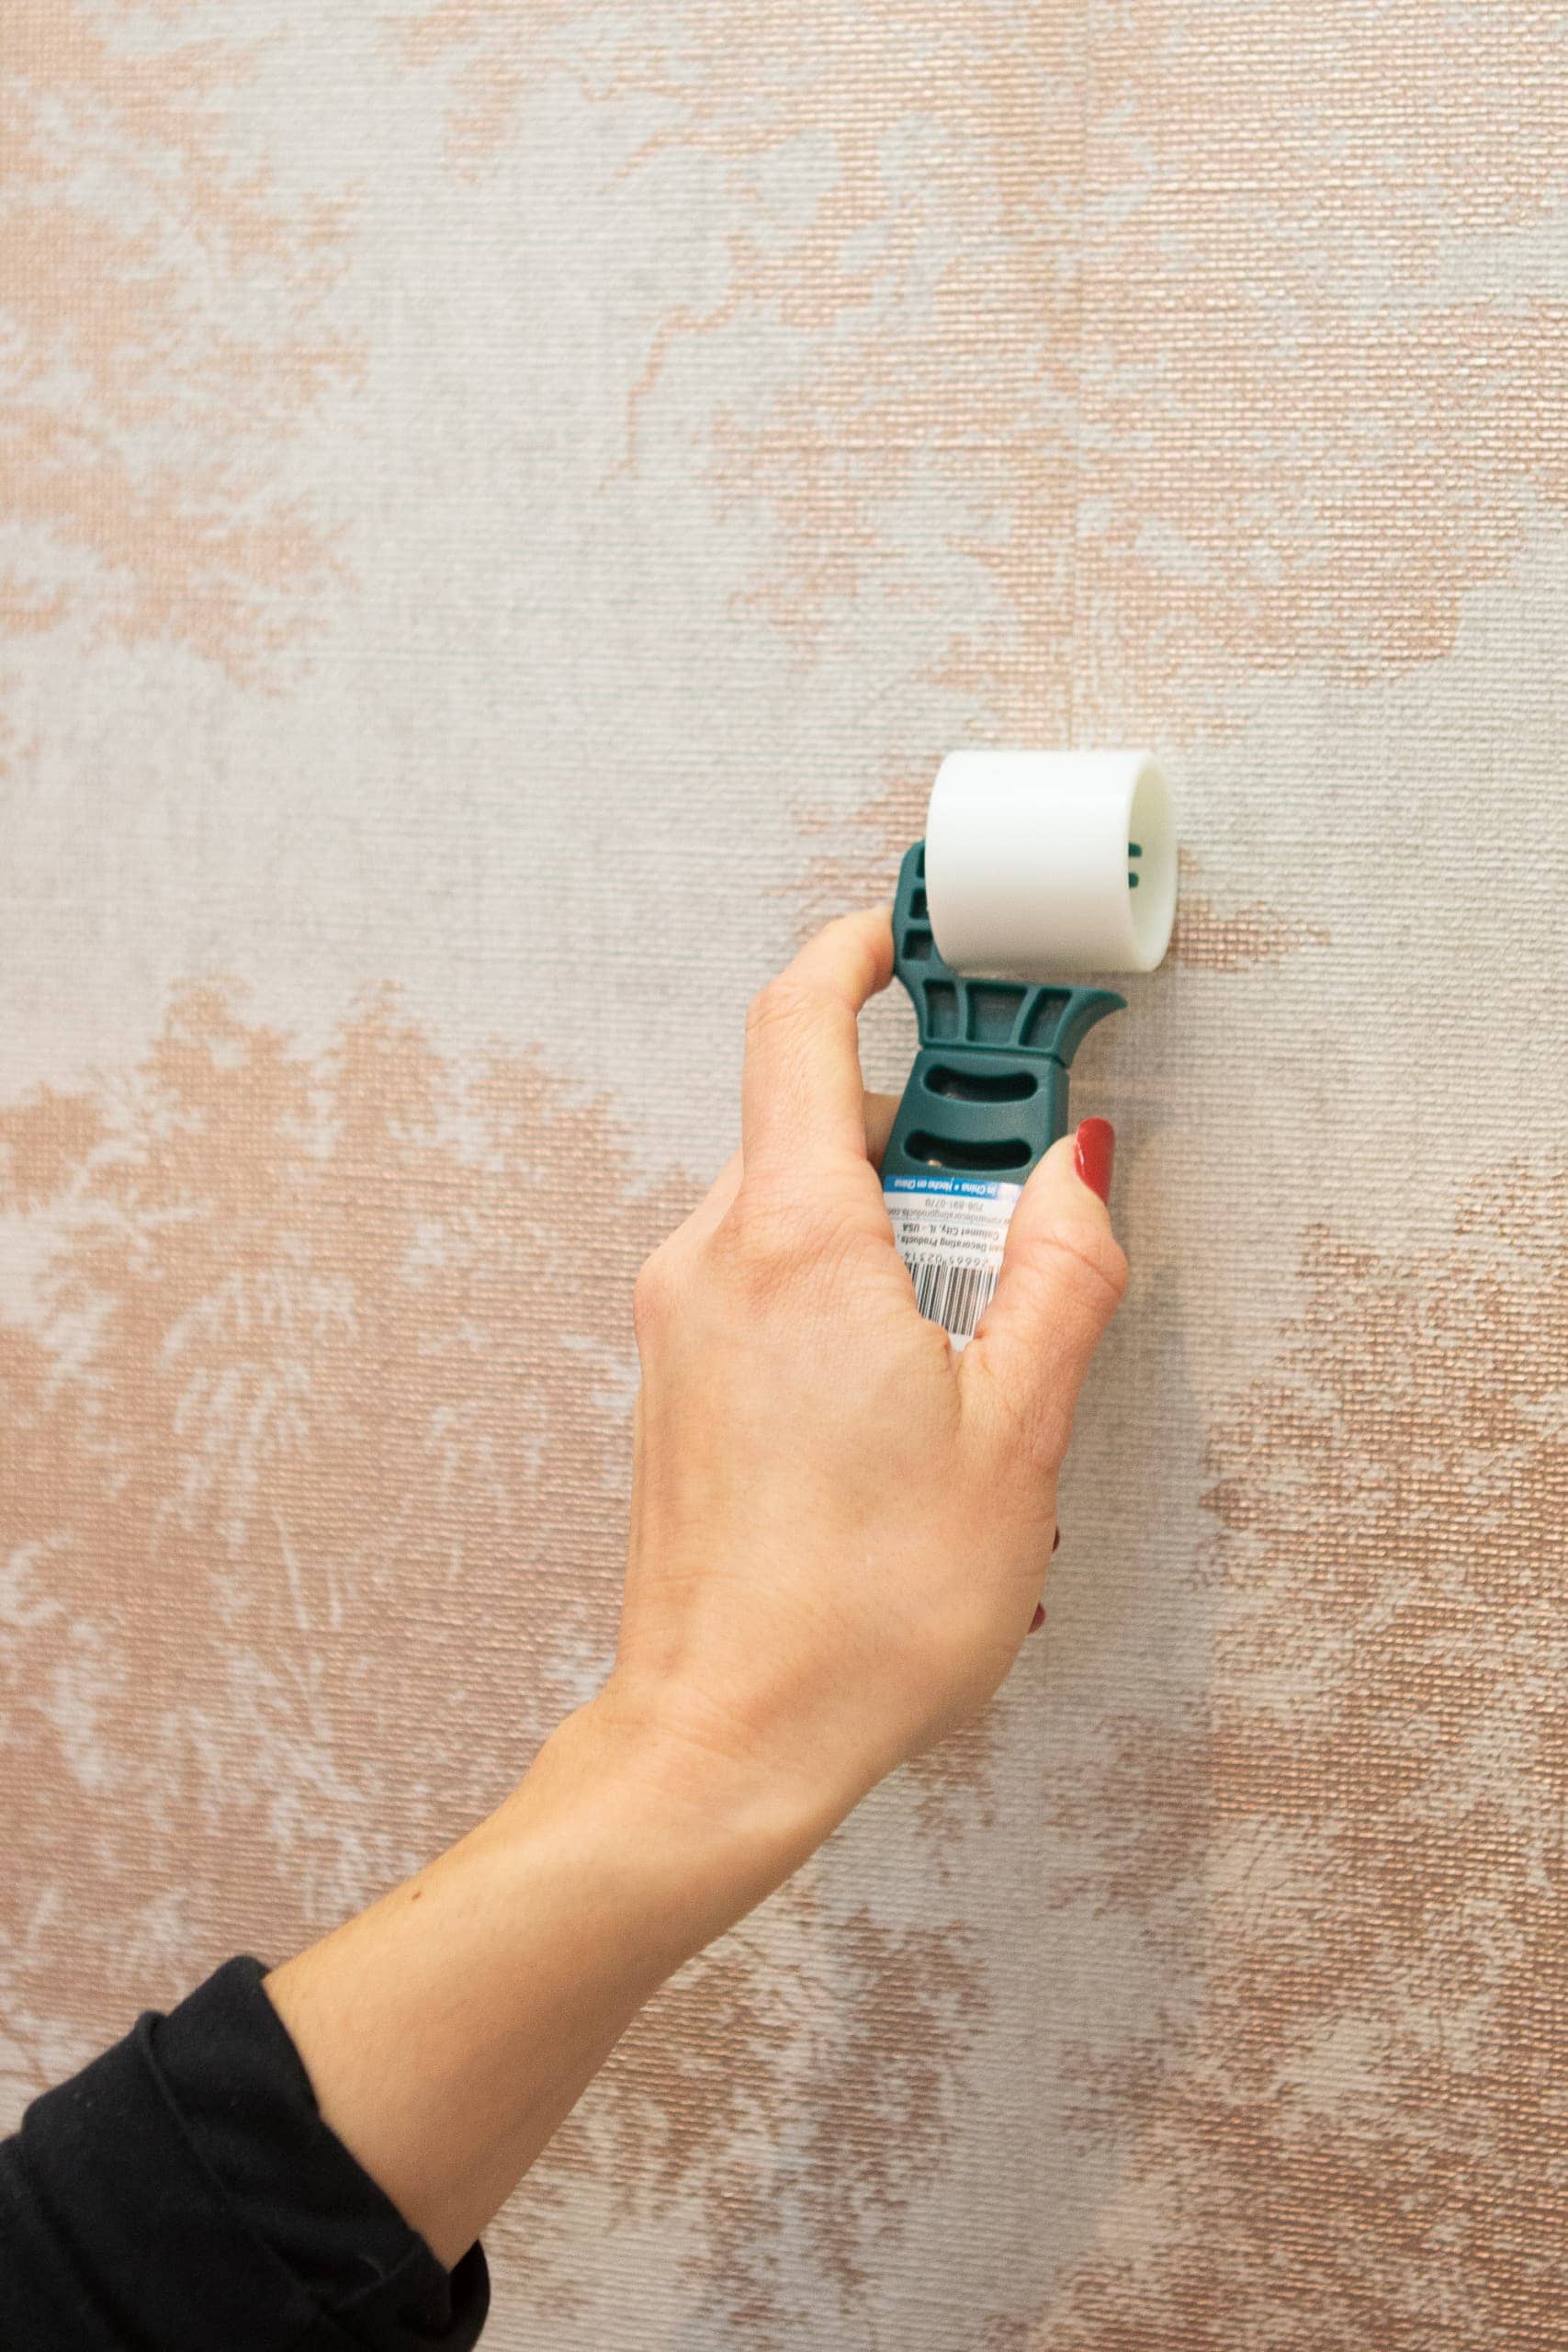
Do your best to match your pattern and butt it right next to the first piece of paper so there isn’t a gap. Then, take a seam roller and roll it across the seam. This pushes the paper down on those edges.
If you need more glue, now is the time to carefully lift the paper and apply a bit more underneath those edges. If things get messy, take a damp sponge and keep the surface of your wallpaper clean. You don’t want any excess adhesive to dry on your wallpaper, so be vigilant.
Sharpie The Sides
If you’re installing a dark wallpaper, as I am, then here’s a trick for you. Take a black Sharpie marker and color the sides of the wallpaper black. The edges of the wallpaper will likely be white, just like the back of the wallpaper. If so, the edges can sometimes show where two panels meet. You can camouflage those dreaded seams with a quick swipe of a Sharpie on the edges.
That Back Wall Was Tough
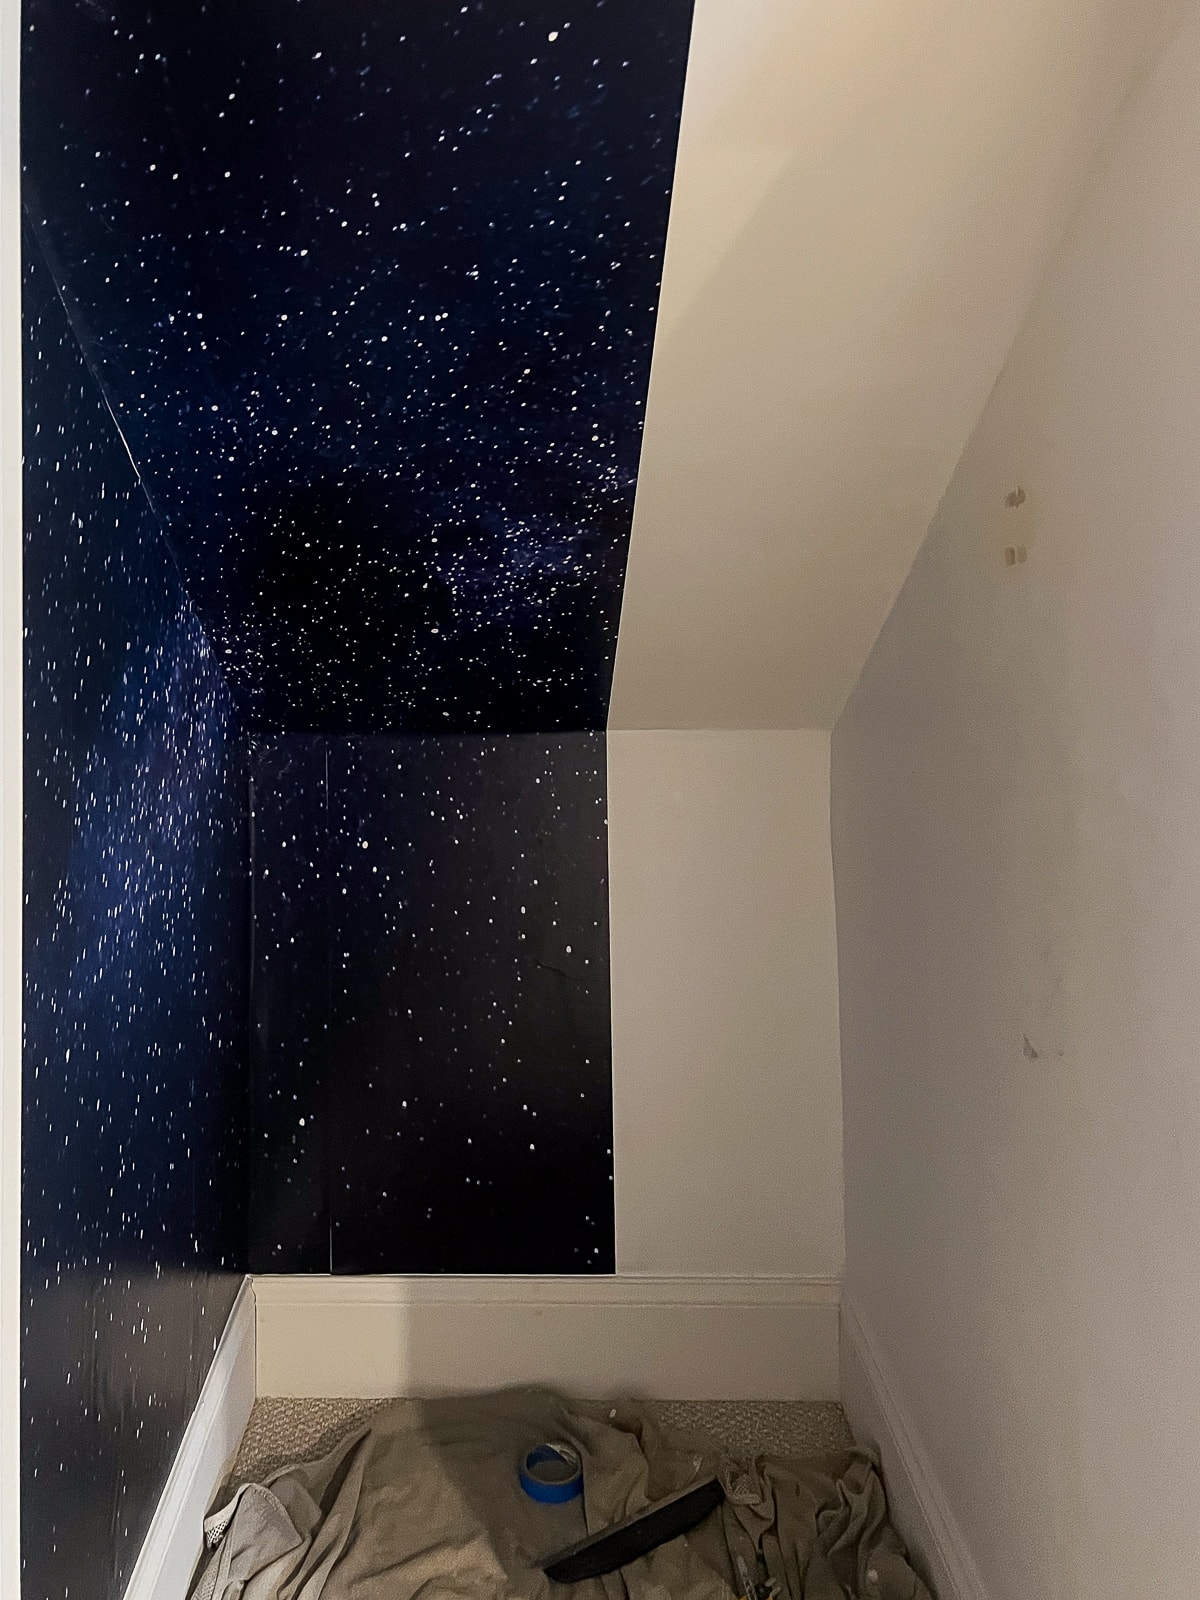
Once I got to the third panel, things got tricky. The third panel had to finish off the left wall, cover the corner, and go on the back wall and up the ceiling. It was a difficult one to get into place! I used some painter’s tape to temporarily hold the ceiling wallpaper in place as I got the bottom parts situated.
This particular piece made me happy that I chose paste the wall wallpaper for this DIY project. If it was peel and stick, it would have been a big mess to unstick and get into place. Just be patient and don’t be afraid to peel the wallpaper back, add more glue, and try again!
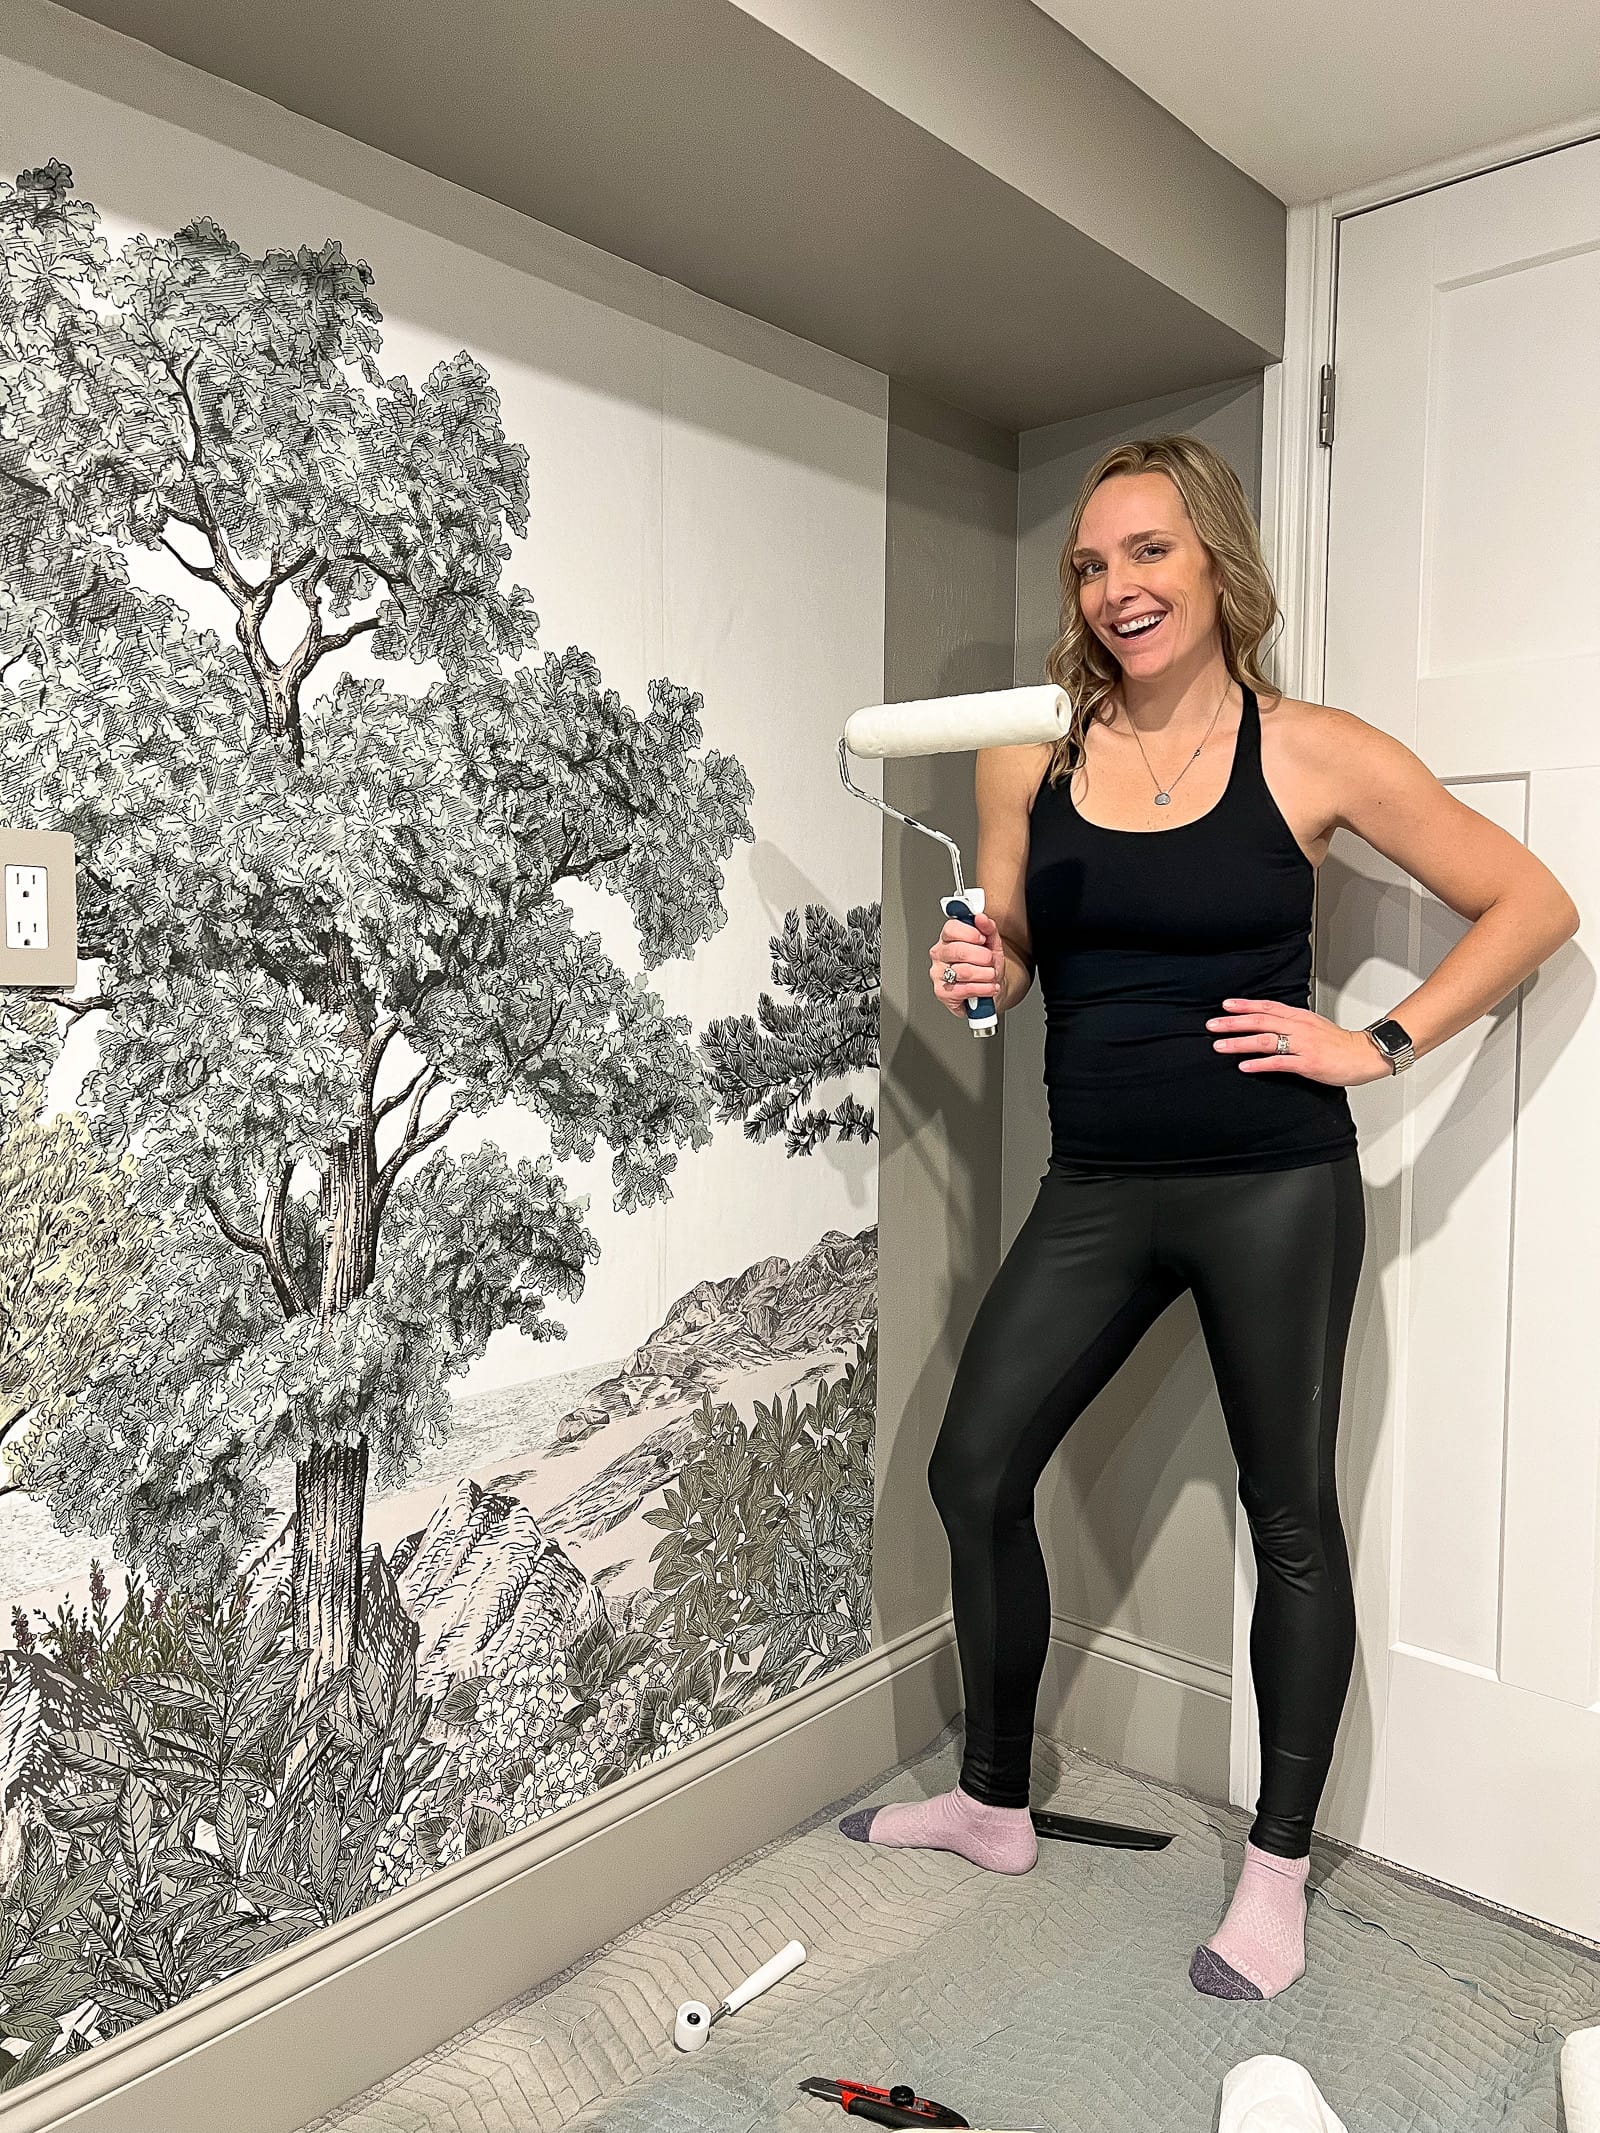
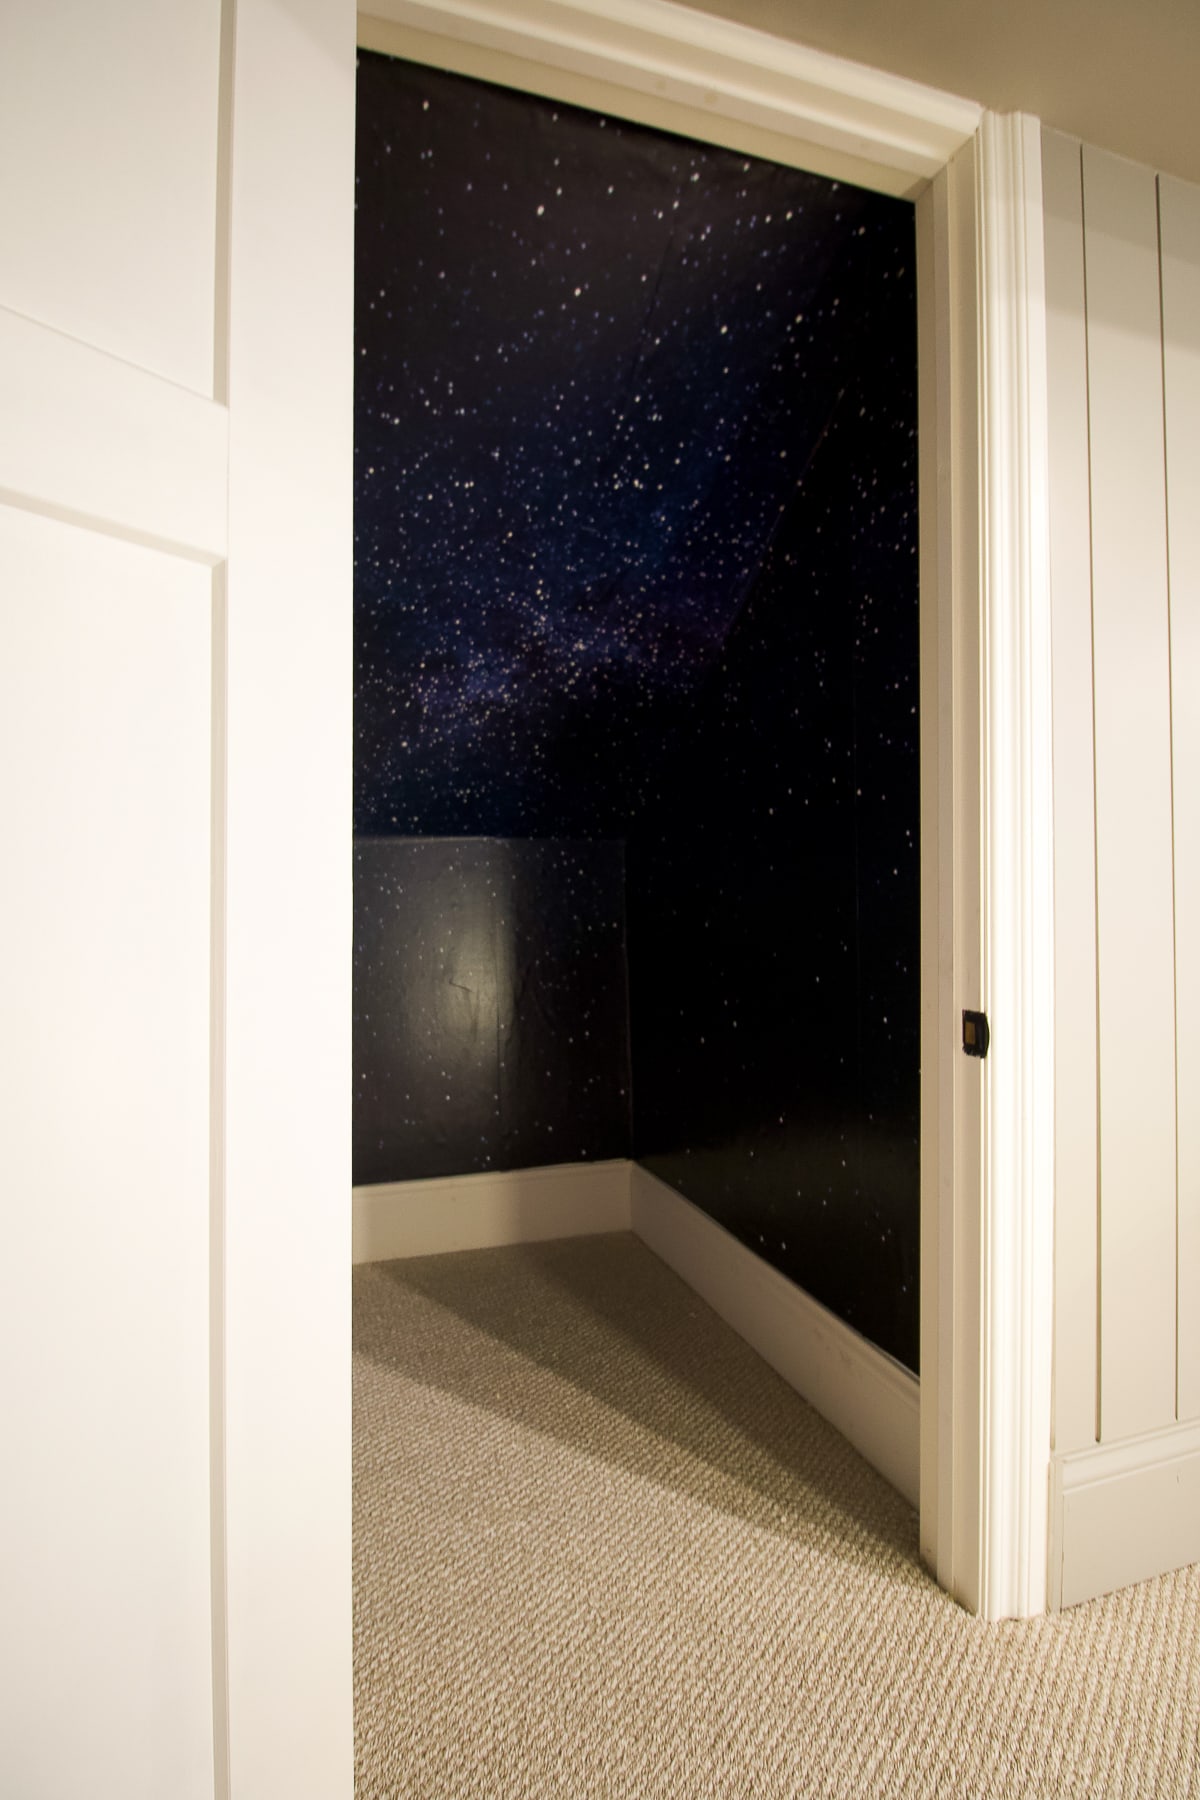
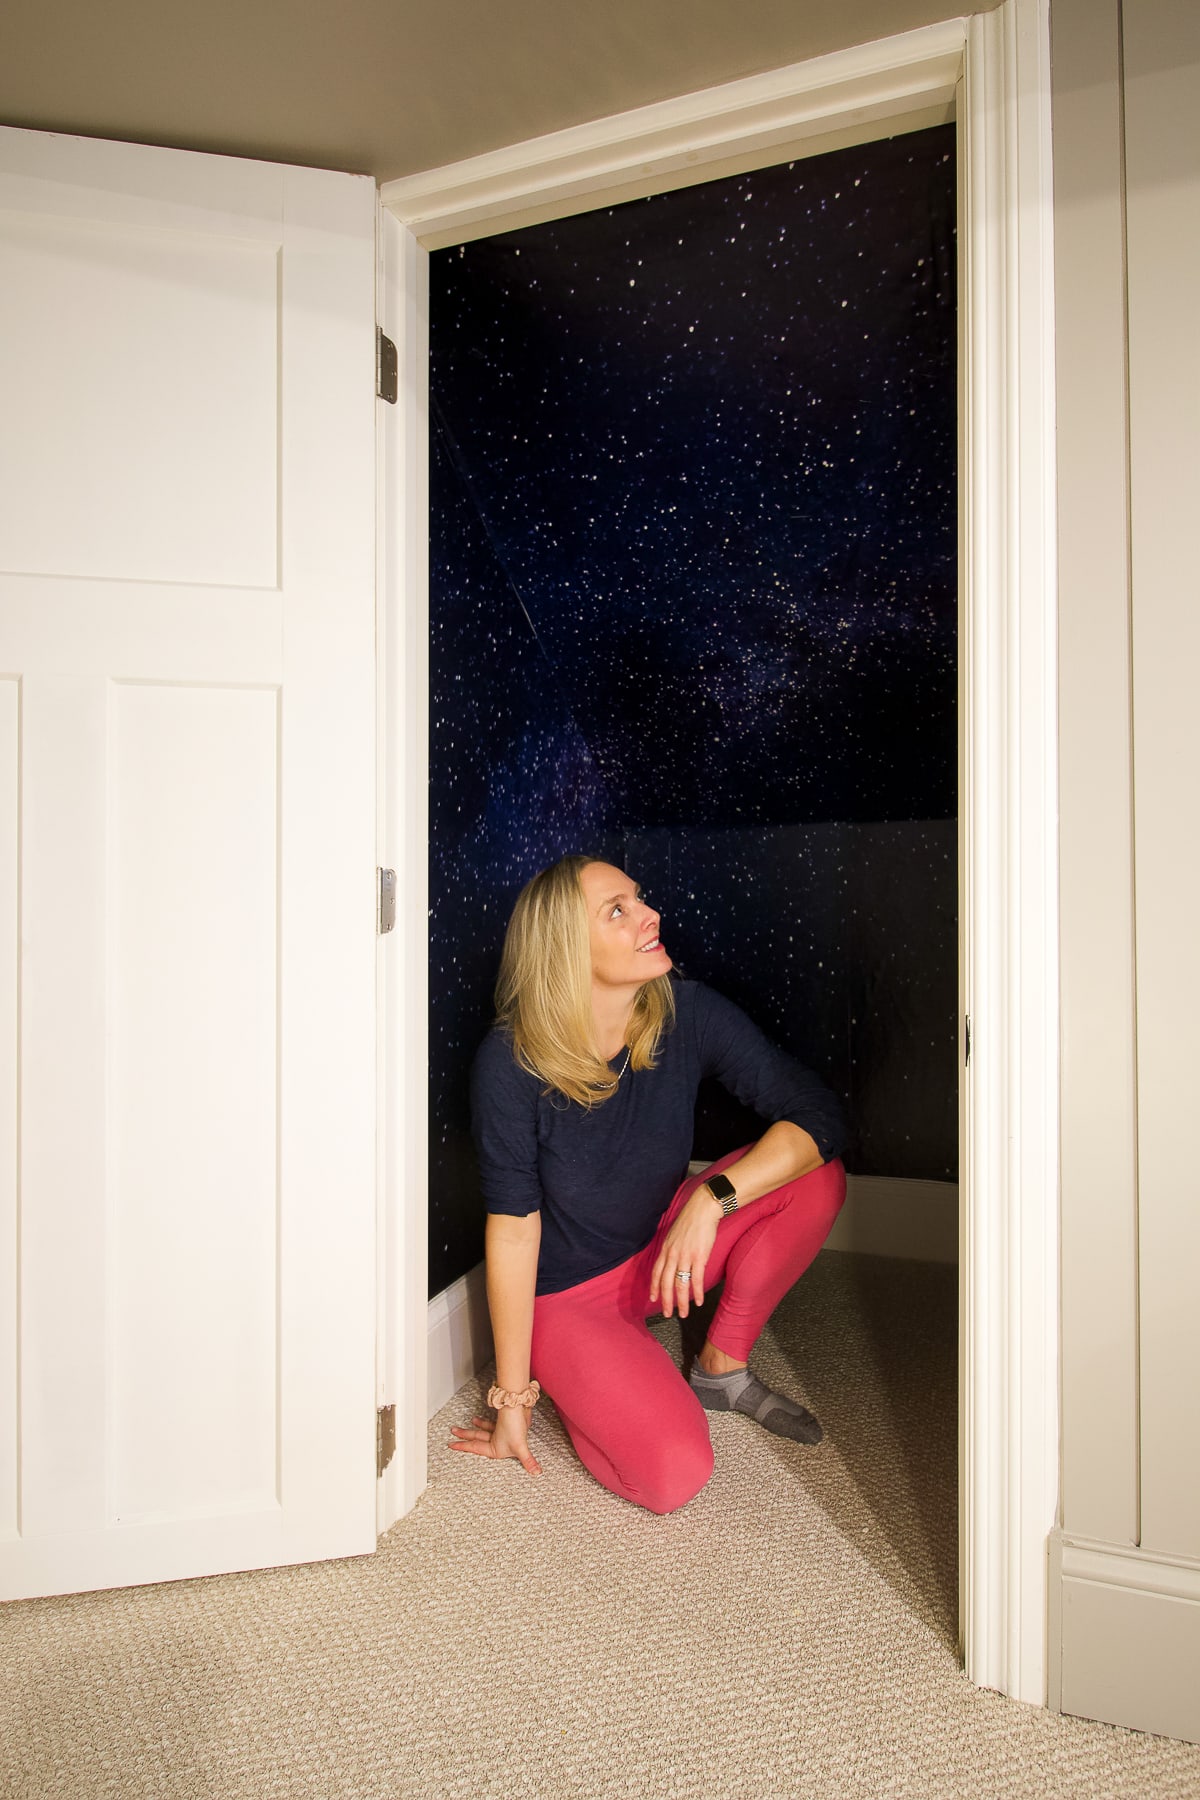
Our Outer Space Closet
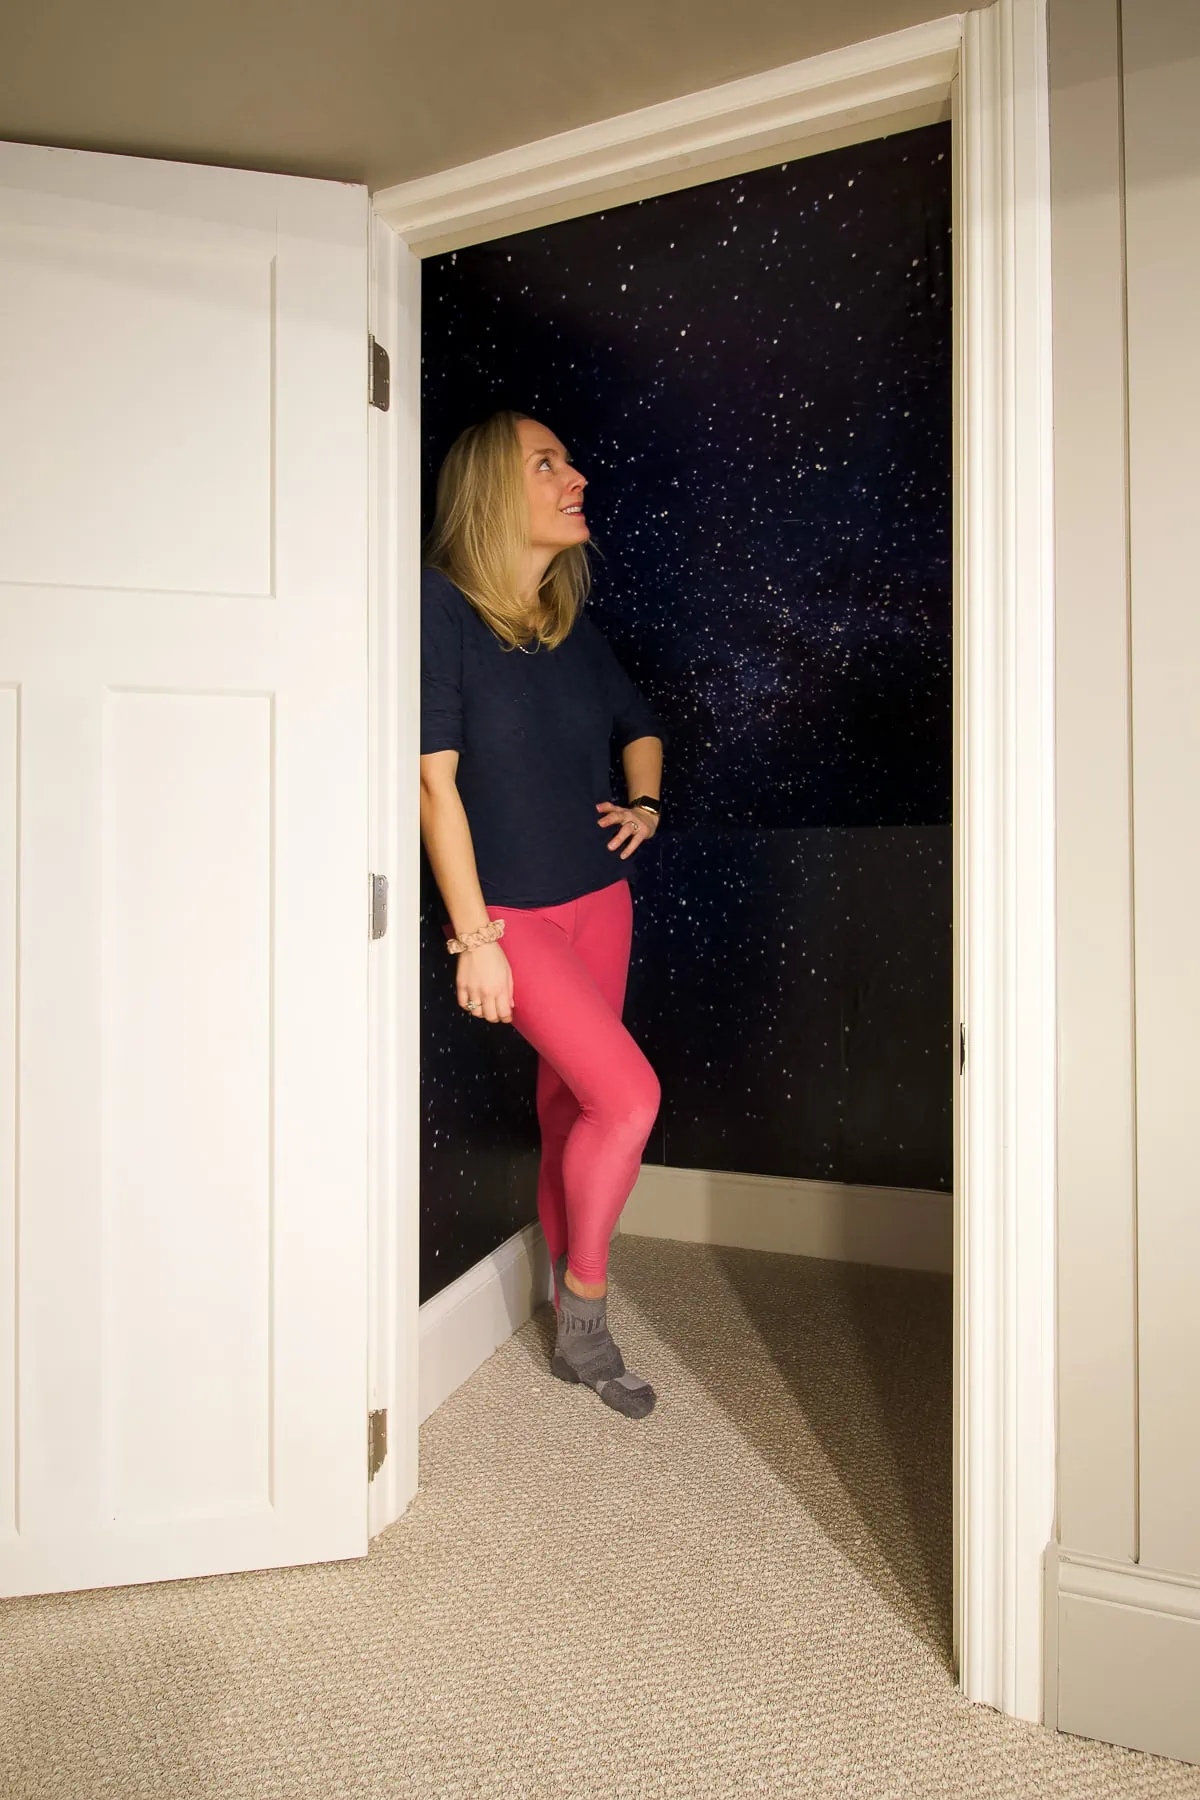
Here’s a look at the closet now! It took me about a half day of work to get this wallpaper hung and it was well worth it. It’s kicking off this project with a bang!
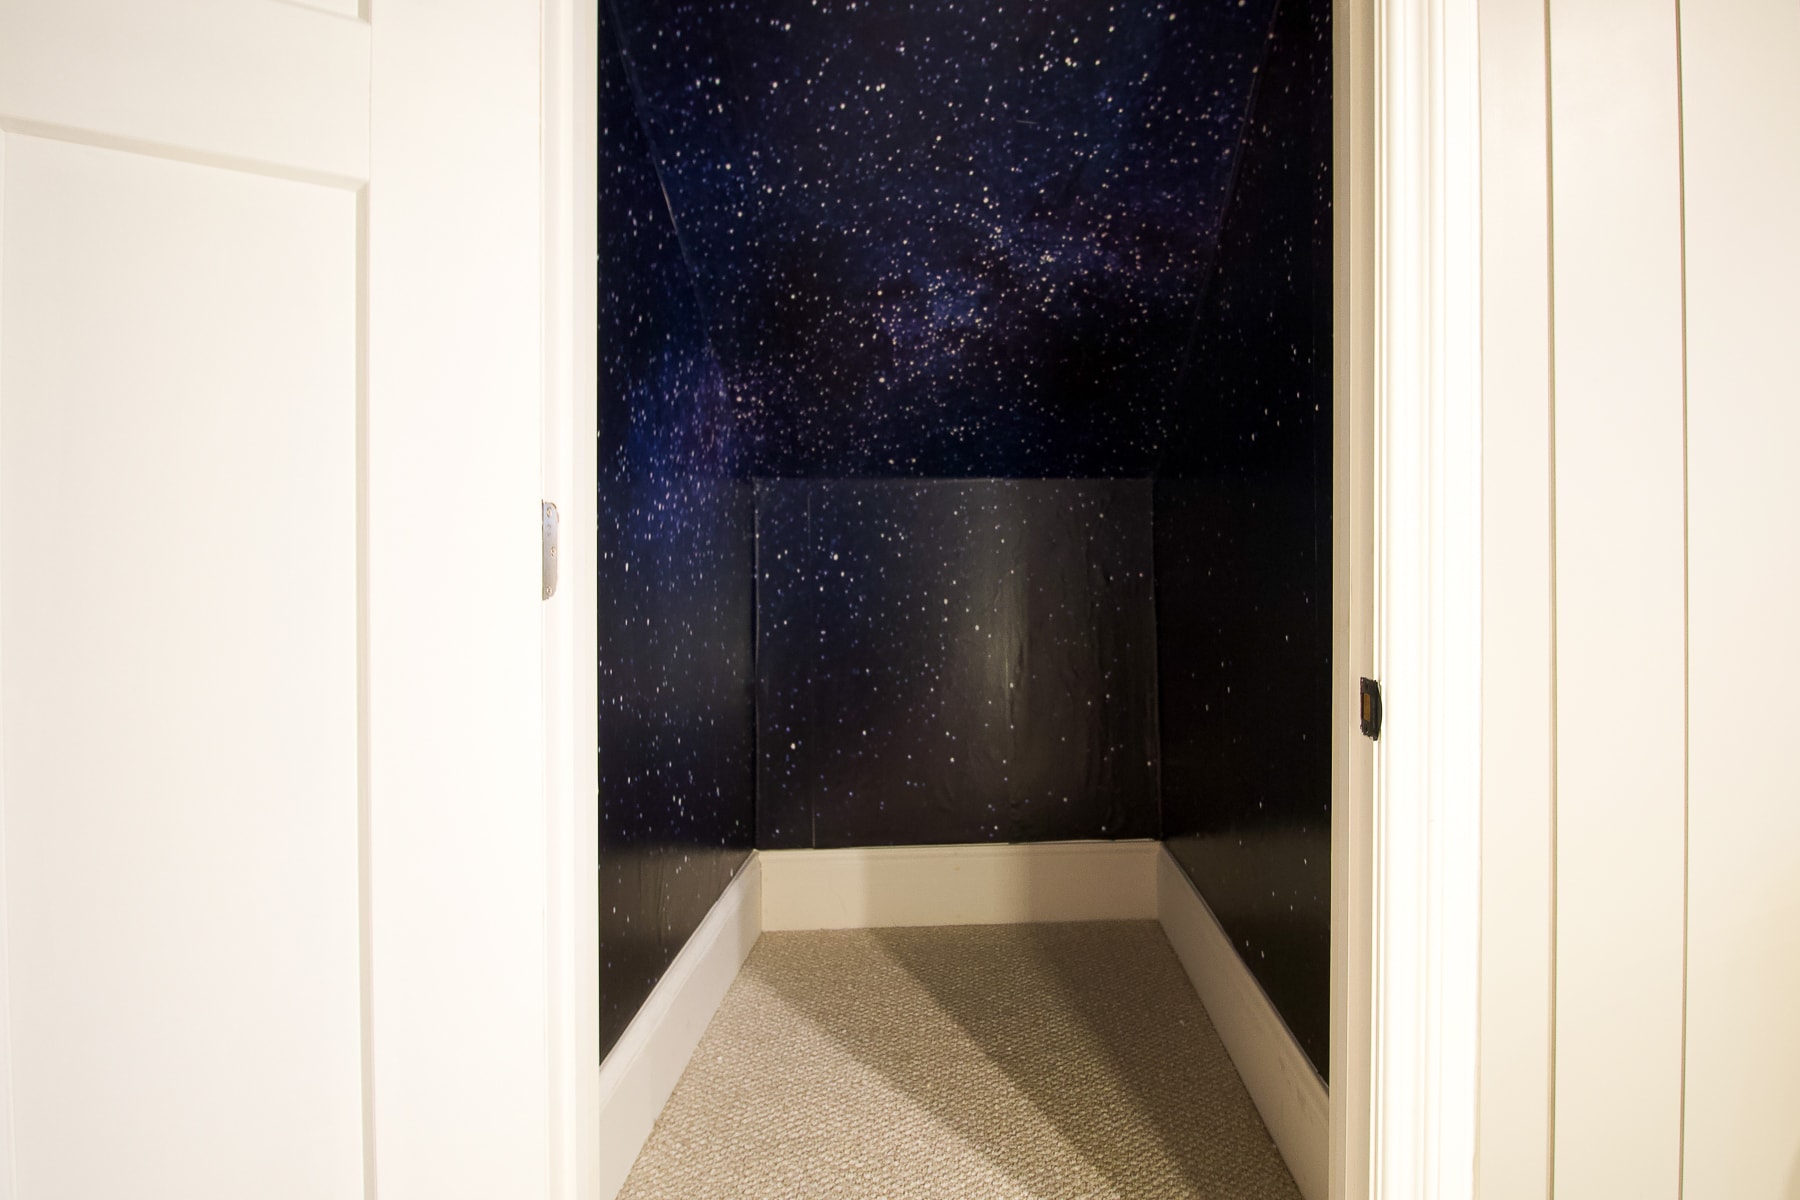
I adore the deep blues and purples in this galaxy scene.
I haven’t showed the kids yet, but I know they are going to freak out when they see it!
What’s Next?
After I added the wallpaper, the white baseboards have been screaming, “Paint me!” ever since. My next project is to color-match a dark blue to the wallpaper and paint the baseboards and trim on the inside of the closet. Stay tuned for that.
Then, it’s time for some lighting in here! As of now, there are no lights in this closet and I had to wear a headlamp for part of this wallpapering project! I just ordered this moon light and these LED strips to add some ambiance and light to this dark closet. Can’t wait to get them installed.