How To Decorate Around An Off Center Fireplace
I’m back with another “DIY Playbook, Save our Space”. My plan for this series is to take a reader’s space and (virtually) offer design tips and tricks on how to improve it.
Here are some of my favorite design solutions from this series…
- Budget Powder Room
- Scandinavian Mudroom Design
- Water Closet with Personality
- Attic Turned Speakeasy
- Living Room Turned Home Office
- Shared Kids’ Bedroom (see the AFTER here!)
- Reader SOS – Where Are They Now?
Offering My Design Tips
Today, instead of tackling one large design problem…I’m tackling multiple (smaller) questions that readers have had for us over the past few months. First up, how to decorate around an off center fireplace.
How Can I Decorate Around My Off Center Fireplace?
“I’ve fallen in love with the custom built-ins you have installed in your homes. The problem for me is that my fireplace is not quite centered and I’m unsure where to mount the TV, and how far the built-ins should go to the right of the TV before it crowds the kitchen area.“
This question is actually from a friend of mine (Hi, Serena!), but I do think it’s a common design dilemma that a lot of people face in their family rooms. How should you set up your living room if you have an off-center fireplace?
Family Room Built-Ins
Serena mentioned wanting built-ins, so let’s first chat about adding those.

We absolutely adore built-ins because they add lots of vertical storage that is hidden. Plus, they increase the value of your home. But, they can definitely be pricey (up to $5,000+) so we understand that they’re not always a good choice for everybody.
Because Serena’s fireplace is off-center, you couldn’t do traditional built-ins (like Bridget’s above).
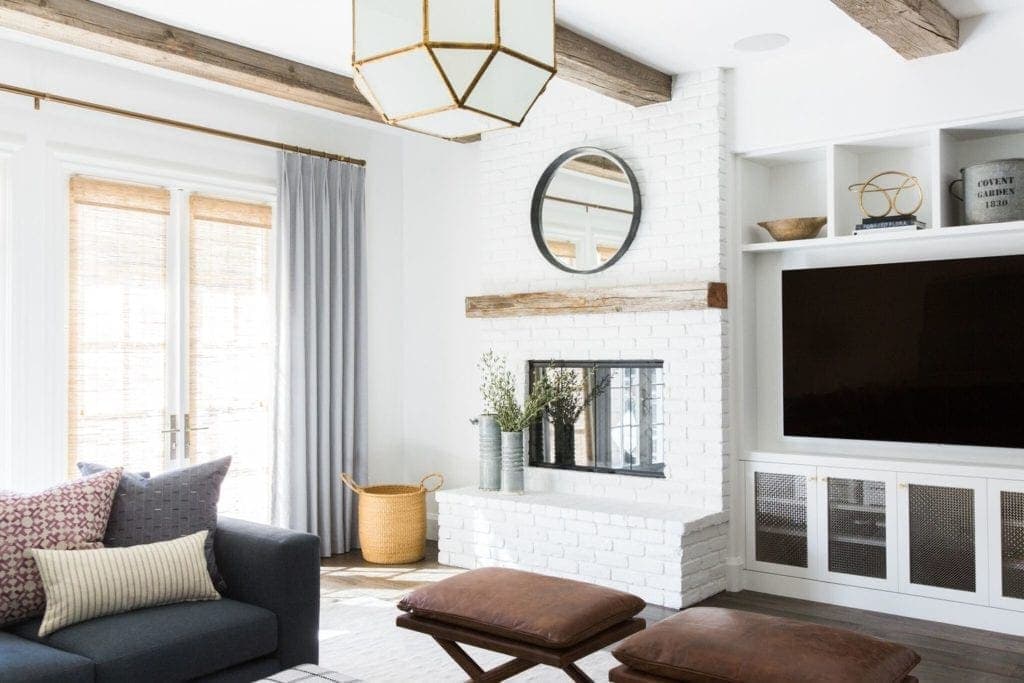
Photo Inspiration via Studio McGee
Instead, we would suggest doing a built-in wall unit all the way to the left of the fireplace, but not to the right of it. Then you could place the TV to the left of the fireplace, instead of on top of the mantle.

Or she could still do built-ins on both sides of the fireplace wall, they just wouldn’t be symmetrical flanking the fireplace surround.
This is actually a great option if you don’t want to hang the television on the fireplace mantel (because it will be too high or you’re worried about the high heat!). Instead, you can do a mirror or layered art on the mantle and have the TV on either side of the fireplace.
Family Room Without Built-Ins
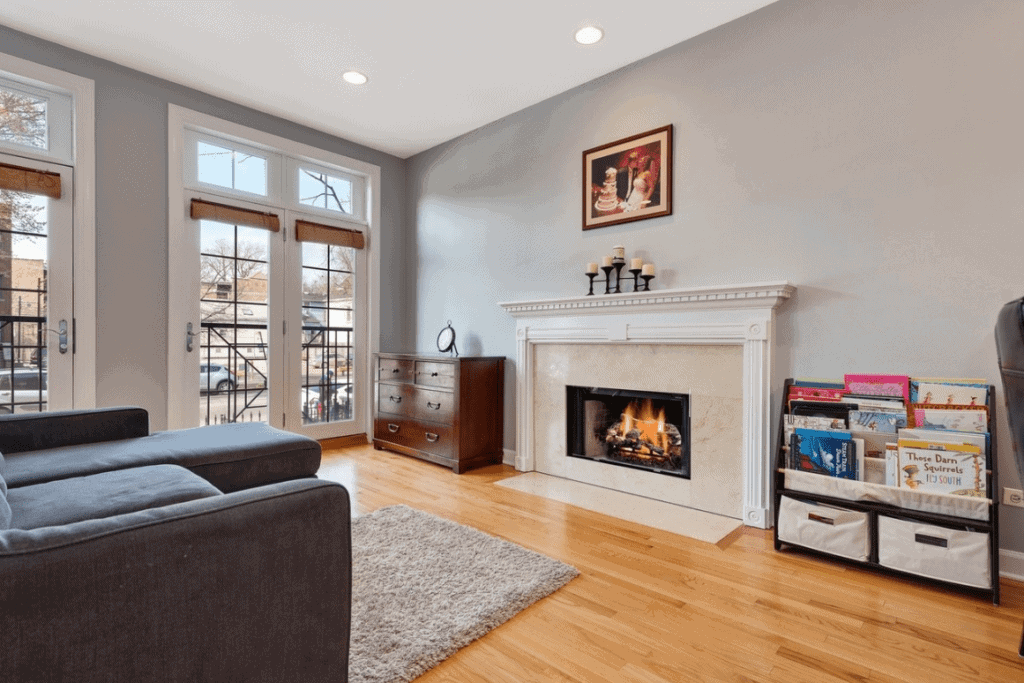
After discussing with Serena some more, she decided to forego the built-ins for now to save money and she came up with some layout options using Modsy (it’s a great way to visualize a room!).
Here’s the first layout option…
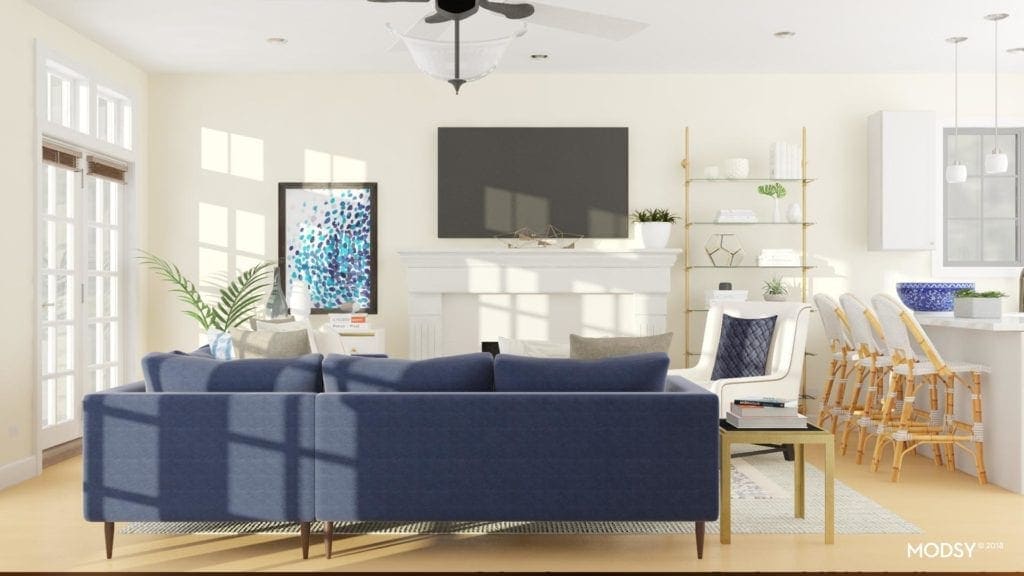
You still get some vertical storage in the living space with the bookshelf on to the right of the fireplace, yet you don’t crowd the kitchen too much.
And on the left, a dresser with a statement piece of art balances it out. I also like the addition of the seating area in front of the stone fireplace to create a conversation area with the sectional sofa. It looks like a cozy and inviting space.
Different Seating Area & Furniture Placement
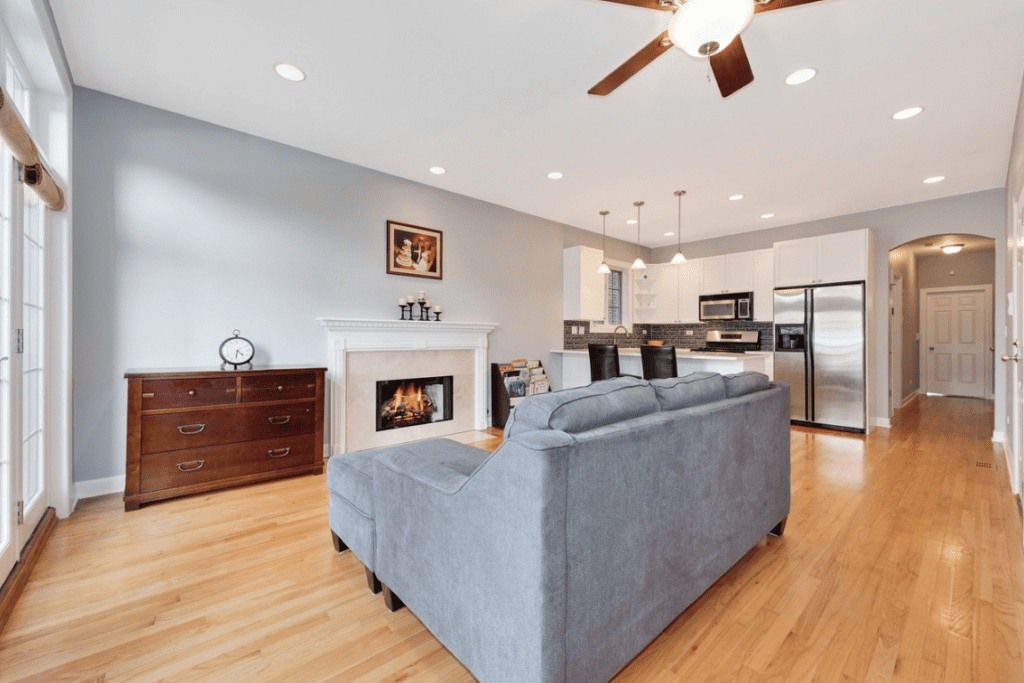
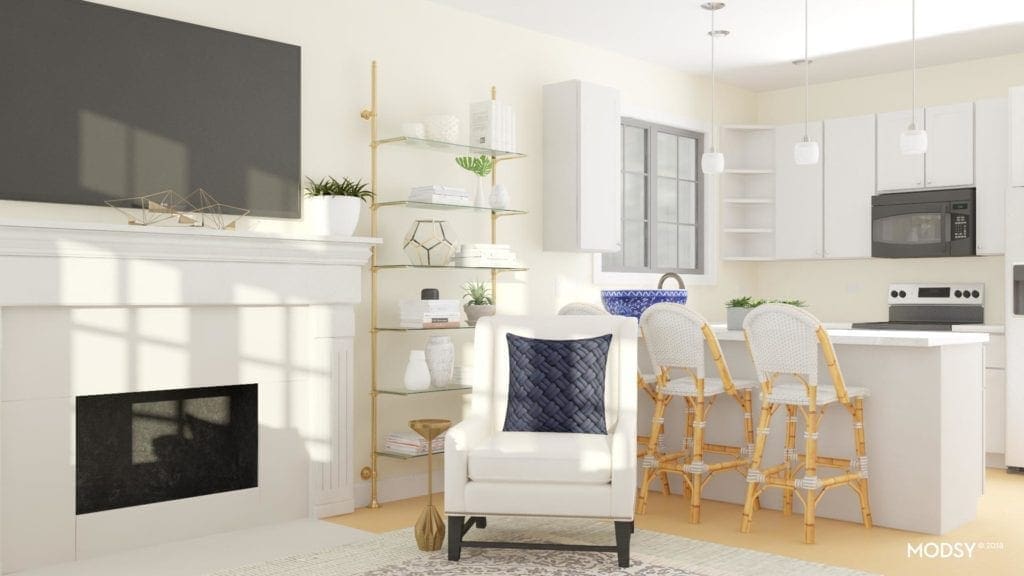
Here’s the second option…
This option features a long credenza to the left of the off center fireplace, and a leaning mirror to the right of it. The furniture arrangement is also switched up with two sofas, a square coffee table in the middle, and an accent chair near the fireplace opening. Everything is then centered around a large area rug.

This option doesn’t offer quite as much storage as the first option, but it’s equally as gorgeous! Plus, I love the white and blue hues in the space. Lots of Serena & Lily vibes happening here and I’m obsessed.
I think both options could work for Serena because they don’t make the fireplace the main focal point of the room. Instead, they showcase interesting artwork and furnishings to draw attention away from the standard fireplace.
How Should I Hang My Light Fixture Over My Table?
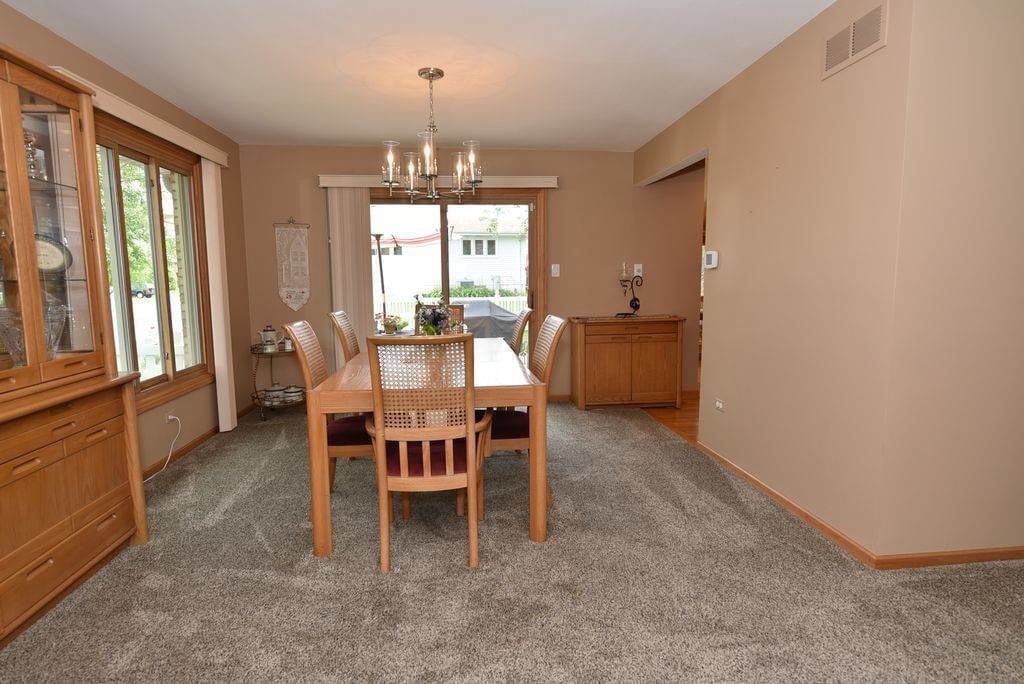
“I have a question about light fixtures hanging over tables. I have a pretty good-sized breakfast nook with cathedral ceilings. The table I have is not too small, but on the smaller side for the room. I really love this one light fixture that is 41” round. If the ceilings are high, is it okay that it’s almost as wide as the table? Also, how high should it hang if it’s in such a high-ceiling room? The light fixture we have now came with the house and has been driving me nuts because I think it’s way too small.”
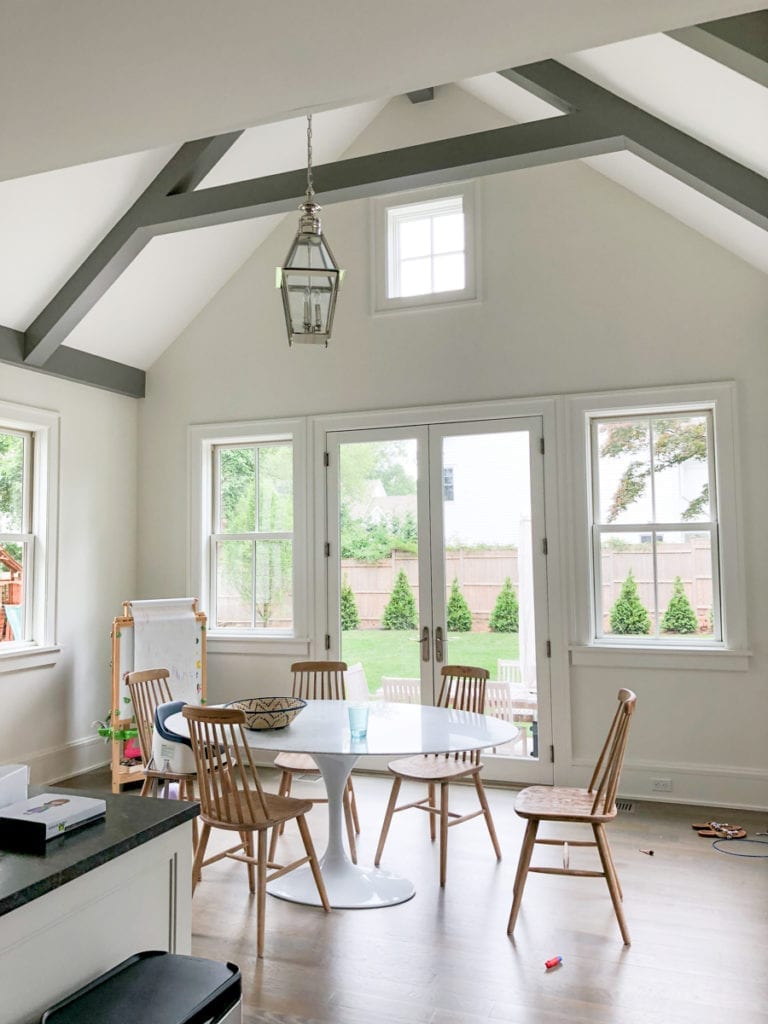
First of all, what a gorgeous breakfast nook! Those high ceilings and the view of the backyard are absolutely stunning.
Here are tips when it comes to hanging light fixtures over a table.
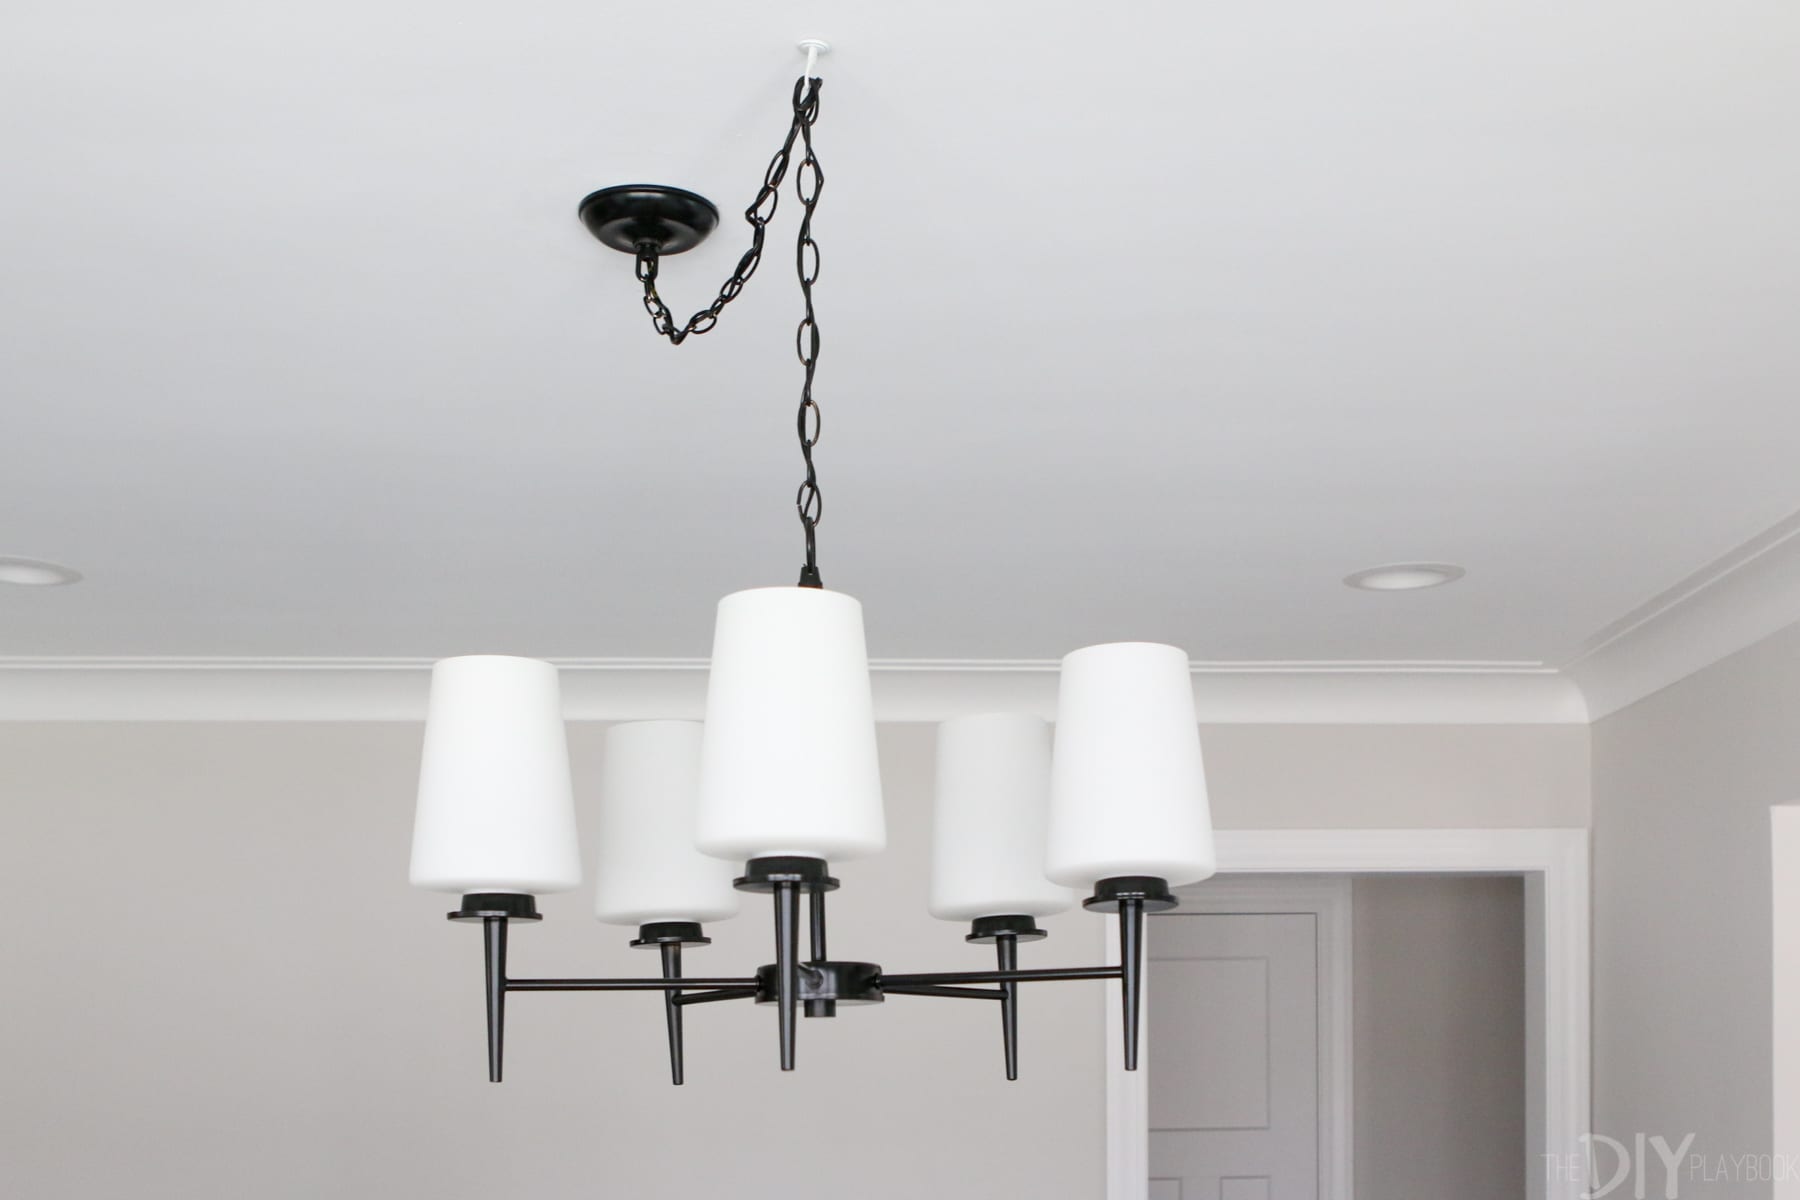
- Center the light fixture over the table. Don’t center it in the room. If your junction box isn’t centered over the table, consider a swag light (like this one!).
- Choose a chandelier that is about half the width of the table. If you go too big, it will overpower the room.
- You don’t want to block anyone’s vision when they’re eating, so make sure the bottom of the fixture is 33″-36″ above the table.

However, this situation is a bit different because the ceilings are so high. For a standard room (with 8′ ceilings), the 33″-36″ above the table should work. However, you can bring it up 3″ per extra foot of ceiling. For example, if your ceilings are 10′ tall you might want to hang yours 39″-42″ above your table.
Should I Paint My Wood Trim White?
“I would LOVE to hear you tackle this design question. Wood trim! Our entire house has wood trim. All the doors are wood. I feel like transitioning to white would be insanely overwhelming and expensive. While I don’t love the wood, I almost feel like it’s just the home’s personality because it’s everywhere. So do we just embrace it and kind of go with it as we style the rooms?“
This is a question I get ALL.THE.TIME. And it’s definitely a polarizing topic…some people are horrified at the thought of painting wood, while others don’t really seem to care. I usually fall into the latter camp, but there are some instances when I think it’s a good idea to keep the wood look. Mostly when it’s a historic home and the wood trim has been there for decades and decades (like in Nicole’s gorgeous Victorian).
But for homes built in the 80’s, 90’s, and 00’s…I say paint all the wood! The wood trim can often be a bit too orange or red and that will greatly impact the color palette of the rest of the space, especially if you’re trying to modernize things.
Here’s a before and after of my Lowe’s room makeover where we painted the wood trim white…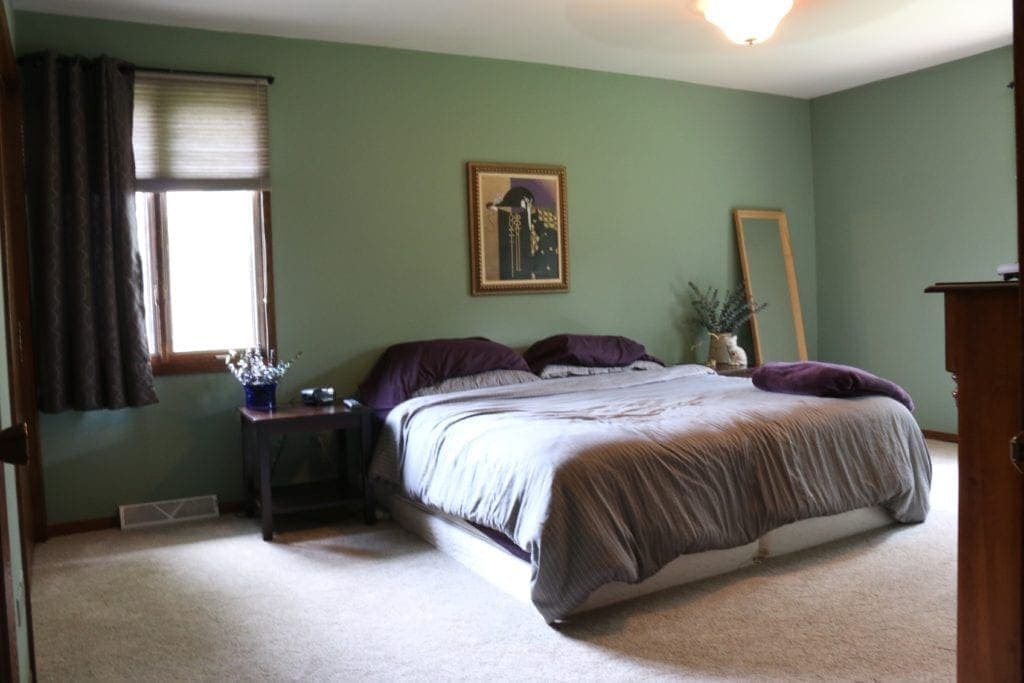
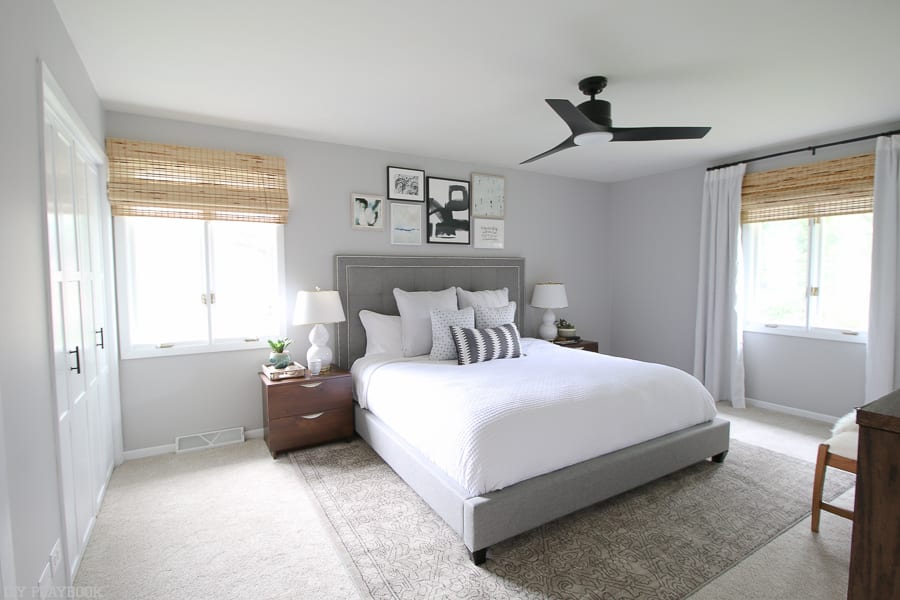
The baseboards, window casings, and doors all received a fresh coat of white paint and it instantly made the room feel upgraded and bright! It brought a new life and light color scheme to the entire room!

But I also understand that painting trim white is a BIG undertaking, and these thoughts were confirmed when we asked B’s dad to give us the scoop. “Big Mike” is a professional painting contractor and he agreed that it’s doable but A LOT of work, especially taking on an entire house. Outside of sharing the sheer amount of work it is, here’s what he had to say about the dramatic transformation:
- The first thing you need to do is put a coat of stain blocker, like this one, on all of the trim so that the stain does not bleed through the wood. This is an oil-based product so it has a strong smell, something to consider if you have little ones around!
- Then you’ll probably have to putty a lot of the nail holes that weren’t visible when the wood was stained dark. The stain blocker (or white primer) will highlight these holes, which will need to be addressed before painting.
- The wood has probably never been caulked either. After it is transformed into white, you’ll probably need to caulk the finished product.
- You’ll also have to prime and then paint the trim with at least one or two coats.
- It’s hard to make a blanket statement on how much a project like this would cost a homeowner to hire out, specifically because everyone’s project needs are so different. But it would definitely run you a few thousand dollars (at least!) to hire a professional.
- If you do end up DIY-ing this project, most people use a semi-gloss or satin finish on the trim. This way, the trim has a bit of a shine and will contrast against the wall’s sheen.
These are just a few things to consider before you commit to the fresh new look. I think it can be well worth the time and money, but I want everyone to know what they’re getting themselves into before making the commitment! Thanks for the tips, Big Mike!
Casey