Reader SOS – Where Are They Now?
Over the past few years, I’ve helped dozens of readers virtually tackle their design dilemmas with my Reader SOS series. It’s a fun way to take a space and offer decorating advice from afar. Usually, I receive the submission, come up with a gameplan and a mood board for the room refresh, post about it, and then that’s about it. I never really follow-up to see what happens next…
Did Readers Do a Room Refresh?
I thought it would be fun to check-in with some of these readers to see if they implemented the tips I gave them to makeover their rooms. I emailed about a dozen readers whom I have worked with over the years and I was overwhelmed with the awesome response from many of them. Most actually did take my ideas and put their own twist on them to create a space that works well for their families.
Let’s dive into four spaces and see what they look like now…
Stephanie’s Front Room – Before

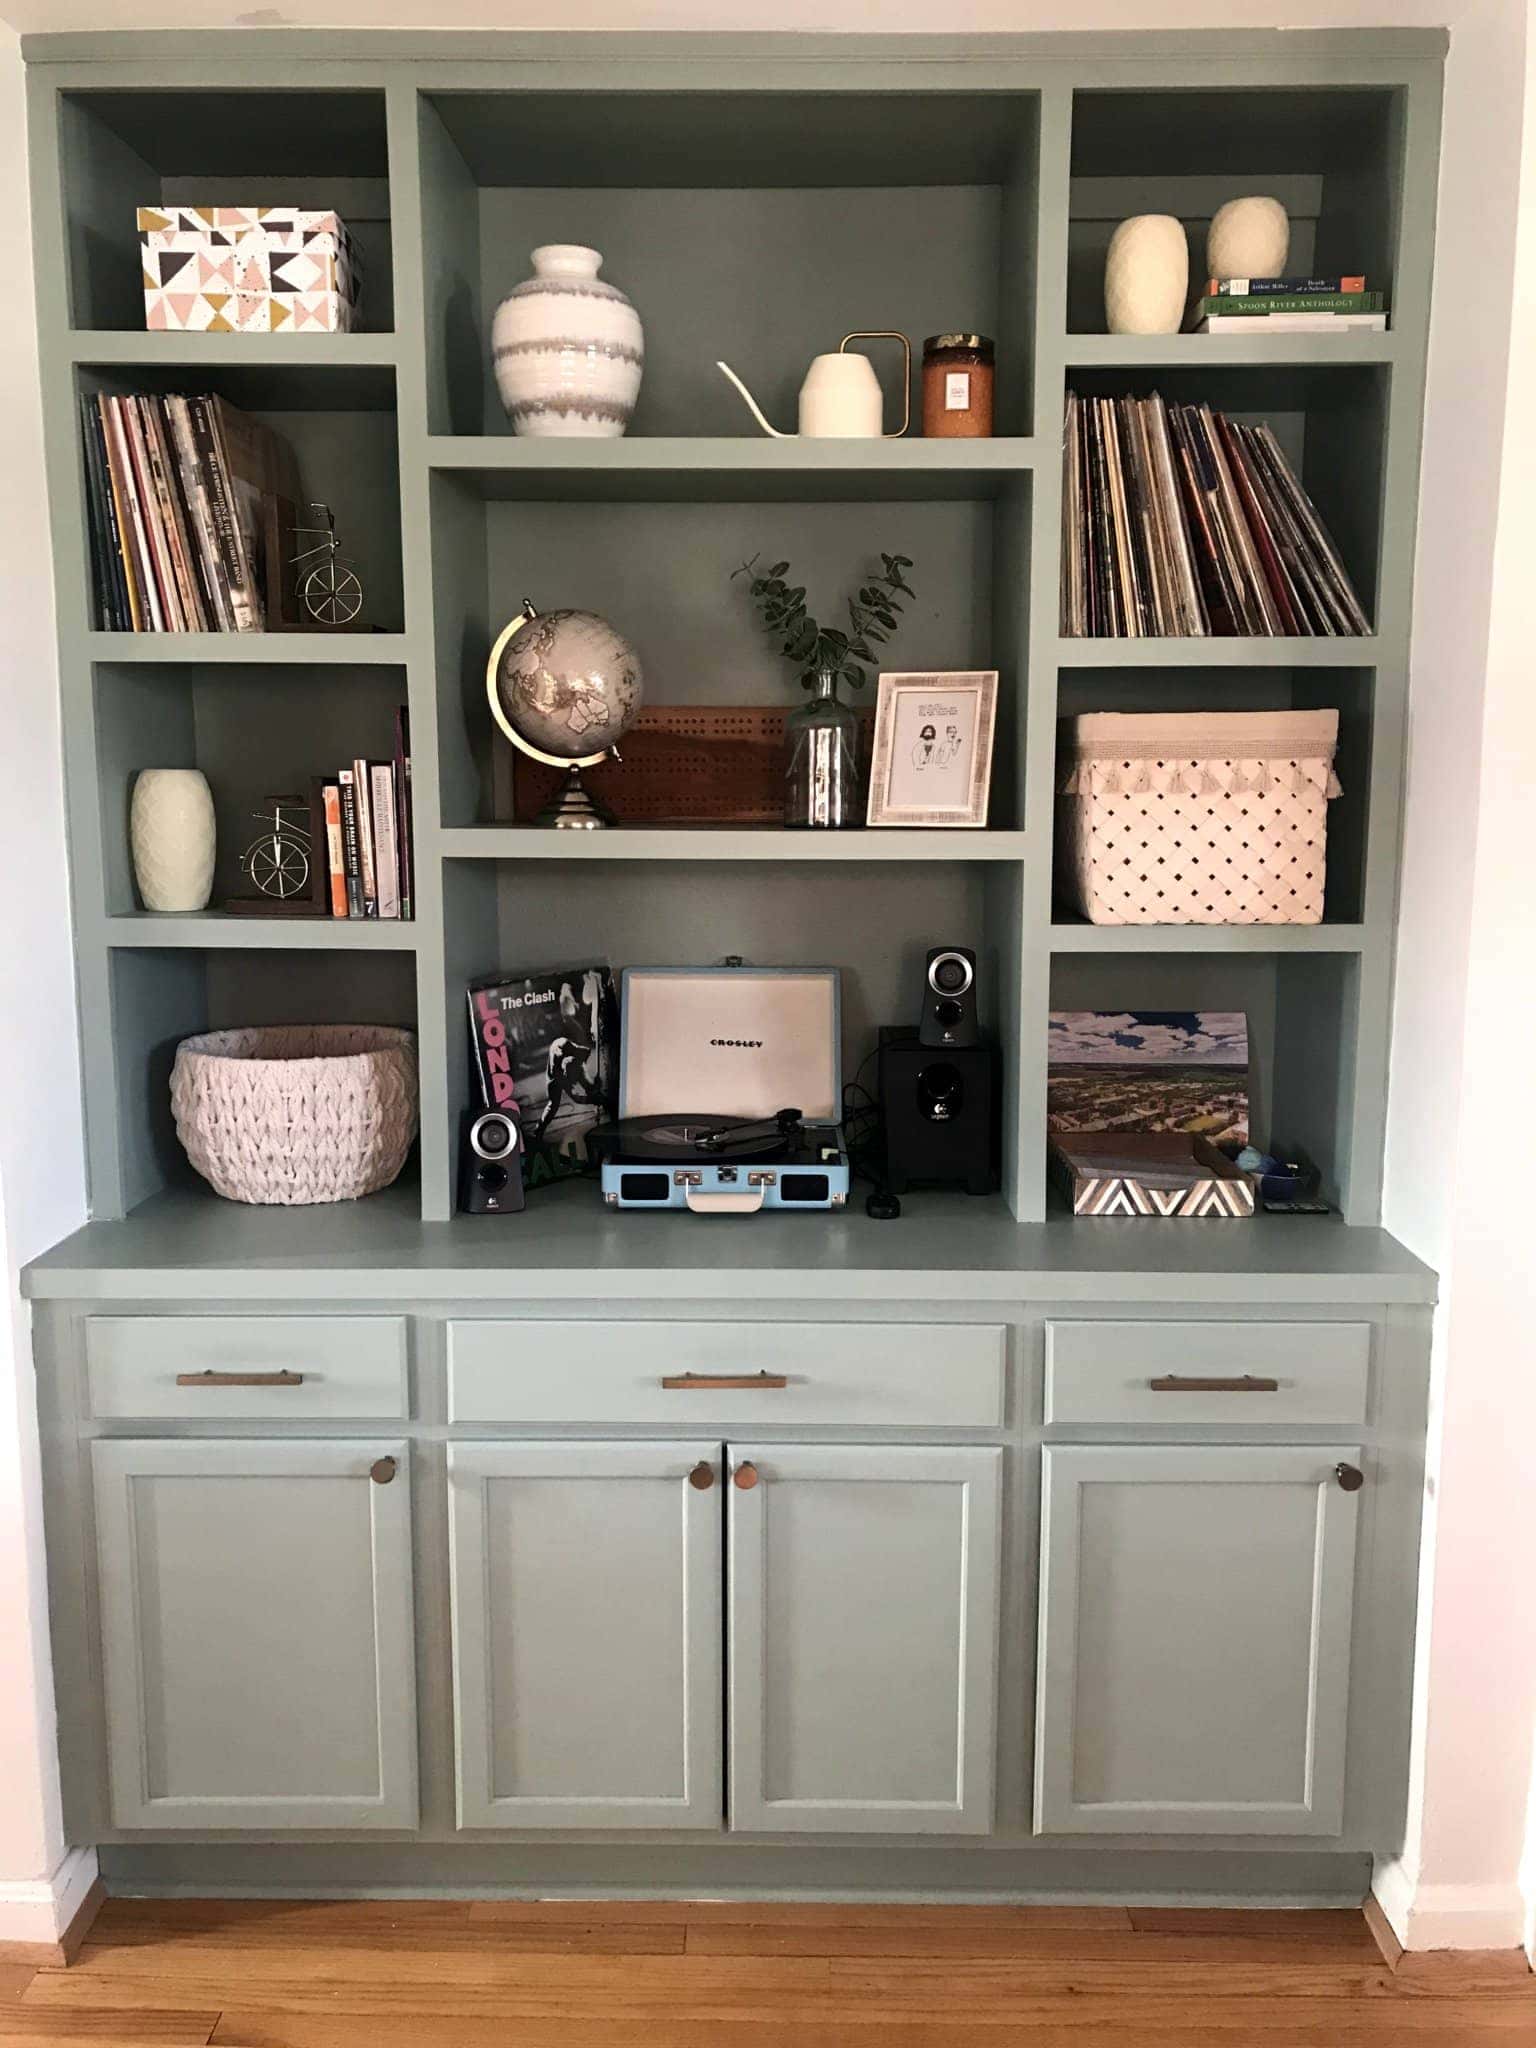
This first room refresh is from Stephanie. A couple of years ago, she reached out looking for help with her front room. It had great bones but was lacking a true purpose. She didn’t want to make a formal living room or dining room and instead wanted a space that would work well for her family, while still looking nice, since it’s the first spot you see when you walk in the door.
The Gameplan 
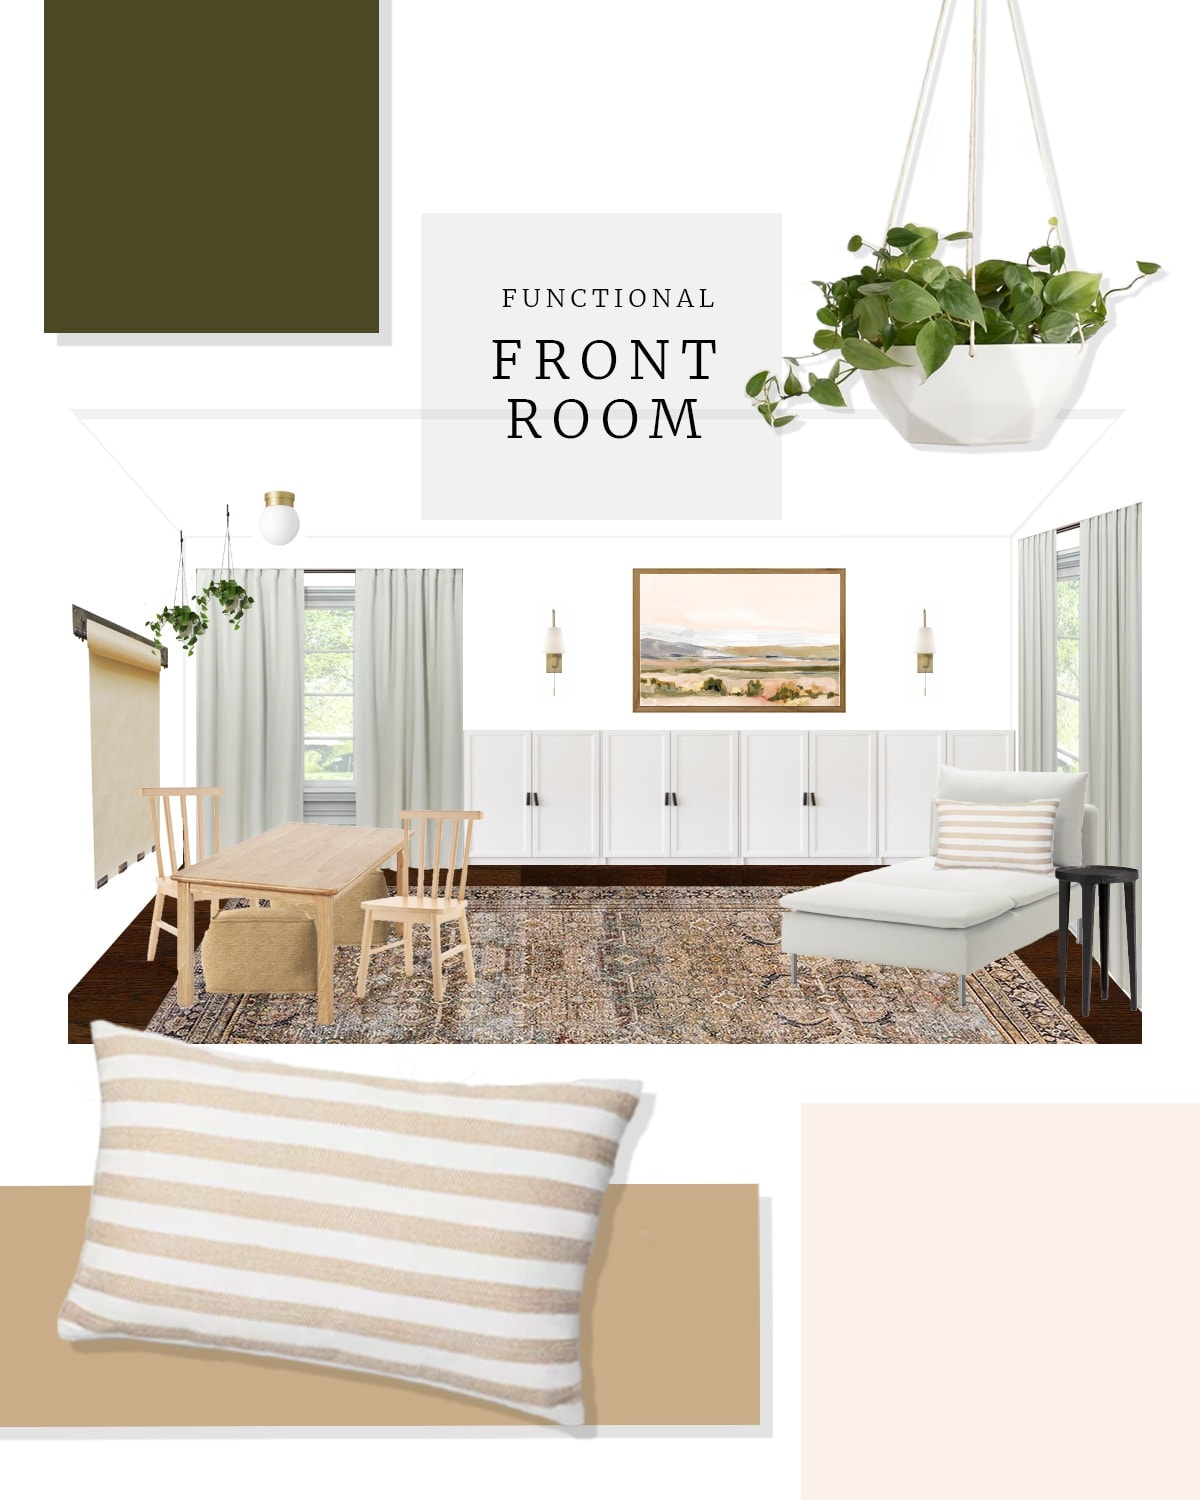
My Reader SOS contributor, Erica, came up with an awesome solution for Stephanie’s front room. Creating functional storage, adding a play area, and including seating. You can see the entire design plan in this blog post.
What It Looks Like Now


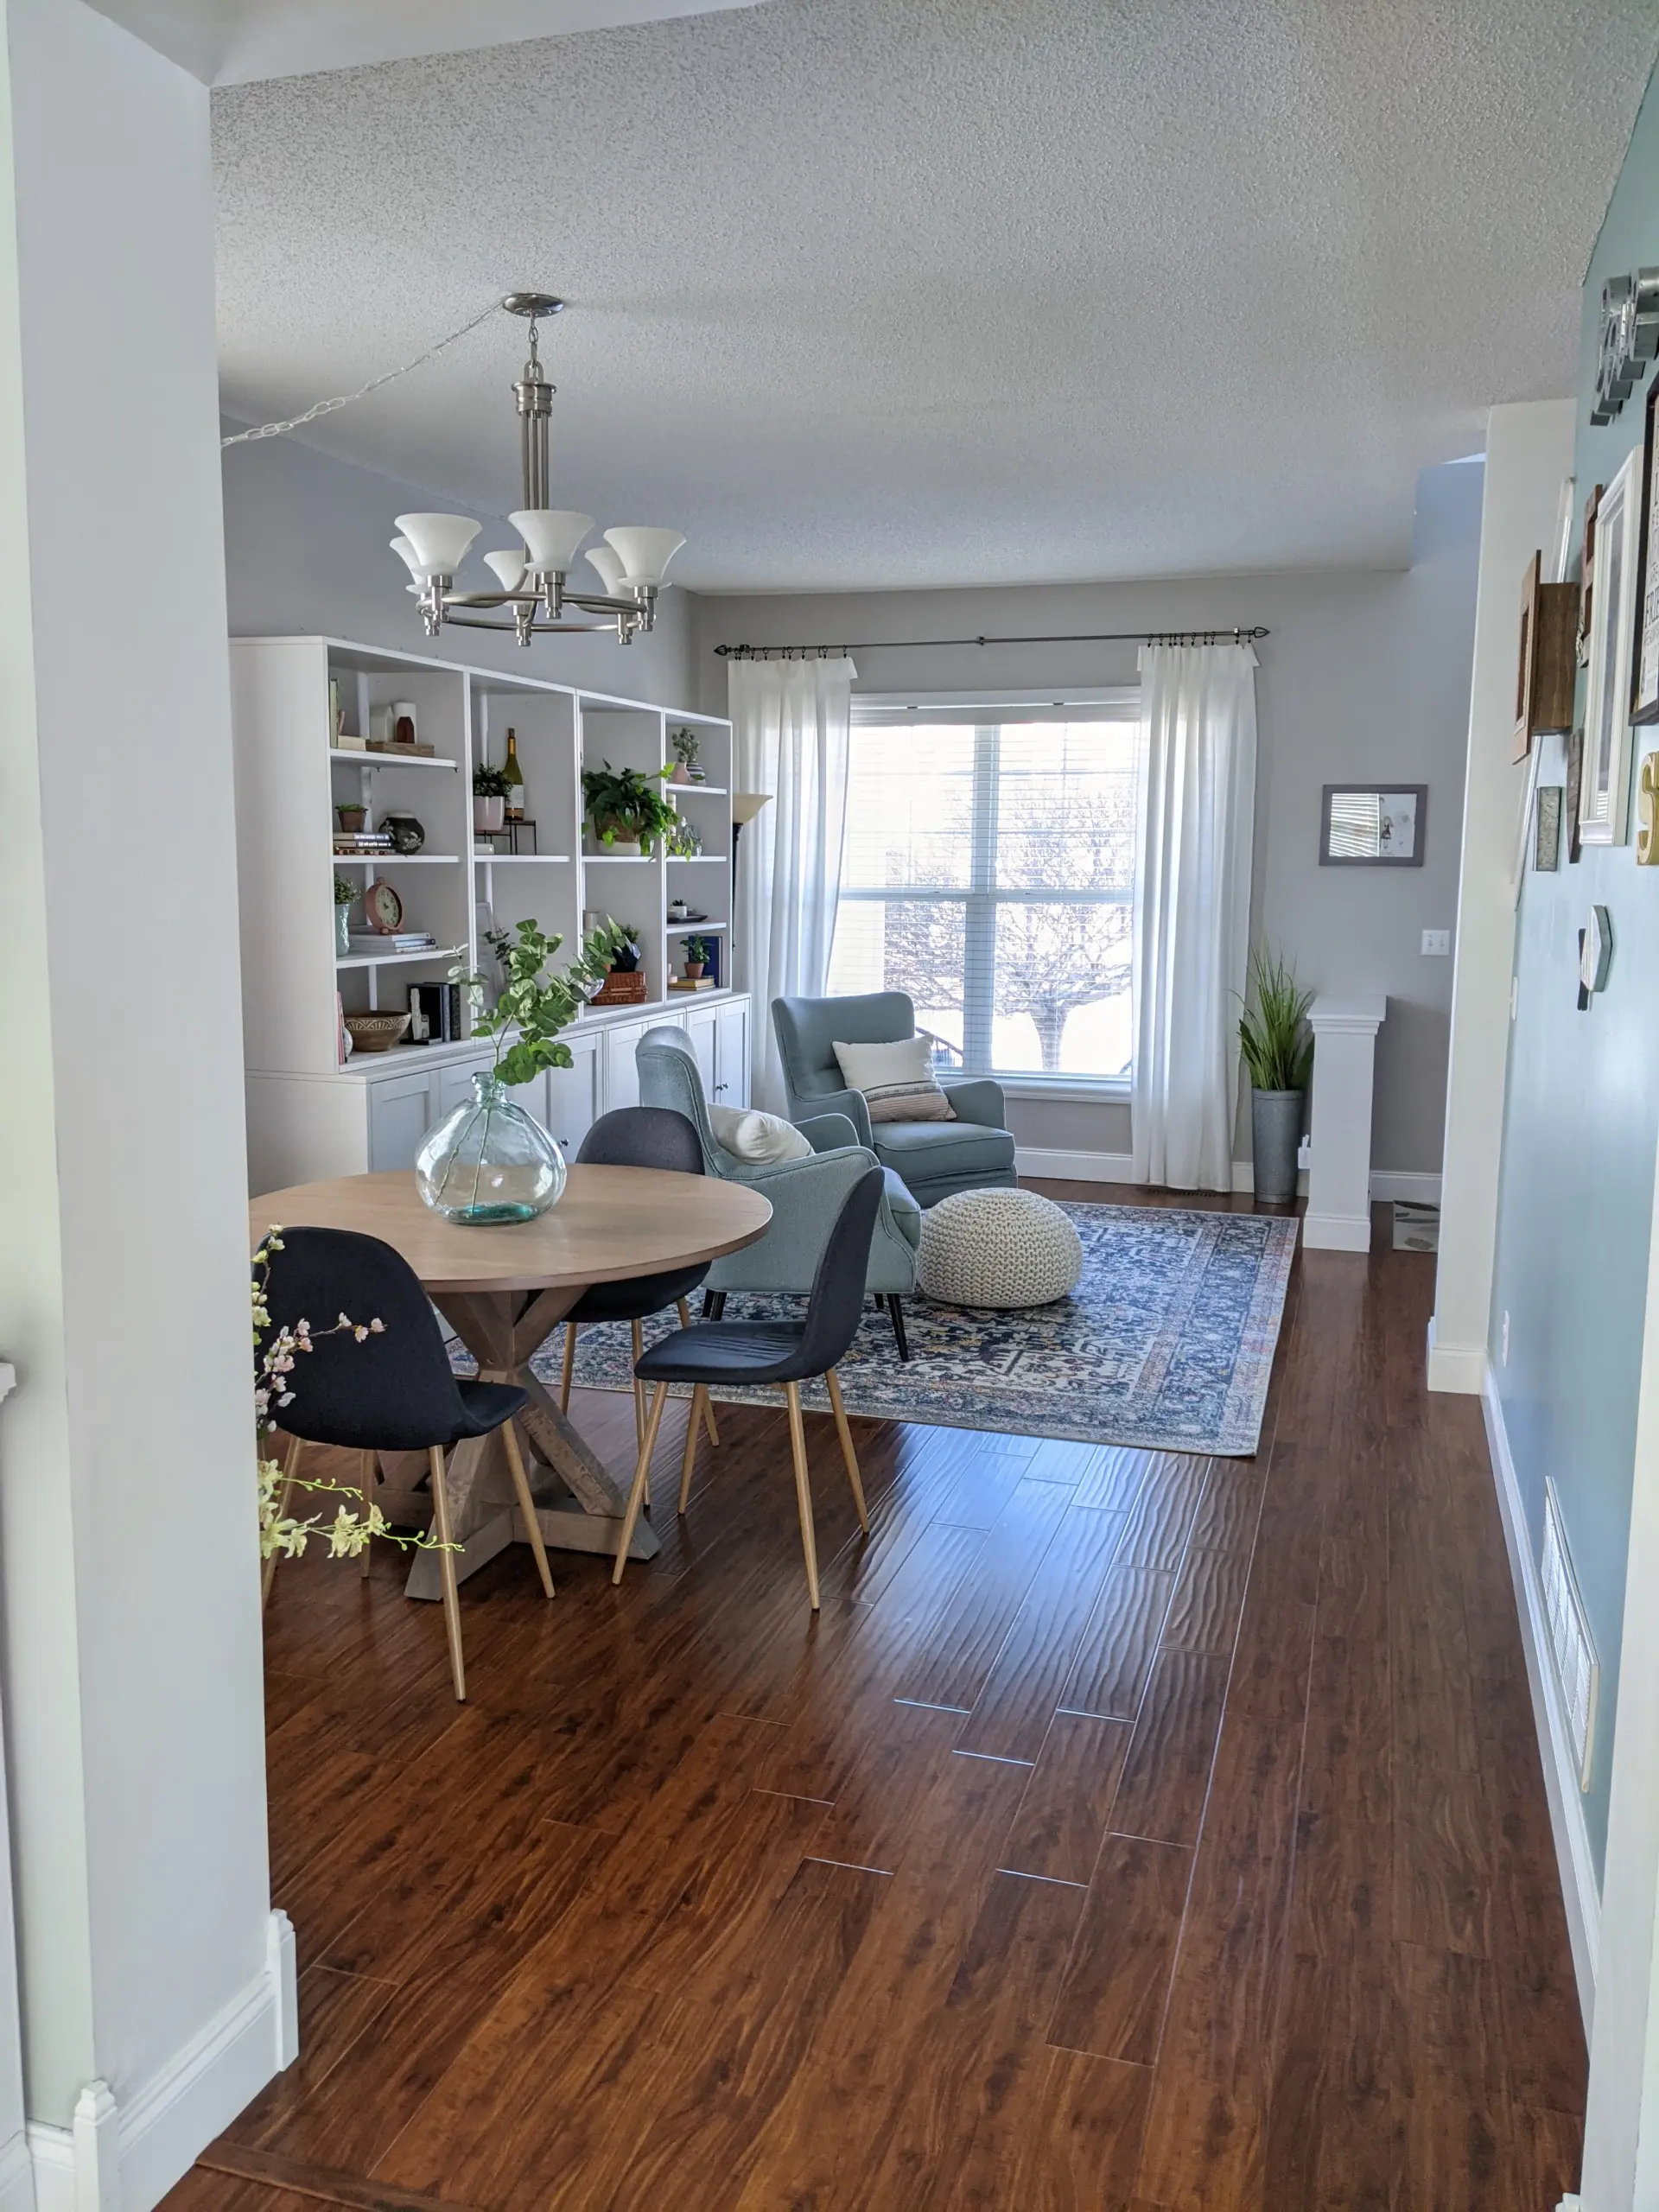
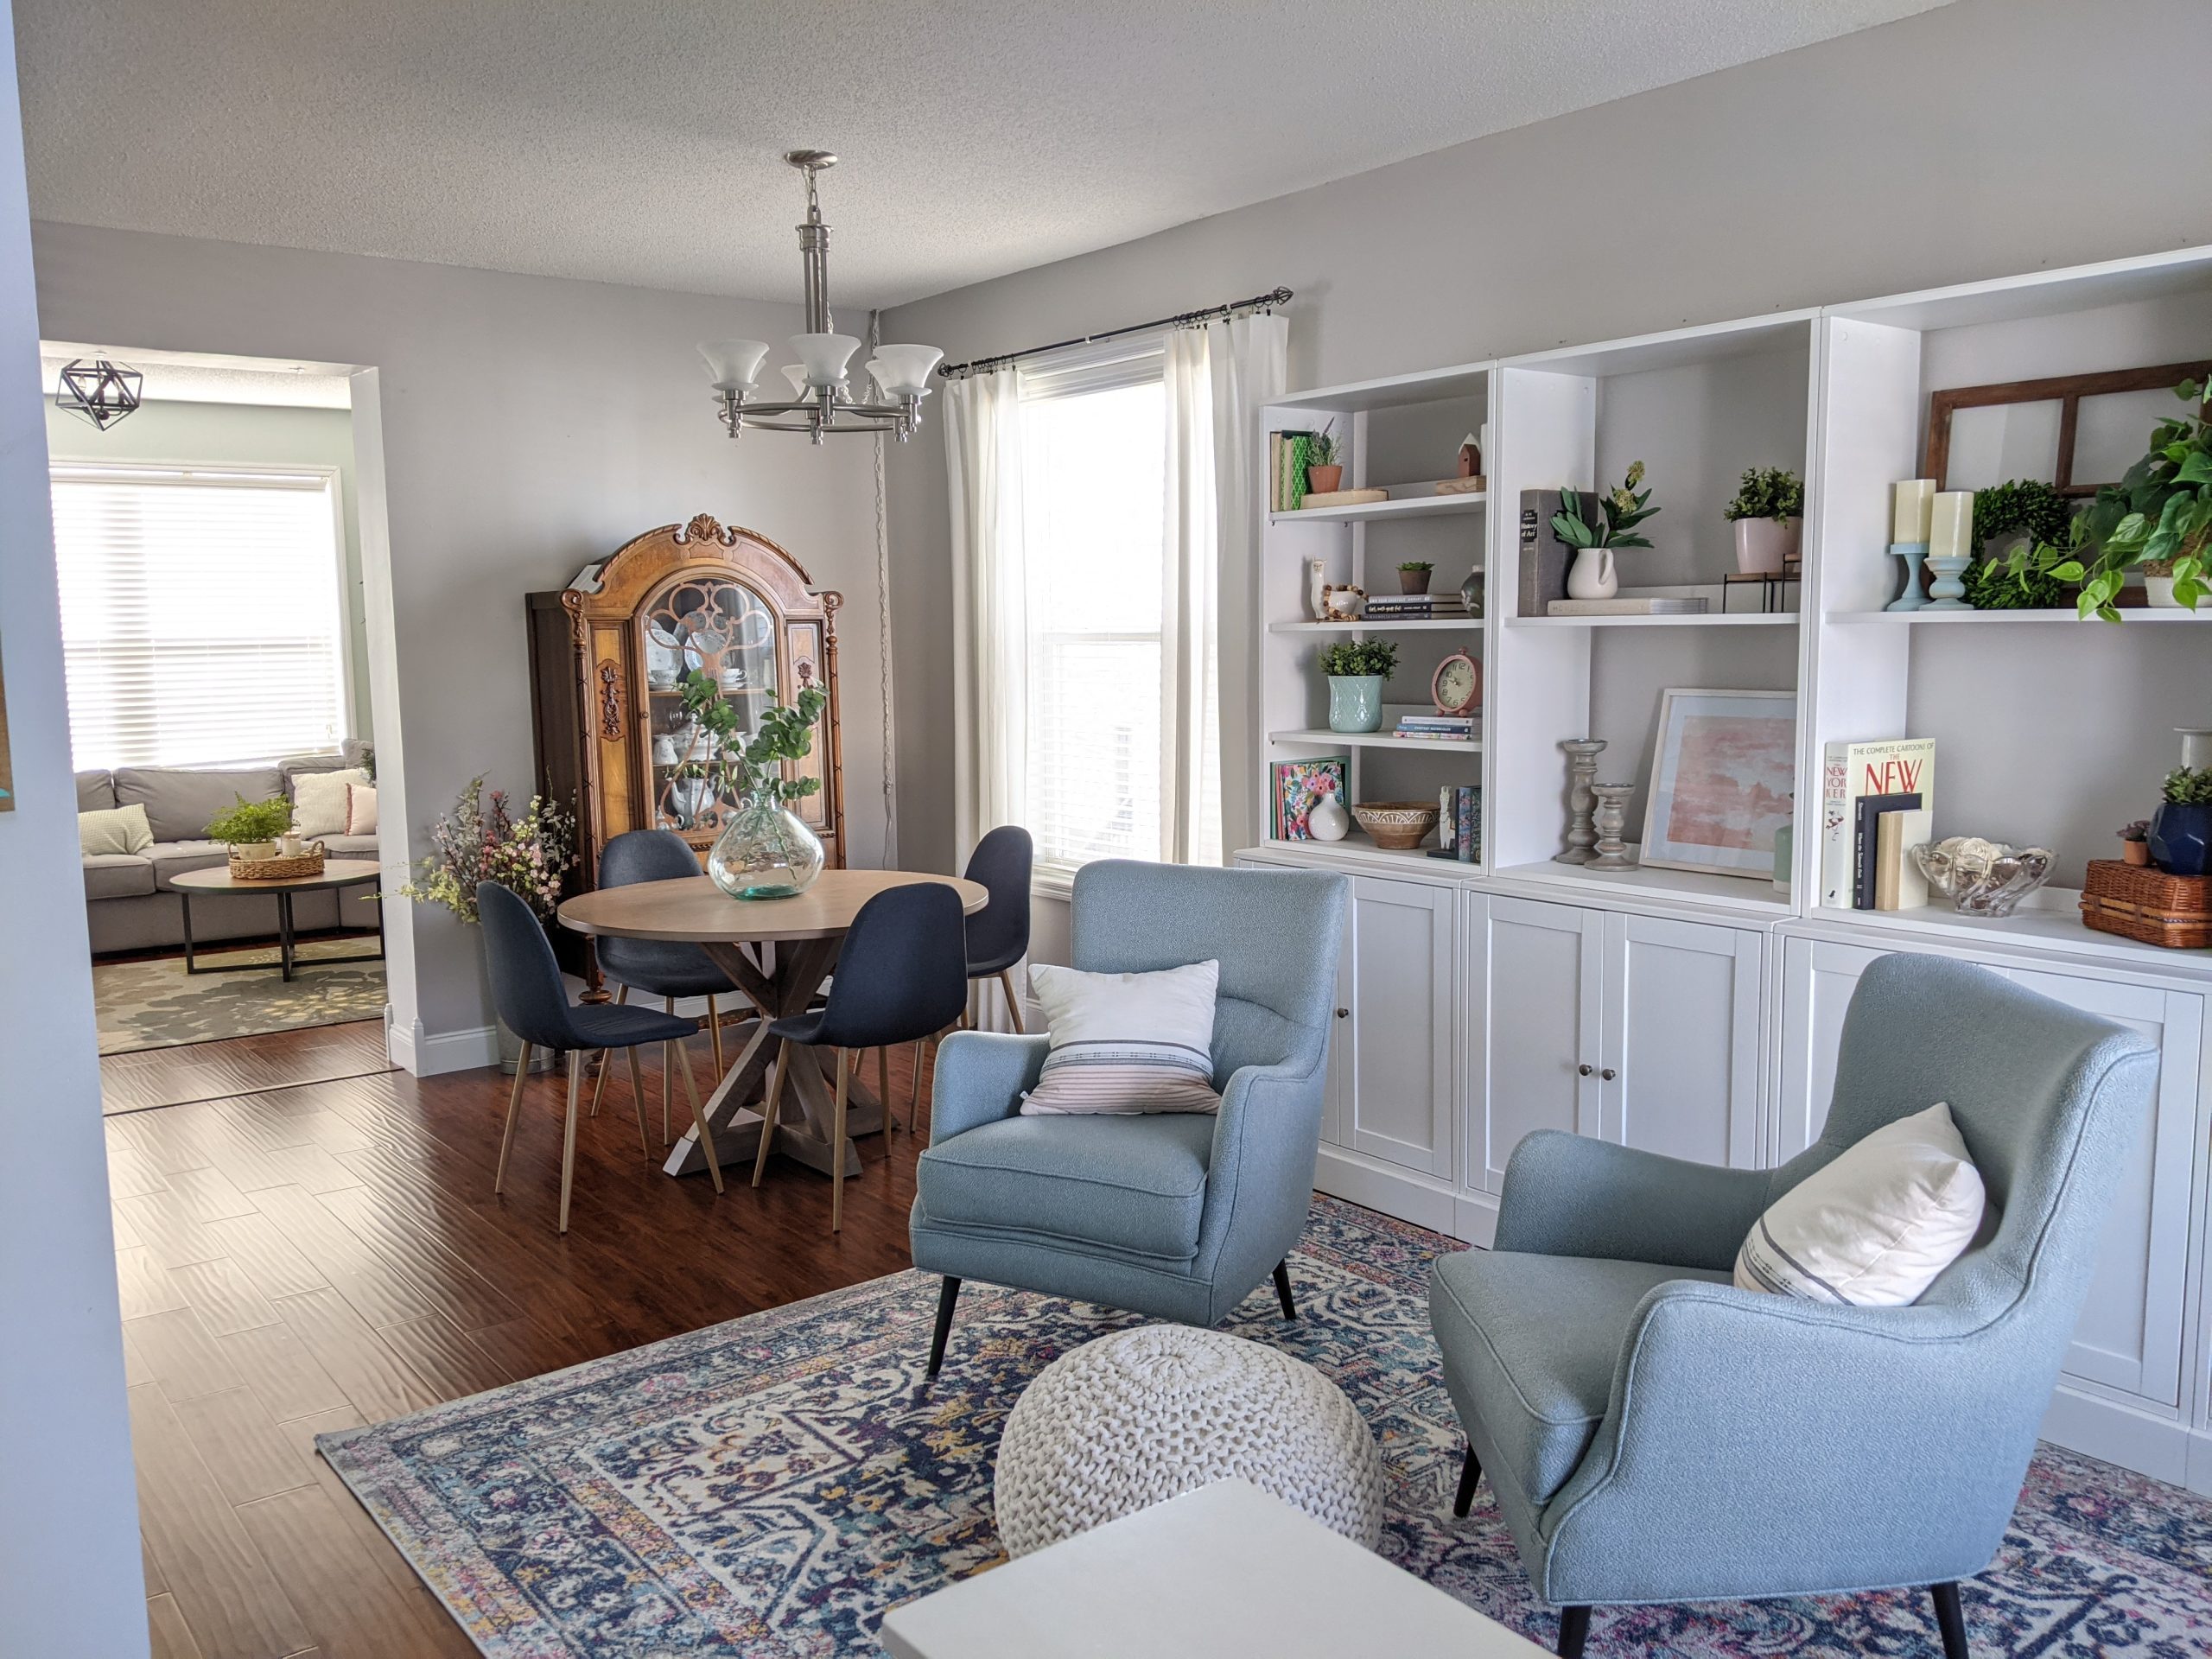
Holy smokes!! Did your eyes widen too? I am so amazed at the hard work Stephanie did to this room. It looks fantastic. She ended up using IKEA shelving for a built-in look, but instead of doing a credenza, they also added four bookshelves for a built-in look. They considered adding molding and building them in, but they’re actually hoping to buy a new house and they want to bring this entire unit with them. Genius. And wow, look at all of that storage they gained.
They also added curtains and a new table and chairs. Stephanie says, “We’ve loved having the table for family game nights, and the girls use it for coloring. It came in handy for distance learning during COVID!” Finally, how about those gorgeous chairs and ottoman? Such a nice relaxing spot for this cute family.
Gia’s Gray Bedroom – Before

 Gia reached out looking for some advice on how to add some warmth and life to her main bedroom. She felt it was too gray on gray on gray, plus she really wanted to figure out a better solution near her expansive windows, as the bench felt a little too dinky.
The Gameplan 
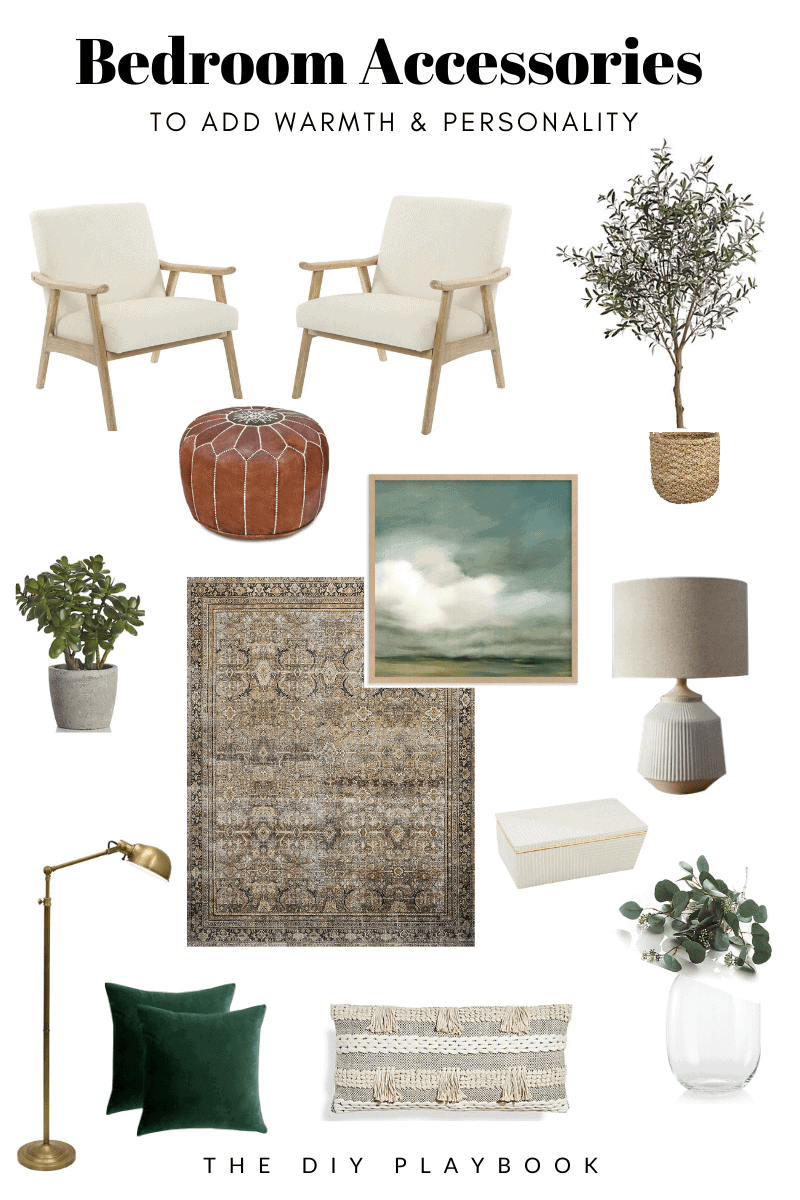
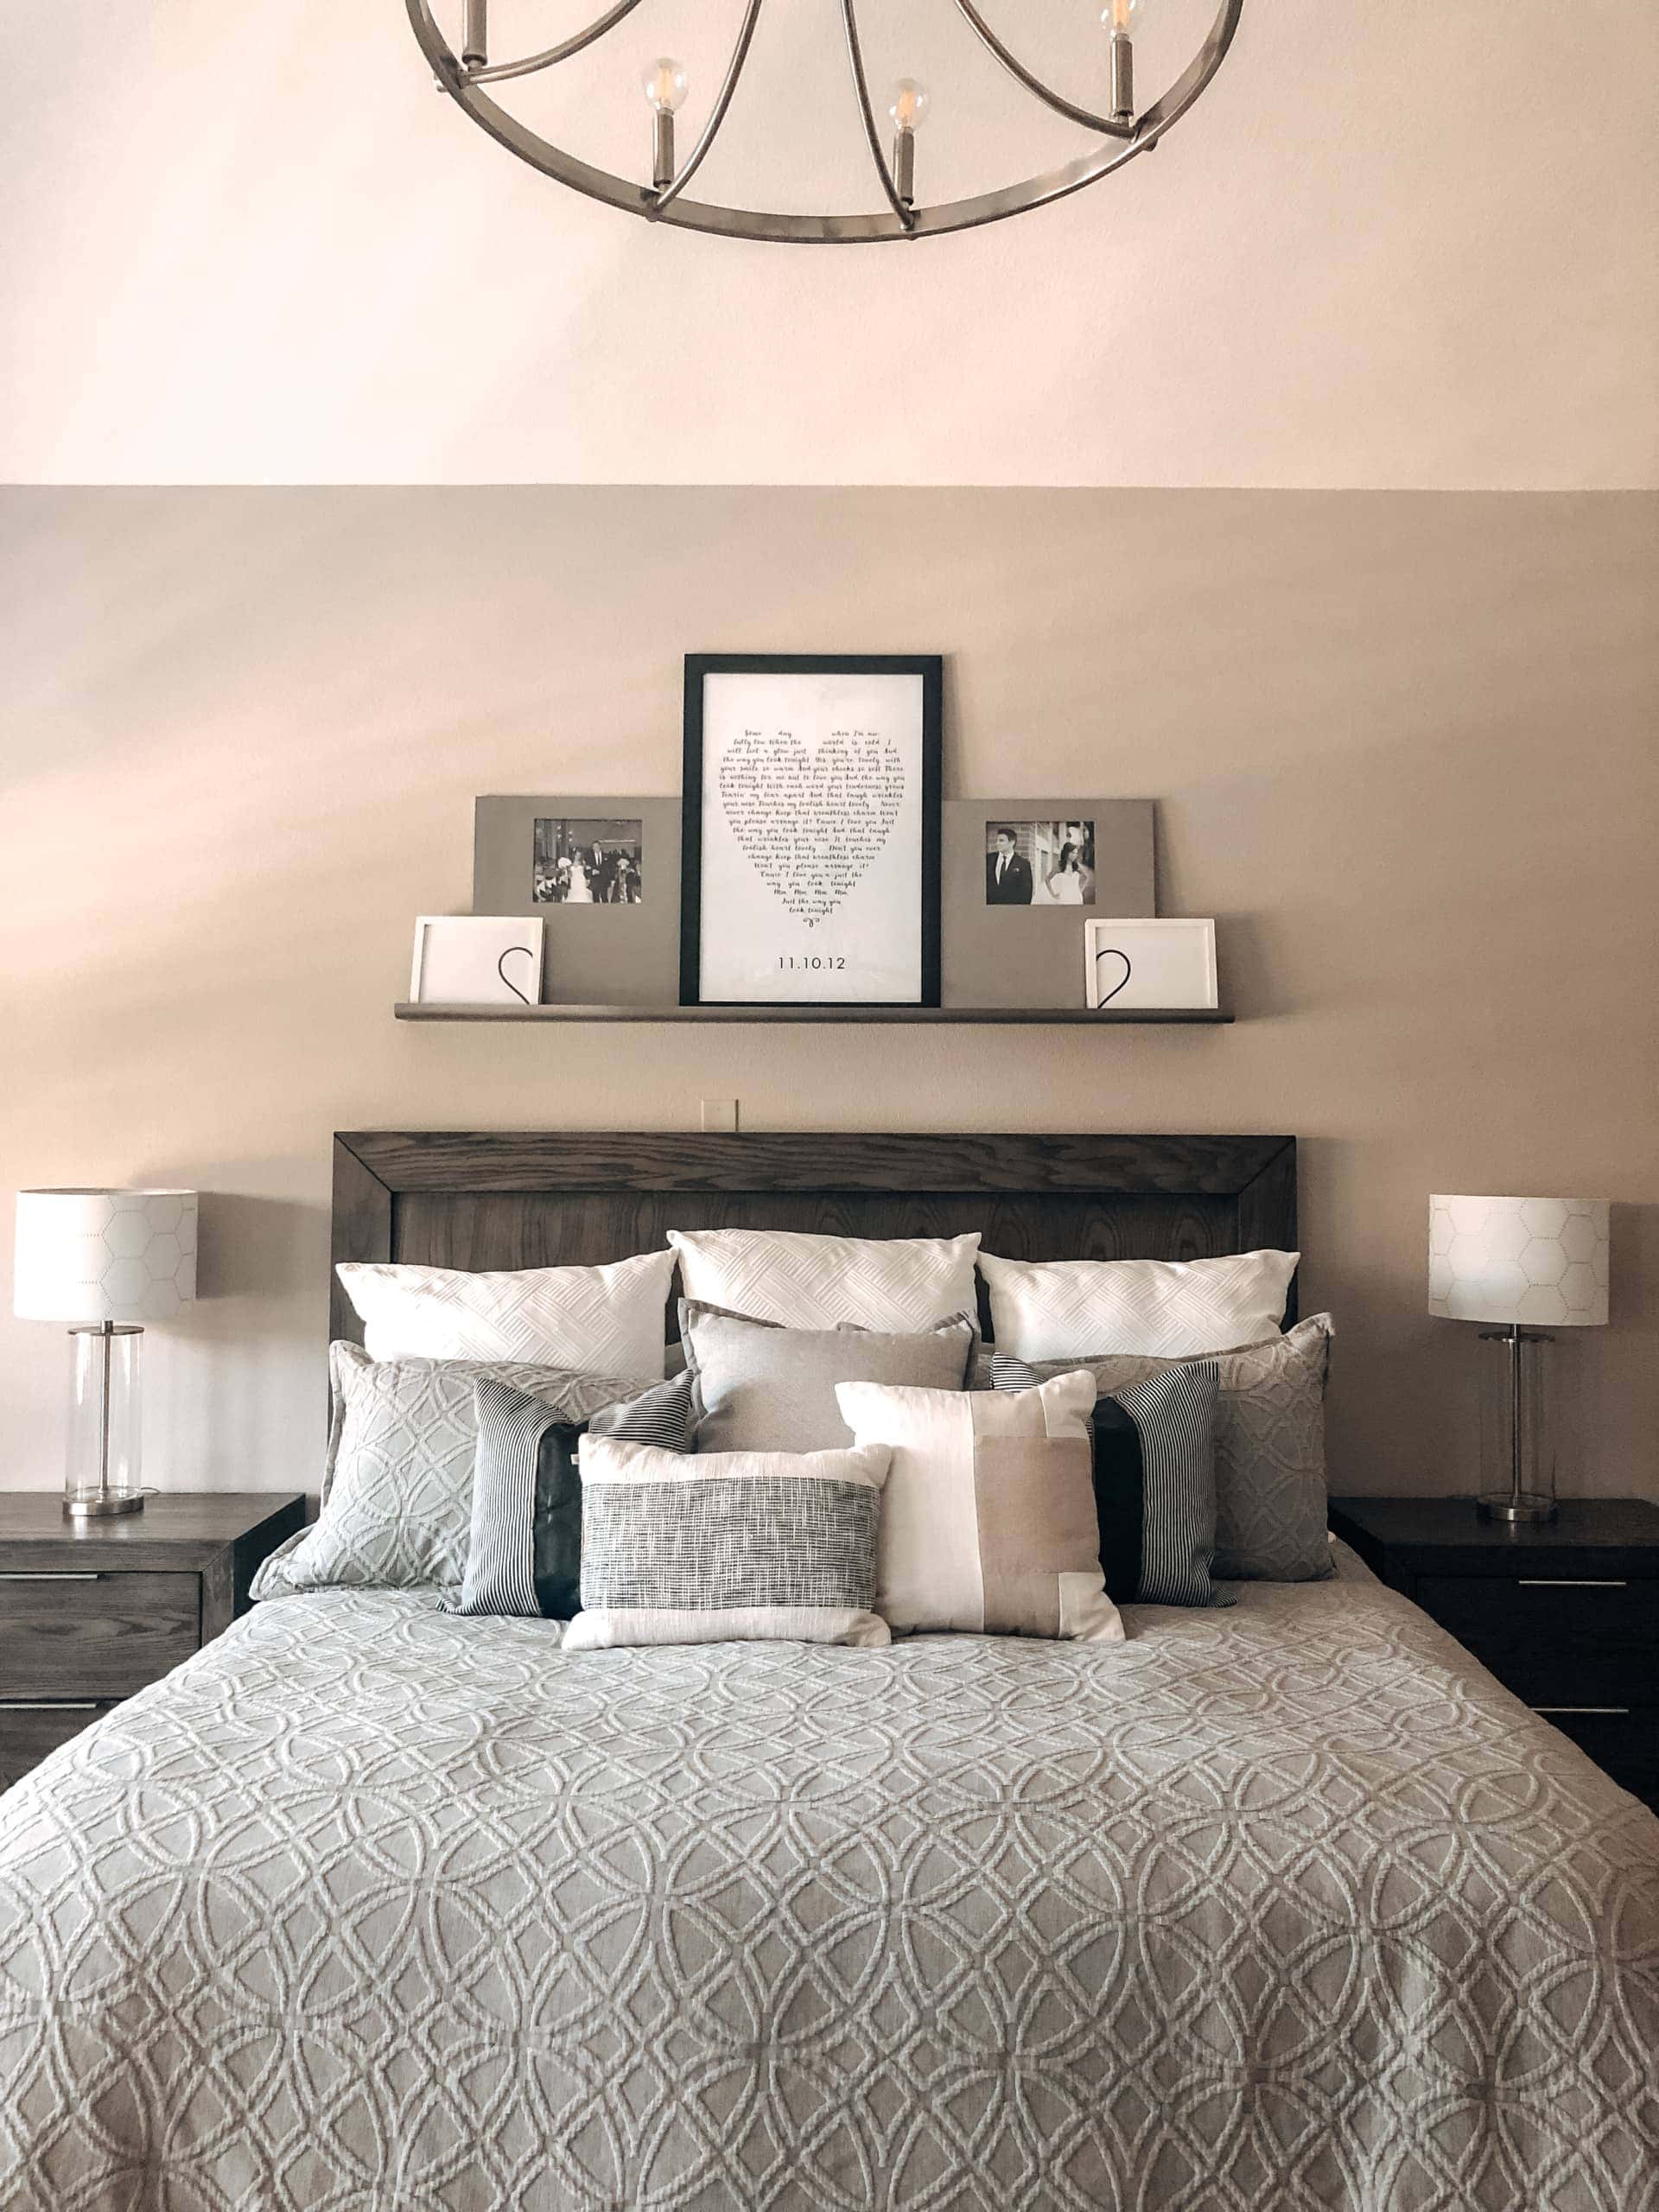
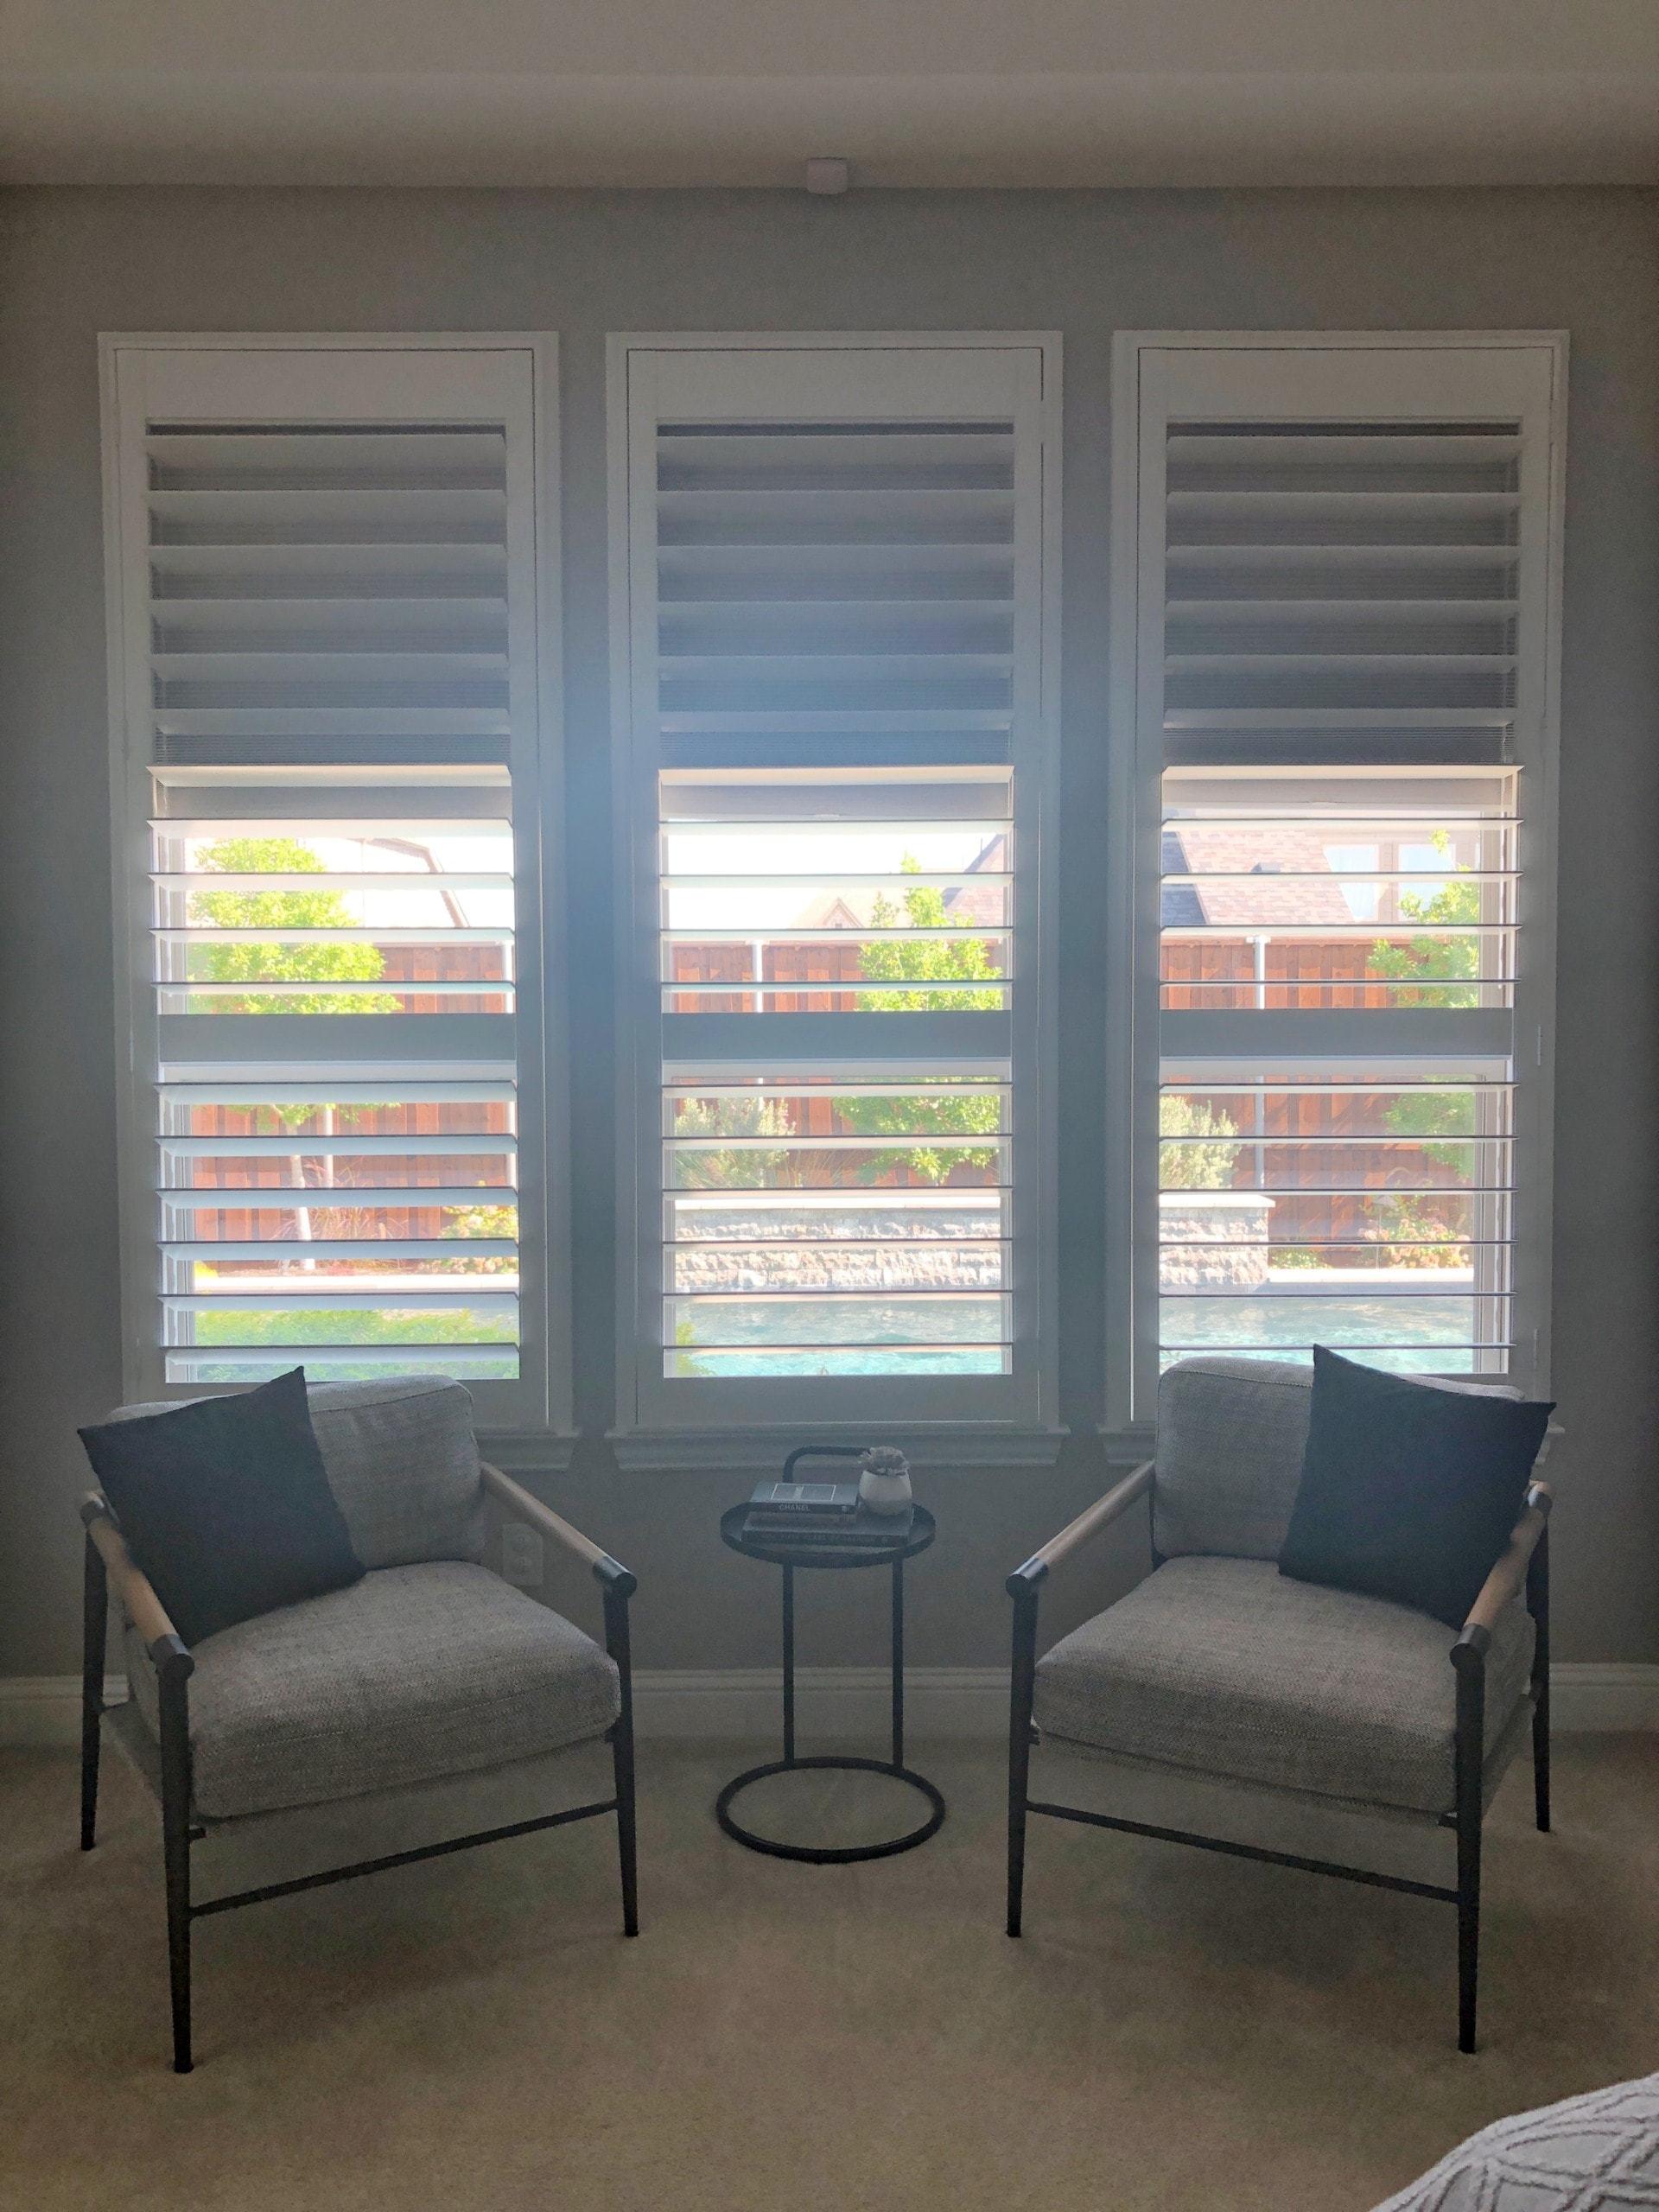
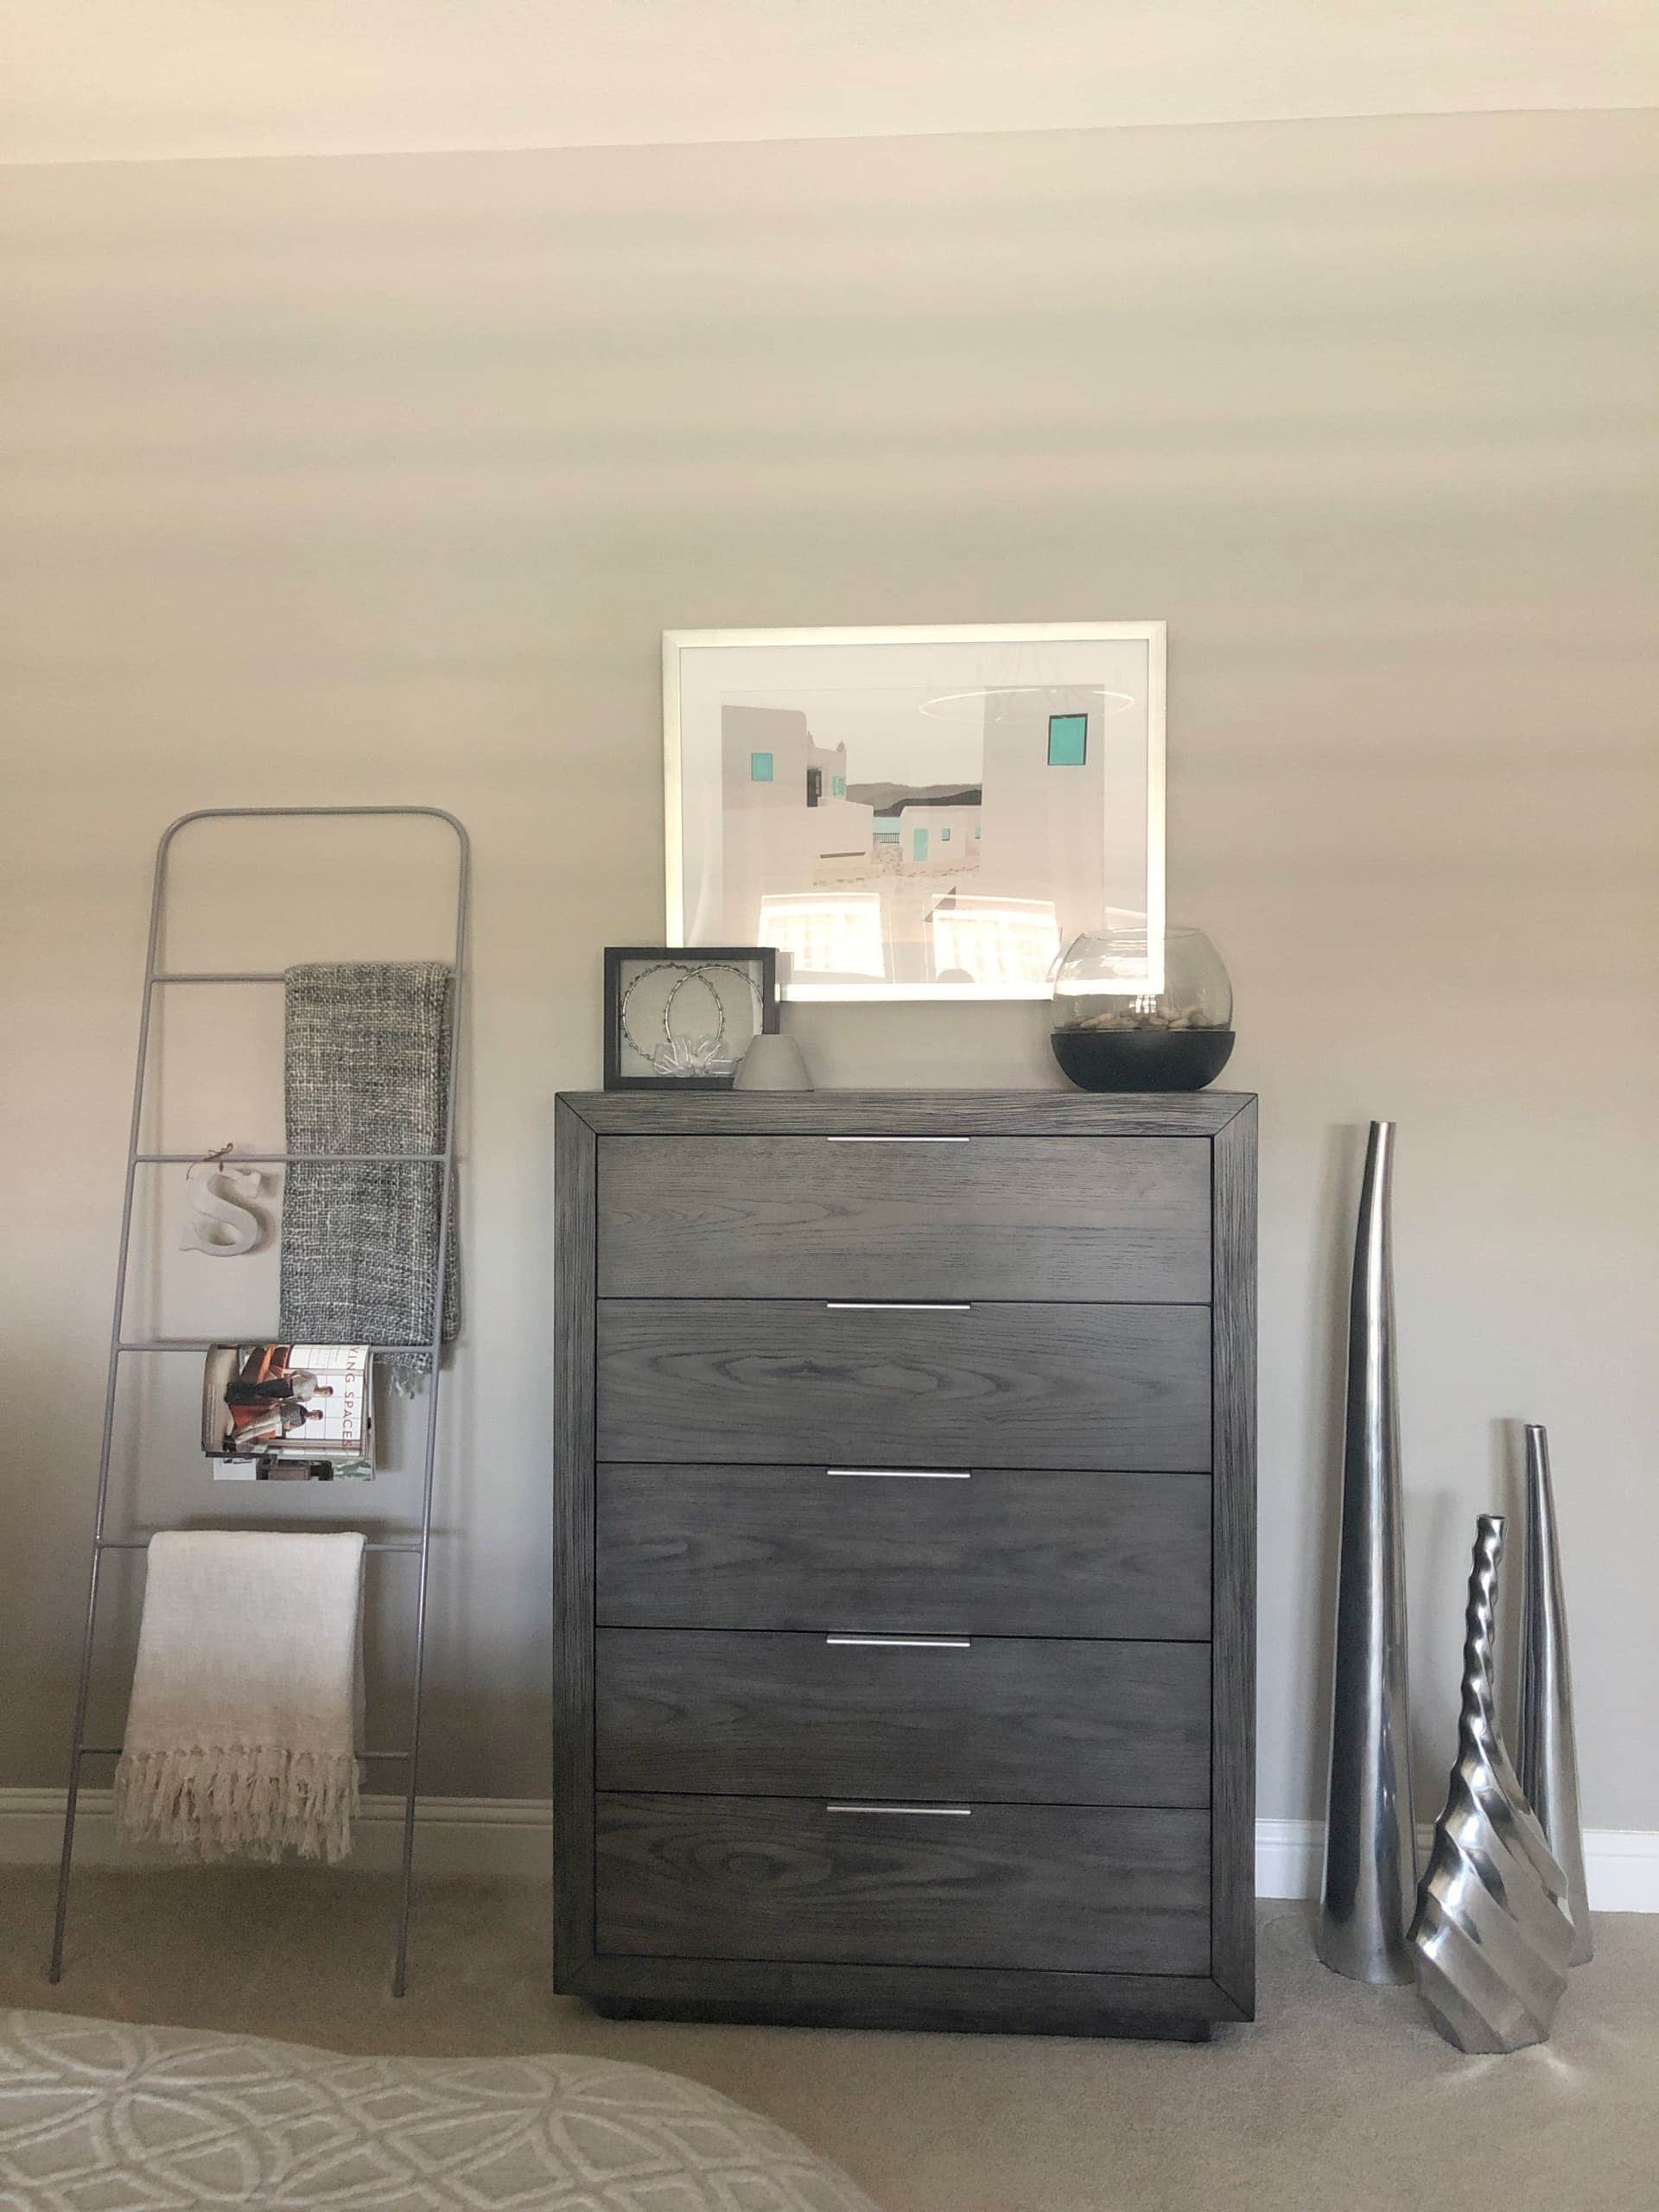
What It Looks Like Now
Steph’s Kitchen Alcove – Before
 This Reader SOS was all about making use of awkward spaces. Steph wrote in looking for some ideas for this alcove off her kitchen. She was looking for storage, but was unsure if she should go the built-in route, because that would be an investment that she couldn’t bring with her to her next home.
The Gameplan
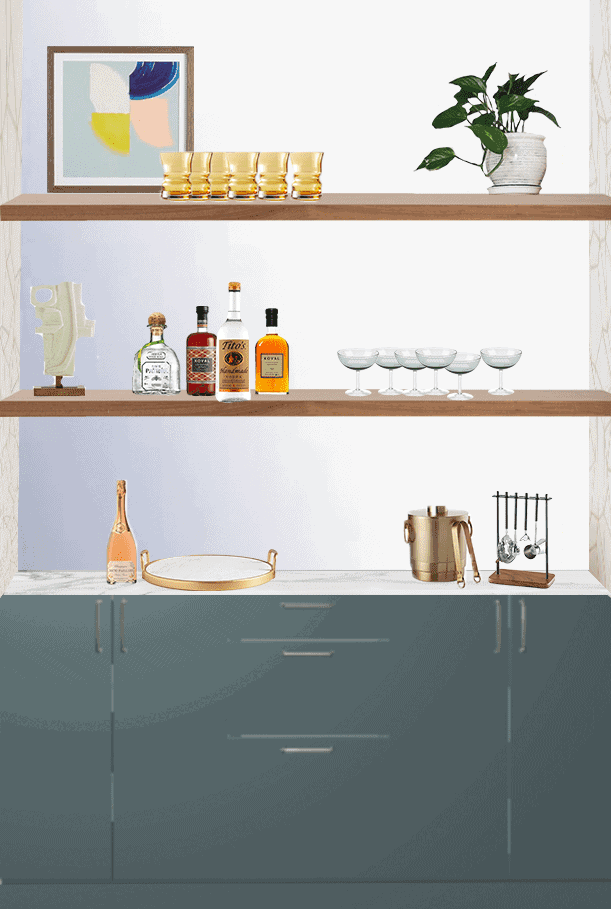
What It Looks Like Now

 Ahhh, I love it so very much! Here’s what Steph told me about the new space.
“We were hesitant about adding a bookshelf from a cost perspective, but we ended up taking your advice and went for it and we couldn’t be happier. It adds so much interest and storage space to our tiny rowhouse. We comment almost daily about how happy we are that we did this. I also took your advice of partially DIY’ing it. We purchased the base cabinets ourselves, then had a carpenter build/install the top shelves for us. Then we did all the painting, hardware, etc. and it really didn’t cost much more than a credenza would have.”
Hell yes! A DIY project that adds value to their home, adds storage, and looks that dang cute? Win, win, win. I’m in love with the color and all of their cool decor.
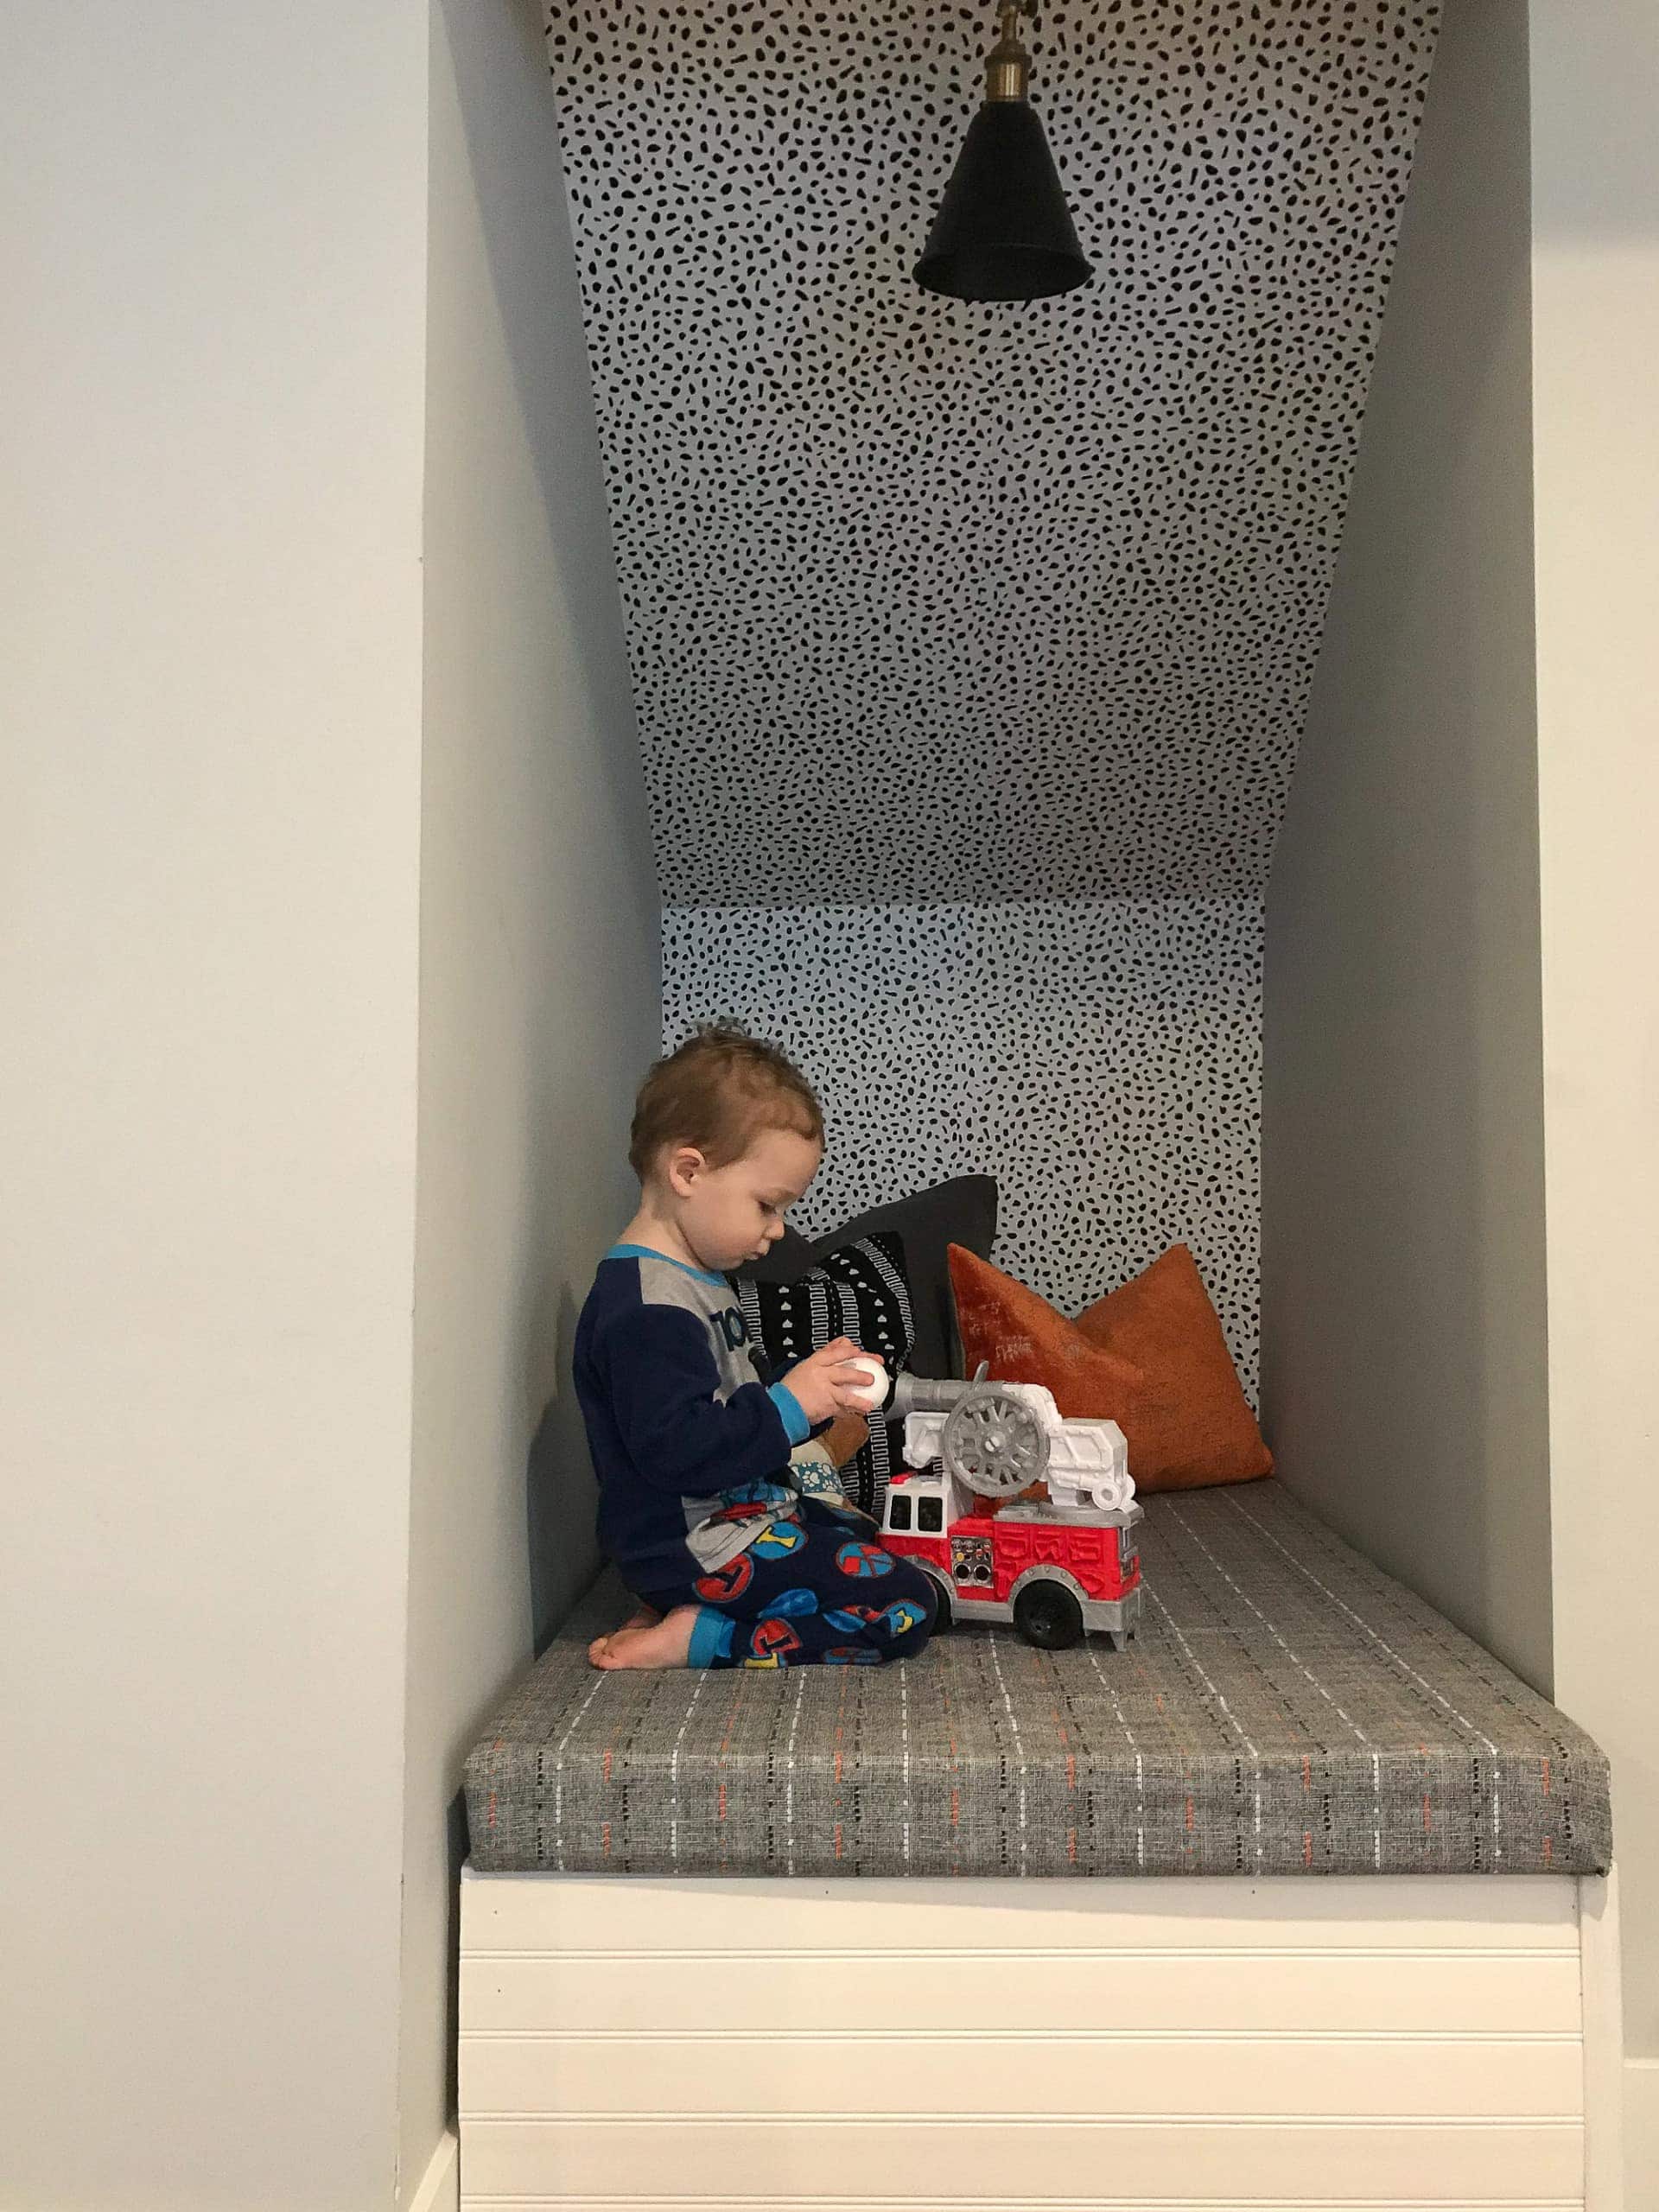
Erik’s Awkward Stair Nook – Before
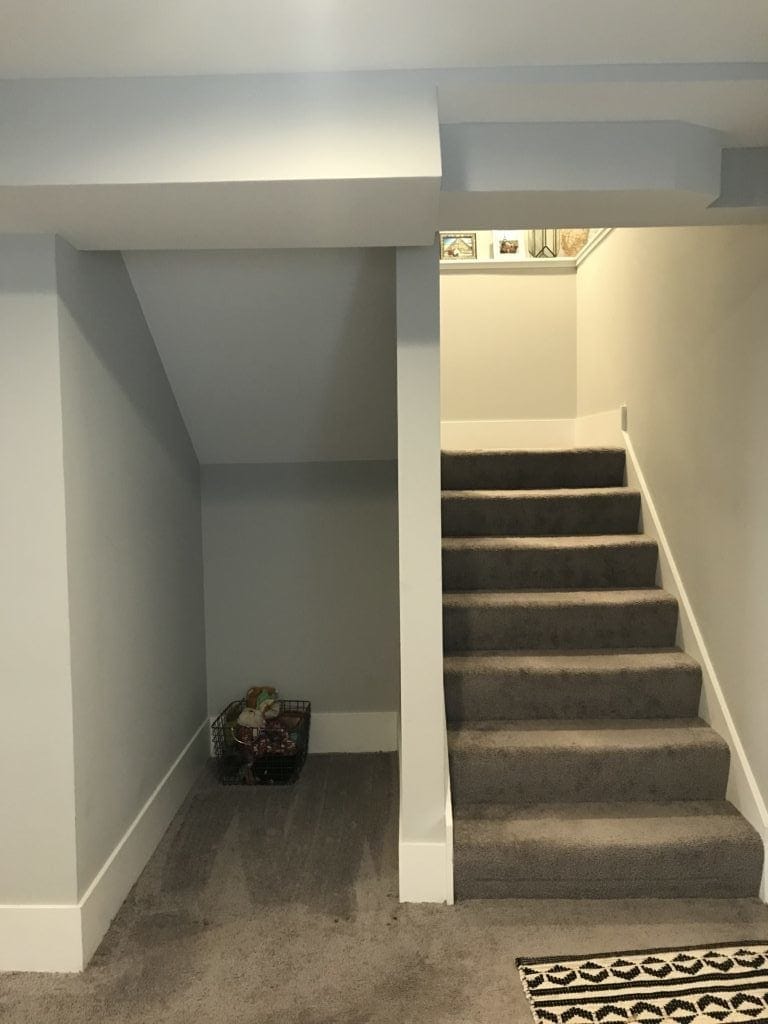
The Gameplan
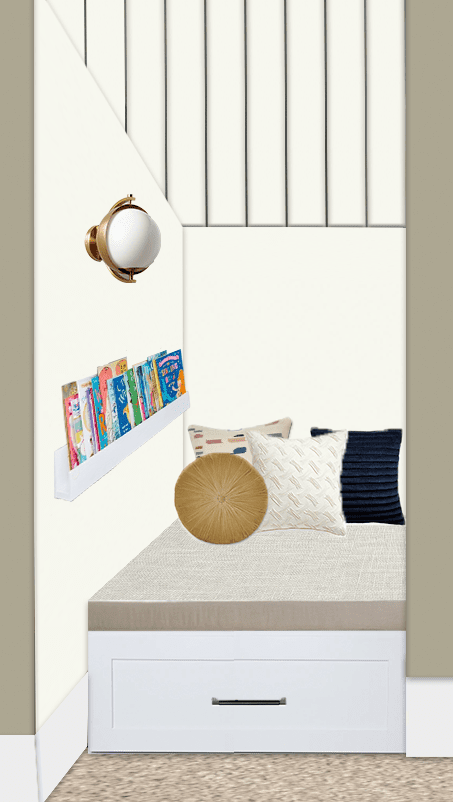
What It Looks Like Now

Let’s Do This Again!
I had so much fun reconnecting with these readers and seeing how they took my ideas and ran with them. I felt like a proud mama seeing these pictures roll into my inbox! I’m still waiting to hear back from more readers, so as soon as I have more updates, I’ll put another one of these blog posts together. It’s so much fun to see each room refresh!
Also, I’m currently on hiatus from Reader SOS submissions…I have quite the backlog to get through! So I’m sorry, but I’m not taking on any more design dilemmas at this time. I’ll let you know when I’m accepting new ones. In the meantime, you can find all of my Reader SOS archives right here. I’ve tackled so many spaces, so perhaps your current design dilemma is similar to one of them!
Casey