Reader SOS – Where Are They Now? No.2
Over the past few years, I’ve helped dozens of readers virtually tackle their design dilemmas with my Reader SOS series. It’s a fun way to take a space and offer decorating advice from afar. Usually, I receive the submission, come up with a game plan and a mood board for the room refresh, post about it, and then that’s about it. It’s fun for me to put together these room makeover ideas and my audience can learn a thing or two about the design process.
Did Readers Do a Room Refresh?
About two years ago, I reached out to some of these readers to see if they implemented these room makeover ideas. I received information from four readers and it was so awesome to see their changes come to life. You can view that post right here.
Now, two years later, I’ve helped more readers and I recently received some after pictures for four more spaces! Many of these readers took my ideas and put their own twist on them to create a space that works well for their families.
Let’s dive into four spaces and see what they look like now…
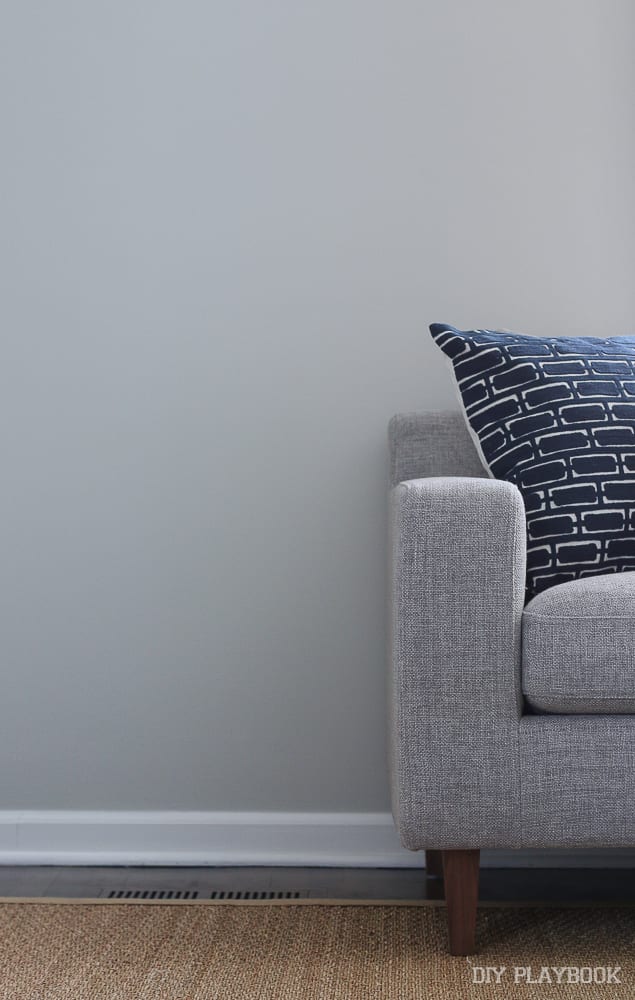
Jamie’s Half Bathroom – Before

Two years ago, Jamie reached out wanting to change up her powder room on a budget. The problem was she didn’t really have a style or direction for where she wanted to take it. Dark and moody? Mid-century? Jamie mentioned that she was up for a few DIY projects to keep it on a budget, so that was music to my ears. You can read her submission right here.
The Gameplan
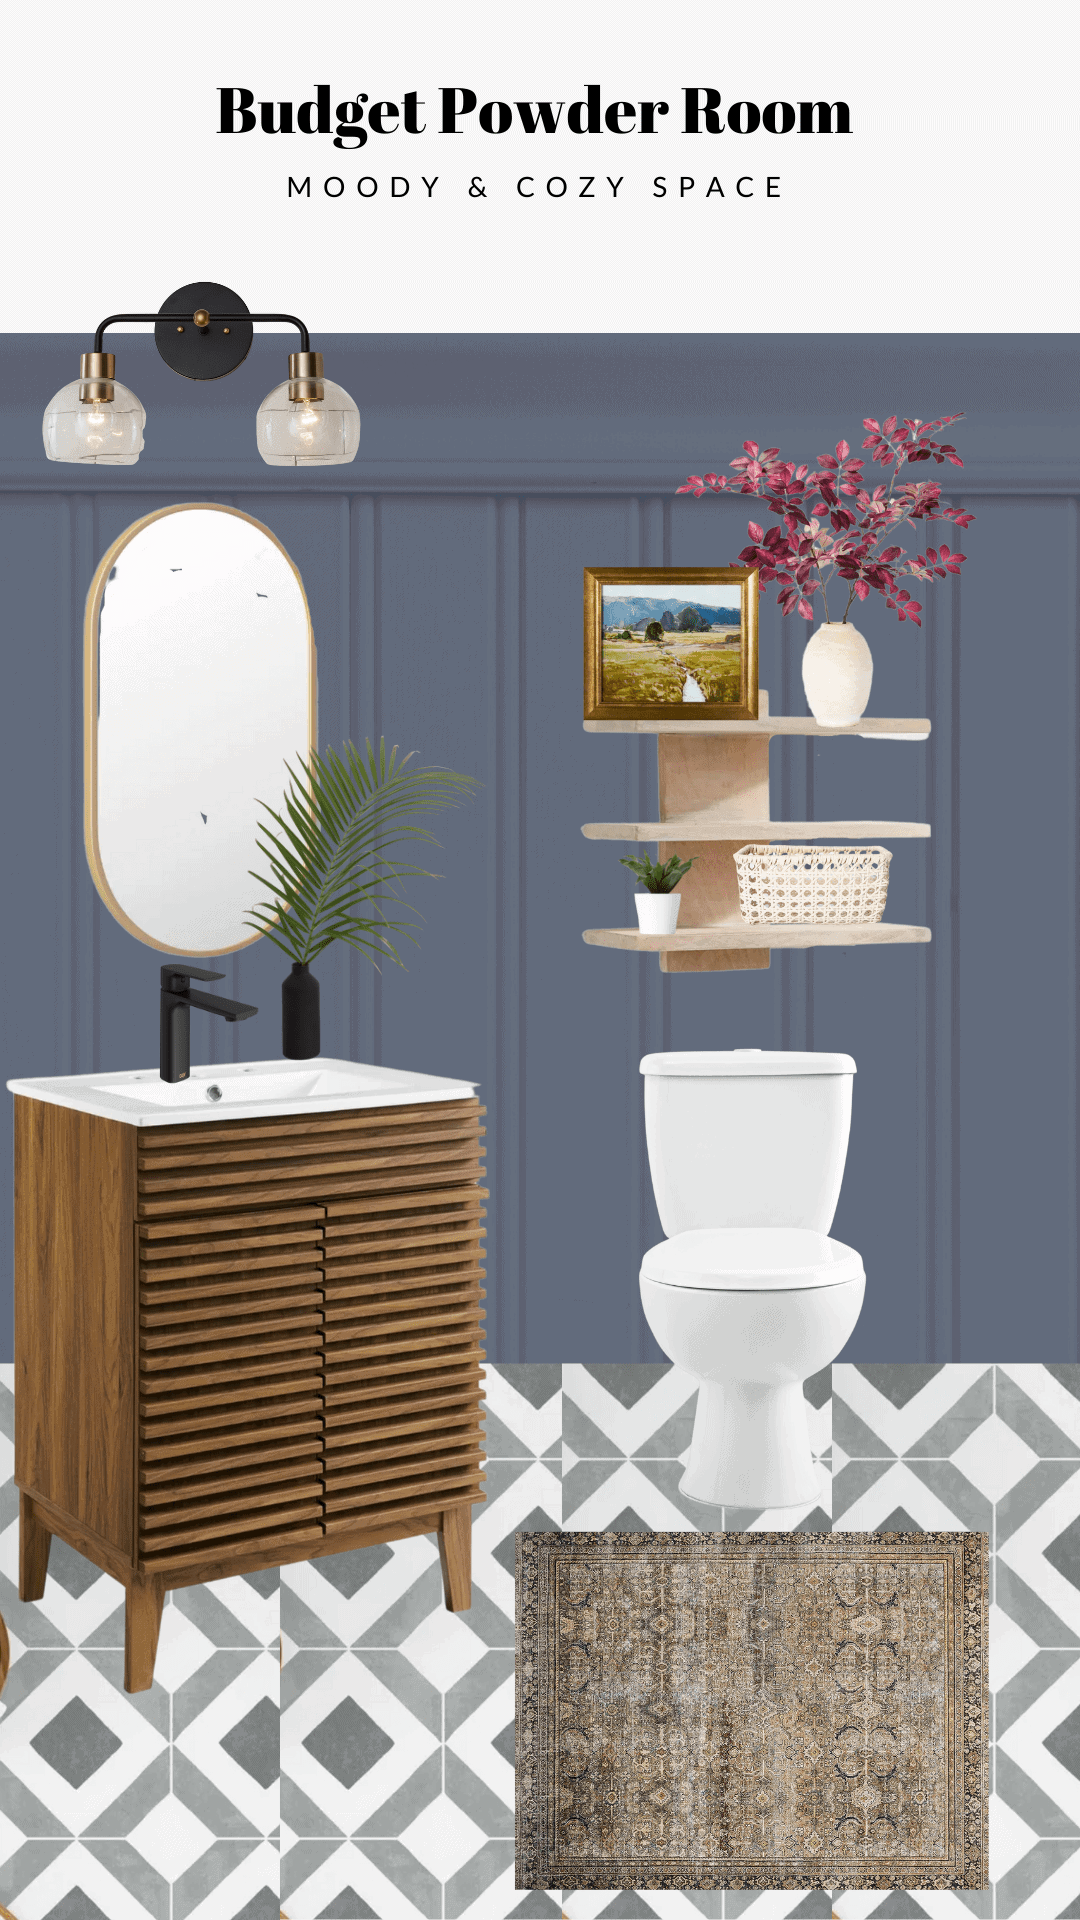
Vanity // Floor Stencil // Black Faucet // Mirror // Vanity Light // Shelf (similar) // Rug // Basket (similar) // Wall Art
I came up with this design plan for Jamie. I urged her to paint her floors (to save some big bucks!) and add a wood wall treatment to give the space a more custom look. A new vanity, shelving, and gallery wall were all a part of my gameplan to give this space a distinct style and look. You can see my full design plan here.
What It Looks Like Now
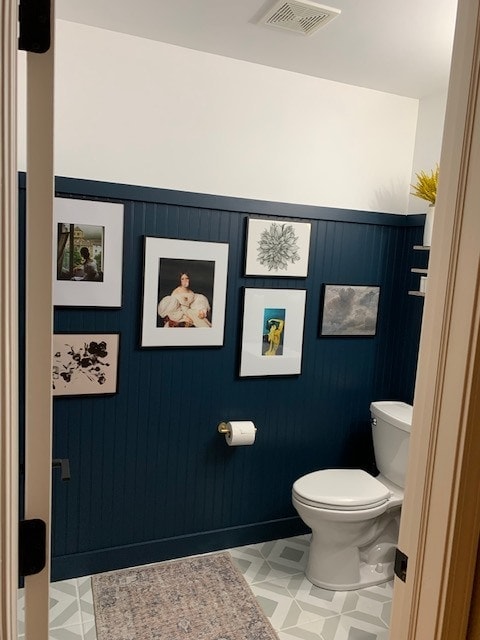
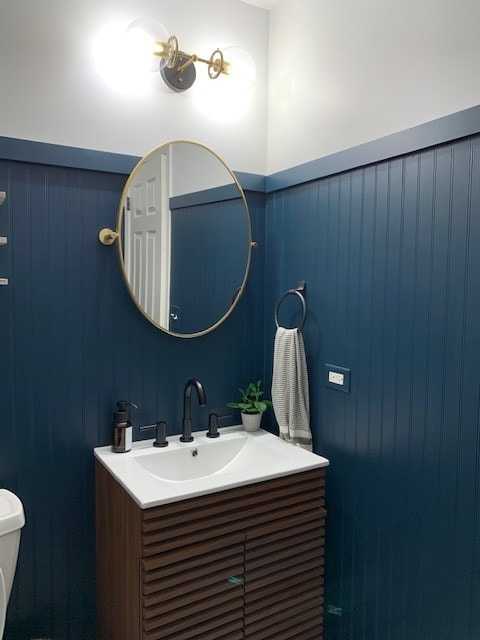
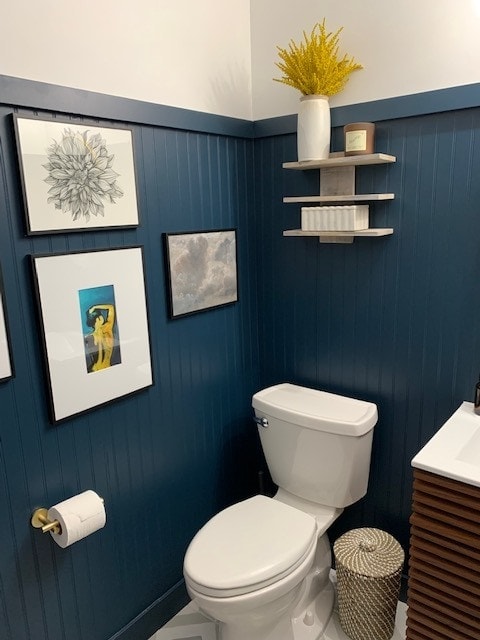
I posted Jamie’s design plan and about a month later she reached out with these photos. Oh my goodness!! Can you even believe it? It looks so freakin’ good and she got right to work to get these projects done. She ended up following my design plan very closely and I think it looks fantastic. What a gorgeous space for her family and guests. In terms of the budget, she said she spent about $1,960 total (over our original budget) to splurge on a mirror and meaningful art pieces. Wow, consider me impressed! Go, Jamie!!
Ainslee’s Little Boy’s Room – Before
Ainslee reached out looking for help creating the perfect bedroom for her son, Lucas, who is three and a half years old. She had a few specific requests because Lucas has autism. She wanted a cozy, warm, and safe room for her son that also showcased his love for animals.
The Gameplan

Shag Rug // Daybed // Dresser // Striped Curtains // Floor Lounger // Book Ledges // Bear Hamper // Felt Animal Heads // Chandelier // Floor Lamp
I decided to go with a daybed and trundle for Lucas’ room, along with a dresser for storage. He loves to read, so a little cozy reading nook in the corner was a must. On the walls, I showcased his love for animals with a gallery wall and various animal heads. You can see the full design plan here.
What It Looks Like Now

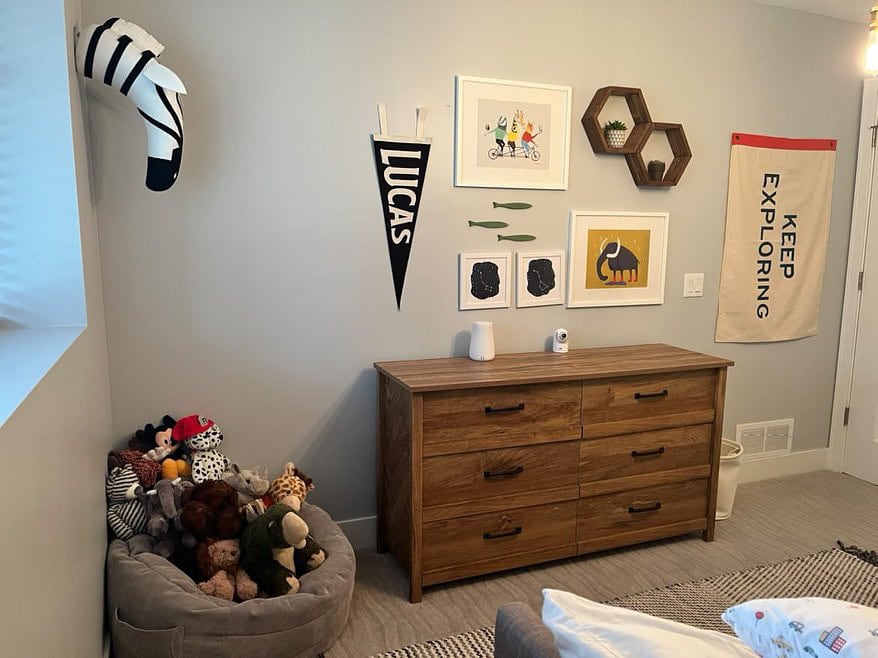
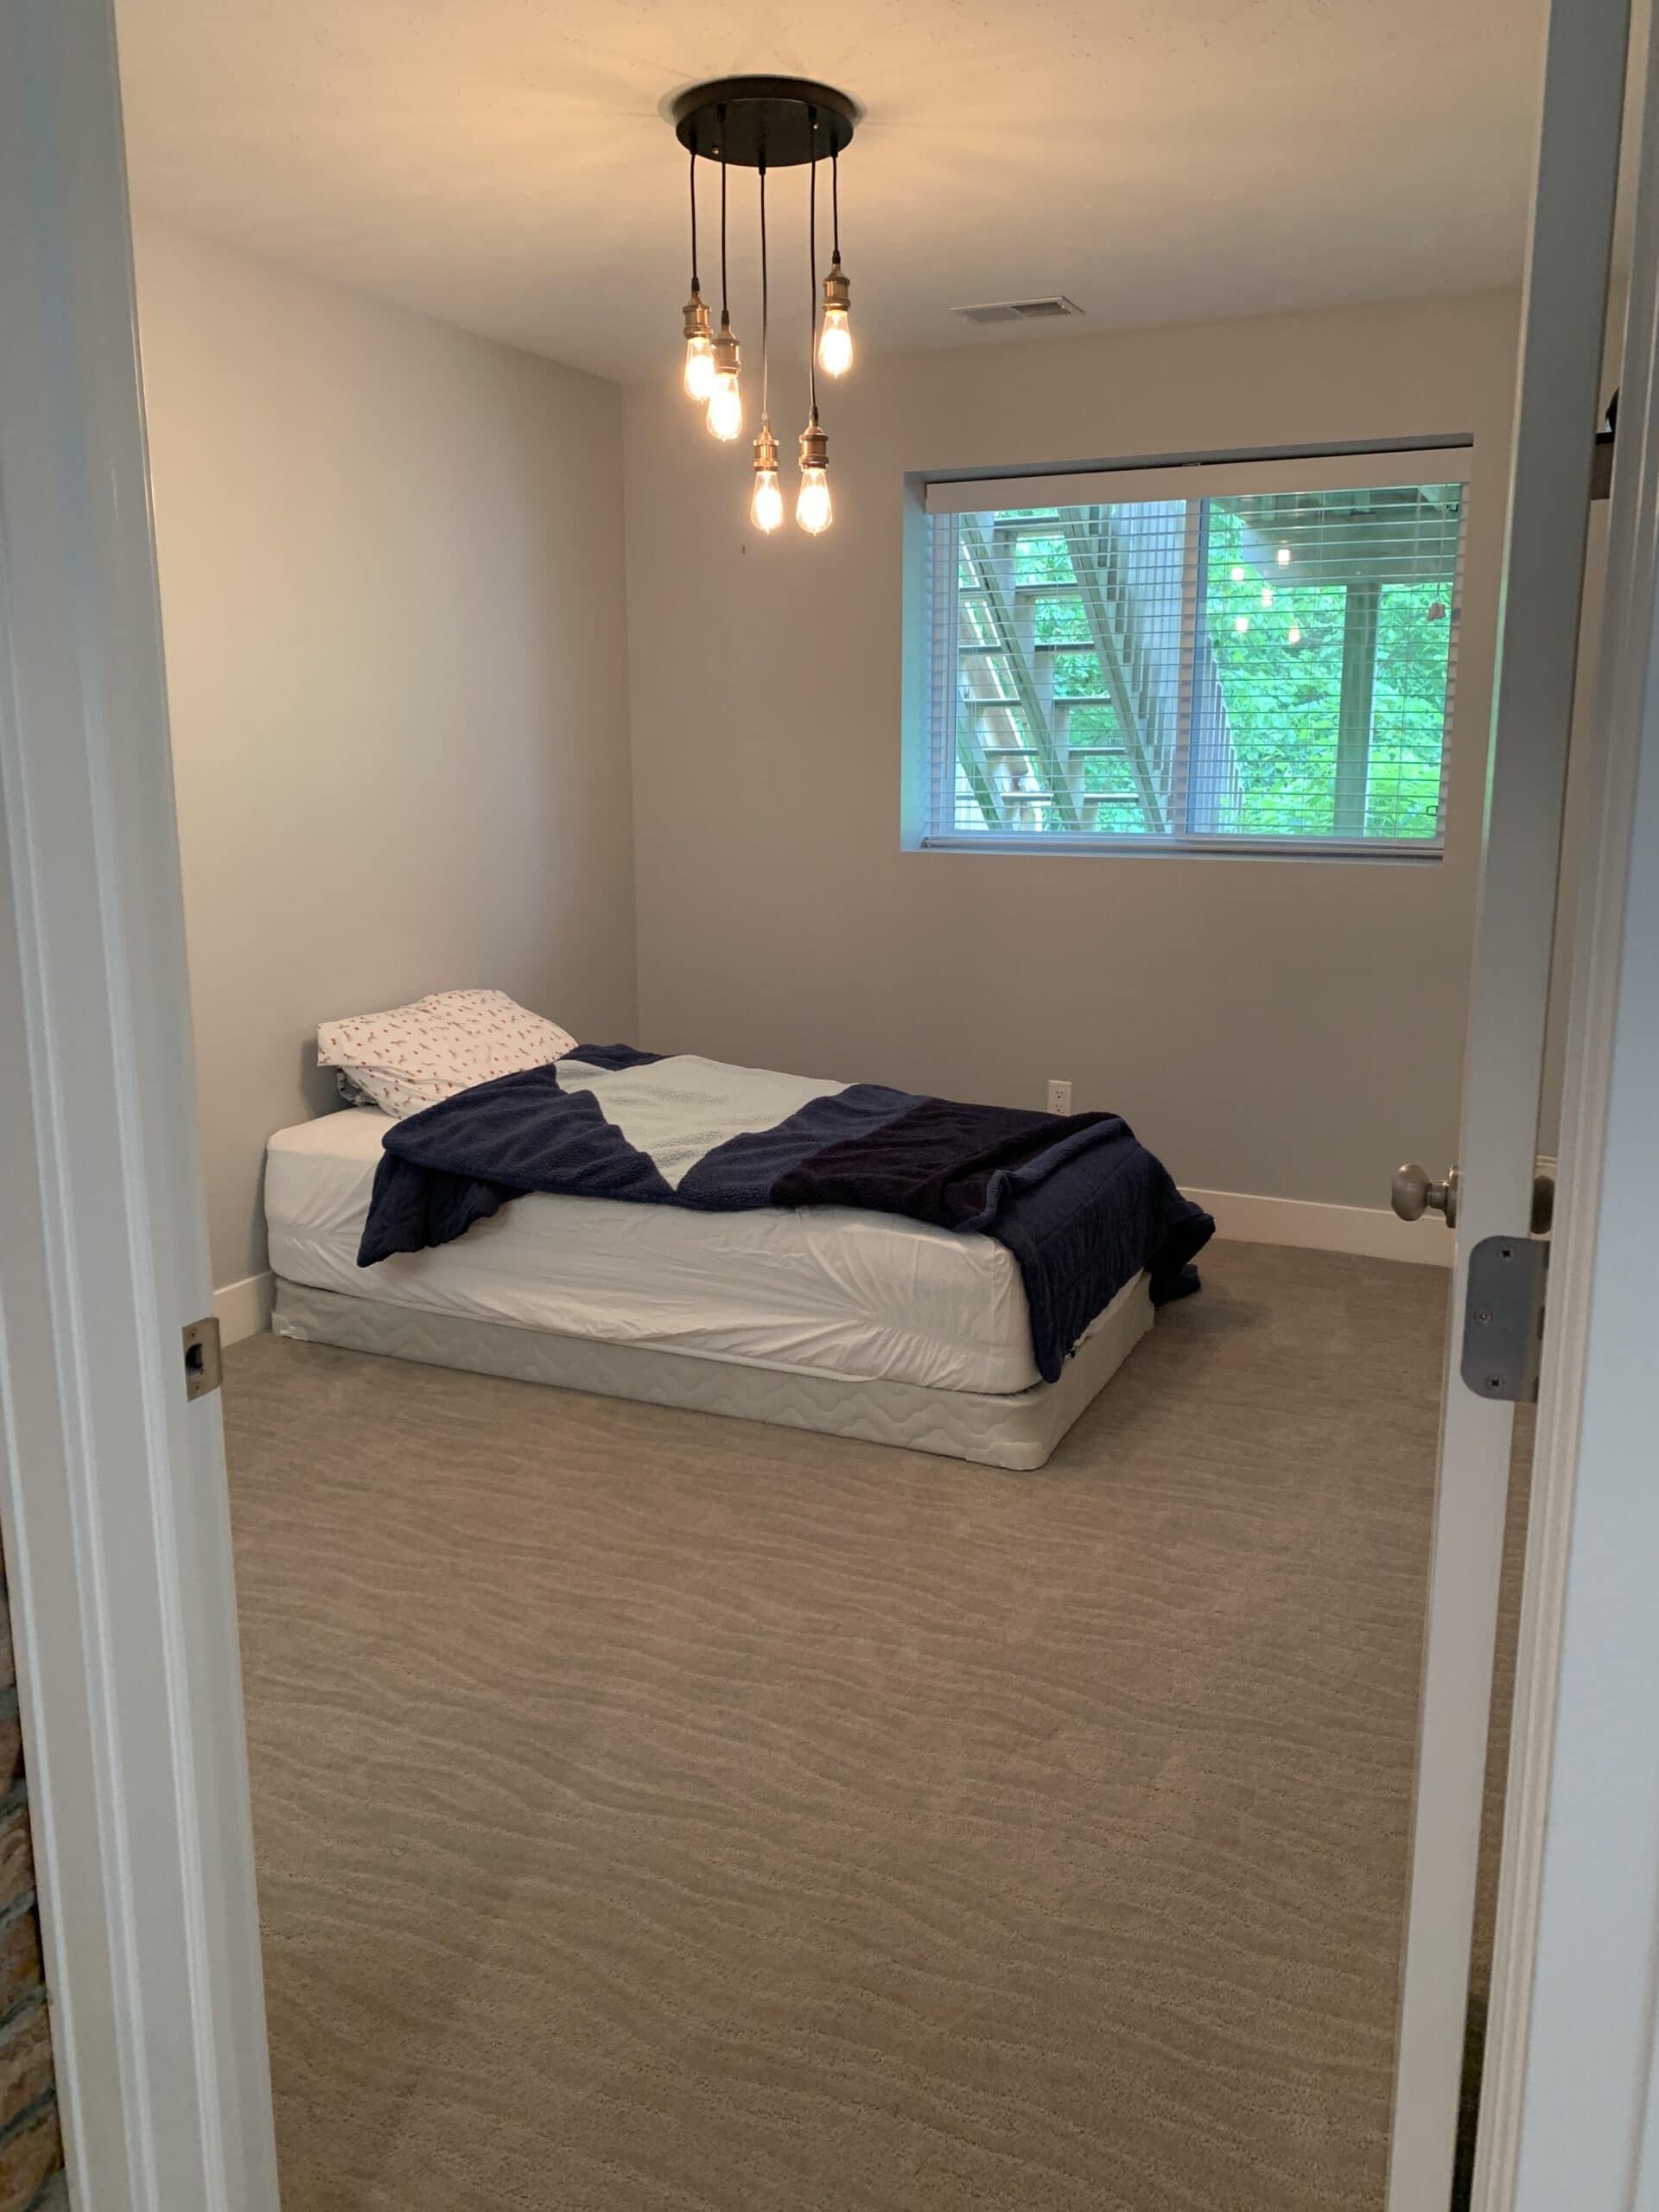
Look at this adorable little boy’s room! Ainslee created the sweetest spot for her boy. Here’s what she said.
We loved the daybed recommendation along with everything else. We opted for a different rug, only because the other would have been too large for the room. The animal “heads” are the ones you recommended too and they work so well in this space. Thanks again!
Liz’s Living Room Turned Office – Before
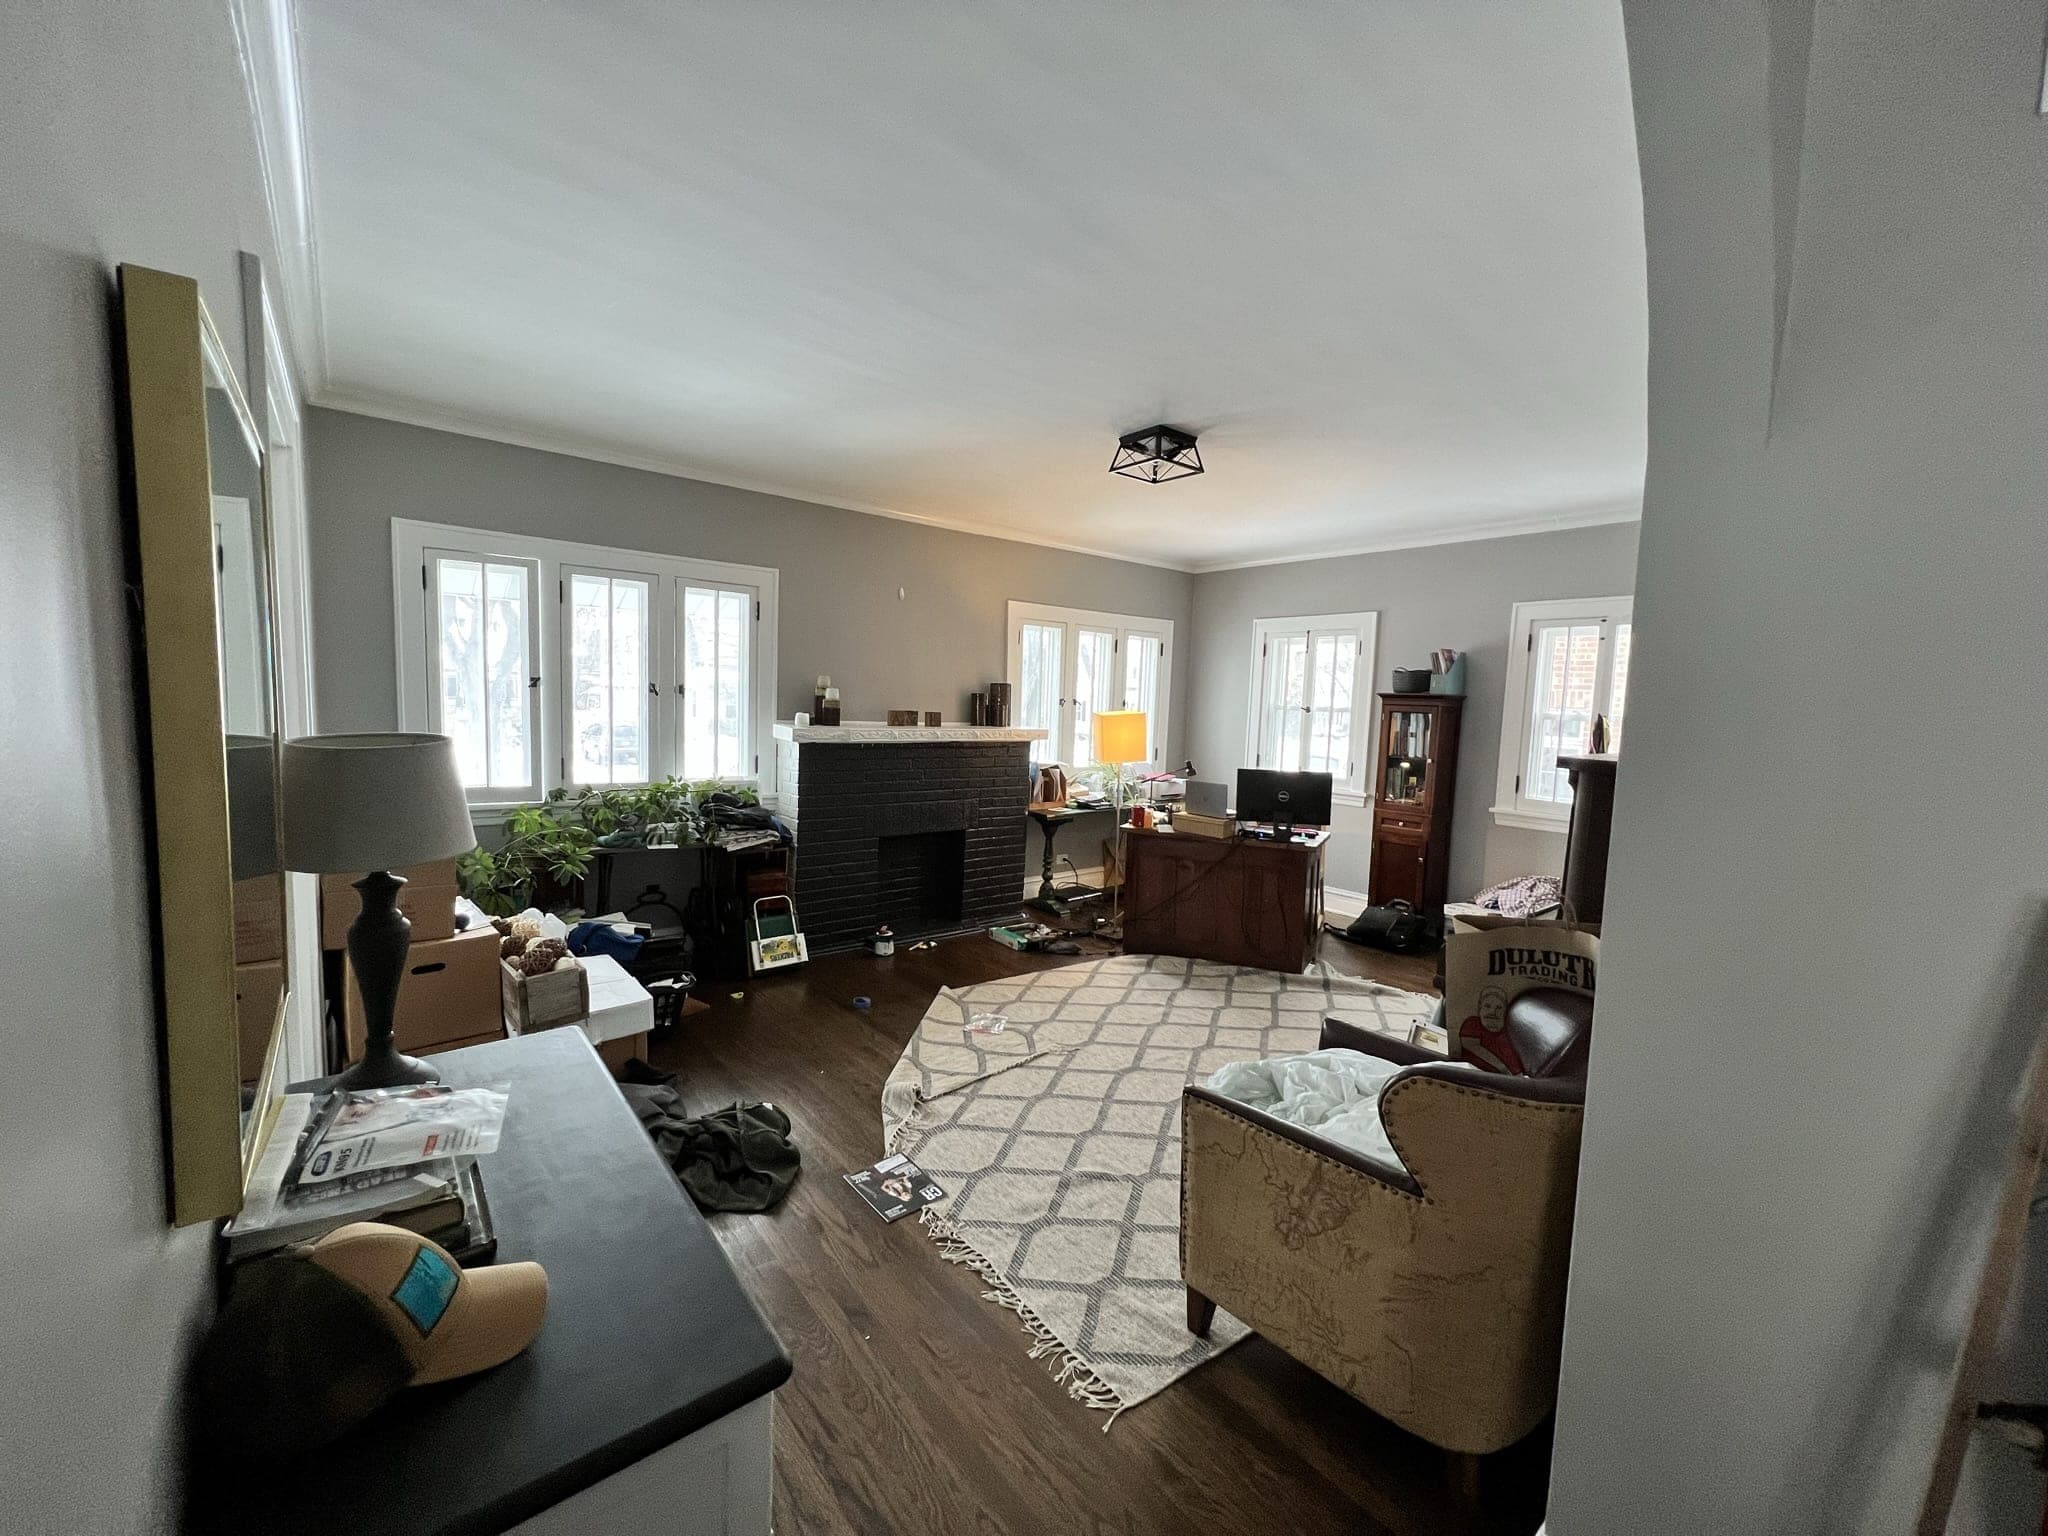
Liz reached out wanting to turn her living room into a home office for her husband who now works from home. This large space needed storage and a layout for both a desk and additional seating. You can see her original submission right here.
The Gameplan
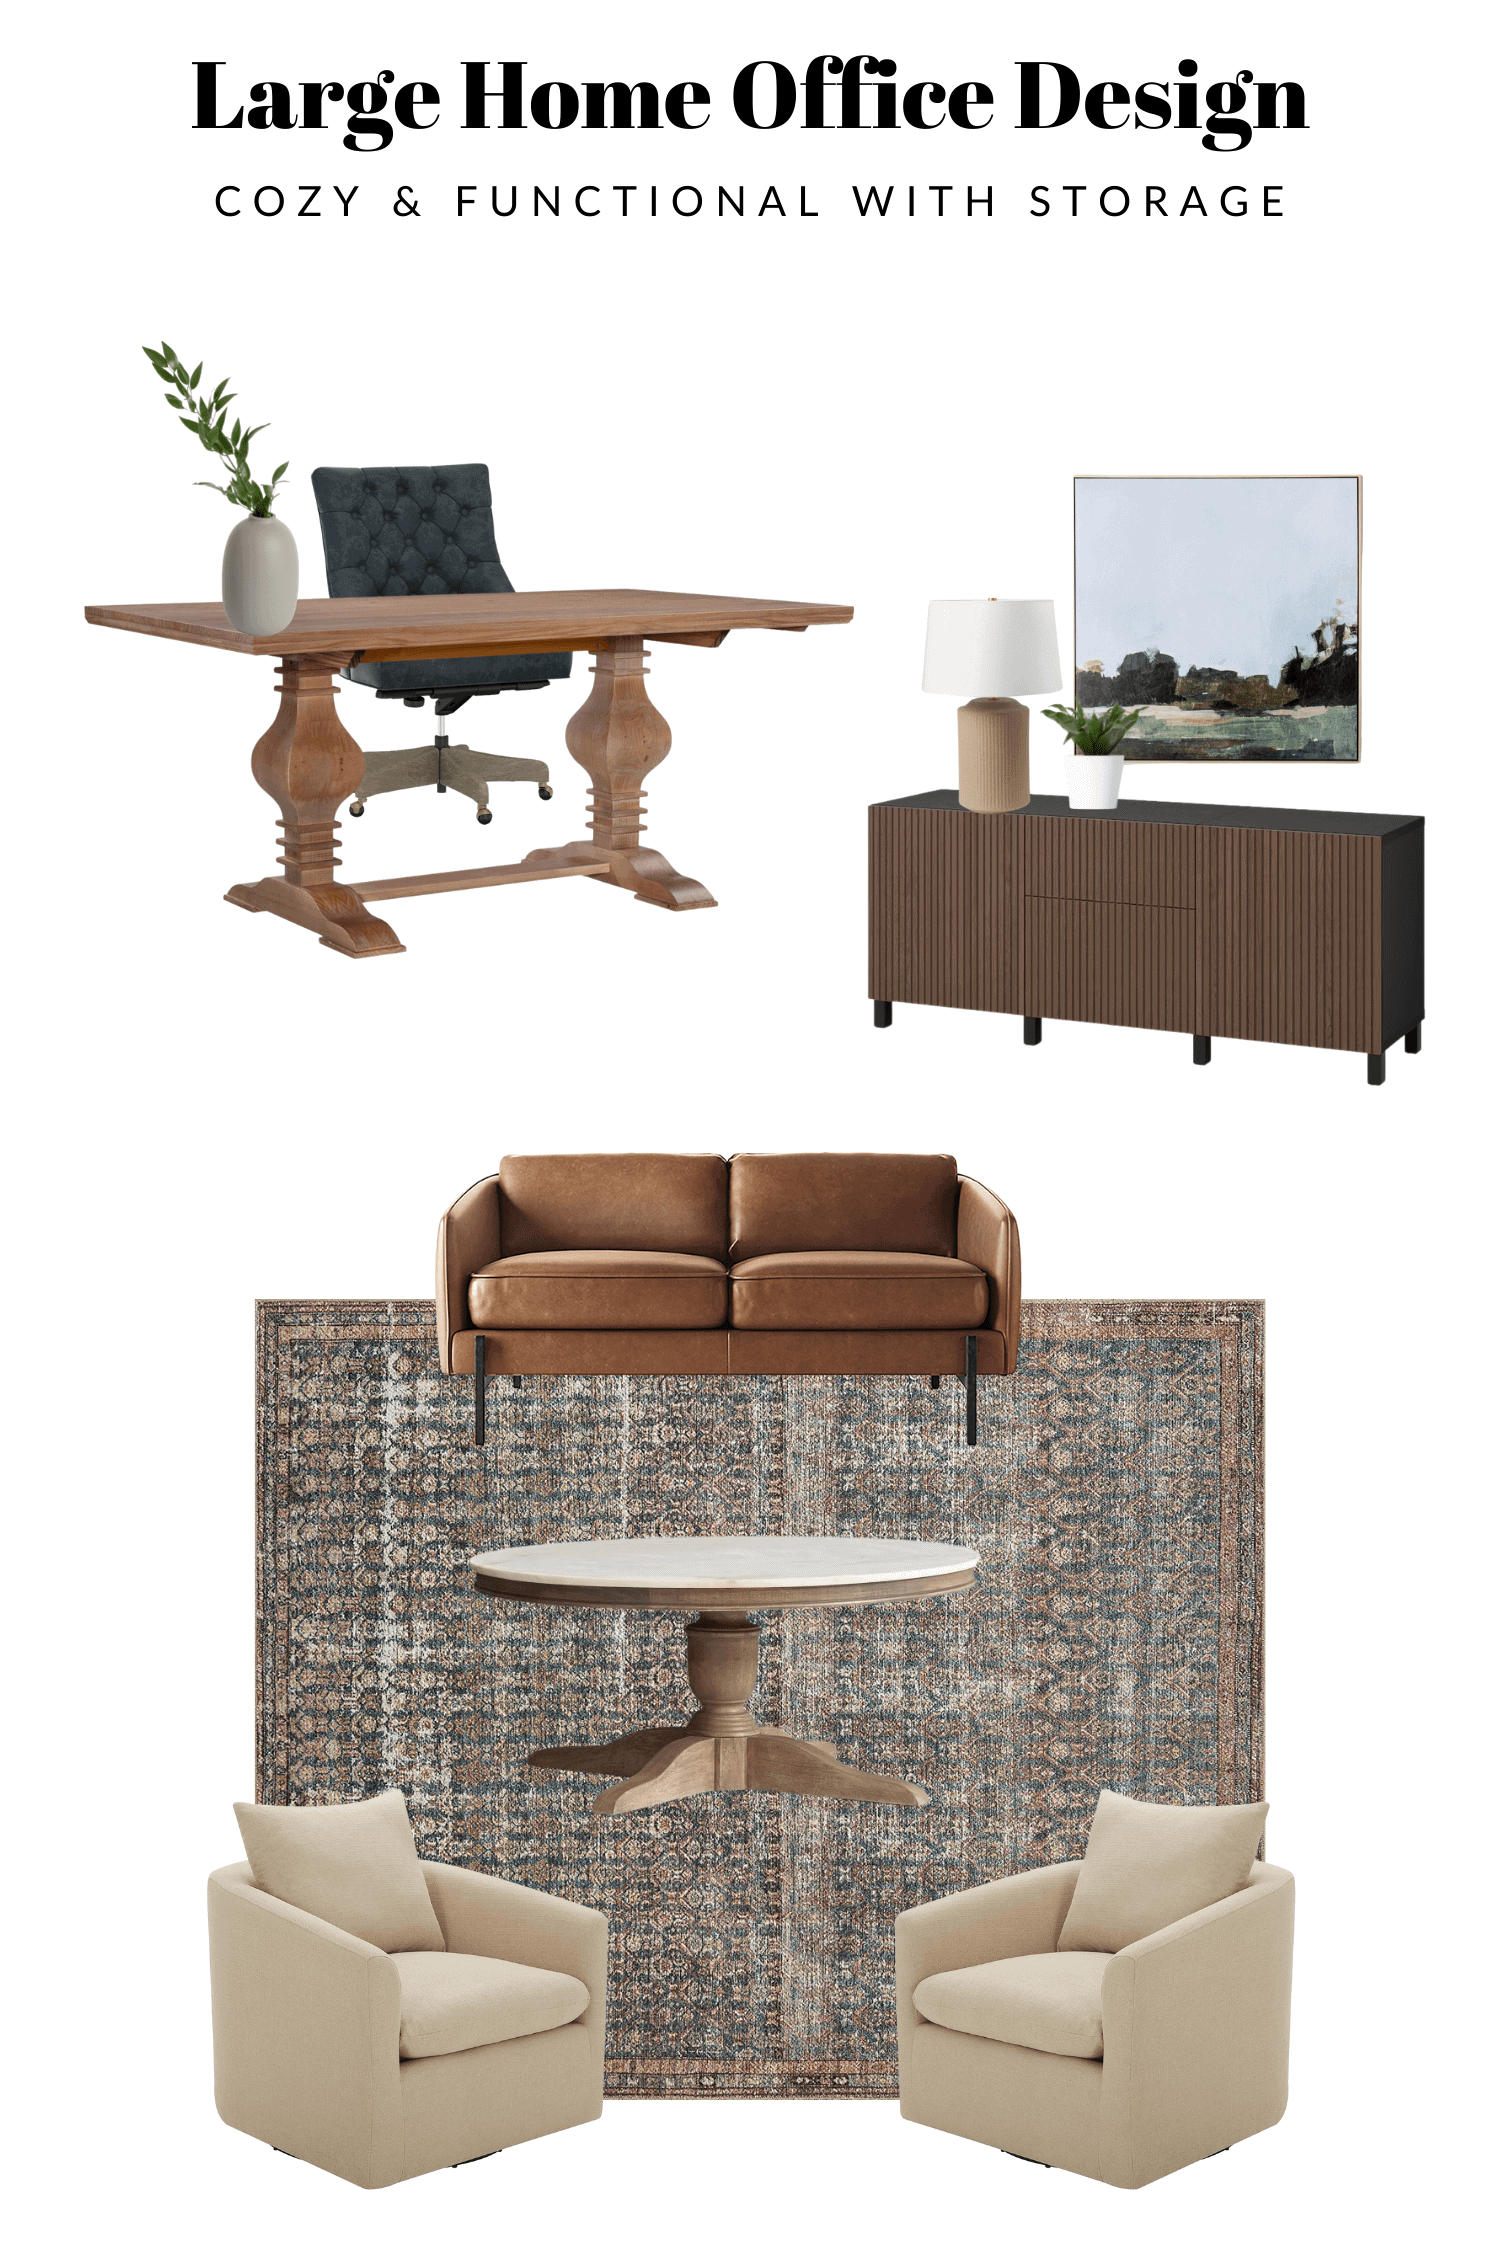
Farmhouse Dining Table // Swivel Chair // Loveseat (similar) // Marble Table // Rug // IKEA Console // Office Chair // Table Lamp (similar) // Large Art
I told Liz to find a larger desk for the space and center it on that back wall. I suggested adding a large wall of hidden storage for office supplies and then seating in the center near the fireplace. You can see my full design plan here.
What It Looks Like Now


Ahhh can you even?! It looks so good. I am in love with the new layout for the space. Tons of seating, a large desk, and even storage. Yay, Liz! And, get this, she was able to do so much of this makeover on a budget. She was also very patient and waited to find the perfect pieces. Here’s what she told me…
My biggest DIY project was putting together the built-in. I scoured Facebook Marketplace for months and was able to get these lower cabinets and upper bookshelves (separately). I sprayed everything the same color as the fireplace (Behr, “Night Club”). I then did a super light/whitewash stain on some plywood and put edge banding on it to make it look more finished. Cabinets ($150), bookshelves ($25), paint, and plywood I would say was about $300 total for this project. All the decor was stuff I already had around the house and/or some personal vintage heirlooms. You can also peek at the swivel chairs I found online at Target that I snagged once they went on sale (I want to say they were around $150/each).
The big reason we needed to tackle this room in the first place is that it is mainly used as my husband’s home office. I loved your idea of using a kitchen table as his desk but didn’t love the price tag. At an end-of-summer garage sale, I picked up this huge, old slab of wood that had all sorts of paint splatter, chips, dings, etc in it. After some sanding and clean up it turned into this super cool desktop and then found some inexpensive table legs on Amazon.
I’m not 100% finished with this room, but it is so much better and looks much more put together than before. We loved your plans and just had to be patient putting things together; waiting for sales, buying things on Marketplace, or figuring out how to use things we already owned. Thank you again for helping us whip this room into shape!
Sarah’s Mudroom – Before

Sarah and Sam reached out about their transition space from their garage to the rest of their home. It had become a catchall for clothes, shoes, and cleaning supplies and they wanted an organized and aesthetically pleasing room. You can read their submission right here.
The Gameplan
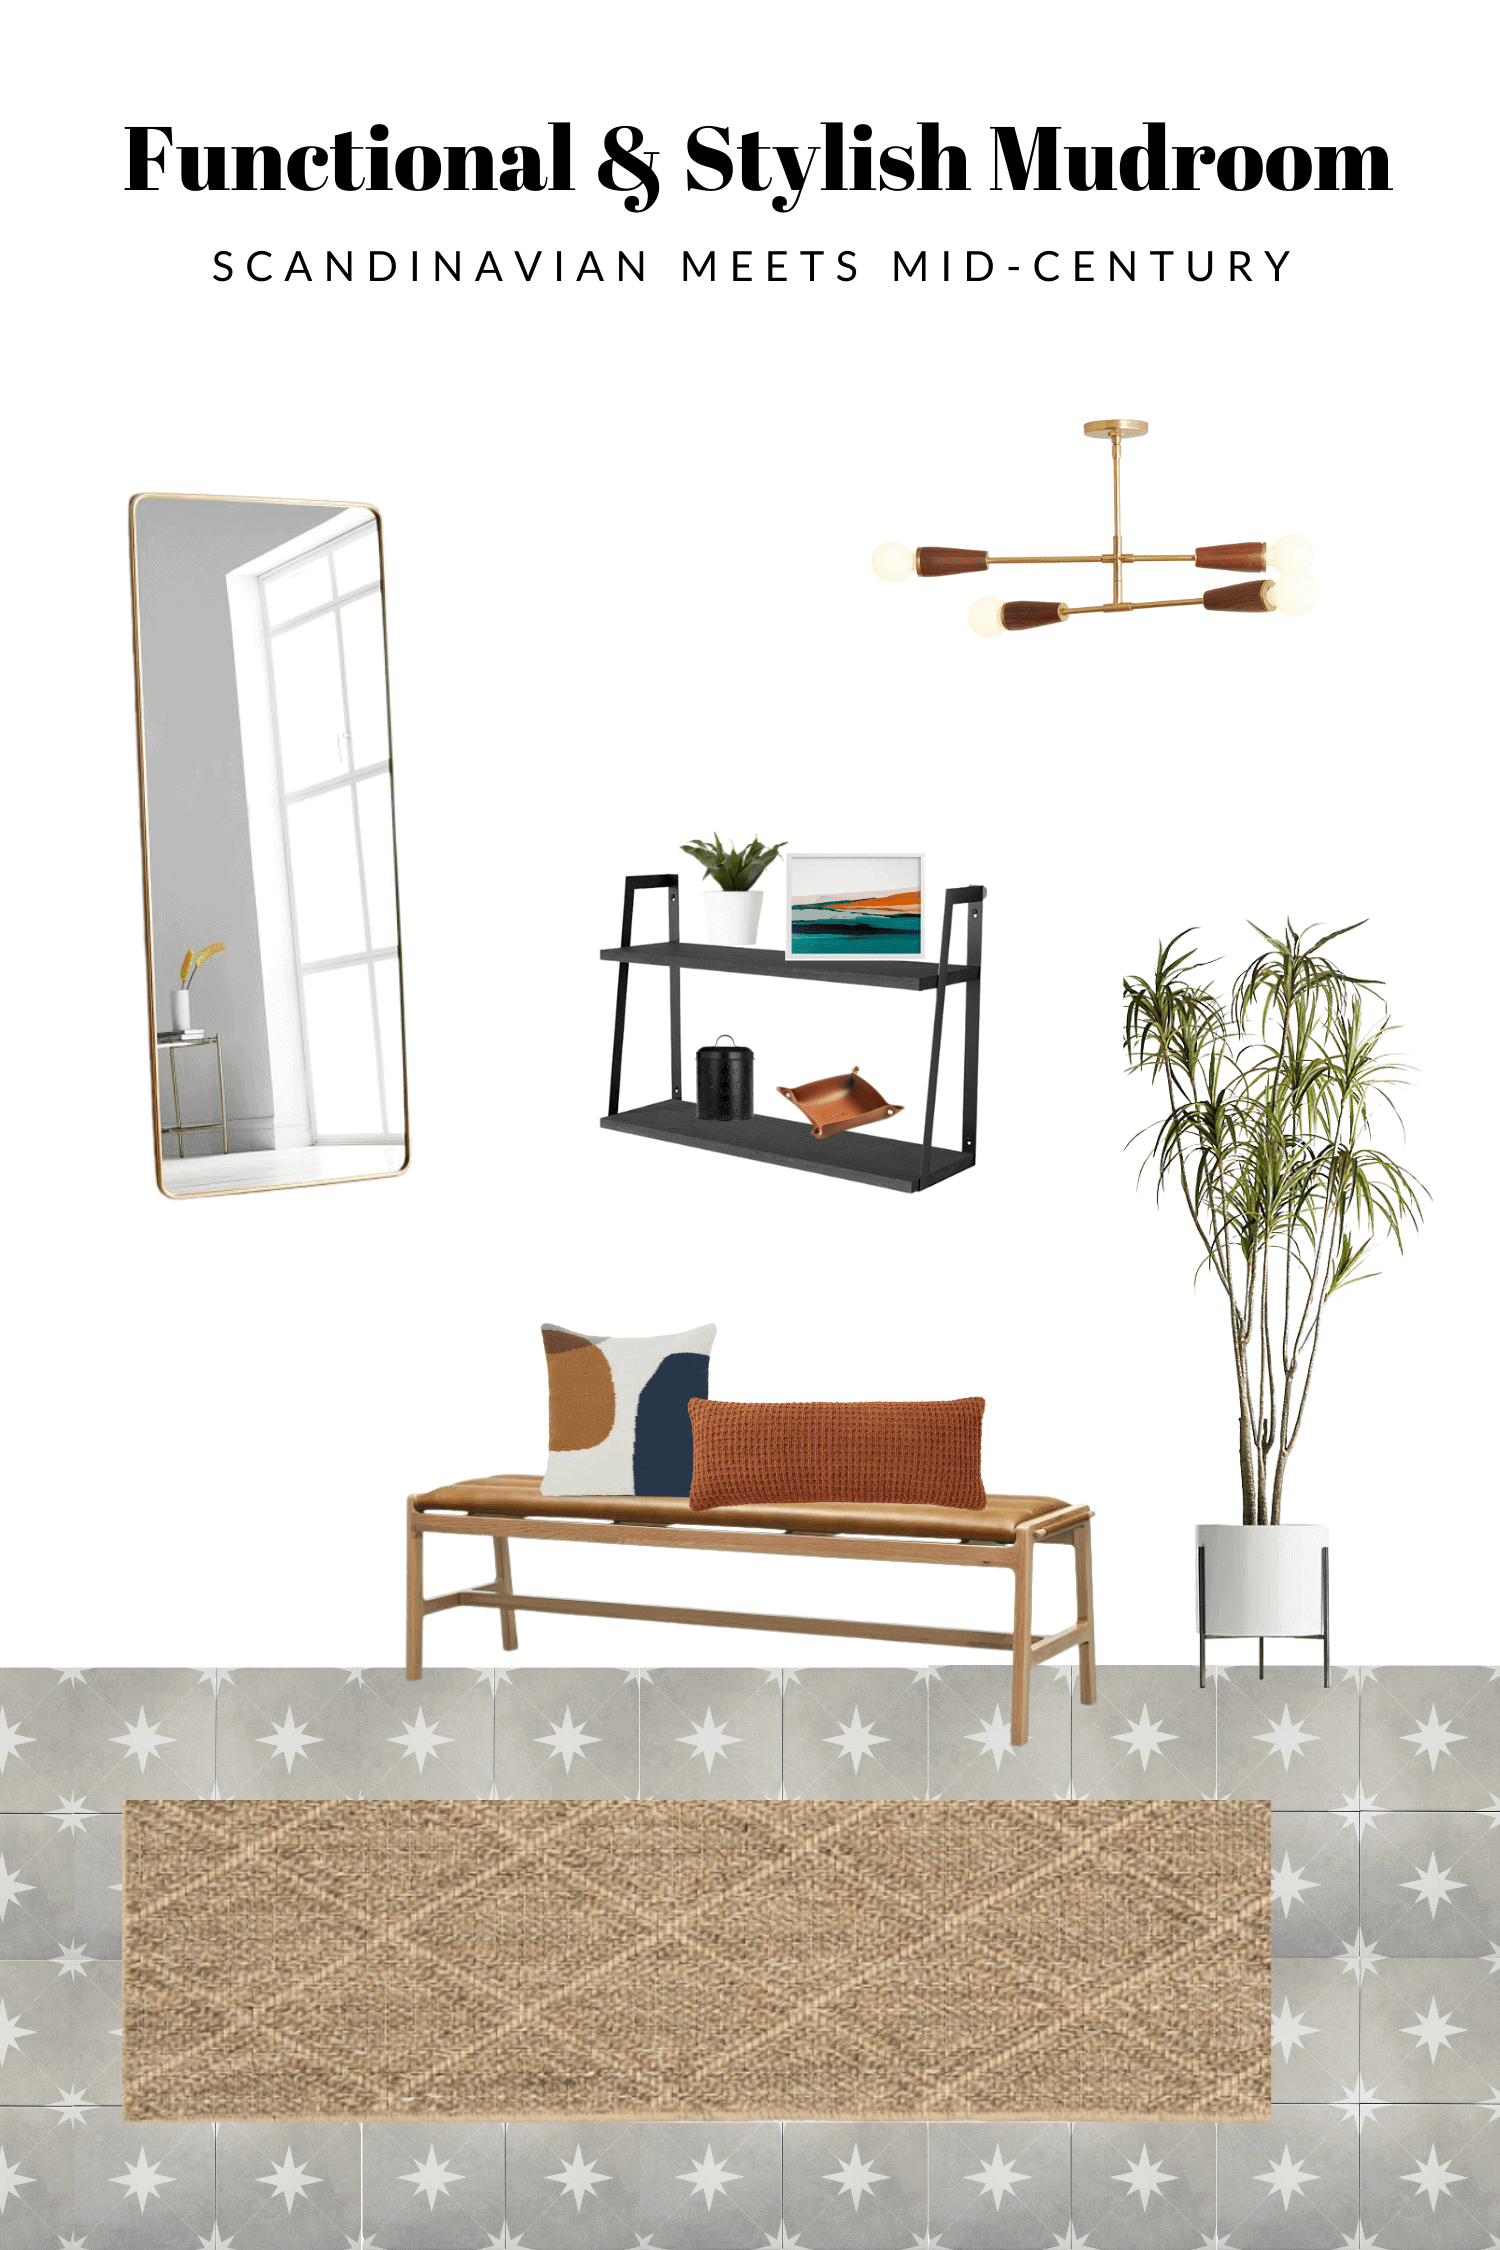
Floor Tile // Mirror // Leather Bench // Black Shelving Unit // Planter // Dog Treat Canister // Leather Tray // Colorful Art // Light Fixure // Sisal Runner // Lumbar Pillow
I recommended that they install a fun tile on the ground and add a large wall of hidden storage for coats, cleaning supplies, and more. Then, I encouraged them to bring in a new light fixture, full-length mirror, and bench to complete this mudroom space. You can see my full design plan here.
What It Looks Like Now


Holy smokes, can you even believe that before and after?! This is the dreamiest mudroom ever. Sarah is actually pregnant and they wanted to get this project done before the baby arrives. They ended up going with vinyl plank flooring instead of tile, to save time and money. And, they painted the fronts of the IKEA PAX system a gorgeous blue. Here’s what Sarah said about the project…
I still need to do some finishing touches like getting a rug, artwork/shelves, mirror, and we’d like to get a new bench. We also plan to add a top cabinet crown molding piece to the cabinet to make it look more built-in. But, the major overhaul is complete! We’ve absolutely loved all the storage and organization the closet has provided. We no longer have an excuse for coats and shoes being left out!
I can’t think of a more perfect project to complete before the arrival of a little one. Congrats to Sarah and Sam!
Can You Even Believe It?!
I was just totally blown away seeing all of these pictures. It made my heart so happy. It’s one thing to work on a space virtually, just by seeing a few photos of a room. But, to actually see these homeowners bring my room makeover ideas to life is the best feeling ever. You guys are the best and I’m so proud of all of this incredible DIY work! Hopefully we will have another post like this very soon!
Casey