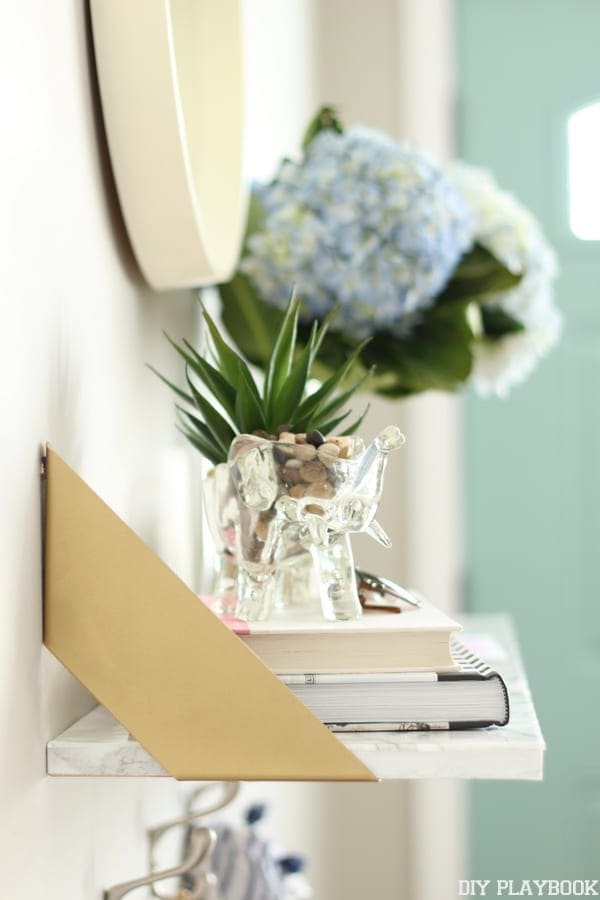
DIY Marble Shelf – IKEA HACK
We have many favorite projects here on the DIY Playbook, and Bridget’s makeshift mudroom is definitely one on the top of the list. You can read all about it in this post, but essentially she took a wall in her entry and utilized the space in a fashionable and functional way. When you live in a small home it’s all about vertical storage space.
That makeshift mudroom recently got an upgrade. And when we say upgrade, we mean it…
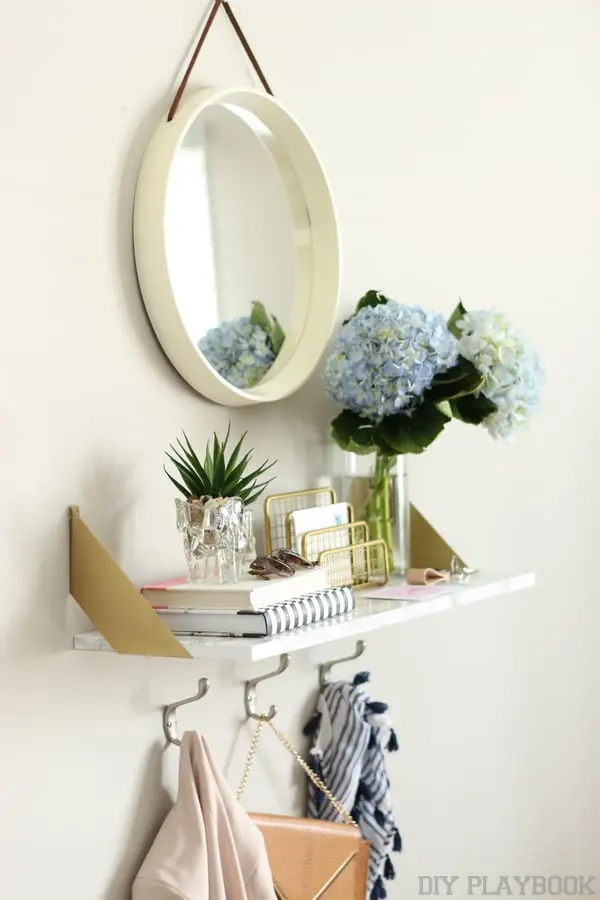 Gold. Glamorous, Gorgeous. Man oh man, what a triple-threat.
But the best part? It has a high-end look…without the high-end price tag. Did your ears just perk up? Okay good!
Here’s the play-by-play for our marble & gold wall shelf.
DIY Marble Shelf Makeover

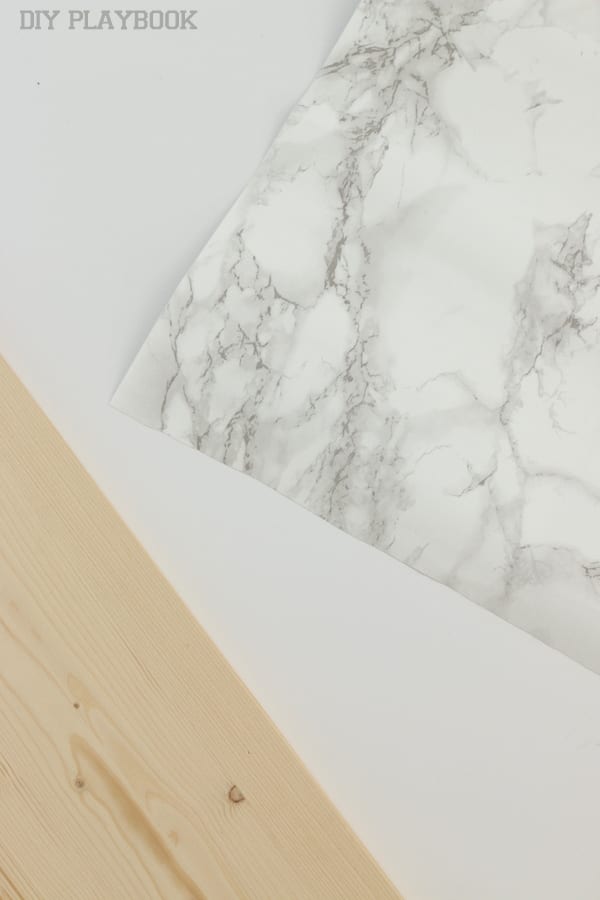
1. (Left): Go to IKEA and pic up the IKEA Fabian Wall Shelf. For $7.99, you will get the wood shelf, 2 silver brackets and all of the screws to hang it on the wall <– pretty amazing deal if you ask us!
2. (Right): You’ll also need marble contact paper, scissors, a pencil and possibly a ruler (especially if your contact paper doesn’t have a grid on the reverse side). We bought our contact paper here, but we got a huge roll. Like seriously…huge. We have so much marble leftover and will definitely be using it for many more projects. I’m sure you can buy a little less to save some moola. Or split the cost with a few friends and each make something marble for your home!

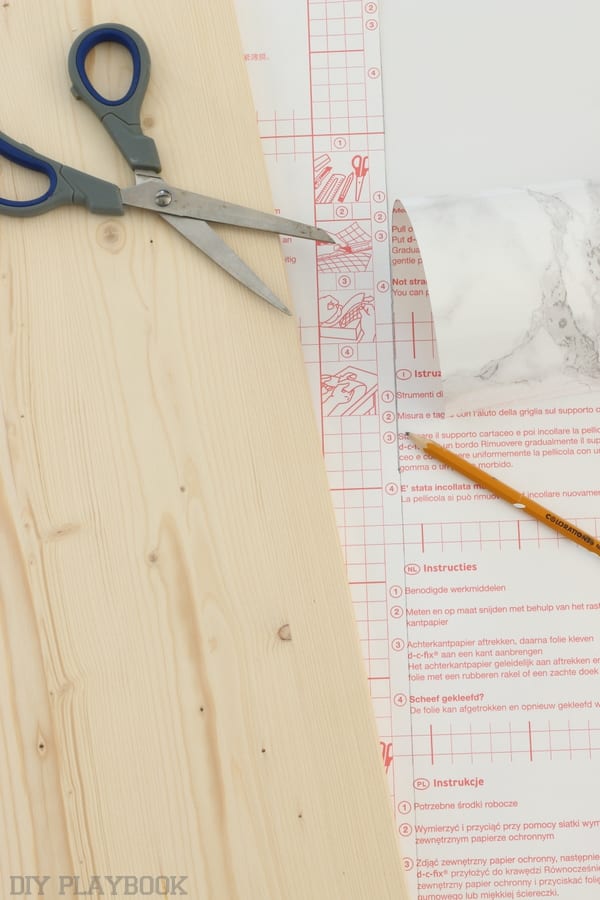
3. (Left): Unroll your contact paper and measure exactly how much you will need to cut in order to cover the top side of the shelf. Cut as closely to that line as you can. Hint: Once you put the contact paper on the shelf you should NOT try to trim it. To avoid this mess, make sure you measure extremely accurately!
4. (Right) Time to cut! Cut carefully along your pencil line so that the marble paper is as close to the perfect size as it can be. (The grid on the back of our paper made it a tad easier to follow straight lines/measurements)
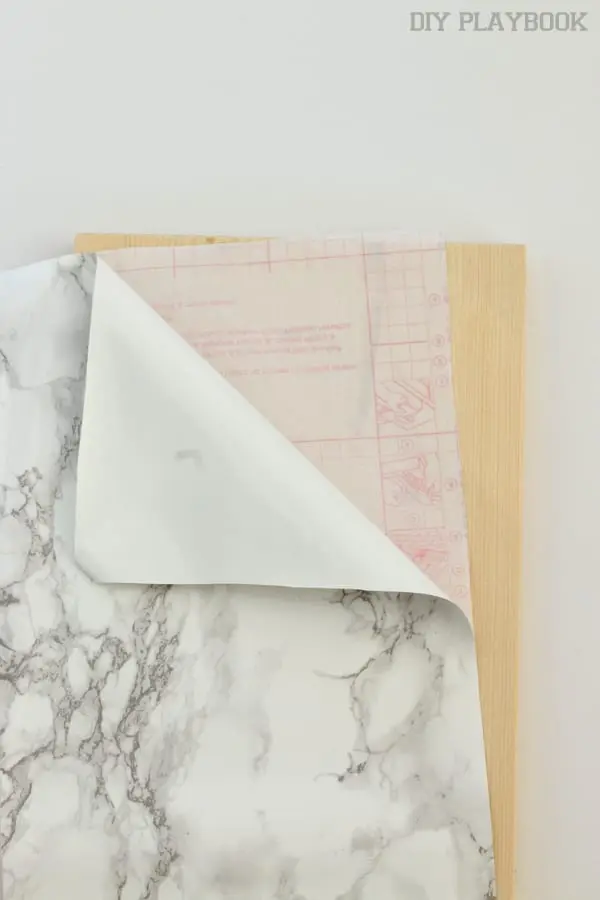

5. (Left): Carefully peel away the backing of the contact paper, leaving the “sticky” side of the paper exposed.
6. (Right) This step may be a two person job to make sure your paper goes on straight and has minimal air bubbles. Place the paper (sticky side down) onto the wood board. The good news is, the paper allows you to un-stick and re-stick onto the surface a few times before it’s permanent! Once you have it exactly where you want it, use a credit card to smooth out the air bubbles. To do this, start in the center and scrape outward until all the air bubbles are GONE!
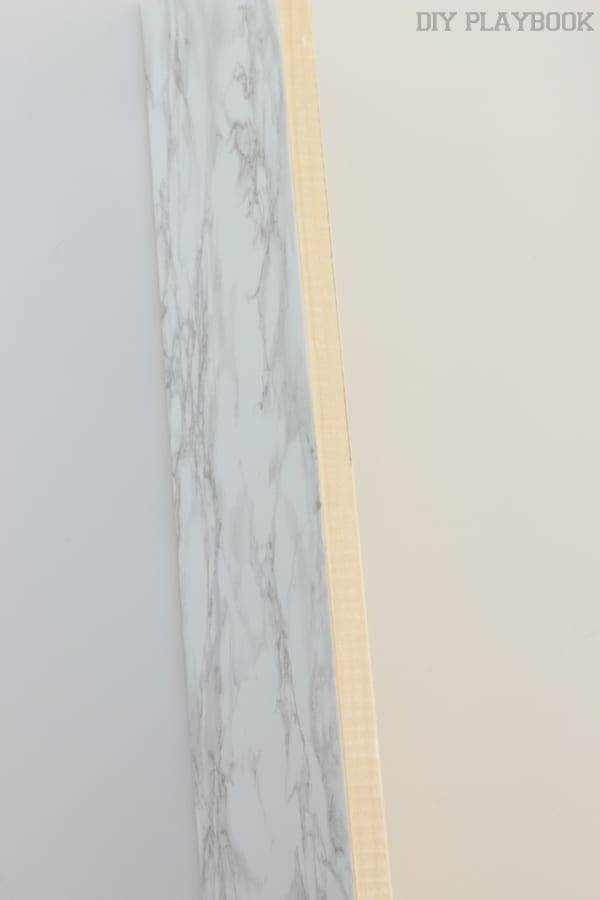
7. (Right) Repeat the steps above to cover all sides of the shelf (including the bottom).
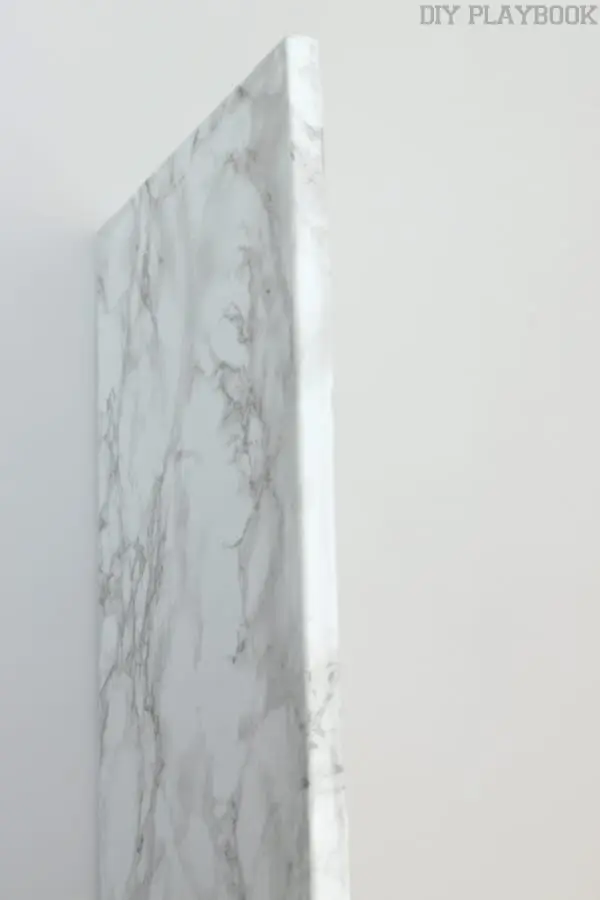
8. (Left) Once all sides are covered, you have a high-end looking marble shelf.

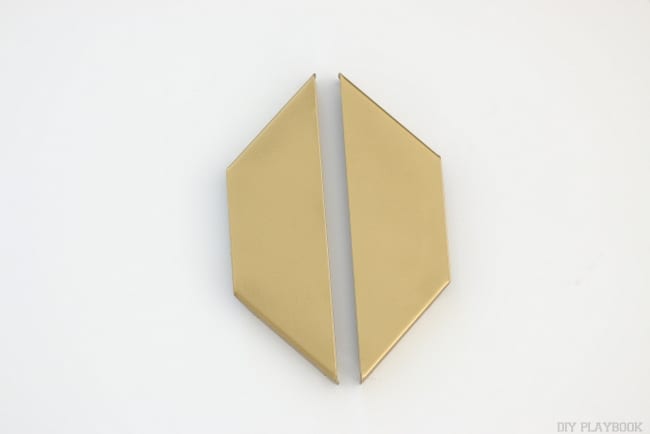
 The last step before you hang the shelf is adding the final touch of glam with some gold spray paint on the brackets. Make sure you use the gold spray paint to paint the screws too, this will ensure the brackets match the screws!
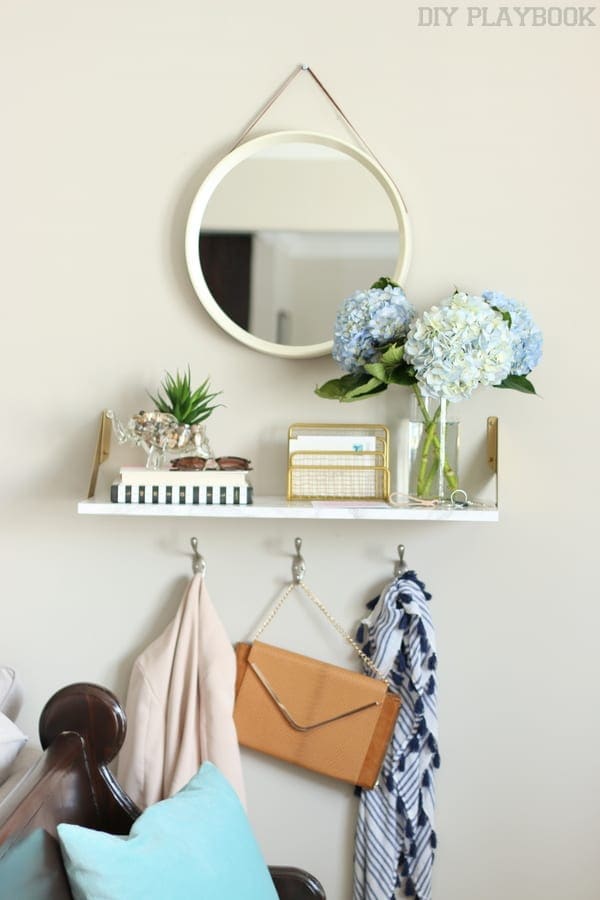 Now, all that’s left to do is to hang the shelf (be sure to use some anchors!) and enjoy the glamorous look that will be sure to fool your guests!
But this isn’t the last time you’ll see this shelf here on the blog. On Monday, we’re showing you 2 ways to style this little area. One will be the a breakdown of the glamorous look we have here today, and the second will be a more “man-friendly” alternative (for any of you married gals out there who are forced to #Compromise!) <– we feel ya!!
 Regardless of how you style this shelf, we do have to say that this was probably the best $7.99 we have spent in quite a while! What. A. Steal. Thanks IKEA!
Bridget&Casey


