DIY Shiplap in the Bathroom
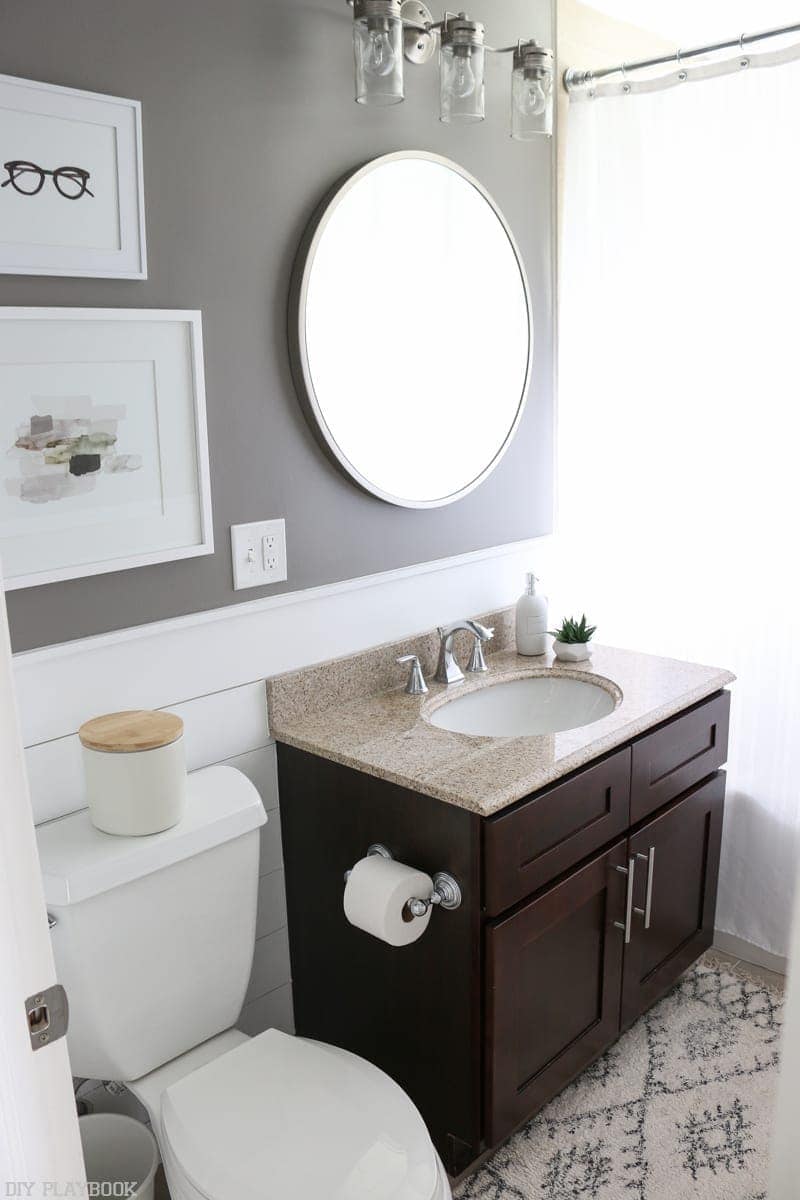
My shiplap dreams have come true! I recently talked about how this new round mirror had me completely itching to make a few more updates in our bathroom. (Enter my shiplap dreams).
Shiplap Plans
In a perfect world, I would shiplap the entire bathroom, but there were a few roadblocks and a few uncertainties that urged me to shiplap halfway up the wall instead. #babysteps
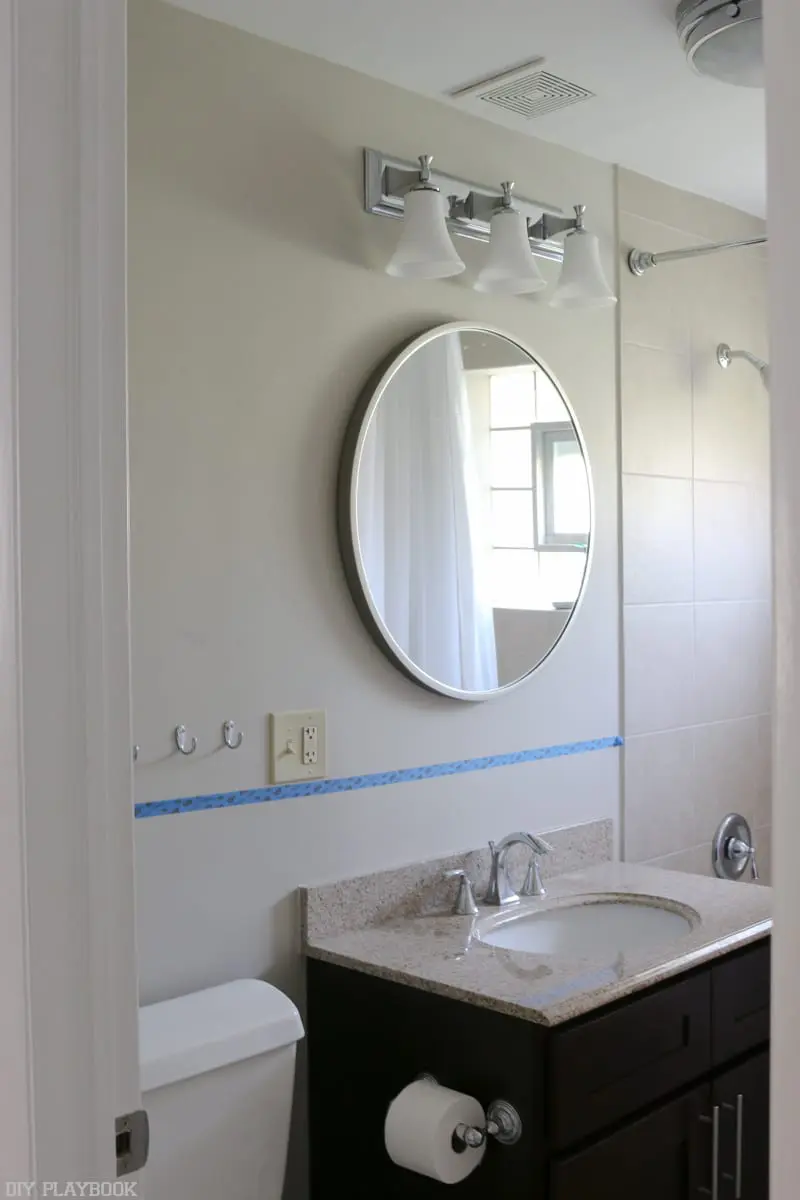
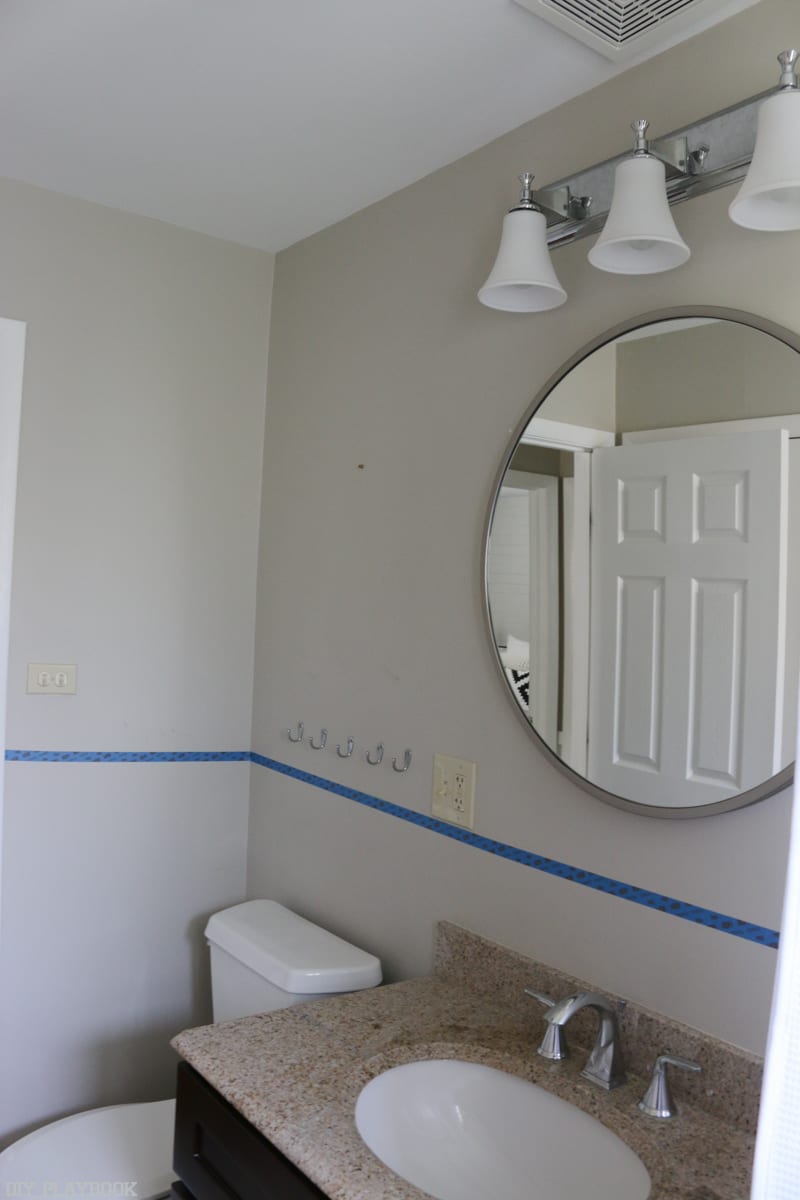
I used painter’s tape to visualize the “look” and thought some shiplap was better than none, so I proceeded with the project and haven’t looked back since.
A few disclaimers:
- I did this entire shiplap project for around $70. Casey let me borrow leftover white paint and I had all of the tools, so all I had to pay for was the wood. And to be honest, I could have done it for less if I figured out previously how much wood I needed before I started. #oops
- I did all of the shiplap while Matt was out-of-town and Casey was at work, proving that if I can do it ALONE, I know you can do it too!
- I did recruit my mom to help on Day 2 because I needed an extra set of hands to hold the shiplap while I nailed it in the wall. <– Moms are the best, aren’t they?! Always willing to help.
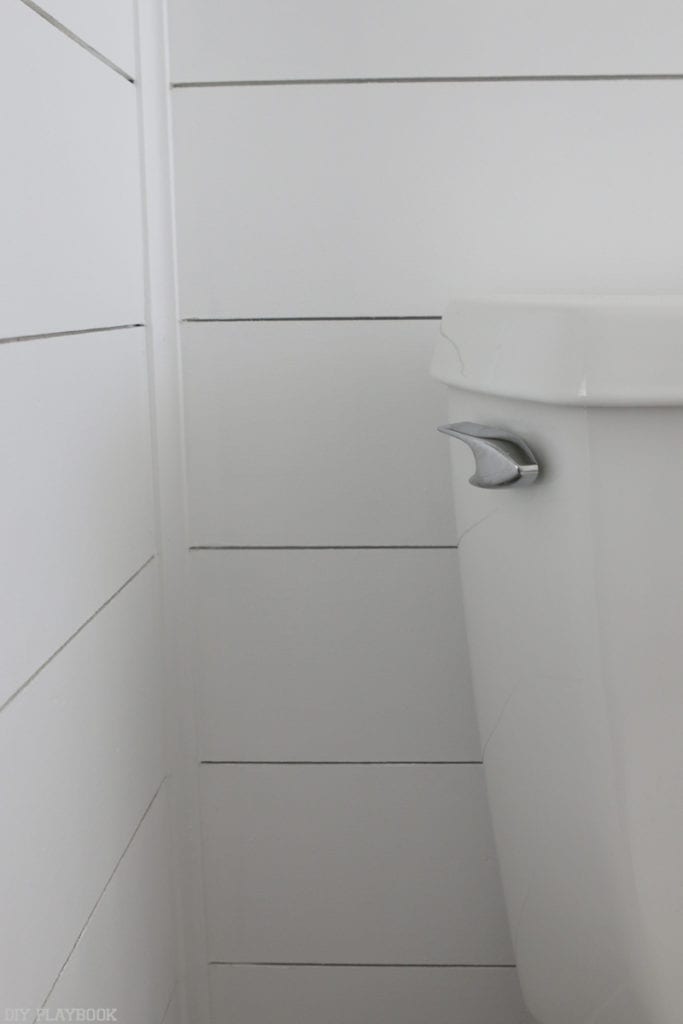
- I would definitely do this project again on a larger scale and think shiplapping a whole bedroom would be even easier than a bathroom because there are less detailed cuts and less tiny spaces to work (i.e. behind the toilet)
Now, onto the rookie-level DIY shiplap tutorial…
Shiplap Supplies
- 2 pieces of Plywood cut down (aka “ripped”) to 5 1/2 wide strips
- Corner wood accent piece to hide seams
- Finishing piece of wood to add to the top seam of the shiplap (I forgot what I used, but it’s a 2″ square piece that I had cut to size in the lumber department)
- Wood Glue + Caulk Gun
- Caulk
- Nail Gun (my favorite one!)
- Miter Saw (love this one)
- Primer
- White Paint
- Roller + Paint Brush
- 50 cents in Nickels (to act as spacers)
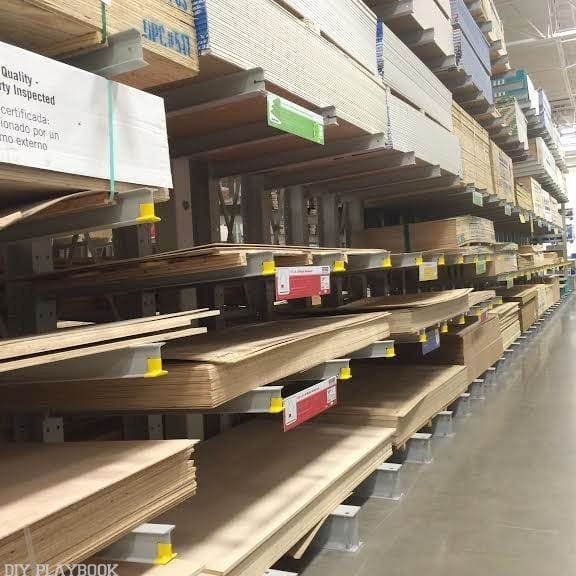
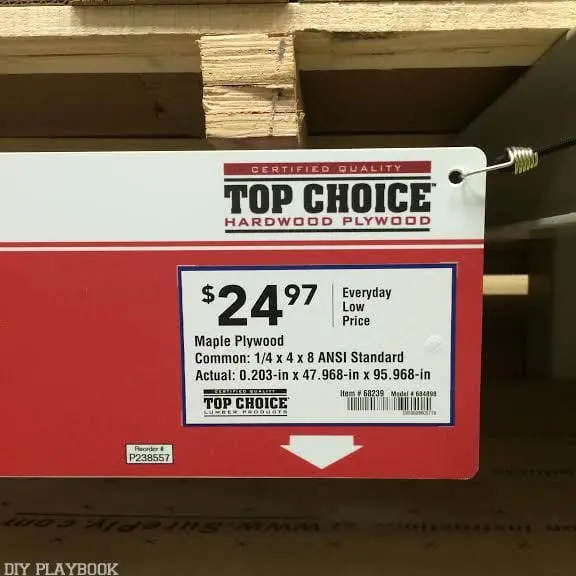
Step 1: Get plywood cut down (free at Lowe’s!)
Shiplap can be a very cost-effective project because plywood is so darn reasonable! I used maple plywood and had two sheets cut down (in store… for free!) to 5 1/2″ strips. You can get your strips cut down (they called it ripped) to whatever size you want. I bought two sheets and had quite a bit leftover. For $24 per board, this stuff is a steal!
Rookie Tip: The plywood I bought is very light and flimsy and did do a bit of chipping when I cut it down, so if you want wood that’s a bit more sturdy, consider buying plywood that’s thicker.
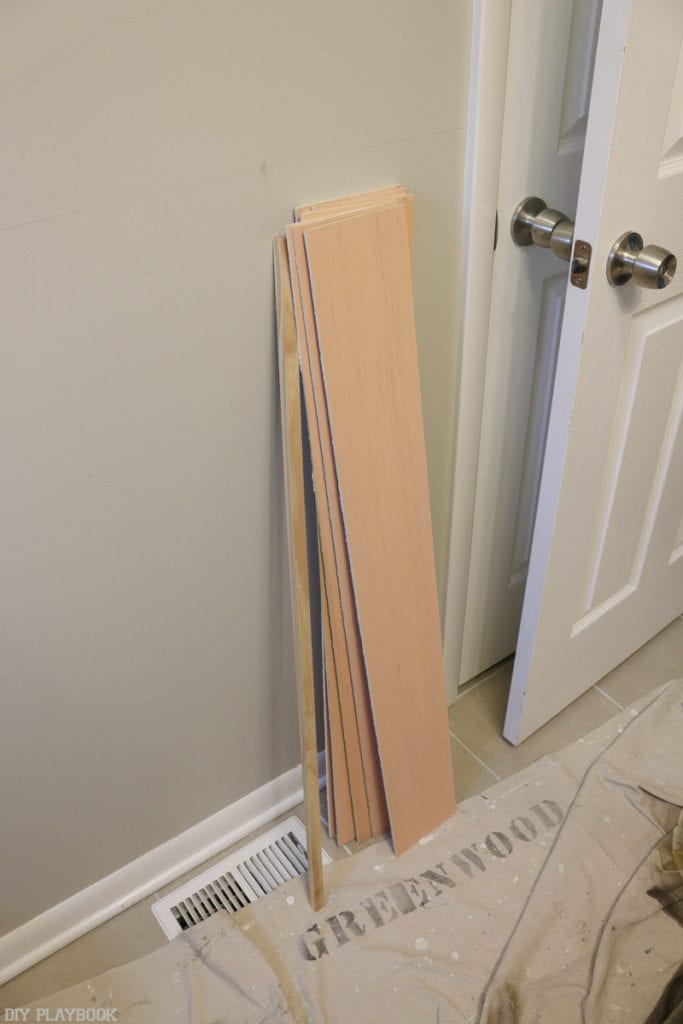
Step 2: Cut the shiplap to size and label
You don’t HAVE to do this step next, but I didn’t want to paint ALL of my wood since I knew that a lot of it wouldn’t be used. To identify exactly what wood needed to be painted, I pre-cut the plywood to fit every area in the bathroom.
The day I tackled this project, Matt was out-of-town and Casey was at work, so I had no choice but to do it all by myself. I would hold the piece of wood approximately where it would end up going on the wall, then I marked the wood and headed to the garage to cut it down with a miter saw. (I was “in the zone” so much so that I forgot to take pics!!

Quick Tip
My BIGGEST piece of advice is to mark on the back of each piece of wood where it will eventually be hung. This piece was marked “2R”, which meant “R” for right of the vanity and 2 for second from the top. I marked every piece of wood so after I painted all of the pieces, I knew exactly where they should be hung on Day 2.
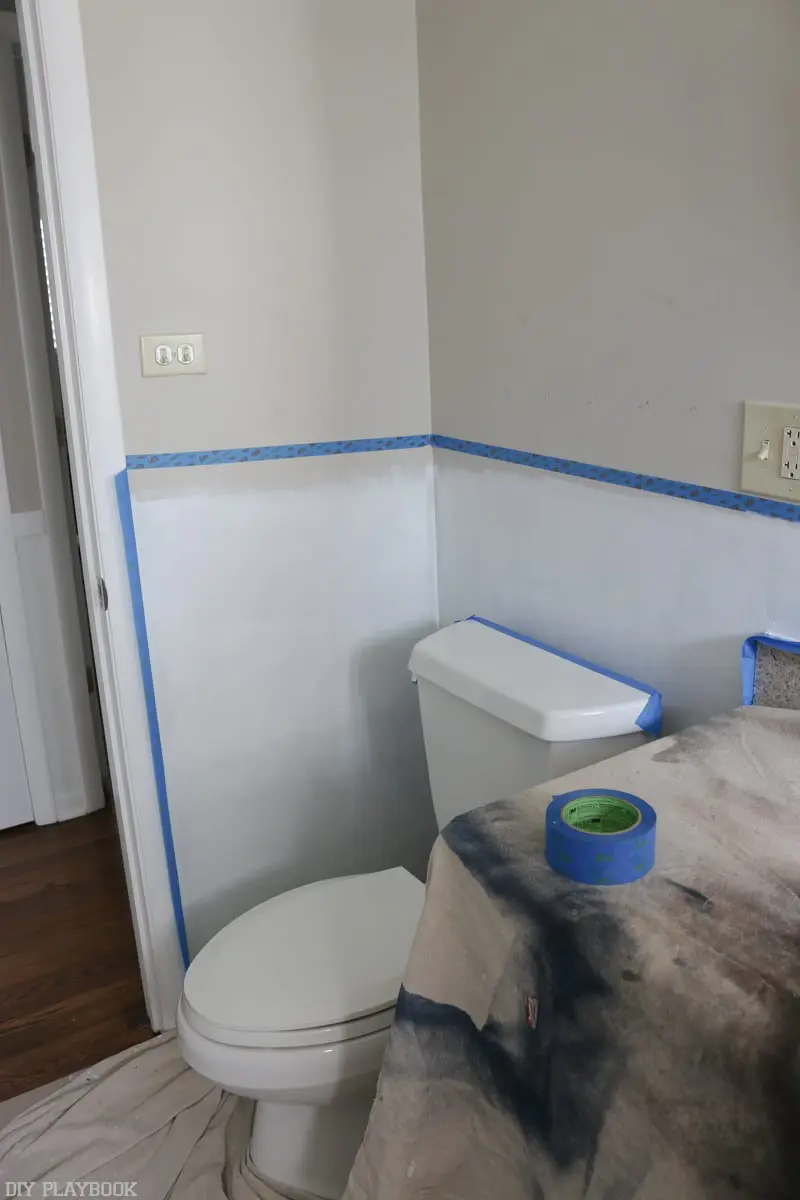
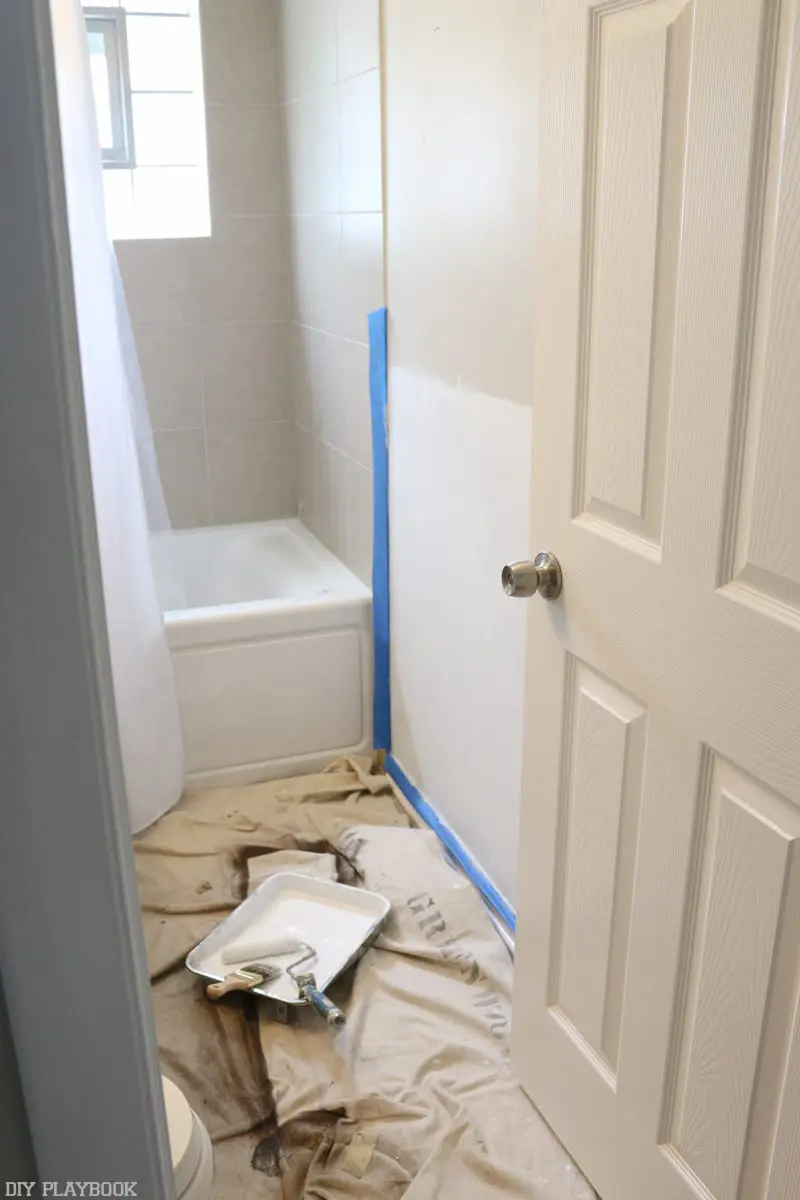
Step 3: Prime the walls and the boards
After the pieces of wood were cut and labeled, I primed the walls and the boards. I’m not sure if priming the wall behind the shiplap is totally necessary, but it will save you from having to get a tiny paintbrush into the little cracks after it’s hung. The same goes for the sides of the boards. Priming the front and sides of each piece before it was hung really saved me tedious painting work later in the project.

Rookie Tip: When priming, don’t try to cover all of the wood with ONE coat… just a light layer of primer on the front and sides of the boards is perfect. I used a roller on both the wall and the boards to avoid brush strokes.

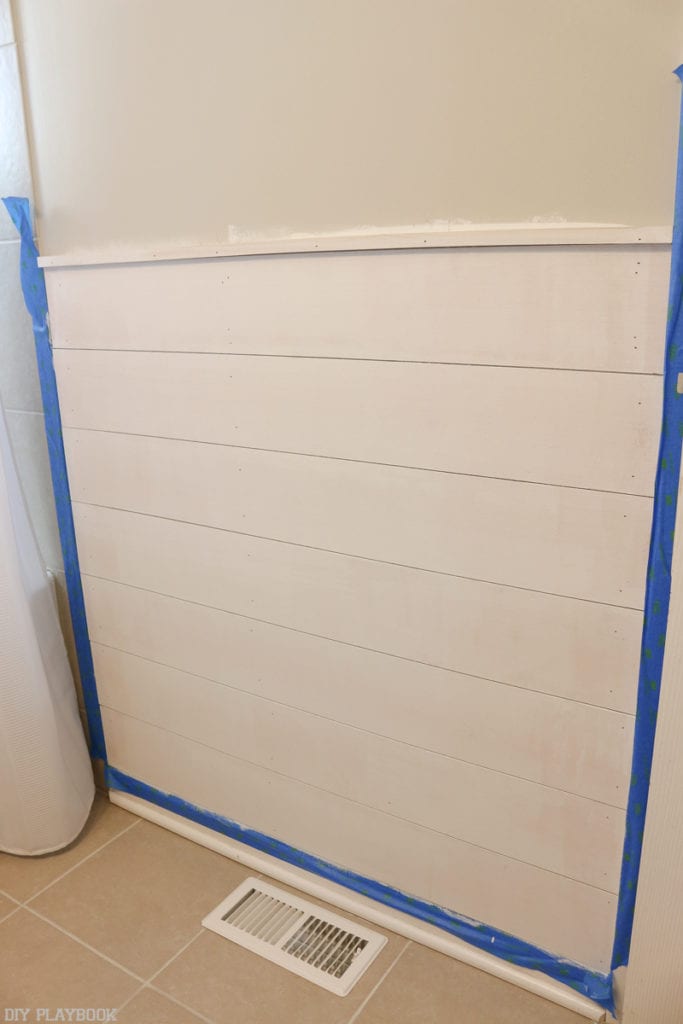
Step 4: Hang the shiplap!
Since I already had all of the boards cut to size AND primed, all I had to do on day two was hang, caulk, and putty. The hanging of the boards took no time at all since they were all cut and ready to go.
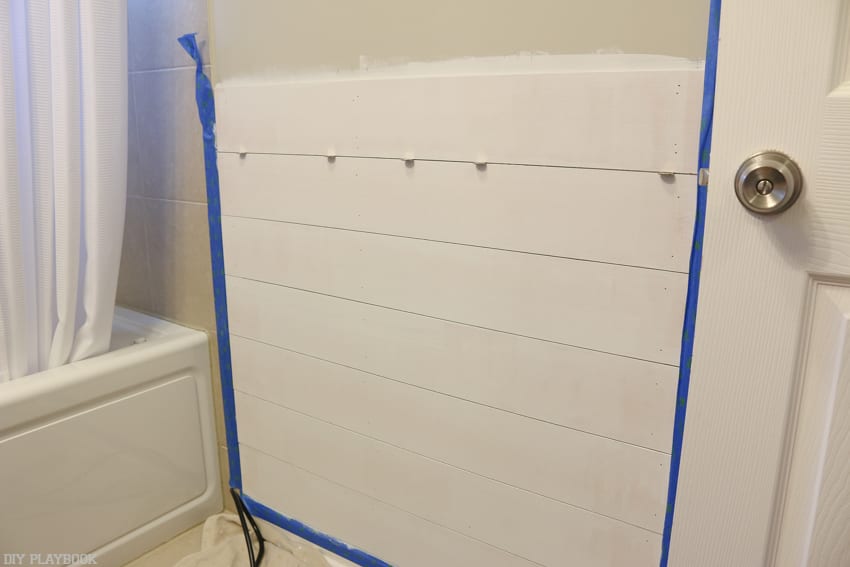
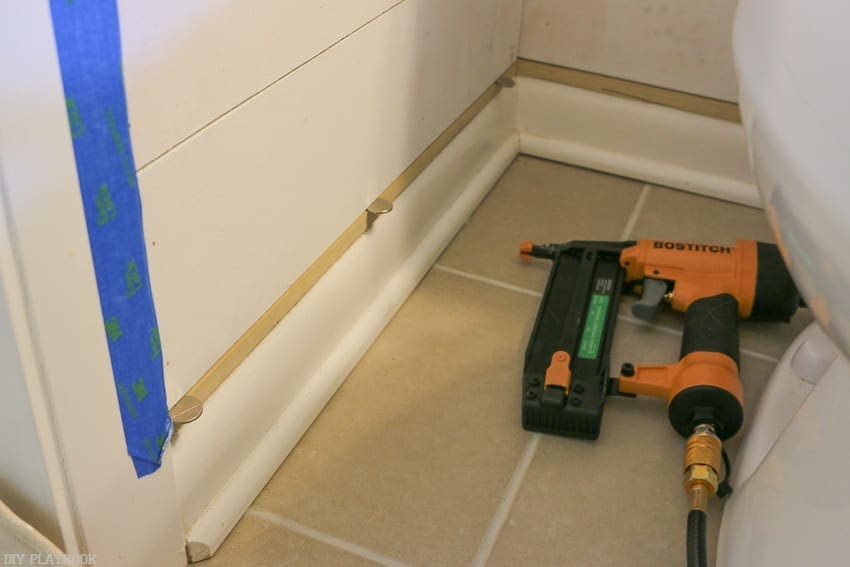
My mom graciously volunteered her afternoon to come over and help hang the boards because I needed an extra pair of hands to hold the boards (thanks, mom!!). On this wall, we started by hanging the first board along the baseboard.
Secure the Boards
We secured the boards to the wall by squeezing liquid nails onto the back of the board and then nailed it to the wall at every stud. Once the first board was up, we simply placed the nickels along the top of that board to create a consistent seam, and then nailed on the next board. We used that same method all the way up the wall.
Keeping the nickels in the seam as we nailed the next board was a lot easier than I thought it would be. Once the board was secure, we pulled those nickels out and used them on the next board.
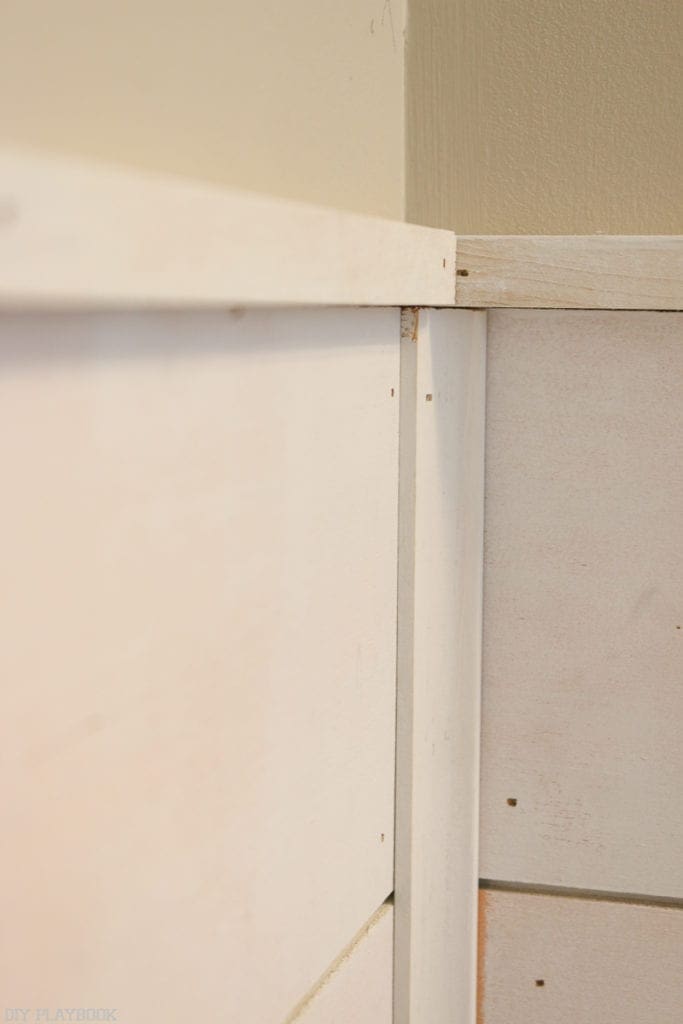
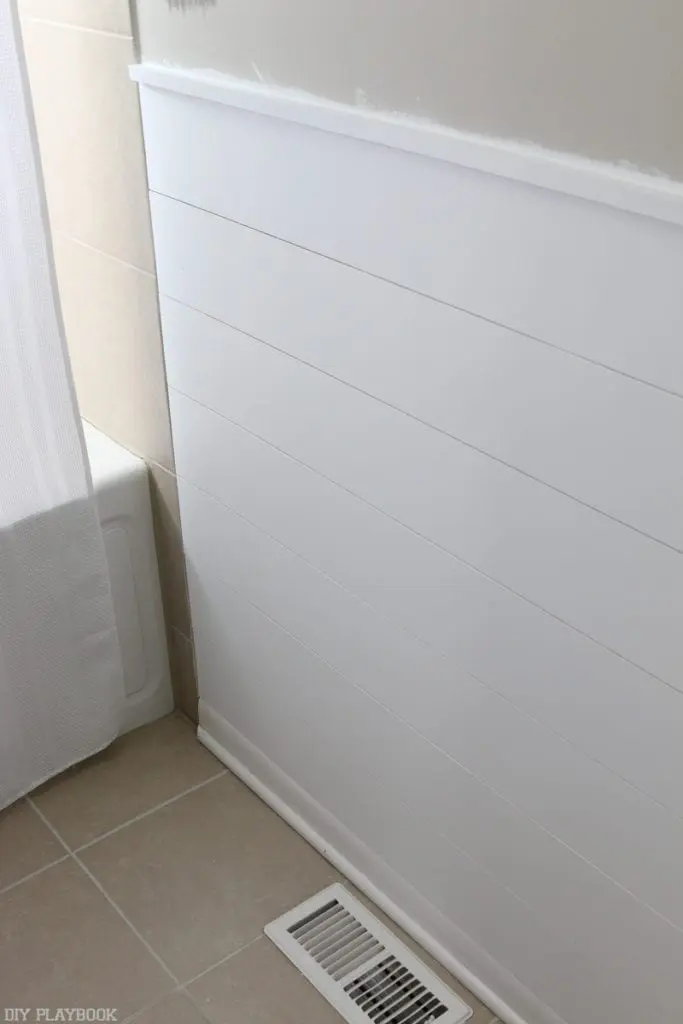
Once the boards were up, we used the same method to secure the top piece of finishing wood, which created a small “ledge” of sorts. Obviously, this piece isn’t needed if you’re shiplapping all the way to the ceiling.
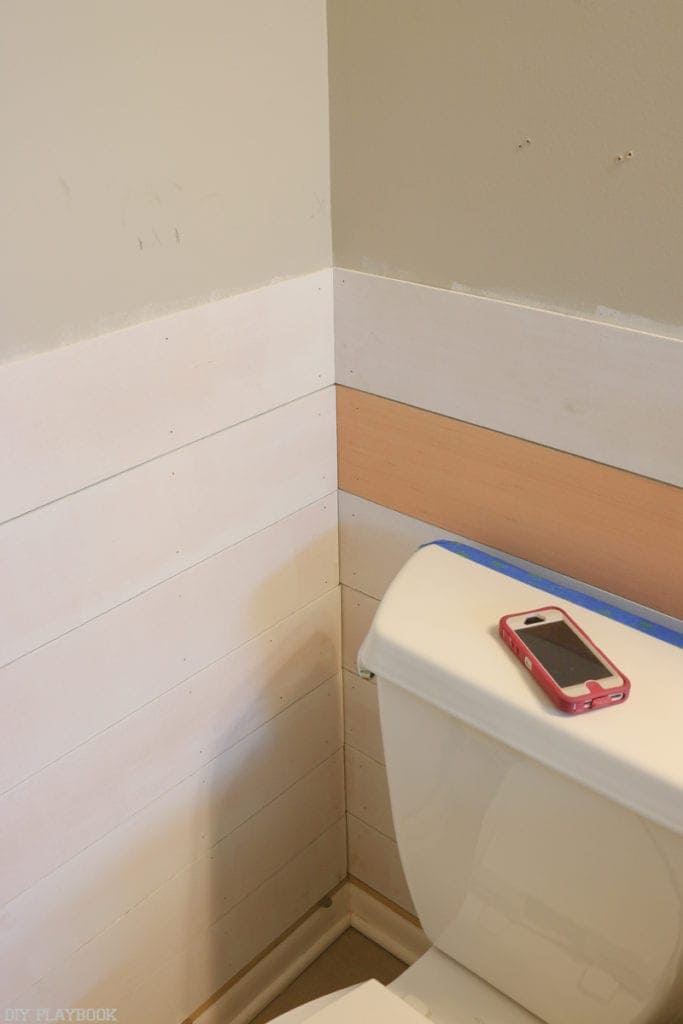
Step 5: More hanging
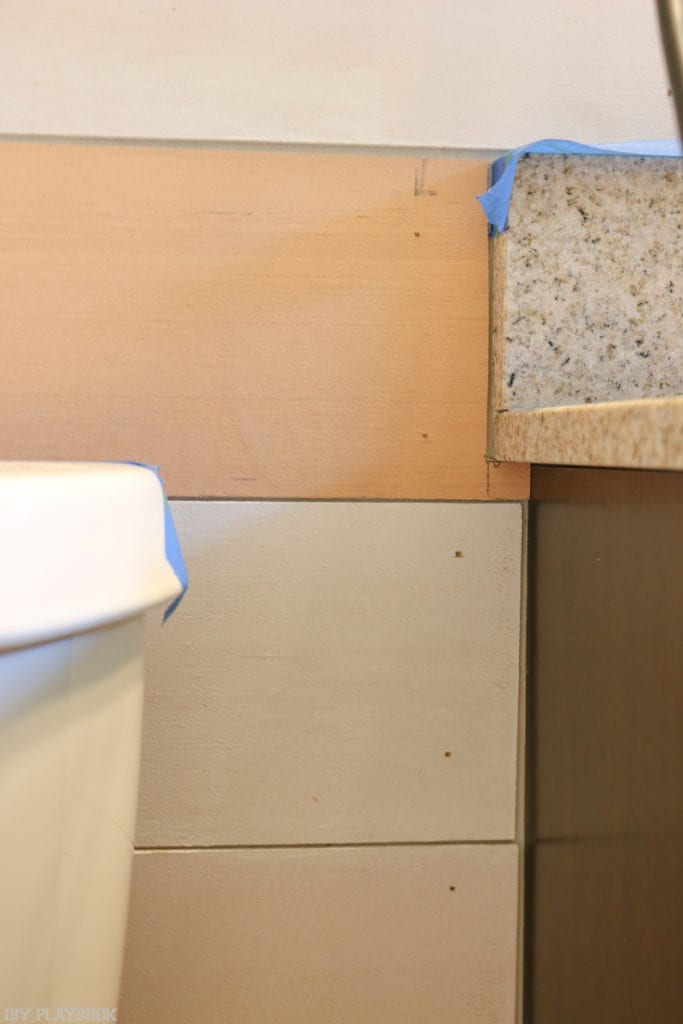
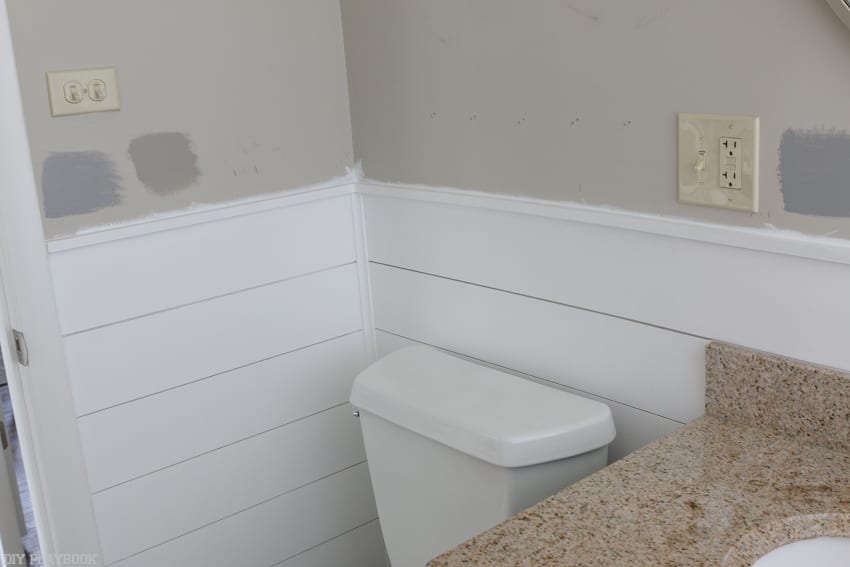
Now the other side of the bathroom was a bit of a different strategy, but unless I told someone about this tiny difference, you’d probably NEVER notice it. Because I didn’t want any obvious “cuts” around the vanity, we started hanging the wood pieces on the top of the wall and worked our way down.
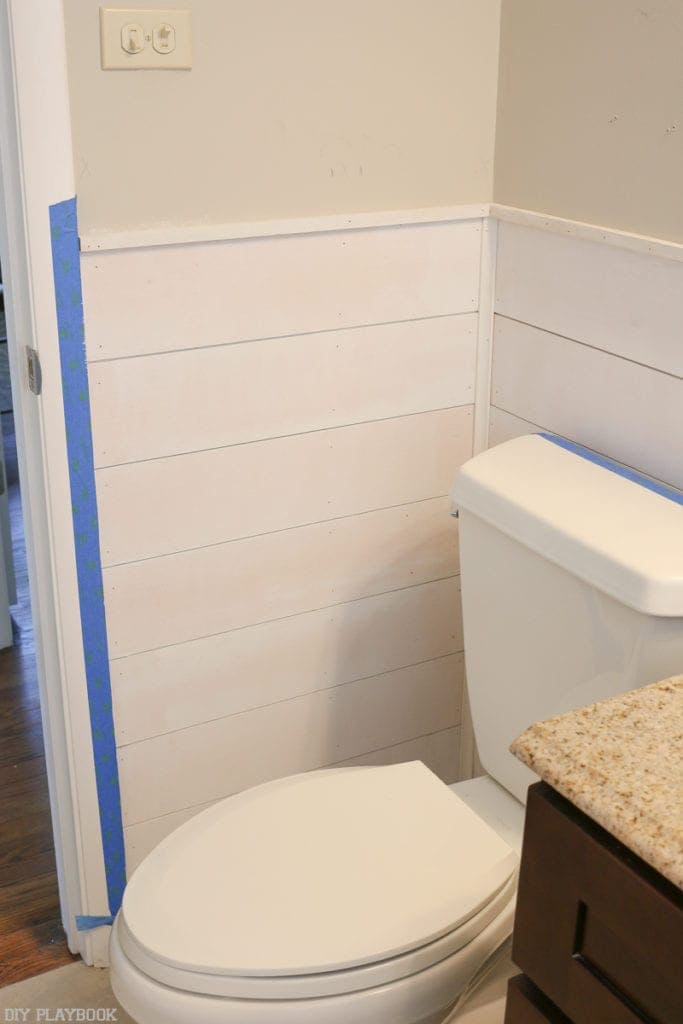
Starting from the top and working our way down created a tiny piece of wood that we had to fill at the very bottom of the wall (which didn’t happen on the other wall). I didn’t mind the slight difference because that tiny piece of wood is behind the toilet and is barely noticeable.
See how the top of the vanity has a whole piece above it and not a lot of random cuts? I think the tiny inconsistency between the two walls is worth the clean, consistent look around the vanity. Even though the bottom piece was extra tiny, we used the same method to add it to the wall — nickel spacers, liquid nails, + nail gun. We didn’t anticipate this tiny space and that’s why the wood isn’t primed like the rest of the boards.
This part is totally optional based on your preference, but I added a small finishing piece in the corner to hide the corner seams. I felt like this simple piece made the corner look more “finished” and dare I say… professional?! Ha!
Step 6: Caulk, Putty, Sand, and Paint!
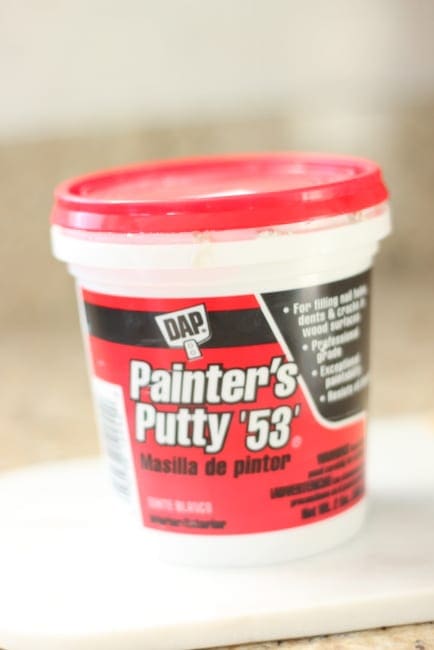

The next day, I caulked the top of the ledges and around the vanity. I puttied all of the nail holes and sanded down the wood. Since it’s plywood, I recommend giving ALL of it a good sanding before painting. This simple step made the wood a lot smoother and overall more consistent.
Last but NOT least, I painted the shiplap using Casey’s leftover “Ultra White” (Valspar) paint from her recent board and batten project.
I wasn’t careful about painting the top ledge of the shiplap because I’m obviously repainting the rest of the bathroom (once the bathroom fixture and outlets are changed).
I can’t believe how clean and BRIGHT this space looked once the shiplap had two coats of this white paint on it. I LOVE the changes and the top of the wall isn’t even painted yet.
Speaking of the top of the wall, I’m having such a hard time choosing the paint color. The dark vanity and yellowish/beige countertop (boo!) is making this color selection so dang hard.
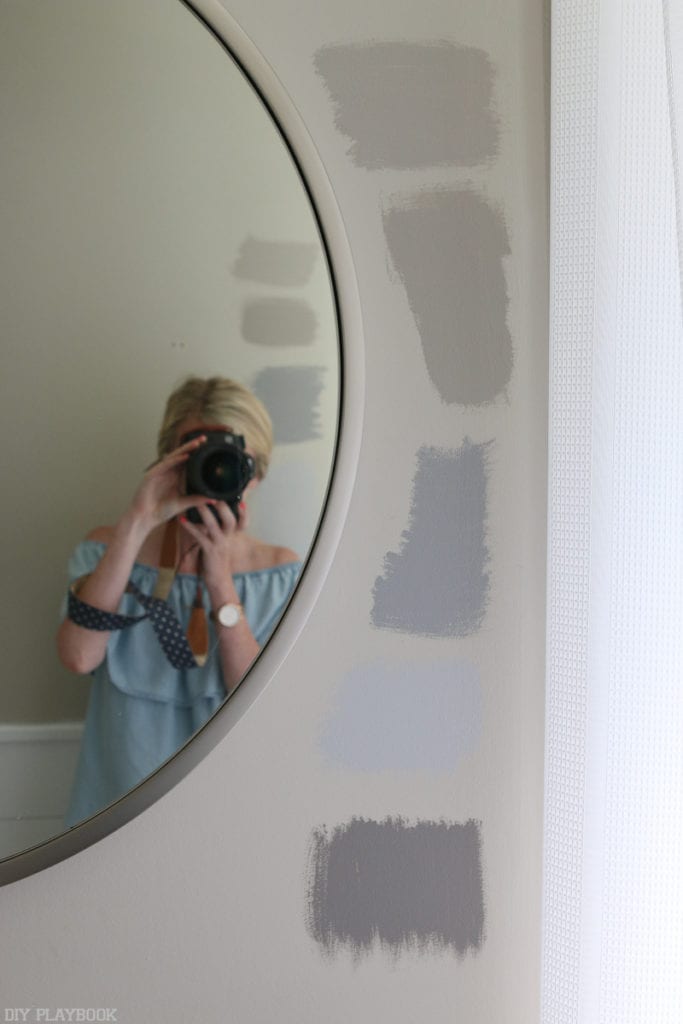
Here are the options I have so far. Any preferences?! A lot of you weighed in on Instagram and your amazing suggestions have really helped me investigate lots of color options (thank you so much!!). Bottom line: finding the perfect “greige” is HARD!
Bathroom UPDATE
We finished the bathroom and would love to show you around! Come get the full tour HERE!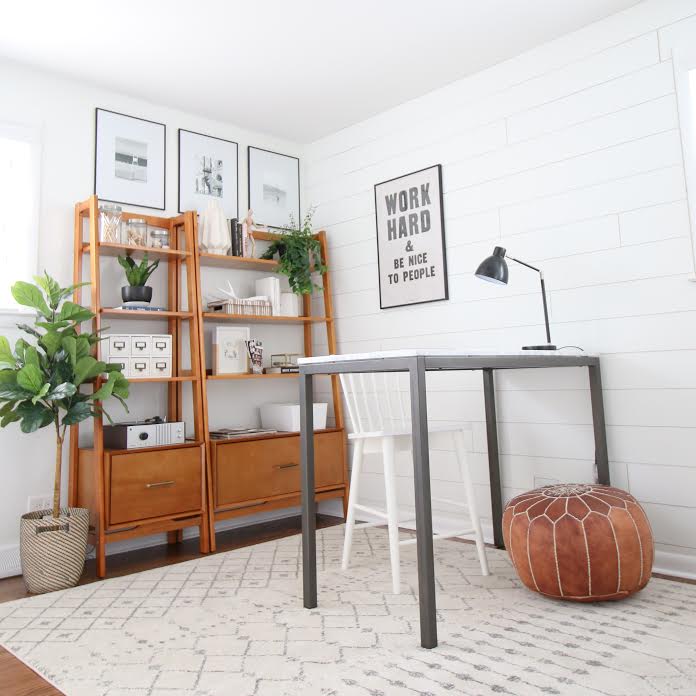
Oh, and if you want to shiplap an entire wall, come check out this shiplap wall in my office.
Bridget