How to Build a DIY Barn Door – Step 3
I cannot thank you all enough for your PATIENCE throughout this barn door journey. I’m happy to report that it’s FINALLLYYYY time to dive into the last step of DIY-ing this barn door and revealing what a gorgeous and functional addition this has been in our office.
If you’re just joining in on the fun today, you can catch up on the process and get detailed step by step tutorials here:
- Step One: Choosing and Hanging the Track
- Step Two: Building & Hanging a DIY Barn Door (plus an epic fail that I made & shared in hopes that you don’t make it too!)
- Step Three: Painting a DIY Barn Door and Attaching the new Pull <– you’re here, keep reading
For those of you who have been patiently along for the ride, let’s pick up right where we left off — choosing the perfect paint color for our DIY door.
Choosing the Perfect Grey
It wasn’t a surprise to me that choosing the perfect grey for this door was tough. Grey paint colors are really hard to choose because they often have undertones of other colors. Some appear too blue or purple while others appear too green or yellow.
I set out to find a very light grey that didn’t have a strong undertone of another coloring coming through. Unfortunately, that’s a lot harder than it sounds and that’s where the delay came in.
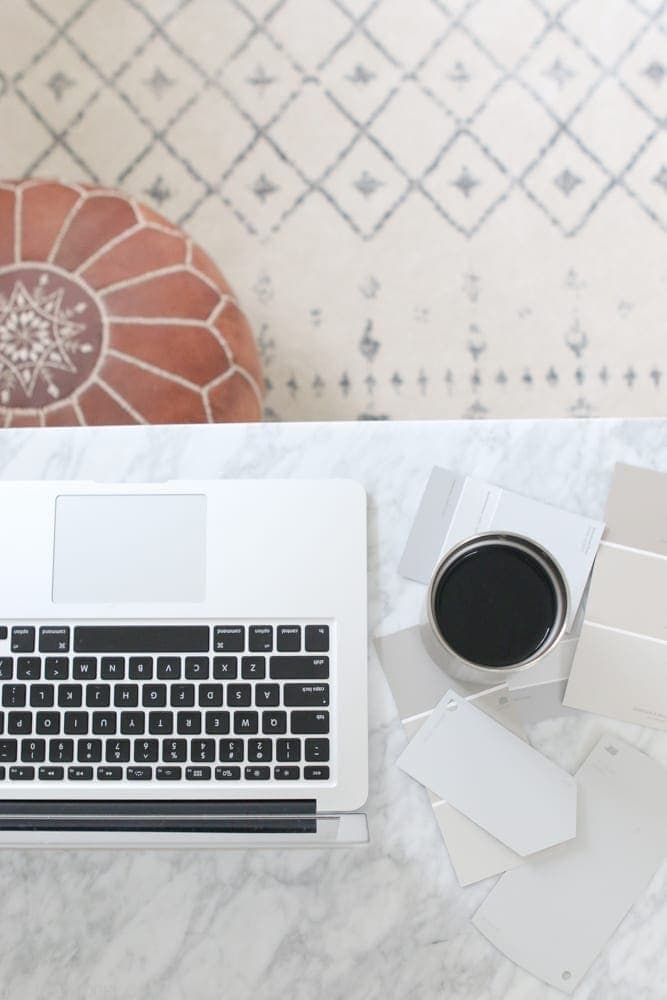 I asked for suggestions on our InstaStories and got a lot of great… or shall I say grey… suggestions. I wrote them all down and visited several different hardware stores to find swatches of all of these greys/greiges. After bringing them all home and lining them up together, I eliminated some right away because of those other colors coming through. I was drawn to a lot of greige colors, but wanted to stick with a pure grey for this space, which eliminated more from my swatch collection.
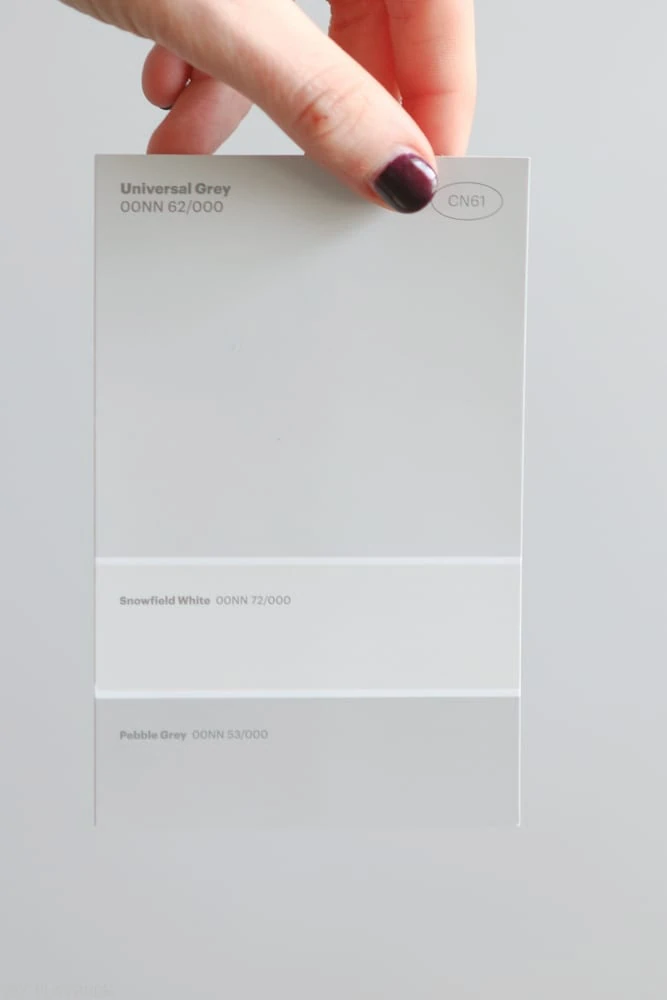
I narrowed down my search to 6 shades of grey and brought home samples of all of those colors. I painted them on a piece of white wood and eventually decided on the grey that seemed most “pure” when compared to its surroundings.
 I went with Glidden’s Universal Grey in Eggshell finish. Although I usually opt for a matte finish, I went with something a tad more glossy so that it would stand up to more wear and tear. Matte finishes aren’t very forgiving in high-traffic areas and although the eggshell is not as forgiving as a semi-gloss, the egg-shell would allow some forgiveness while still looking a bit more matte than the semi-gloss would. Since it’s a door that will probably see some finger prints, forgiveness was definitely a priority.
Paint!
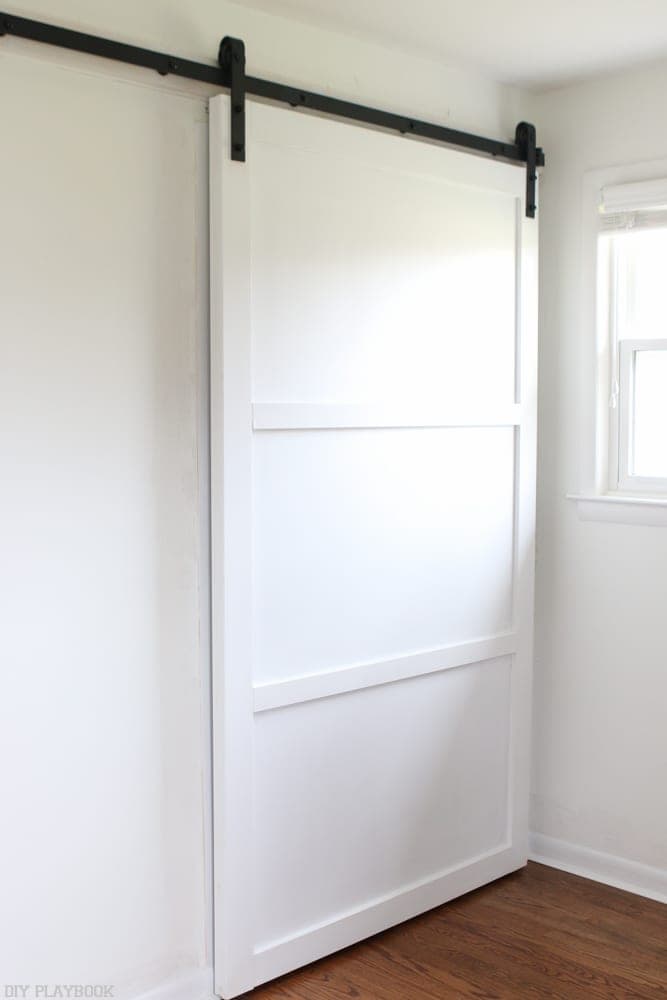
Once I settled on this light grey color, it was time to paint. Two coats of paint later (after we primed it during Step 2), we were left with this gorgeous new look…
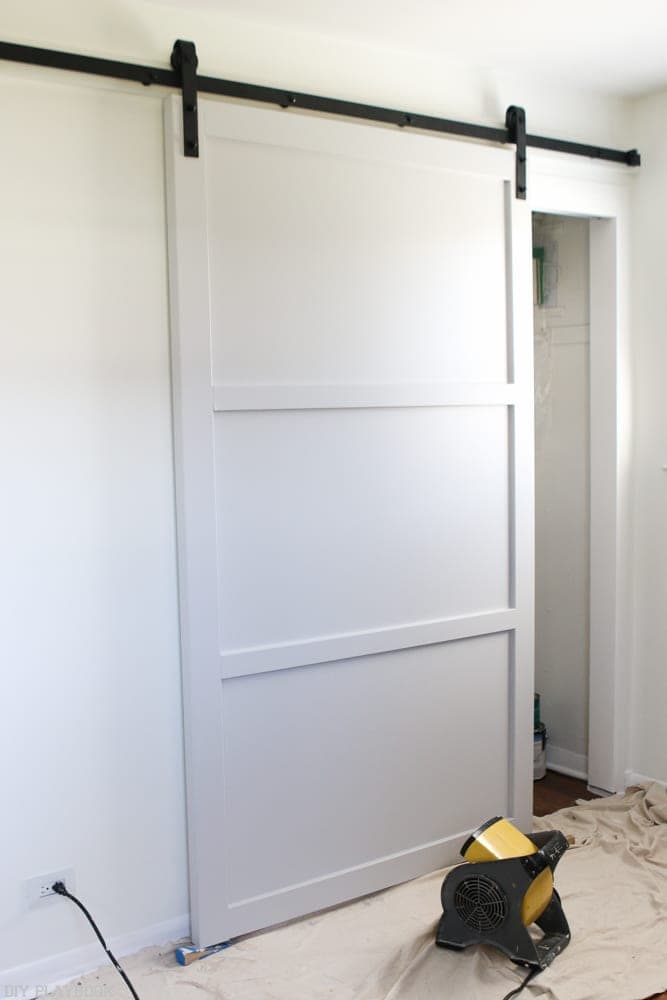 I mean, can you even?! I was always excited about incorporating this new project in our home but after seeing it painted, I was even more excited to cross the finish line! Once it was dried, all that was left to do was add a handle.
Adding Hardware
I knew I wanted a long sleek handle to make this barn door a little less farmhouse and a bit more modern. I looked on Amazon and found a few really great options BUT all of those options were made for cabinets and not barn doors. Why does that matter?
Well, when the hardware is made for cabinets instead of a barn door, the screws that come with them are not long enough to go through our 2+ inch door and catch the handle on the other side.
I contacted a few sellers to see if they had longer screws to sell for these more affordable handles but they all said no. SOOO… I decided that I needed to find a handle from a barn door company, which would ensure that the screws would be long and sturdy enough for this job. I bought the “LOFT STYLE PULL” from Rustica Hardware but it was definitely pricier than I had anticipated. At around $70, the handle was almost the same price as the entire track.


When it arrived though, the higher price tag was well worth it because the screws fit perfectly and the handle was heavy-duty and very gorgeous!
 Installing the handle was a little nerve-racking since there was very little room for error. <– I did not want to drill the hole wrong and have to DIY a whole new Barn Door!
I measured about 17 times, checked the level a few more times, and drilled my two pilot holes. Thankfully the precision paid off because the handle went on without a problem and I was left with this…
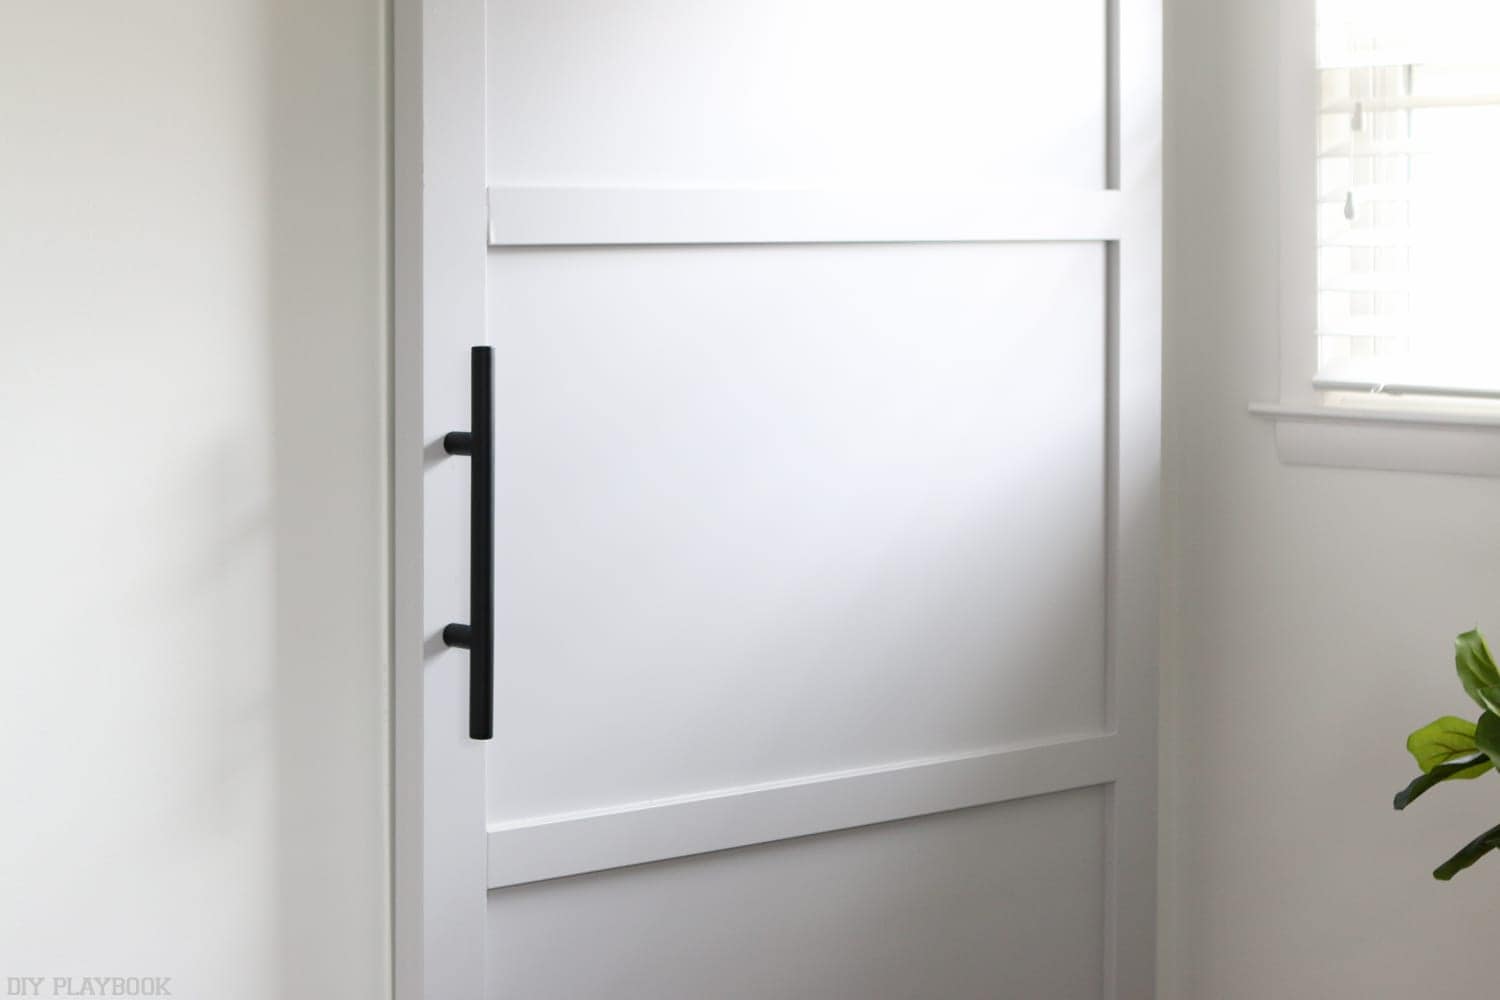 It’s exactly what I had envisioned when I set out to tackle this project and I’m really loving the new look.
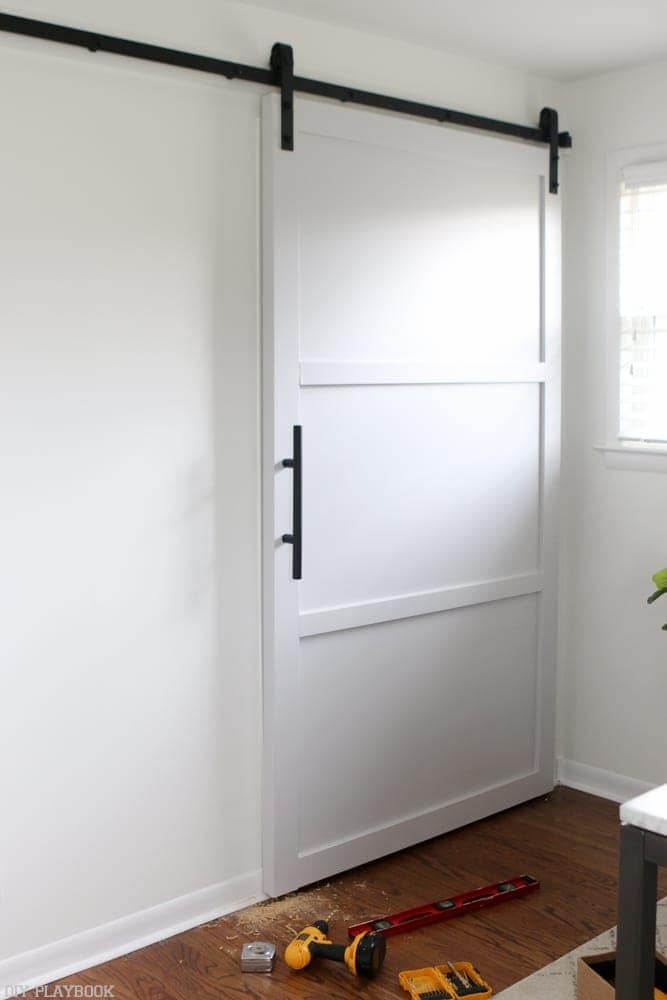
The black hardware next to the white walls and super light grey door is perfect for our bright office. Although there were some bumps along the way, like the epic track fail, I can confidently say our barn door mission has been accomplished… and man did I learn a lot along the way.
Moving Back in!


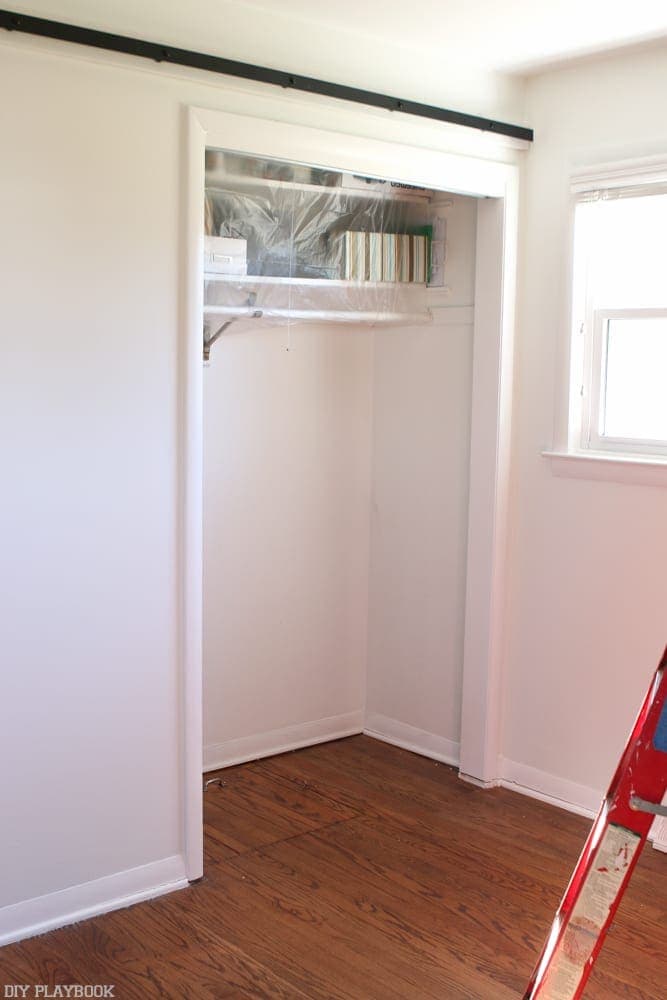
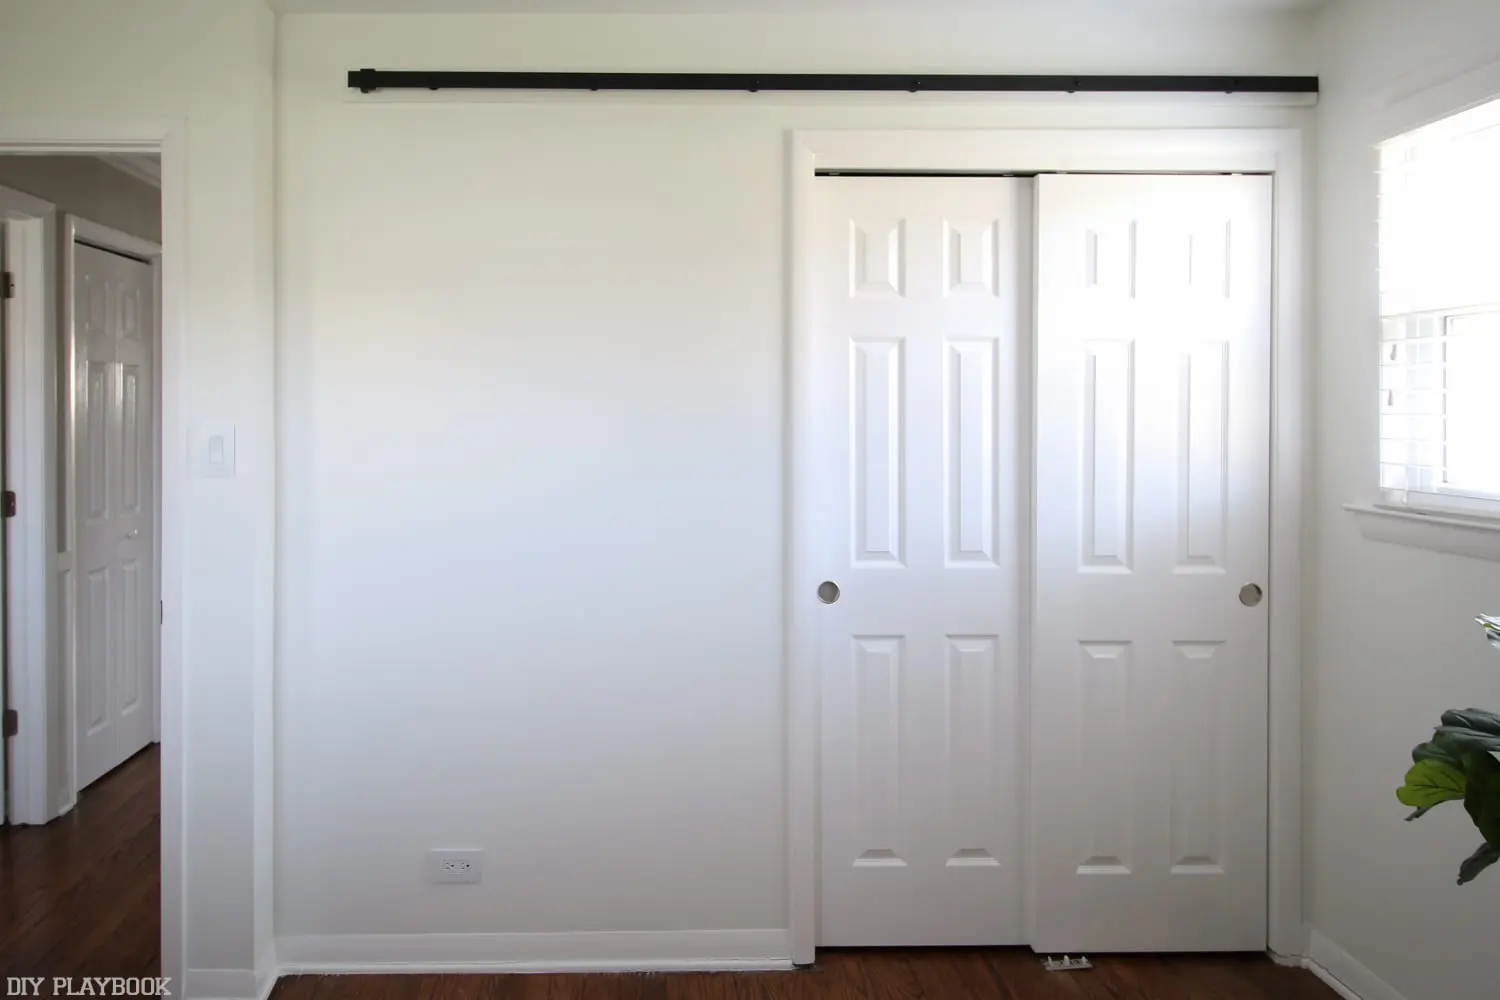
Once the mess was cleaned up, I brought everything back into the office including all the stuff that was in the closet before we started this project. My objection with the last closet was that the bypass doors only allowed me to look into half of the closet at a time, which made it difficult to see everything and to enter our crawl space.
 *this picture only shows the barn door half-open
Now that the entire barn door moves to the side, the closet seems 100x bigger and far more convenient to look through. This is probably my favorite change between the before & after. Saying it’s been “life changing” seems a bit dramatic, but it has made a big difference every time I open up that closet. Which makes me want to add a barn door to ALL of my closets. Haha kidding… kinda?
Before vs. After

I was intimidated to start this project because it was very new to me and I figured it would cost a ton of money, especially after looking at buying a pre made barn door instead of DIY-ing one.

Now that I’ve survived the project, I can’t even express how happy I am that I stepped outside of my comfort zone to tackle it. The total cost (with track, hardware, paint and supplies) probably cost me a little less than $300, with $70 of that being the handle. I’ve seen DIY-ed handle options that aren’t as modern but would probably cut down the cost quite a bit.

I’m sure I missed some information throughout the journey so if you’re looking to DIY your own barn door and have a specific question, feel free to leave it in the comments or shoot us an email (diyplaybook@gmail.com) and I’ll try my best to answer it! Bottom line: if I can do this project, I know that you can too… and you should because it’s SO worth it in the end!
Bridget