DIY Housewarming Gift + FREE Printable
Lately, we’ve been getting away from “crafting” here on the blog (we chatted more about it in the State of the Blog post here). Not because we don’t enjoy the creativity and fun it provides (it definitely is a nice way to relax), but moreso because we both live in small homes and don’t have enough space for all of the stuff we create.
But gifts are a whole different story. To us making a homemade, personalized gift is the best gift of all. So when Finn & I got an invite to a housewarming party last month, I knew it was time to dip into my supplies and get my craft on! Bring on the ribbon & washi tape…
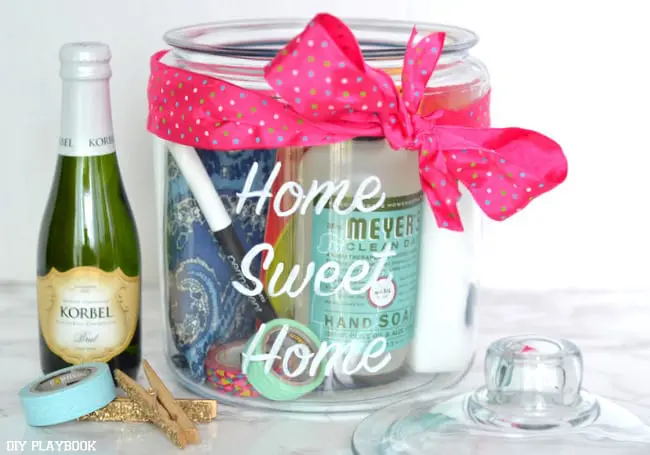
I decided to make a jar full of my favorite home products for our friends who are new homeowners. I love this gift because it’s a way to share some of your favorite things, it gives the homeowners some actual supplies they probably need, and best of all… it’s super easy to whip up!
Housewarming Gift Supplies
- Glass Jar or Canister (This one is from Crate & Barrel)
- Chalkboard marker or paint pen
- Printed off Text
- Tape
- Ribbon
- Free Printable (download here!)
- Goodies to fill your jar! We’ll list some fun ideas below to get your creative juices flowing…
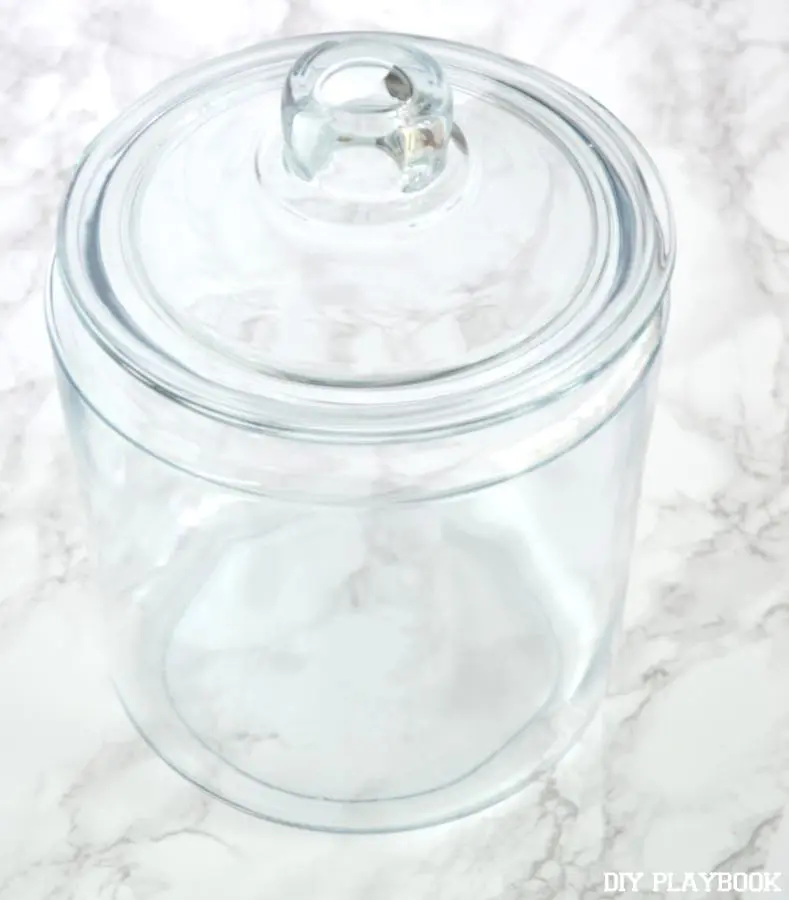

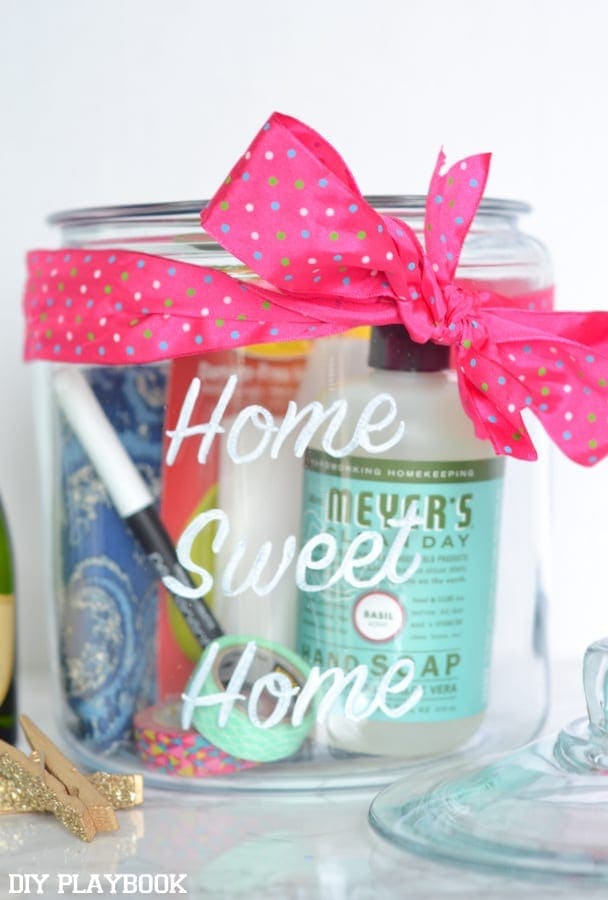
The first thing you’ll need to do is write on your jar. I went with “Home Sweet Home,” but also considered doing their address or the couple’s initials. I went into microsoft word, found a font I liked (this one is called SignPainter-HouseScript), and printed off “Home Sweet Home” on regular computer paper.
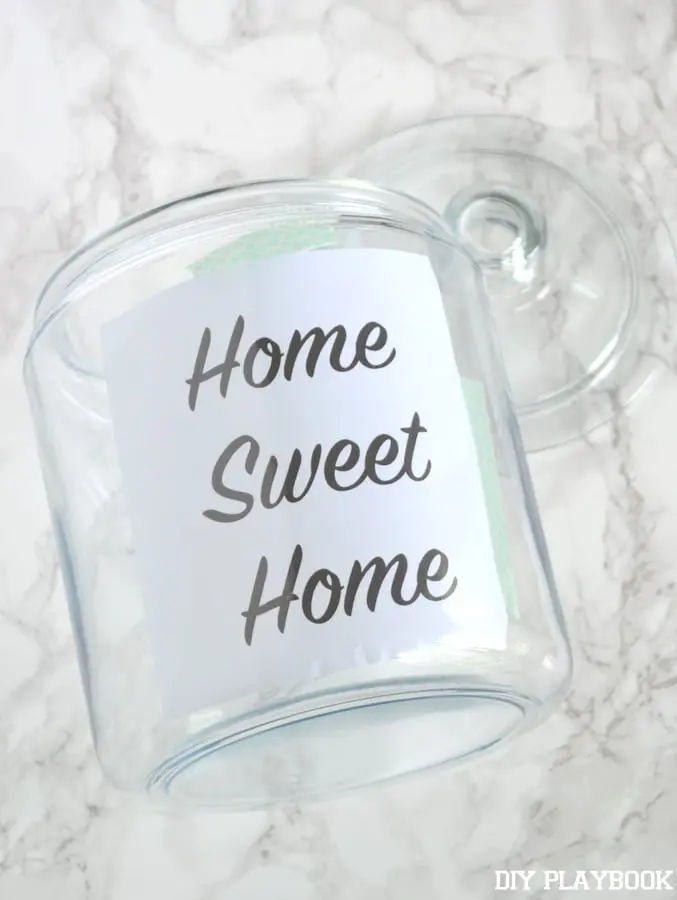
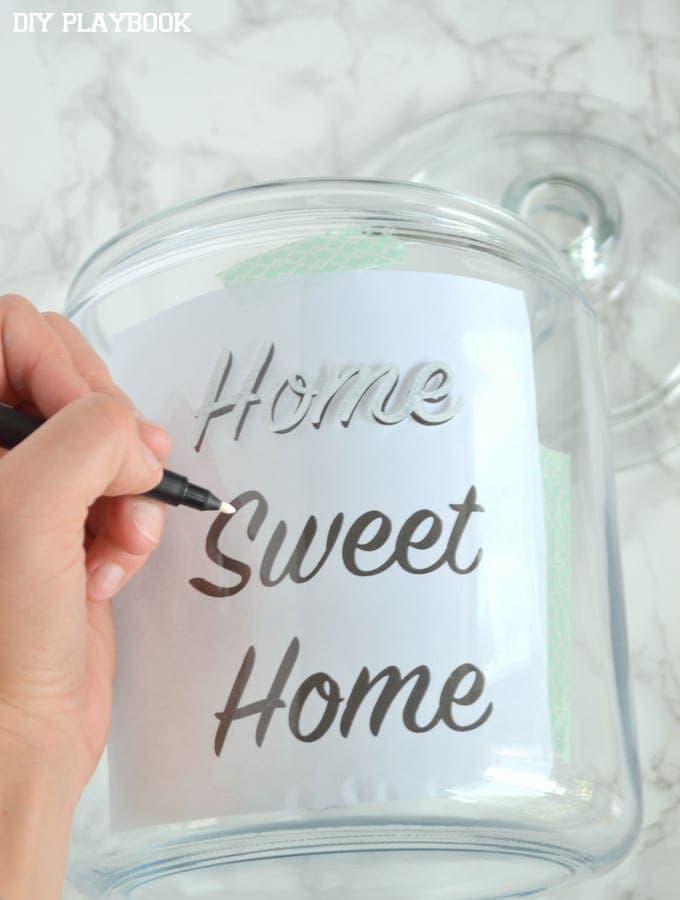
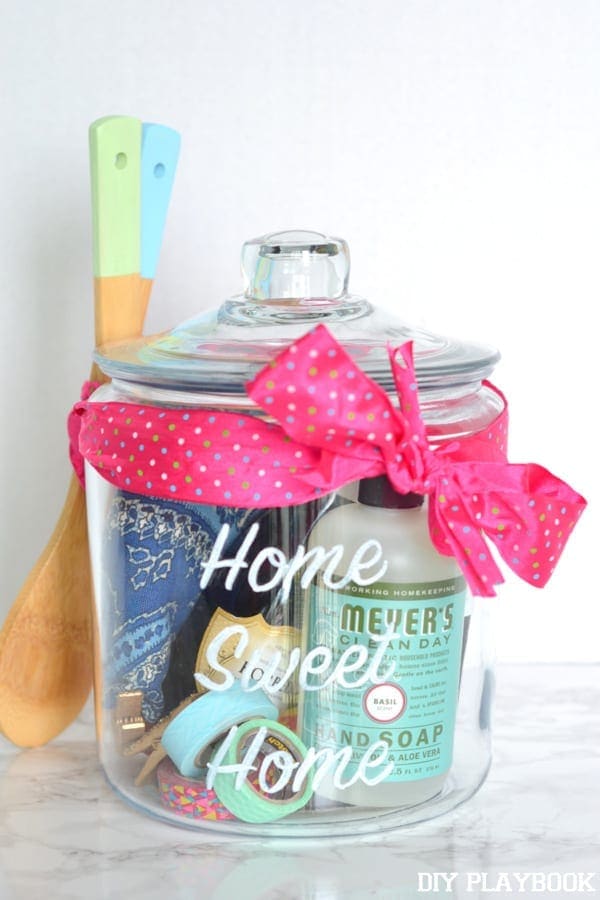
Then I taped the paper to the INSIDE of the jar using some washi tape, and traced the letters on the outside using a chalkboard marker. If you have awesome handwriting or you’re super artistic, you could definitely freehand this. But for me, I knew it was going to look a heck of a lot better if I just traced the words. The chalkboard marker is not permanent, but it should stay on there fairly well as long as you don’t rub it off. If you make a mistake you can wet a paper towel and start over. Seriously…this is a foolproof project. I think you could also try a paint pen for this…but I had a chalkboard marker on hand so I went with that. 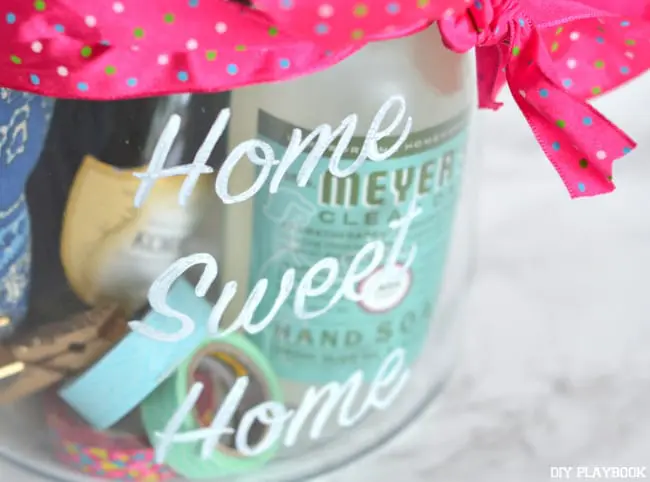 Boom. That’s pretty much all it takes. Then all you have to do is fill the jar with lots of home goodies!

Some Ideas for Inside the Jar…
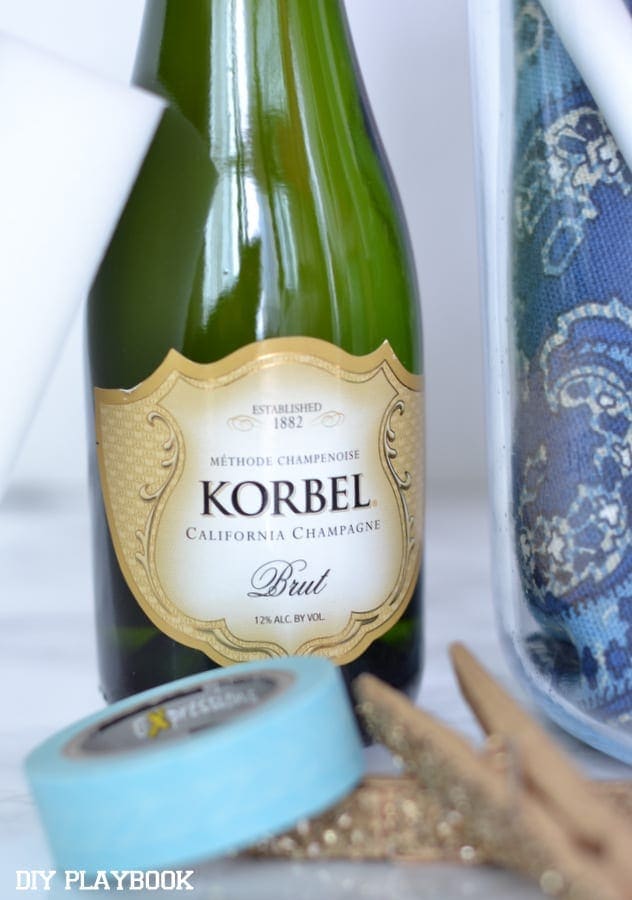
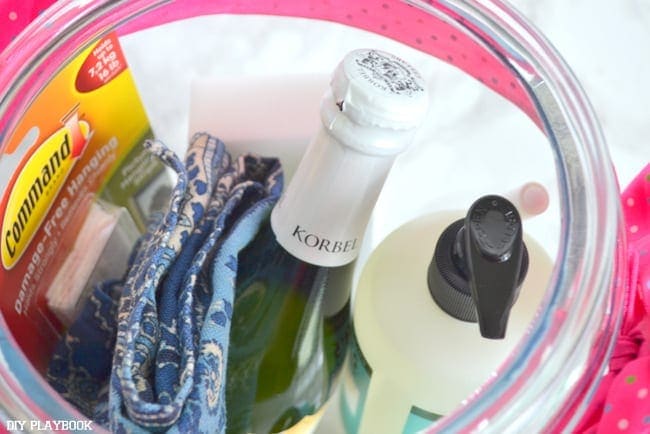
- Mini champagne bottles
- New wooden spoons (I just taped off the ends and painted them with craft paint for a colorful look!)
- Soap
- Washi Tape
- Clothespins
- Magic Erasers (they are our favorite!)
- Towels or Patterned Napkins
- Your favorite scented candle
- Screws, Nails, or Command Strips
- Chalkboard Marker or Paint Pen (throw it in there so the homeowners can easily change up the writing on the jar!)
- Goo Gone, Stainless steel cleaner, or your favorite home cleaning products

Free Housewarming Printable
As extra credit, you can also add this adorable free printable that we created for you. Just tuck it inside the jar, your housewarming card, or tie it to a ribbon around the jar…either way, this little tag will explain the contents of your gift and will seriously impress the recipients!

Just download it here, print one of the tags on card stock and stick the mini card in the jar!
With this crafty homemade gift, I’m confident those new homeowners will be happy to have you over to their new pad whenever you want!
Casey