Fireplace Makeover – Demo + Adding Cement Board
Last week, I showed you guys the before pics of our fireplace along with our makeover plan. Today, it’s time for a little more action around here!
Whenever I start a DIY project, I make a general timeline for the project. And the truth is, I always underestimate how long I think a project will take. In my mind, it all seems so easy and so doable. But once we get going, it inevitably takes twice as long. That’s definitely the case at the start of this project as we ran into a few issues right from the start…
Fireplace Makeover – Demo Day
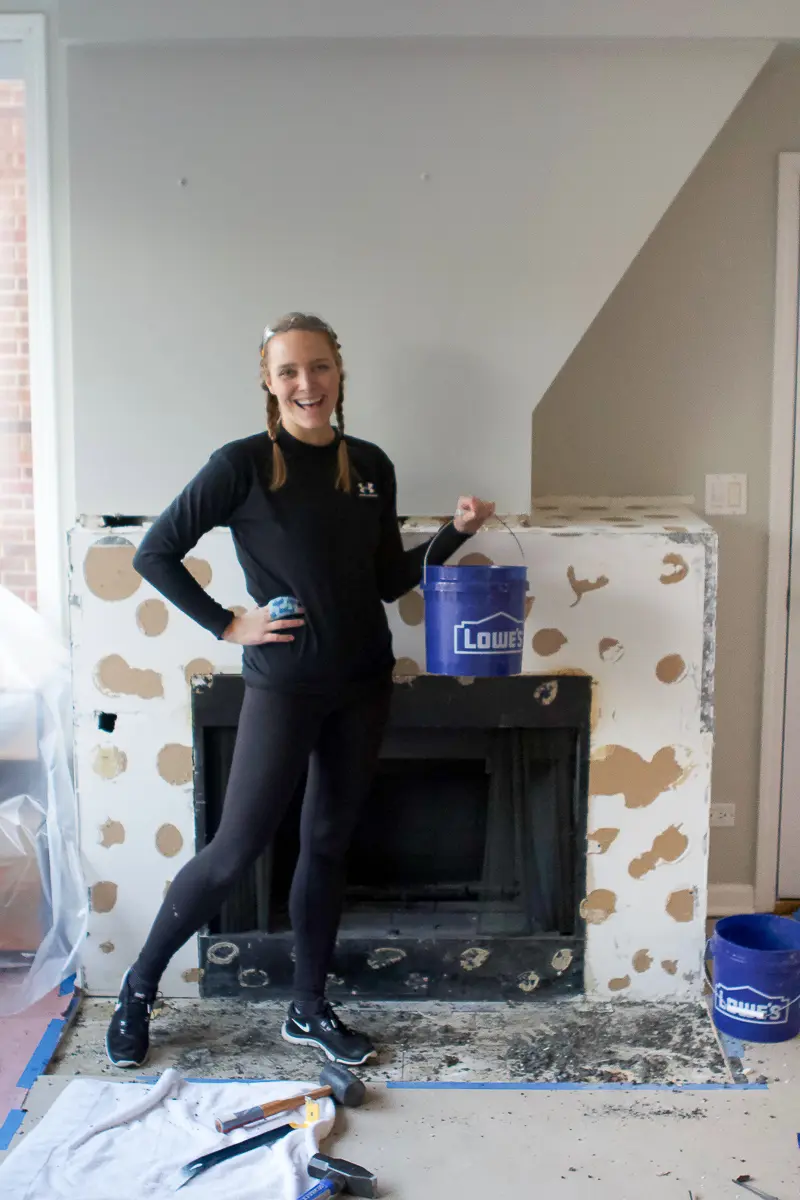
Finn and I were really excited for demo day on the fireplace. Our plan was to demo and prep for tile on Saturday, and then start tiling on Sunday. On Friday afternoon, I spent some time prepping the space and getting out all of our supplies. I highly recommend prepping the day before you start any DIY project. It’s always so nice to just wake up and get right to work instead of spending an hour moving furniture, taping things off, and wrangling all of your supplies.
Because the project is in the middle of our home, I covered our living room furniture with plastic and put paper on the ground to protect it. I also removed all of the decor and the hanging mirror over the fireplace.
That night, we ended up going out with friends and stayed out until the wee hours of the morning. We originally planned to wake up early and get started with demo around 9 am (can’t start too early when you live in a building with other people) and work all day long. Because of our late night, we ended up sleeping in and didn’t get a start until noon or so. 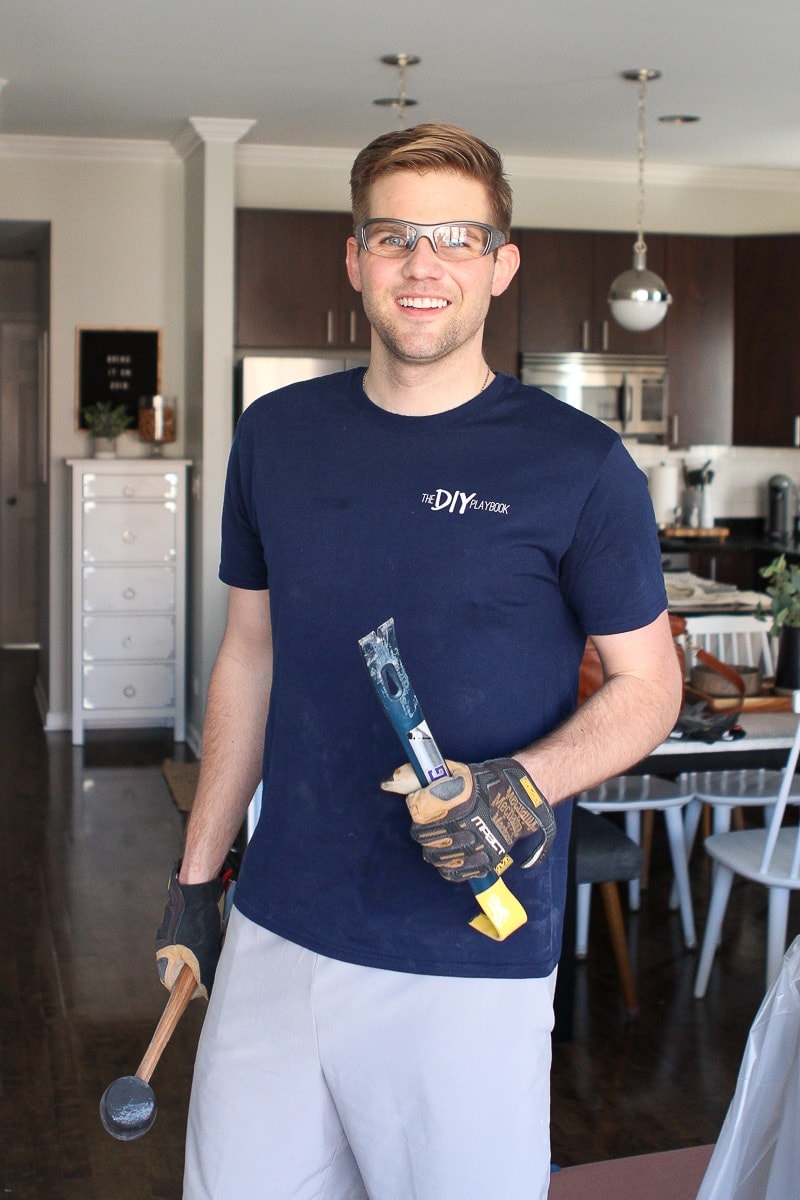
But that was okay, we were eager to begin and start smashing! We put on all of our safety gear (seriously a must) and grabbed our crowbars.
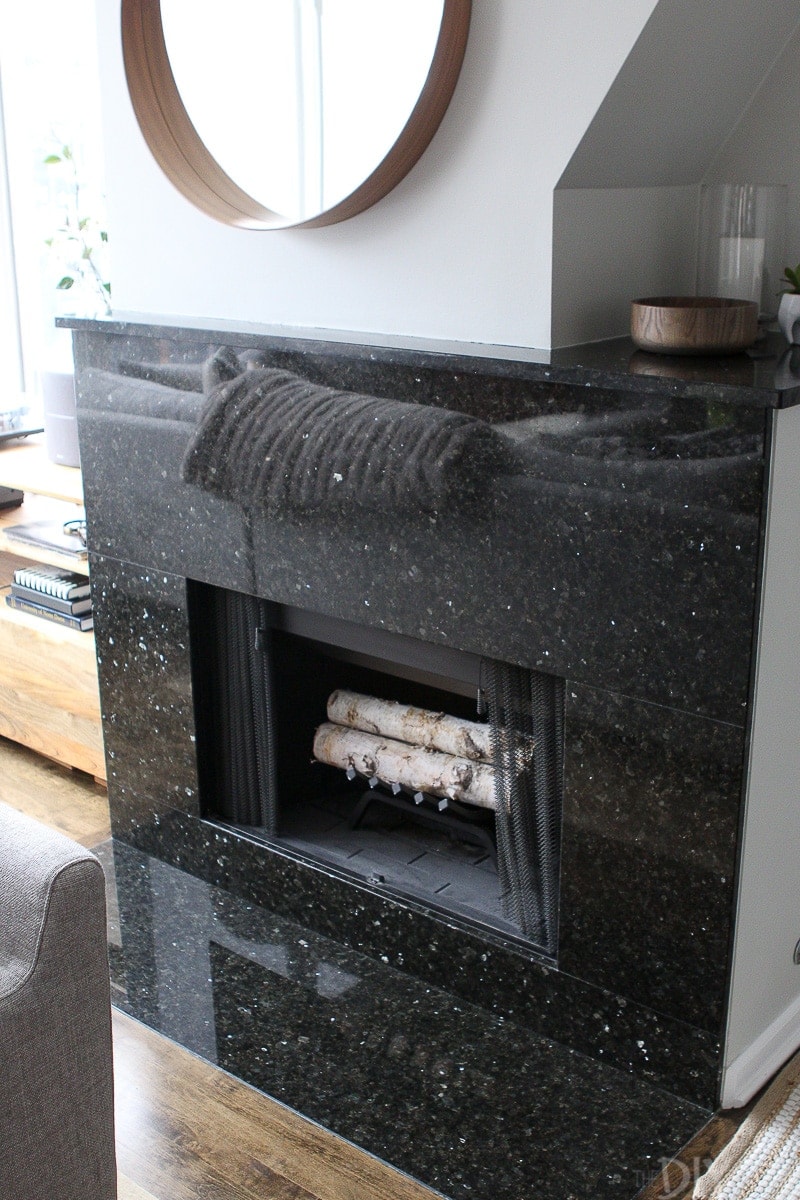
Removing the Granite
Our fireplace is made up of a few large pieces of black granite, so our plan was to try to remove the pieces as best we could keeping them whole. 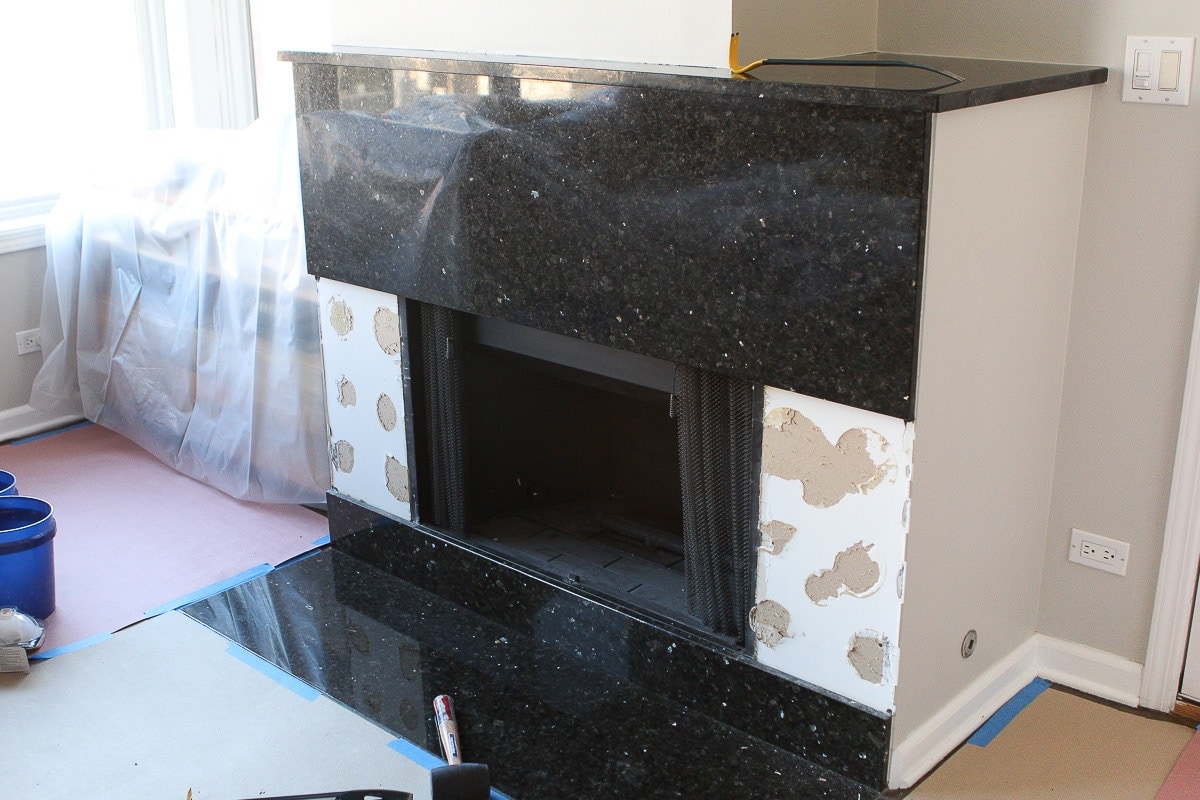 The side pieces came off easily with a crowbar and mallet, and then we were able to get the bottom piece off really easily too.

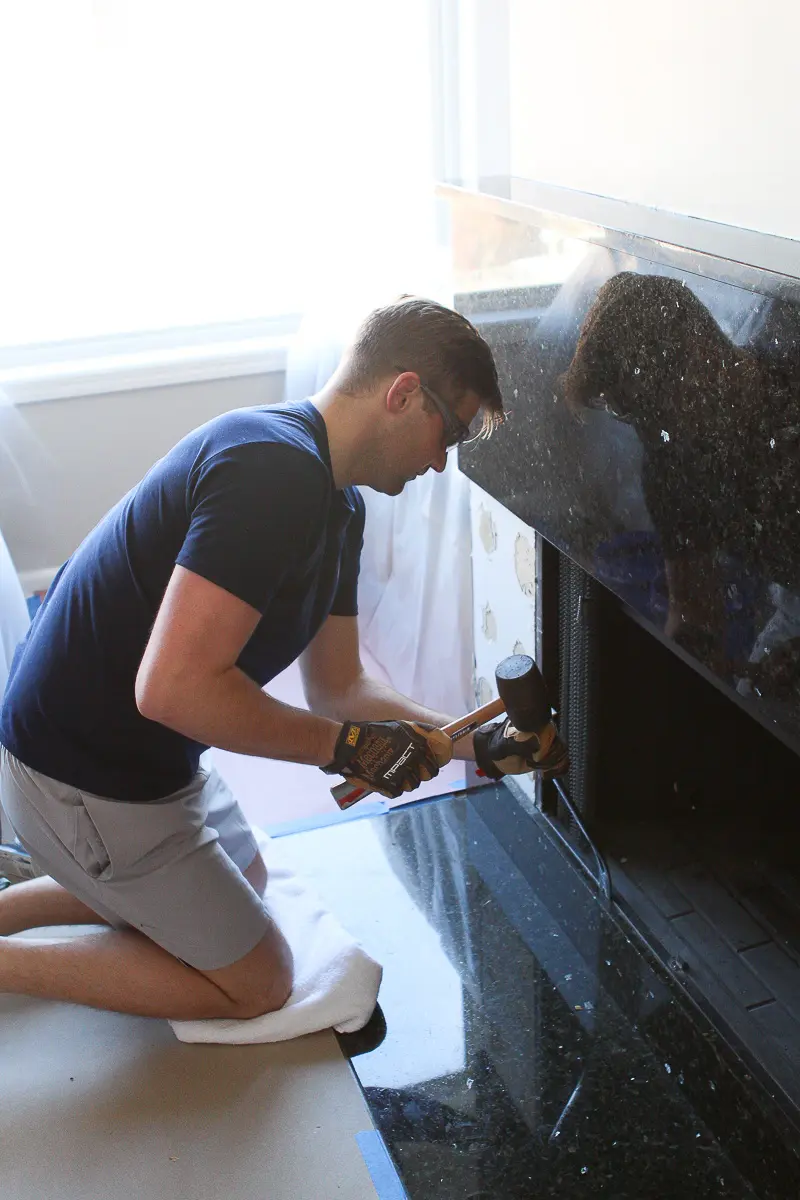
The best “technique” when removing tile or stone is to take your crowbar, shove it into a crack, hit the top with a mallet a few times, and then start pulling! Loosening the glue in a few spots will then make it easier to pry the entire piece off (similar to the steps Bridget used in this post about demoing trim).
Next, it was time to get the top piece off. That was a little tricky, but luckily it cracked in one spot which made it easier for us to lift up and off of the fireplace.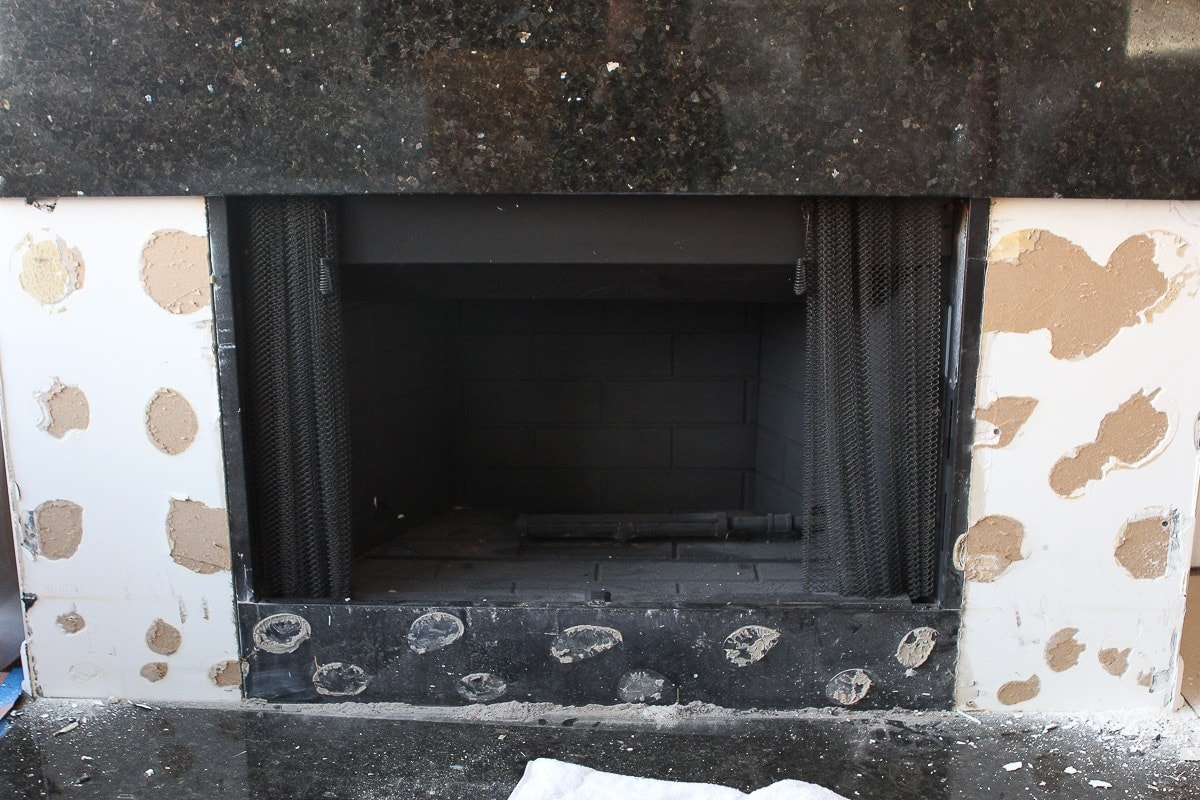
We were most worried about the upper portion of the fireplace. It was a huge continuous piece of granite (ummm heavy!) and we didn’t want to pry it off only to have it come crashing to the ground. So we decided to have Finn work on prying it off, while I was there to steady to the stone and make sure it didn’t crash to the floor.
Well, our plan didn’t work out too well. Finn got behind the stone and yanked a piece of it off and I went to grab it to prevent it from creating a huge dent in our floor. As I grabbed it, it hit me right in between my fingers. I took my glove off and my hand was bleeding like crazy. Yikes. I ran my hand underwater to check out the cut and it wasn’t terrible, but we didn’t want to risk anything so I headed to an urgent care clinic in our neighborhood (so convenient!).
They gave me a tetanus shot (probably should have one anyways with all of these DIY projects!), cleaned the cut, and glued the wound together. I was good as new in about an hour, but my accident slowed the momentum of our otherwise amazing demo day!
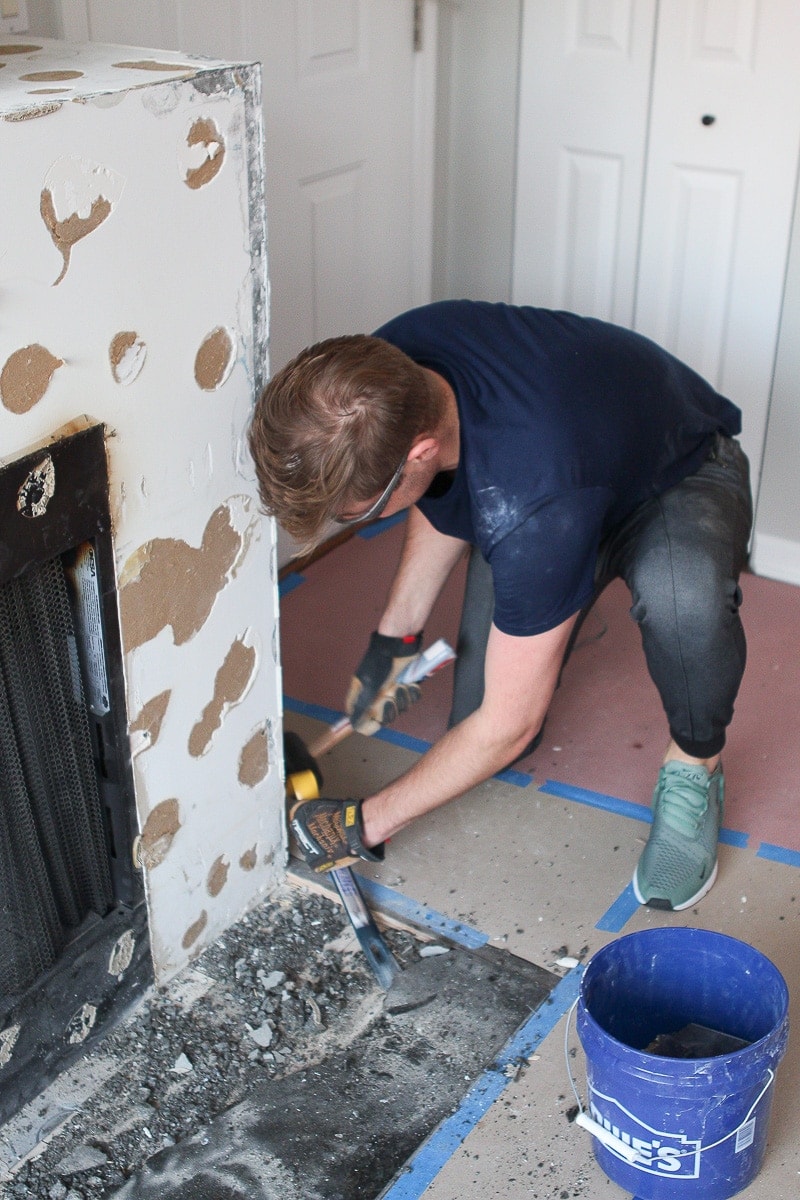
The last part left to demo was the floor and this was by far the most difficult to remove. We ended up using a sledgehammer to break the stone so we could get in there with a crowbar and pry it off. It wasn’t ideal to have it come off in little pieces (what a mess!), but it got the job done!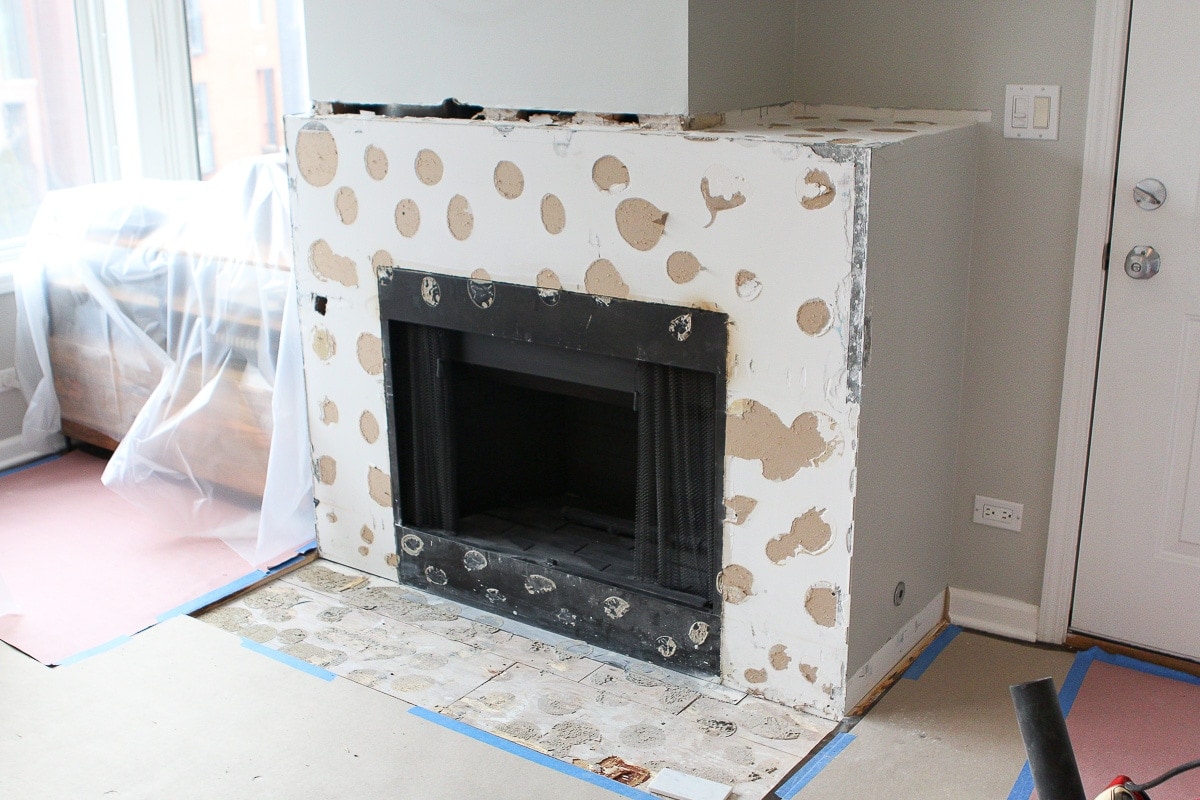
In a couple of hours (minus my injury fiasco), our fireplace was sparkly granite free! While we had plans to prep the area for tile, we decided to call it a day and get started bright and early Sunday.
Prepping for Tile
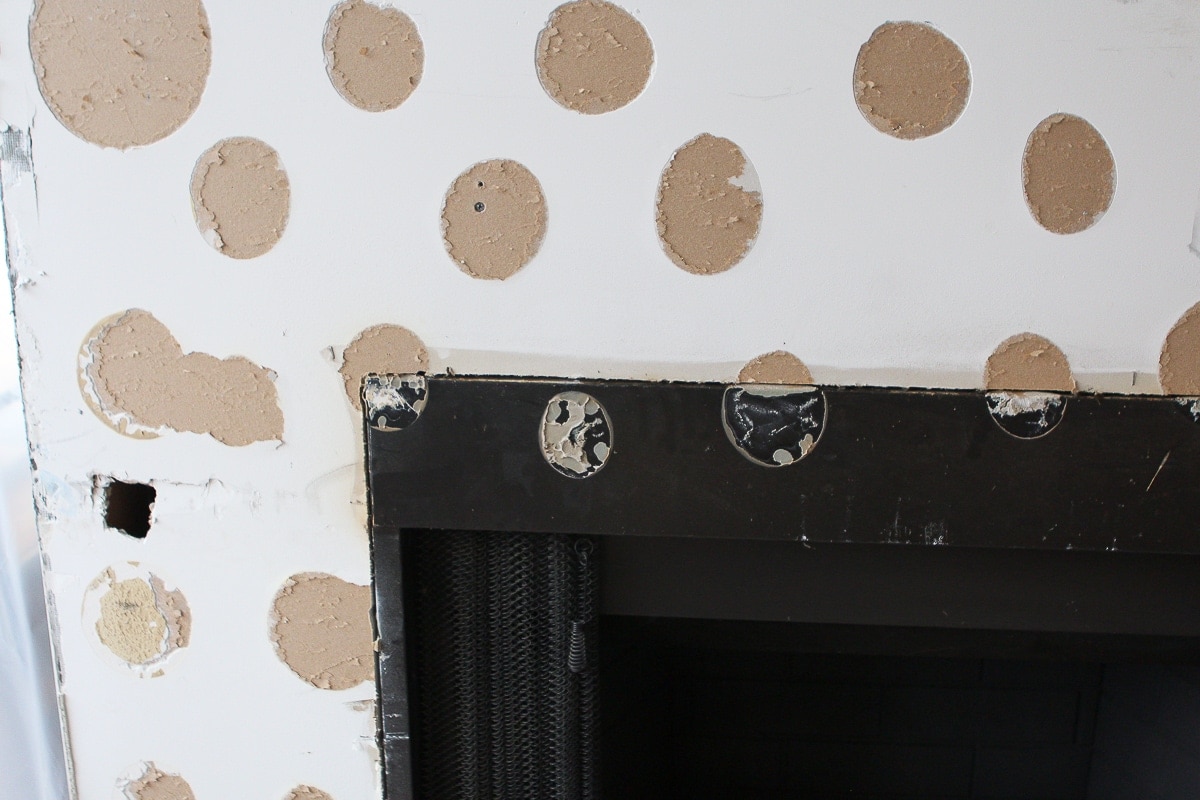
When we removed all of the tile, we realized that the builder tiled directly over the fireplace surround (the black part around the fireplace opening). That left us with some glue spots and damage to the surround that we couldn’t really fix. So we figured we would just tile right on over the fireplace surround and go from there.
But as I did more research, I realized that that might not be the best plan. Adding thinset mortar to a metal surround that is likely to get hot could equal a tile disaster. The grout could expand and shrink, leading to cracked tiles. Yikes. I immediately started to look for alternative ways to tile the fireplace surround and came across this technique.
Add cement board to the entire area you’ll be tiling (for us, that means the floor and all 4 sides of the fireplace leaving room for wood mantle). On the ground and drywall, use thinset and screws to attach the cement board. But on the metal surround, use high heat adhesive to attach the cement boards. We had a plan of attack!
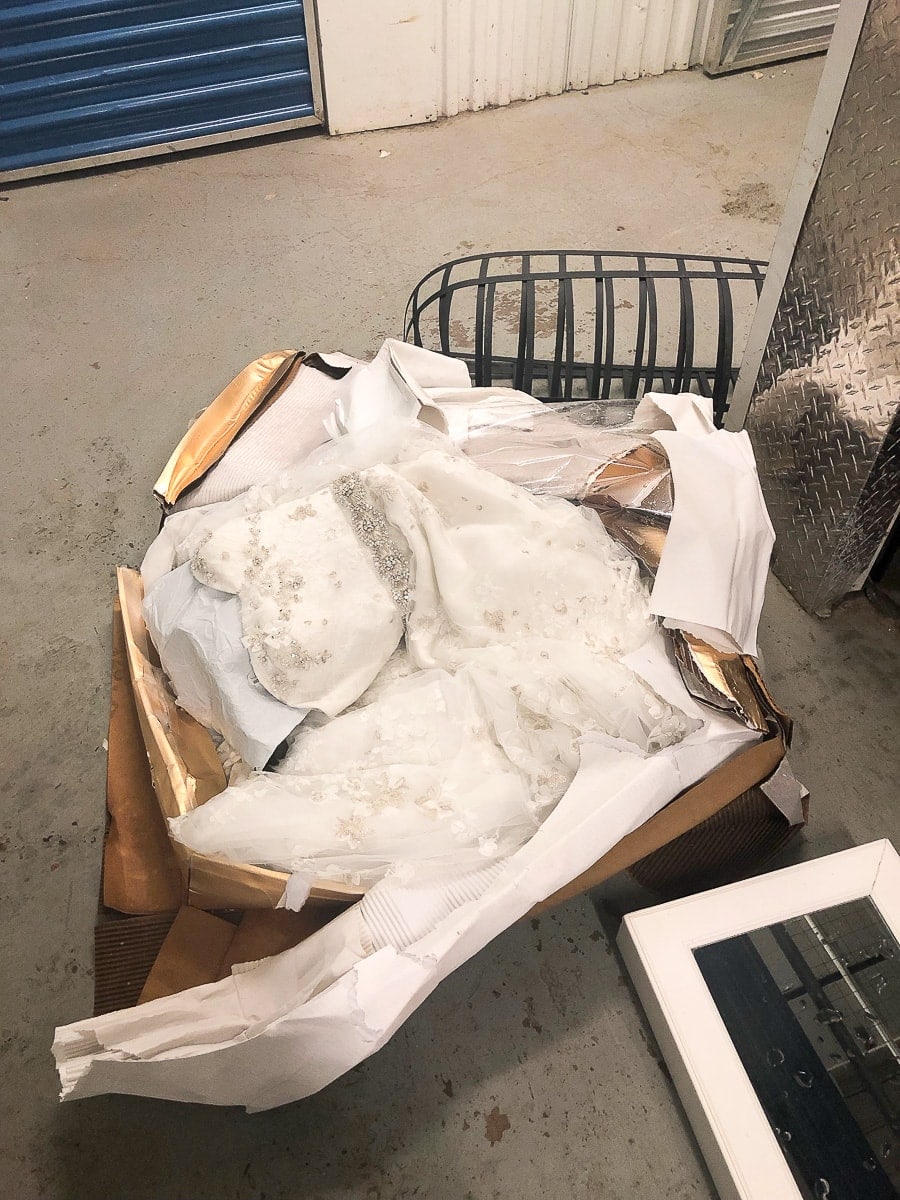
Finn and I needed to stop by our storage unit before heading to pick up the cement boards, and well..let’s just say we had another delay in our plans. Our storage unit flooded and we ended up spending hours going through our unsalvageable possessions (you can read more about it in this post).
Our fireplace project was again delayed by an unexpected accident. Oh boy.
Adding Cement Board to the Fireplace
Eventually, we made our way to the store to pick up the goods and we were able to attach those cement boards! Neither of us had ever worked with this material before, so I wanted to share how that goes down.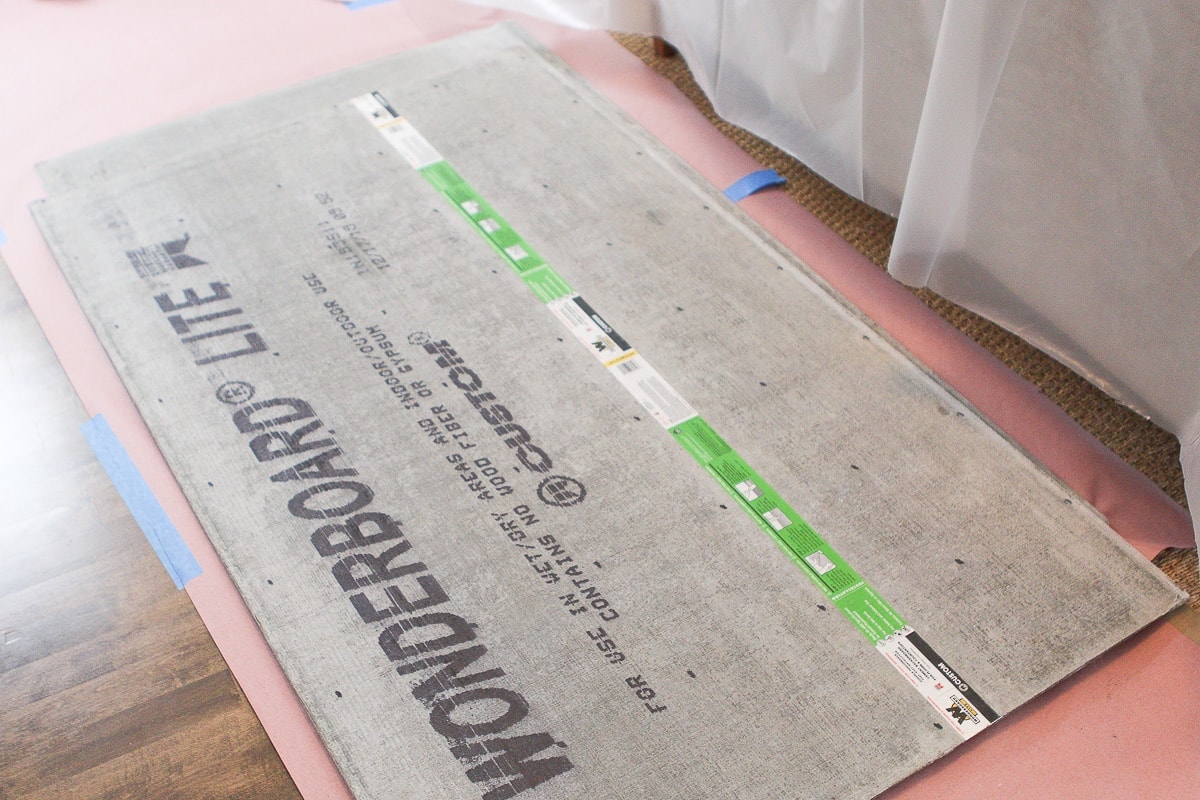
Cement board is a combo of cement and fibers that usually comes in 3×5 foot sheets. We ended up going with 1/4 inch thickness, but it also comes in 1/2 inch. It isn’t waterproof, but absorbs moisture well and is a great support for tiles. It’s also heavy and smells kinda icky when you cut it (just so you know ahead of time).
Cutting Cement Board
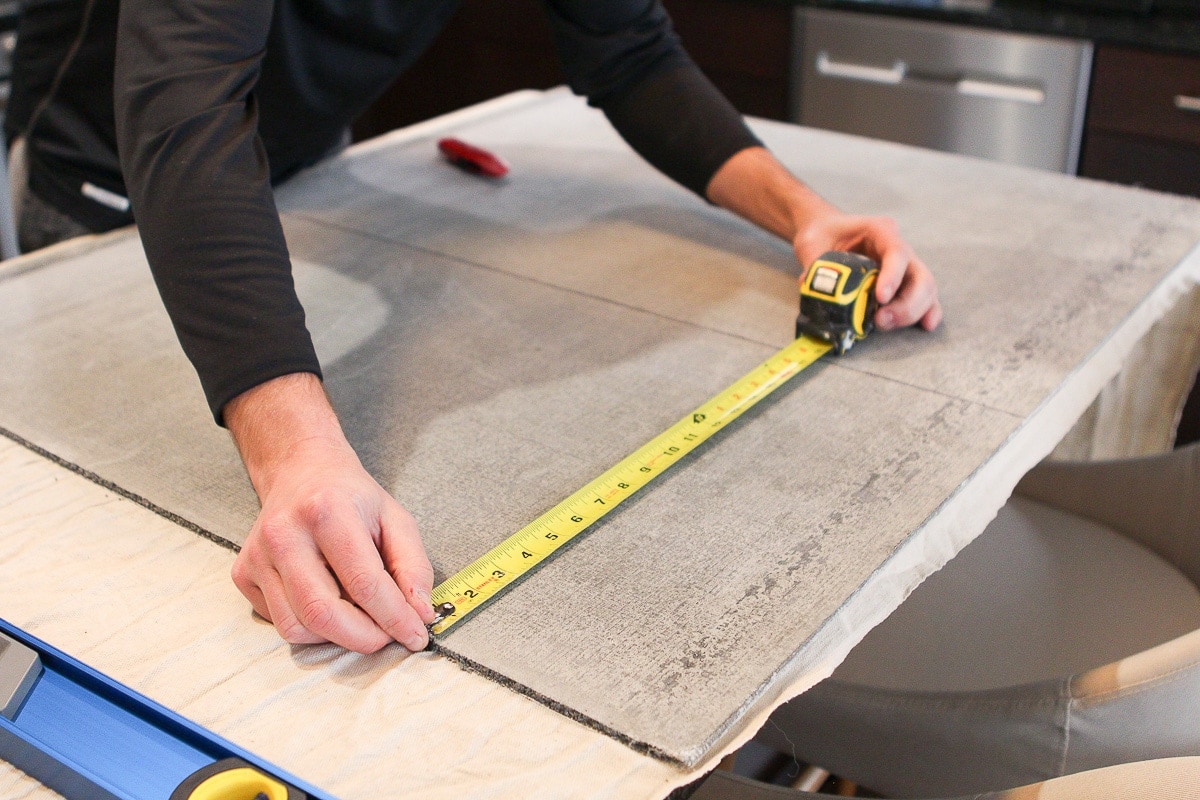
Cutting it is actually pretty dang easy. Measure how much you need, and then take a marker and a straight edge (we used a level). 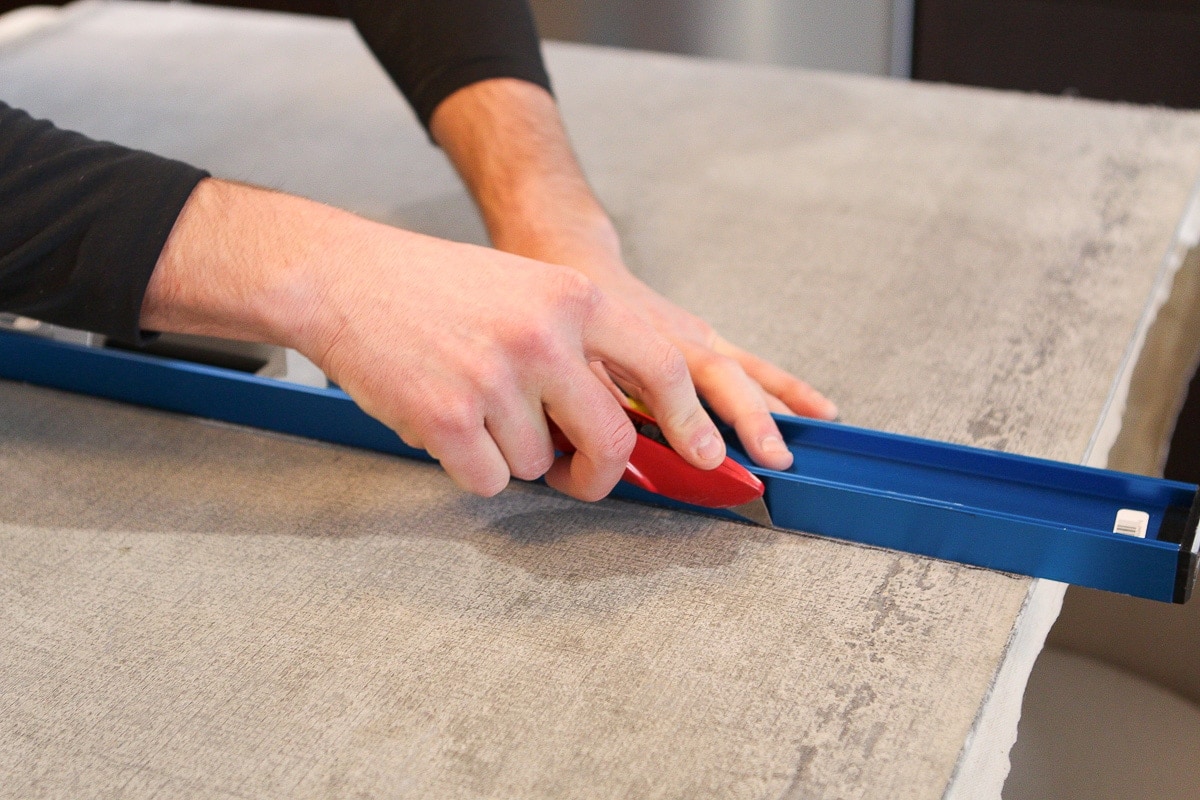
Use a razor to score the board using a straight edge as your guide. You’ll want to go over it 3-4 times to make sure it’s scored really well.
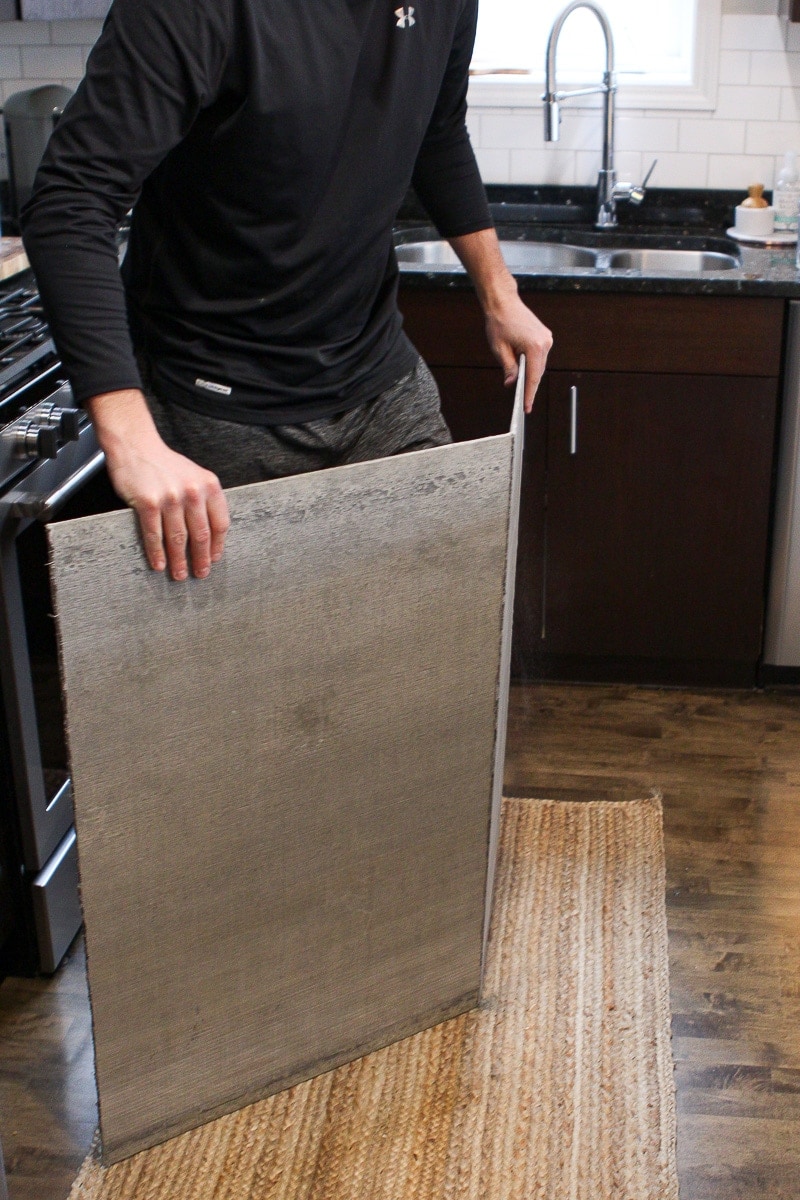
Use your knee and a bit of force to break the cement board in that spot. The fibers may be attached in a few spots, so you might have to use the razor to break those. 
Here is Finn feeling like a hero the first time he broke the cement board. I was impressed.
Installing Cement Board
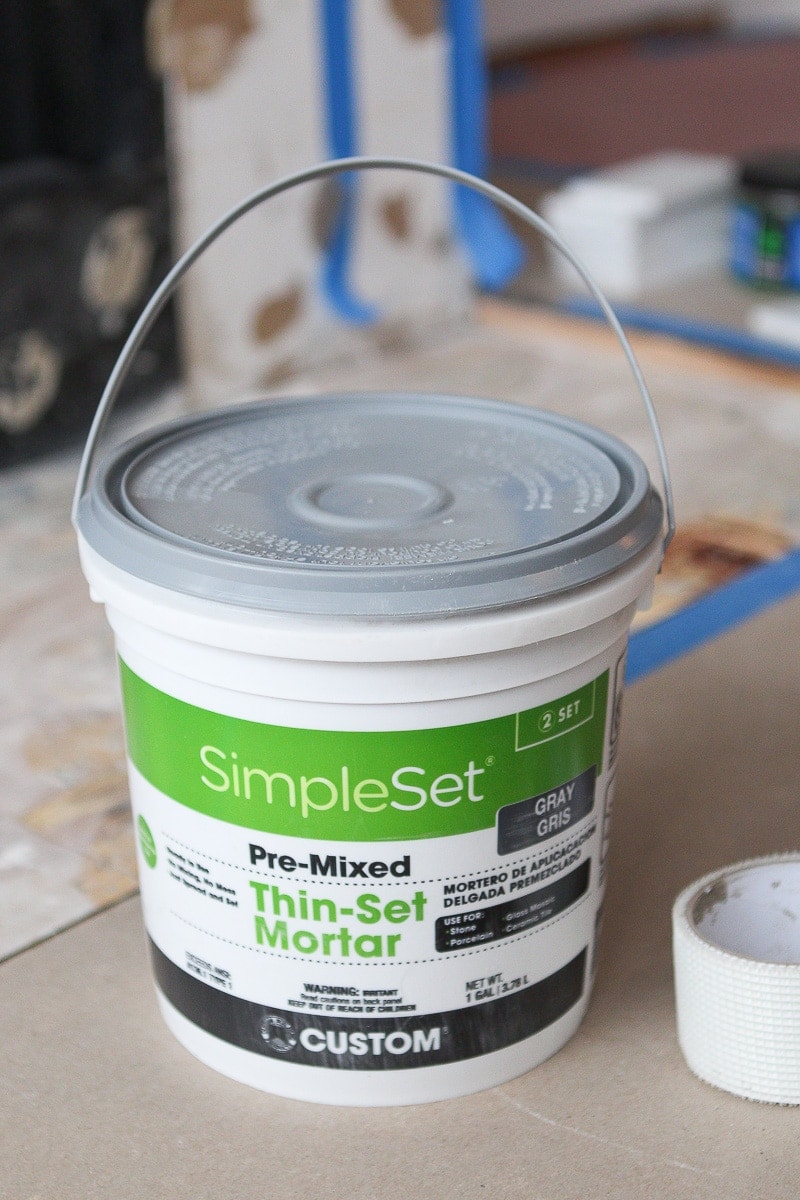
As I mentioned a minute ago, our plan was to use thinset, screws, and high heat adhesive to attach our cement boards. To make our lives easy, we used a pre-mixed thinset. It’s more expensive, but damn it’s so much easier than mixing it up. 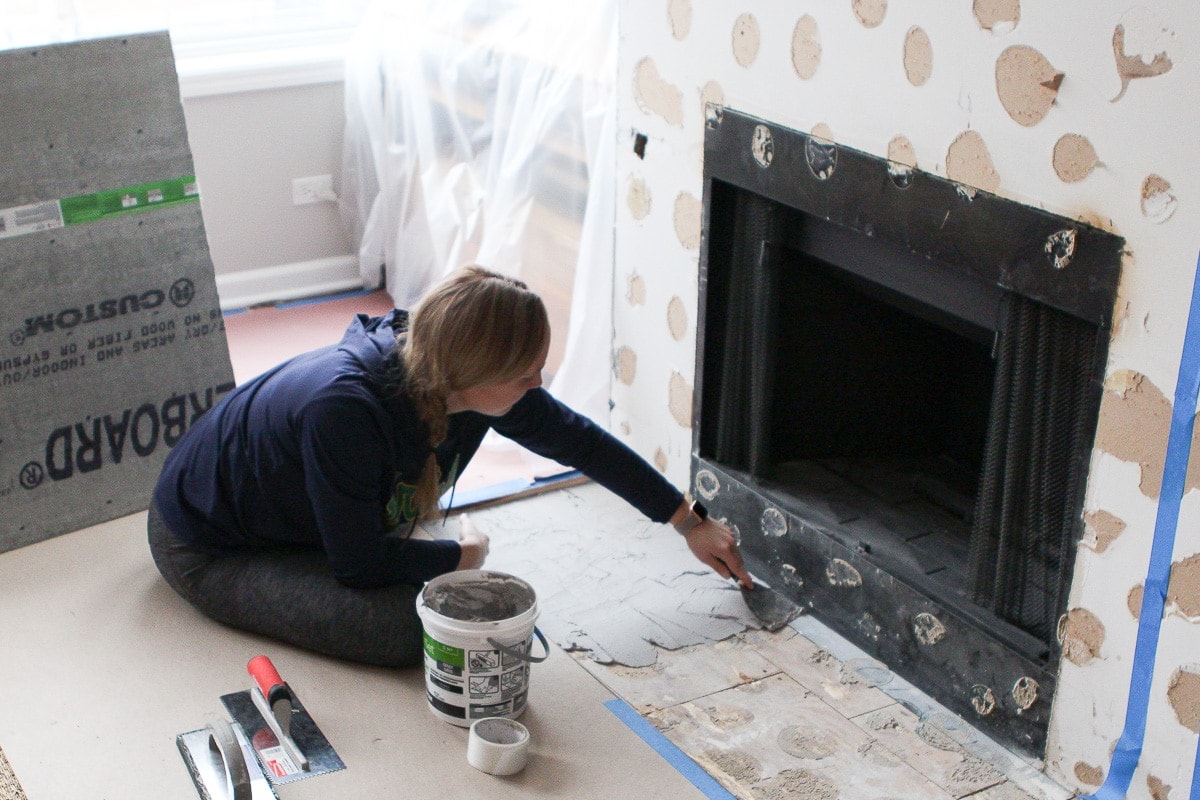
I spread it out on the fireplace hearth using a trowel, and then went over it with a notched trowel to get the grooves in. Once it was all level and looking good, we pushed the cement boards into place. 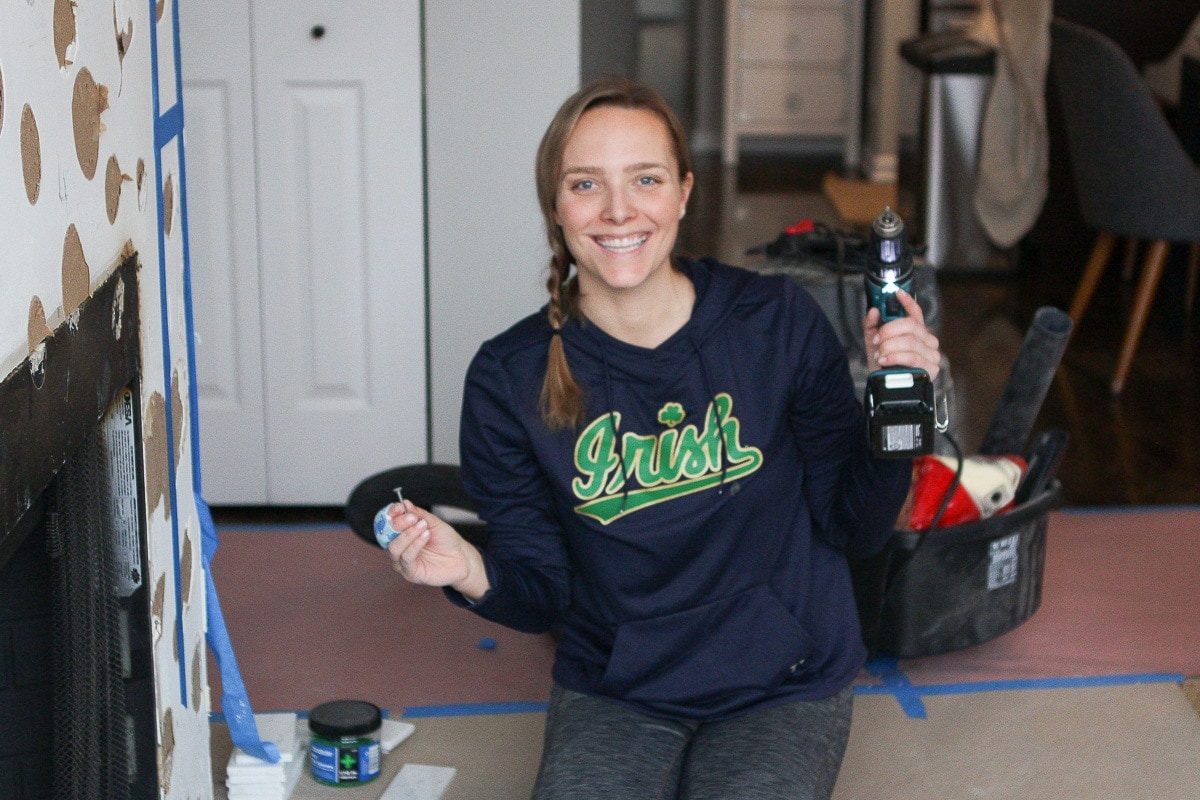
Screws are also necessary for extra reinforcement. So I grabbed my drill and special cement board screws for this step.  These screws have a star head, so your normal drill bit won’t work with them. Luckily, these screws came with a special drill bit that fits right into the star hole.
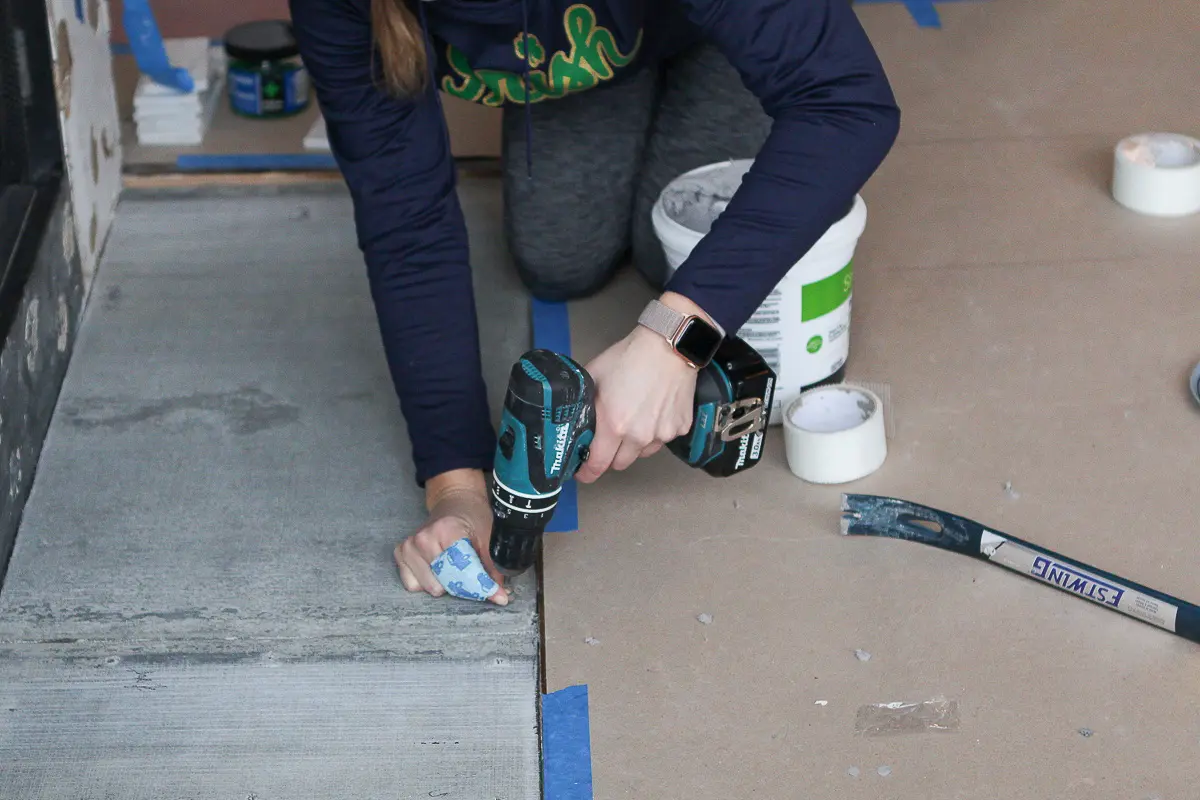
I placed screws every 4 inches or so along the entire length and width of the cement boards. Notice my battle wound from the demo. Ha! I persevered!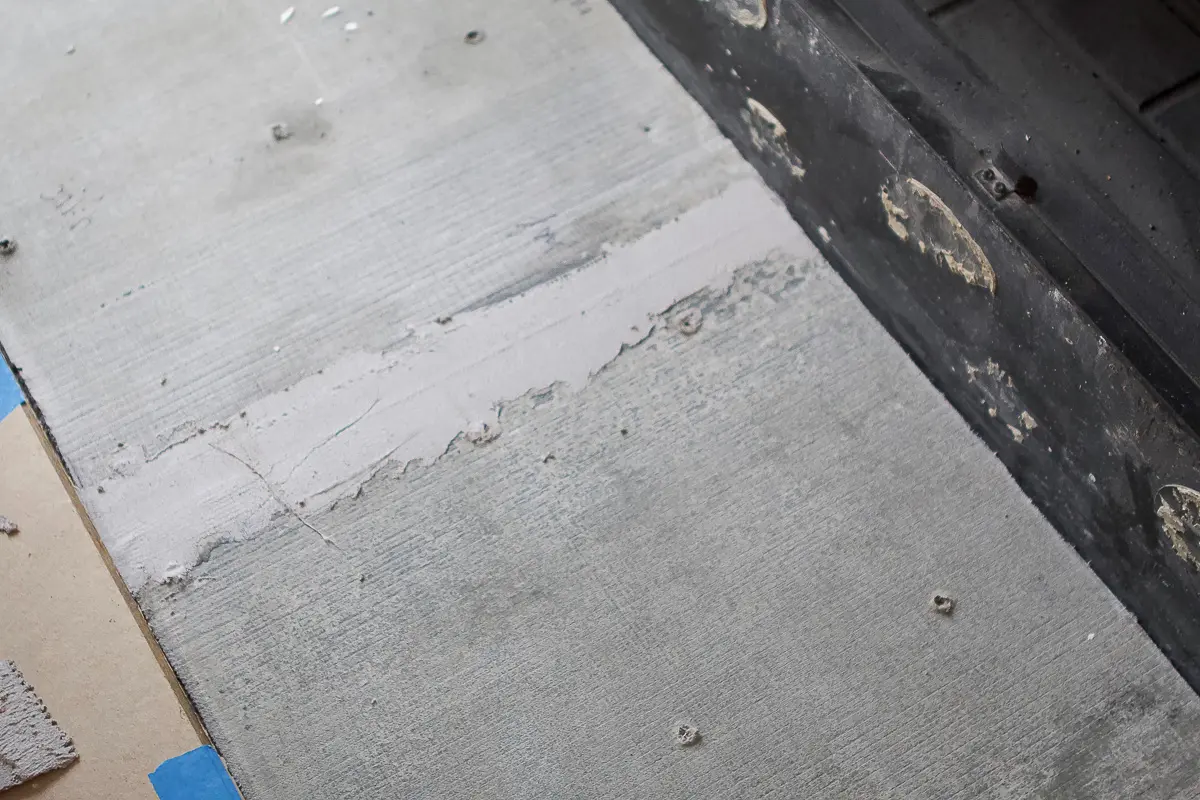
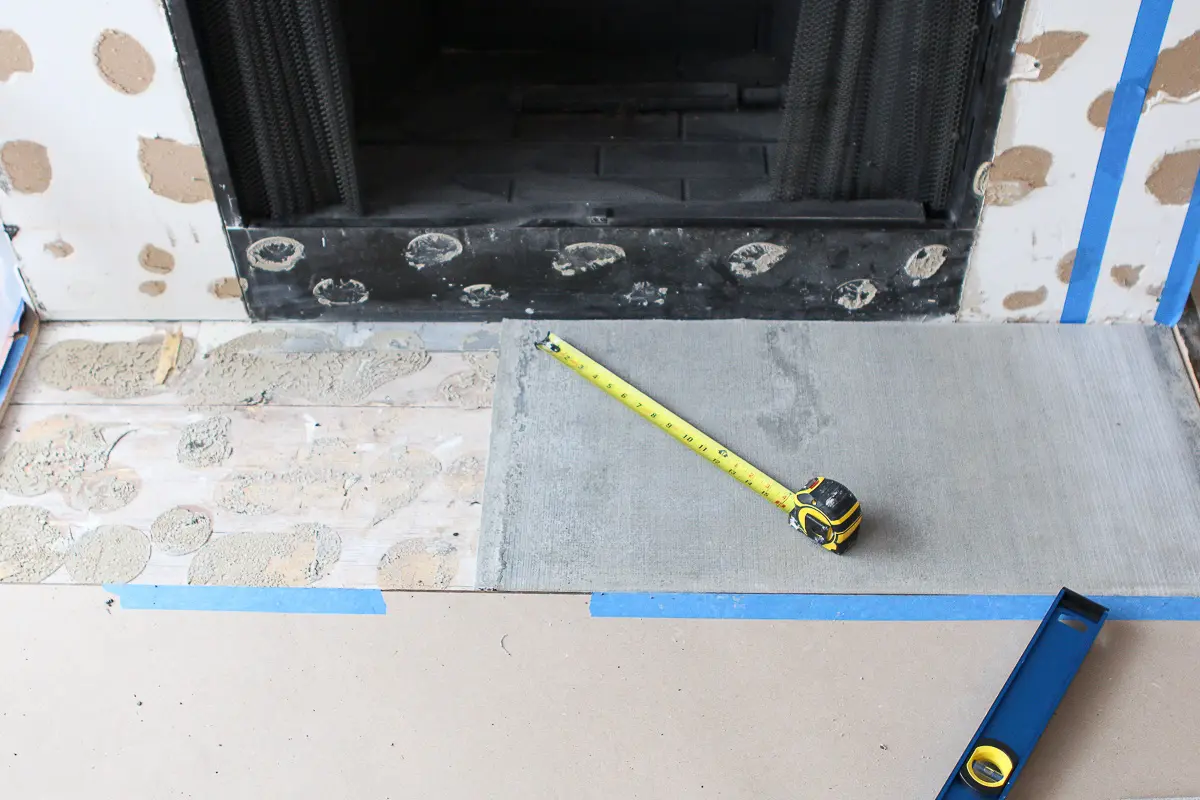
You want a really level area when you tile, so we used joint tape to connect the 2 boards on the hearth. You just place it down and then use thinset right over it. We also spread thinset over the screw holes to make sure they were filled and completely flat.
Cement Board on the Fireplace Surround
Once I figured out to add cement board to the fireplace surround, I was a little worried about the edges of the cement board showing when it was installed. After some research and looking online for inspiration, I decided to use a piece of metal schluter for the edges on the inside of the fireplace. 
We used this when tiling Bridget’s backsplash, but essentially it creates a clean edge for your tiling projects. You can cut it with a saw, but I was too lazy to go downstairs and get ours all setup. 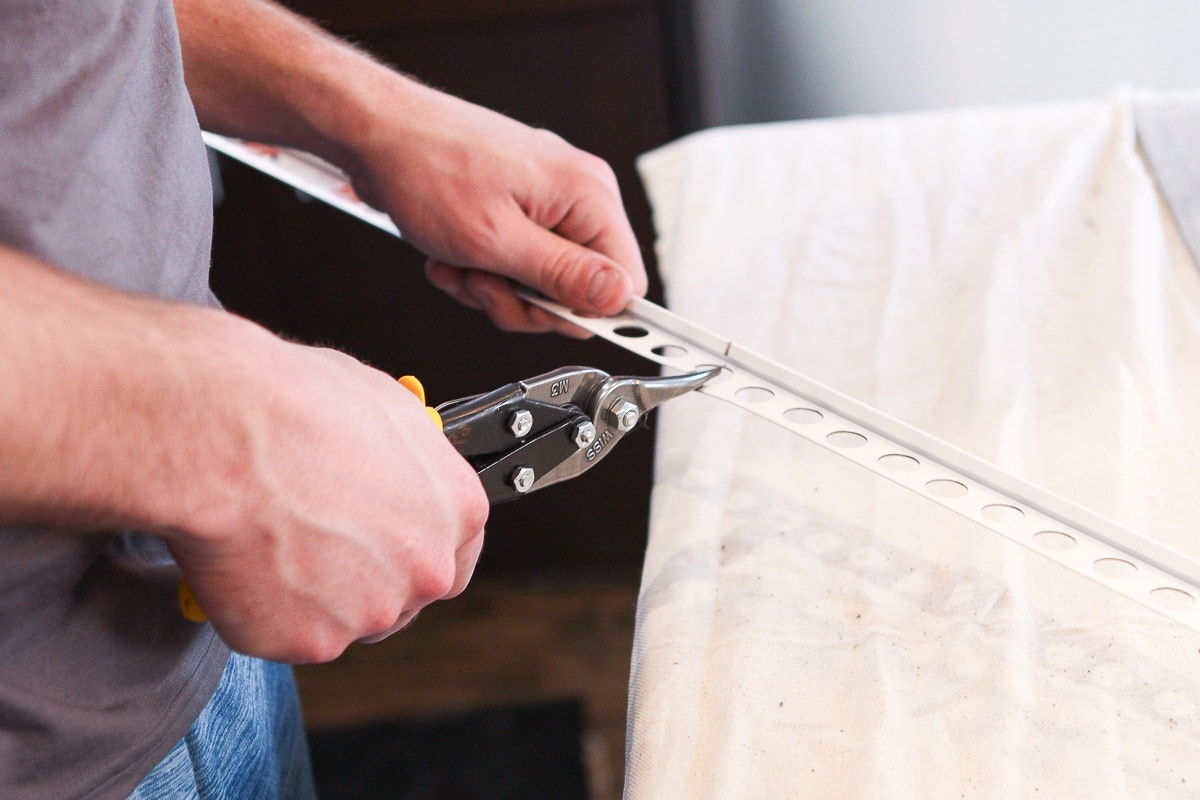
Finn and I ended up using snips to cut the metal schluter to size. 
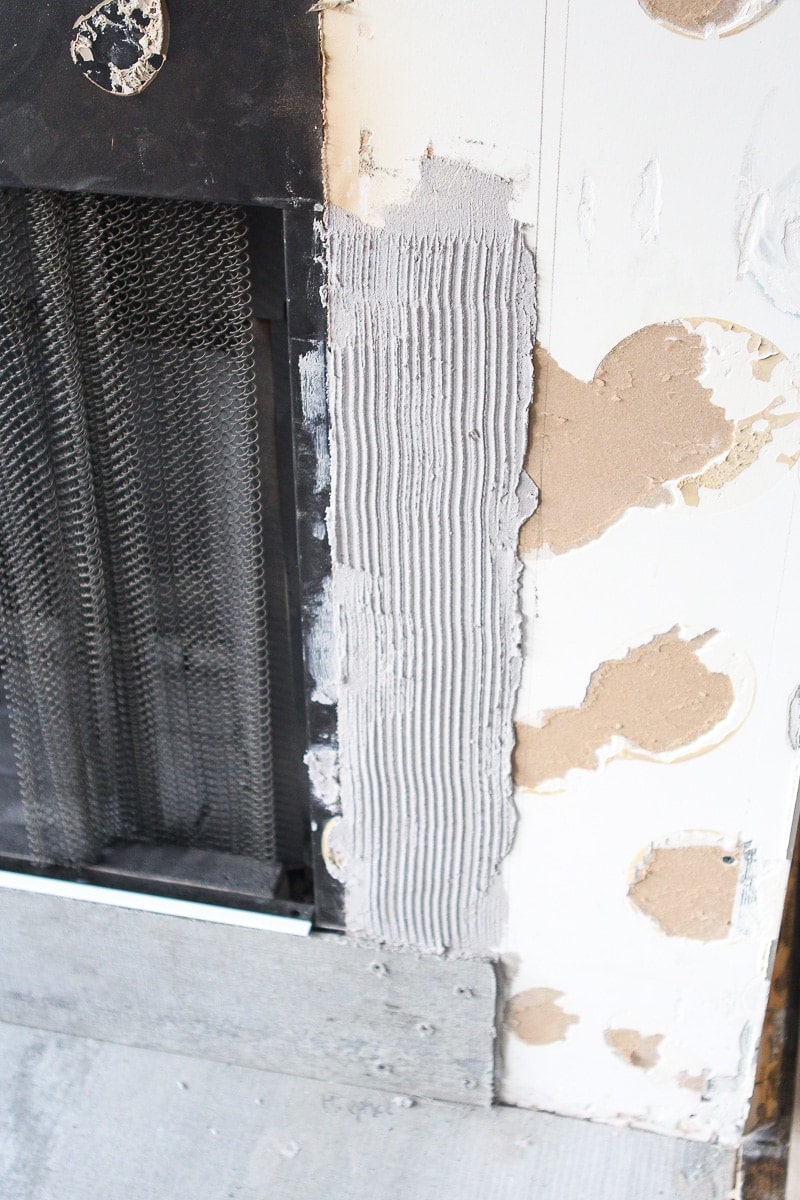
We attached our first piece of cement board following our plan. I used a high heat adhesive on the middle portion (to attach to the metal surround) and also used that same adhesive to attach the schluter behind the cement board to the fireplace. On the sides, I used thinset and cement screws to attach into the studs and drywall. Between the adhesive, thinset, and screws…that board wasn’t going anywhere!
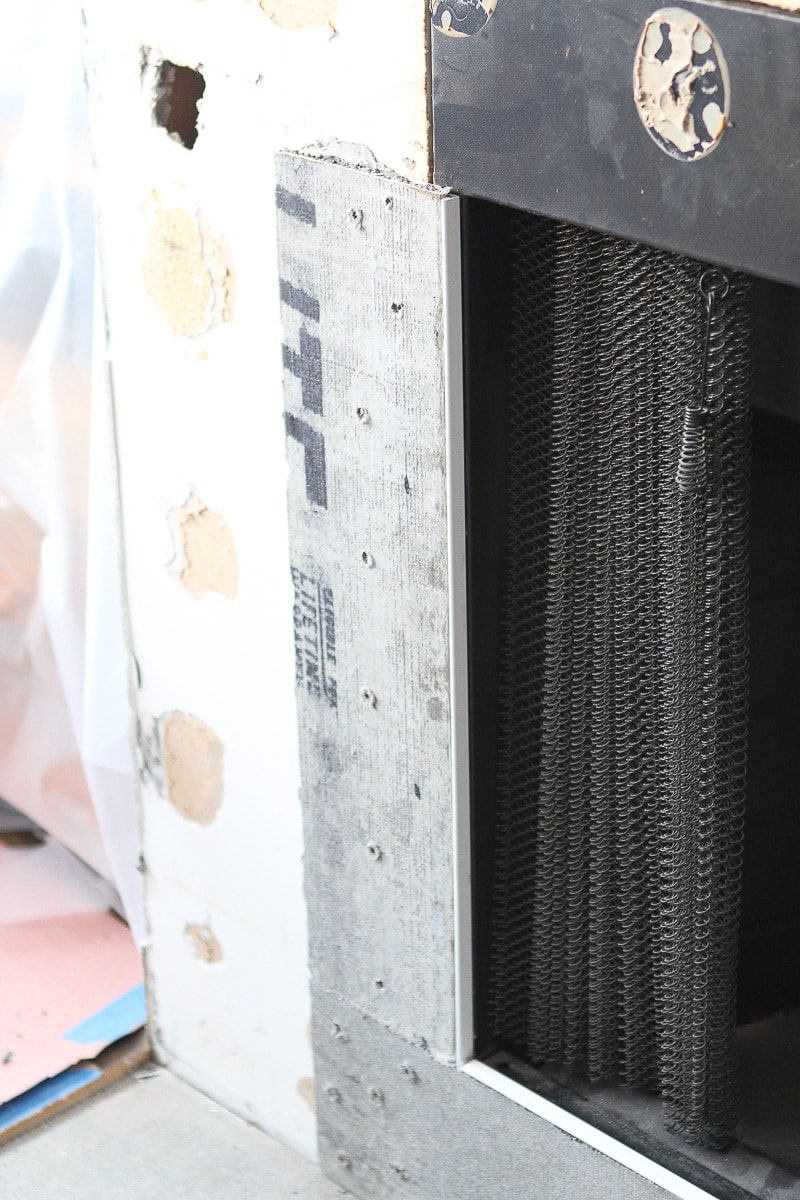
The sides followed the same technique and were up really quickly. As for the top portion, we actually decided to hold off on installing that. Why though?
Well, the thing with tiling is that you have to do tons of planning ahead of time. If you don’t, you might end up with super tiny cuts on the ends or where planes meet (which are tricky and don’t look very good). Because we have some play in how low we place the wood for the mantle, we decided to tile the bottom portion of the fireplace first, then add the cement board before finishing. That way we can hopefully do all full tiles above the fireplace (which is difficult to calculate until you have the floor and sides done).
So we ended with the floor and 3 sides of the fireplace filled with cement board and then started tiling!
Between the flooded storage unit and a trip to urgent care, you just don’t know what a DIY weekend might bring! Luckily, tiling went a lot smoother. I’ll be back with those details next week.
Casey