If your garbage disposal is leaking, jammed, or showing signs of wear, it may be time for a replacement. In this guide, I’ll show you exactly how to replace a garbage disposal with easy, step-by-step instructions you can tackle yourself.
Note: I originally published this post in 2018, but I’m re-sharing it now because the information is incredibly helpful! I updated all links and info to make it an even better resource for you.
A few weeks ago, I got a text from Finn that said we had a puddle of water underneath the kitchen sink. Ugh. Not the best text message to receive.
After investigating further, we realized that the water was dripping from our garbage disposal. I figured that it might just be a loose pipe, but it was actually coming from the base of the old unit. A nice slow drip. I did a bit of research online and learned that if the disposal housing is leaking, it probably needs to be replaced altogether.
Ours was 13 years old, and the typical lifespan of a garbage disposal is about 10–12 year, so it was official – we needed a new one.
I took a look at my week ahead and saw I was pretty slammed with projects, so I headed to Angie’s List to find a plumber to fix this issue quickly. I found a plumber, but he couldn’t come out for about 4 days and he was going to charge me $320. ($120 for the new disposal and $200 for labor)
That’s when I decided I should just DIY this project and figure it out myself. Because if I was going to have to wait a few days and shell out that much money, I might as well give this project a shot in the meantime. Spoiler alert: This project was WAY easier than I thought it would be. I blocked off four hours on my calendar, but the entire garbage disposal replacement took just about an hour.
Supplies needed: New garbage disposal (this is the one I purchased) Bucket Towels
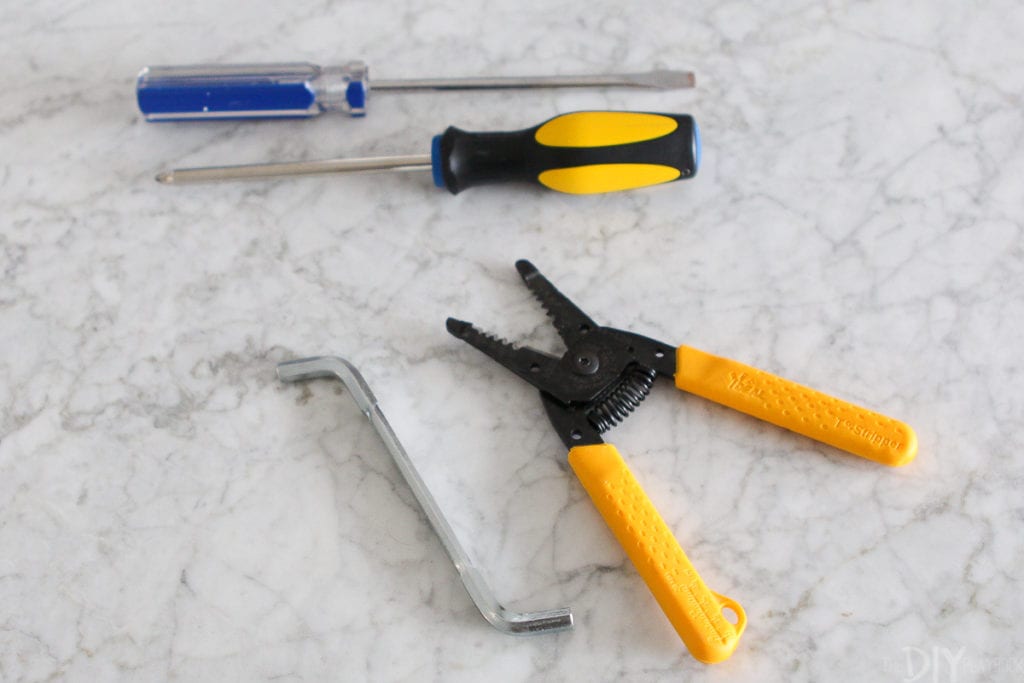
Tools needed: Wire Cutters Screwdriver (flat head & Philips) Wrenchette (should come with the new disposal) Adjustable Pliers
How to Replace a Garbage Disposal (Step-by-Step)
Important note: This is a replacement tutorial, not a full garbage disposal installation. If you don’t already have a power supply and wiring under your kitchen sink, that’s a job for a professional plumber or electrician. Here, I’m simply swapping out my old unit for a new disposer. If you’re doing the same, follow these easy steps.
Step 1: Buy a New Garbage Disposal
Before I headed to Lowe’s, I snapped a few pictures of my broken garbage disposal. When buying a new one, you’ll need to match the horsepower on the old one. My old one was a 1/2HP, so that’s why I ended up going with this new InSinkErator garbage disposal.
Step 2: Turn Off the Power at the Circuit Breaker
The very first thing I did was head to our electrical panel and flip the switch for the garbage disposal. Even though there’s a wall switch at the sink drain, I wanted to be absolutely sure the power supply was off at the circuit breaker. I tested the switch over the sink, and when the old unit didn’t make a peep, I knew the electrical power was safely disconnected. (It is always better to double-check than risk any surprises with wiring!)
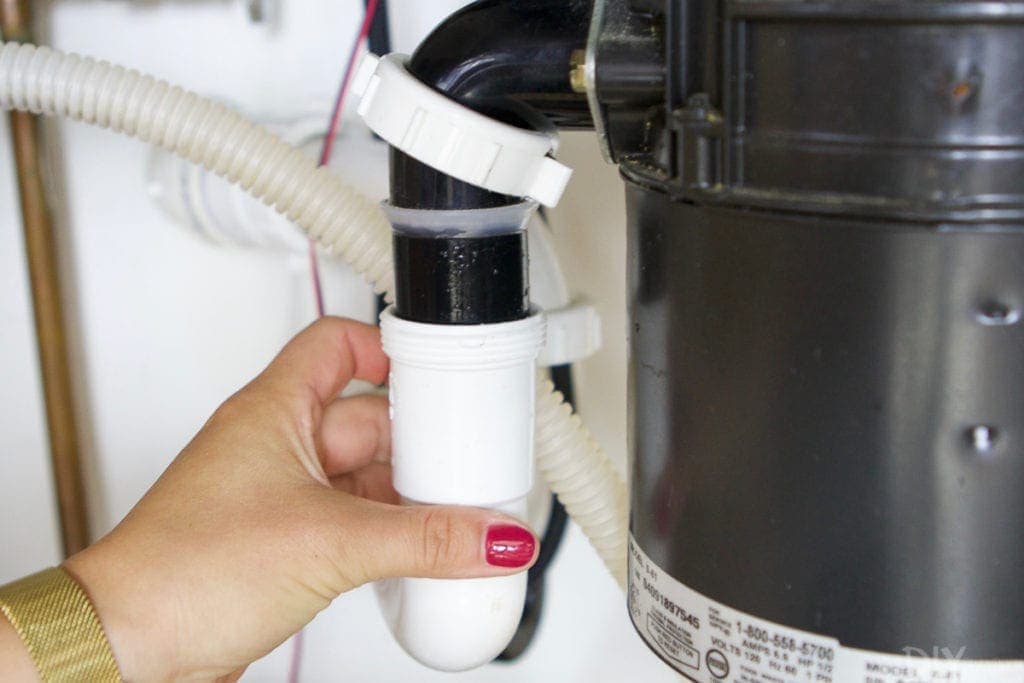
Step 3: Disconnect Drain Trap
Next, I cleared out my work area under the kitchen sink and slid a bucket and towels underneath. Then I loosened the mounting screws on the drain trap and disconnected it from the bottom of the garbage disposal.
A little water and food waste spilled out, which is totally normal, so I was glad to have towels ready. I set the drain pipe aside because I’d be reusing it with my new disposer later.
Step 4: Remove the Old Garbage Disposal
It was time to say goodbye to the old unit. I grabbed the wrenchette (a new-to-me word – basically the big metal tool that comes with a new disposer) and inserted it into one of the lugs on the lower mounting ring.
With my other hand, I supported the bottom of the garbage disposal so this heavy object wouldn’t crash down into my work area. Then I turned the wrenchette to the left to unlock the old mounting assembly from the mounting tabs. I’ll be honest, this part took some serious muscle, so I really had to put my back into it, while I muttered a few choice words, to get it loose.
Tip:
Don’t toss your old mounting screws or electrical clamp connector! You’ll need them when wiring and mounting the new unit.
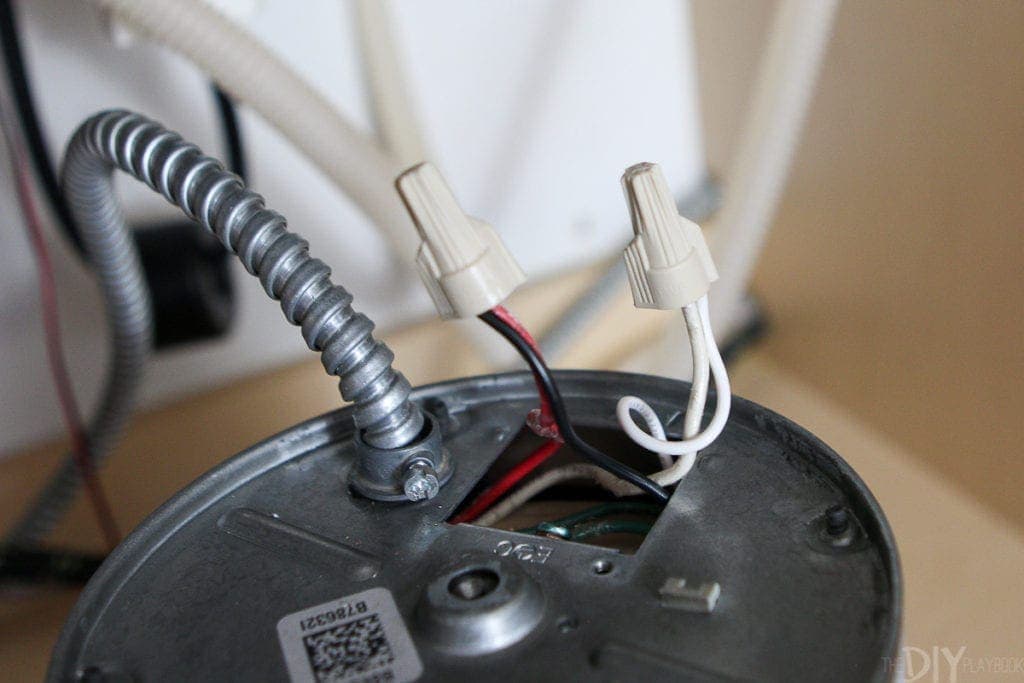
Step 5: Disconnect the Electrical Connections
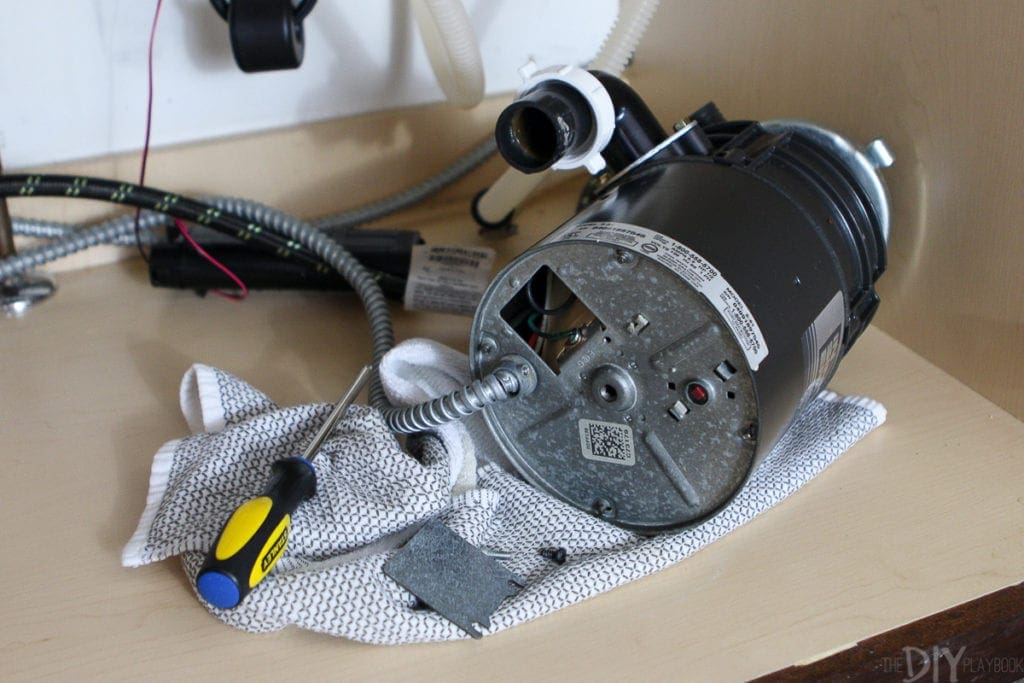
By this point, my old disposal was disconnected from the sink drain, but it was still connected to the electrical power supply. I used a screwdriver to remove the electrical cover plate on the bottom of the machine and I then disconnected all of the wires.
You should have a green (ground), red (hot), and a white (neutral) wire coming from your electrical supply. Once I got everything disconnected, I put the old disposal to the side. Hold onto your electrical clamp connector and screws. They will be reused on the new unit.
Step 6: Wire the New Garbage Disposal
Next up was wiring the new disposer. I removed the electrical cover plate and ran my electrical cord through the hole, securing it with the insert cable connector. Following the manufacturer’s instructions, I attached red to black, white to white, and grounded the green wire to the green ground screw.
I capped the wires with wire connectors, gently pushed them back inside, and replaced the cover plate. It was my first time wiring an appliance like this, but with the right tools and clear directions, it felt pretty straightforward.
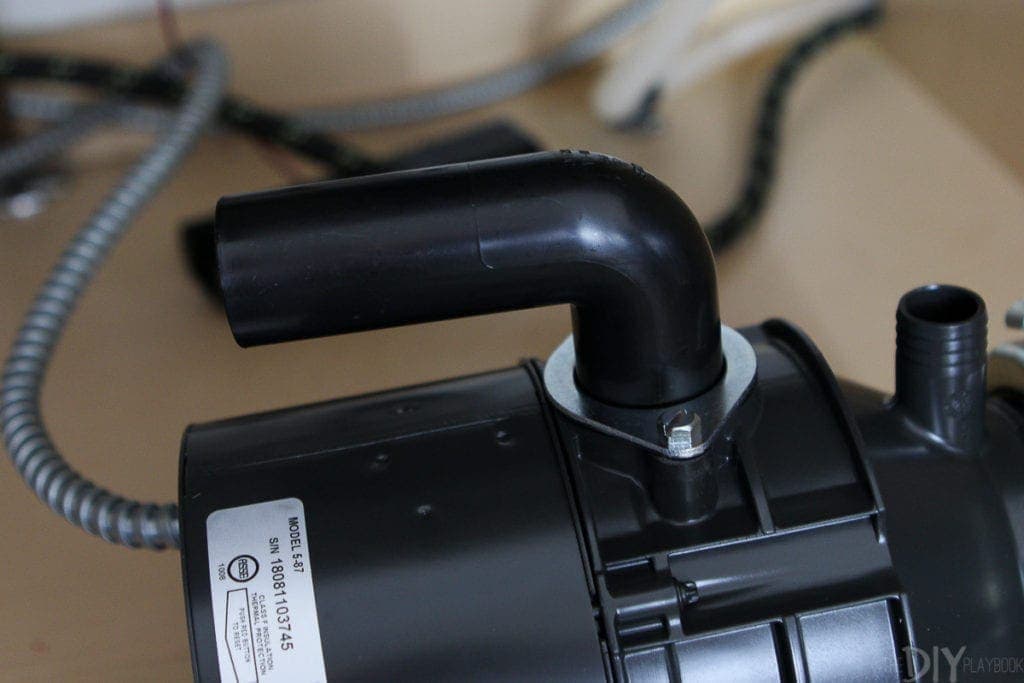
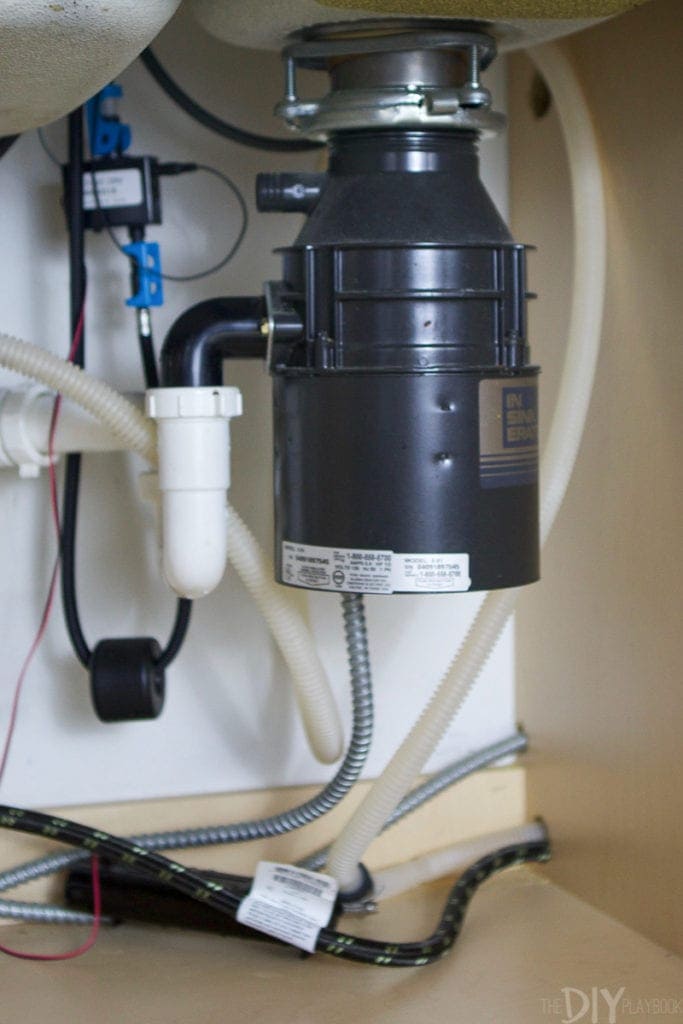
Step 7: Add Discharge Tube
With the wiring done, I turned to the plumbing. Following the directions that came with my unit, I added the discharge tube to the side of my new garbage disposal.
Step 8: Connect Disposer to Mounting Ring
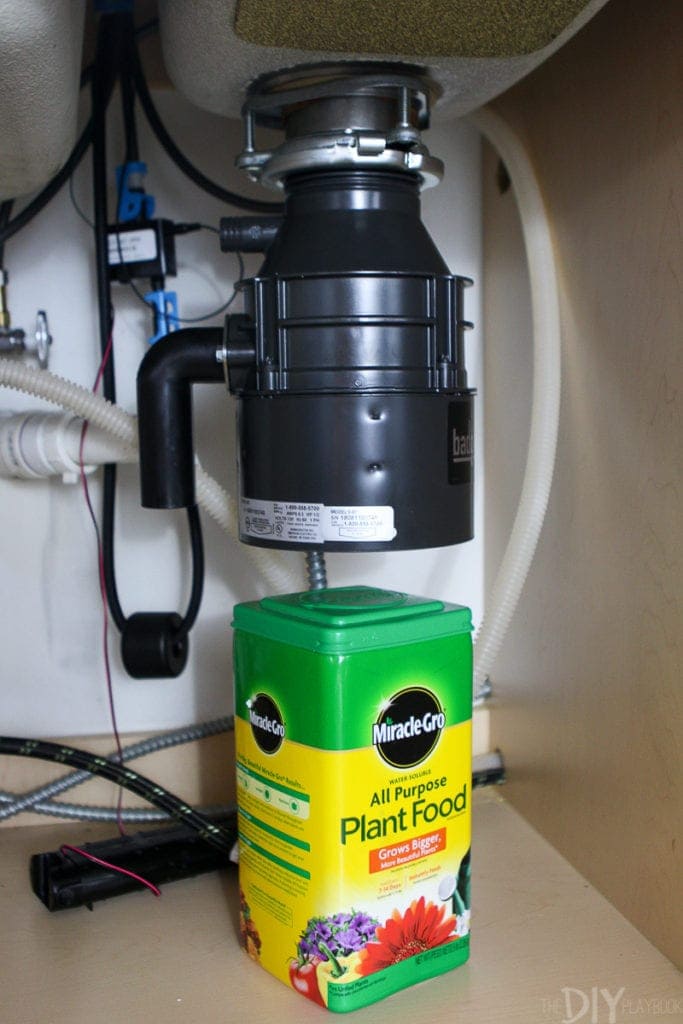
Lifting the heavy disposal to attach it to the mounting ring was the hardest part of this home project, because I was doing it alone. While this should have been an easy step, it was a difficult one to do by myself. I found myself sweating (and cursing) as I attempted to lift and twist the new disposal into place.
I ended up resting the disposal on a large box of fertilizer to give myself a break as I lined everything up. It was quite the shoulder workout, holding this thing, but I eventually got it into place! I then used the wrenchette to make sure the connection was tight and secure.
Step 9: Attach Discharge Tube to Waste Drain
The last step is to attach the discharge tube back up to the waste drain. I cleaned out my old PVC pipe from my old disposal and used that to hook it all back up.
Step 10: Restore Power & Test The Unit
Moment of truth! I flipped the circuit breaker back on to restore the power supply, ran the water supply into the sink, and turned on the switch. The new disposer purred like a kitten—so much quieter than my old disposal. No leaks, no clogs, no drama. Just a smooth-running garbage disposal installation.
Troubleshooting & FAQs
What if my garbage disposal is leaking from the bottom? If water is dripping from the bottom of the garbage disposal, that usually means the internal seals are worn out. In that case, repairing isn’t worth it—you’ll need to replace the entire unit.
Do I have to use plumber’s putty on the sink flange? Yes, plumber’s putty (or sometimes a rubber gasket, depending on your model) helps create a watertight seal between the flange and the sink surface. If you skip it, you may end up with small leaks around the drain opening.
Do I need to remove the dishwasher knockout plug? Only if your dishwasher connects to the disposal. Use a screwdriver and hammer to knock out the plug inside the dishwasher inlet before attaching the hose. Don’t forget to remove the loose knockout plug from inside the disposal!
How long does a garbage disposal last? Most disposals last around 10–12 years. If yours is near the end of its lifespan and showing signs of wear—like leaks, frequent clogs, or loud grinding noises, it’s usually best to replace it.
What size garbage disposal should I buy? Match the horsepower to your household needs. A 1/3 HP unit may work for a single-person household, but families usually prefer ½ HP or ¾ HP models. Bigger households or frequent cooks may benefit from 1 HP or higher.
Final Thoughts
Not only do I have a new non-leaking garbage disposal, but I didn’t have to shell out $320 to get this project done. Plus, I feel like a badass knowing that I did this all by myself. You should have seen me frantically texting Finn when I was finished, just to tell him about my accomplishment. Best.feeling.ever.
If this is your first time tackling a garbage disposal replacement, don’t stress—it really is an easy DIY project with the right tools.
 I did a bit of research online and learned that if the disposal housing is leaking, it probably needs to be replaced altogether.
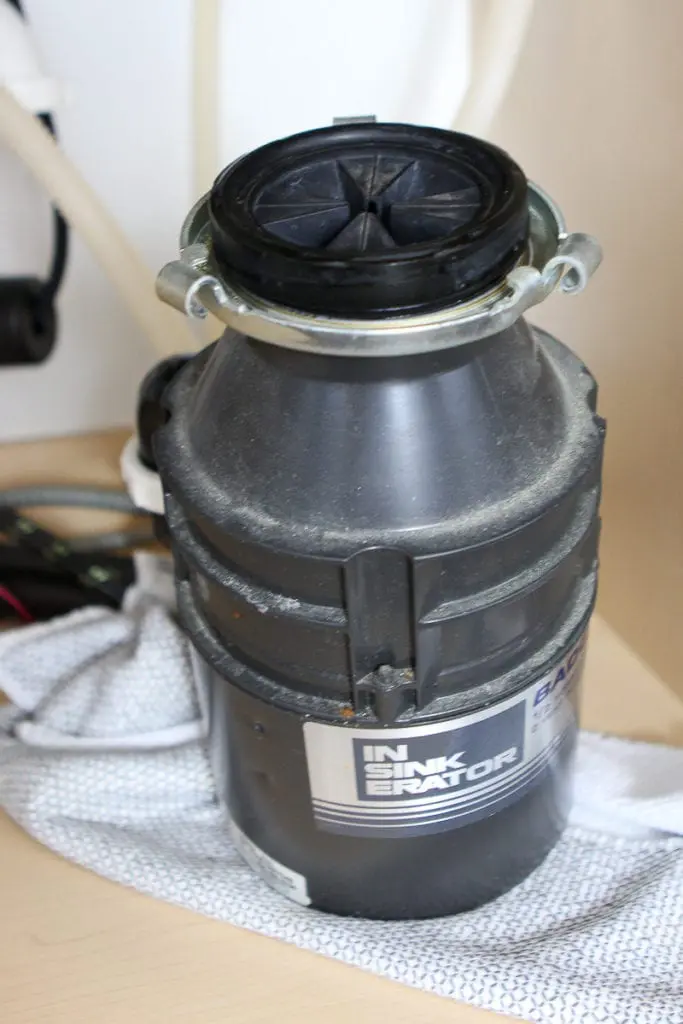
 Spoiler alert: This project was WAY easier than I thought it would be. I blocked off four hours on my calendar, but the entire garbage disposal replacement took just about an hour.