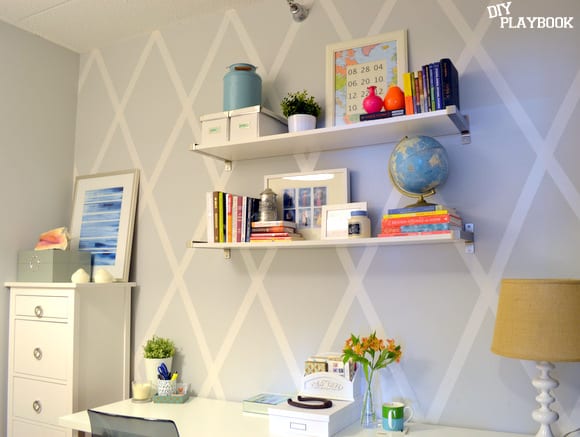
Ikea Hemnes Dresser: Hack
Earlier this week, you guys got a glance at the new tall dresser that’s currently hanging out in our office. I showed you how I jazzed up the drawer sides with marbled paper, and today I want to show you how I jazzed up the outside of this ho-hum dresser.
I purchased this dresser from Ikea because I needed a decent amount of storage for our office, and I wanted it to be hidden inside drawers. This dresser is a great size and you simply can’t beat the price ($149!)
Side Note: My hubby-to-be and I have put together a decent amount of Ikea furniture in our day. This dresser was the absolute worst thing we’ve ever put together….by far. I guess dressers just take forever to put together. Lucky for me, I have a very patient fiance who enjoys putting things together while watching sports on TV.
The dresser was great once we finally got it together (albeit a little boring), but it just took a very long time to get from step 1 to step 35 (no joke…).

After this bad boy was put together, I immediately knew that I wanted to trade out the hardware. I’ve said it before, and I’ll say it again…hardware is one of the easiest ways to update any piece of furniture in your home. These boring knobs had absolutely no chance of staying… #buhbye

I ordered 5 of these silver pulls on Amazon and $25 later I had pretty new pulls for my dresser.

I’m in love with the shiny silver. It adds a nice glamorous touch to the otherwise blah dresser.

But my customization of this Ikea piece didn’t stop there. I’ve always been eager to try out the industrial, campaign-style look on a dresser and this white piece offered up the perfect opportunity! So I purchased some silver brackets (these ones to be exact) and decided to add them to each drawer front.

This is just about the time that this project slowed down. I was totally on a roll, and then boom…I had to install 4 brackets on 5 drawers. It took some major drilling time. Learn from me and take these tips into account if you’re looking to add brackets to one of your own dressers…

Rookie Tip #1: Use a drill bit to create pilot holes in the front of the drawer. This is very, very important. If you skip this step, then you risk splitting the wood. It’s also key when you go to put the screws in. I suggest using your drill for the pilot holes, and then just a normal screwdriver for the screws.

Rookie Tip #2: Each bracket will have 4 holes and 4 screws. That’s 16 screws per drawer, and with 5 drawers that’s 80 screws to measure, pre-drill, and then screw in. Yikes. Instead, I recommend only putting 2 screws in to hold each bracket. The bracket will be plenty snug on the front, and you’re less likely to split the wood. I did all 4 on one of the drawers, and then immediately switched tactics. Learn from my mistakes…


Casey