My Design Plan For Our Basement Bathroom
Are you guys ready for my next big project around here? I’m not totally sure I am (it’s been project overload in our house!), but I am diving right in anyway! It’s time to work on the bathroom in our basement. And today, I’m here to share my basement bathroom design plan and what I’ll be tackling myself, versus hiring out.
When We Moved In
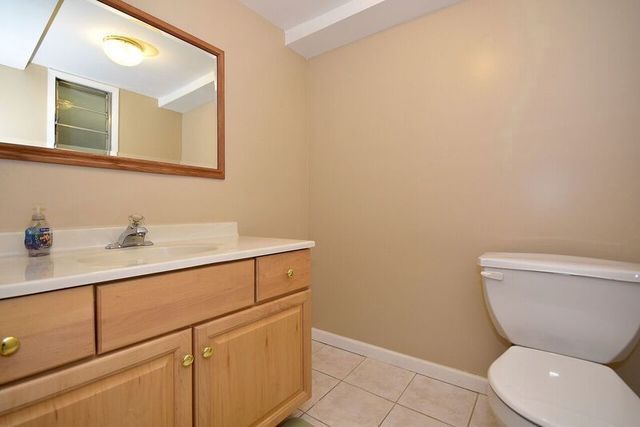
Before we get to the goods, let’s rewind to this space back when we purchased this home in 2019. The bathroom was pretty outdated and icky. It doesn’t have any natural light and had a strange “window to nowhere” that peeked into our cluttered storage room. Not my favorite.
After My Budget Refresh
In August 2020, I gave the space a nice budget-friendly refresh with lots of paint – on the tiles, the vanity, and the walls. I also removed the creepy window and made thin shelves to cover the big hole in the wall. I thought that this space would live like this until we moved out.

Then, we had our basement flood in September 2022. Eek. We had to replace the drywall and the remediation company recommended replacing the vanity too, since it was saturated with water. We dried it out to keep it, temporarily, until it was time for a larger renovation. Well, that time has come!
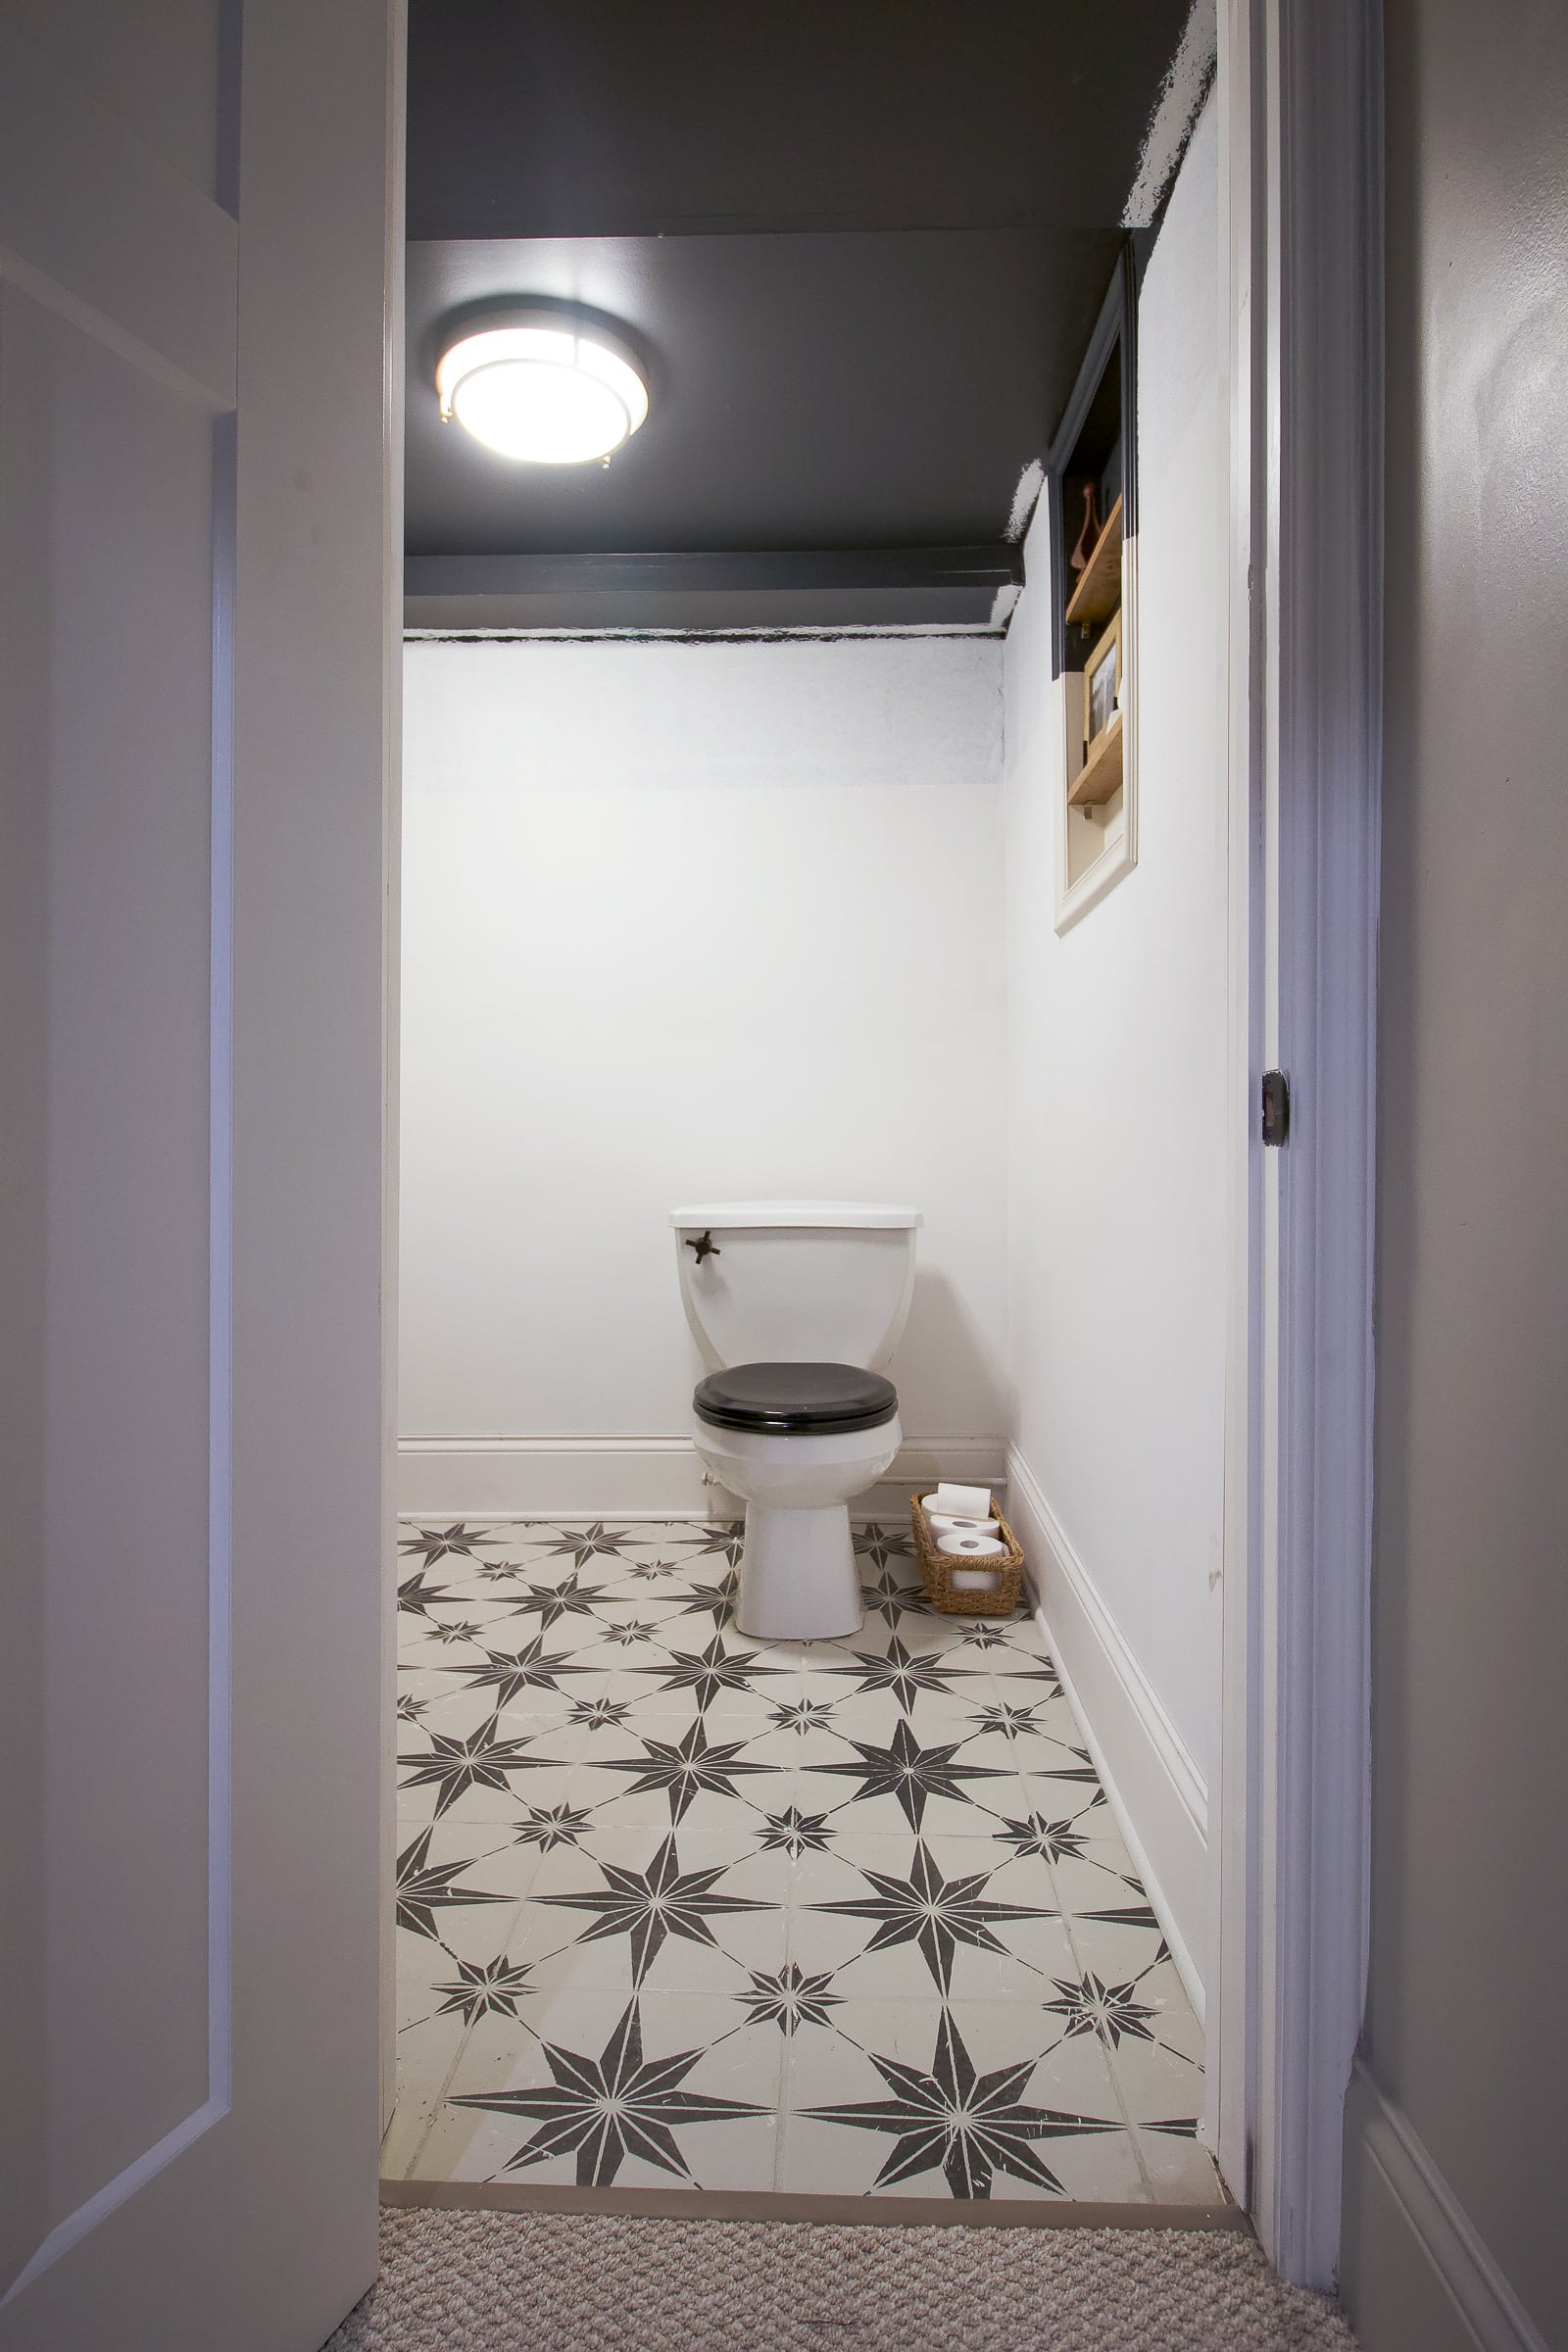
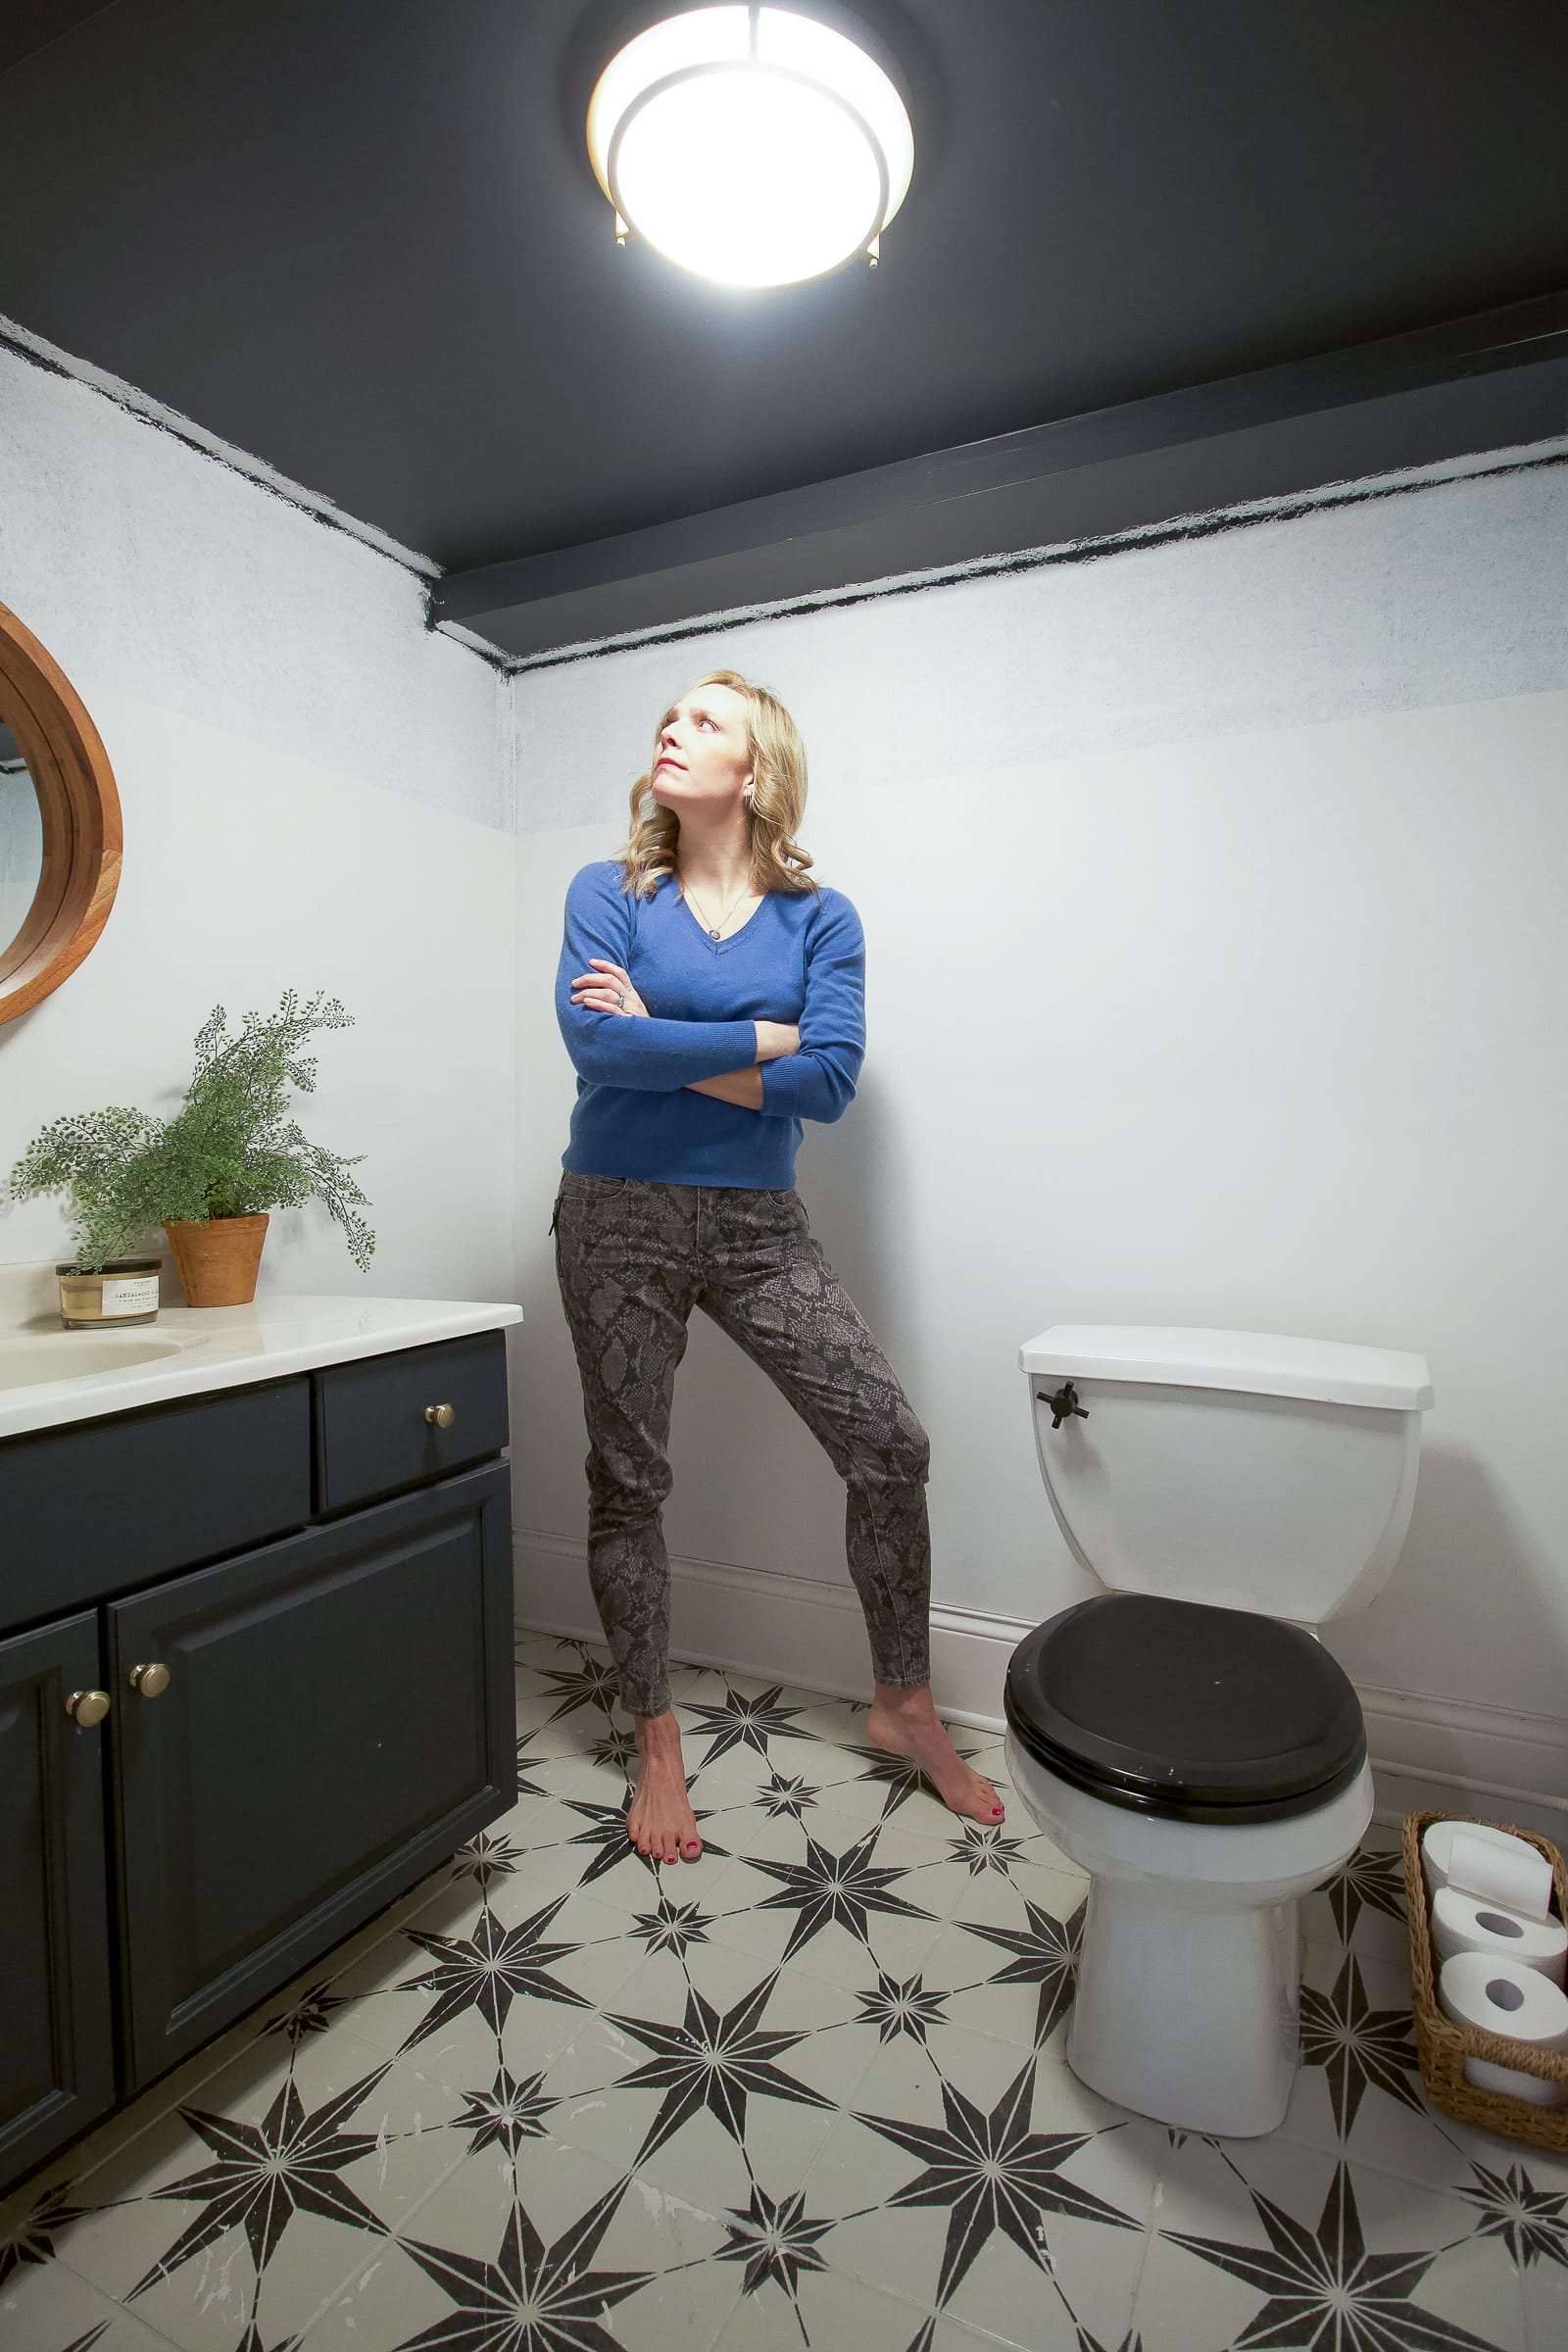
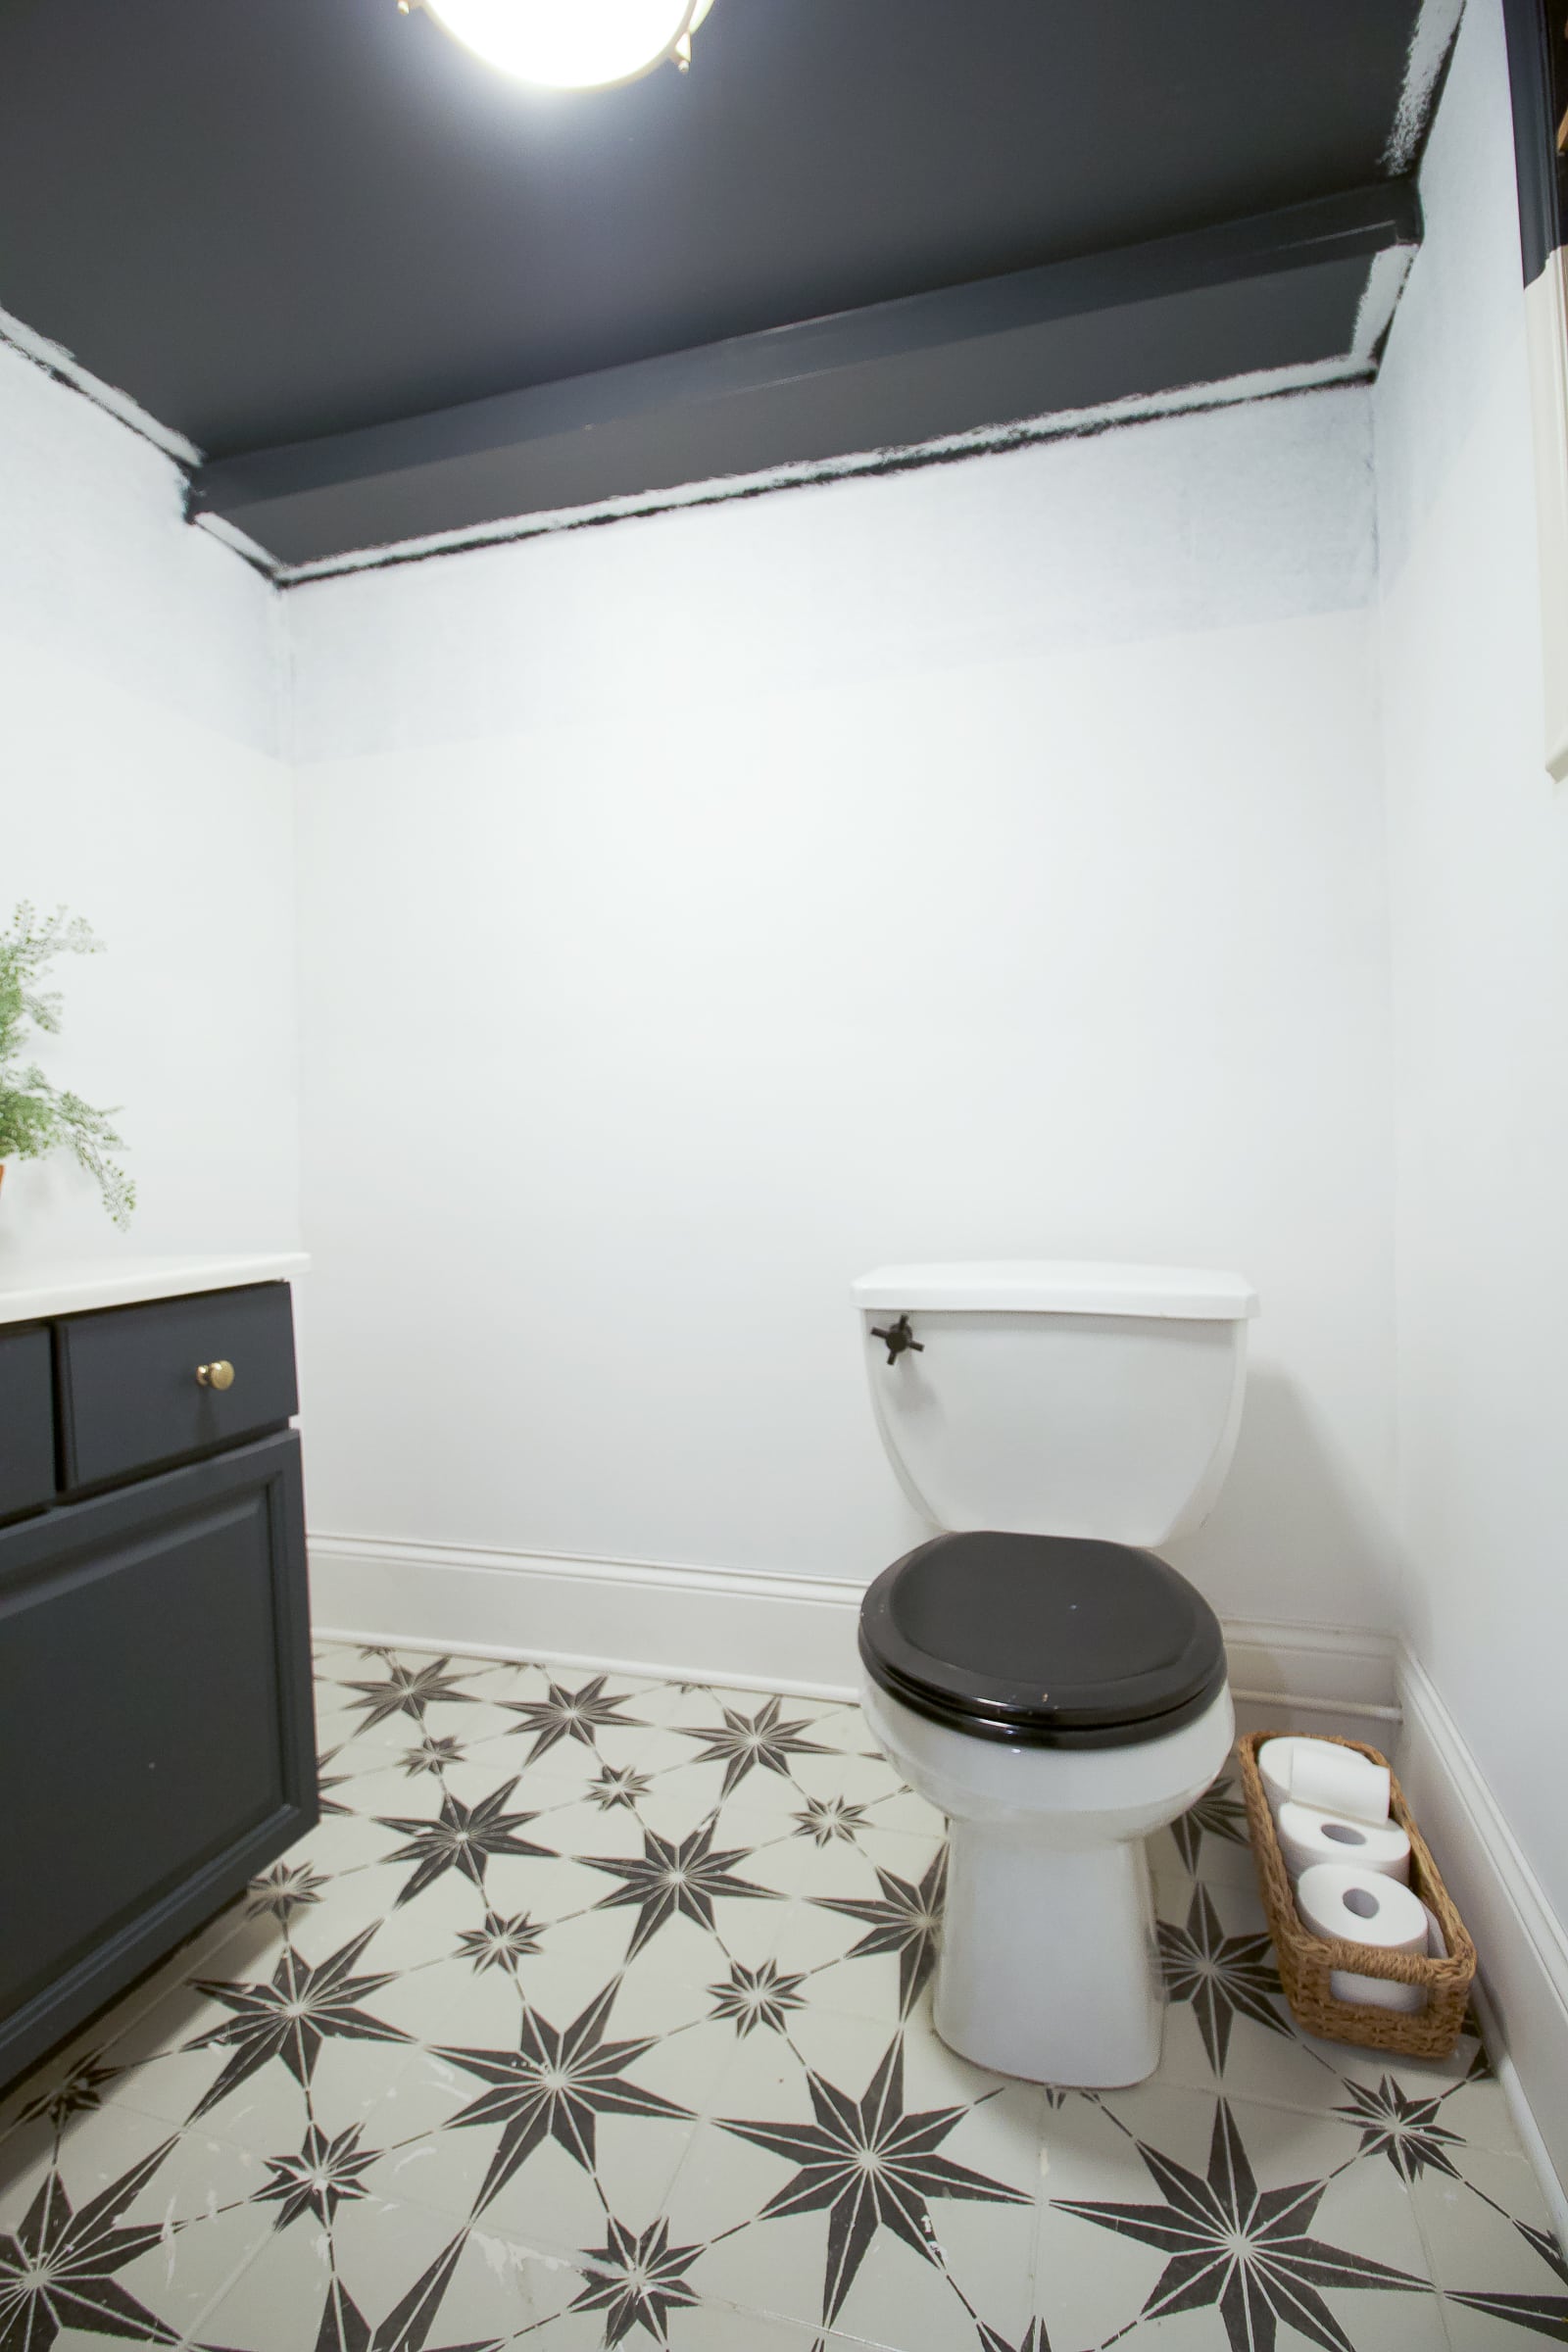
The Basement Bathroom – Now
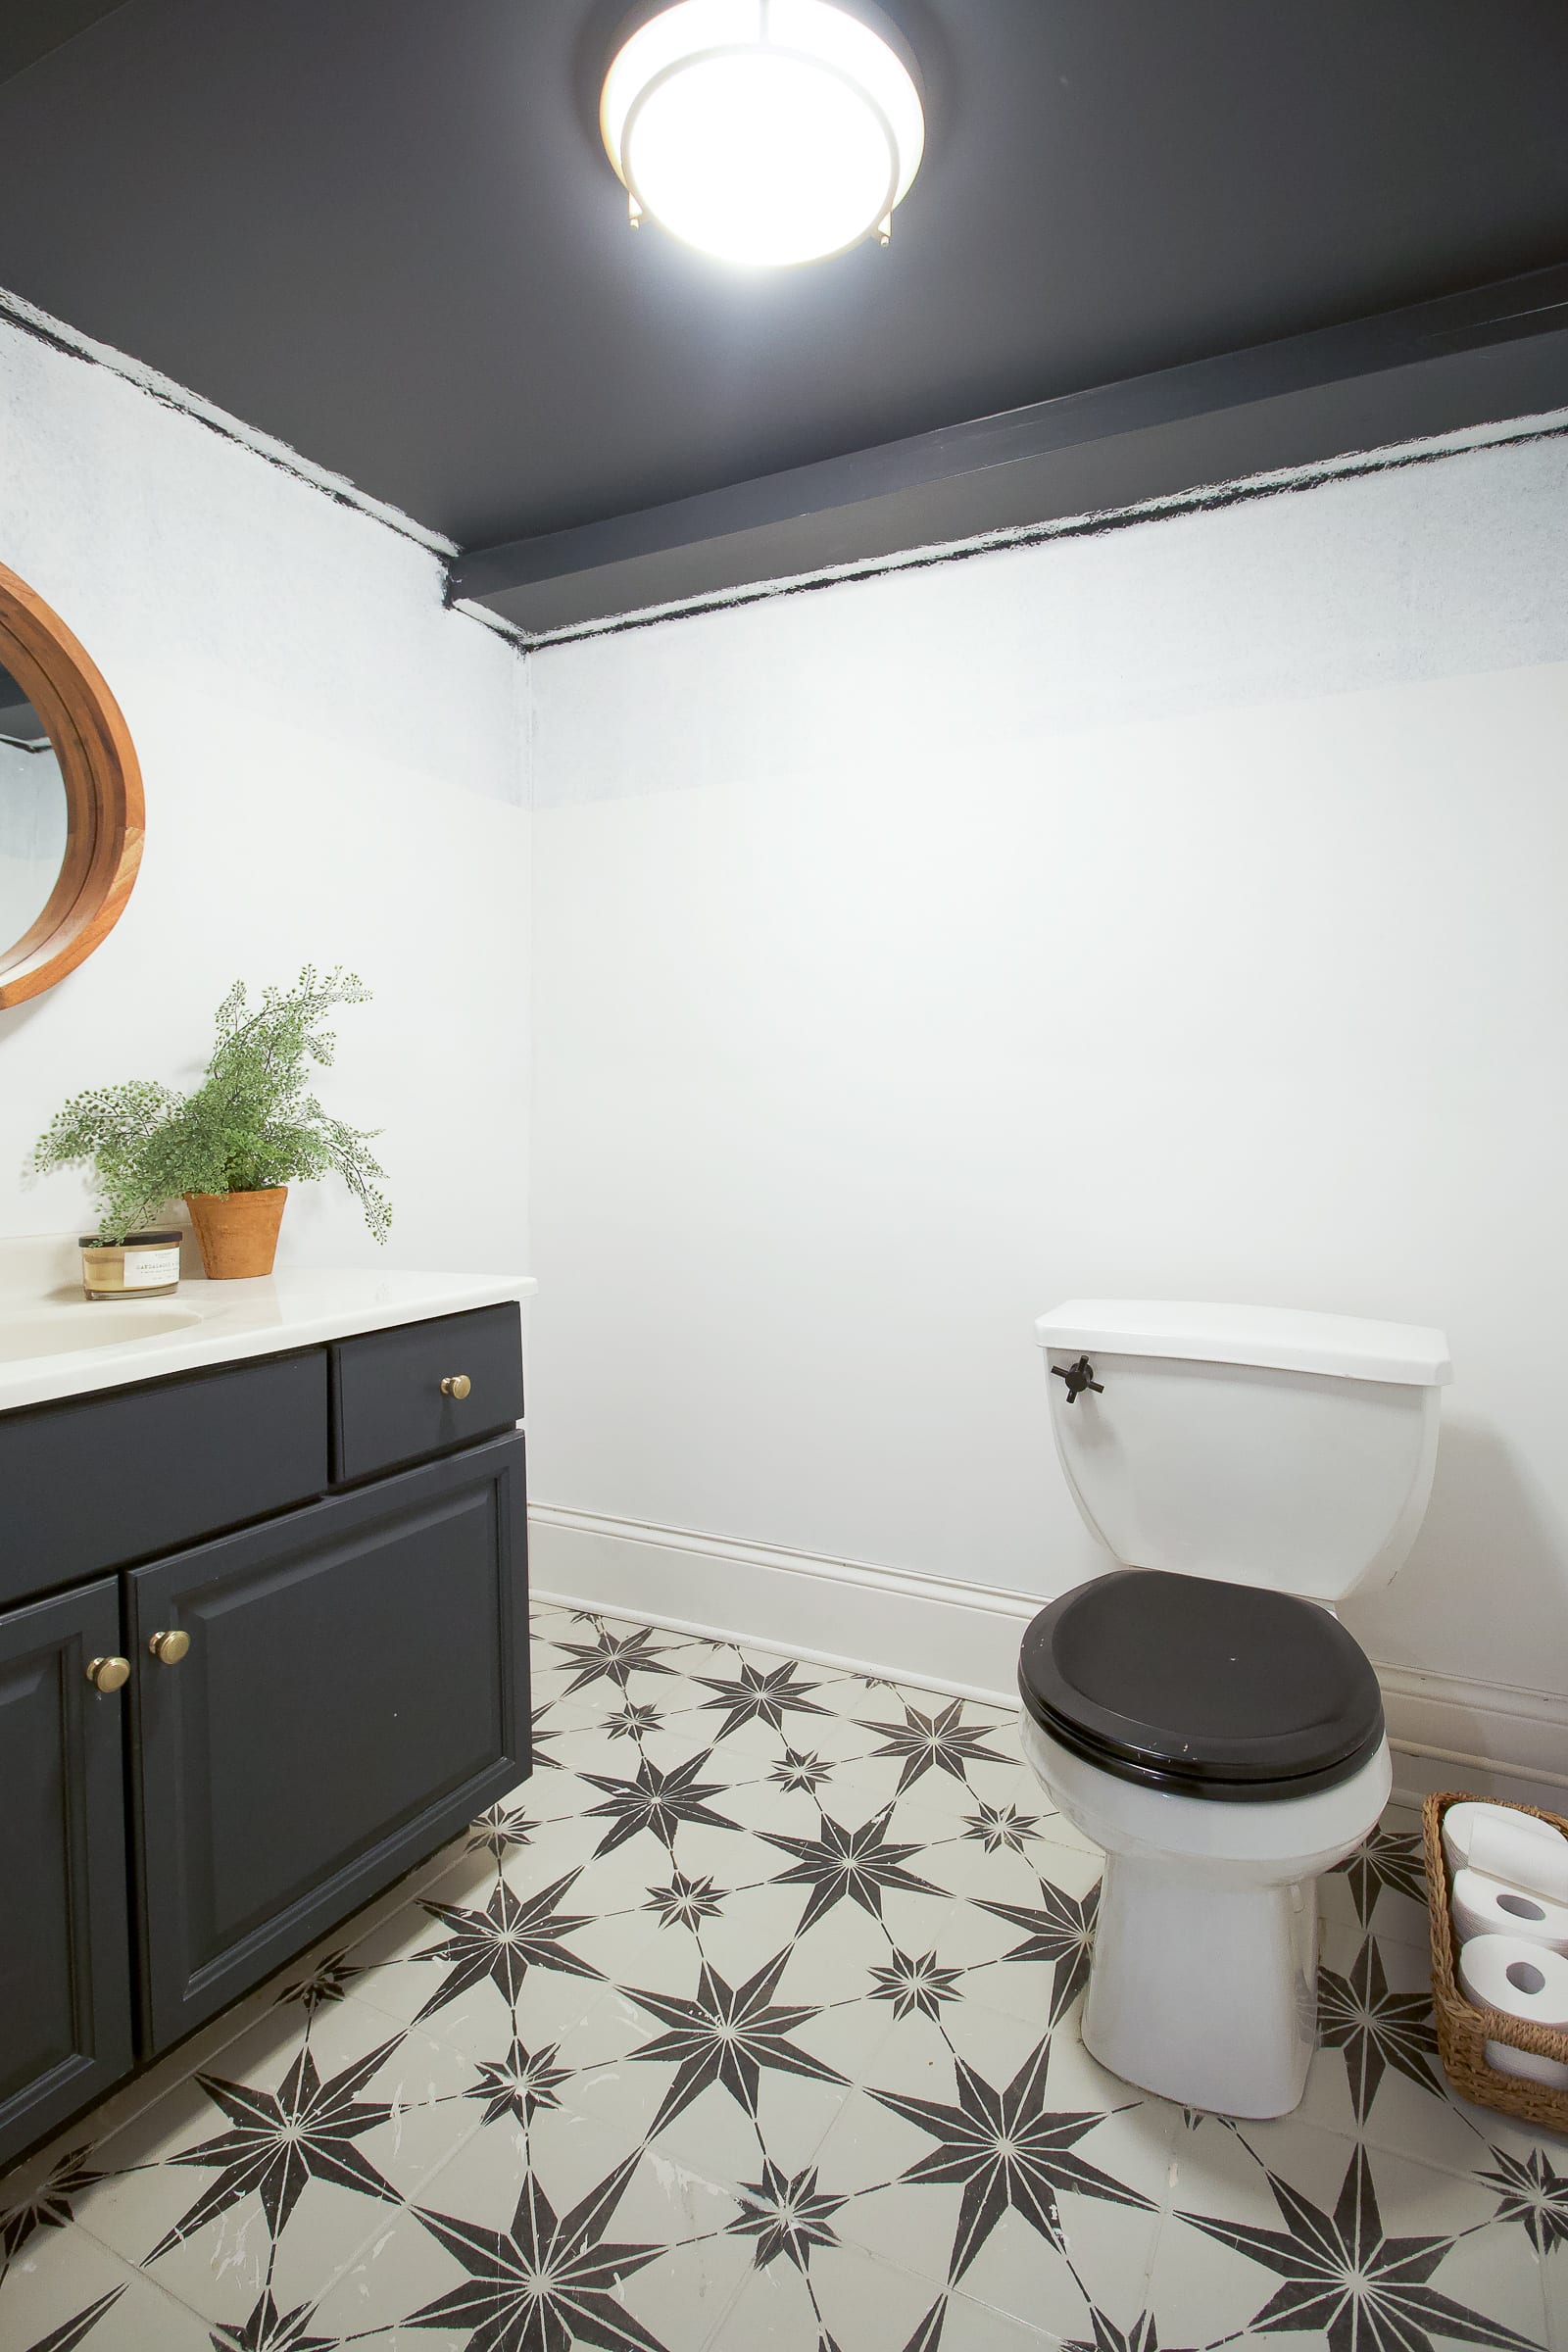
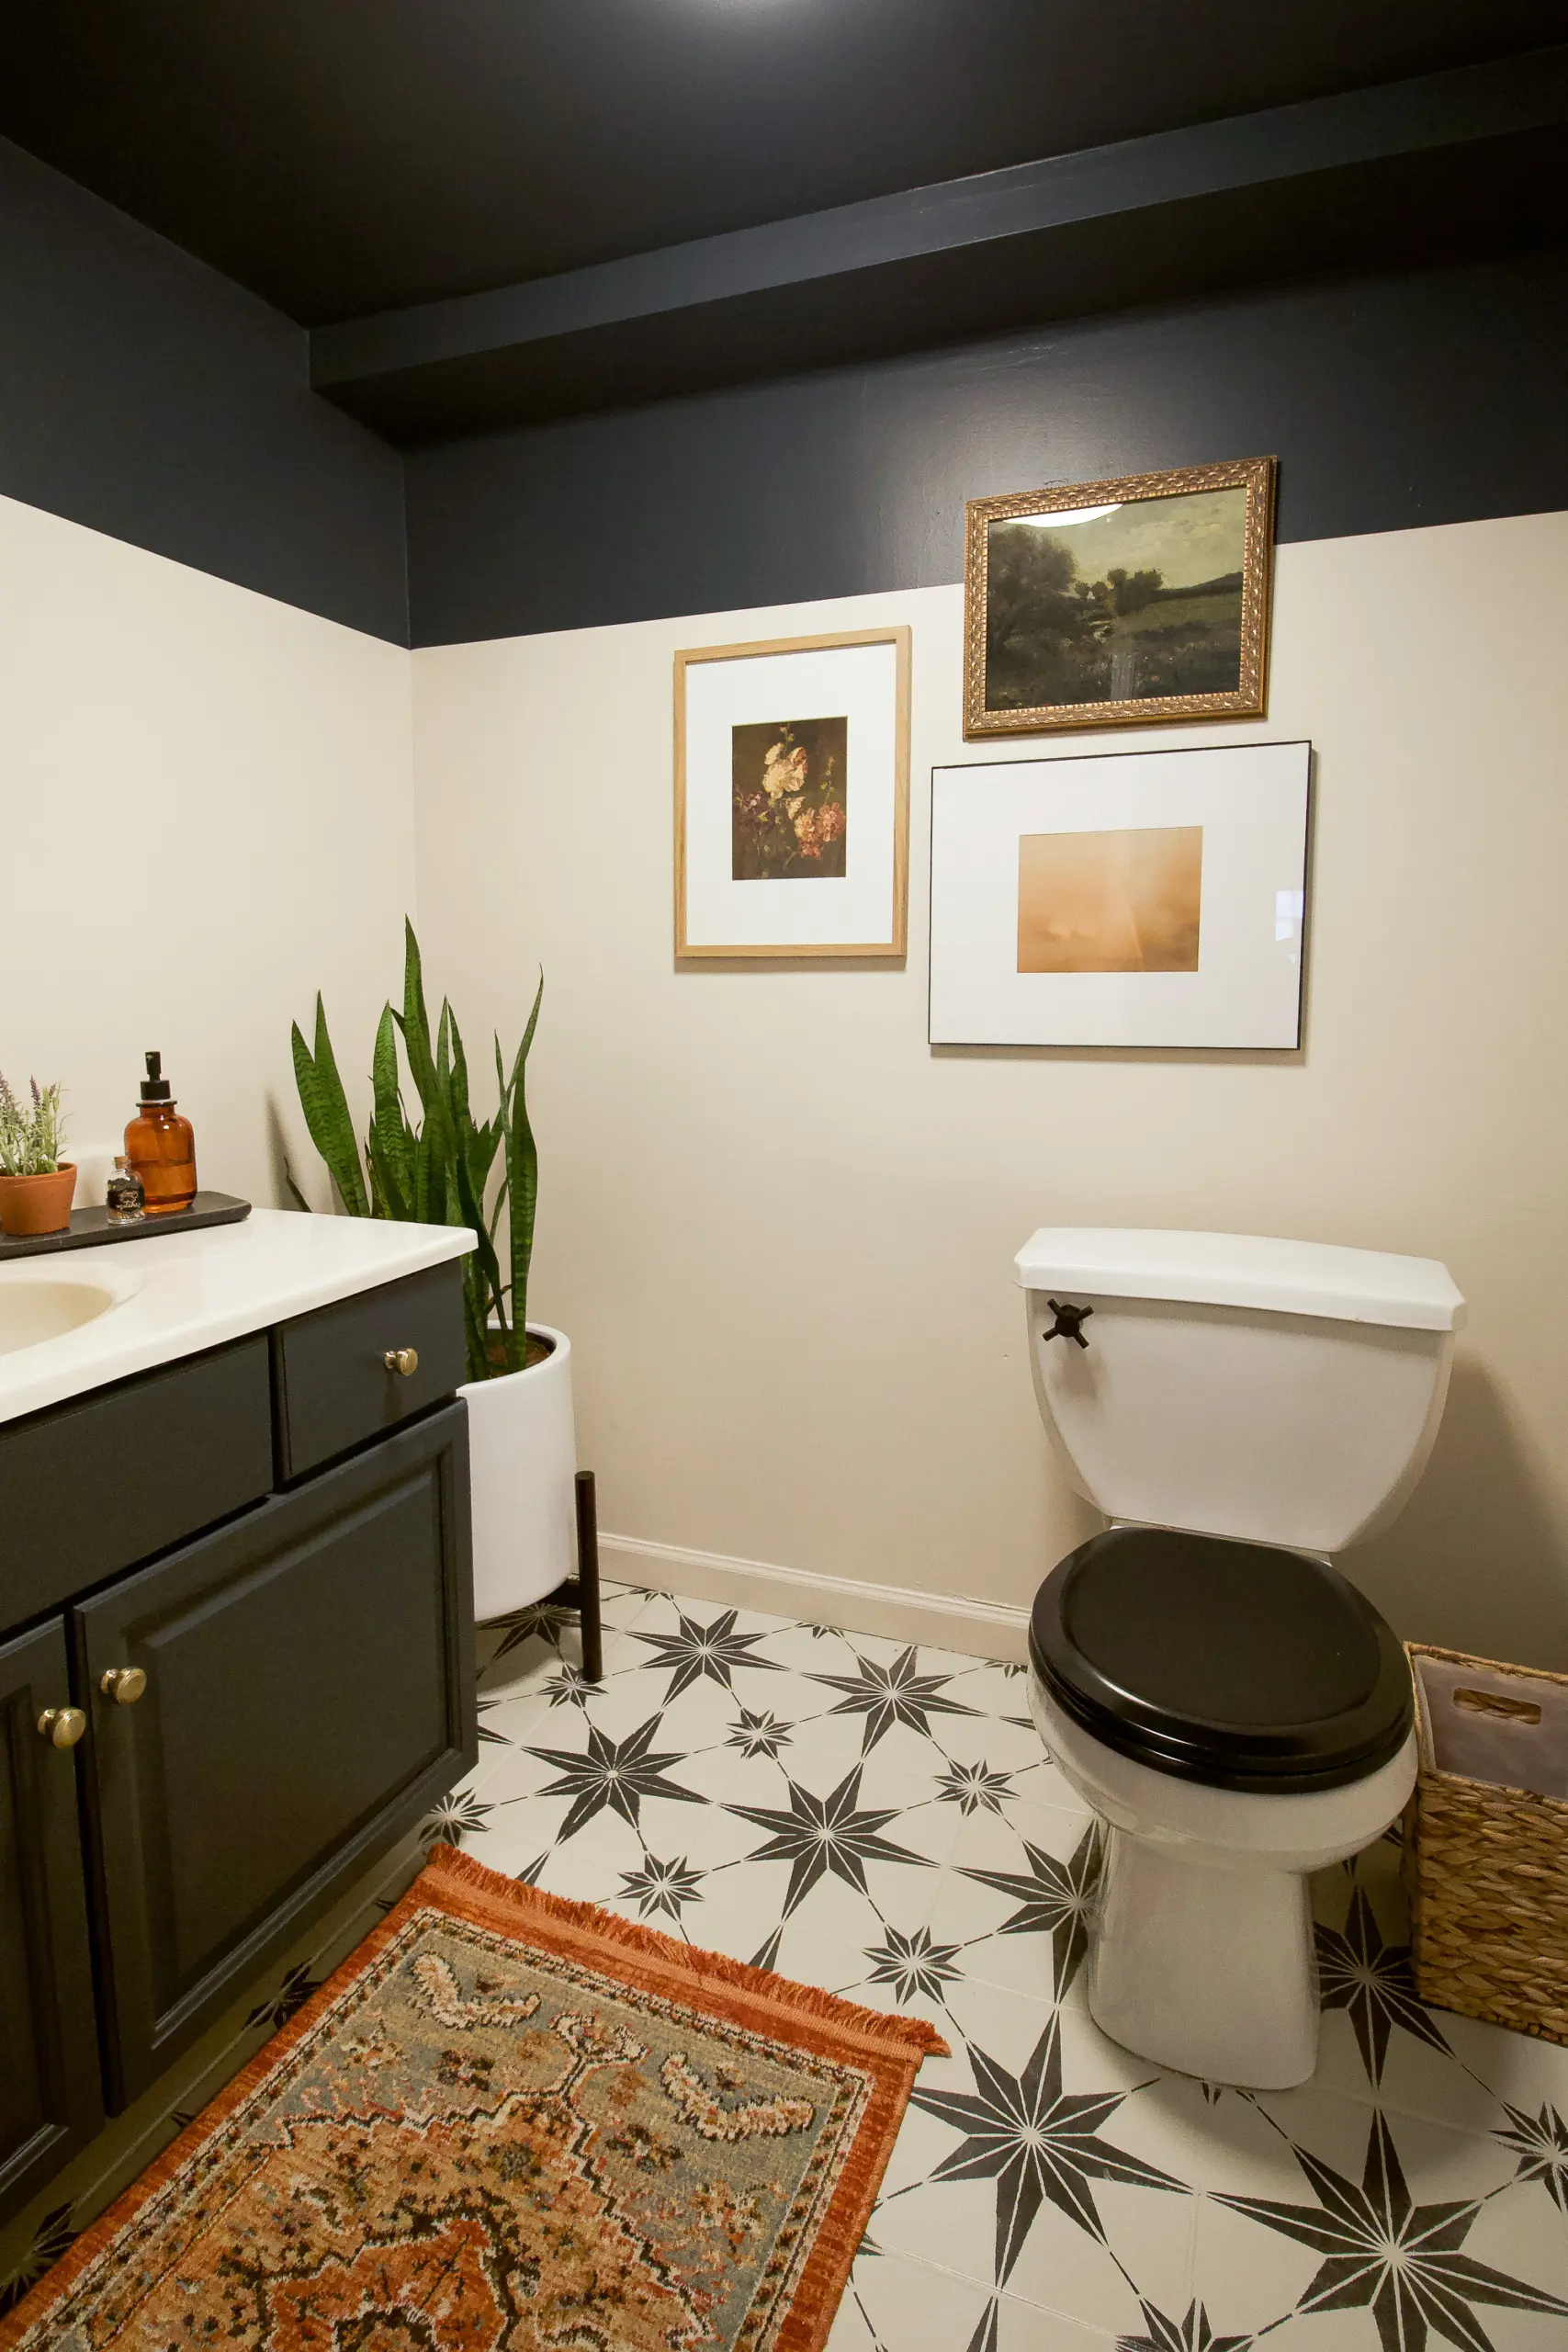
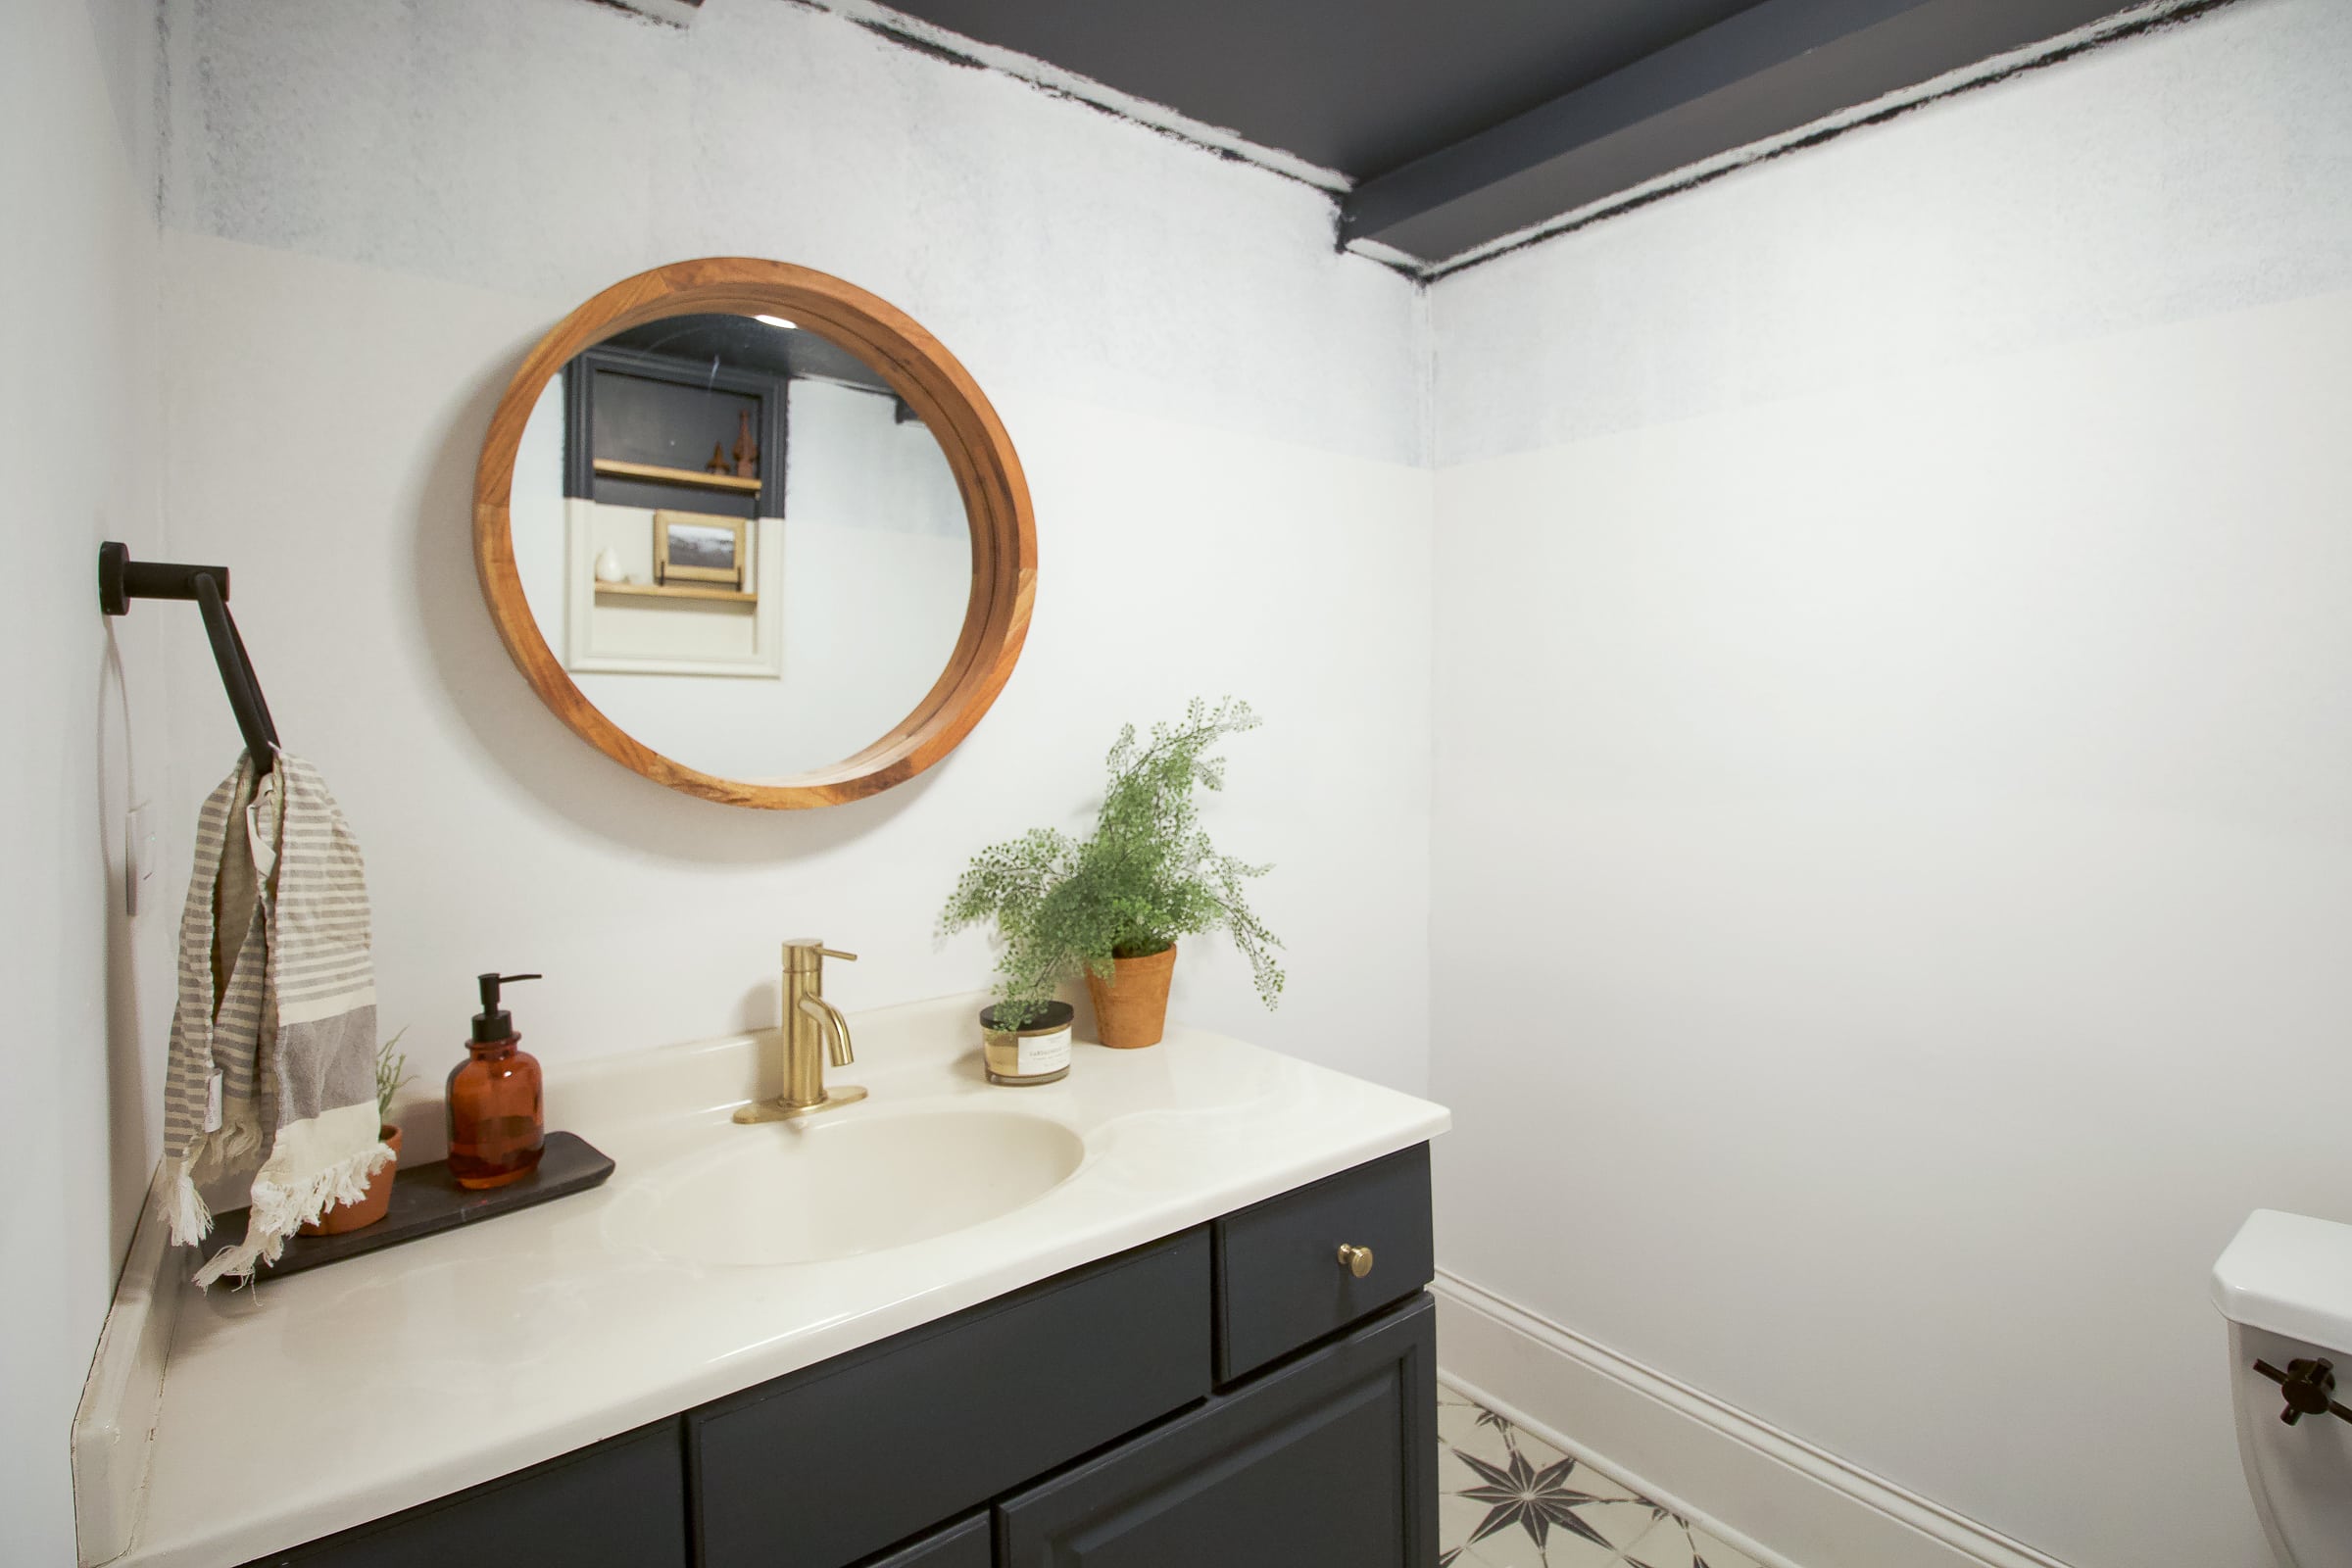
Here’s the space now. We have new drywall on the bottom portions of the wall and the walls have been primed. The painted tile floors are damaged from the flood and construction. All in all, it needs some TLC.
My Basement Bathroom Design Plan
My plan is to gut the space and build it back up with new materials! I want it to complement the colors going on in the rest of the basement with the forest wallpaper and greige walls. I think this basement bathroom design plan will work well…
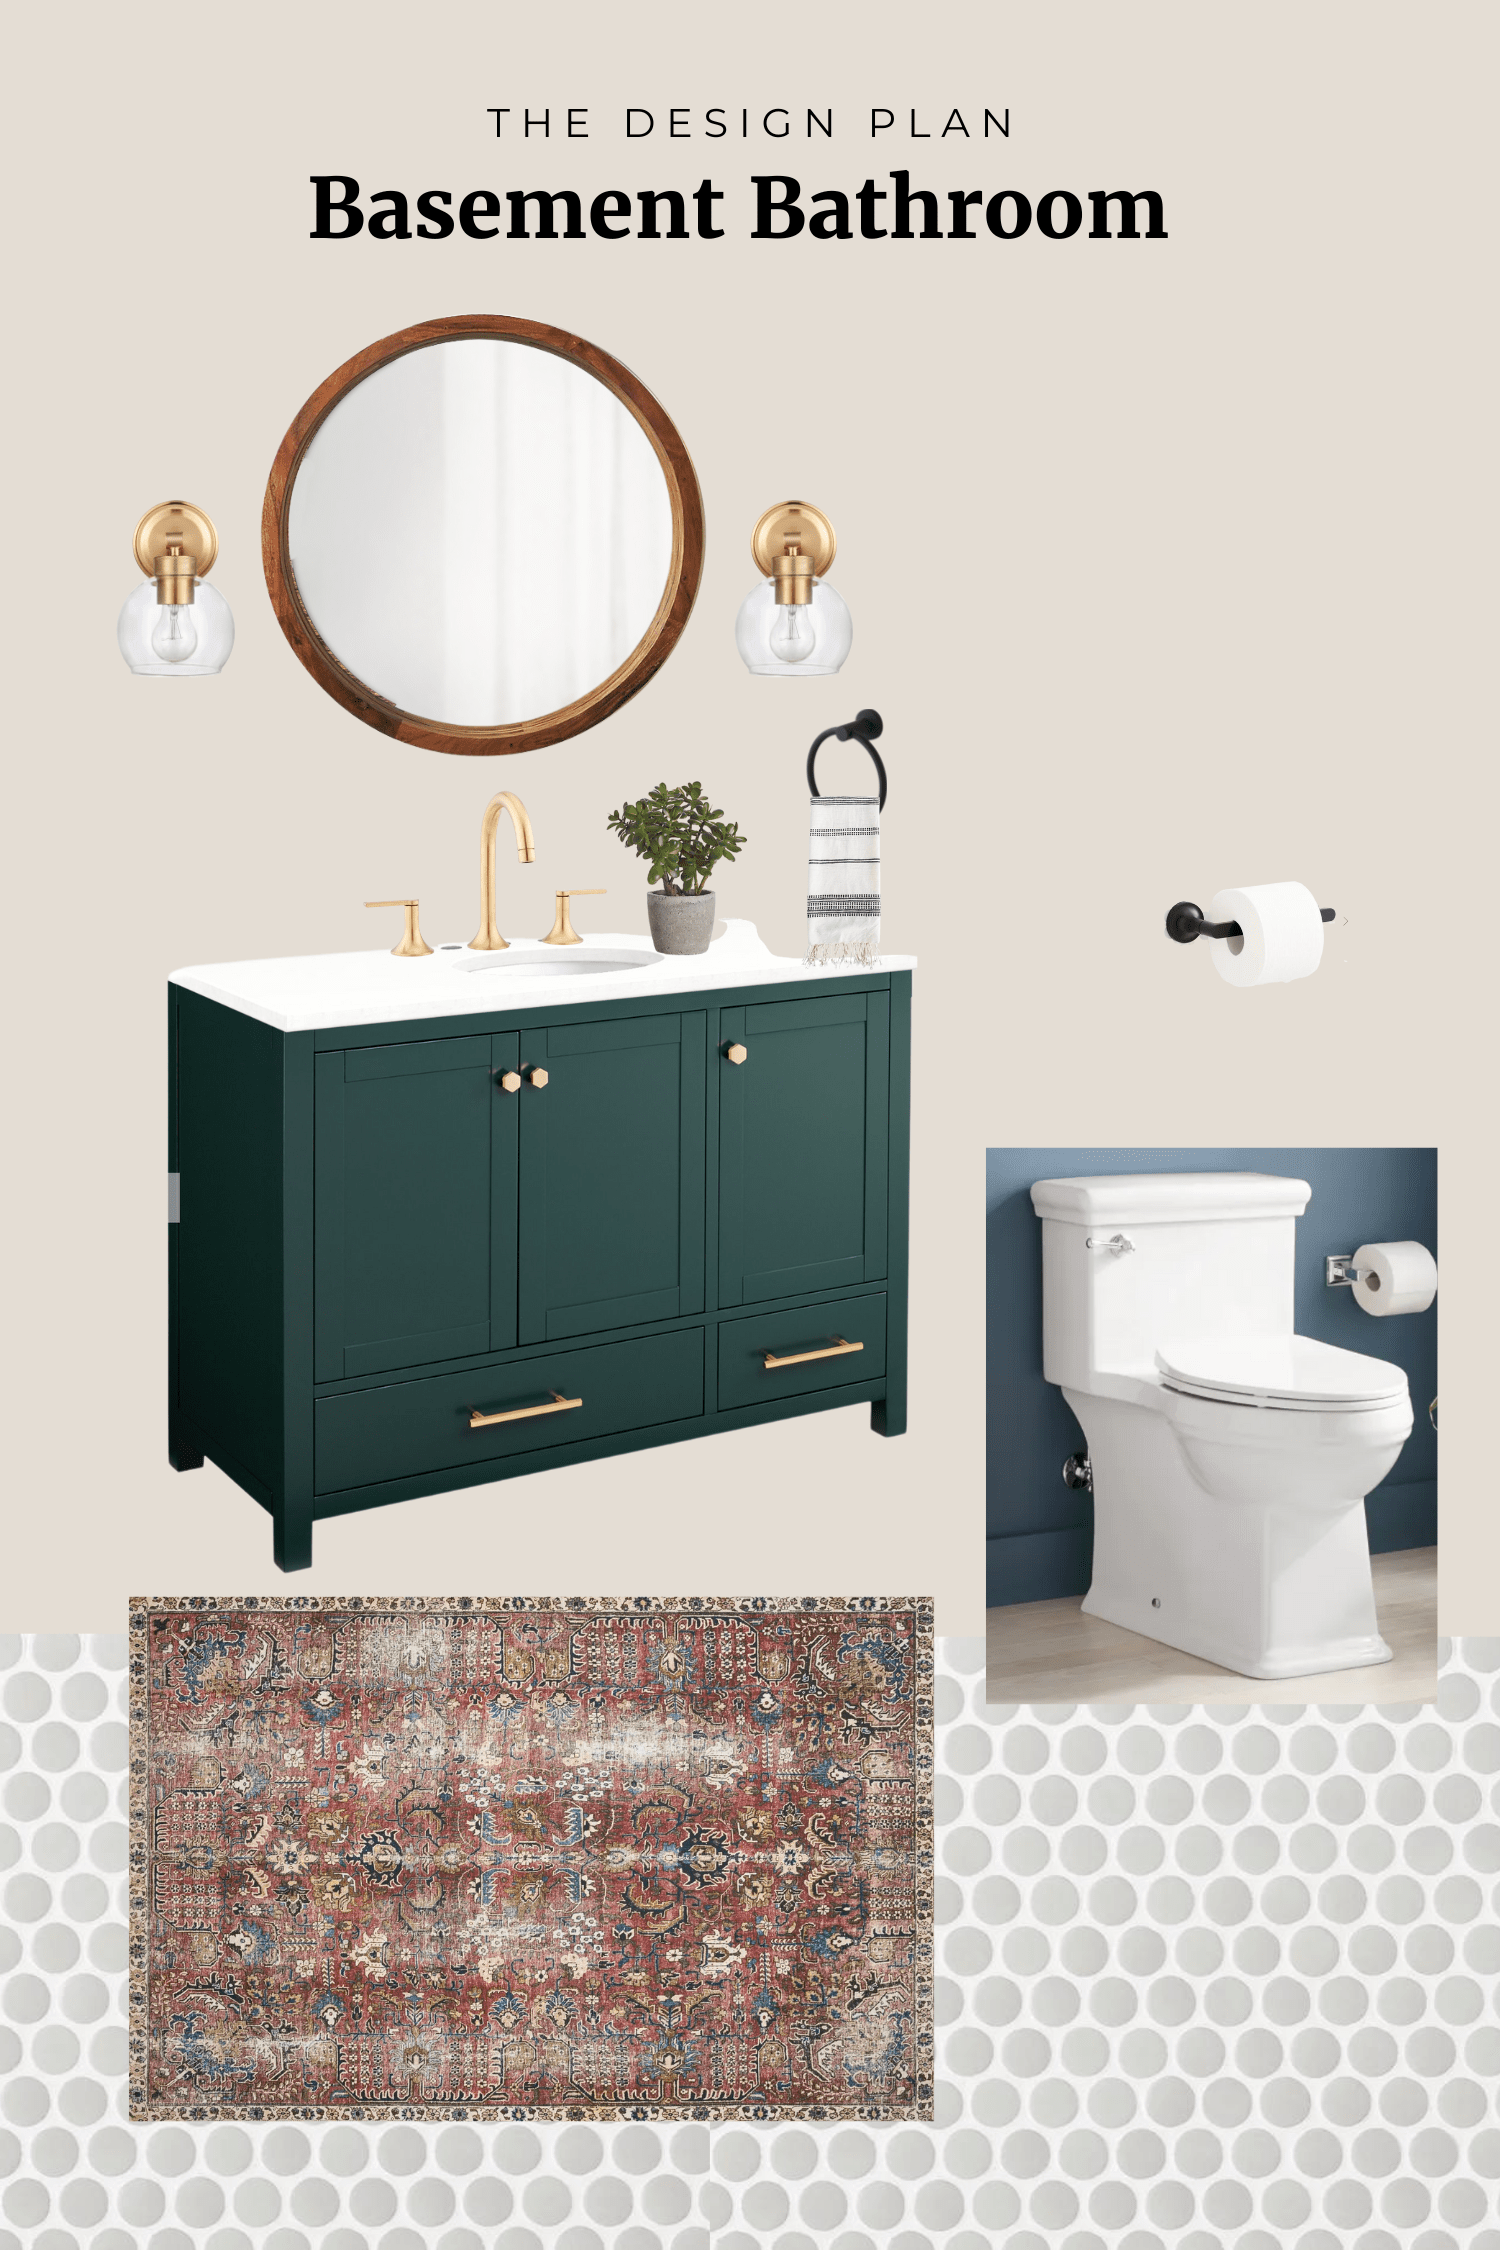
Penny Tile // Towel Ring // Wood Mirror // Rug // Vanity // Toilet // Gold Faucet // Toilet Paper Holder // Sconces
For the floors, I’m going with this penny floor tile. Why penny tile? Well, for a number of reasons. It’s pretty inexpensive and because of all of the grout lines, it’s a good option for a kids’ space because it’s nice and grippy! Plus, the floors down here are not level at all, and a mosaic tile like this is flexible with wonky floors. I’ve never installed penny tile and I know it has its challenges, so I’ll take you along for the ride as I lay this tile.

I chose this dark green vanity and I’m so excited for it to arrive. I think the dark green works nicely with the rest of the basement space. I want to center the vanity on the wall so I can add more lighting with two sconces flanking the mirror. Right now, there’s an awkward amount of space on the right.
For the toilet, I’m opting for the model we used in our kids’ bathroom and our main bathroom. Then, I’ll have a mixture of black and brass finishes in here with the toilet paper holder, faucet, and light fixtures. You know I love mixing metals, so I think this will work out nicely.
DIY vs. Hire Out
This is subject to change, but as of now, I’m planning to demo the space myself by ripping out the vanity, toilet, and tile floor. Then, I’ll prep the subfloor and tile the space. I’m giving myself two weeks for this process, but it may take longer. We will see what happens. With DIY projects, you just never know what will happen once you start ripping things up!

Because I’m centering the vanity on the wall and adding electrical for the sconces, I need to tap a plumber and electrician to help out. For me, those are not DIY tasks and I always like to call in the pros when necessary. Once I get the tile down, I’ll have them come out and do their thing.
I’m still not totally sure what I’ll be doing with the walls. Another cool paint treatment? Wood on the walls? Wallpaper? I think it will take some hanging out in the space to really get a feel for what I want, and I’ll have plenty of time in there when I’m tiling!
First, Testing For Asbestos
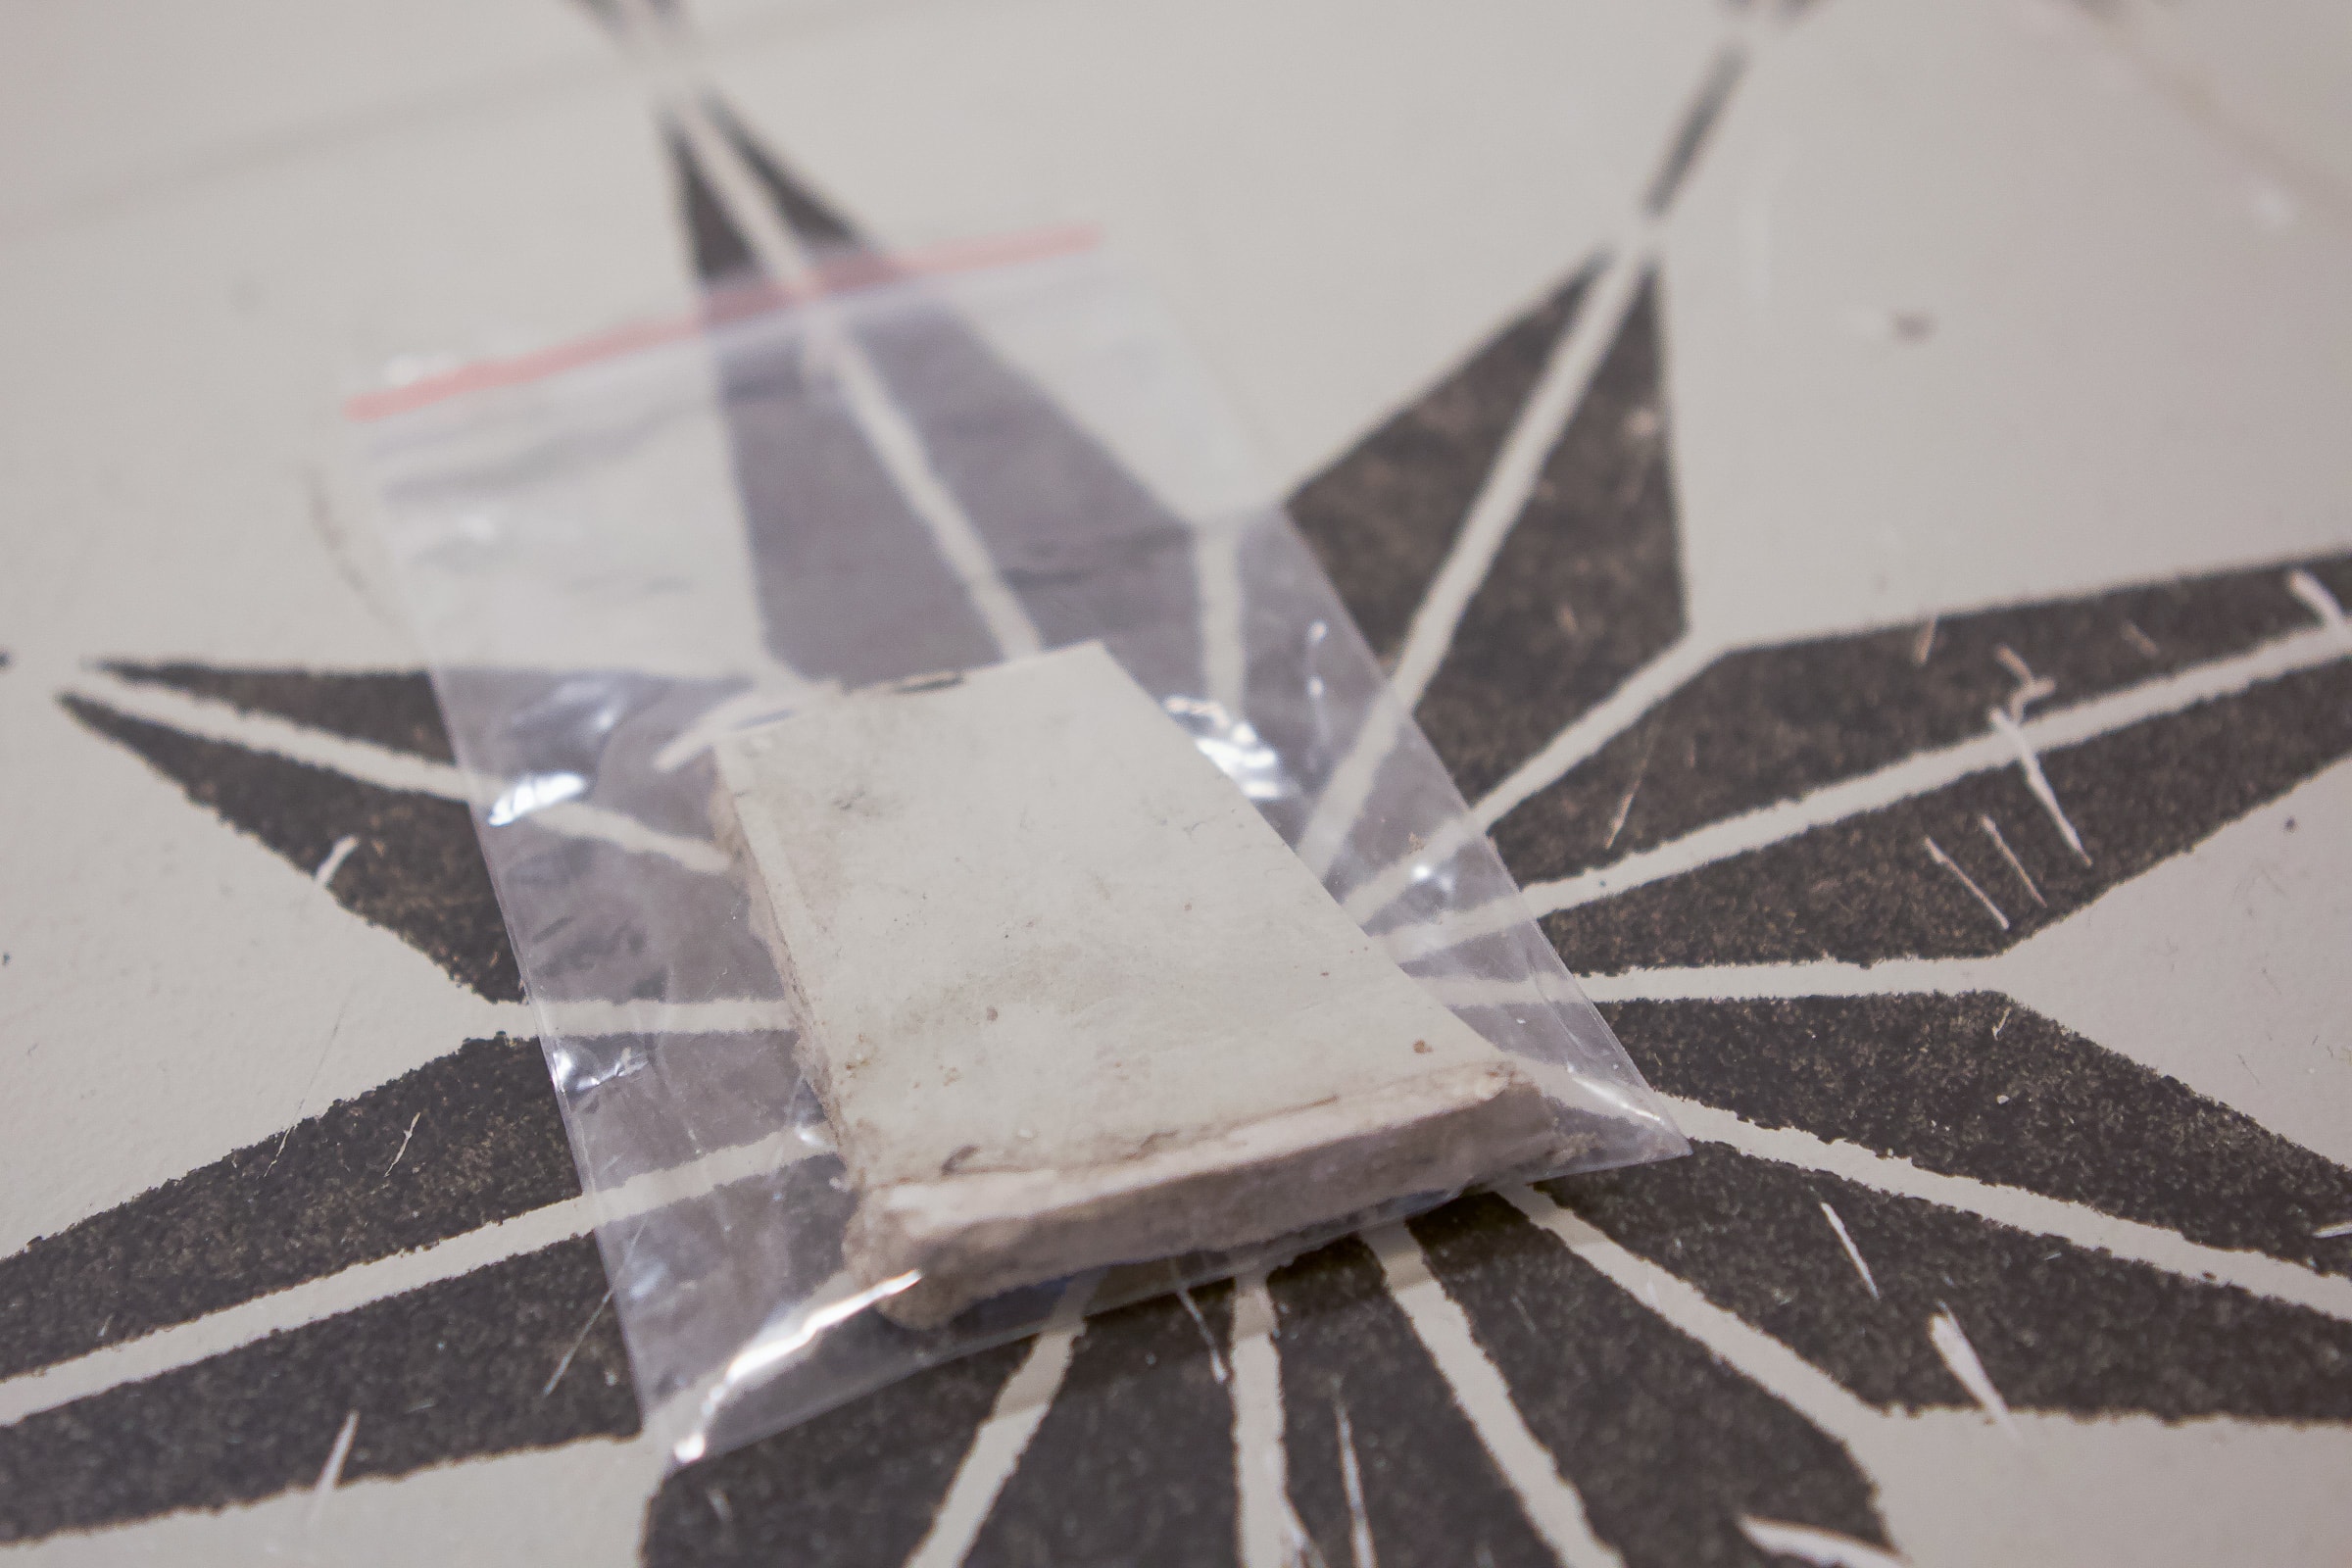
Before I start demoing the space, I wanted to test the flooring for asbestos to be extra careful! Our house was built in 1921 and asbestos was commonly used in homes between the 1920s and the 1970s. Our bathroom floor tiles are a 12 by 12 size, which isn’t common for asbestos floor tile, but better safe than sorry.

I bought this testing kit online and snapped off a bit of the floor tile to send into their lab.

Within a week I got the news – no asbestos! Now, I can start demoing the space without fear that I’ll be kicking up anything harmful.
What’s Next?
Demo is first on the list! I’ll be sharing that process next week. I’m excited to get my hands dirty and get this project going…
Casey


