My Solution for Our “Window to Nowhere”
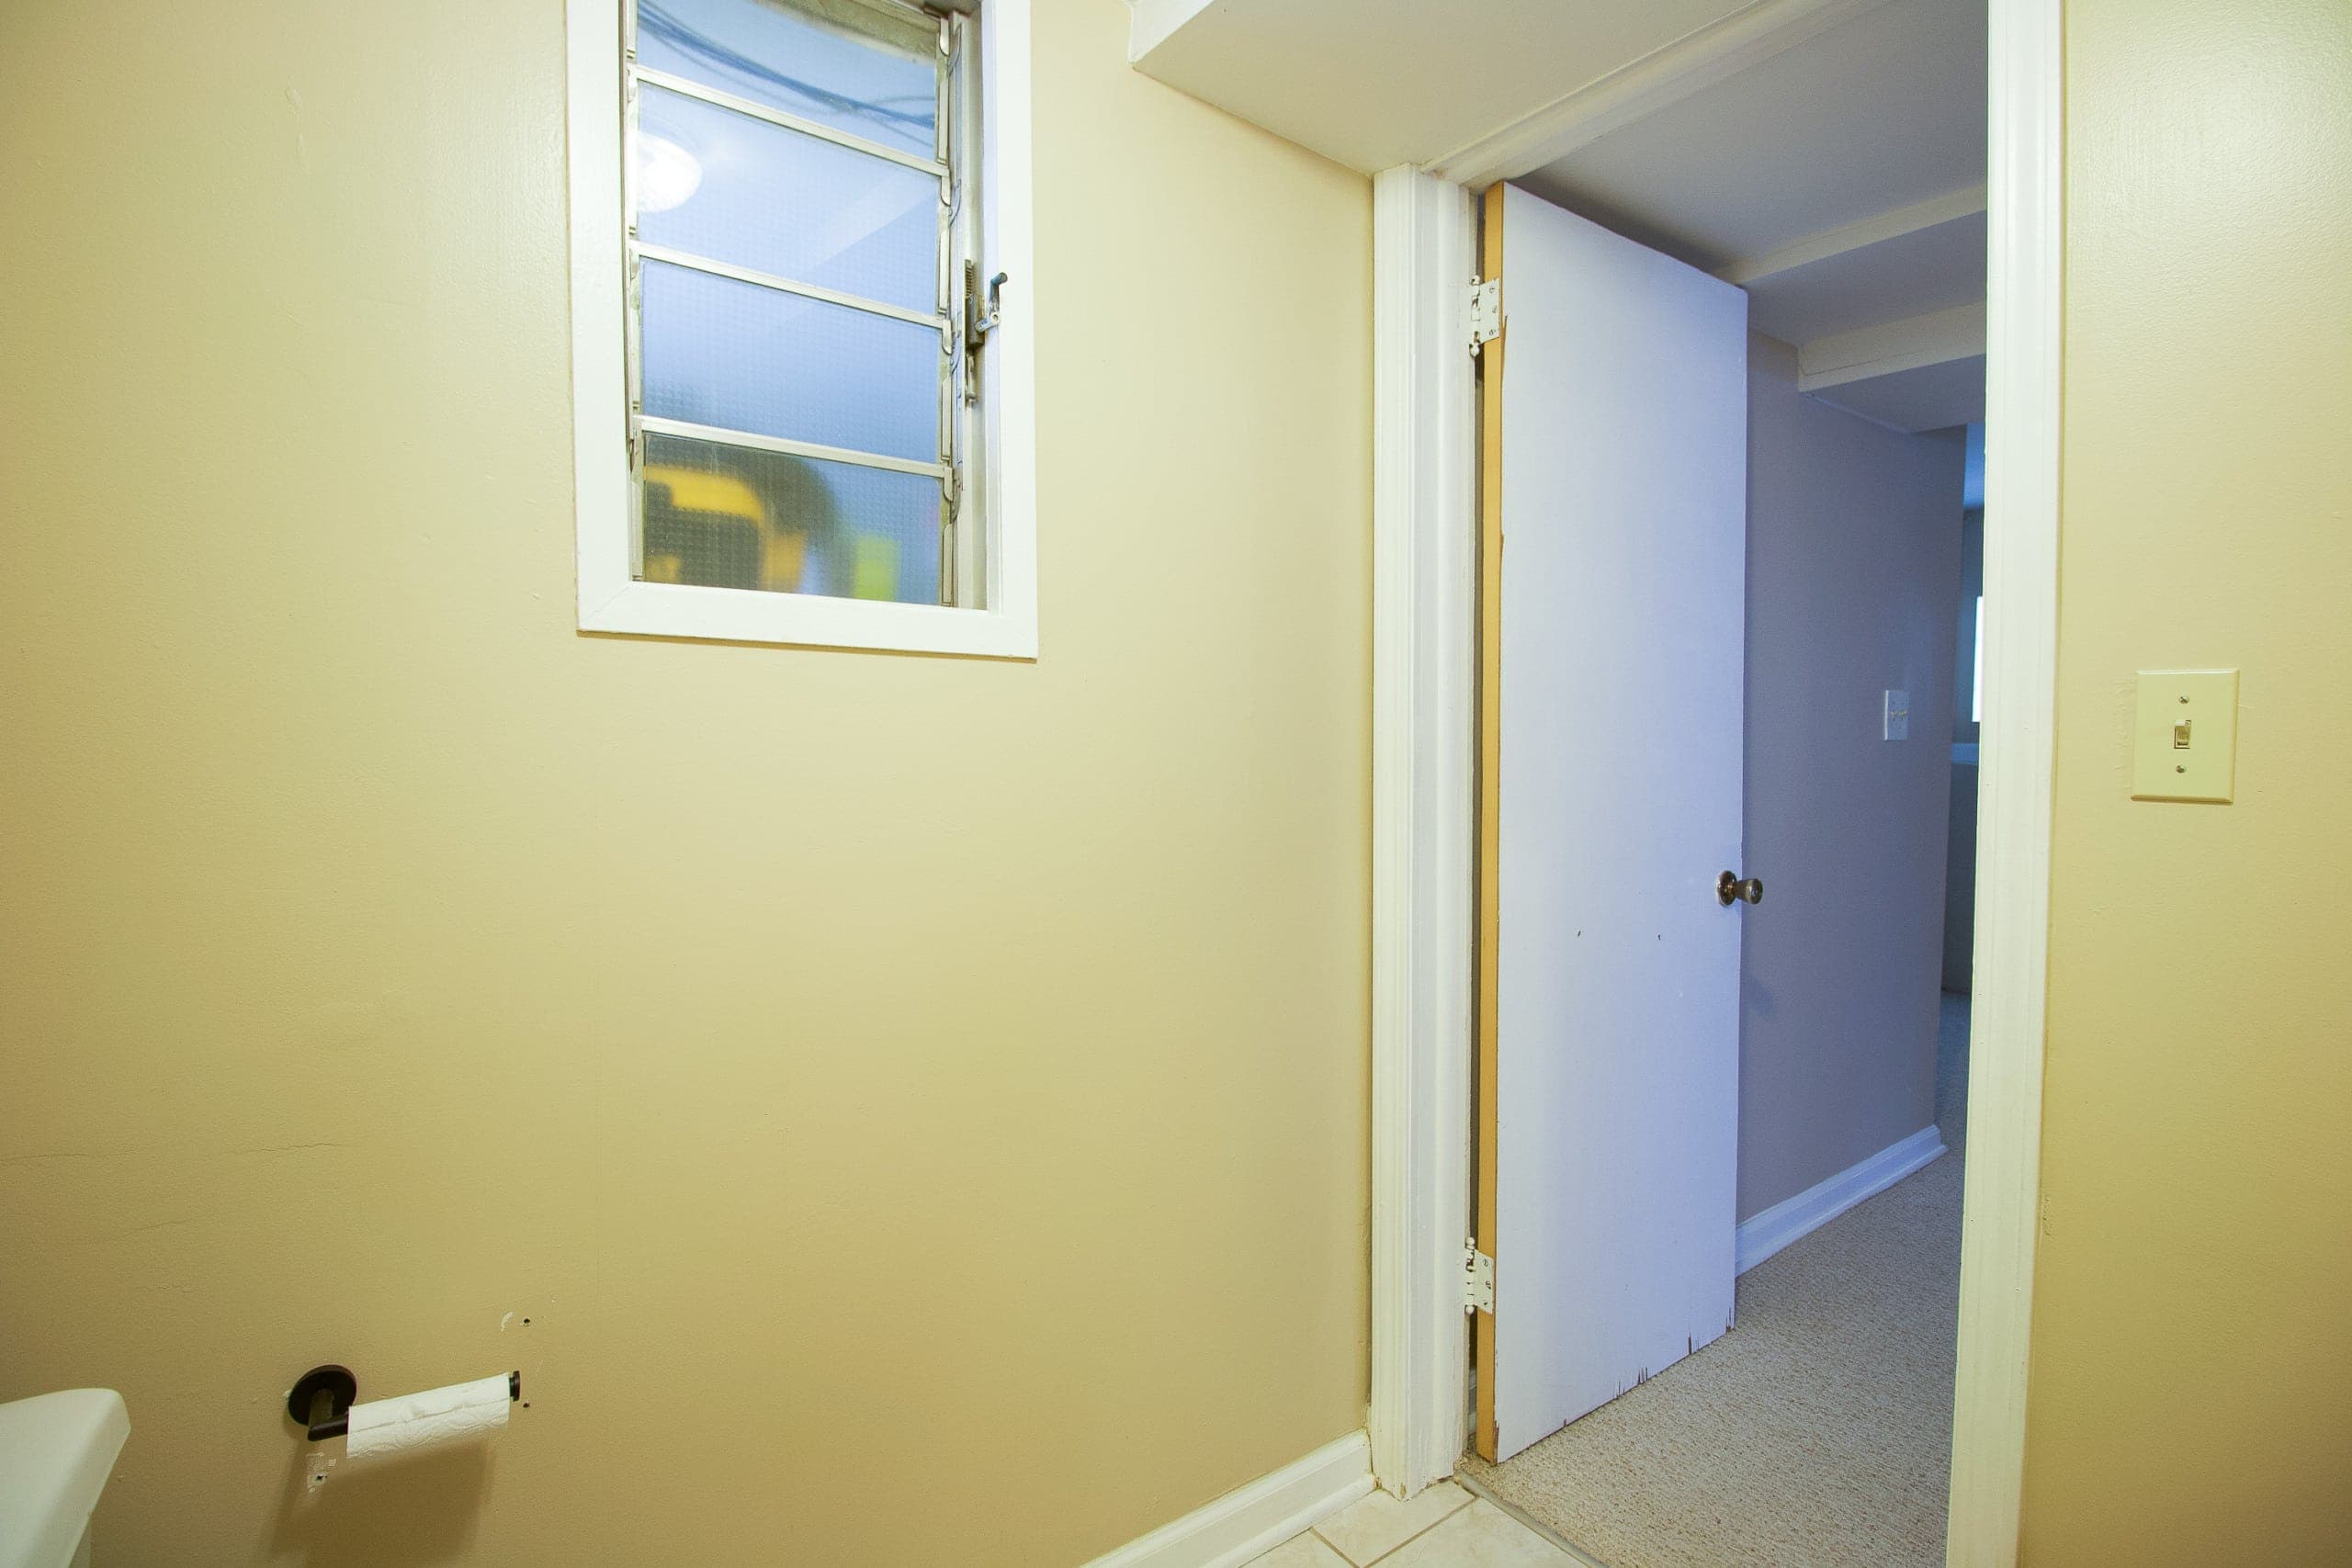
The “window to nowhere” in our basement bathroom has been on my mind for the past two months. I’ve stared and stared at that space, totally unsure as to what I should do with it. Should I just drywall right over it? Replace the window? Hang art over it to hide it? I went back and forth on so many ideas and loved reading all of your suggestions over in the comments section of this Instagram post and in my DMs. You guys are so creative!
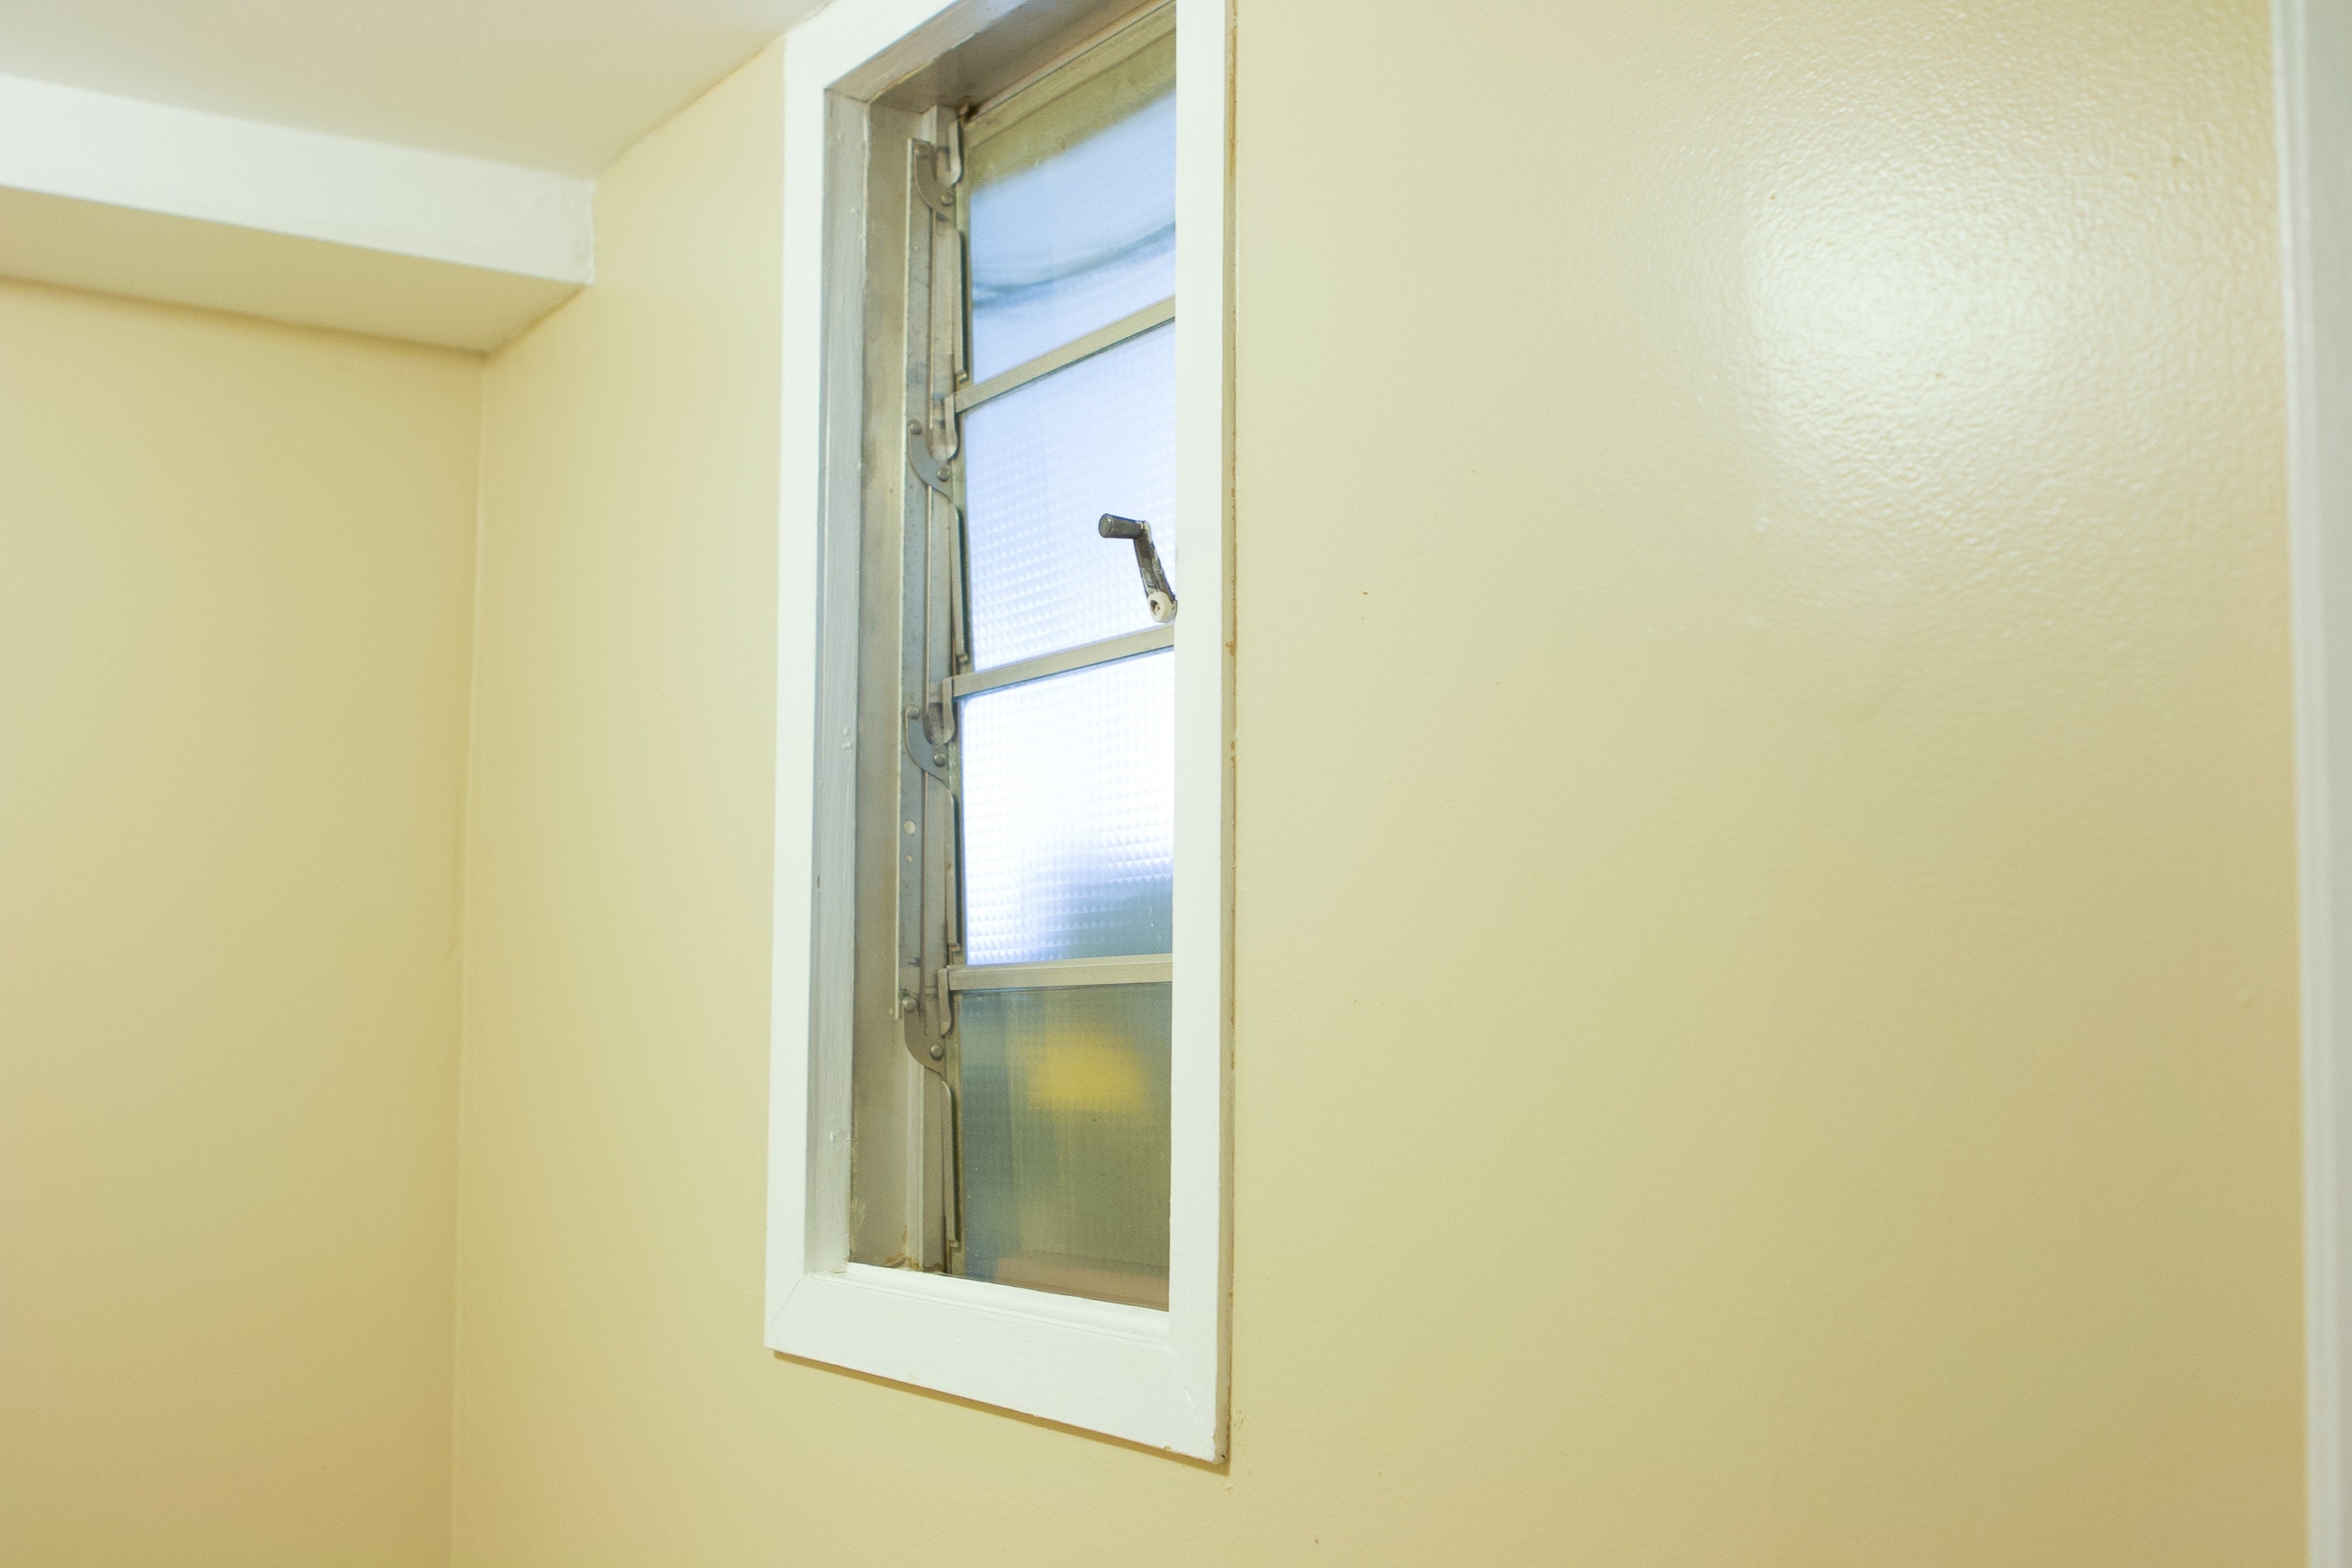 A few readers recommended keeping the window so I could get some natural light in the room. On the other side of this window is our storage unit and there actually is a tiny bit of natural light coming in from glass block windows in there. While I’m all about natural light, I really didn’t want any view of the storage room on the other side, even if it was blurred out with the right glass. So that idea was out the window. (Ha, bad pun, I know!)
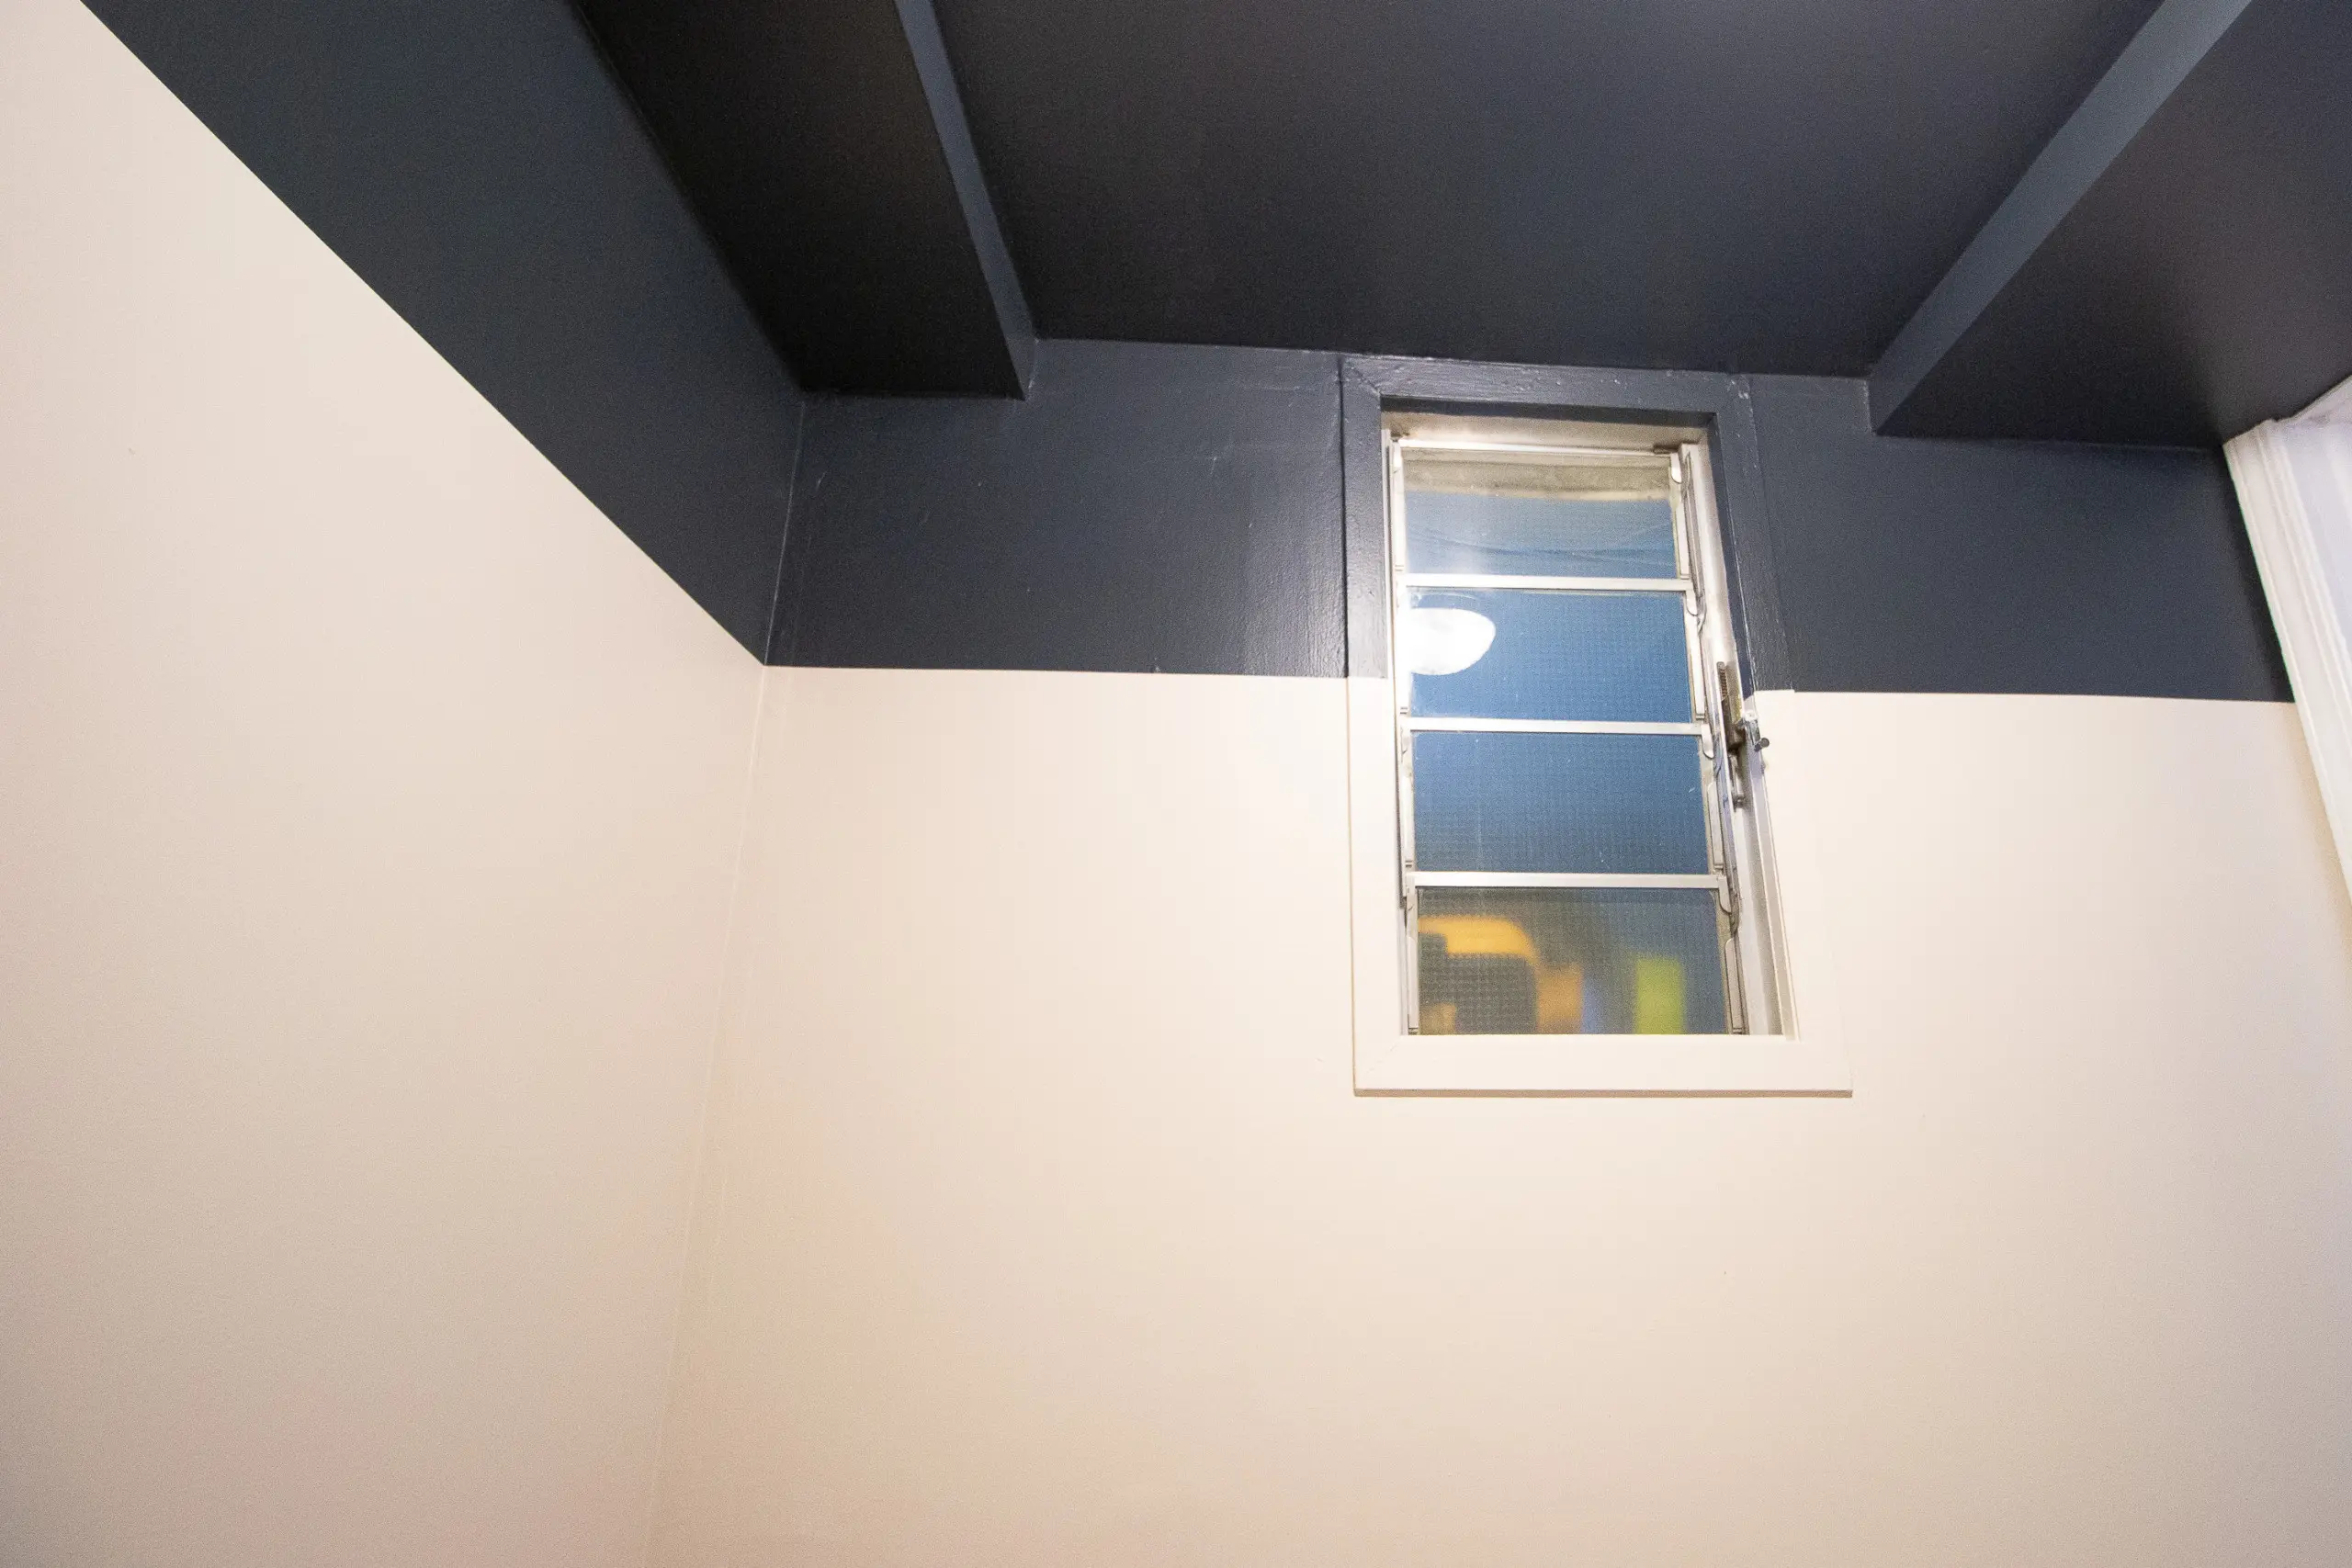
I also considered just drywalling right over it and making it a normal wall. To be honest, I don’t really know how to patch drywall where it would look seamless and good. I suppose I could have had my contractor do it while he is working away in the kitchen, but I wanted to try to keep this project as budget-friendly as possible.
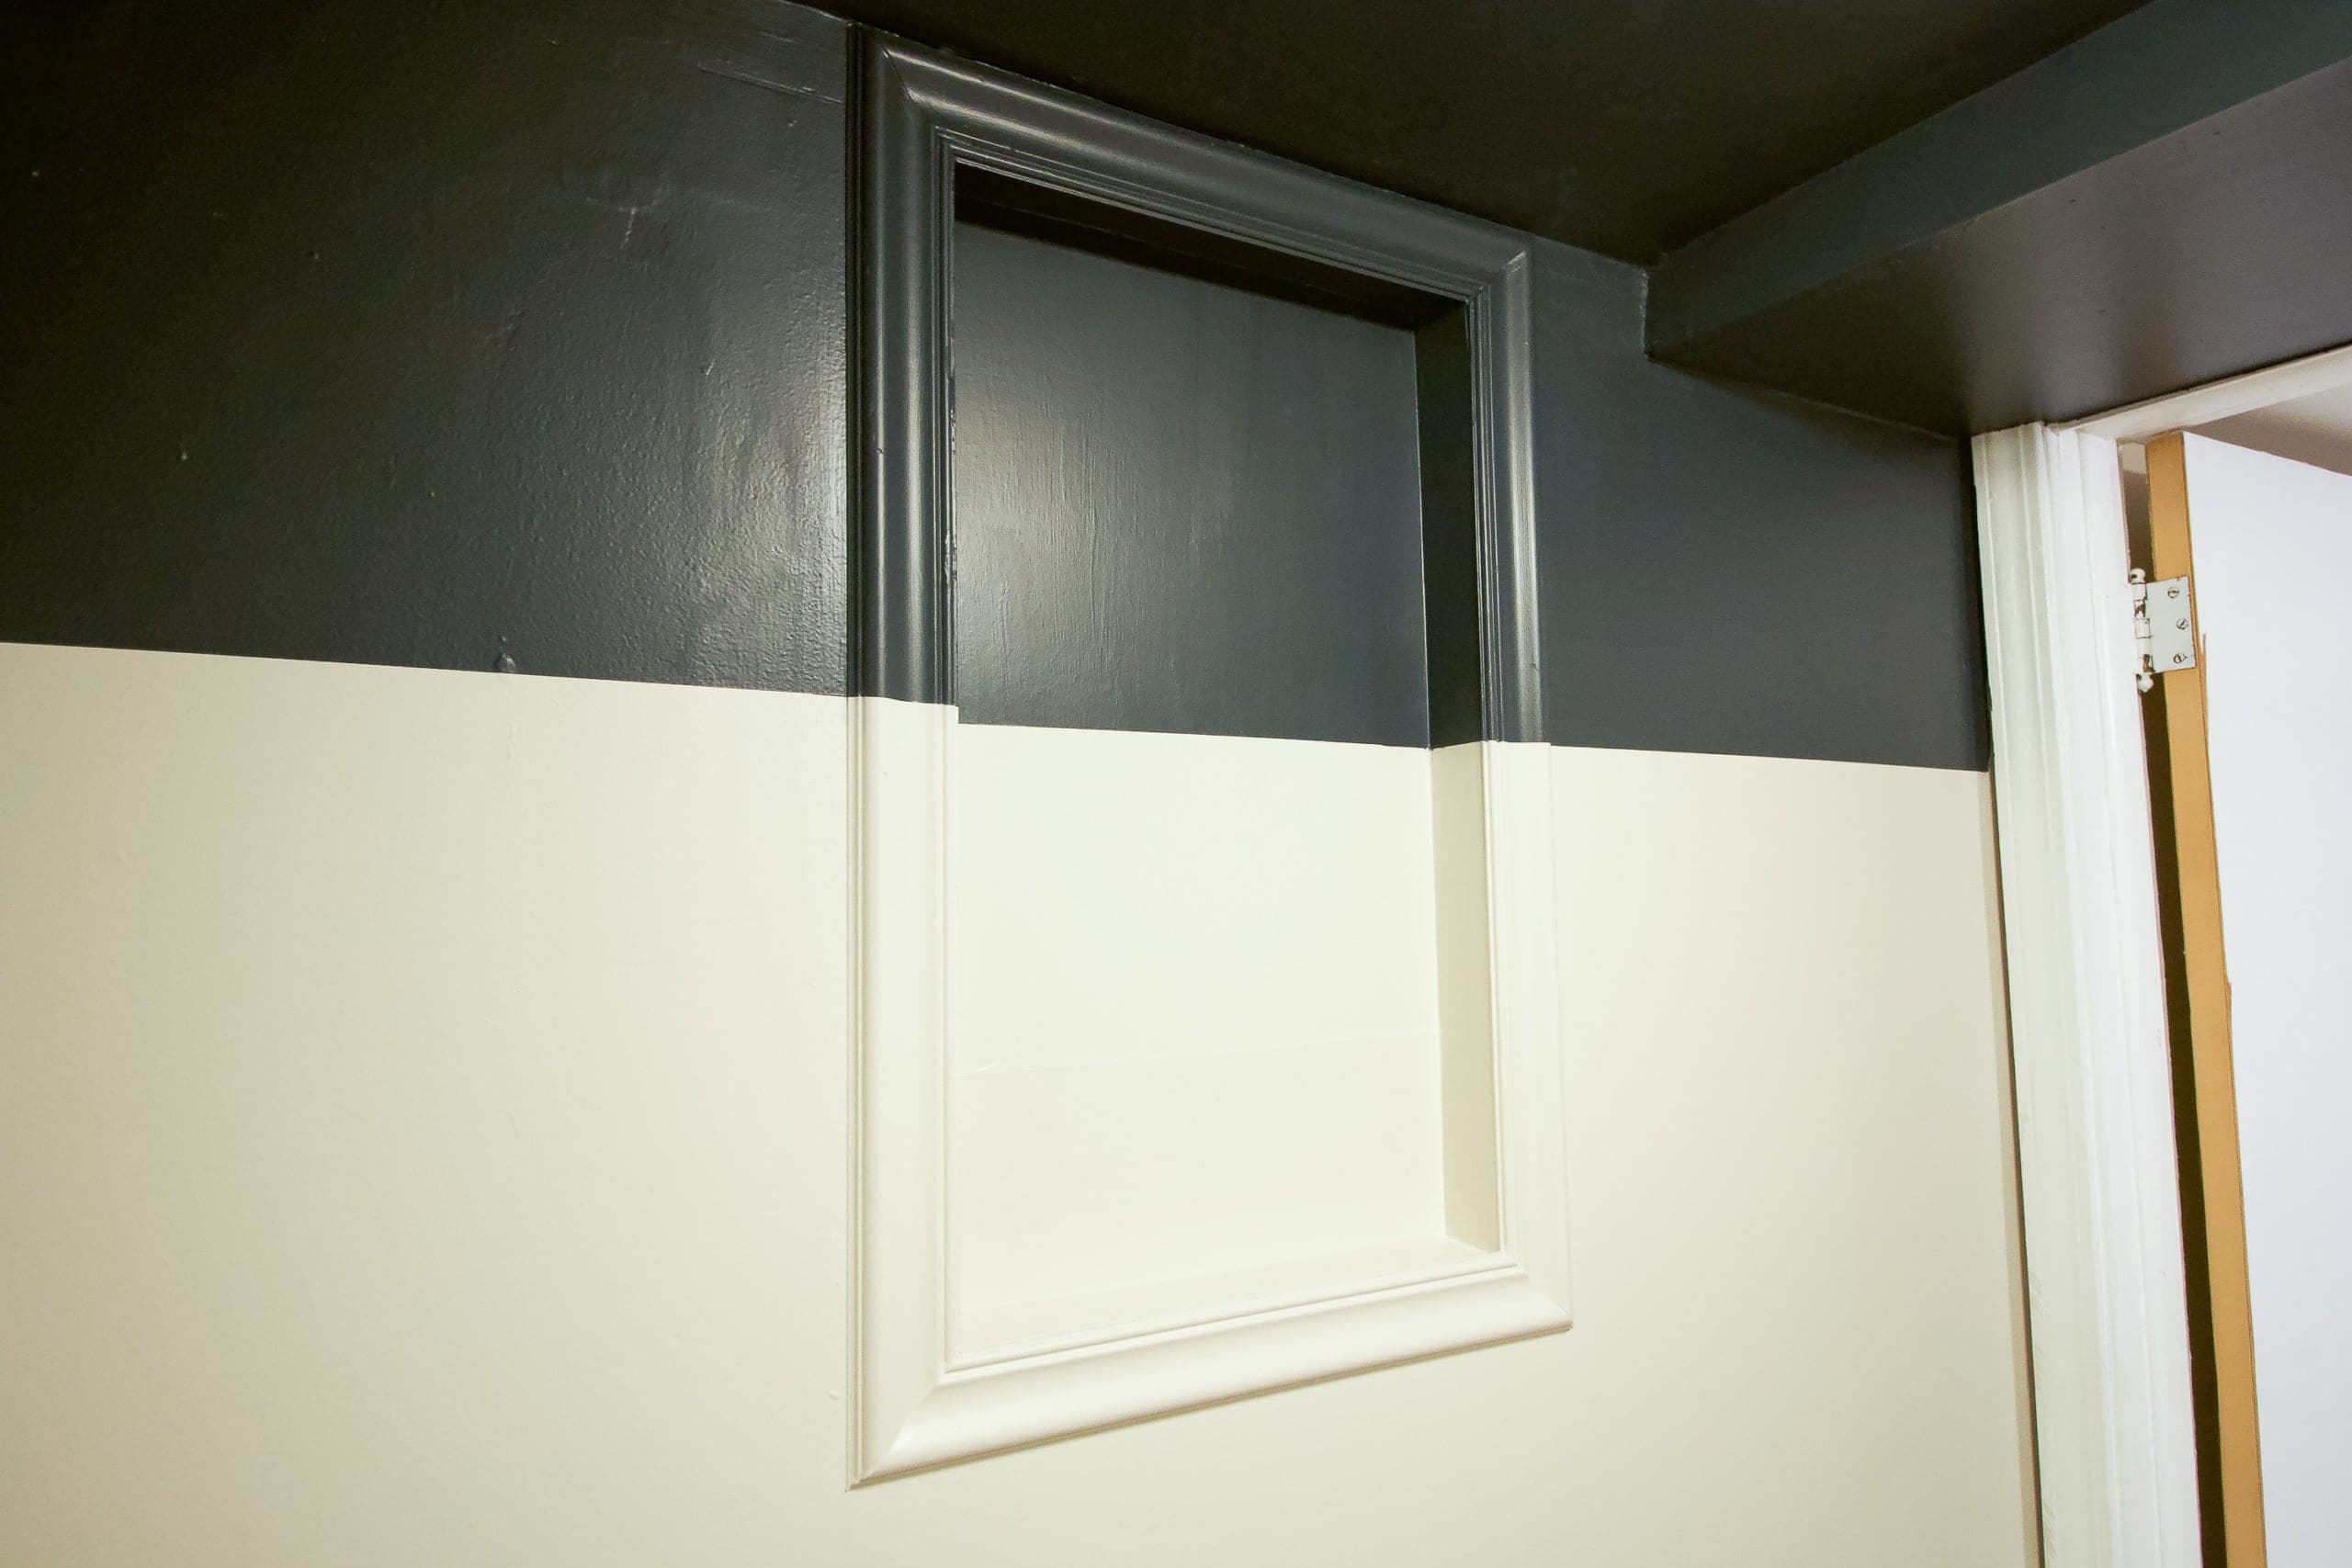
Another idea was to just cover the window with a large art canvas. This was tempting because it would be the easiest of the bunch, but the trim of the window goes all the way to the ceiling and I thought it might be weird if the art was hung so high up. That idea came off the list.
Finally, I just decided that I needed to stop sitting around thinking and just take the dang window out. That way, I would know what I was working with and I could make a plan from there.
Removing the Window
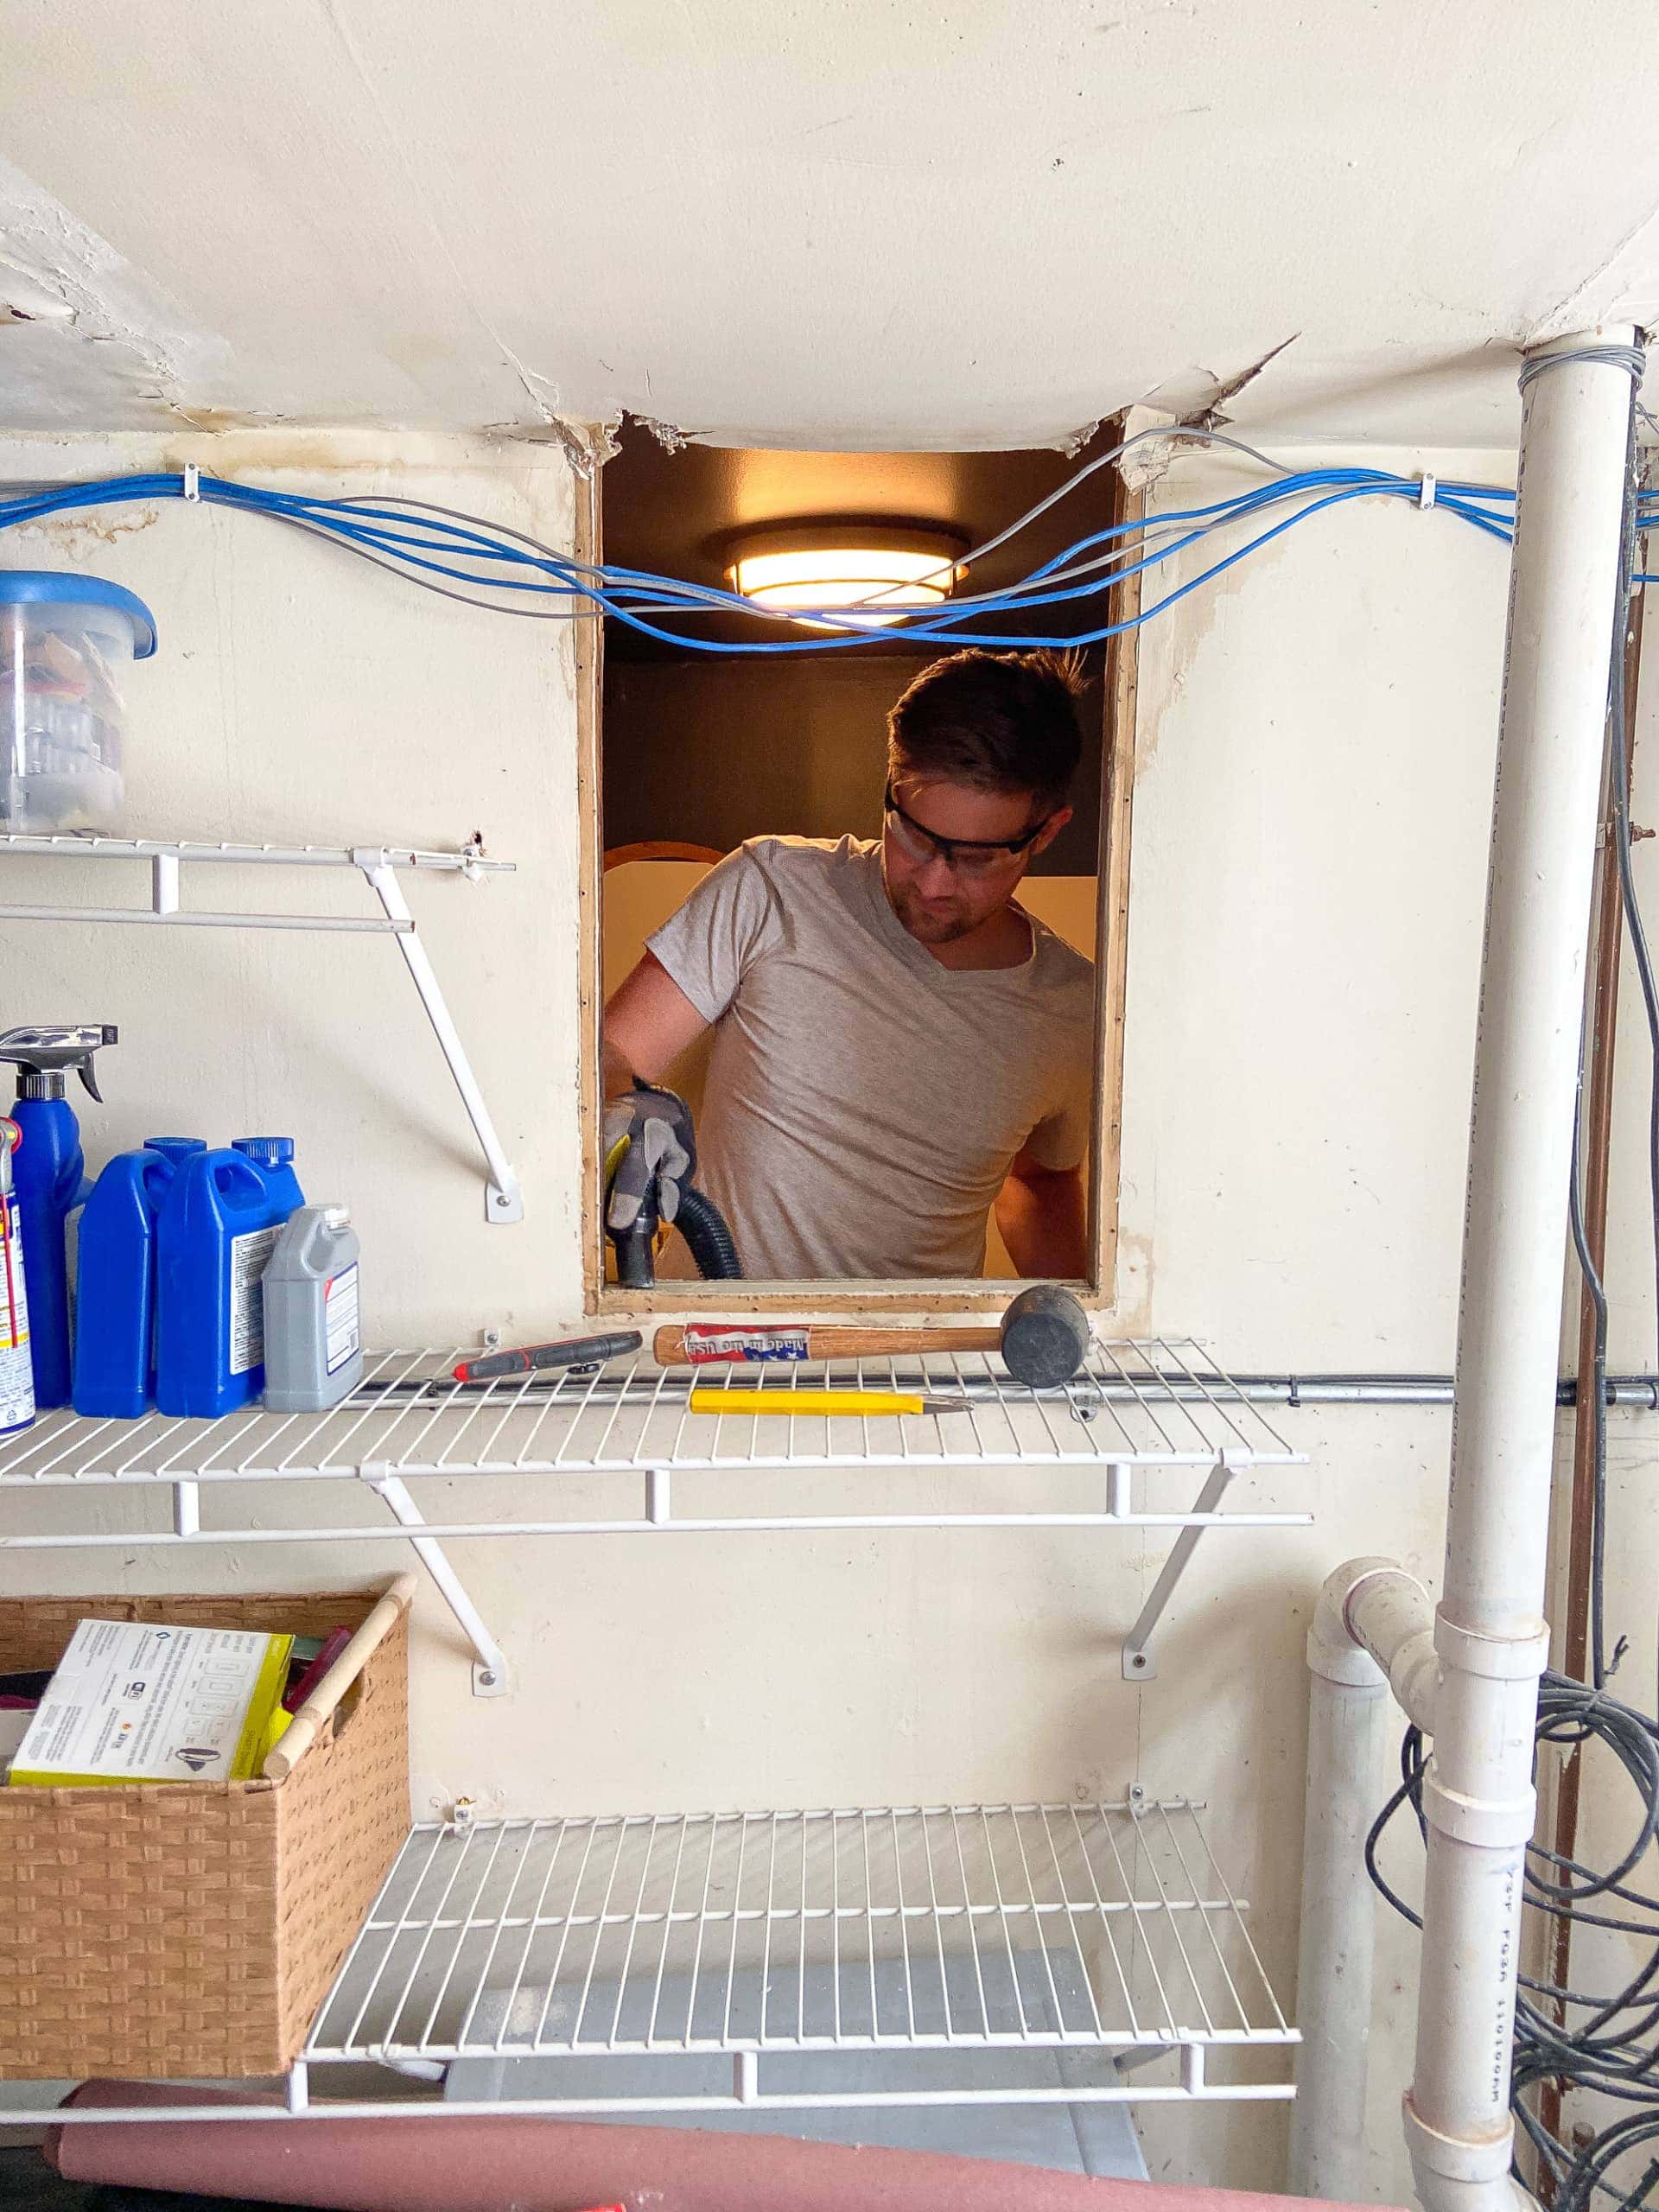
After close examination, I realized that the window was held in place with some screws on the other side of the window. I simply removed the screws and tried to wiggle the window on out. It didn’t budge. I recruited Finn, and together (with gloves and eyewear), we managed to push and pull that old window on out.  I was terrified that we might break the window and glass would go everywhere, but it was totally okay.
Gross Ceiling

As I mentioned, the other side of the window is our storage room and like the rest of the house, it is 100 years old. The ceiling in there is lower and damaged and when we removed the window, we realized you can see right into the gross ceiling. There are also wires everywhere from running internet throughout the house, so that was another pretty view from the bathroom. 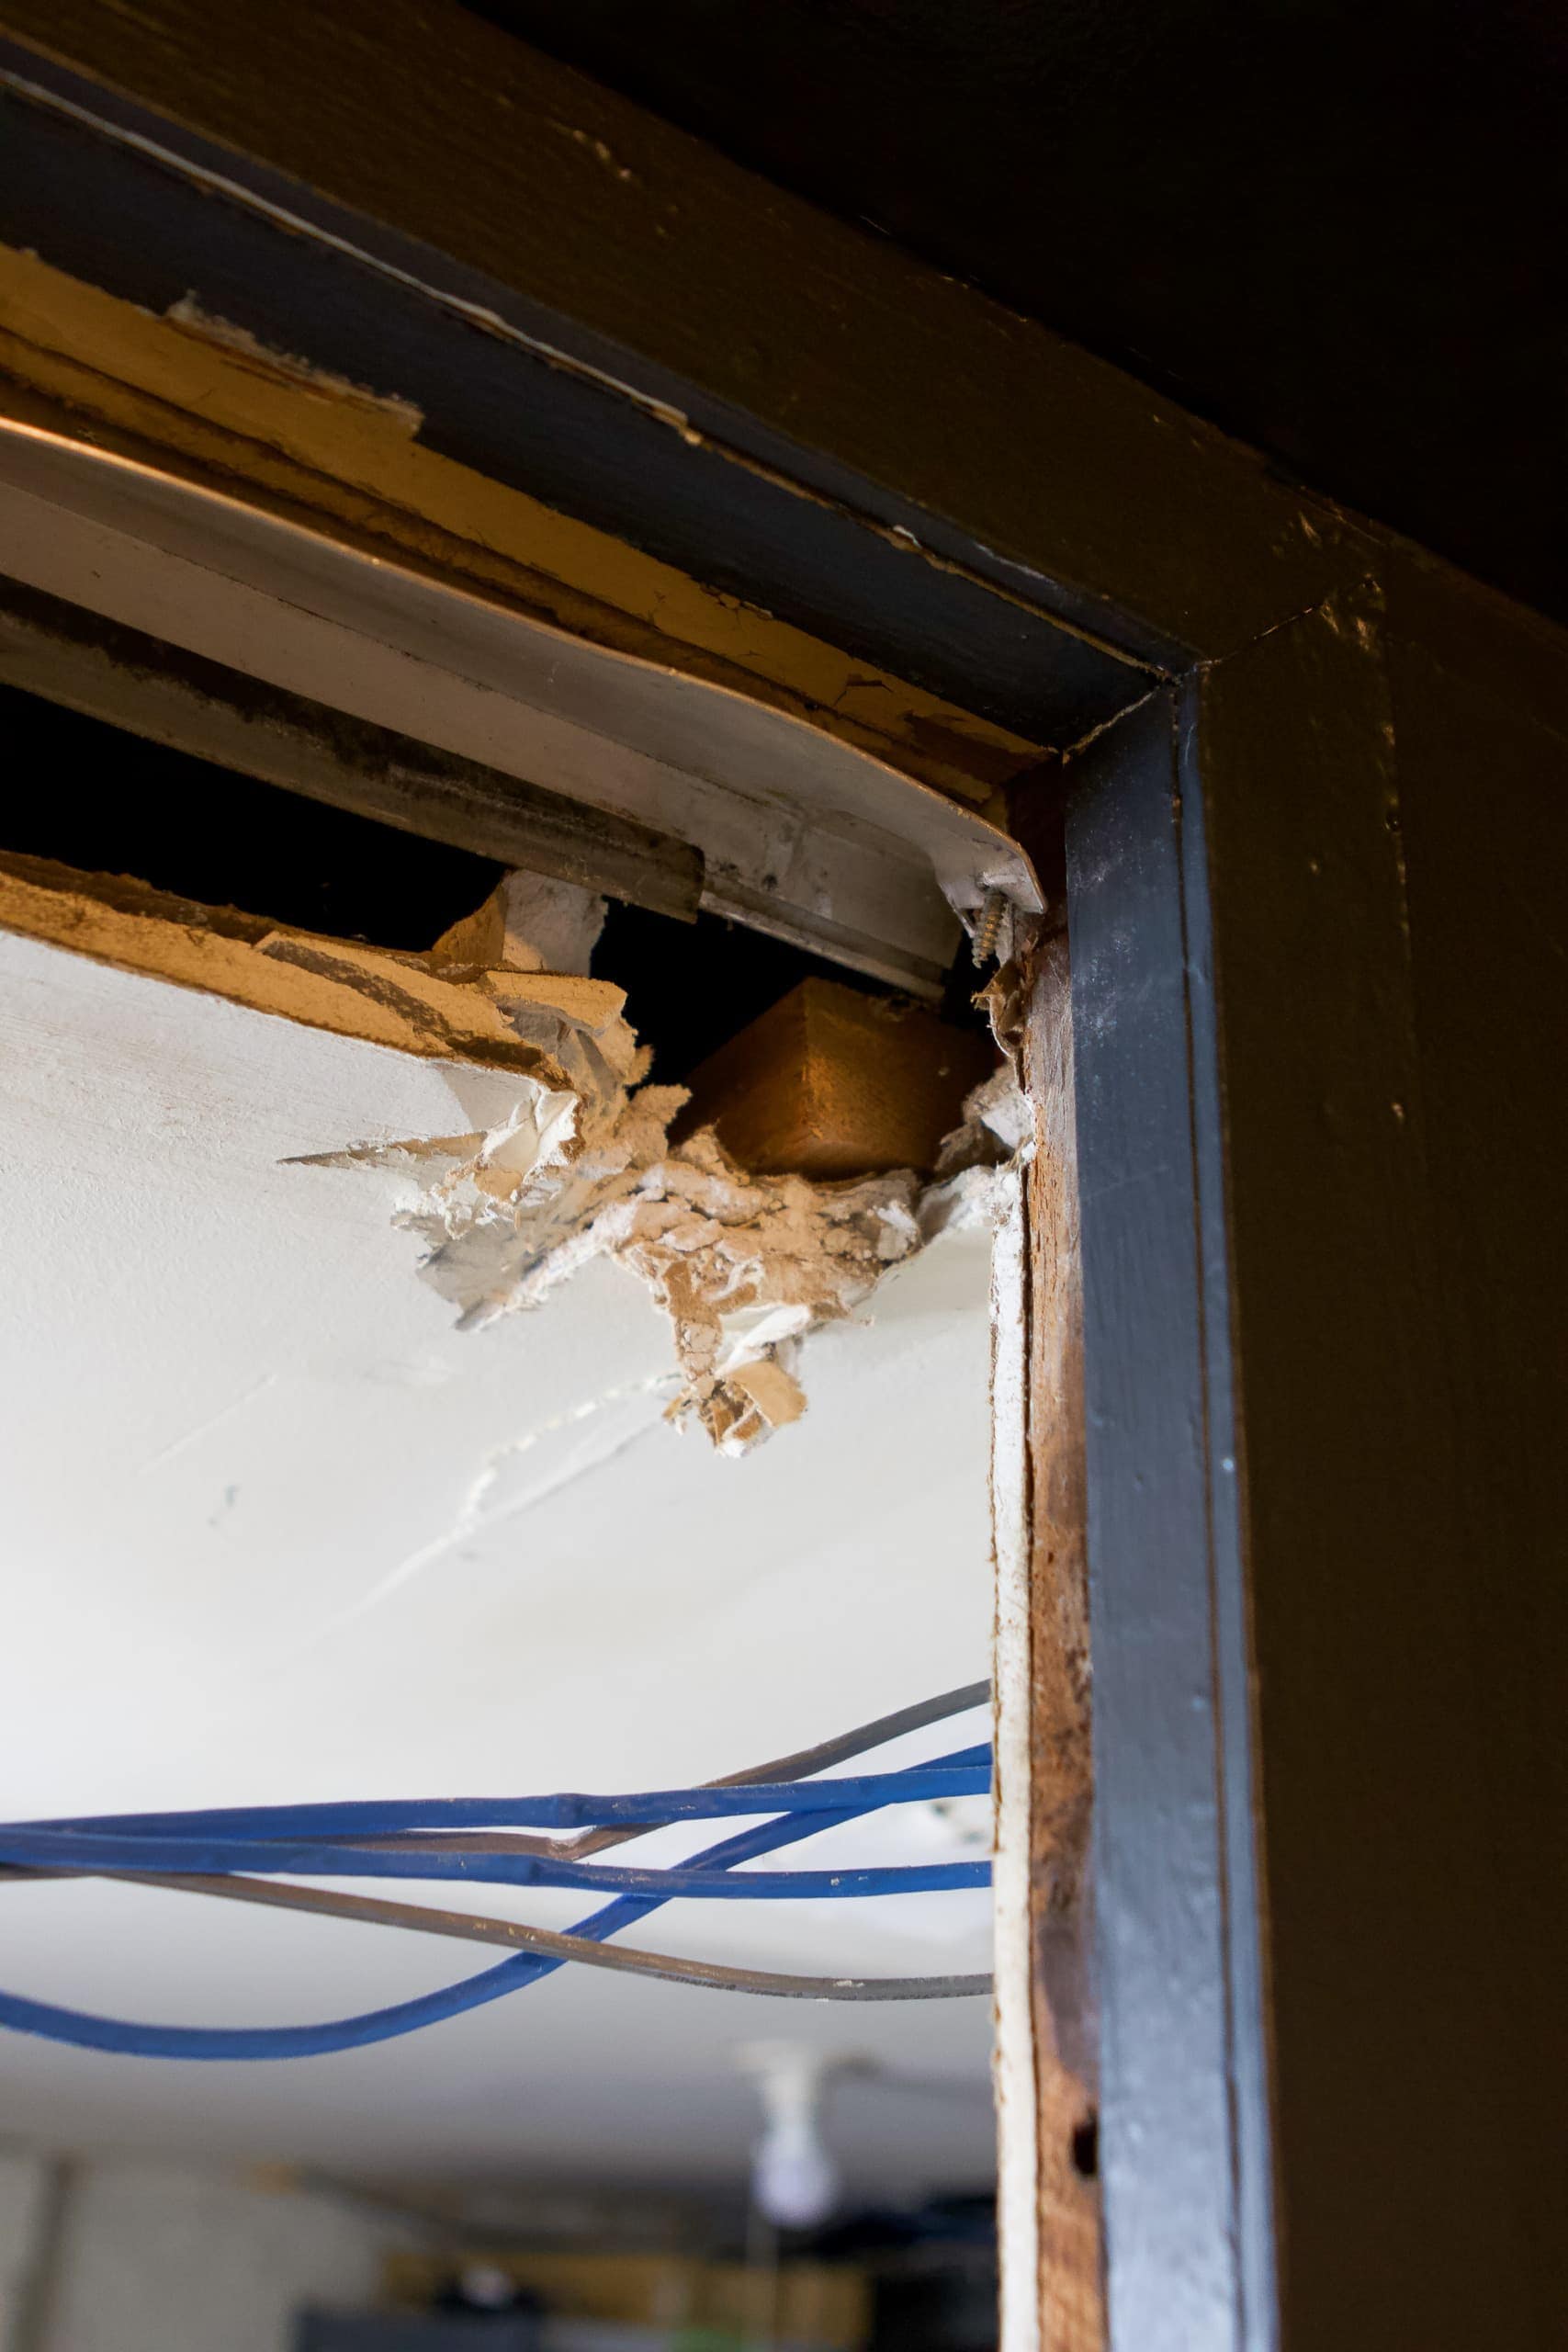
After seeing this, I knew that I had to cover this window hole so I couldn’t see into this creepy space. (Sorry, storage room. You are very functional, but not very pretty.) We also went ahead and removed the trim around the window before building it all back up.
Drywall It Up
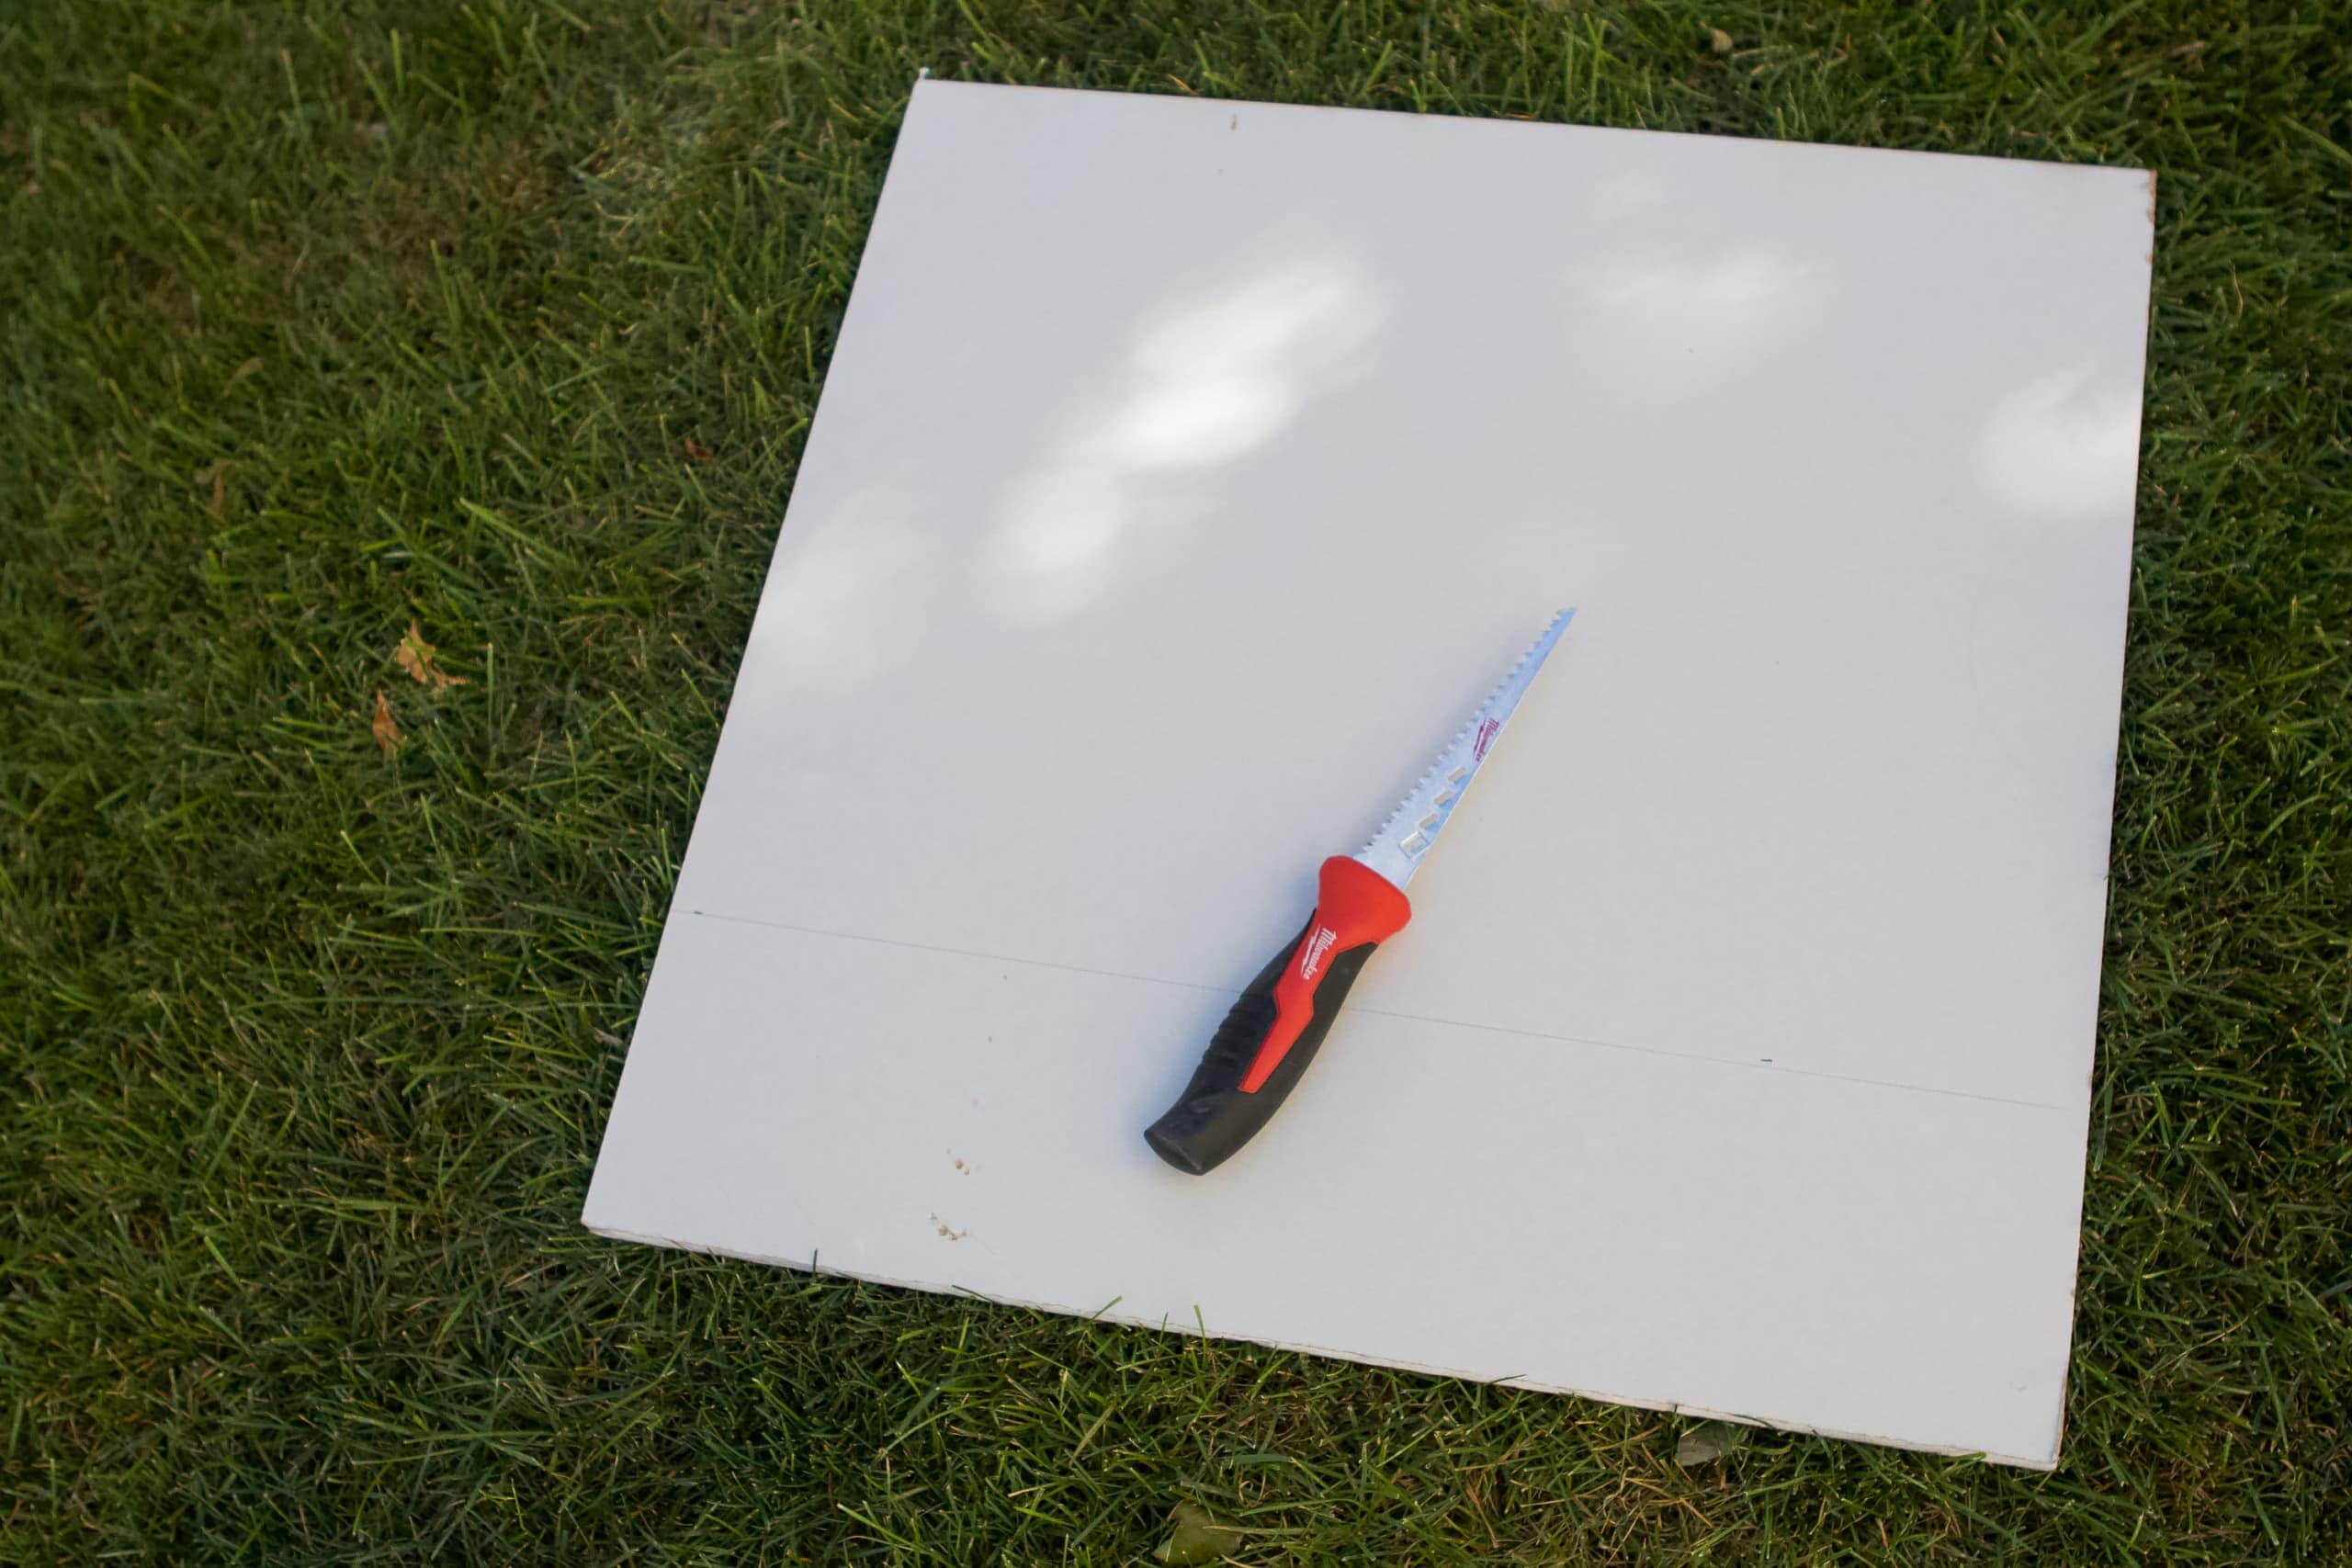
I had some leftover drywall from this blog post about using wall anchors, and I decided to hang it on the back of the wall. I’ve never used drywall for a project before, but it wasn’t too bad, just messy. I used a drywall cutting knife to cut it a few inches bigger than the window and then I used drywall screws to attach it from the storage unit side of the hole.  Because my drywall was only 2 feet by 2 feet, I had to use two pieces with a seam down the middle.
Free Wood & Trim
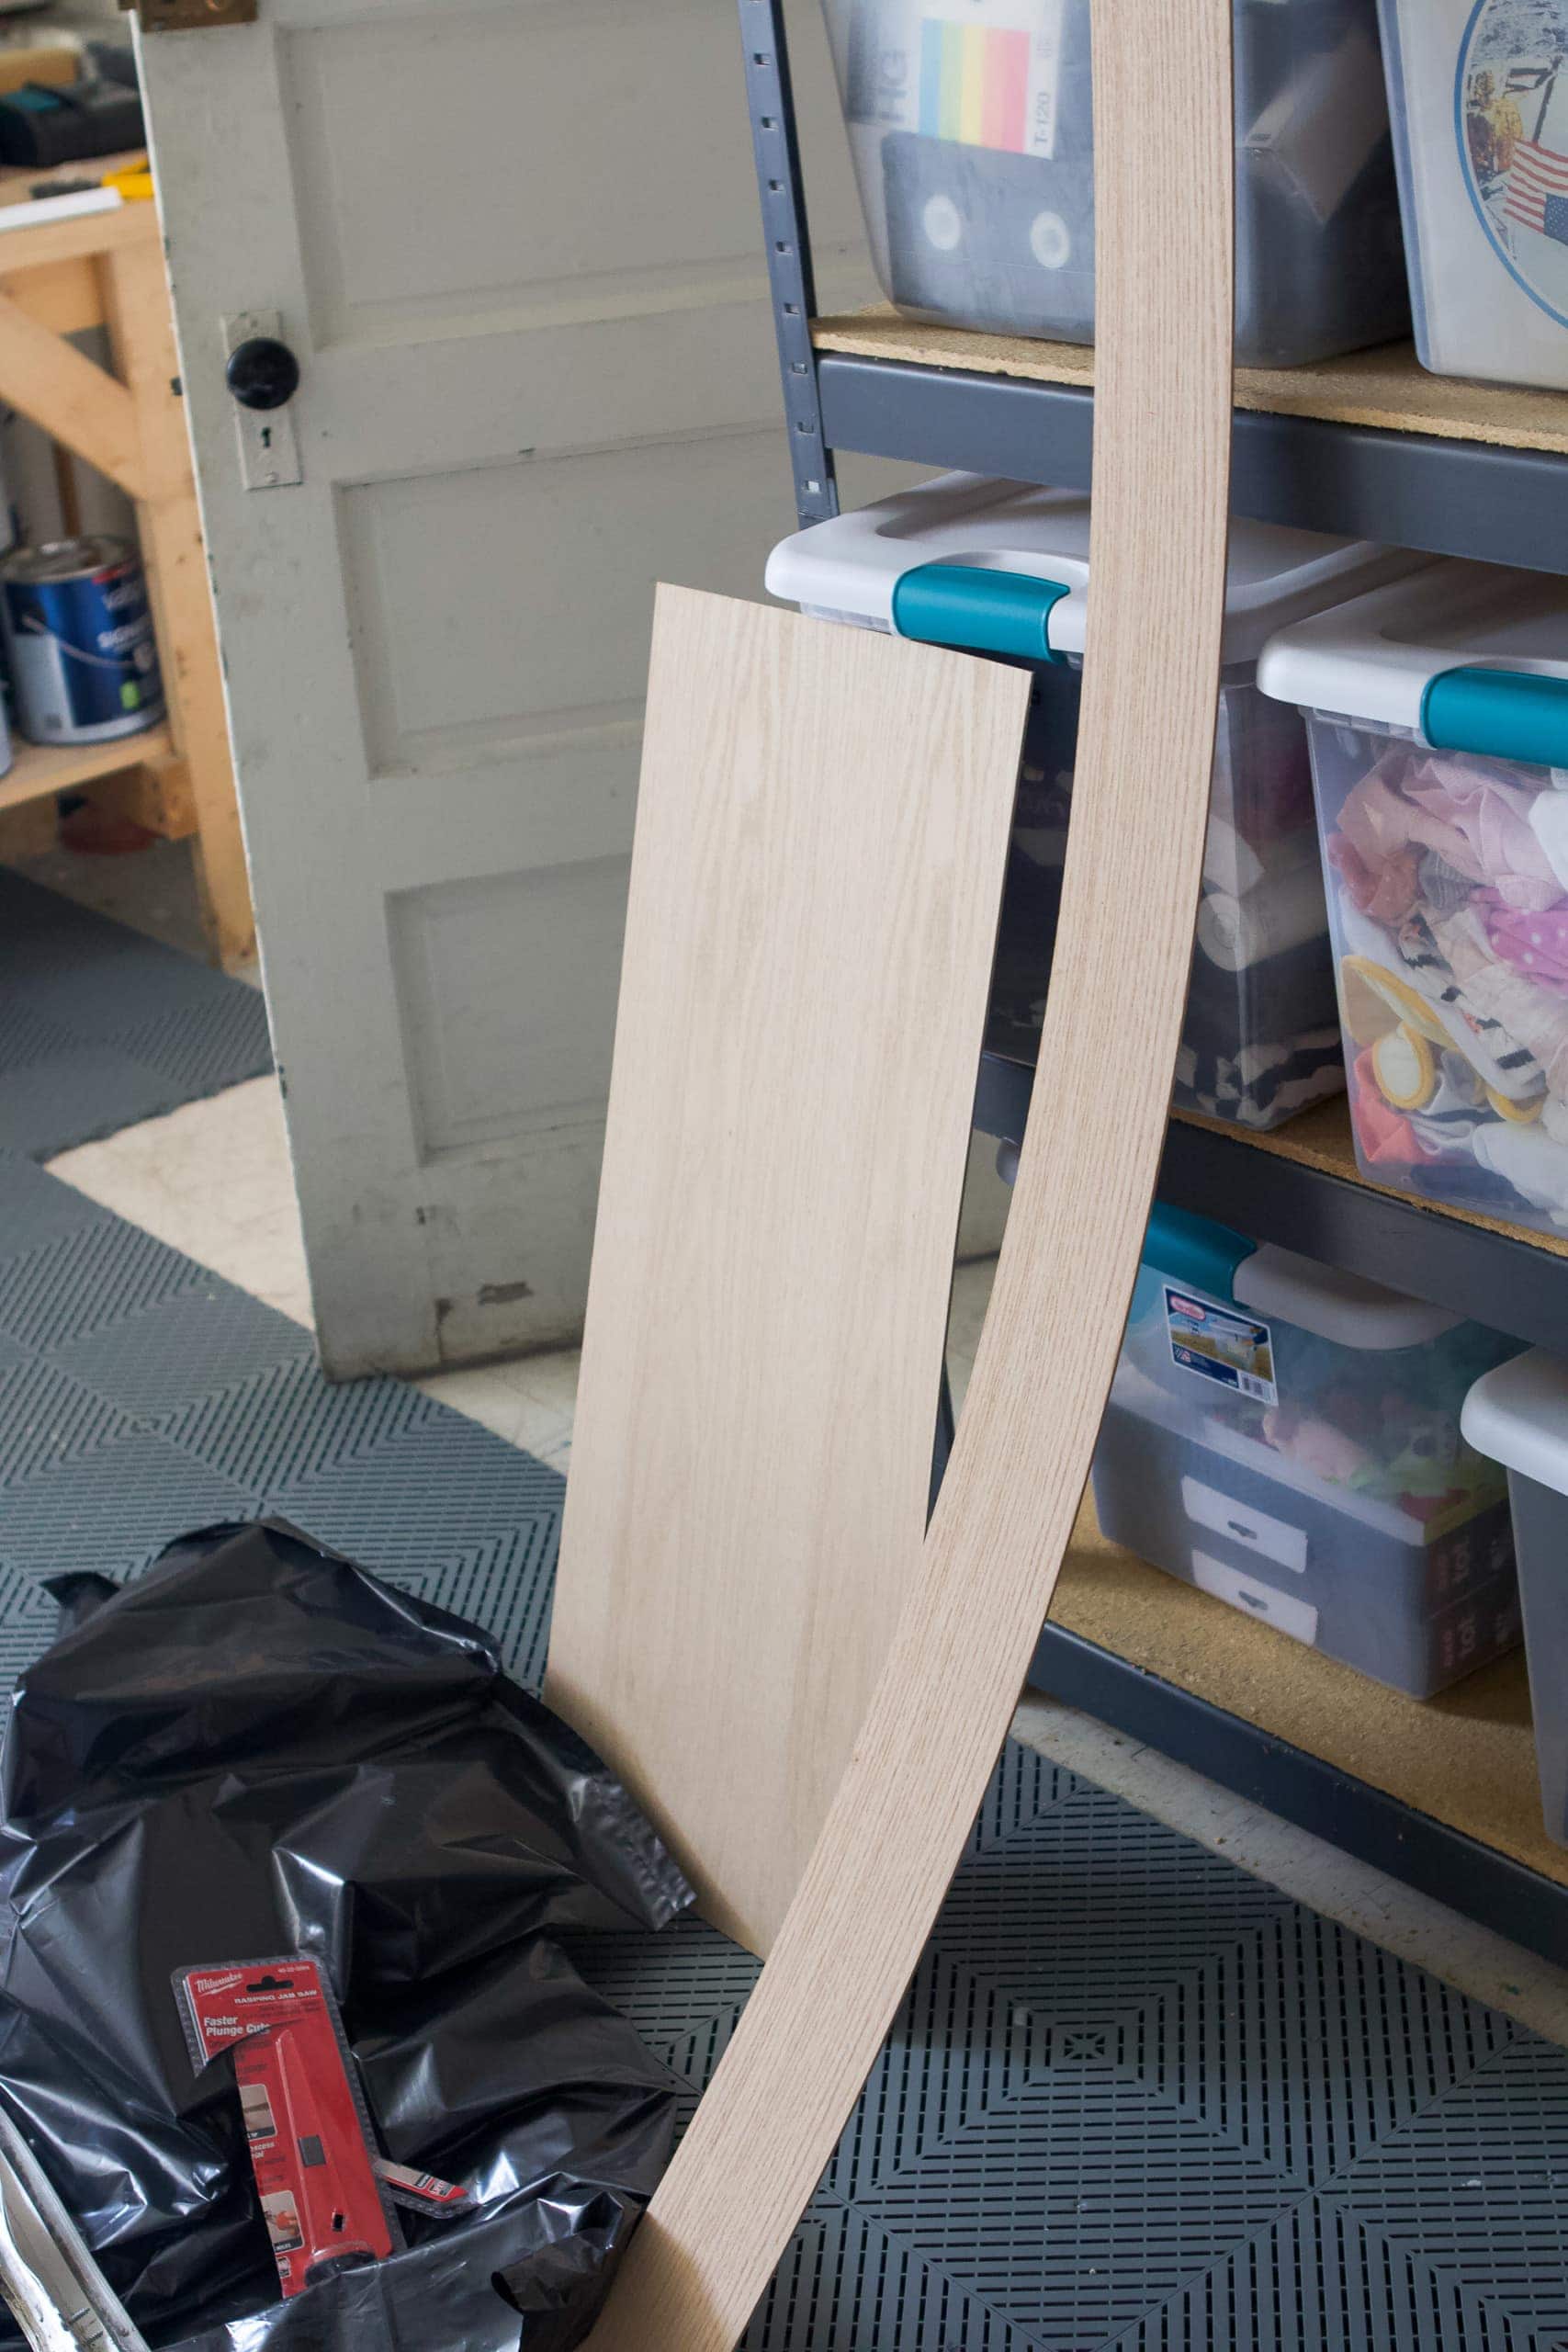
In an effort to make this project as budget-friendly and close to free as possible, we scrounged through our discarded wood supplies to see what we could find. We ended up finding extra filler pieces from our office built-ins project, along with some chair rail from Rory’s nursery project. The filler was perfect because it was thin enough to create a new box on the inside of the window, without being too bulky. 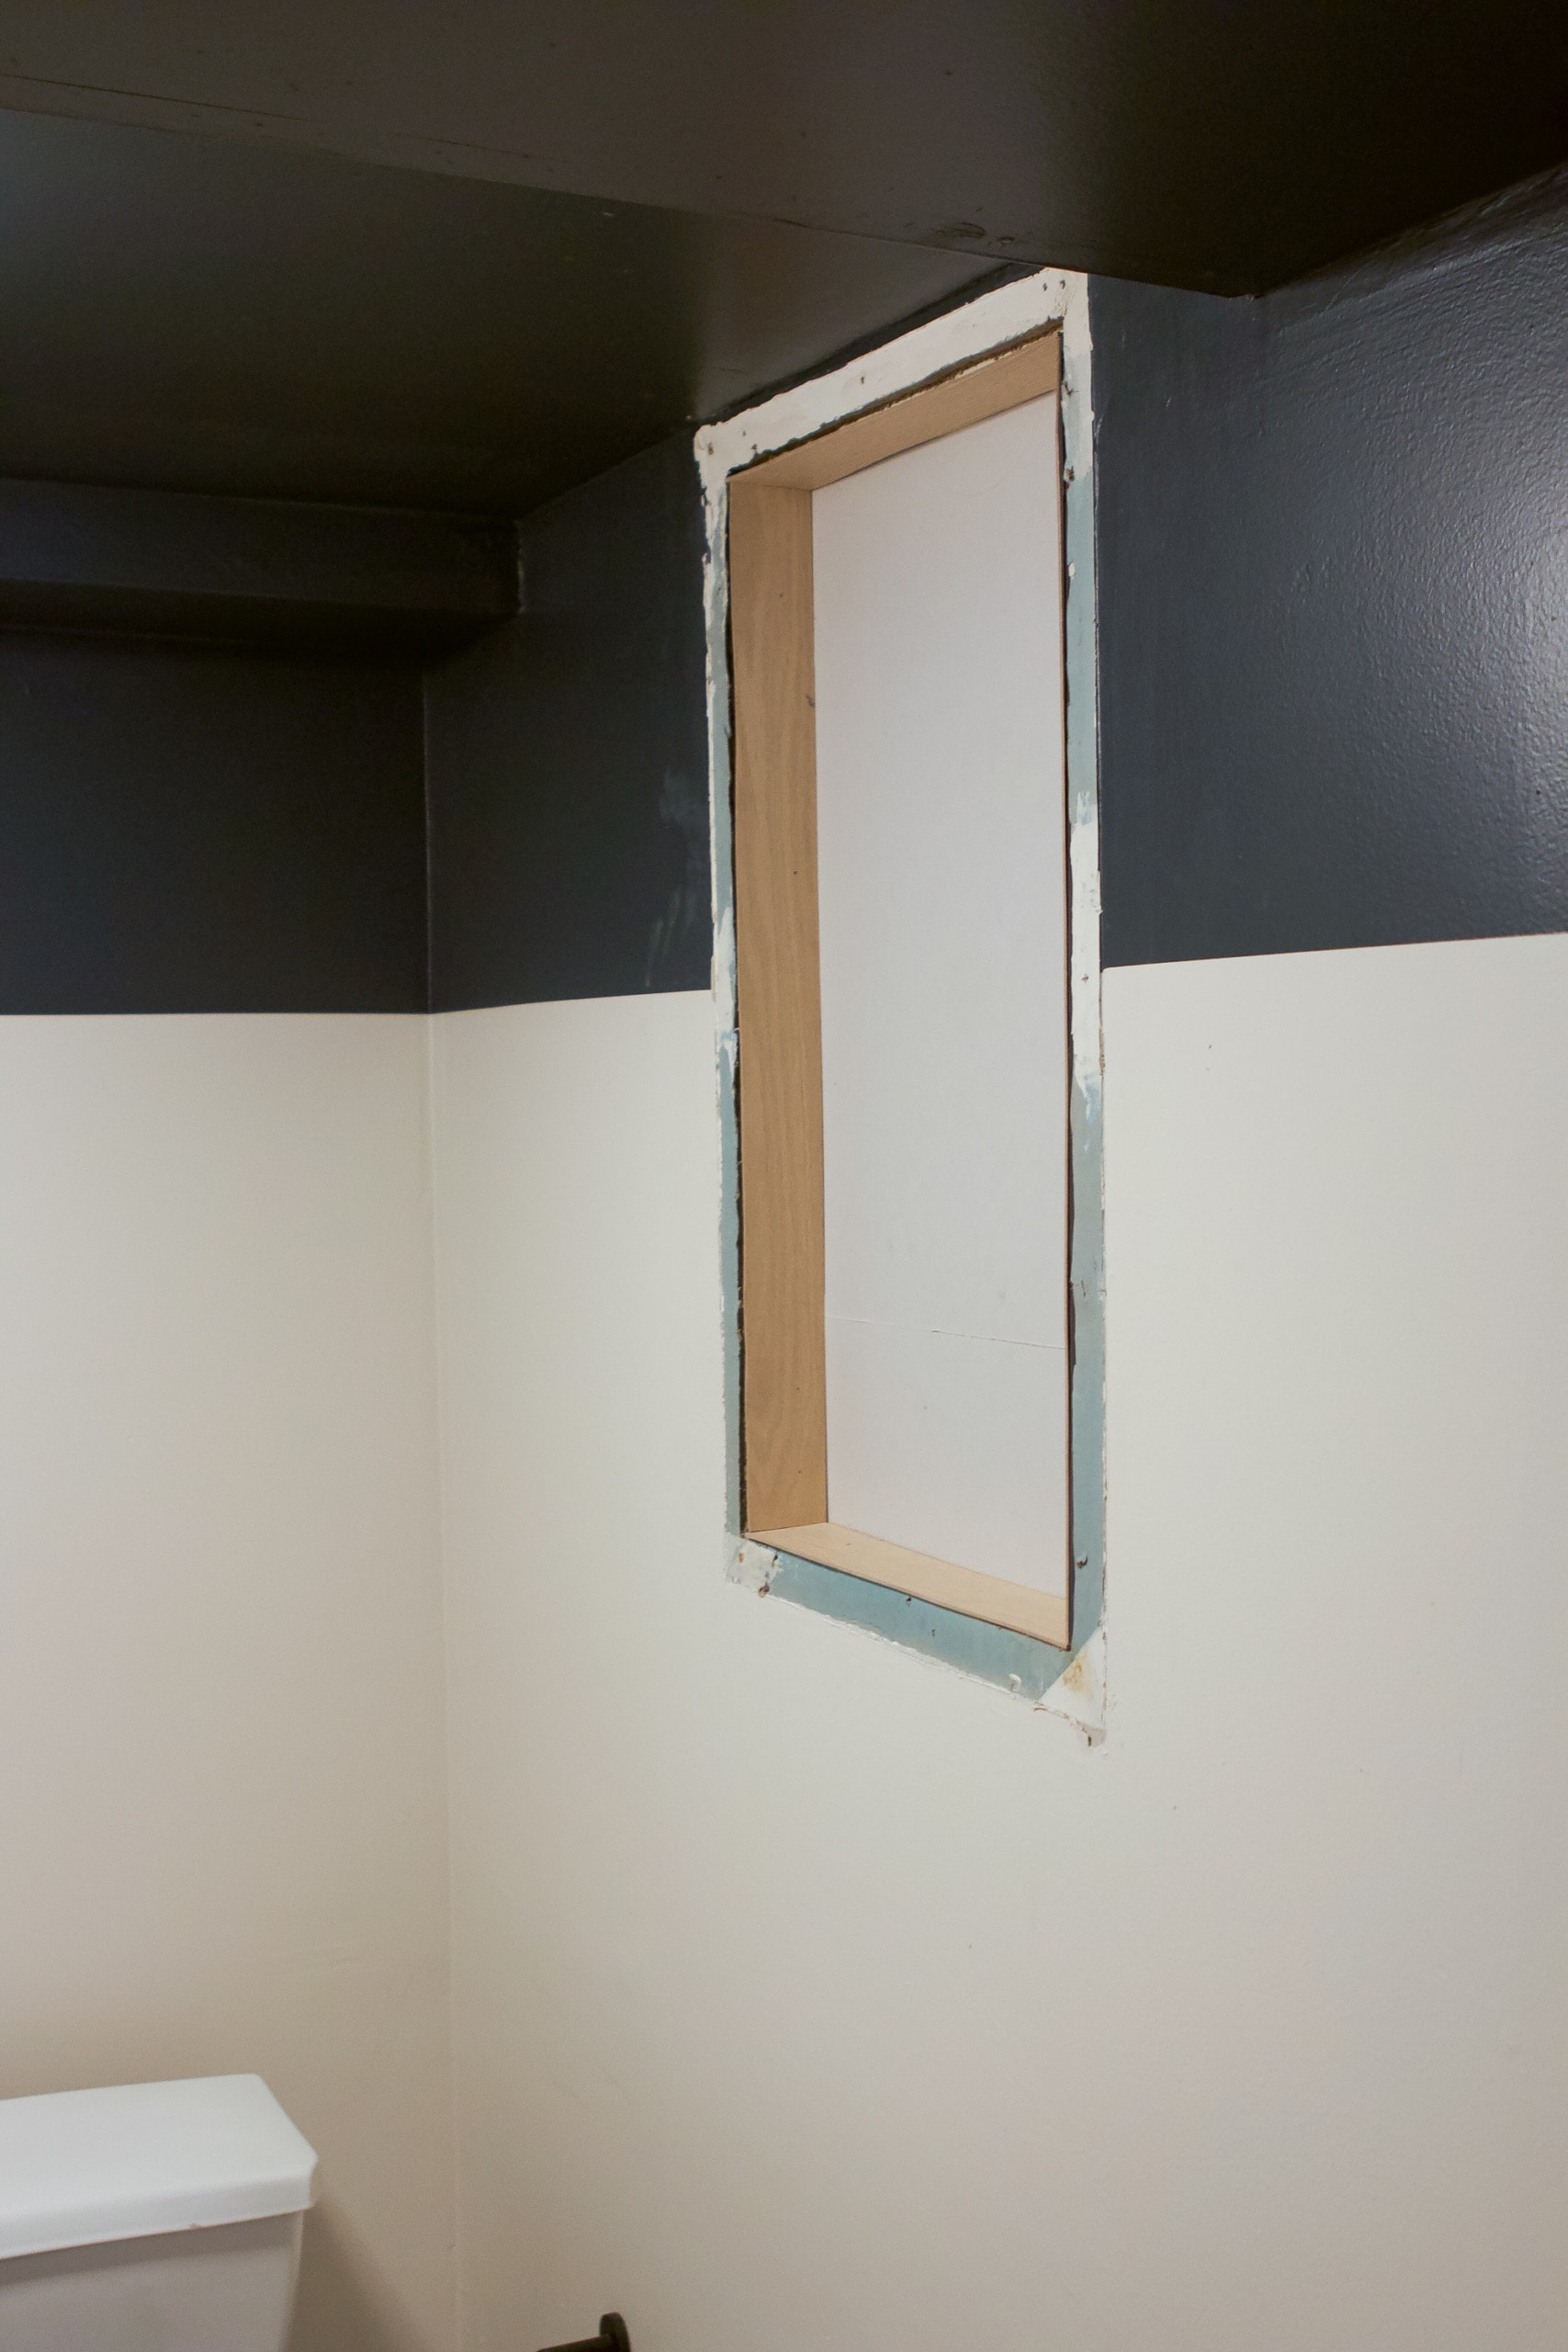 Finn used our jigsaw to cut it to size, and I used liquid nails and our brad nailer to attach it to the inside of the window frame.
We used the excess chair rail for the trim around the “window”. Technically, it really isn’t window trim, but you would never know! These four pieces were all cut at a 45-degree angle with the miter saw, so they met at the corner. I also used some lightweight spackle to cover the seam of the two drywall pieces.
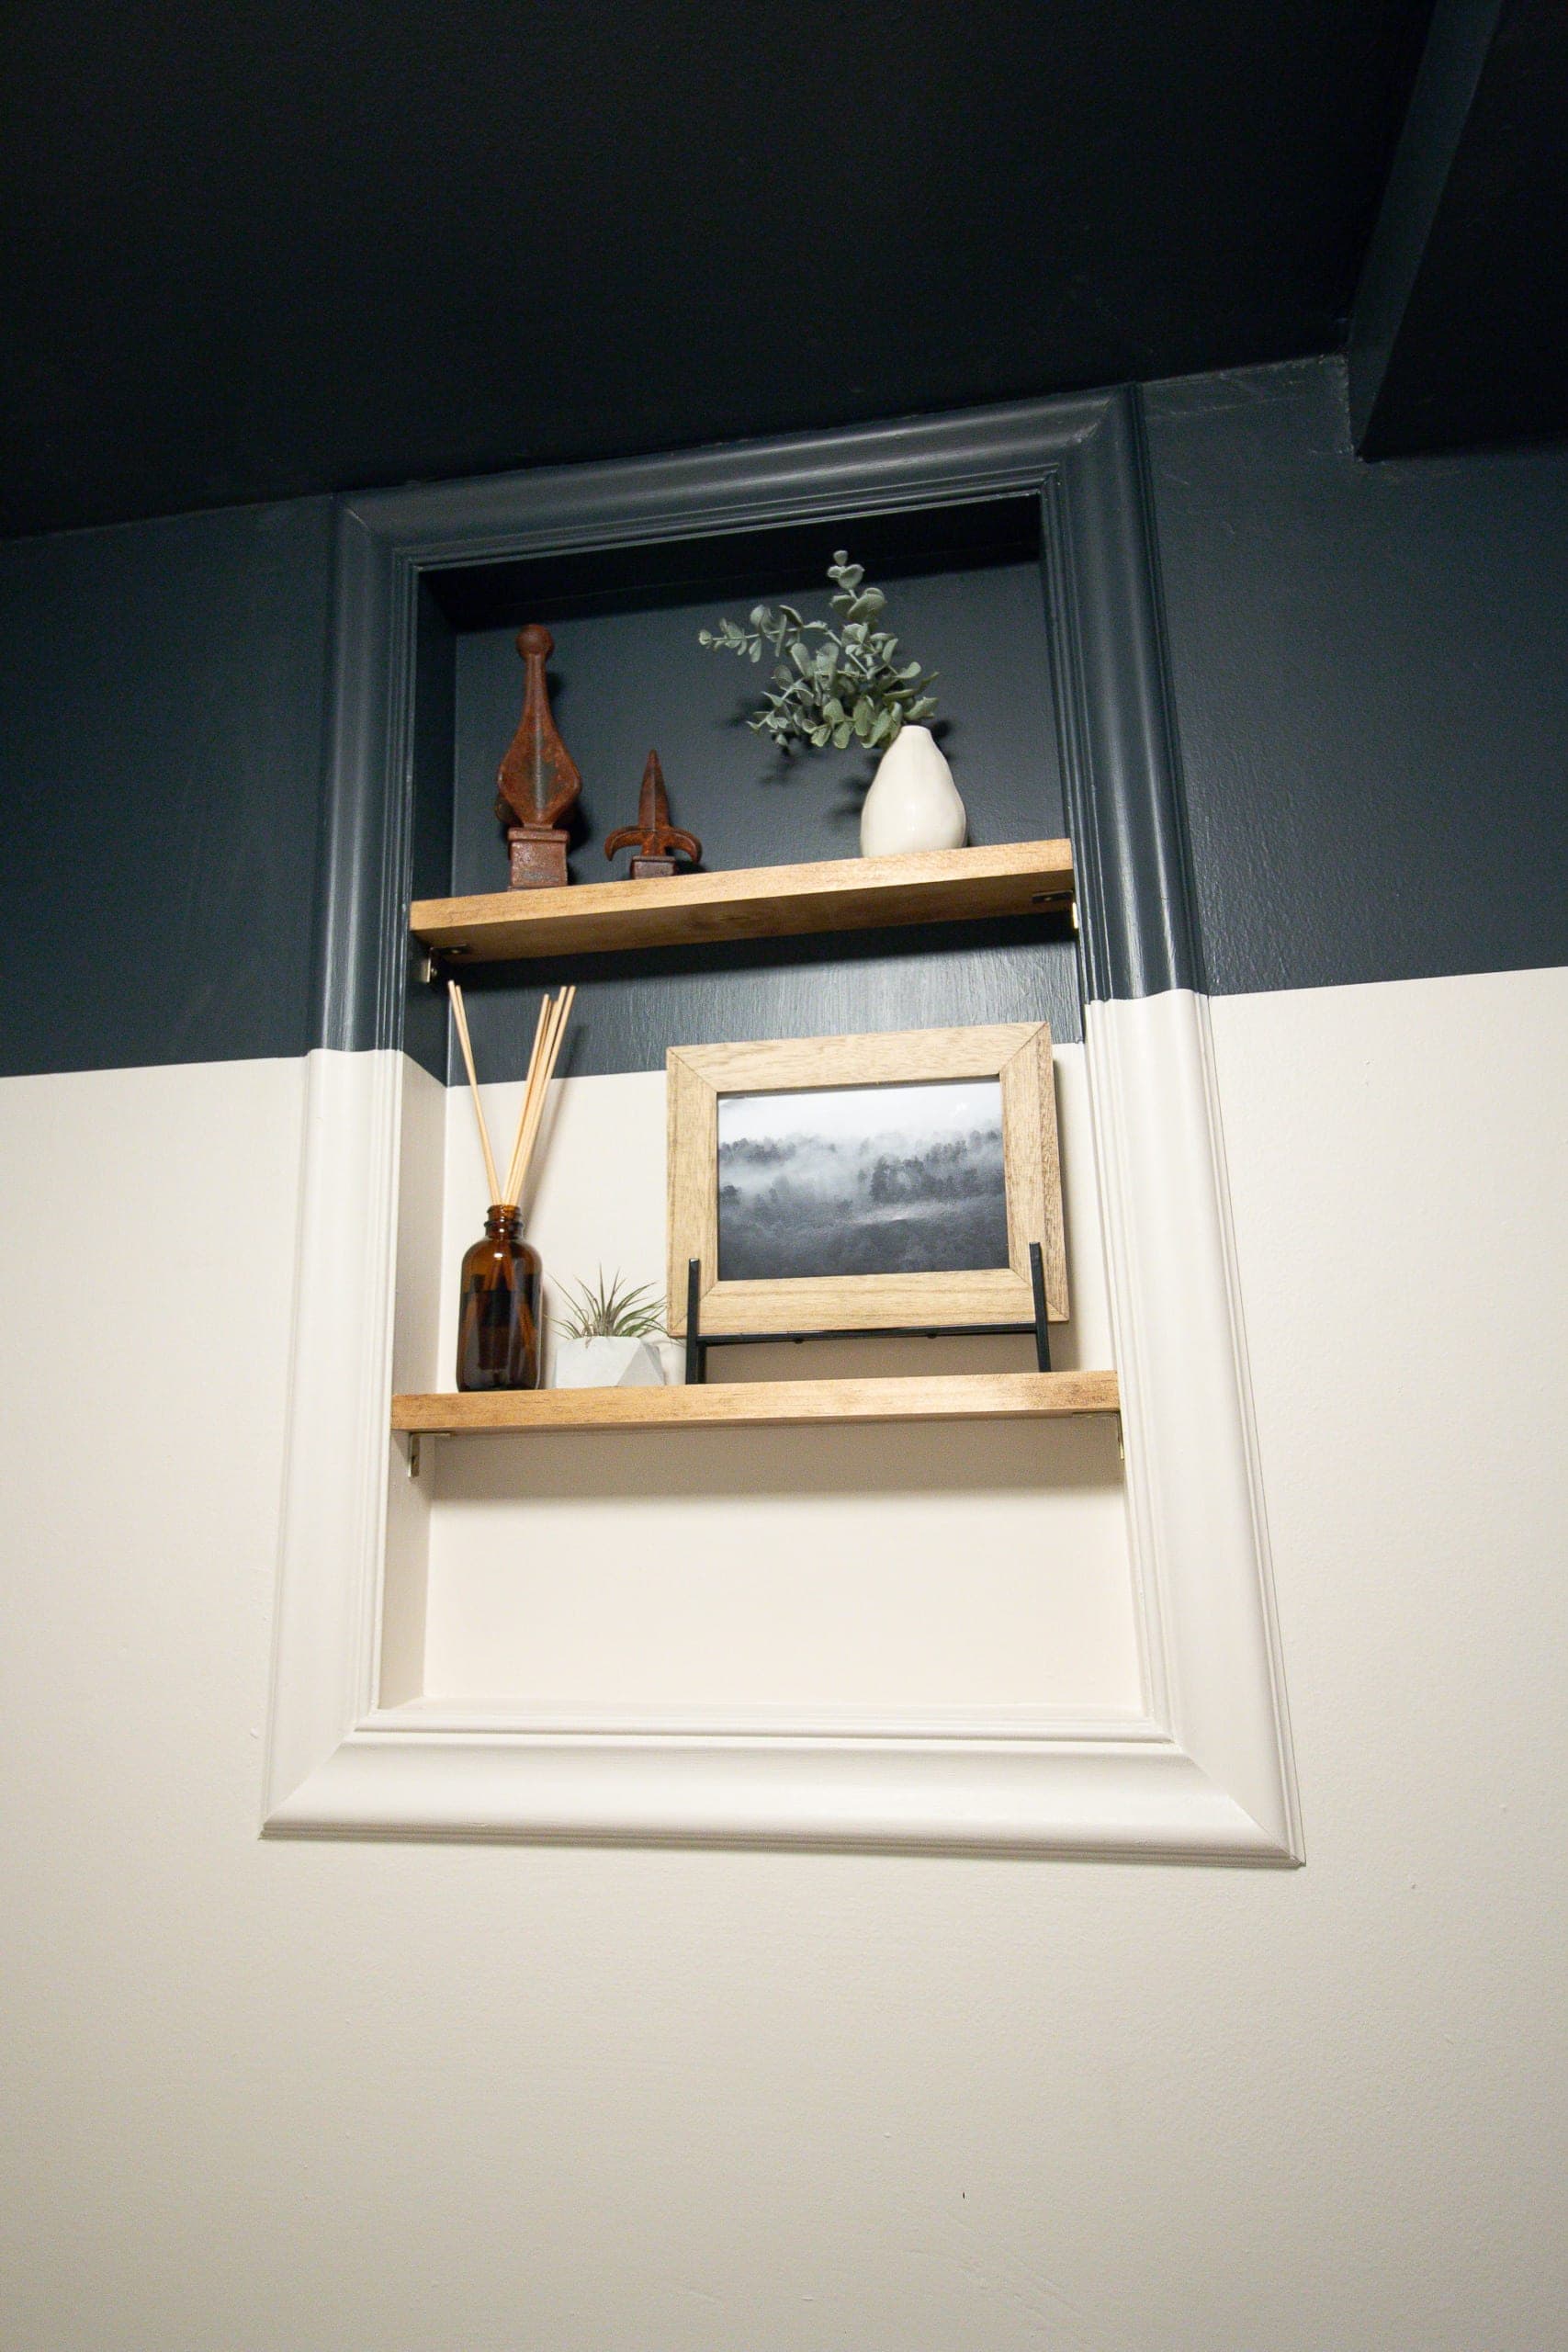
Wood Shelves
We had some leftover pine from an old project – I can’t quite remember which one – and we lucked out that it was the exact same depth as our window frame…about 2.5 inches. I used a wood conditioner and stain in the color “Provincial” (from this wood shelving project) to prep the wood and have it match the wood mirror on the other side of the bathroom.
Caulk & Paint
Caulk and paint were the finishing touches for this little project. All seams got caulked to hide any imperfections and make the new shelving unit look like it was meant to be there from the start! I also filled nail holes with painter’s putty. Once that dried, I used the same two-tone painting technique from the rest of the room to have this new shelf area match the space.
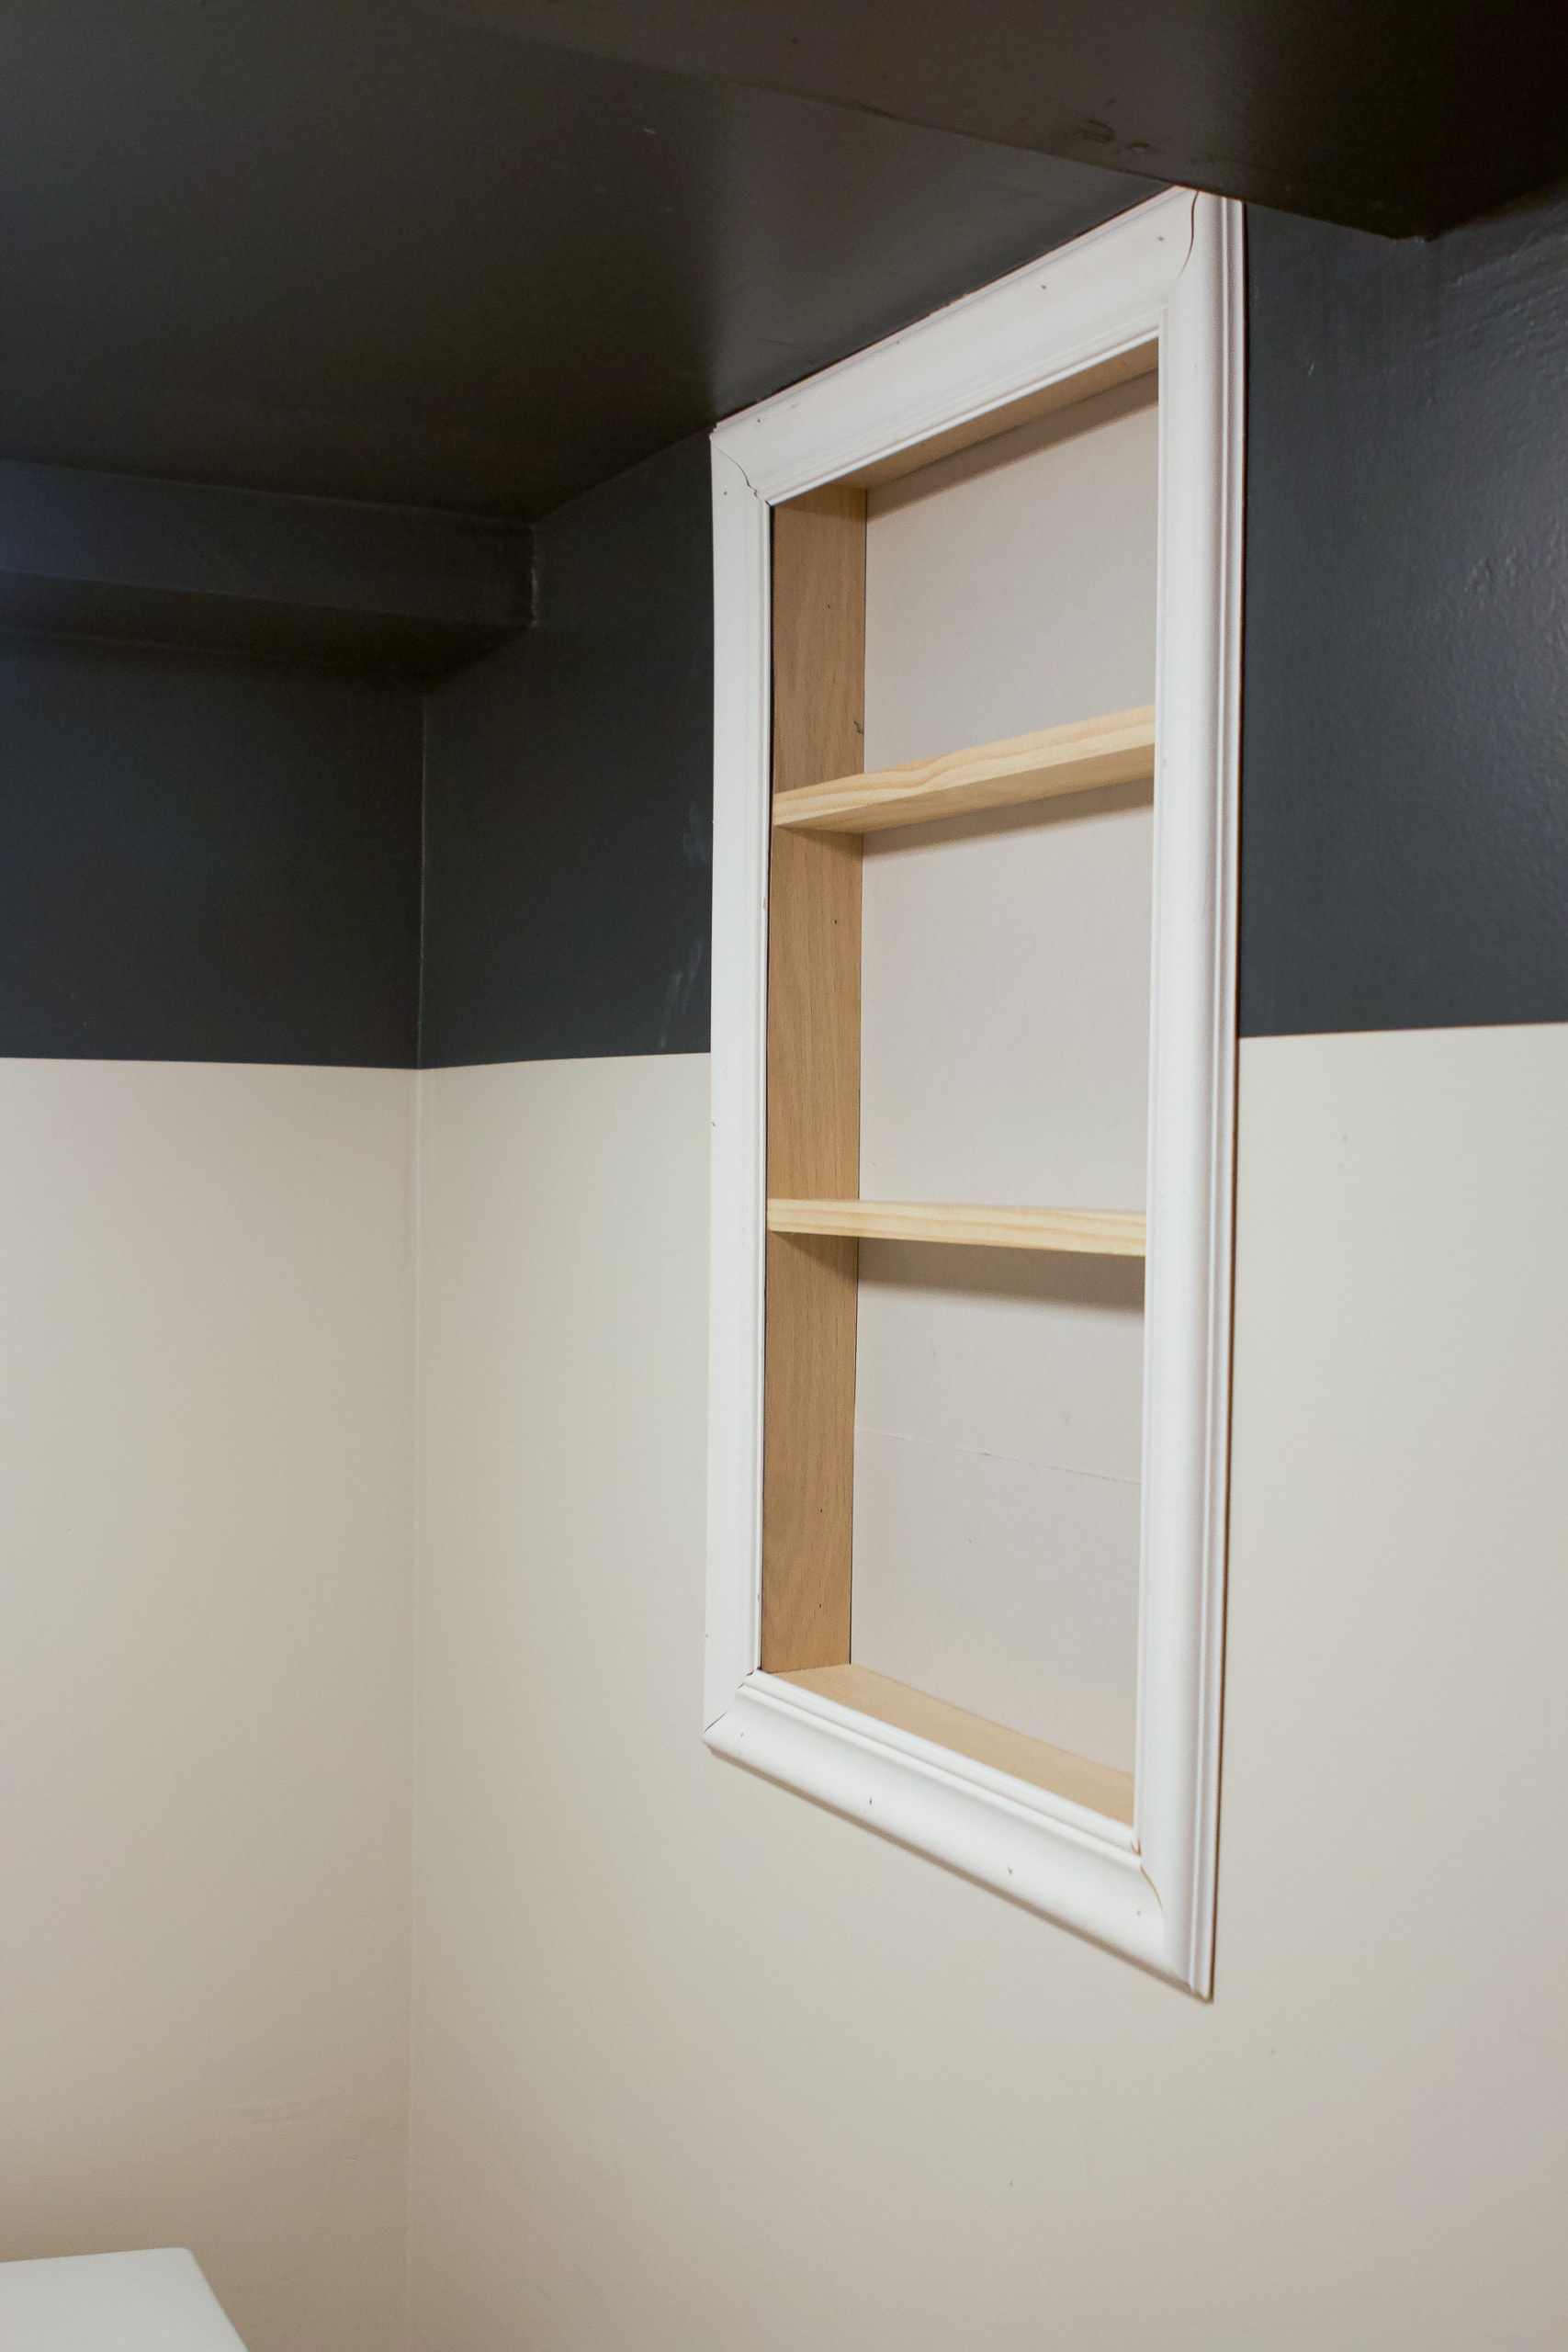
Our New (Almost Free) Window Shelves
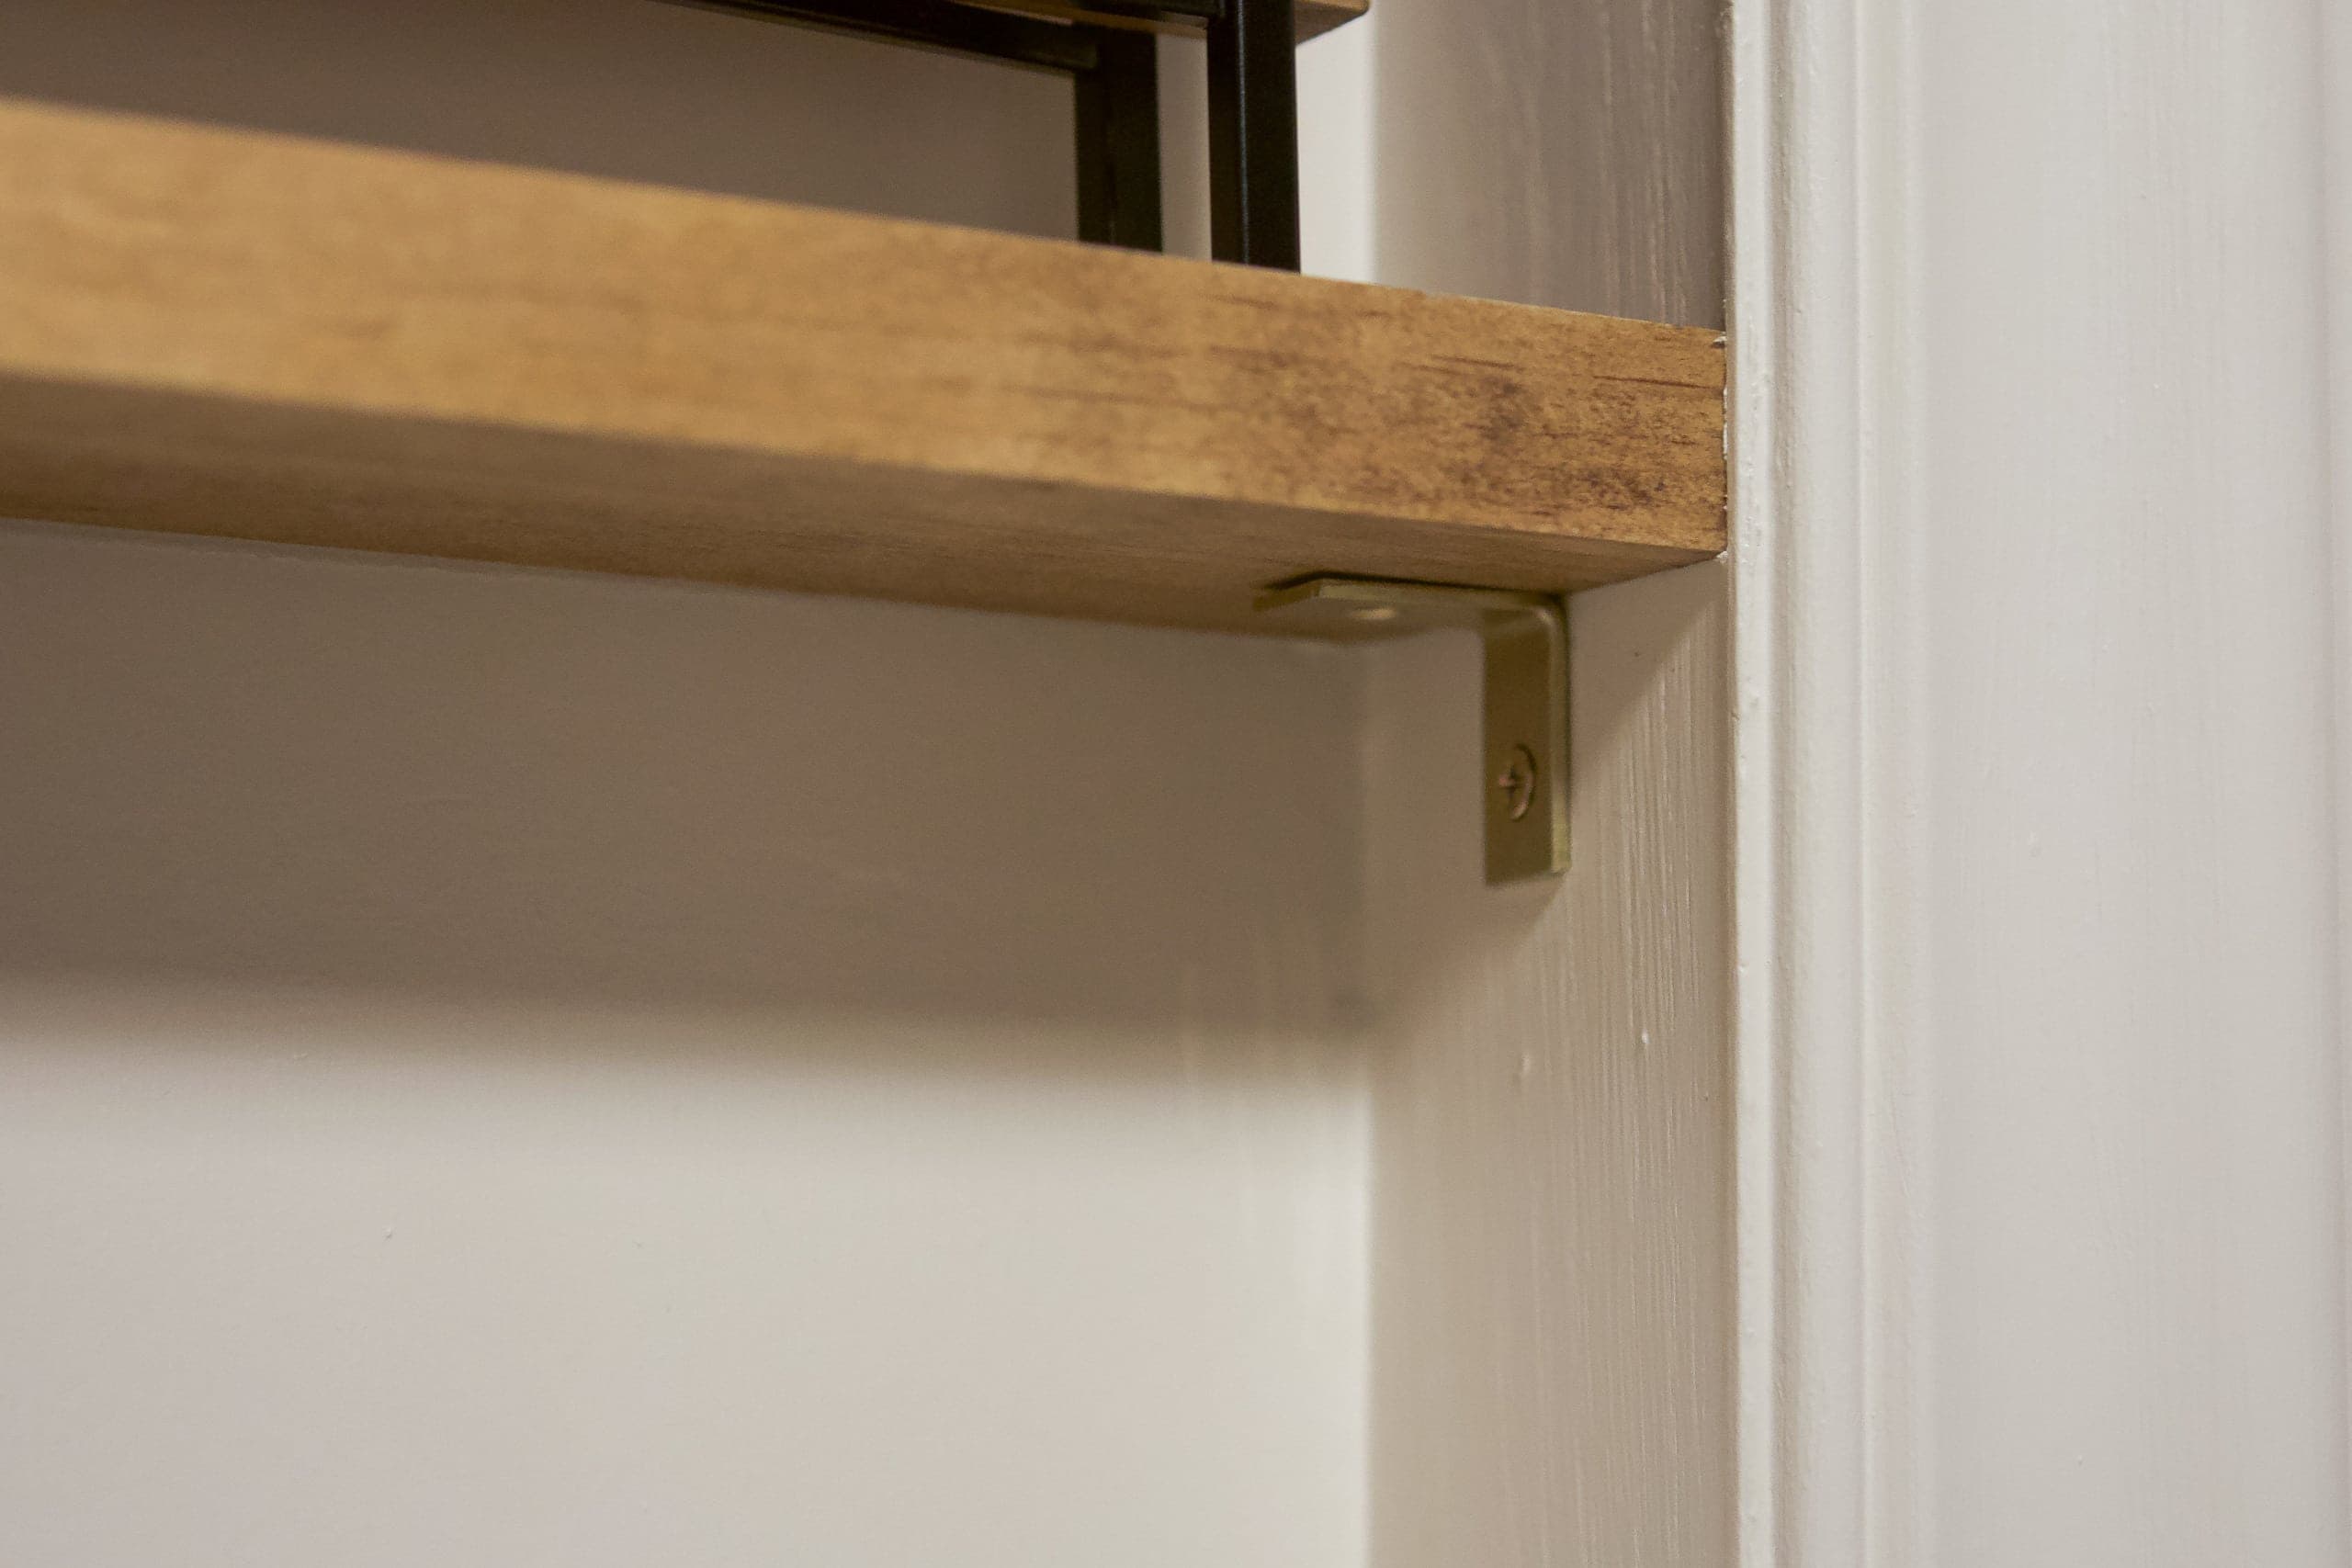
To hang the shelves, I bought a 4-pack of $3 gold brackets. I drilled these into each side and rested the wood right on top. The wood is wedged into the space pretty well, but the brackets are there just in case gravity does its thing over time and they start to fall a bit. 
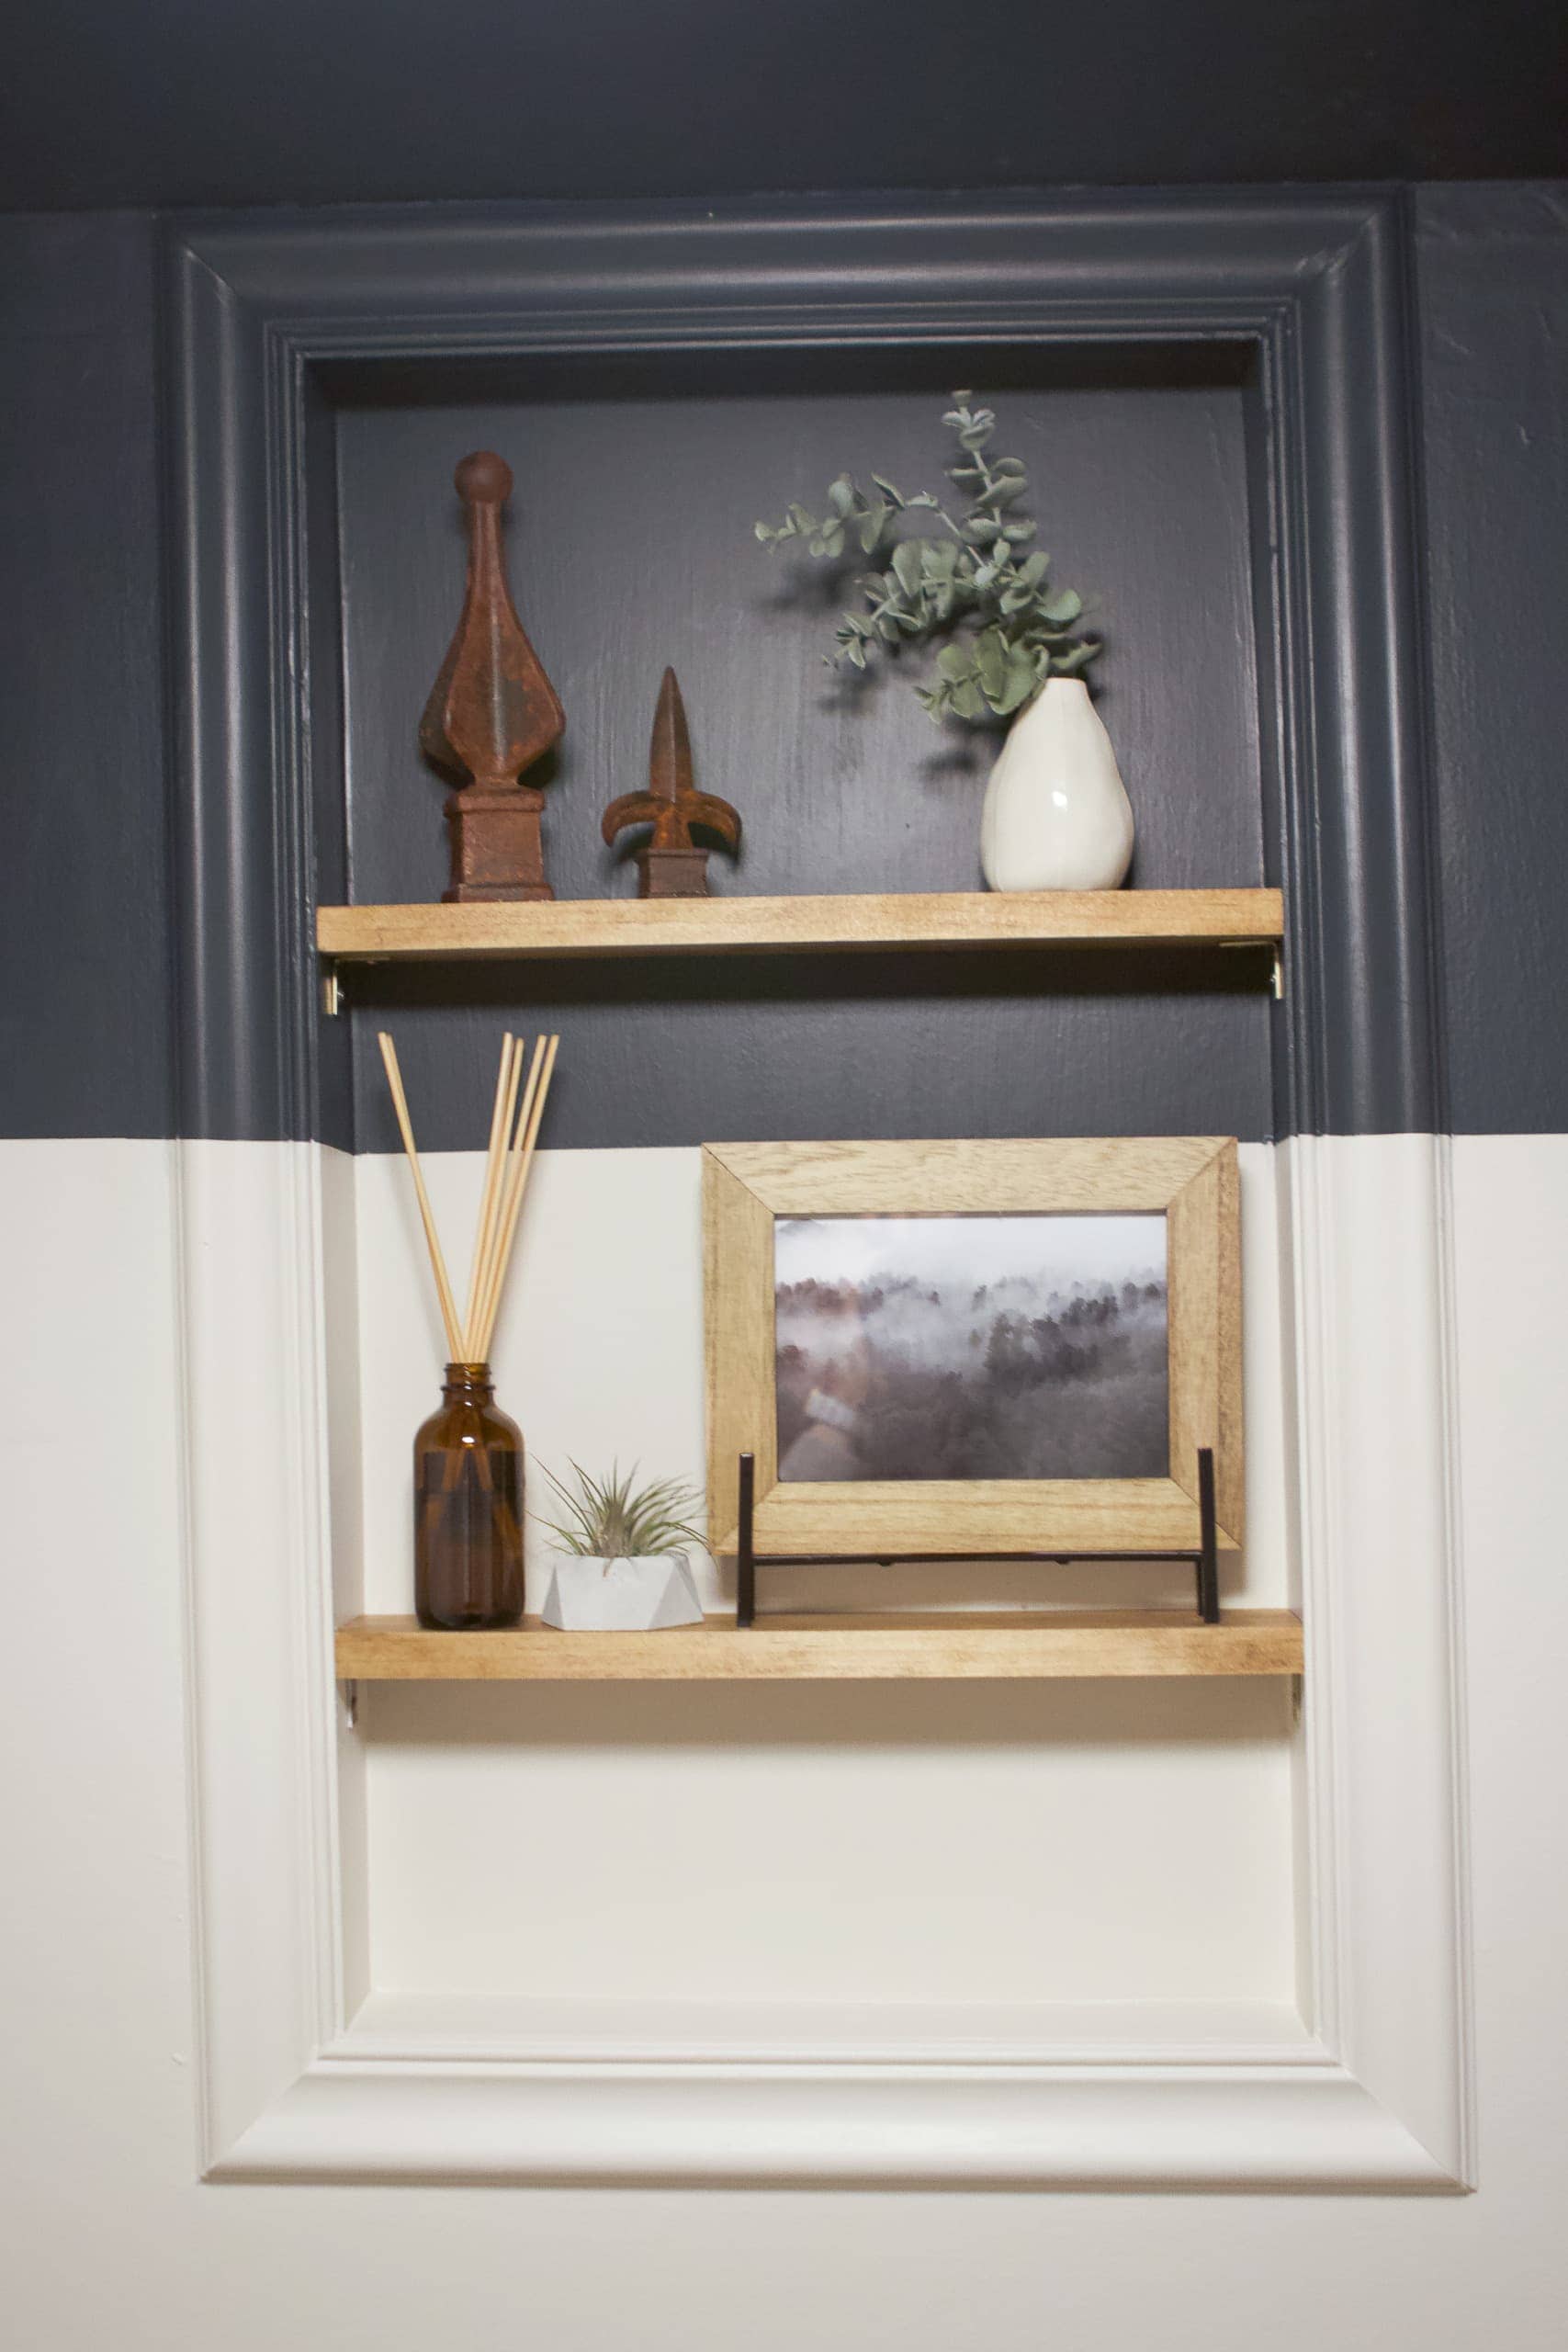
I’ve gotta say, the hardest part was decorating our new window shelves! They’re only 2.5 inches deep, so they can’t hold tons of items. 
 I ended up adding some plants, a diffuser, matches, and a few other decorative accessories.
In the end, this project only cost me $3! We used extra supplies we had on hand and made it work. I’m actually pretty proud that we were able to replace the eyesore of the old window without spending much money at all!
Before & After

Wow, such a difference! I’m super pleased with this little DIY project. Cya, window to nowhere. I won’t miss you and your creepy view of the storage room.
Window Shelves – Sources
Paint Colors: Valspar “Chimney Smoke” & “Clay Angel // Stain Color: “Provincial” // Picture Frame // Concrete Planter // Reed Diffuser // Bud Vase // Decorative Objects (gift to my mom from my Aunt Paige)
What’s Next?
Tomorrow, I’ll share our new painted tile floors. It’s the last big project left for this basement bathroom and it made a world of difference in this space! We are just about to the finish line…
Casey


