My Mom’s Main Bathroom Reveal
Two weeks ago, I shared my mom’s guest bathroom reveal and you guys loved it. I knew you would. It was quite the transformation from that dark green space. (Or was it black? The controversy continues.)
Today, I’m back with more bathroom excitement – a look at my mom’s main bathroom, complete with a new freestanding tub! Two years ago, we did a refresh to this space to remove the builder-basic vanity and add a little more of her feminine style. That was nice for a while, but my mom really wanted to give the entire room an upgrade. She was not a fan of the tile on the floors or shower and it bugged her every day. She finally realized that she was living with something she hated and vowed to change it as soon as possible.
Before we get to the after shots, let’s take a look at the before photos and design plan for the space.
The Before & Design Plan
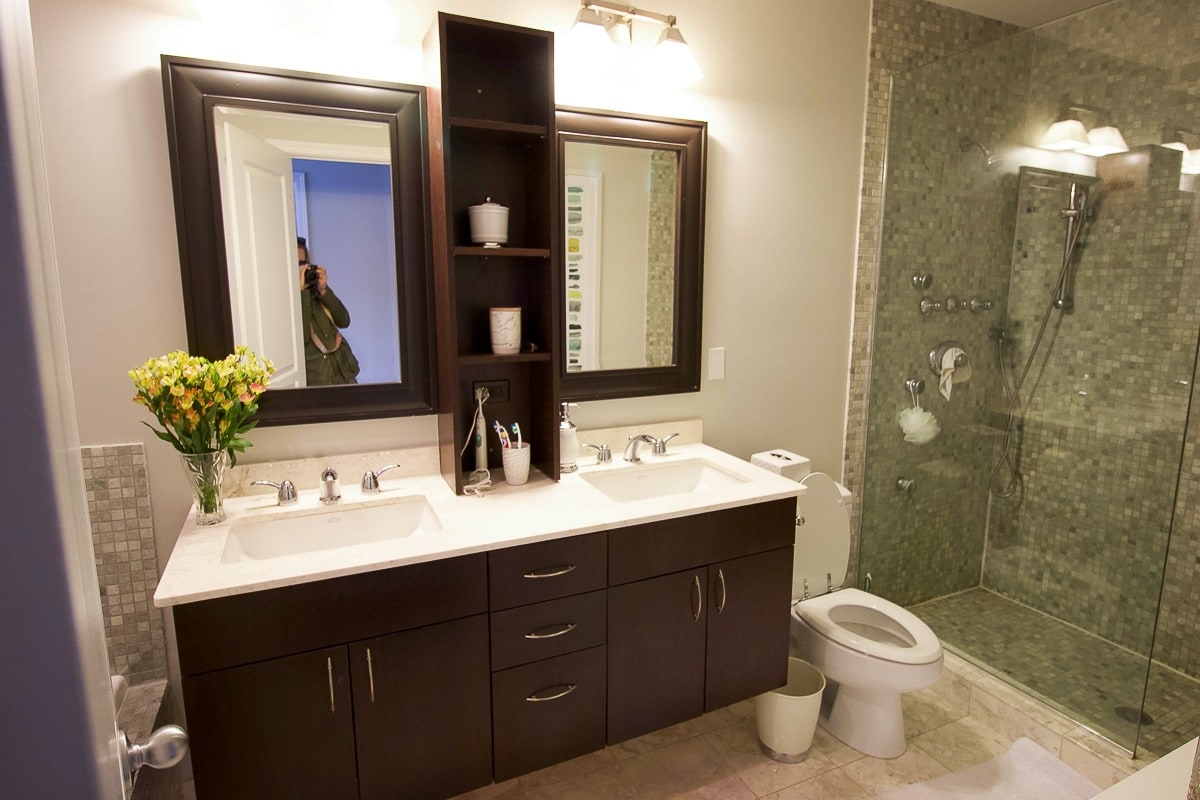
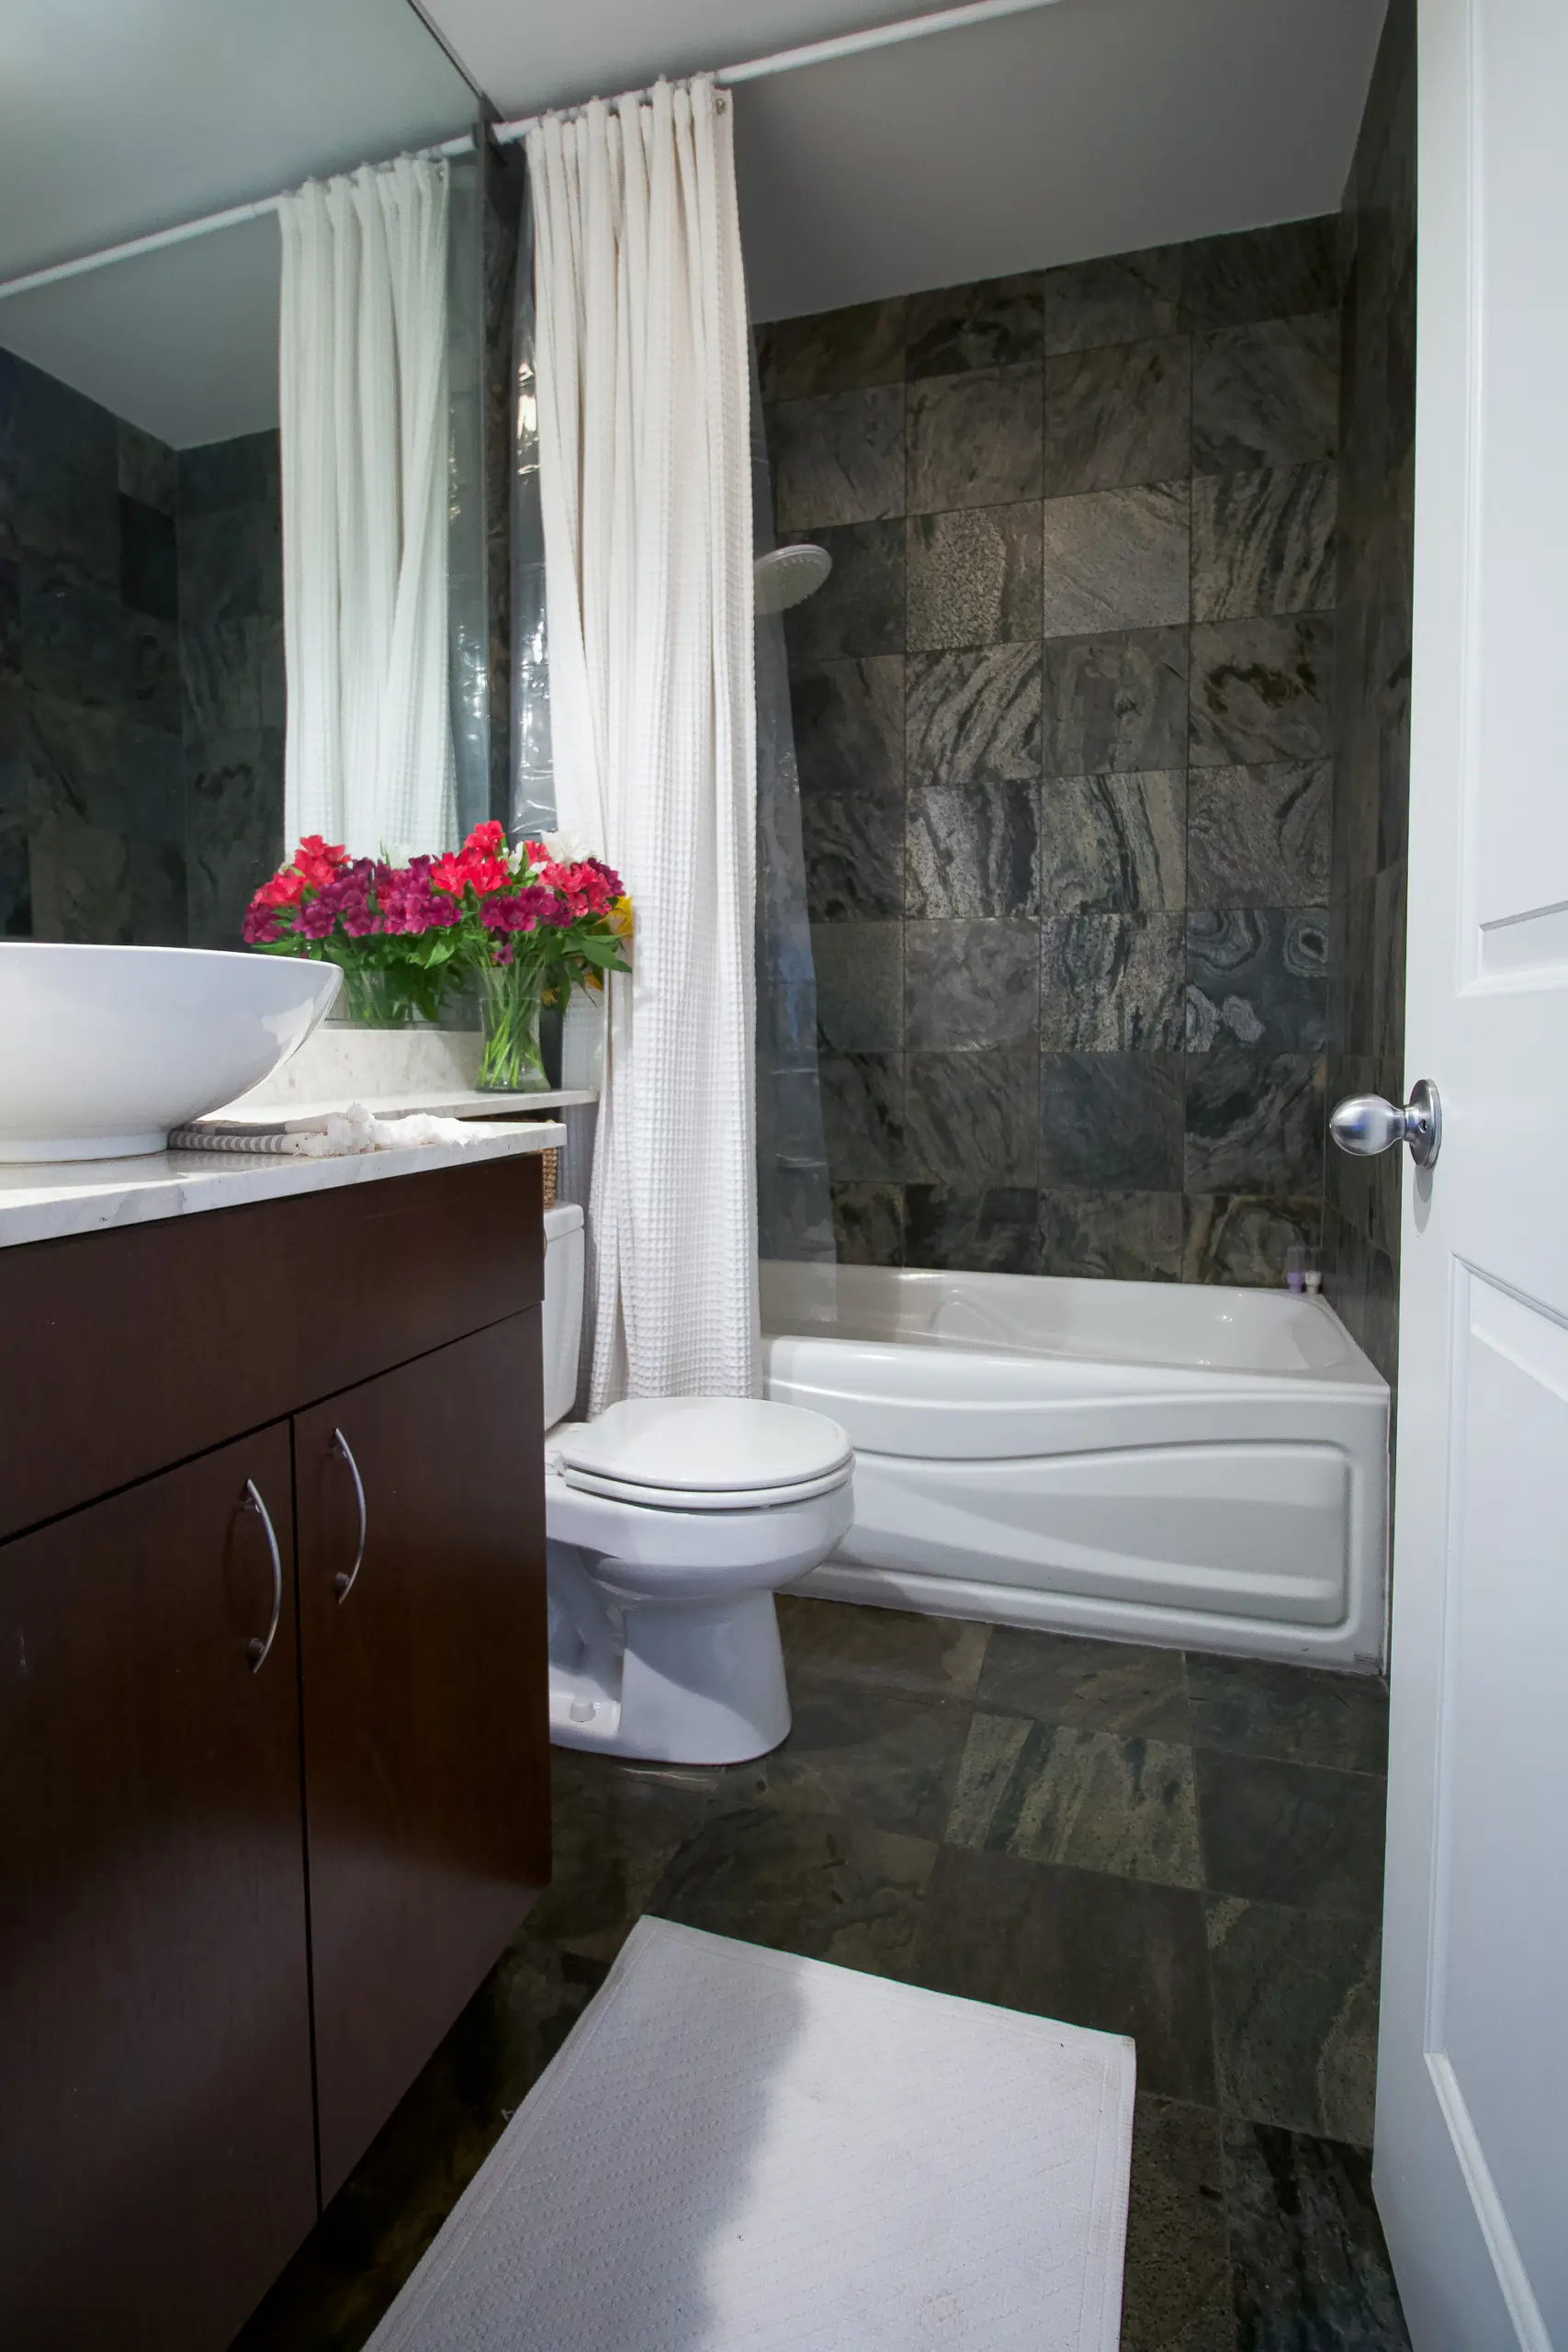
Here’s a look at the “before before.” This is the space before we did our refresh with the custom vanity. My mom didn’t love the builder-basic vanity, not to mention that she had a double sink when she didn’t need that at all.
Here it is with the upgraded vanity. It was so much better, but the rest of the room was itching to be changed. 
We got to work creating a design plan for the new space…
Gray Wall Tile // Floor Tile // Freestanding Tub // Bath Filler // Chandelier // Shower Hardware // Toilet // Black Toilet Lever
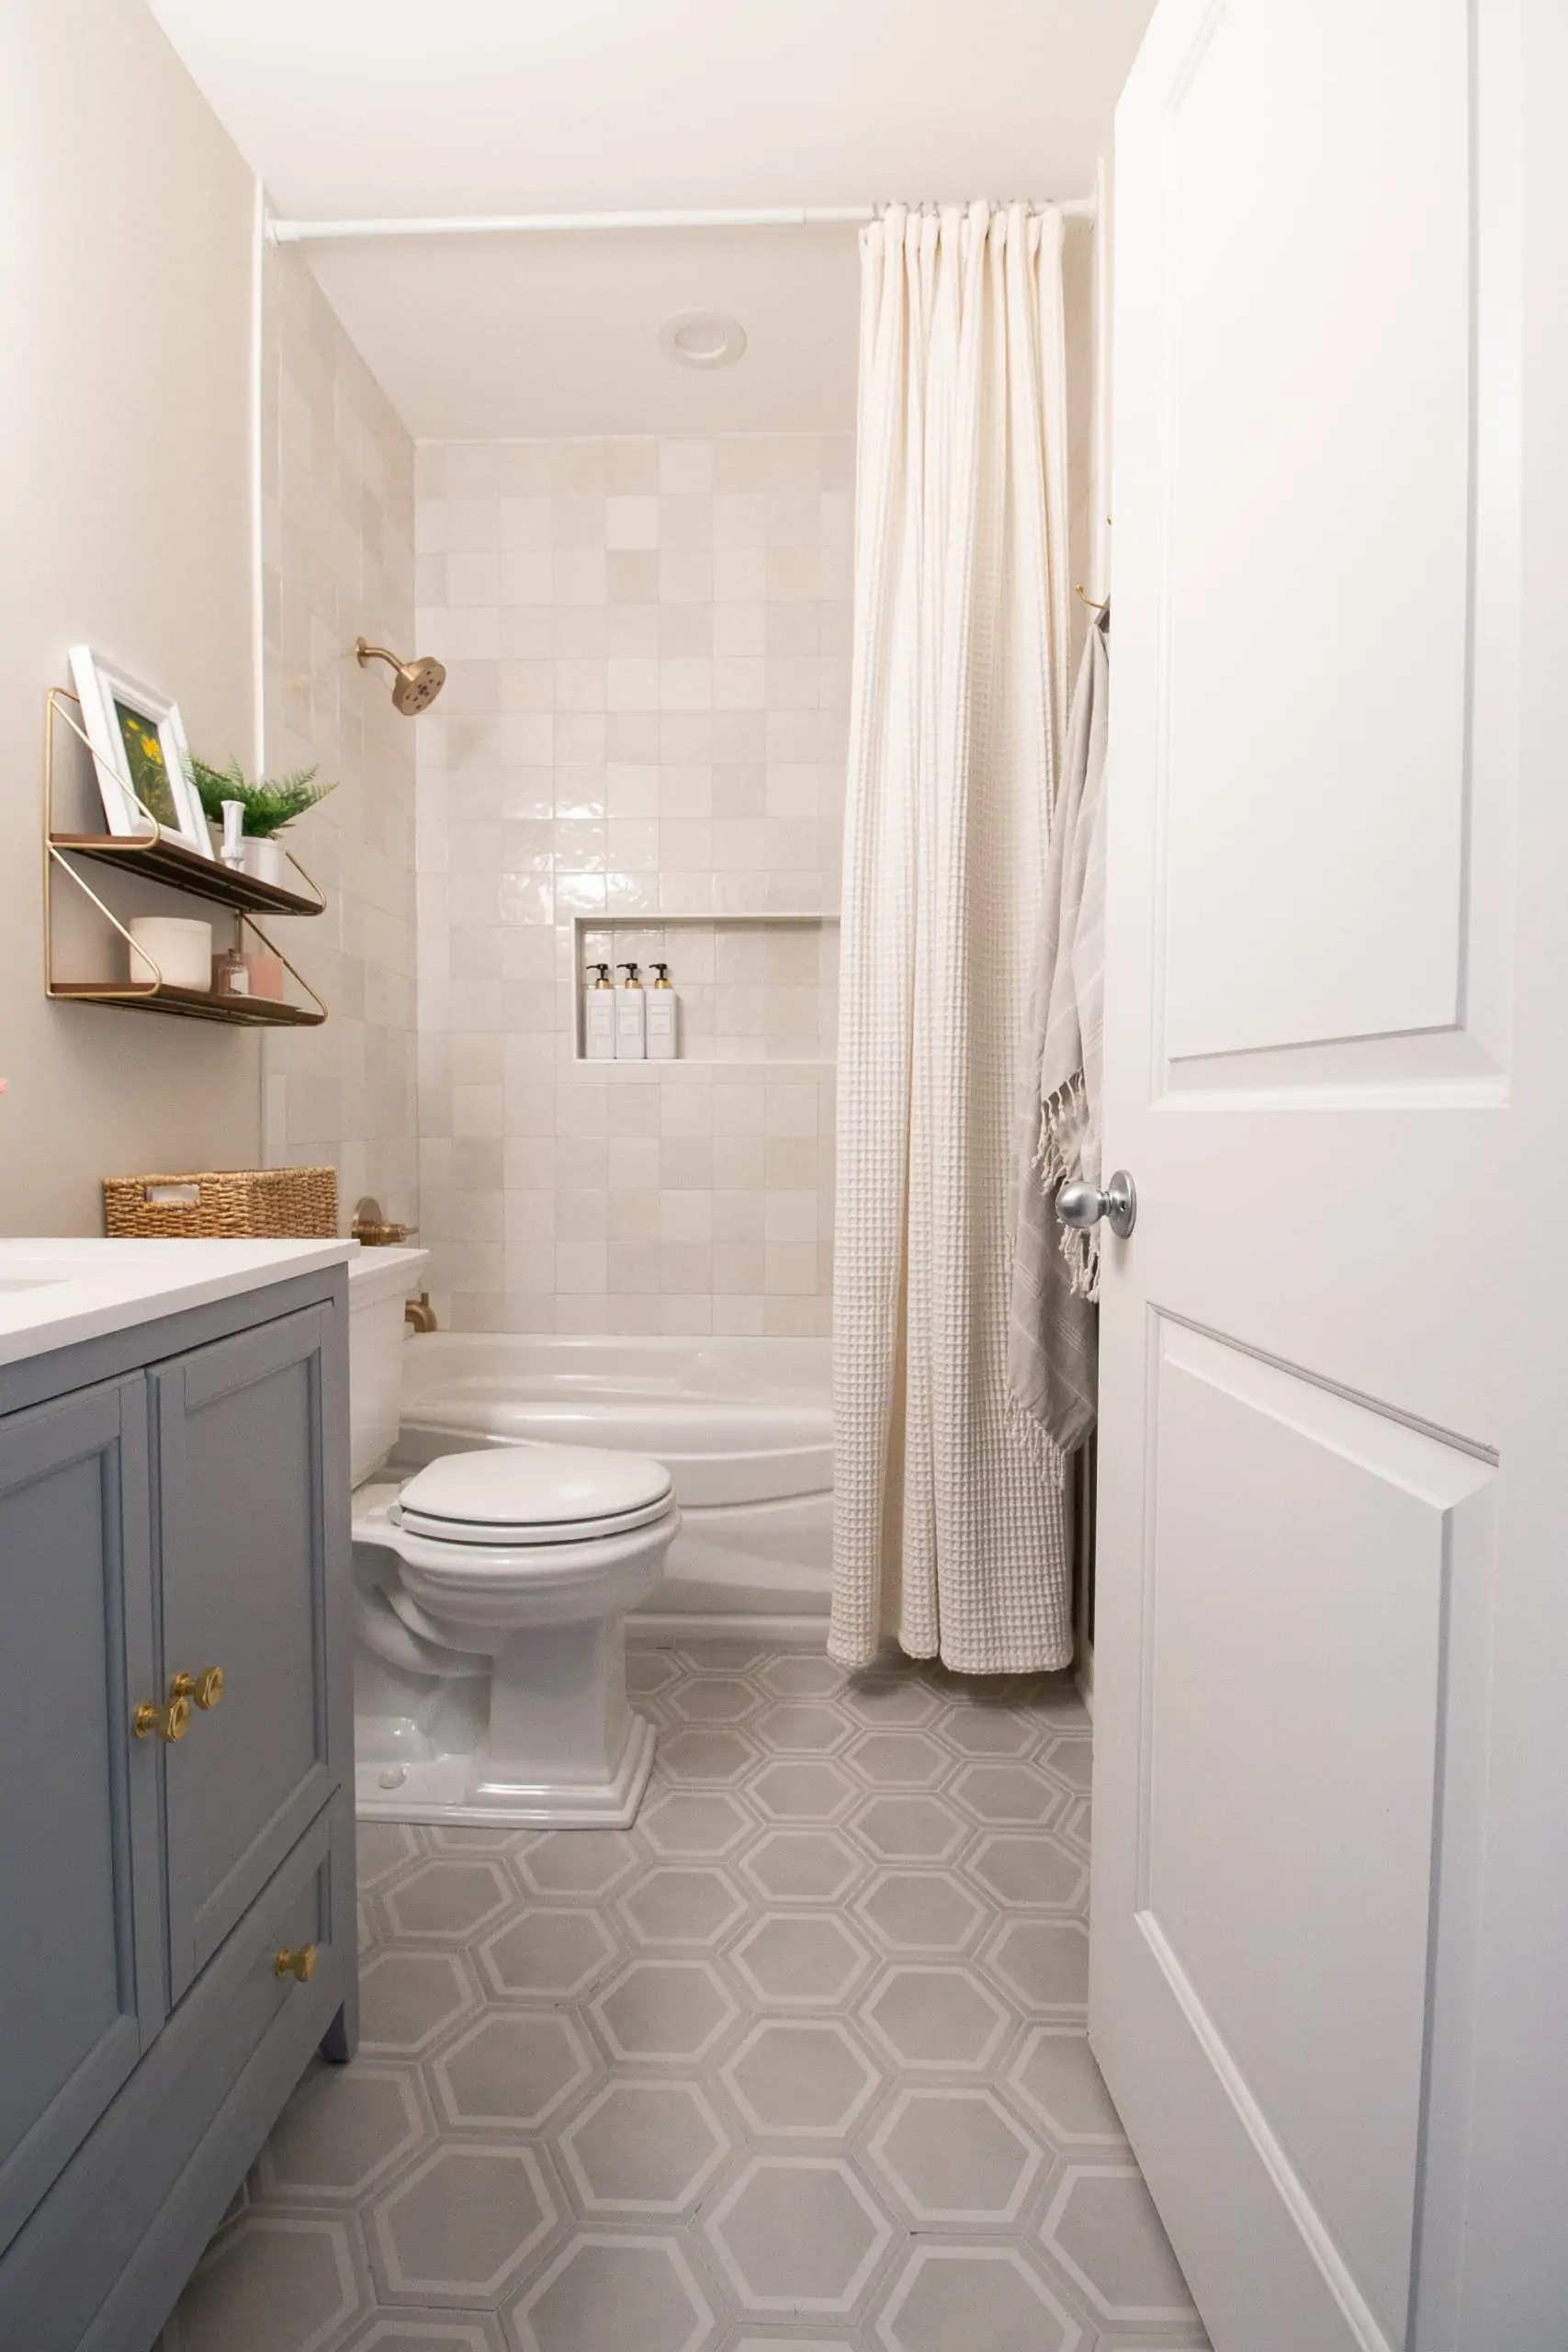
The Main Bathroom – Reveal


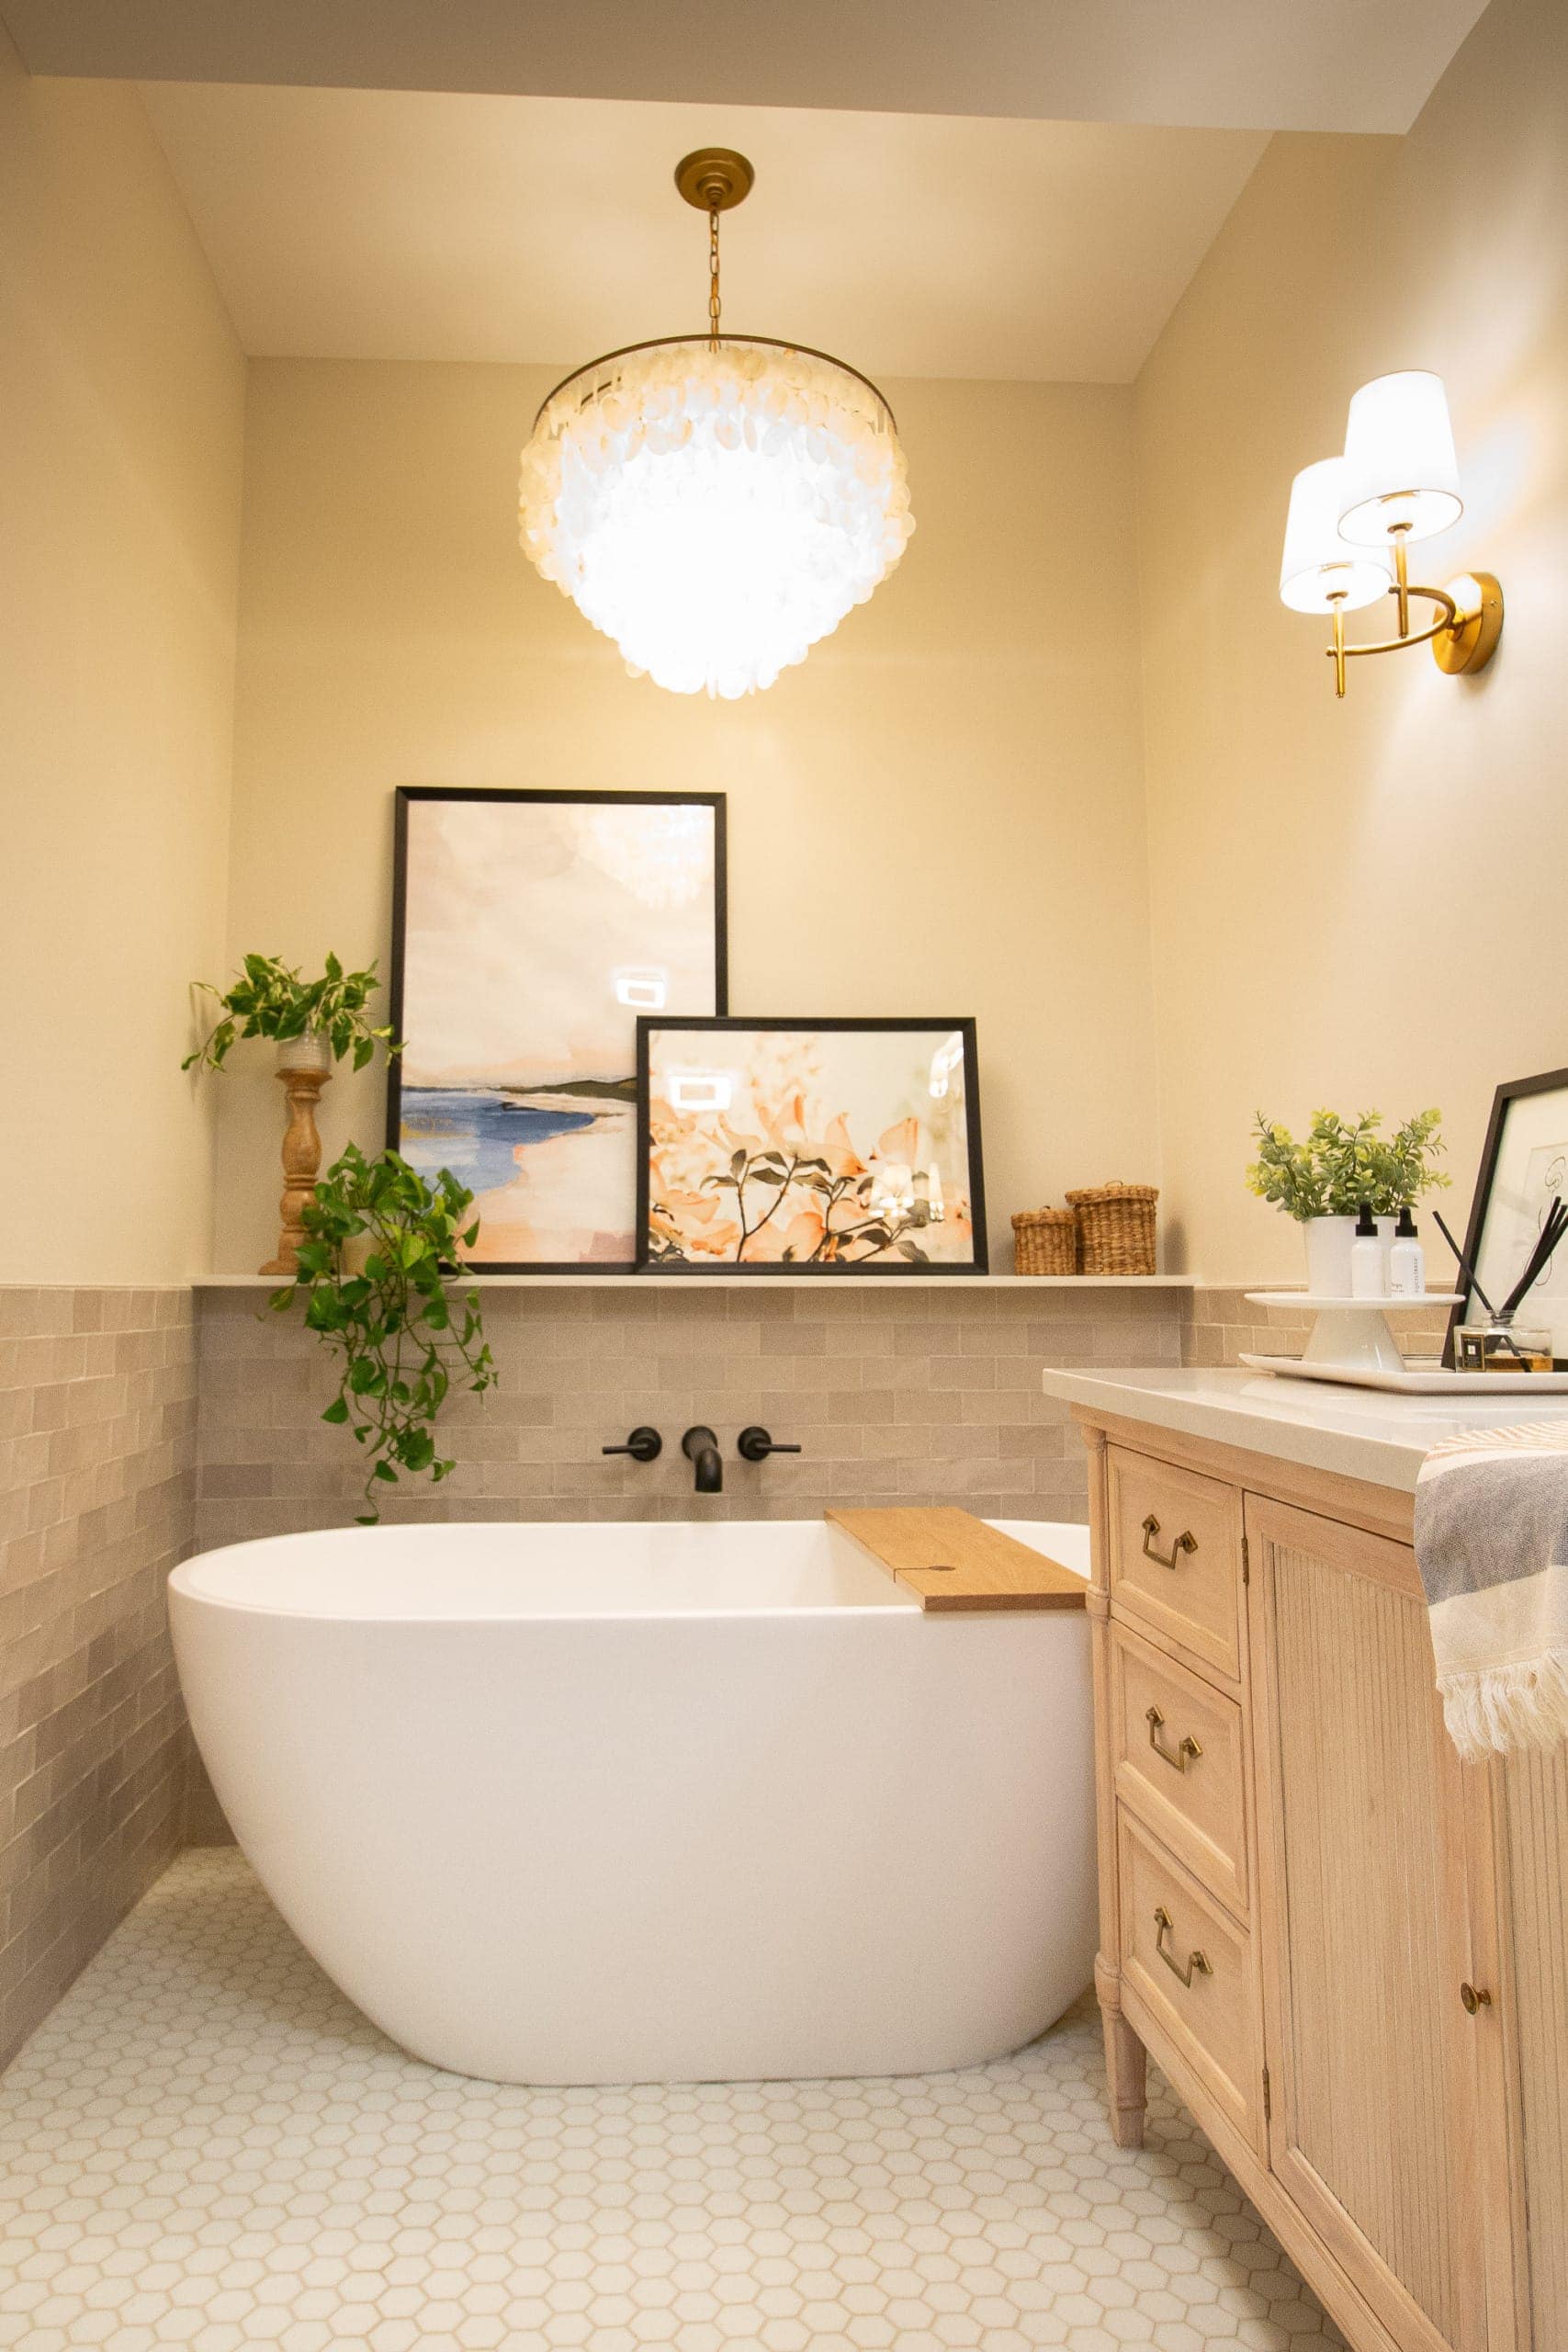
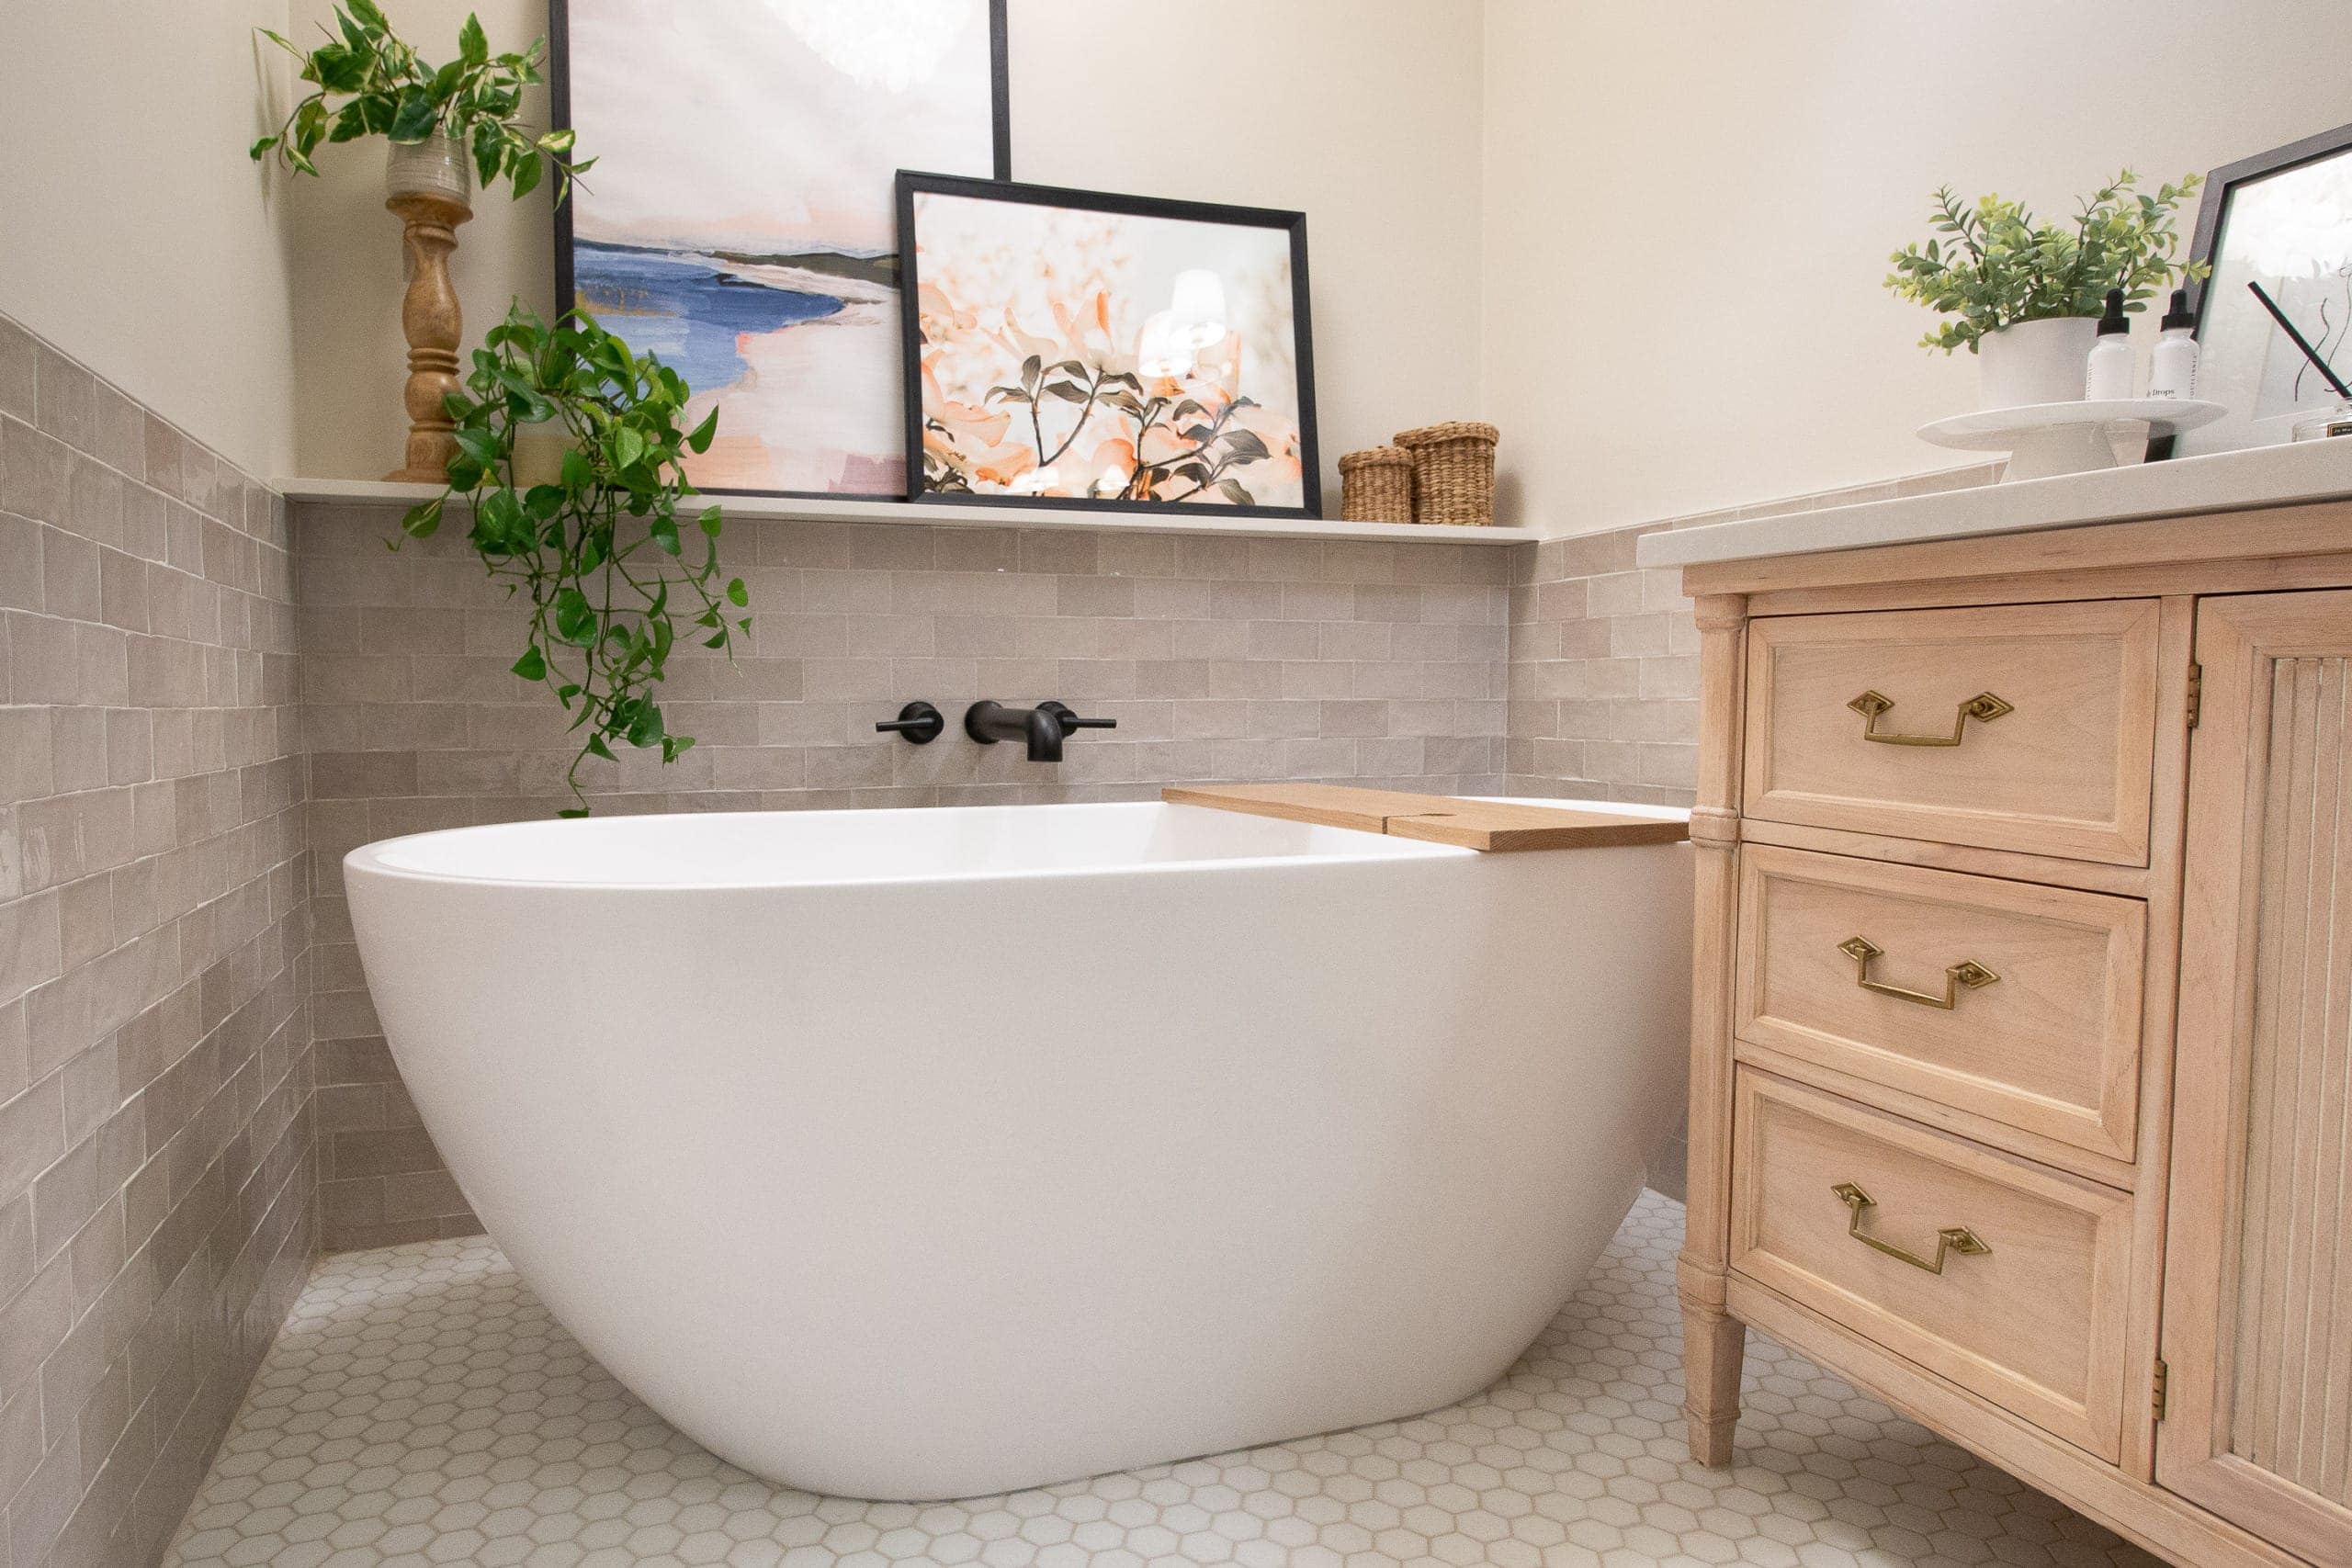
Isn’t it incredible? The hexagon tile floors, the taupe tile all across the room, and that freestanding tub…holy smokes! It truly does feel like a hotel when you step into this space and my mom could not be happier with how it turned out. Let’s dive into the details.
The Freestanding Tub
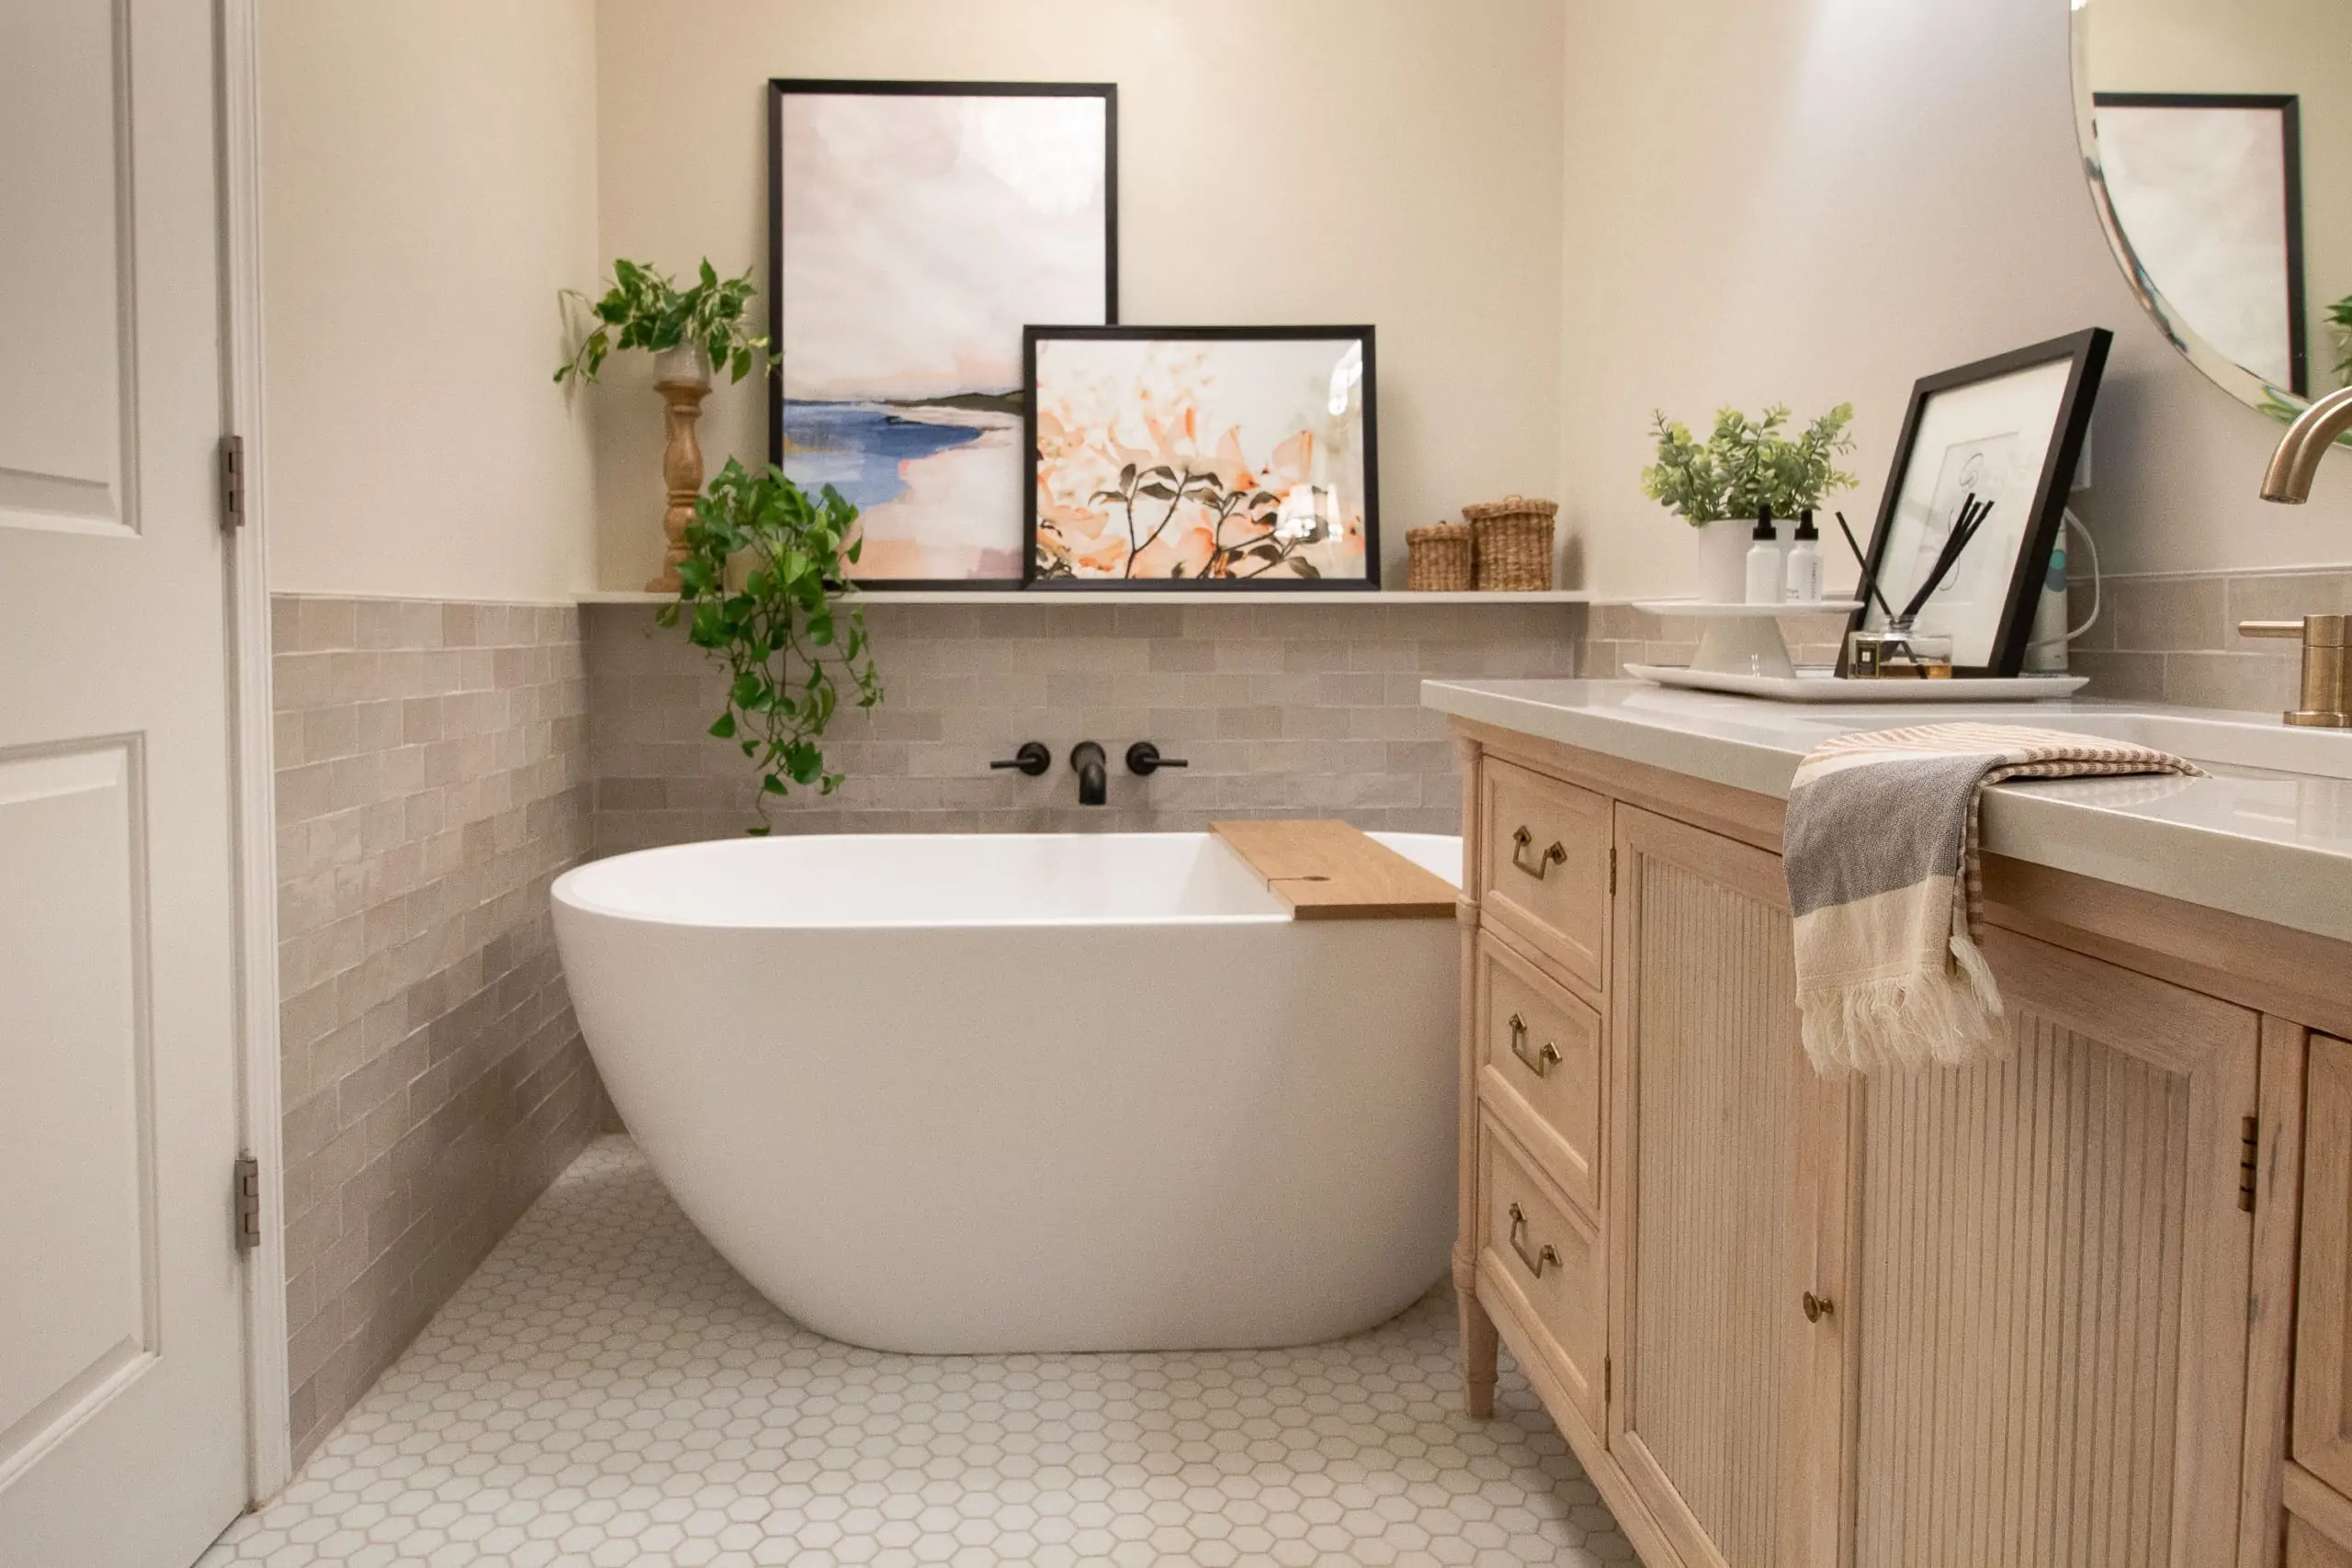
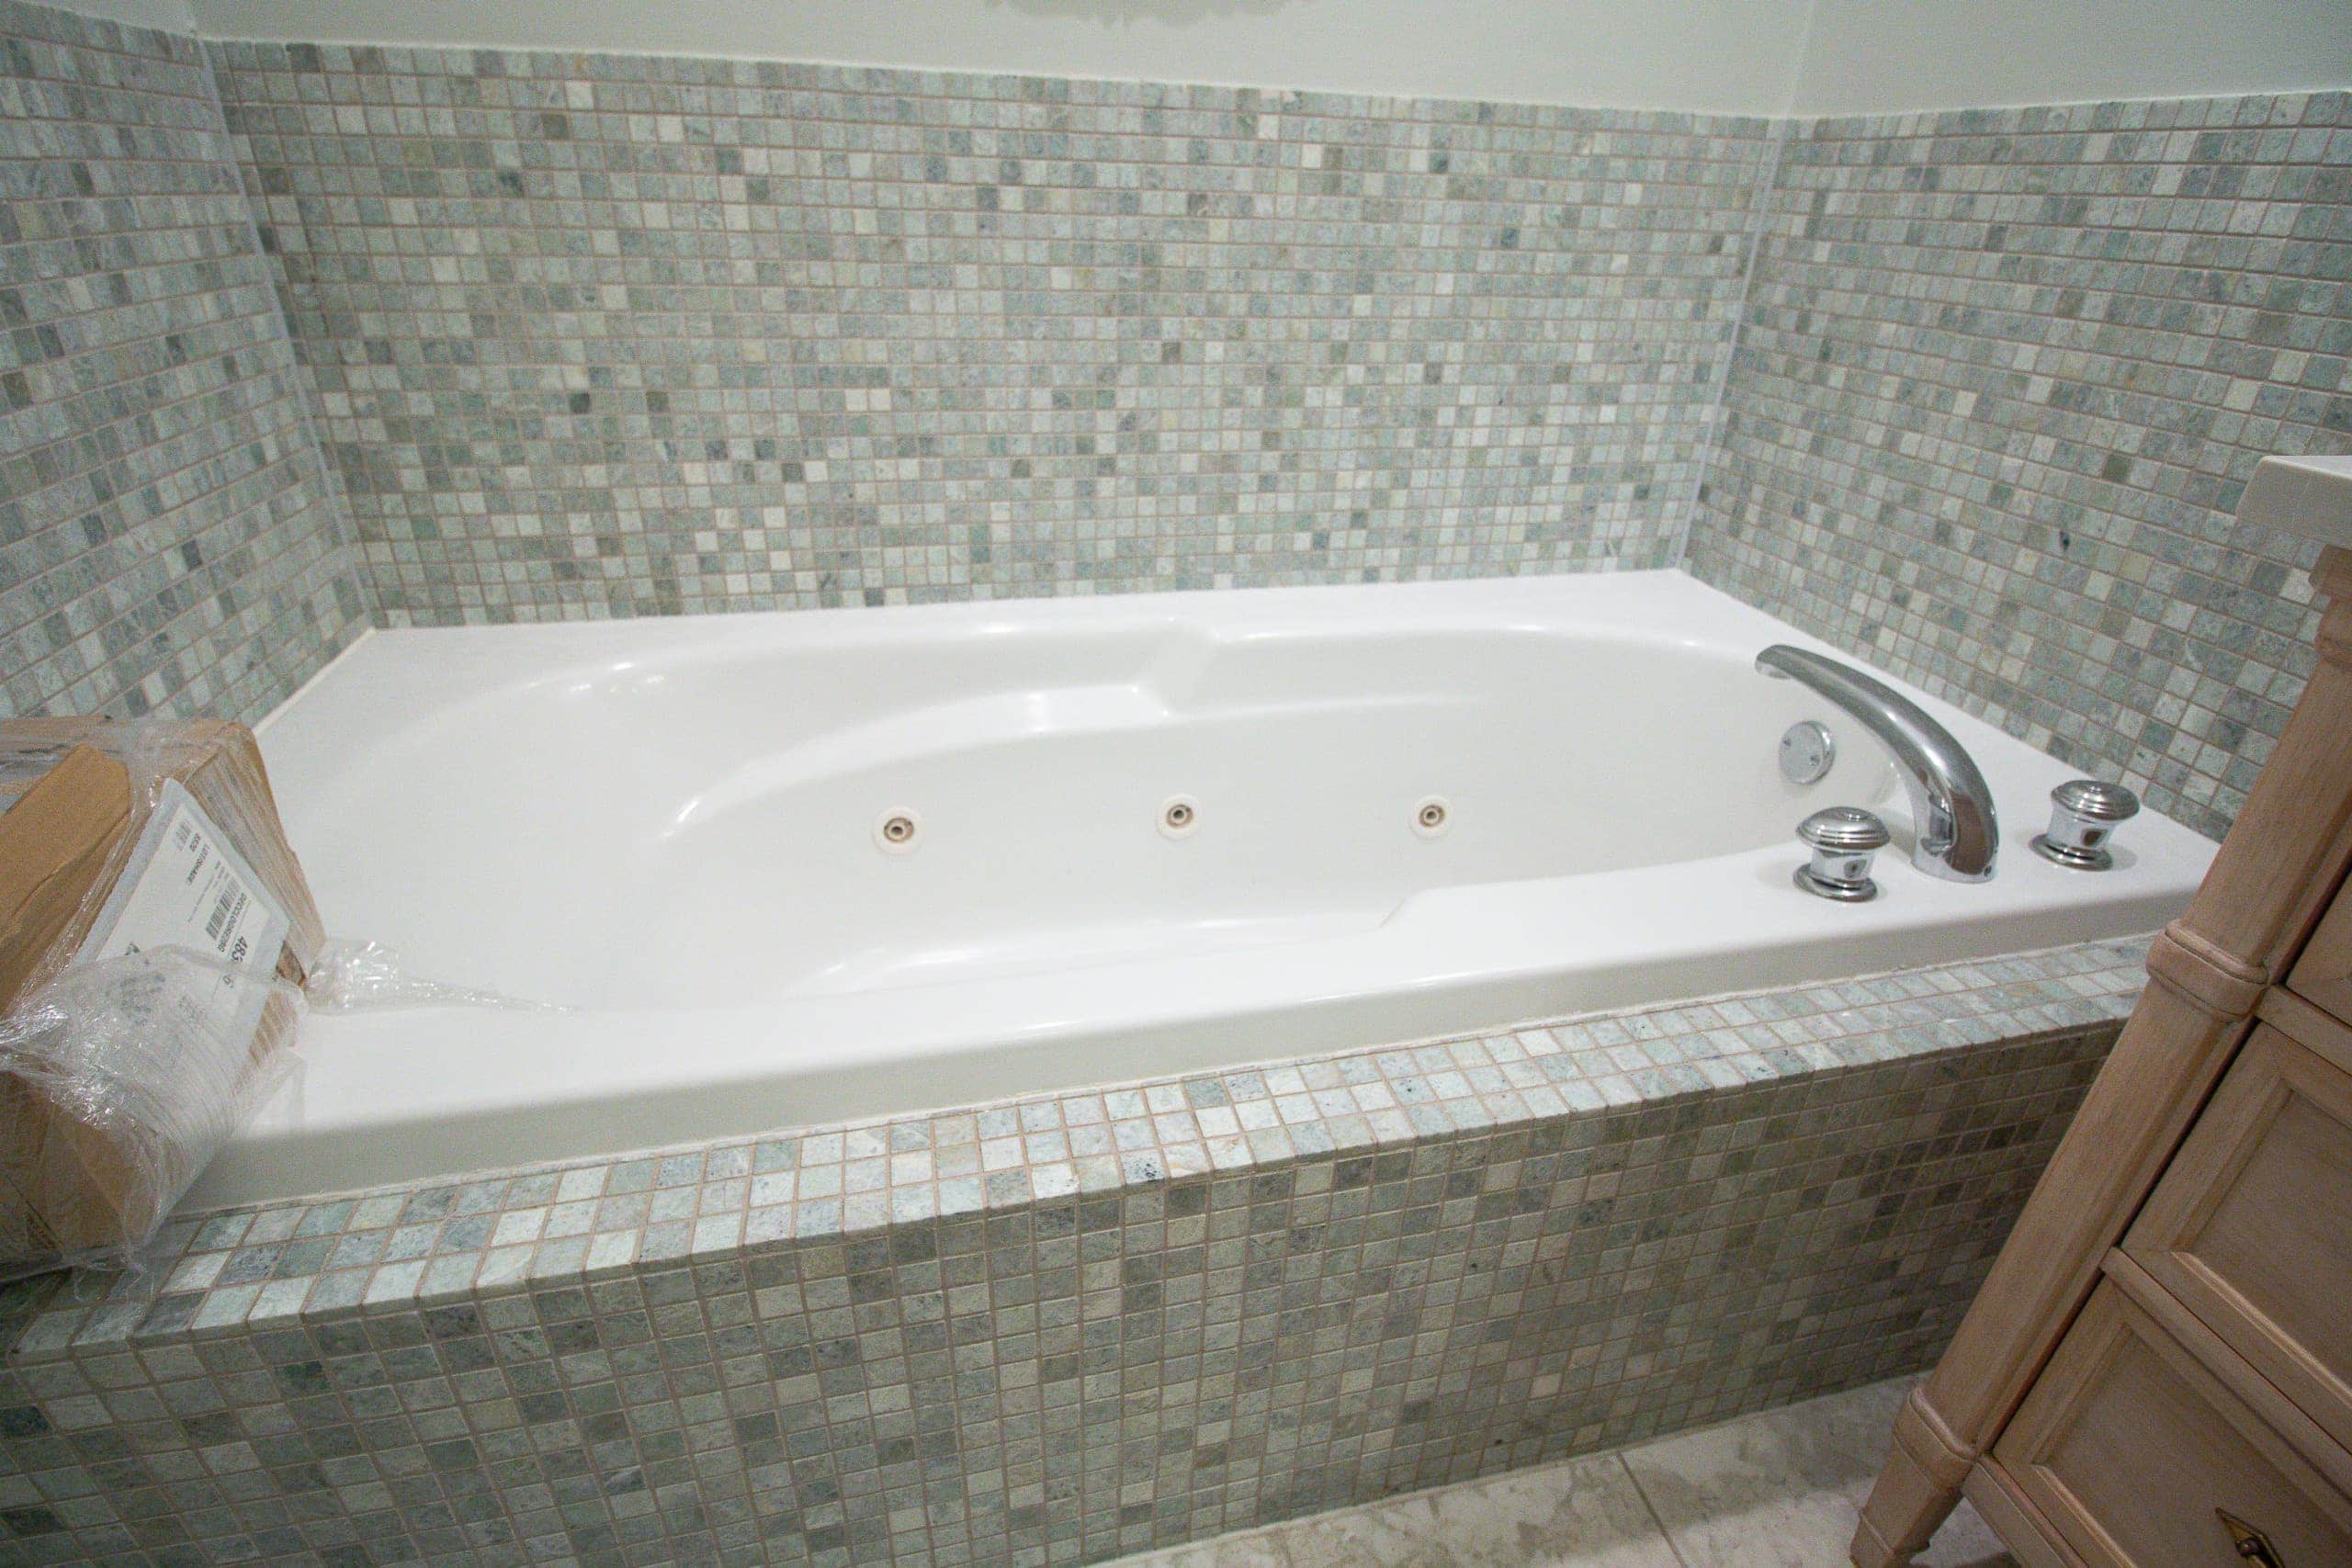
I must say, I am most jealous of her new freestanding tub. I’m a big bath person and would probably use this every single night if it was my house! Before, she had an outdated jacuzzi tub and when we realized that a freestanding tub might work in its place, we were both so excited. My mom isn’t even a big bath person, but she has been taking baths because of this new gorgeous tub! 
We went with black wall-mounted hardware and it really pops against the taupe tile and the white tub. 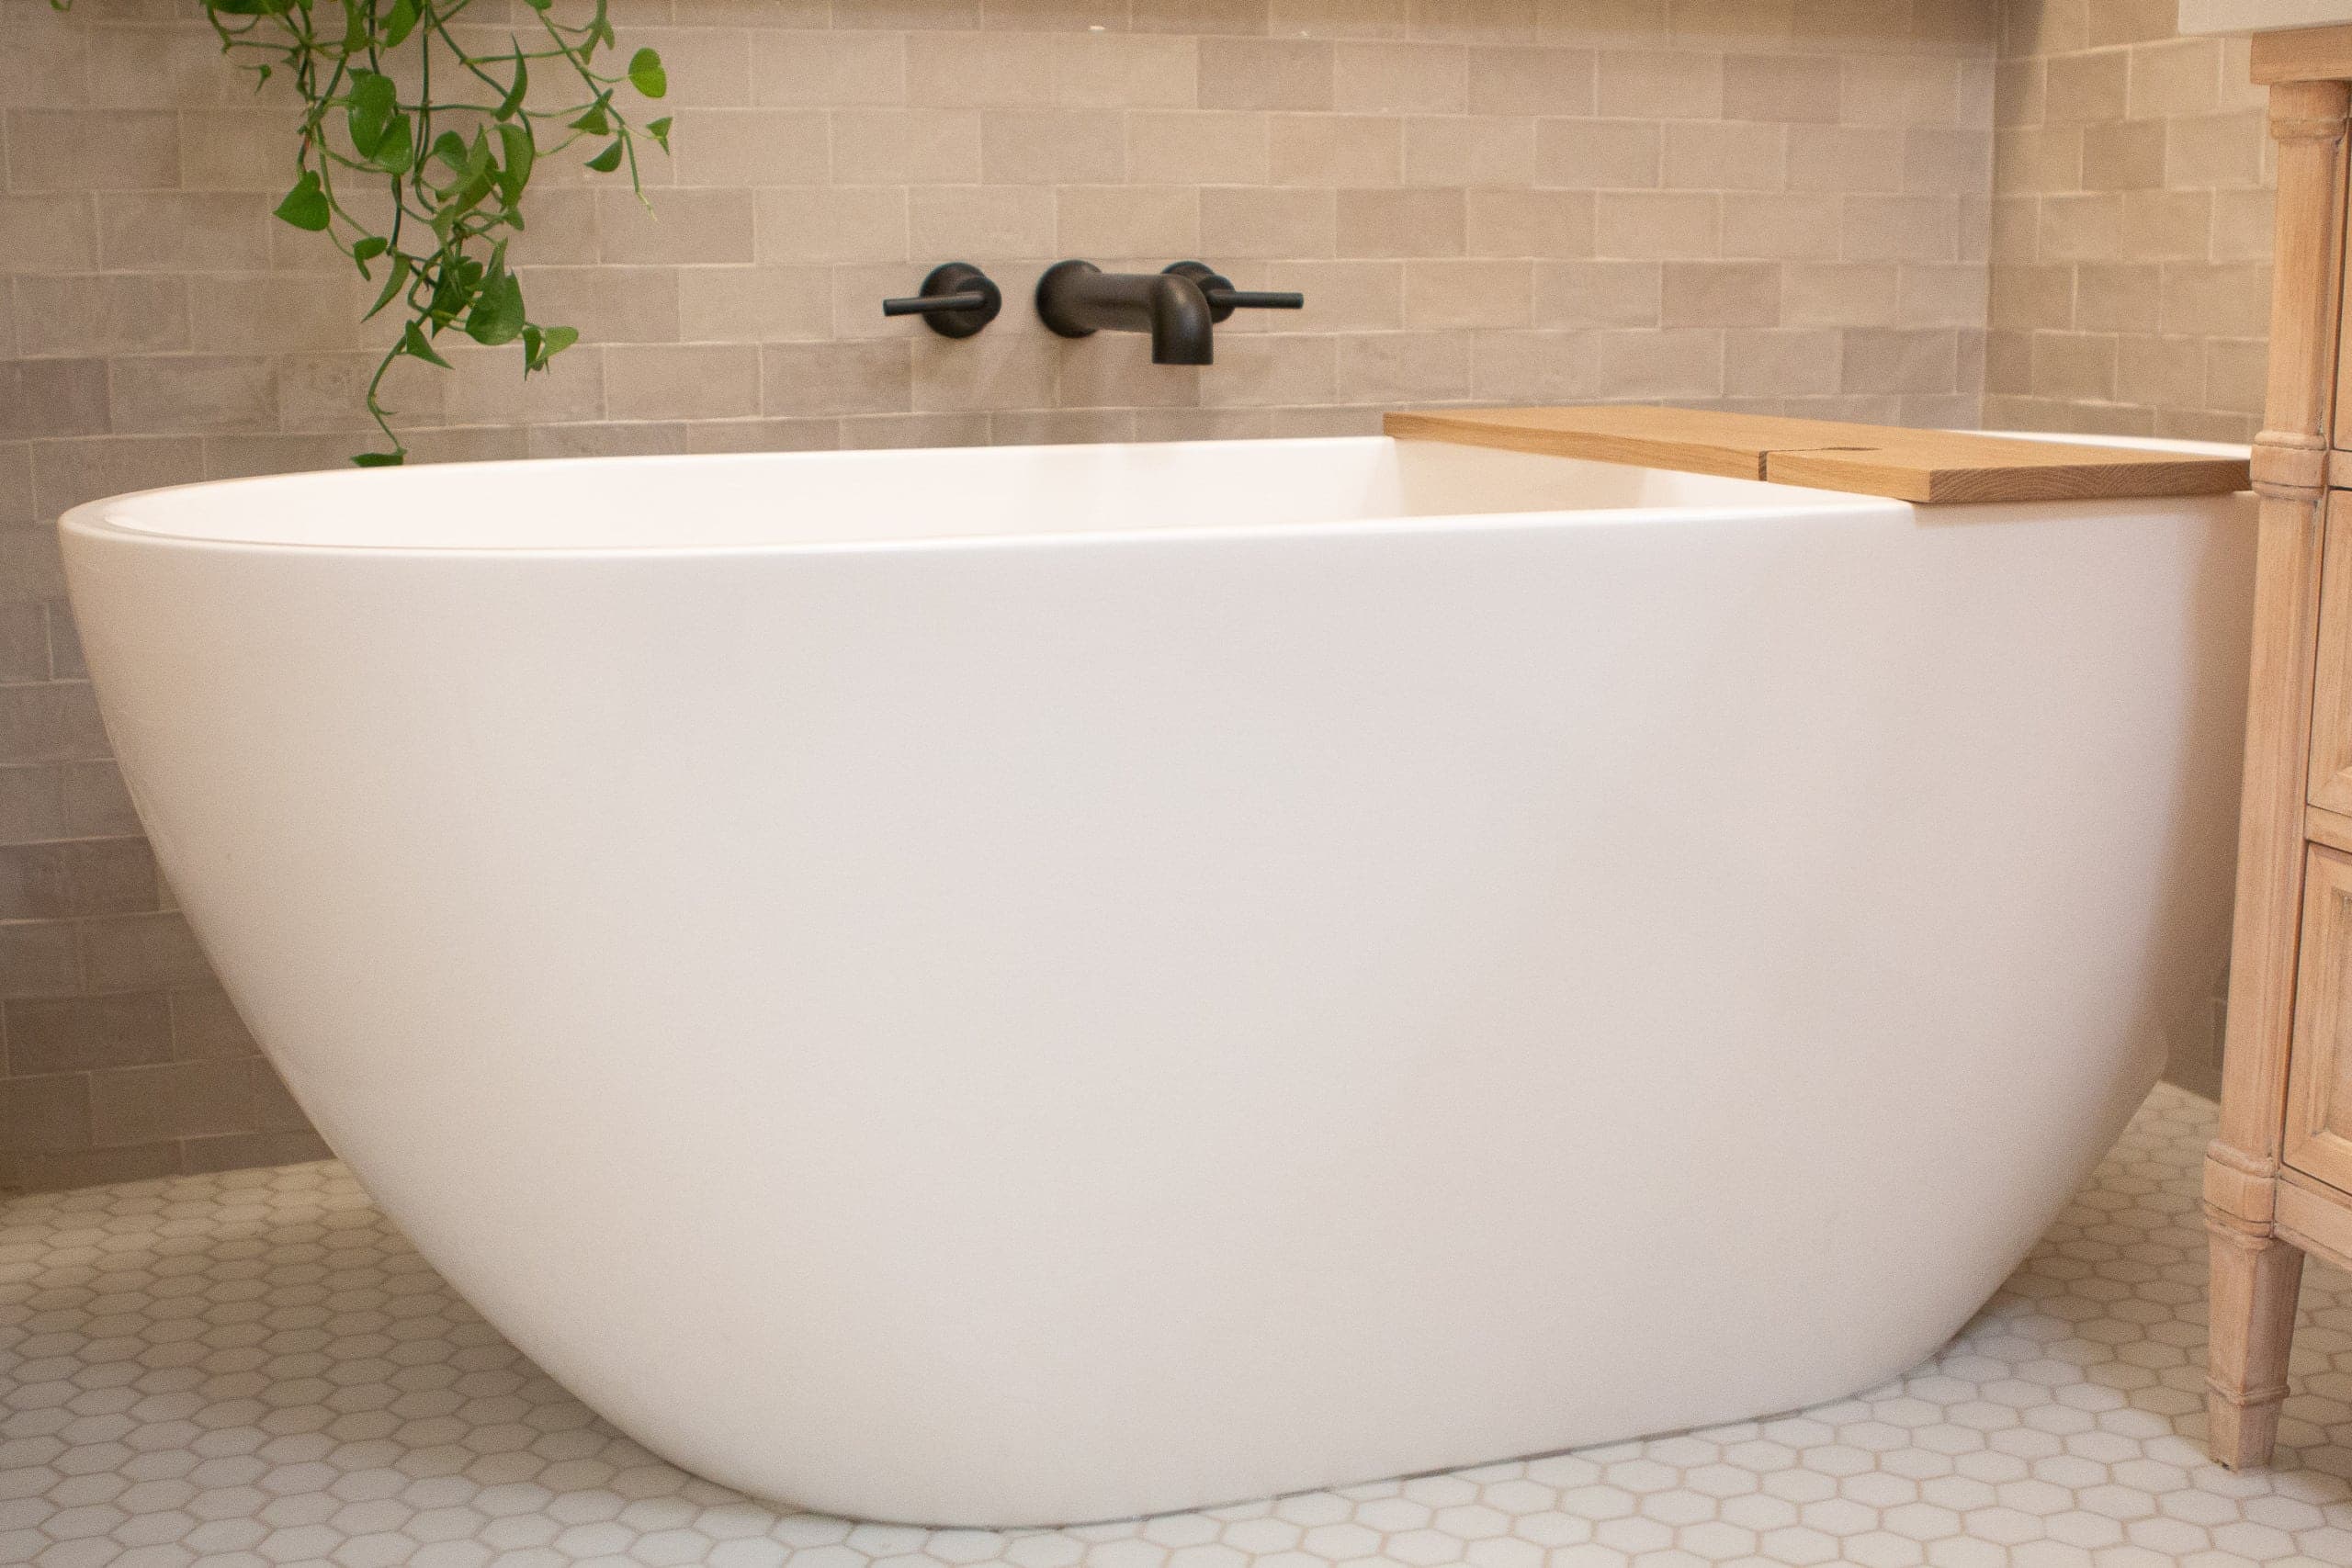
I love the shape of the tub because it’s very simple. The vanity has so much detail and I didn’t want this bathtub to compete with that. Instead, it’s just nice and sleek and BIG! 
I bought my mom this custom bath tray for Mother’s Day to use here and I think it works perfectly. The wood adds warmth and complements the wood vanity. Plus, it even has a spot for a glass of wine! 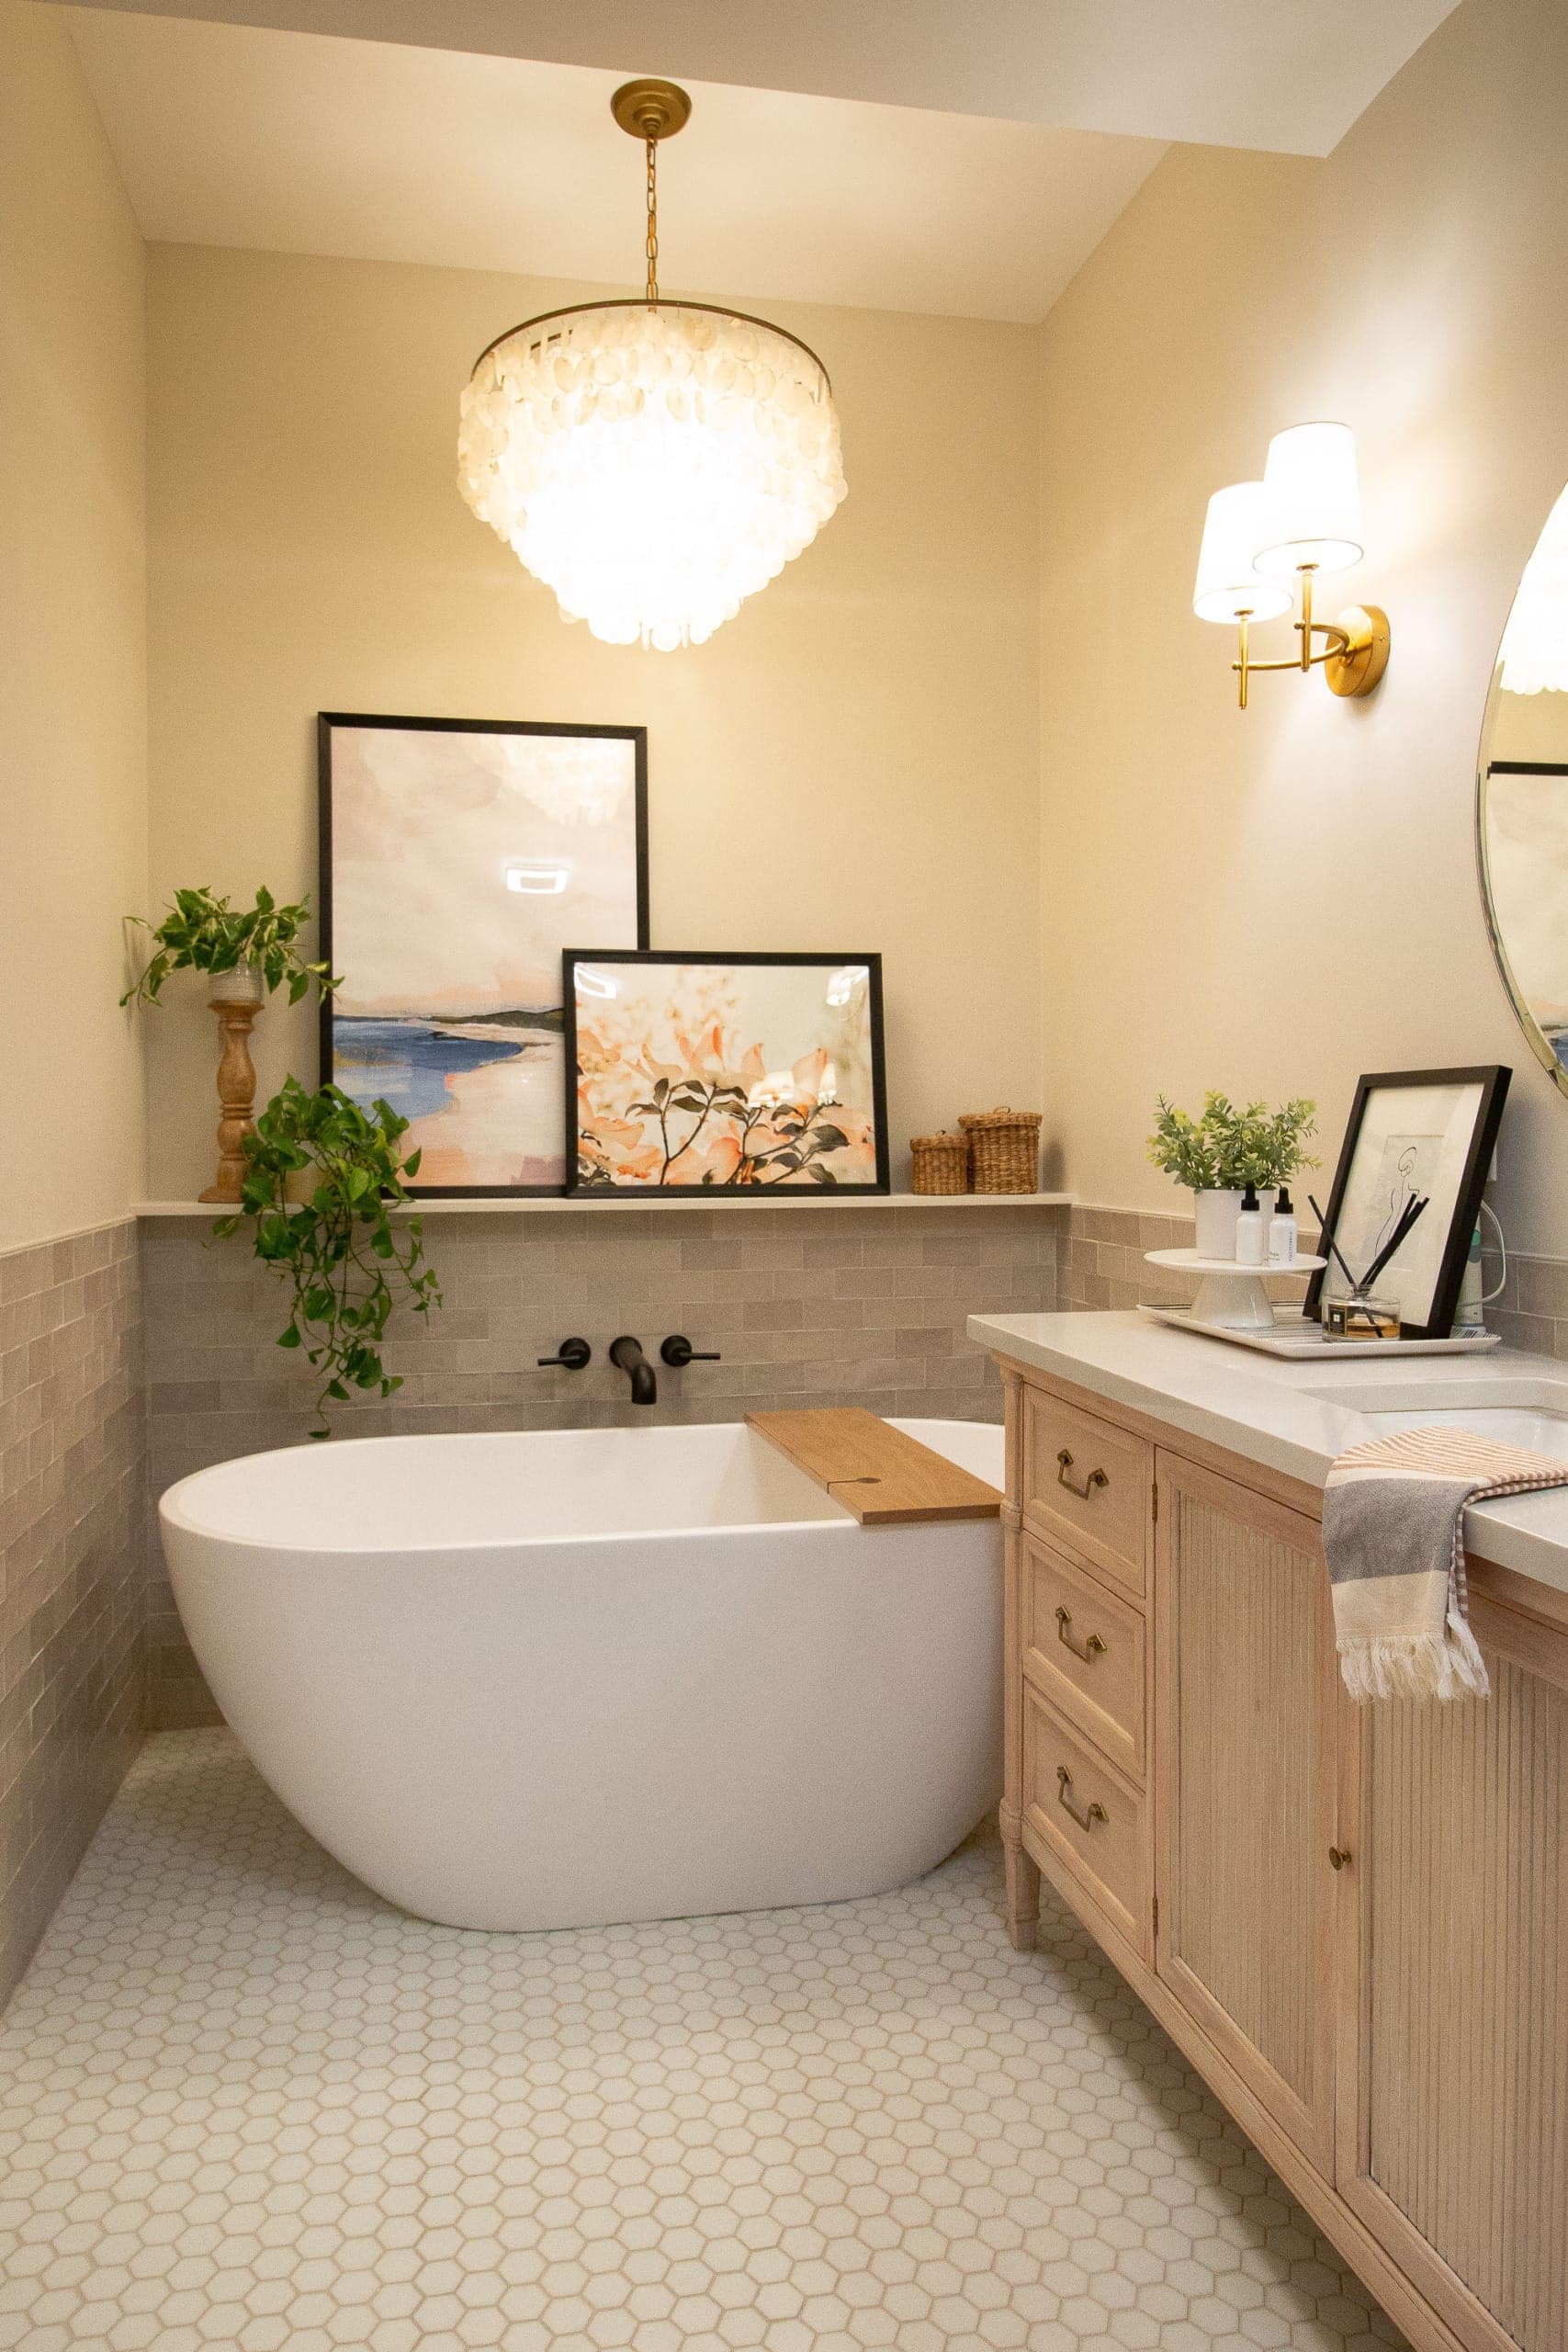
Over the bathtub, we chose this gorgeous brass chandelier and wow, it adds so much to the space. It brightens things up, but it also brings a bit of glam to the entire room. 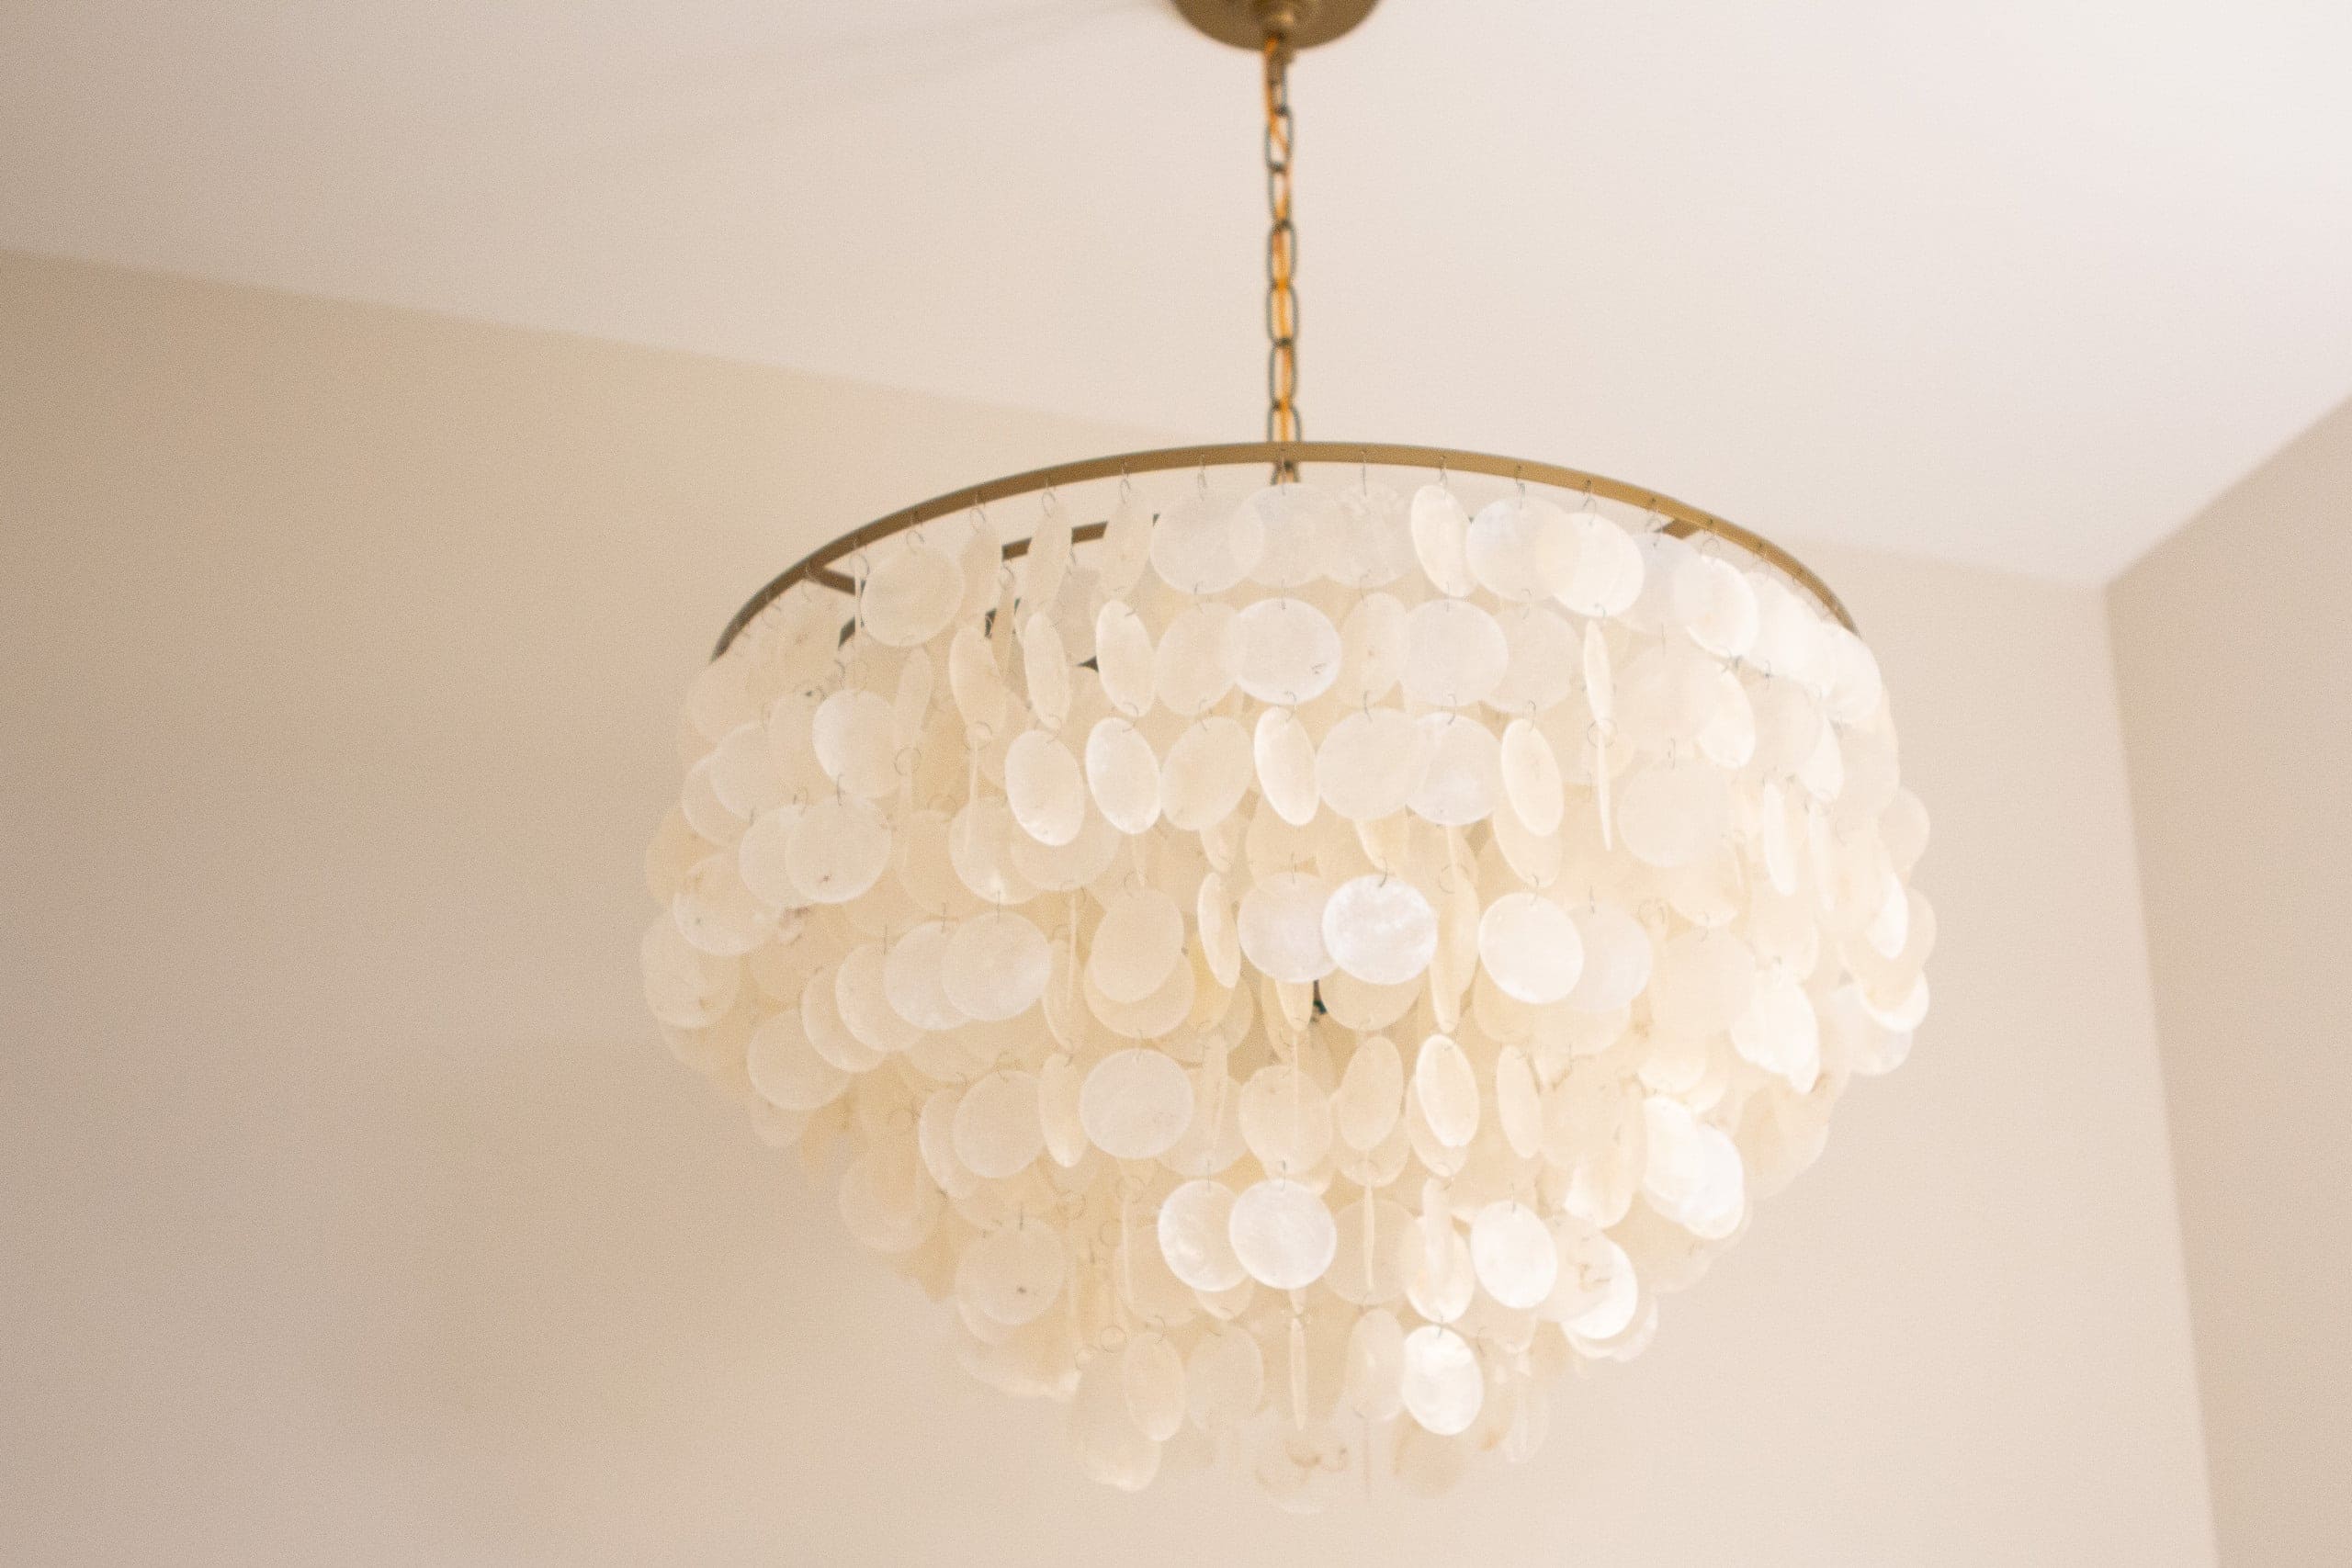
I like how the capiz shells on this chandelier complement the capiz mirror in her guest bathroom. It’s all about repeating elements throughout your home to keep everything feeling cohesive.
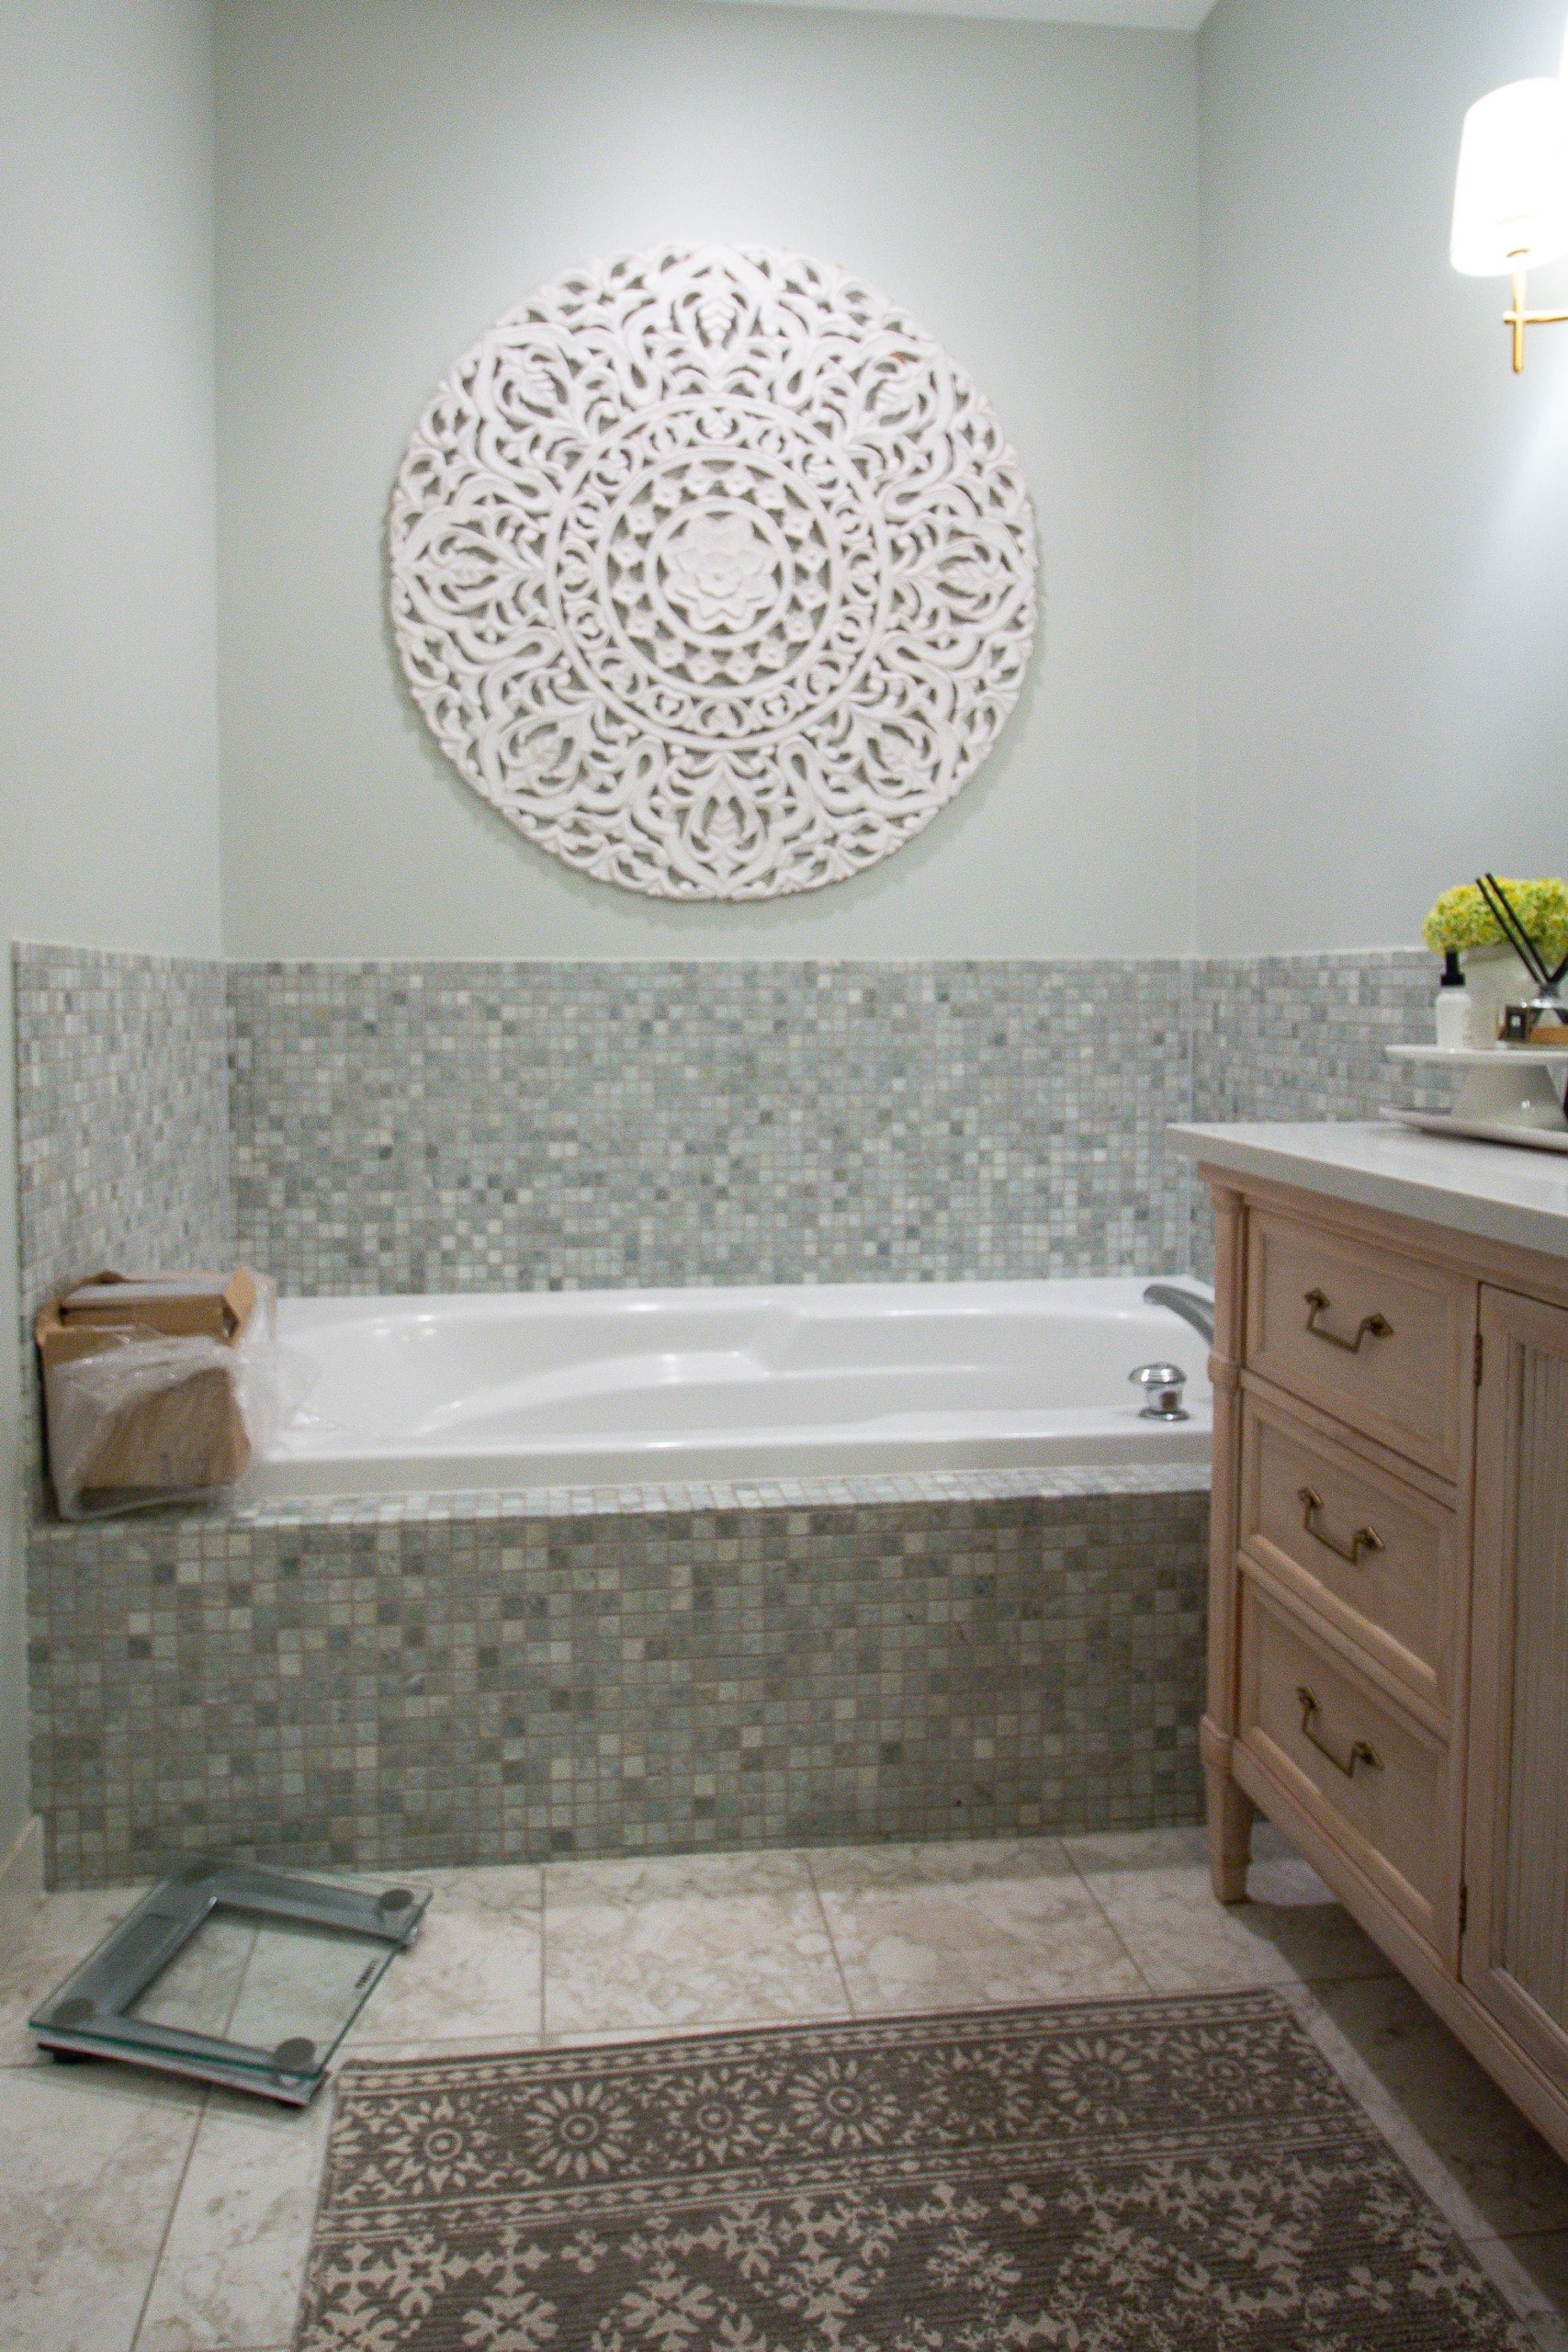
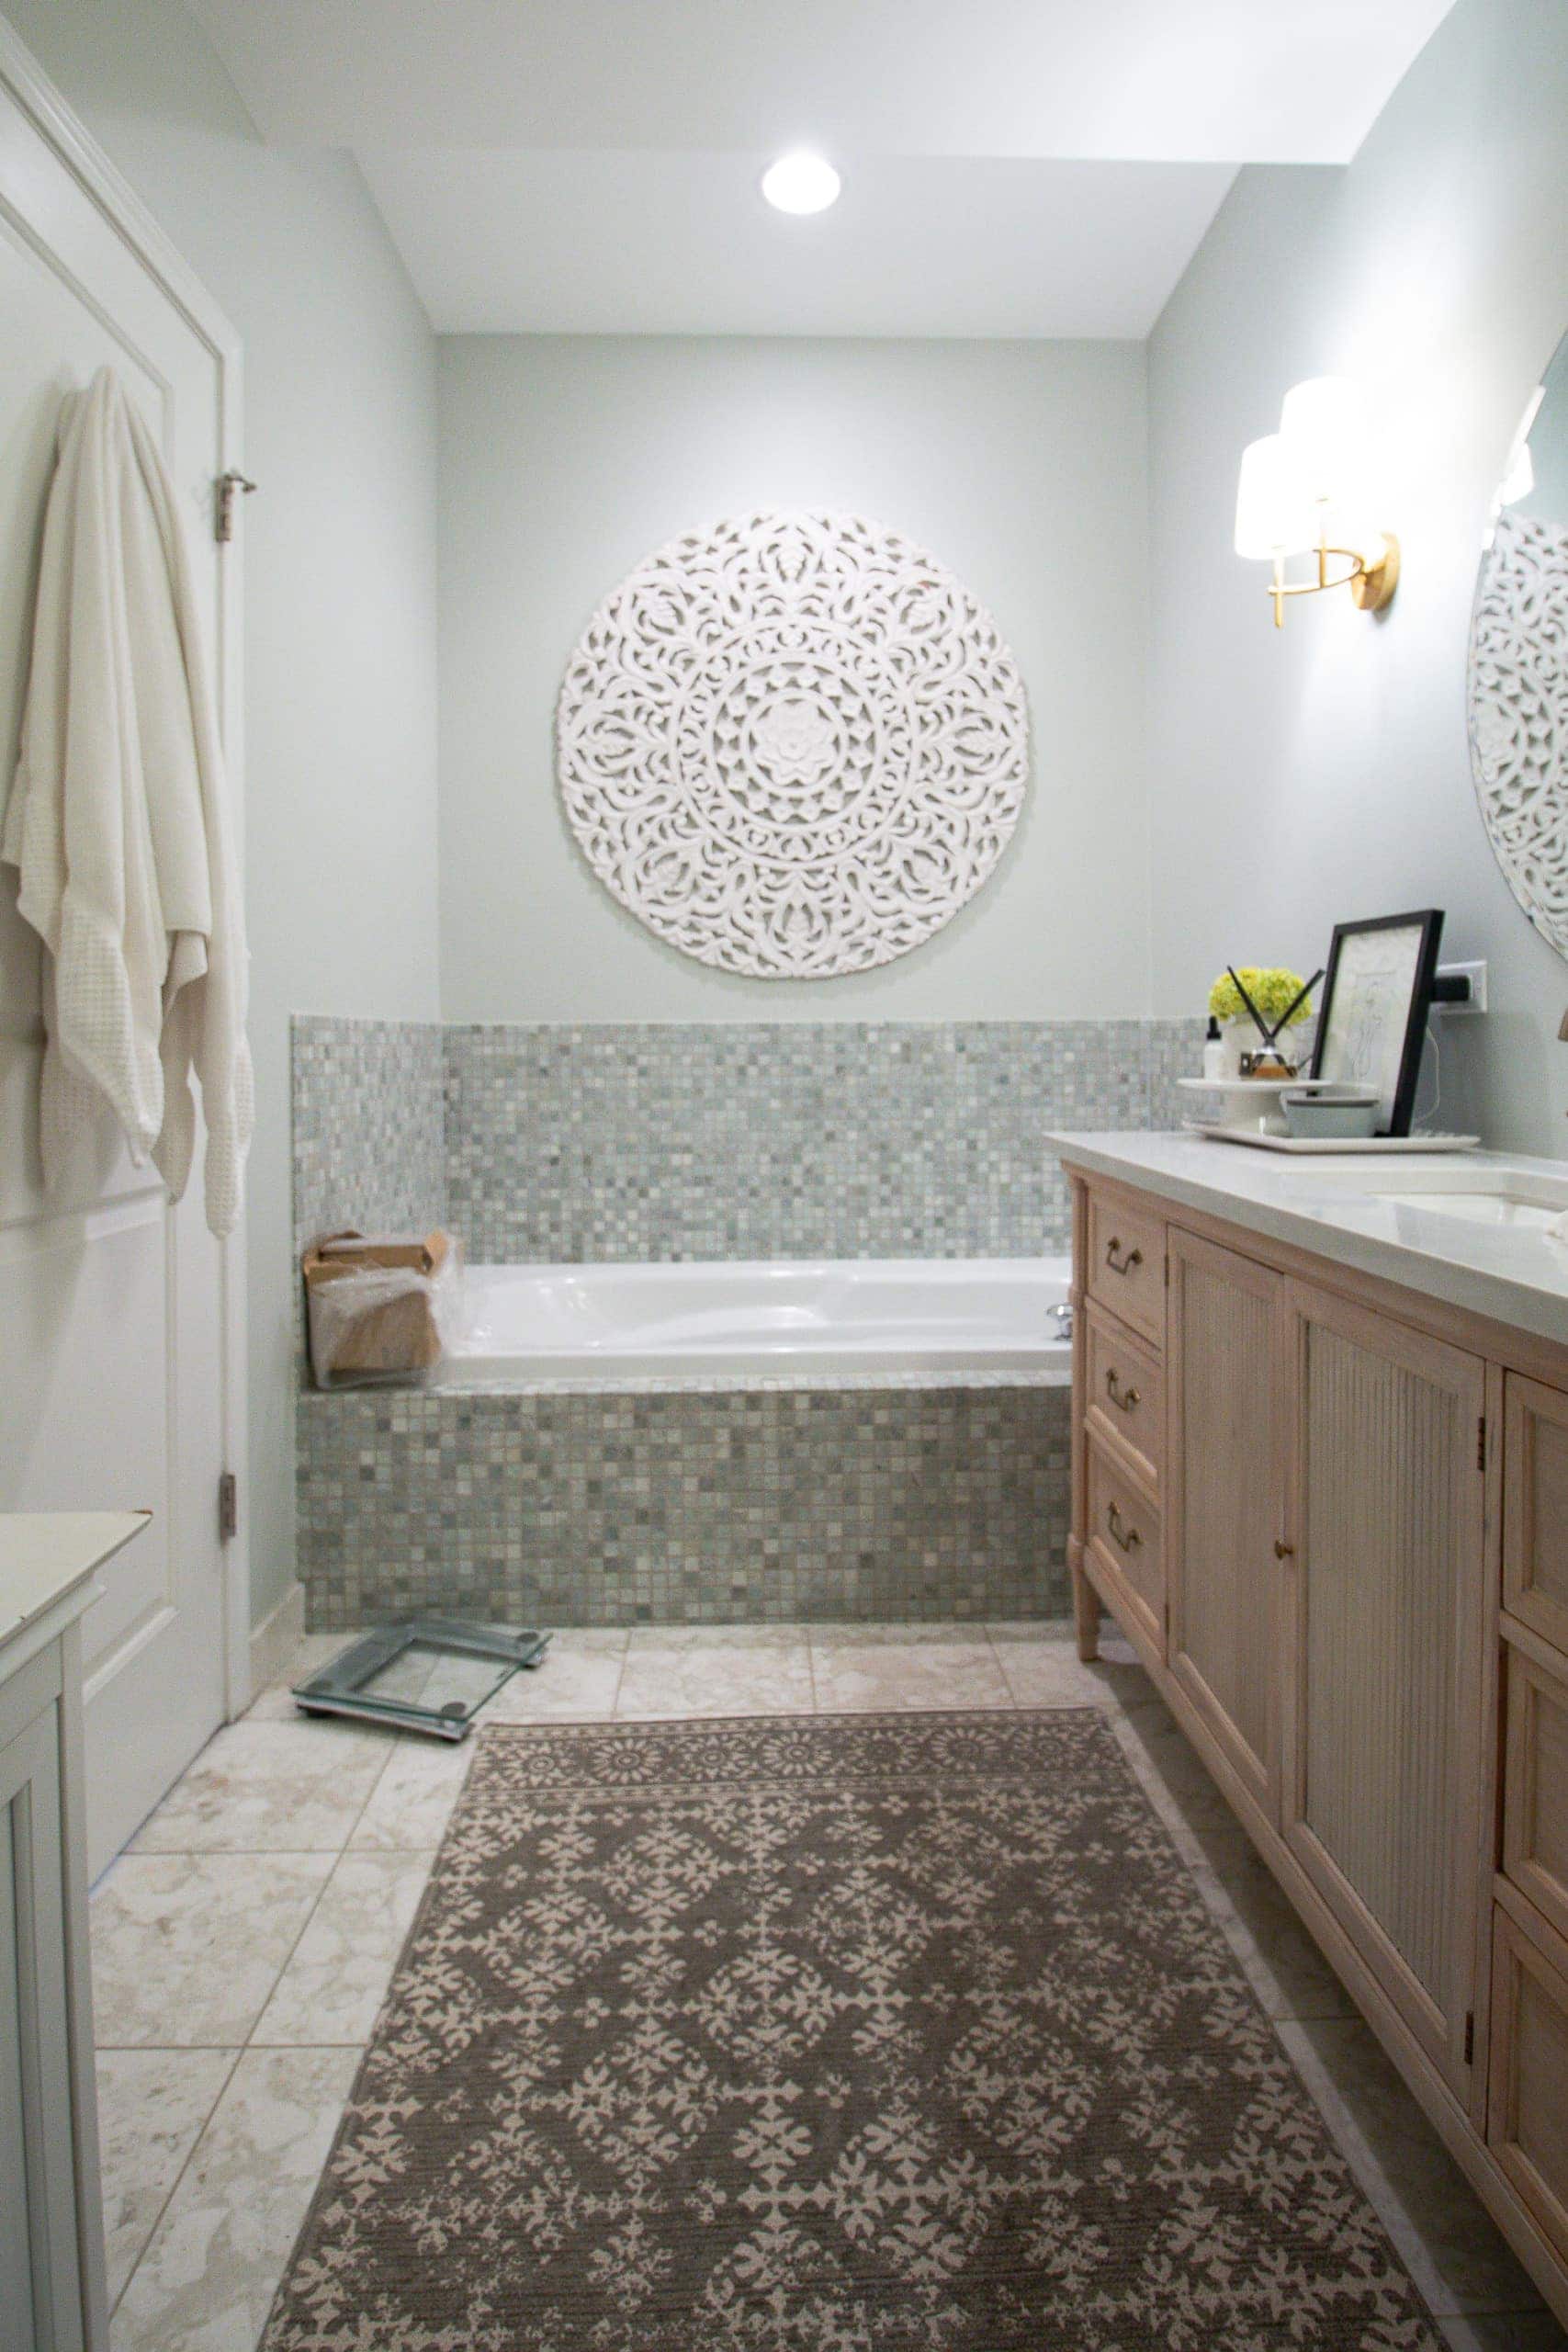
The Bathtub Ledge
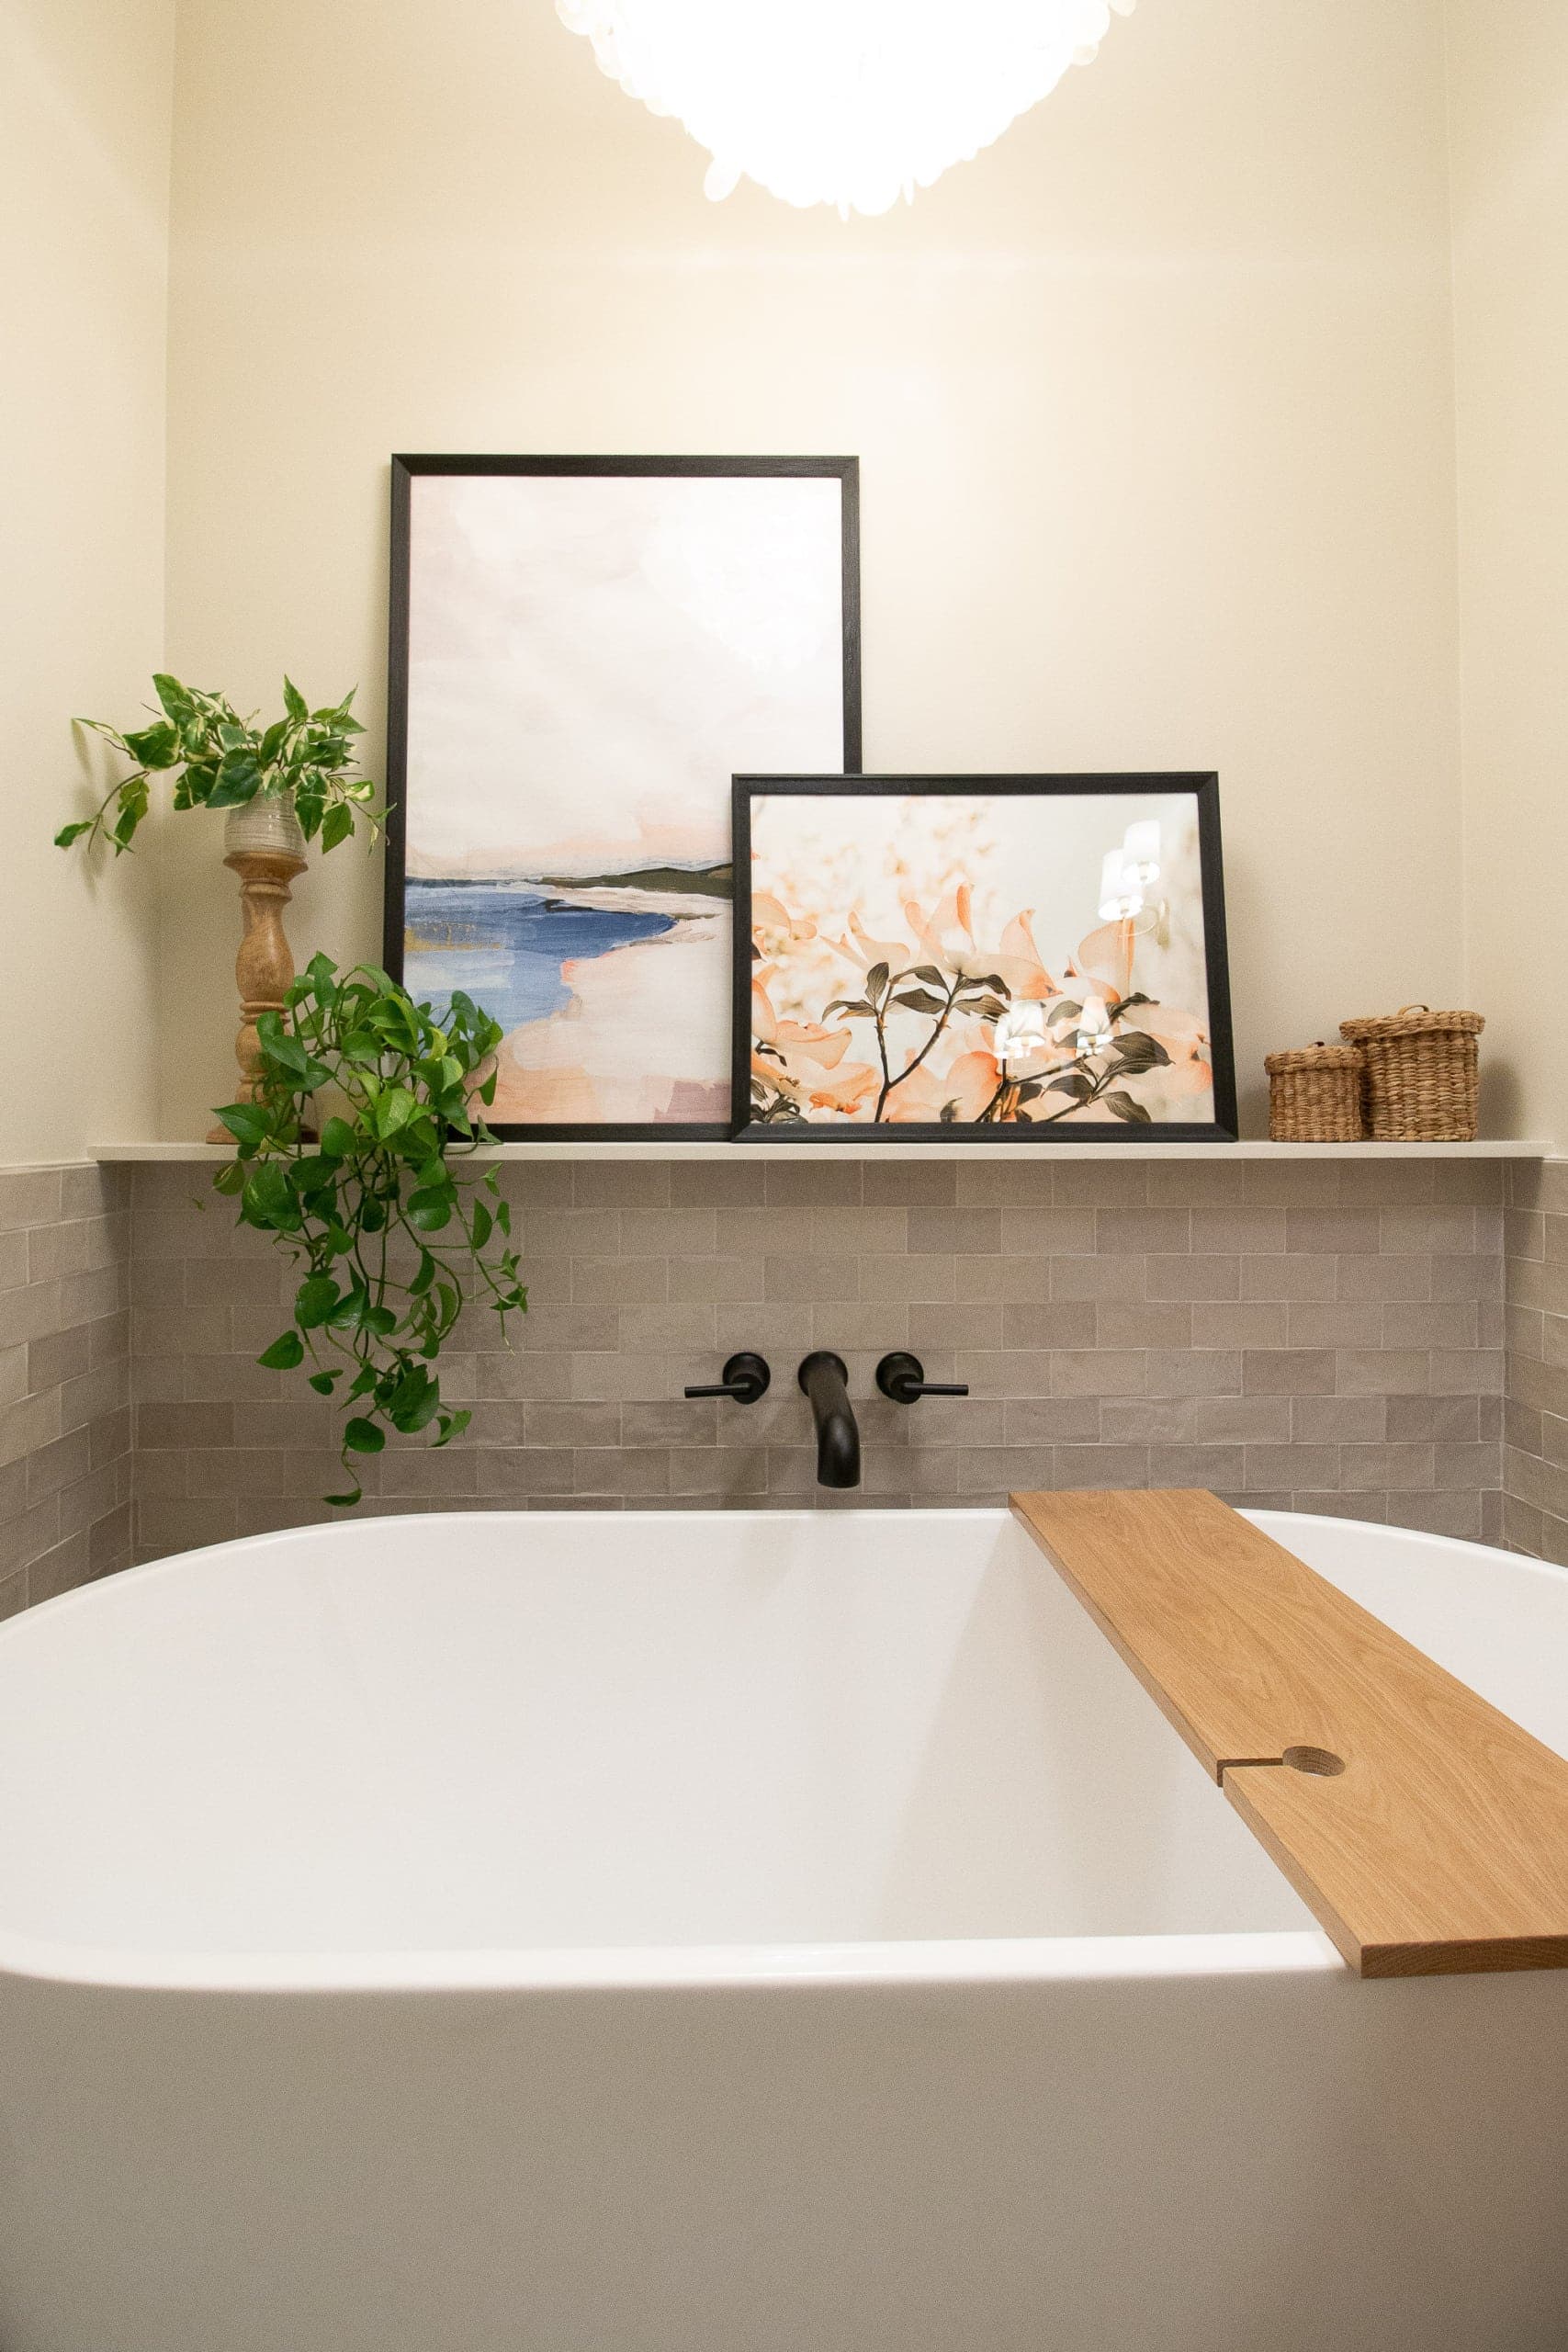
One really smart addition was adding a ledge near the freestanding tub. Not only is it a nice place to put a glass of water or a shampoo bottle, but it’s also the ideal spot to have a little fun with art and accessories. We just had the contractor add a piece of wood right over the tile and he painted it the same color as the walls (Benjamin Moore “Fog Mist”). We were originally going to do wood for the shelf, but between the bath tray and the vanity, it felt a little heavy with wood on that side of the room. 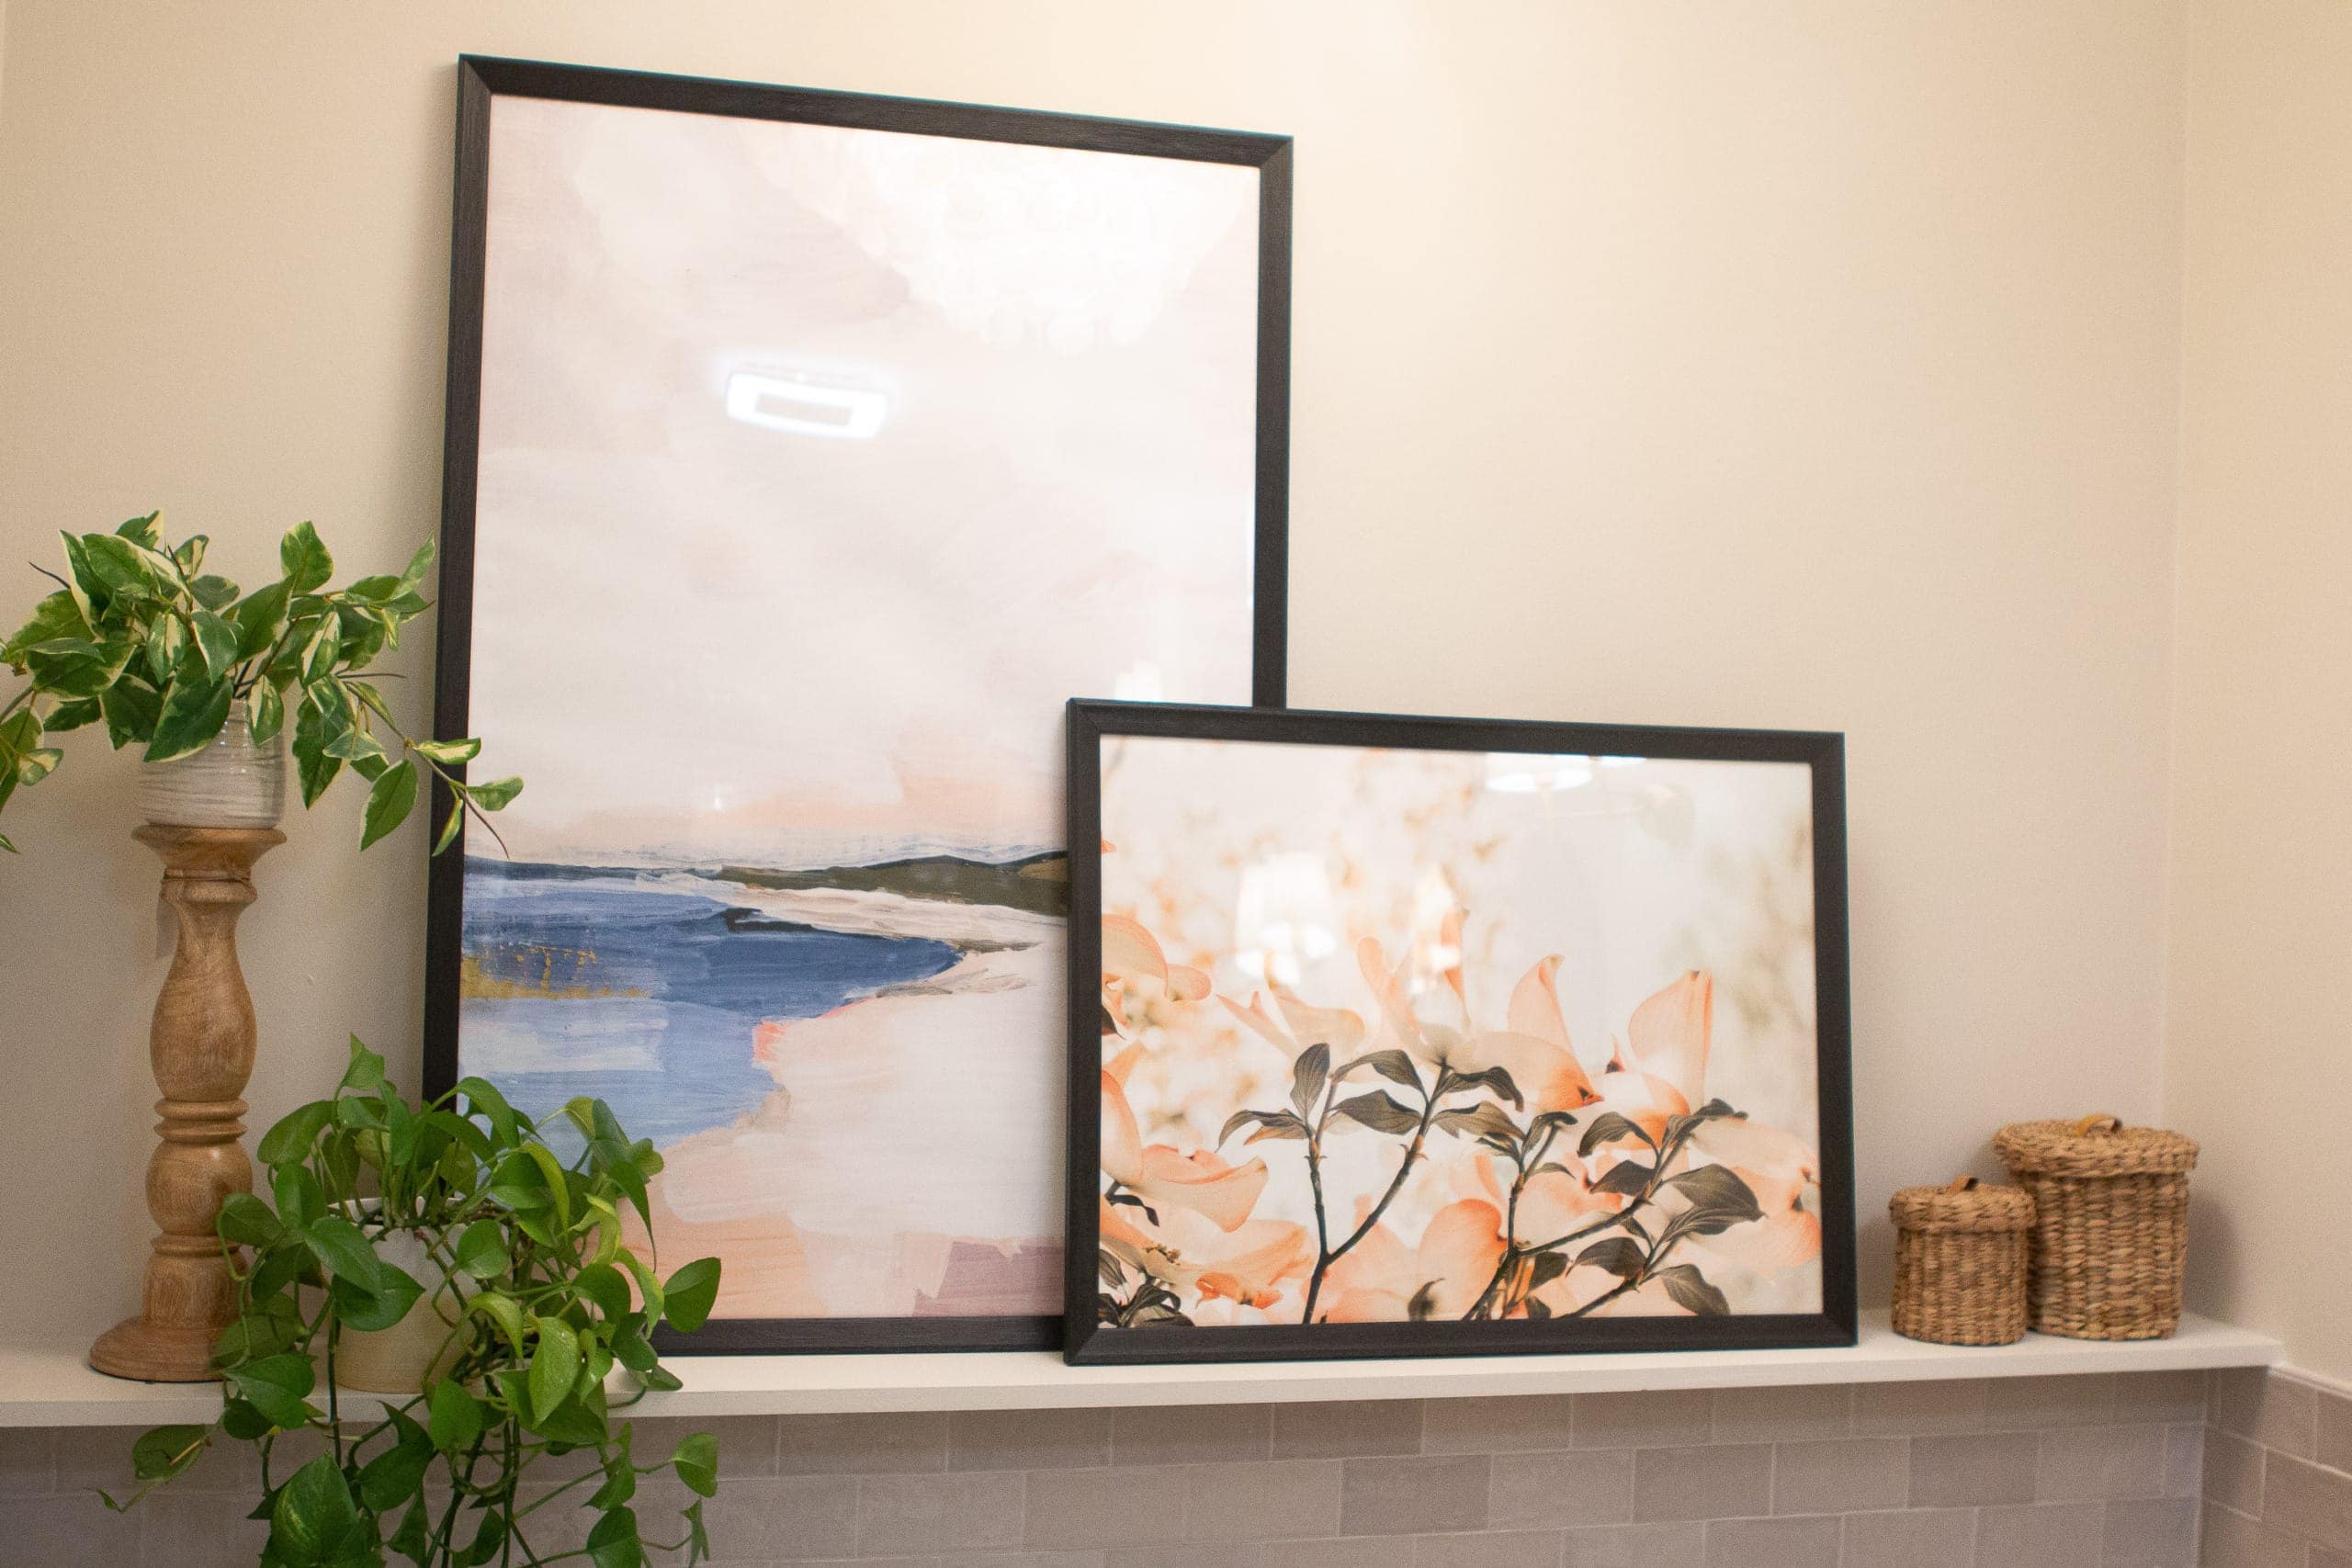
For the art, we knew we had to go big to fill up that huge space. (The ceilings in here are 10 feet high!) My mom ordered the print on the left from Juniper Print Shop in a 24×36 and then she bought this smaller piece from Minted in 18×24. We used these inexpensive black frames from Target to frame them. I always say every room needs a little black, so I’m happy we went with black for the frames. 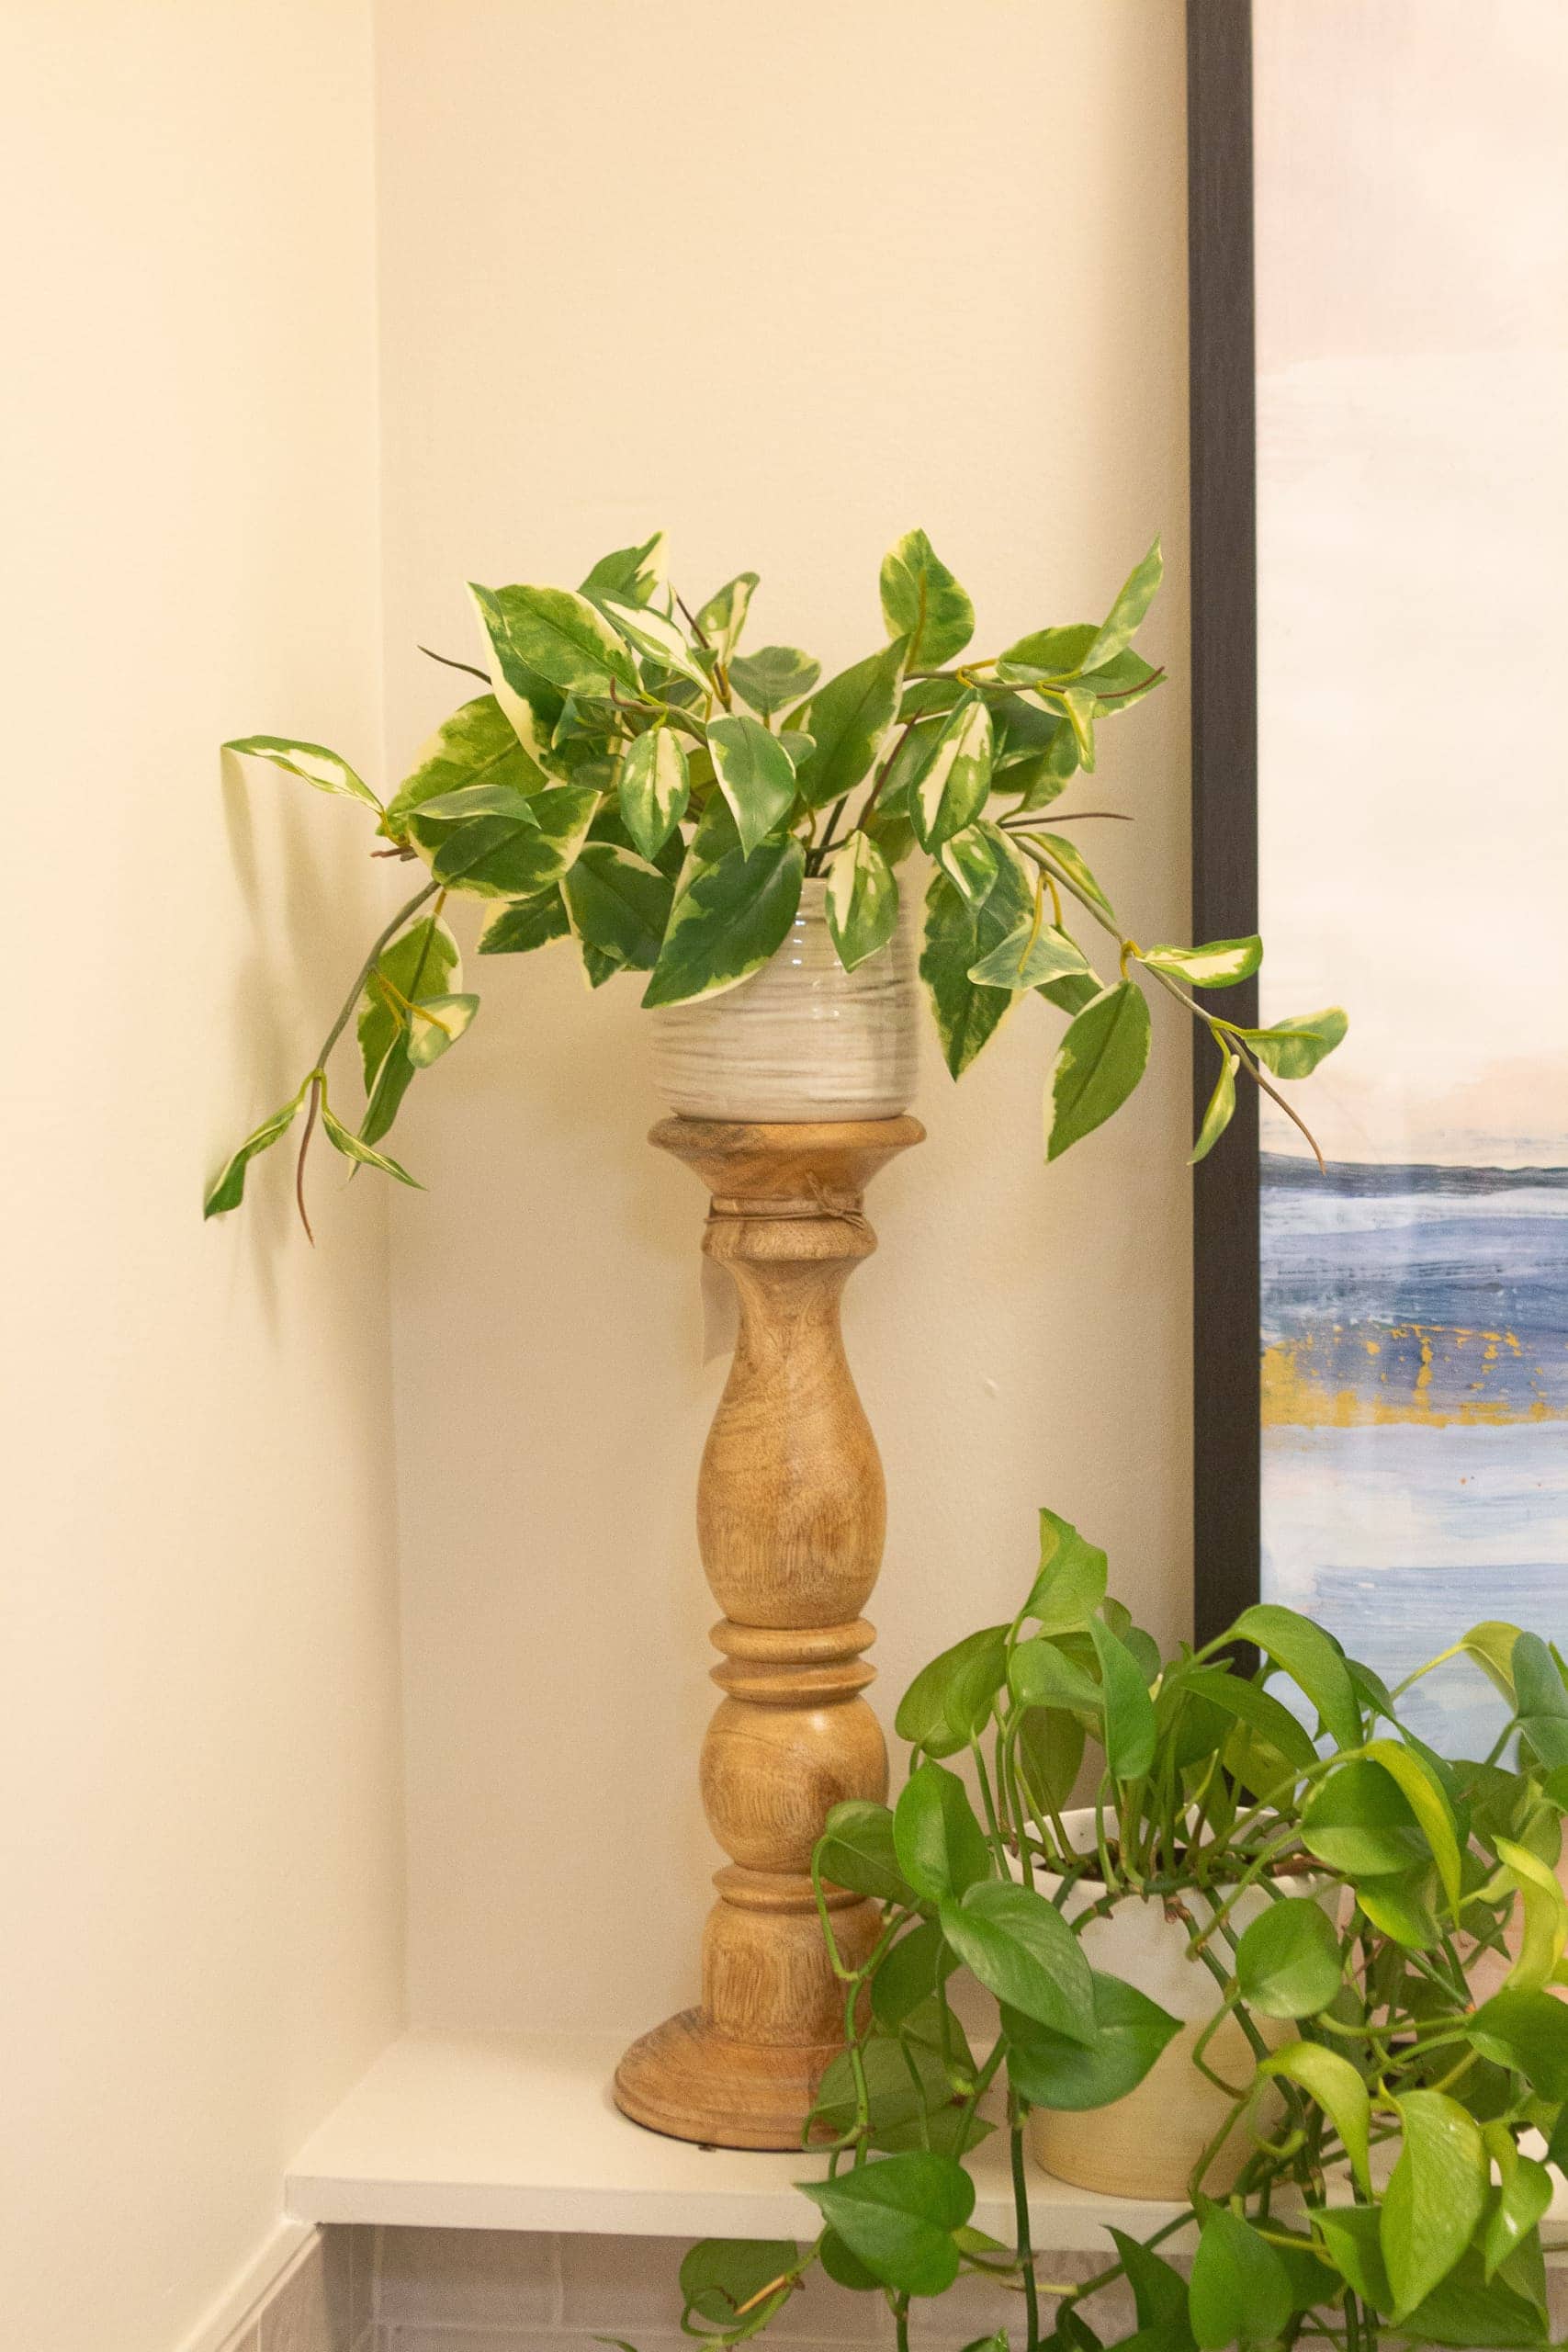
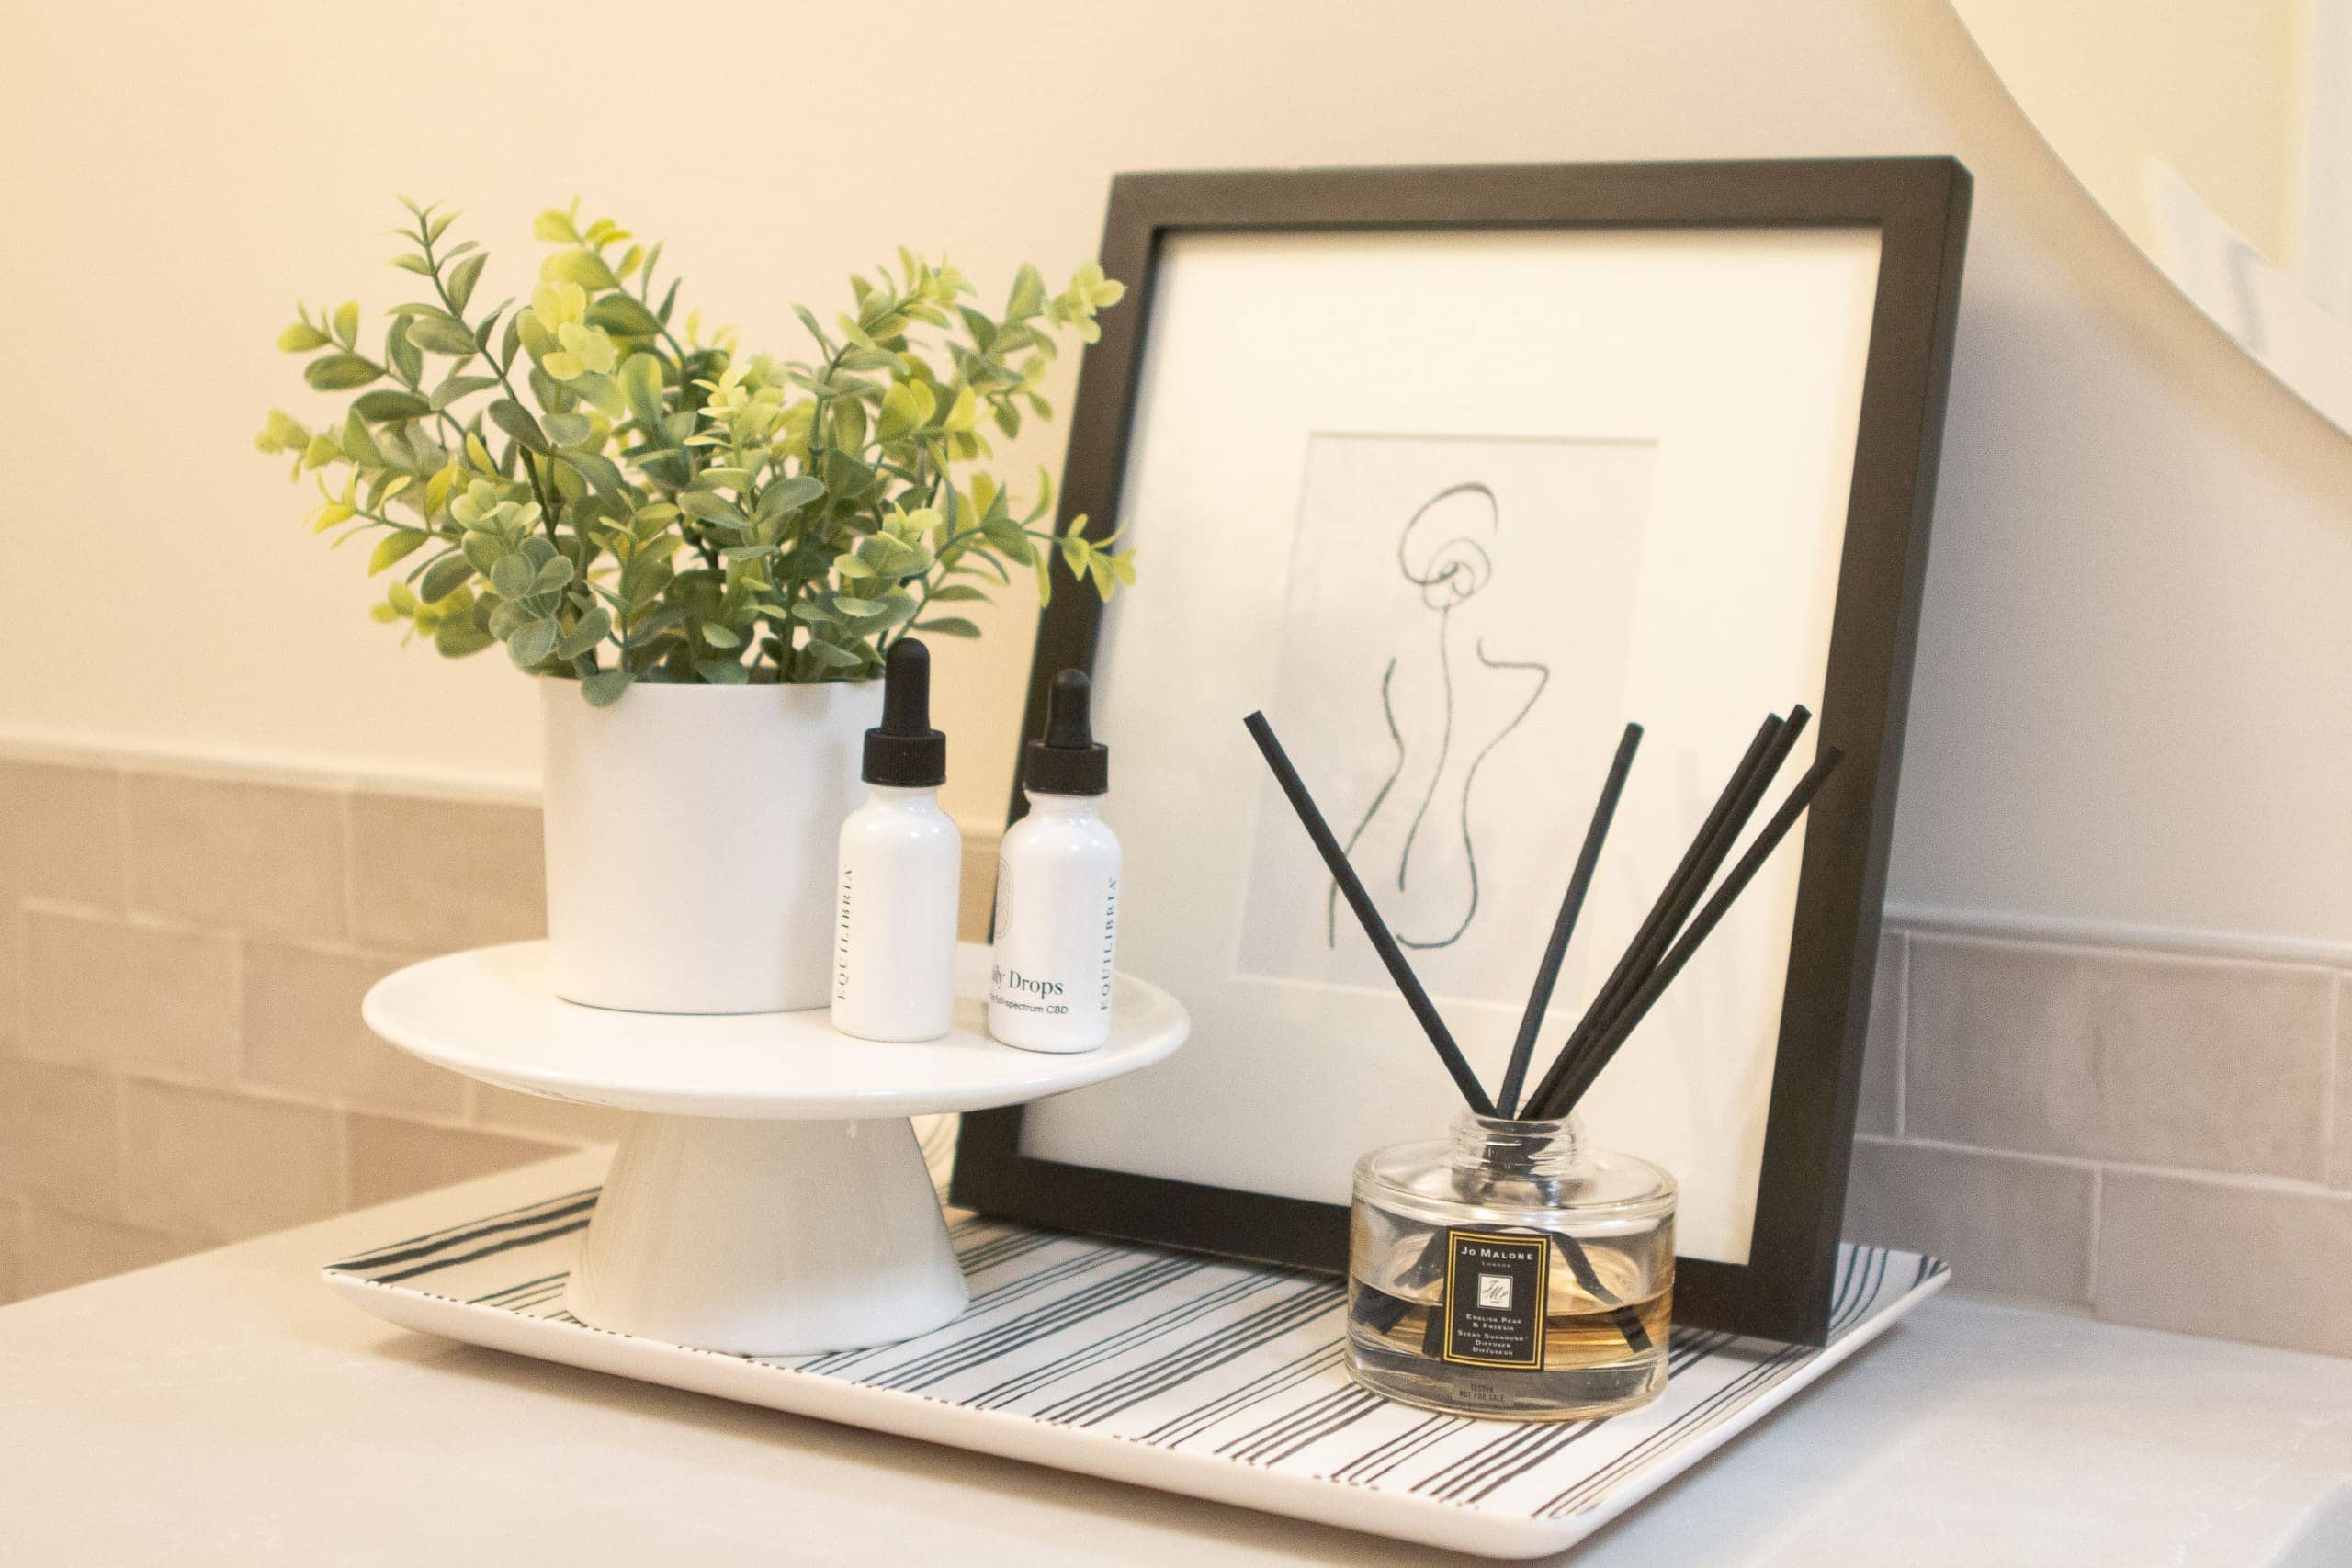
The plant on the wooden candlestick is faux because there are no windows in here, and the other is a pothos plant that usually lives in my mom’s living room. I’m trying to find a good faux drapey plant to swap it out with and I’ll keep you posted if I find anything that looks realistic!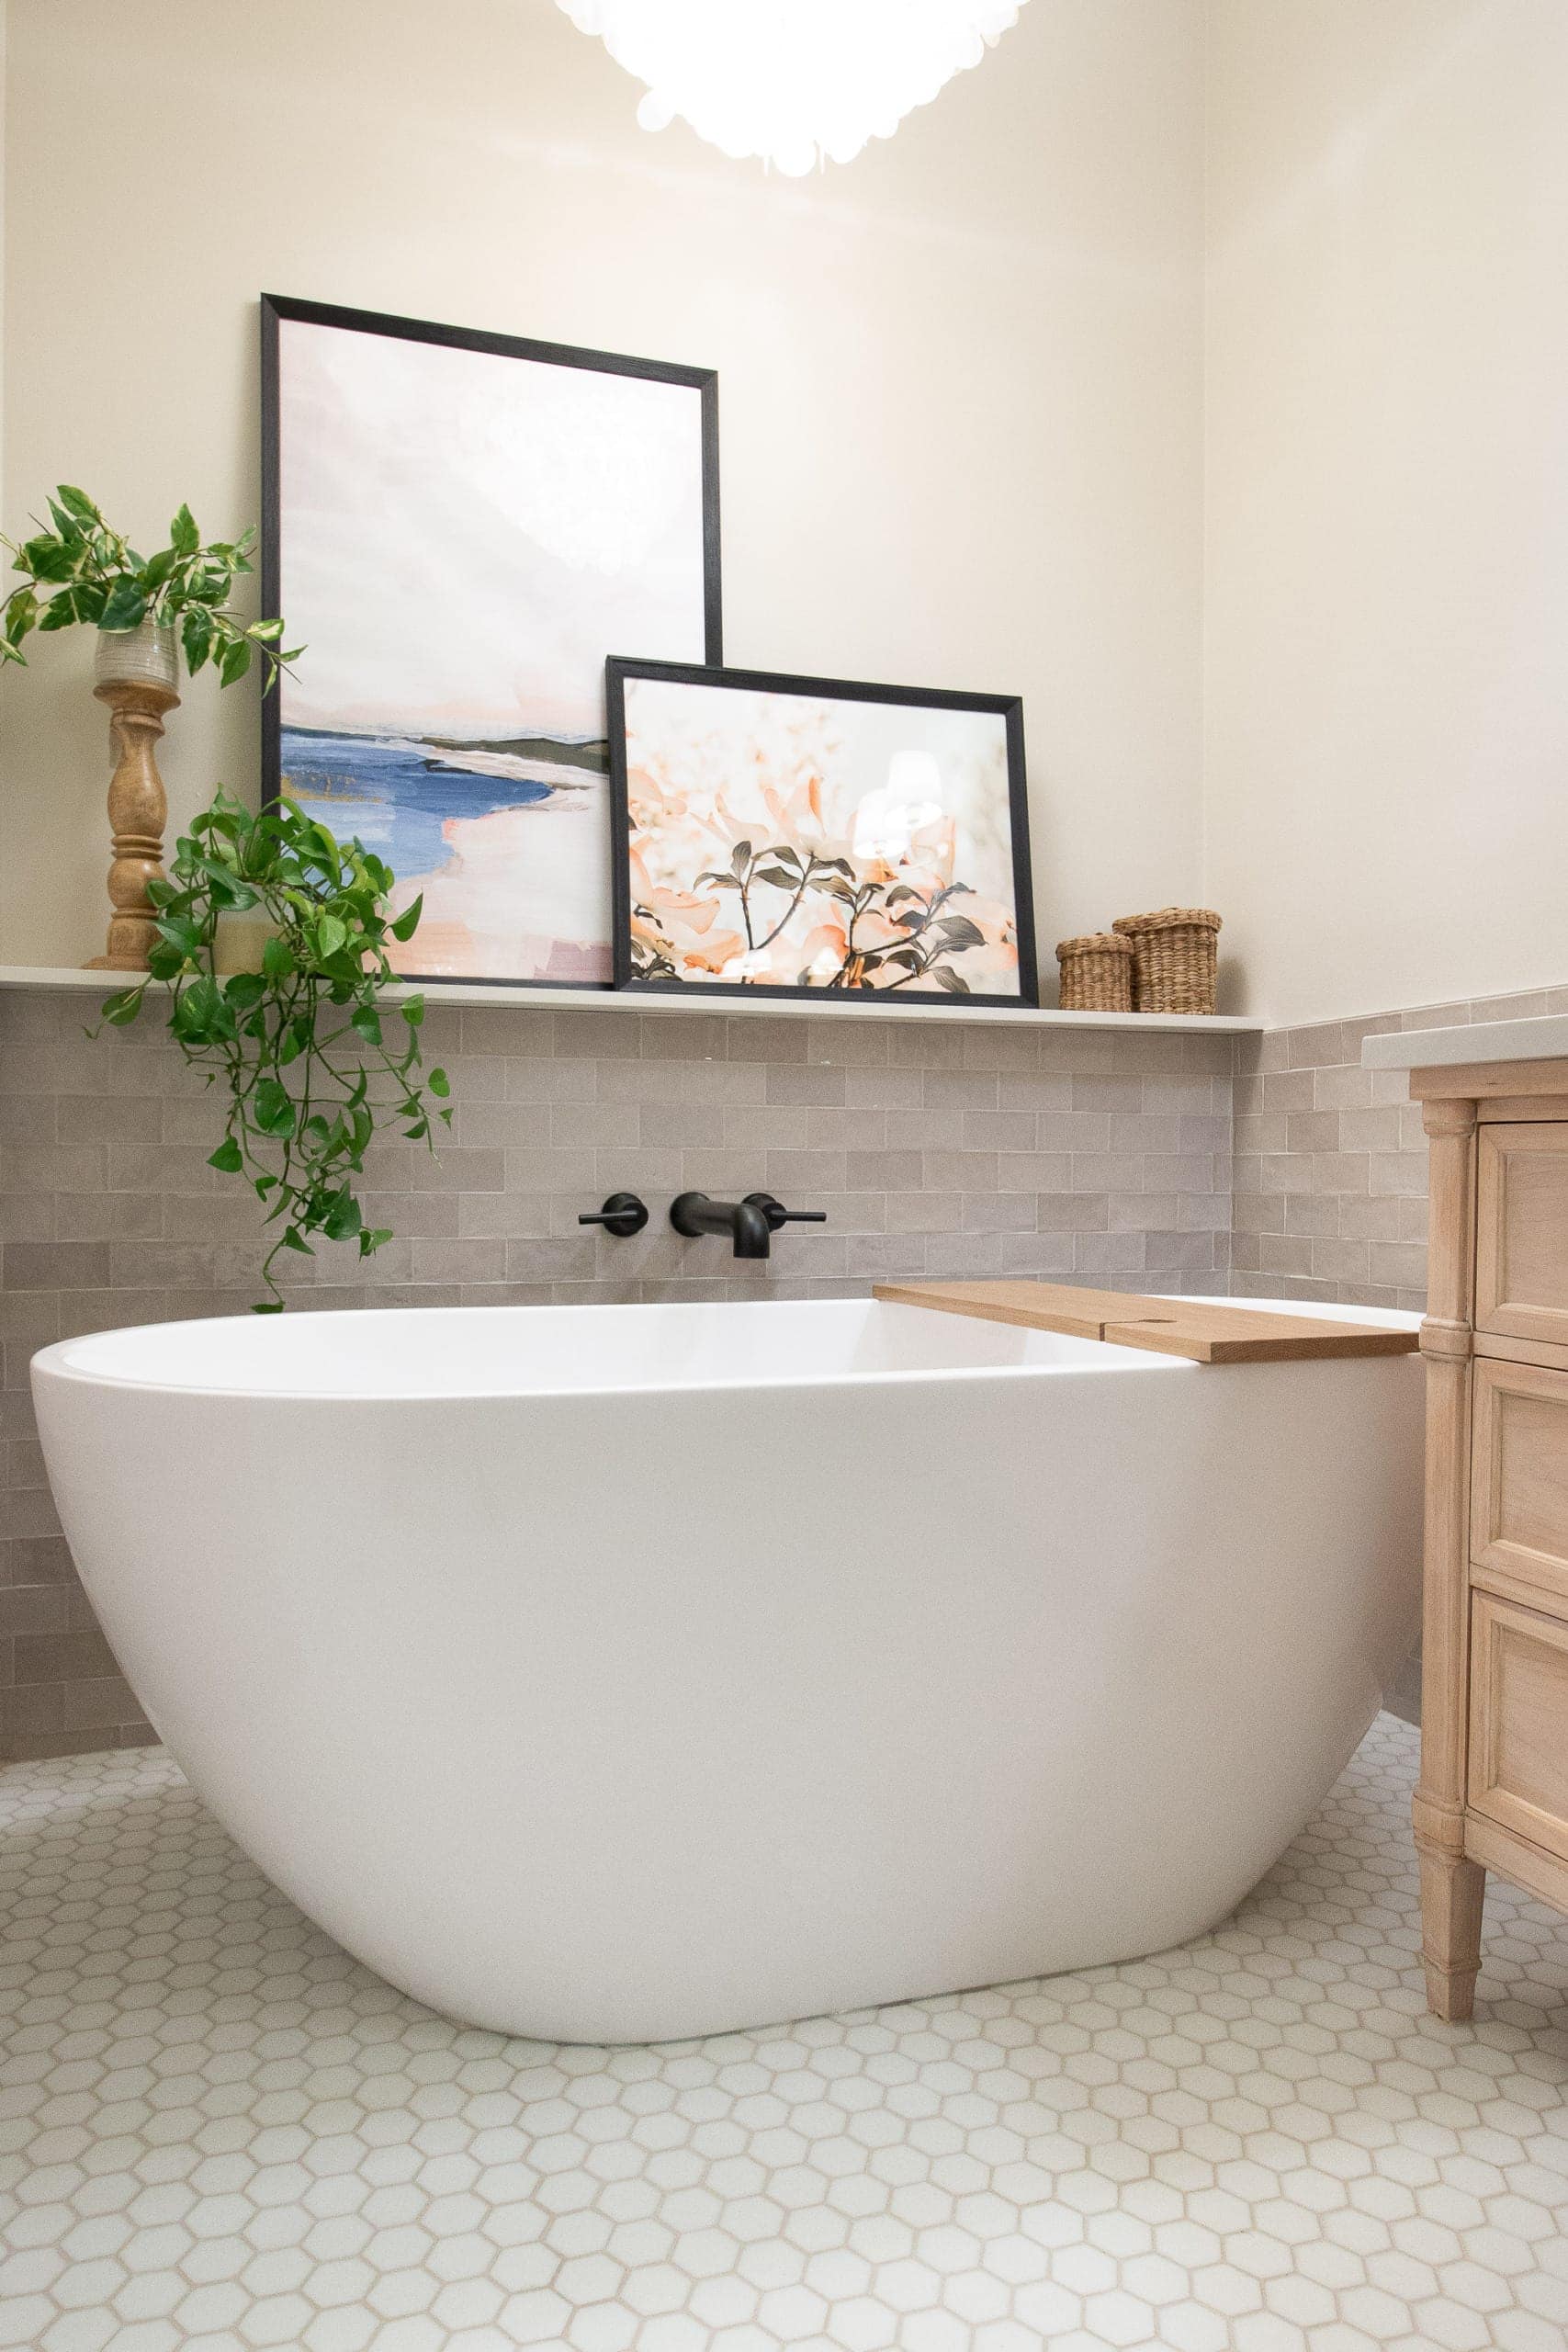
Overall, this little corner is just my absolute favorite. Freestanding tub for the win!
The Glass Shower
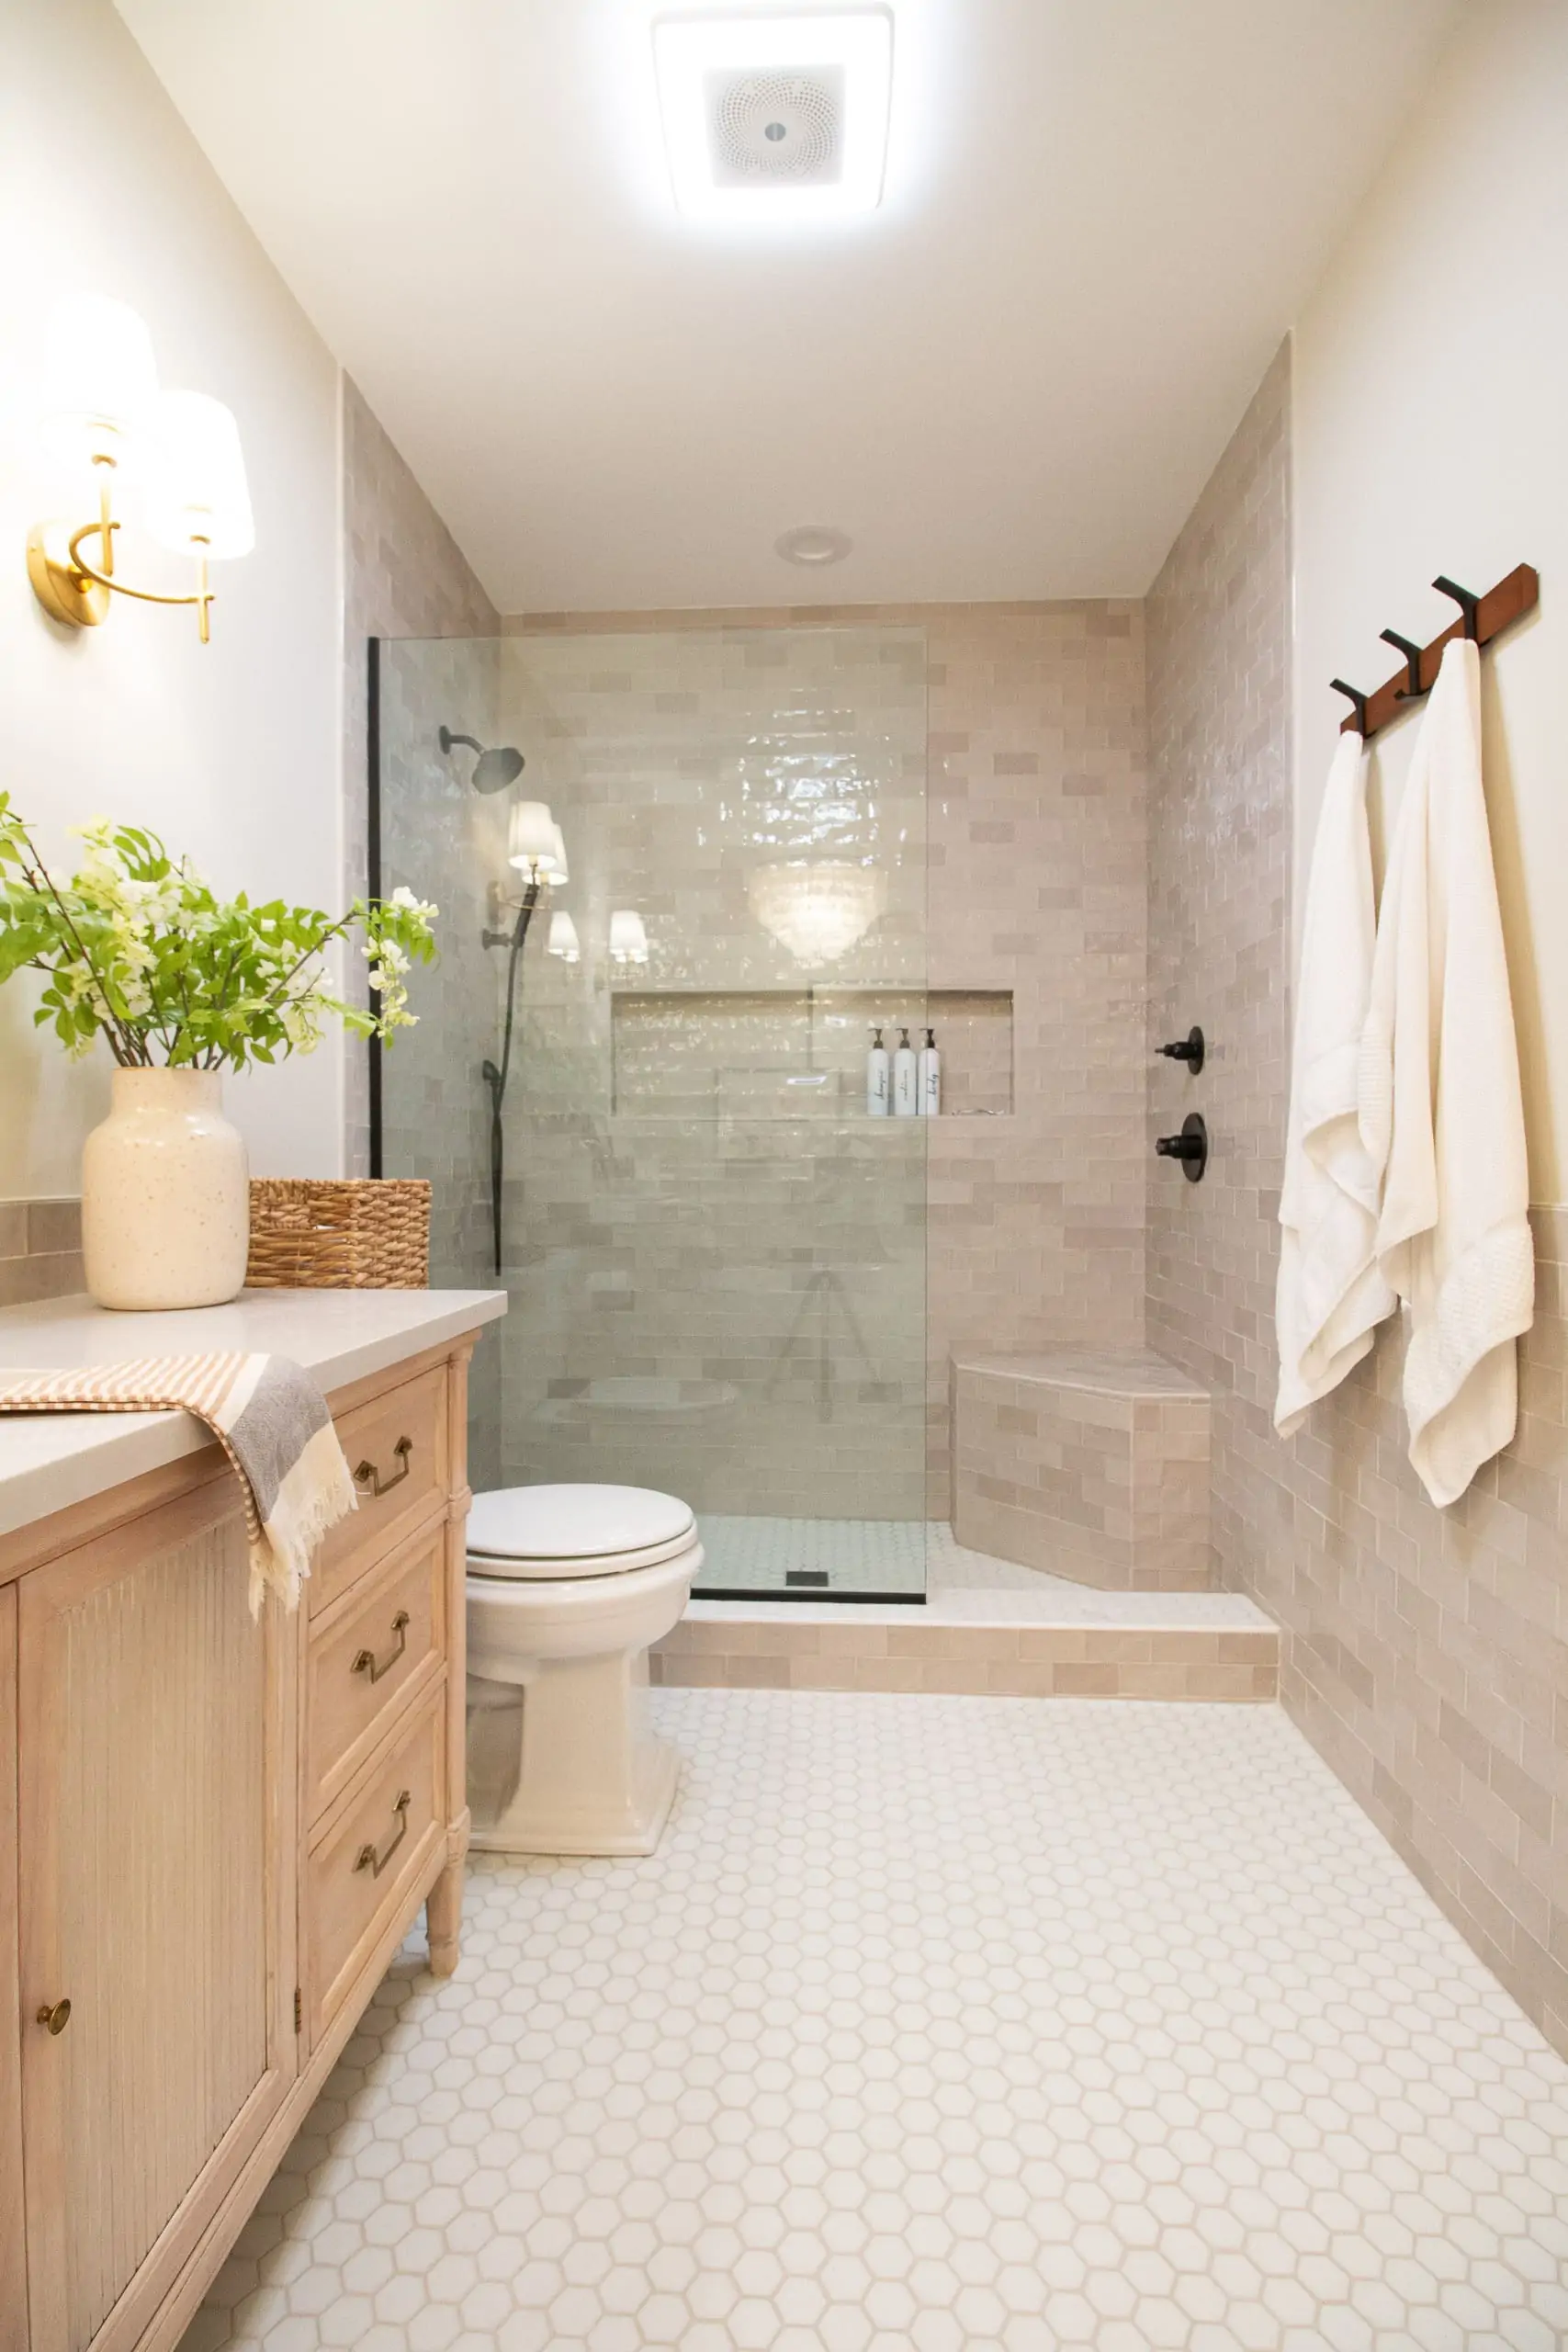 Now, onto the other side of the room…the shower! The layout of this space is just about the same as the before photos.
 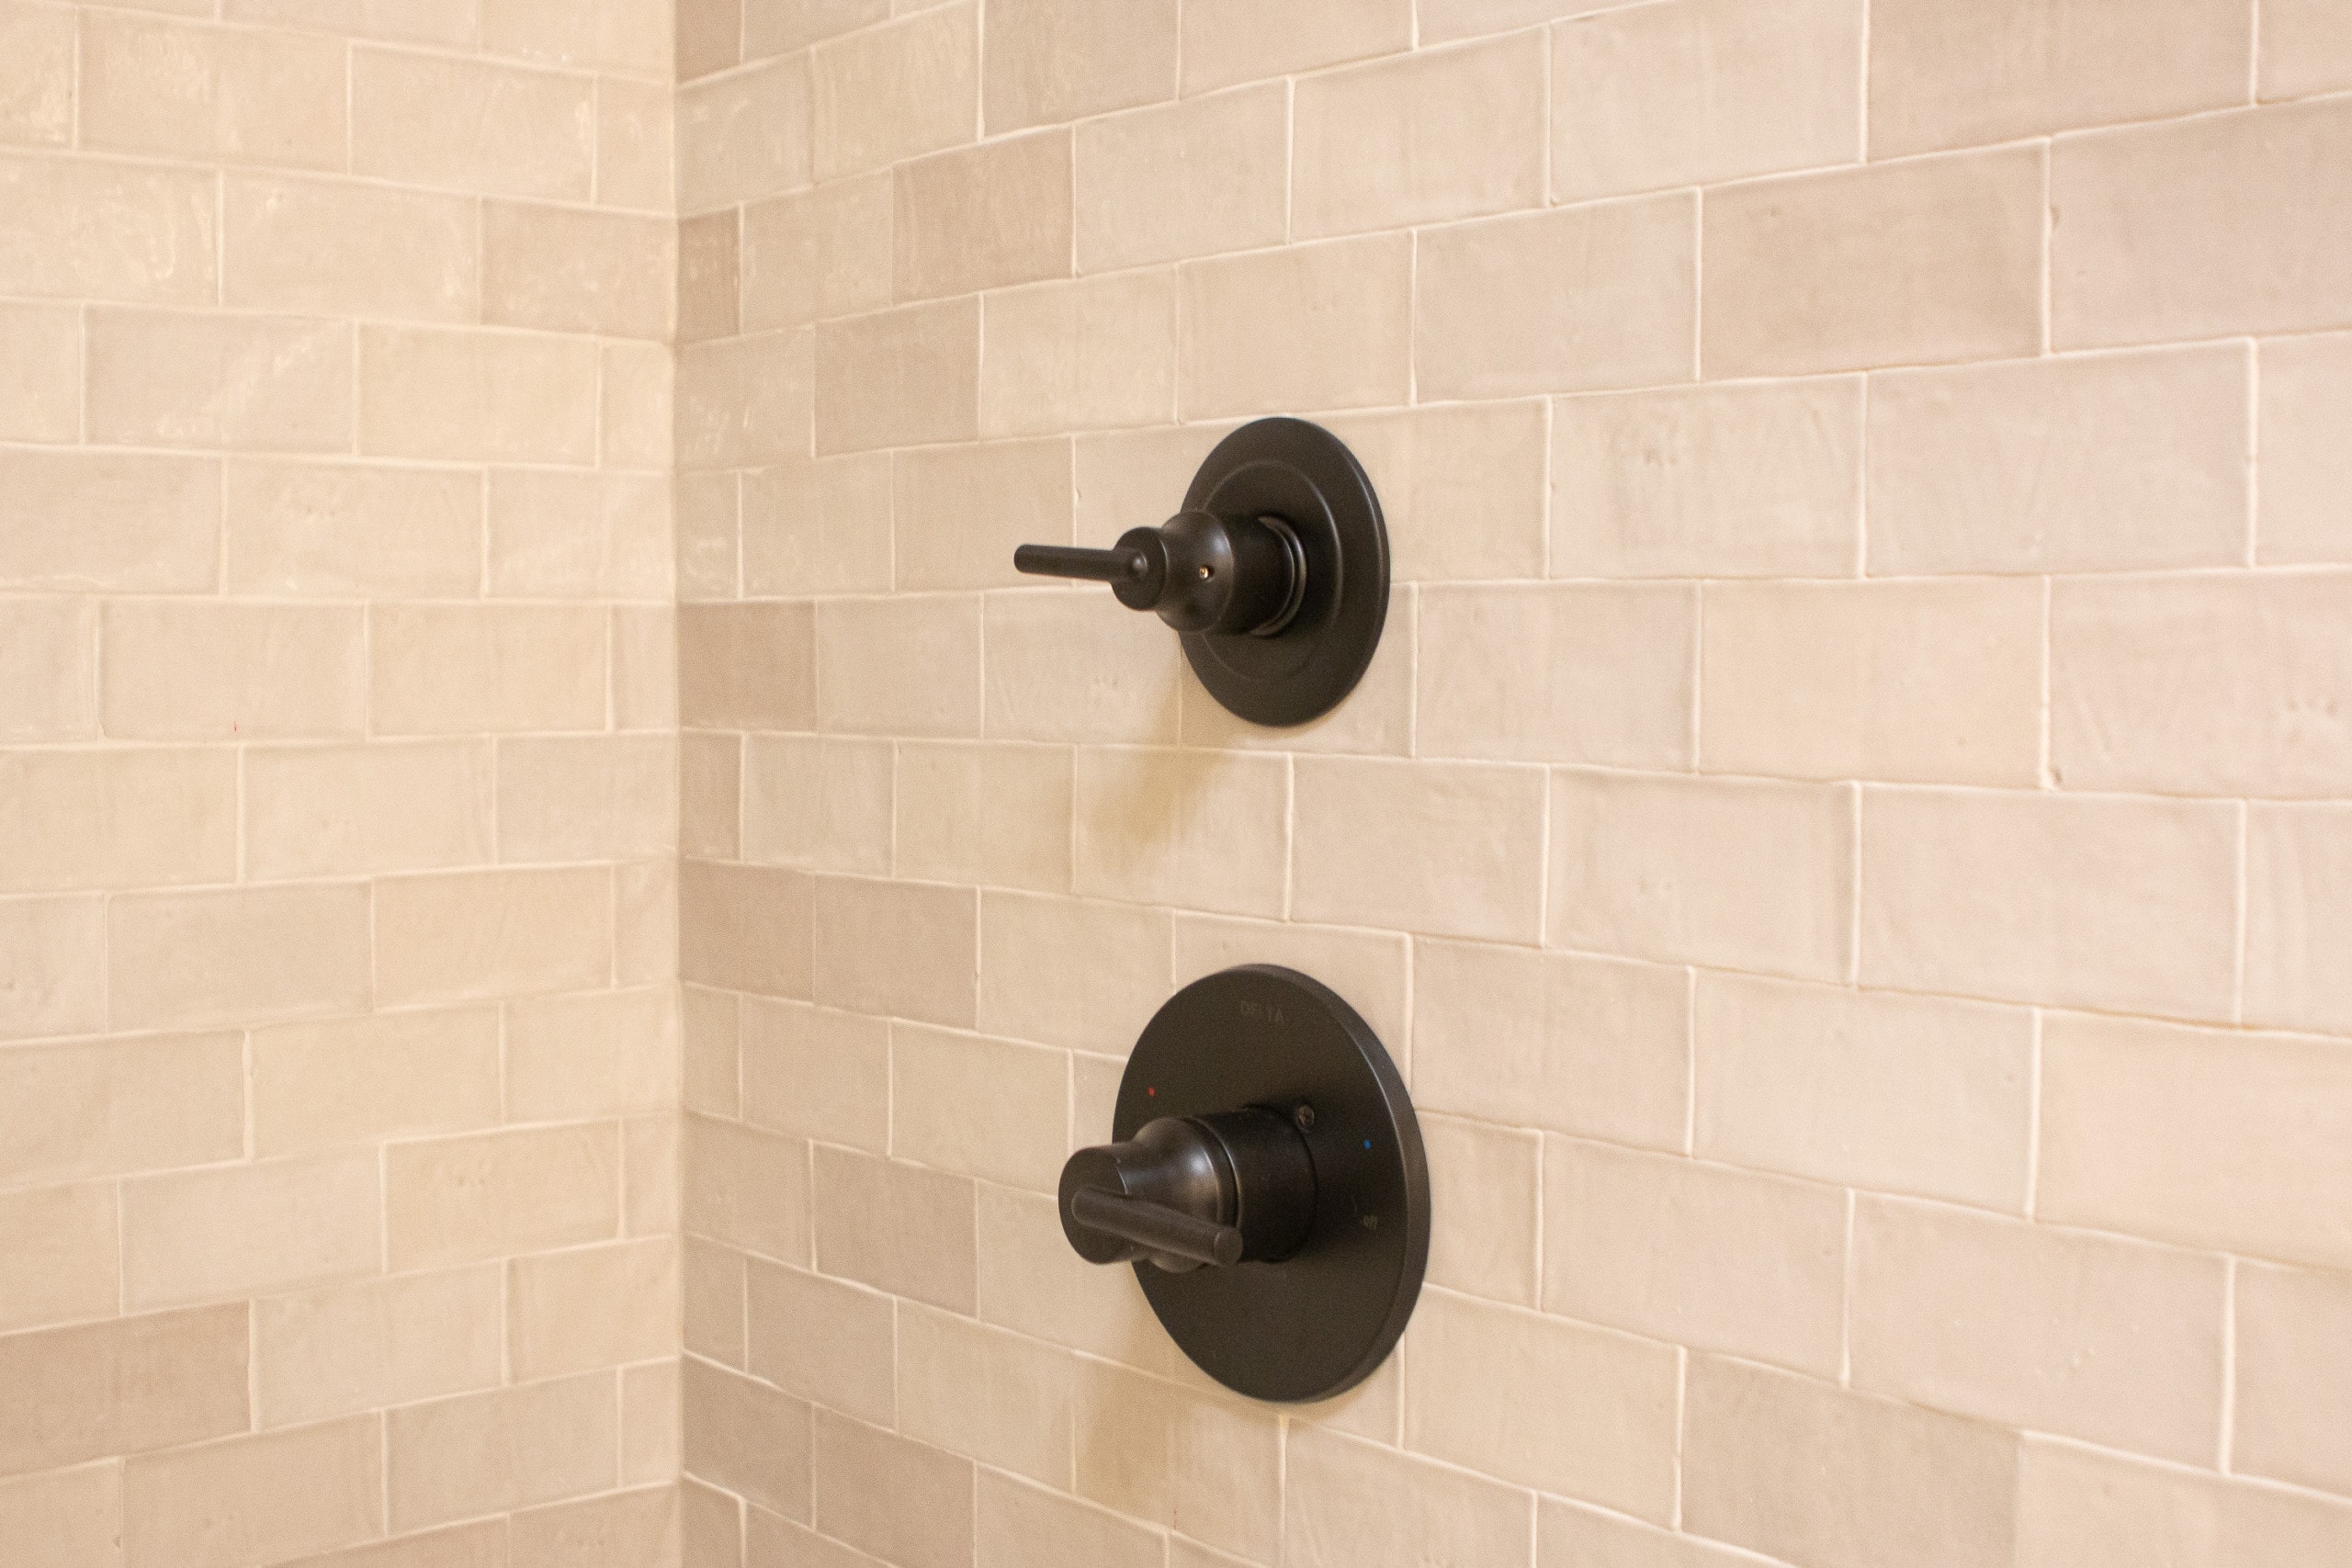 However, we ended up having the contractor move the temperature control and on/off valve to the right side of the shower. That way, my mom can turn the shower on without having to get wet! I highly recommend this if you’re reconfiguring your shower.
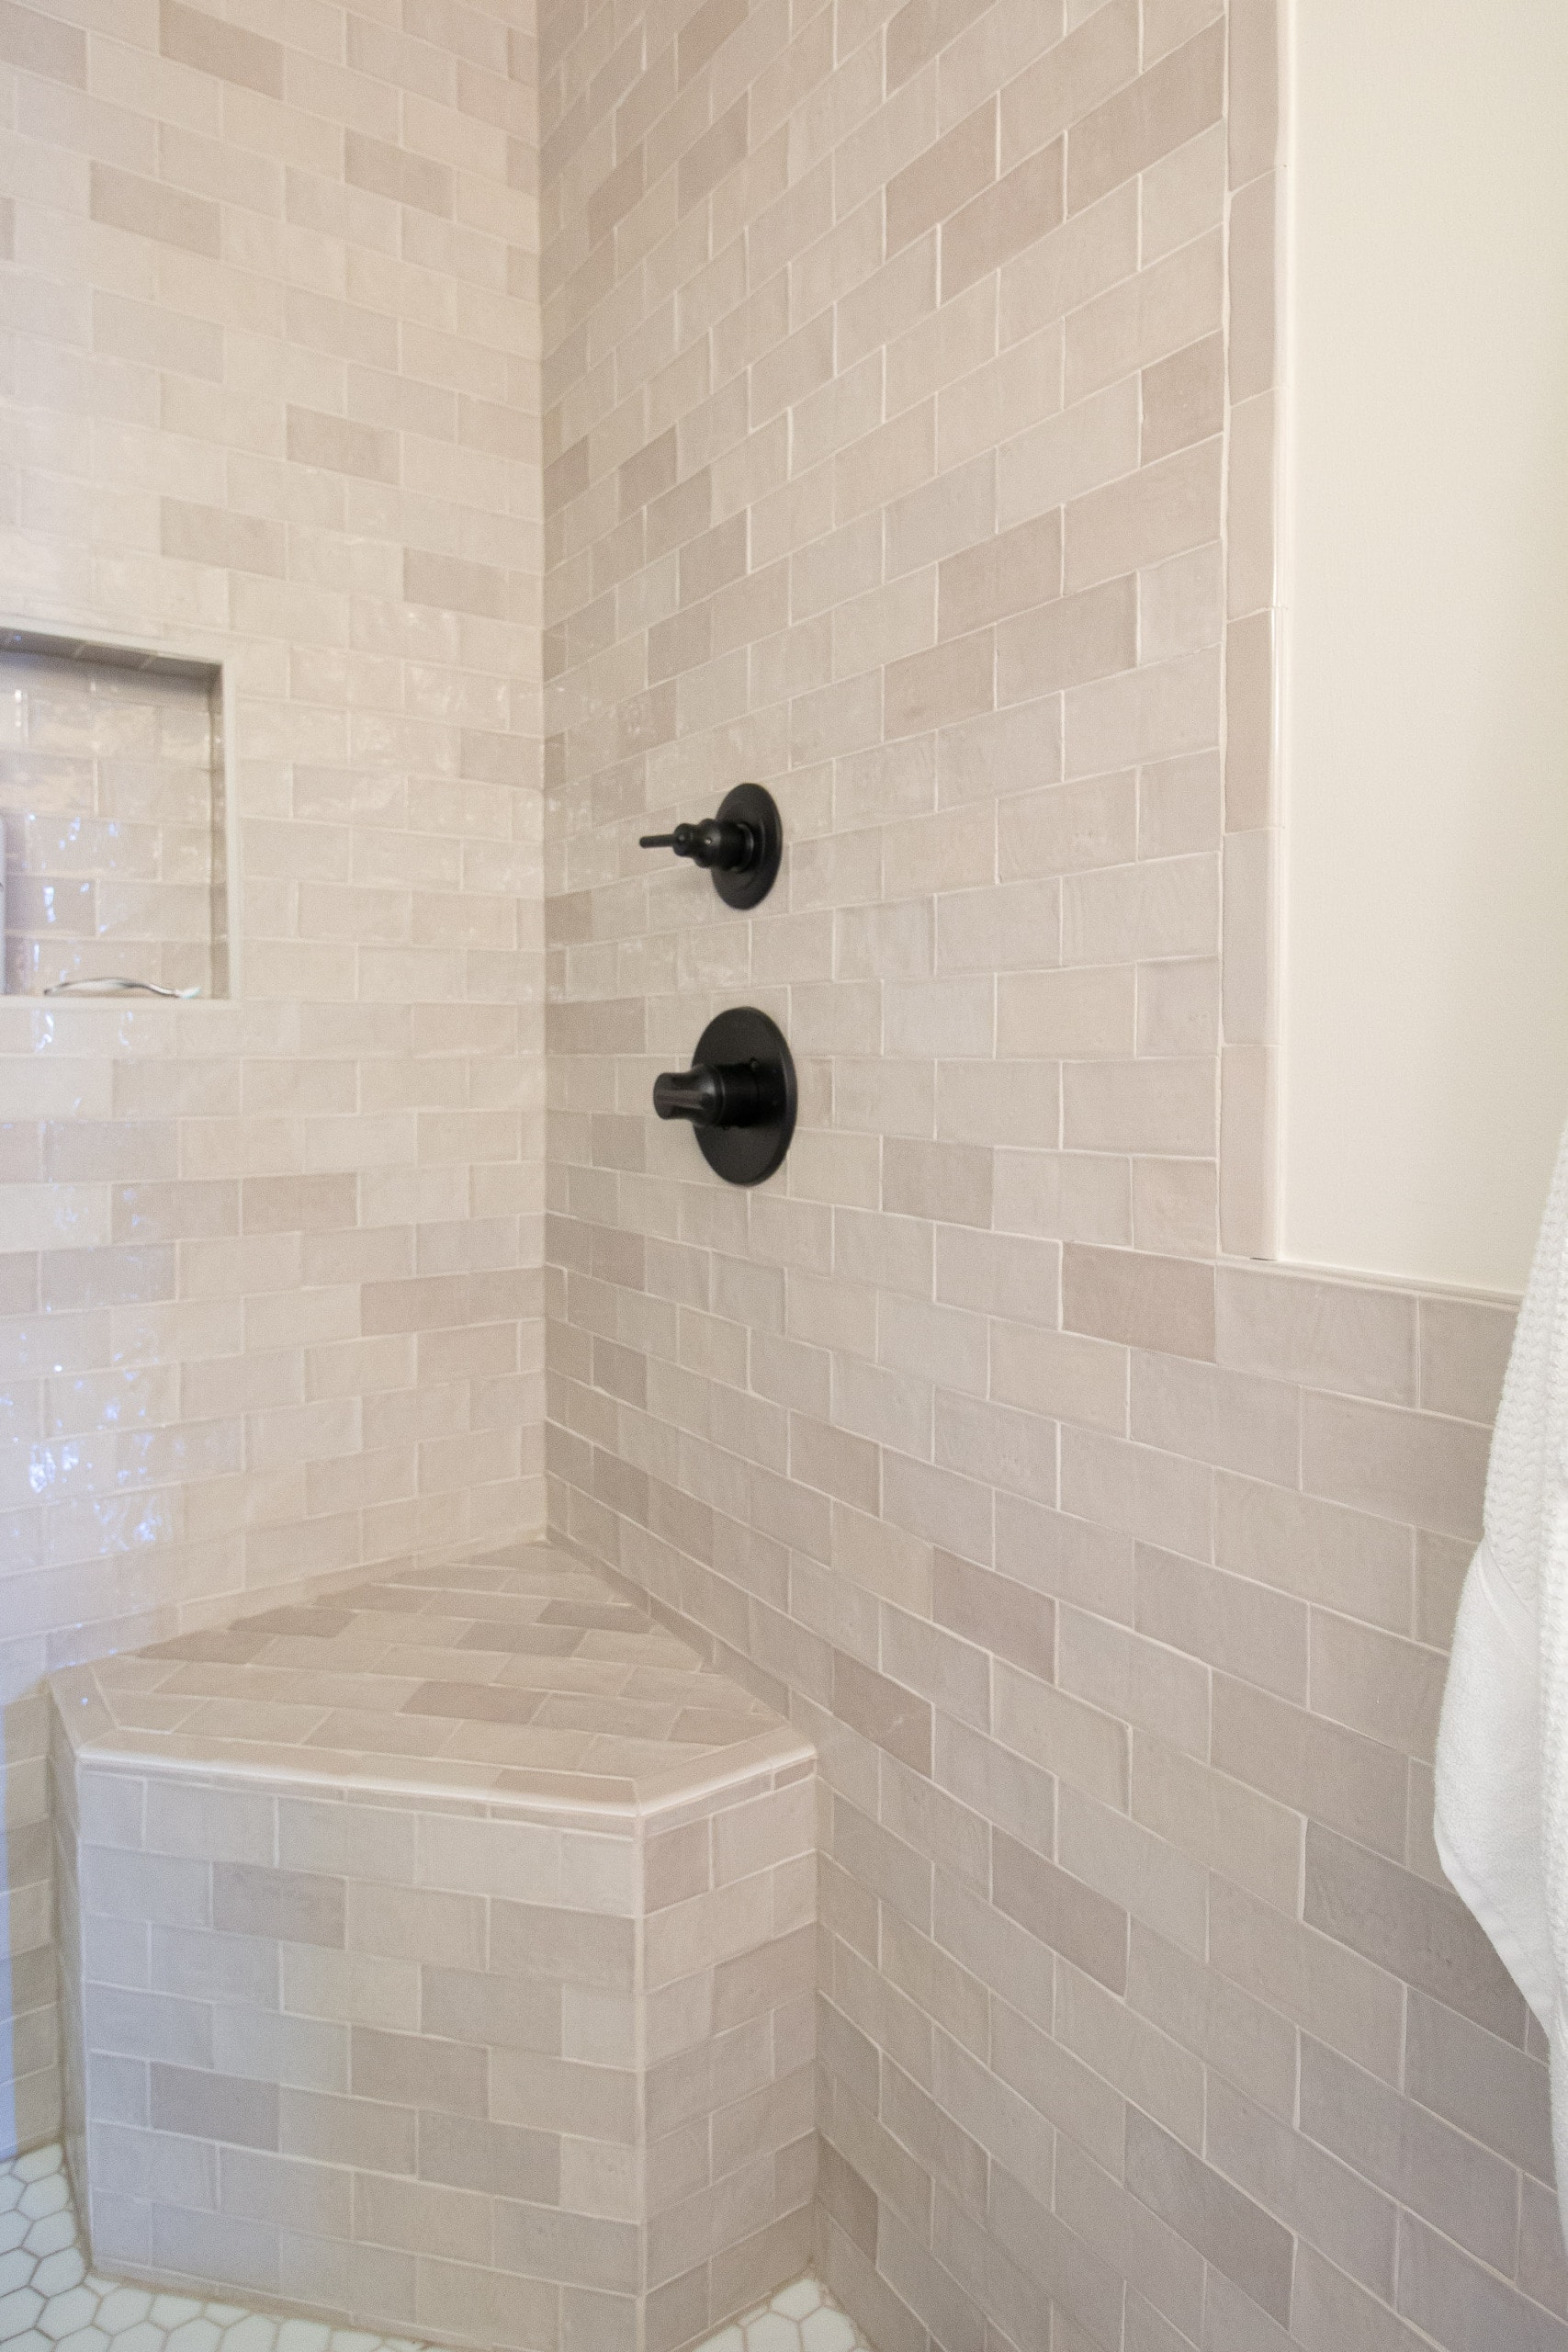
My mom also really wanted a bench in here (good for shaving legs) and we weren’t sure if we had enough room to fit one. Instead of building a longer one on the right side wall, we had the crew create a little angled bench. It turned out so cute!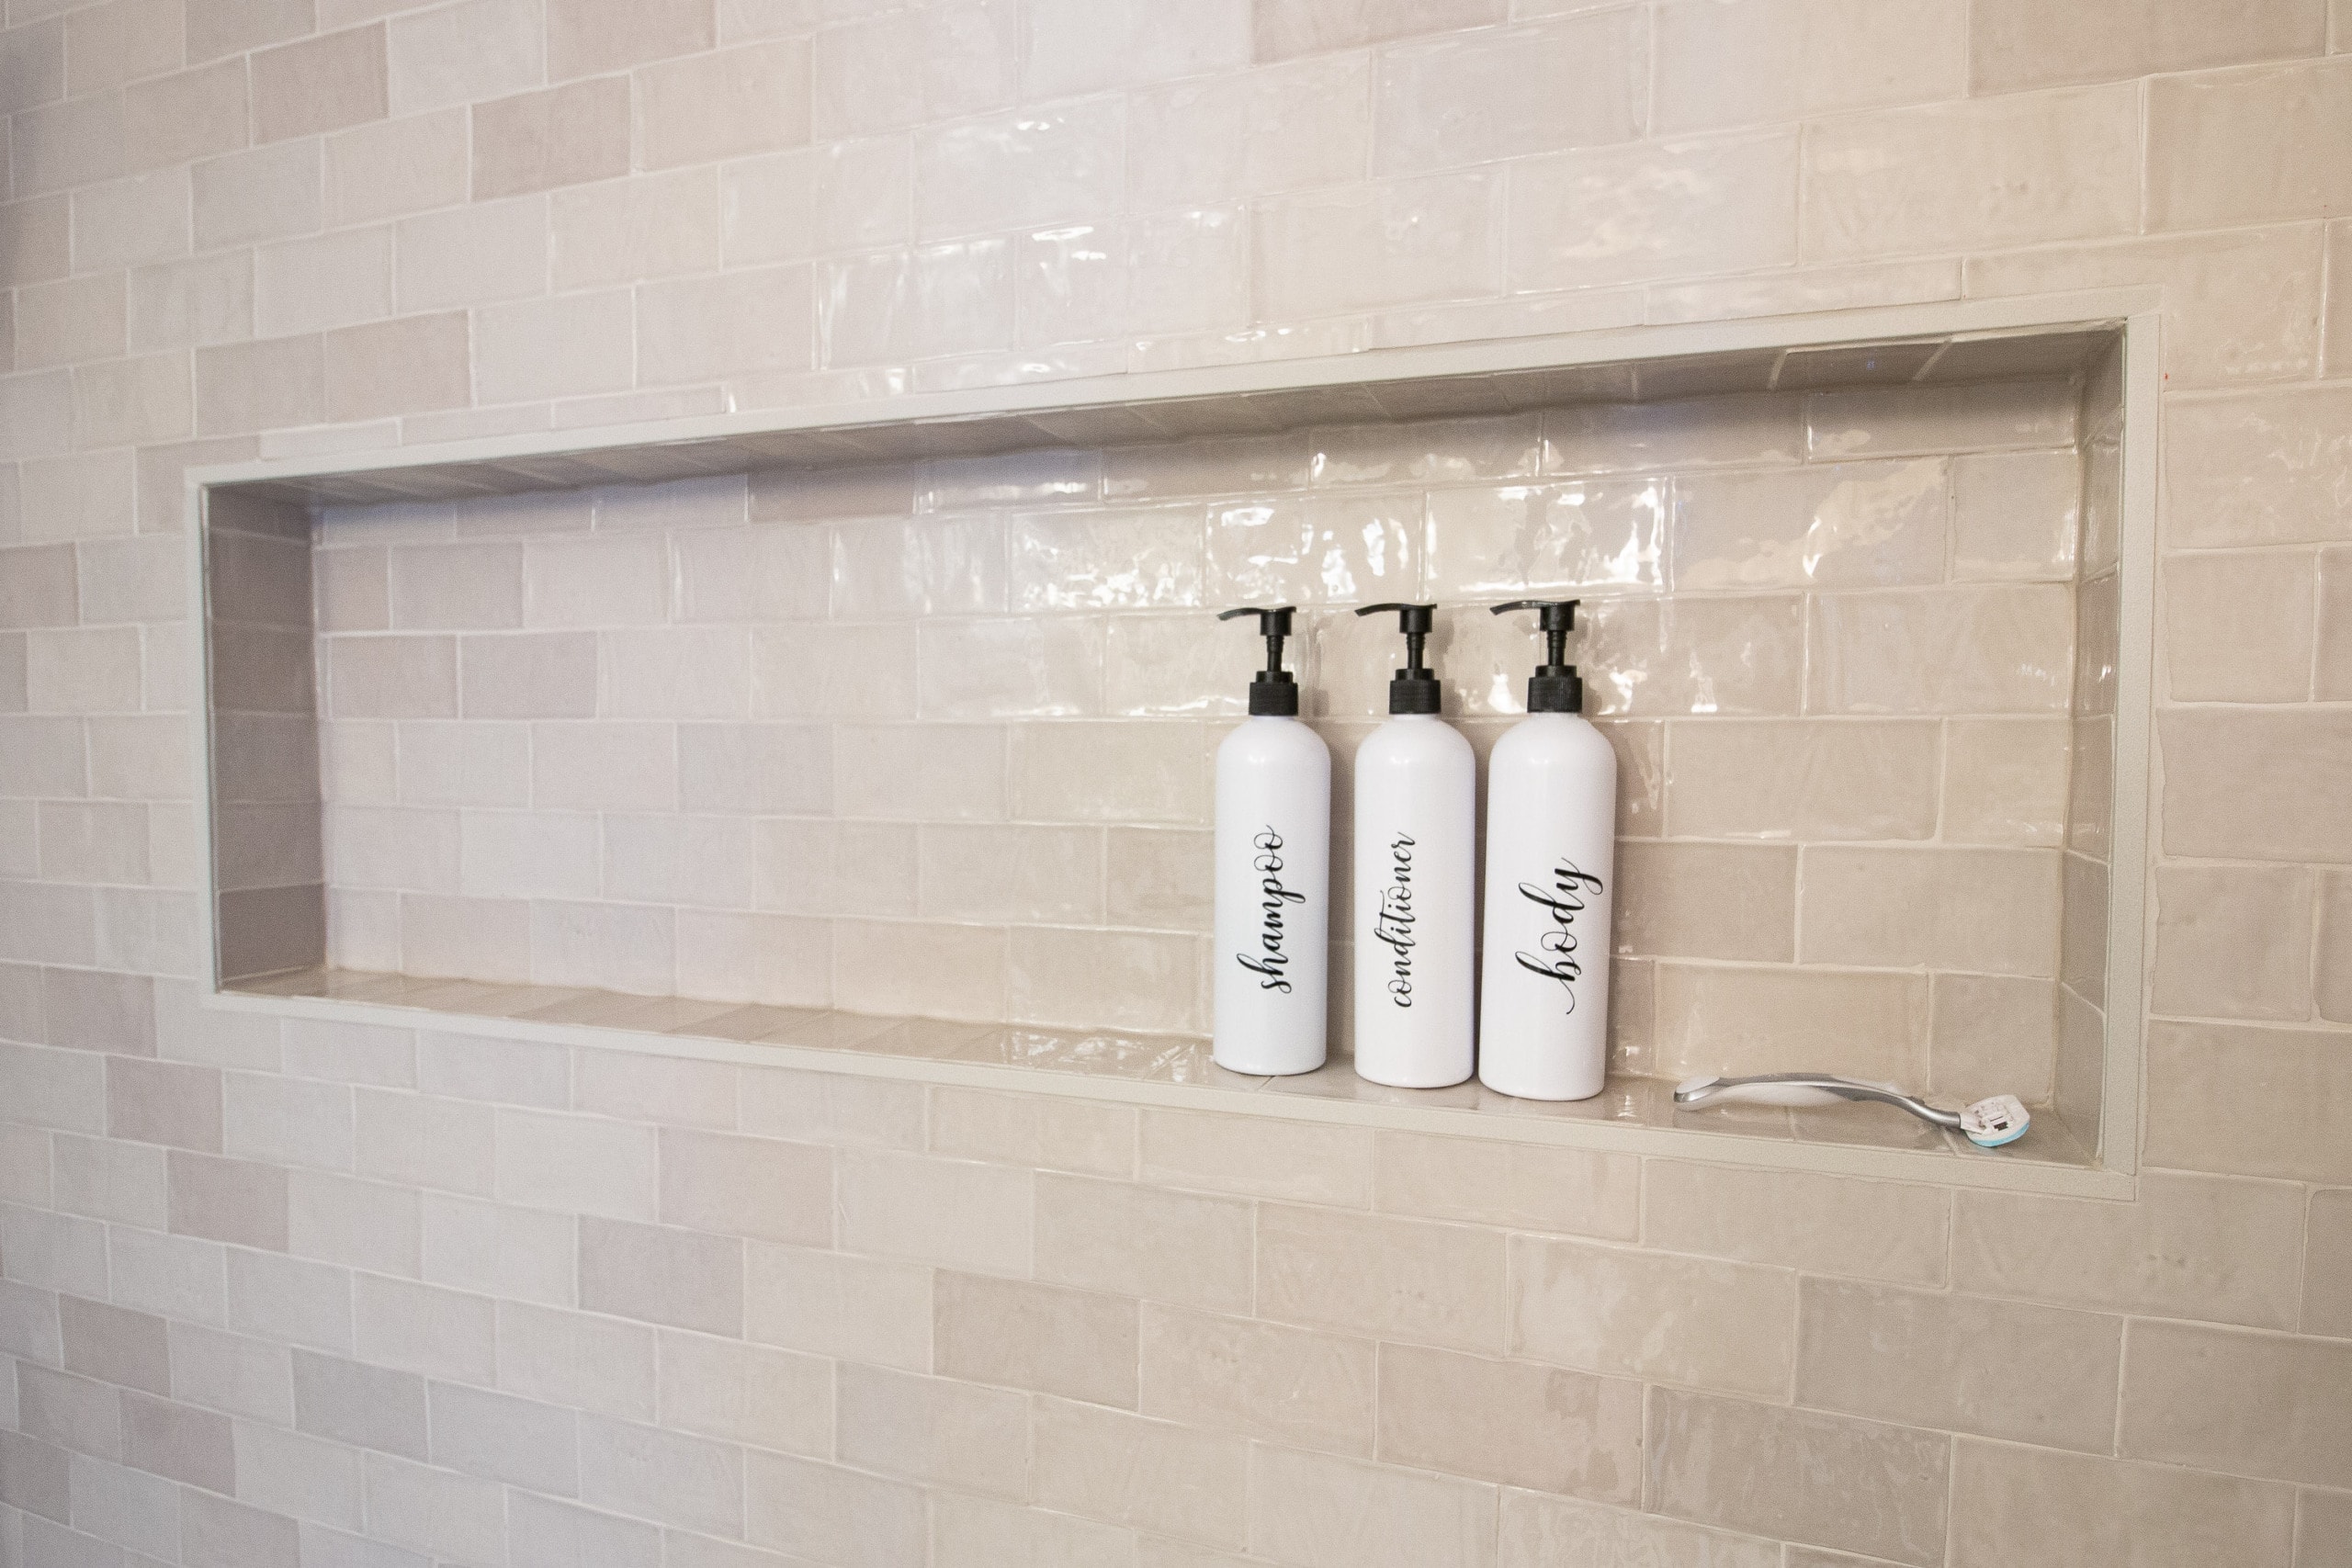
A shower niche was another must for my mom and I love how they went long and wide with this one. She even bought cute toiletry bottles for all of her things so it looks clean and streamlined.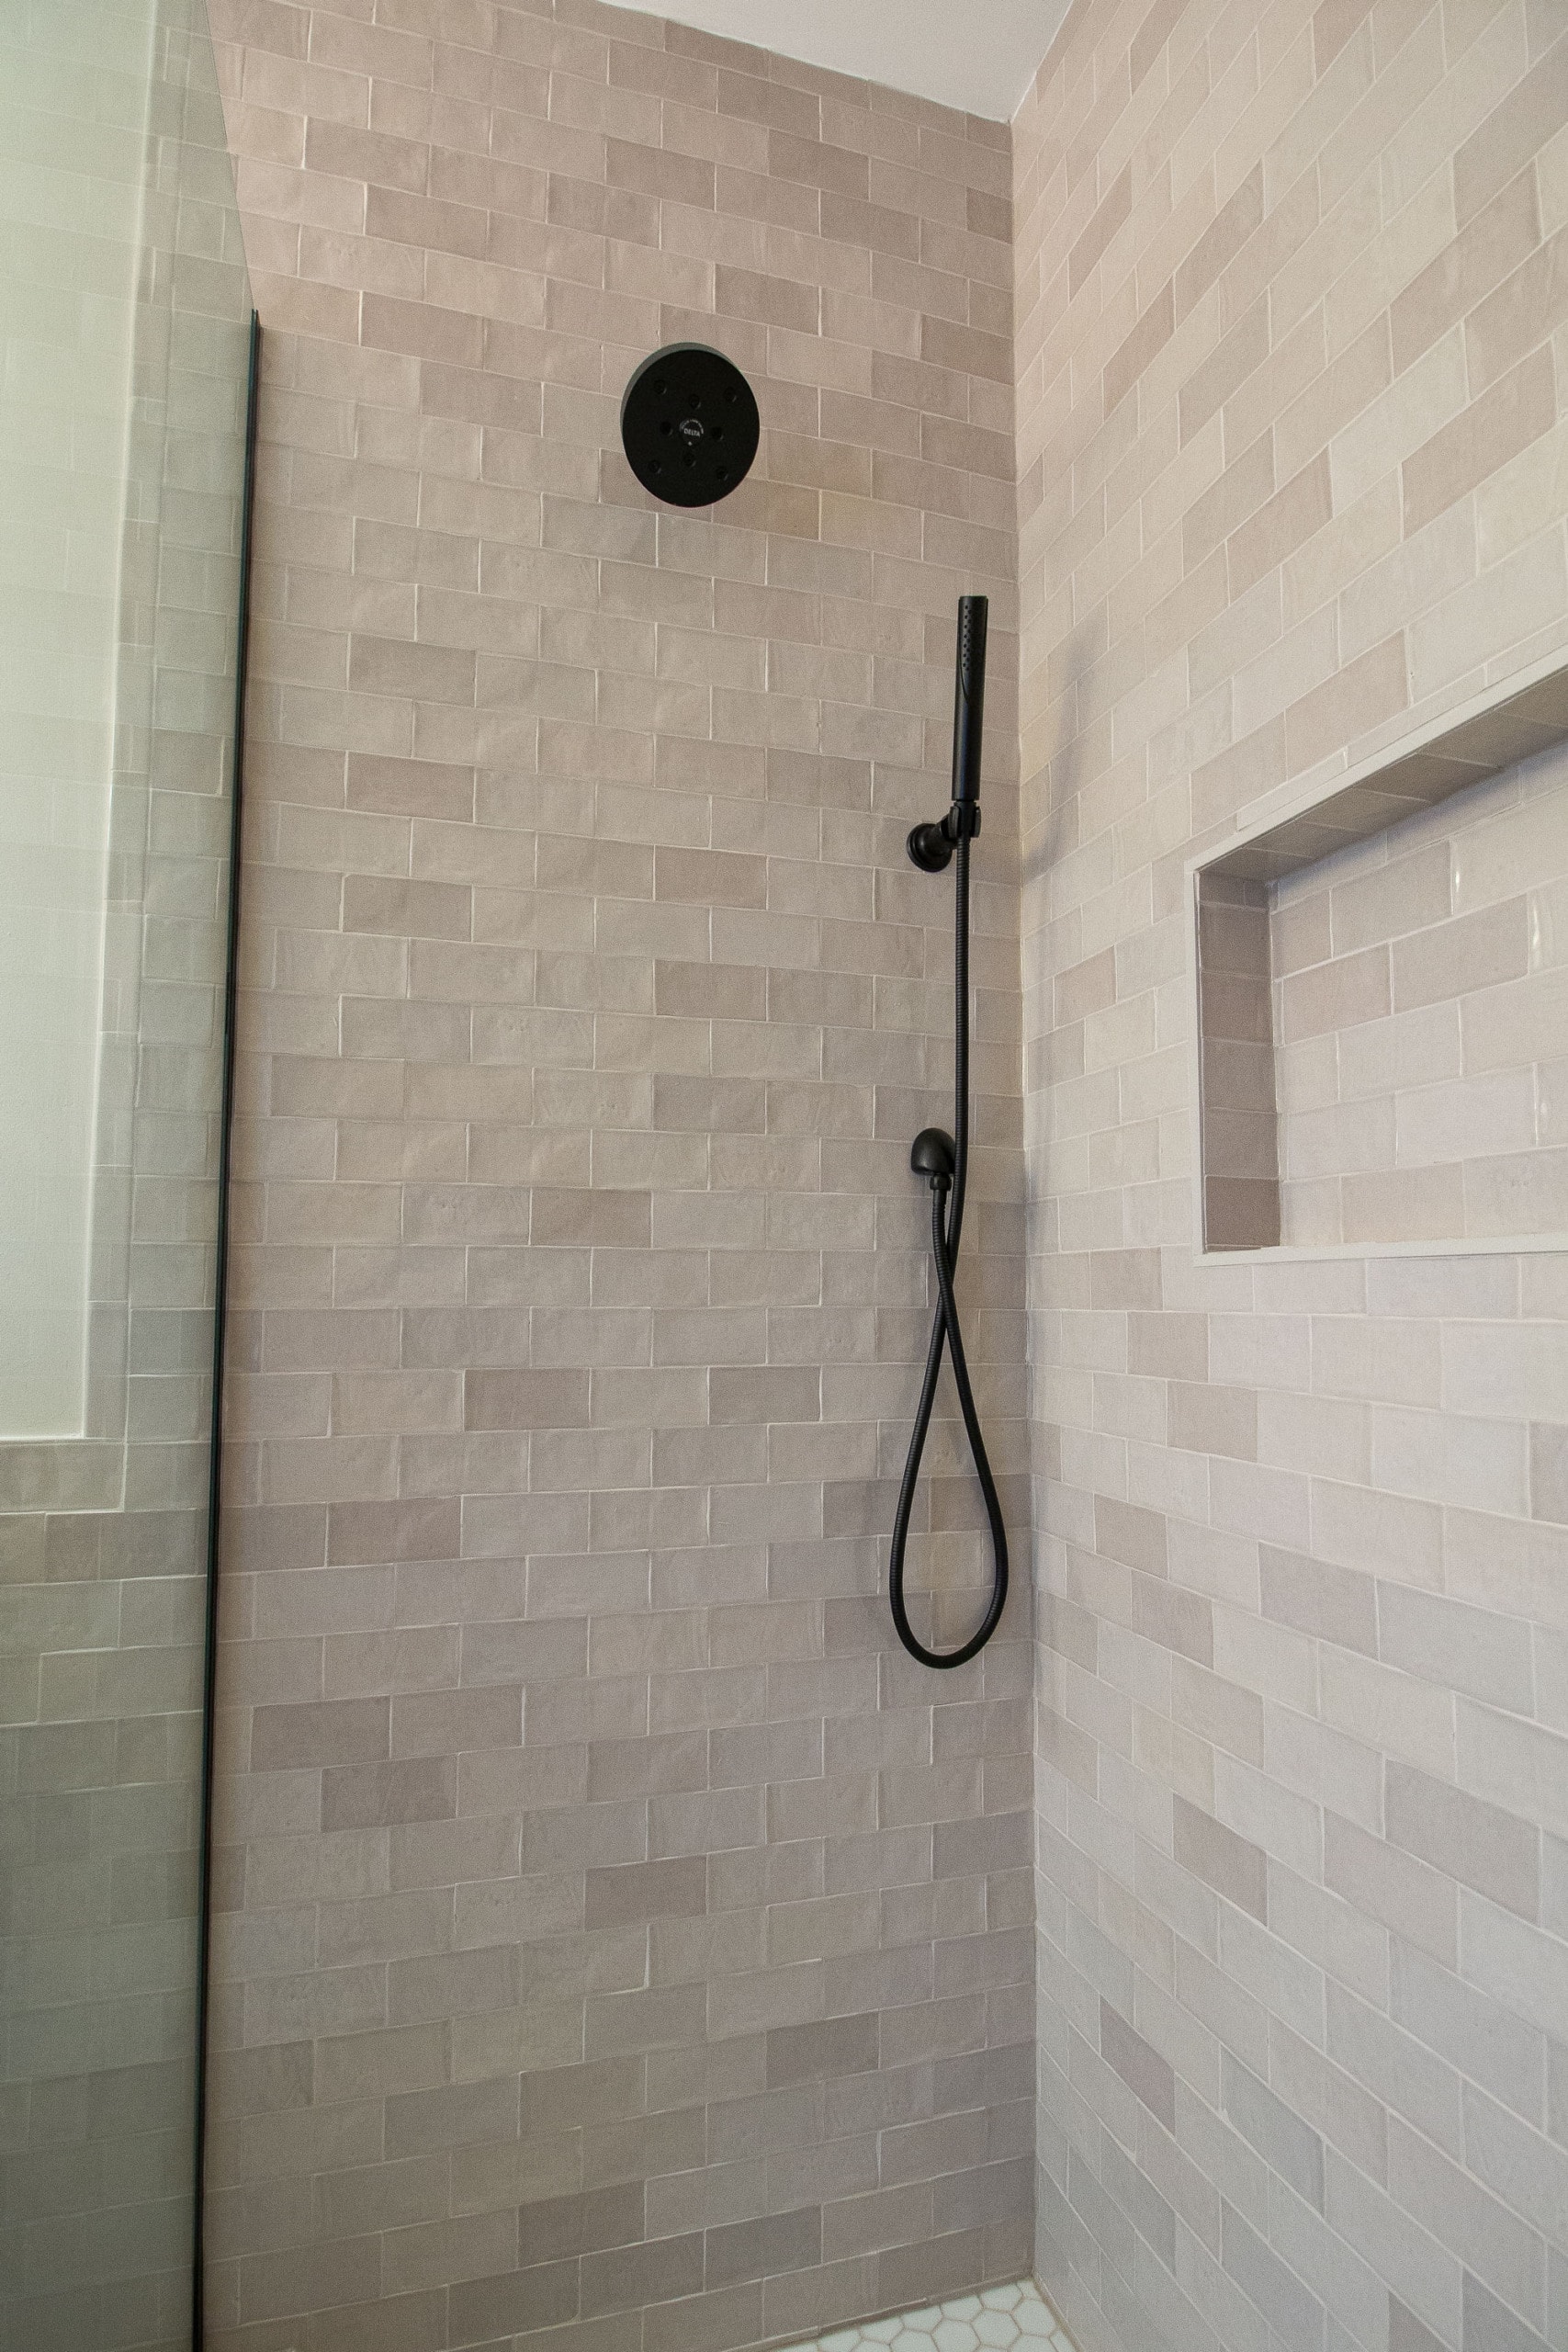
And how about the tile? Isn’t it so pretty?! We originally had plans to go with this Cloe tile, but it was back-ordered, which was the same problem we had in the guest bathroom, so we frantically searched and found this replacement. It’s called WOW in “Fez” and we used the color “Warm Gloss”. My mom ordered it from her local tile store, The Tile Outlet, and it came quickly! Our original tile was a bit more gray, while this one is warmer and reads more taupe. 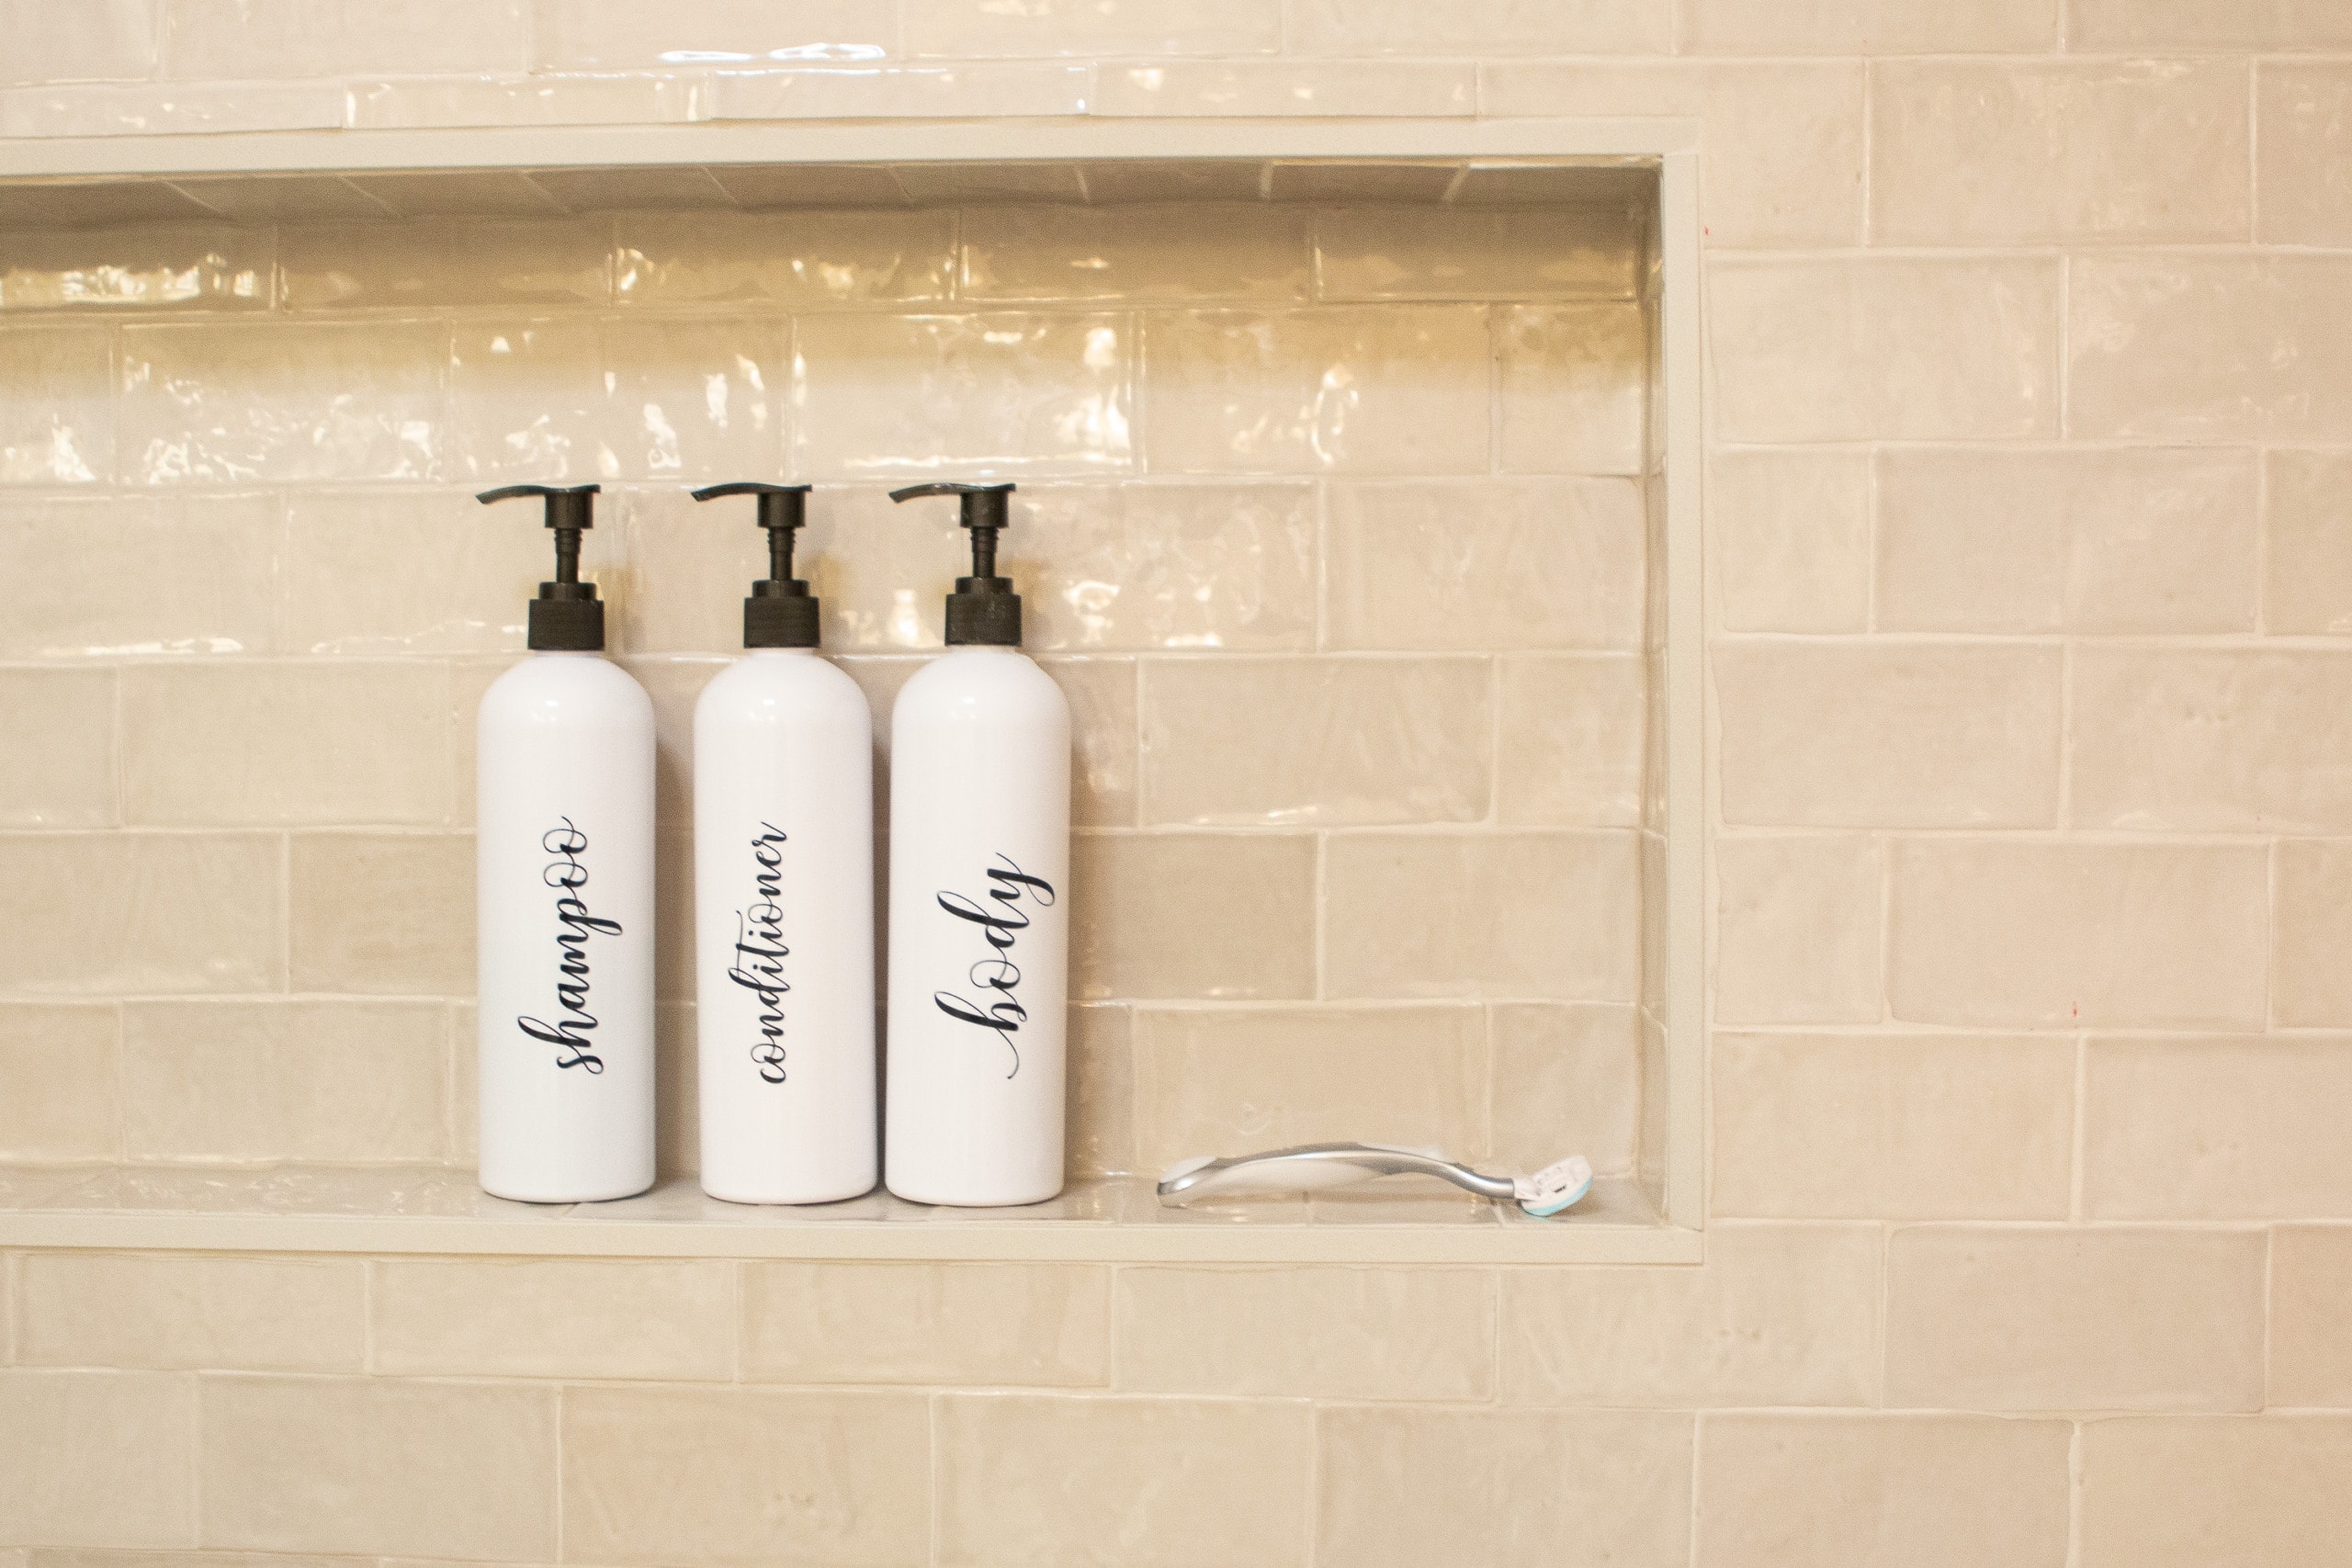 I’m thrilled with the end result. I think the gray would have been too cool in here and it all worked out just the way it should.
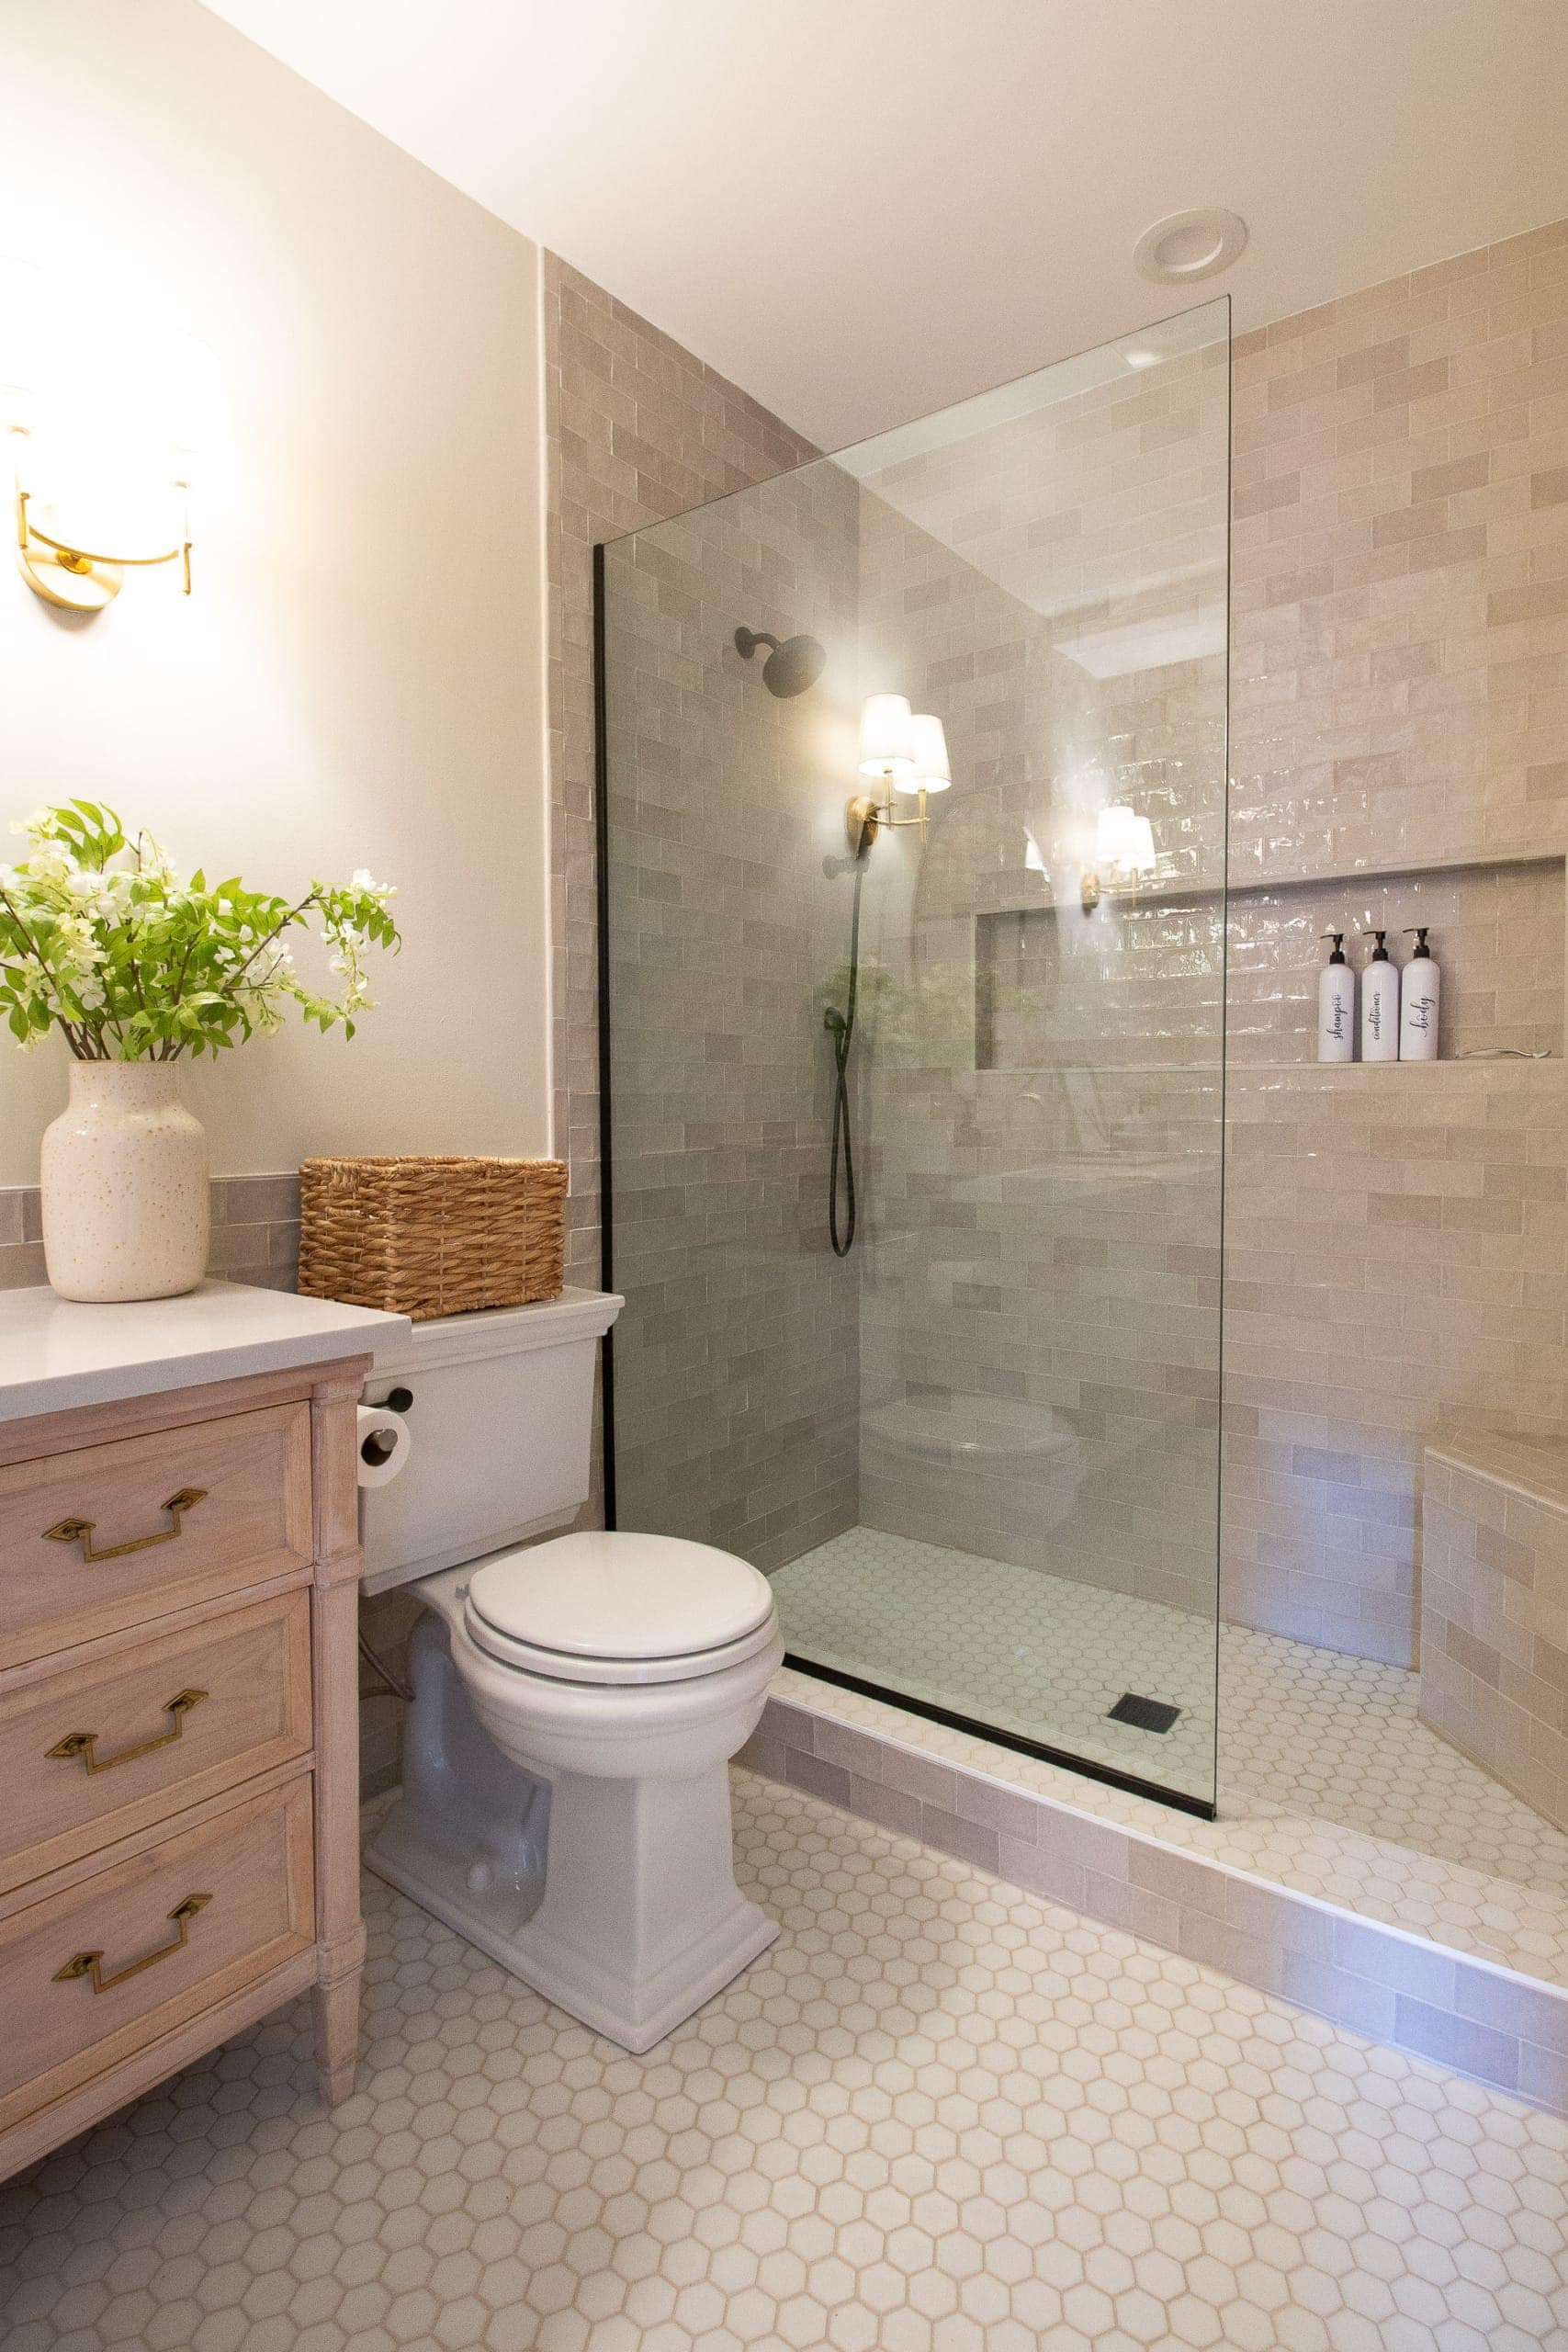
For the glass, my mom opted for a sleek piece of glass with black trim. It looks nice and streamlined in here and she doesn’t have to worry about opening and closing a door. This was similar to the previous setup that she liked, so we knew it would work in the new space.
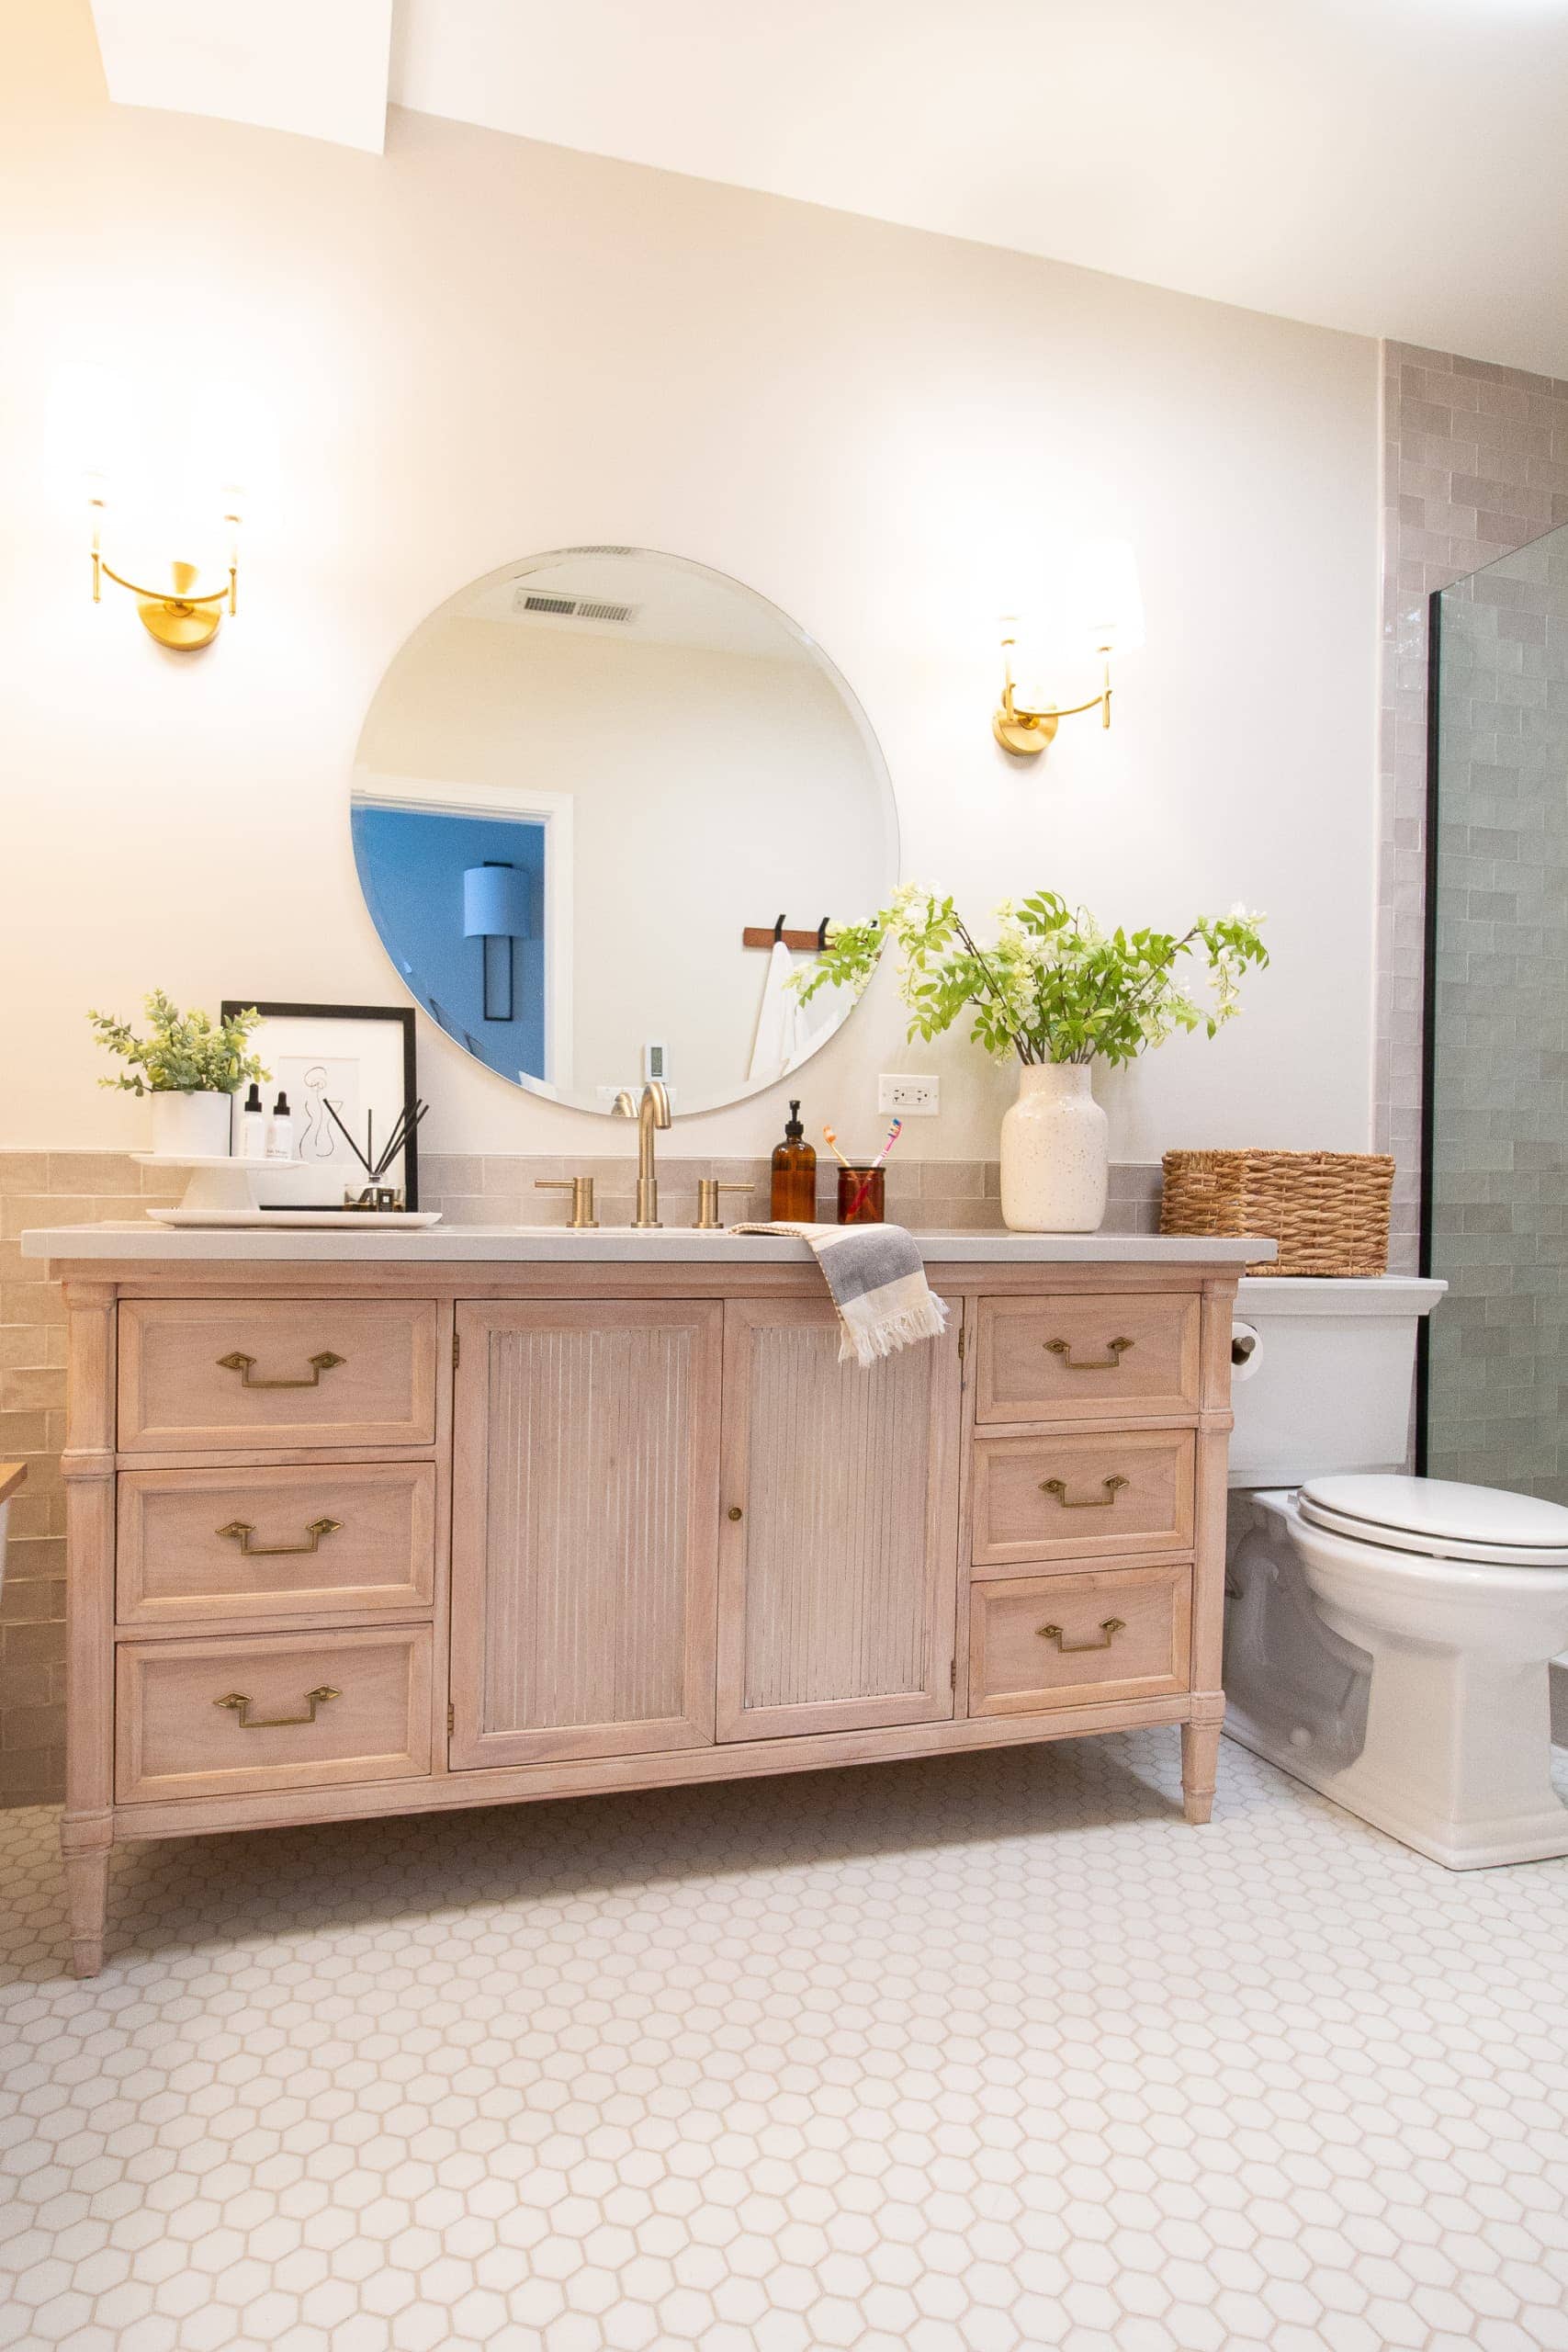
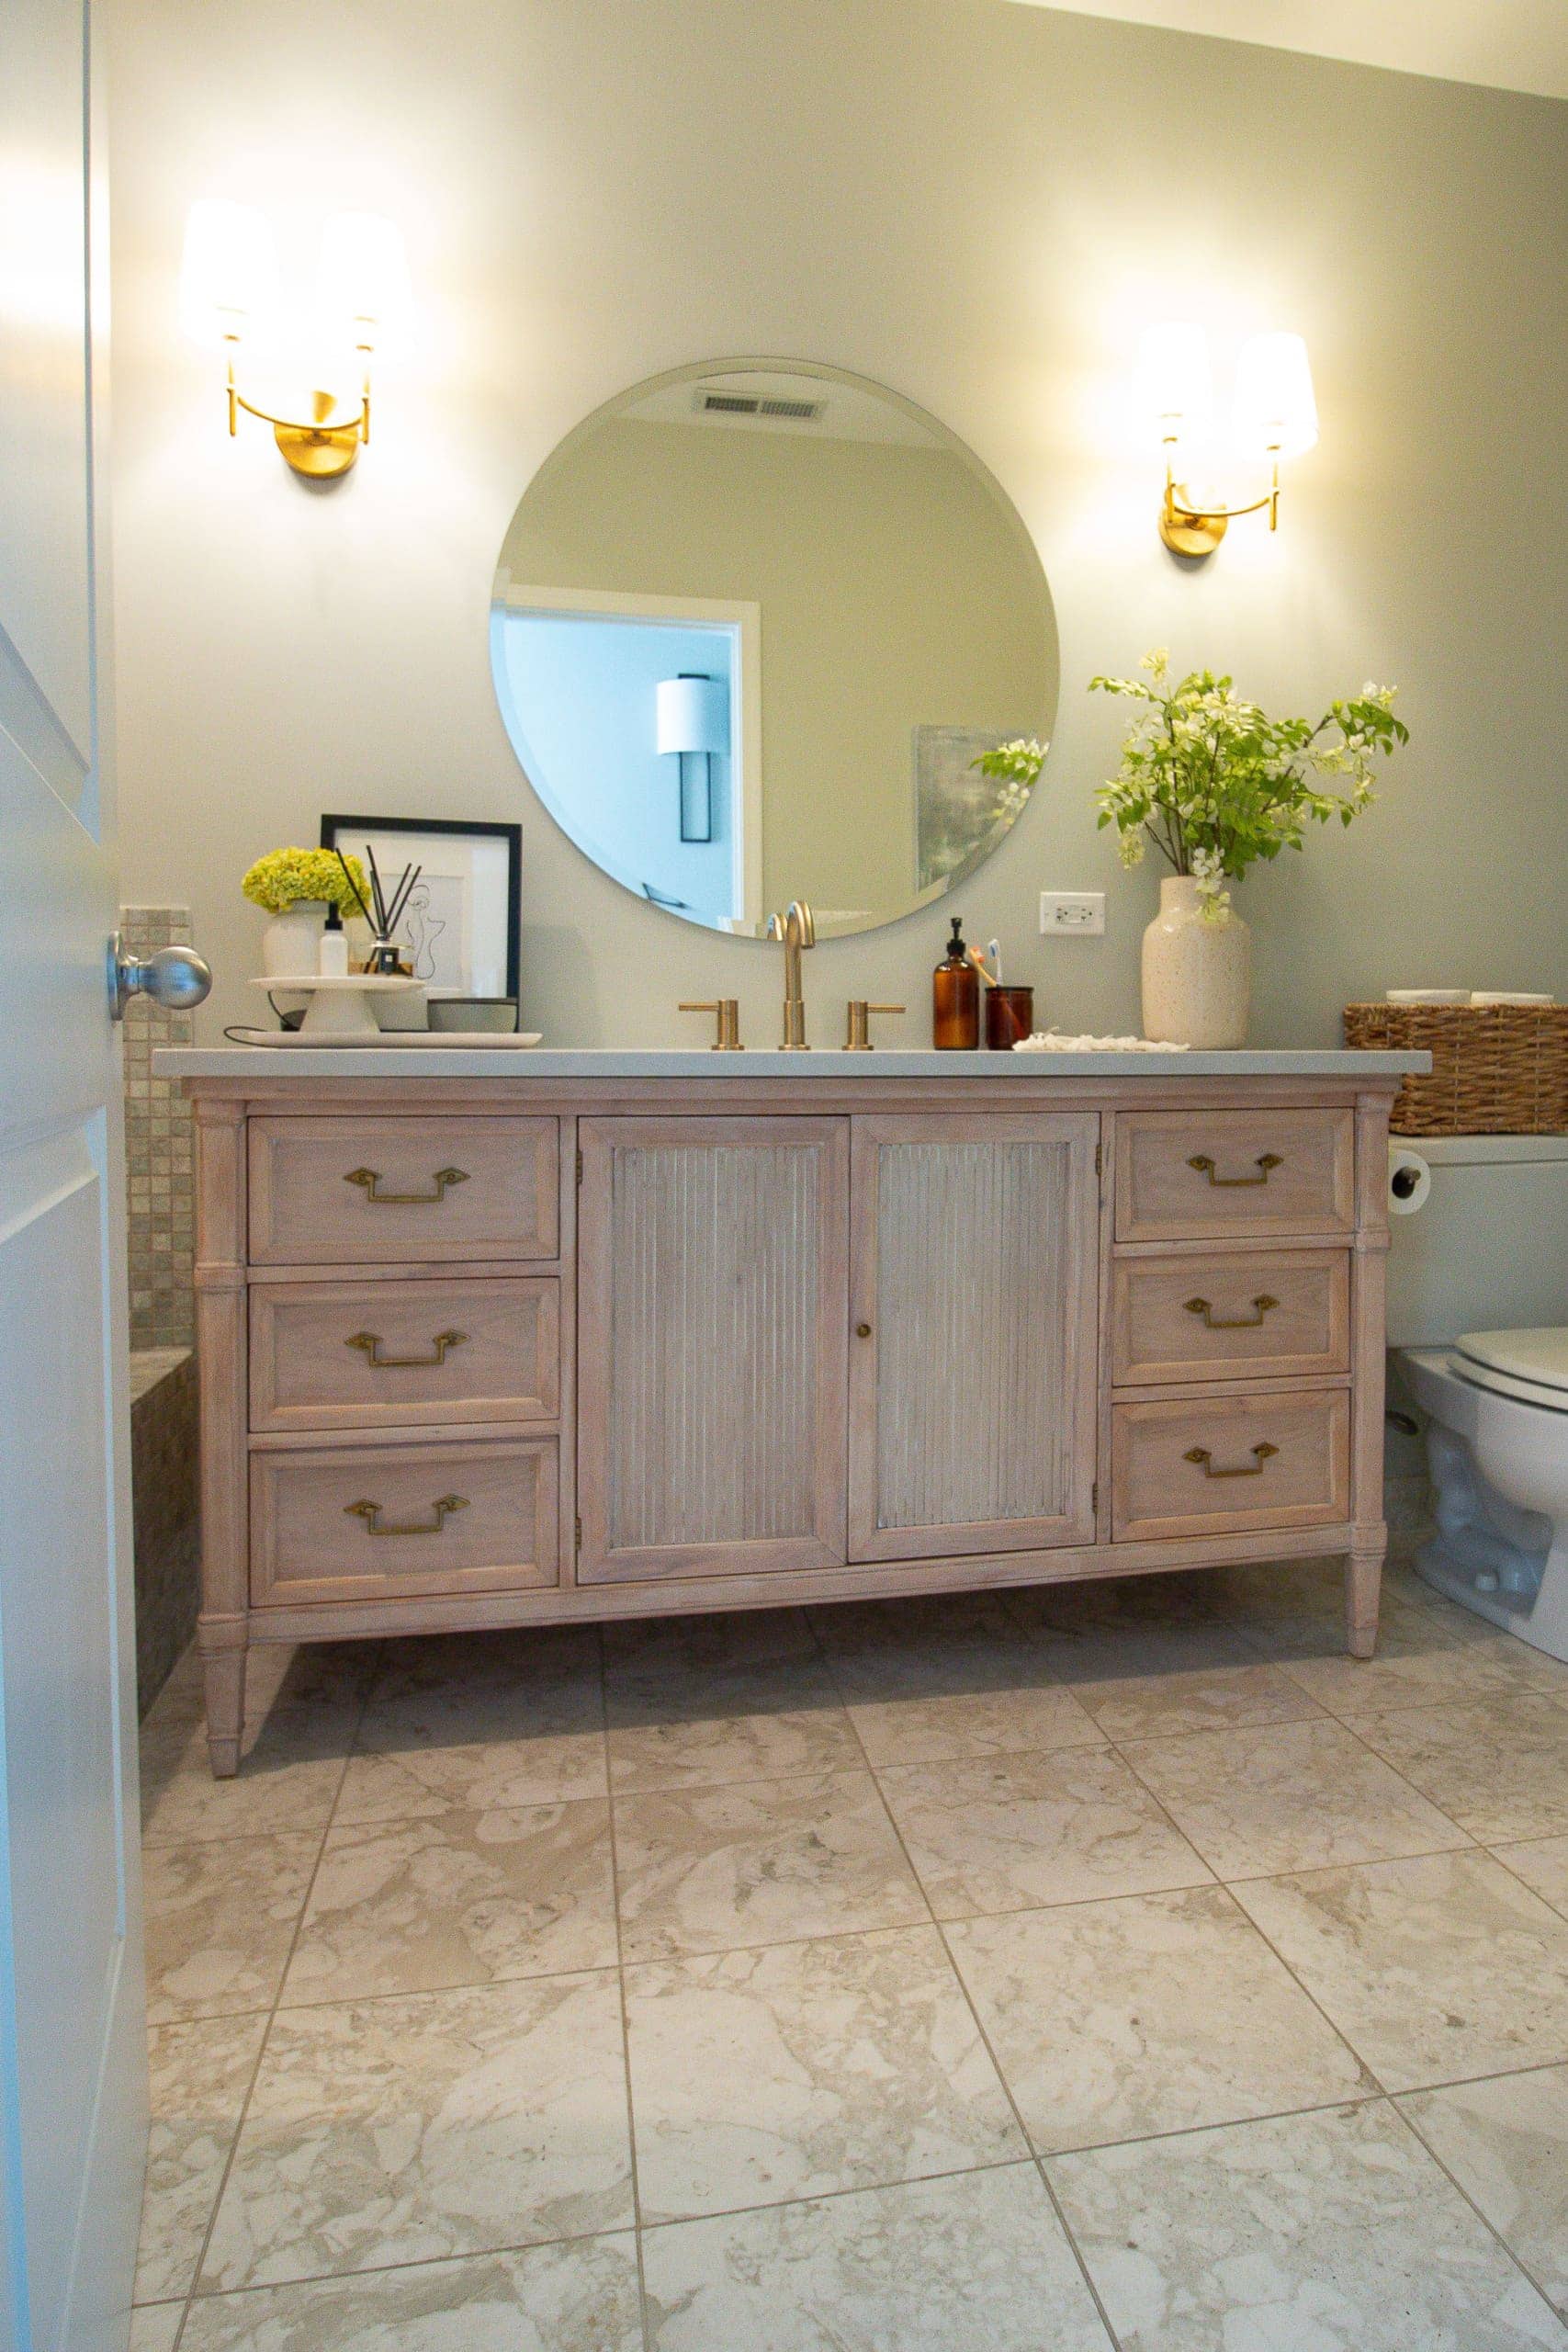
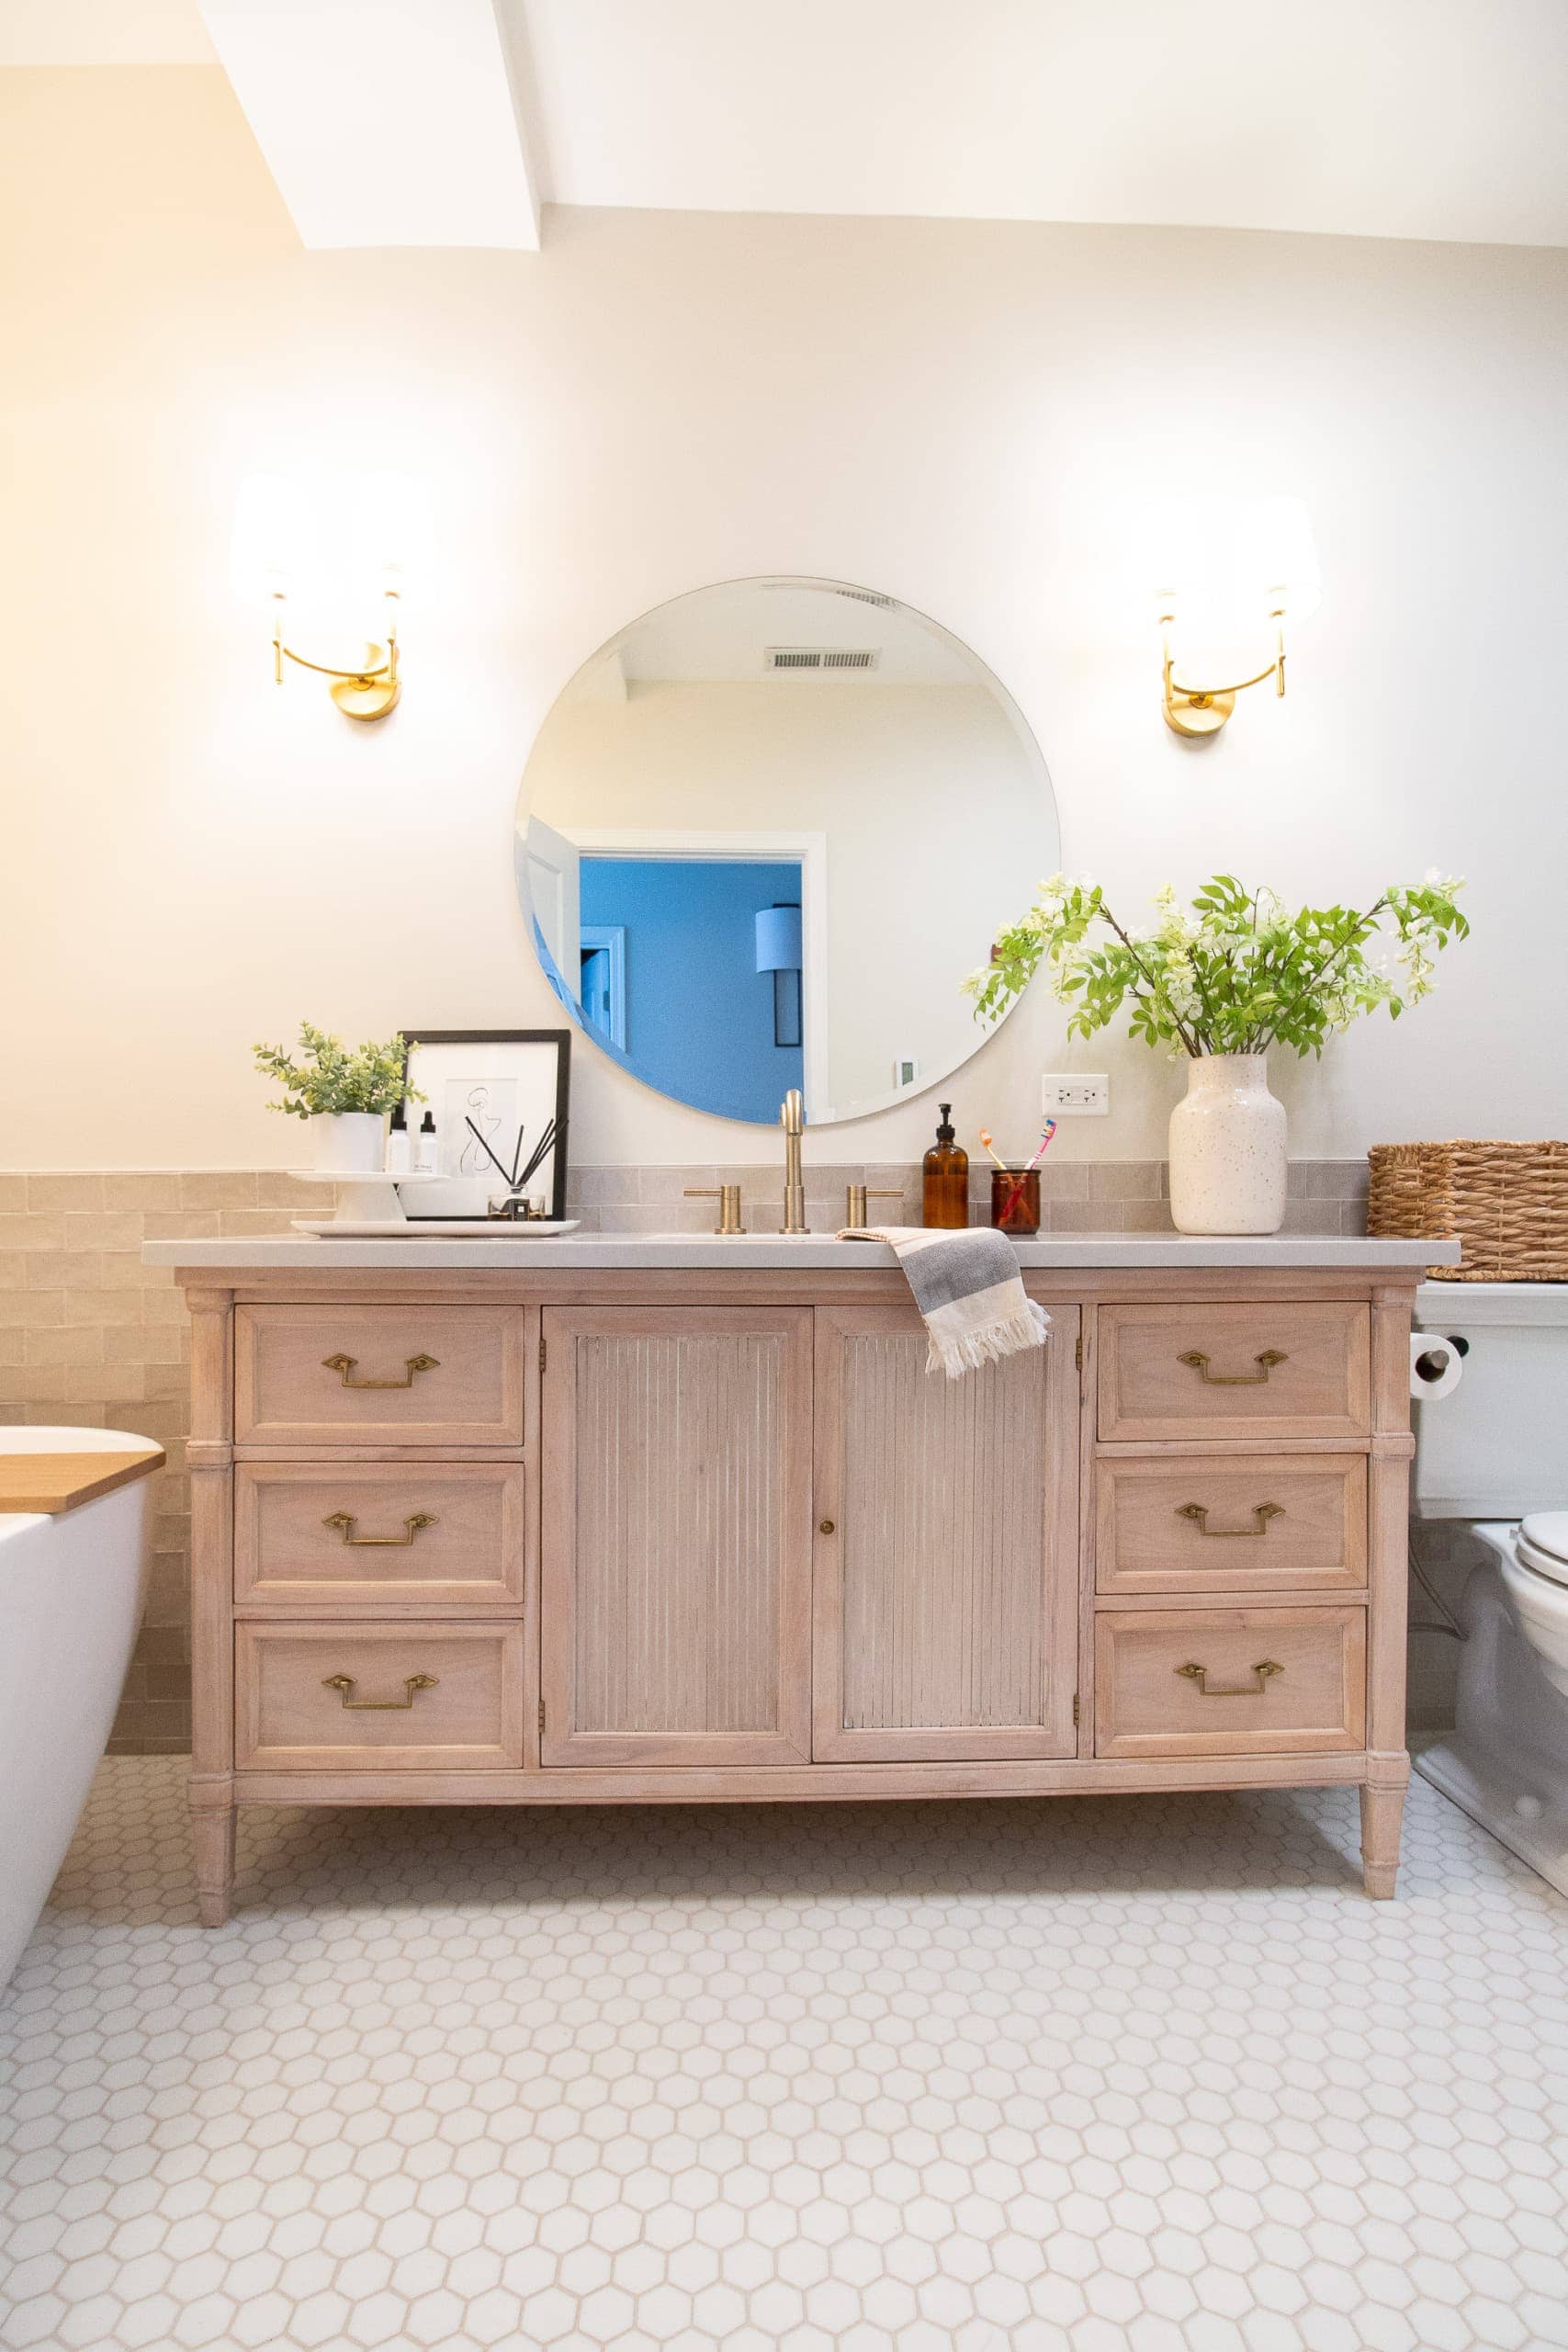
The Wood Vanity
I’ve always loved how this custom vanity turned out and now I like it even more. You can see that we had the taupe tile from the shower run all the way around the room, including above the vanity, as a little backsplash. We didn’t have them tile behind the vanity because the tile is expensive and so much would have been wasted, but you certainly can’t tell.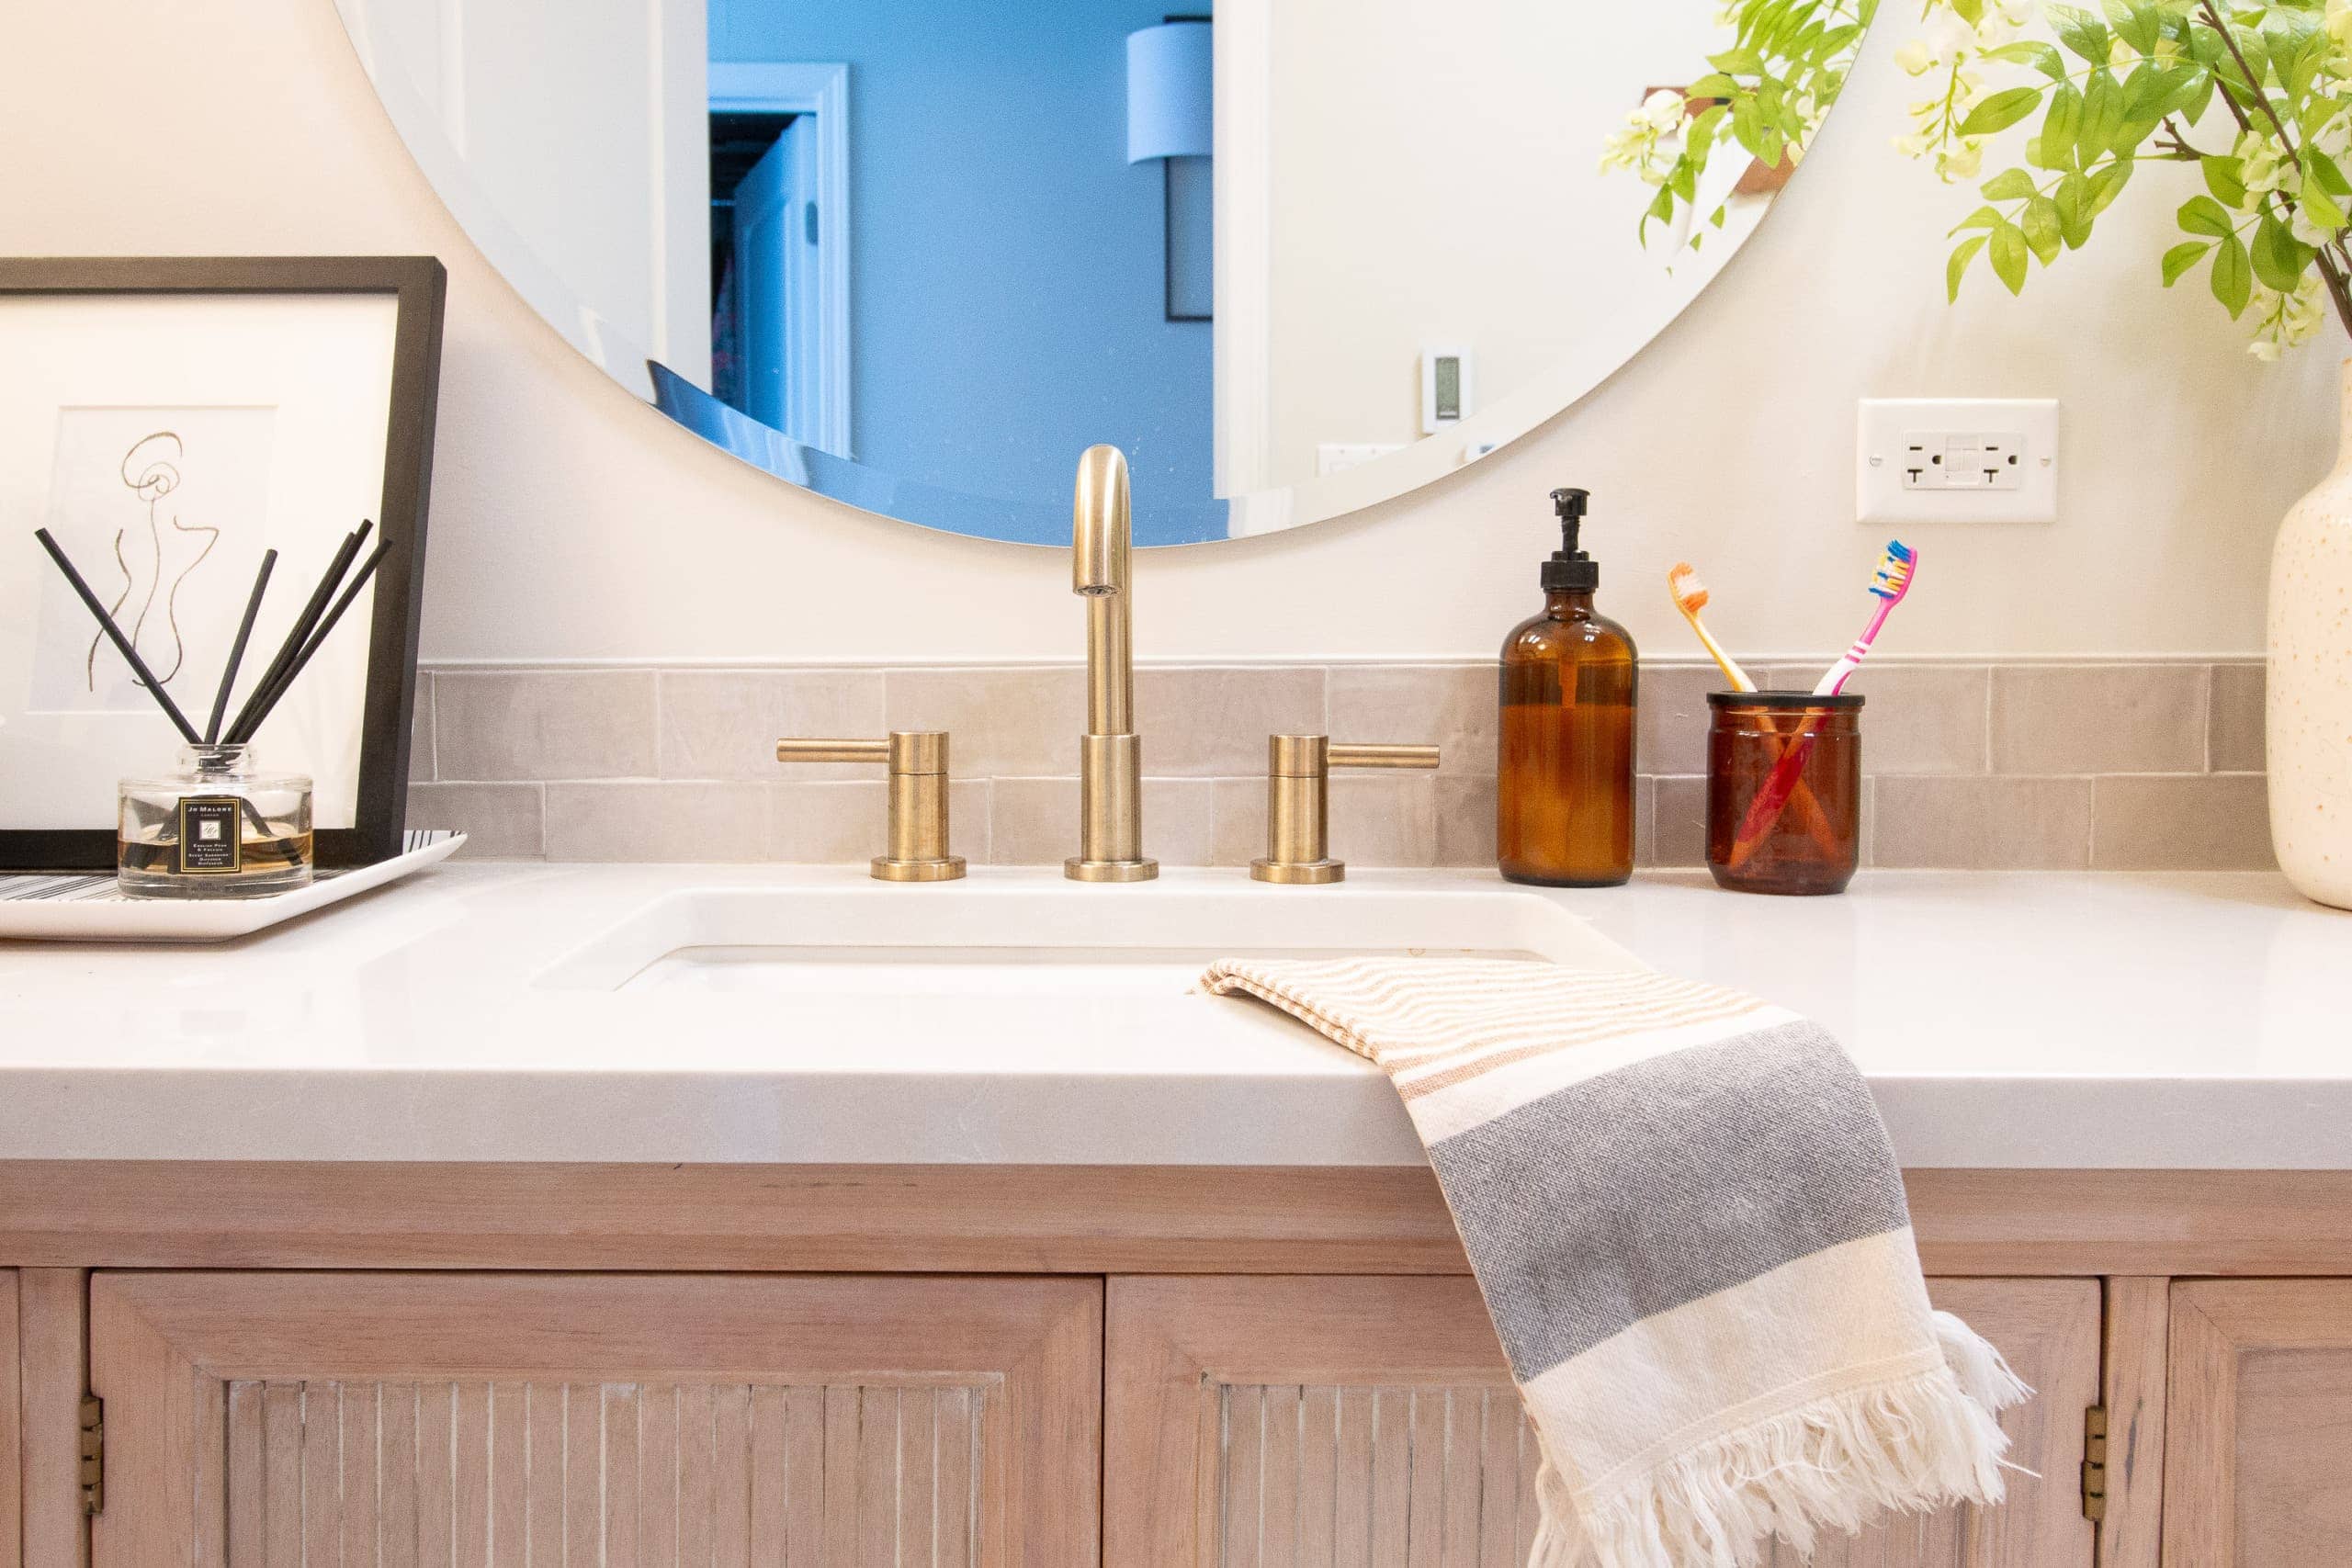
As for the vanity details, I found this gorgeous dresser from MegMade, here in Chicago, two years ago. I had them refinish it and I then ordered a stone top from Lowe’s, along with a faucet and sink. We retrofitted the entire dresser to turn it into a vanity and it worked out beautifully. You can read more about the process in this blog post. 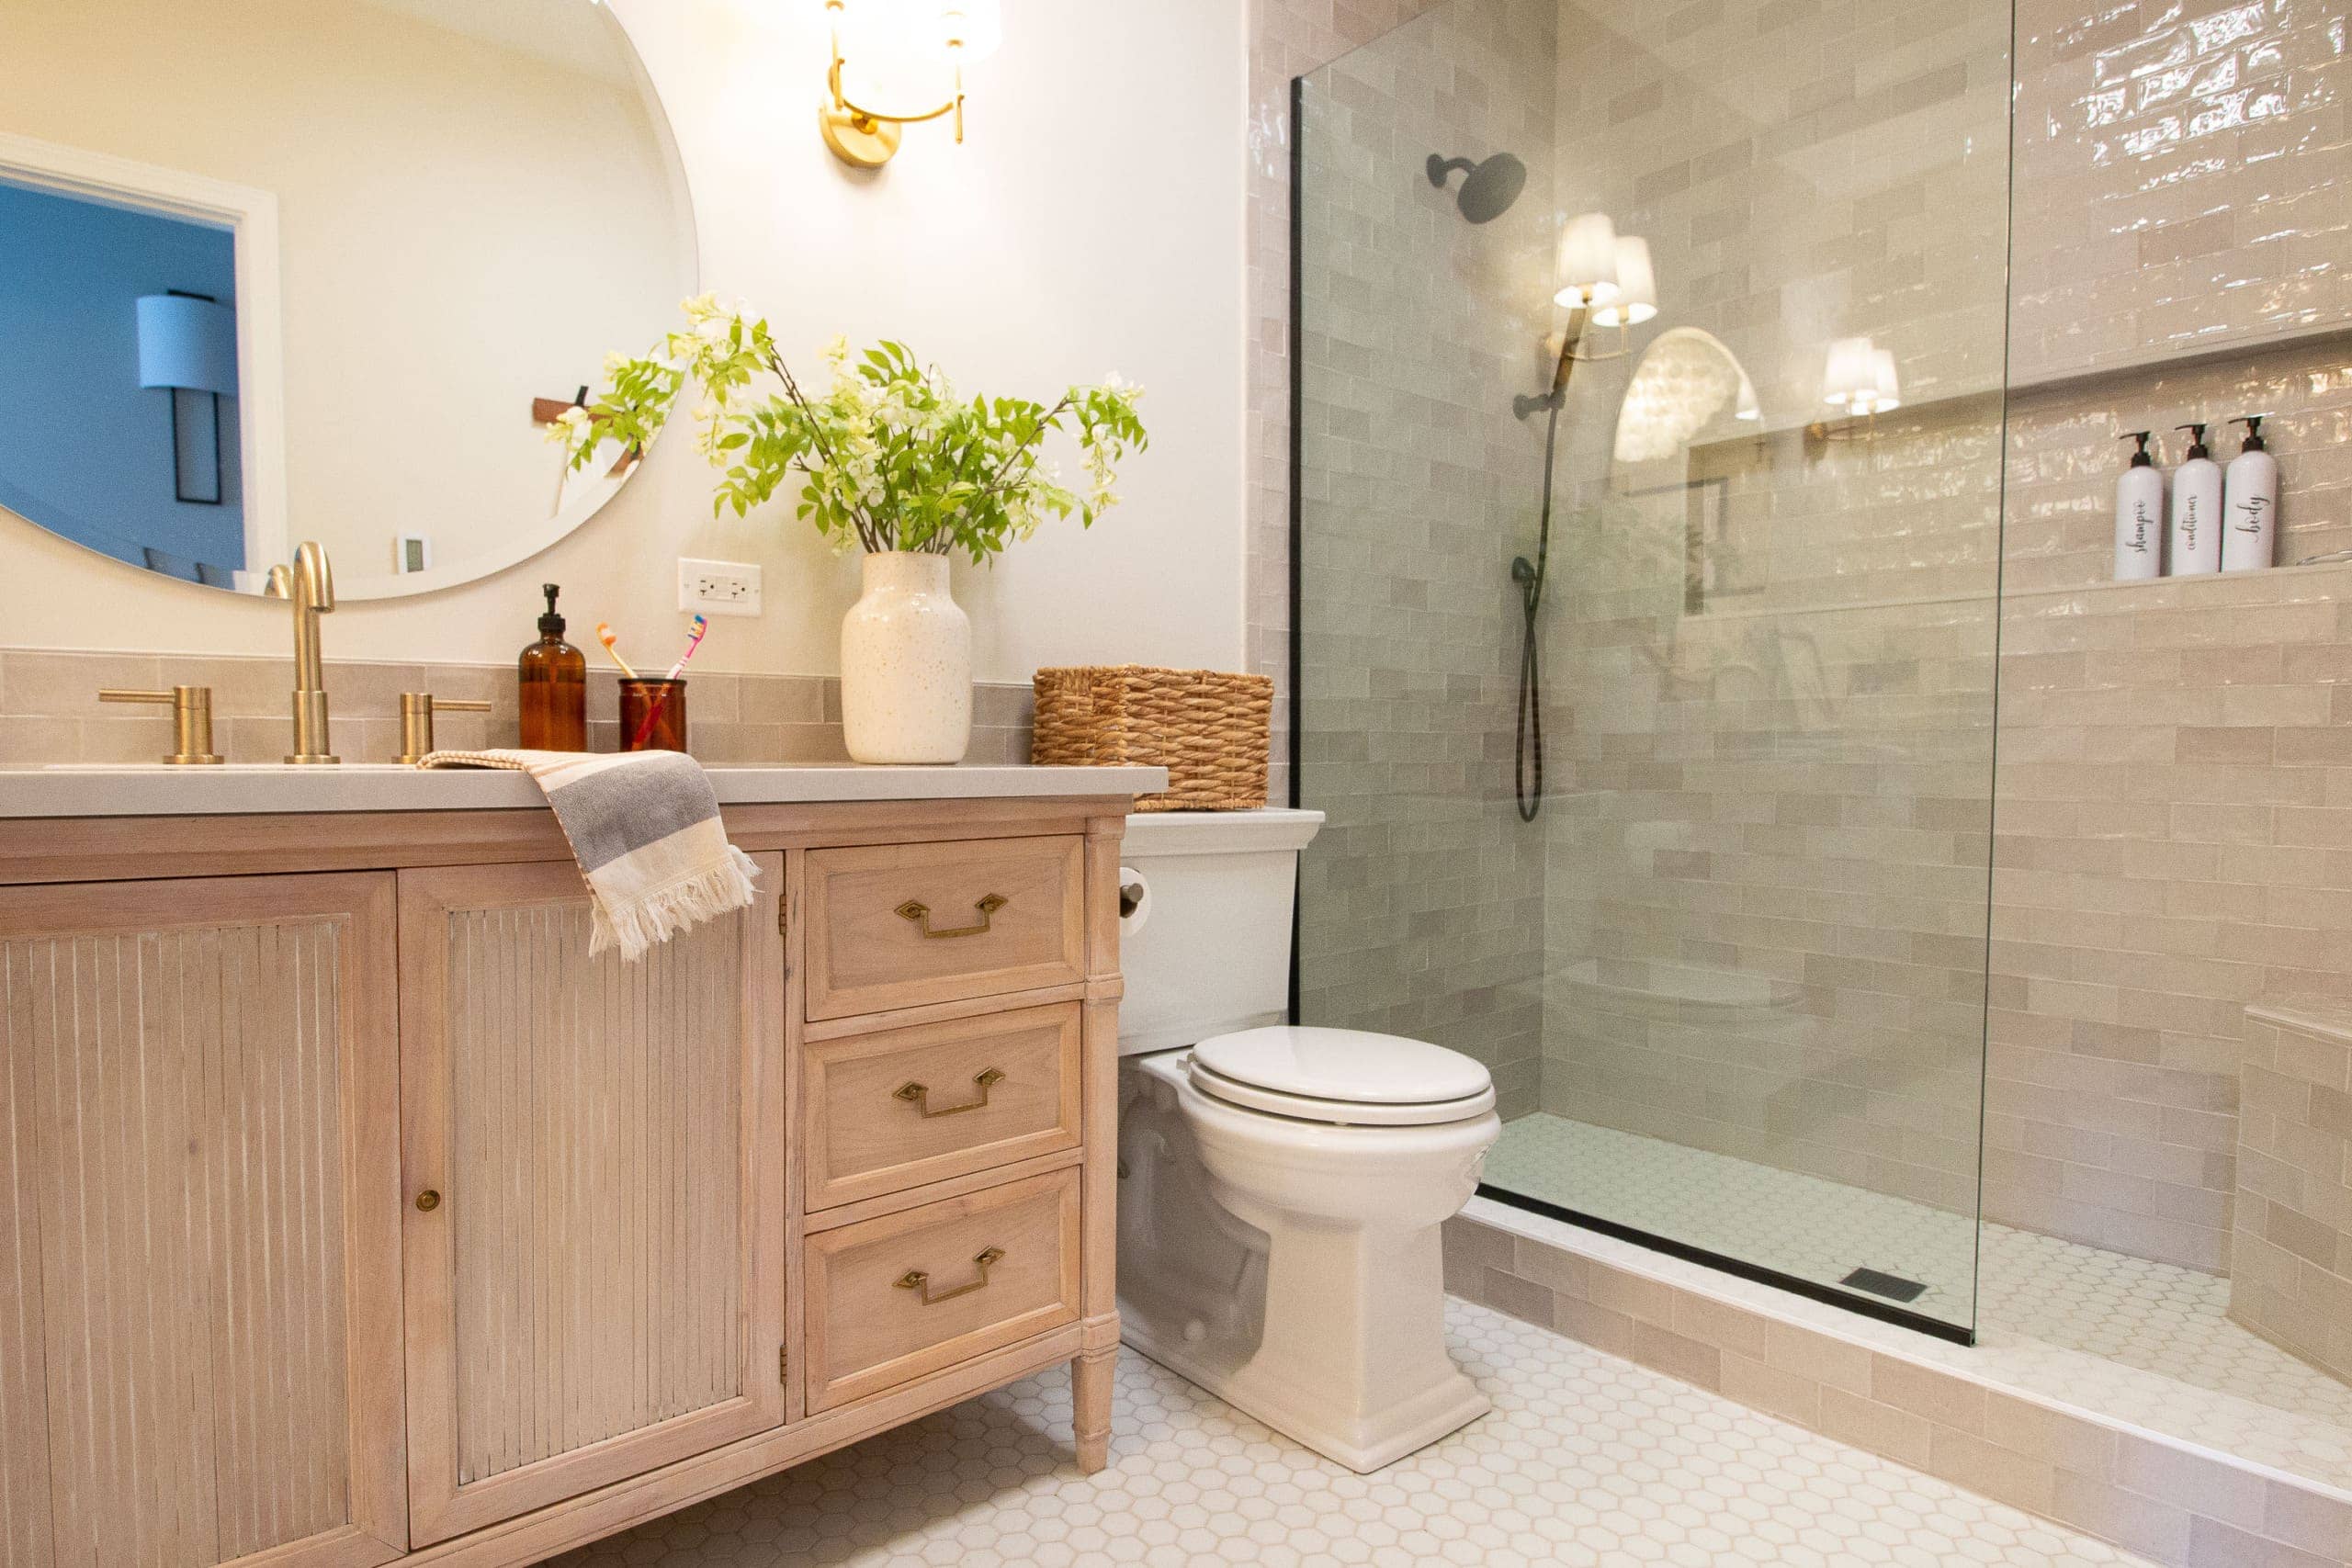
We ended up keeping most of the same accessories and pieces in the vanity area because they still reflect my mom’s style. Now the rest of the room matches it so well!
Bringing It All Together

When designing a bathroom space, I like to use a minimum of two metals. This creates interest and prevents a room from feeling too flat. In here, we opted for black and brass. We have the black hardware in the shower and the tub, along with the black shower door. 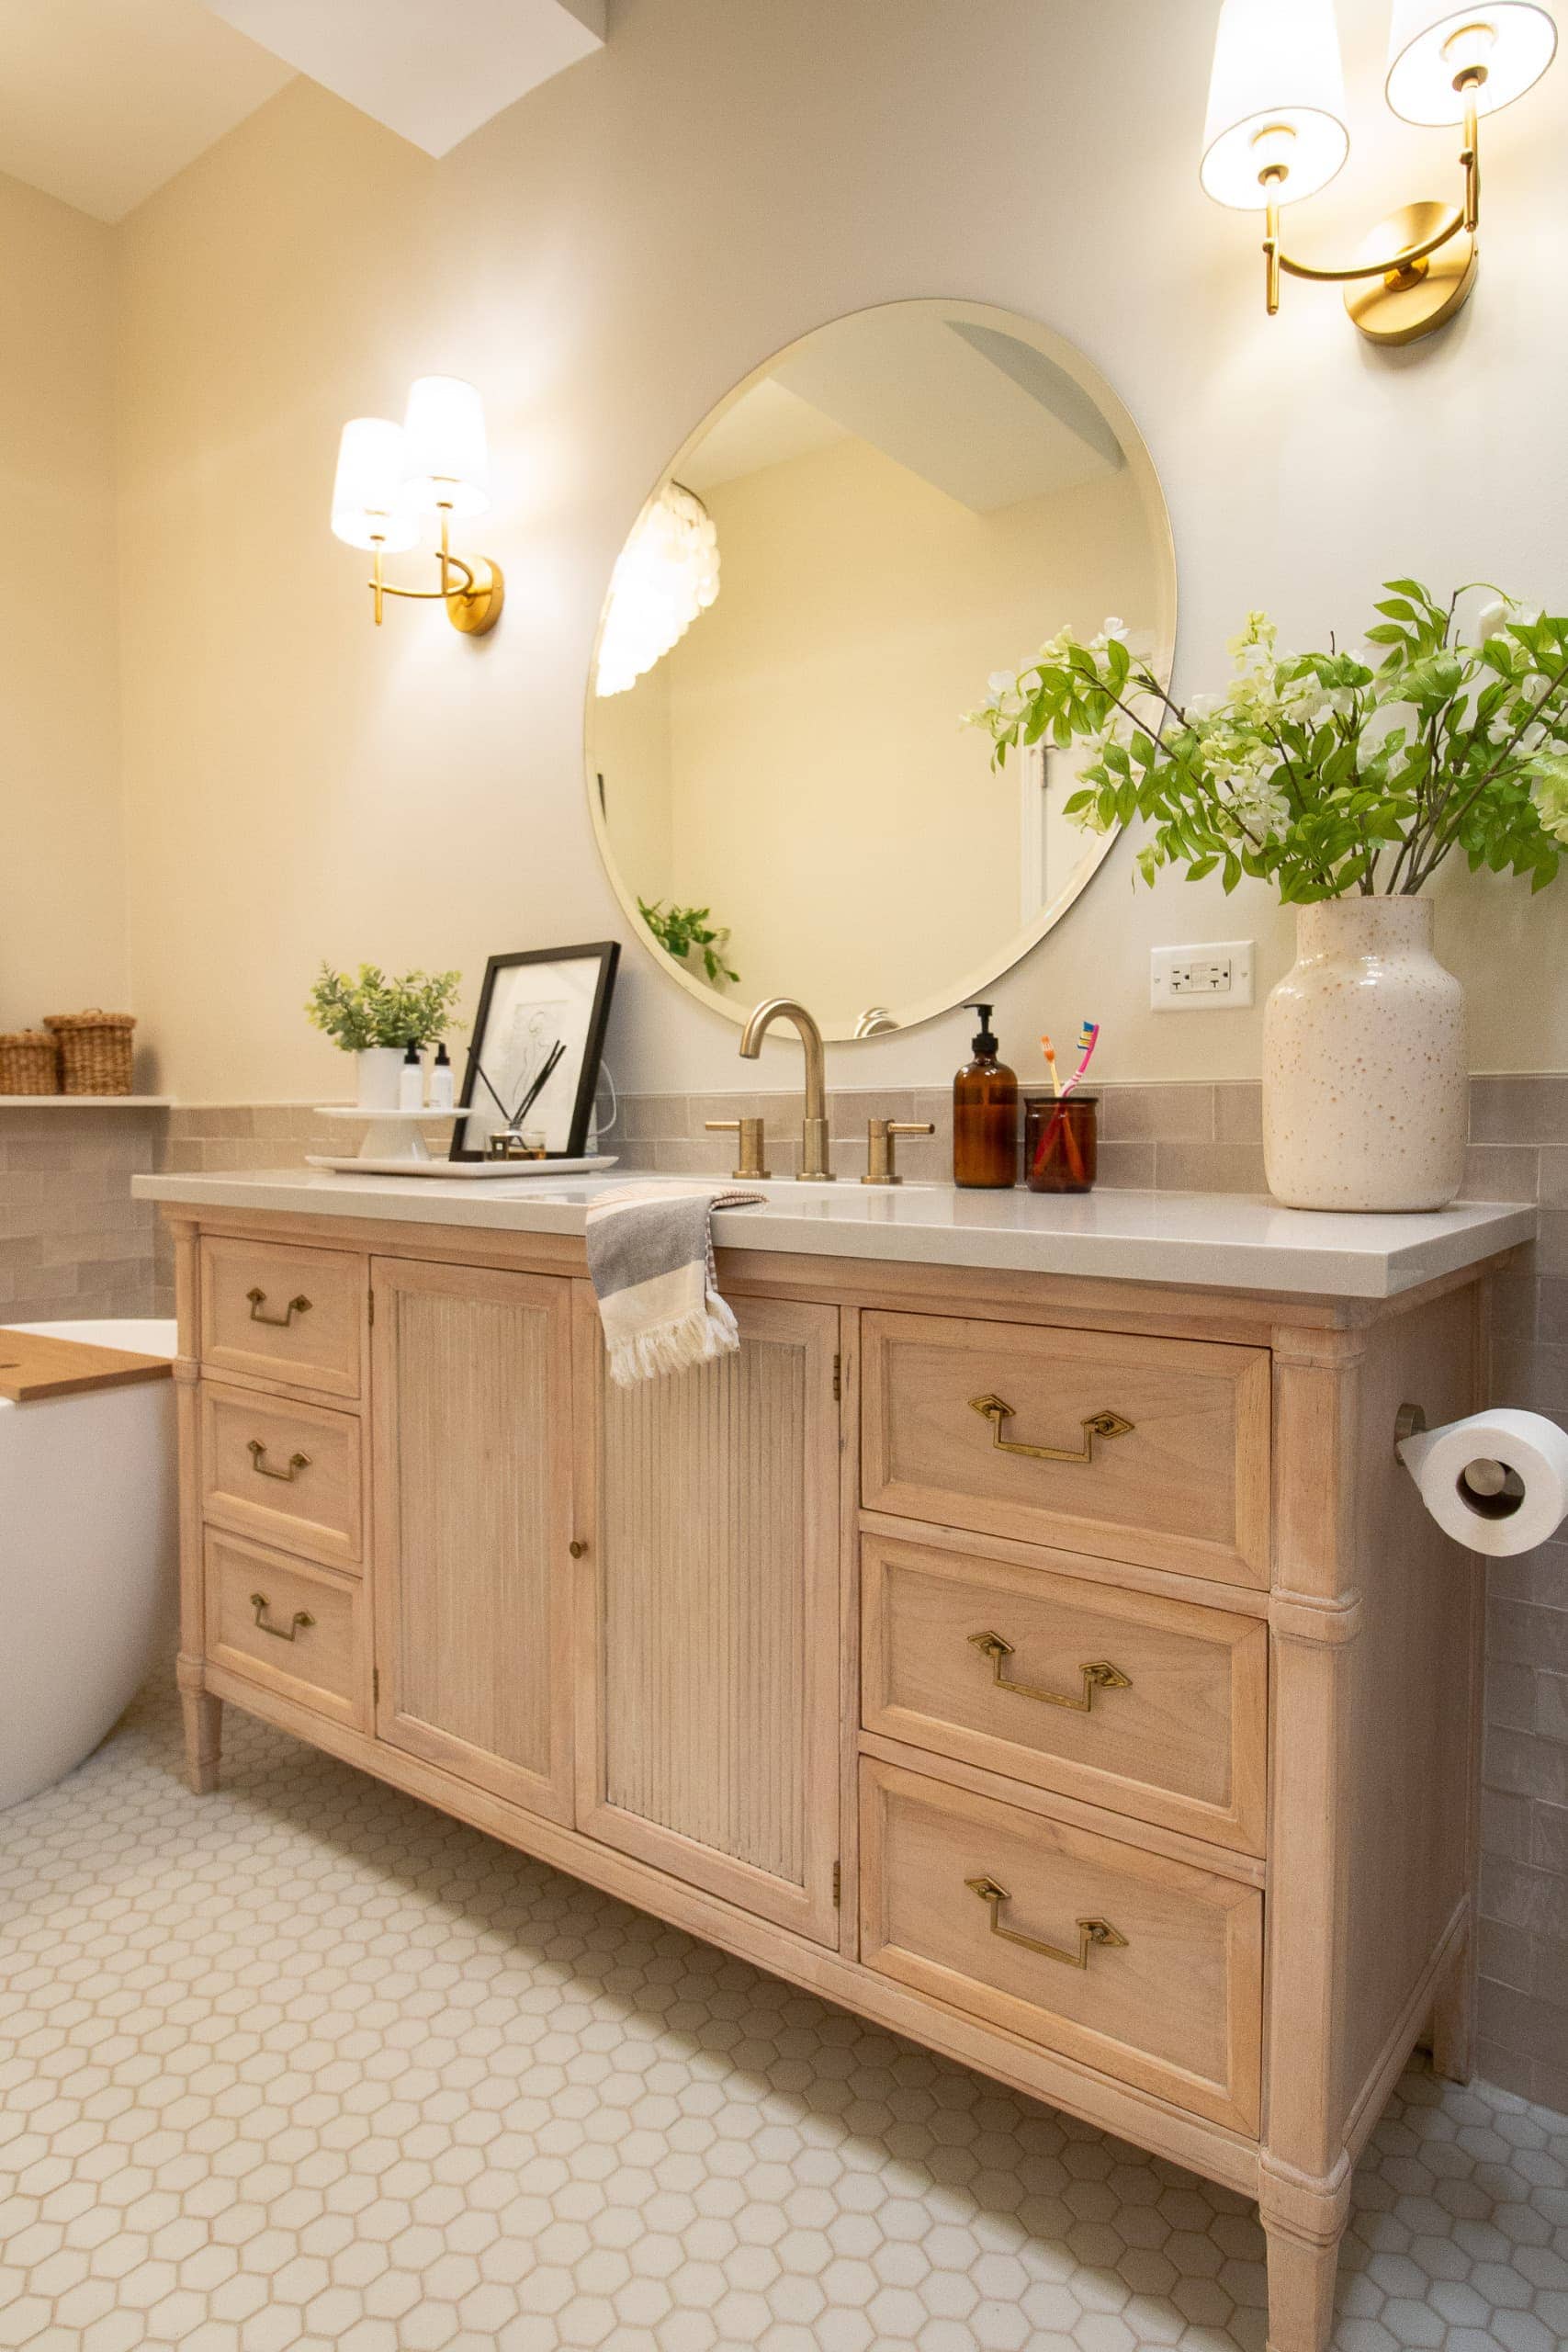
Then, we have the brass chandelier, sconces, and vanity faucet to bring in the warmth of the gold/brass tones. 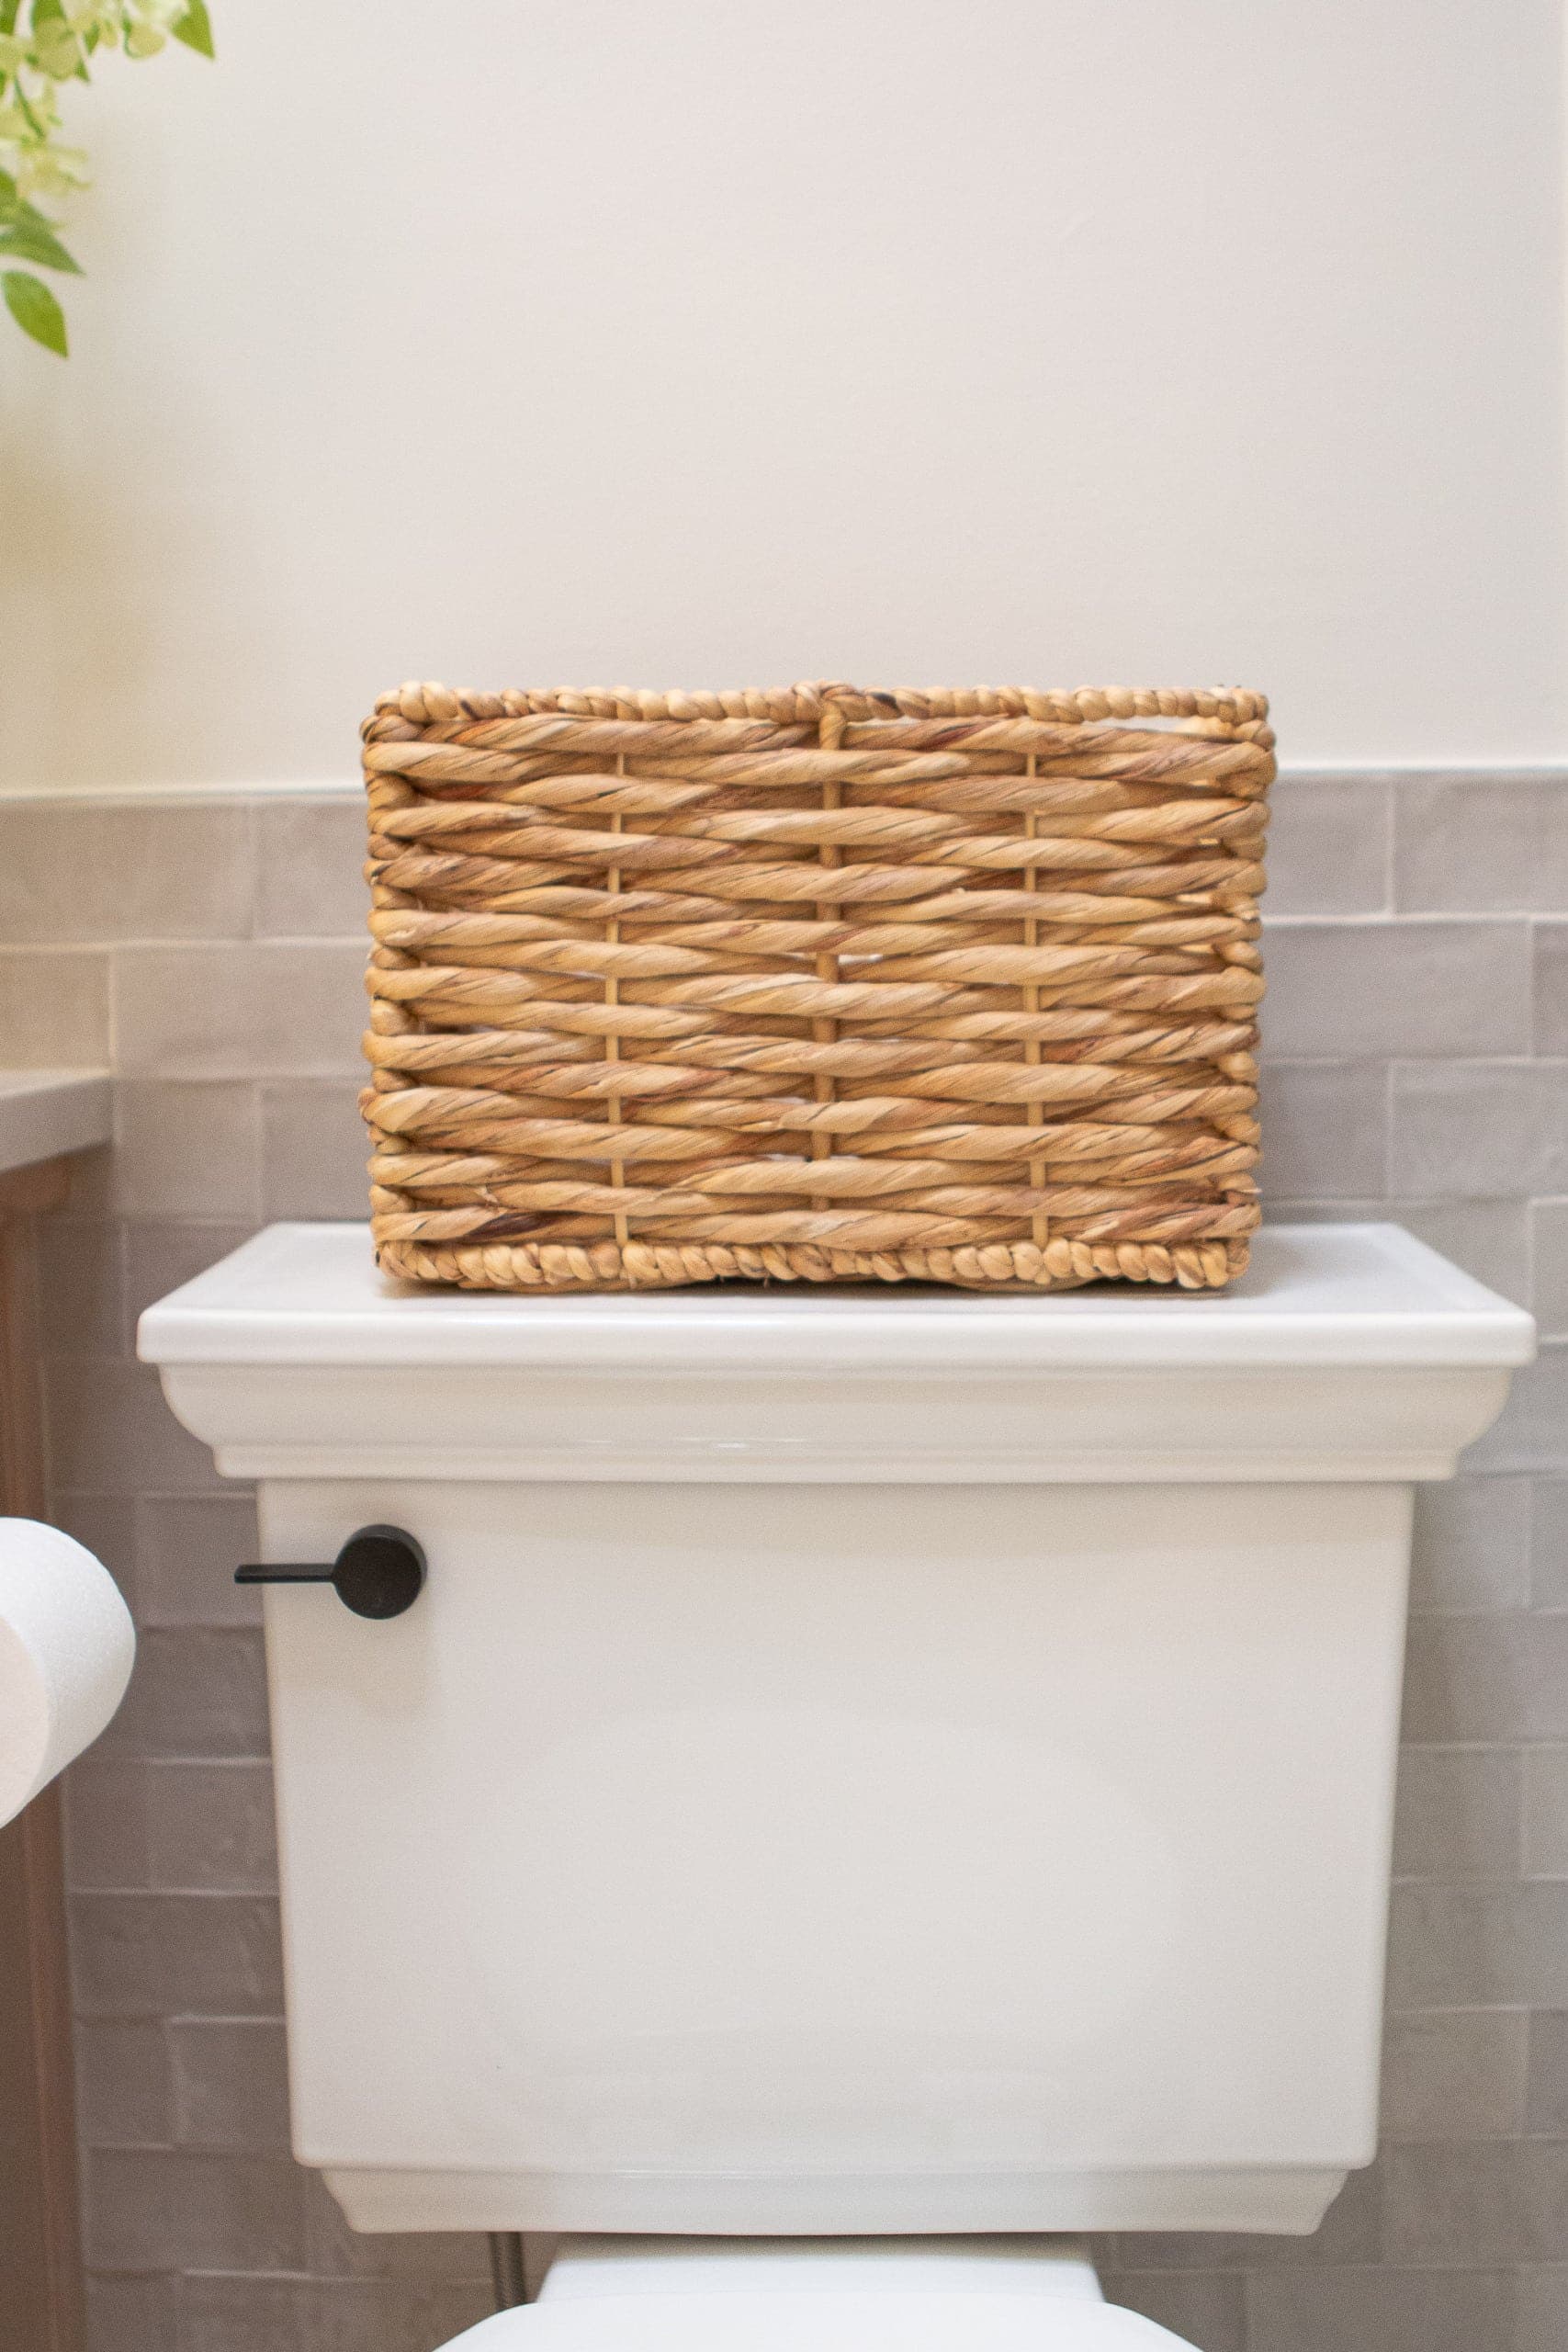 Oh, and we even opted for a black lever for the toilet. It’s all about those little details to bring a space together.
Before & After
These before and after pictures confirm that this space came a long way in a very short amount of time!
The Main Bathroom – Sources
 Paint Color: Benjamin Moore “Fog Mist” // Wall Tile (“Warm Gloss”) // Floor Tile // Freestanding Tub // Bath Filler // Chandelier // Shower Hardware // Toilet // Black Toilet Lever // Vanity Information // American Standard White Undermount Sink // Jacuzzi Duncan Faucet in Brushed Bronze // Safavieh Barrett Gold Sconces // Better Bevel Bathroom Mirror // Vase // Nude Abstract Art // Countertop Silestone Quartz “Desert Silver” // Soap Dispenser & Toothbrush Holder // Wood Bath Tray // Faux Plant // Baskets // Black Frames // Juniper Print Art // Floral Art // Toiletry Bottles // Towel Rack
What’s Next?
Next week, my mom will be taking over the blog to share the lessons she learned along the way with these two big projects. This was her first time taking on a project of this size and I know she has a lot of wisdom to share. Oh, and she will also break down the timeline for this project (I think they got both bathrooms done in three weeks!) along with an overall budget for both bathrooms. I know you guys always like to see numbers. Stay tuned for that…
Casey
If you want more details about any of the spaces in her home, check out these blog posts below.
- Full Home Tour
- Full Home Tour – Video
- Christmas Home Tour
- Main Bedroom
- Main Bedroom Built-Ins
- Installing Bedroom Window Treatments
- Hallway Gallery Wall
- Entryway Details
- Guest Room
- Pantry Makeover
- Kitchen Reveal
- Farmhouse Dining Room
- Blush Living Room
- DIY Guest Room Closet
- Main Bathroom Refresh
- Downsizing Part 1 // Downsizing Part 2 // Downsizing Part 3
- Guest Bathroom Reveal