How to Demo a Bathroom in a Weekend
When Finn and I sat down to plan out the order of our bathroom renovation, we knew that before we could get started with the new stuff…we needed to rip out the old stuff. Sure, Chip Gaines makes it look like fun on Fixer Upper, but could we really demo a bathroom all by ourselves?
Turns out. We could and we did. 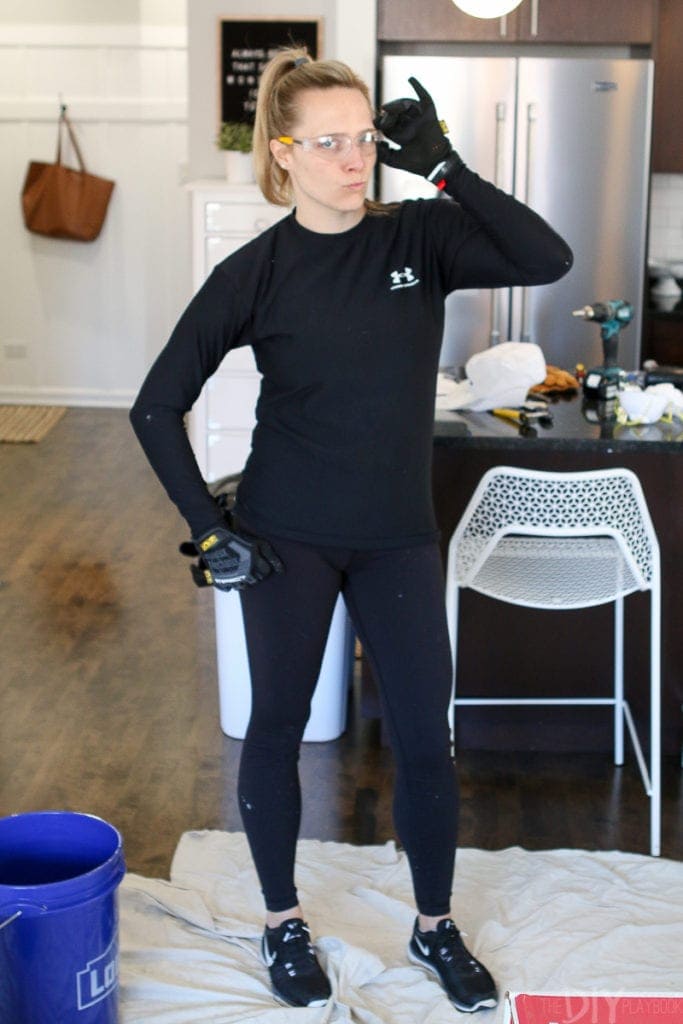 And I must say out of every single task we’ve done in the bathroom thus far, this was by far the easiest and most fun! Plus, we saved some money doing it ourselves instead of hiring this task out. So let’s break down how exactly we went about ripping out our bathroom in a weekend.
The Prep
Finn and I reserved an empty weekend on the calendar for 2 days of demo. We then scheduled our contractor to come that Monday to haul all of our trash away and get started laying the foundation for our new shower. The deadline of him coming on Monday really kept us motivated and on-task over the course of the weekend.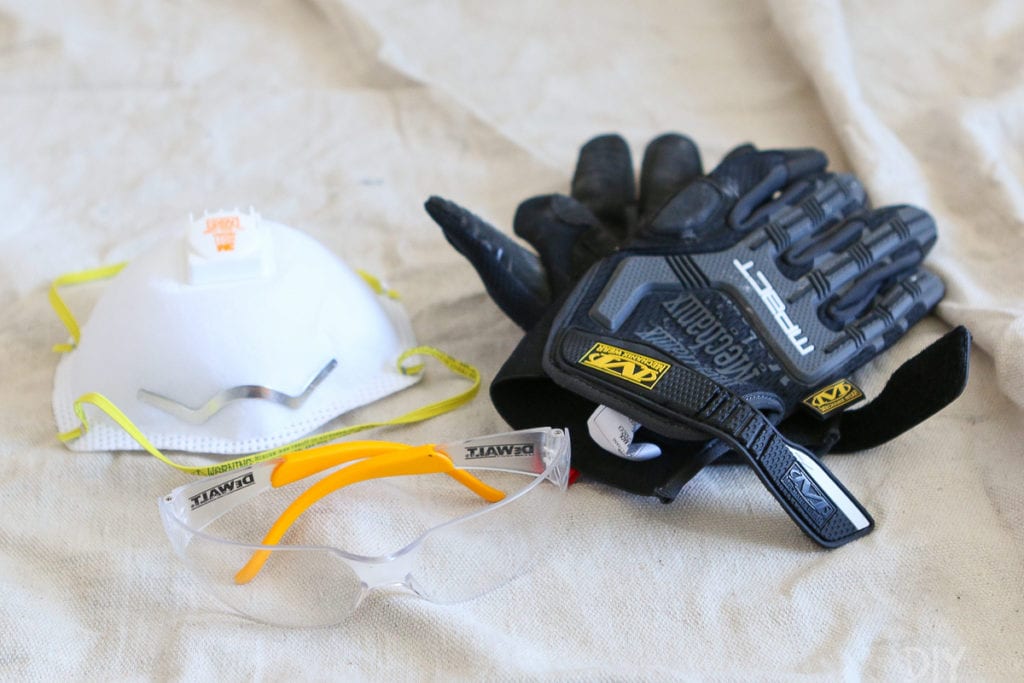 We also loaded up on all of our supplies from Lowe’s on Friday night, so we could be up early on Saturday and ready to go. I highly recommend this! The hardware store is a heck of a lot less crowded on weeknights. So stock up on everything you need on Friday, so you can get right to work on Saturday.
How to Demo a Bathroom – The Supplies
It’s kinda surprising the number of supplies you’ll need to demo a bathroom, but we recommend stocking up on the following. 
- Goggles
- Hard Hat
- Face Mask
- Heavy-duty Gloves
- Contractor Trash Bags (they’re super heavy duty and don’t rip)
- Drop Cloths
- Plastic Wrap
- Painter’s Tape
- Mallet
- Trash Can
- Crowbar
- Buckets
- Rags
- Knee Pads
- Wrench
- Screwdriver
- Broom
- Shop Vac
- Ladder
How to Demo a Bathroom – The Steps

Saturday
Demo is loud. Like really really noisy. And we live in a building with 4 other units. Therefore, the first thing we did was alert our neighbors about what we were up to via email. We also didn’t start with anything noisy until after 9:30 am on Saturday. So we spent the first hour or 2 that morning clearing out the bathroom. We cleared out the vanity, took down the mirror, unscrewed toilet paper holders…really just did everything possible to get everything out of the room.
Remove the Door
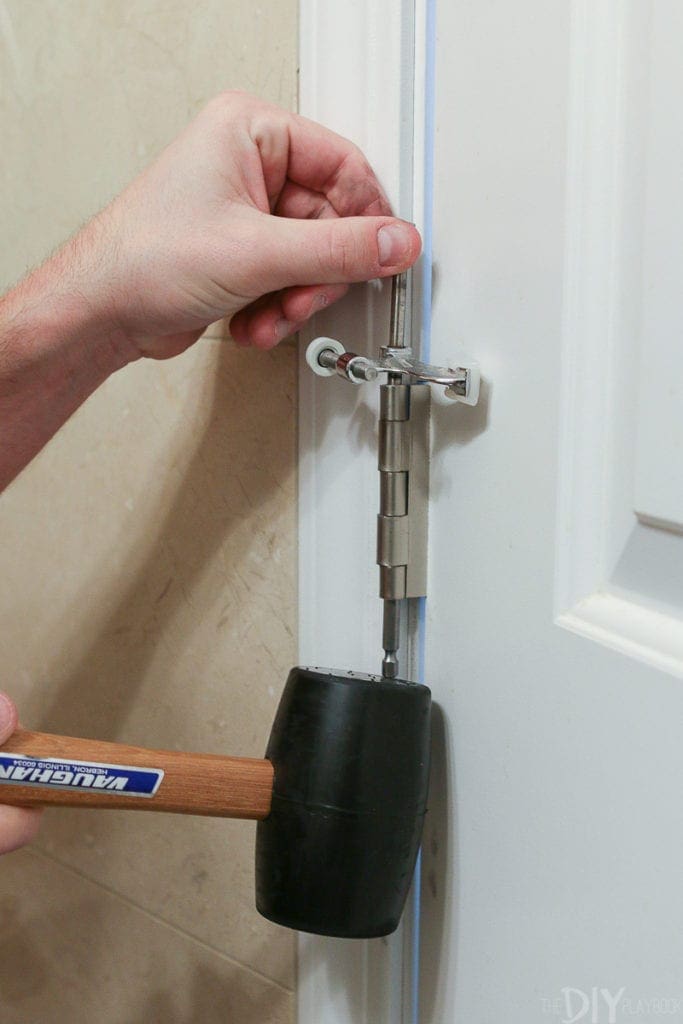
We then took the door off the hinges so we would have more room in this space to work. To do this easily, take a long drill bit (or anything long and sturdy) and stick it in the hinge. Then use a mallet to tap upwards to get the door pin out. It should come out fairly easily!
Tape off Vents

Demo (& bathroom renovations in general) are super dusty. We taped off the ceiling vent in our bathroom to prevent dust from getting sucked in and moved to other parts of the house. It only took about 5-minutes to get this all protected, but it’s well worth it.
Remove the Toilet
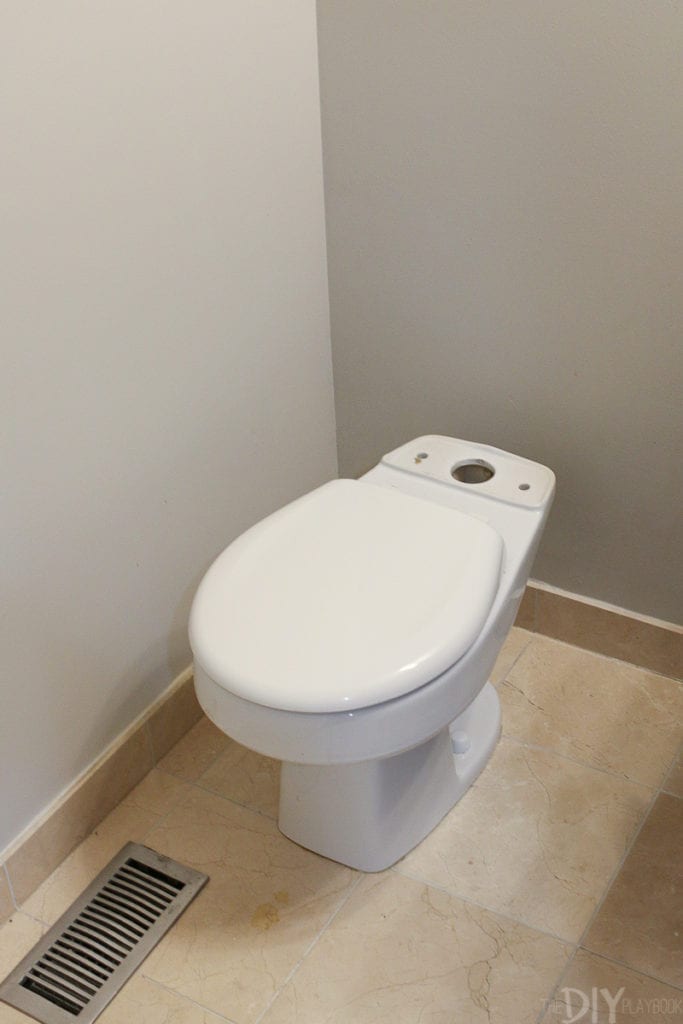 The first major thing we did was remove the toilet. There are lots of great youtube tutorials (we watched this one) out there to walk you through this, but you’ll want to turn off the water, flush to get rid of as much water in the bowl and tank as possible, and then remove the tank from the back. Then disconnect the water supply, unscrew the bolts on the bottom, and lift it on off. We got ours out in about 30 minutes, so it really isn’t too tricky.
  You will want to make sure you plug up the hole with a rag or else sewer gases will come into your home. Yeah…not good. Keep the stink away and clog that baby up quickly!
Remove the Vanity
With the toilet gone, it was time to move onto the vanity. Again, this one wasn’t too tough either. 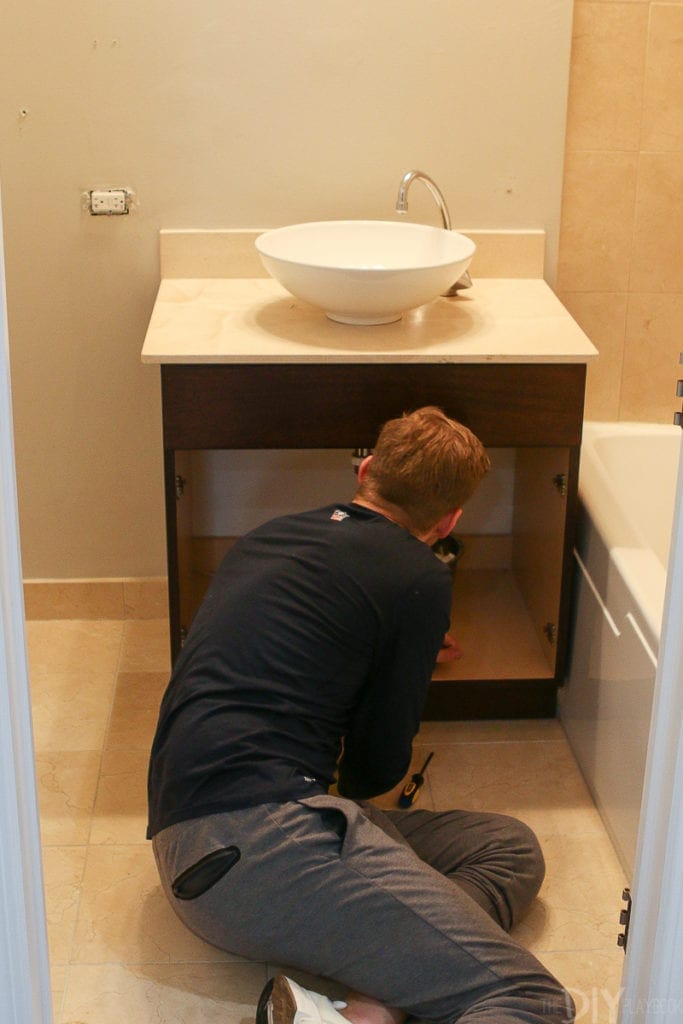 Get under the sink and turn off the hot and cold water valves (clockwise until they’re tight). Then disconnect the hot and cold water supply lines and loosen the slip nut on the p-trap to disconnect that as well. Next, find the screws that connect your vanity to the back wall and take those out.
 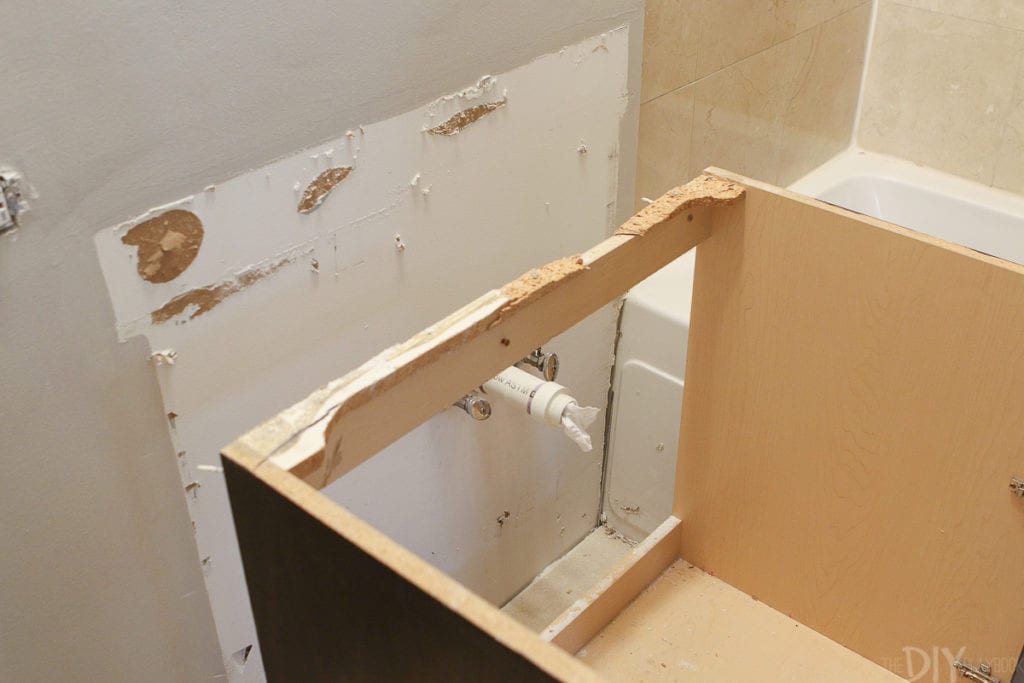 After that, it was just a matter of pulling and tugging to get it off. We took the top of the vanity off first and then were able to get the base off.
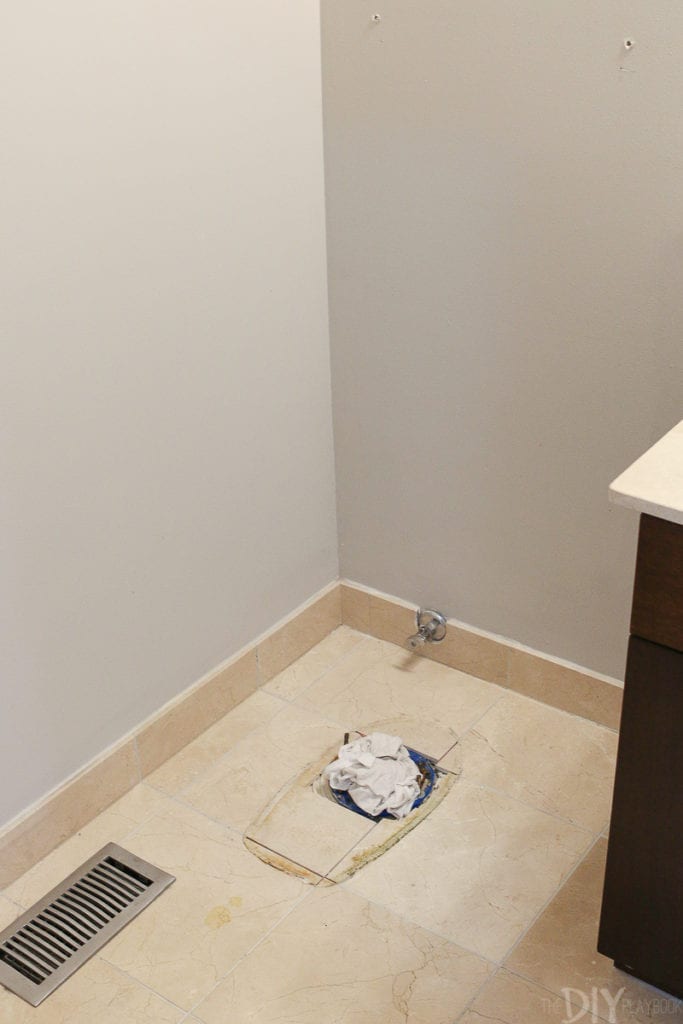
Chisel Off the Floor Tile
Yay! Our big items were out. Now onto the floor. Our main tools for this part of the bathroom demo were mallets and crowbars. Oh, and lots of safety gear because dust is flying and you don’t want to inhale that nastiness. 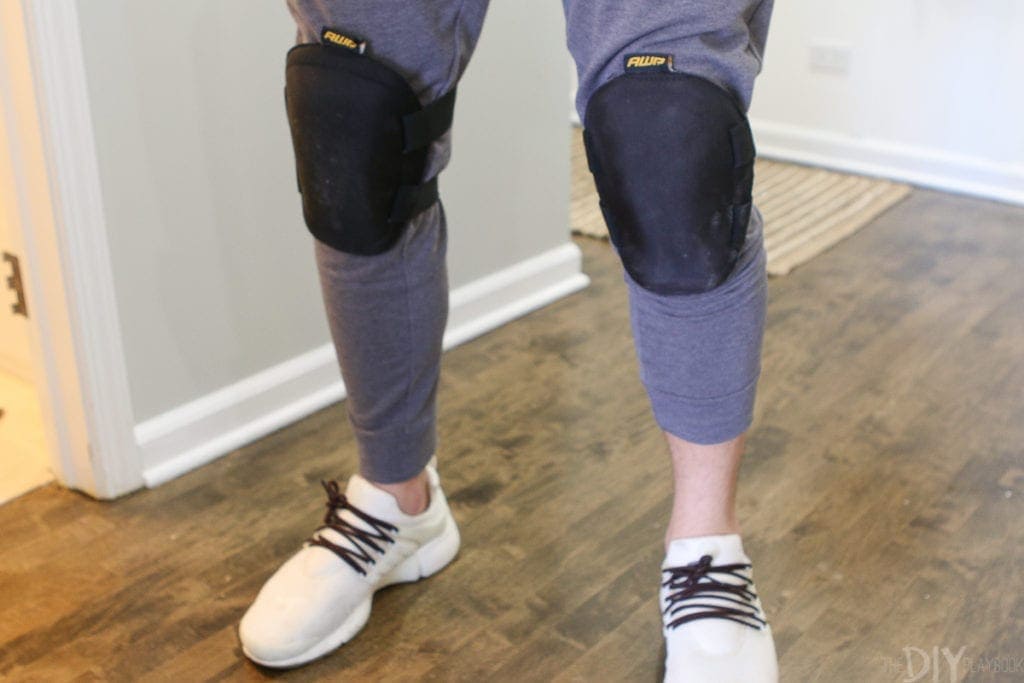 Also, knee pads! Buy knee pads! When you’re crouched on the floor for so long, your knees will hate you. Knee pads help (and will come in handy when it’s time to lay new tile).
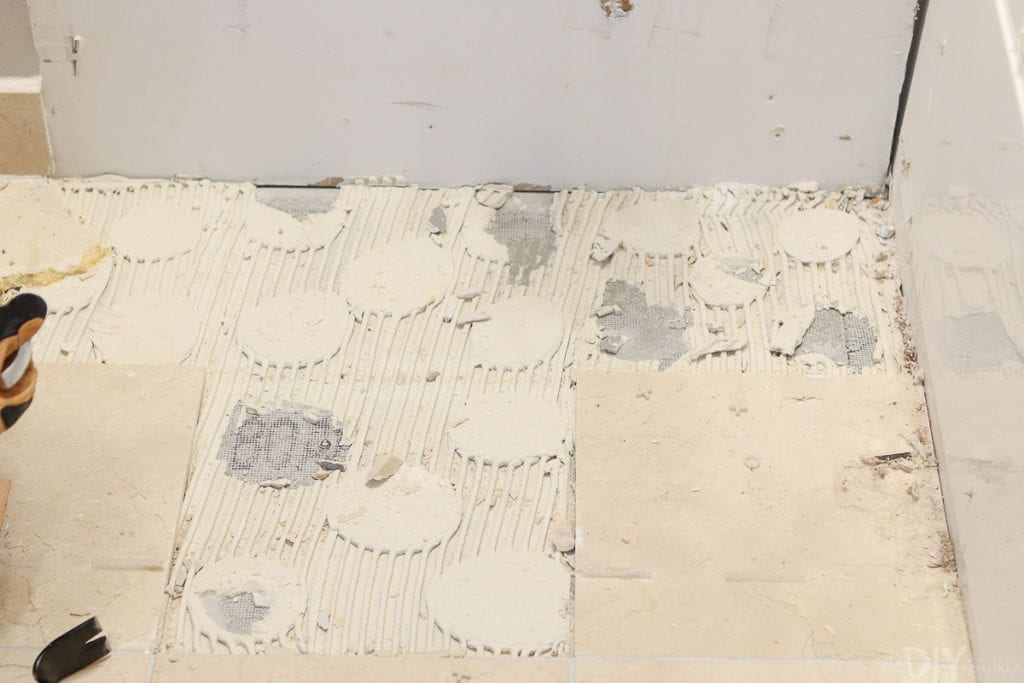 We started to get the tile up where the vanity was because the builders somehow thought it was okay to not grout under the vanity (insert eye roll here). Not cool, but also made it easier to get those first few pieces of tile off the floor.
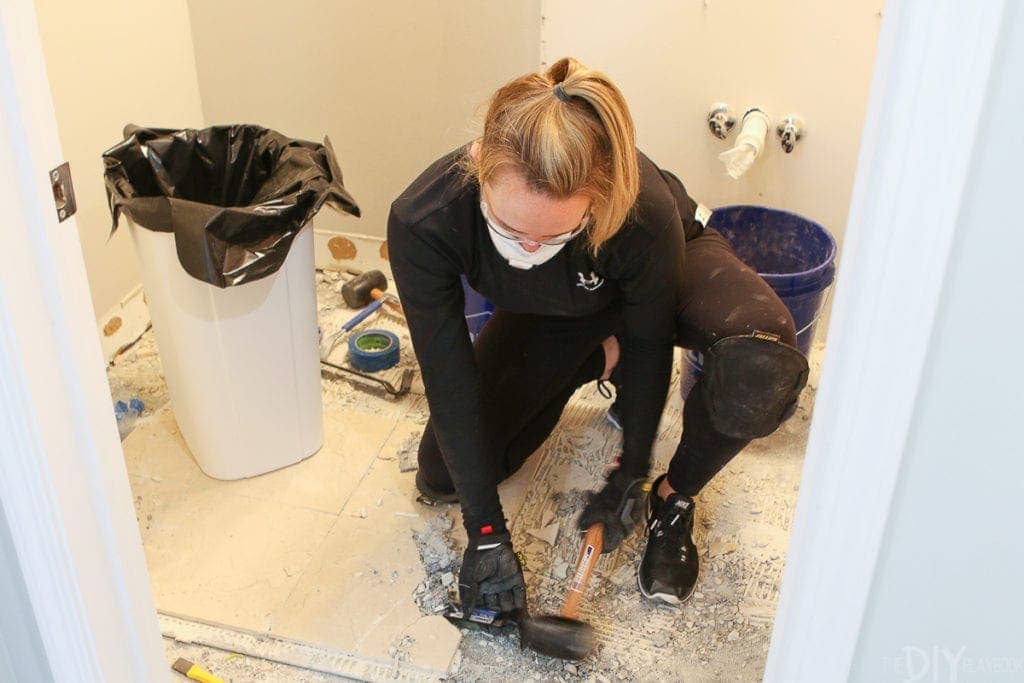 Our method was to wedge the crowbar in there, pound away with the mallet, and pull off as much as we could. Eventually, we were able to get underneath the thinset to the cement board, and if we got to that we just pulled that straight up to expose the plywood underneath. This was faster because we could take it all off in one big chunk.
  This part was time-consuming and exhausting. We took turns so we could give our bodies a break and stopped for lunch somewhere during this time. Eventually, after about 3 hours of chiseling, we got it all out of the bathroom, loaded into trash bags, and down to our garage and ready for pick-up.
 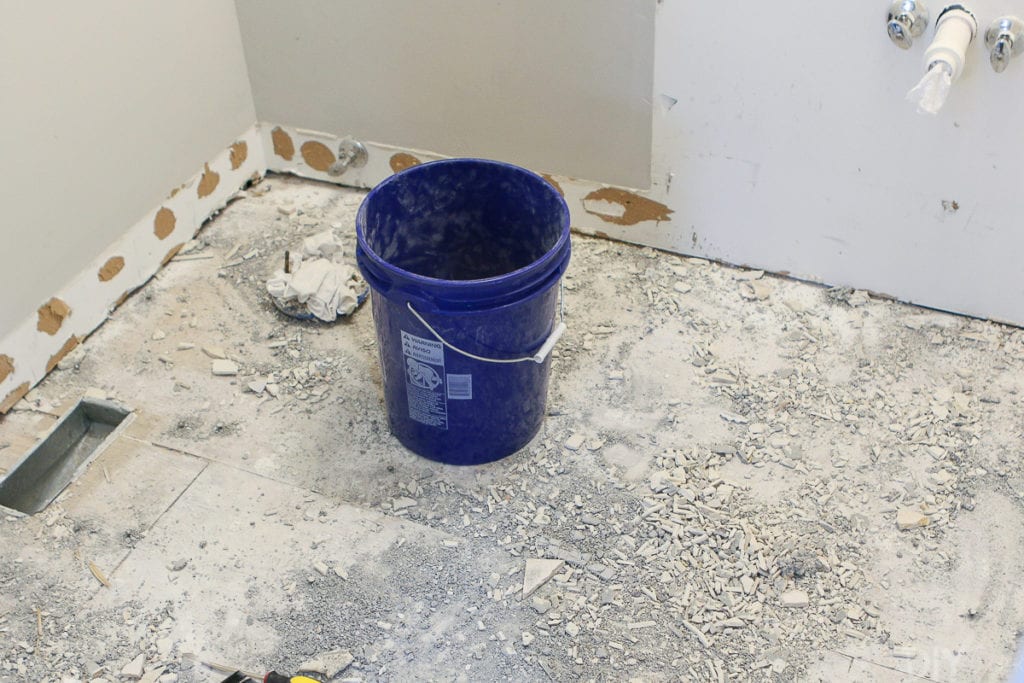 That’s pretty much everything we got done on that Saturday. By the end of the day, we were exhausted and ready for showers!
Sunday
We woke up on Sunday very sore from our work on Saturday, but in good spirits and ready to get to work! Our next item of business was to remove the floor to ceiling tile in the shower area. Since we got the hang of removing the floor tile, we figured the shower tile would be about the same.
Remove the Shower Tile & Cement Boards
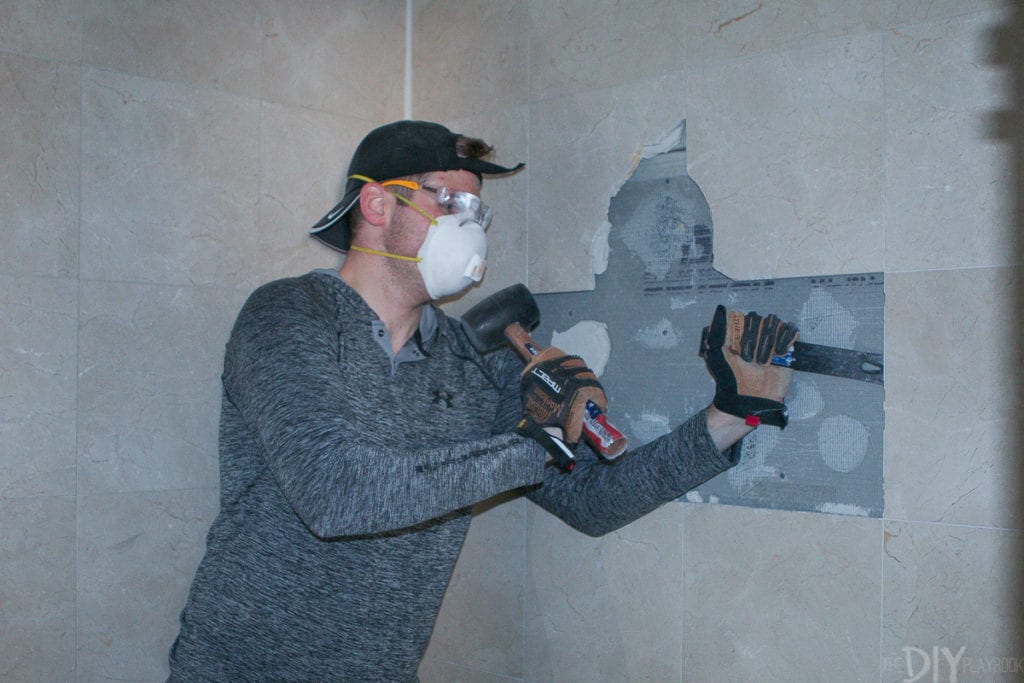
Wrong. Oh, we were so wrong. The shower tile was a lot harder to get off for a few reasons. First, we had to turn the water and electrical off because we didn’t want to accidentally pound into a wall and hit something bad. While we had flashlights setup, it was still pretty dark in this room. 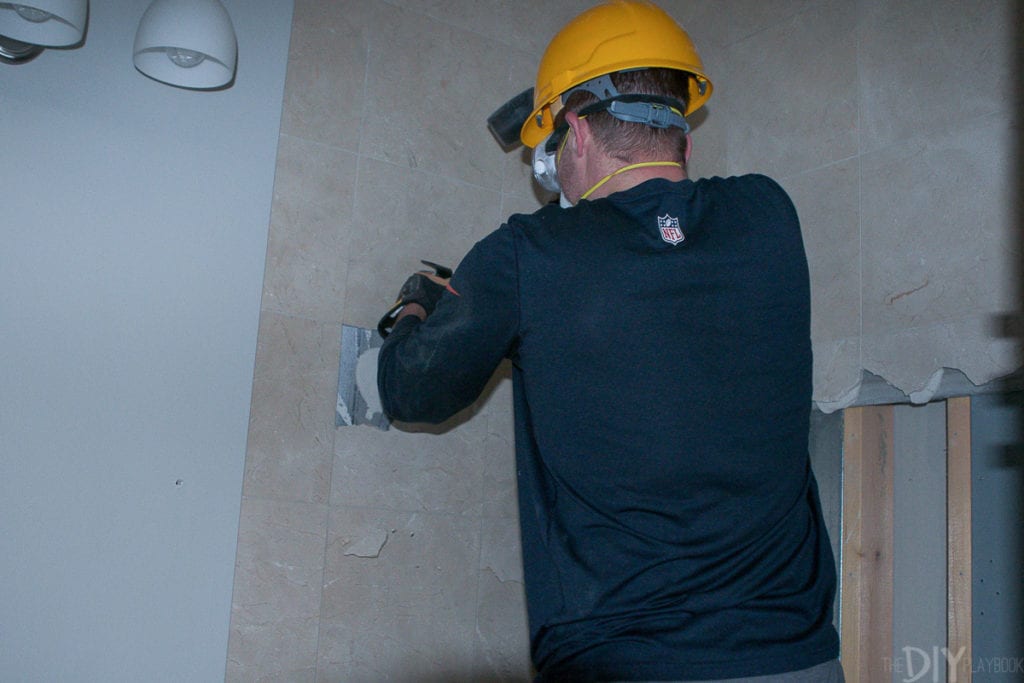 Also, these huge heavy tiles are flying off the walls onto the ground. It’s kinda scary and dangerous (especially those pieces up high). We actually ran to Lowe’s and purchased hard hats because we wanted to make sure a chunk of tile didn’t fall off the wall and onto our heads. Stay safe, people!
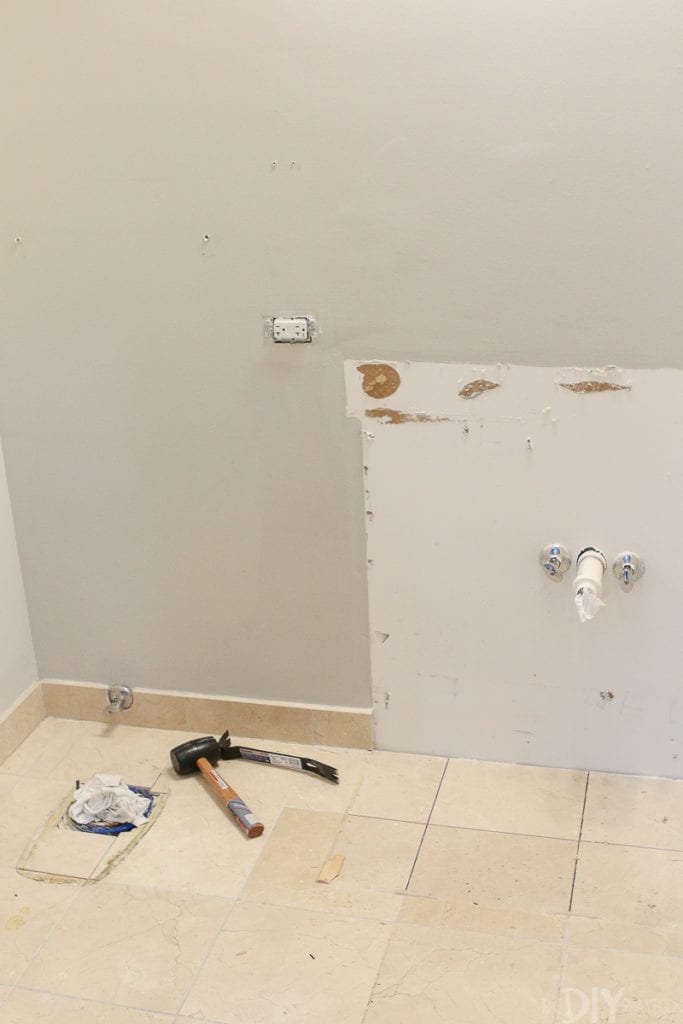
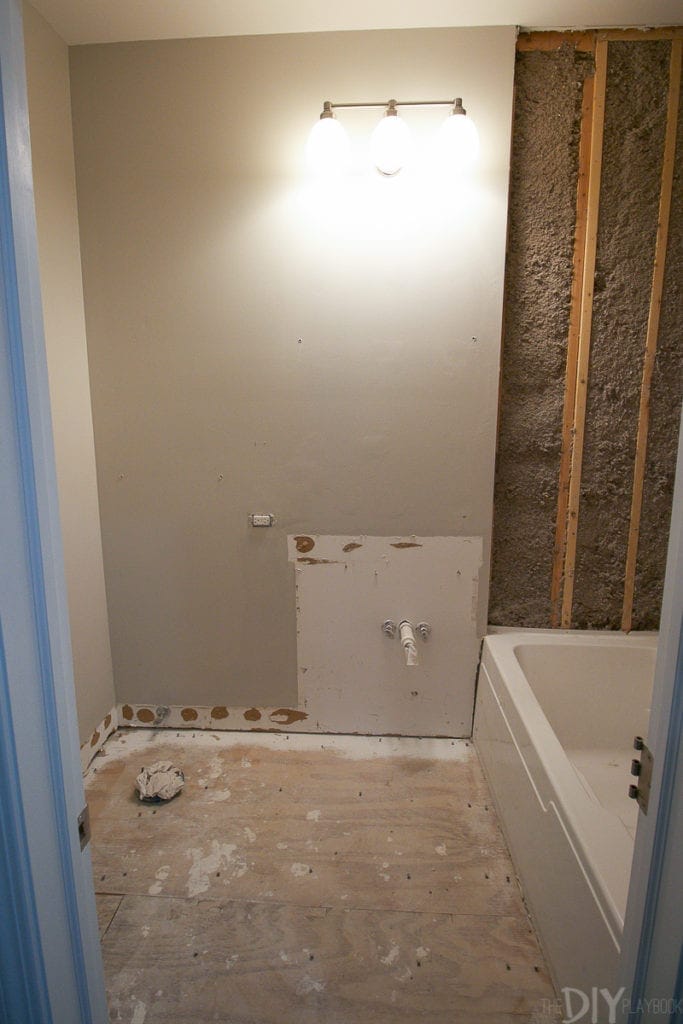
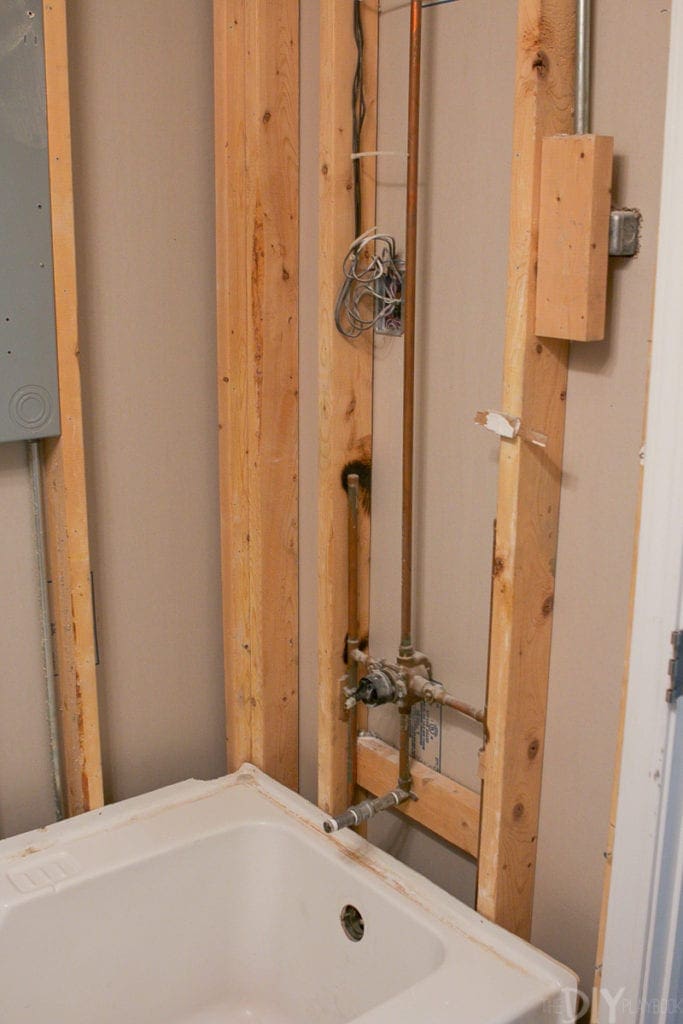
Our goal was to get the shower down to the studs, removing both the tile and the cement board underneath. However, we found it easiest to remove all of the tiles first and then remove the screws holding the cement boards in place. It was a lot of pulling, sweating, and carrying large sheets of cement board down to the garage.
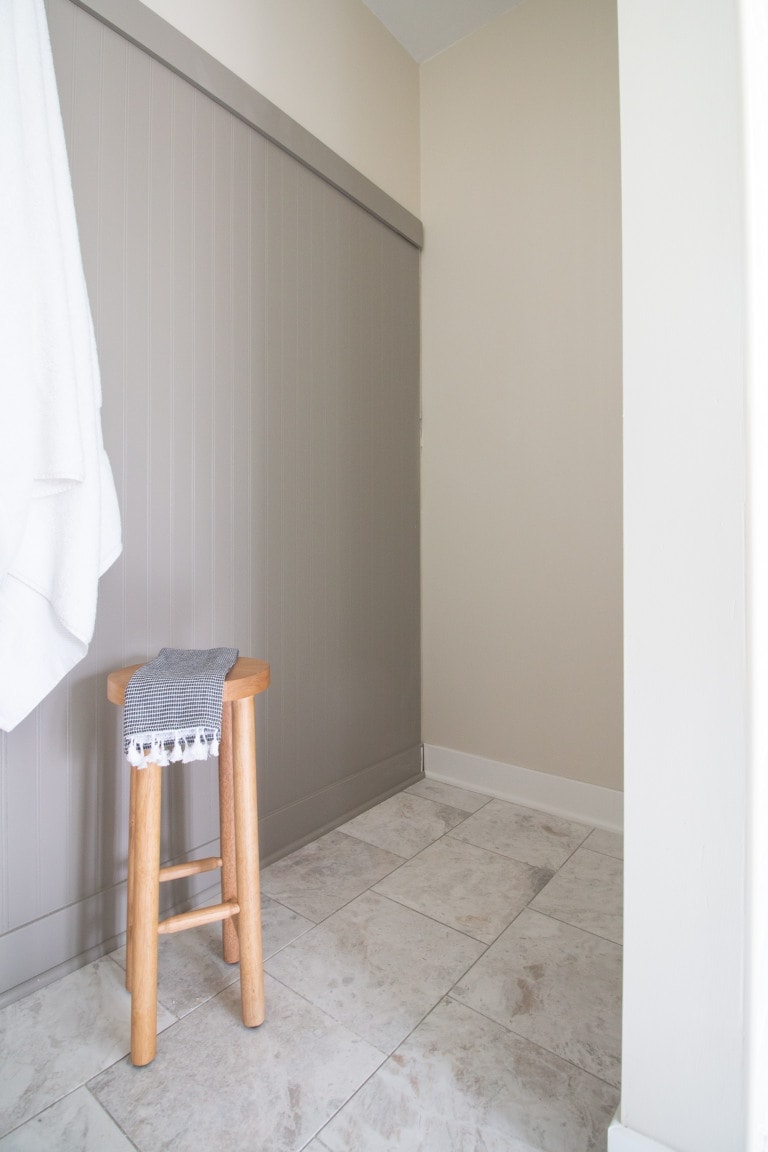
But after an entire day of work, we got it all outta there and our bathroom looked like this…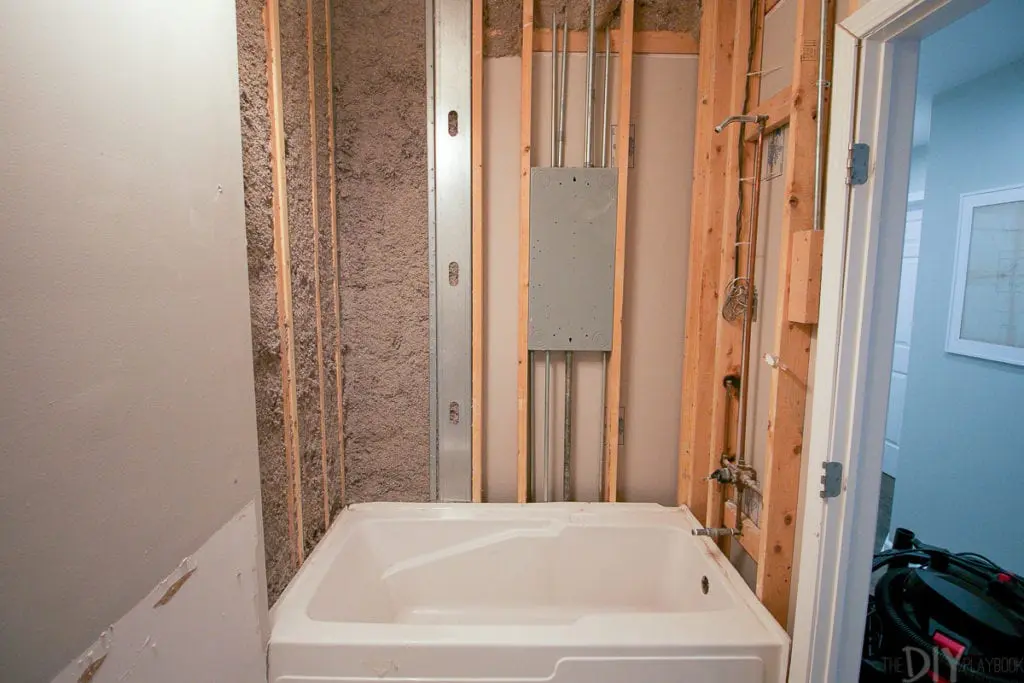
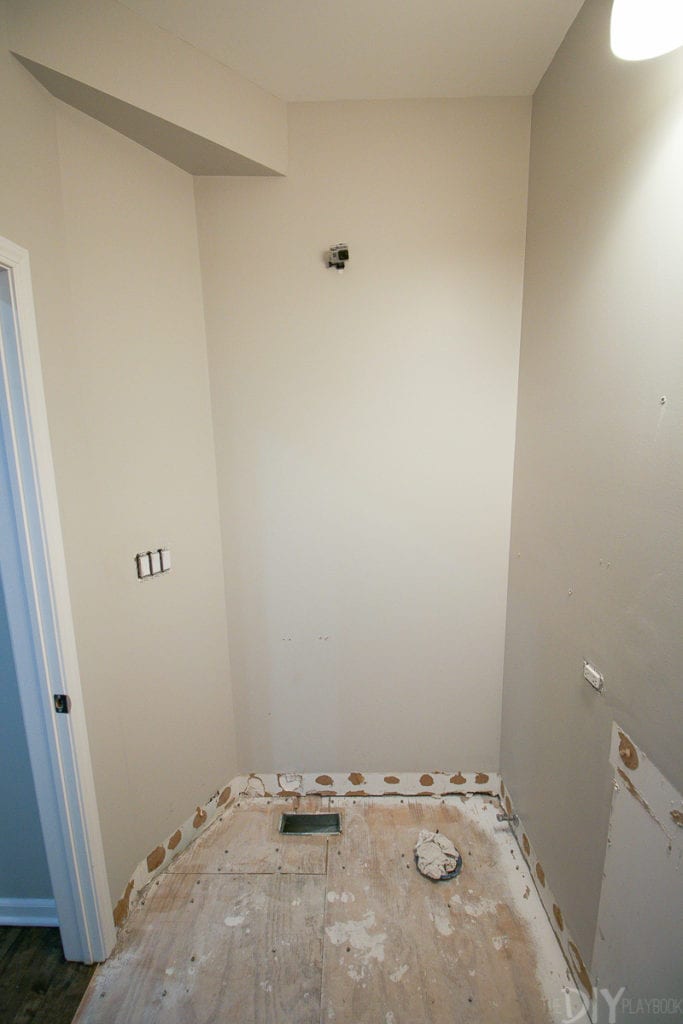
 We swept up all of the large chunks of debris and then used our new shop vac to get as much dust and dirt outta there. We bought a shop vac specifically for our bathroom renovation and it is used constantly. I think this is a must for any home renovation, so find one you like! We bought this one from Lowe’s.
 After two long days of really hard work, we officially demo’ed our bathroom and got it all ready for our contractor to come the next day to get started. We both slept like babies that night, and woke up with sore muscles and random bruises all over our body. It was hard on our bodies, but actually really fun in the end!
If you want to save some money on your next project, give demo a try! With the right partner, some music, and a good attitude…you can get it done in a weekend.
Casey
Catch Up on the Bathroom Renovation
- Bathroom Planning
- Bathroom Mood Board
- Our Demo Weekend
- Bathroom Progress Report
- Tiling the Floor
- Adding Subway Tile
- Choosing a Dark Gray Paint Color
- Painting the Bathroom
- How to Install a Vanity
- How to Hang a Mirror
- Bathroom Renovation – Reveal
- Storage Solutions for Small Bathroom
- What We Learned Renovating Ourselves