Kitchen Updates: Ceiling, Floors, And Doors!
It’s Tuesday and I’m excited to check in this morning with kitchen updates on the kitchen floors, ceiling, and doors! I’ve been sharing mini updates in these categories on InstaStories, but I always like chatting about these updates here on the blog because I can share more details.
Of course, we still have a looonnnnggg way to go, but progress in these three categories has me extra excited to keep powering through this renovation (chaos and all!).

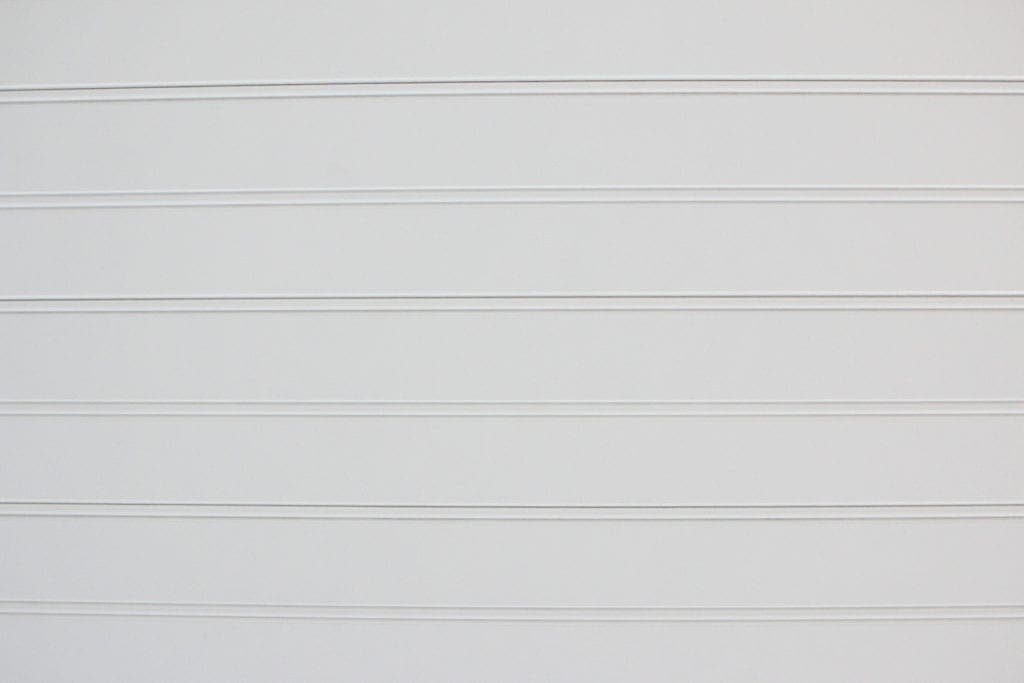
Beadboard Ceiling
After we installed this ceiling treatment on the popcorn ceiling of the kids’ room makeover we completed earlier this year, I was sold on using this same product in our kitchen. It’s such a great way to add character and hide an imperfect ceiling! We have plaster ceilings that have seen better days, specifically in the kitchen. It was always difficult to capture all of the imperfections on camera, but trust me when I say that they were bad.

And once we took out the dark cabinets and opened up the space, the light came streaming in and highlighted these imperfections even more.
 I ordered these ceiling planks from Lowe’s and our contractors had our old ceilings covered with the new beadboard planks in less than a day’s worth of work.
 I debated which direction to run the planks, but am happy I decided to run them parallel with the floor (thanks for all of your feedback on insta!). I can’t believe how much bigger the space looks thanks to the illusion of these planks. Not to mention, the beadboard adds the perfect amount of character and charm.
 We still need to add crown molding of some sort to finish off the edges, but until then, these planked ceilings are getting all the heart eyes from me.
Kitchen Floors

Now, let’s talk about the kitchen floor saga. Like I mentioned in this post, we were torn about the floor in our kitchen. The previous owners added a hardwood floor on top of another hardwood floor, which created an uneven level between the dining room floor and the kitchen floor. This meant that when you walked from our dining room into our kitchen, you had to “step up” just a bit.
The Flooring Solution
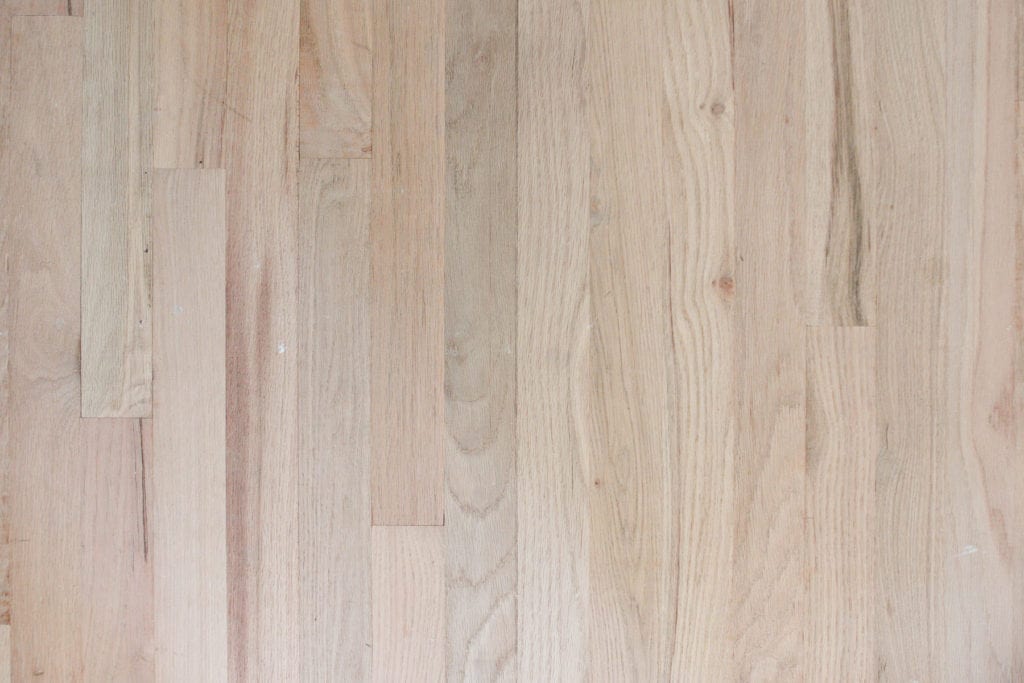 I came to the conclusion before the renovation that the “step up” would be staying and even extending since we didn’t have the peninsula anymore. That was until my contractors convinced me that I should spend the extra $1,000 for them to rip out all of the old flooring and lay new flooring that would be the same level (and direction) as the rest of our home’s hardwood floors.
 At the moment, the last thing I wanted to do was spend the extra money, but already I’m so glad I let them talk me into this upgrade. We don’t have the “step up” any longer and the transition is seamless. The floors still need to be stained to match the rest of the house, I promise to keep you updated on those updates as they happen.
New & Vintage Doors
And last, but certainly not least, let’s chat about the new doors in the kitchen!! Can you tell I’m excited?! First, let’s chat about the door leading out to the mudroom.
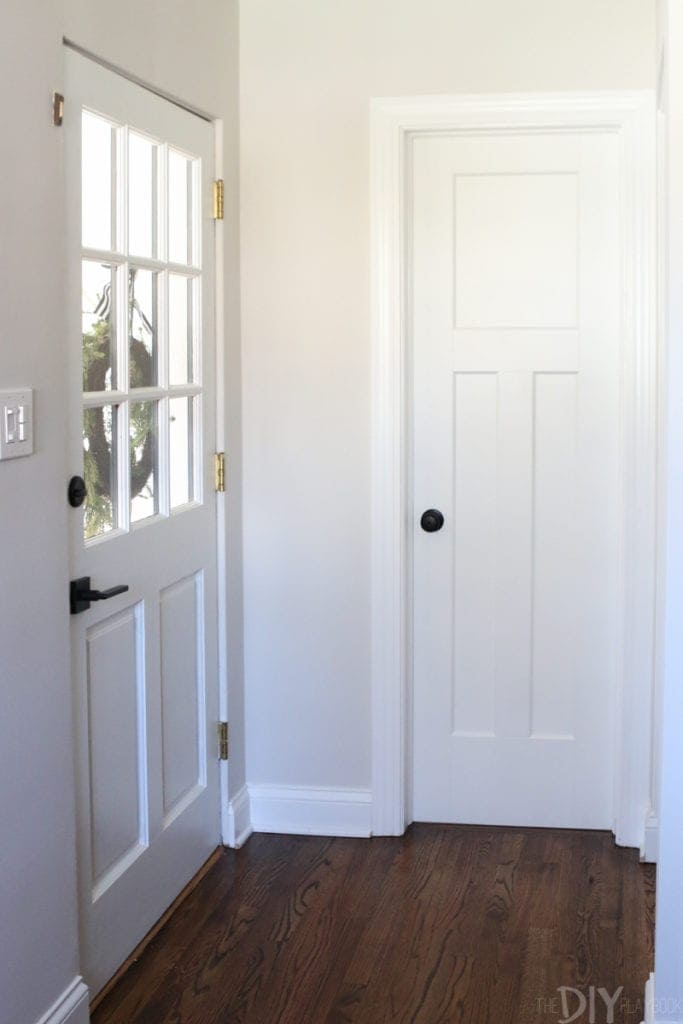 I actually never minded the door going out to the mudroom. We painted it when we moved in, changed the hardware, but there was a crack in the door that couldn’t be recovered. When we decided to tackle the kitchen makeover I was excited for the chance to use this as an excuse to replace this old door with one that adds a bit more character (and natural light).
 Casey and I always say it’s important to add a few old or vintage pieces into a room to add a bit of character. So it was time to practice what we preach and Matt and I set out to ReUse Depot outside of Chicago to shop their huge selection of old doors.
The Winning Door
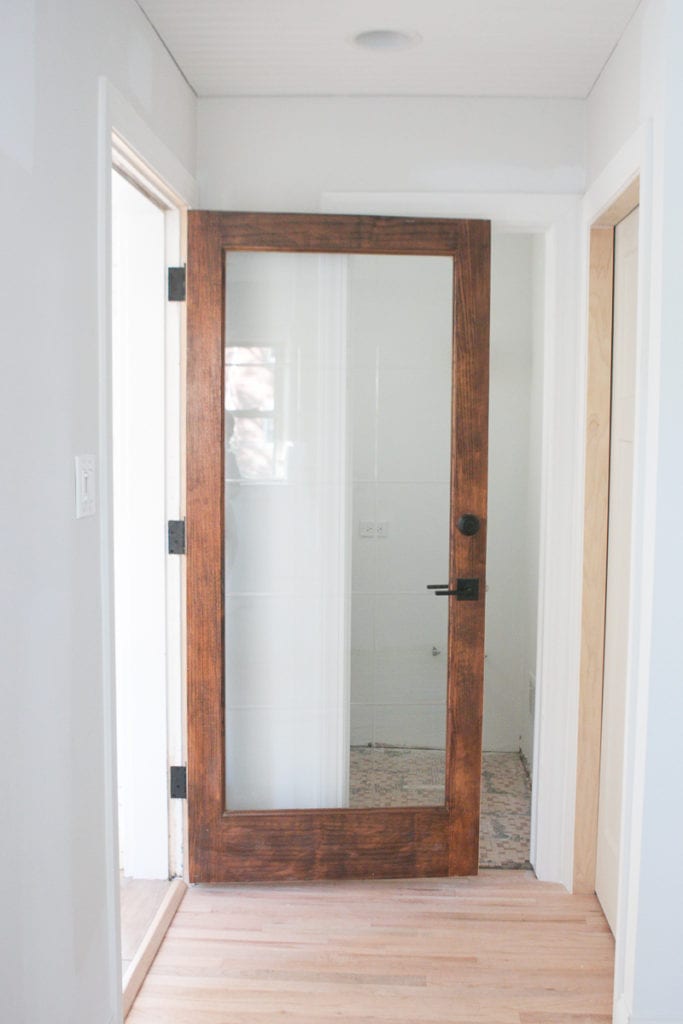 I laid eyes on this one and knew it would be perfect, especially since it offers a significant amount of glass to let in all of the natural light from the mudroom.
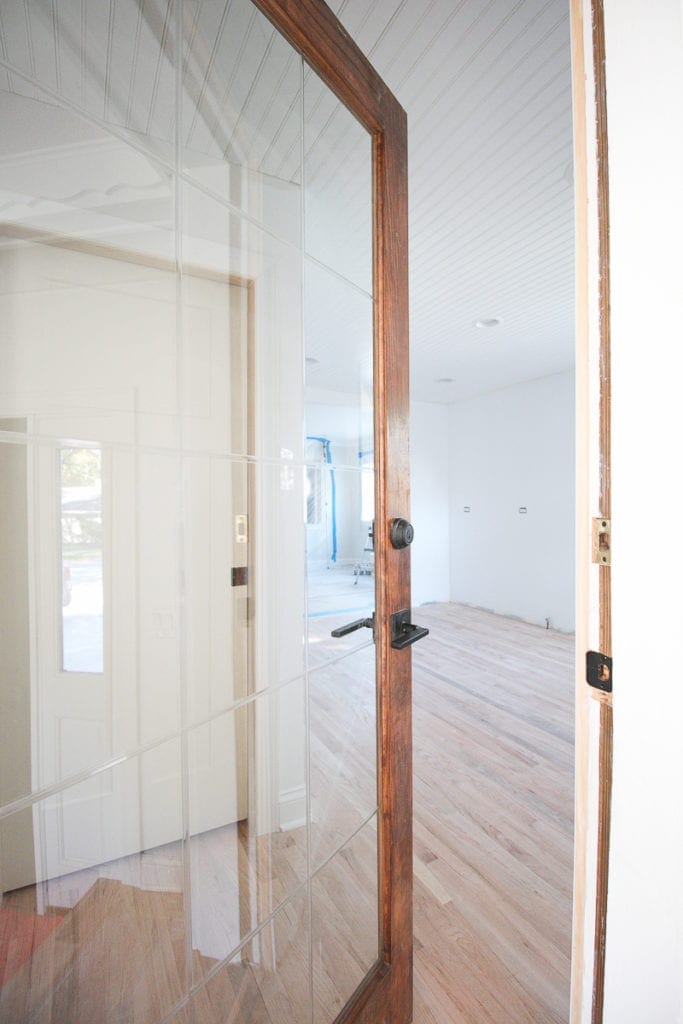 Our contractors used their magic to make this imperfect door fit perfectly into the door frame and I’m officially obsessed with the airy feel. I’m still not sure how we are going to finish it. Stain? Paint? It all depends on what it looks like after the floor is finished. All I know is that I love the new style, the natural light, and am so glad I ventured out to reuse an old door for this space instead of defaulting to a brand new one.
 And speaking of magic… our contractors somehow took out the old, rusty pocket door that used to be at the stop of our basement stairs and swapped it out for an updated one I found in store at Lowe’s. We needed a new one (one that would actually close!) so that we can close it and lock it to keep Ben safe. Of course, we still need to paint it, but this door was literally the best $44 I’ve ever spent. Ah-mazing!!!
Ceiling, Floors, & Doors
So those are pretty much all of the updates I have for this week’s check-in. Next up, the floors are being stained and then it’s time for cabinet installation! Stay tuned on InstaStories for the latest developments and I’ll meet you back here next Tuesday to dish on the next round of updates.
Bridget
Follow Our Kitchen Progress
- Finding Kitchen Inspiration
- Choosing Kitchen Appliances
- Hiring a Pro to Draw Up Blueprints
- Our New Kitchen Layout
- From Inspiration to Renovation
- How to Order Kitchen Cabinets
- Beginner’s Guide to Kitchen Demo
- First Steps of a Kitchen Makeover
- Surviving a Kitchen Makeover Without A Kitchen
- Kitchen Updates: Ceiling, Floors & Doors
- Our New Lowe’s Kitchen Cabinets
- New Appliances Installed
- Everything You Need to Know to Prep for DIY Backsplash Tile
- Step-by-step Backsplash Tutorial
- How To Style (and Organize!) Open Shelving


