The Mudroom Before: Layout and the Design Plan
One of the spaces I’m most excited about in our new house is our “mudroom”. I received quite a few comments and a lot of Insta messages about this interesting room and I’m not surprised because it’s super confusing! It’s hard to get a grasp of the space just by looking at the before photos because let’s be real… why are there so many doors?! 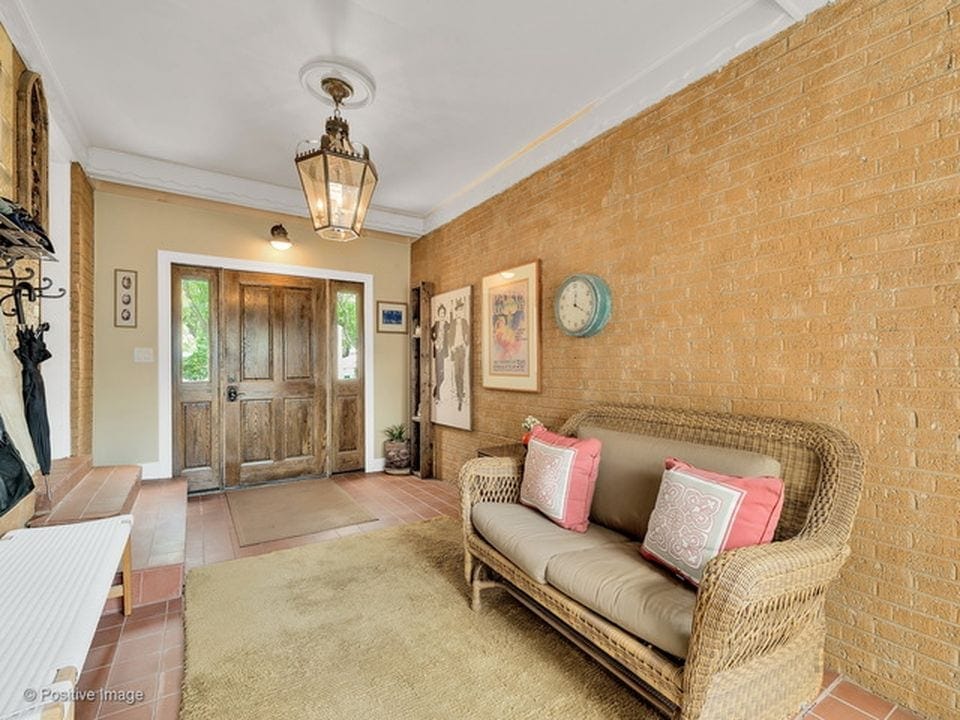 I finally got my hands on a floor plan to give you guys a better idea of how this random room fits into our home.
 This floor plan isn’t exactly to scale but hopefully this picture plus a little extra explanation will give you a better idea of where all of these random doors come into play!
A Little Mudroom History
 This room was actually an addition after the house was built. Before the house and the garage were NOT connected but somewhere down the line one of the previous owners enclosed the breezeway between the two. The mudroom was born.
The Mudroom Layout
 The dark brown door in the photo above is an exit out to a walkway that connects to our driveway. This is where we enter the house 99% of the time. The light brown door at the top of those steps is an entrance to the inside of the house (the kitchen to be specific). Before the mudroom was built, that door was the house’s “side entrance” and where you would enter after leaving the garage.

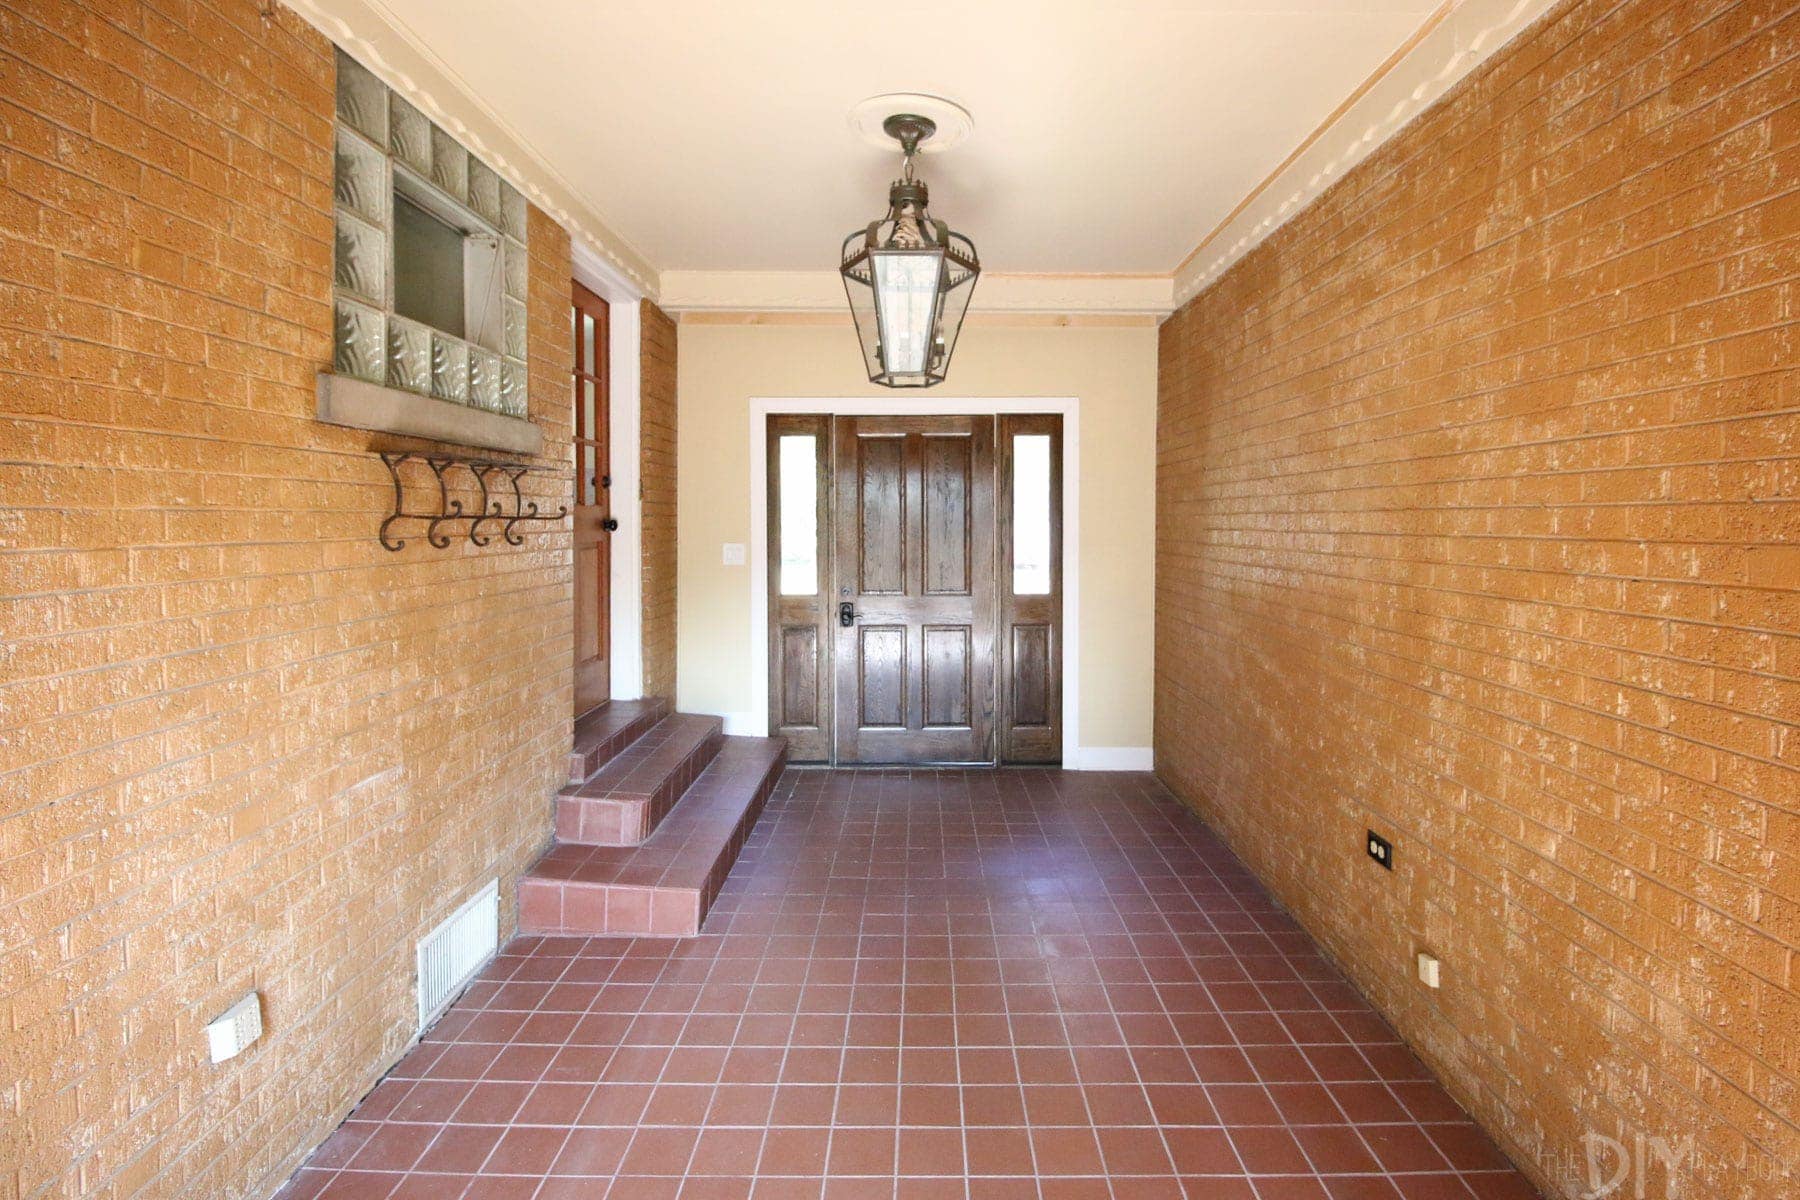
This picture was taken from the top of those steps looking down. The sliding glass door is an exit out to the patio and the door right next to that is the entrance to the garage.
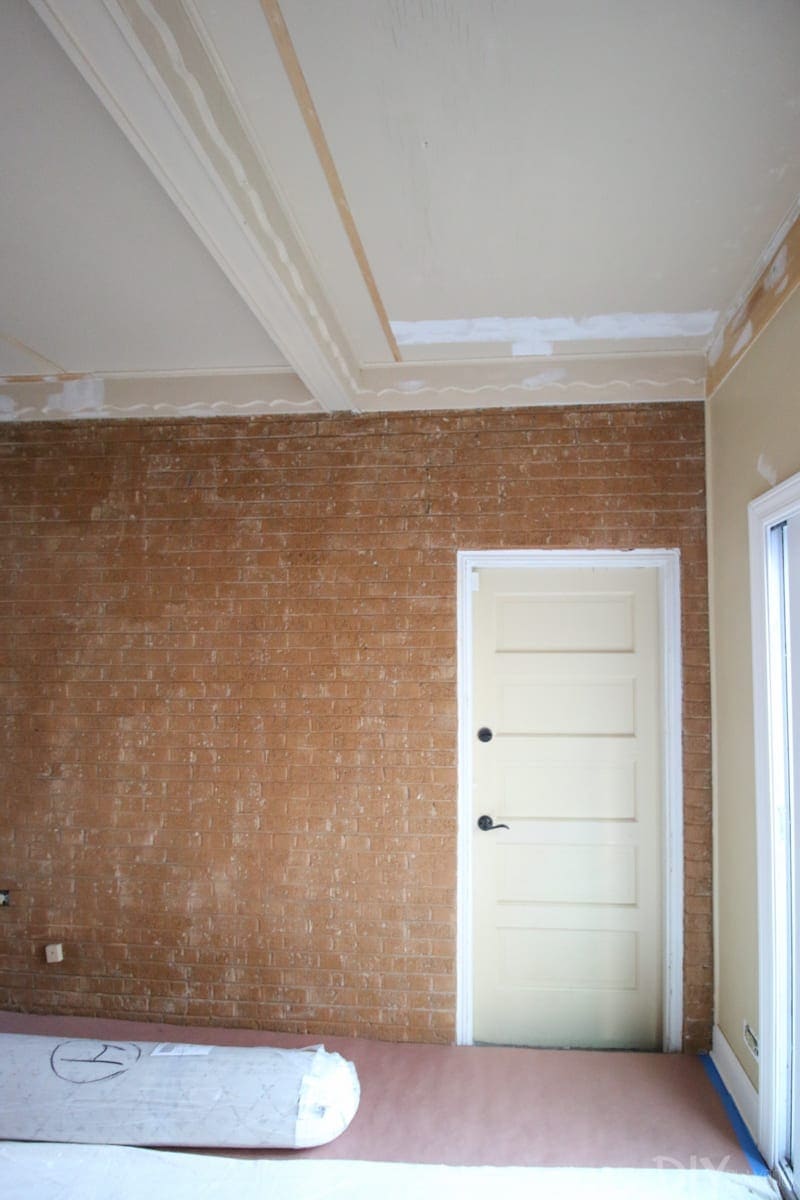
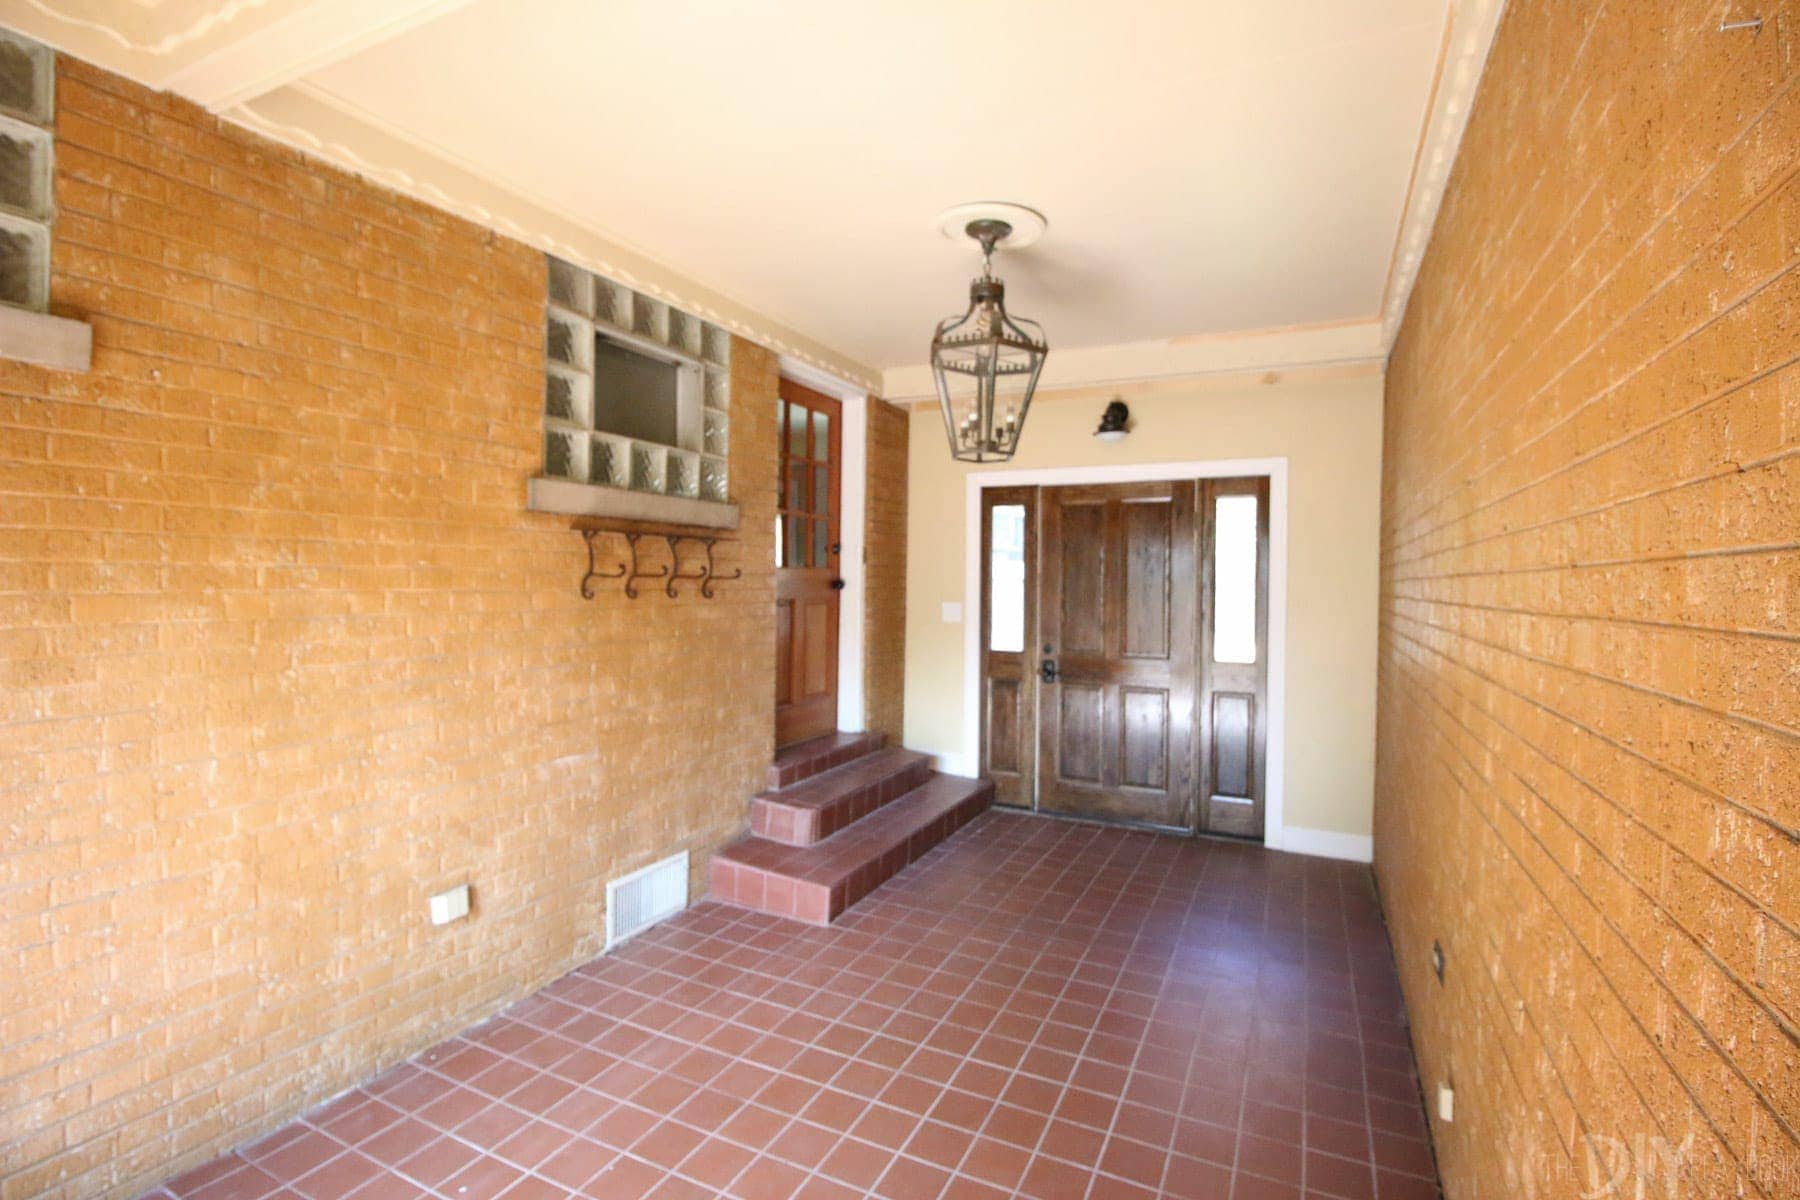 This picture is taken right in front of the garage door looking back at the front door. See those cinder block windows?! Yea… they have to stay for now. Holy design dilemma! They are cinderblock because they used to be exterior windows from the 50’s but since the enclosure, they’re now indoors. The bigger one is a window to the half bath right off the kitchen, and the little window brings a little natural light into the master bedroom closet. I’m not a fan of either of them but they are the reality in there so I have to figure something out. Any suggestions?!
I hope this gives you guys a better idea of our confusing mudroom and a better sense of where all these mystery doors lead to. Now let’s get to the fun part… the design plans for this potentially amazing space!
The Mudroom Design Plans

Paint the Brick White: The brick is actually already painted an orangey/brown. So painting it a clean, bright white will be a great way to make the room look brighter and bigger!
Paint the Doors Black: There are so many doors, which is definitely a design dilemma in here! I’m hoping that painting them all a uniform black will be the perfect contrast next to the white brick! And a classic option for a timeless look.
Change the Tile: Even if I loved this clay tile (which I don’t), I would have to change it eventually because it is cracking because of some subfloor problems. I figured now is the perfect opportunity to fix that problem and update the look along the way. Because it will see some wet traffic on rainy/snowy days, I needed to keep this in mind when choosing tile.
Update the Lighting: I don’t hate the idea of the large hanging pendant, but I do think this one is a bit too large (and low) for this space. I haven’t found exactly what I want instead of this fixture, but my eyes are peeled.
Change out the Door Hardware: Almost all of the hardware is brown so I definitely want to update it to black. Plus I loved my Kwikset set from my old house, so I’m excited to incorporate that style here too.
Change the Outlets to White: some of the outlets are almond and some are black, so changing them all out to white is definitely on my to-do list.
Bring in our Pew & Decorate: I’m not sure if our old pew will fit perfectly in here but that’s my tentative plan because it’s long and thin. I would also like to add a little warmth with a rug, some pillows, maybe a plant? I don’t see all of those details clearly yet, but I’m hoping to add some subtle color and personality to make it cozy, yet still very functional.
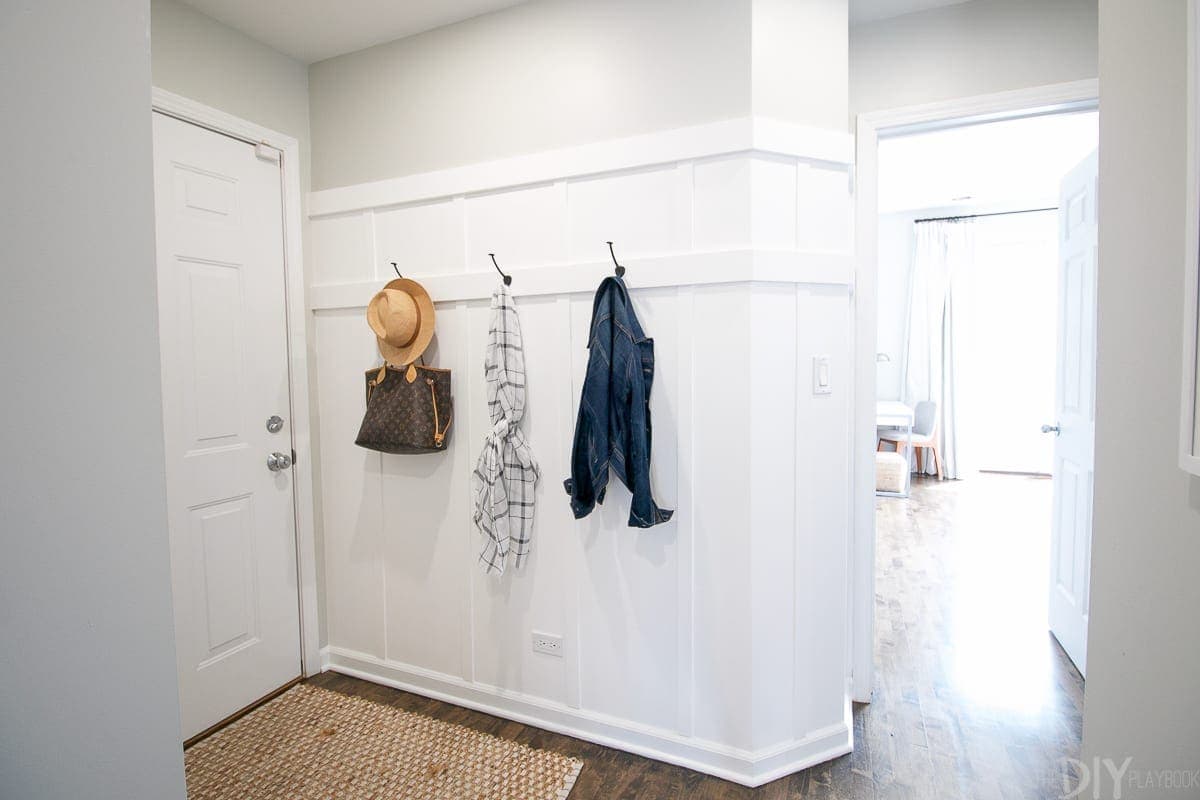 This space will be a functional entry/dropzone so I want to keep that in mind when decorating as well. Hooks? Some type of secret storage? Again I’m not exactly sure, but as the room takes shape I’ll be more inspired to make a clear plan!
Stay Tuned… Changes Are Coming Quickly!
That’s the story of our mudroom. So many doors and so much potential! The great news is that this room is taking shape faster than I anticipated so tomorrow I’ll be checking in with updates on the painted brick (OMG– it’s amazing!!) and then next week with updates on the new tile.
Bridget