Making Progress on Our New Deck
I checked in a few weeks ago with a look at our backyard progress. In that post, our yard was still a bit of a construction zone. Okay, it was definitely a construction zone and a mud pit out there. I’m happy to say that things are looking much better and there has been a lot of progress made!
While I’ll be sharing more details about the patio and other areas of the yard soon, today I want to focus on the deck area because there’s a lot to cover!
The Deck Before
So here’s a look at the deck before. It was fine. Totally fine. But we always felt like it was just such an awkward size for our yard. You couldn’t really fit a ton of people up on the deck itself, so some people would be up on the deck, others down below, and it just felt very disjointed. Not to mention, it was not great with Rory who wants to play in the grass, while we want to sit and watch her. 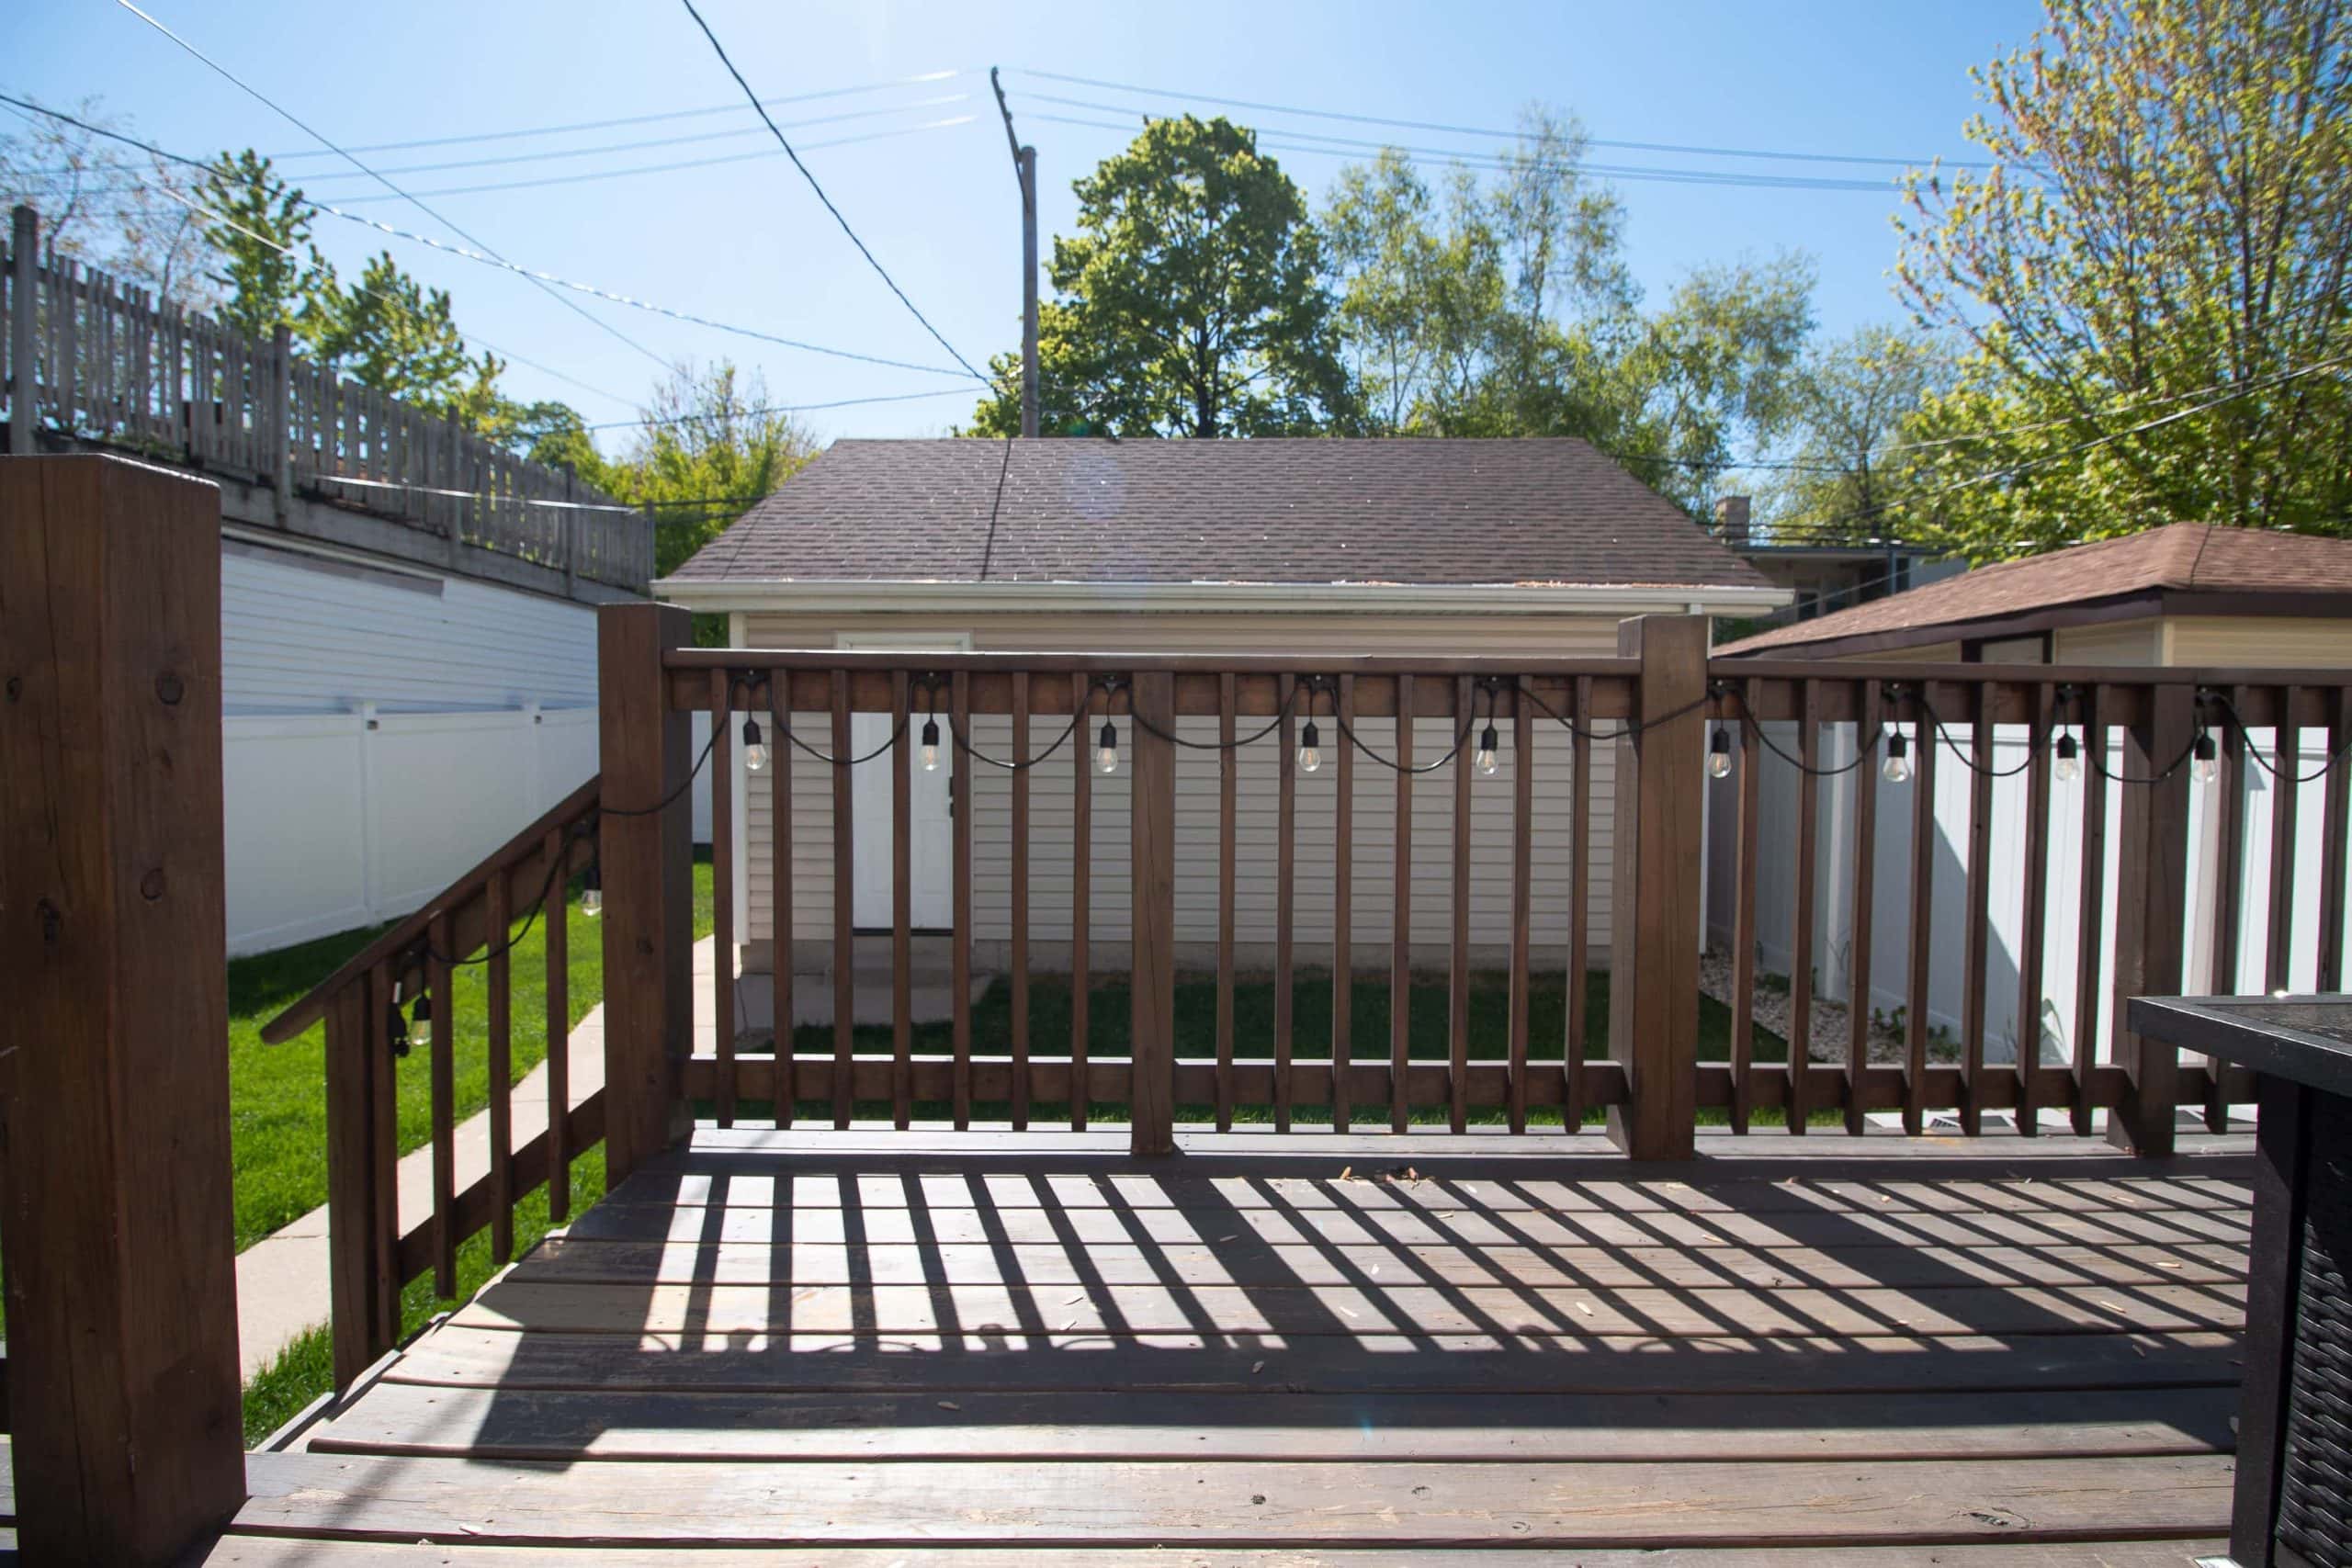
 Our entire gameplan for this backyard renovation is to make it feel open like it’s an extension of the inside of our home. Reworking the deck is a big part of that.
The Deck Plan
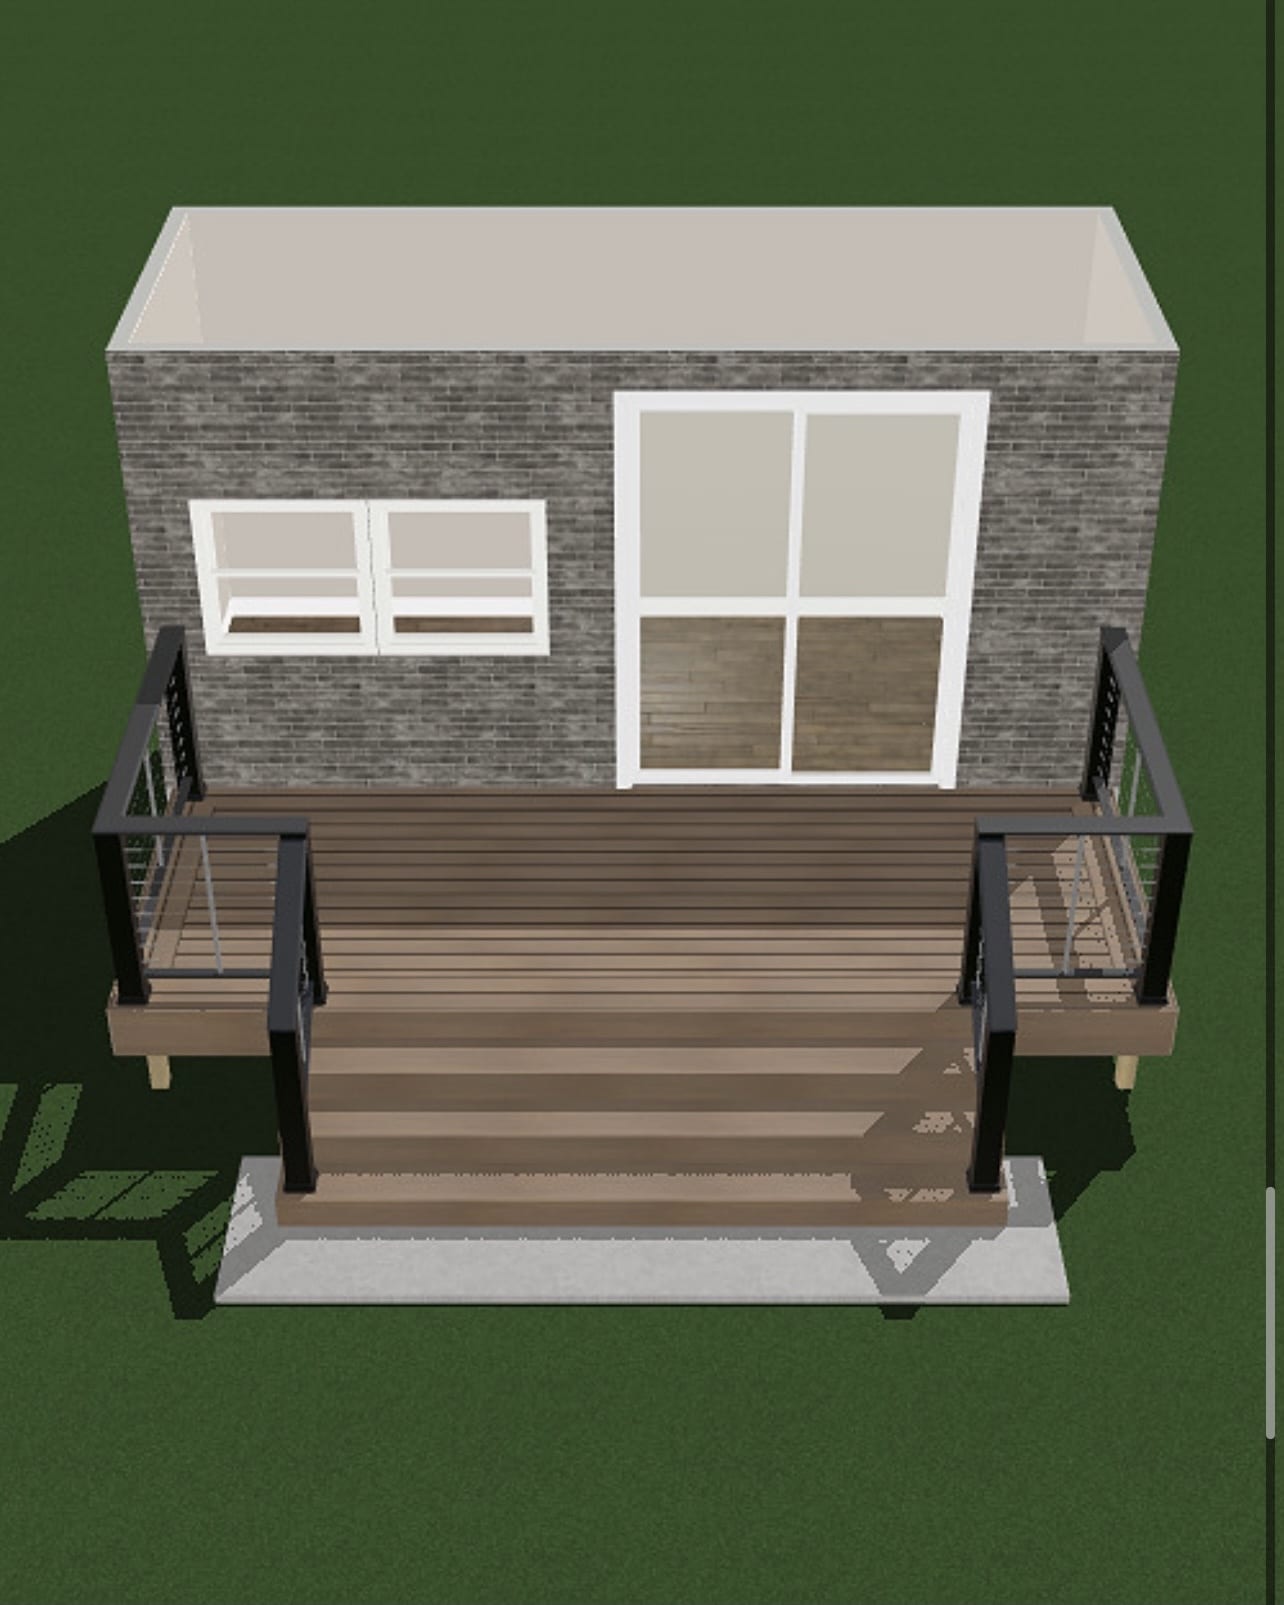
I’ve already shared this rendering and the TimberTech deck information a few times, but I’ll share it one more time in case you missed it. We’re cutting down the size of the deck a bit to make room for a larger patio. We’ll then have large stairs all the way across that will really open up the view from the inside of the house down to the patio.
In terms of materials, we went with composite decking from TimberTech. We chose composite decking because we wanted something that would be low-maintenance and weather-resistant. Our old deck was wood and I stained it when we bought the house. It was worn out and tired looking after just two years and we vowed to go with a different material for our new deck.
The TimberTech deck looks and feels like real wood, but without the fading, staining, and cracking. It also comes with a 50-year fade and stain warranty. We literally won’t have to do any sort of upkeep to the deck. I was also happy to see that their decking boards use up to 80% recycled materials and their mission is all about sustainability. Love that!
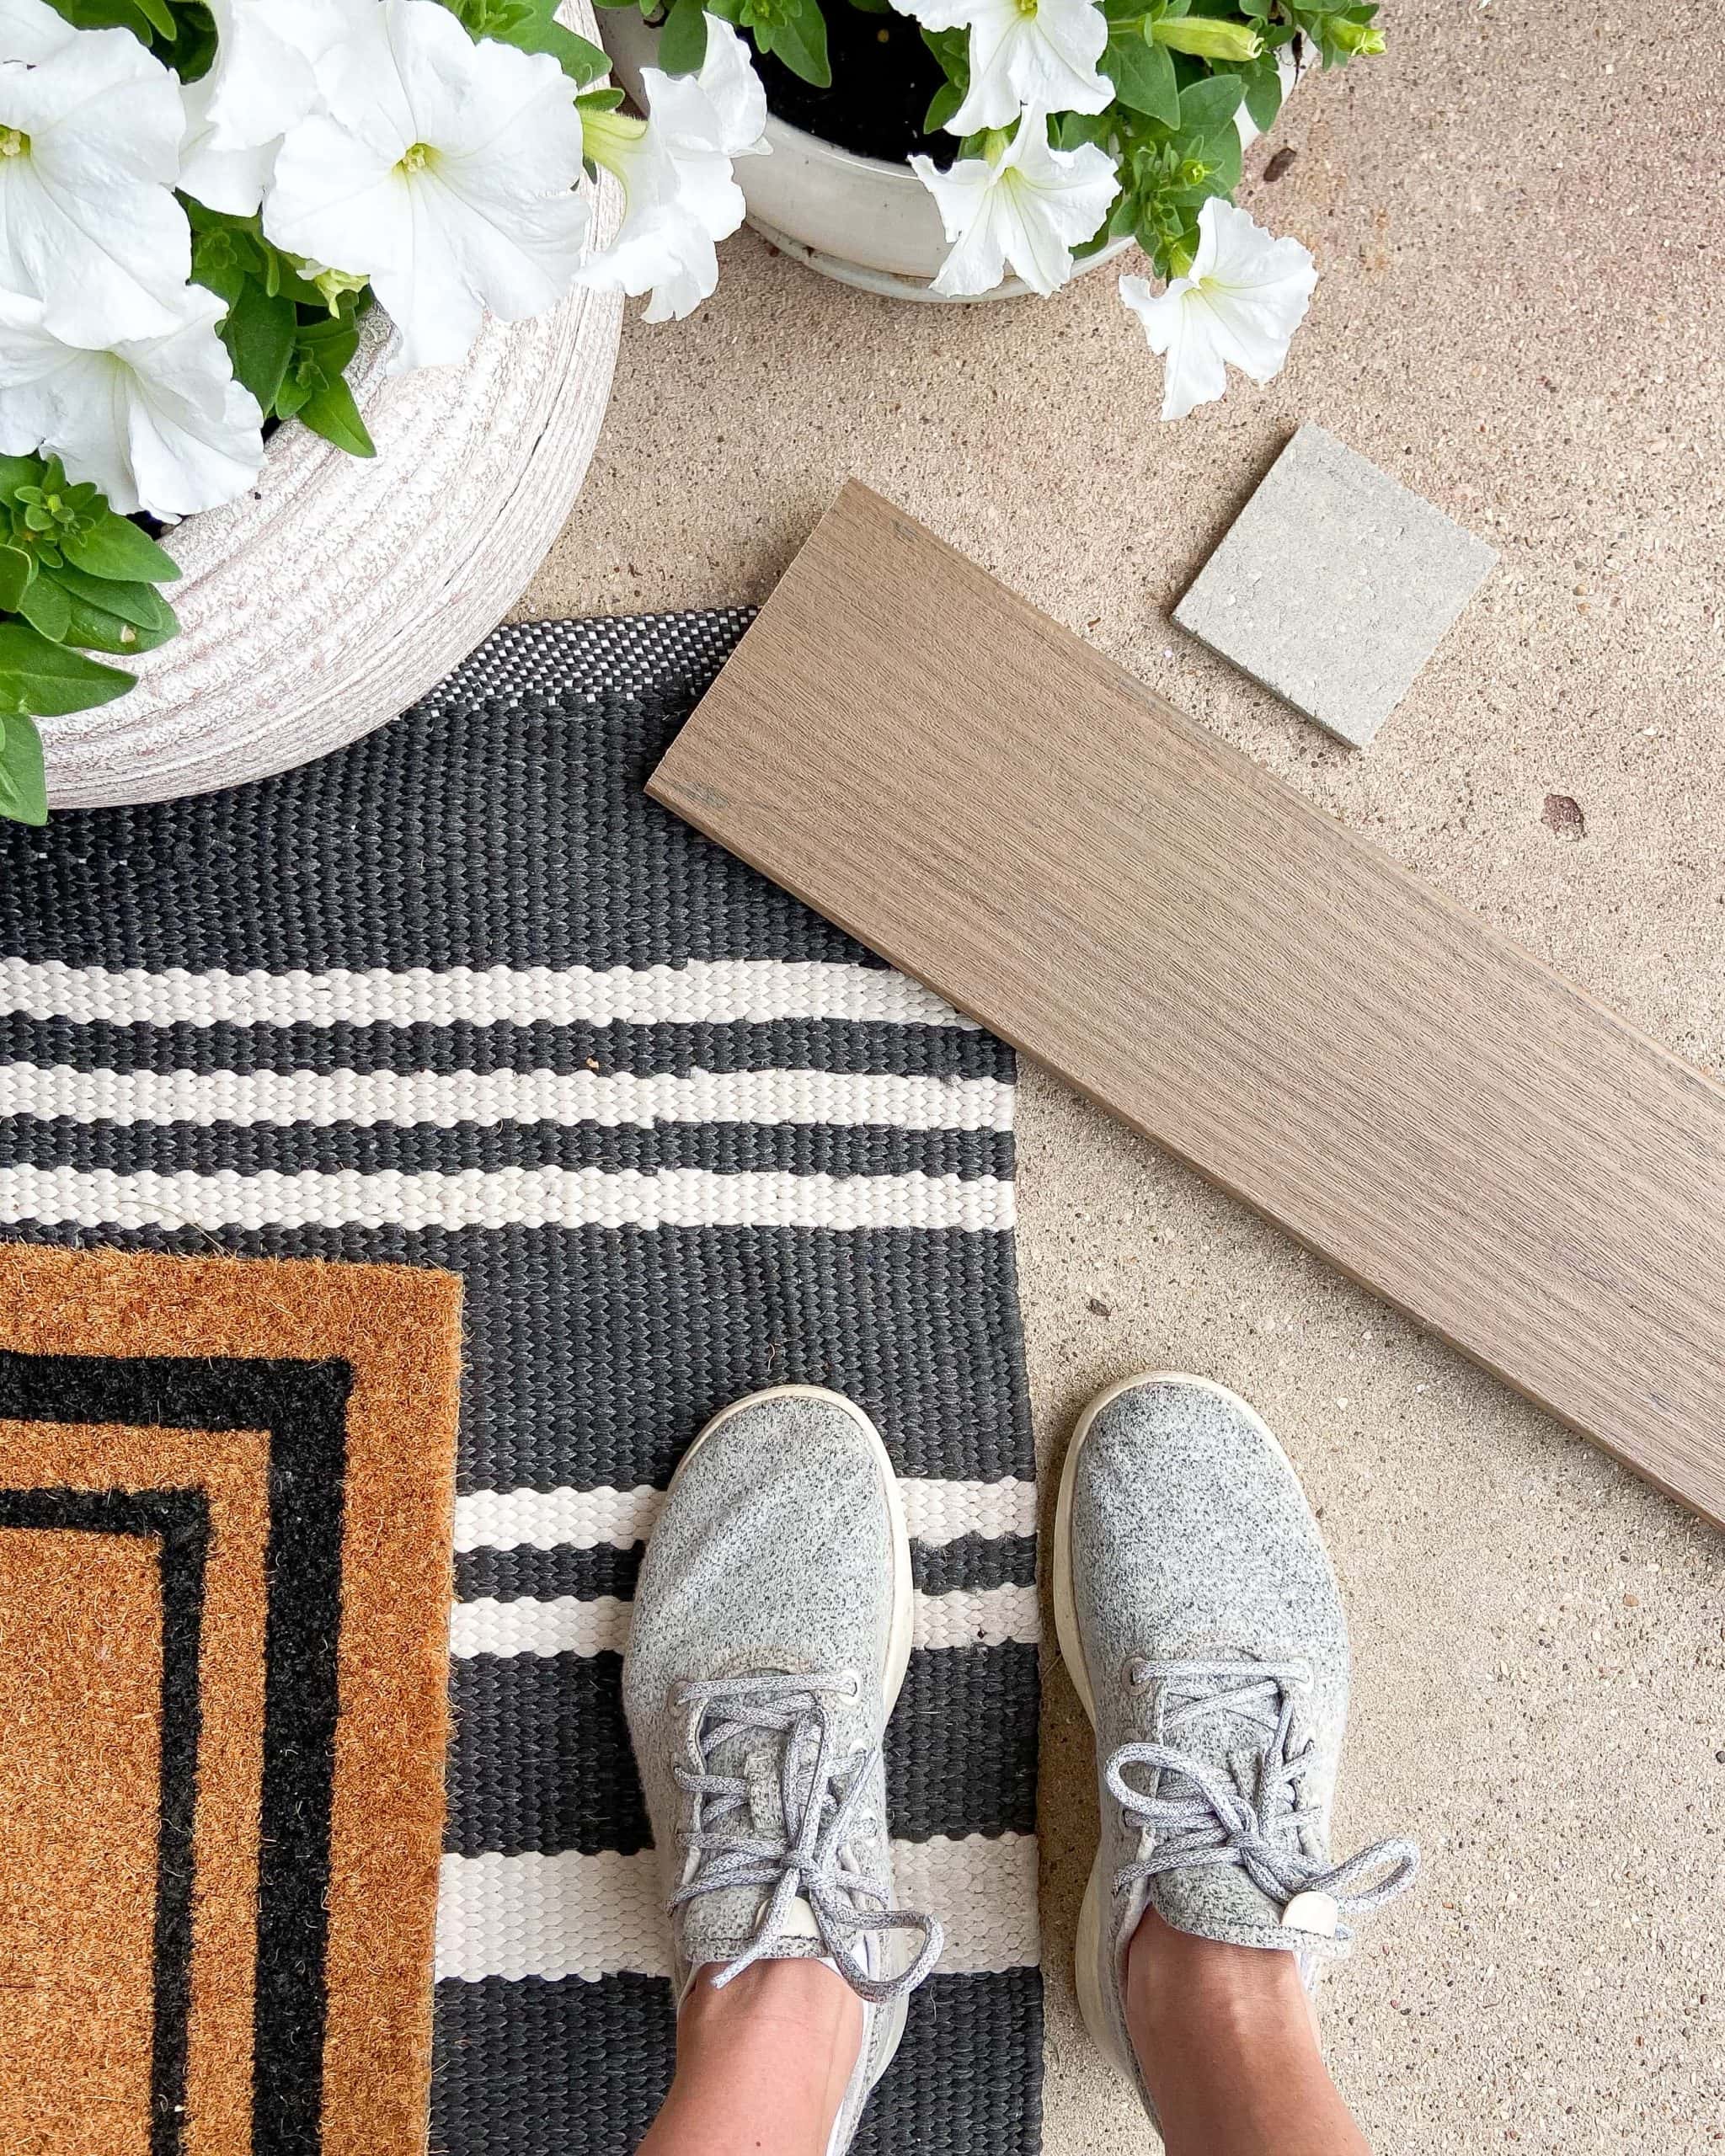
I went with the color “Pecan” from TimberTech’s Legacy Collection. It’s a pretty light brown and really goes well with the coloring on our home.
Our TimberTech Deck Progress
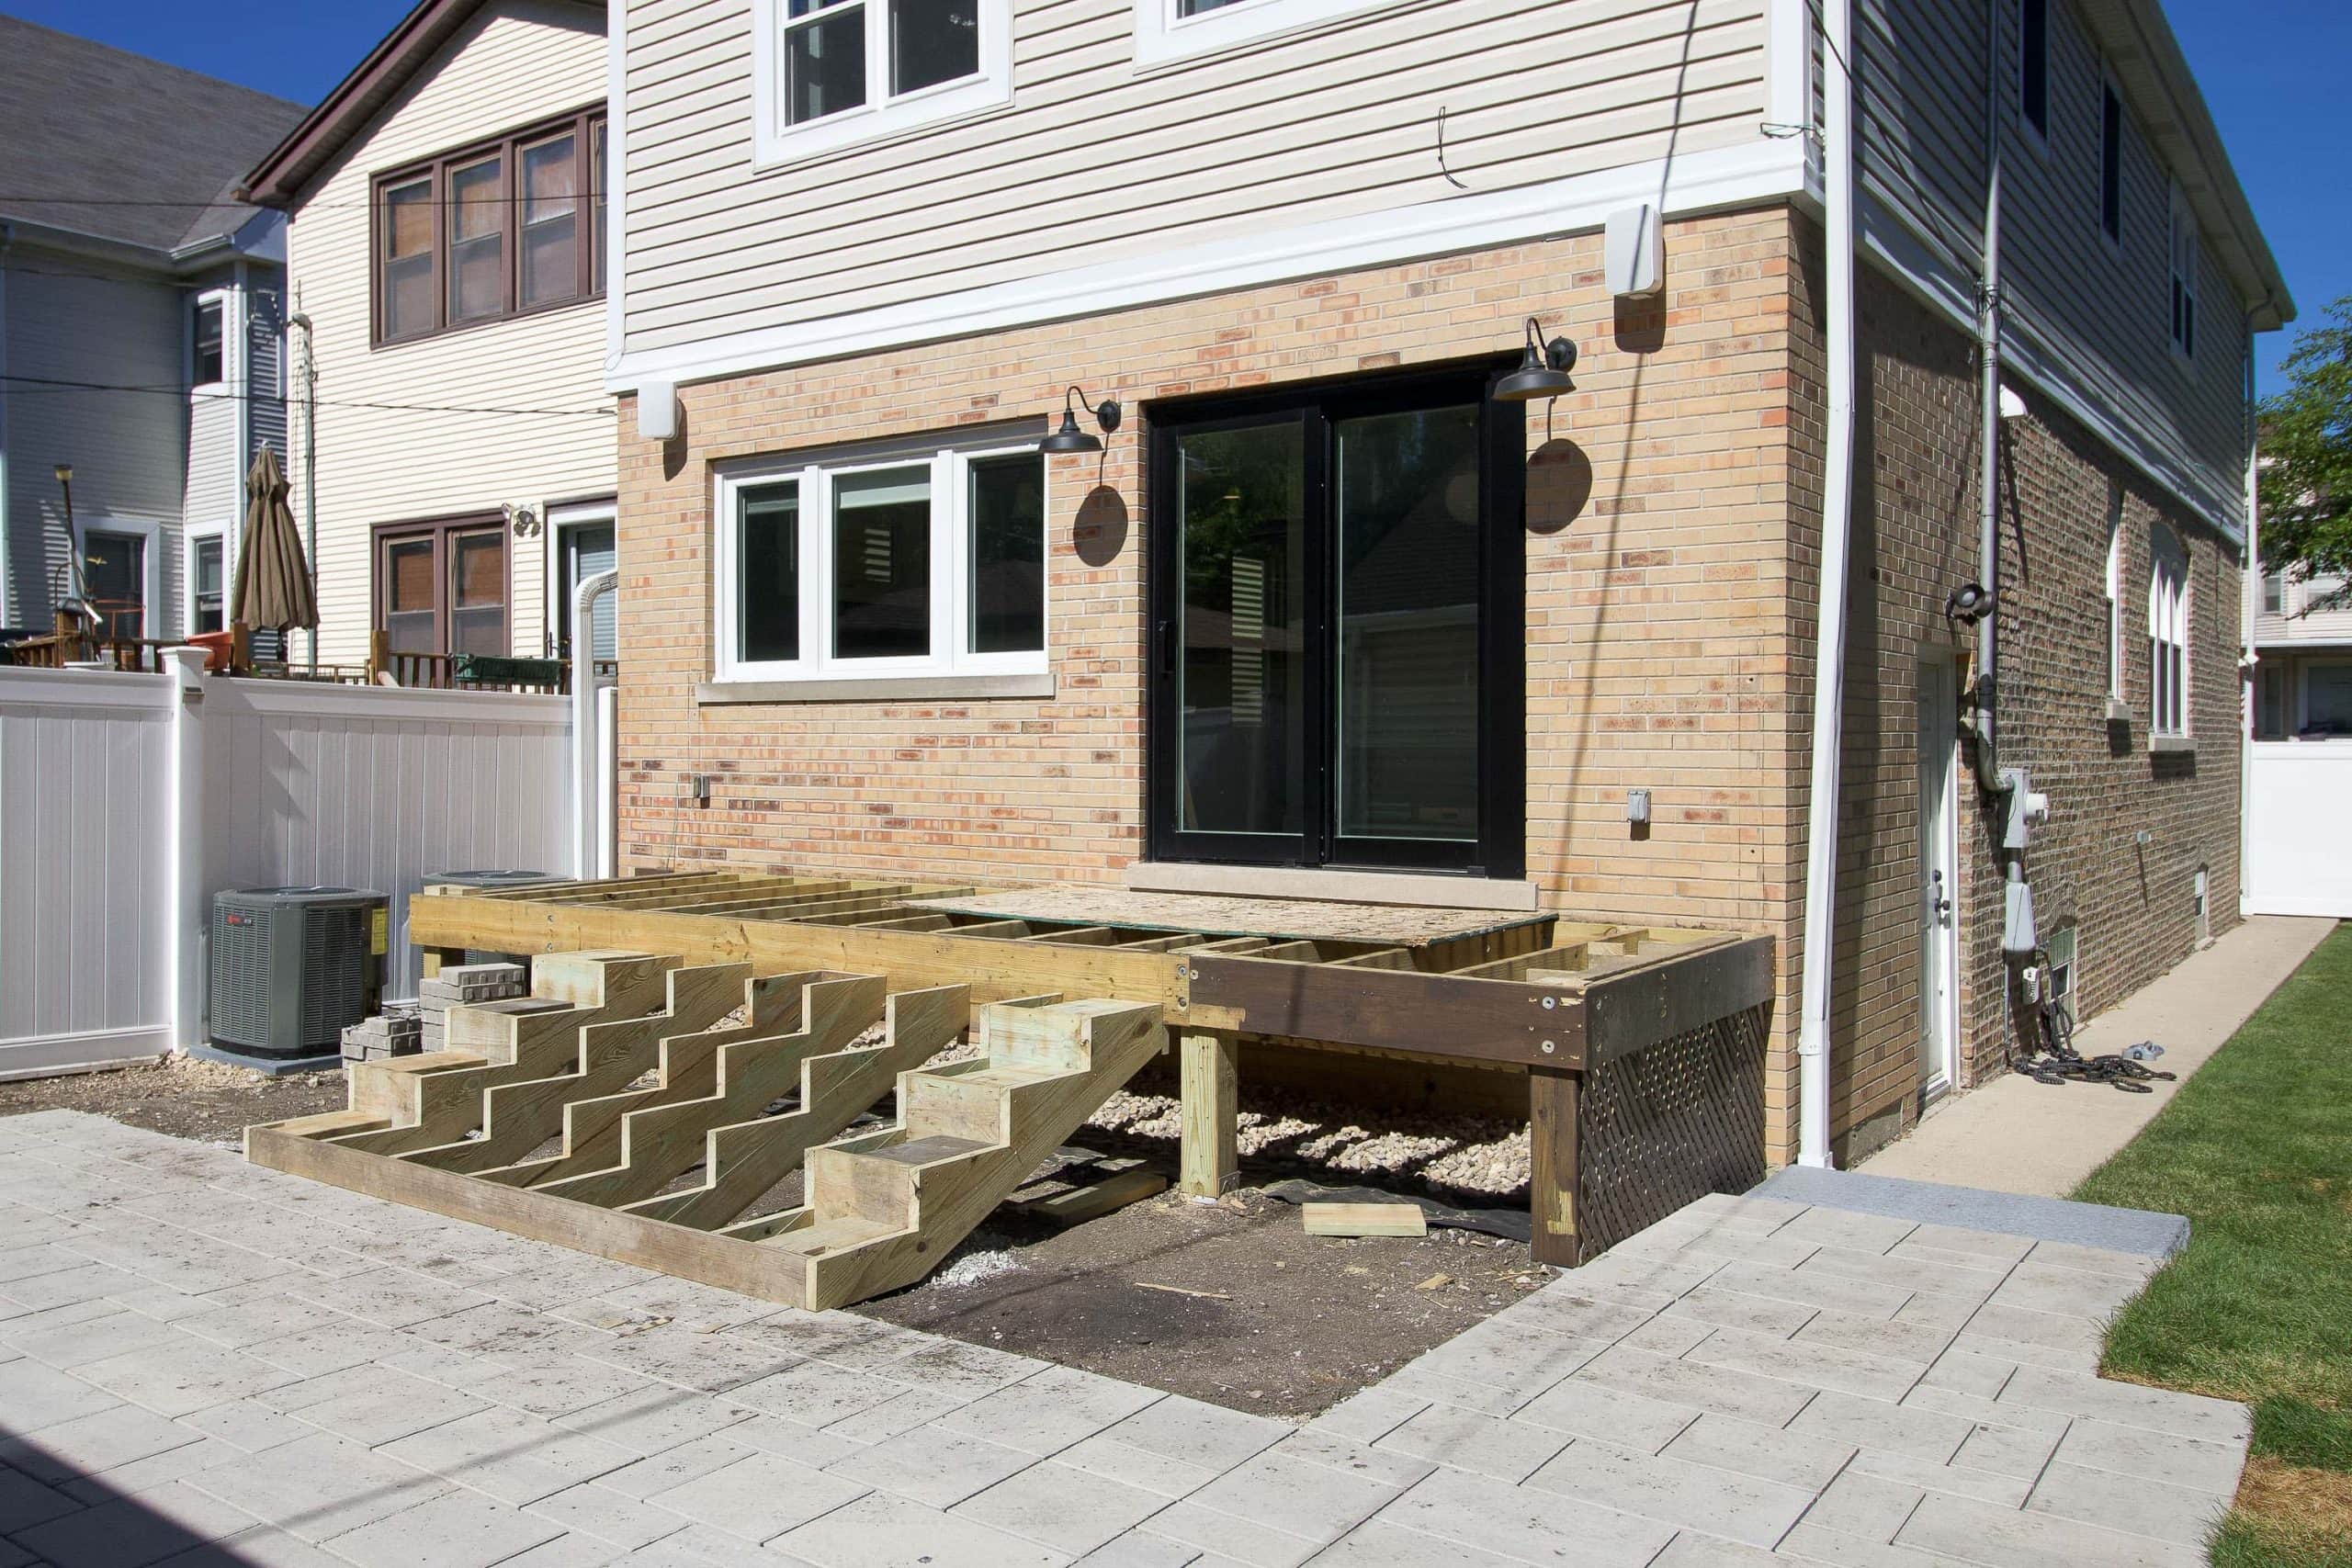
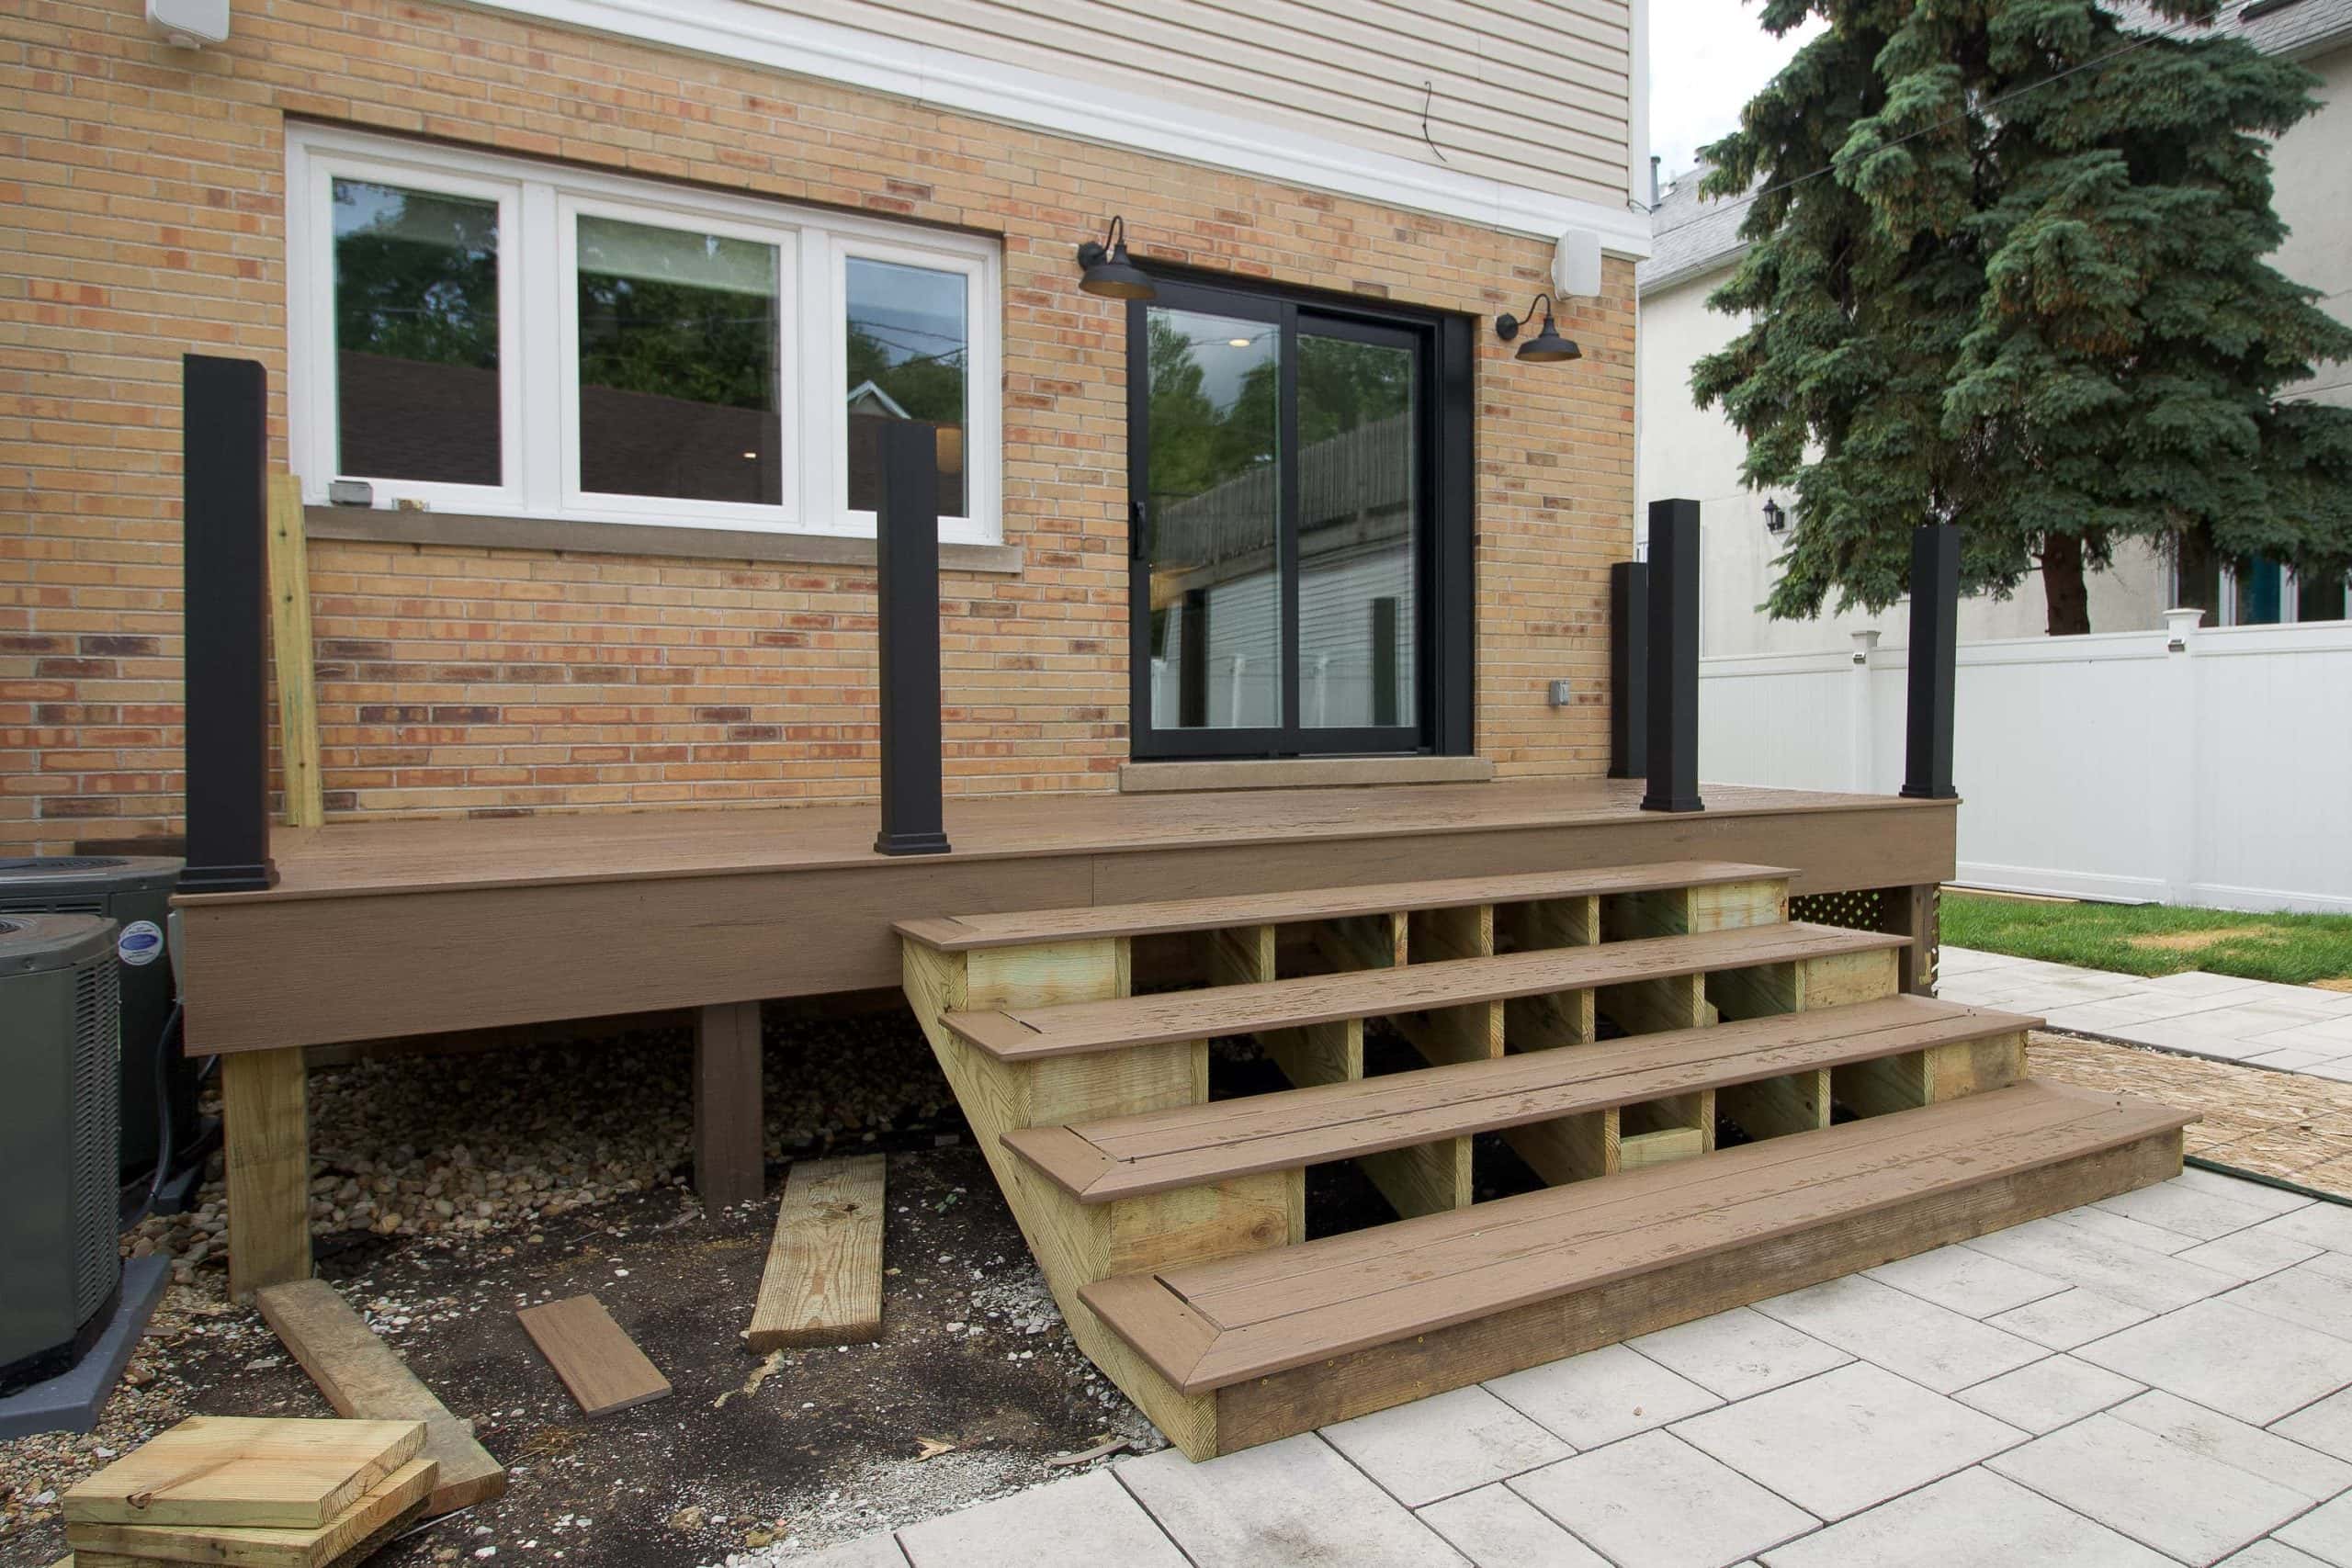
In order to save time and money, the team ended up keeping the footings and main structure of the deck intact. Our old deck was only a few years old and the base was in good shape, so it made sense to go that route. 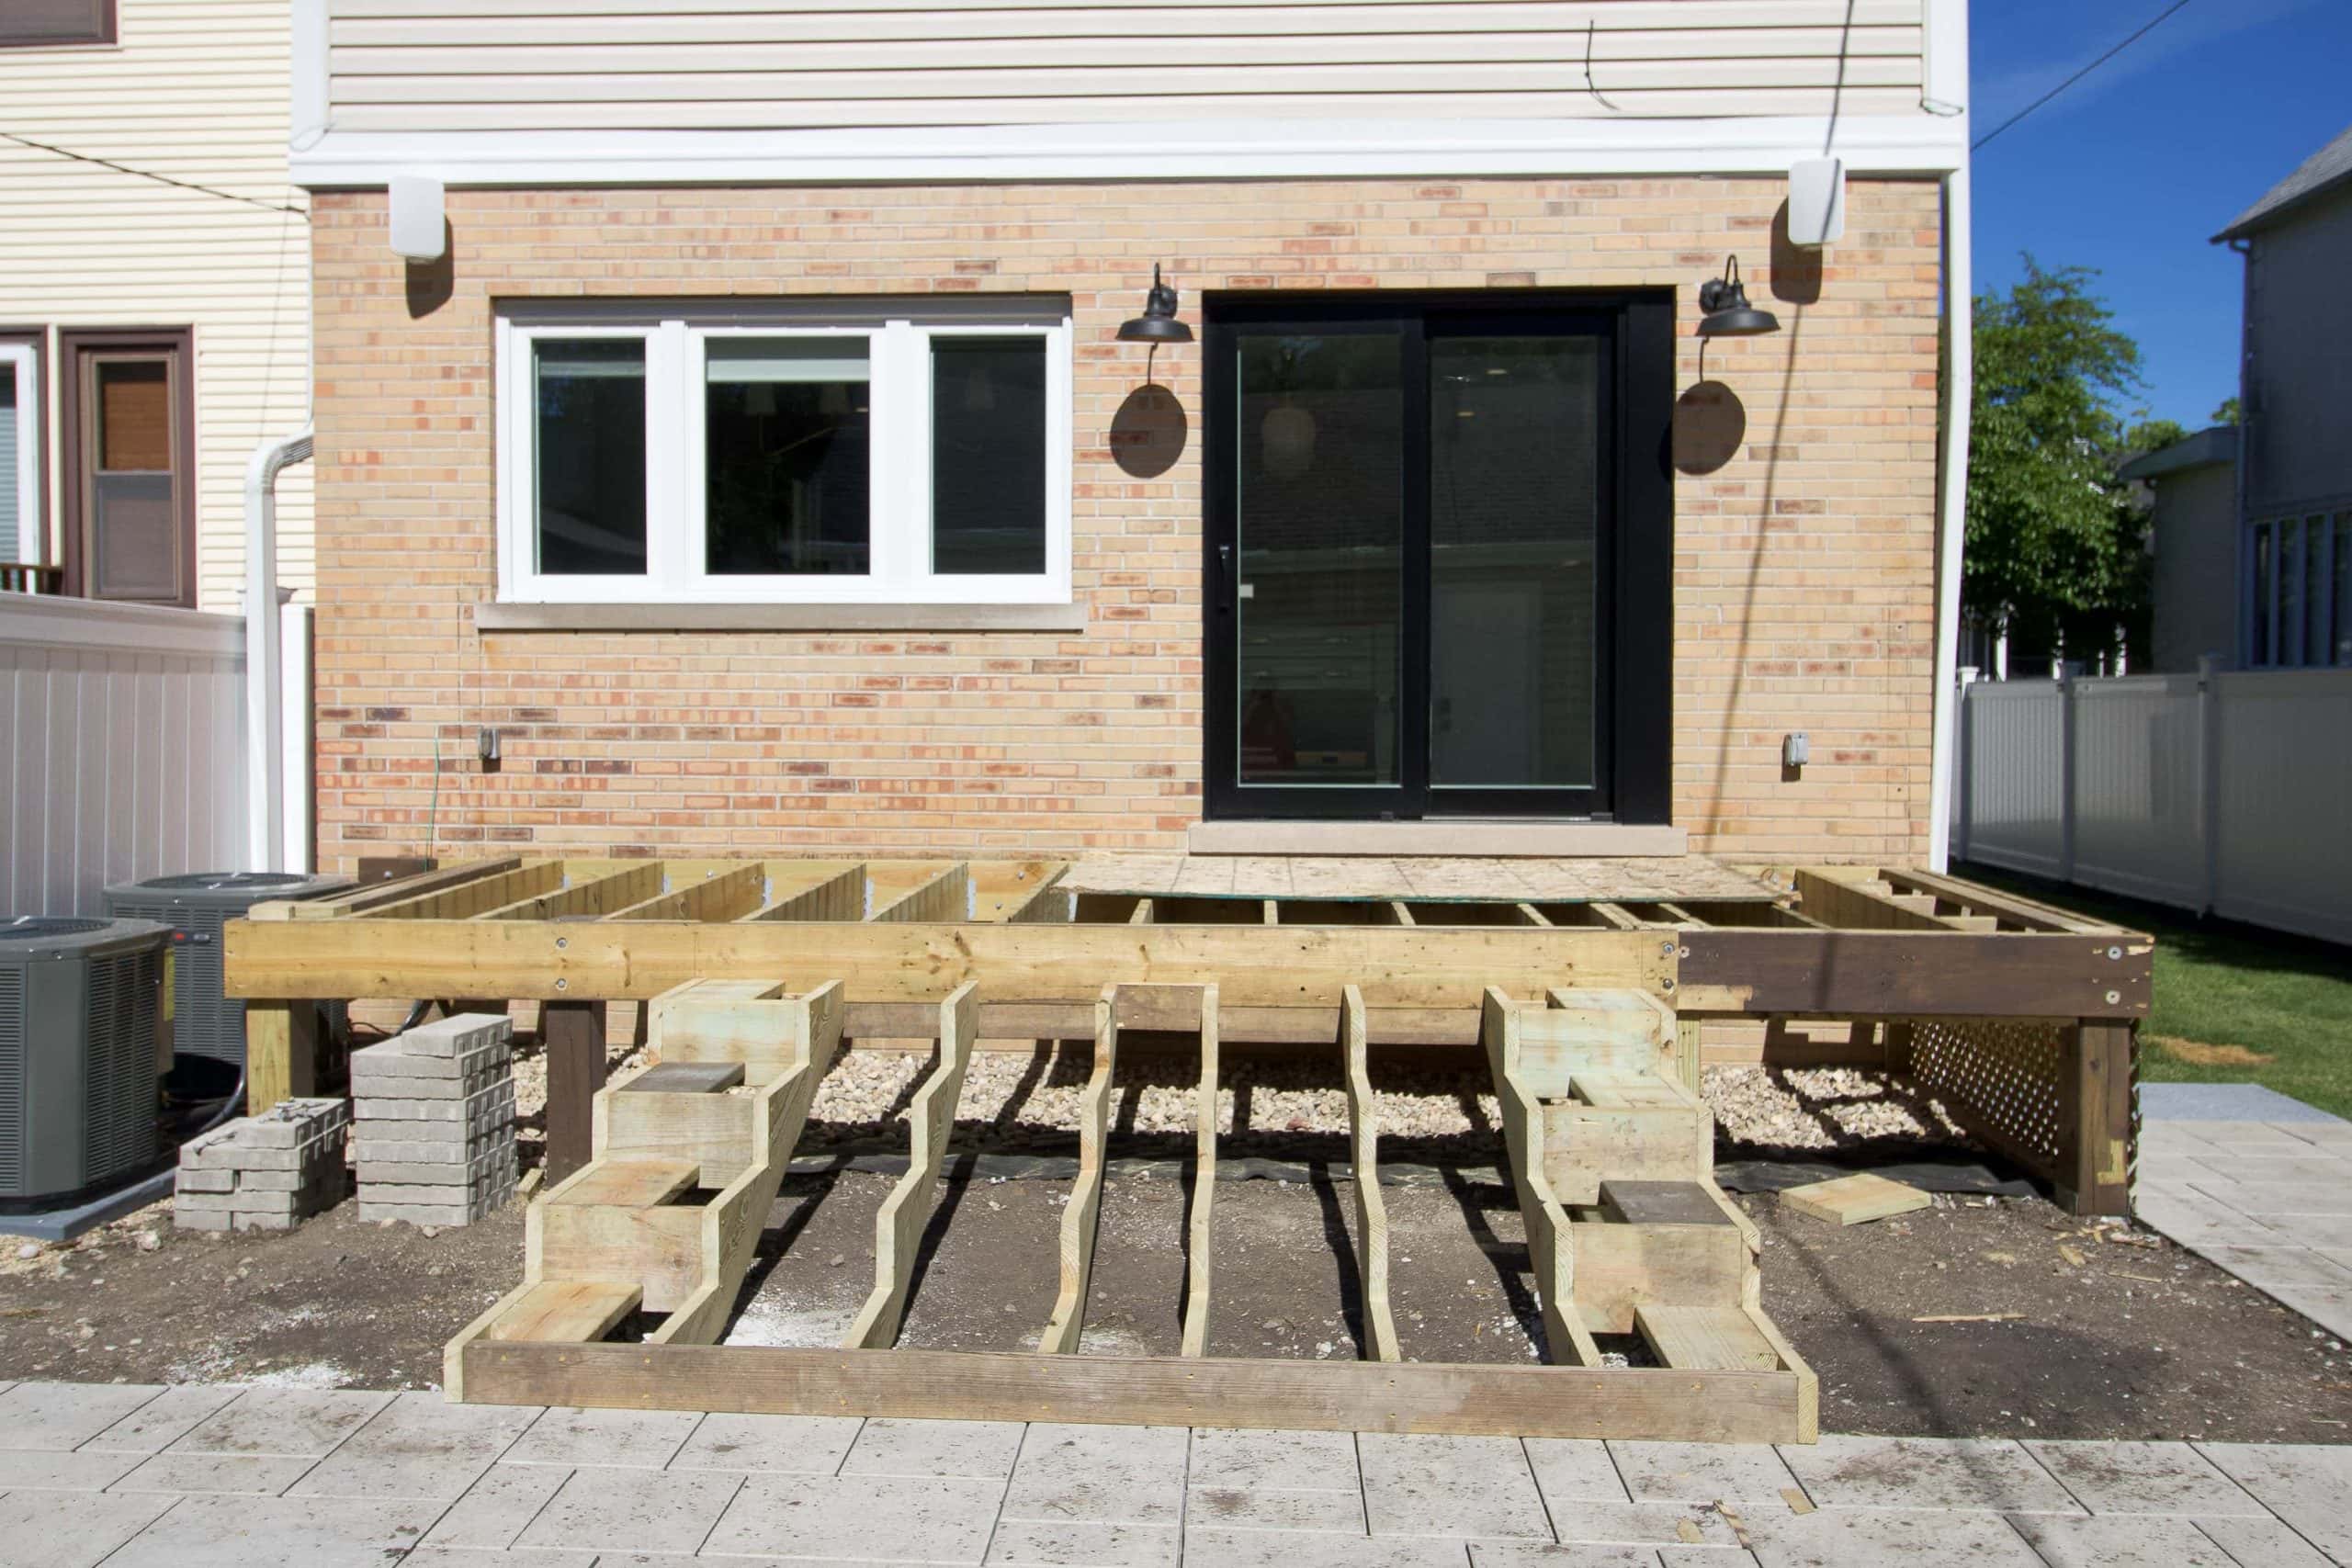
They had to pour new footings for the stairs and build the stair structure from scratch. But once this was in, I could really start to envision it!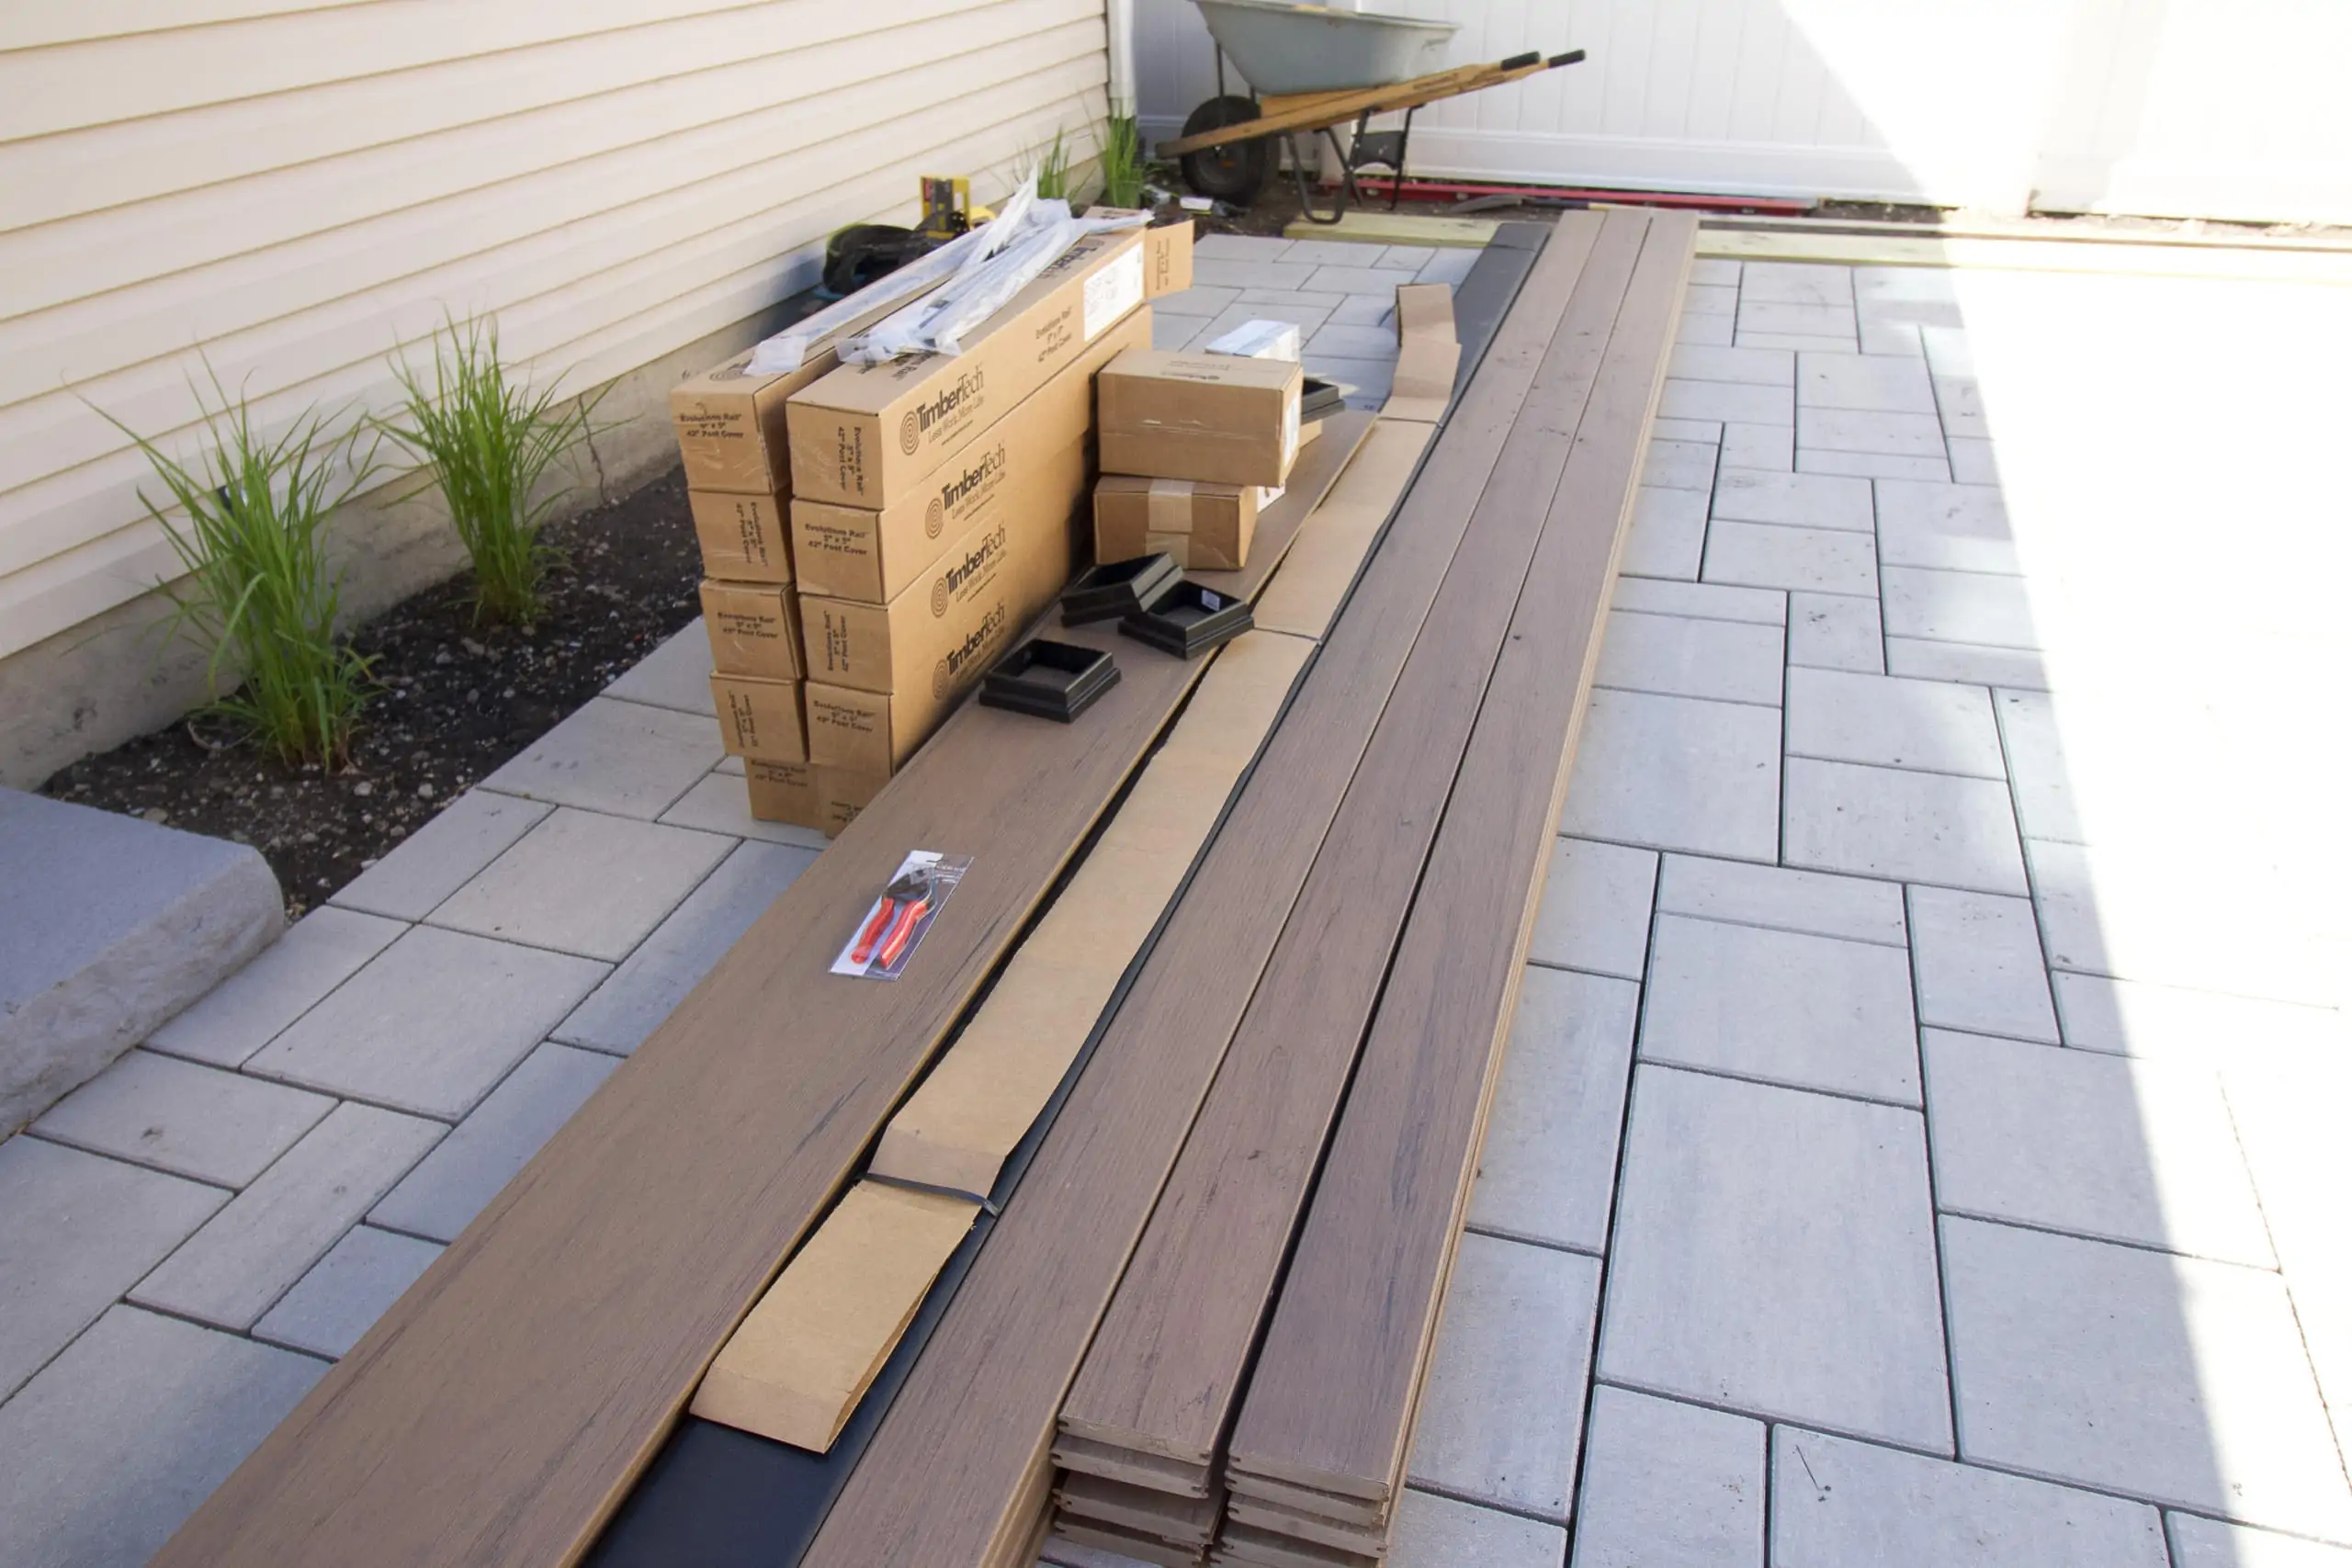
With the base of the deck complete, our materials arrived from TimberTech and they were able to beautify things a bit!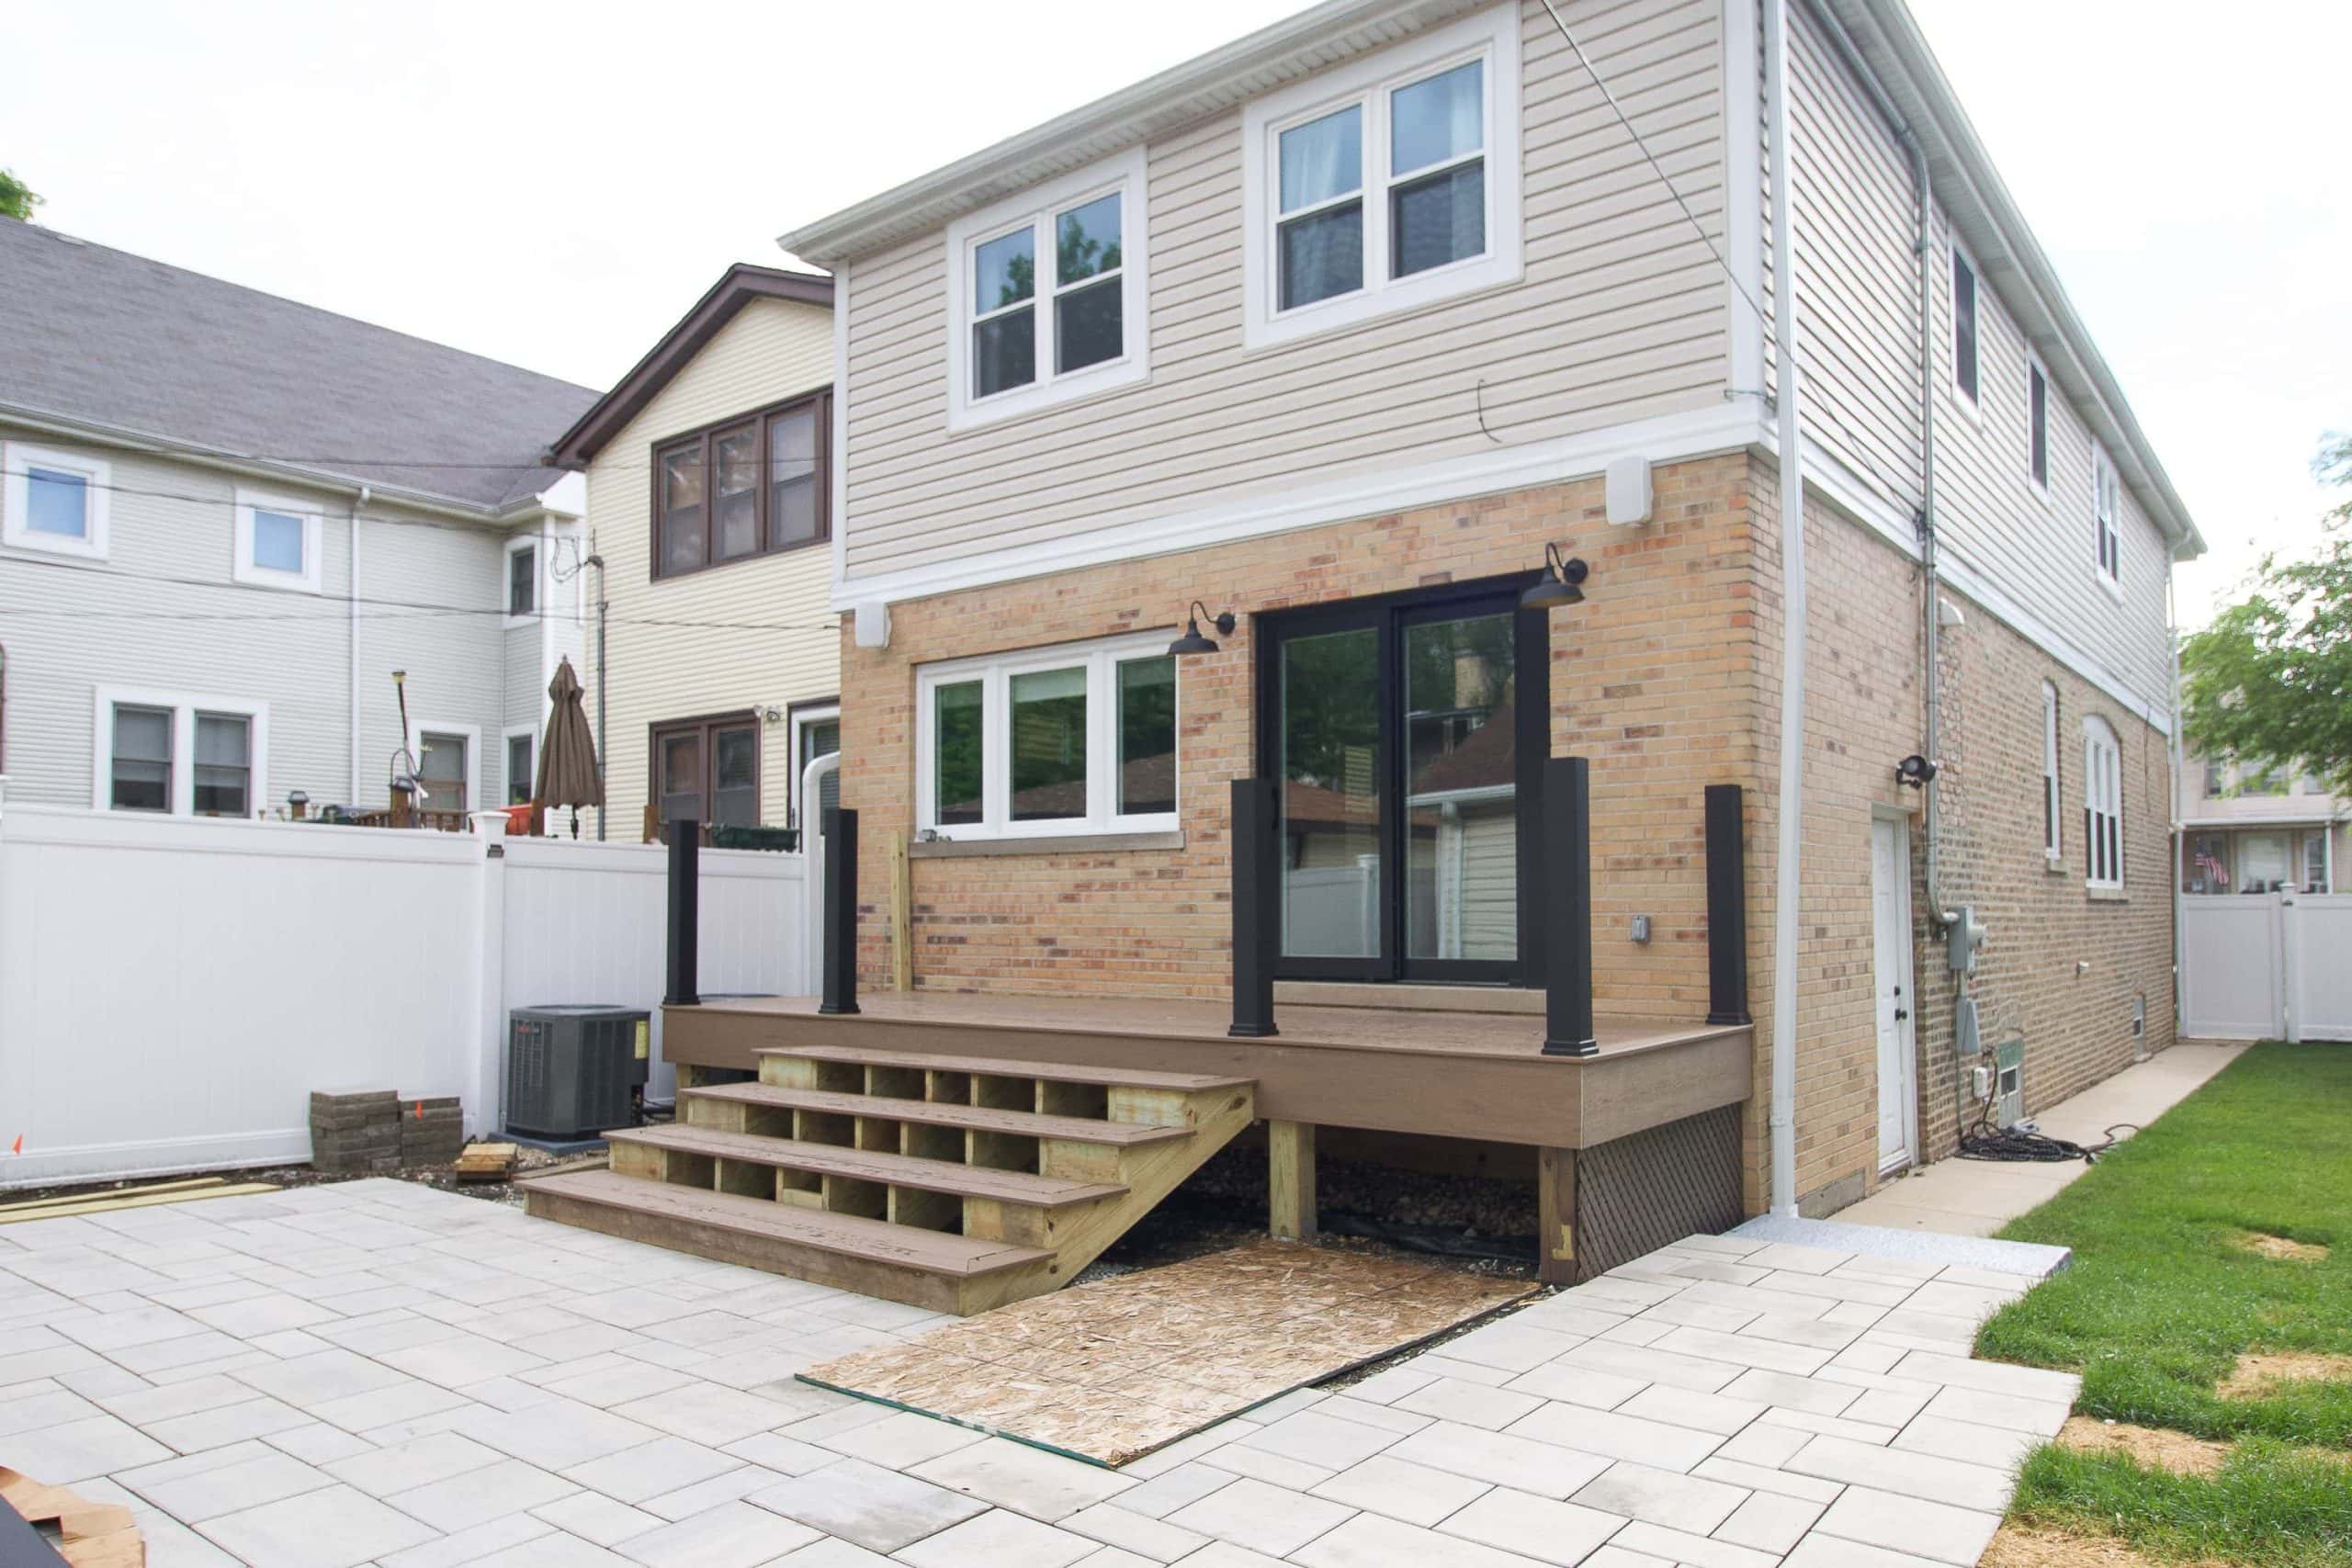
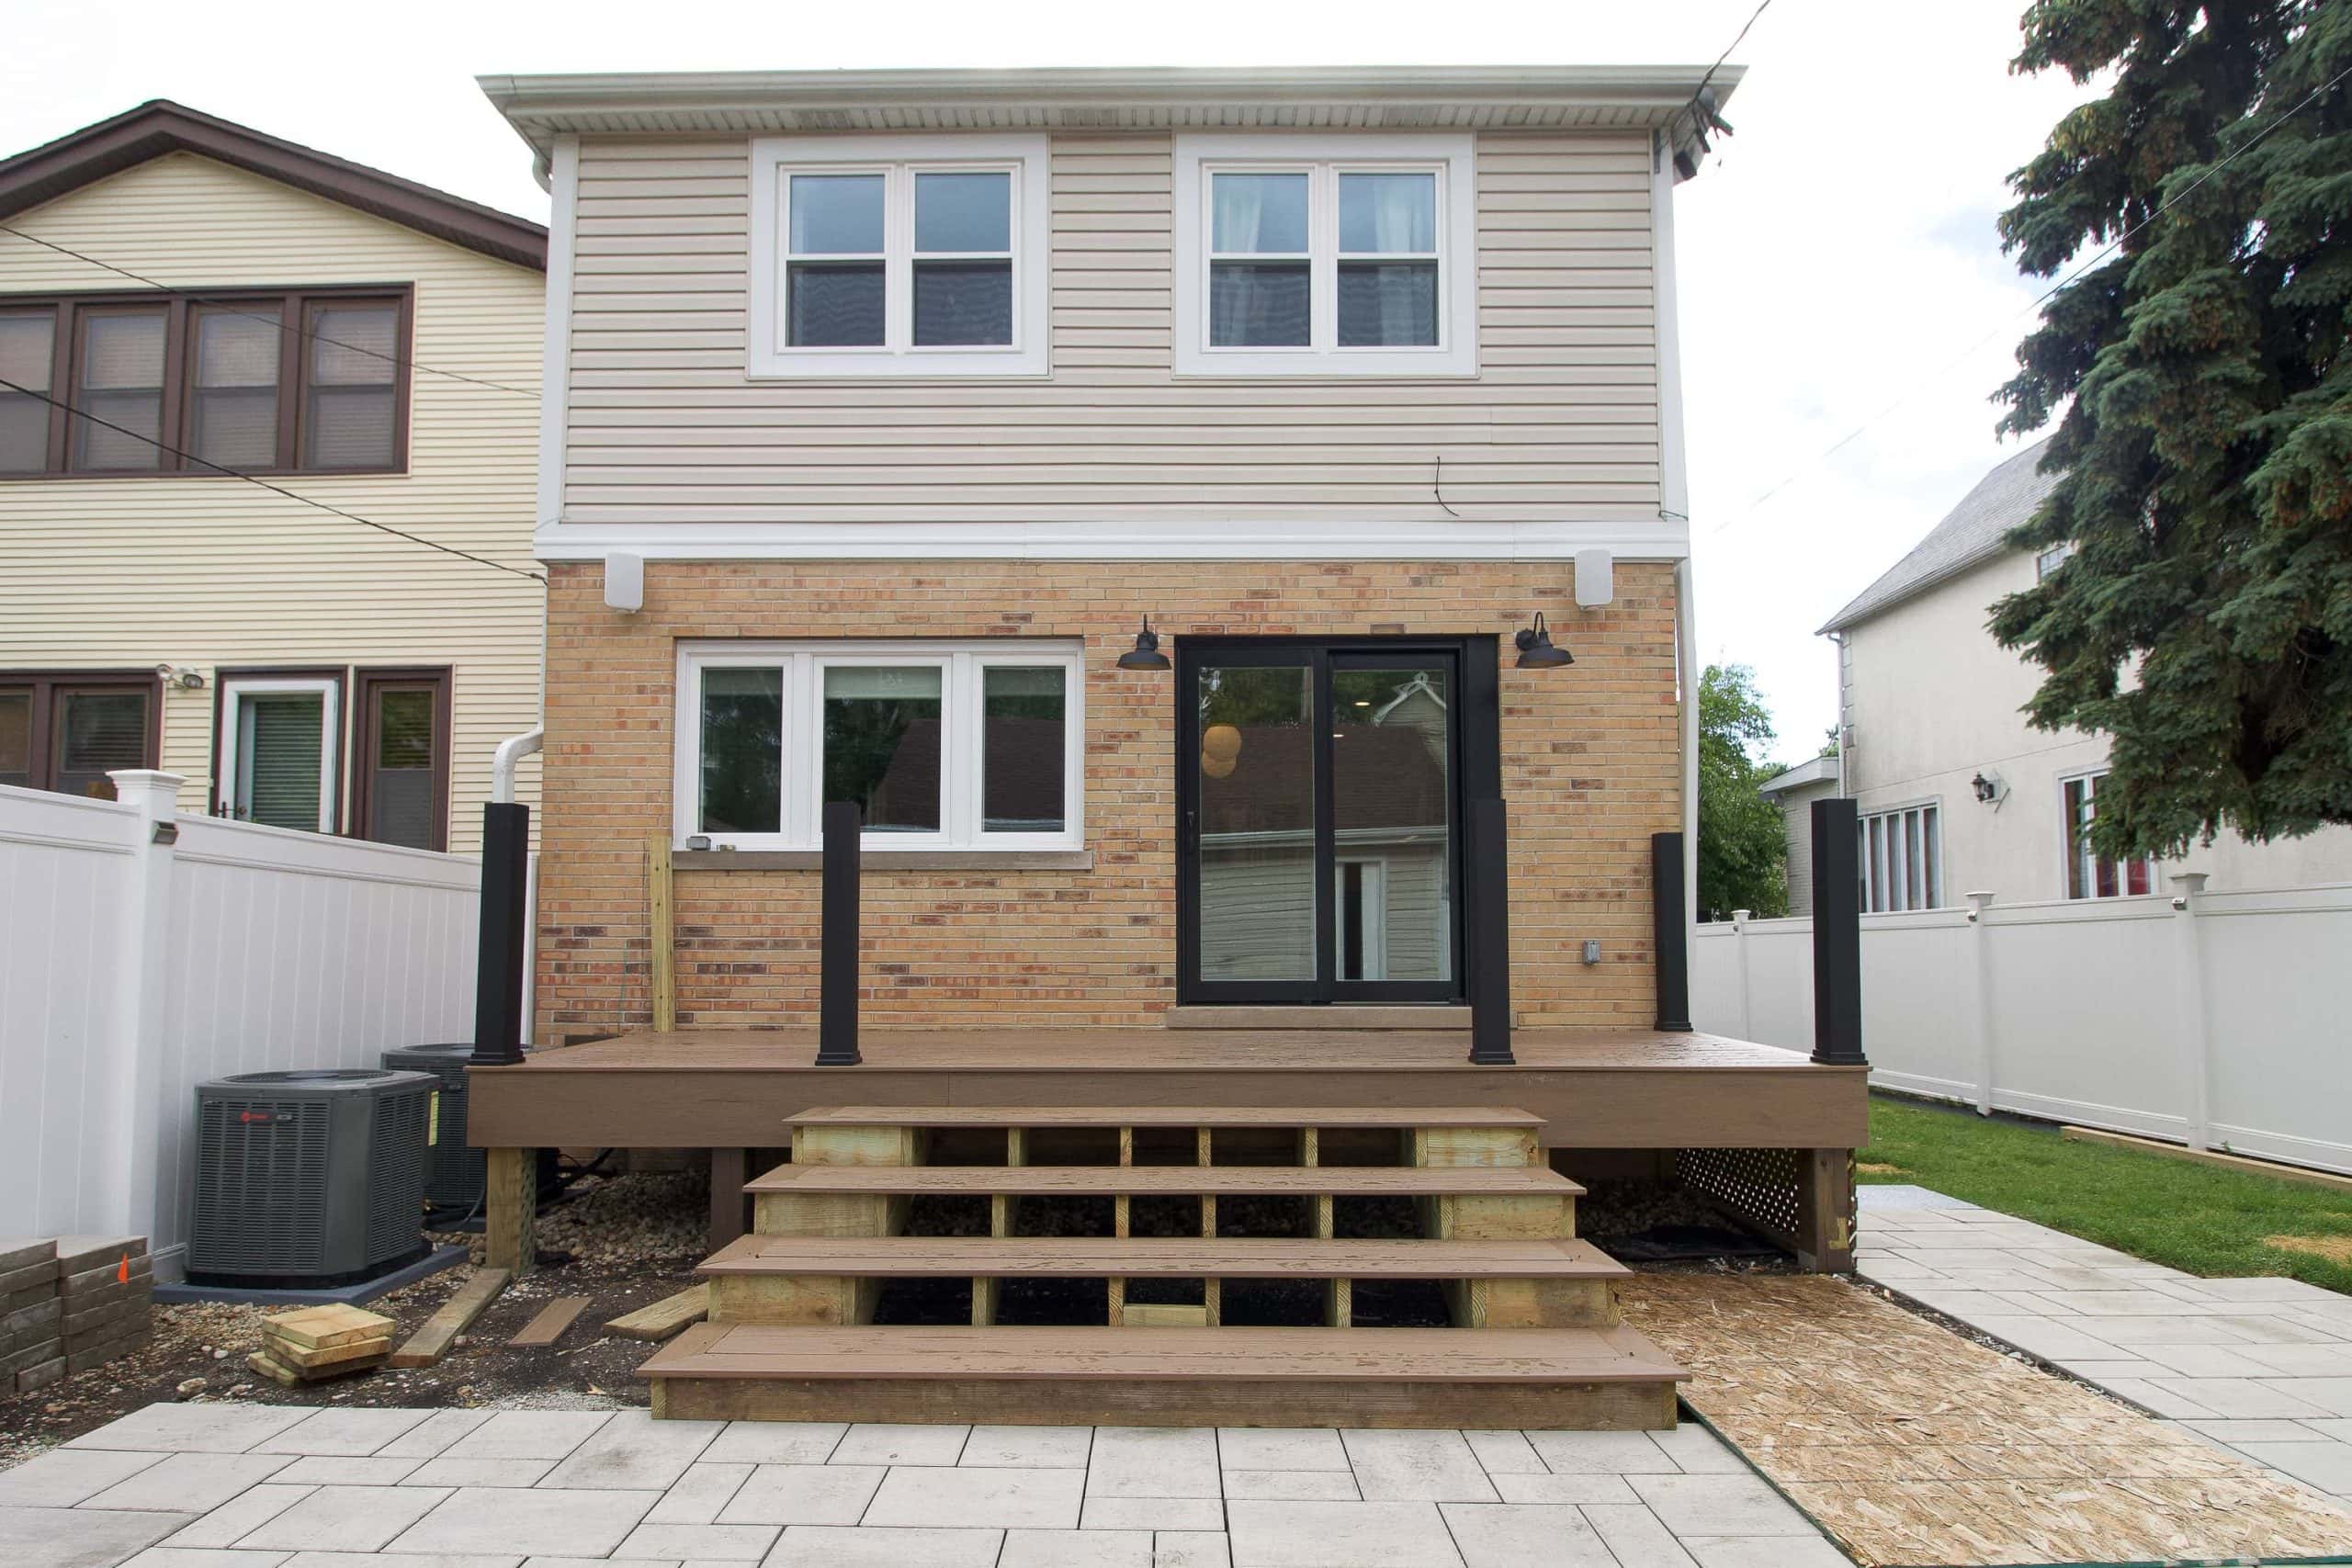
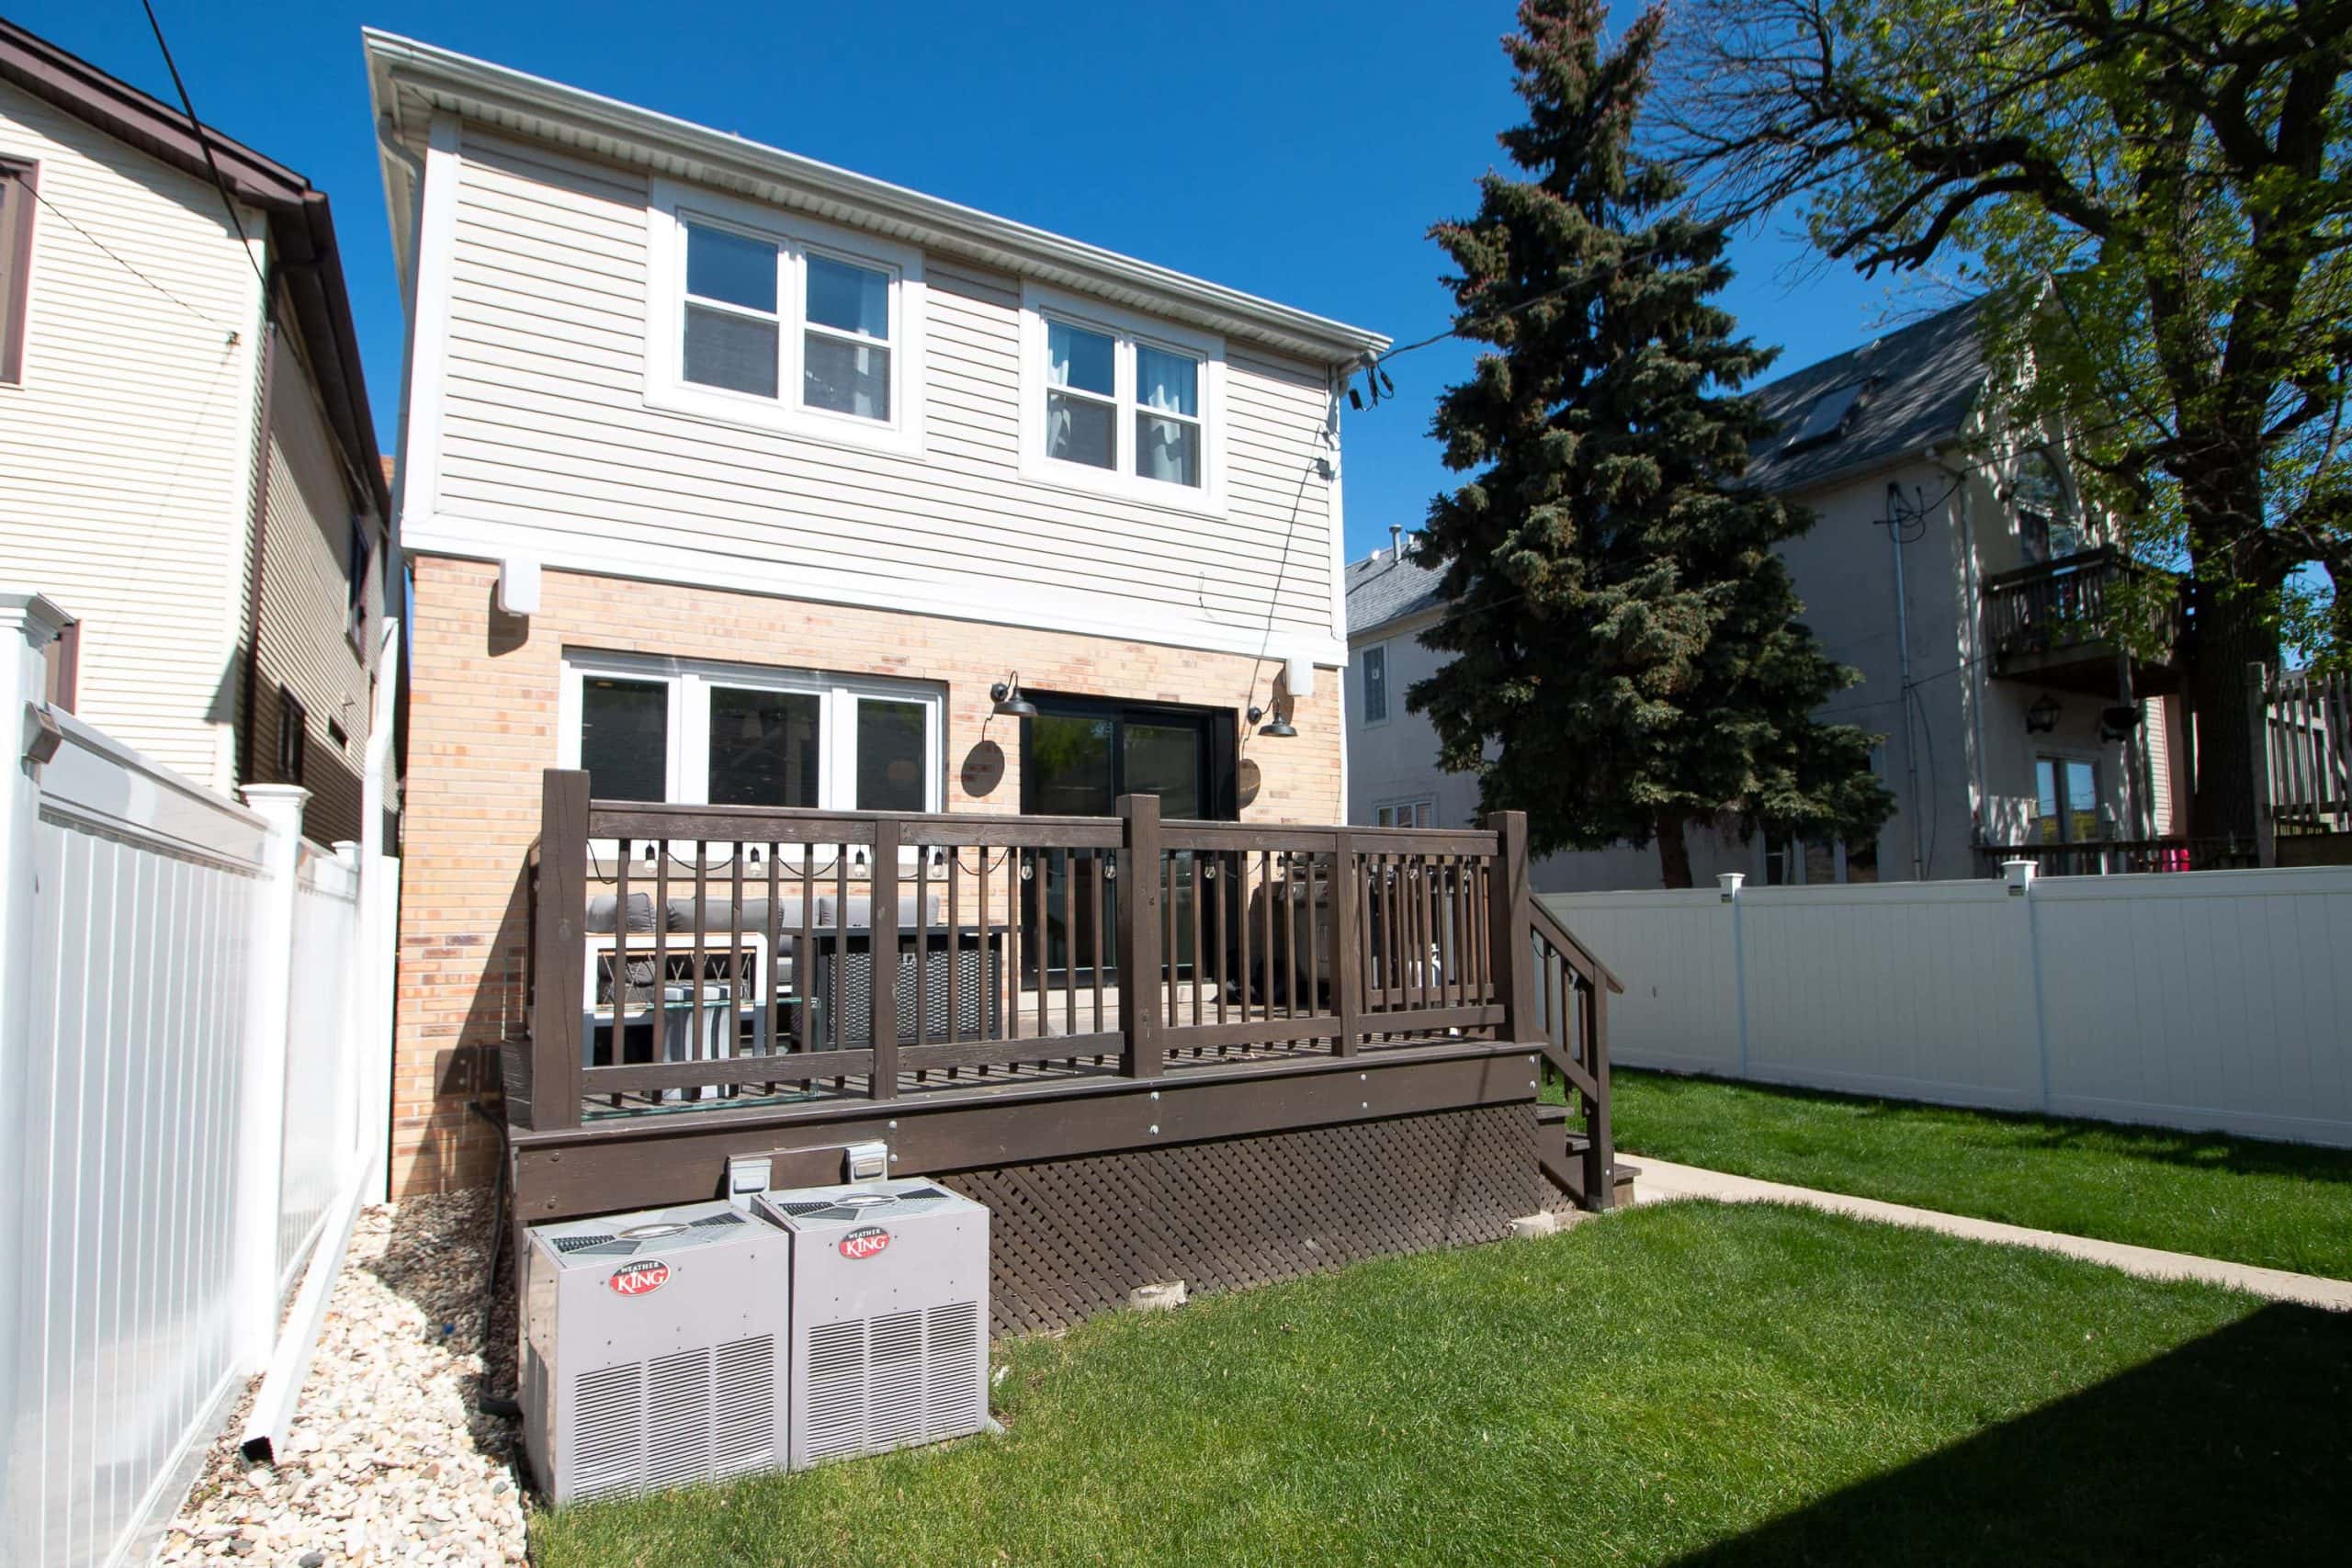
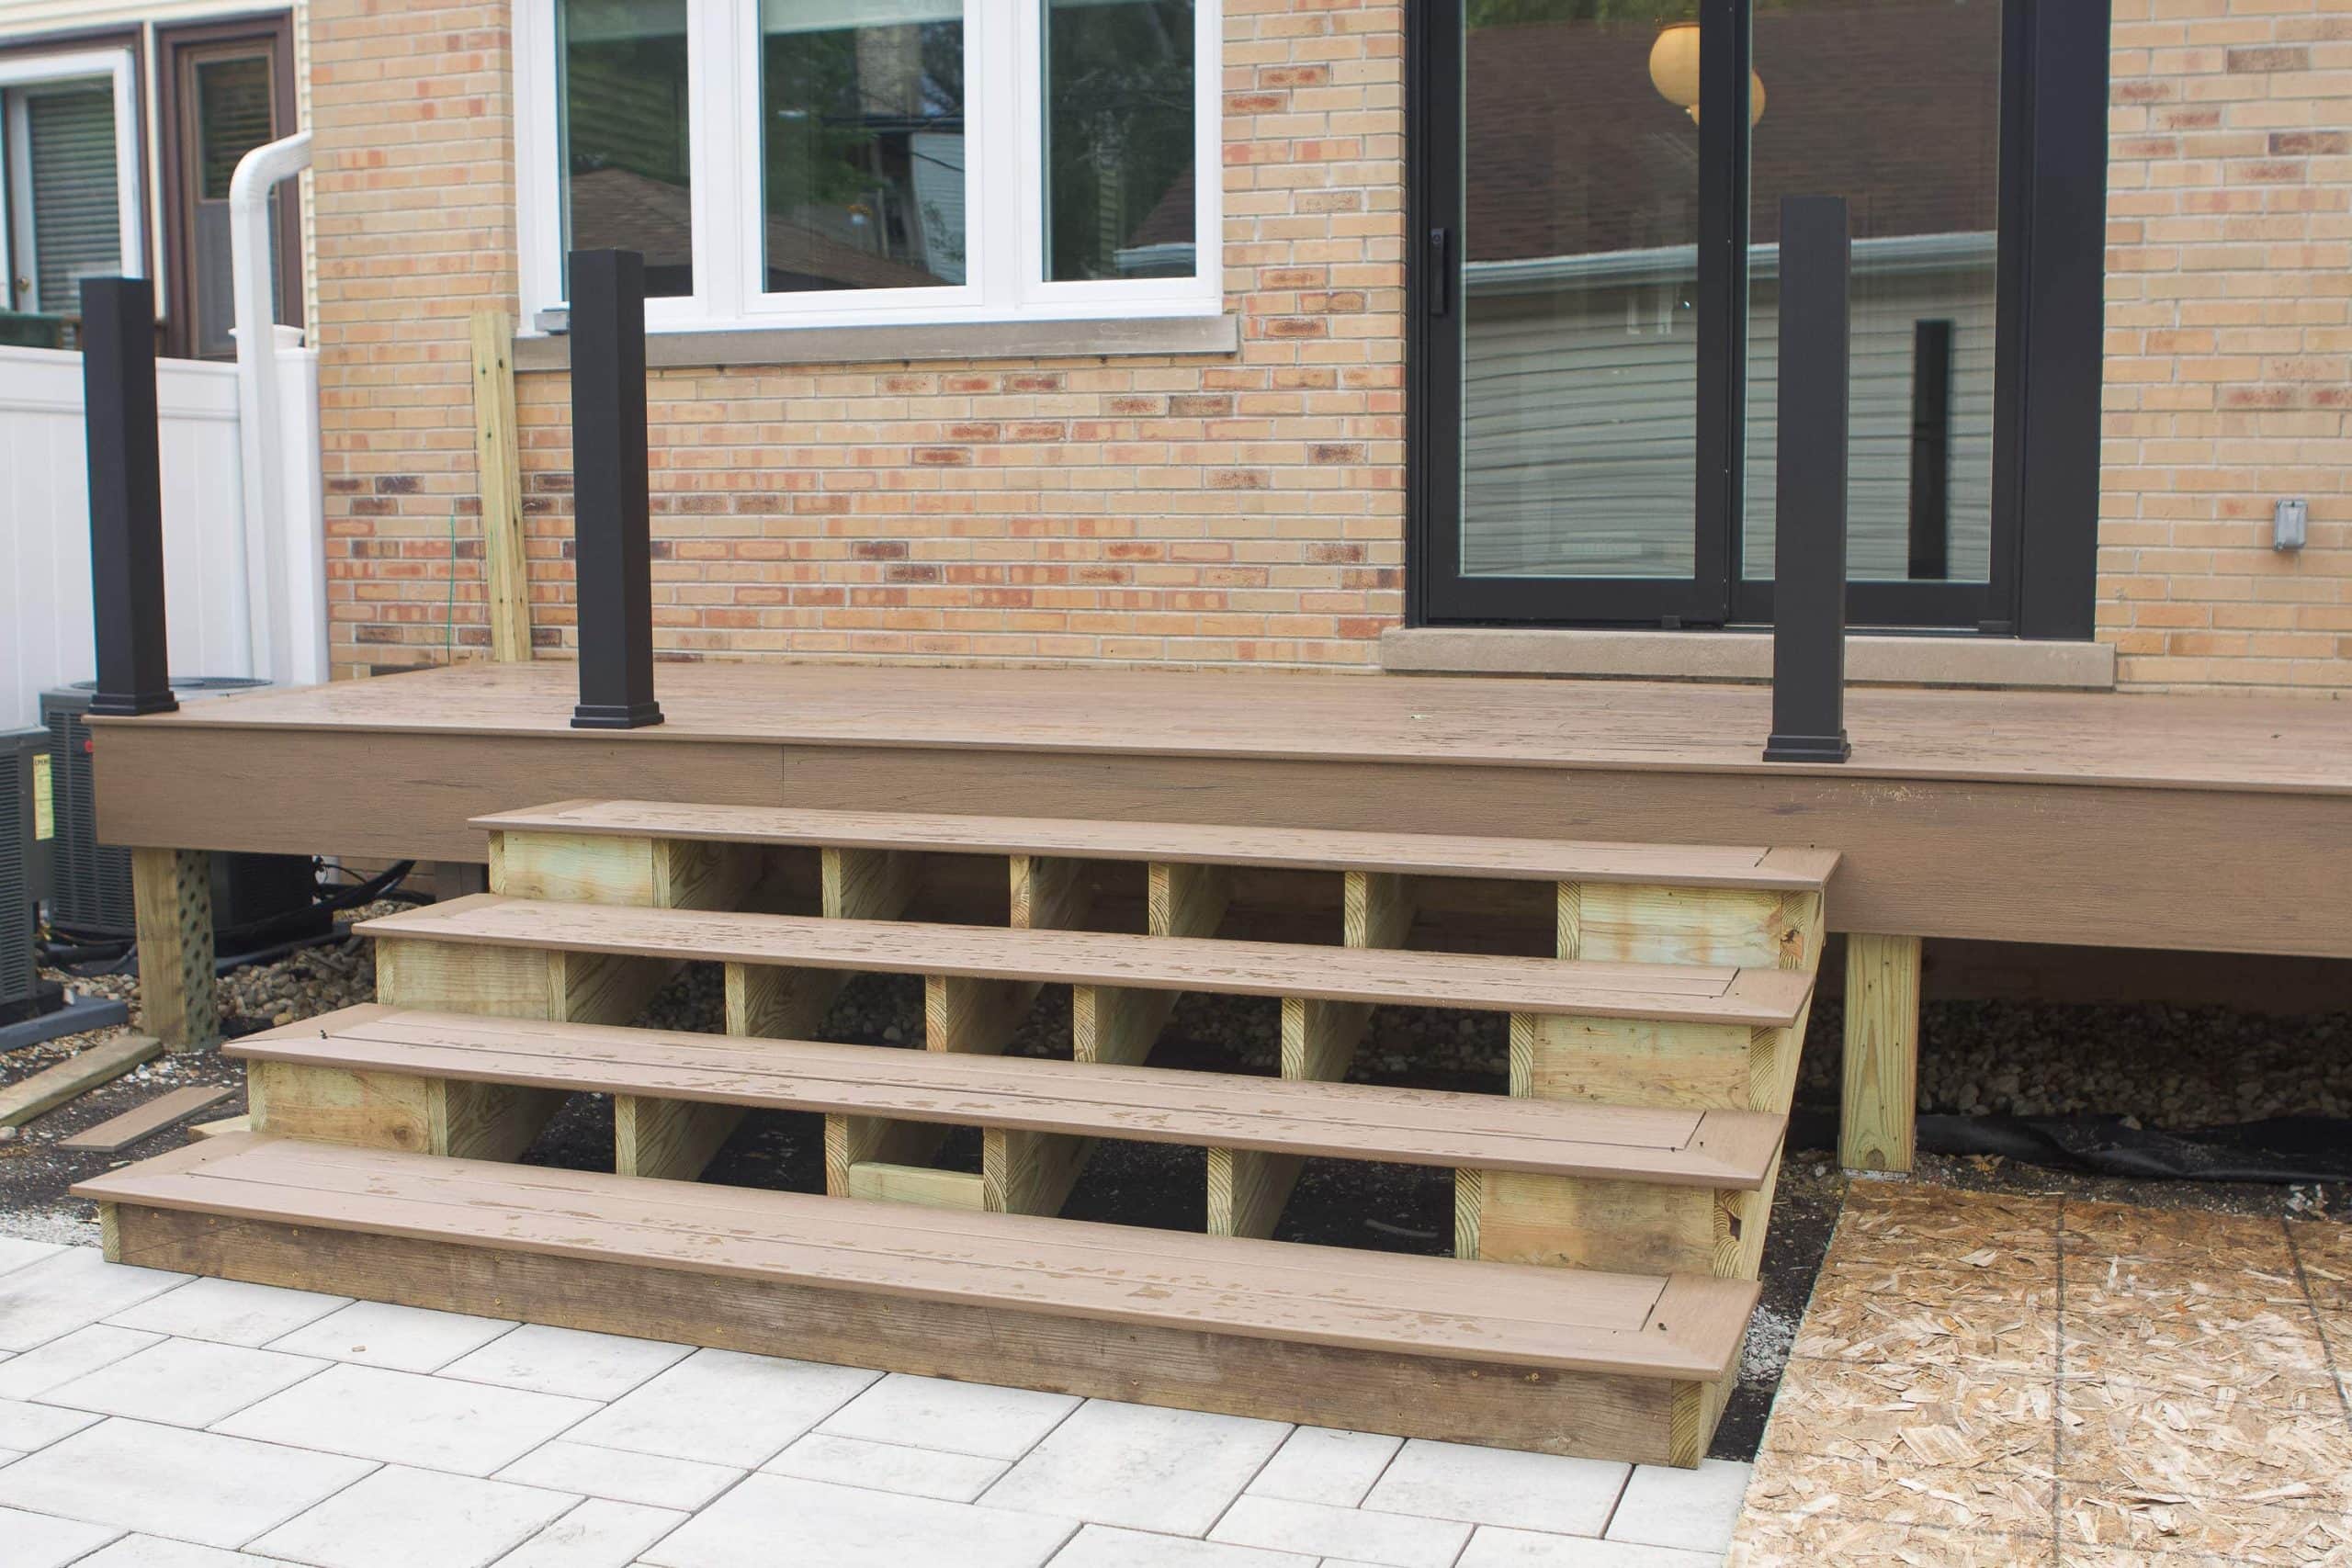
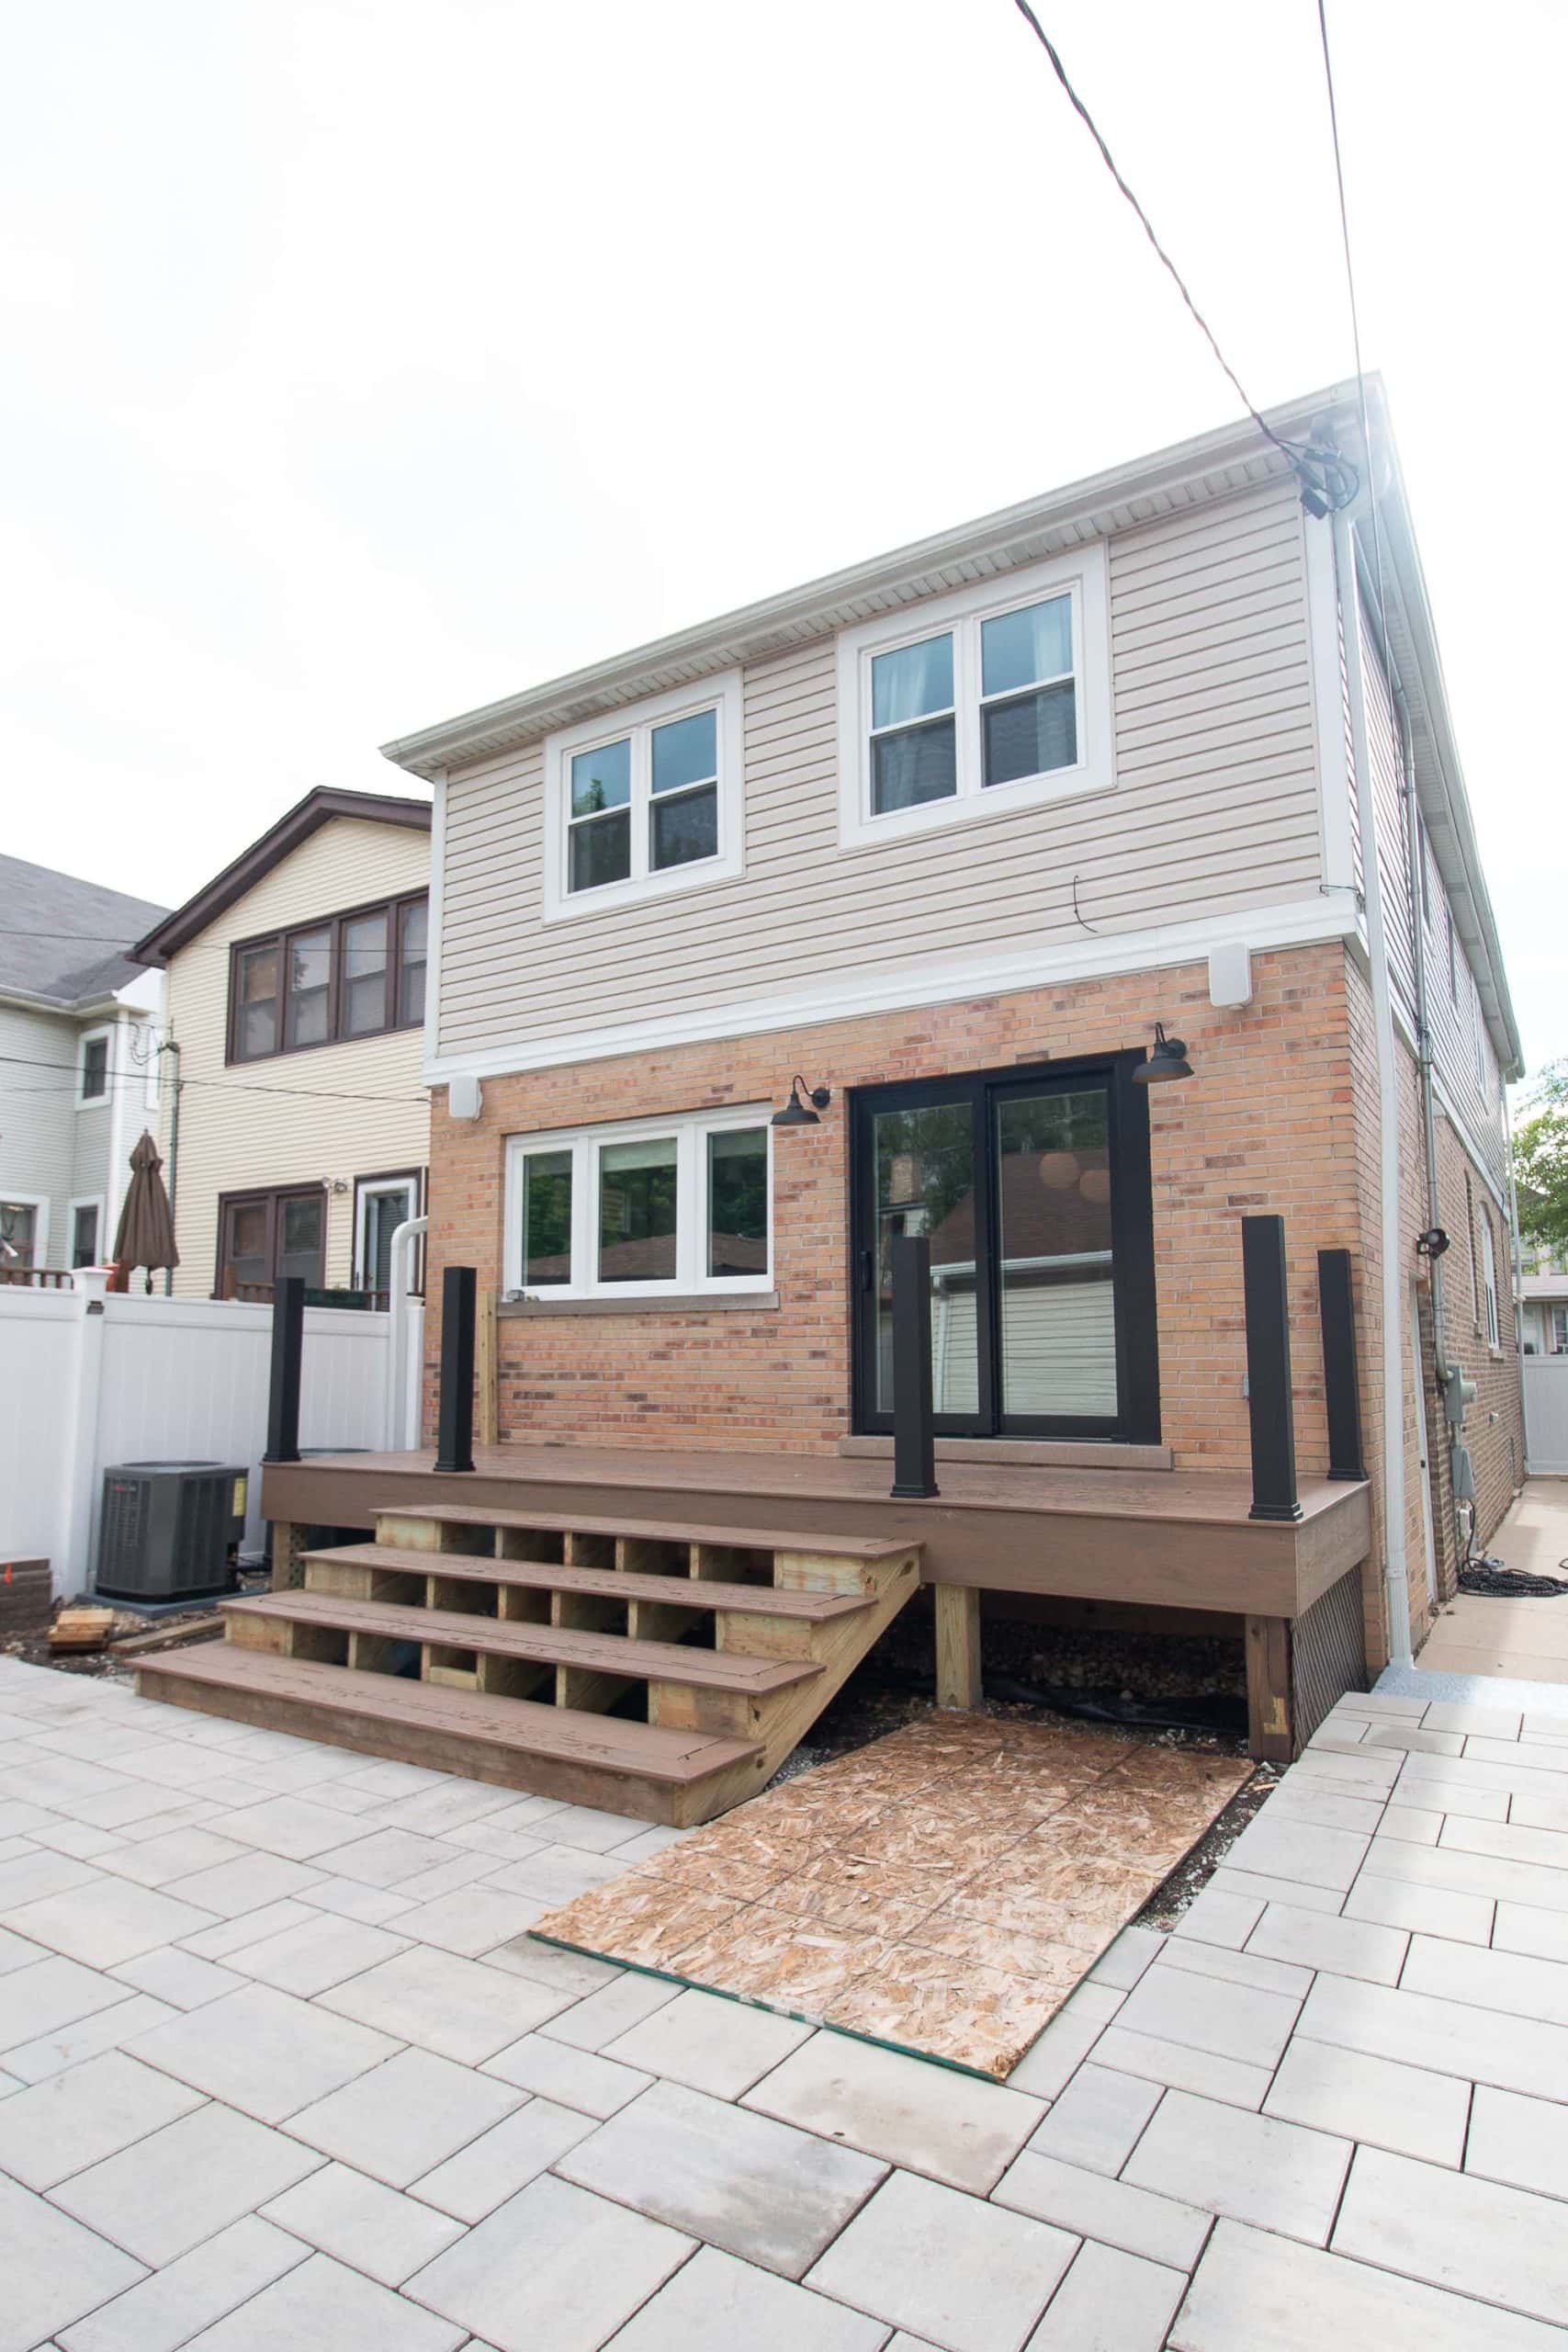
I feel like these pictures give you a good sense of the new layout. It feels so much more open! It’s wild how closed off that old deck felt. Now with the wide stairs, it really feels like an extension from the kitchen down to the patio. 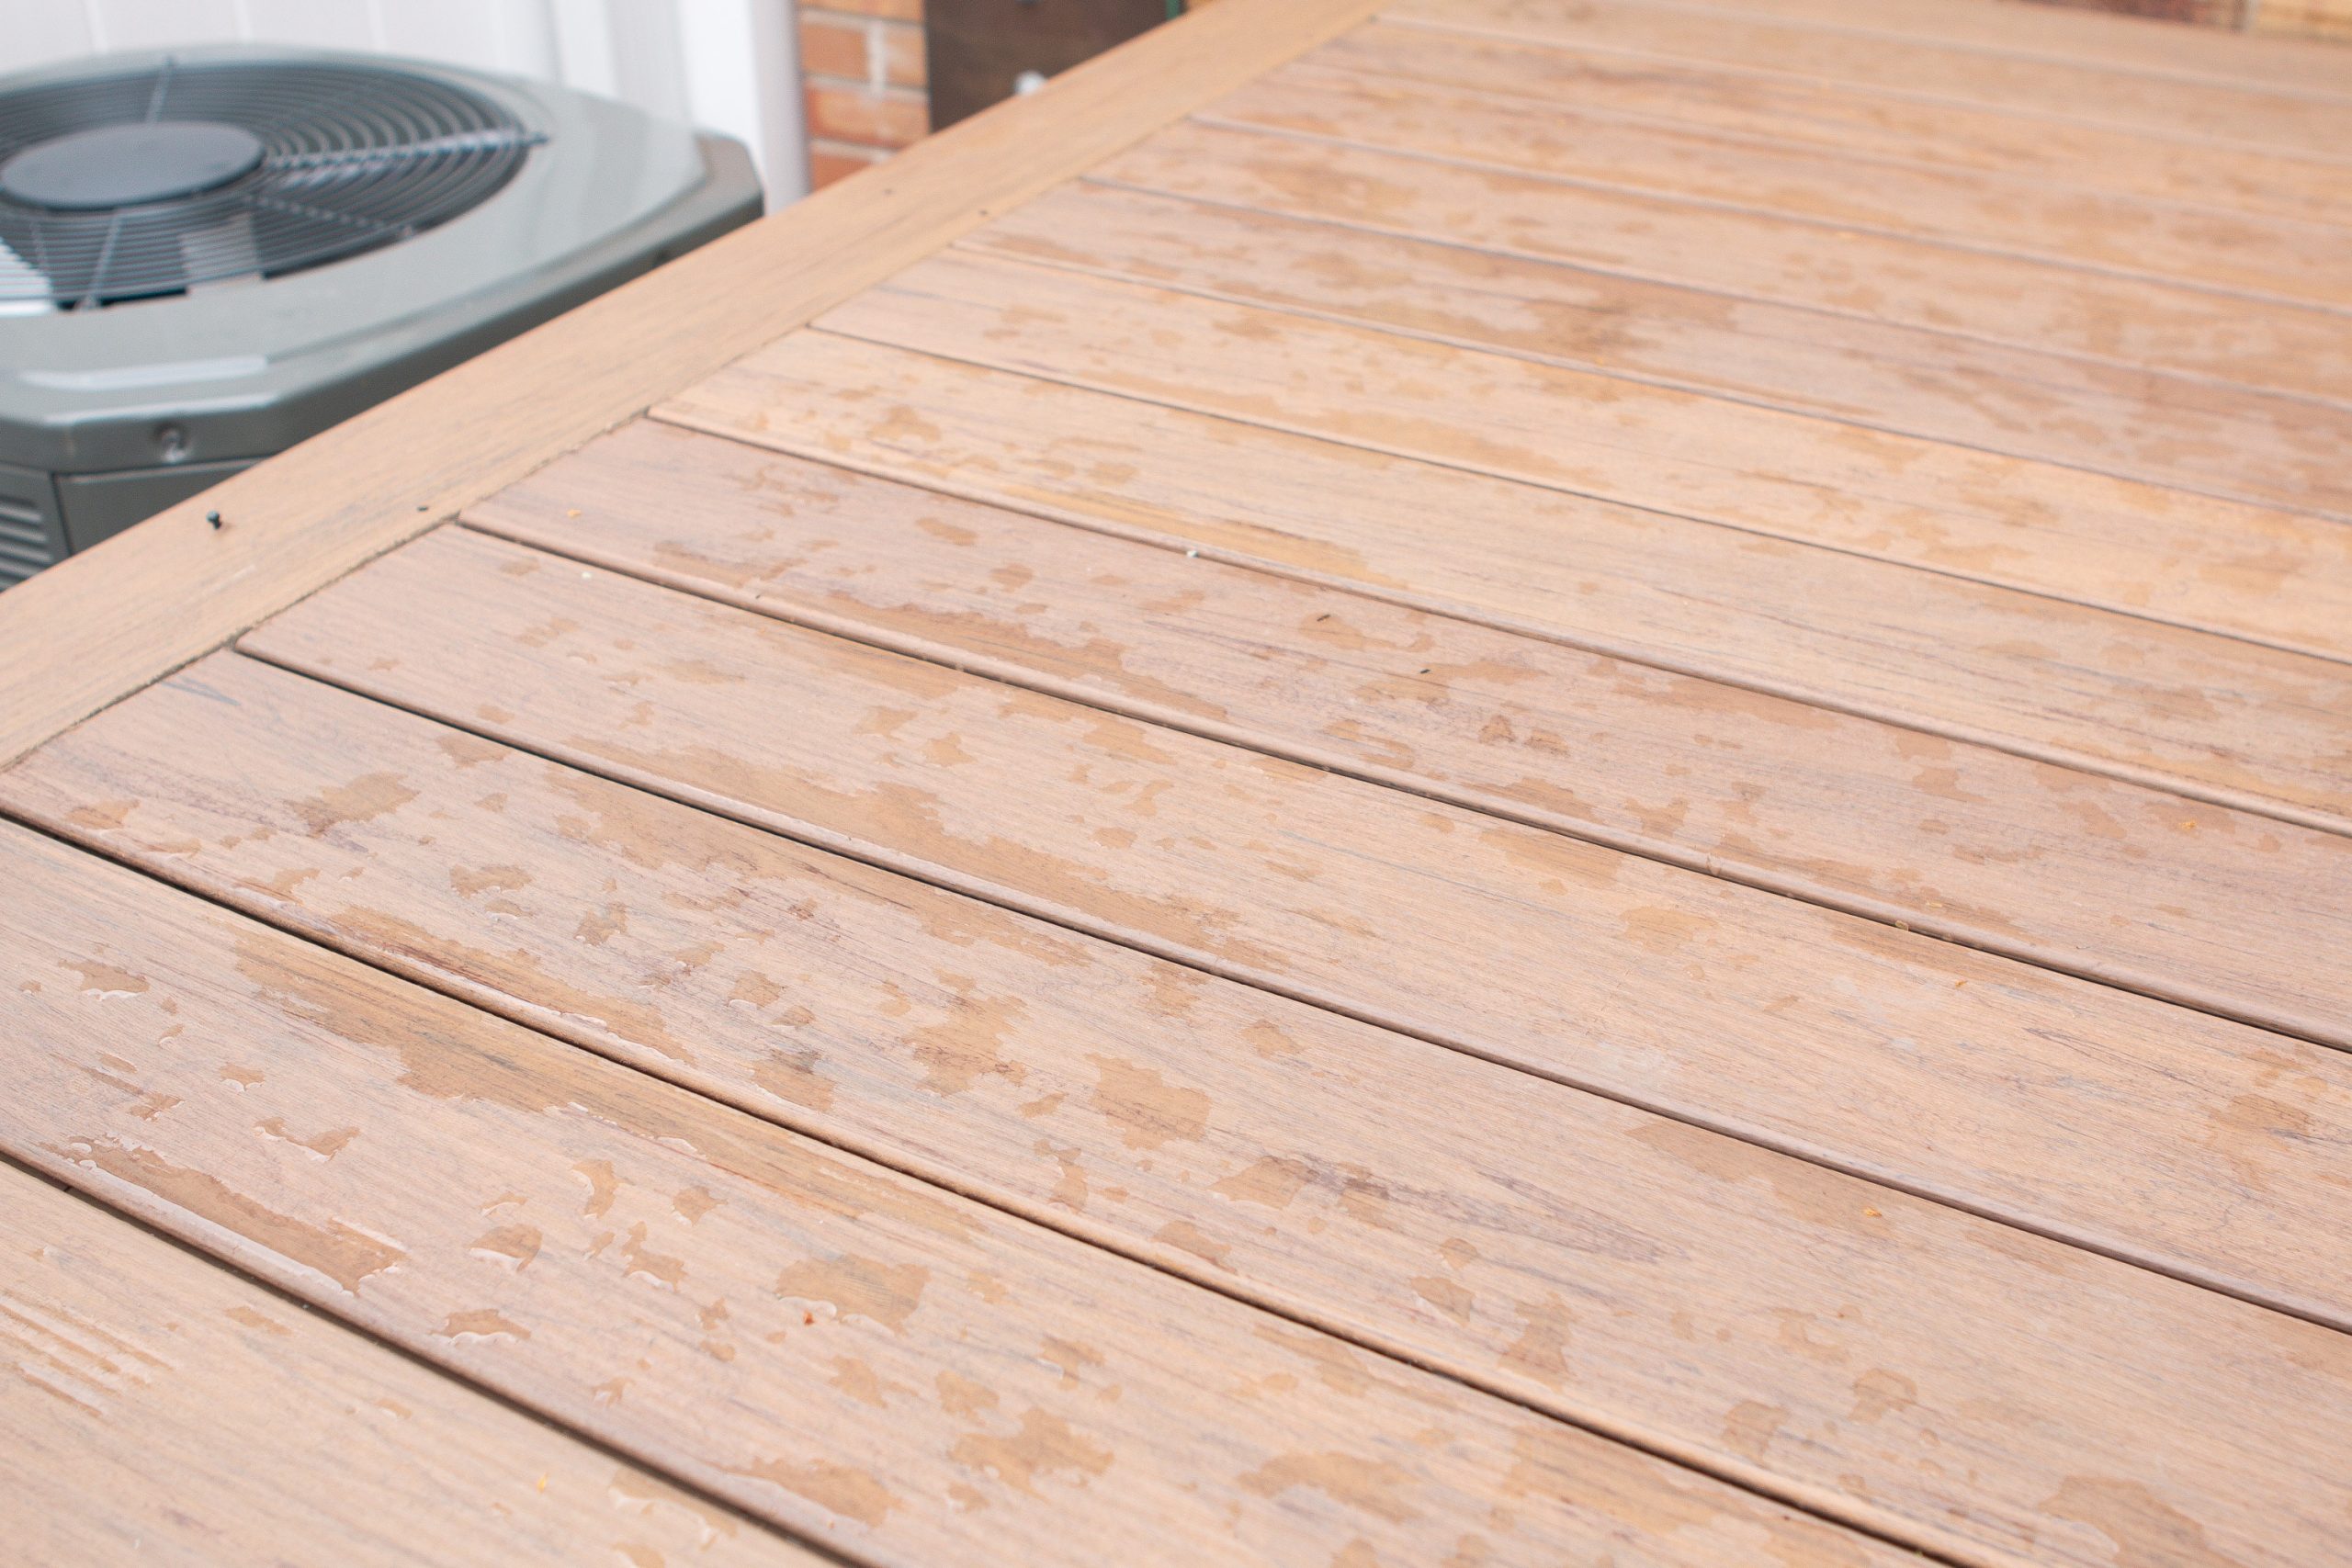
I also really love the color. Our old deck was way too dark and didn’t complement the tones of the house. This light brown wood has a nice warmth to it, without being too dark or overpowering. 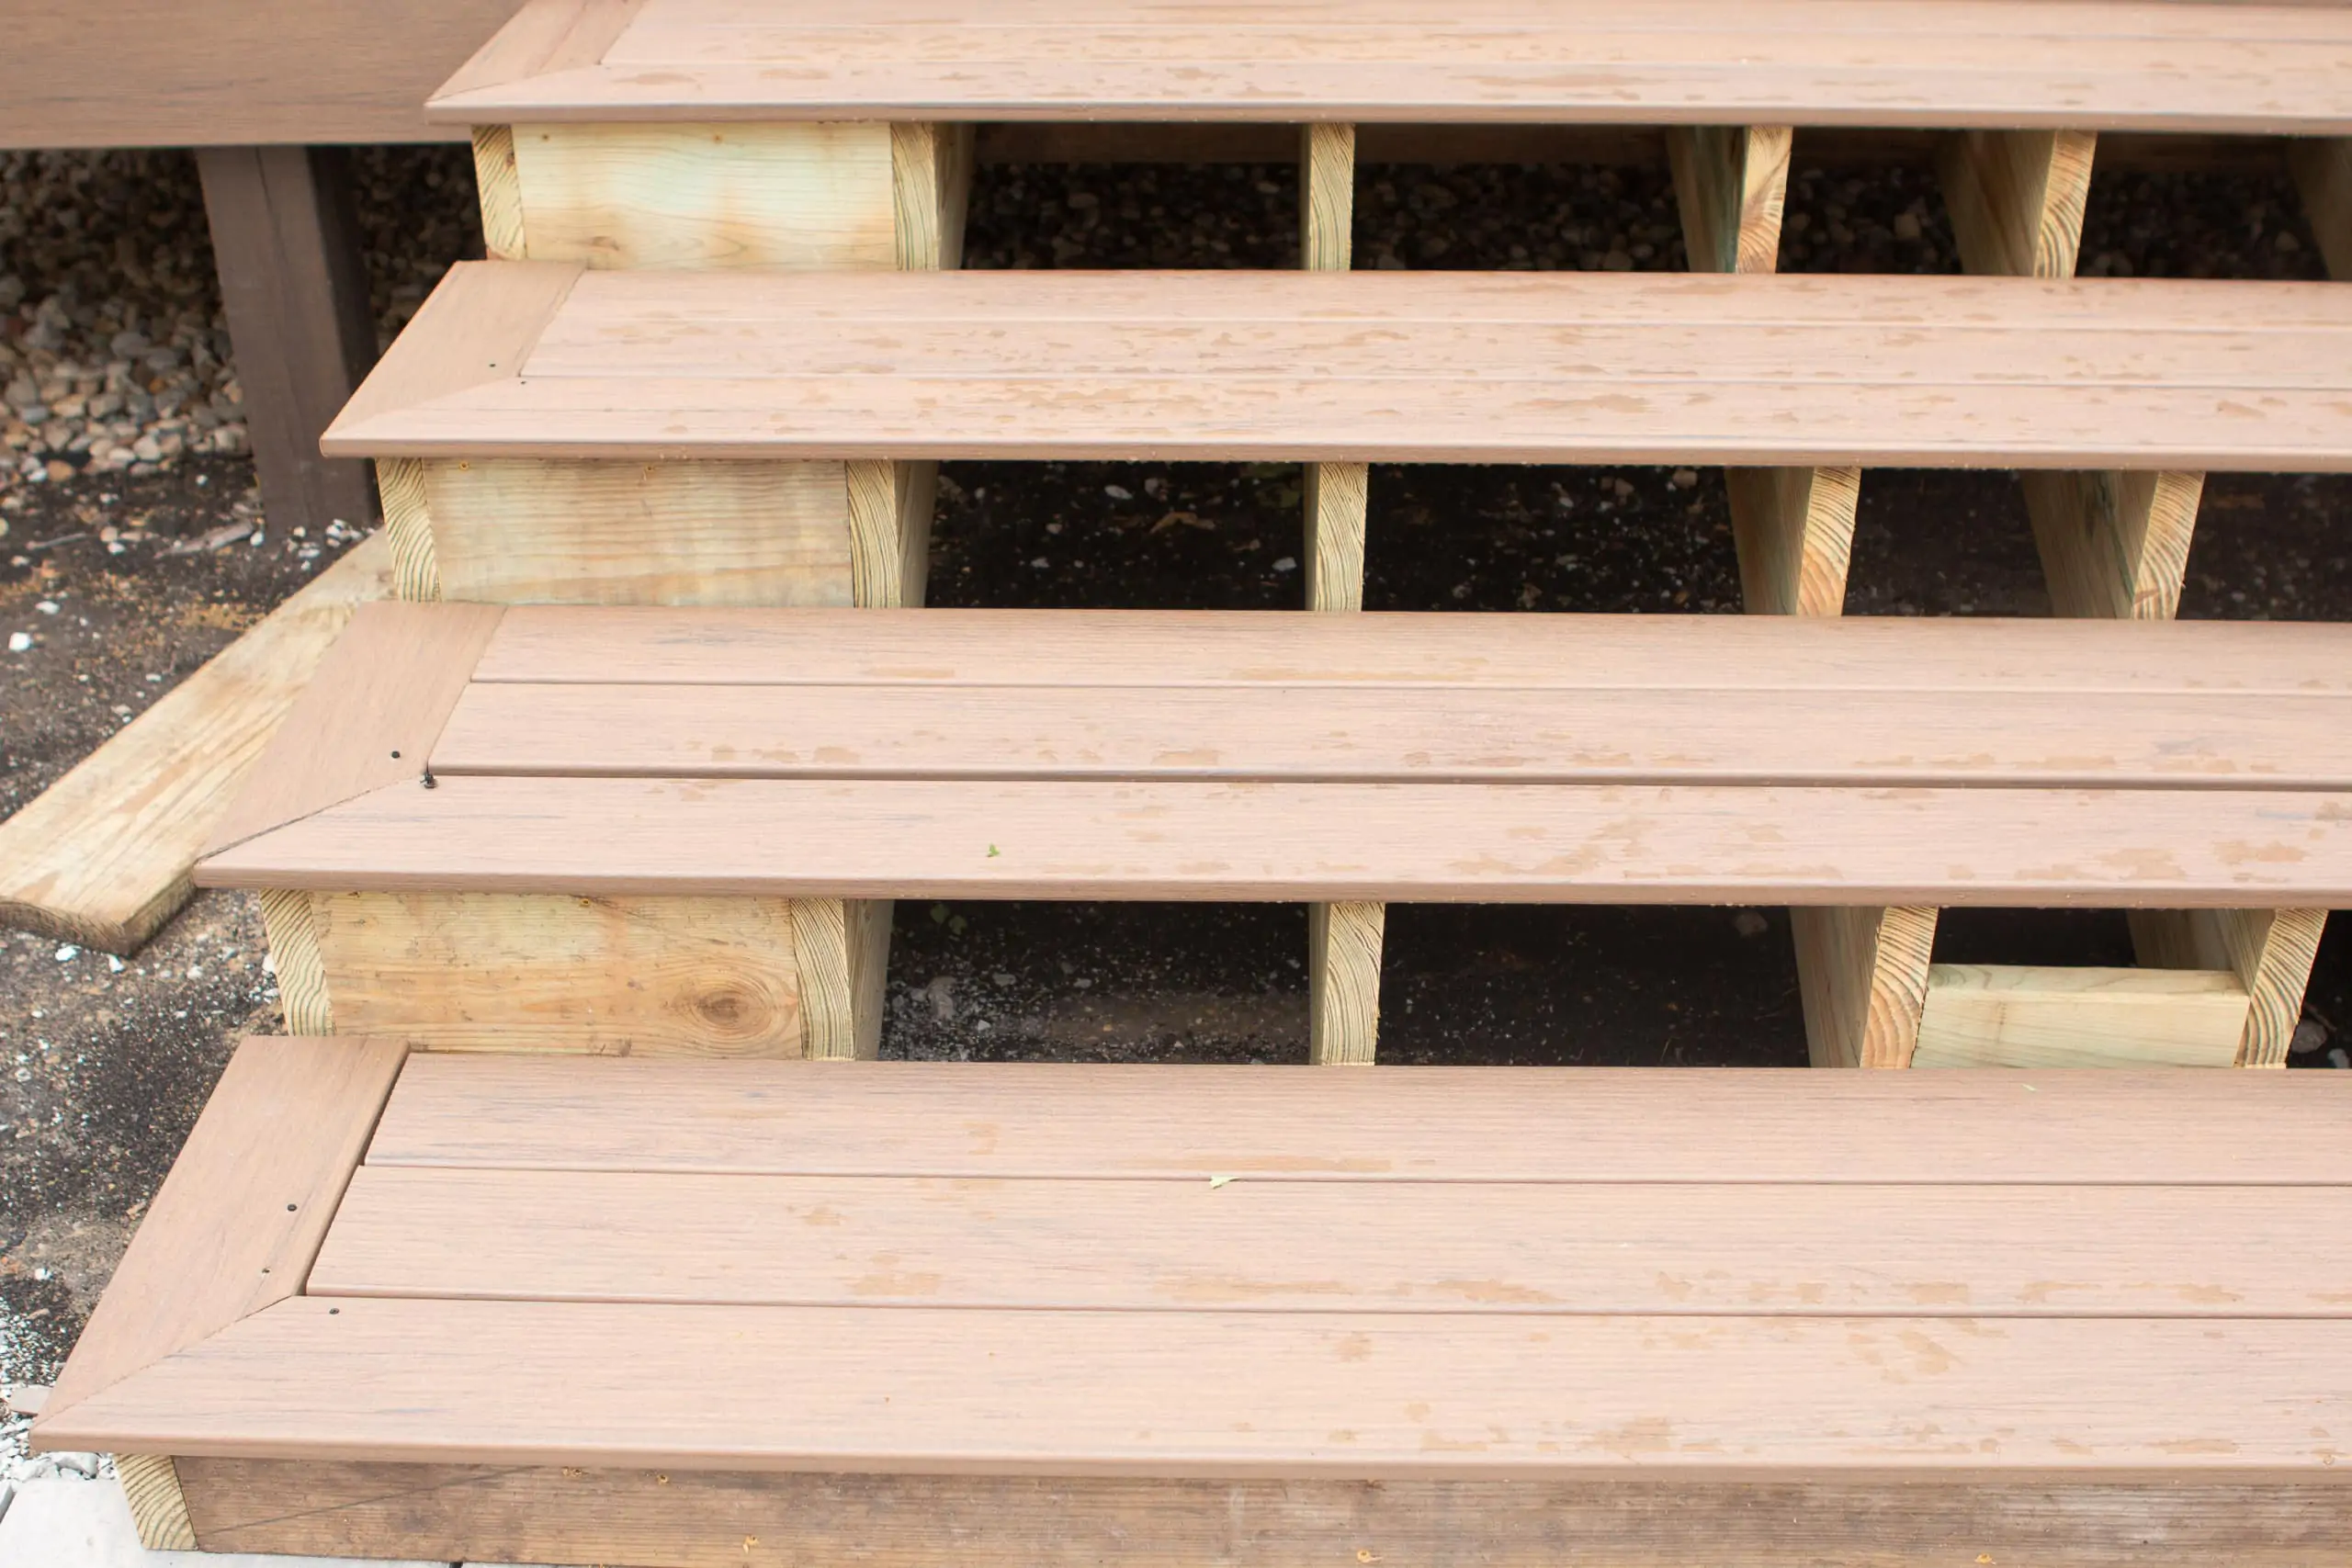
You can see that the stairs aren’t bolted down yet. We need to get the railings in first before that can happen, so these are still a work in progress. 
They added the contemporary posts from TimberTech to the landing of the deck and I really love how they look. In between, we’ll have horizontal rails to complete the modern feel. I’m happy we’re going with the rails because they won’t be too bulky and therefore won’t obstruct the view of the yard below. I’m all about making this space feel as open as possible with lots of sightlines to see Rory!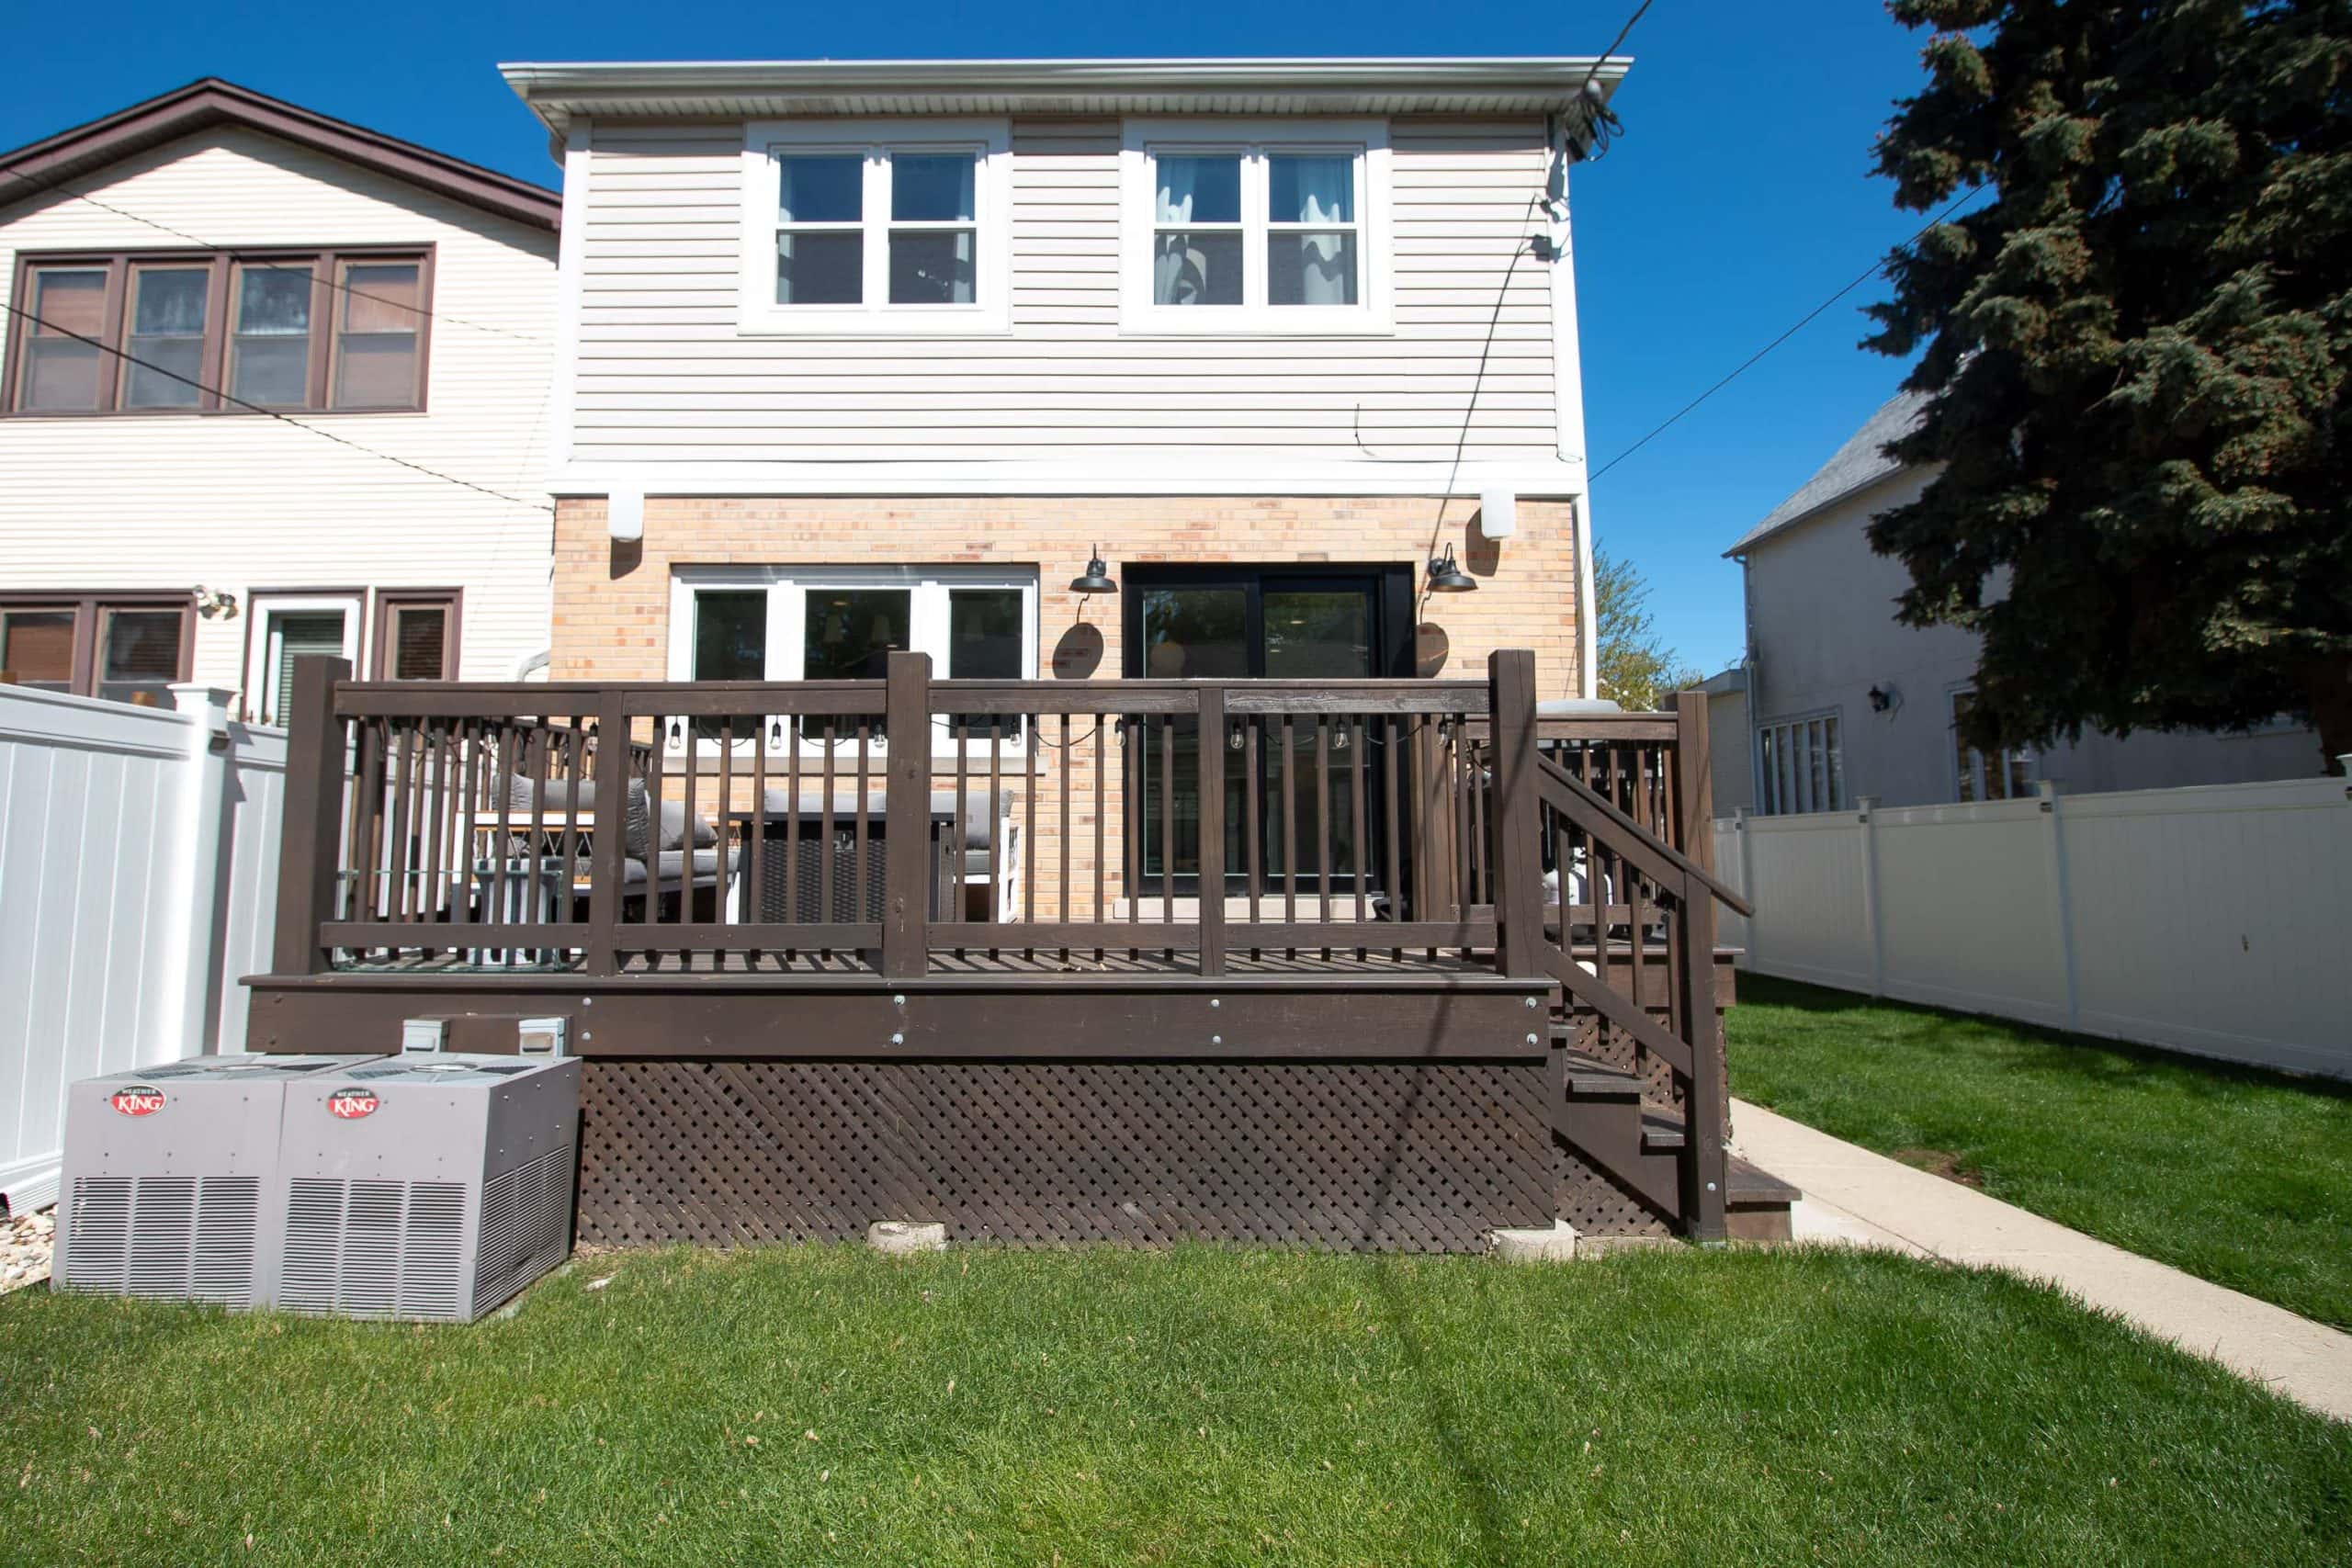
The above two photos give you a good sense of all that has changed with the new deck layout. I love it!
Deck Cost
This post is not sponsored by TimberTech, but they did provide the materials for this project. Without labor, the cost of the decking materials is about $9,000 including the deck boards, railing, cable rails, stairs, and installation hardware. I’m not sure how much it would have been if we went with traditional wood for this project, but I do know that lumber prices are at an all-time high. Plus, it’s pretty tough to even get your hands on lumber right now! Also, if you’re going with wood, you will need to calculate the cost of yearly maintenance and staining. For us, going with composite decking made the most sense.
What’s Left to Do?
Lots. Ha! I’d say the deck is about 75% there. We’re waiting on the railings to come in and once those arrive they can finish up the deck. (Building materials seem to be a bit delayed these days.) In the meantime, I’m hoping they can finish up the landscaping. We’re waiting on three more trees, lots of bushes, and stones for the rest of the space. I’m excited to see this backyard with some greenery and life to it!
Casey
Catch Up On Our Backyard Renovation
- Yardzen Design Plans
- Backyard Renovation Kickoff
- Backyard Renovation Progress (2 Weeks In)
- Our New A/C Units
- Deck Progress
- Painting the Garage Door
- How to Install String Lights
- Backyard To-Do List
- Backyard To-Do List: Progress
- How to Protect Teak Furniture
- Our New Outdoor TV
- Backyard Landscaping Details
- Our Outdoor Furniture
- The Big Backyard Reveal
- Backyard Renovation Lessons We Learned