How I Demoed Our Basement Bathroom Myself
I’m renovating our basement bathroom all by myself. Here’s how I removed the toilet, vanity, and some very stubborn bathroom tile to prepare it for my DIY tile installation.
Last week, I shared my design plan for our basement bathroom. The time has come to start to bring that space to life. First up? Demoing the existing bathroom. Even though it’s a small space (about 35 square feet), it was quite a task with all of the tile flooring.
But, I’m proud to say that I did it all by myself and I have the sore muscles and rough hands to prove it.
Our Condo Bathroom
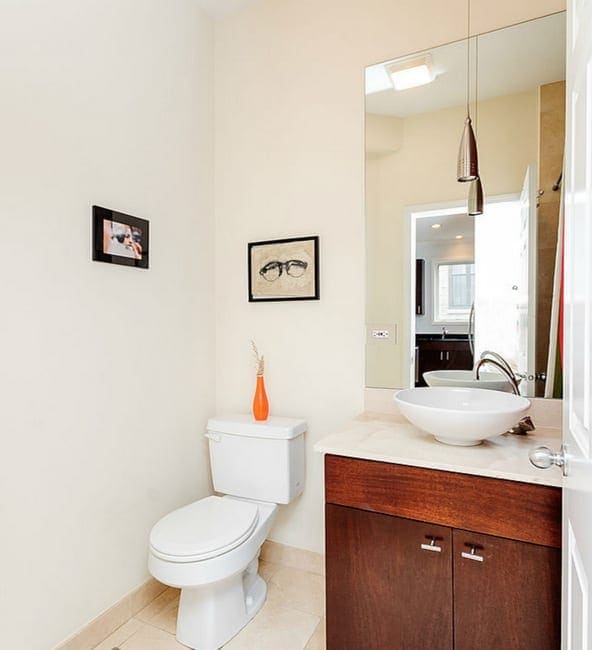

It’s been a few years since I’ve demoed a bathroom and worked hard to remove floor tiles. Back in 2018, Finn and I renovated the bathroom in our condo, ourselves. It was our first really big DIY project and we learned so much along the way.
Together, we demoed the entire space in a weekend and it was hard, backbreaking work. This time around, I wasn’t going to have Finn around to help me, since the guy has to work, so I made a plan to get it done myself.
Hiring out a demo can get expensive (here’s a breakdown of how much the demo of our mudroom cost us…yikes!), so I wanted to save on any labor costs here.
Here’s my step-by-step guide to removing a toilet, vanity, and an old tile floor along with a list of the necessary tools to get the job done.
How to Remove a Toilet
First up, getting the toilet outta there. Guys, this thing was gross. I have no idea how old it is, but it has seen better days. I was eager to get it the hell outta there. Removing a toilet isn’t difficult, but it can be a tad heavy. Here are my tips…
- Grab a drop cloth so you have somewhere to transport your toilet.
- Turn off the water by turning the knob all the way to the right.
- Flush the toilet to get rid of as much water from the tank as possible.
- Disconnect the water supply line from the toilet.
- Grab a wrench, take the toilet bolt covers off, and loosen up the nuts.
- With the nuts removed, lift the toilet straight up and off of the bolts.
That’s it! It’s not hard, but you will have some water still left in the bowl, so be careful about splashing that gross water. I’m hesitant to even share this picture with you (so scroll by quickly if you want), but here’s what the wax ring looked like underneath our toilet. It was old, gross, and disgusting. I was excited to get that thing off of there.
With the toilet gone, the sewer pipe will be exposed, so make sure you stuff in a rag or cover it with a bowl, as we did, to prevent those sewer gases from stinking up your house. Usually I would use a rag, but because this is the basement, it goes directly to the sewer line and the hole is huge! I didn’t want a rag to fall down in there and get stuck. So the bowl was a good idea for us!
How to Remove a Vanity
With the toilet off, the next step was to remove the vanity. Again, it’s not difficult at all. It just takes a few steps.
- Turn off the hot and cold water lines by turning the knobs all the way to the right.
- Disconnect each water line from the faucet.
- Disconnect the pipe from the wall to the sink.
- Most vanities are attached, via screws, in the back of the cabinet. Unscrew these to loosen the vanity from the wall.
- Use a utility knife to score the caulk on your countertop.
- Tug and pull to get the vanity off of the wall.
With the vanity away from the wall, I got it onto a drop cloth and I was able to pull the drop cloth to get it out the door. I did have to enlist Finn to help me get the vanity to the alley (where it was picked up by a garbage picker, hooray!), but other than that, this was doable, solo.
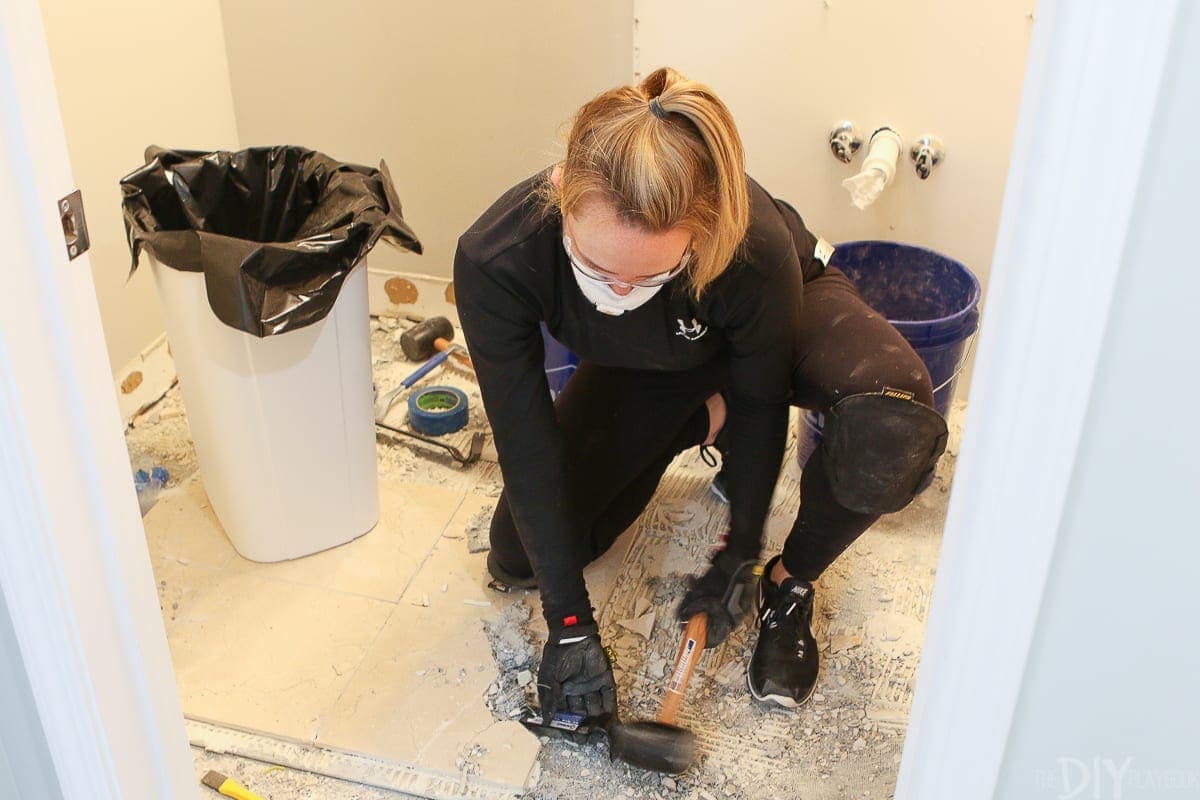
Tips to Remove Floor Tile
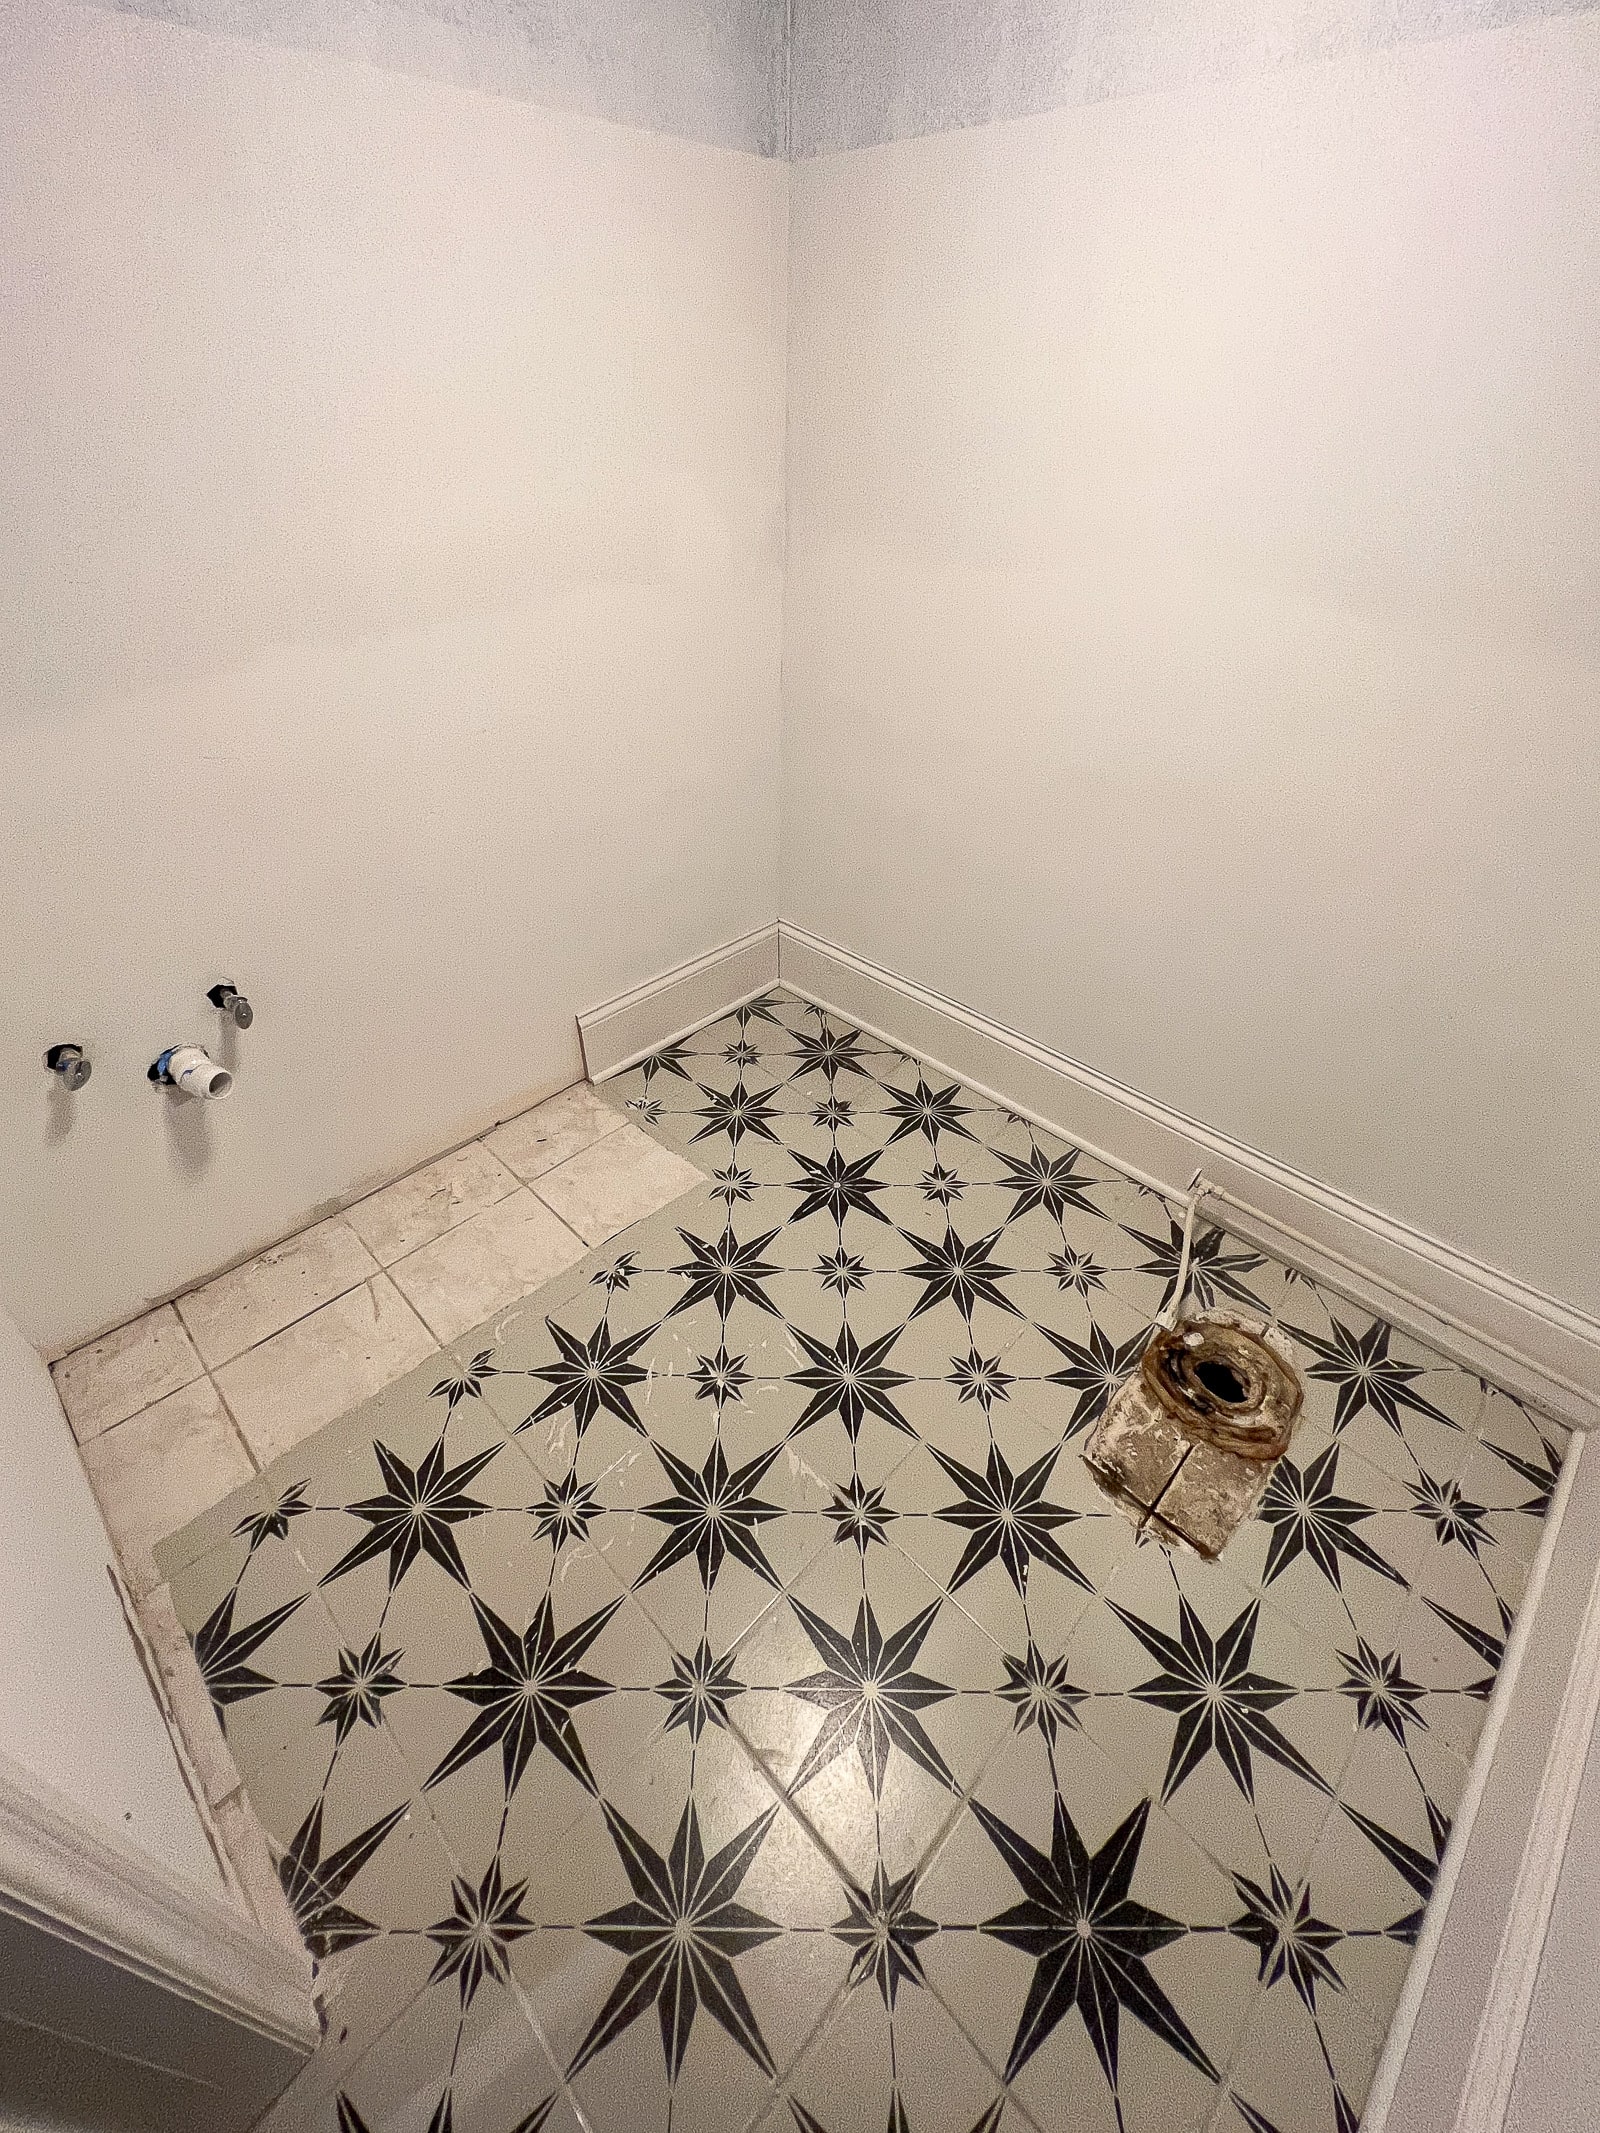
Okay, onto my saga to remove floor tile in this space. The toilet and the vanity were quick demo projects. Maybe 1-2 hours tops. The tile removal project was another story, completely. This took me about a full day of backbreaking work to complete. Let’s get to the goods…
Take Safety Precautions

You want to protect yourself when you’re smashing things to bits, so wear eye protection, ear protection, a face mask, close-toed shoes, long-sleeved shirts, pants, and work gloves. At first, I wore regular safety glasses, but I quickly switched to ski goggles (Use what you got, right?!) because they offered better coverage. You want the right tools for the job, especially safety goggles!
Oh, and here’s my NUMBER ONE tool when it comes to removing floor tile. Get some knee pads!! Holy moly, these are an absolute must! It brought me back to my junior high volleyball days, but they were so necessary to remove floor tile. You’re kneeling on a concrete floor for hours and it’s impossible without knee pads. Not to mention, there are shards of tile, debris, and broken pieces everywhere.
My Technique
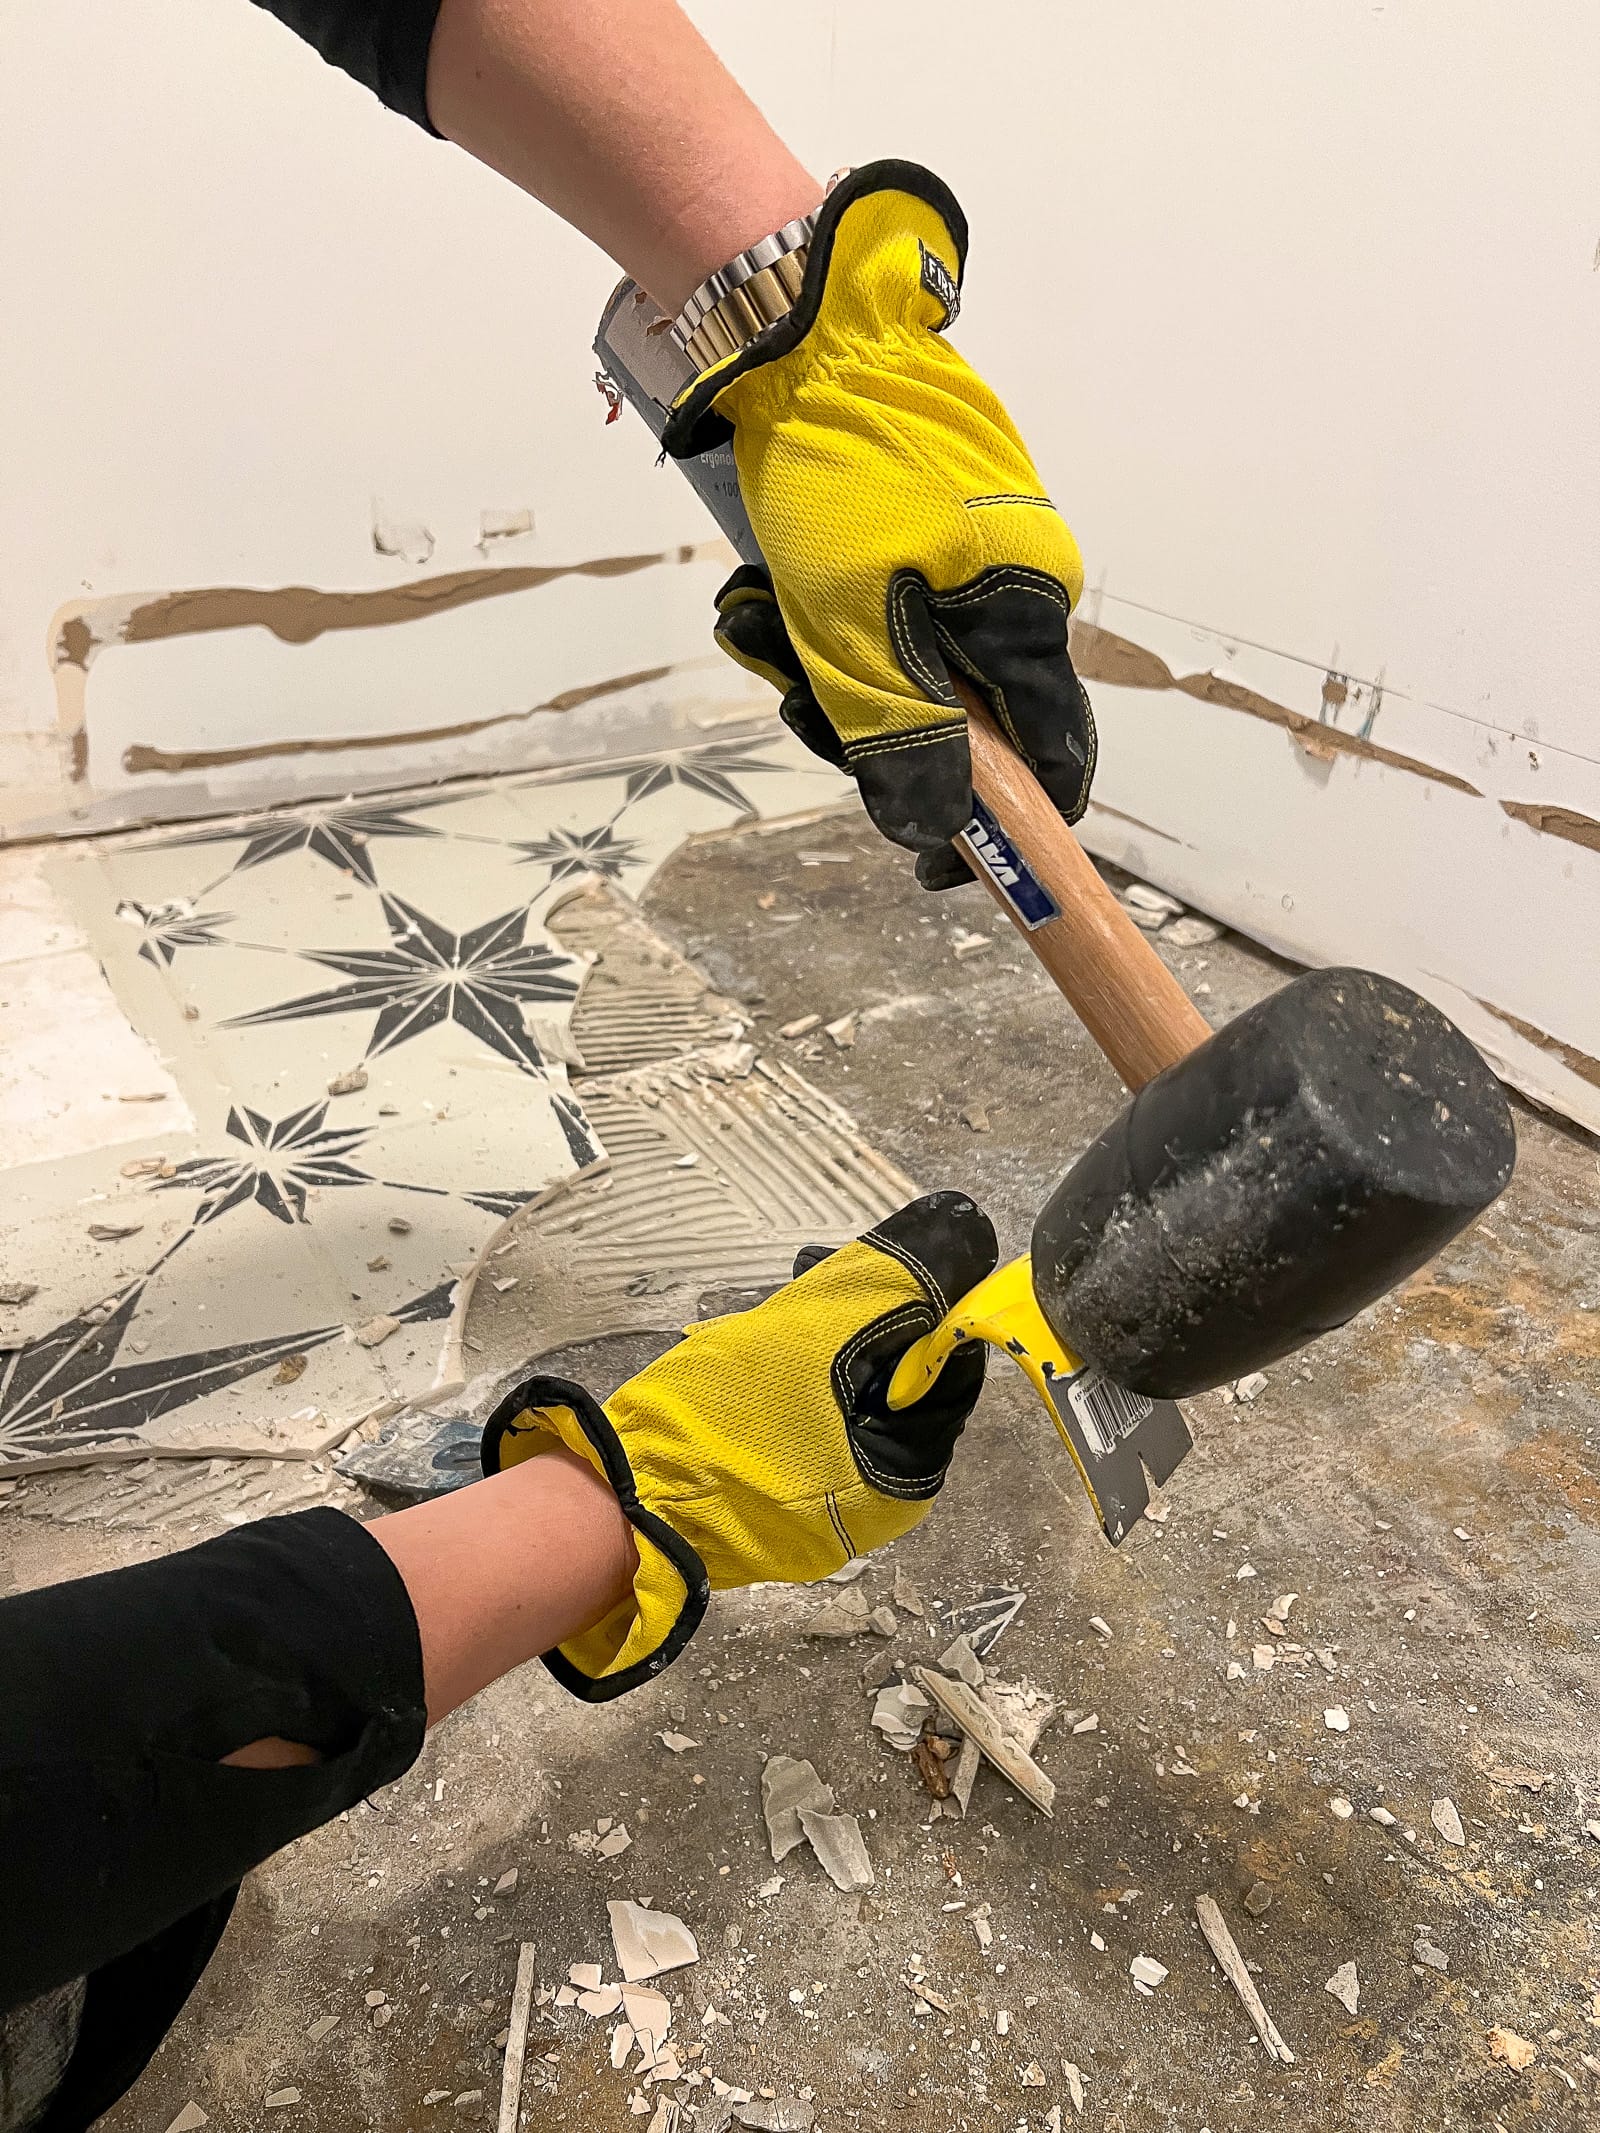
These large format porcelain tiles were fairly easy to remove – for the most part, at least. I would take a crowbar and wedge it under the tile, and then tap the top with a mallet to get under there to remove tiles.
I was thrilled to discover that most of the tiles were coming up easily, thin-set mortar and all. I got through 60% of the bathroom in about an hour with just hand tools like the pry bar! Hooray!

But then, I got to the other side of the room and I needed some power tools for the remaining tiles.
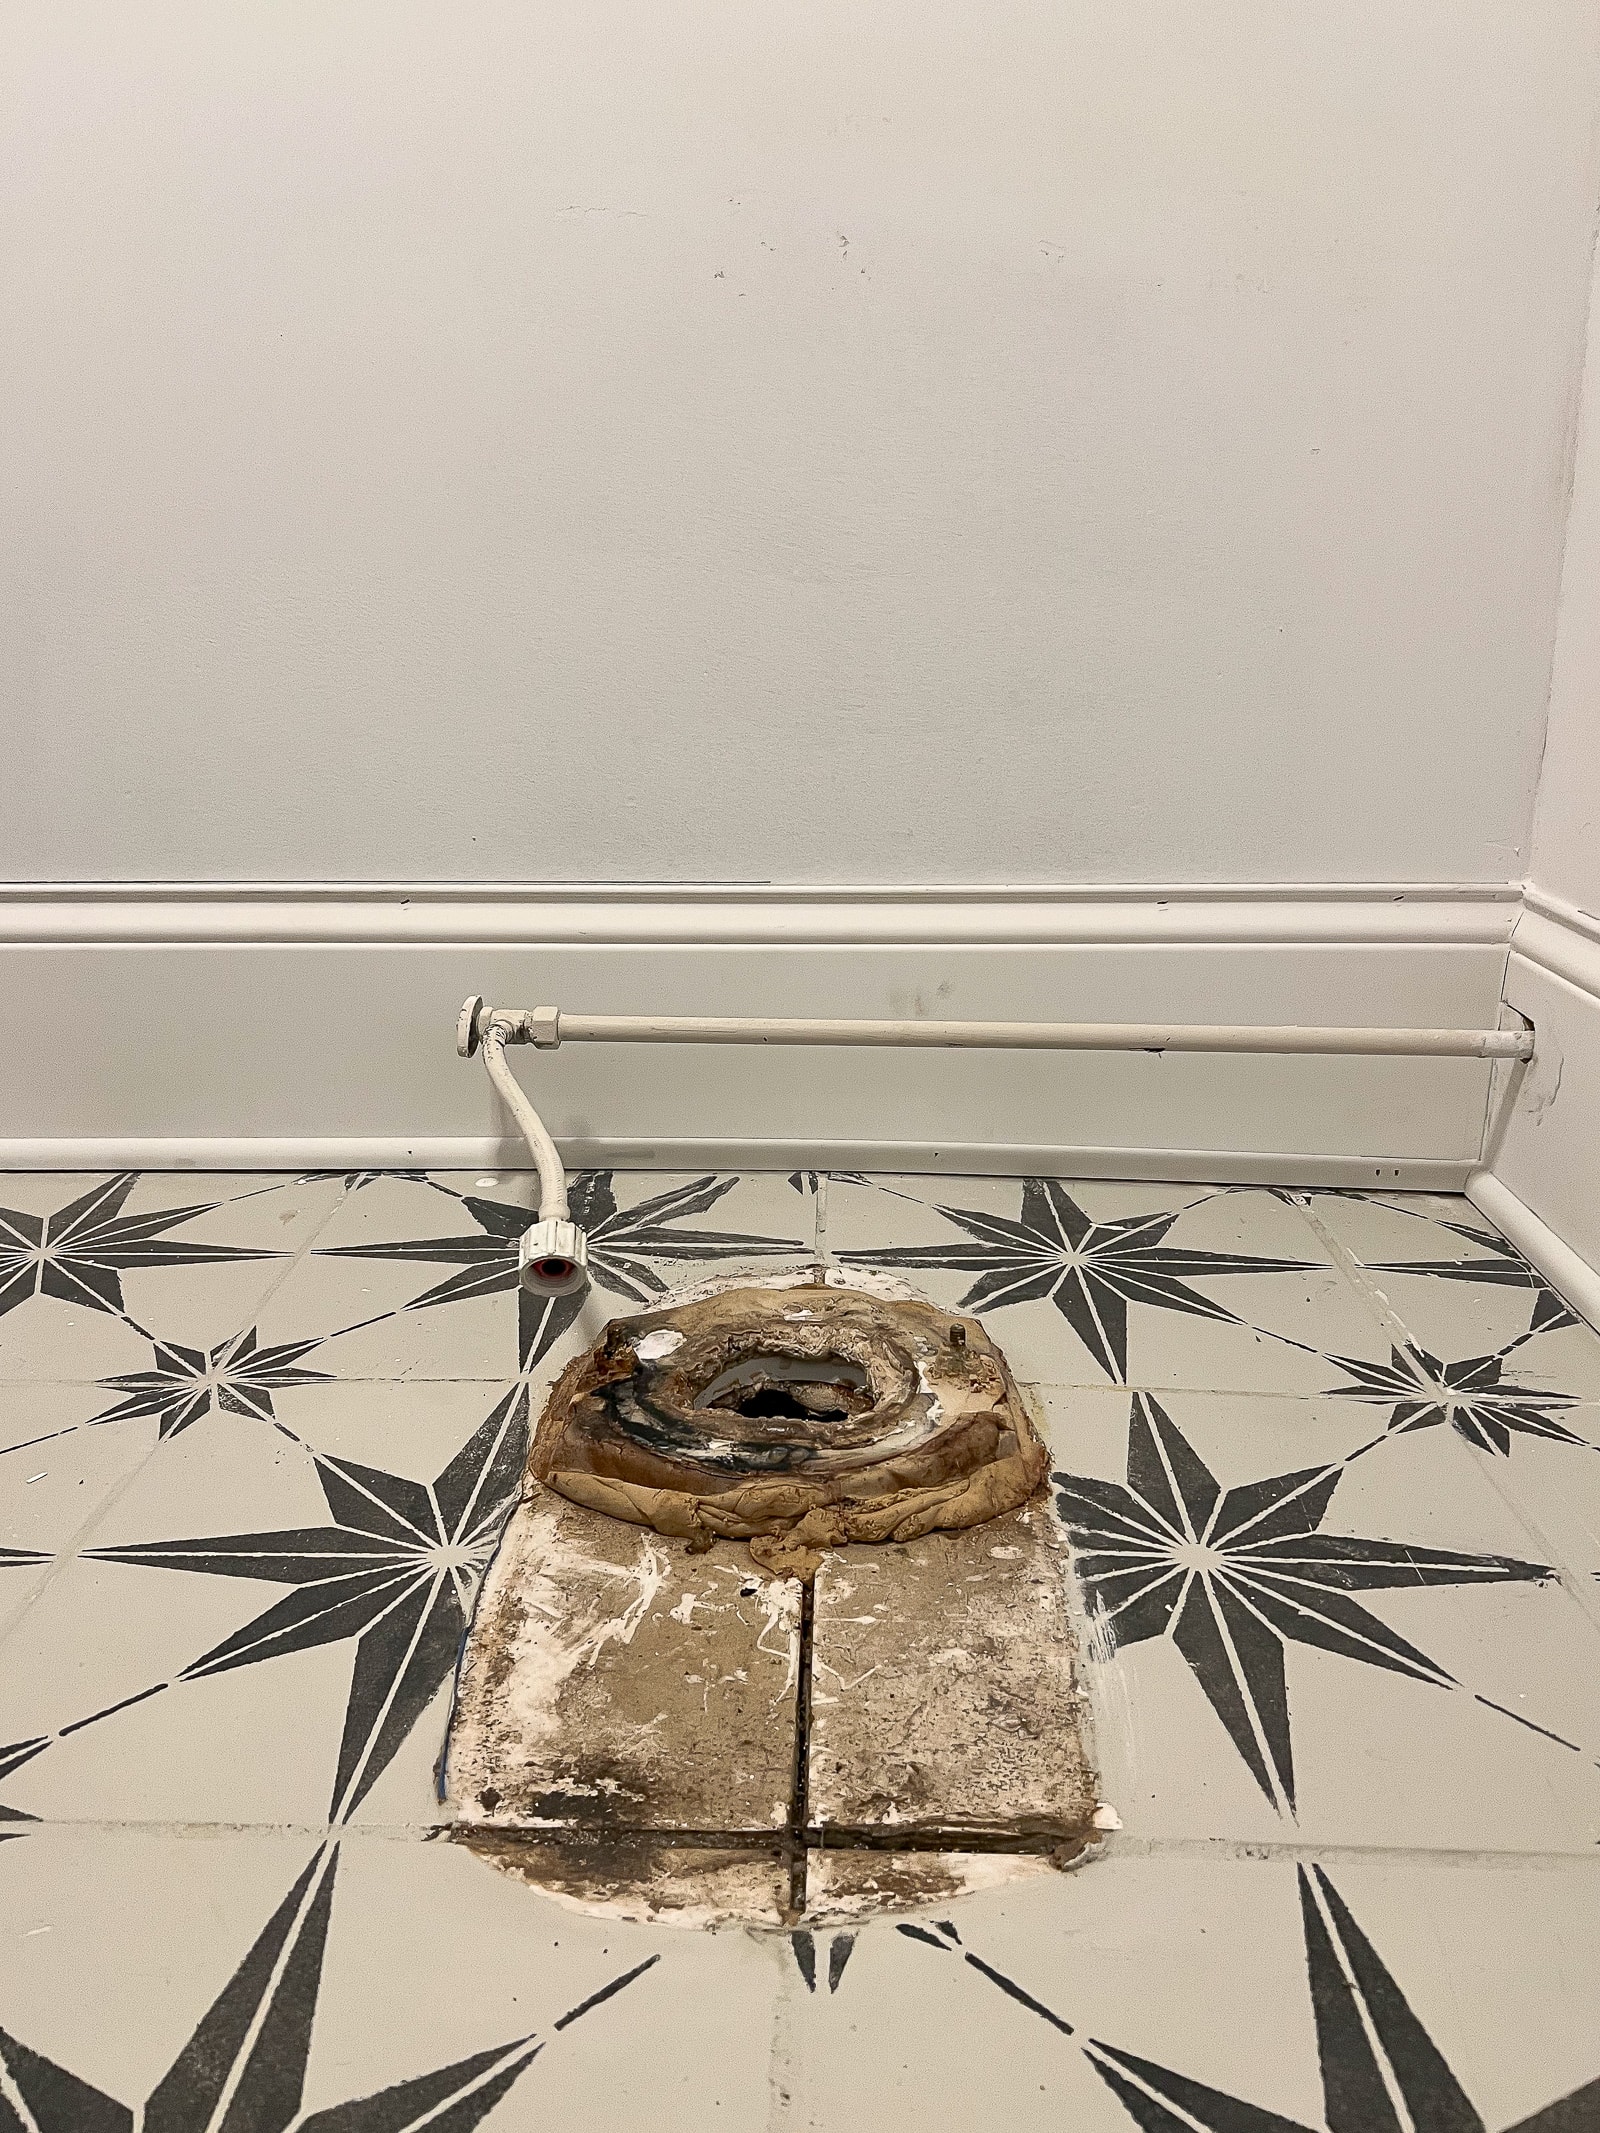
A Stubborn Area


Near the old vanity, the installers decided to use a boatload of thinset and mastic for the tiles. Like layers and layers of it underneath the existing tile. This made it so difficult to get the tiles up. You want your floor to be as clear as possible, without any tile or thinset on it, before installing new flooring.
I worked on a tiny portion for hours trying to get the thinset off. Nope.
Renting a Heavy-Duty Demo Hammer
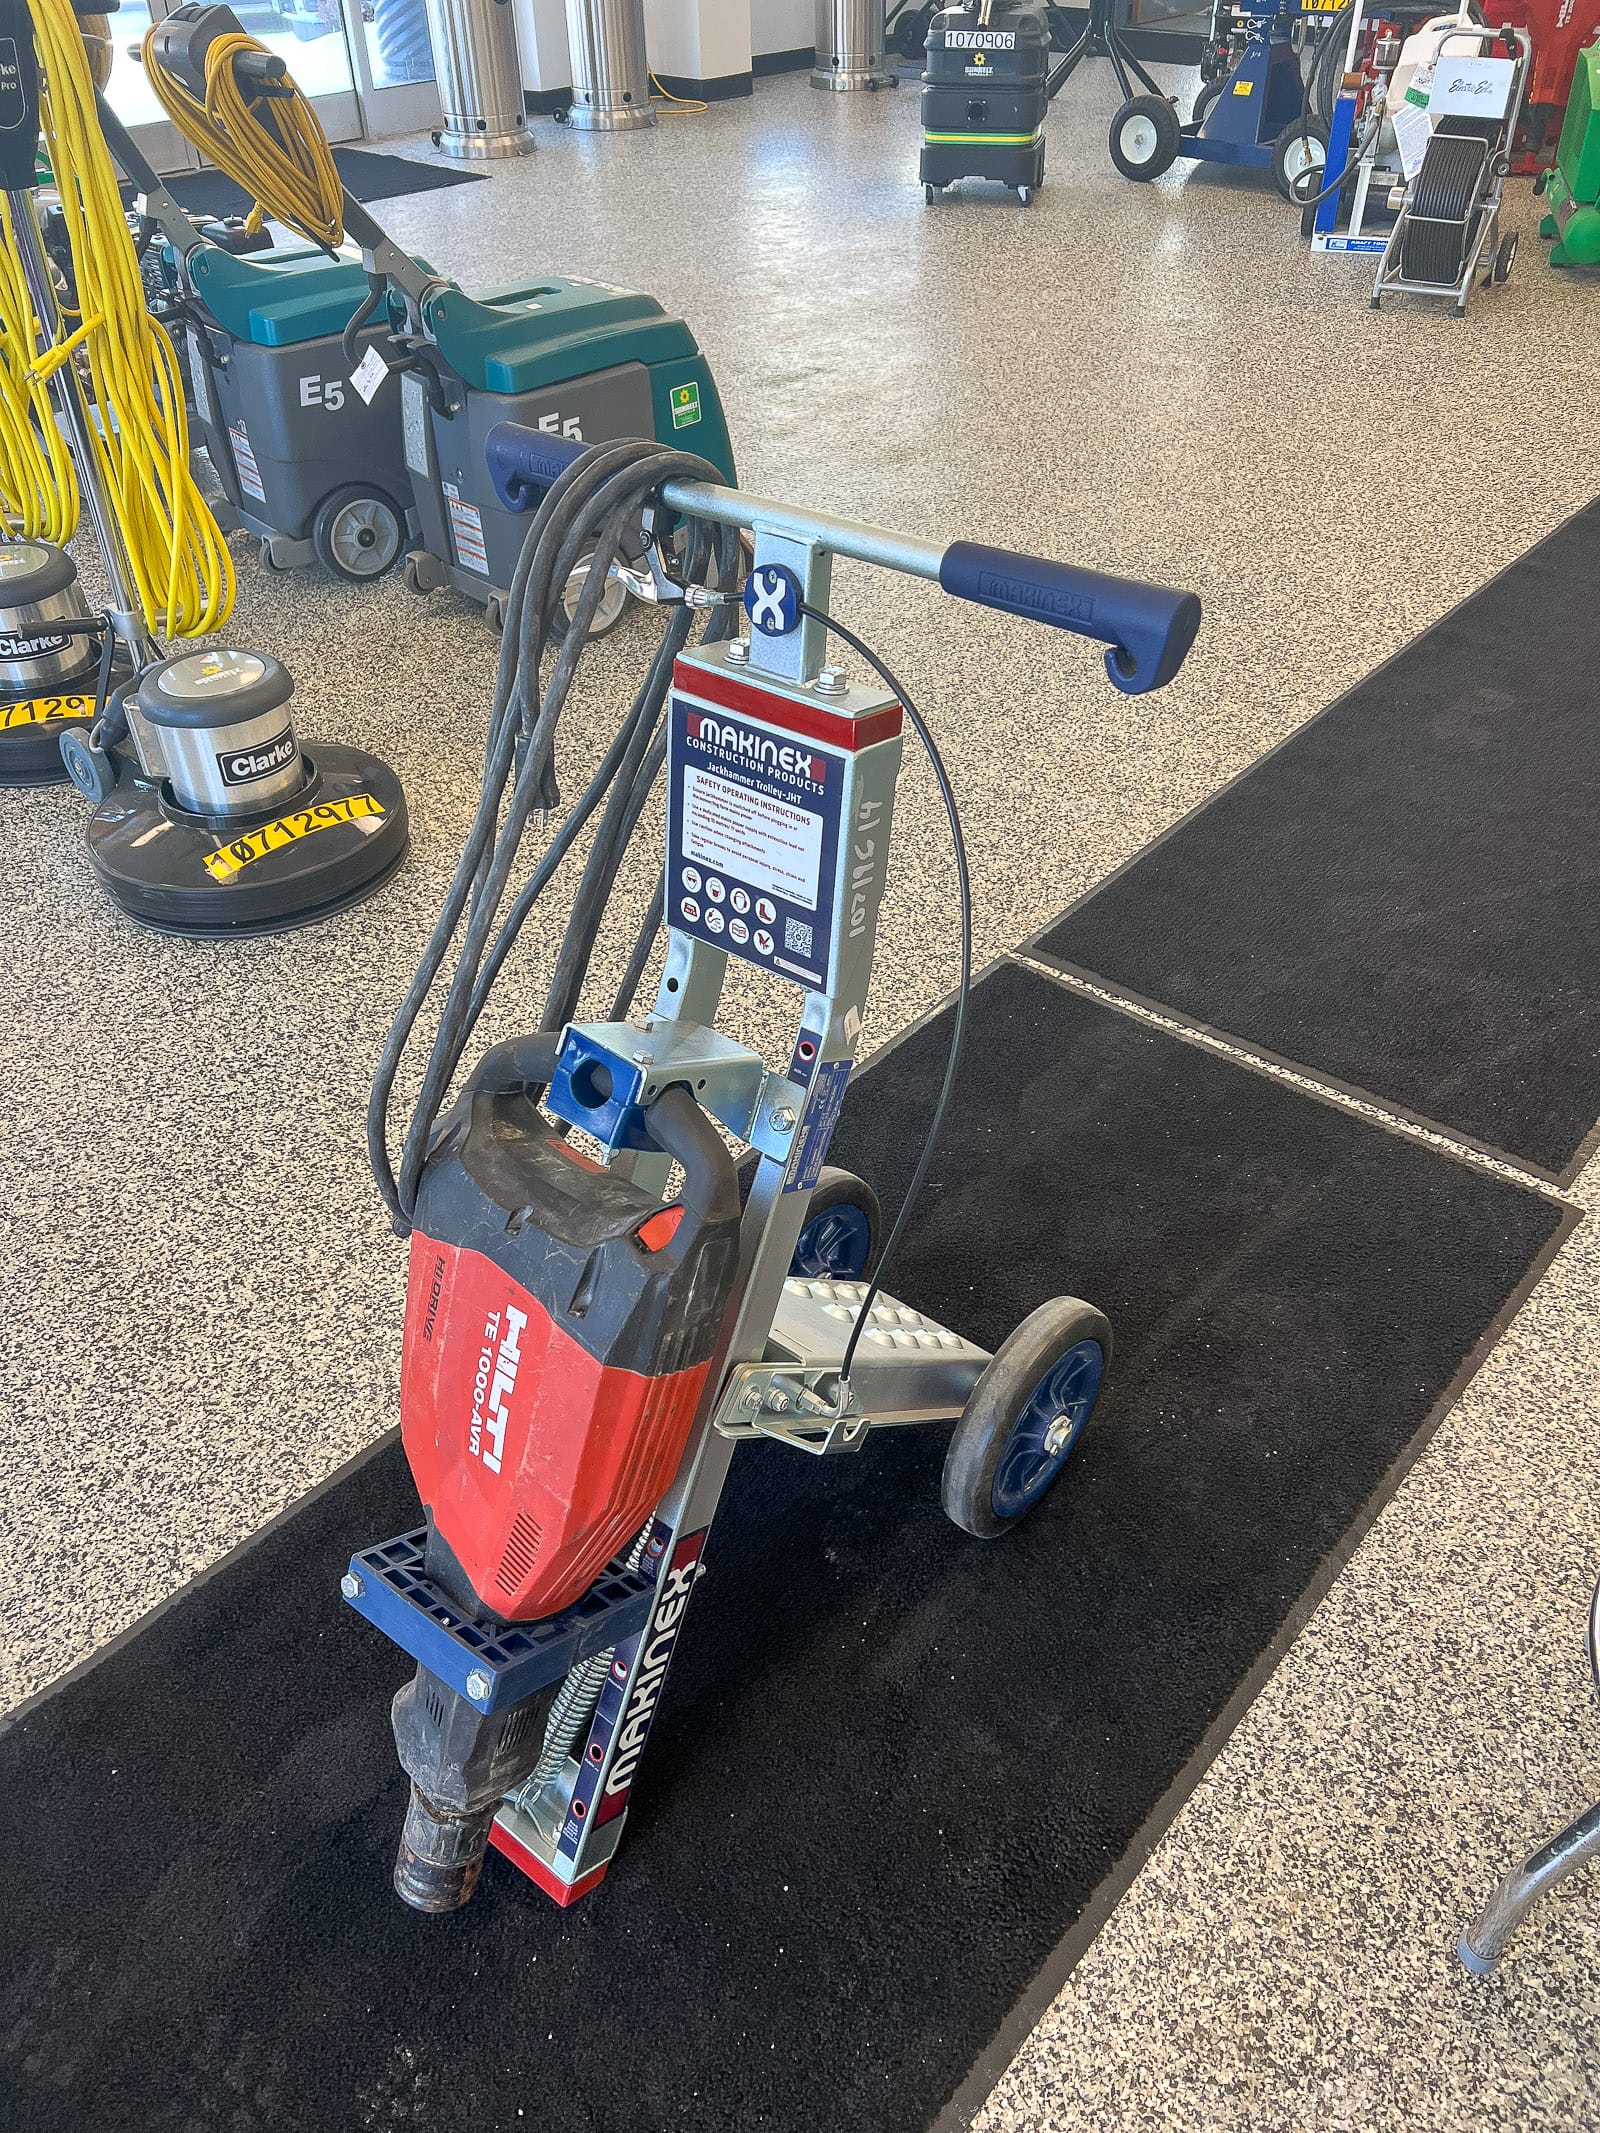
On demo day, I was already heading to Sunbelt Rentals to pick up my wet saw for the second half of this project, and I decided to add a demo hammer to my order. I thought it would be kind of like a handheld hammer with a chisel attachement on the end to help get the thinset and old grout up. When I arrived at the store, I was shocked. The demo hammer was HUGE!
I told the rental specialists that this was just way too much for my small project. Luckily, they walked me through how to use it and said this hammer drill (that you use on the stand) is actually a lot safer and easier to use than a handheld one.
They gave me the confidence to give it a try and I loaded up both my wet saw and this big bad boy into my car. I was hopeful that this would be the best approach for my DIY tile removal project.
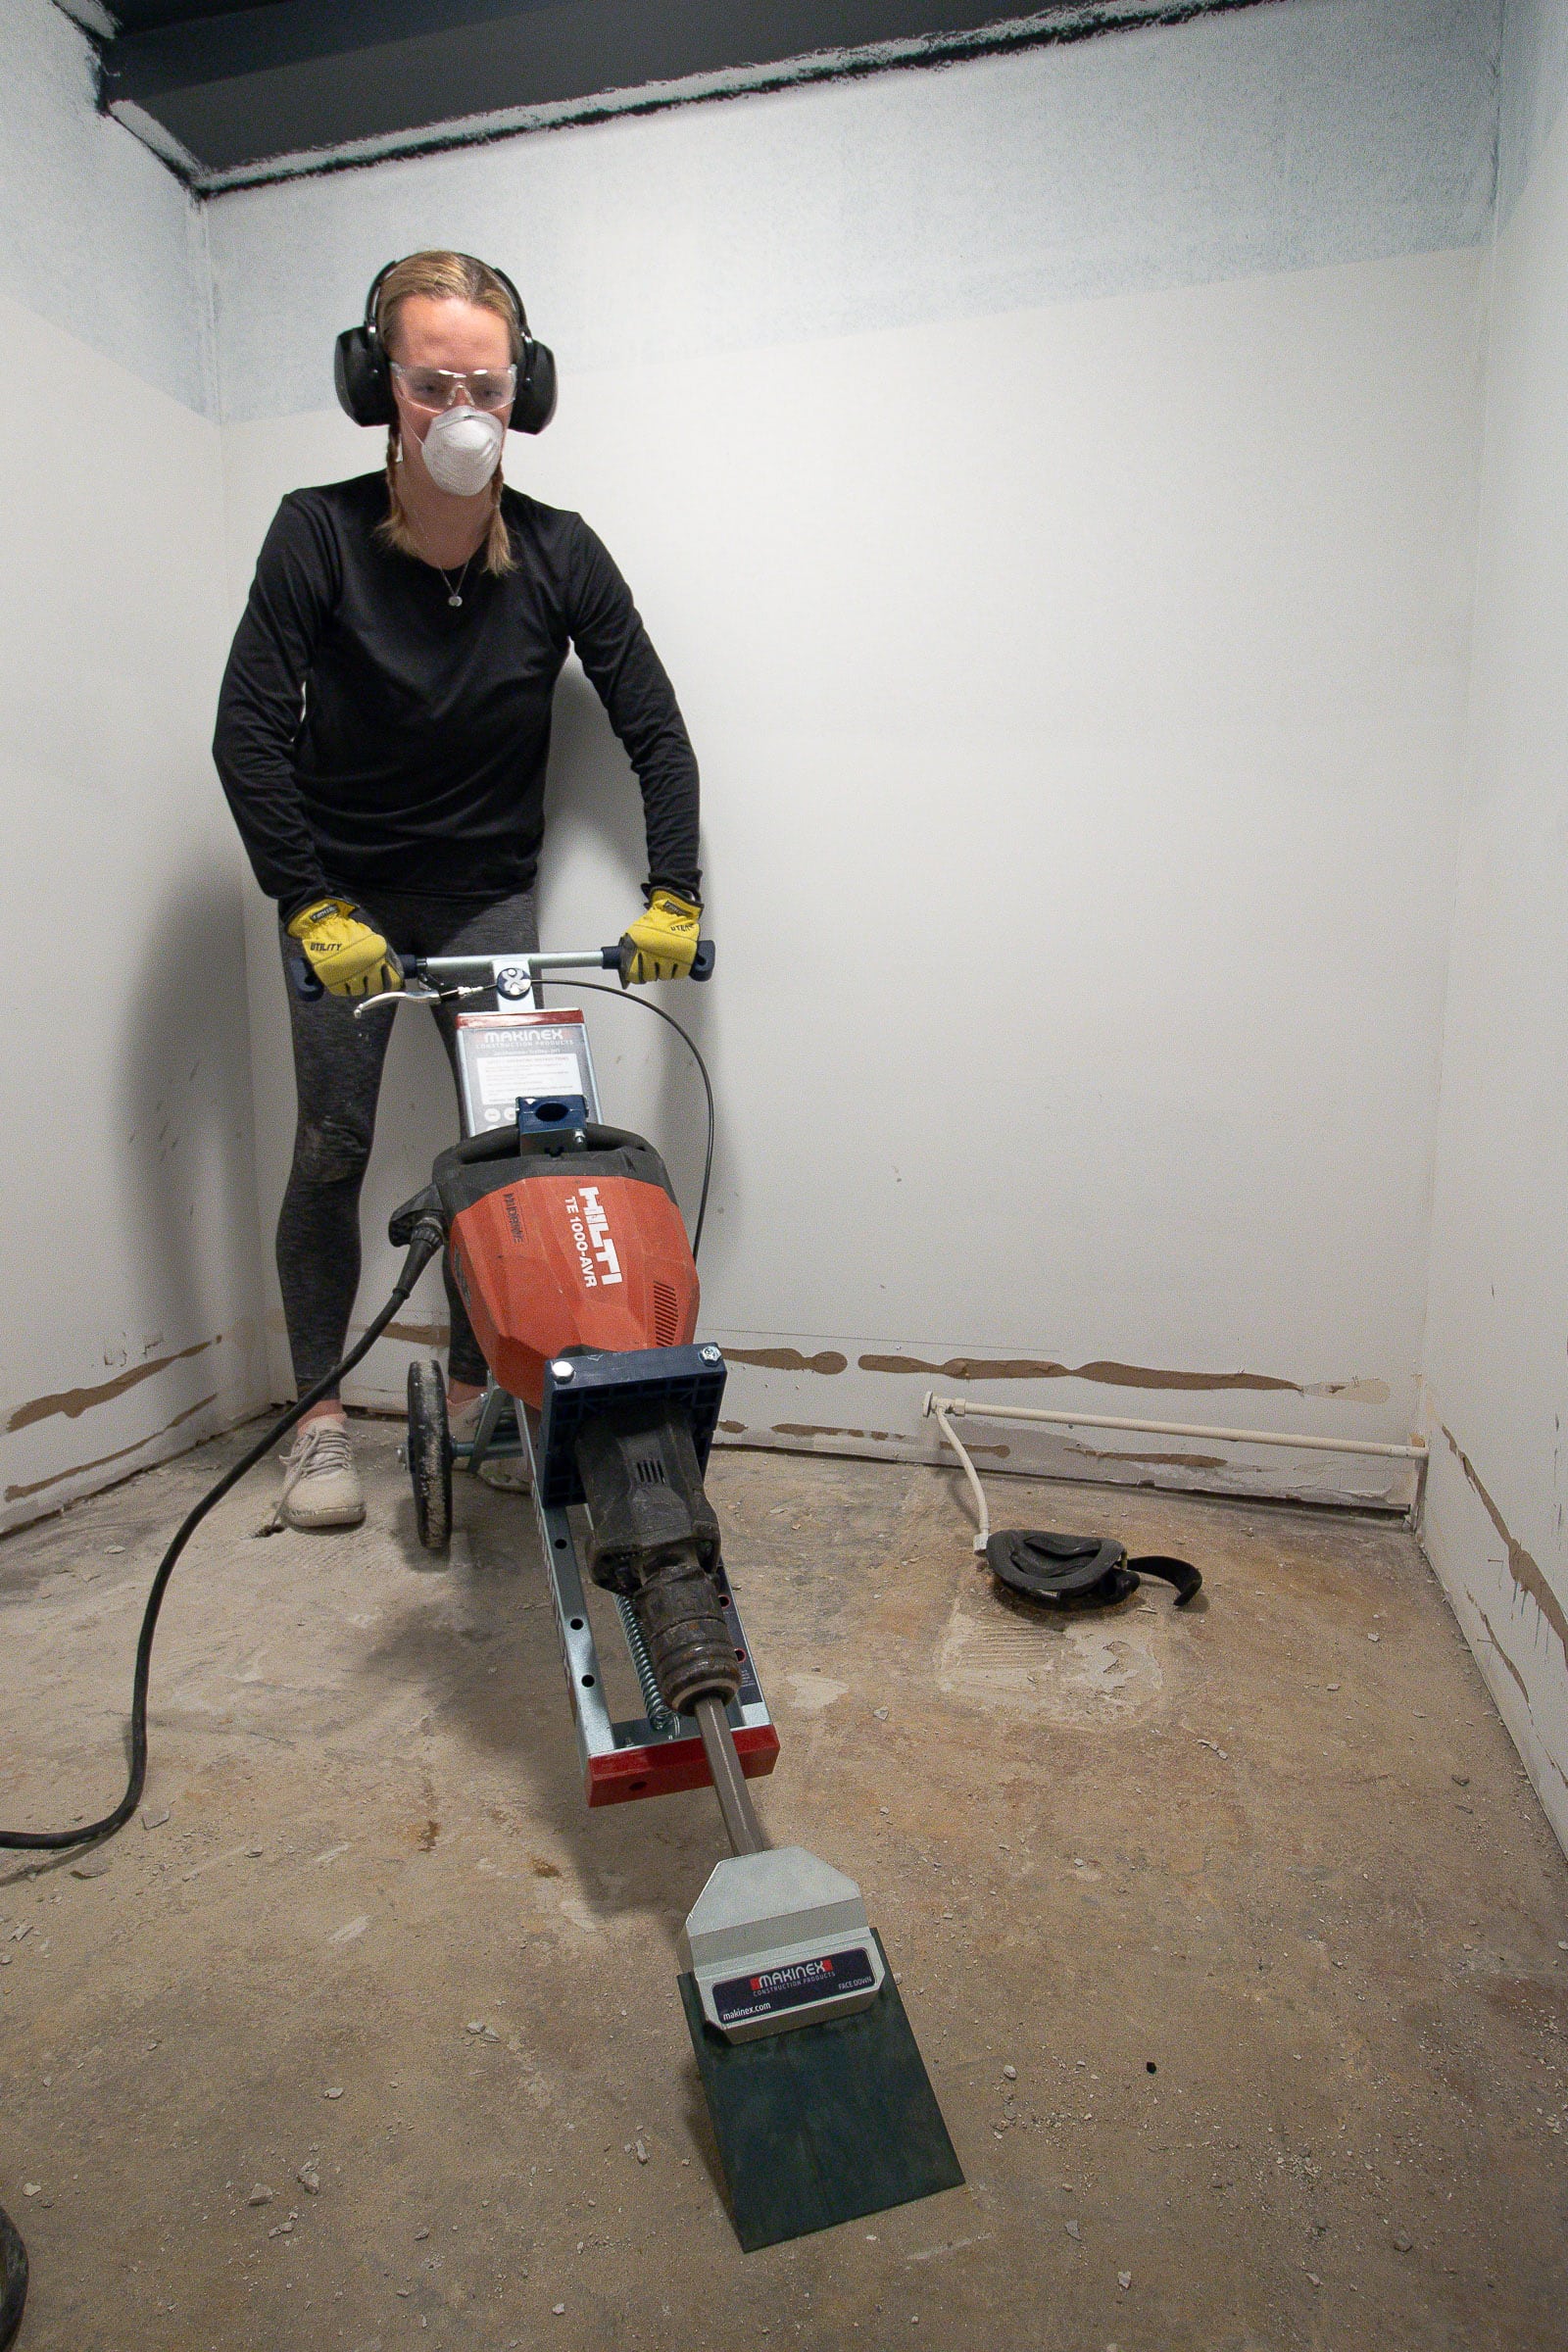
When I got home, I put the demo hammer to use and it worked like a charm to get the stubborn thinset off. It likely saved me hours of work, chipping away at the stubborn thinset with my crowbar. Heck yes! You just plug it in, set the angle of the blade, and slowly go over the area. It uses force to get underneath and scrape it from the ground. It can be tough to use in tight spaces, but if I can make it work in this bathroom, then anyone can use it!
Finding a Hole?!
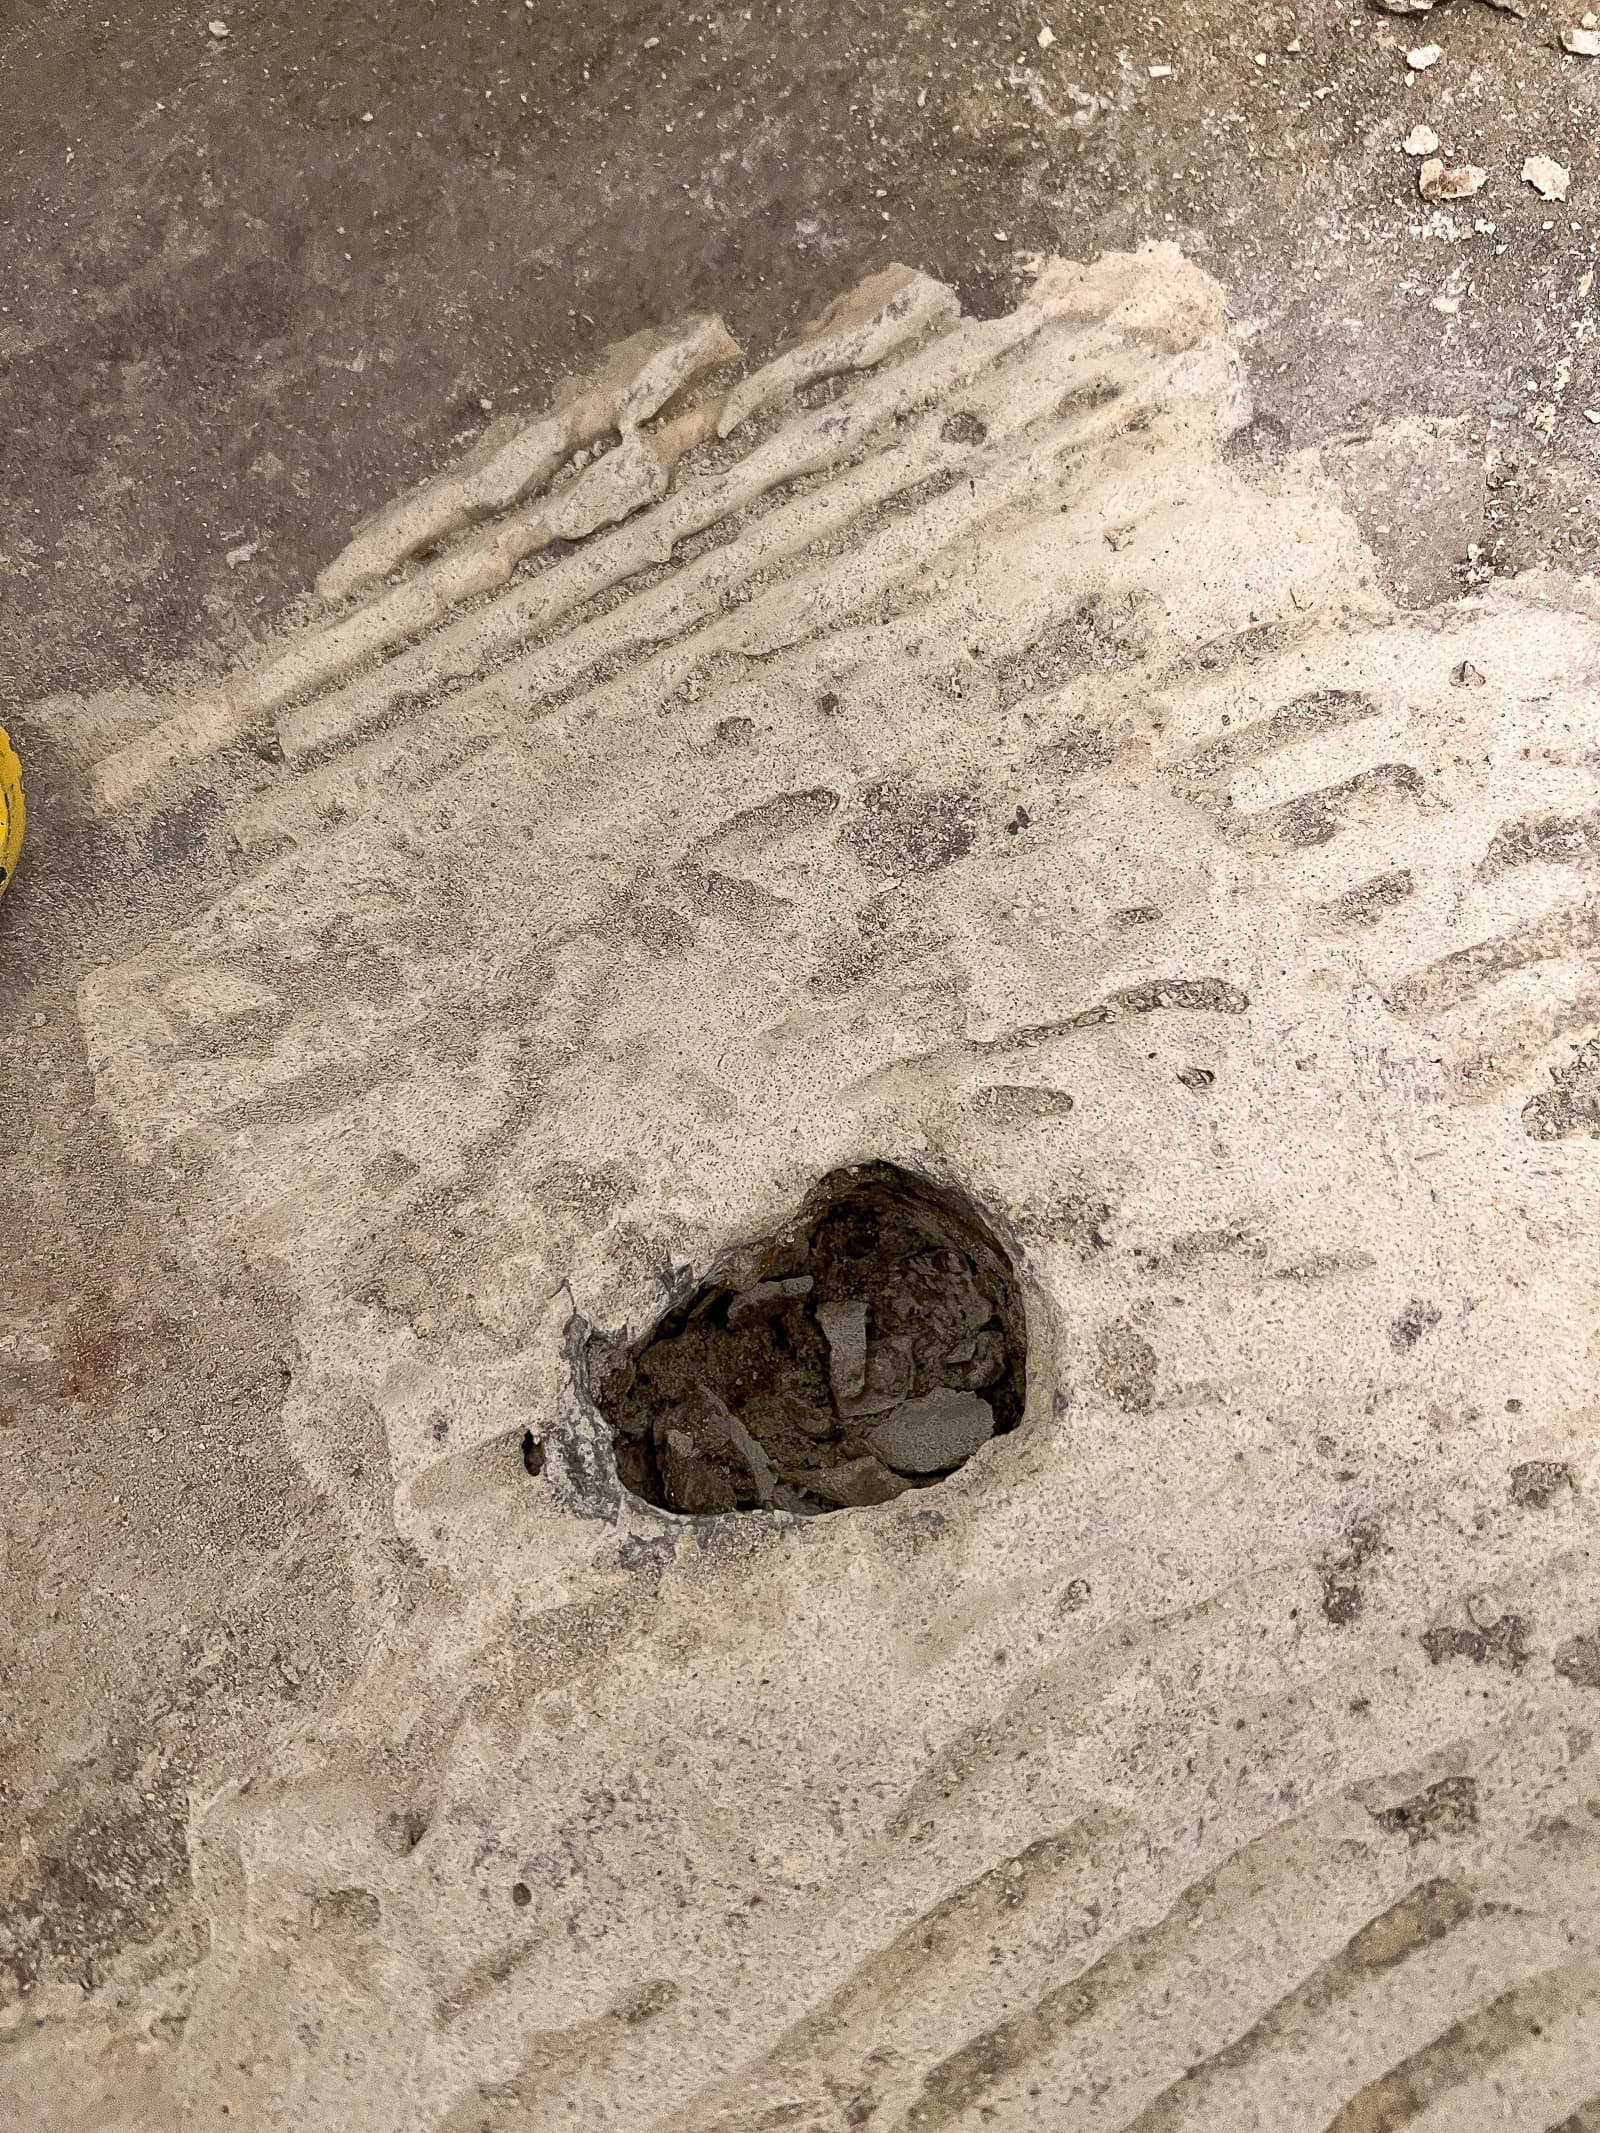
With the thinset mostly gone, I realized why the original installers had used so much in the first place. They were covering a hole in the floor! At first, I was very alarmed. I thought, “Why is there a hole in my bathroom floor and the foundation of our home?” I called my plumber, showed him the hole, and he said it was likely a very old pipe that was no longer needed and they cut it off and covered it up. He gave me the green light to go ahead and cement over it. I’ll show you how I did that with the proper tools on Friday…
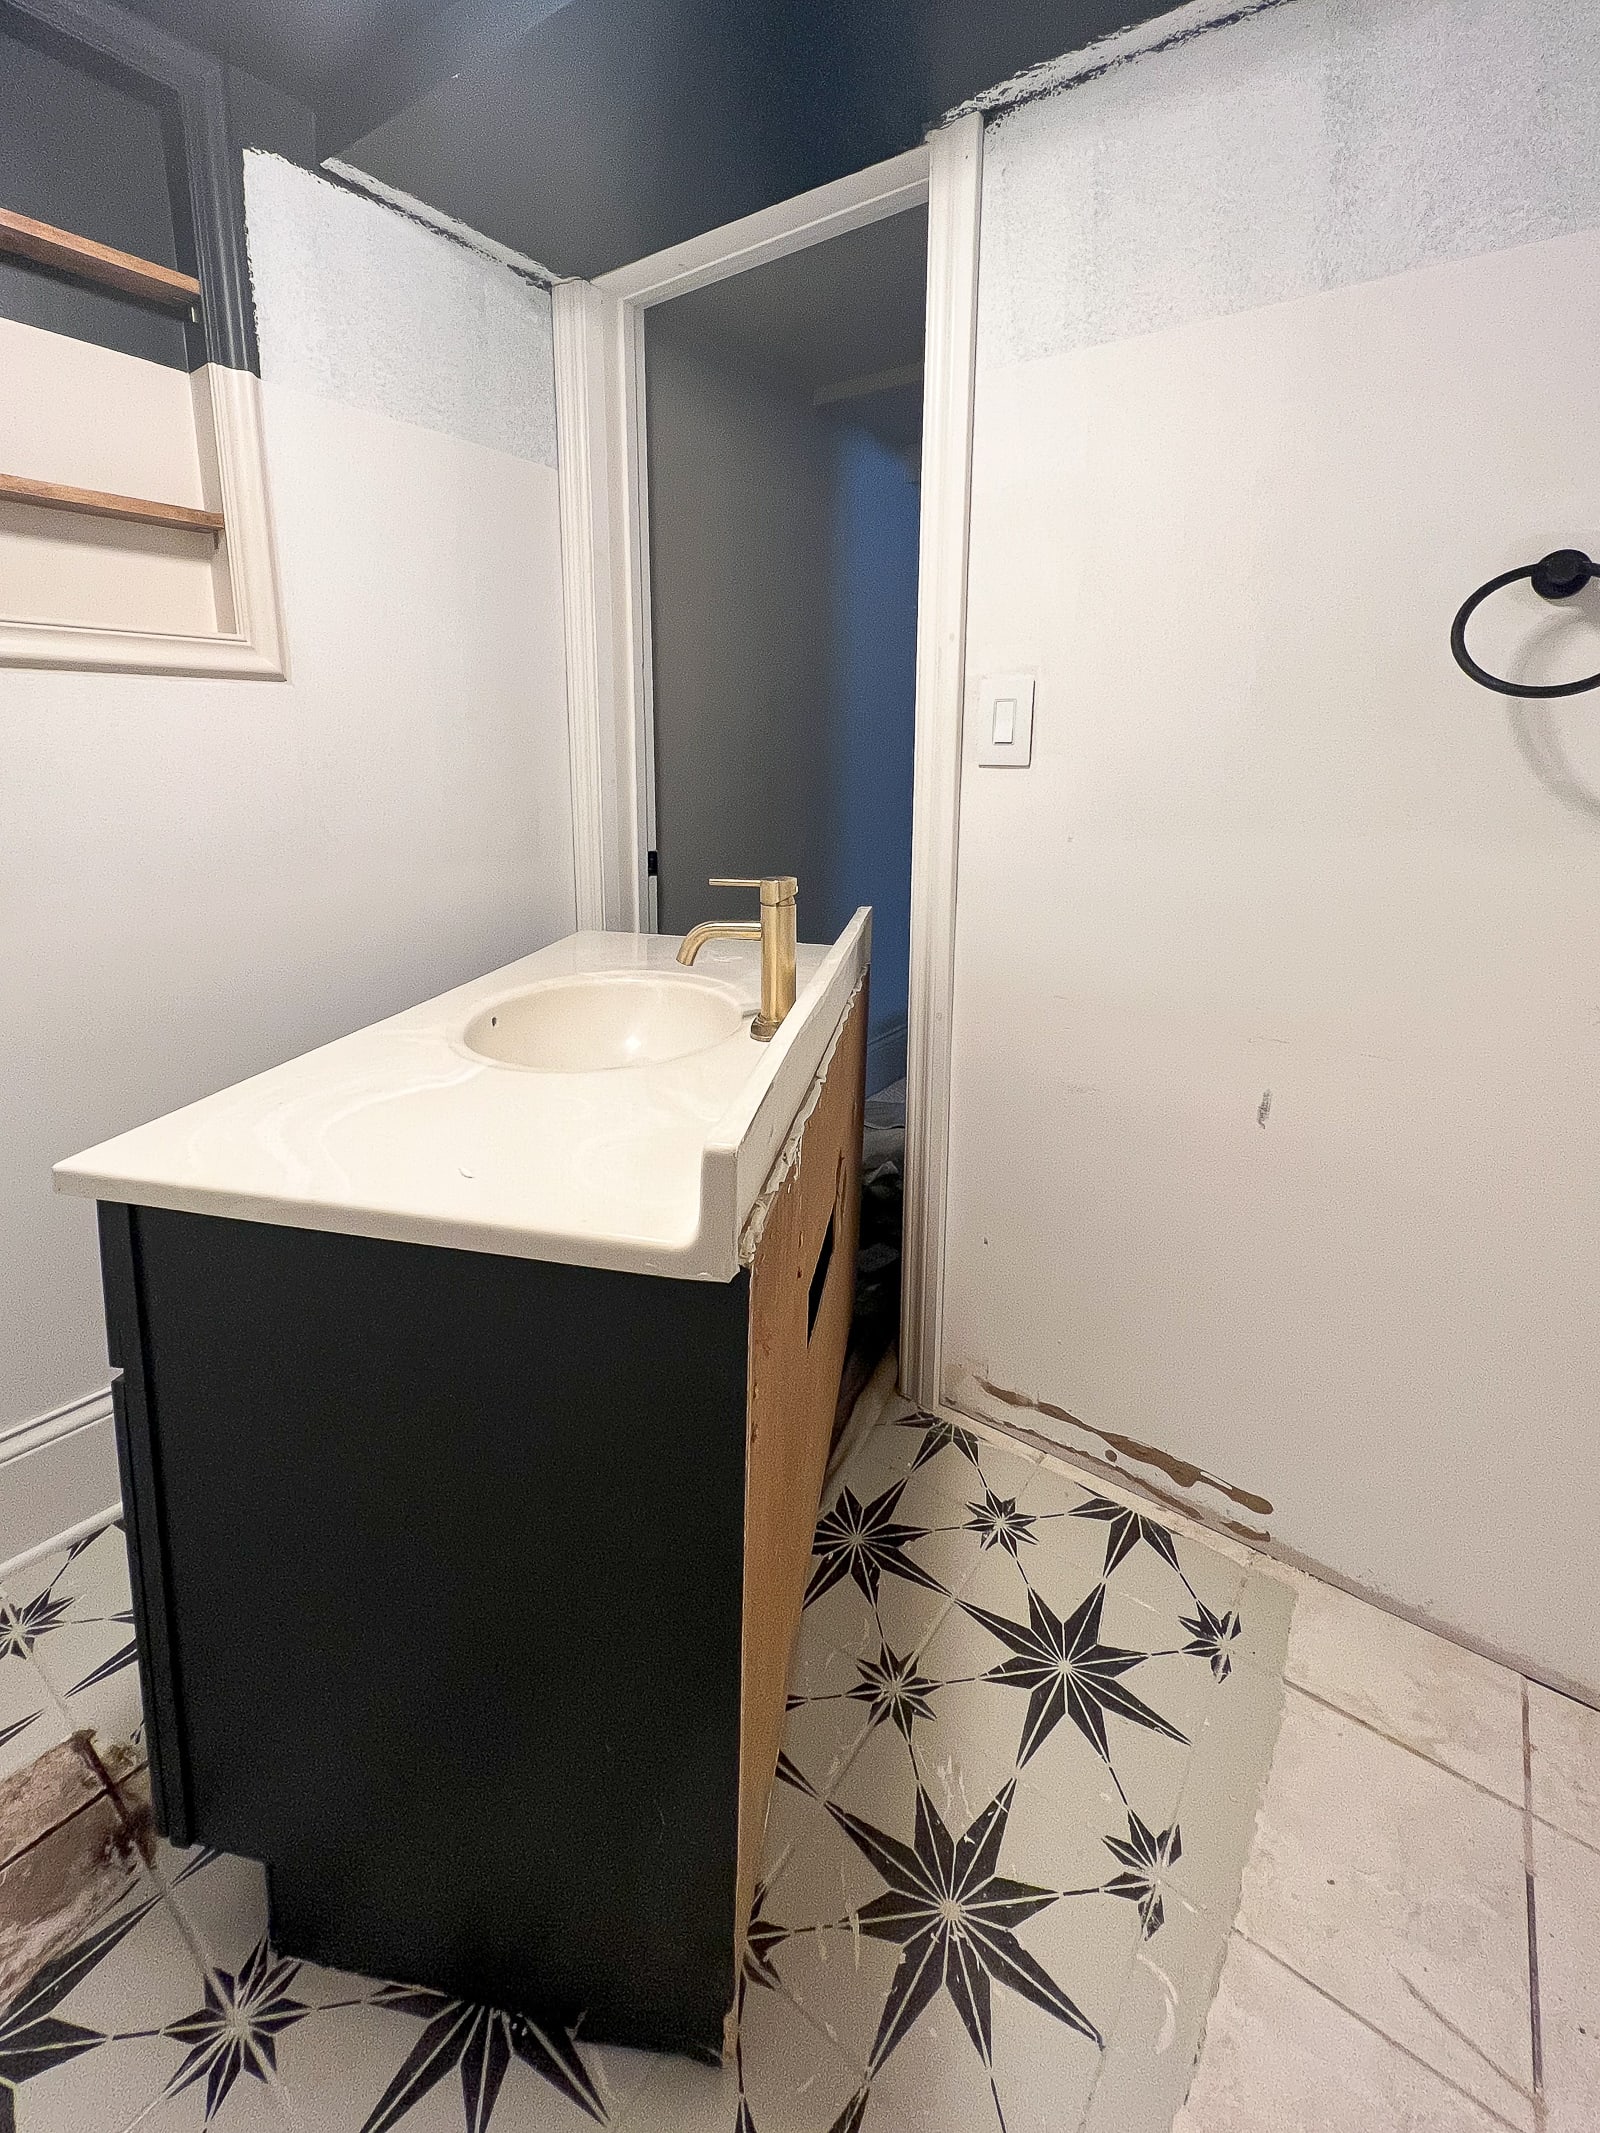
Our Bathroom Now
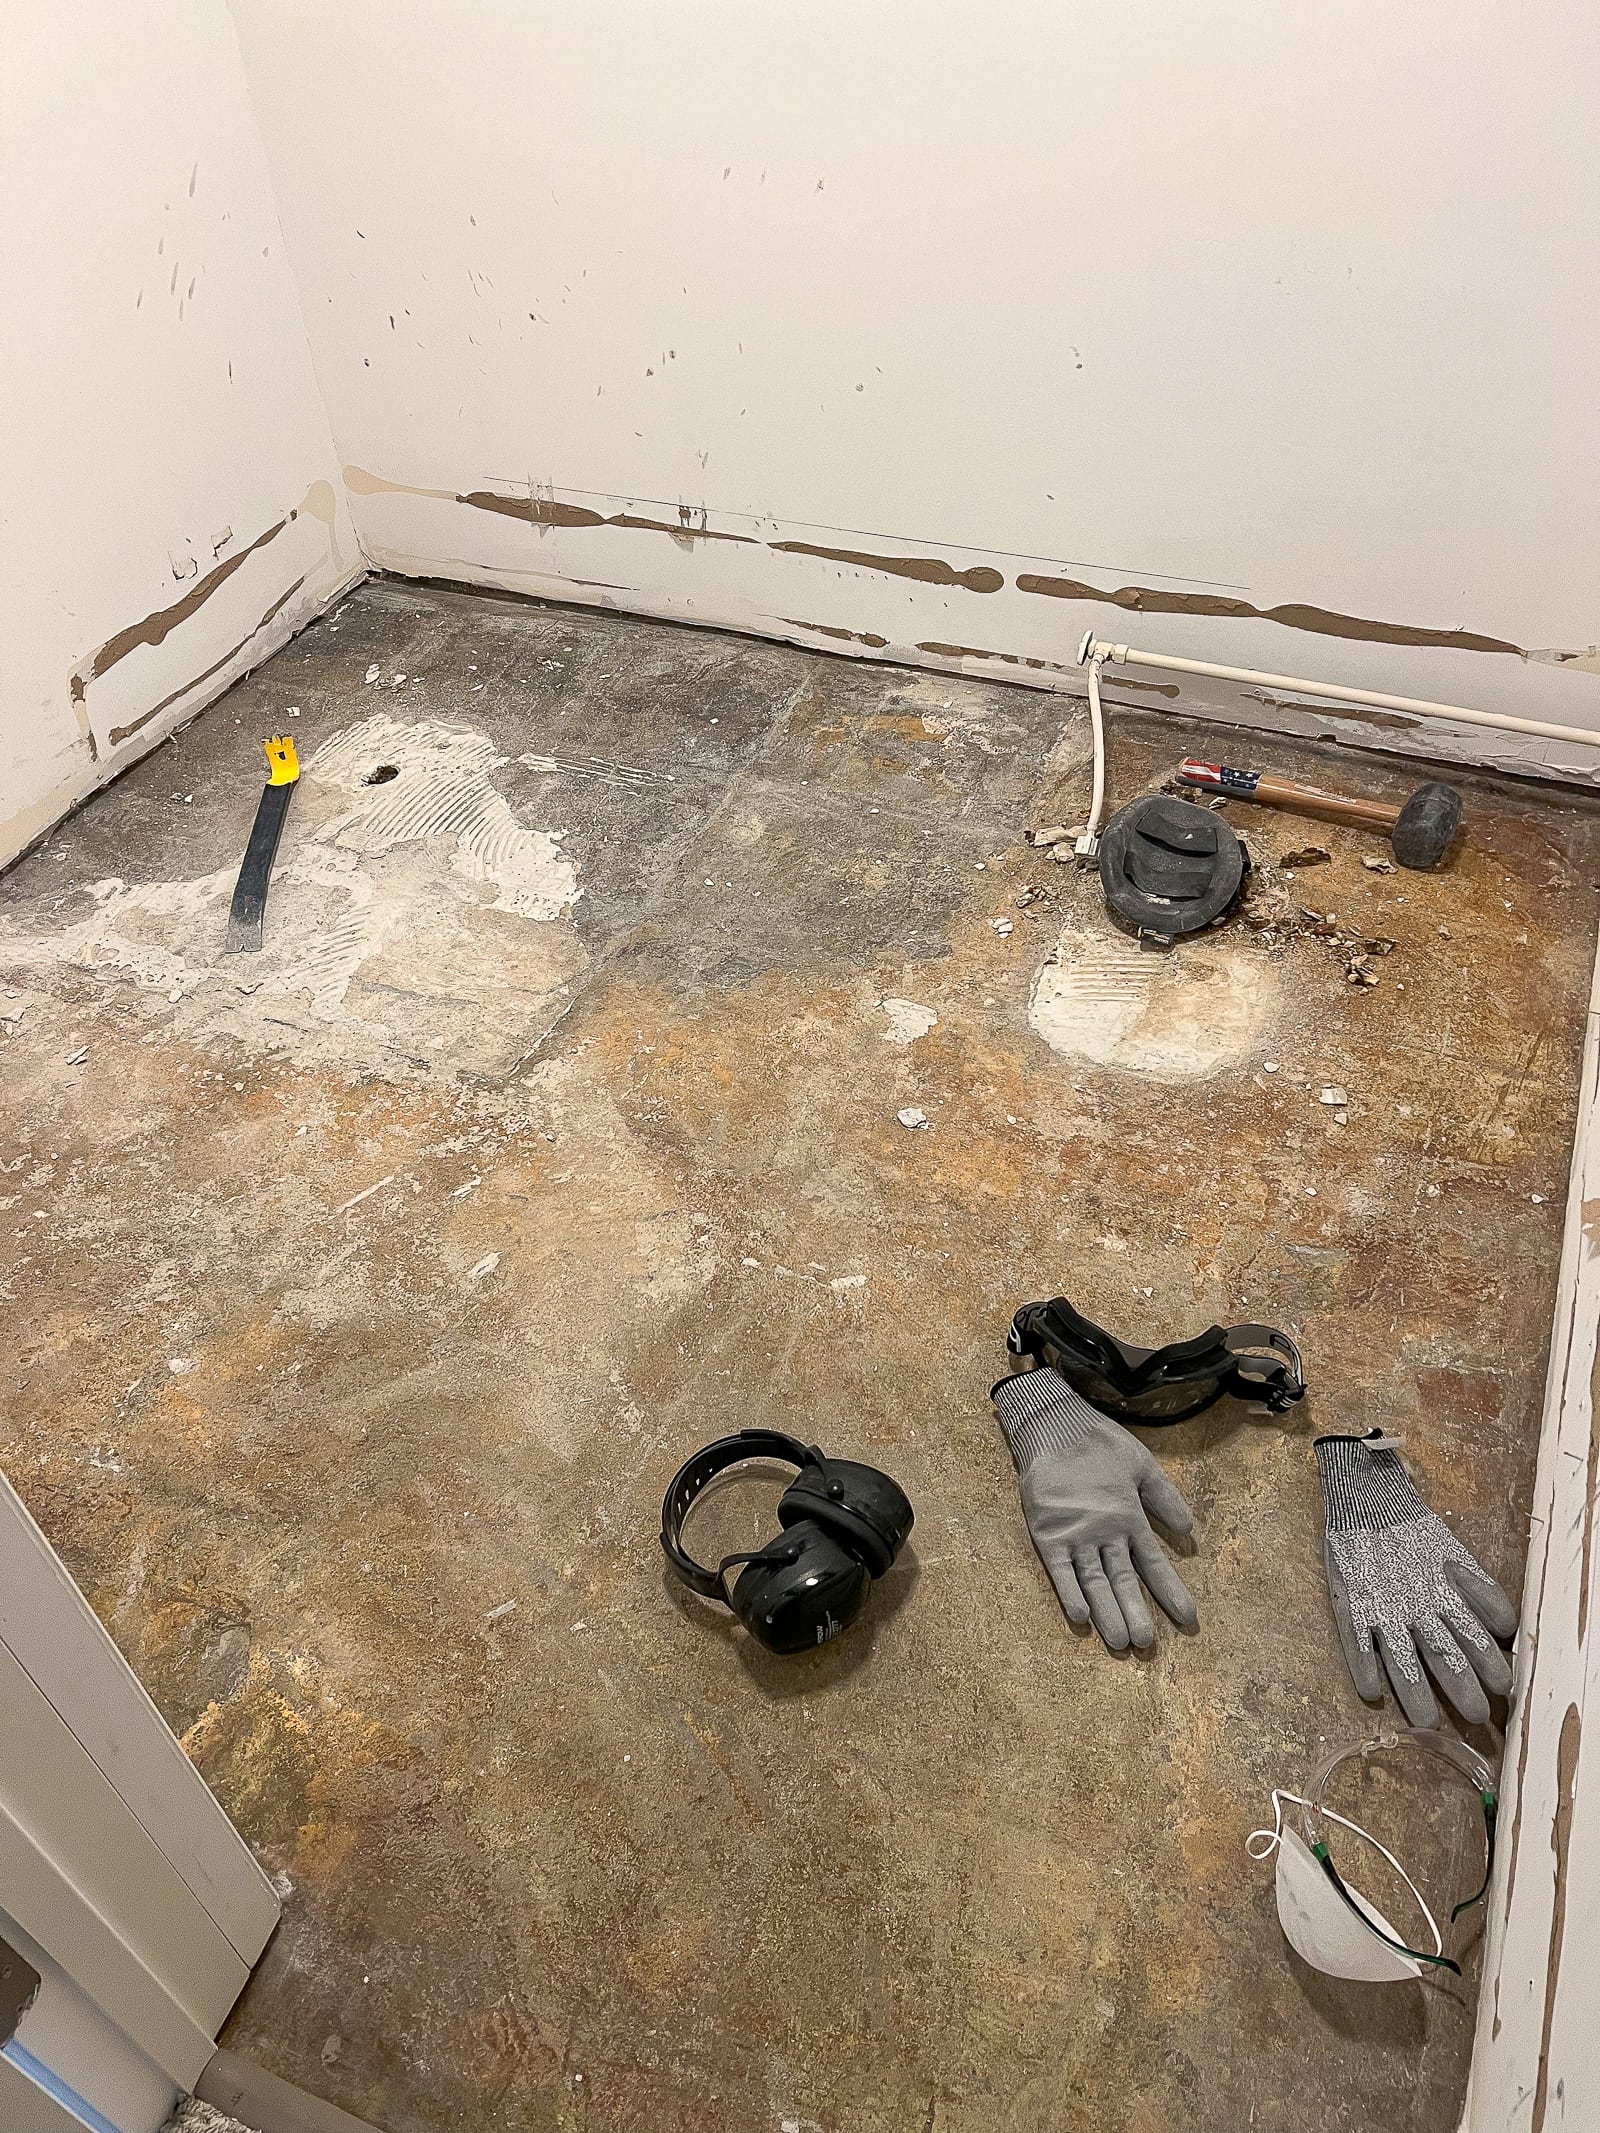
Well, everything is out of this bathroom and I lived to tell the tale! My body was sore in many strange places, but I felt proud that I was able to get all of this old stuff out myself.
There was a lot of dust, so my shop vac came in handy during cleanup – along with a dust mask!
What’s Next?

Next up, how I prepared the concrete slab work area for the new tile, including how I filled that hole.

P.S. Want to see the finished space? Here’s the big reveal of this gorgeous green bathroom.


