Dark Green Bathroom – The Reveal
I’ve been working on the bathroom in our basement since January and I am so excited that the reveal of this big DIY project is finally here! This has been a labor of love and a project that I’ve tackled mostly on my own. That’s the reason it has taken over three months to complete. But, guys, it’s d-o-n-e and I cannot wait to show you our new dark green bathroom. Before we get to those juicy “after” photos, let me remind you of what this space looked like when we purchased our home…
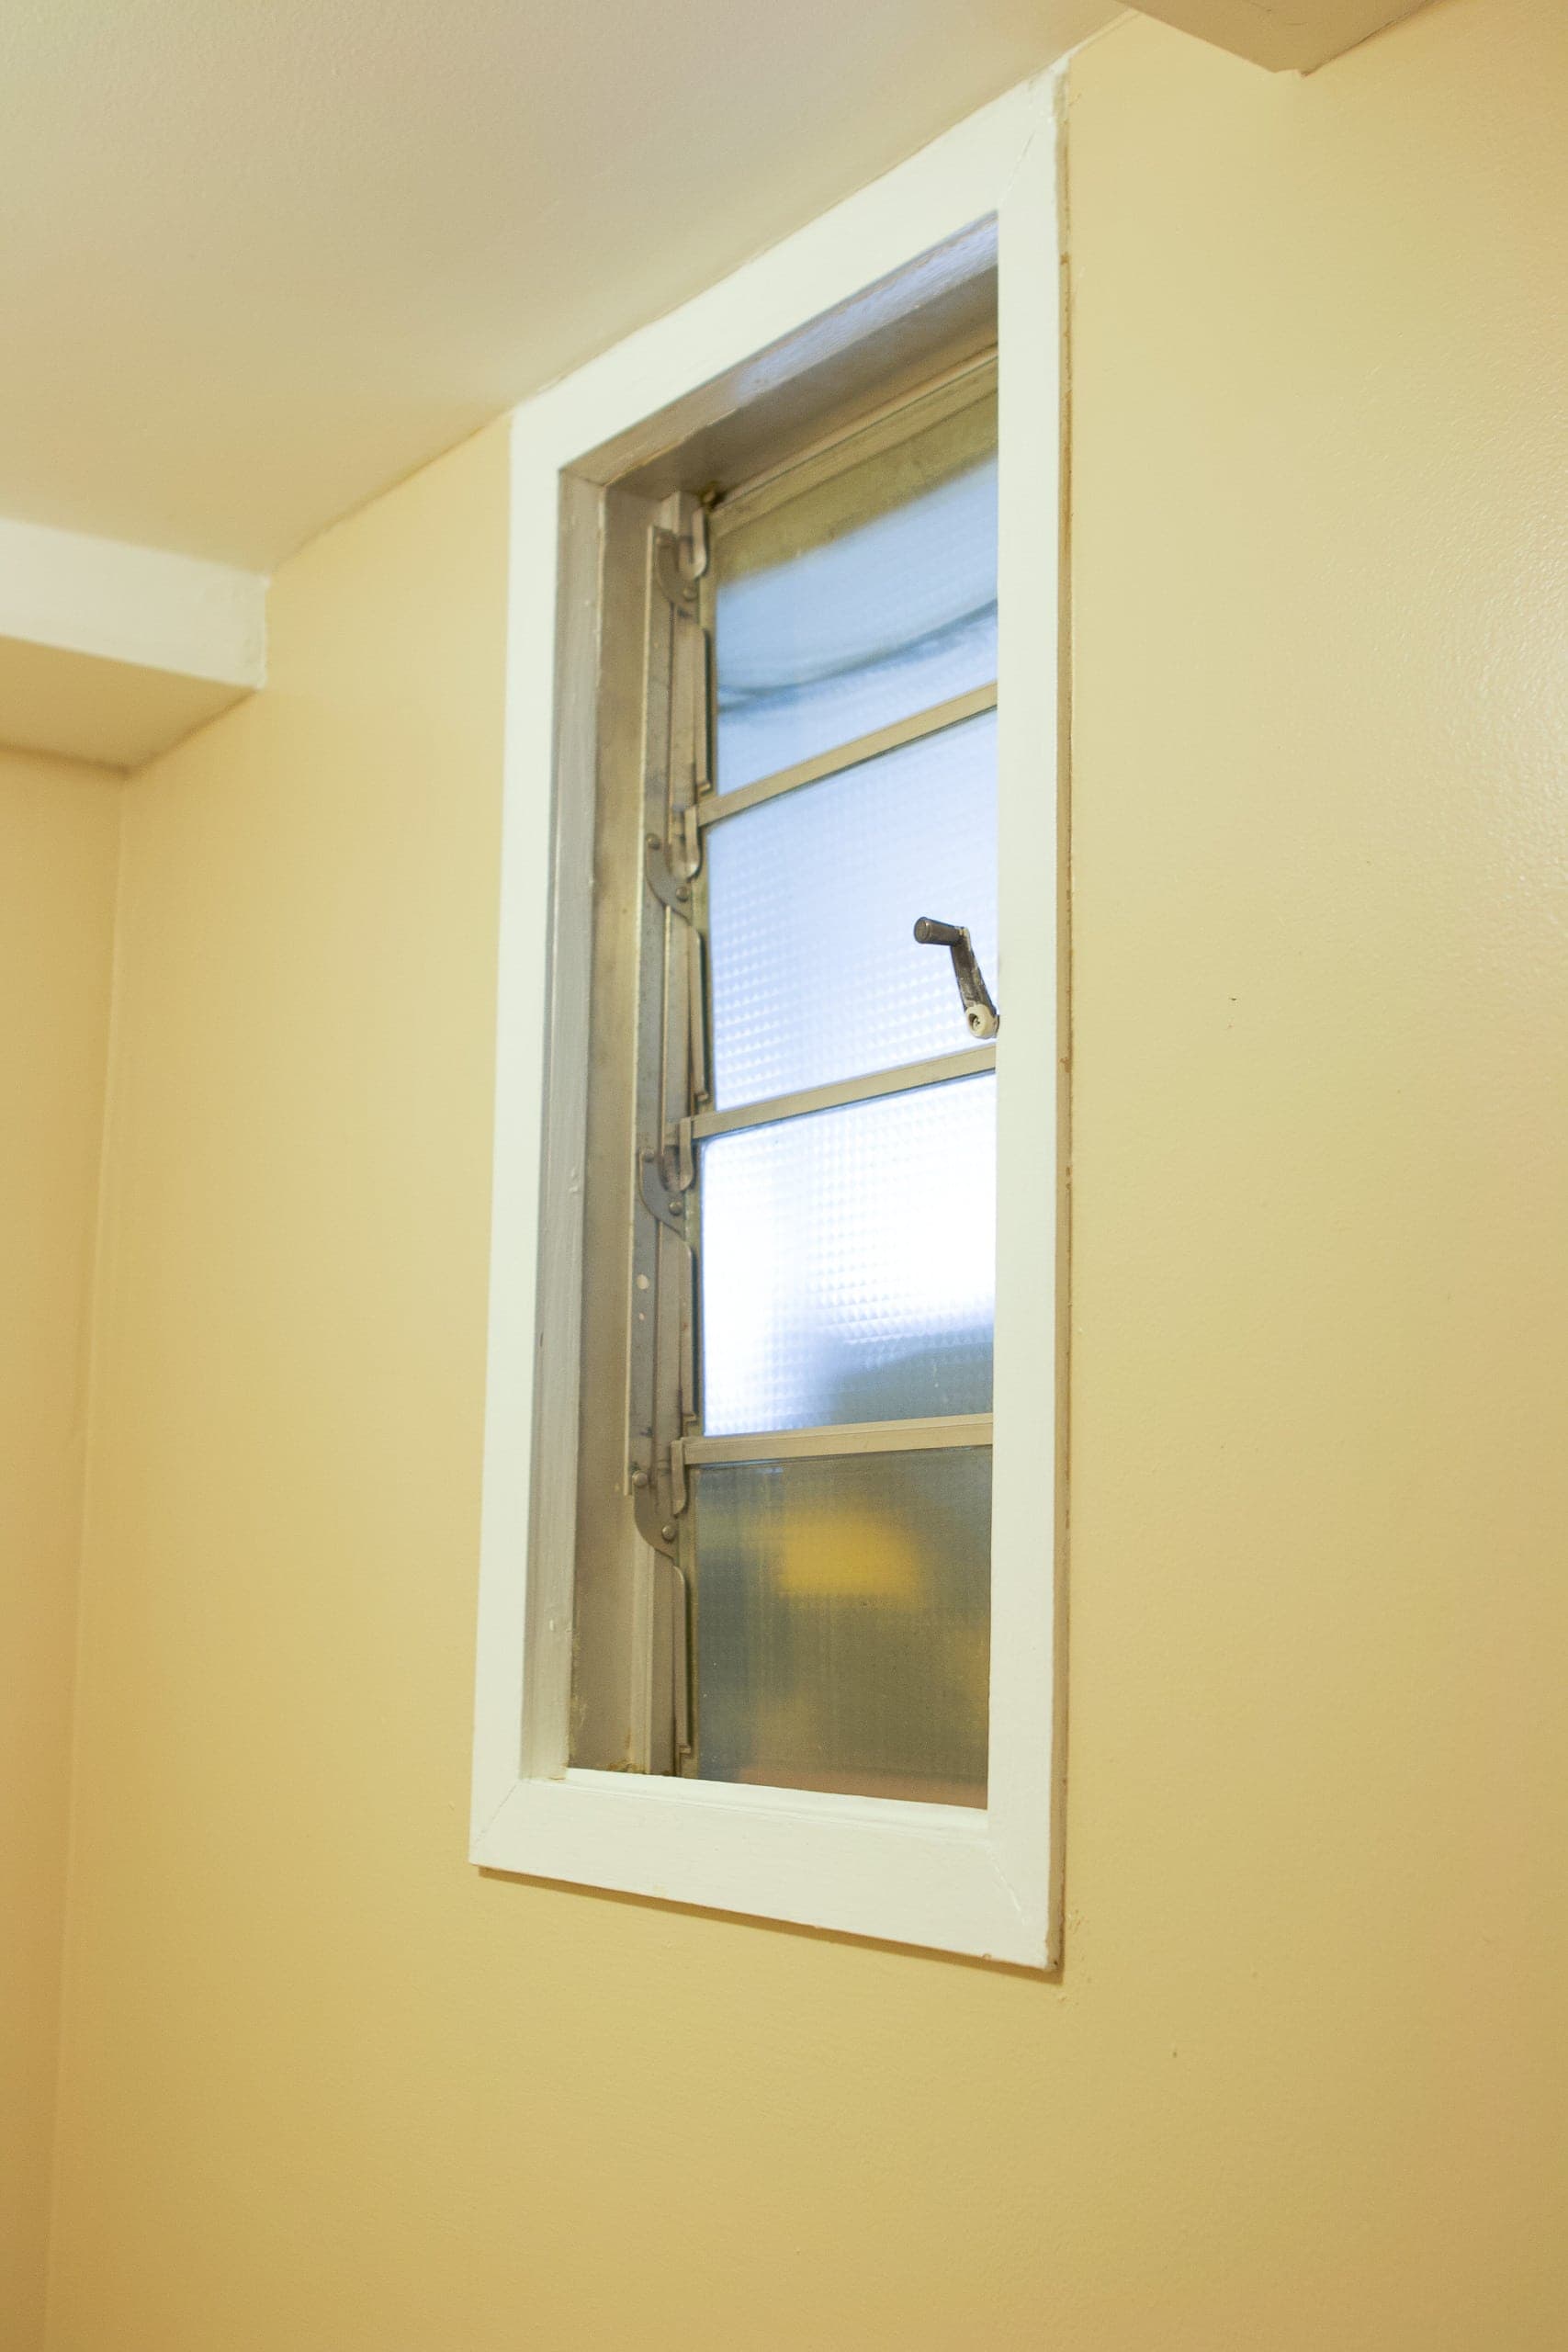
The Basement Bathroom, May 2019
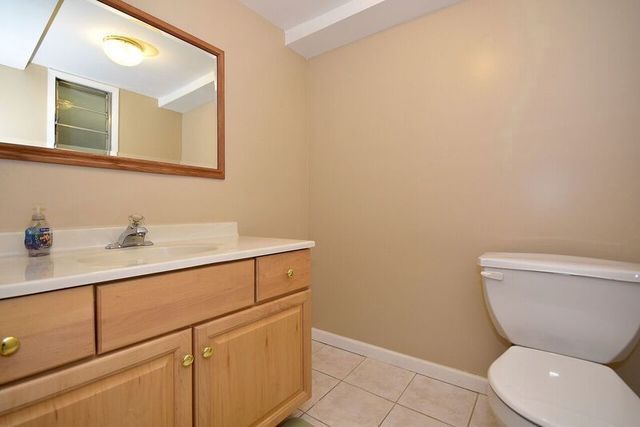
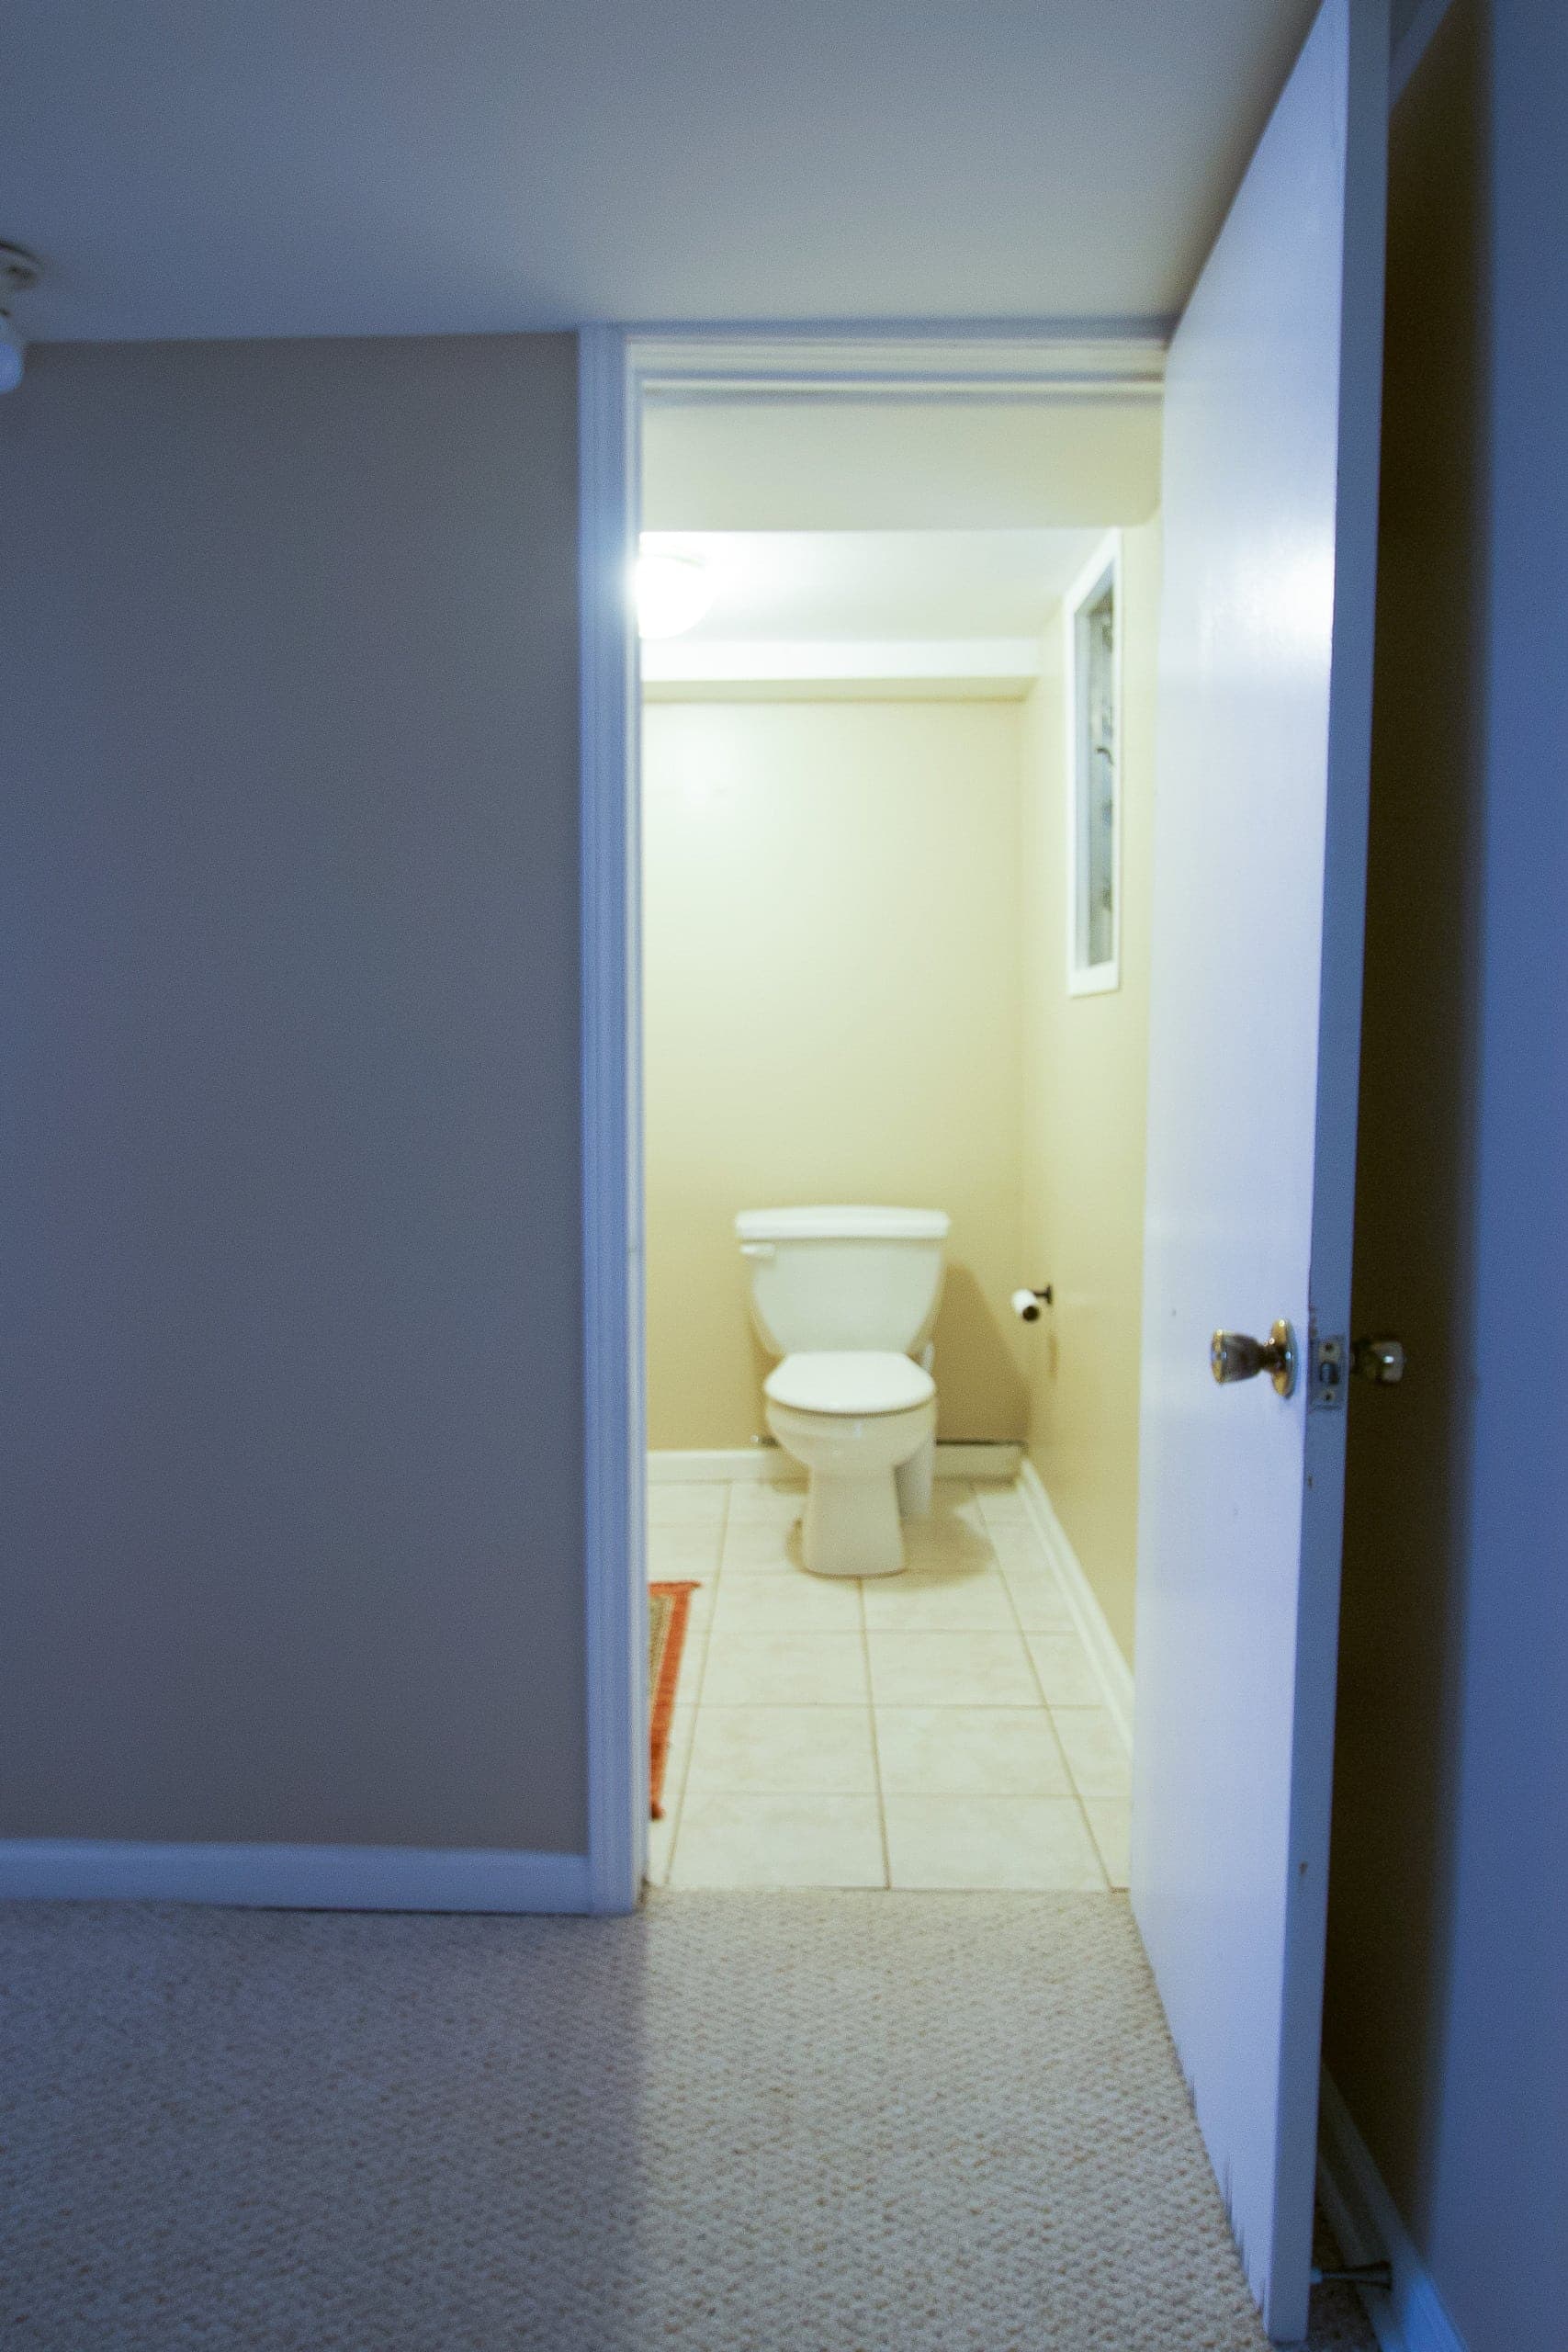
Back in May 2019, this bathroom was pretty outdated and icky. The room doesn’t have any natural light and it had a strange “window to nowhere” that peeked into our cluttered storage room. Not my favorite. Overall, it was just beige, boring, with a lot of poor-quality building materials.
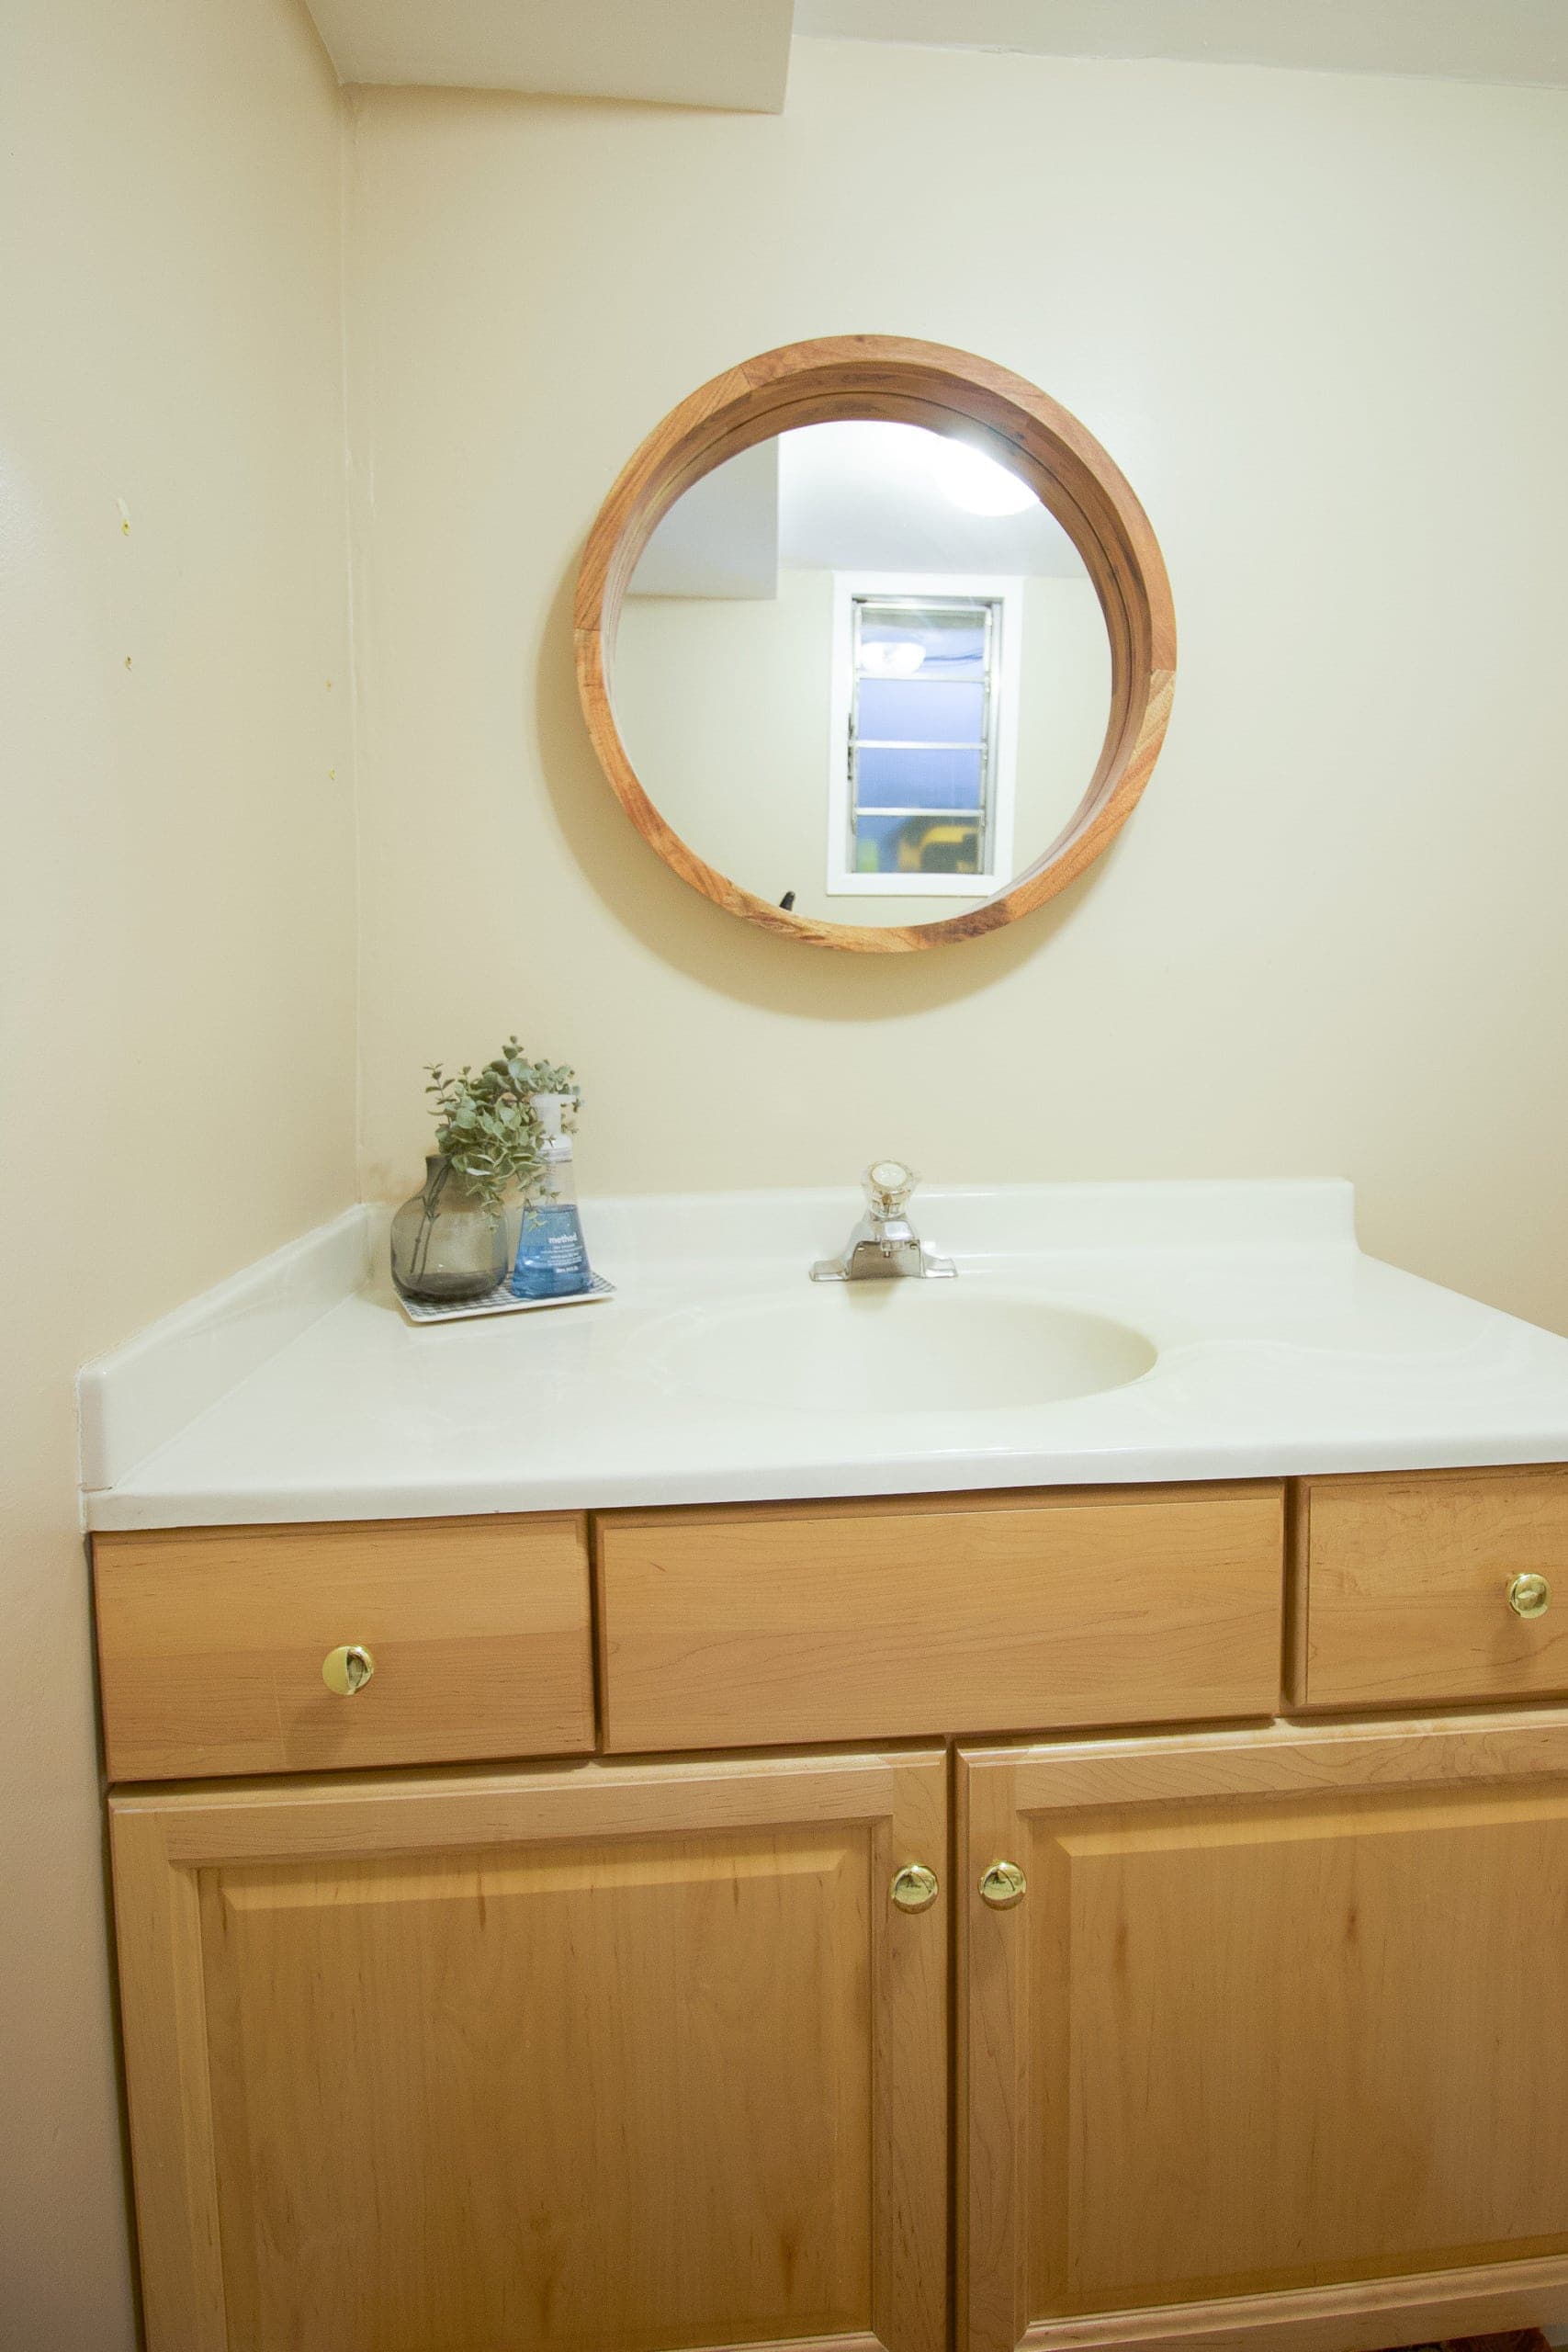
The Basement Bathroom, August 2020
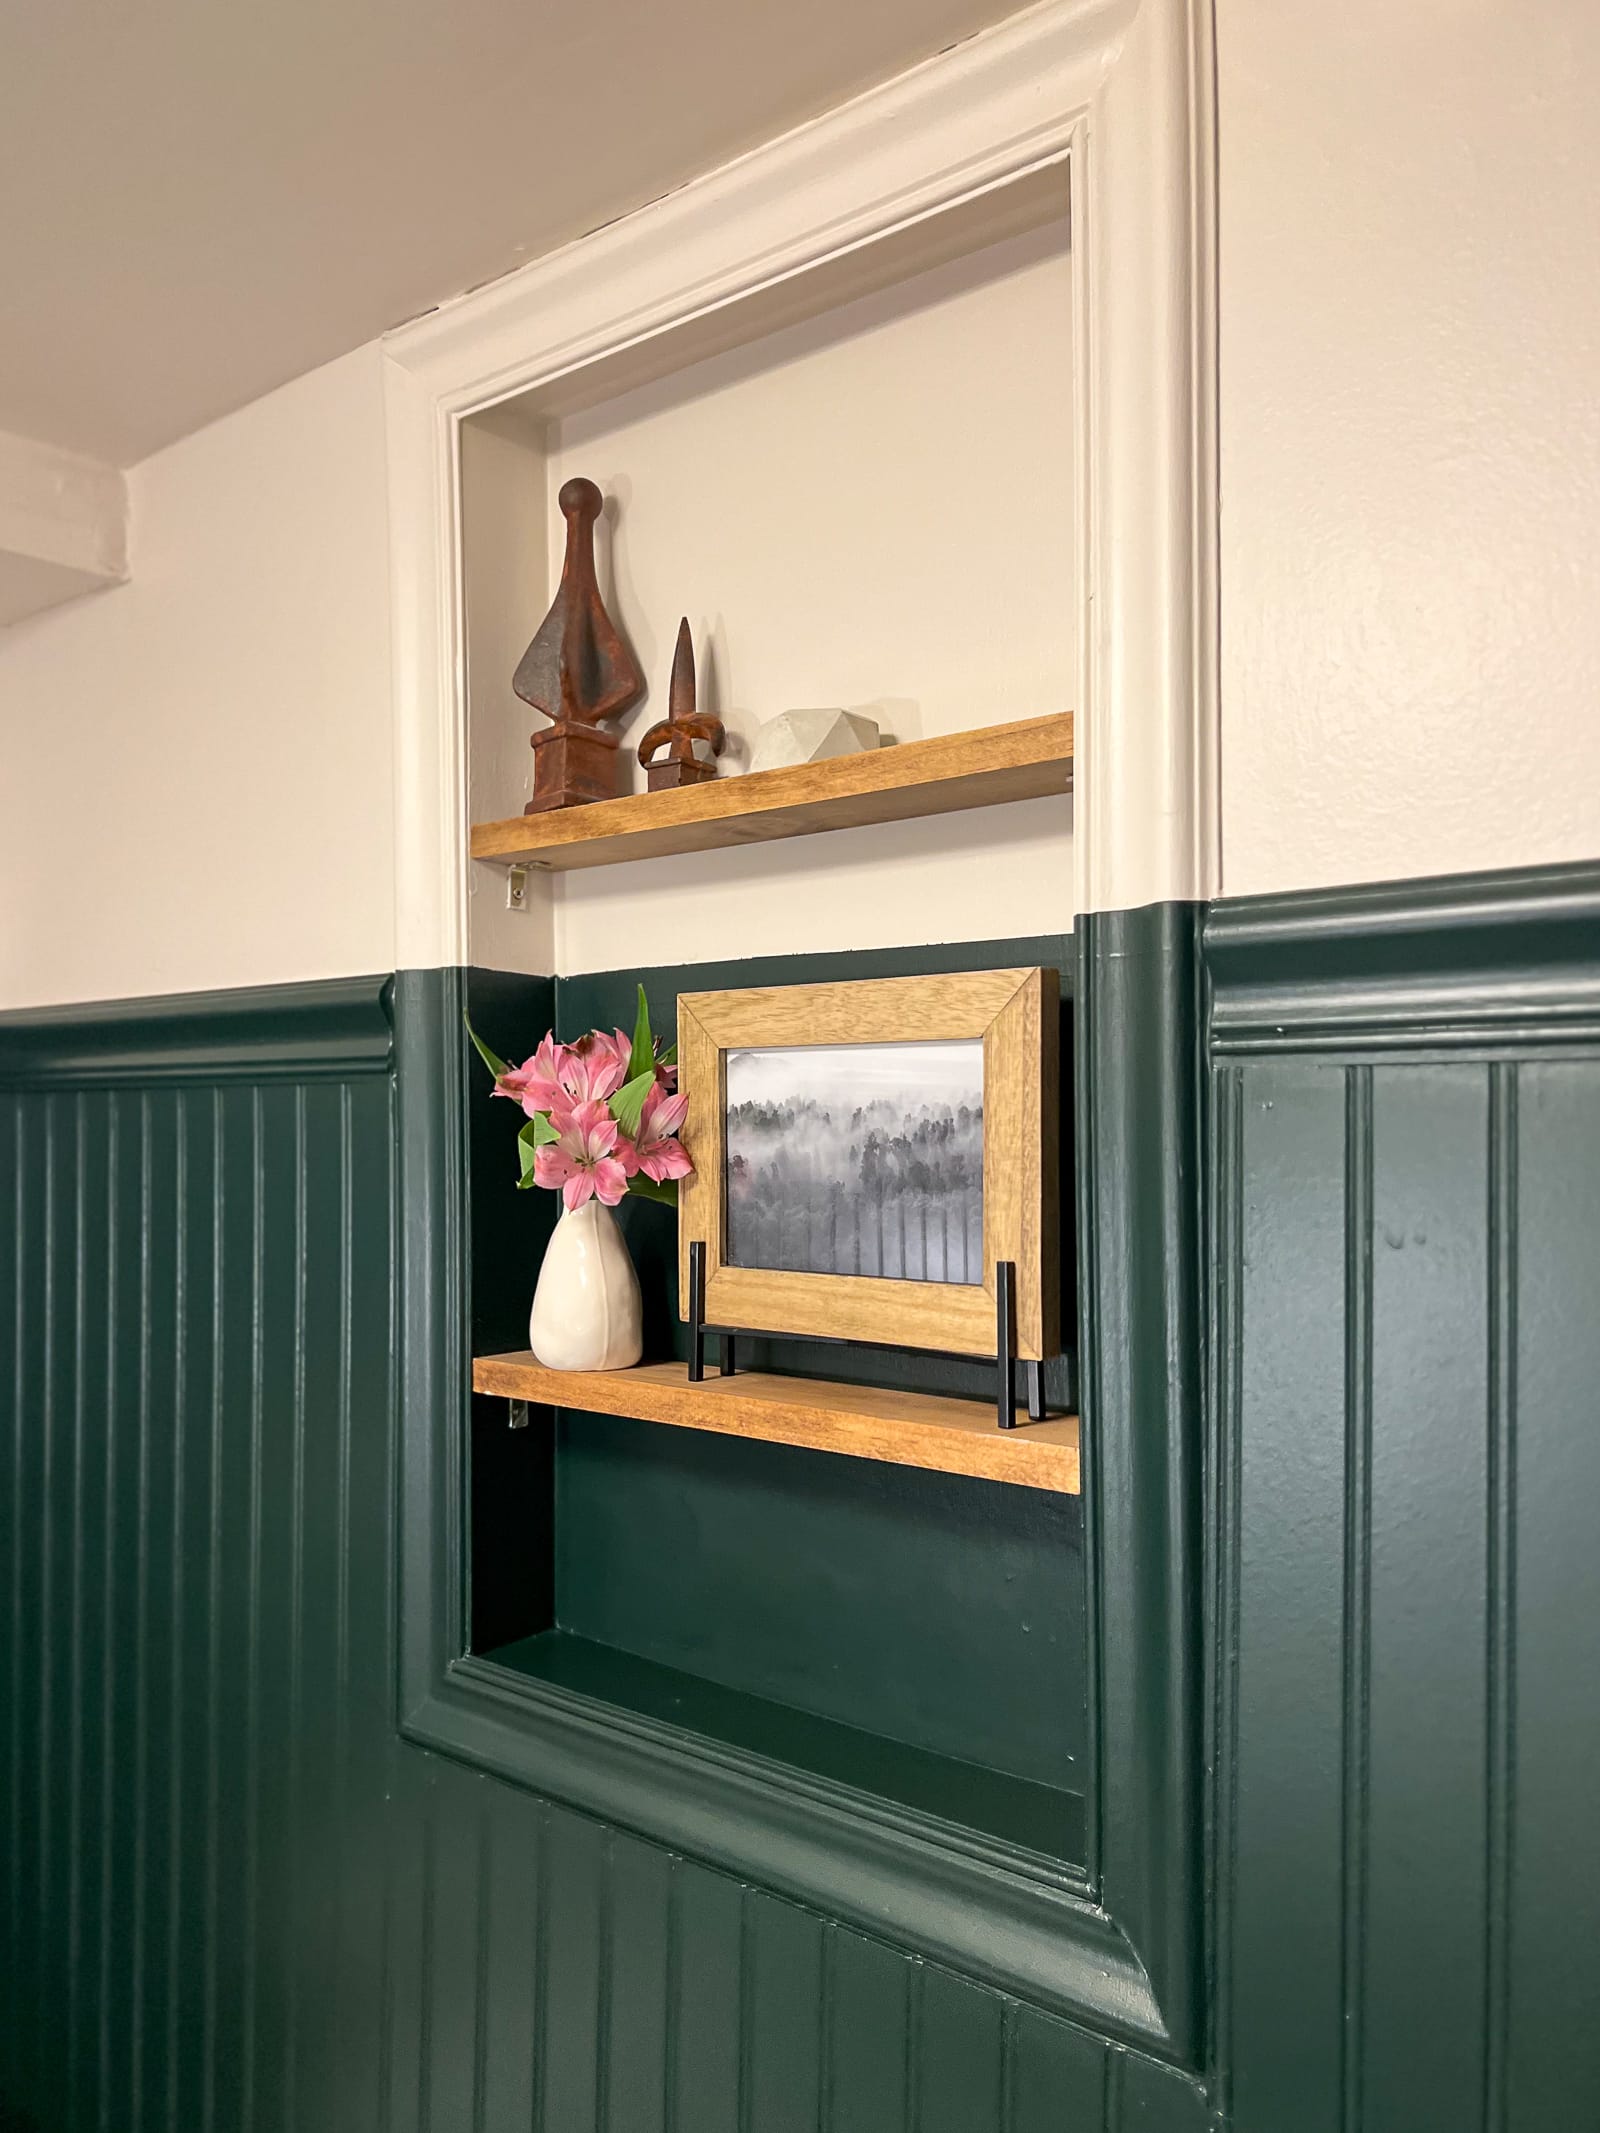
In August 2020, I gave the space a nice budget-friendly refresh with lots of paint – on the tiles, the vanity, and the walls. I also removed the creepy window and made thin shelves to cover the big hole in the wall. I thought that this space would live like this until we moved out. It was a beautiful cosmetic update that didn’t cost a ton of money and the space was perfectly functional.
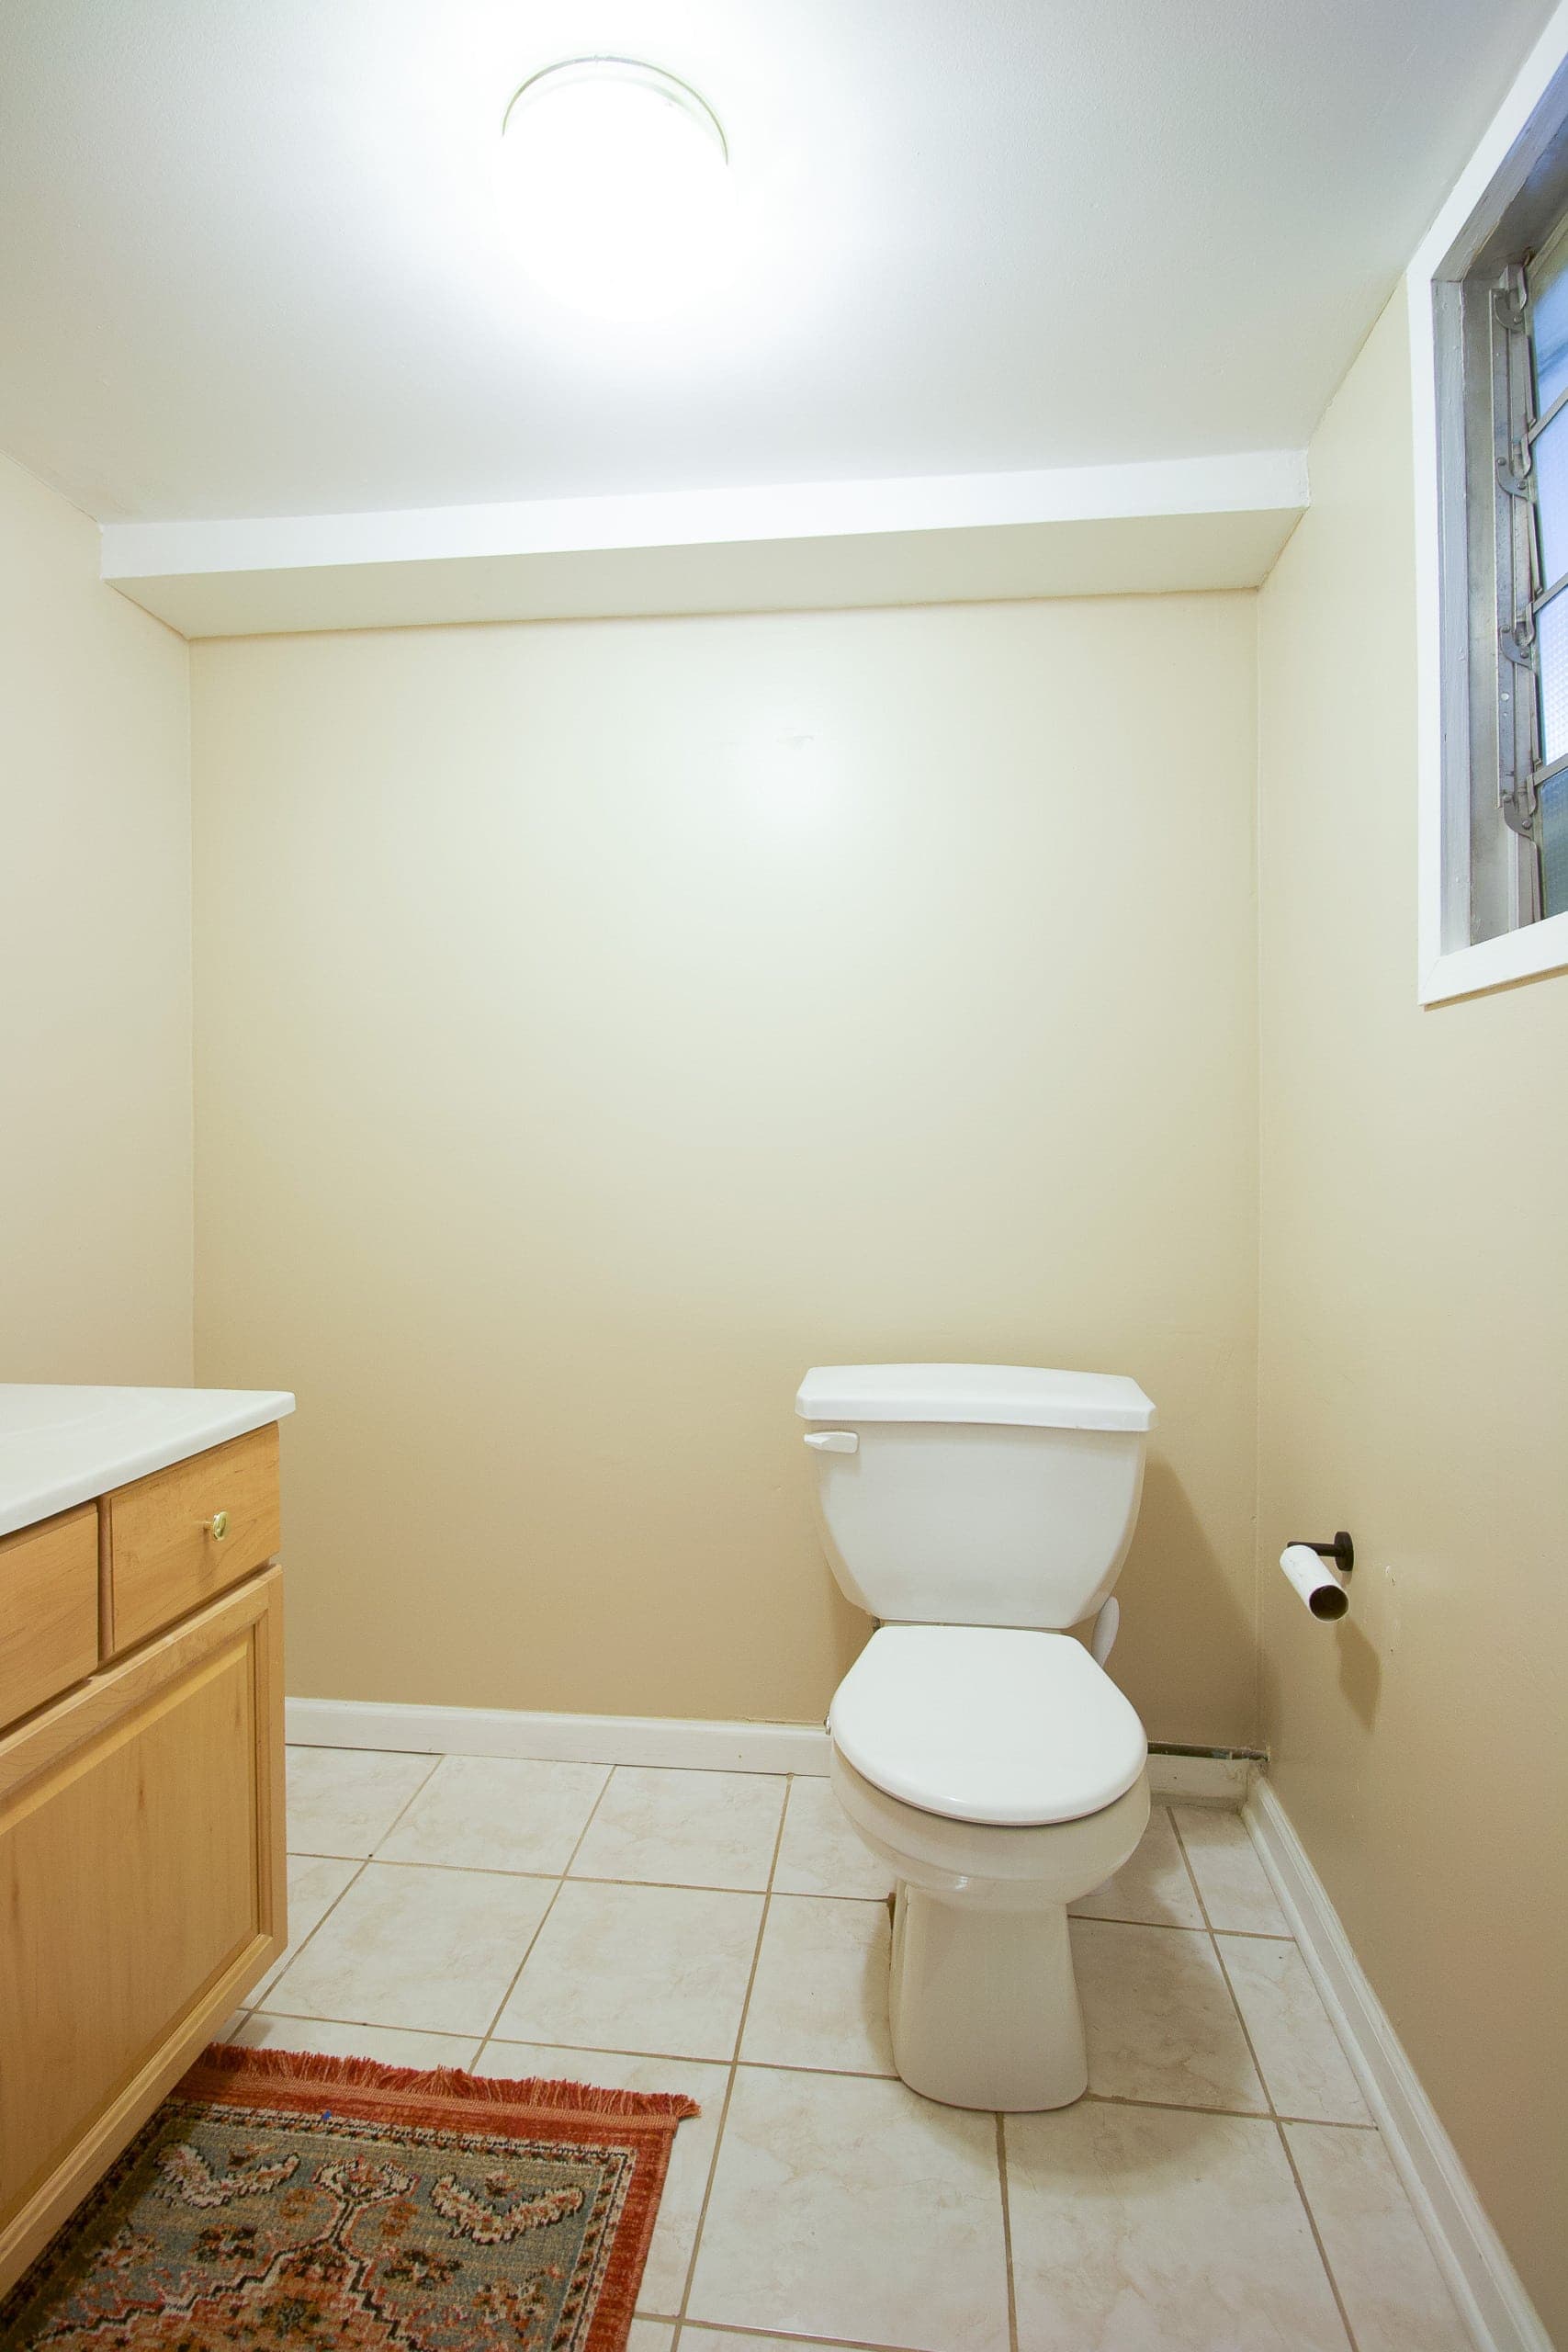
The Basement Bathroom, Fall 2022

Then, we had our basement flood in September 2022. Eek. We had to replace the drywall and the remediation company recommended replacing the vanity too since it was saturated with water. We dried it out to keep it, temporarily, until it was time for a larger renovation.
The Demo

The first order of business was ripping everything out. Whoa, this was a freakin’ workout. I removed the toilet and vanity (They were quickly taken by trash pickers…yay!) and then I got to work on the floor tile. It was a lot more challenging than I anticipated and I had to rent a demo hammer to get it all up!
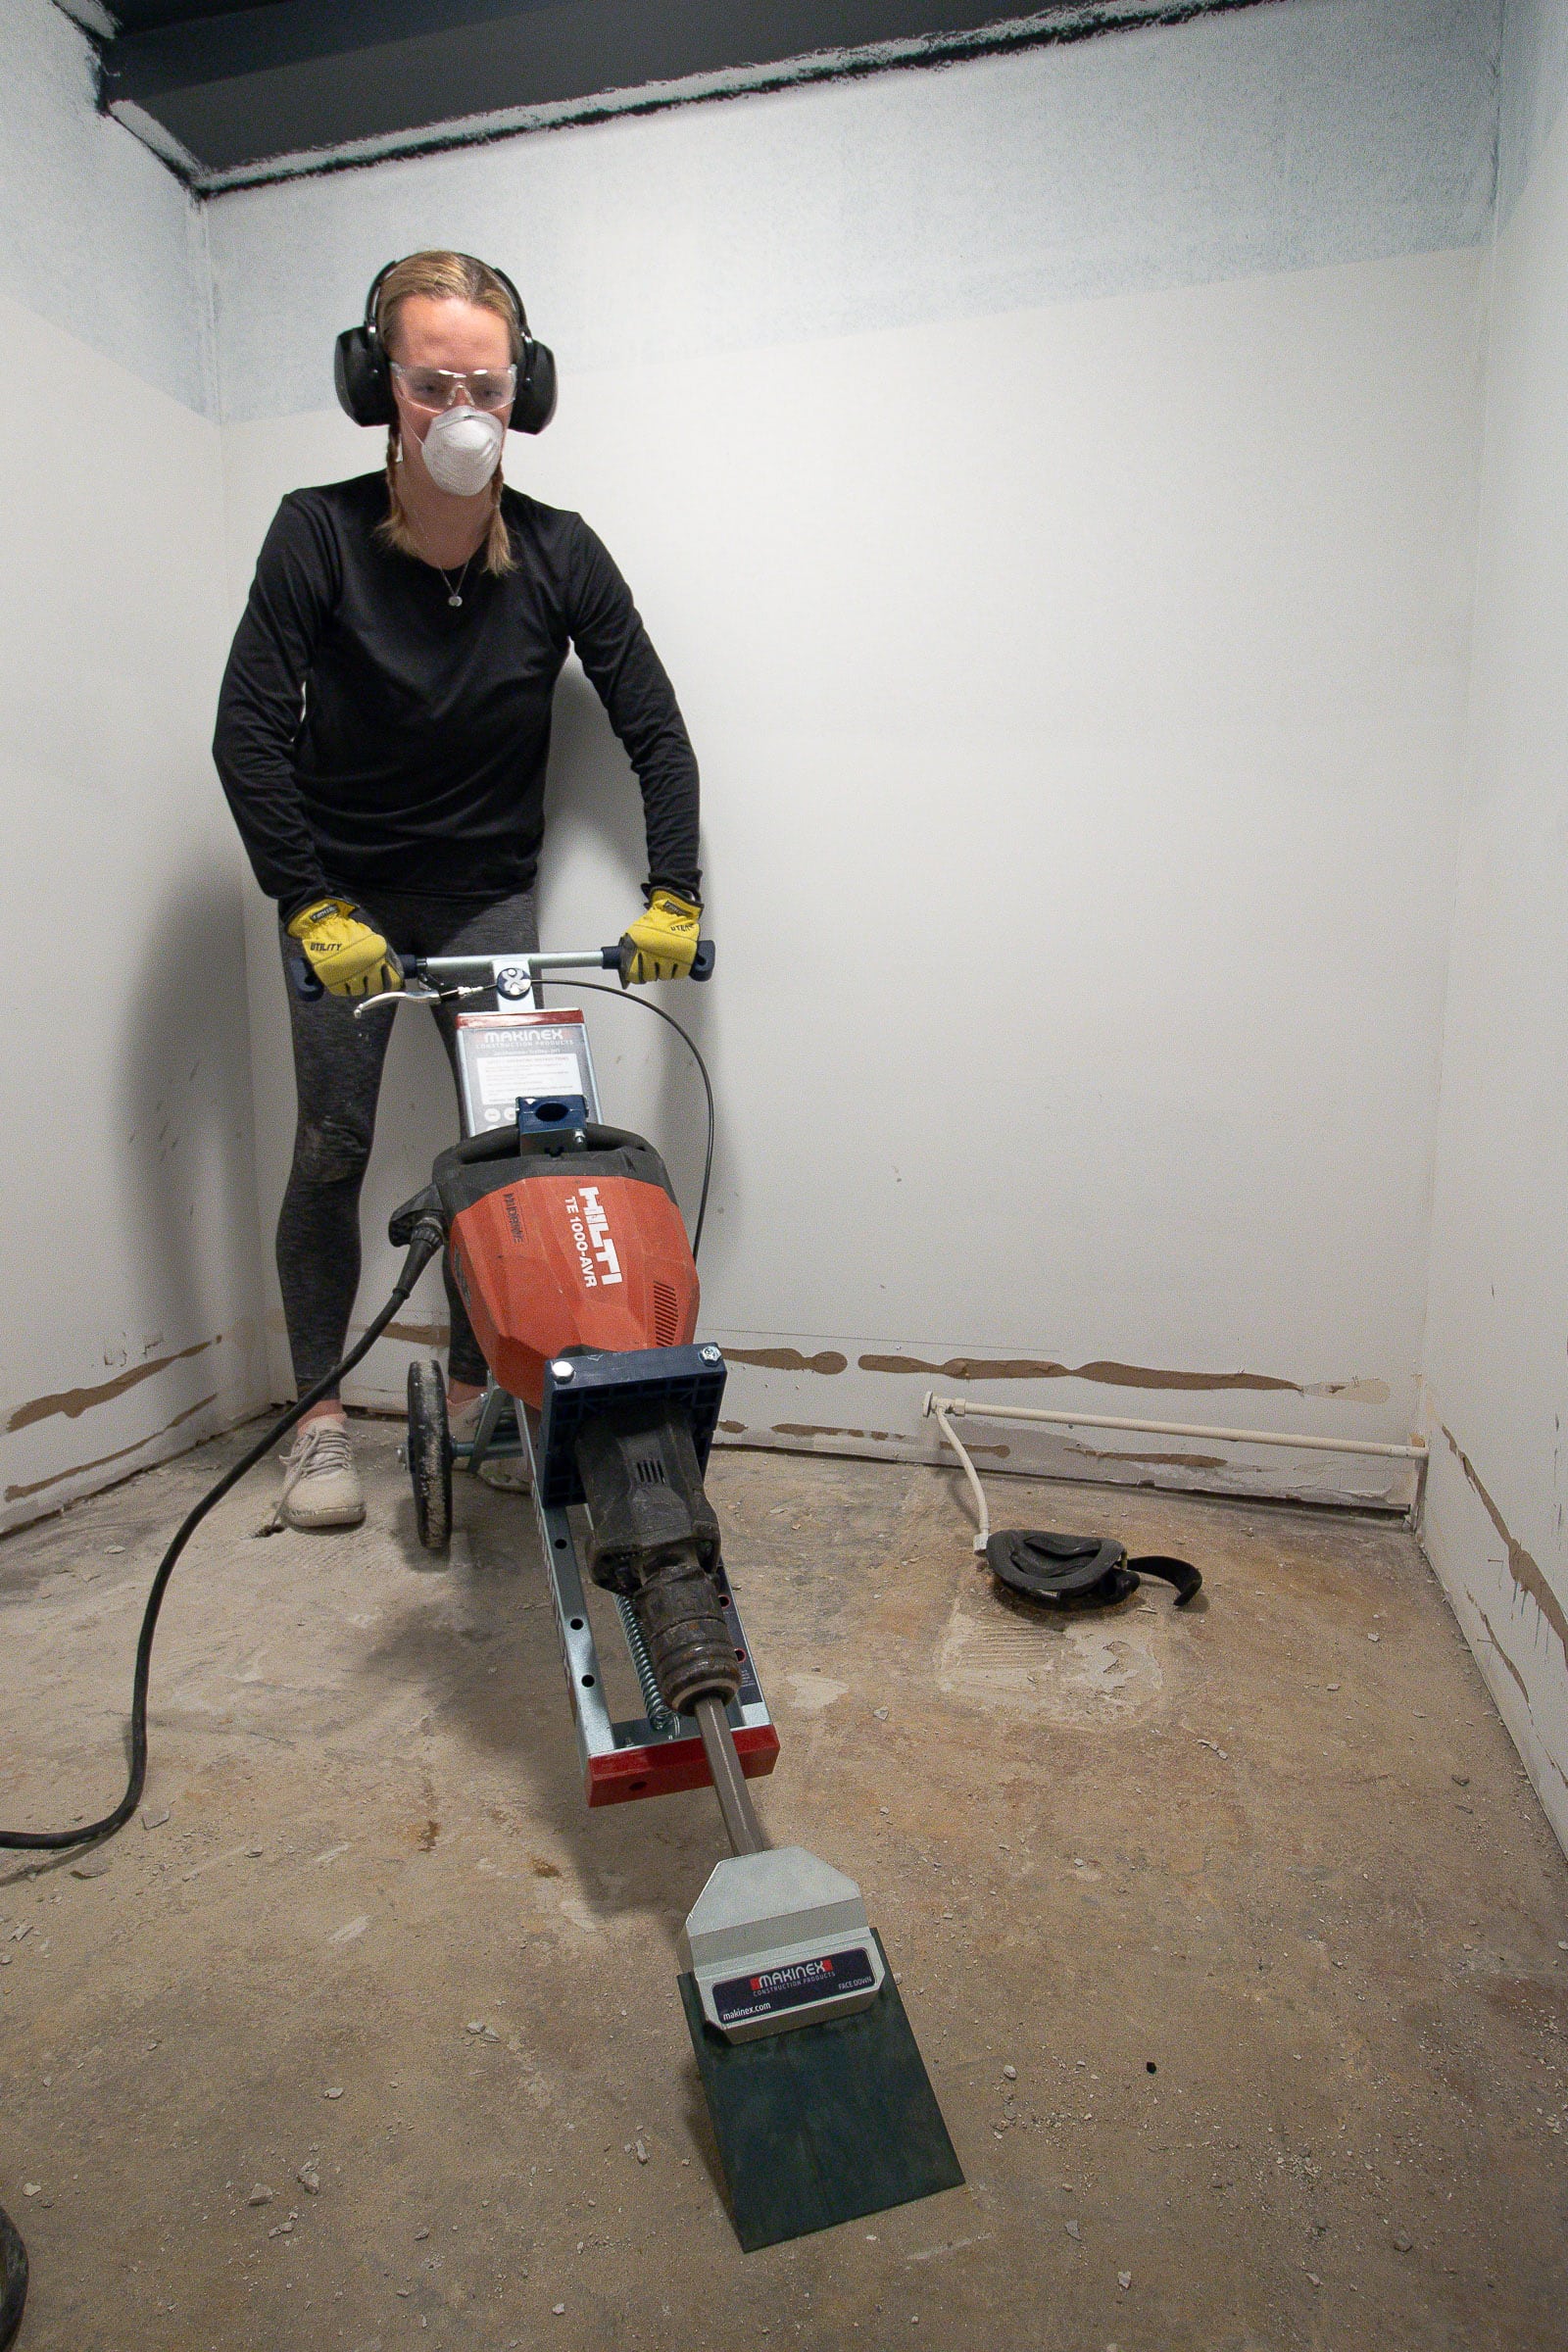
It took a lot of sweat and many hours of my time, but I was thrilled when this bathroom was finally empty and ready for the next step – tile!
Installing The Penny Tile
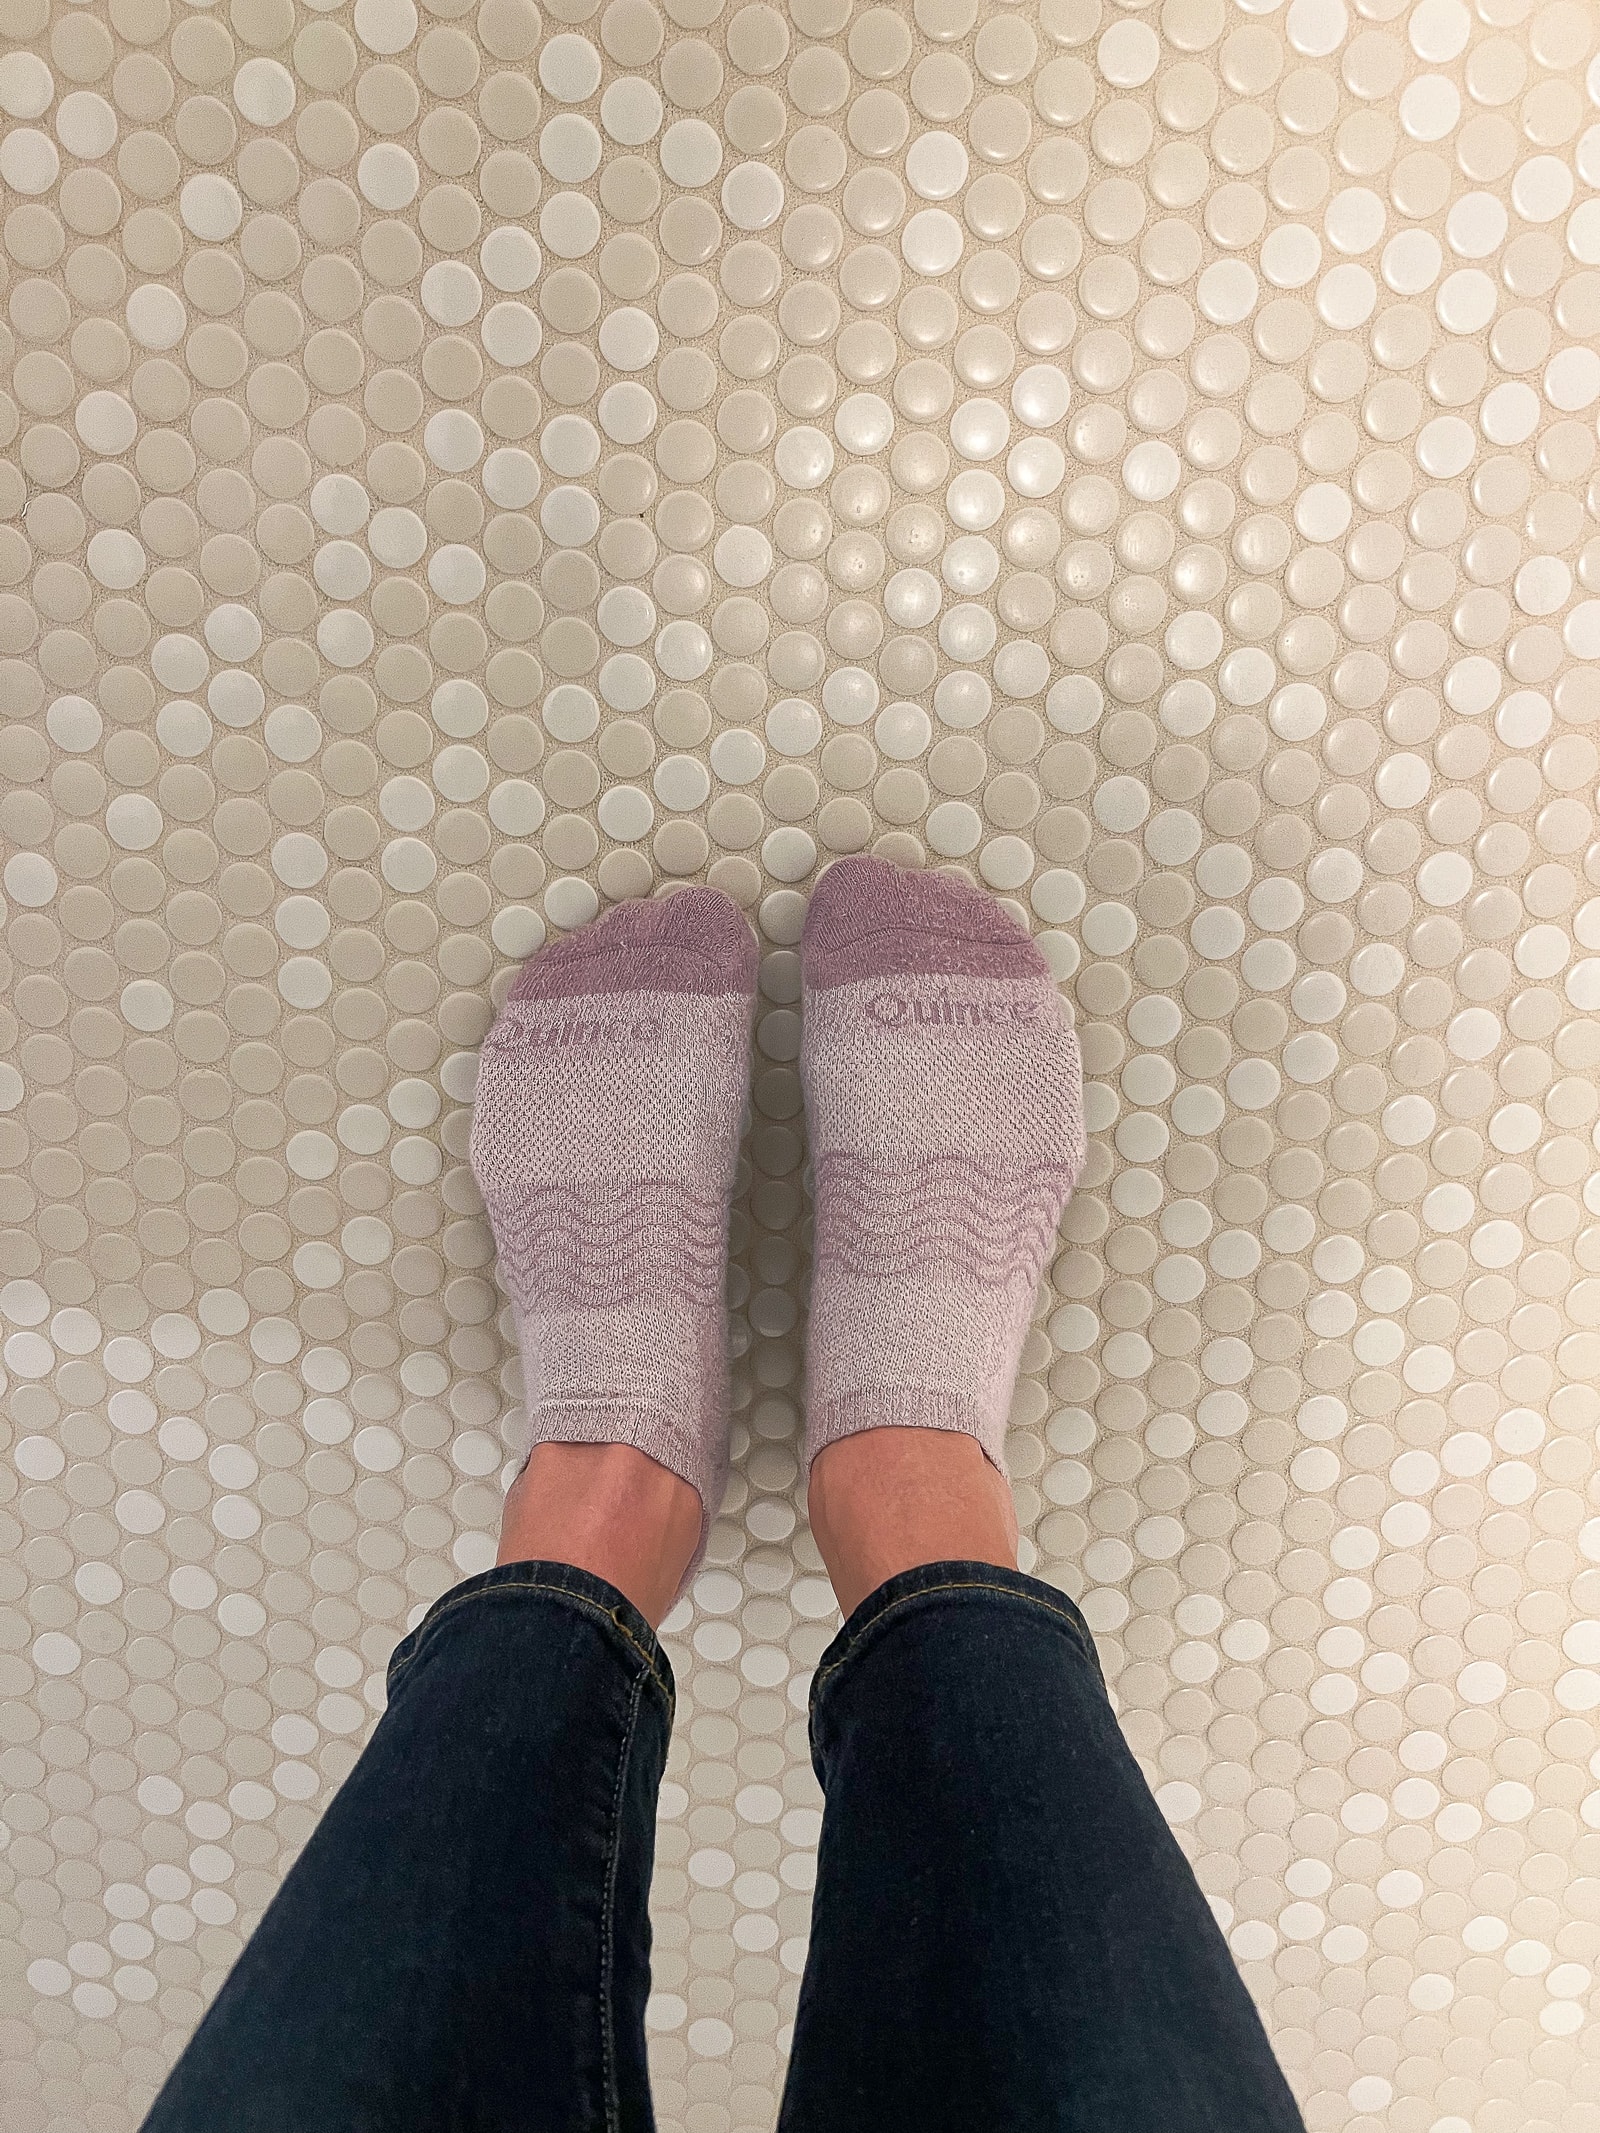
I chose this neutral penny tile for the floors and did not expect it to be so controversial! I shared this video of the installation process over on TikTok and it now has almost 9 million views. In the comments, it was such a divide between people who either loathed the tile or loved it. I had to turn the comments off because the comments were getting so vicious and there was a lot of fighting between the commenters. So wild! TikTok is a new-to-me platform and so far, I’m not loving the community over there. Eek.
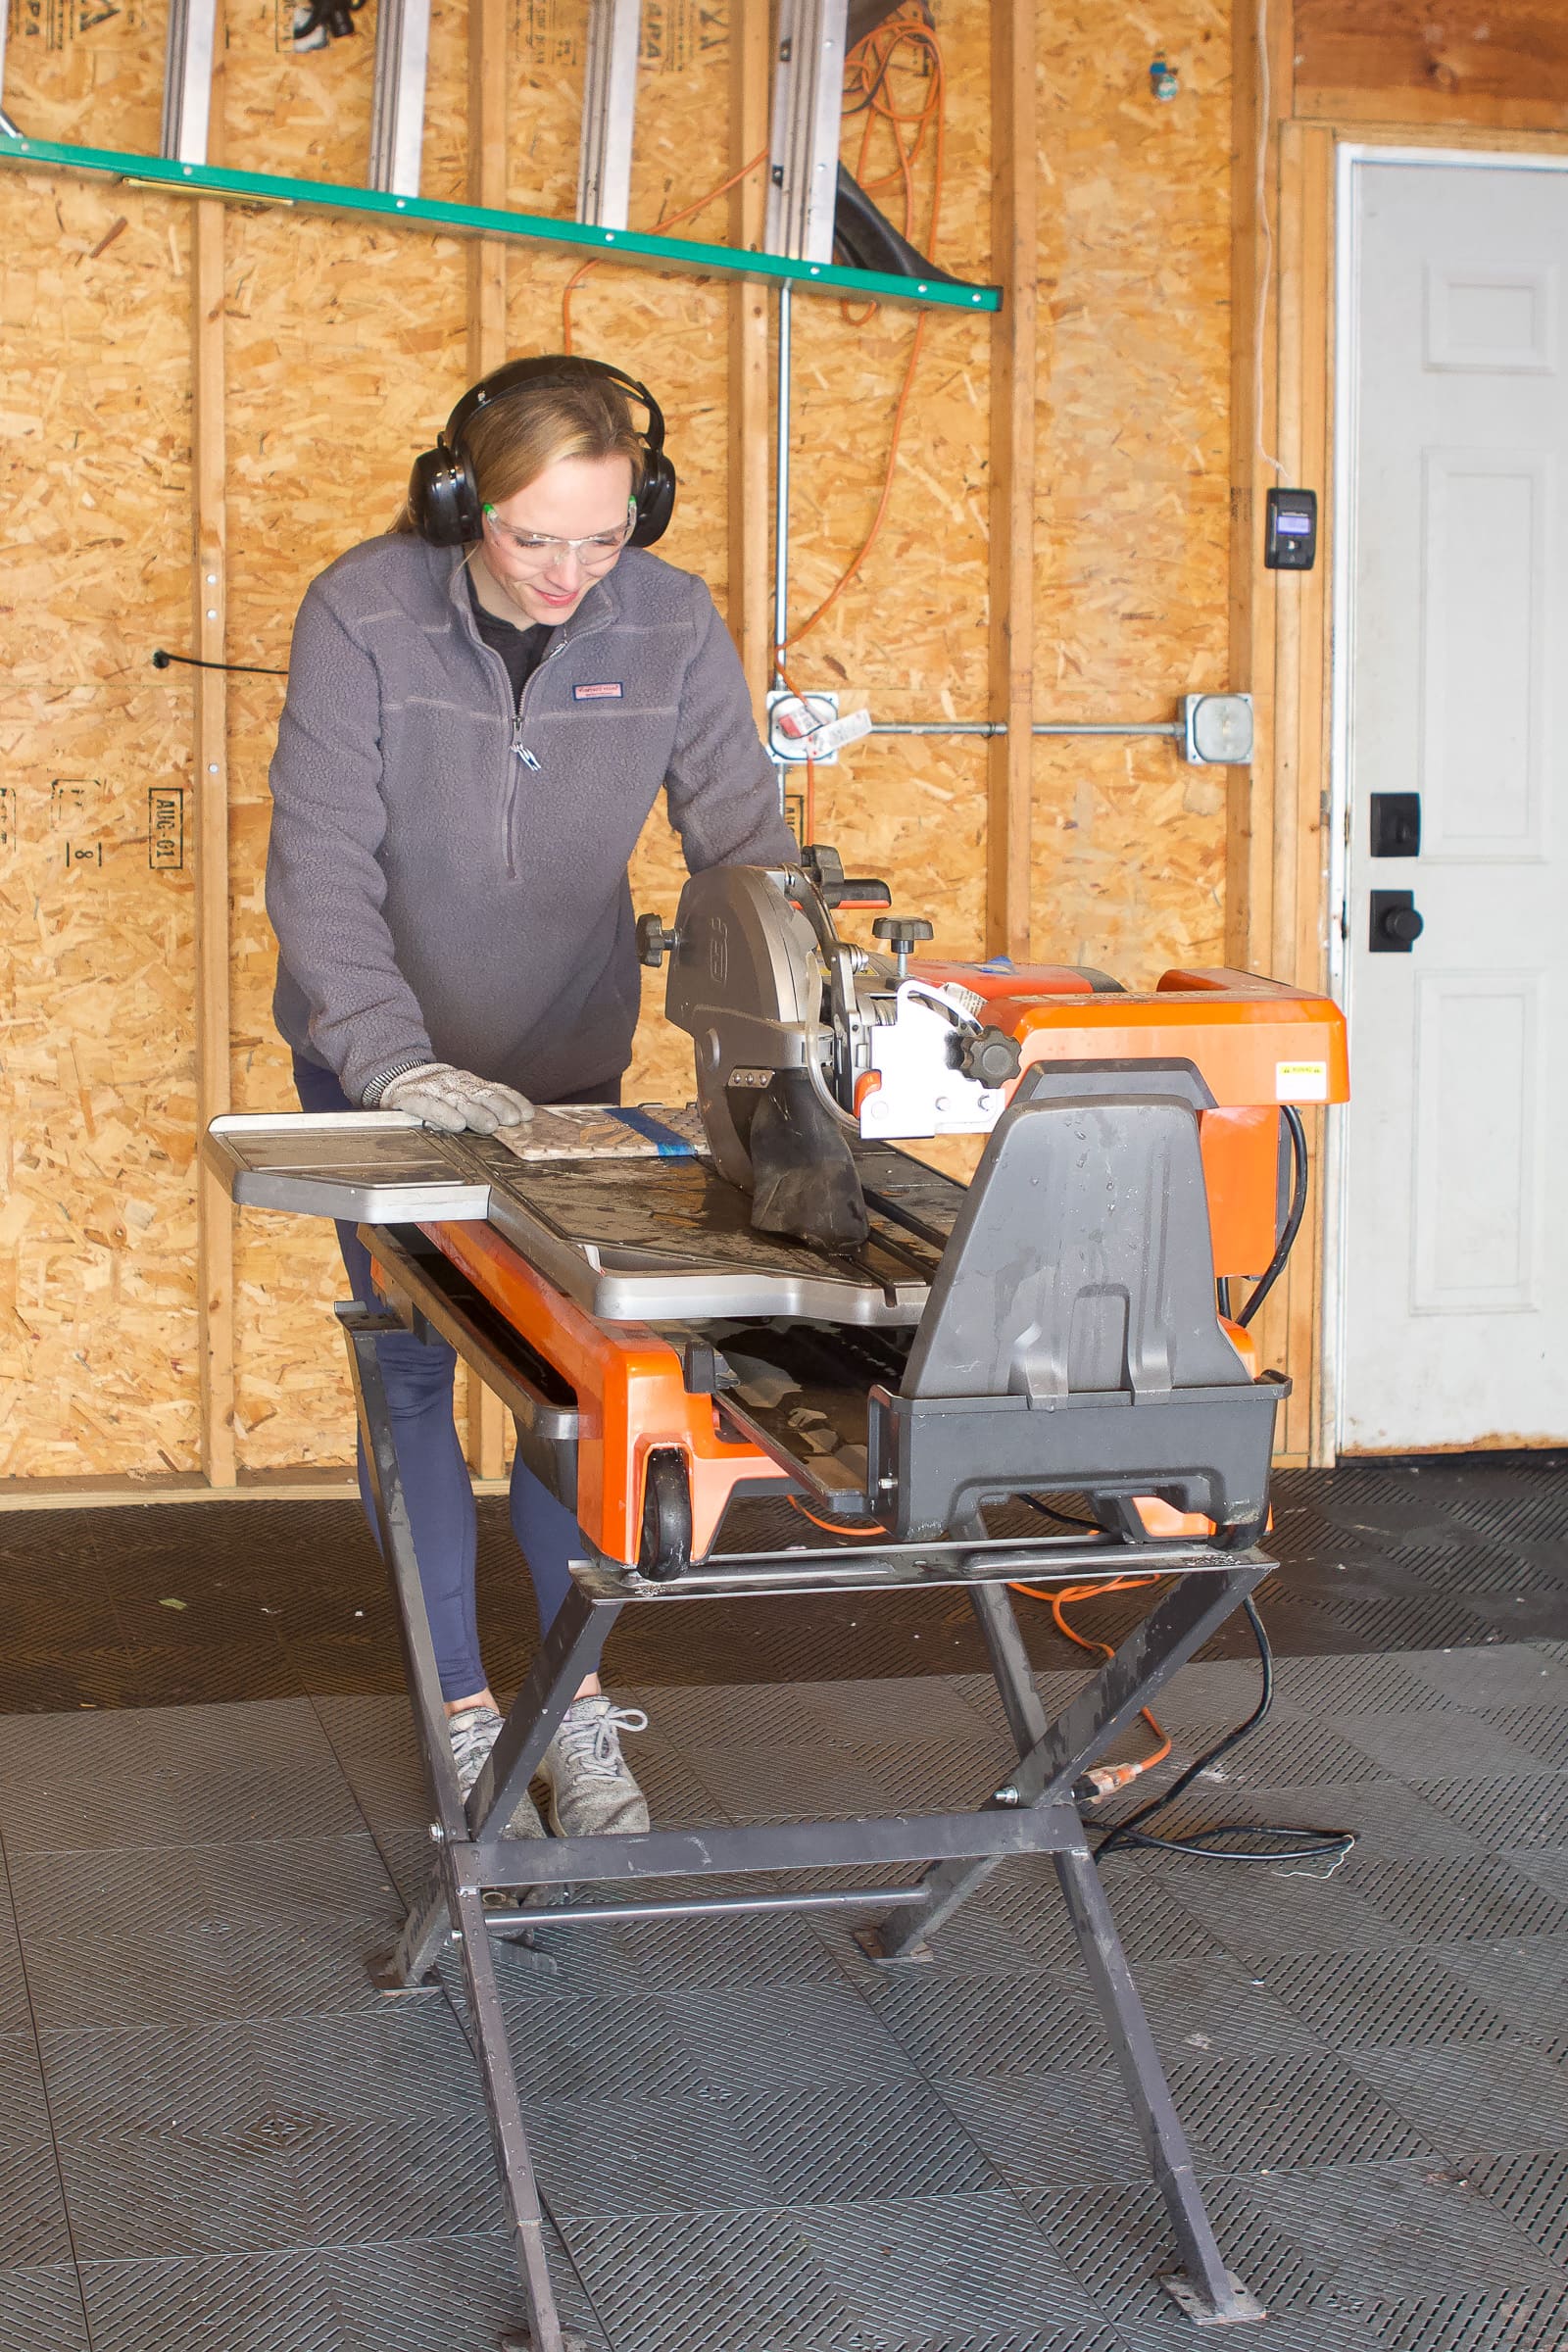
Anyway, I really like the tile (and that’s all that actually matters) and I had a lot of fun installing it. I shared the full step-by-step tutorial to install it over in this blog post.
Adding The Beadboard
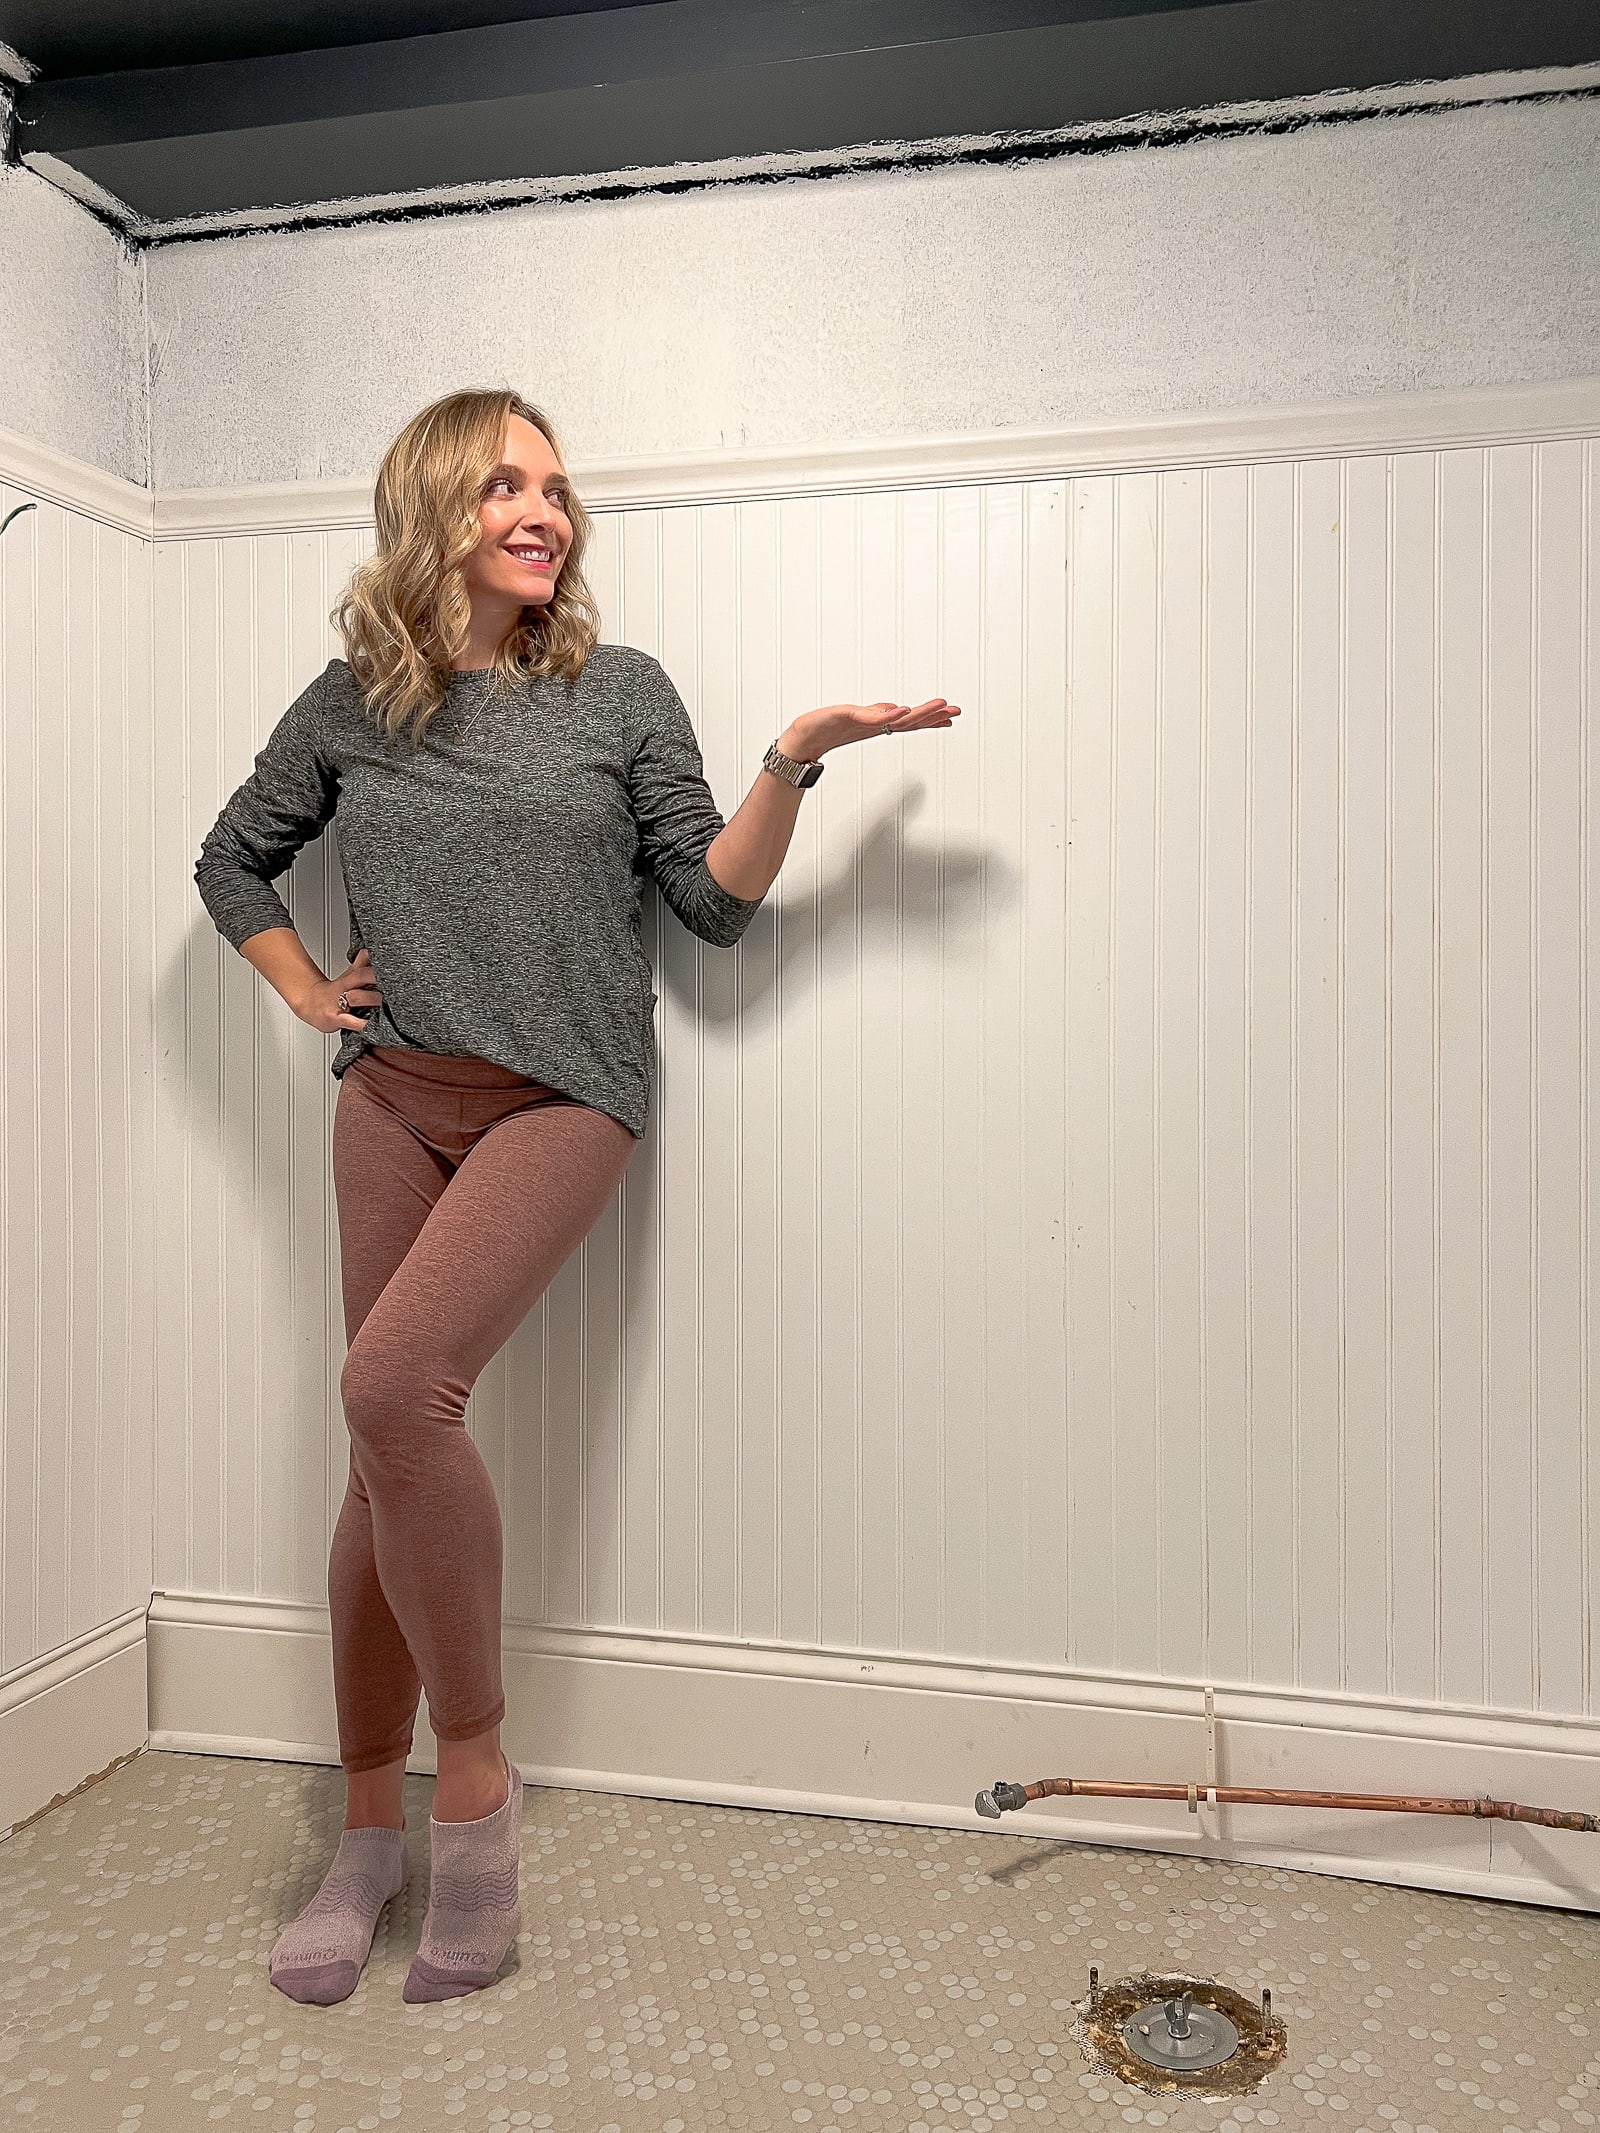
With the floors done, it was time to give the walls some attention. I decided to install beadboard about 2/3 of the way up the walls with a chair rail on top. It was a big, and somewhat challenging project and it took me a few days to complete. But, I really think it was worth the effort.
Painting It All
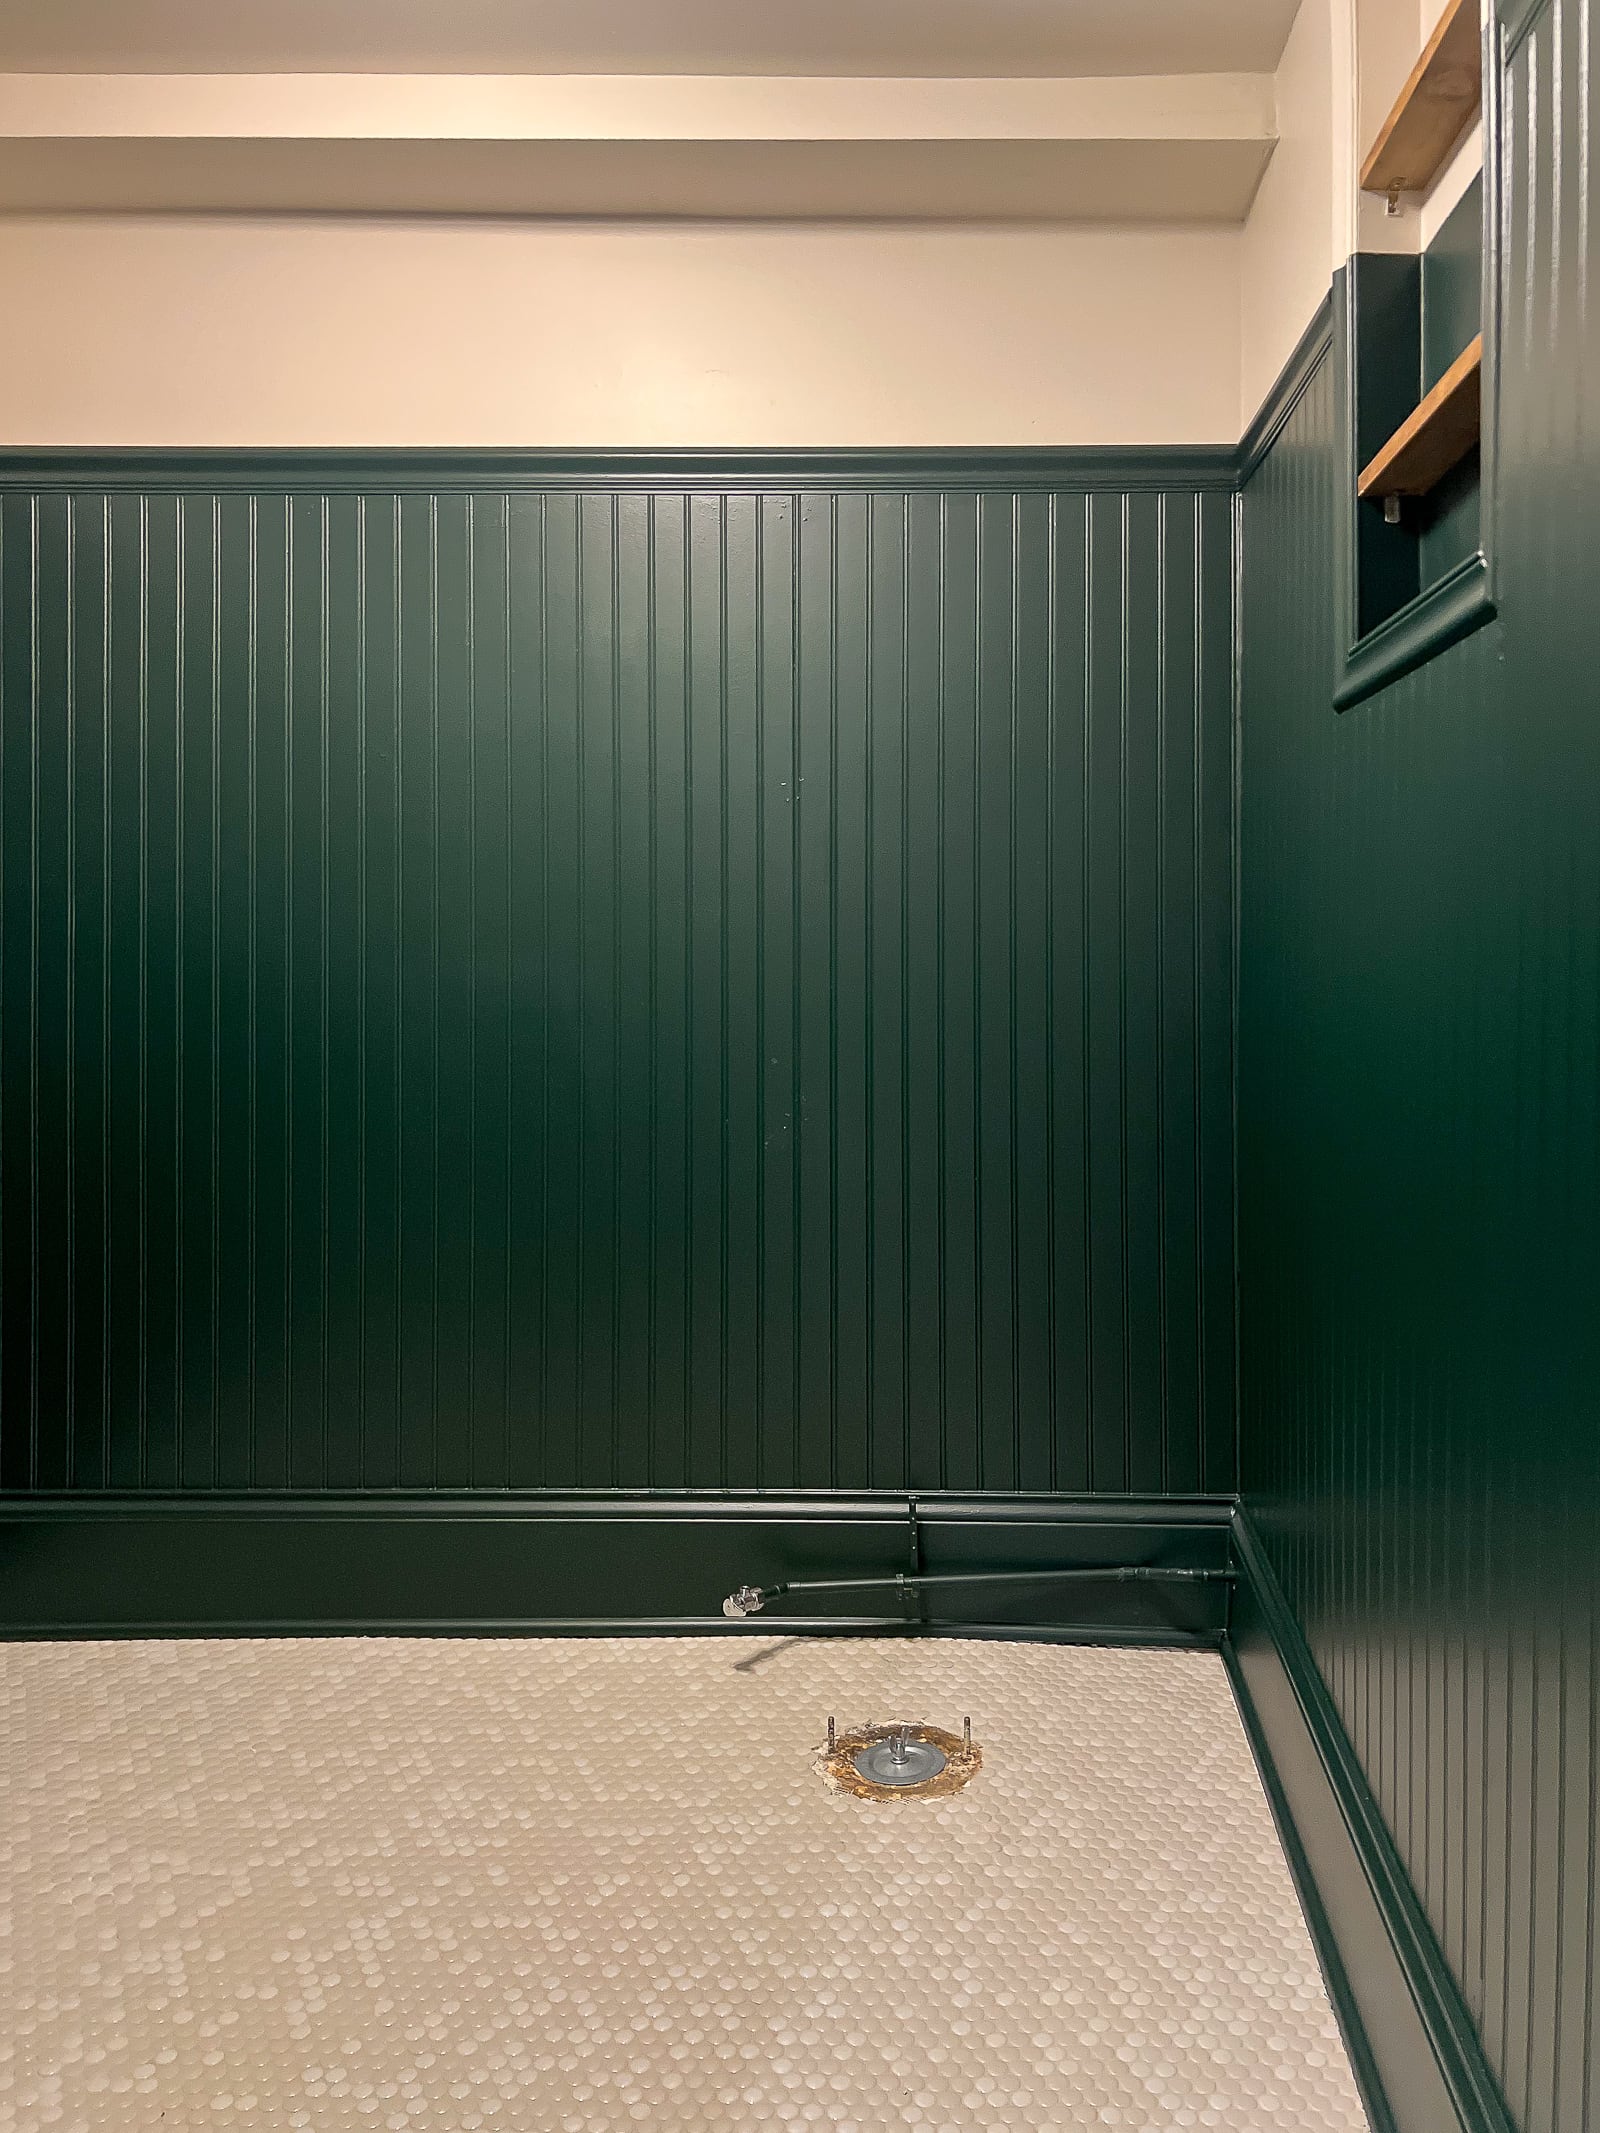
Finally, I painted the walls a dark green color to match the vanity and the top of the walls and ceilings Valspar’s “Clay Angel.” I was unsure if I loved it after the first coat, but once I had three coats of that dark green paint color on the beadboard, I was obsessed! You can see the full painting tutorial here, along with the formula for that dark green paint color.
What I Hired Out

I ended up having to hire out some of the plumbing and electrical work in the bathroom because these are skills that are far beyond my DIY skillset. I had a plumber come to move the pipes so I could center the vanity on the wall and he also had to move the water intake pipe for the toilet. Once I was done, he then returned to actually install the toilet and vanity.
The same goes for the electrical. I had an electrician out to add electrical so I could flank the mirror with two sconces and get some additional light in this windowless space.
Between the electrical and the plumbing, I spent about $1,100 on labor. I can’t imagine what the labor cost would have been if I hired out the demo, tiling, and woodworking in this room. Let’s just say, I saved big by doing those other projects myself.
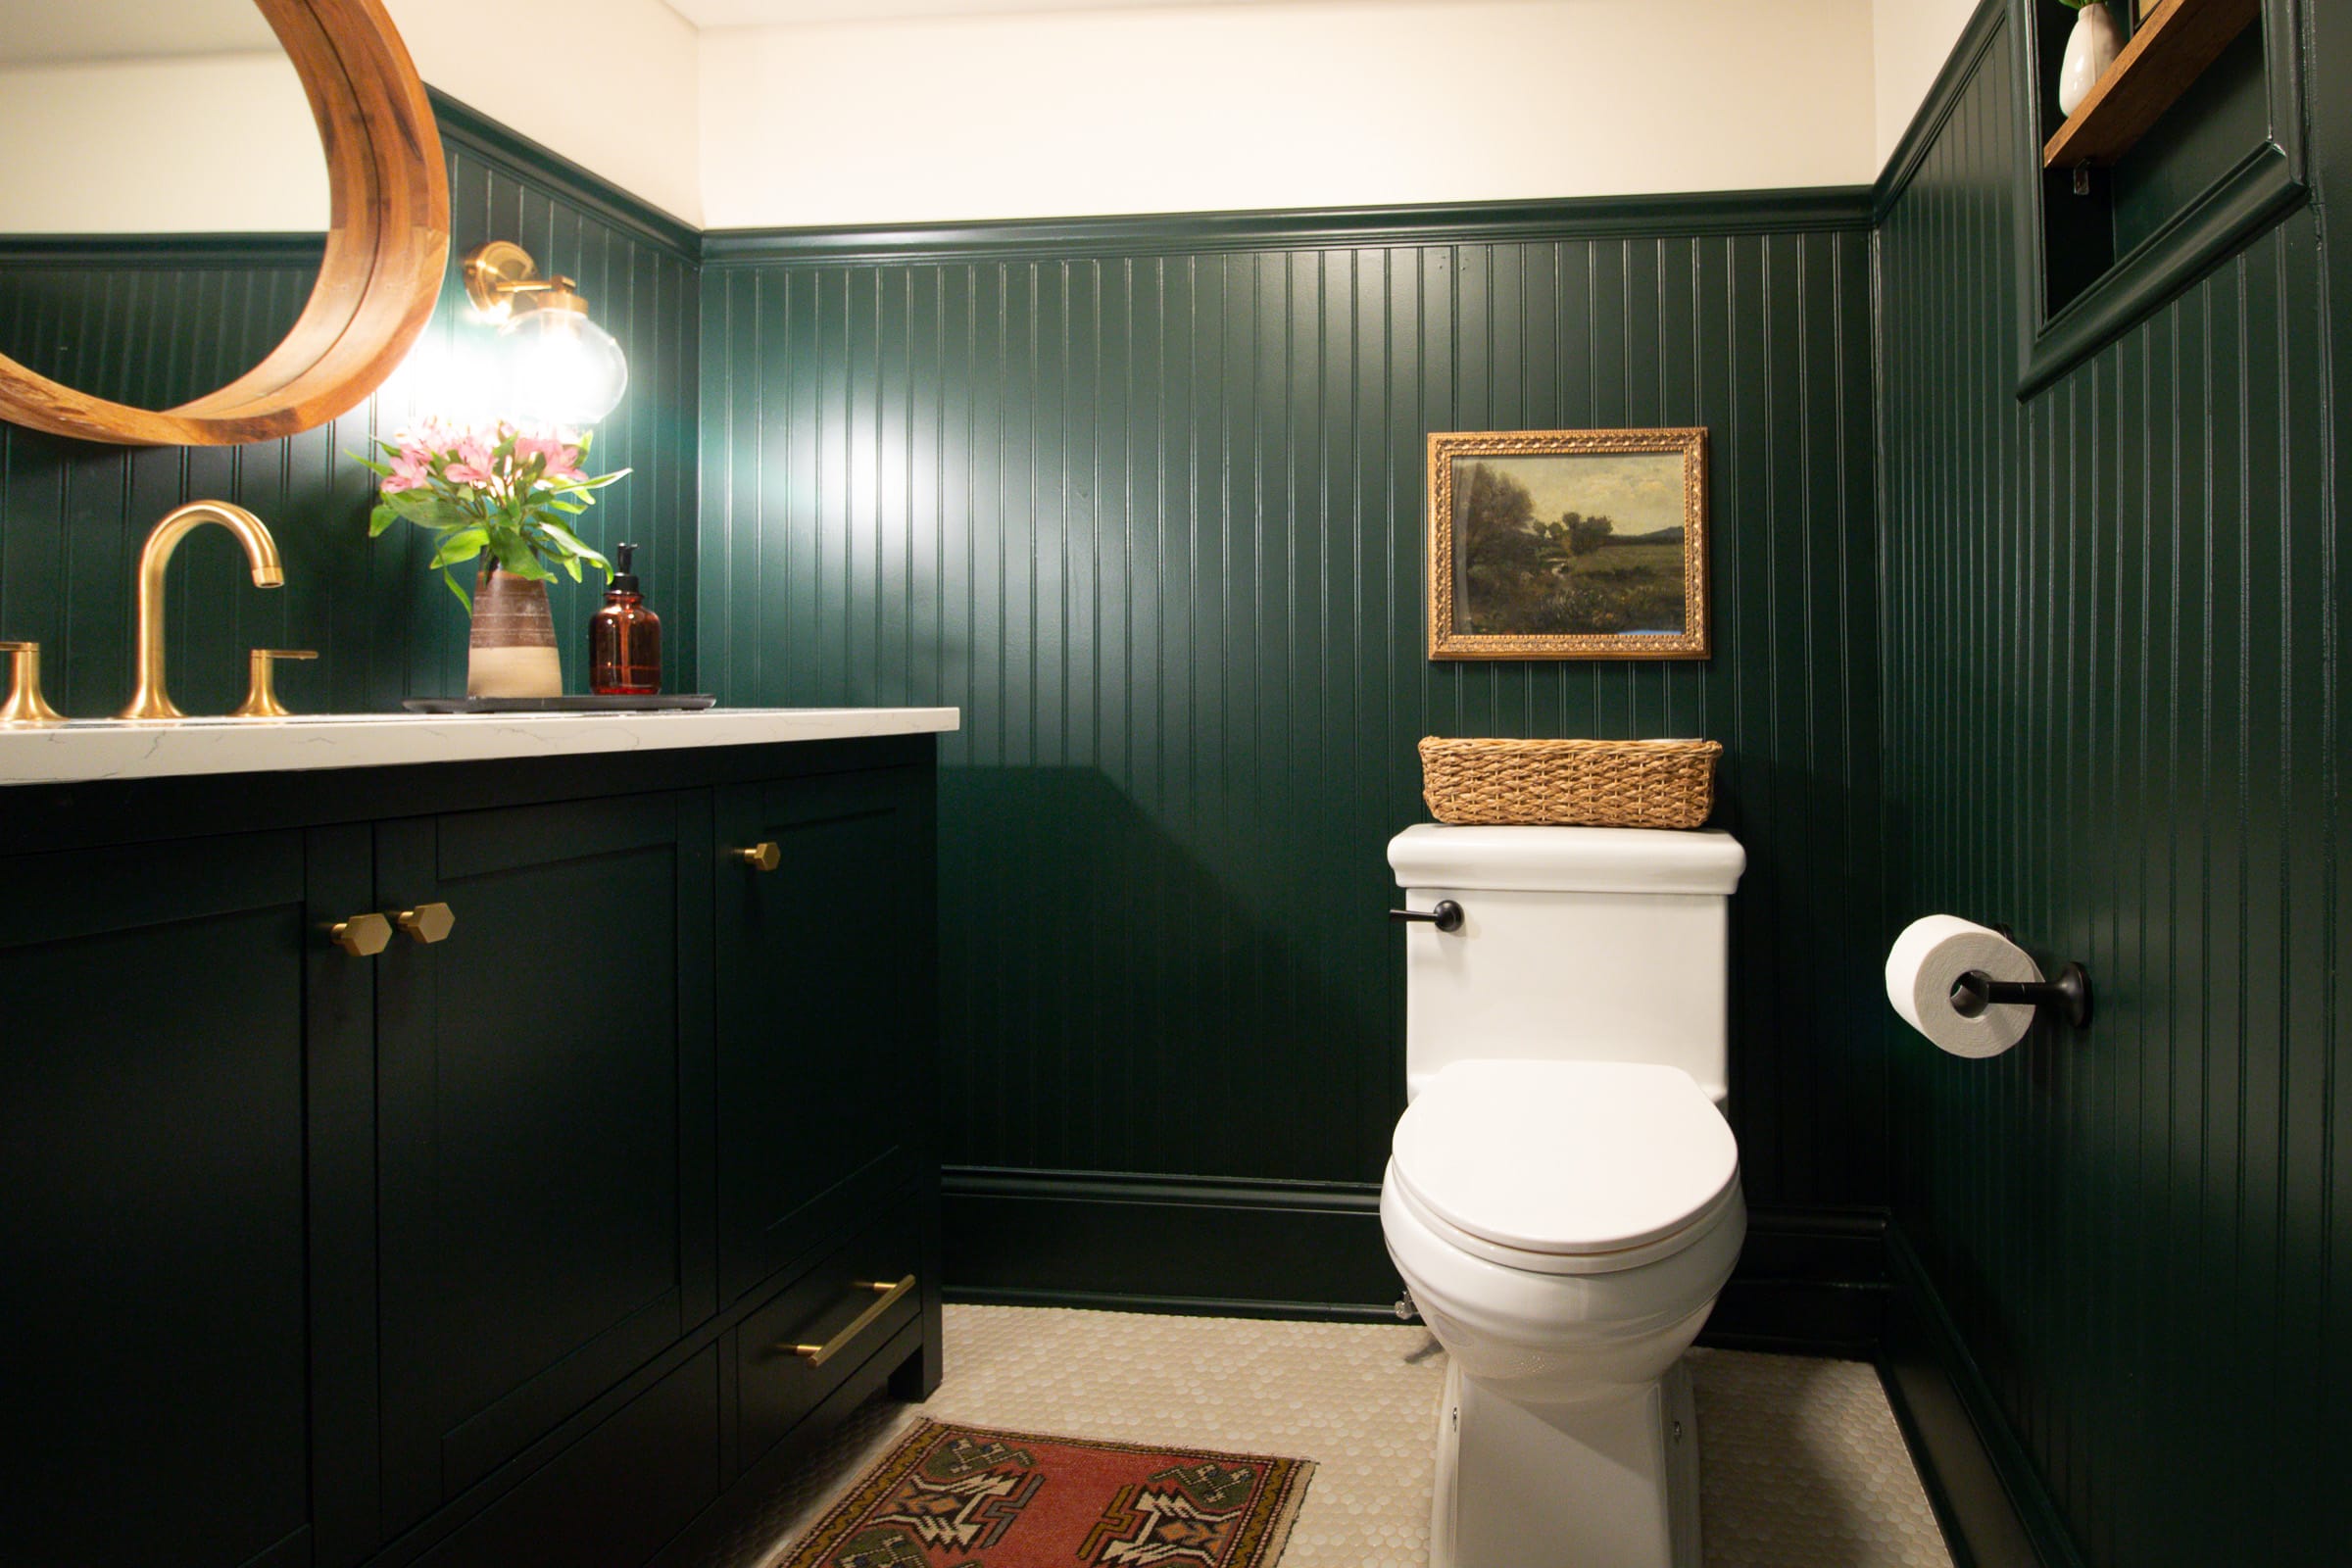
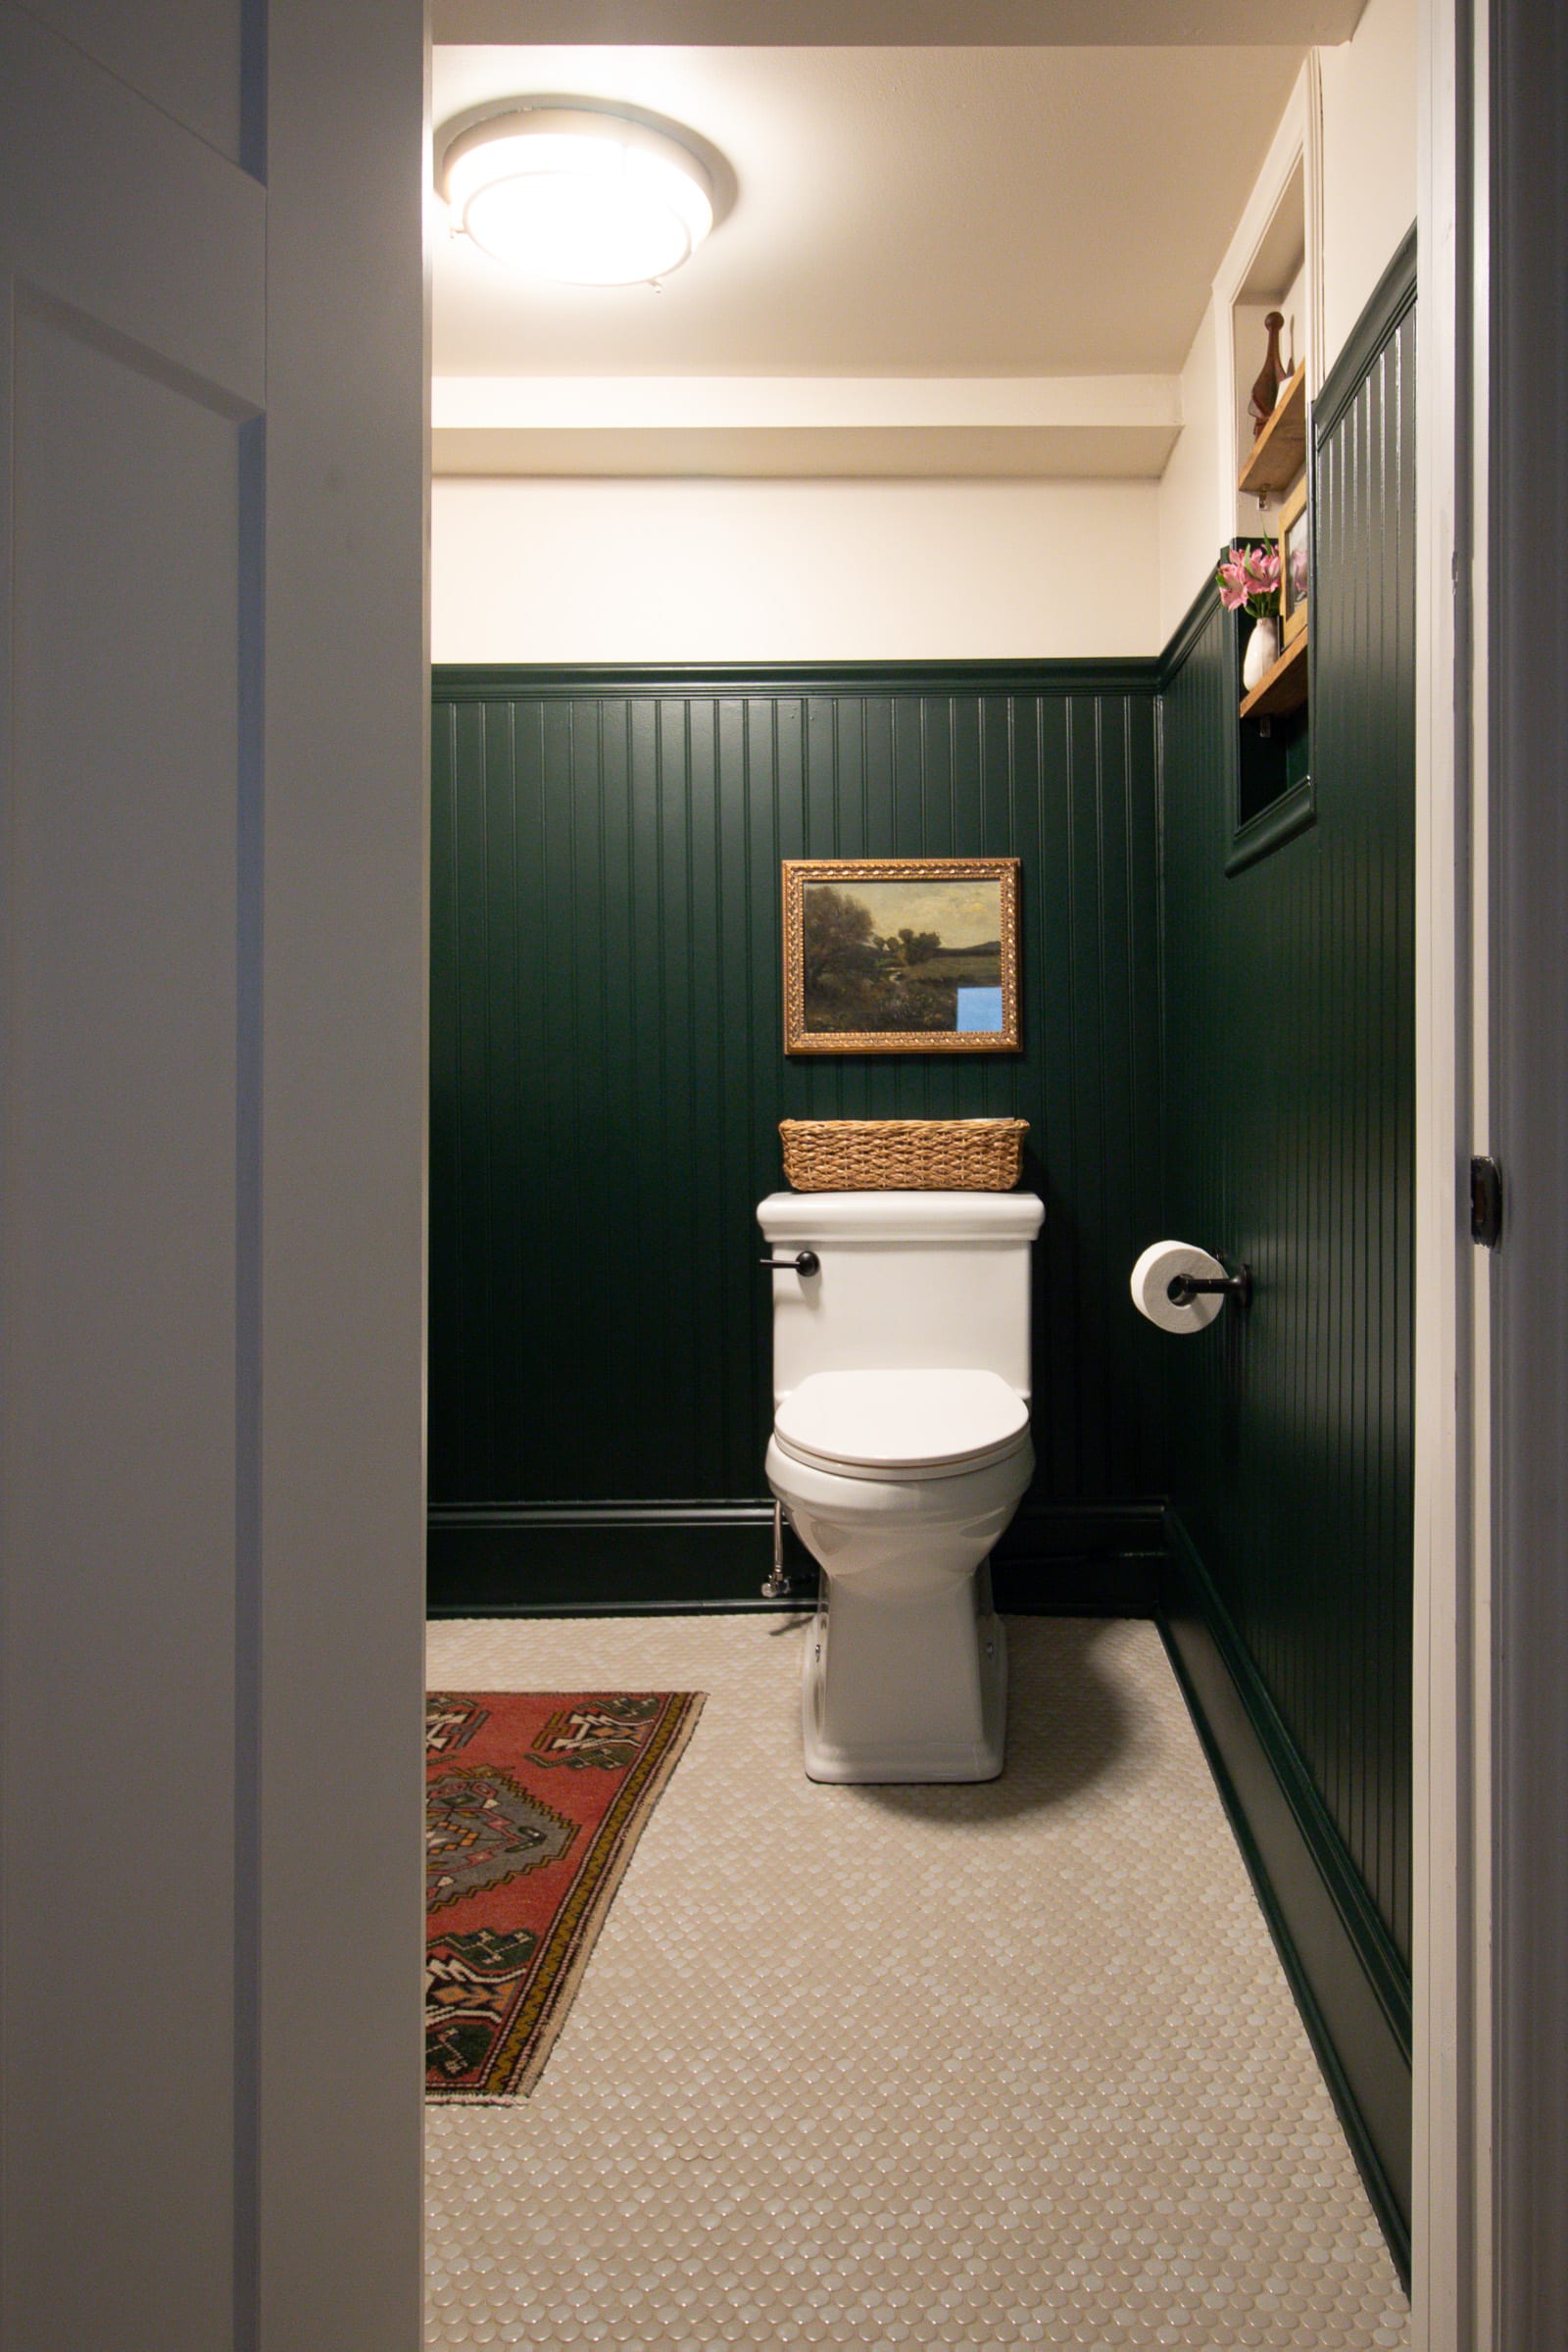
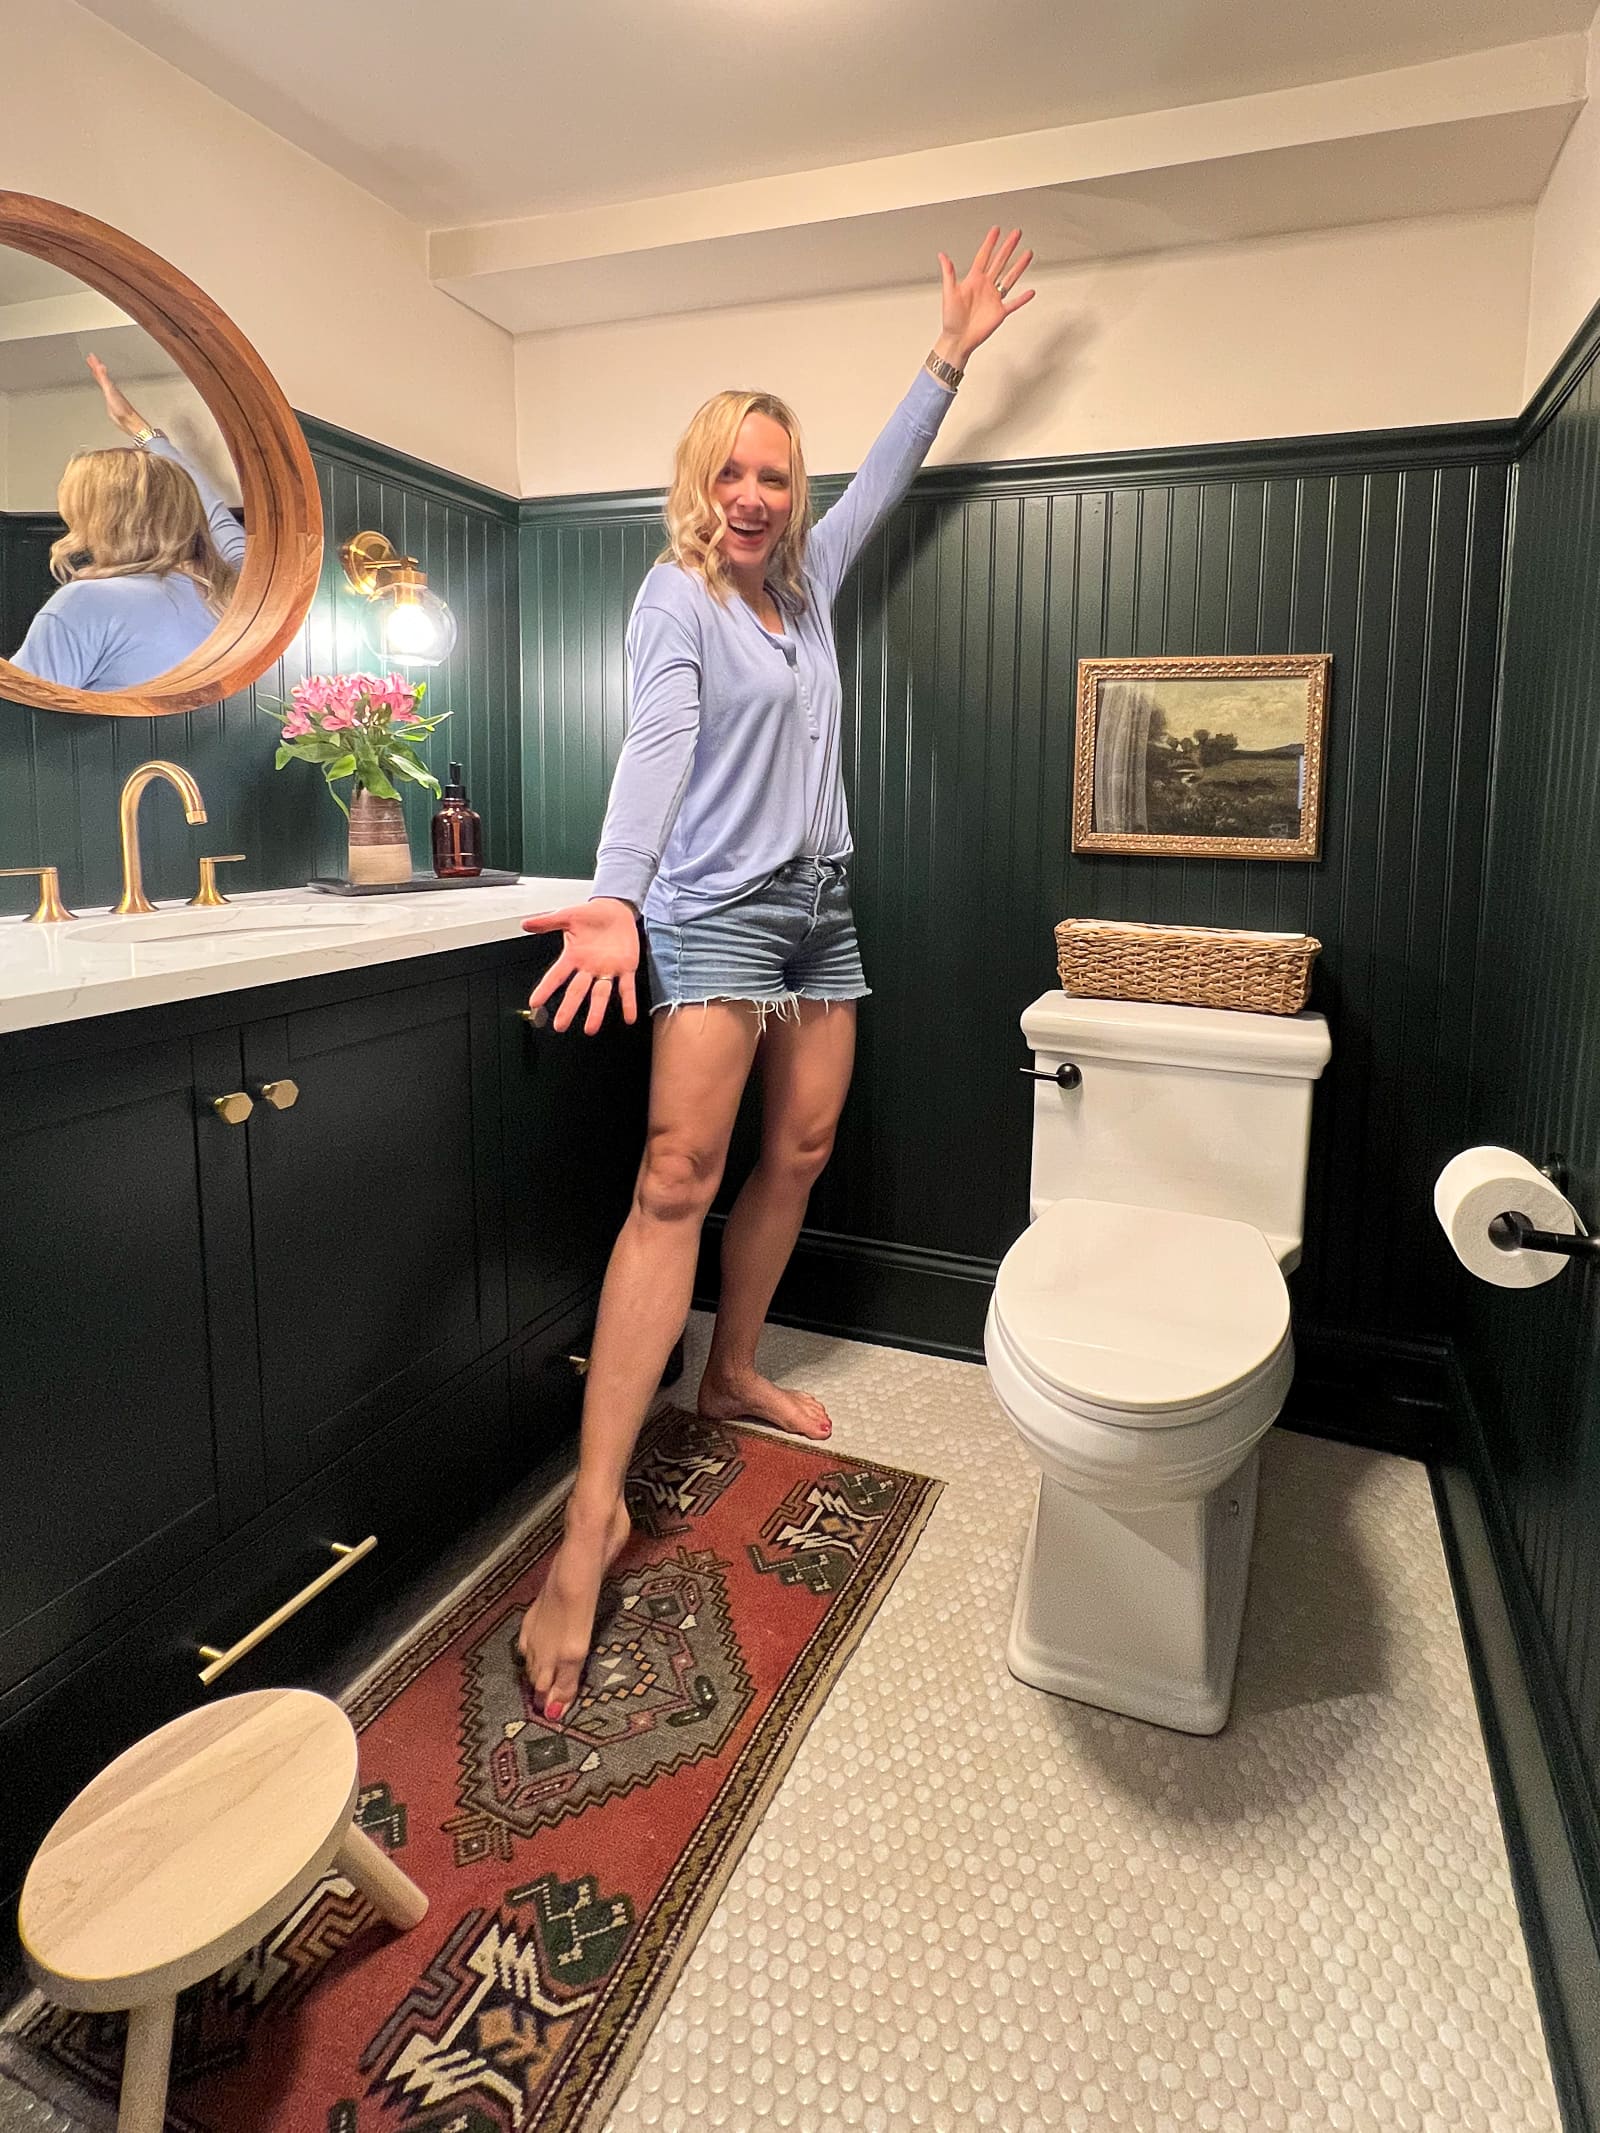
The Dark Green Bathroom – Now

Here’s our new dark green bathroom. To be honest, it turned out even better than I imagined in my head.
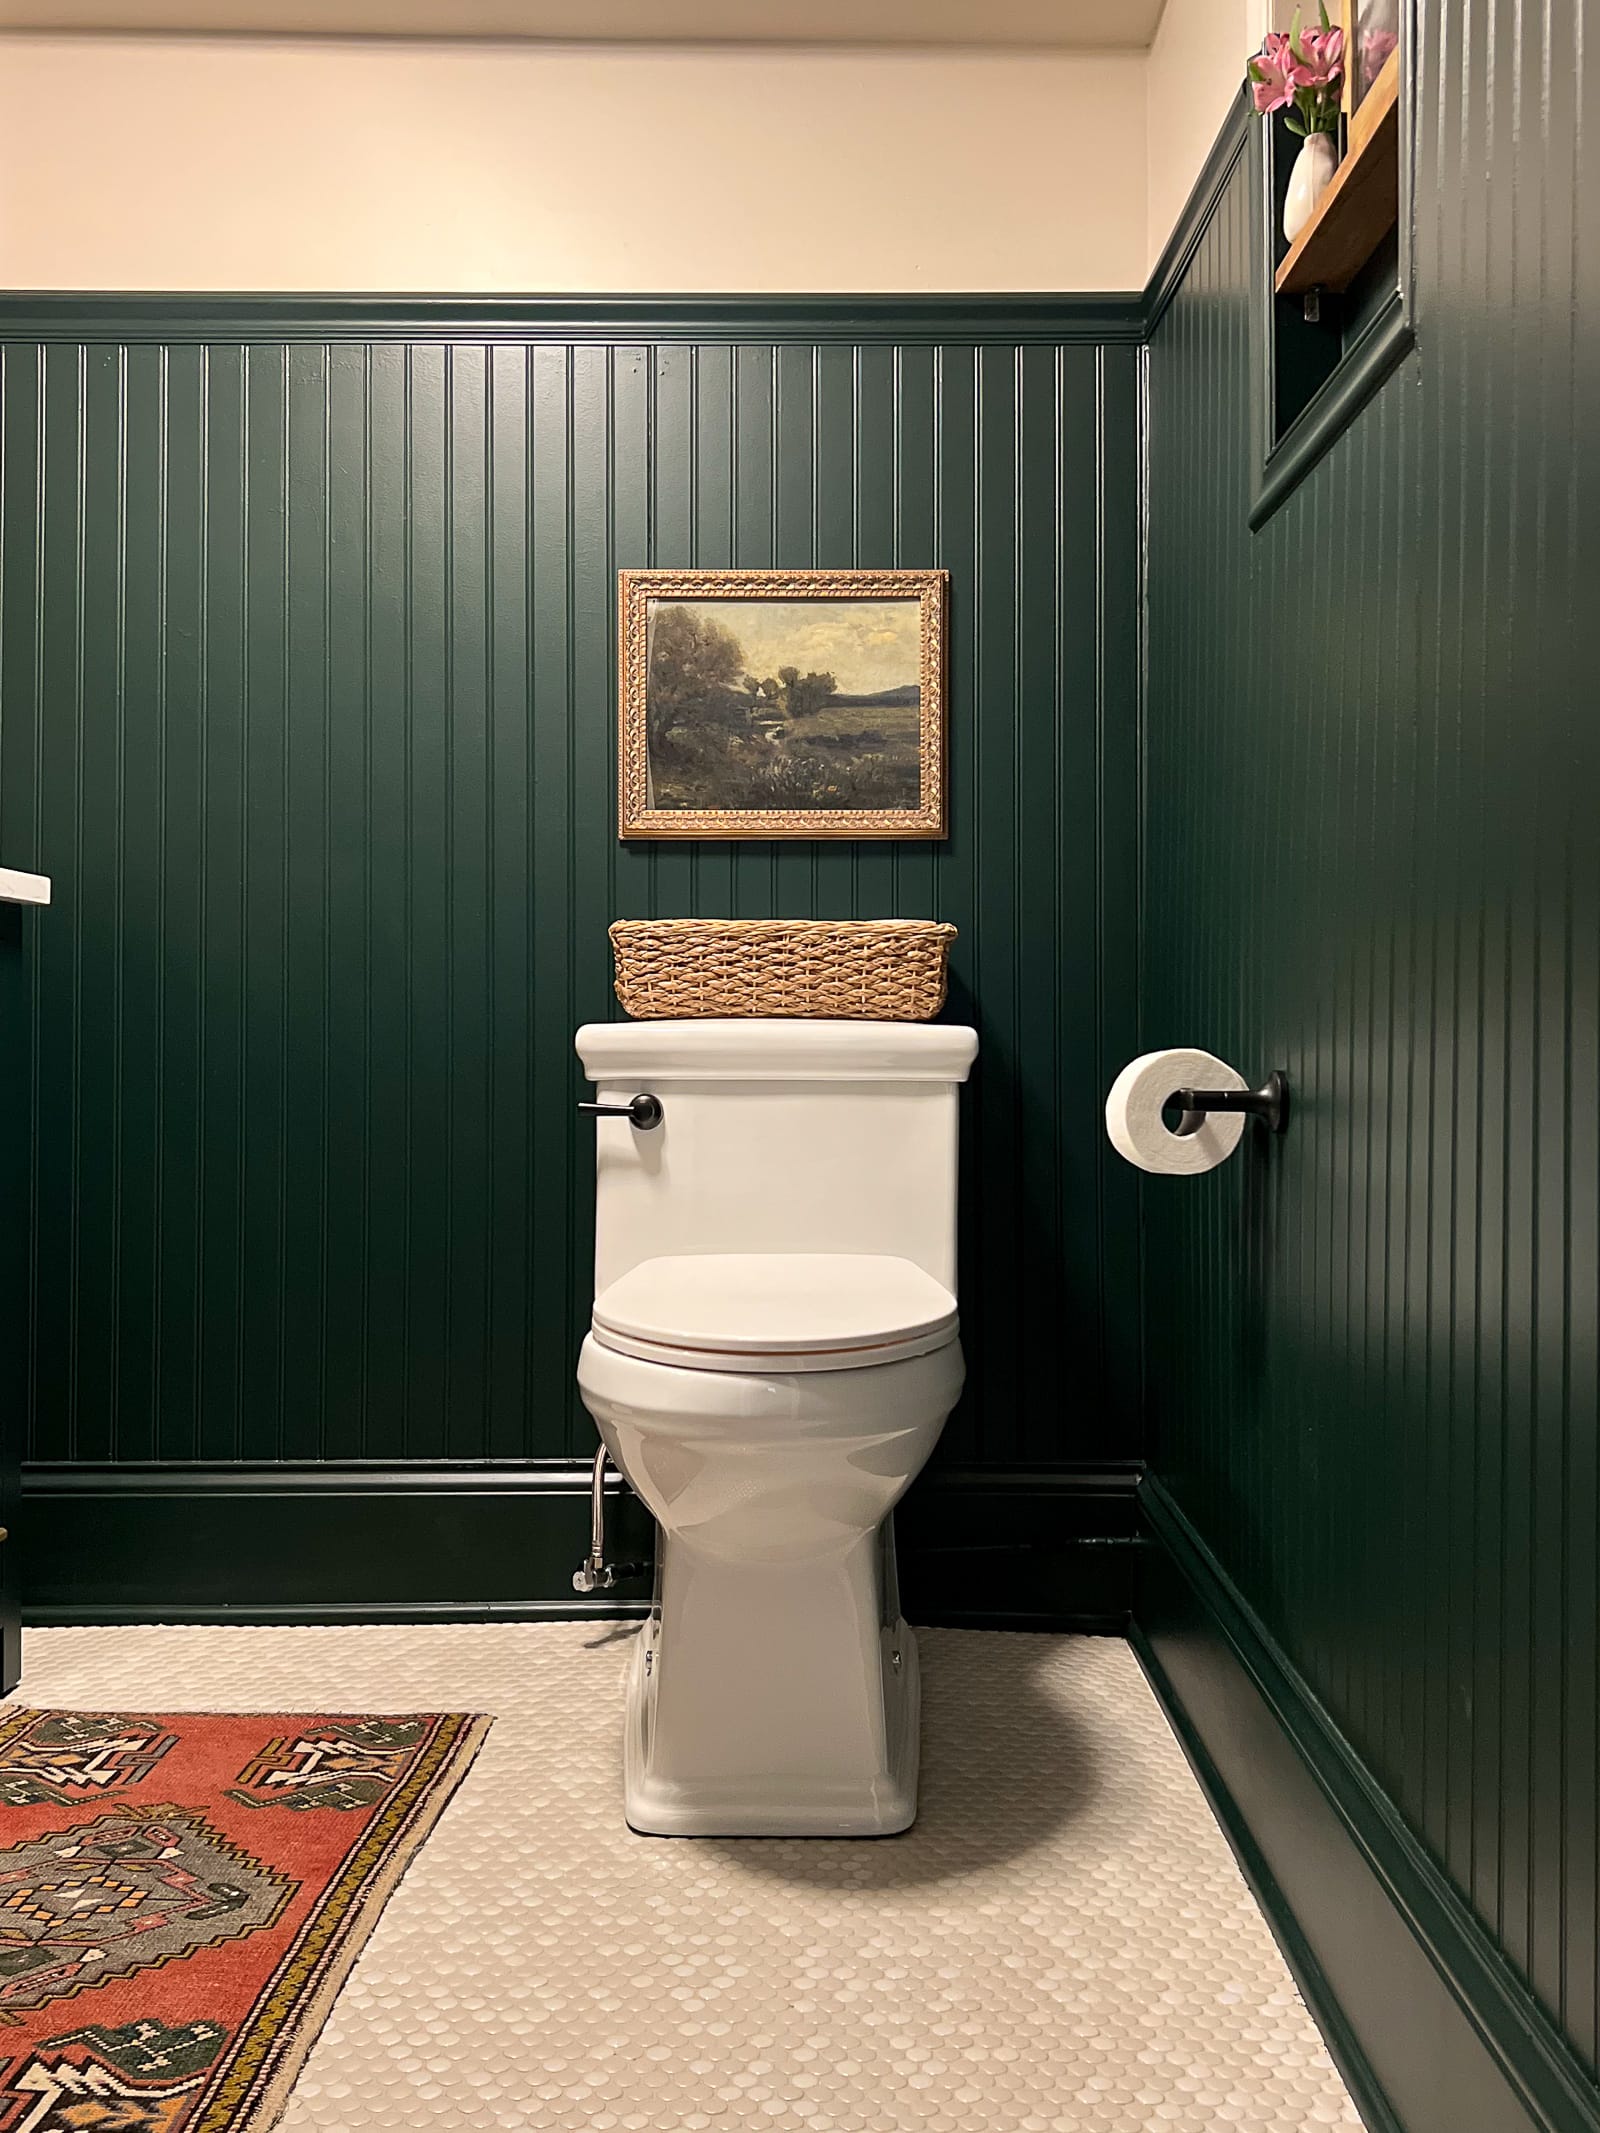
It feels like the bathroom you would find in an upscale cocktail lounge. There is a hint of traditional style with the penny tile and beadboard, but a luxe feel with the dark green and gold combo.
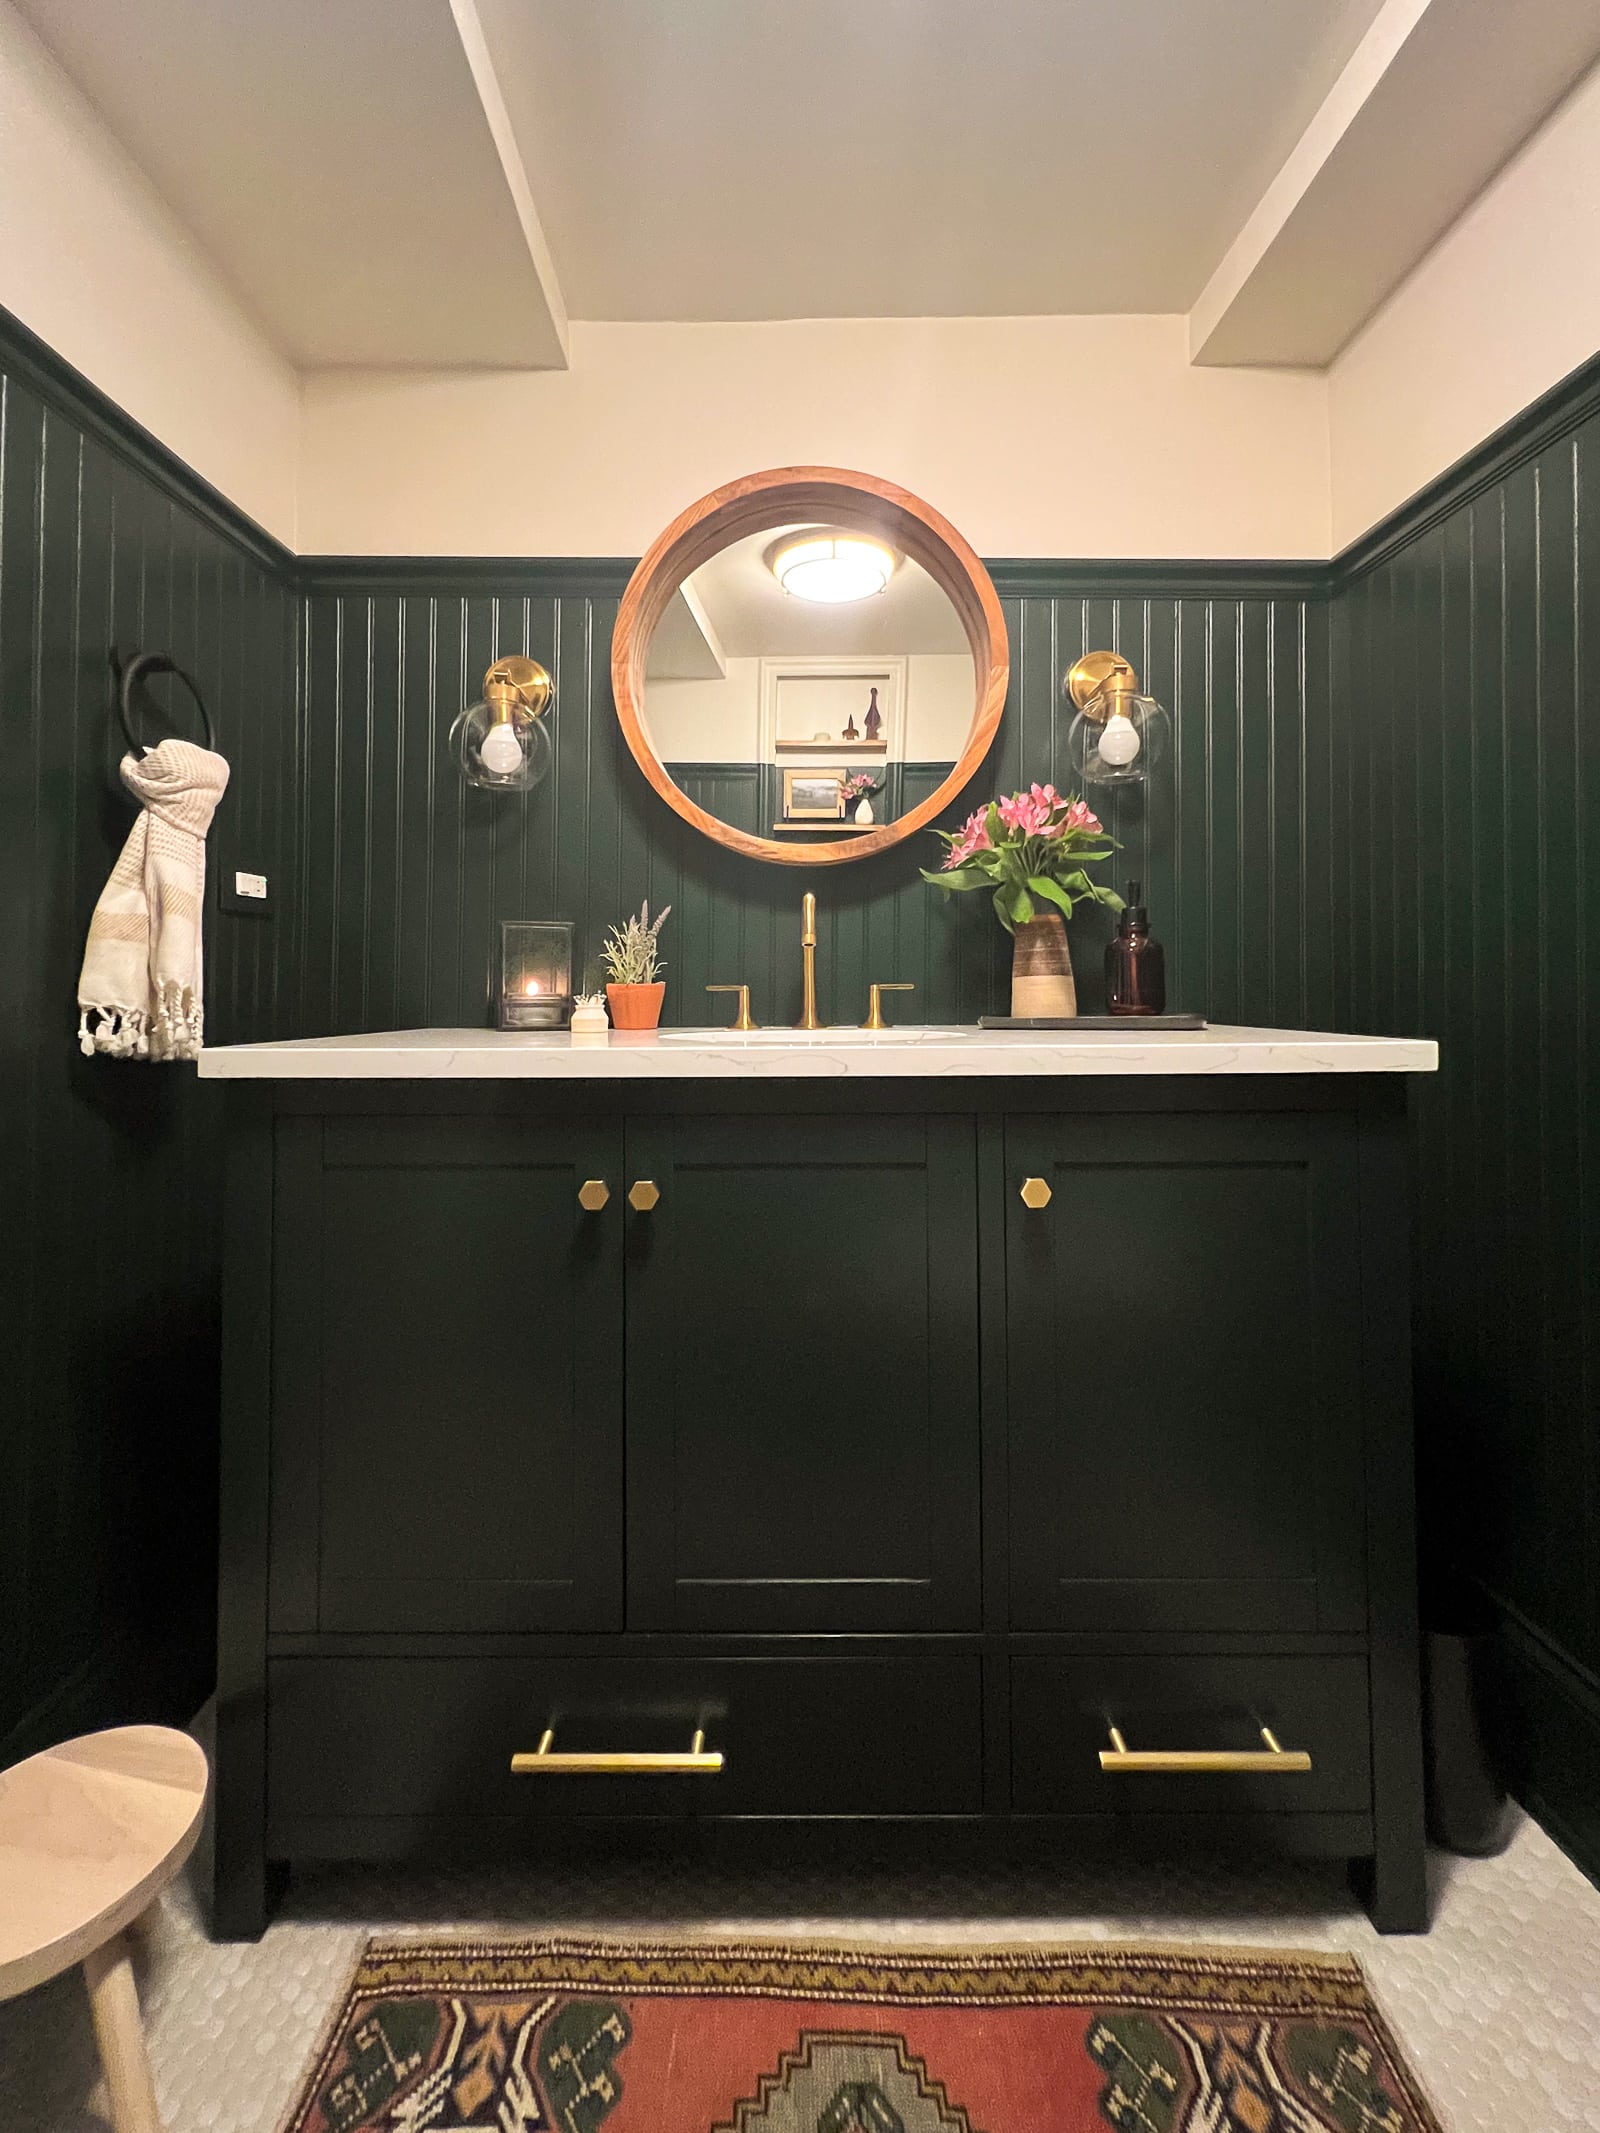
The Dark Green Vanity
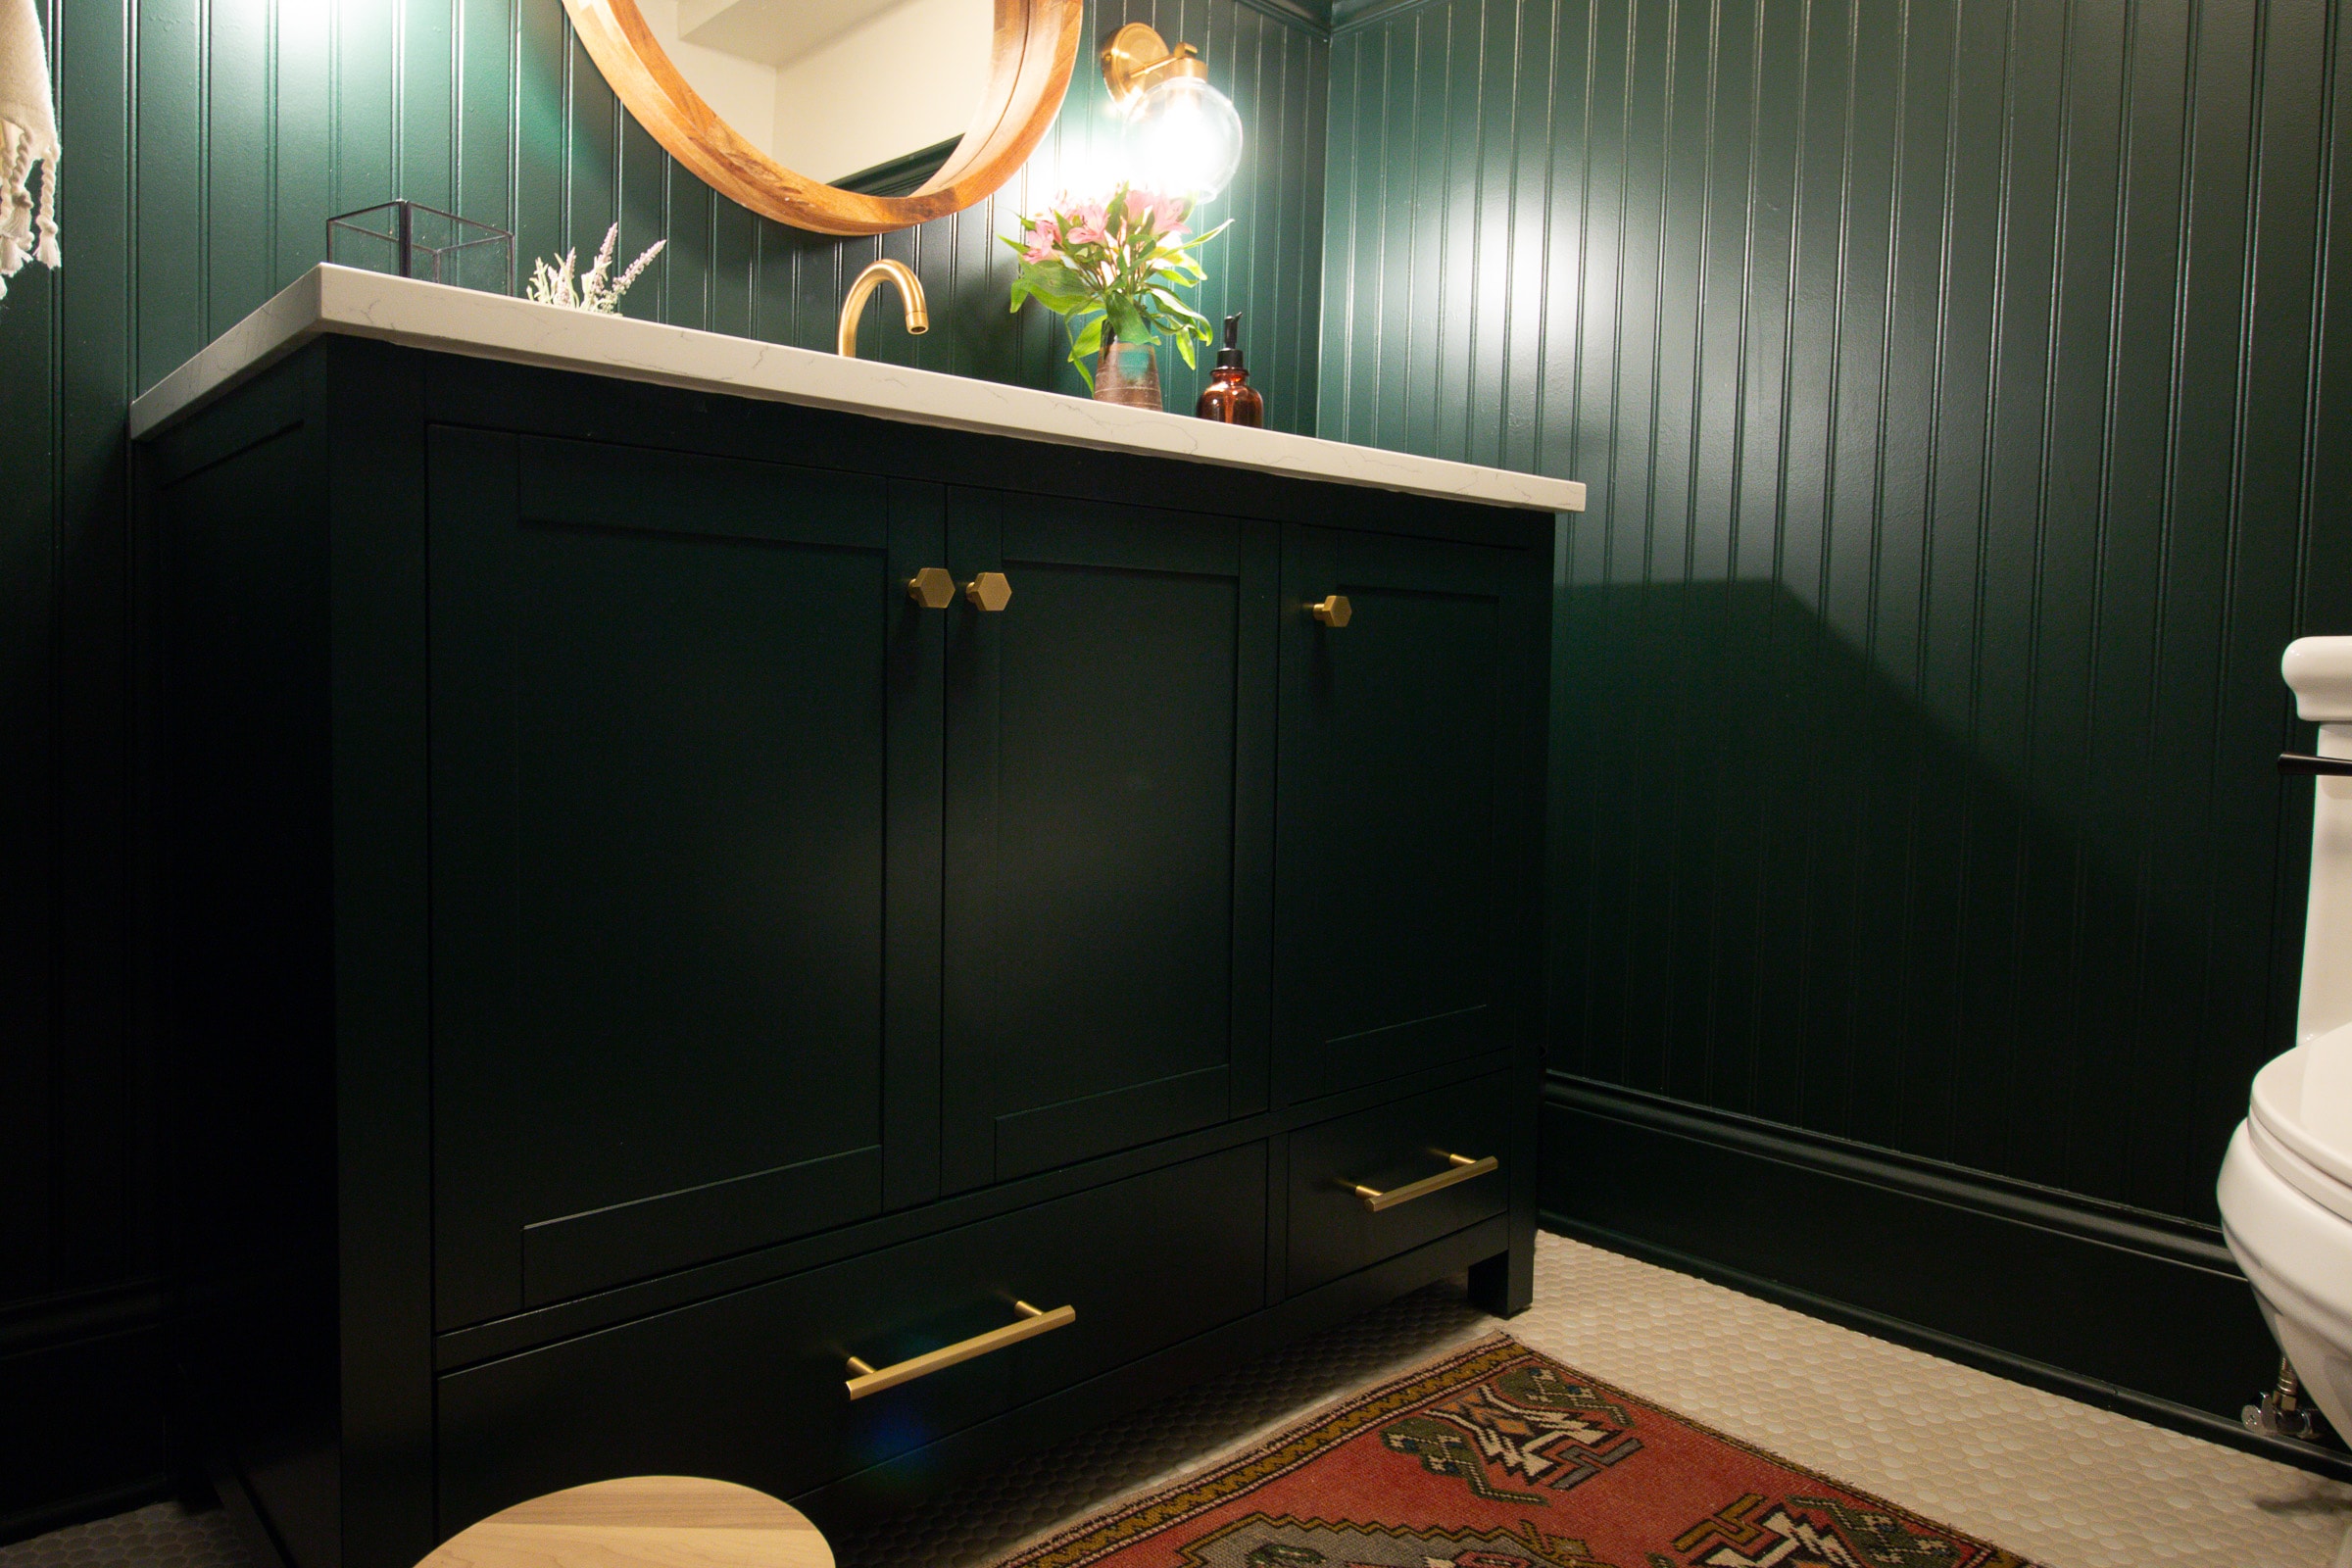
The vanity is a stunner and it has loads of storage with three cabinets and two drawers. I wasn’t sure if I would keep the hardware that came with it, but I ended up really liking these pulls and knobs.

On top, I went with a white feathered quartz for durability. I was tempted to go with the Carrara marble top instead (It’s stunning!), but since the kids will be down here often, I don’t want to be worried about water marks and stains on top. This white quartz looks great and really pops off the dark walls.
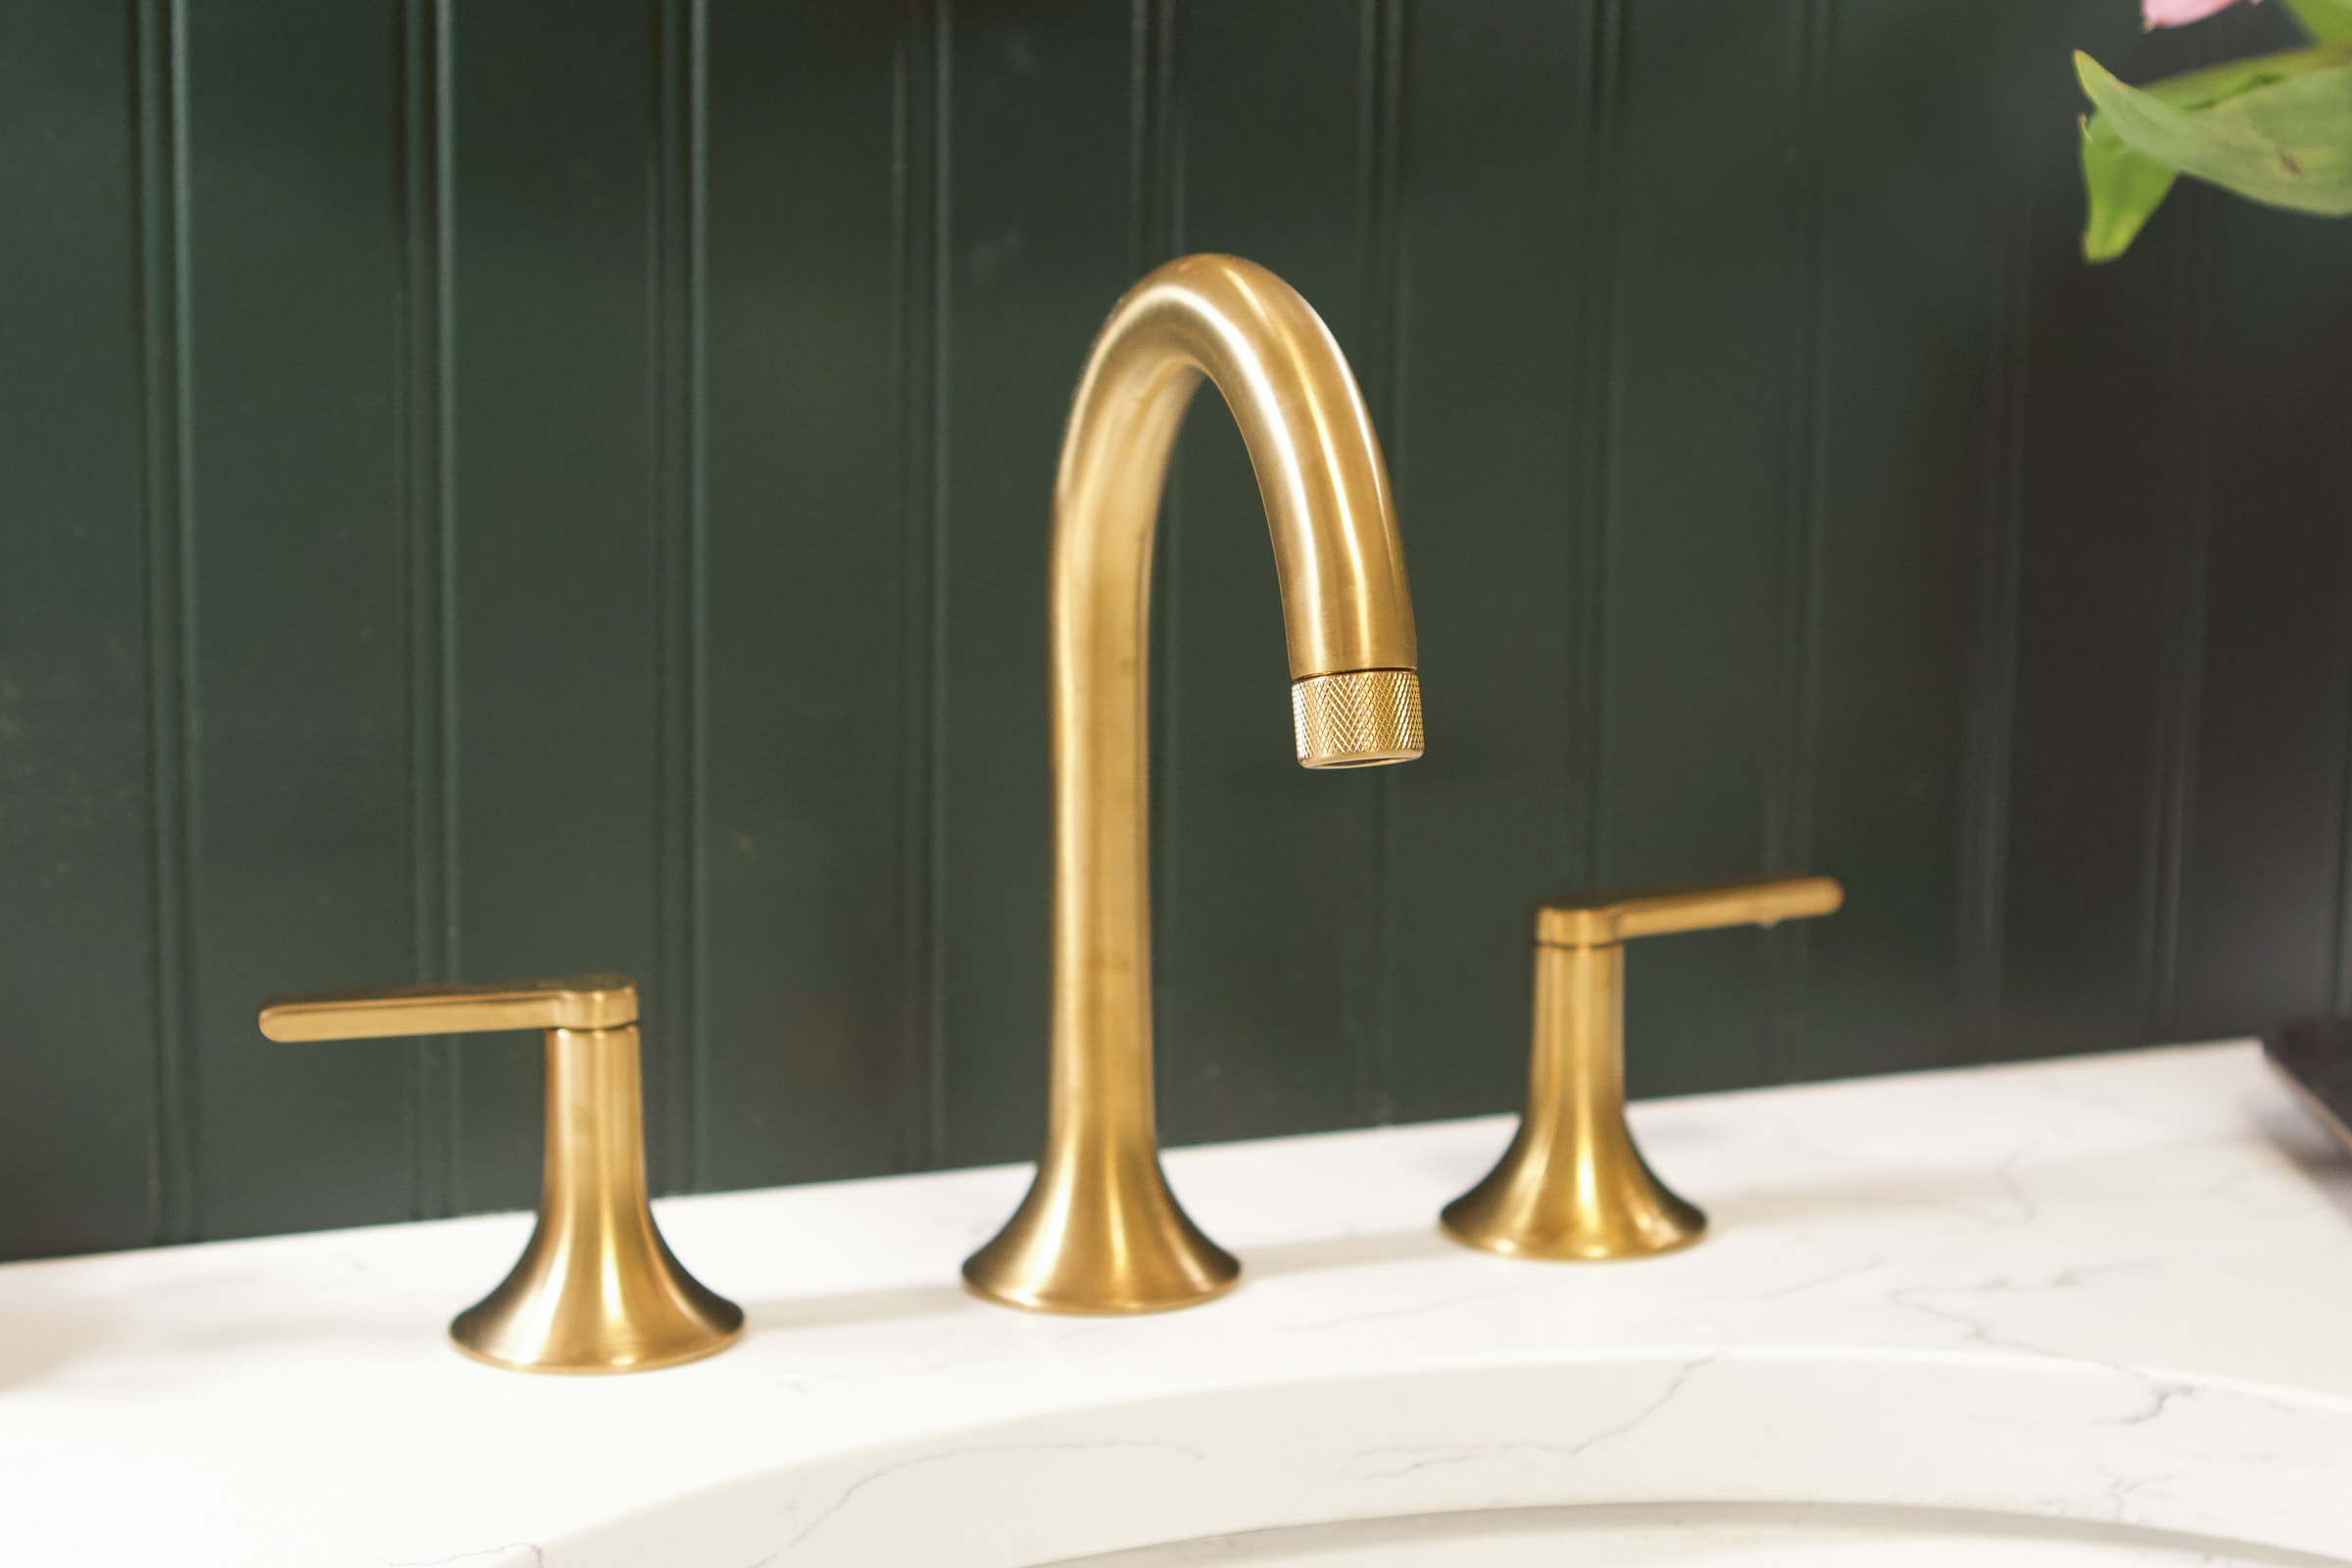
The gold faucet is the same one that we have in our main bathroom upstairs. While I don’t think every fixture in your home should match, I do like repeating some elements throughout your home to keep things cohesive. The faucets in our main bathroom still look amazing, so it was an easy decision to go with that same one in here. I did, however, swap the aerator for a more decorative one. It comes with two and you can easily interchange them! I like the subtle detailing on this one because it exactly matches the detailing on the sconces!
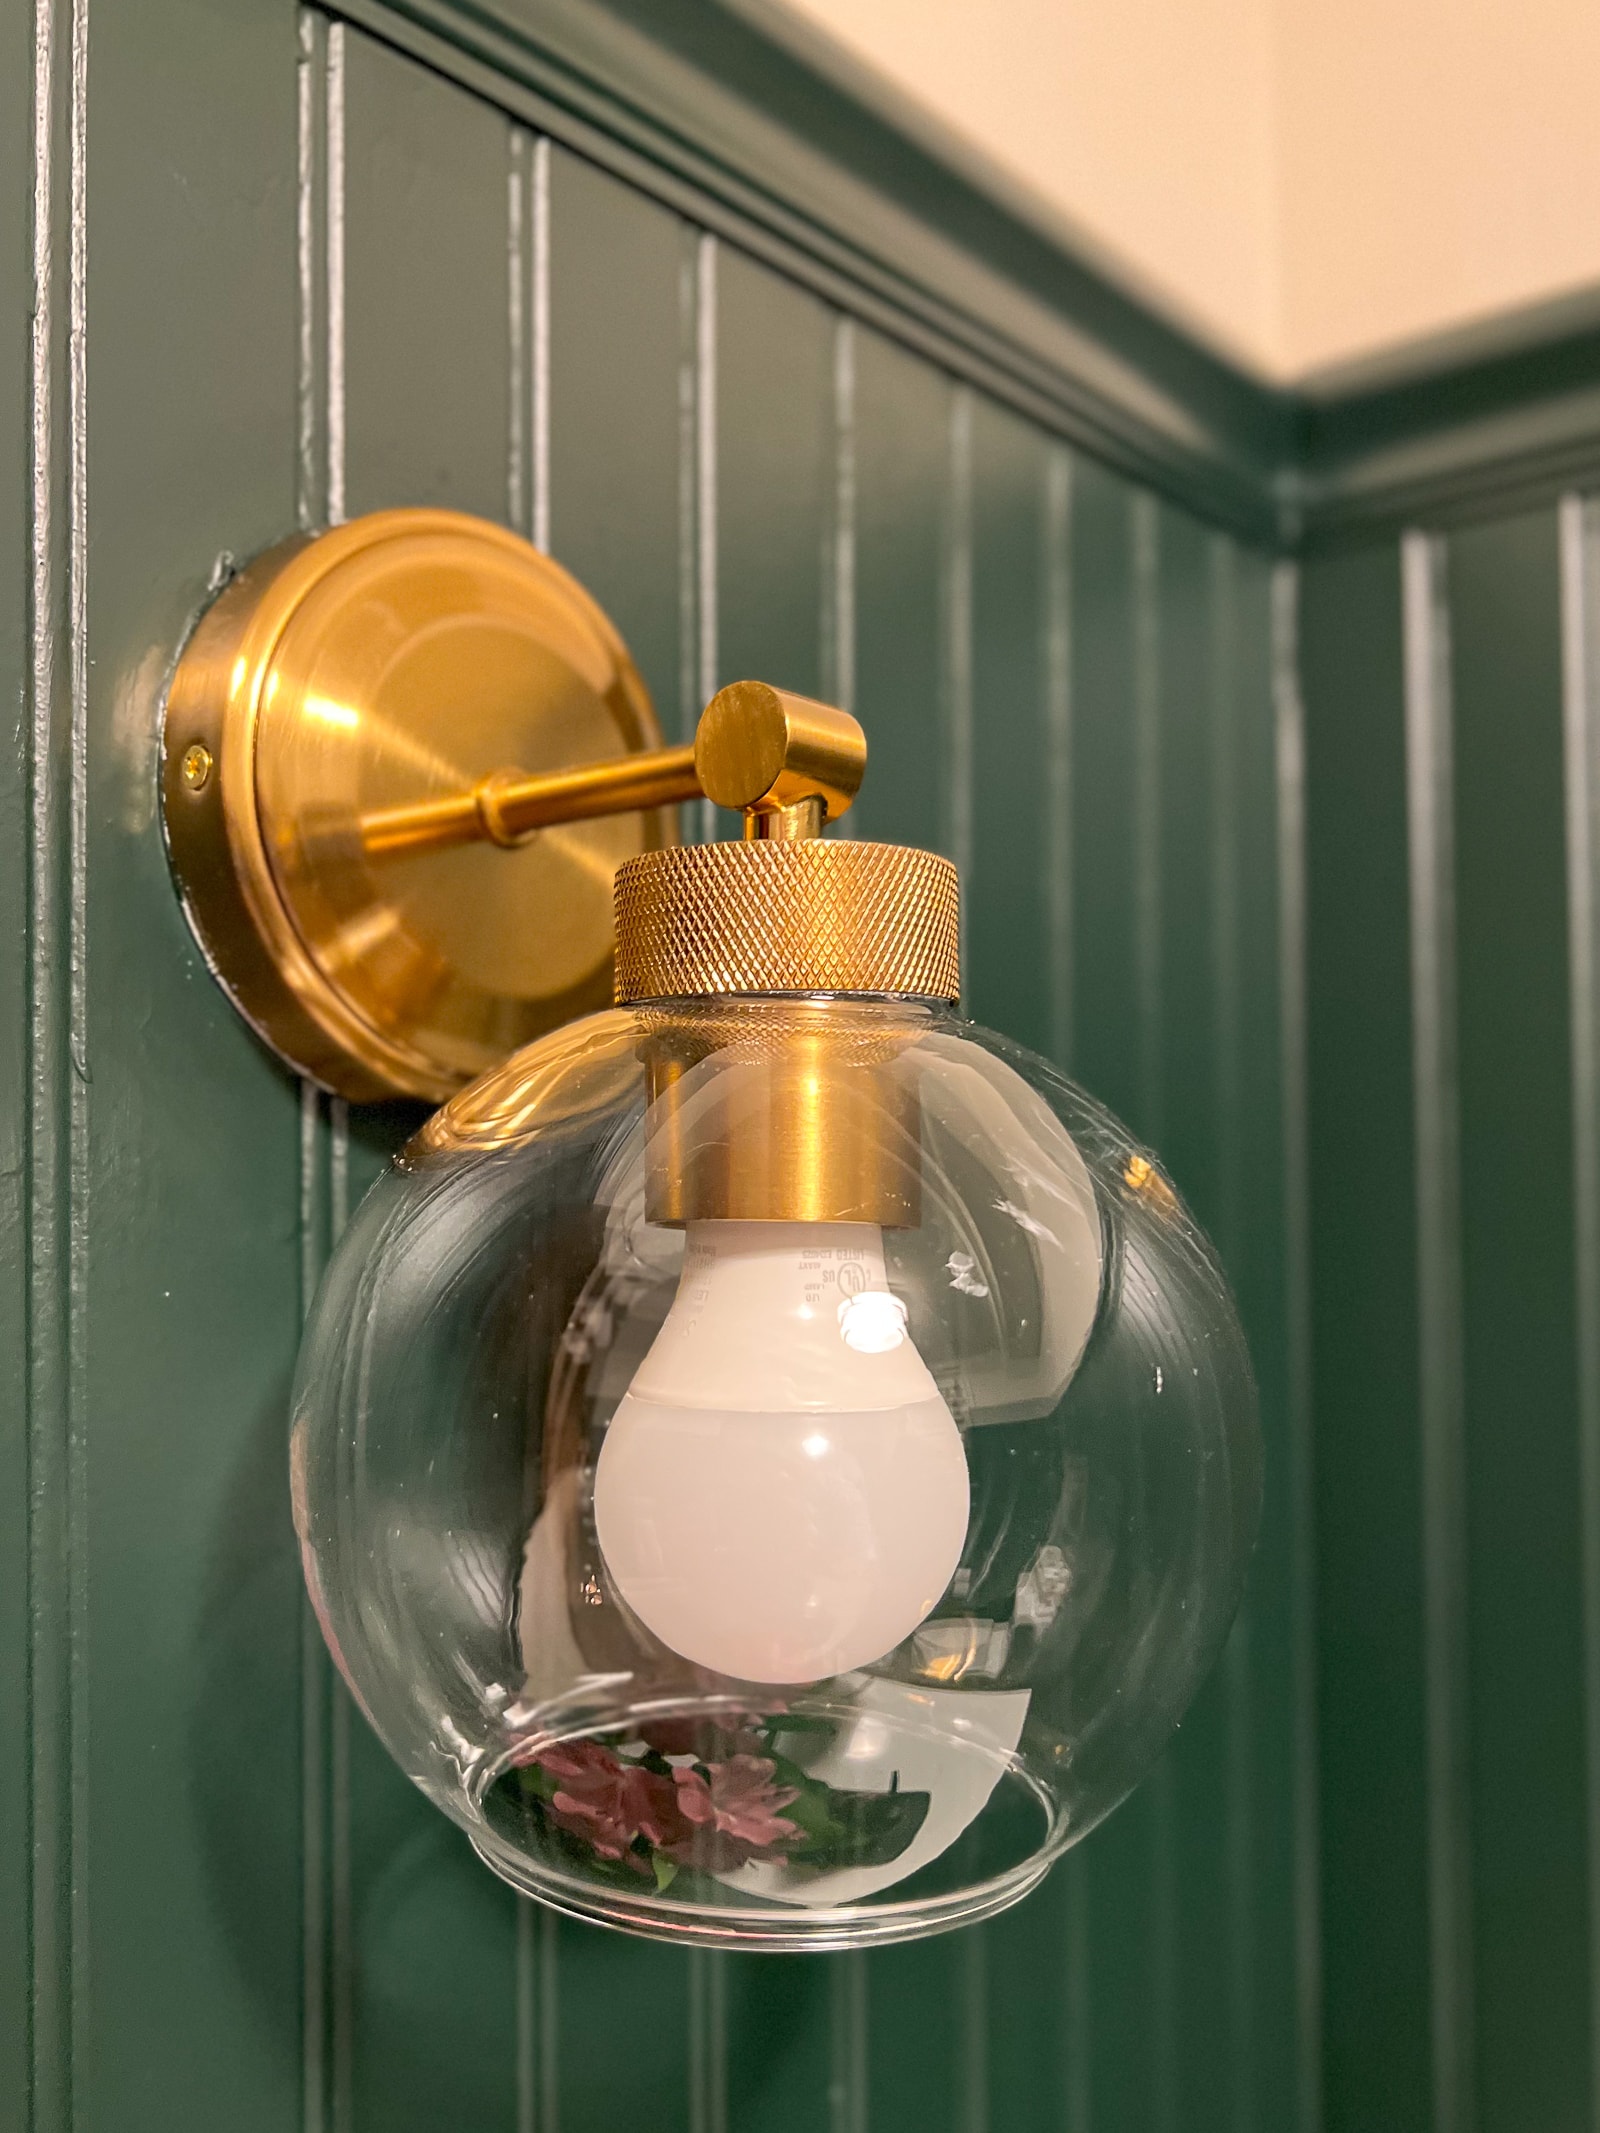
Isn’t that super cool how they match and complement one another? In a small space, like a bathroom, I typically suggest getting all of your hardware from the same manufacturer so the metals can match. In here the gold faucet and sconces are both from Signature Hardware, so they match! It can be tough to match brass/gold finishes between various manufacturers, so that’s my foolproof method.
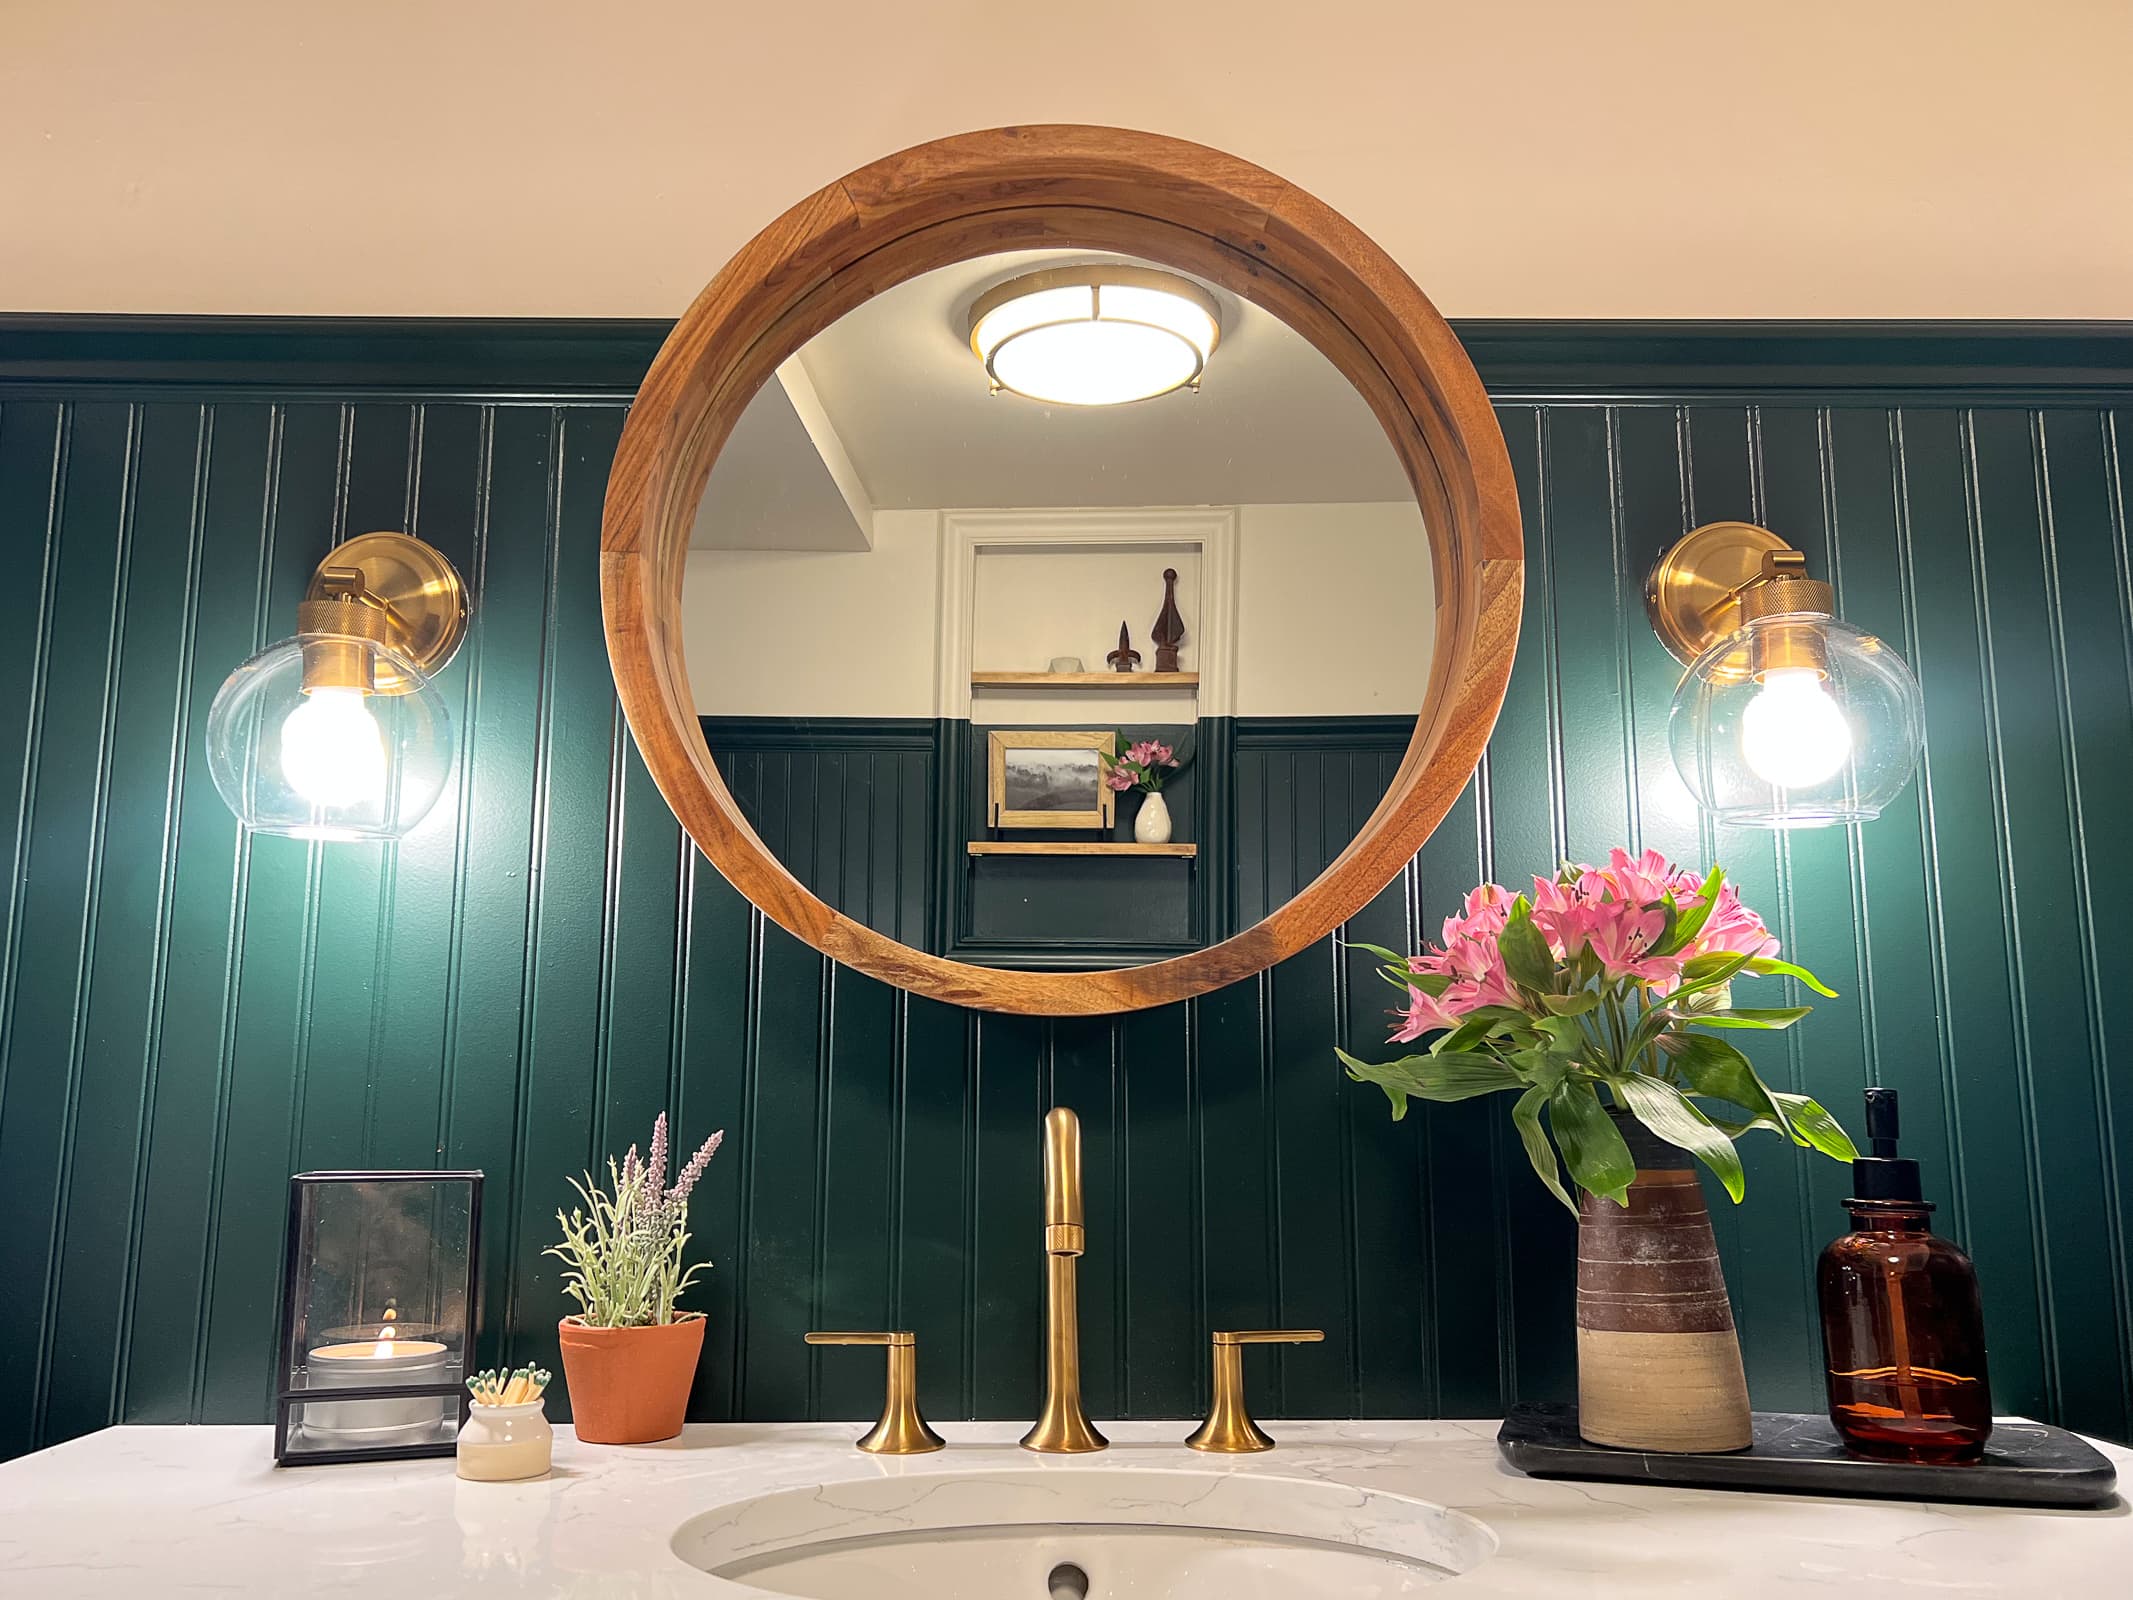
Those new sconces emit so much light! Even though the walls are now dark, this bathroom truly is brighter than ever since I tripled the amount of light in here! I am happy that I spent the extra money to center the vanity and add the electrical for these. It took a bit of extra time and money, but it was worth it!
Black Finishes Too
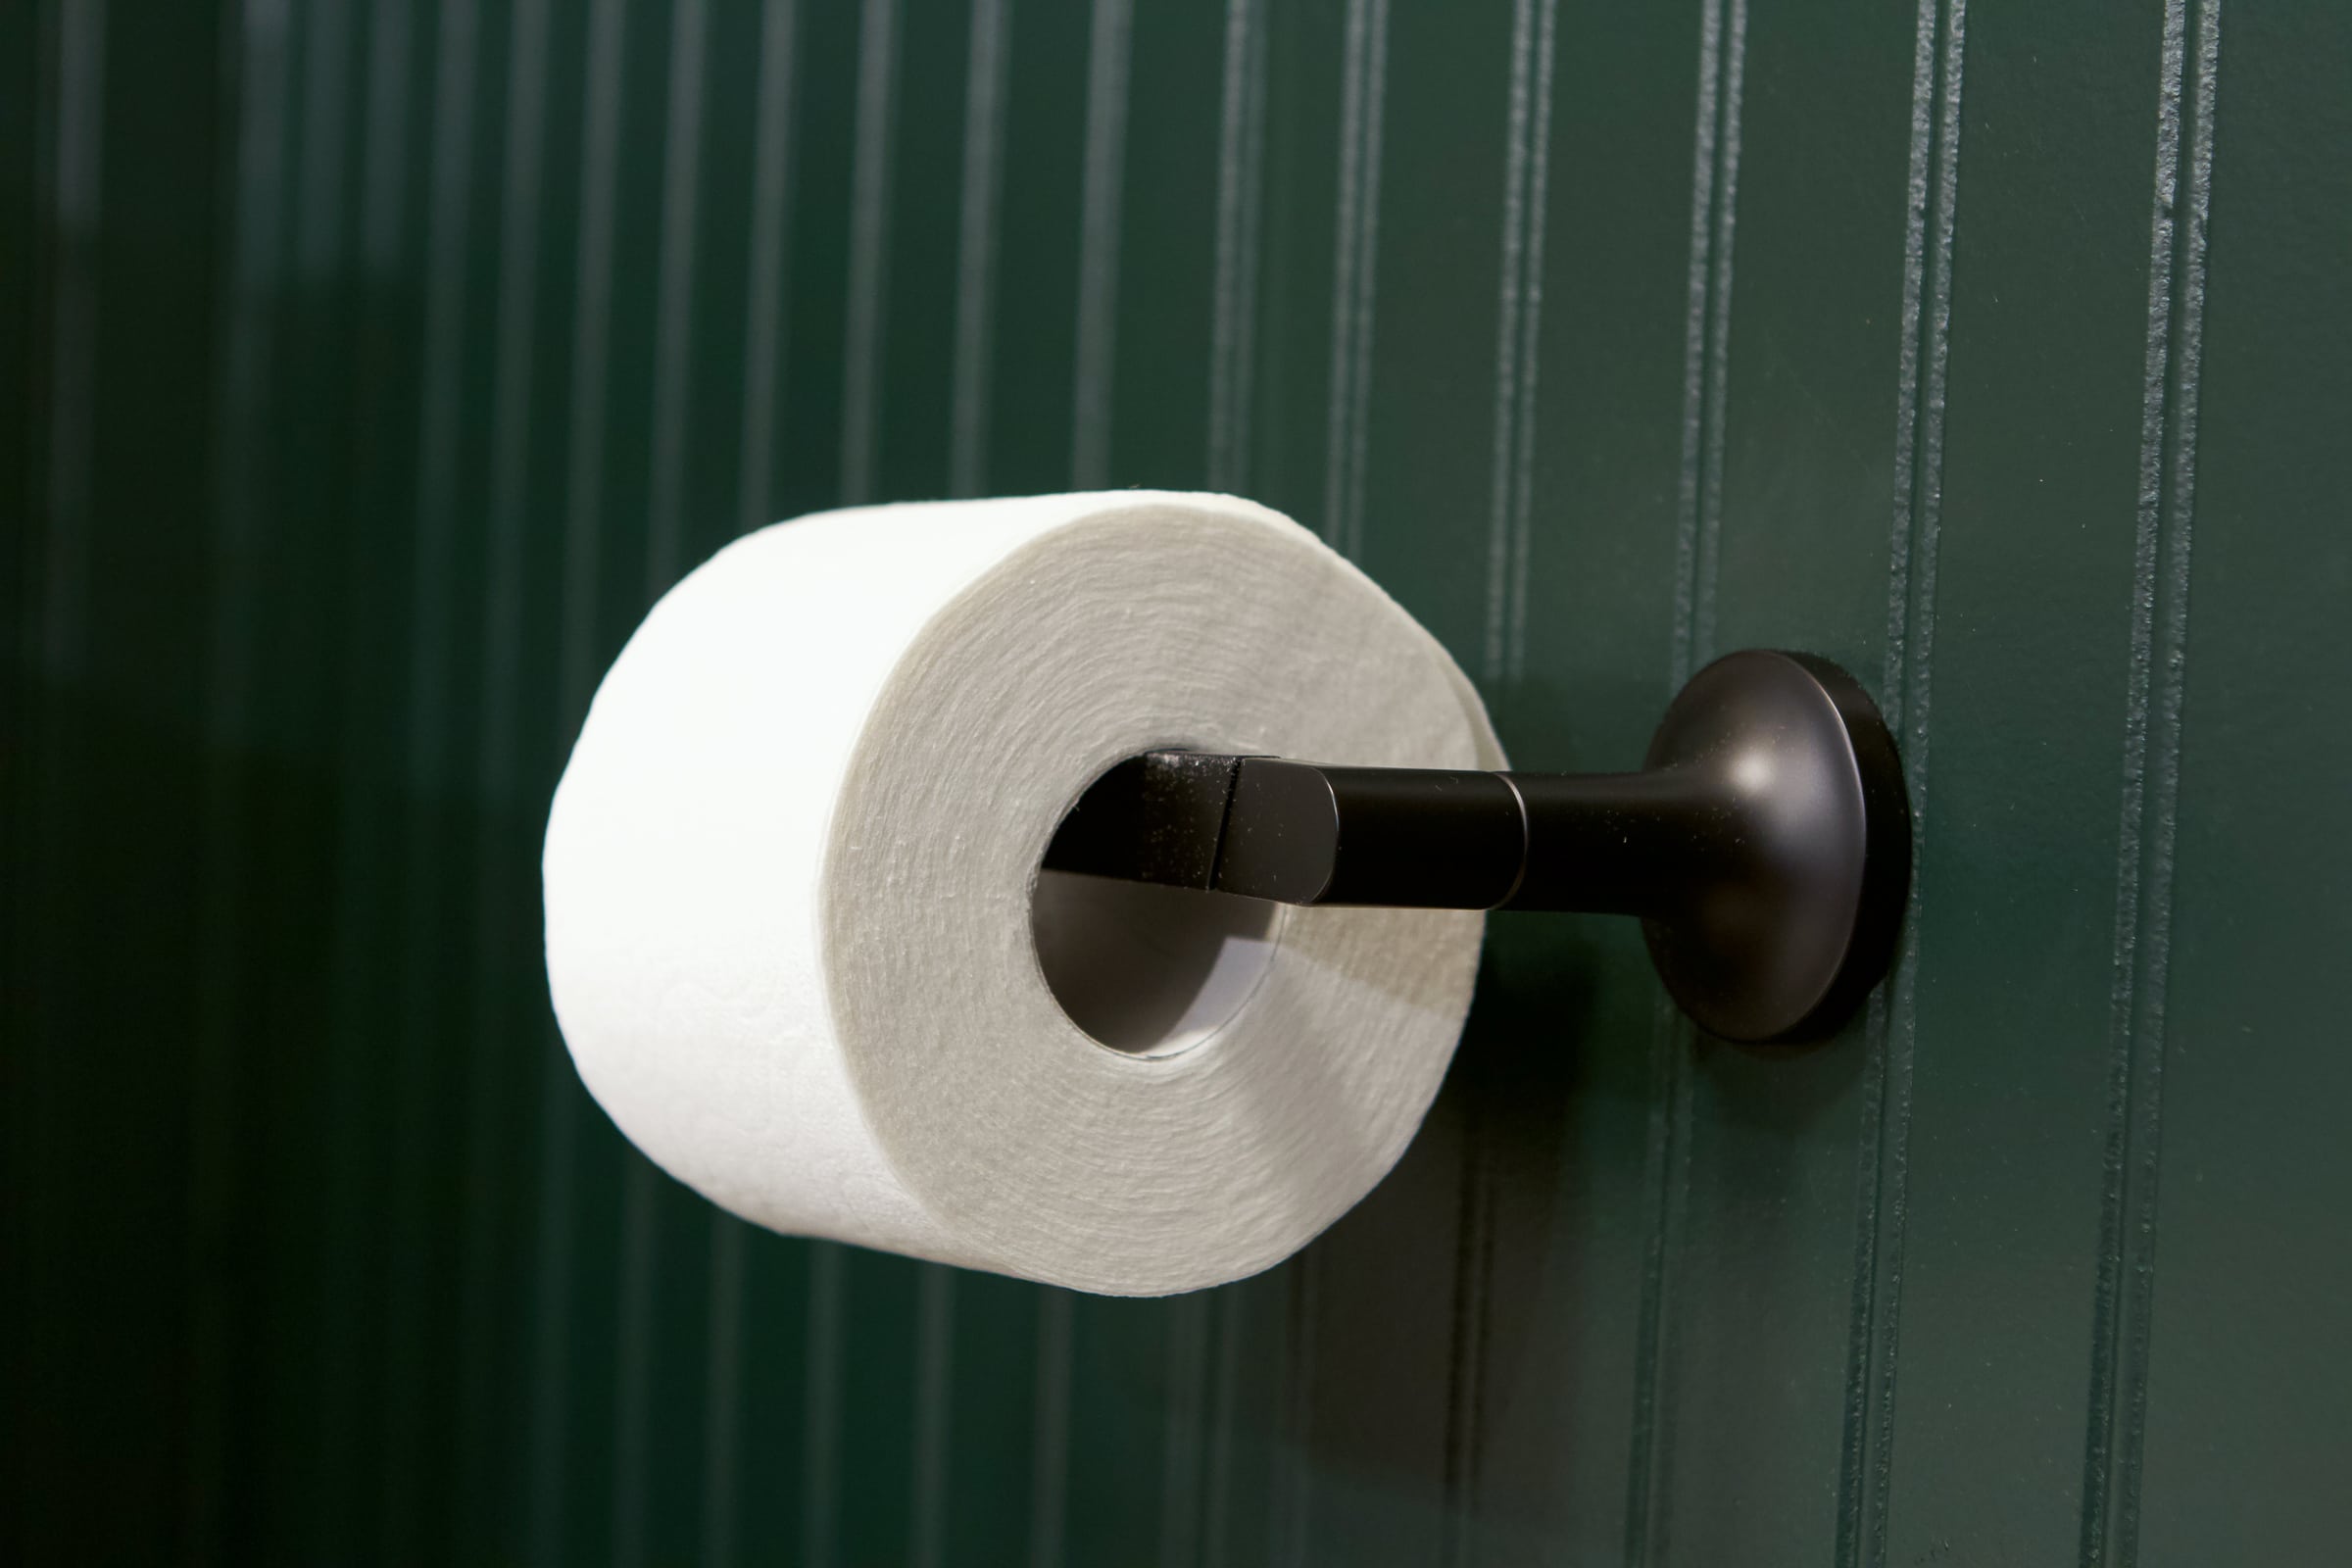
I think it’s important to mix metals in a space and in here I have matte black (toilet paper holder, towel ring, toilet handle) and gold (lighting, hardware, faucet) going on. You can read more about my tips to mix and match metals in this blog post.
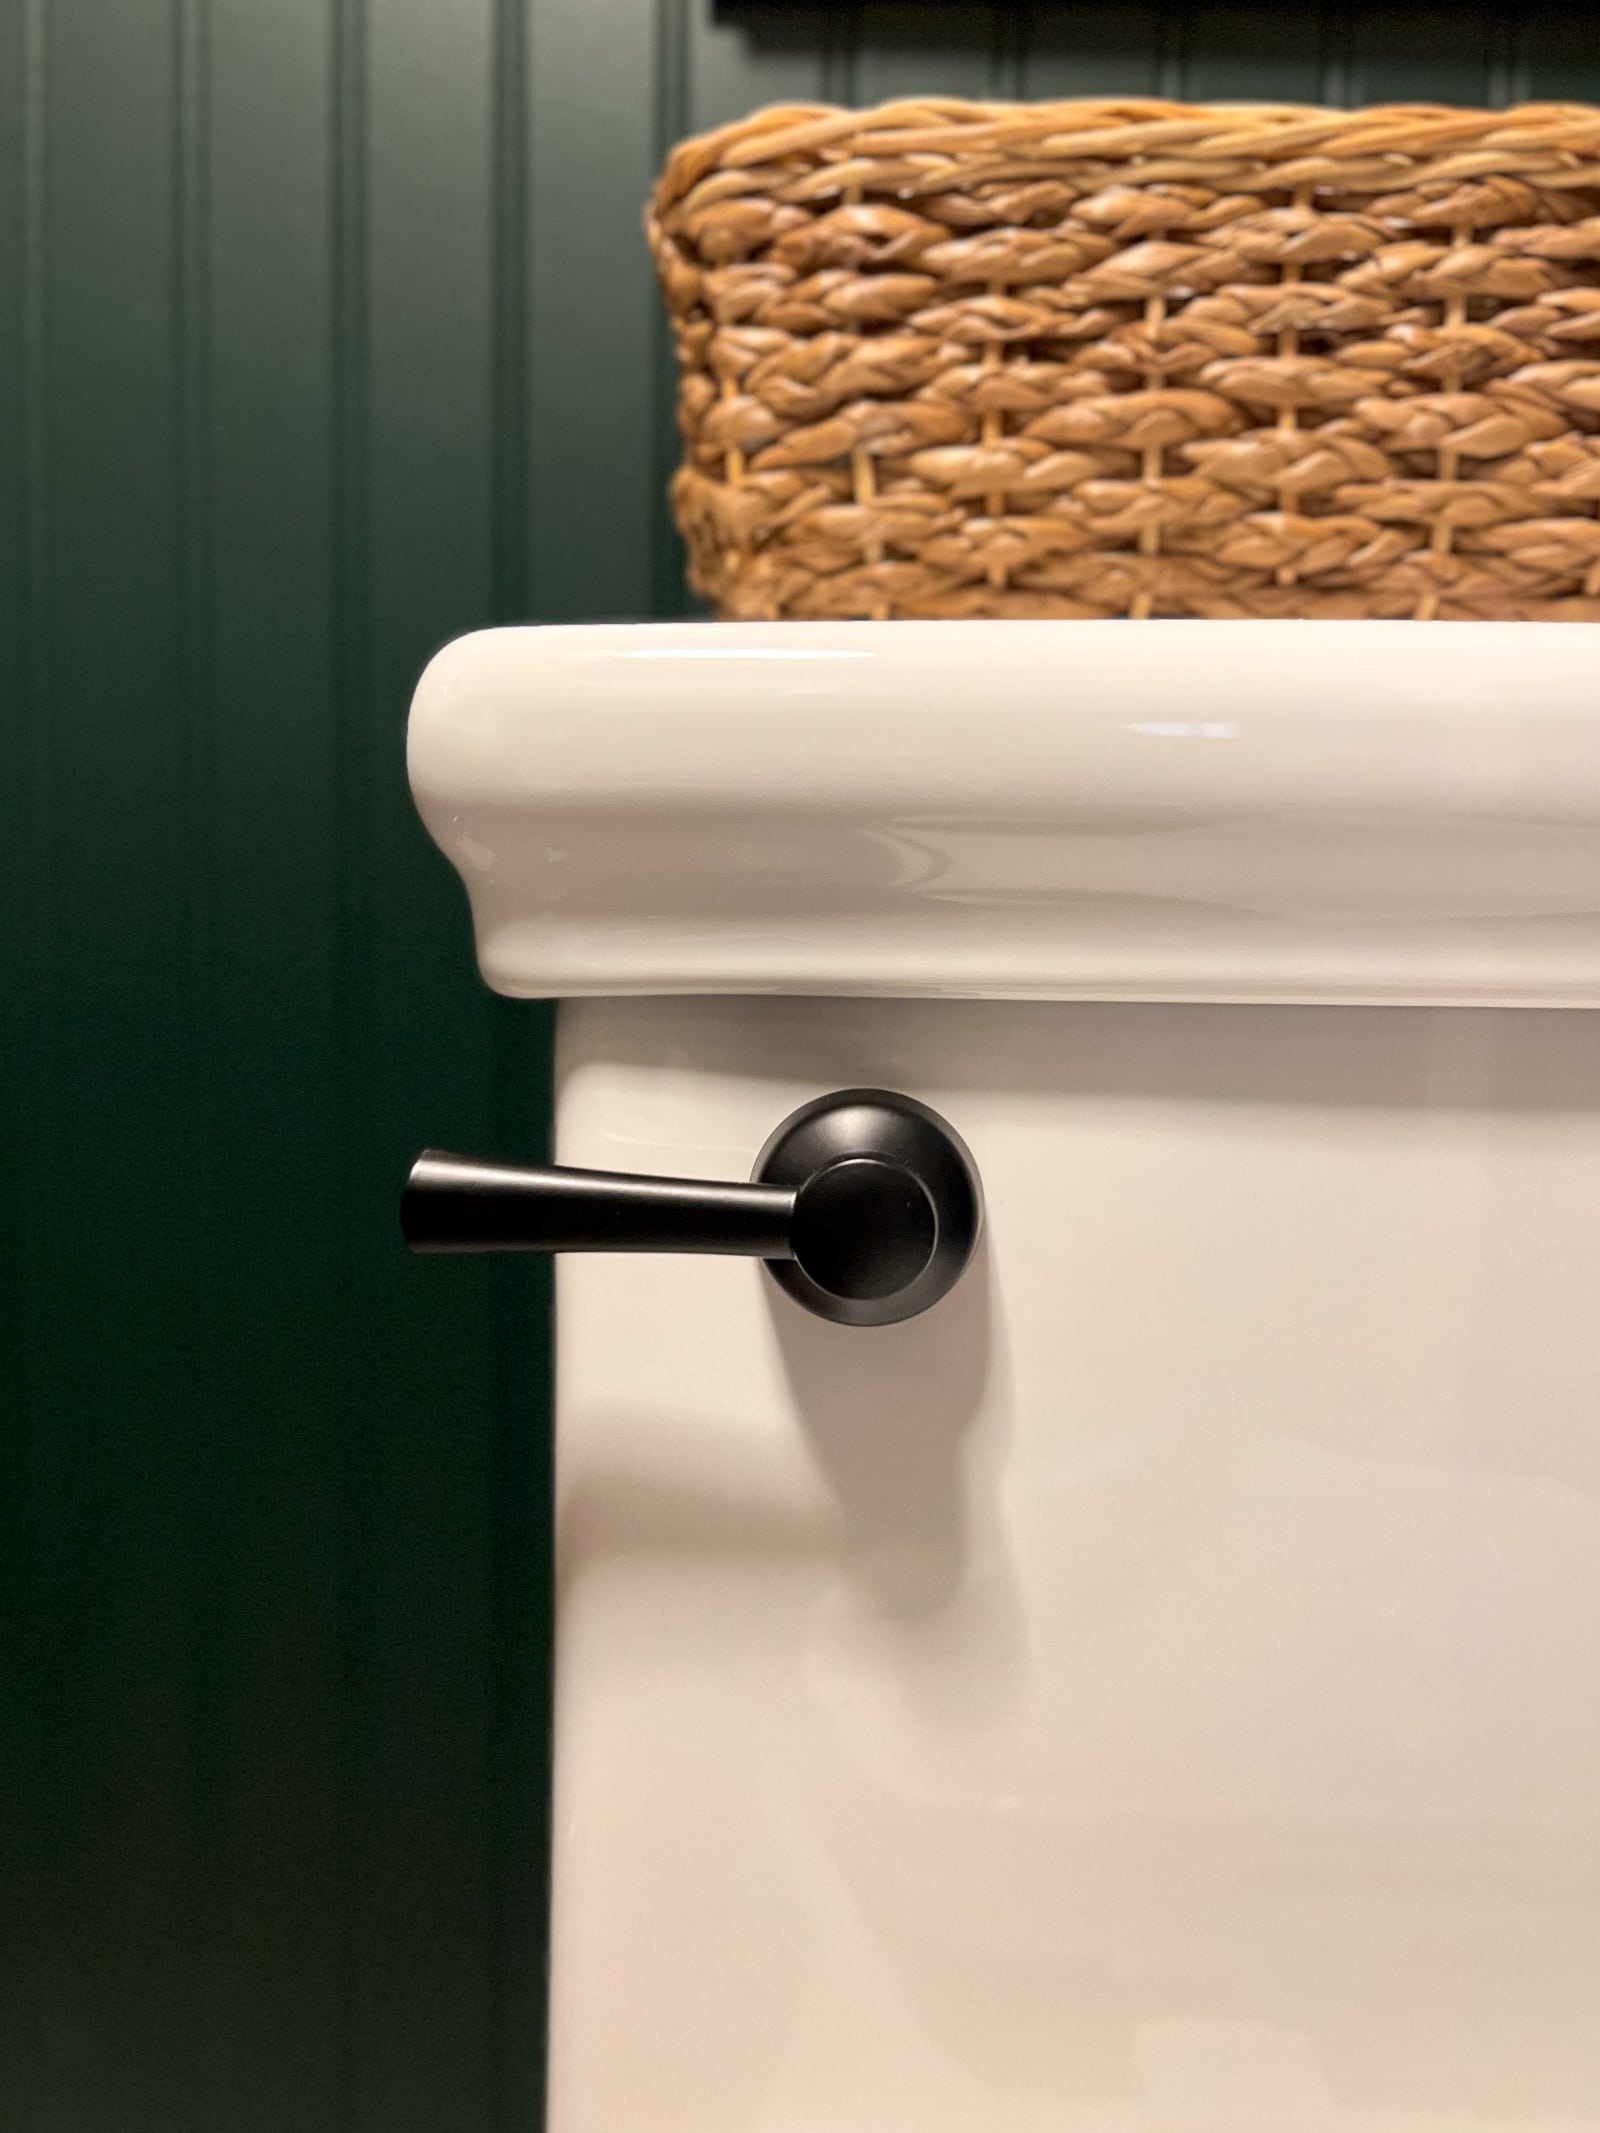
It was super easy to swap out the original chrome toilet handle for this matte black one. I’m talking less than five minutes for this easy swap. If you want to add some cohesiveness to the finishes in your bathroom, that might be a good place to start!

I also added this black towel ring that we had in the original bathroom. It wasn’t touched by the flood water, so it was still good to use! Oh, and I bought a 2-pack of these hand towels in the beige color and they’re fantastic! So soft and absorbent for the price.
Adding Pretty Accessories
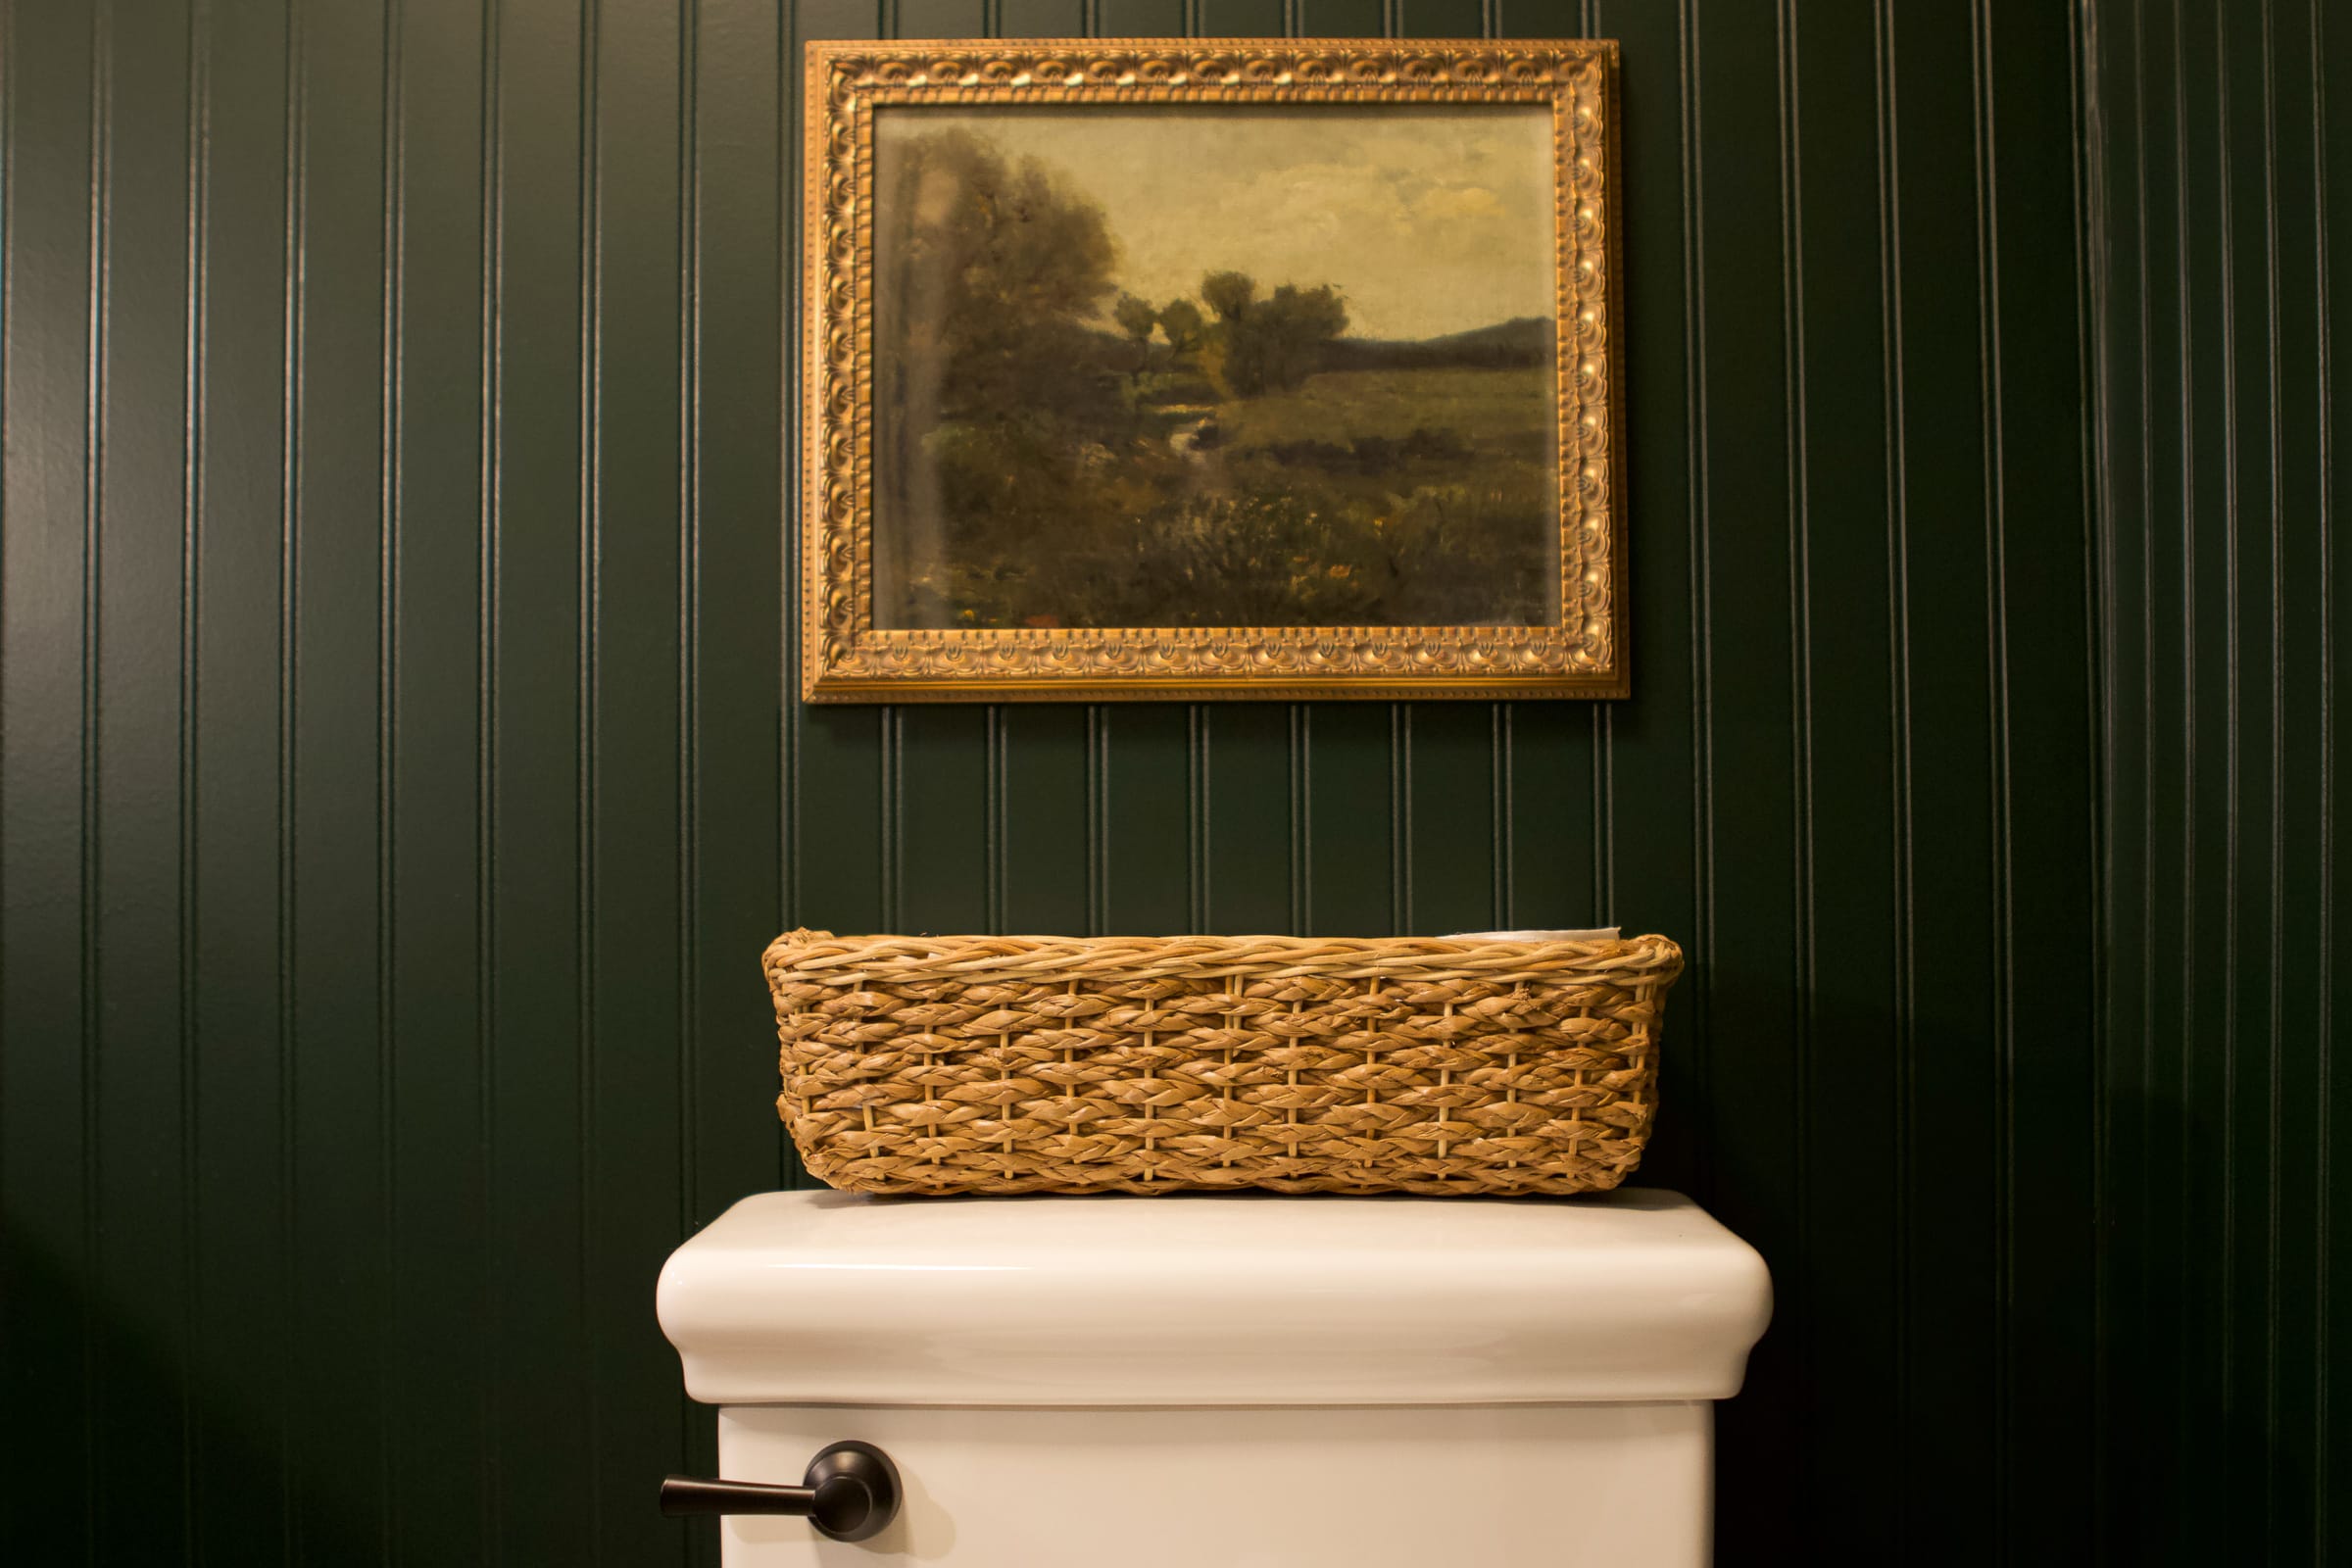
Over the toilet, I used command strips to hang a digital art download in my favorite gold frame. I used this in the previous bathroom and still loved it so much!
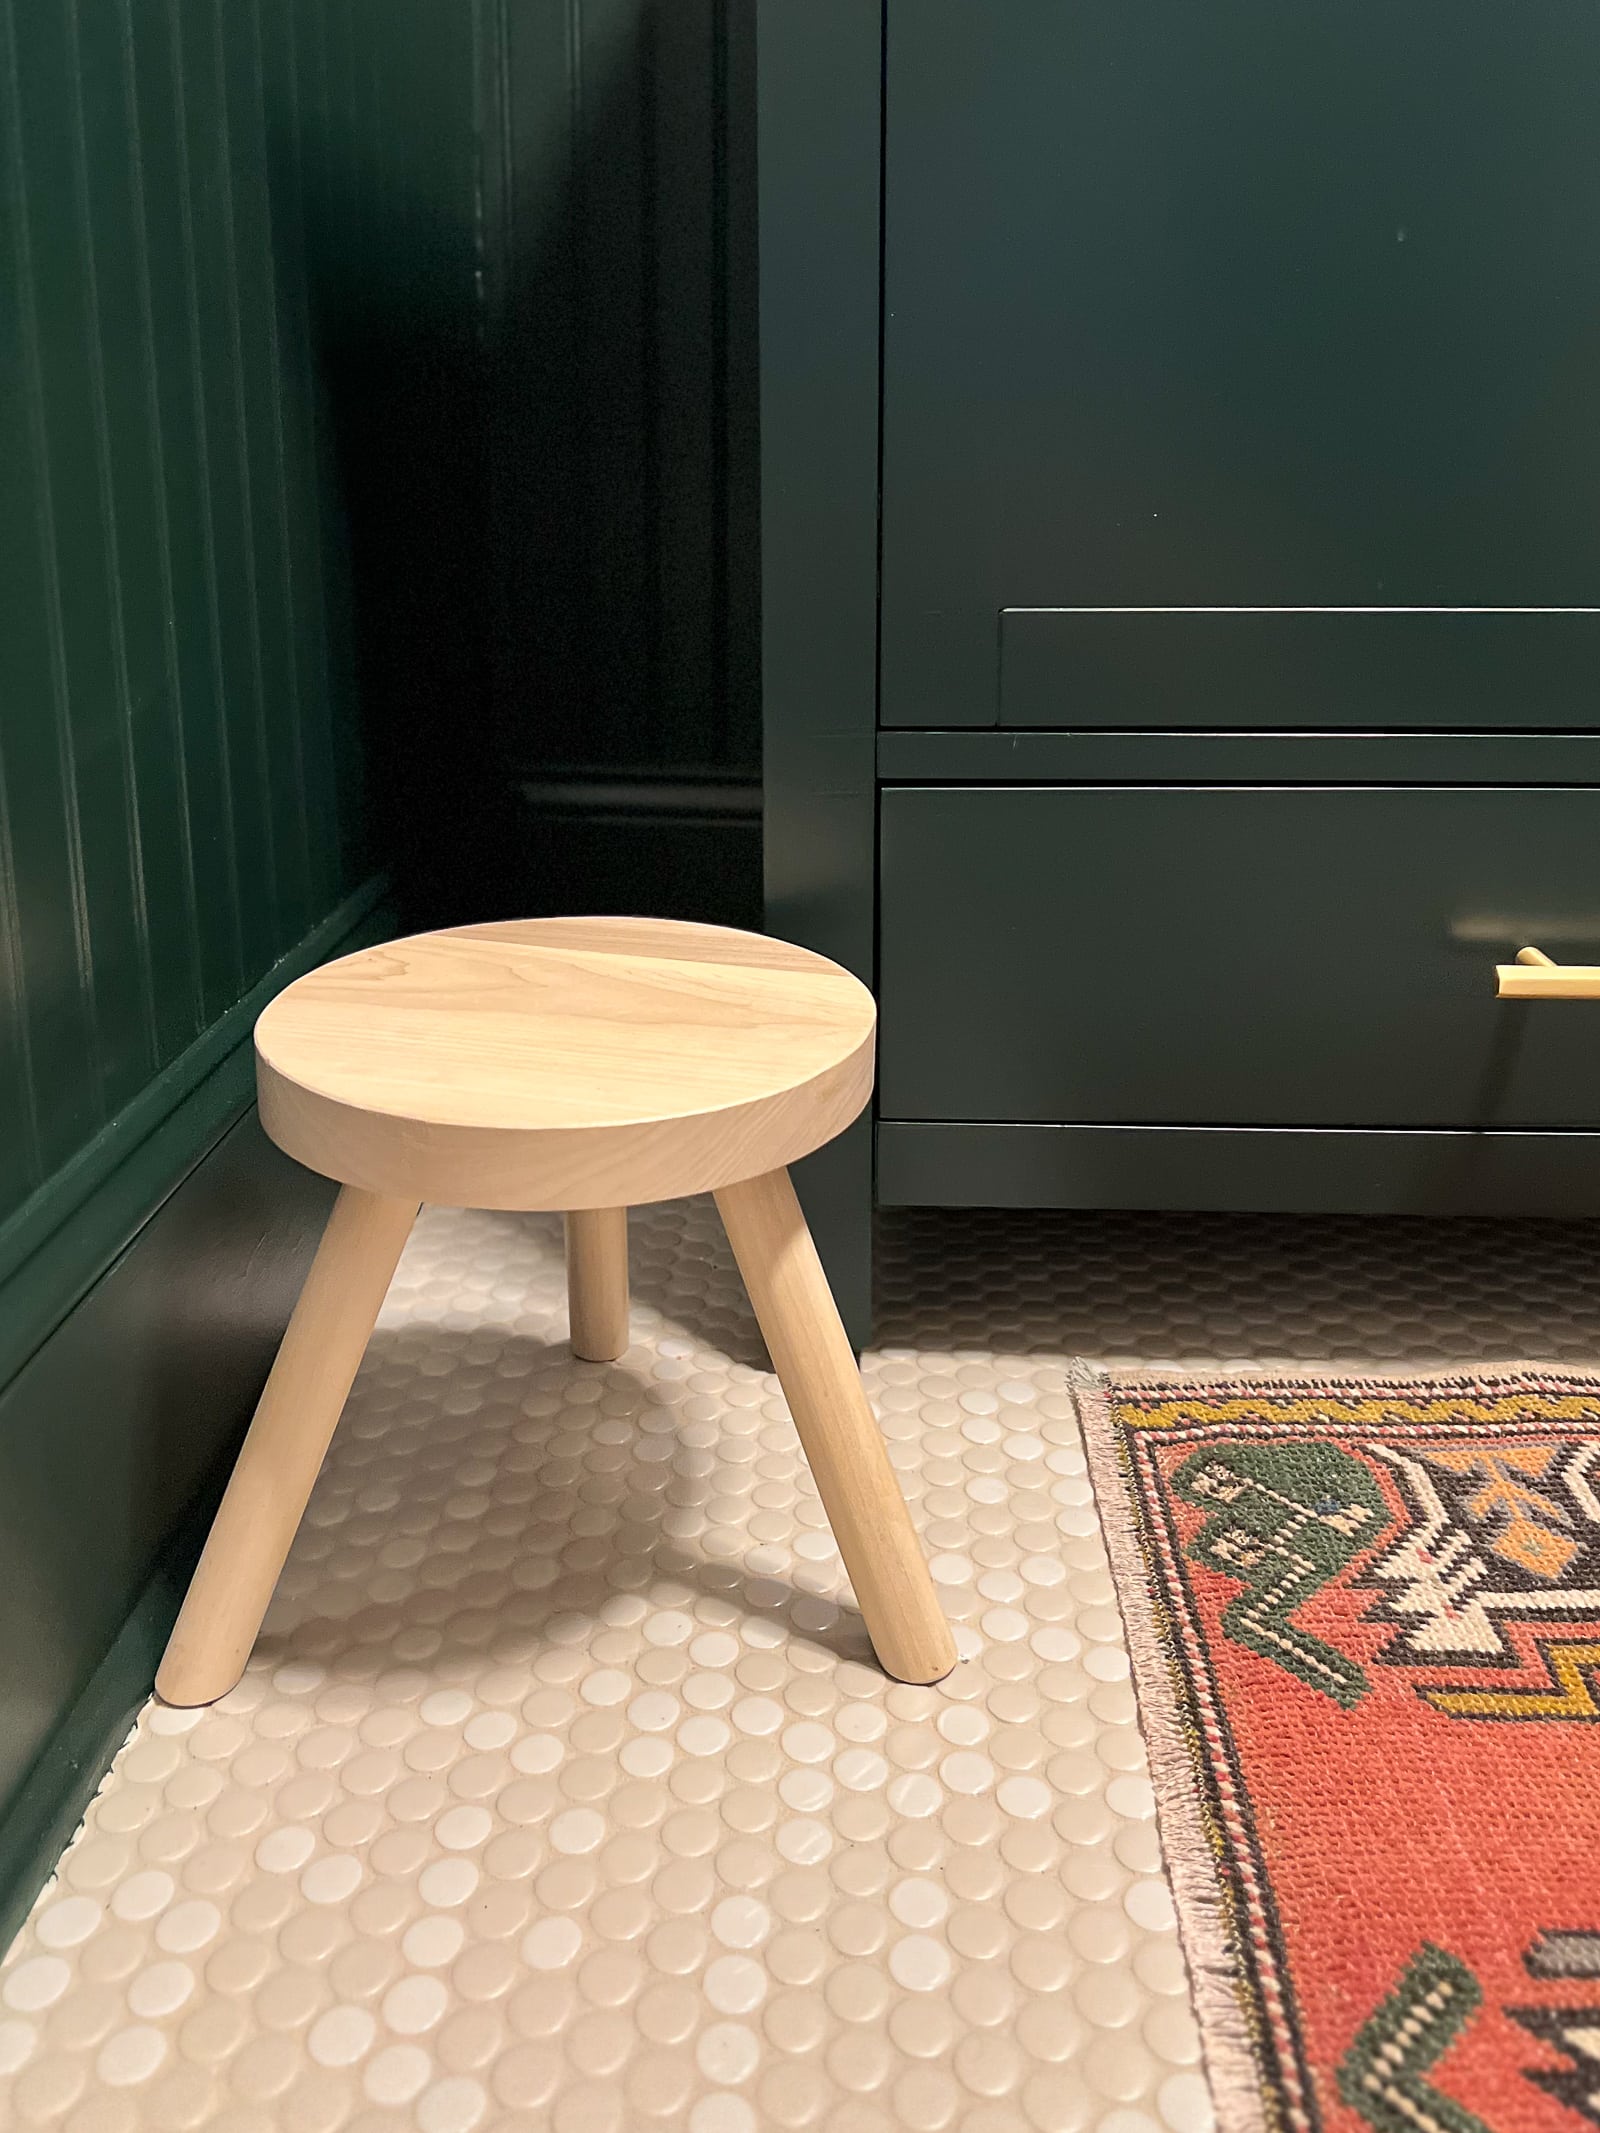
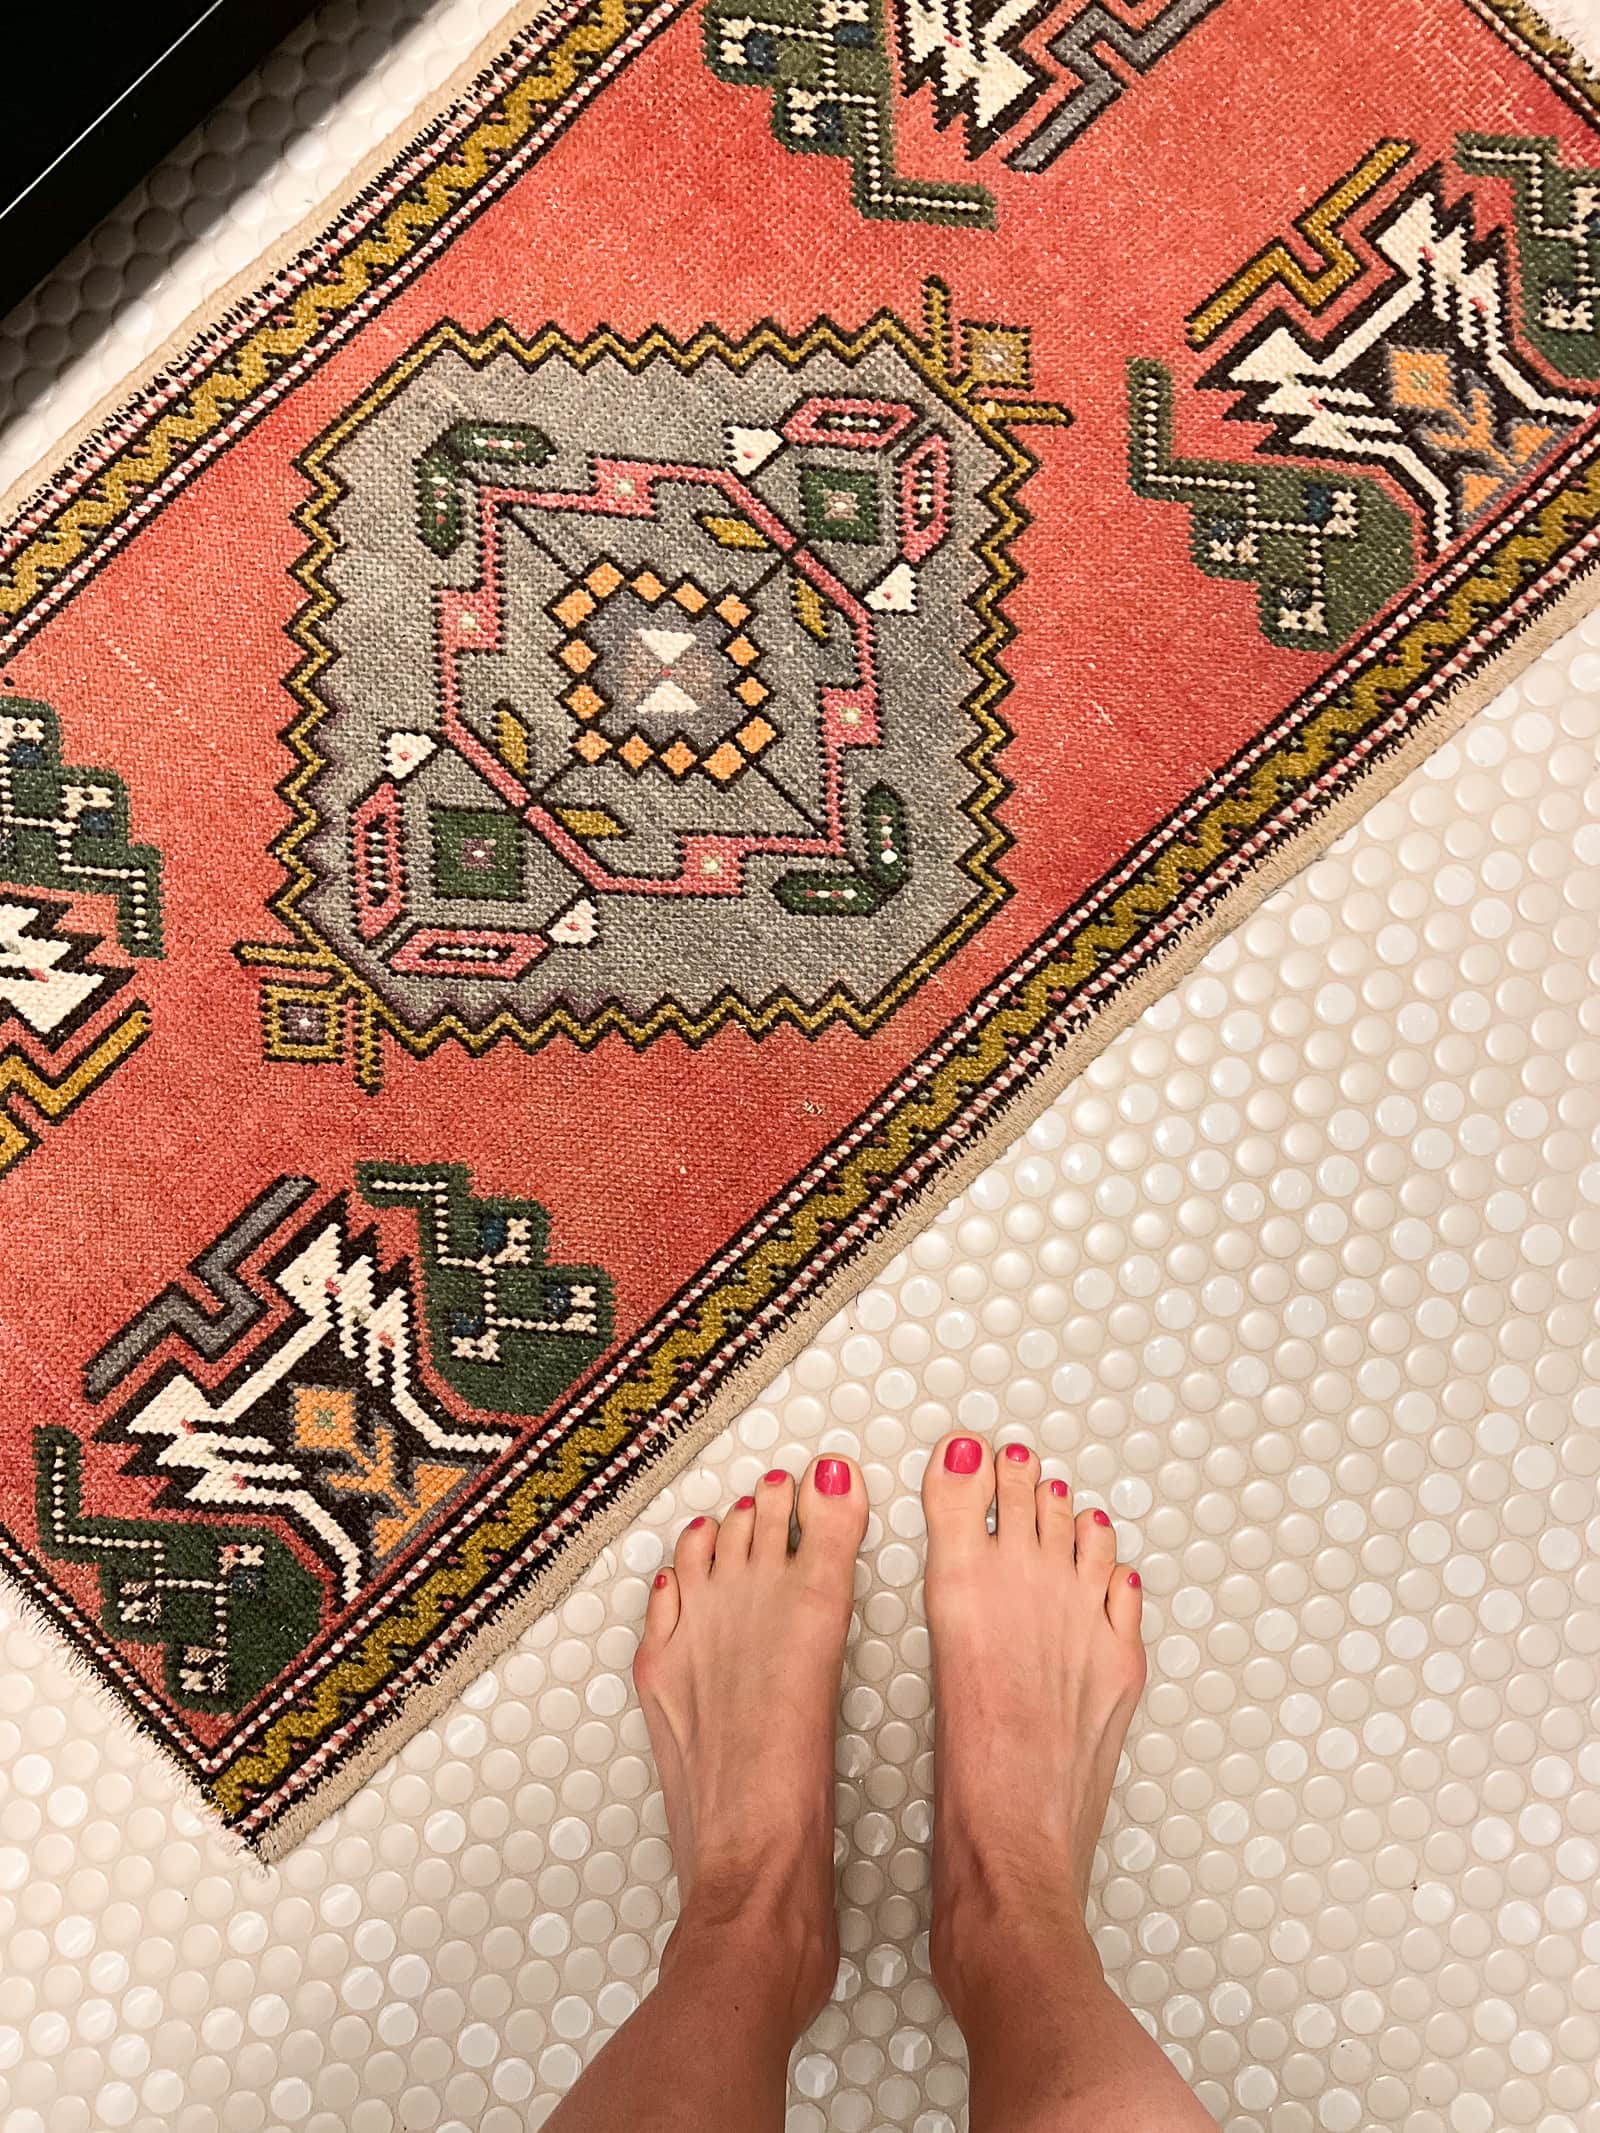
As for the floors, I knew I wanted to add a pop of color next to the neutral penny tile floors. This Turkish rug is stunning and it ended up being the perfect size! While this rug is one of a kind from Turkey, the shop where I got it has so many beautiful rugs of all sizes and colors.
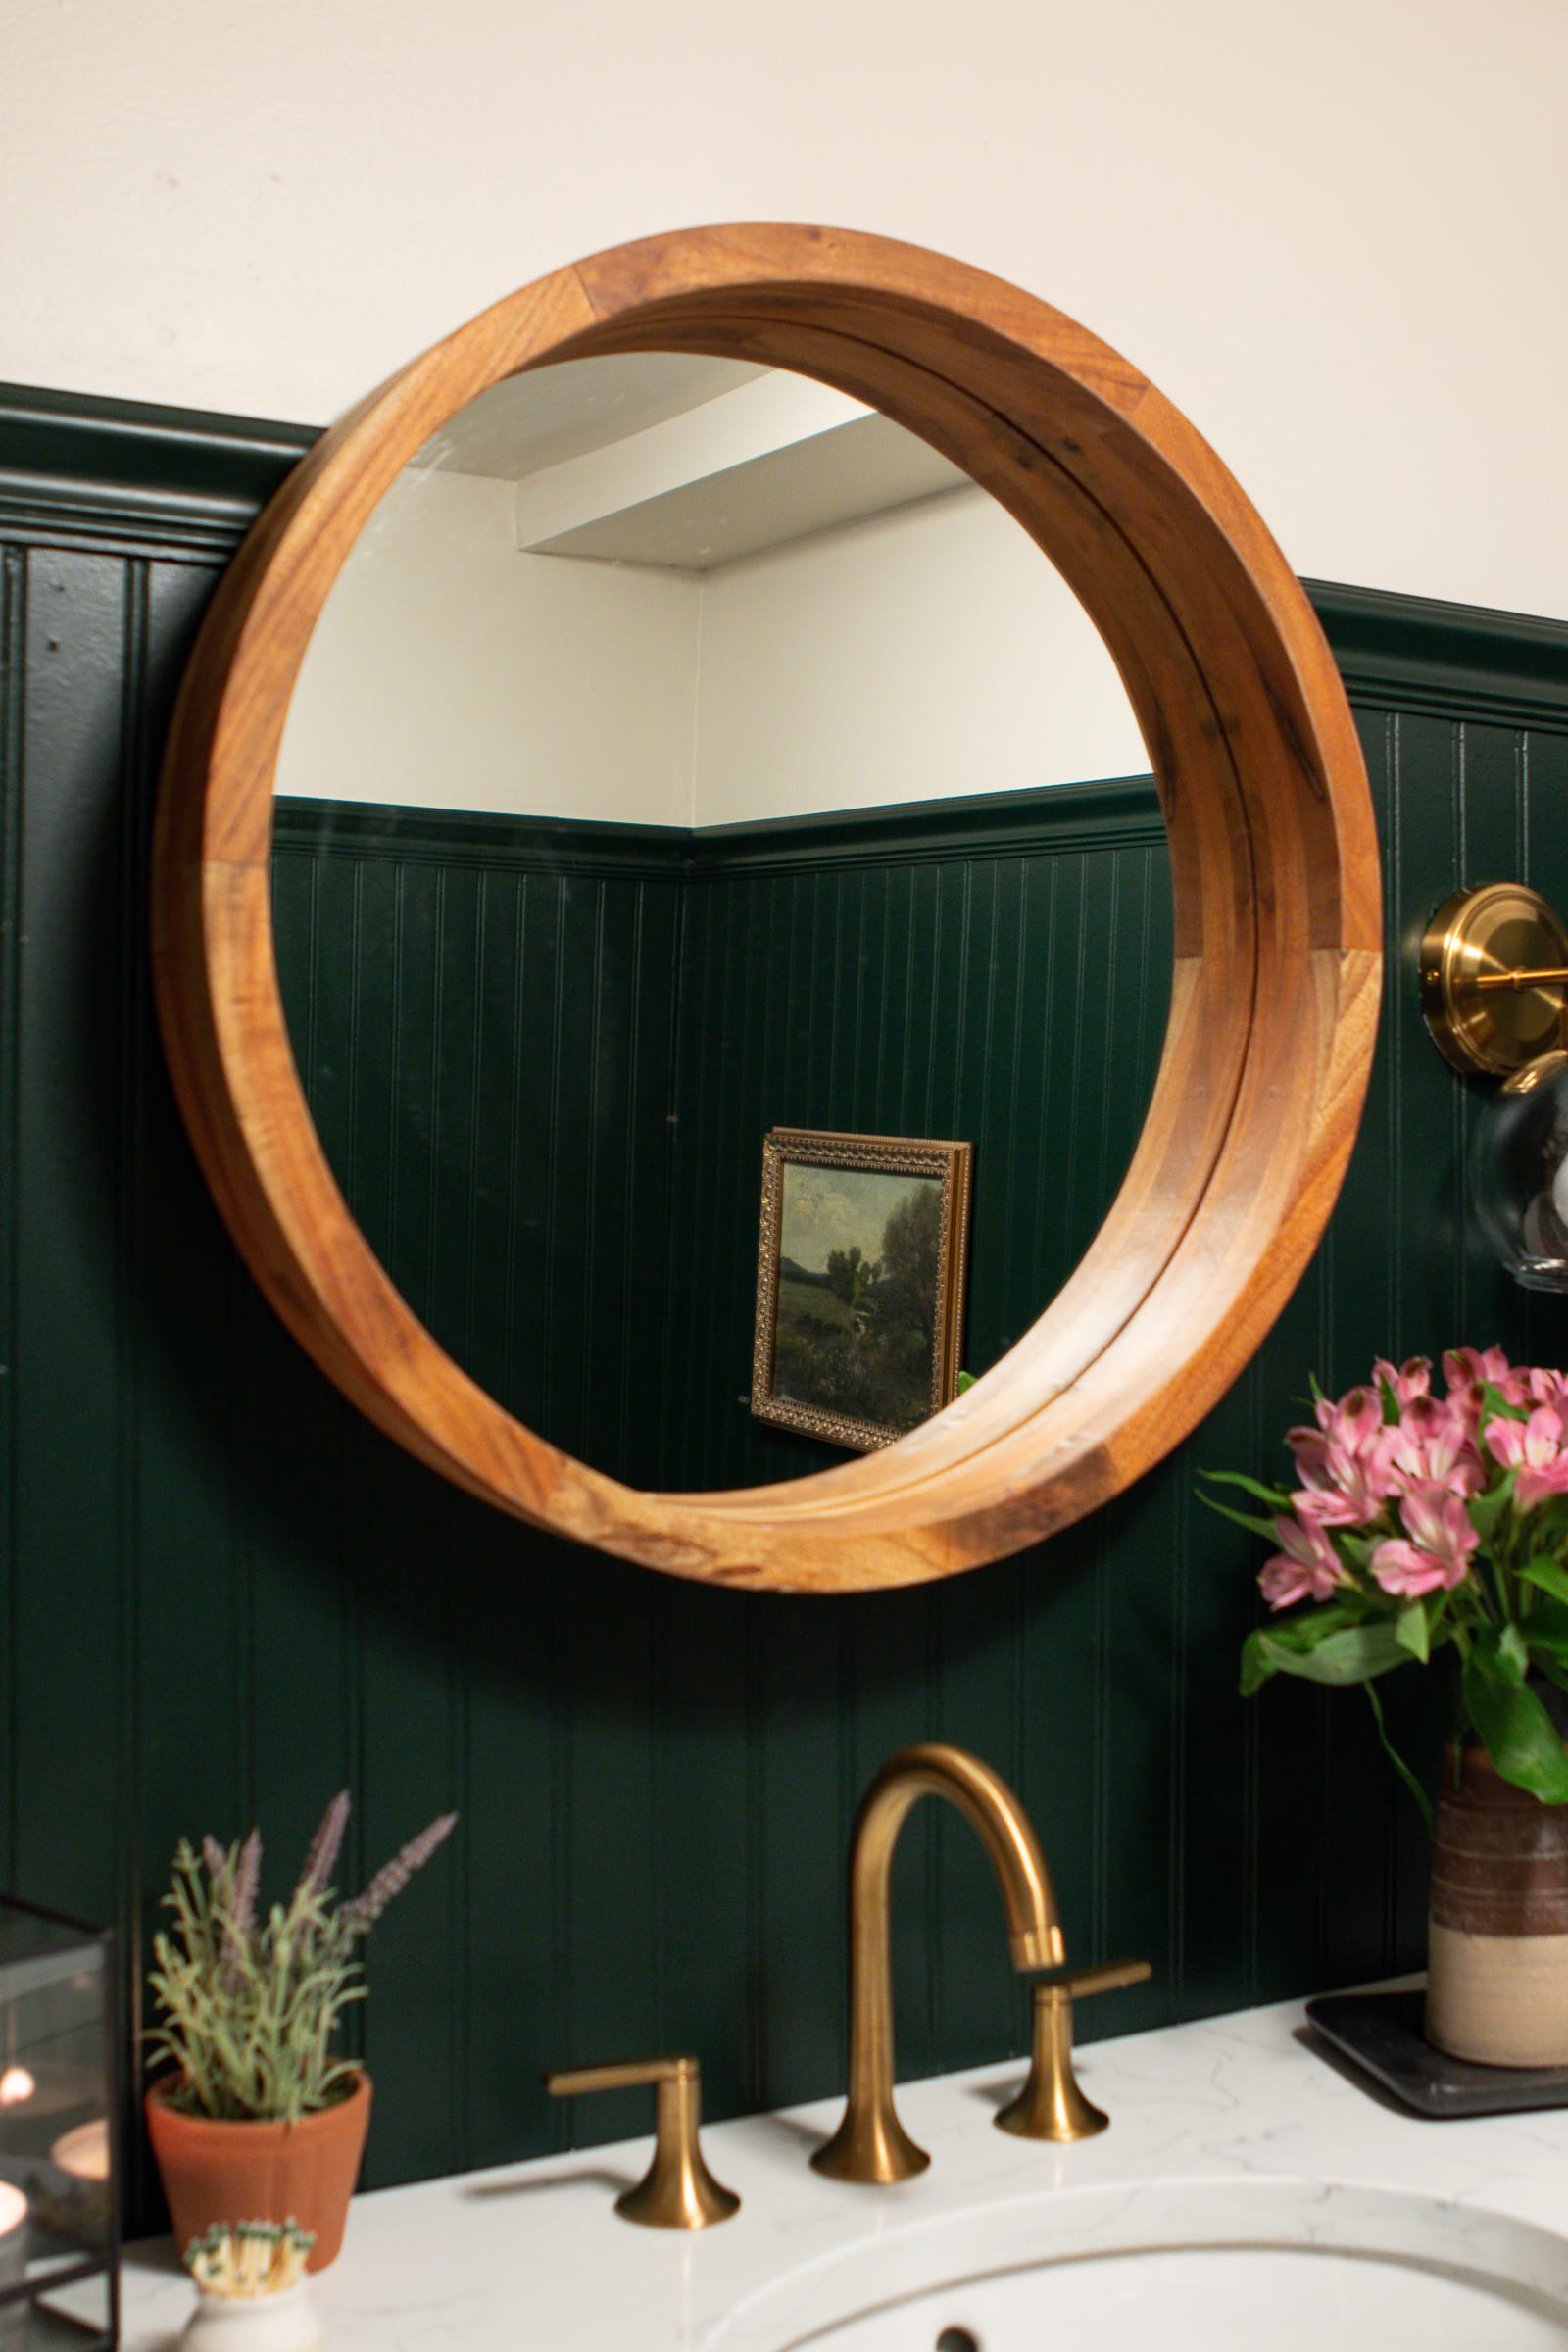
I was also able to re-use the round wood mirror in the bathroom. I still love it all these years later and the wood adds warmth to the space, plus it complements the wood shelves on the other side of the room.
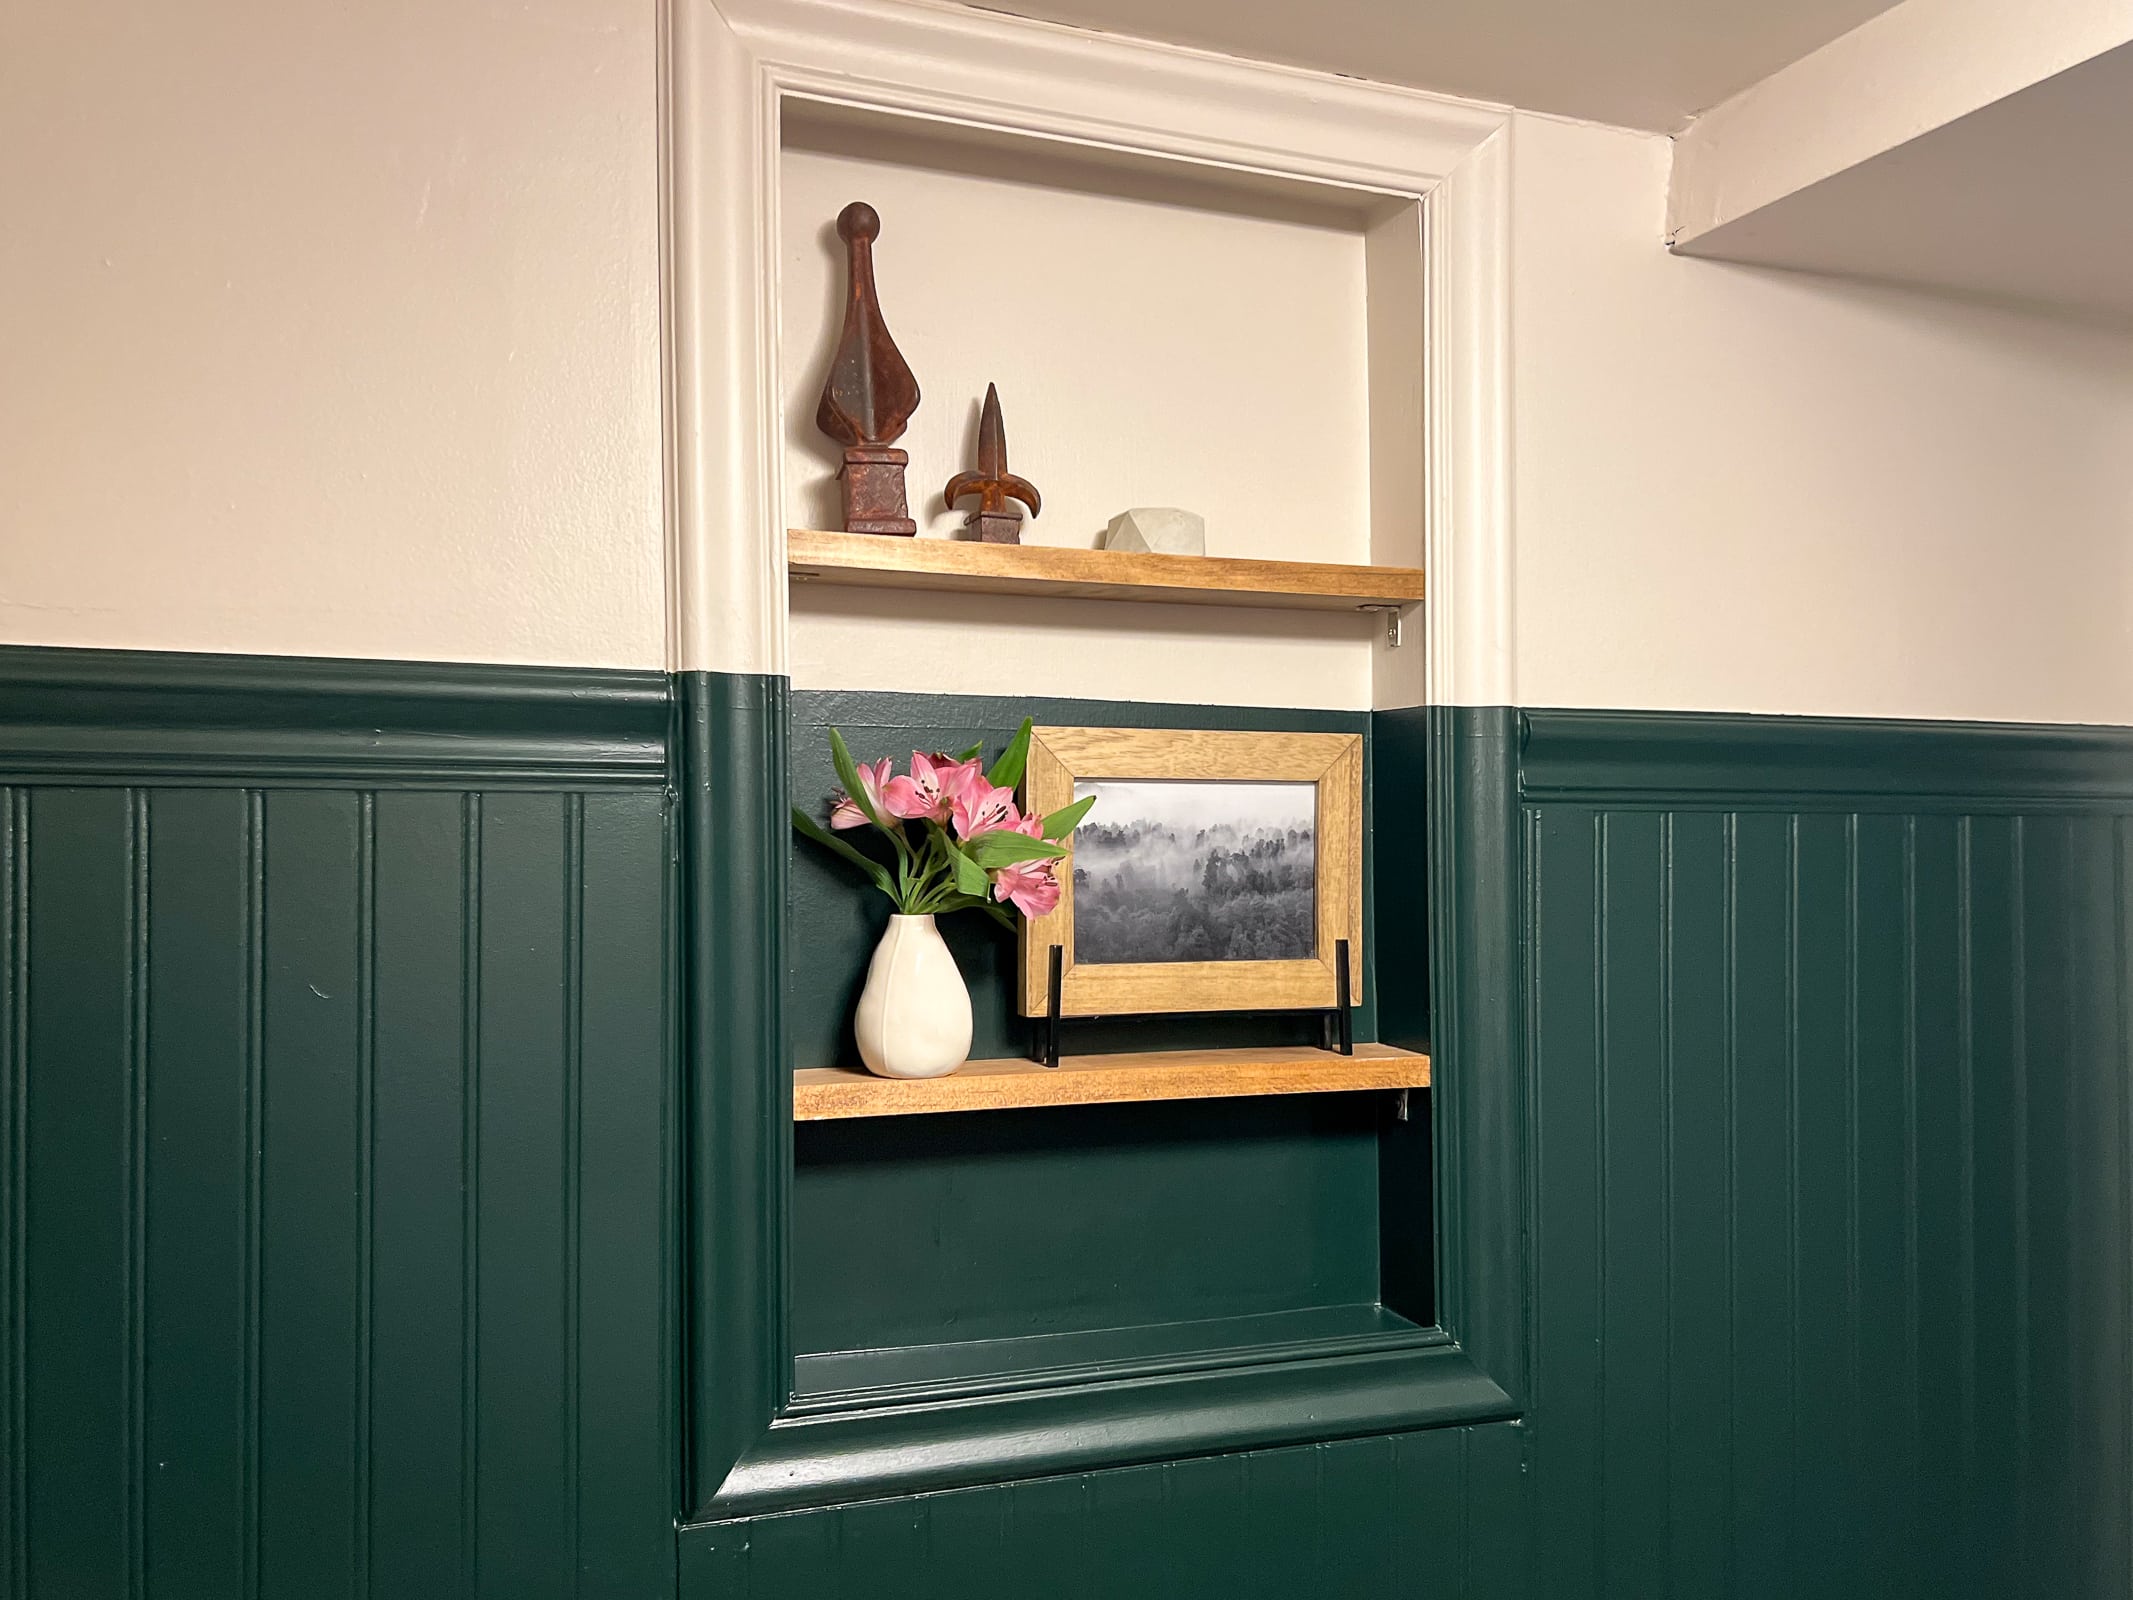
A few people asked why I didn’t just paint the entire shelf area green. Honestly, I still kinda love the two-toned look in here! I think it’s kinda fun and jazzes up these shelves. Since they’re so thin (only a couple of inches), they’re super difficult to style, so I was able to use a few of the same pieces I already had in here!
Before & After

Dark Green Bathroom Sources

Paint Colors: Dark Green (custom color found in this blog post), Valspar’s “Clay Angel” (upper walls and ceiling) // Penny Tile with “Ivory” grout // Vanity // Toilet // Gold Faucet // Toilet Paper Holder // Sconces // Towel Ring // Hand Towel // Wood Mirror // Turkish rug from this seller // Wood Stool (similar) // Soap Dispenser // Black Marble Tray // Candle Hurricane // Toilet Tank Basket // Gold Frame // Art in Gold Frame // Matte Black Toilet Handle // Overhead Light Fixture // Bud Vase // Picture Frame
Heading To Italy!
Holy smokes, it has been project overload around here since the fall. I feel like I’ve had big project after big project and this mama needs a break!
Next week, I’m heading to Italy with a group of Playbook readers to celebrate 10 years in business. I am so eager to relax my mind and body, drink wine, eat good food, and bond with our group of 14 women. Because of my big trip, I won’t have blog posts for the next two weeks. I’ll be back to it on Monday, May 8th!
In the meantime, you can follow me on Instagram stories. I’ll be sharing a behind-the-scenes peek at our trip. Ciao, friends!