How To Use Chalk Paint On Old Furniture (Easy DIY Guide)
I don’t do many furniture makeovers here on the blog anymore. Back in the day, around 2013, I did paint a few pieces of furniture in our St. Louis apartment. They were old pieces that I found at thrift stores that needed a new life. My paint jobs were sub-par, but I still had a lot of fun with them and those experiences got me hooked on DIY projects.
Today, I’m going to walk you through a recent furniture transformation that I did to highlight an amazing local non-profit.
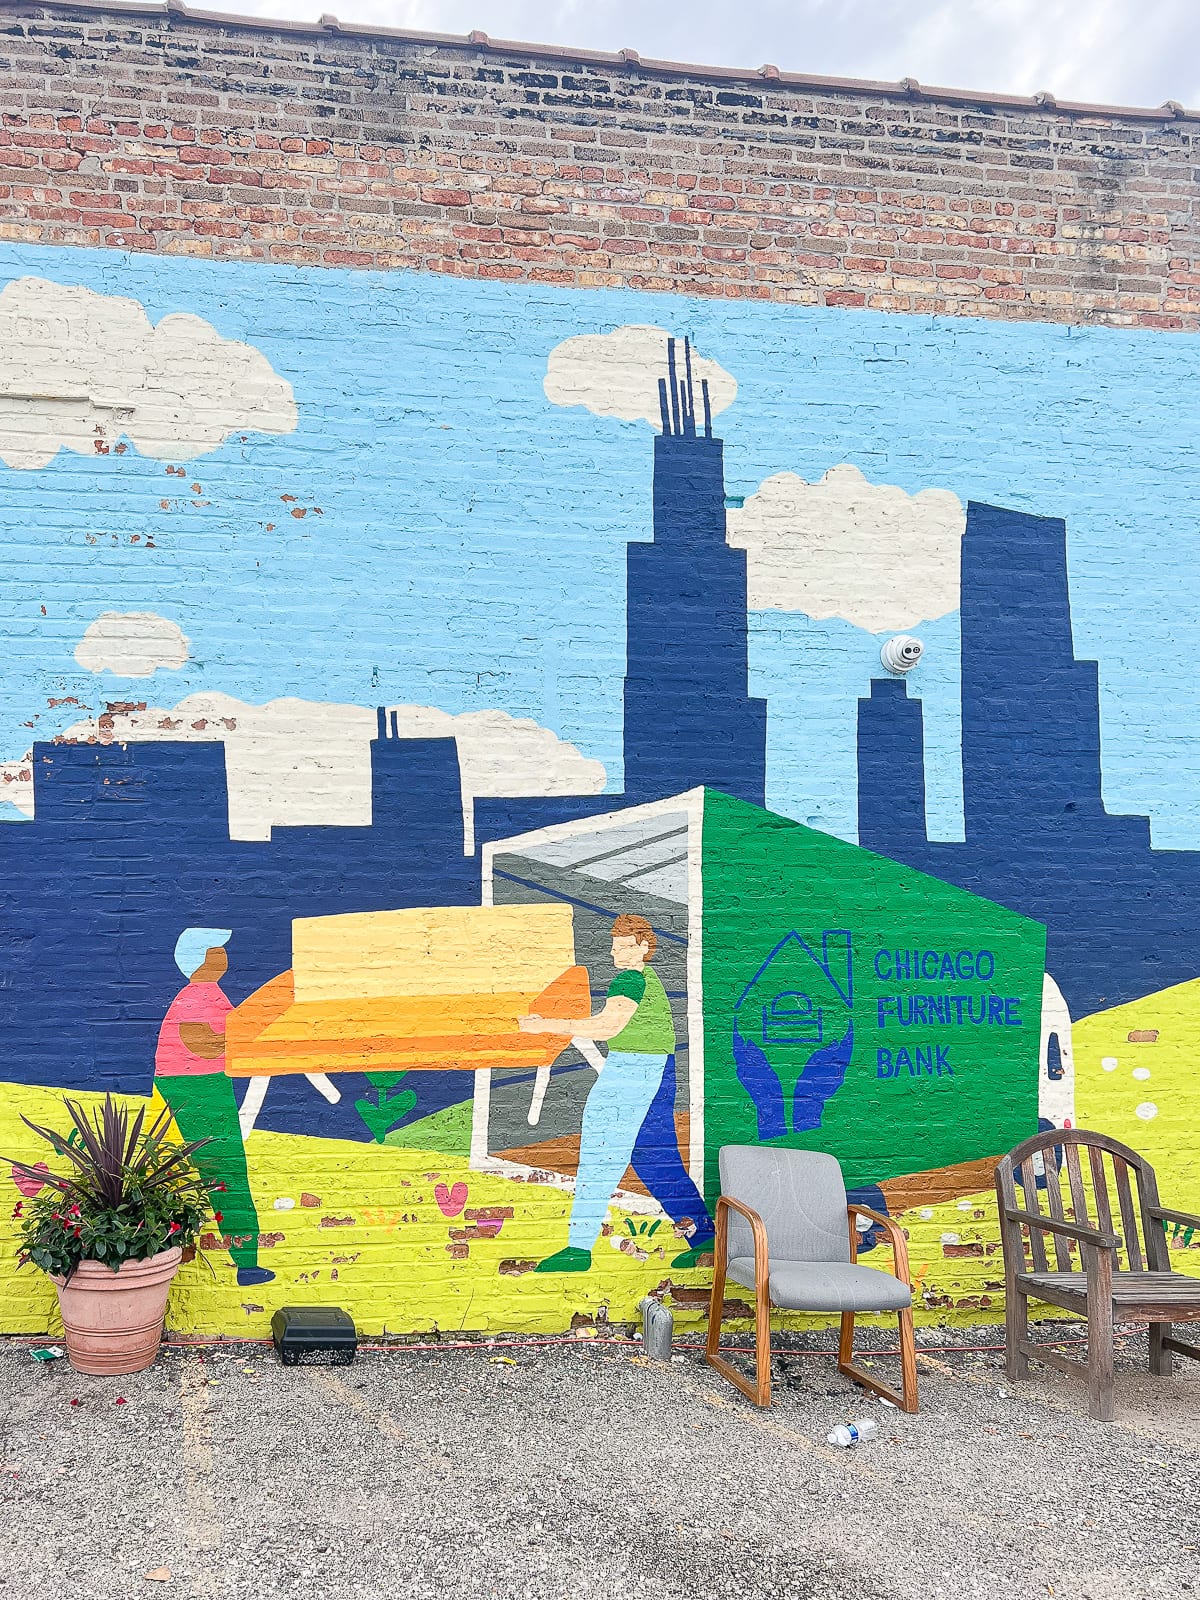
The Chicago Furniture Bank

The Chicago Furniture Bank reached out to me at the beginning of the fall to introduce me to the incredible work they’re doing here in the Chicagoland area. They believe that everyone should sleep in a bed and enjoy a furnished home.
Since 2018, they’ve furnished over 13,000 homes for individuals leaving poverty, homelessness, and domestic violence situations. We’ve also had a large influx of asylum seekers here in Chicago and they are helping them as they receive housing.
Their clients can tour their showroom and pick out an entire home’s worth of furniture…for FREE. They help about 15 families per day and around 4,200 per year. Isn’t that just incredible? When I heard about their mission I was blown away by the good that they’re doing in this world.
If you live in the area, please consider donating your household items to the Chicago Furniture Bank. They team up with the Honest Junk Company and can do pickups right from your home! You can visit their site to learn more.
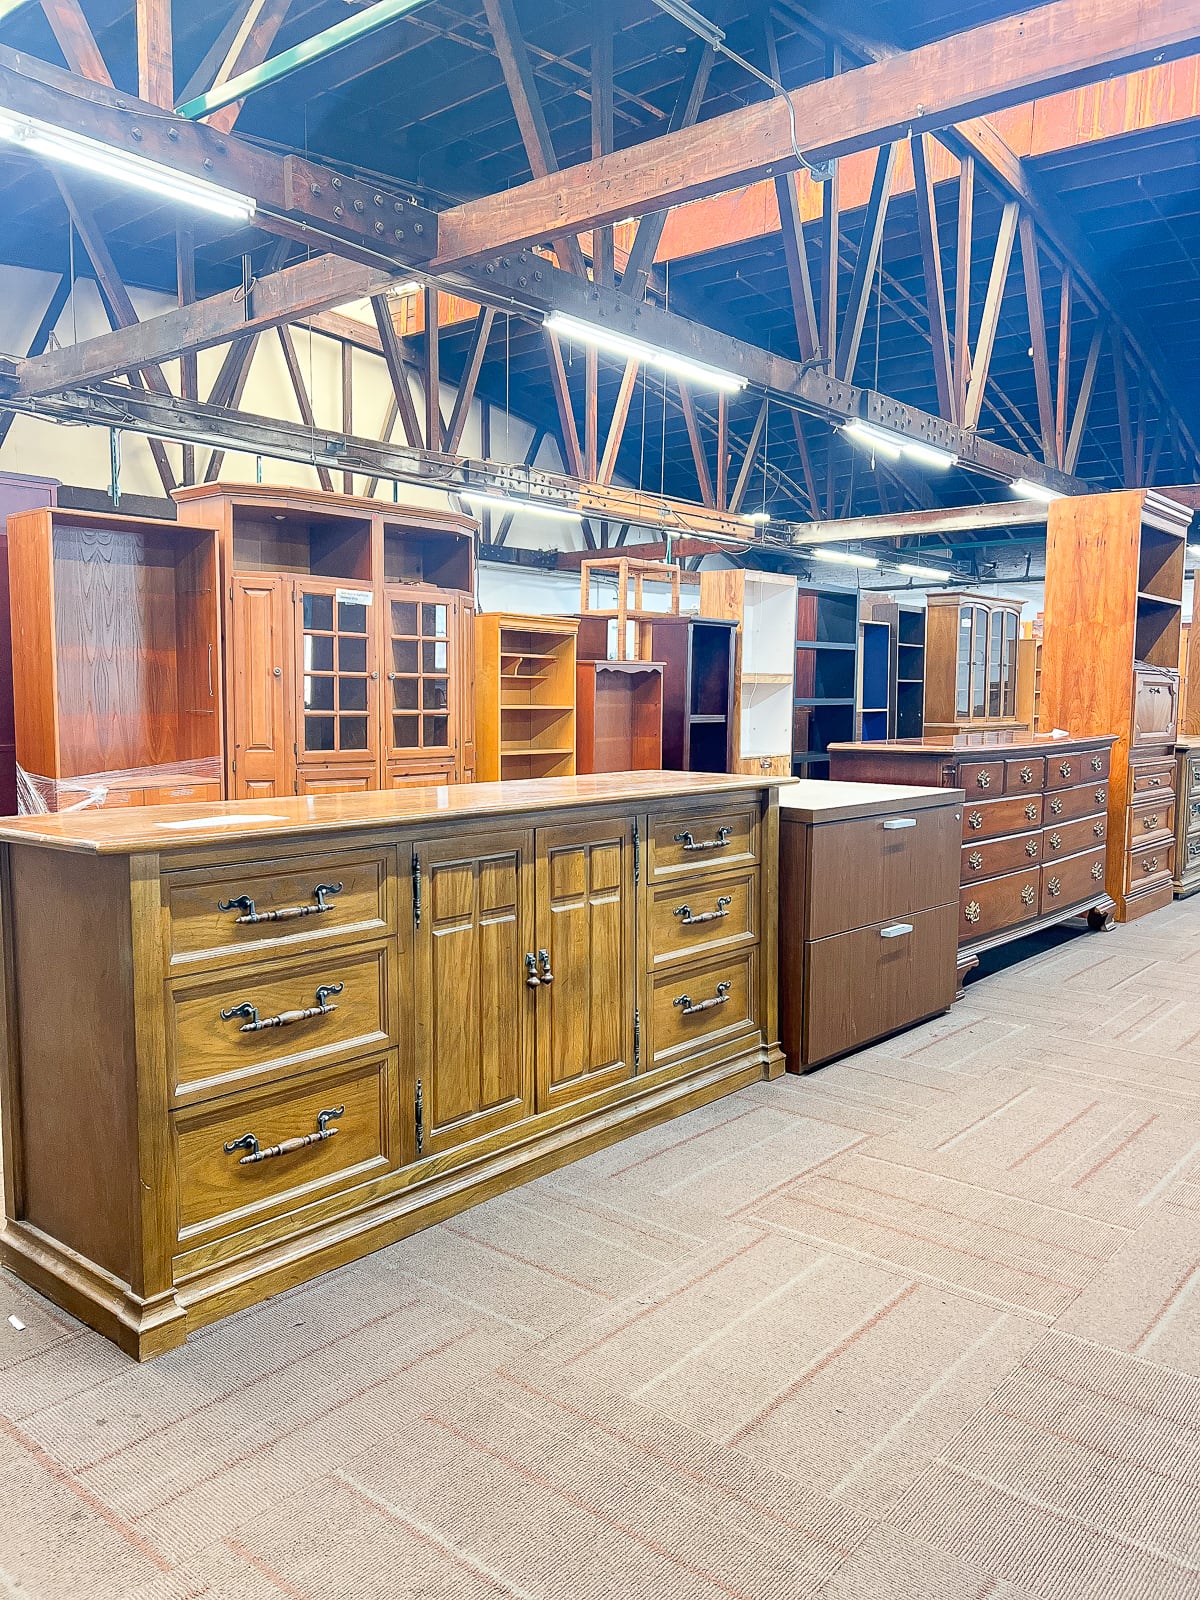
Choosing Furniture To Spruce Up

I had a chance to visit their showroom and was blown away. They have a hardworking team of people receiving donations, setting up their showroom for clients, and organizing all of their furniture. They even take mattresses and have a thorough cleaning process!
Chicago Furniture Bank asked if I wanted to choose a piece of old furniture to spruce up for a deserving family. I jumped at the chance! After perusing their amazing pieces, I found a vanity and chair that could use some love.
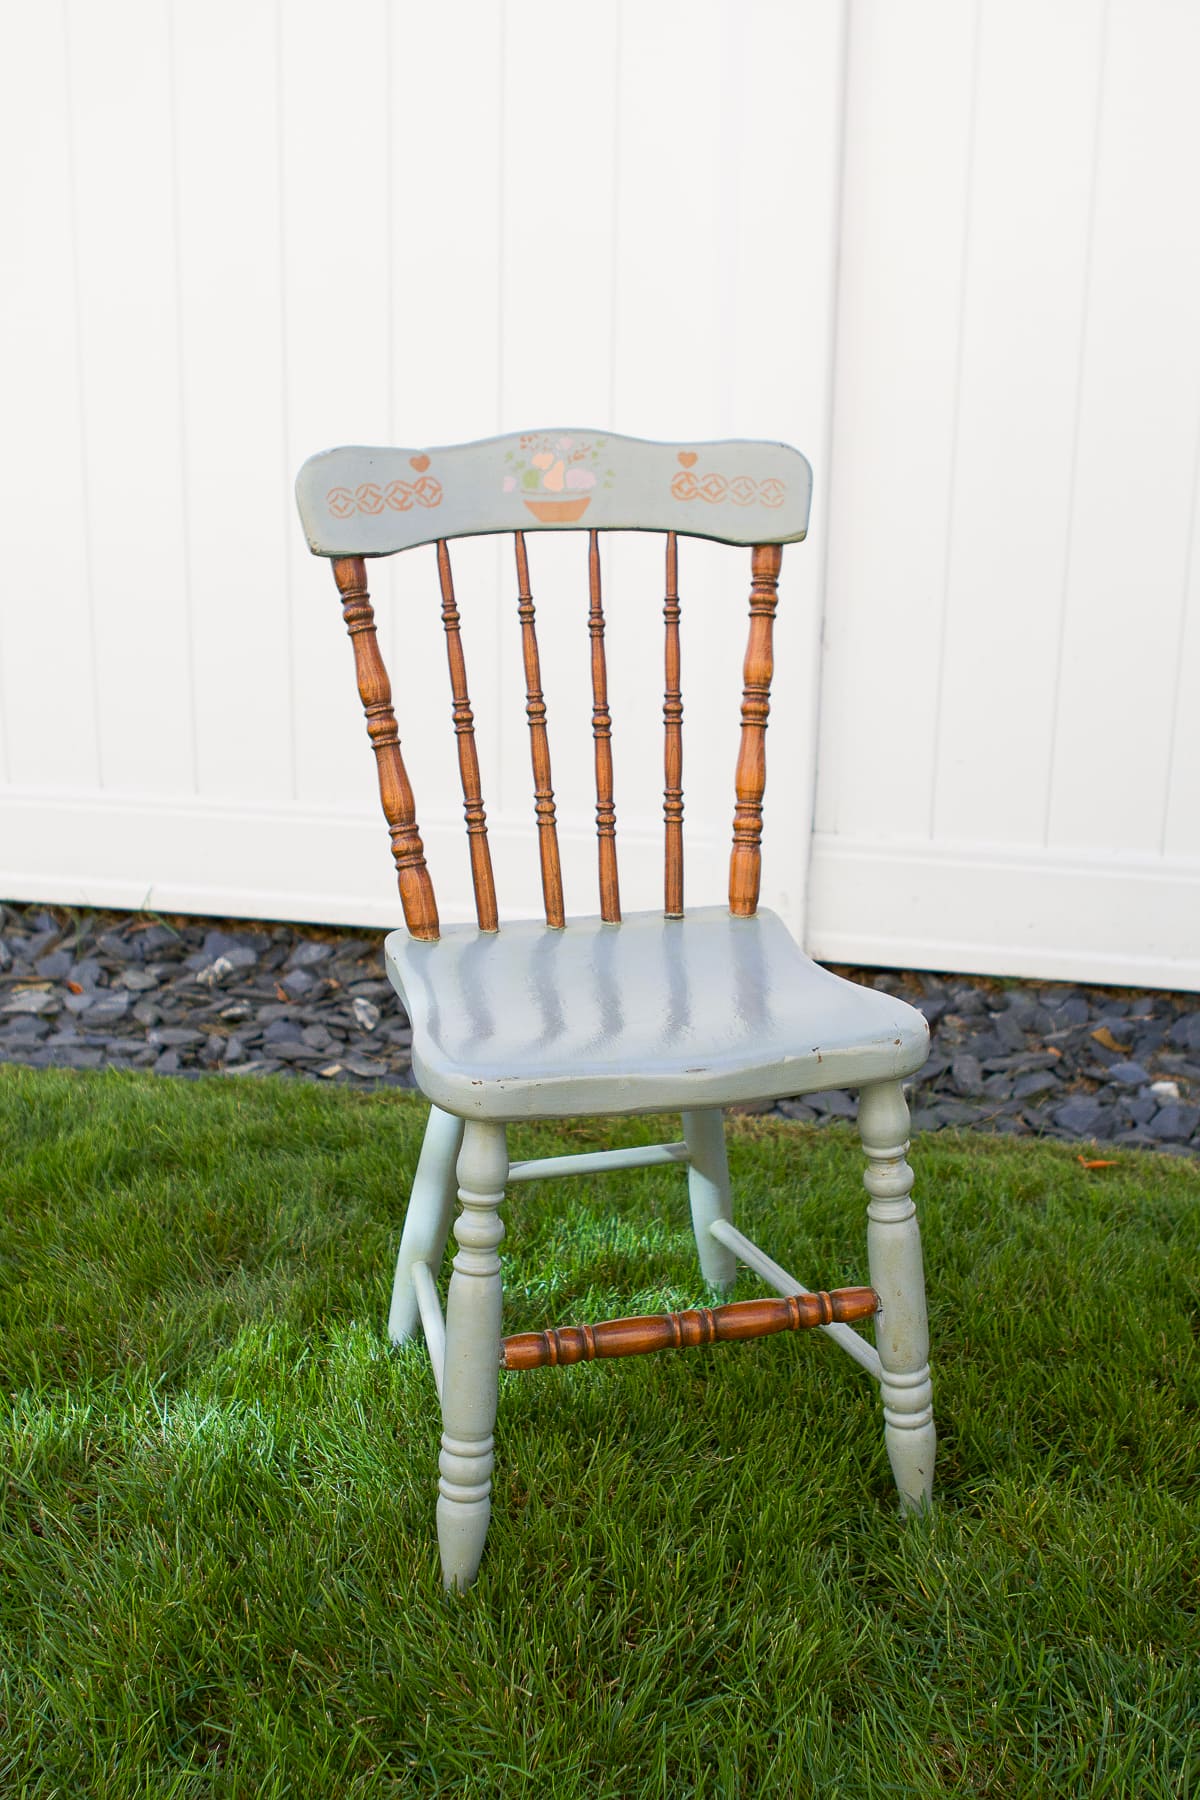
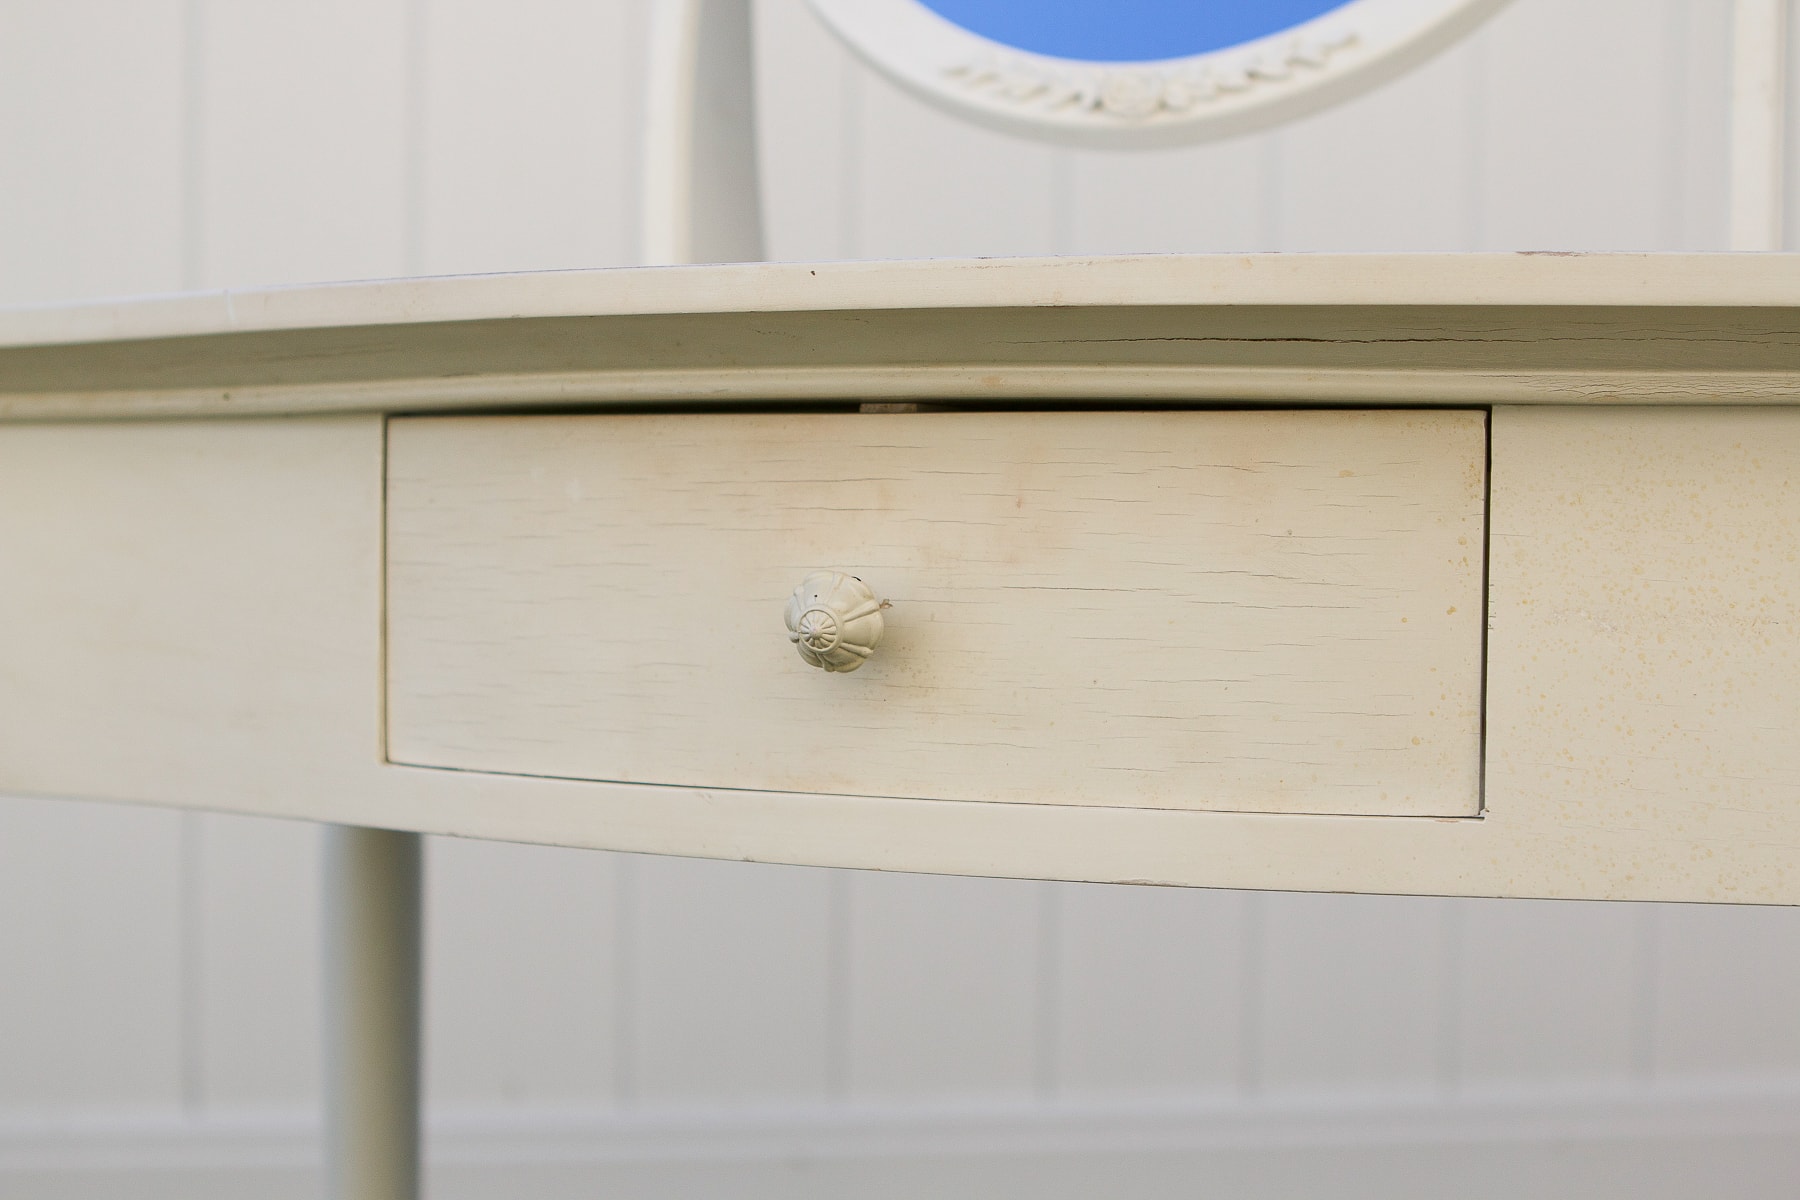
Vanity & Chair – Before
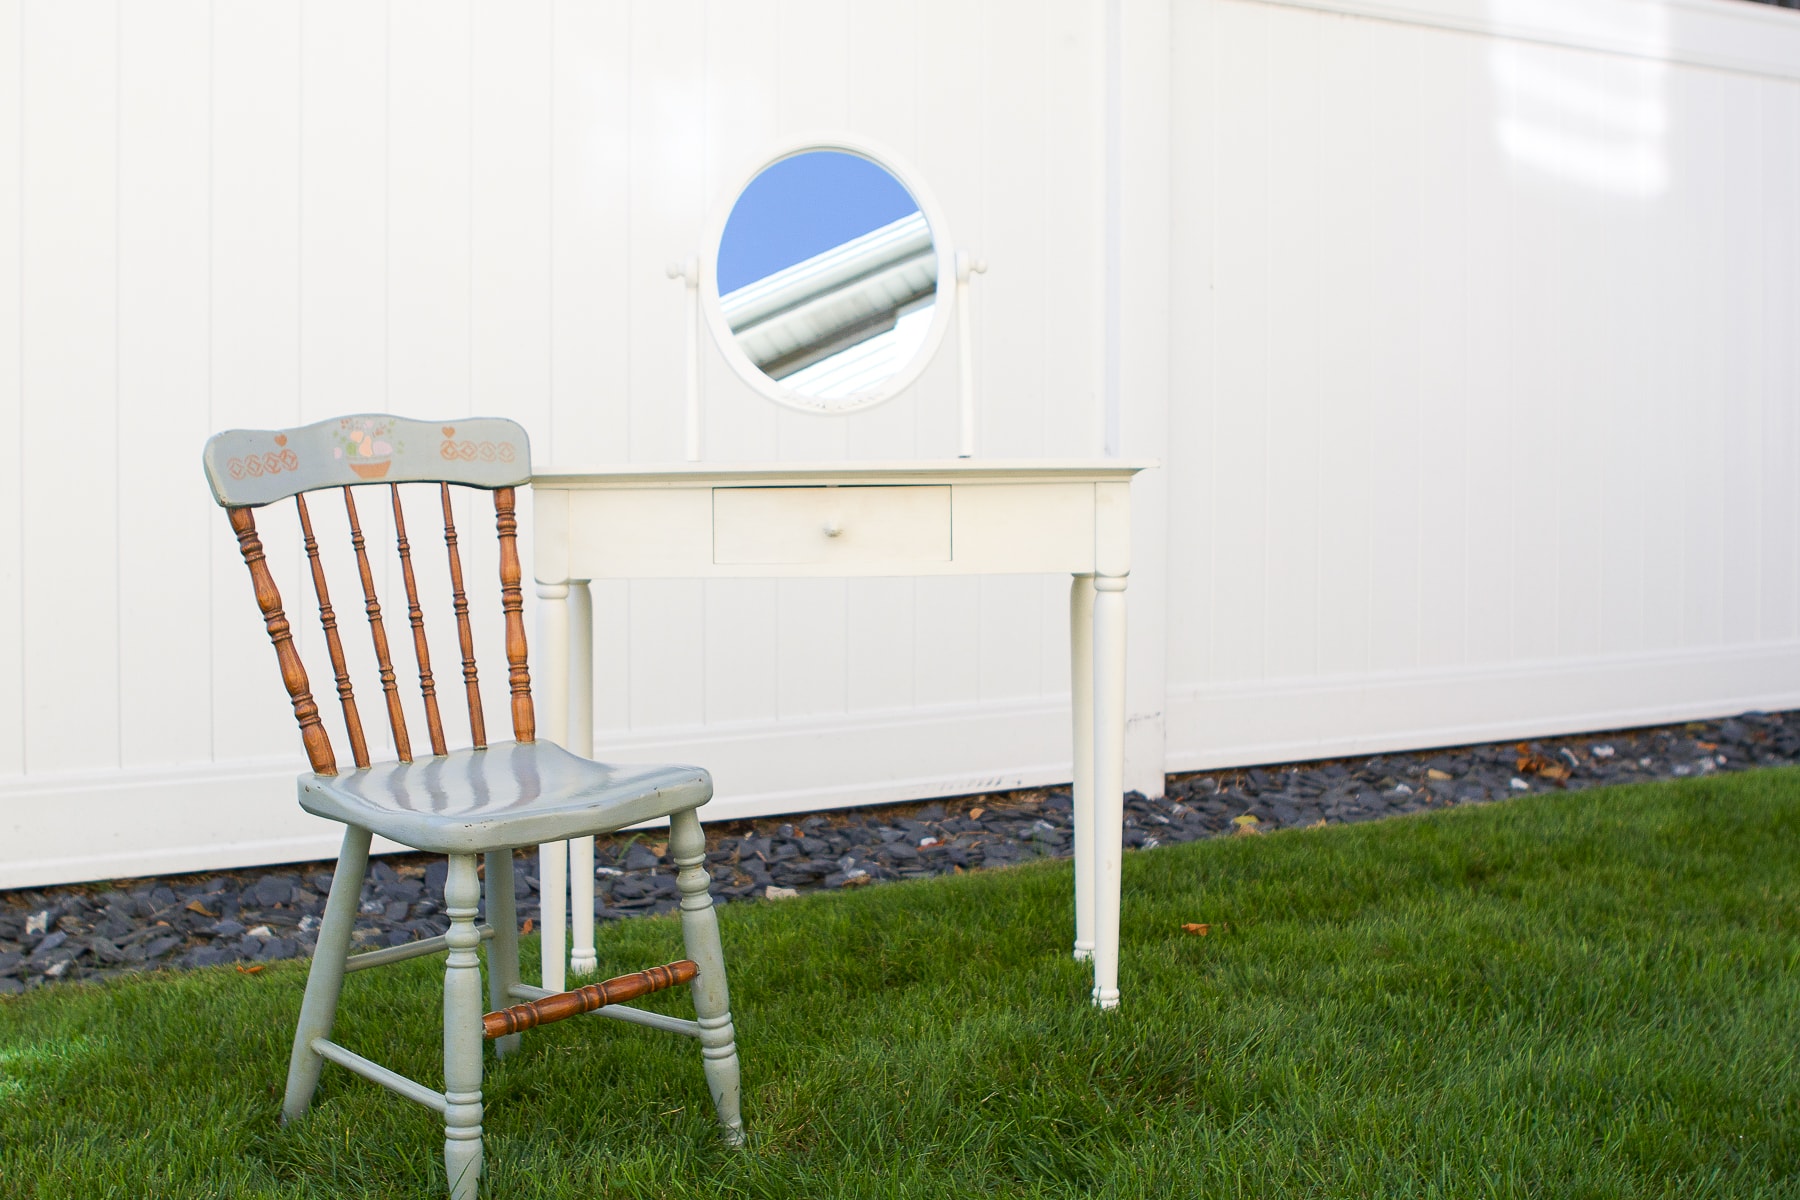
Here’s a look at the vanity and old chair that I found amongst all of the furniture. I immediately pictured a little girl sitting at the vanity to get ready before school and knew that I wanted to transform it with her in mind. The chair is petite, so it should work well for a child.
Let’s Try Chalk Paint
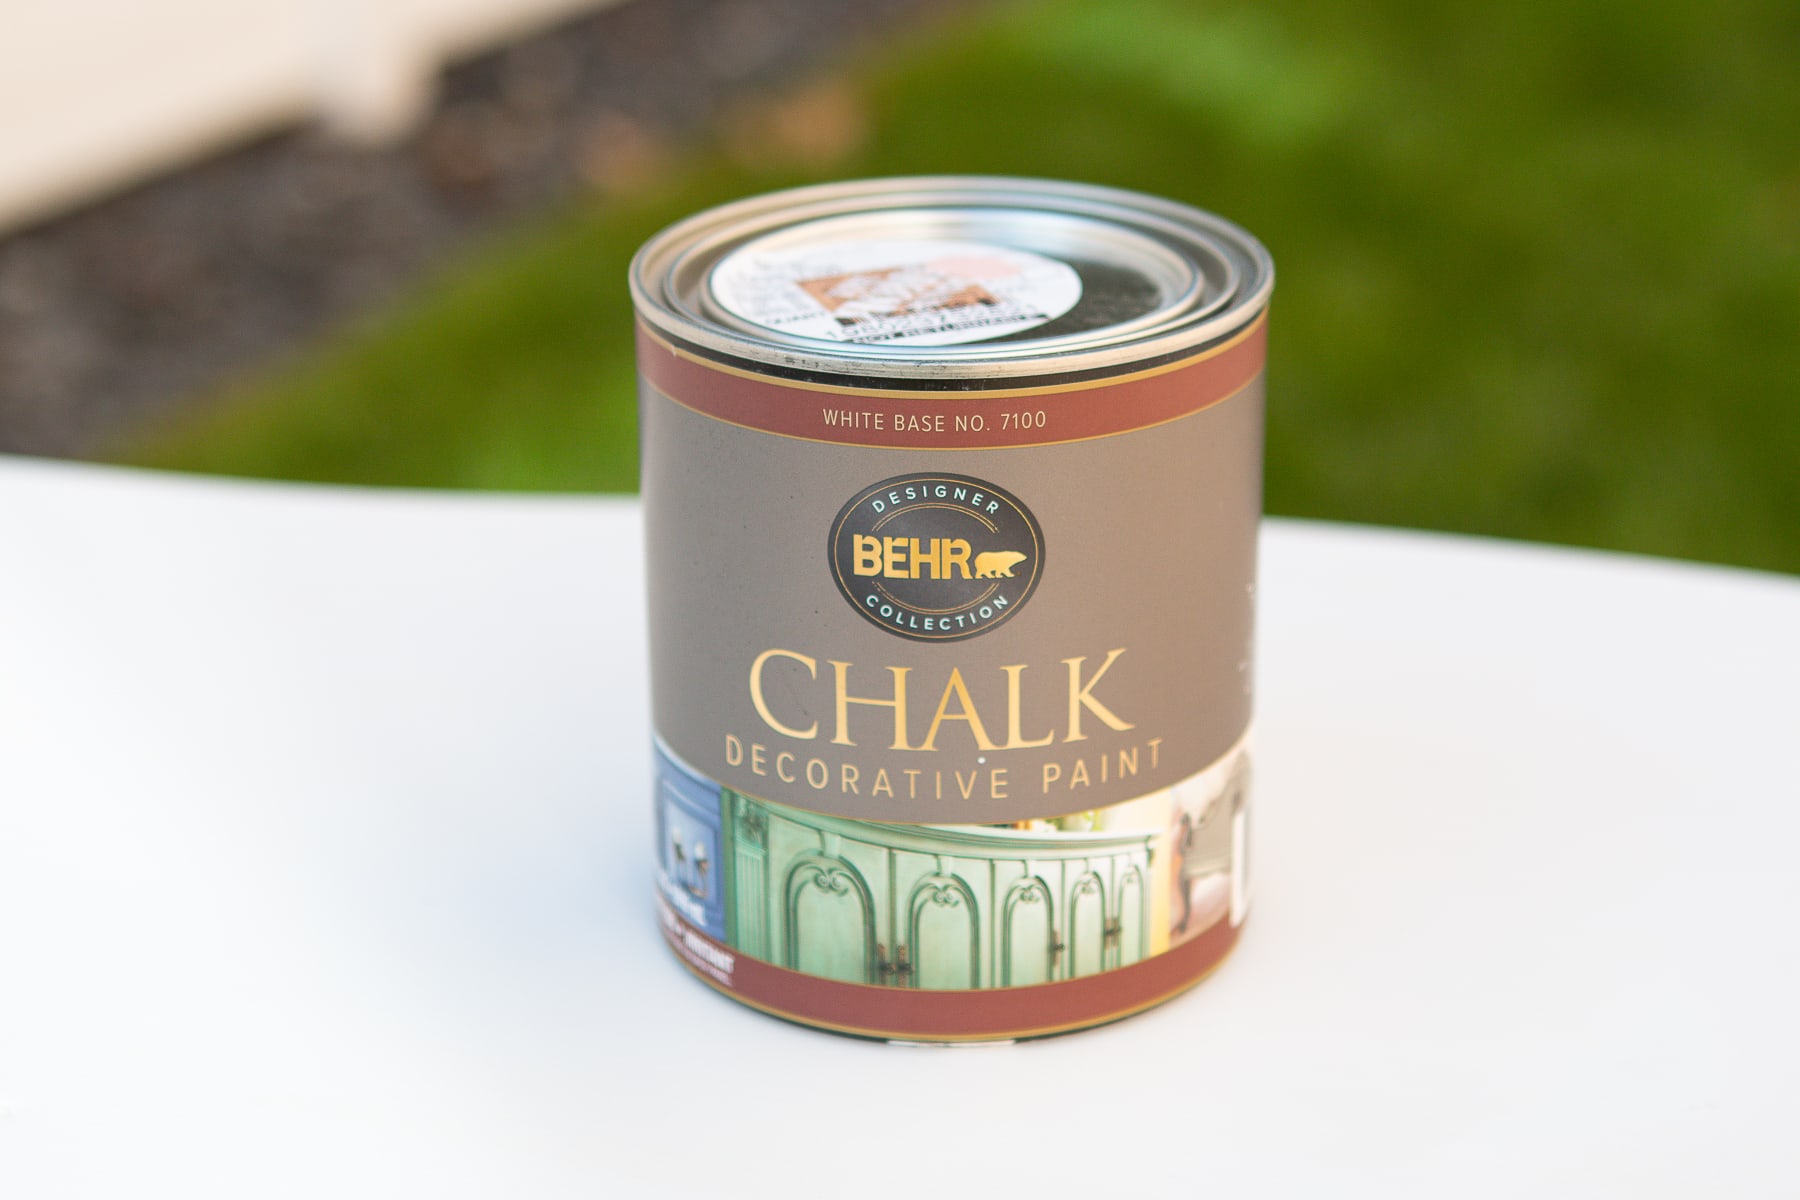
Since I’m out of the furniture painting game, I wasn’t totally sure which method I wanted to use when it came to painting. I know some people use latex paint or regular paint, but I was very intrigued by chalk-painted furniture. I know the technology has really improved over the past decade and now there are many different brands of chalk paint.
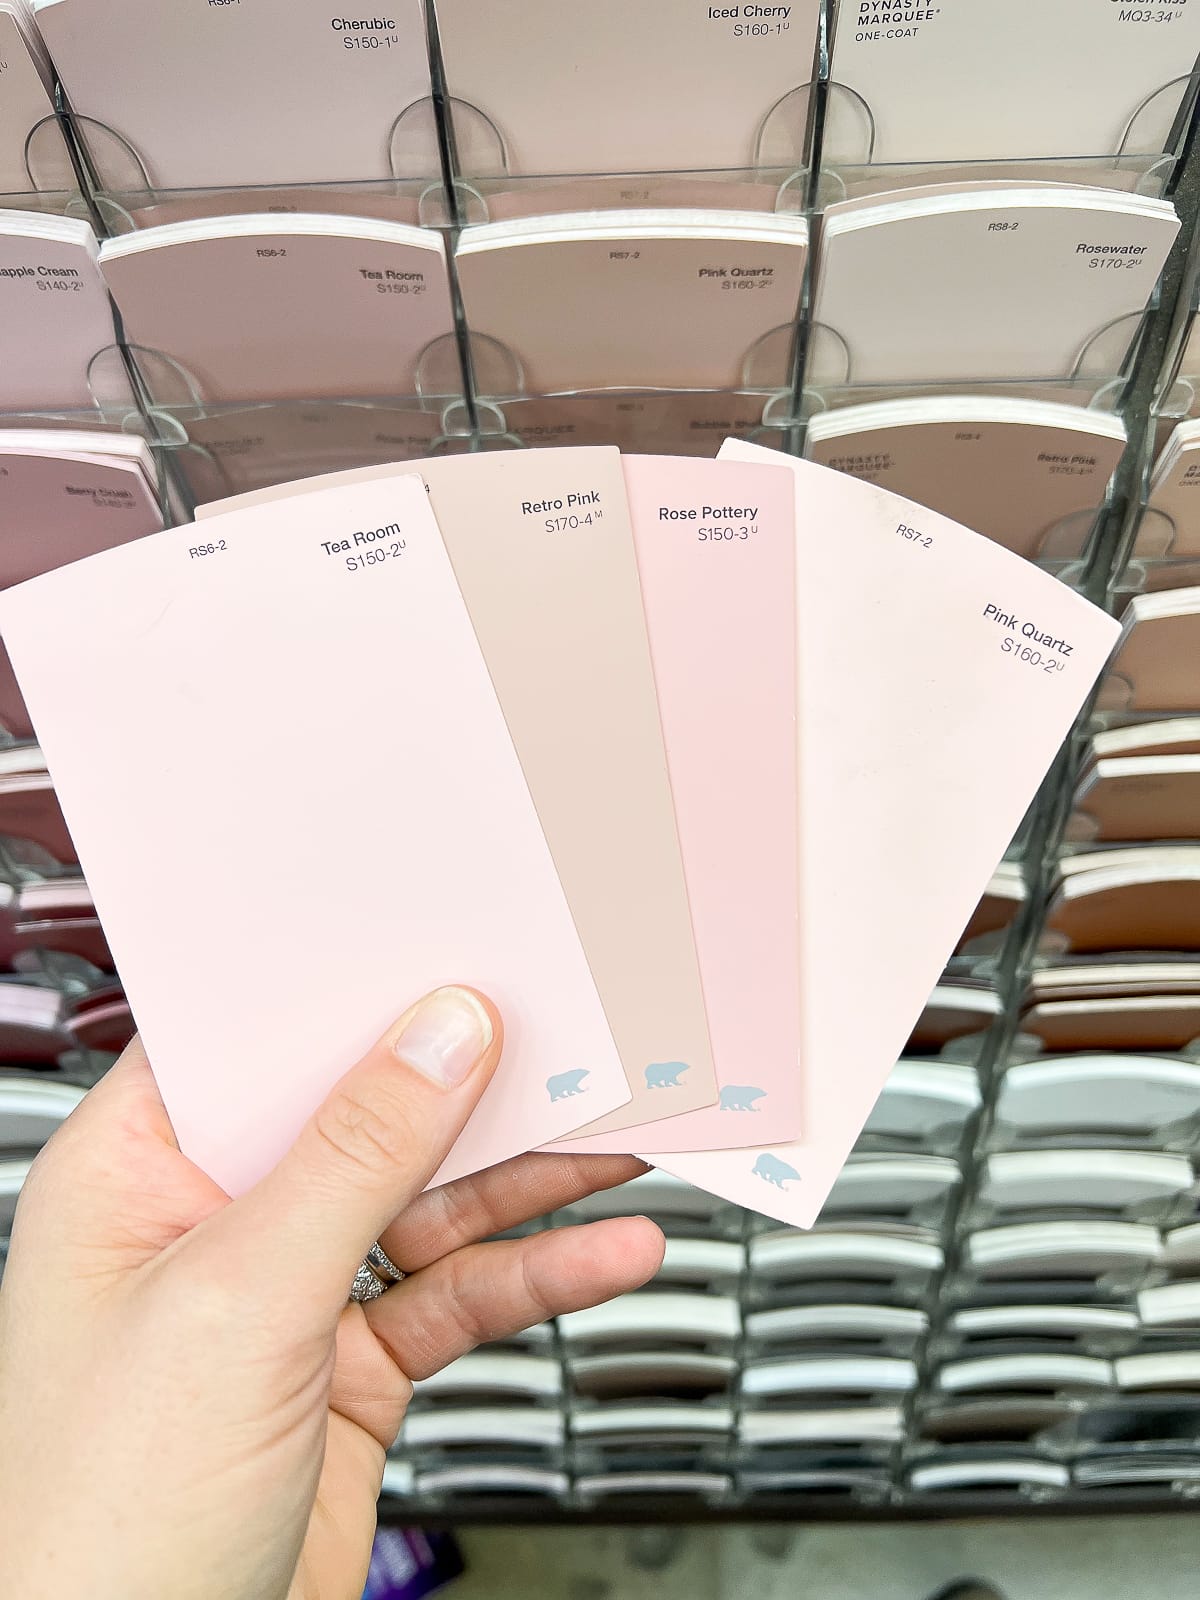
I hit up my local Home Depot and found that Behr has their own brand of chalk paint. I liked the idea of using this because you can have it tinted to tons of different colors.
After perusing their pale pinks, I settled on the color, “Pink Quartz.” It looked like a pretty light pink that would be perfect for a little girl (or boy!).
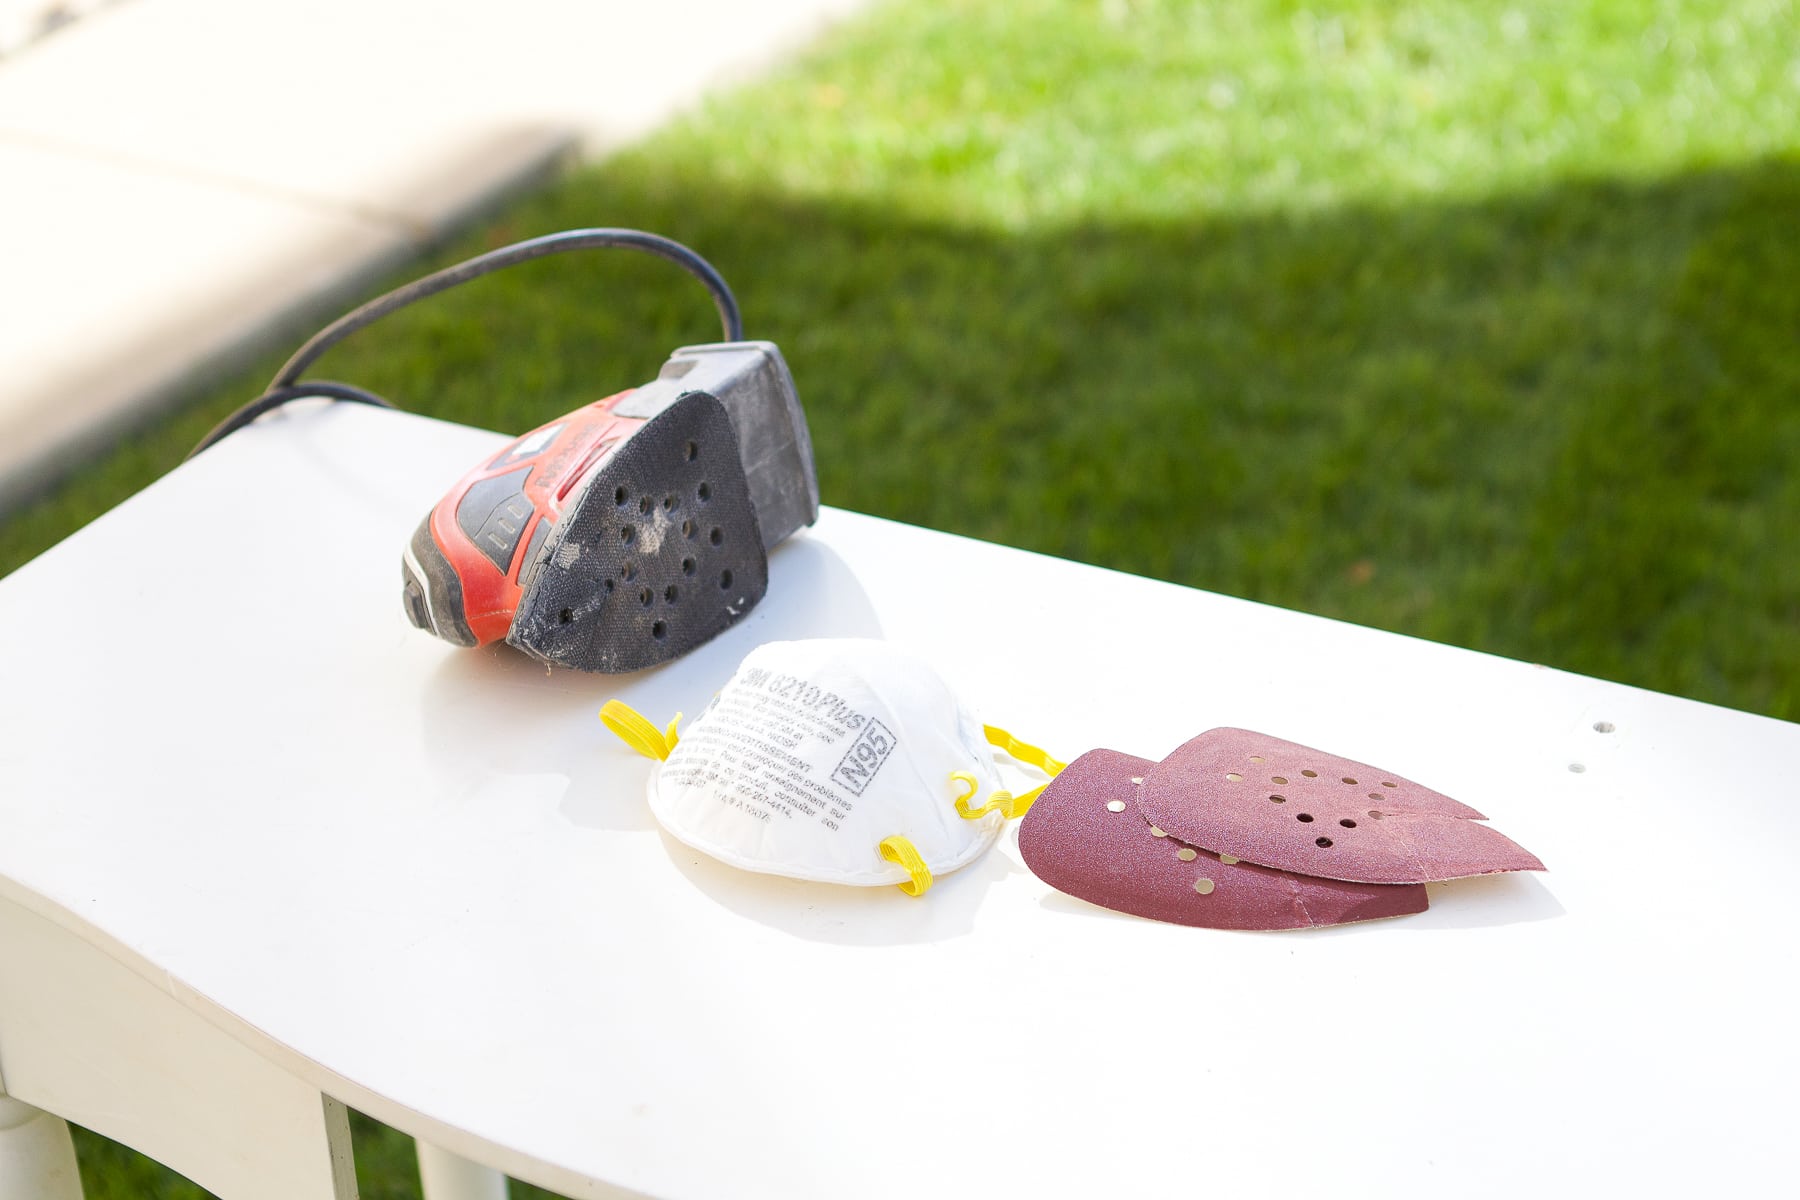
Chalk Paint Furniture DIY – Supplies
Once I decided on chalk paint, I researched to figure out what else I would need for this project. Here’s my list of DIY supplies and tools to grab.
- Chalk paint (tinted to the color “Pink Quartz”)
- Clear wax
- Paint brush
- Smooth foam roller
- Palm sander
- Sanding sponge & sandpaper
- Painter’s tape
- Rub ‘n Buff
- Small stiff paintbrush
- Rags
- Paint pail
- Wallpaper & Paste
How To Use Chalk Paint On Old Furniture
This was my first time using chalk paint and I learned a lot along the way. Spoiler alert — I was very impressed by this paint. Here are my best tips to transform any furniture piece with chalk paint. Hopefully, these helpful tips will encourage you to try your own chalk paint furniture DIY project.
Consider Prep Work
During my research, I came across a lot of conflicting advice when it came to prep work when using chalk paint. Some say that you just have to clean the piece and then you can start painting. Others say you should really sand and prime to get a perfect and smooth finish.
Since this was my first time, I erred on the side of caution and decided to move forward with sanding and priming. It’s just second nature as a DIY’er, and I wanted to achieve the best results! But, I think it would be interesting to try a similar project without the prep work and see how it comes out. You would definitely save some time!
Sand & Prime
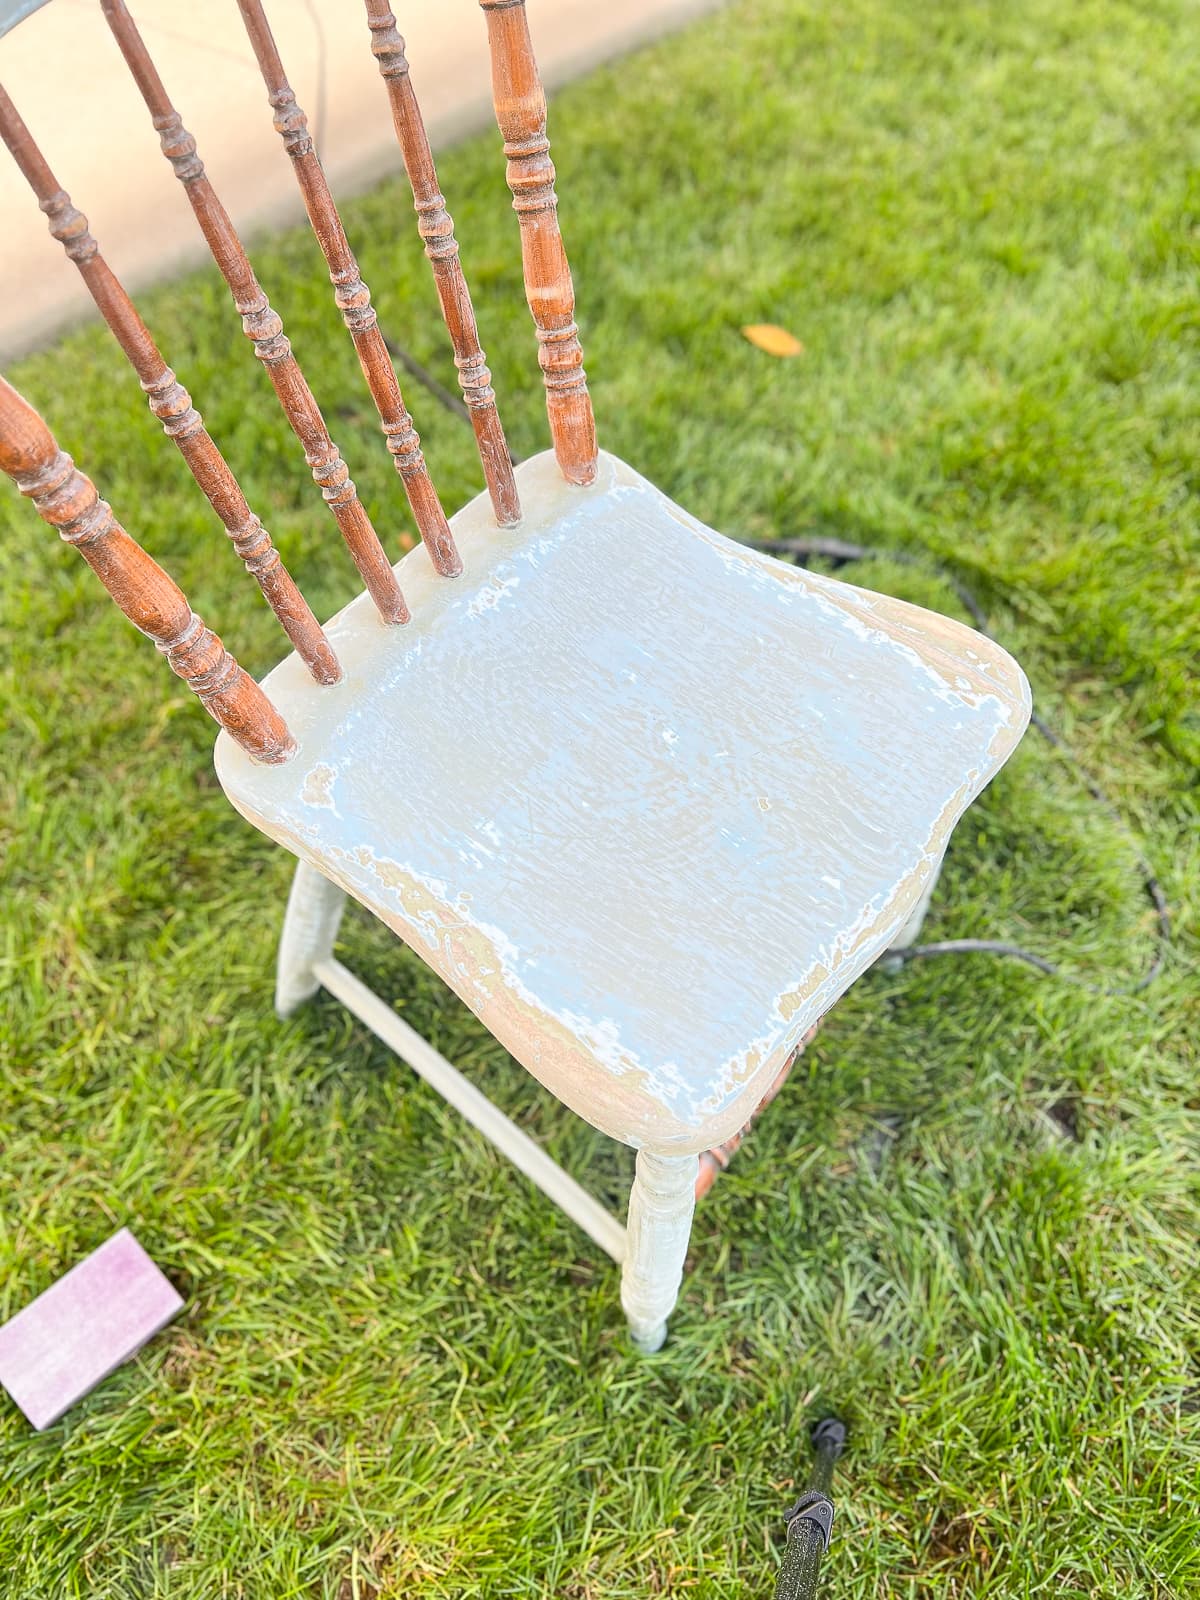
I whipped out my palm sander and a few different grits of sandpaper. The chair was in pretty rough shape, with lots of layers of paint on it, so I started with a coarser grit (120) and worked my way to a finer grit (220). This helped to get a lot of the old paint off and buff out any dents and marks. If your piece has large dings, you could always use wood filler at this point too.
Because the chair had so many nooks, crannies, and spindles, I also had to use a sanding block and sandpaper to get all of the edges.
The vanity was in pretty good shape and I didn’t want to over-sand it. For this, I just did a light sanding using 220 grit sandpaper. This just rid the surface of any imperfections and gave it a smooth surface.
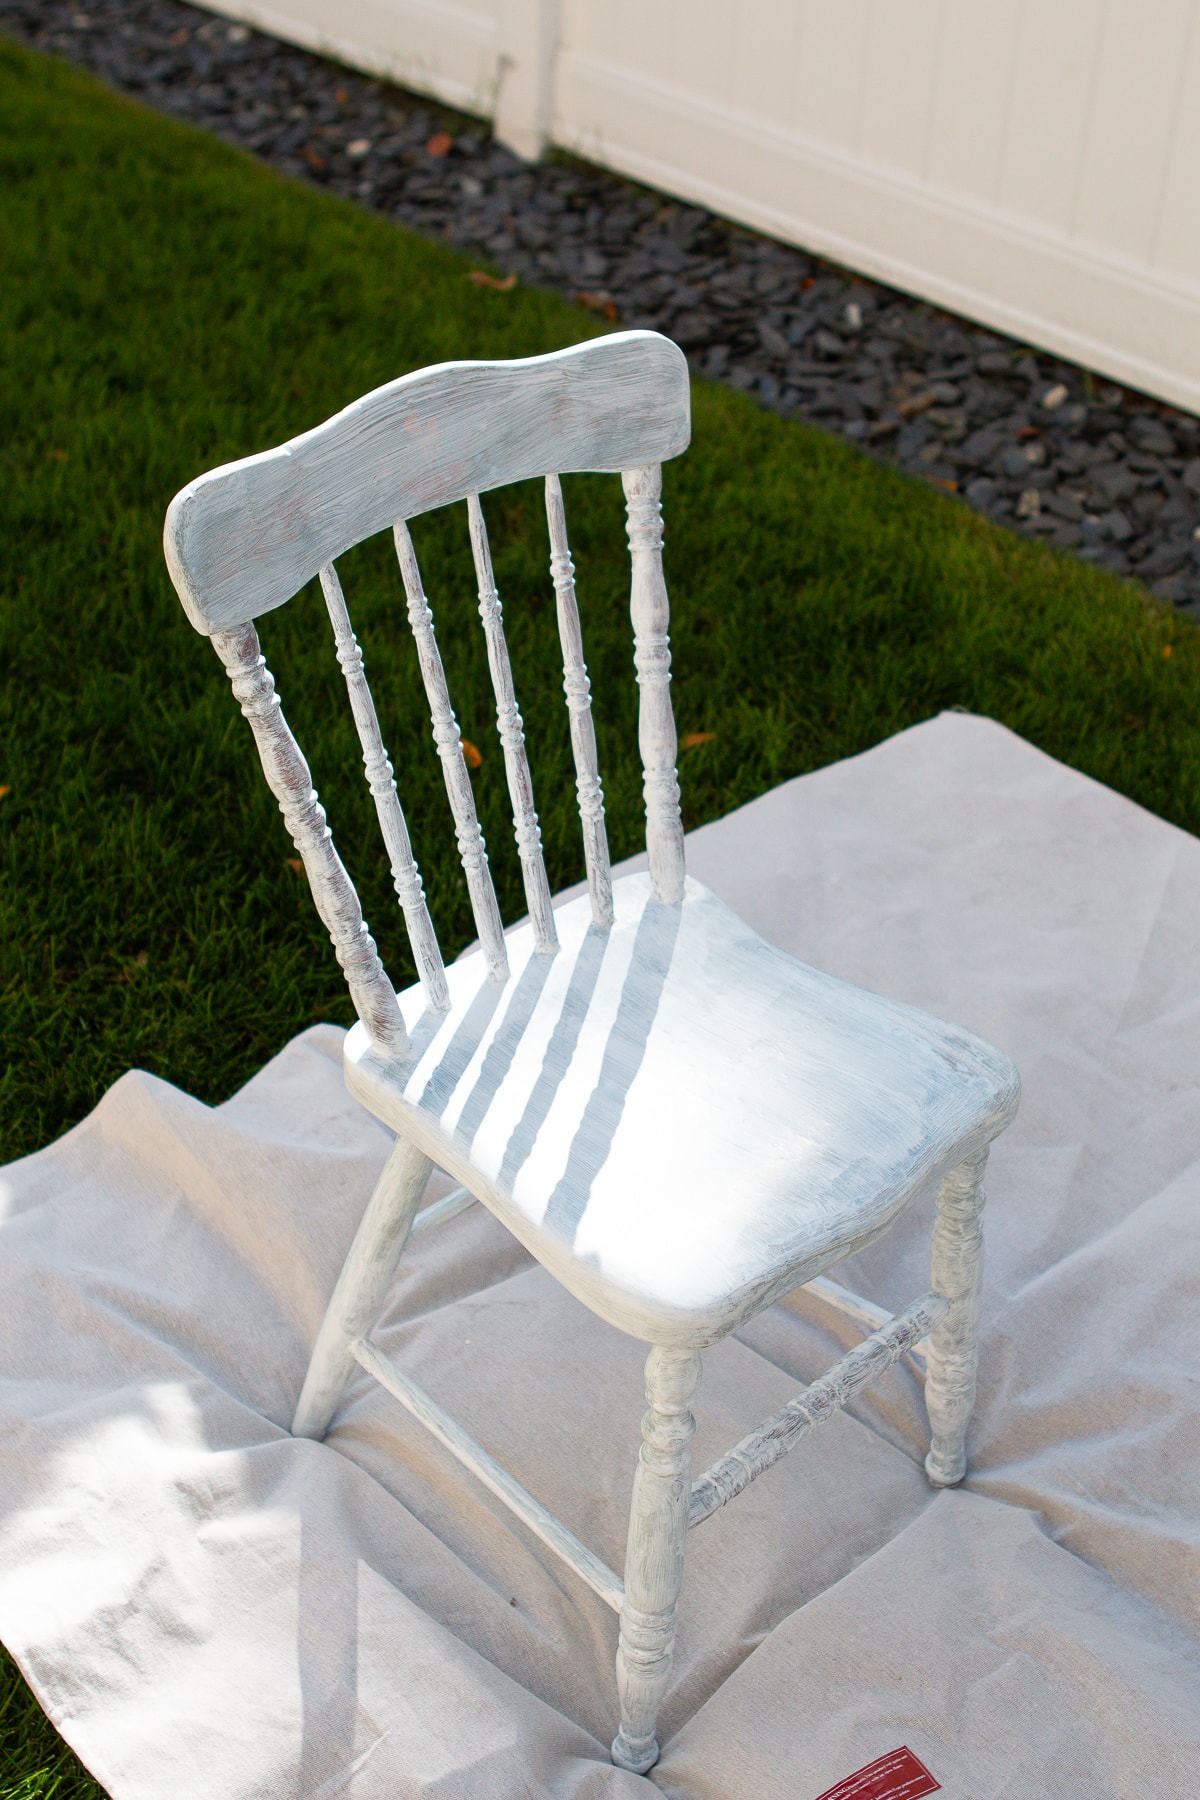
Next, I gave everything a good clean with Krud Kutter and painted a light coat of primer. My go-to is this one from the Zinsser brand. It’s water-based primer that works with chalk paint.
Apply Chalk Paint
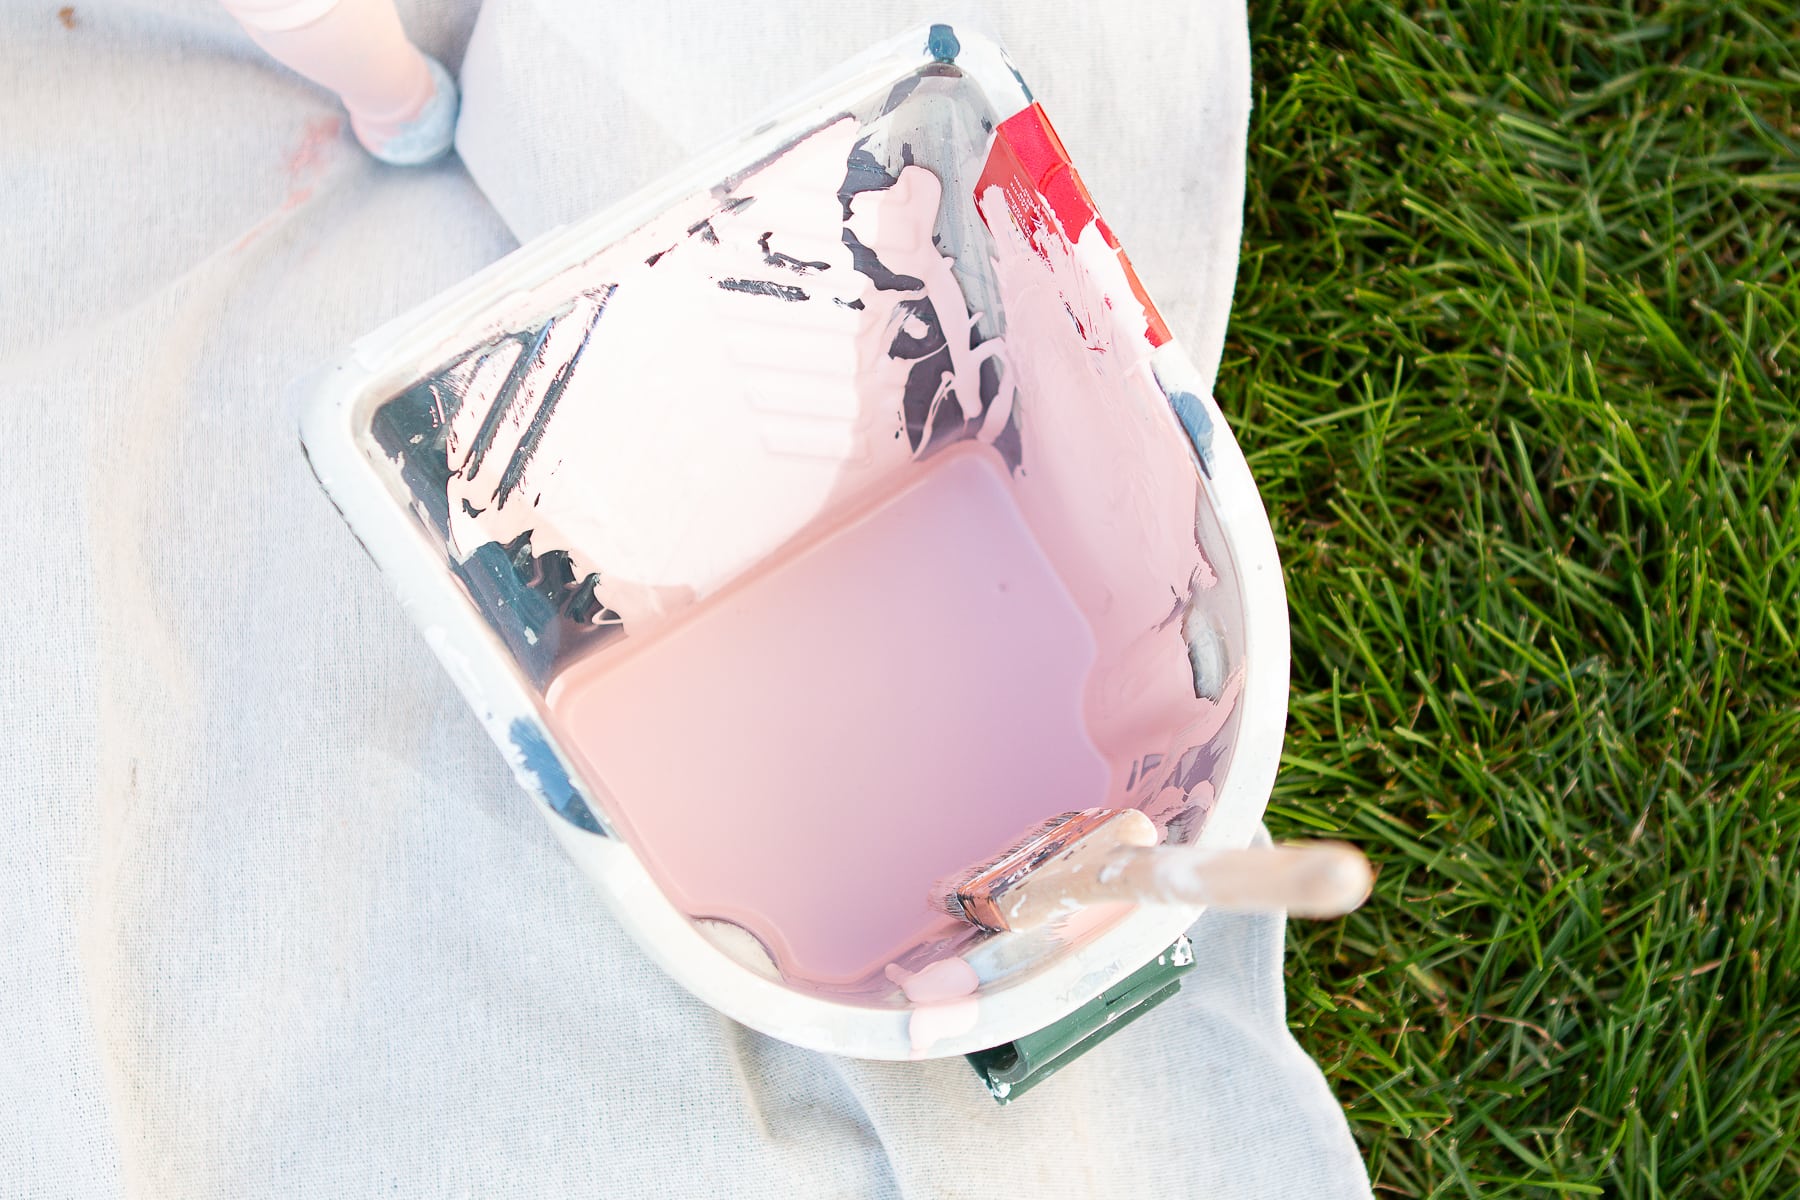
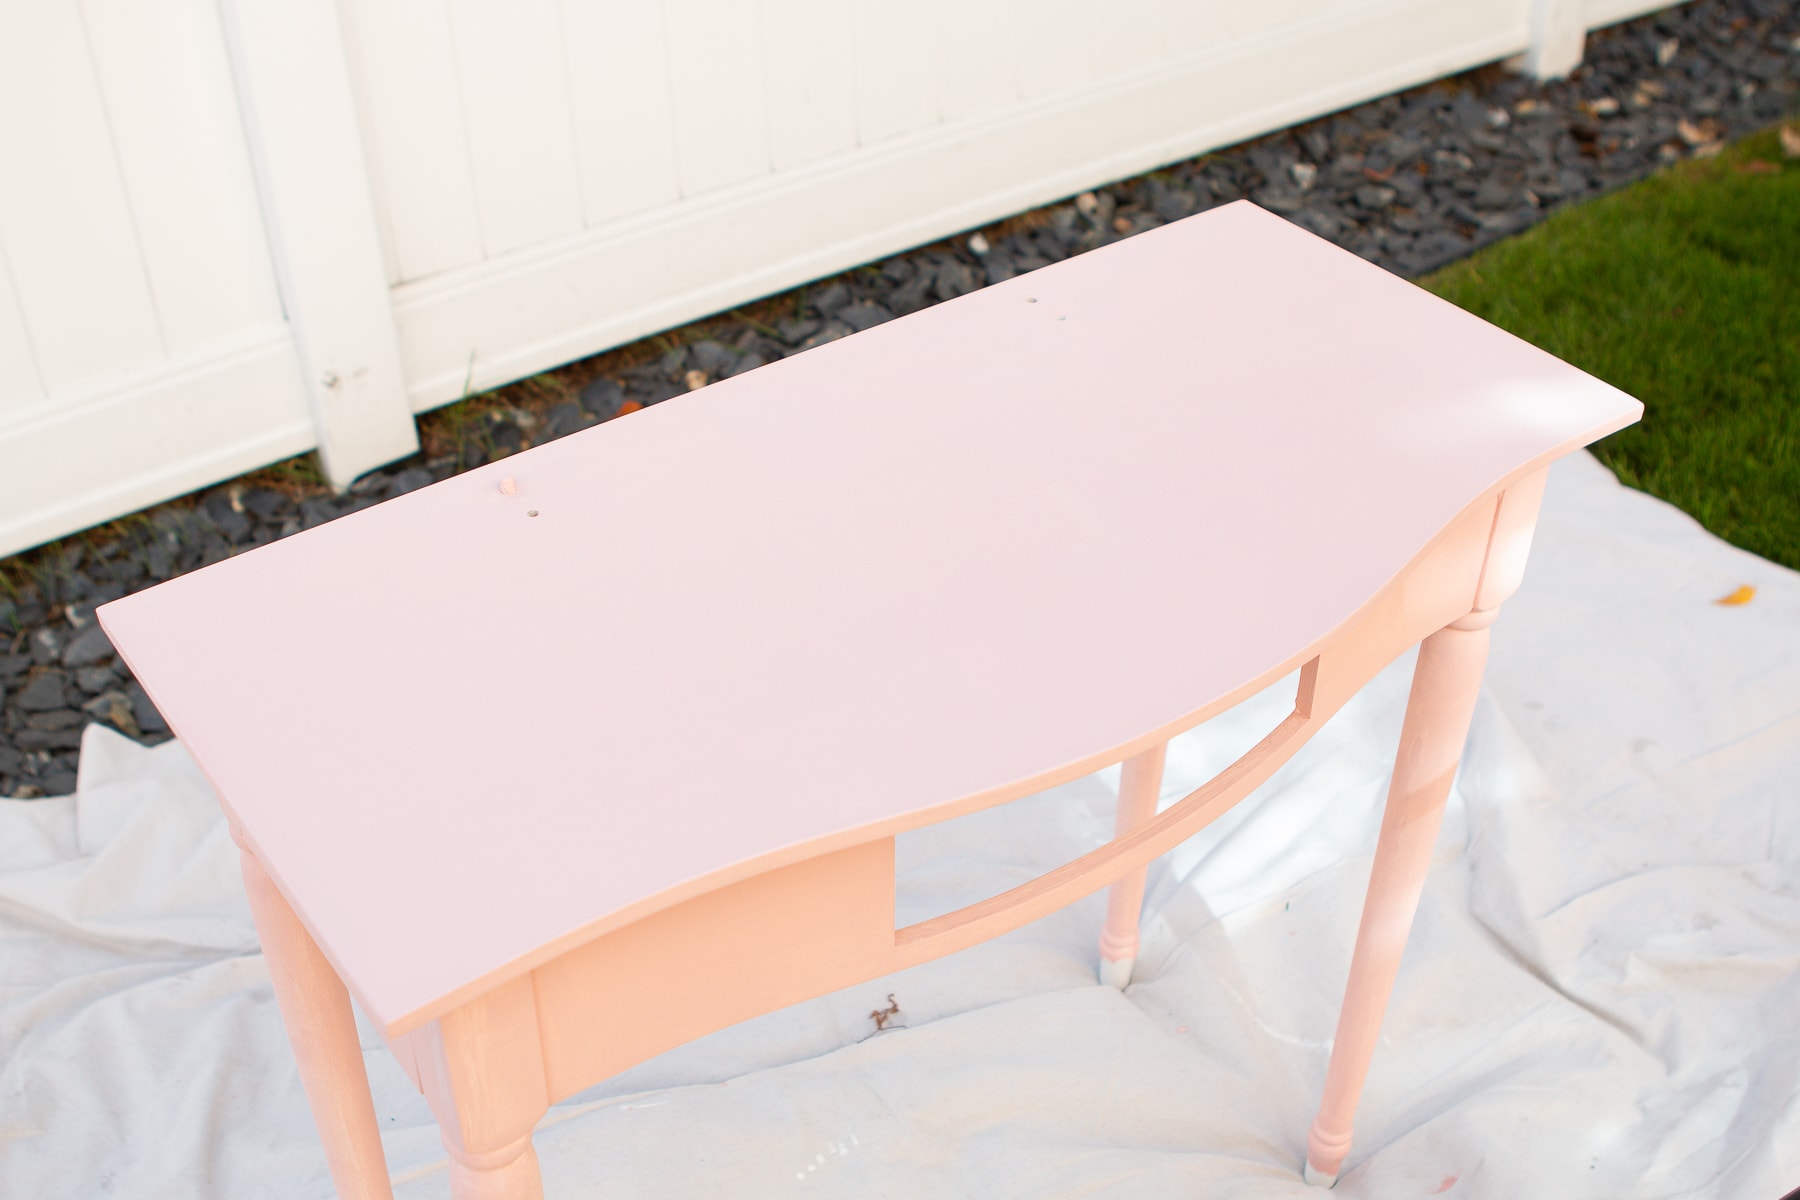
The next day, I was ready to use the chalk paint and I was a tad nervous. I poured the paint into my favorite paint pail (seriously, I use this for every single paint project) and gasped at the gorgeous color. The pink was perfect!

I started on the underside of the chair, just to give the paint a good test before painting a more noticeable area. Luckily, it came out beautifully and covered really nicely.
You’ll want to use a paint brush on the nooks and crannies and then a foam roller for the smooth surfaces, like the top of the vanity. The foam roller goes a bit faster and eliminates any visible brush strokes.
As with most painting projects, I always recommend light coats of paint. This prevents drips and any overly saturated areas. After that first coat of paint, there was good coverage but it was still a tad splotchy.
Add A Second Coat
Chalk paint dries surprisingly fast and by the time I was done with my first coat, I was ready for the second coat of paint. And because it dries so quickly, be sure to work in small sections.
This second coat really gave a nice full coverage. For me, a third coat wasn’t necessary, but depending on the color, you could always go for one more light coat.
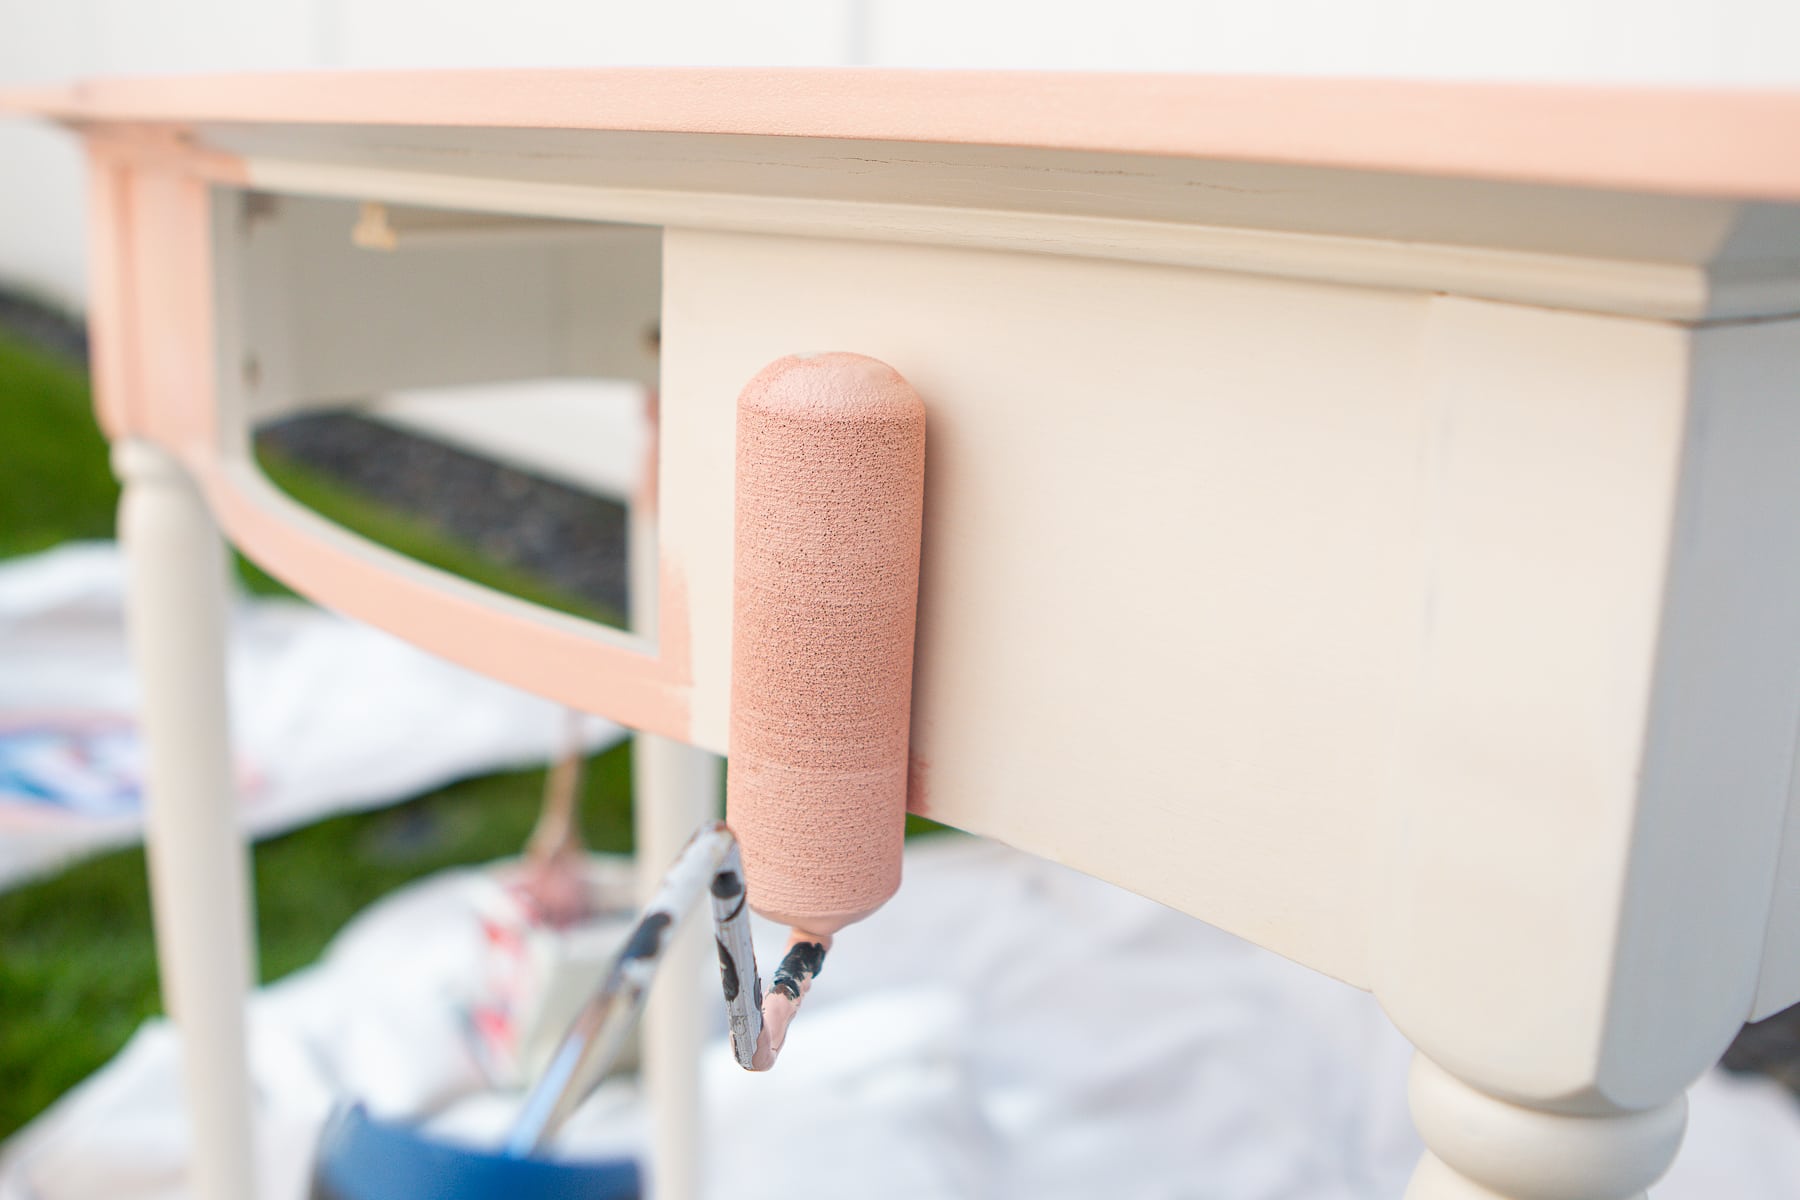
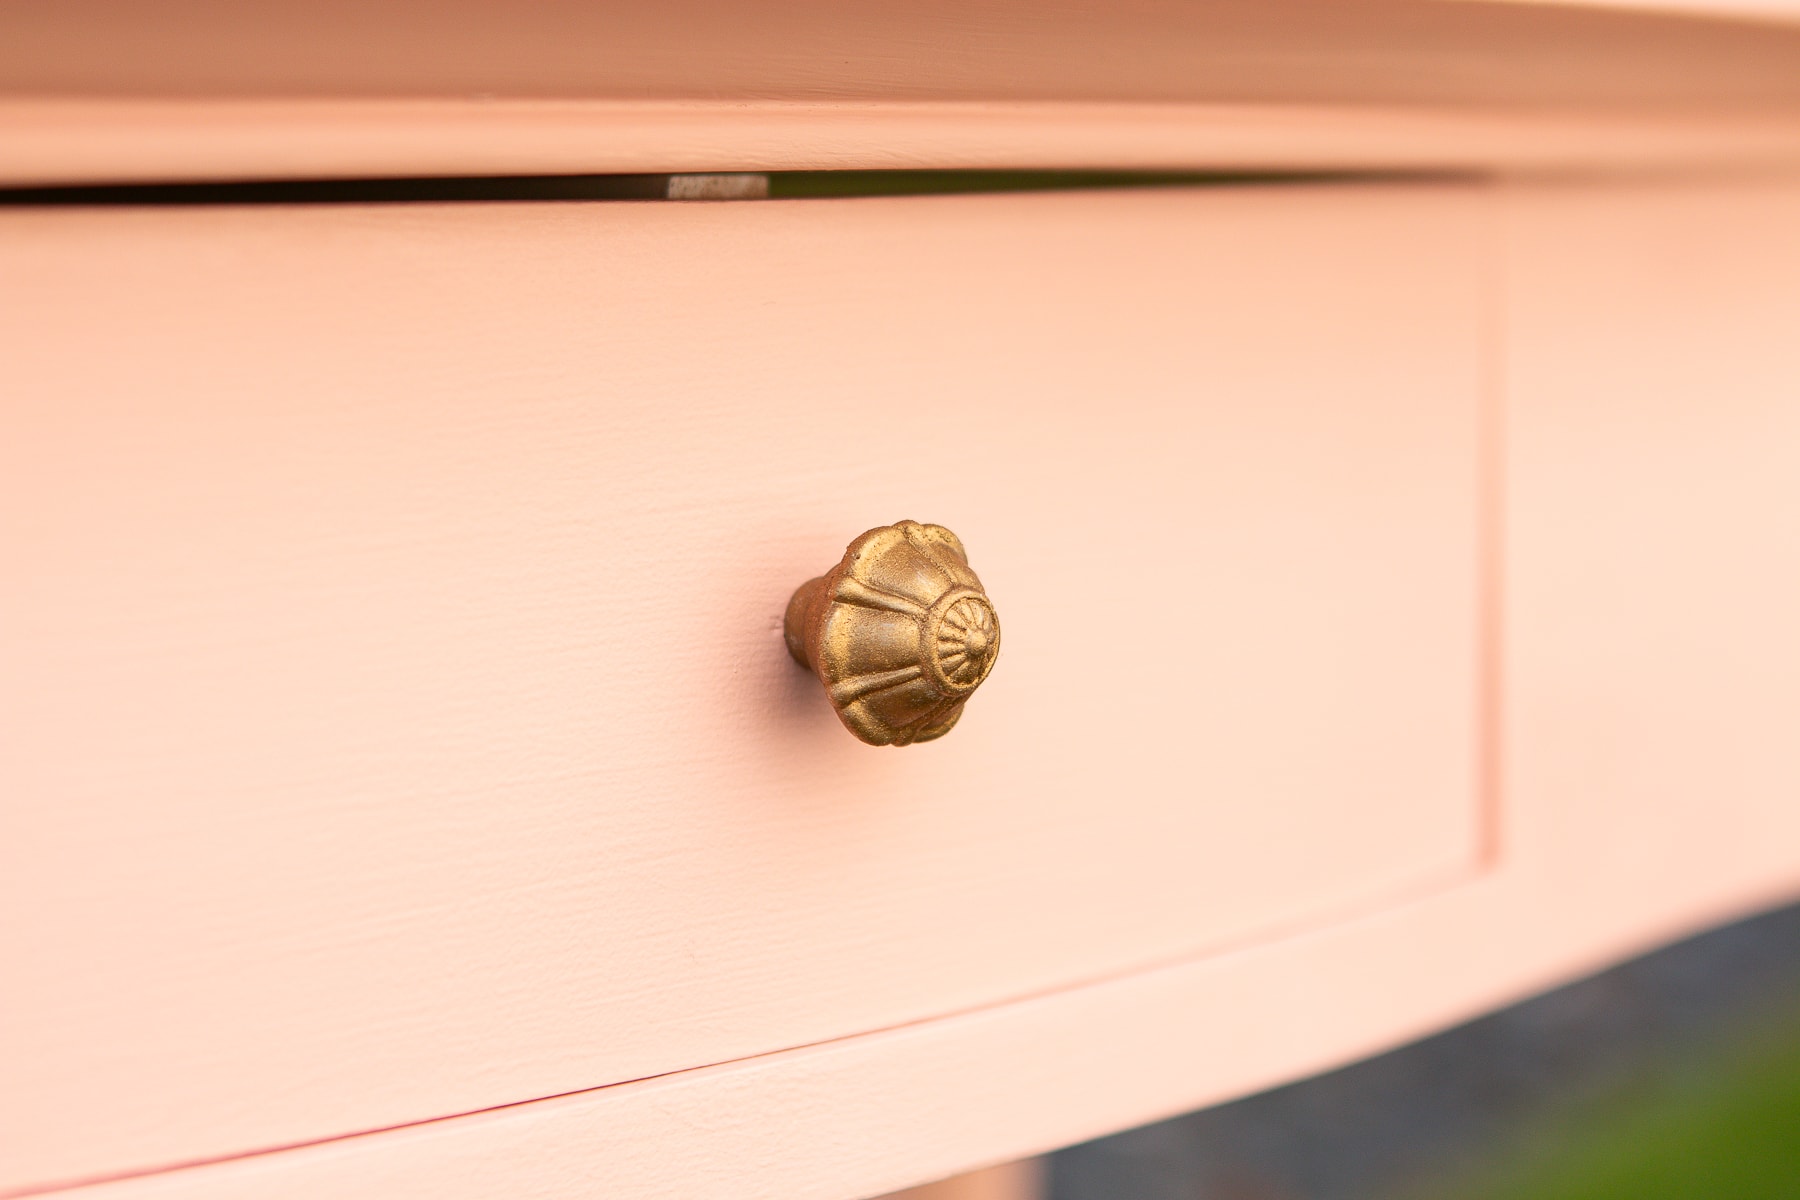
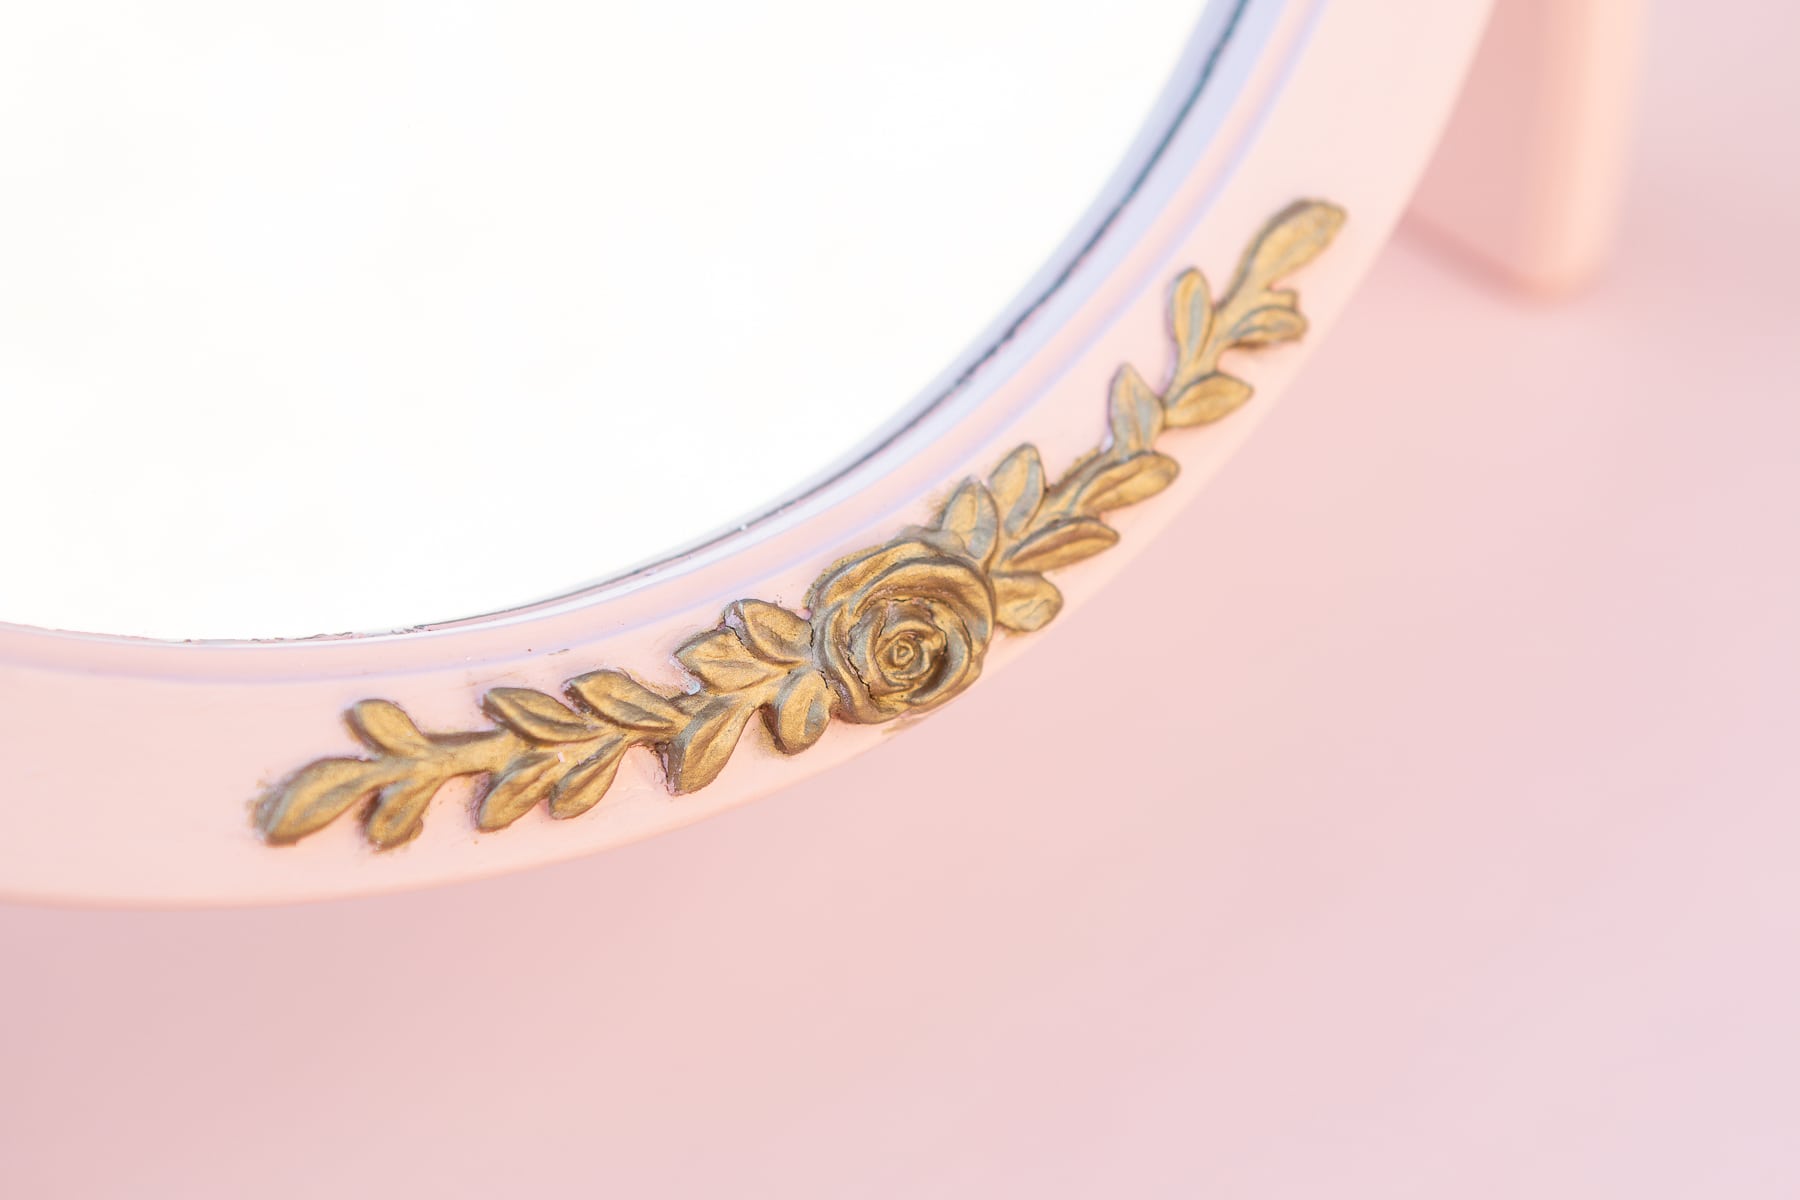
Using Rub ‘N Buff
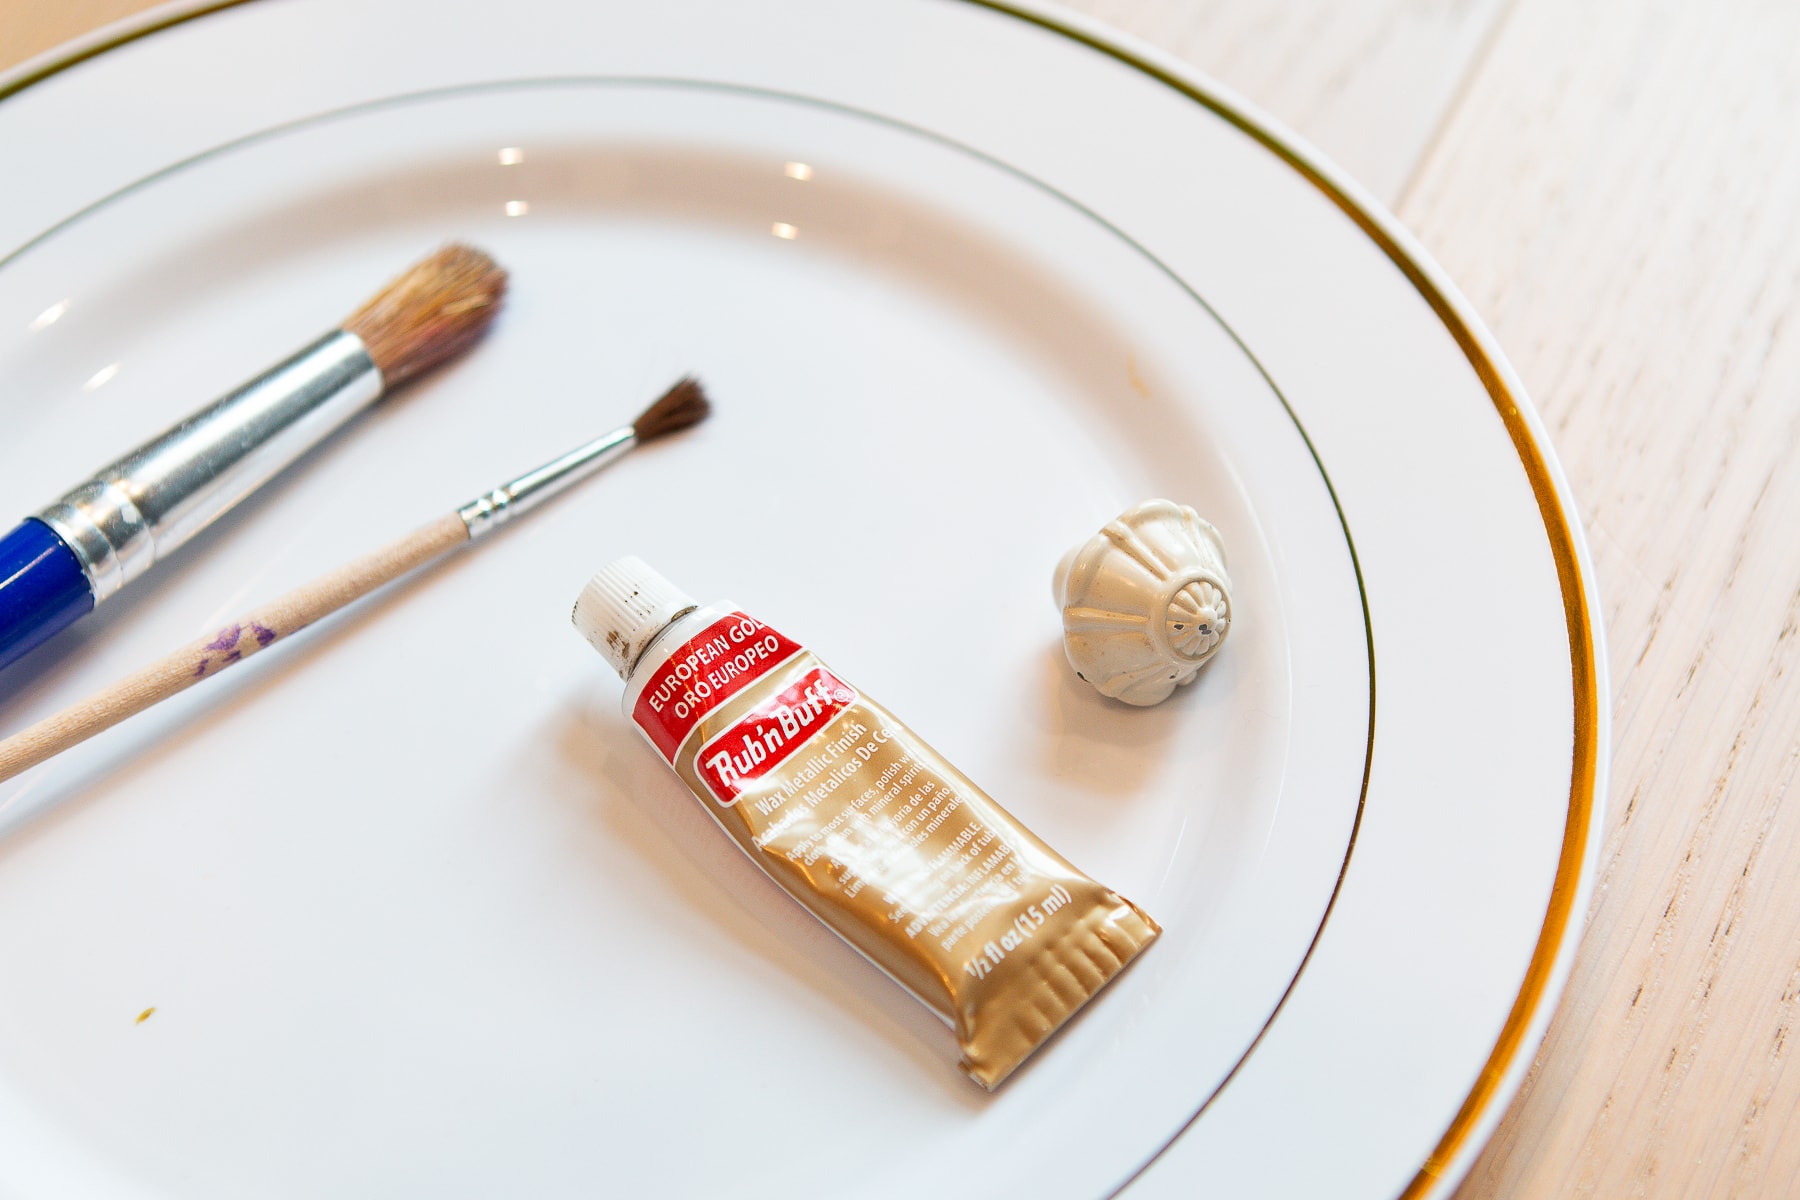
Now that my old furniture was looking new with that fresh coat of paint, it was time to add a little something extra. Remember when I used Rub ‘n Buff to transform our black curtain rods to gold? I was so impressed with that tiny tube of gold paint that I knew I needed to use it again for this project. Not to mention, I still had a lot leftover from that project!
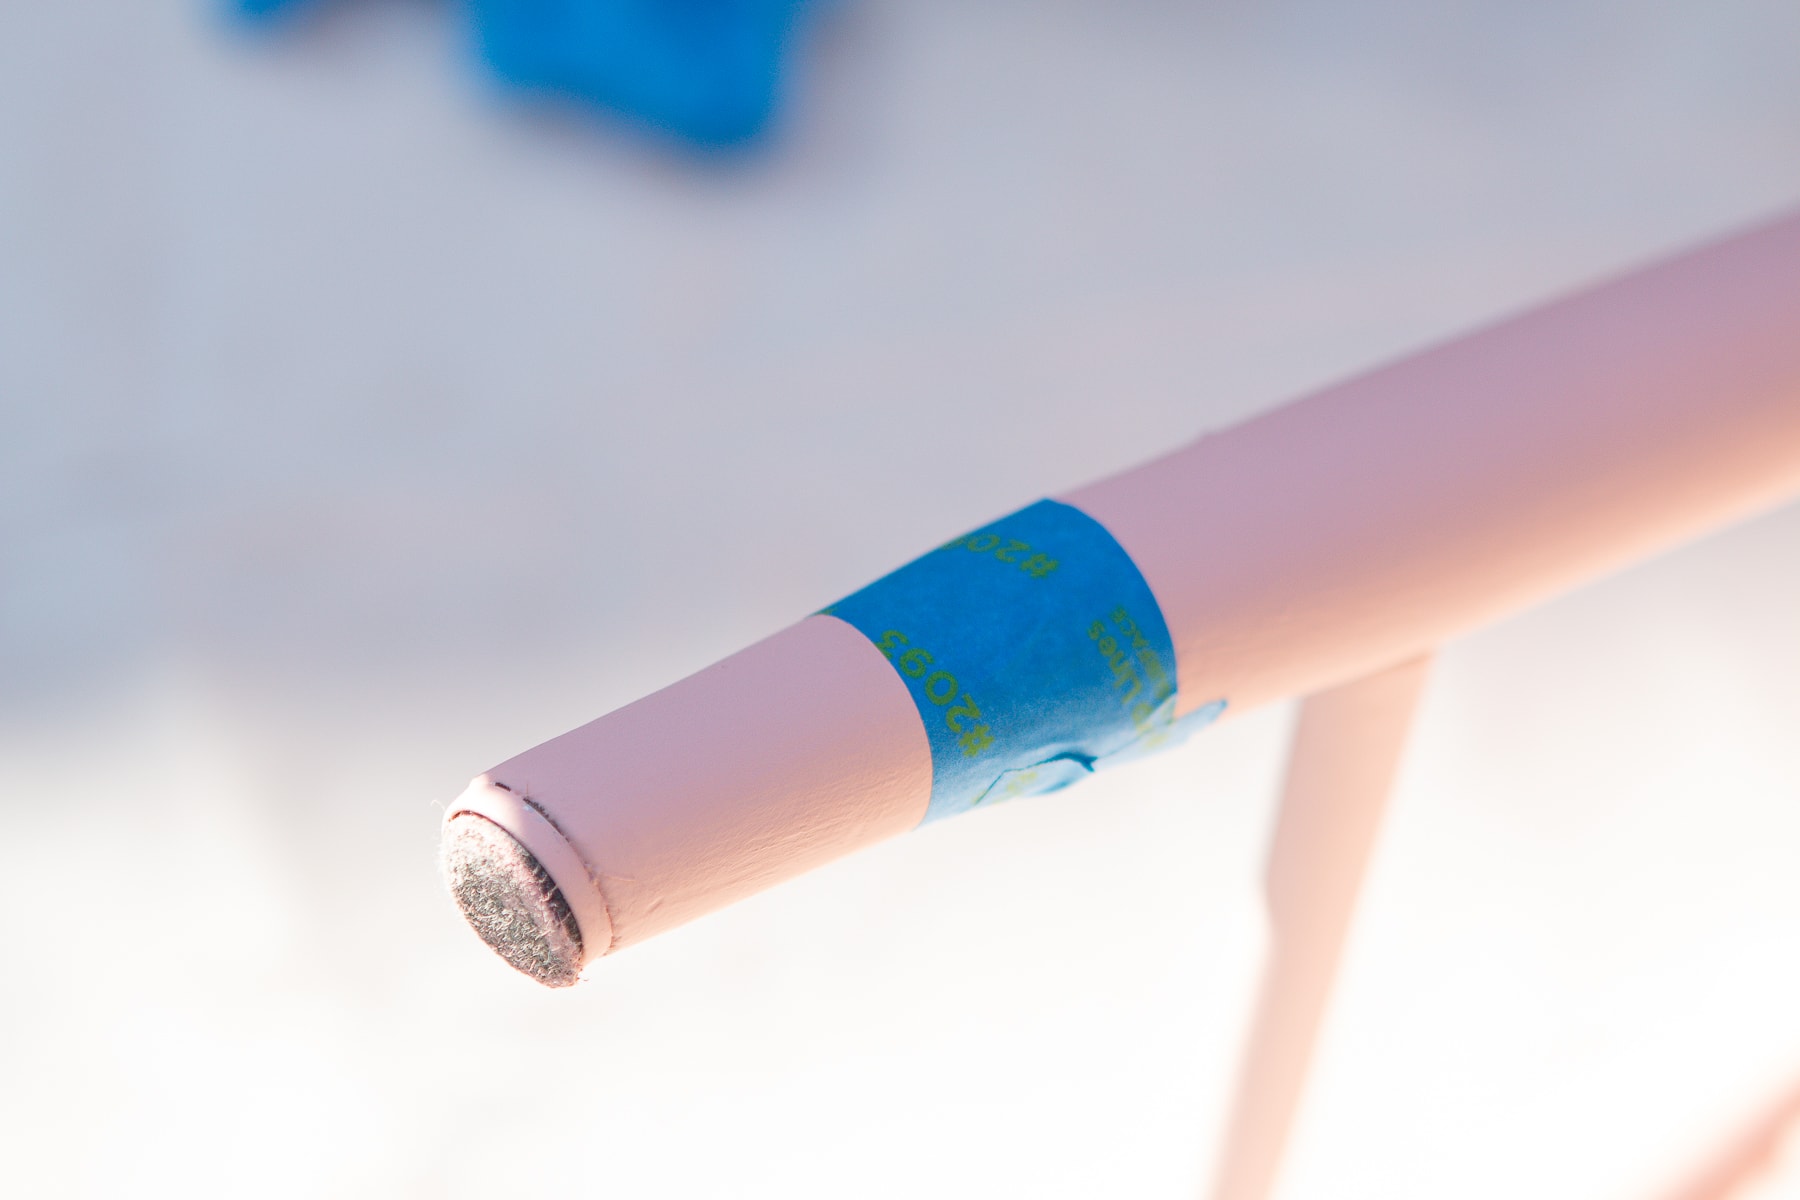
I decided to “dip” the feet of the vanity and chairs in gold. To do this, I used painter’s tape to mark off the section and then grabbed the Rub ‘n Buff. A little goes a long way with this stuff, so don’t overuse it. I highly recommend using a stiff brush and spread it out evenly as you go. I ended up using a makeup brush to apply it. Oh, and wear gloves because it’s super messy!
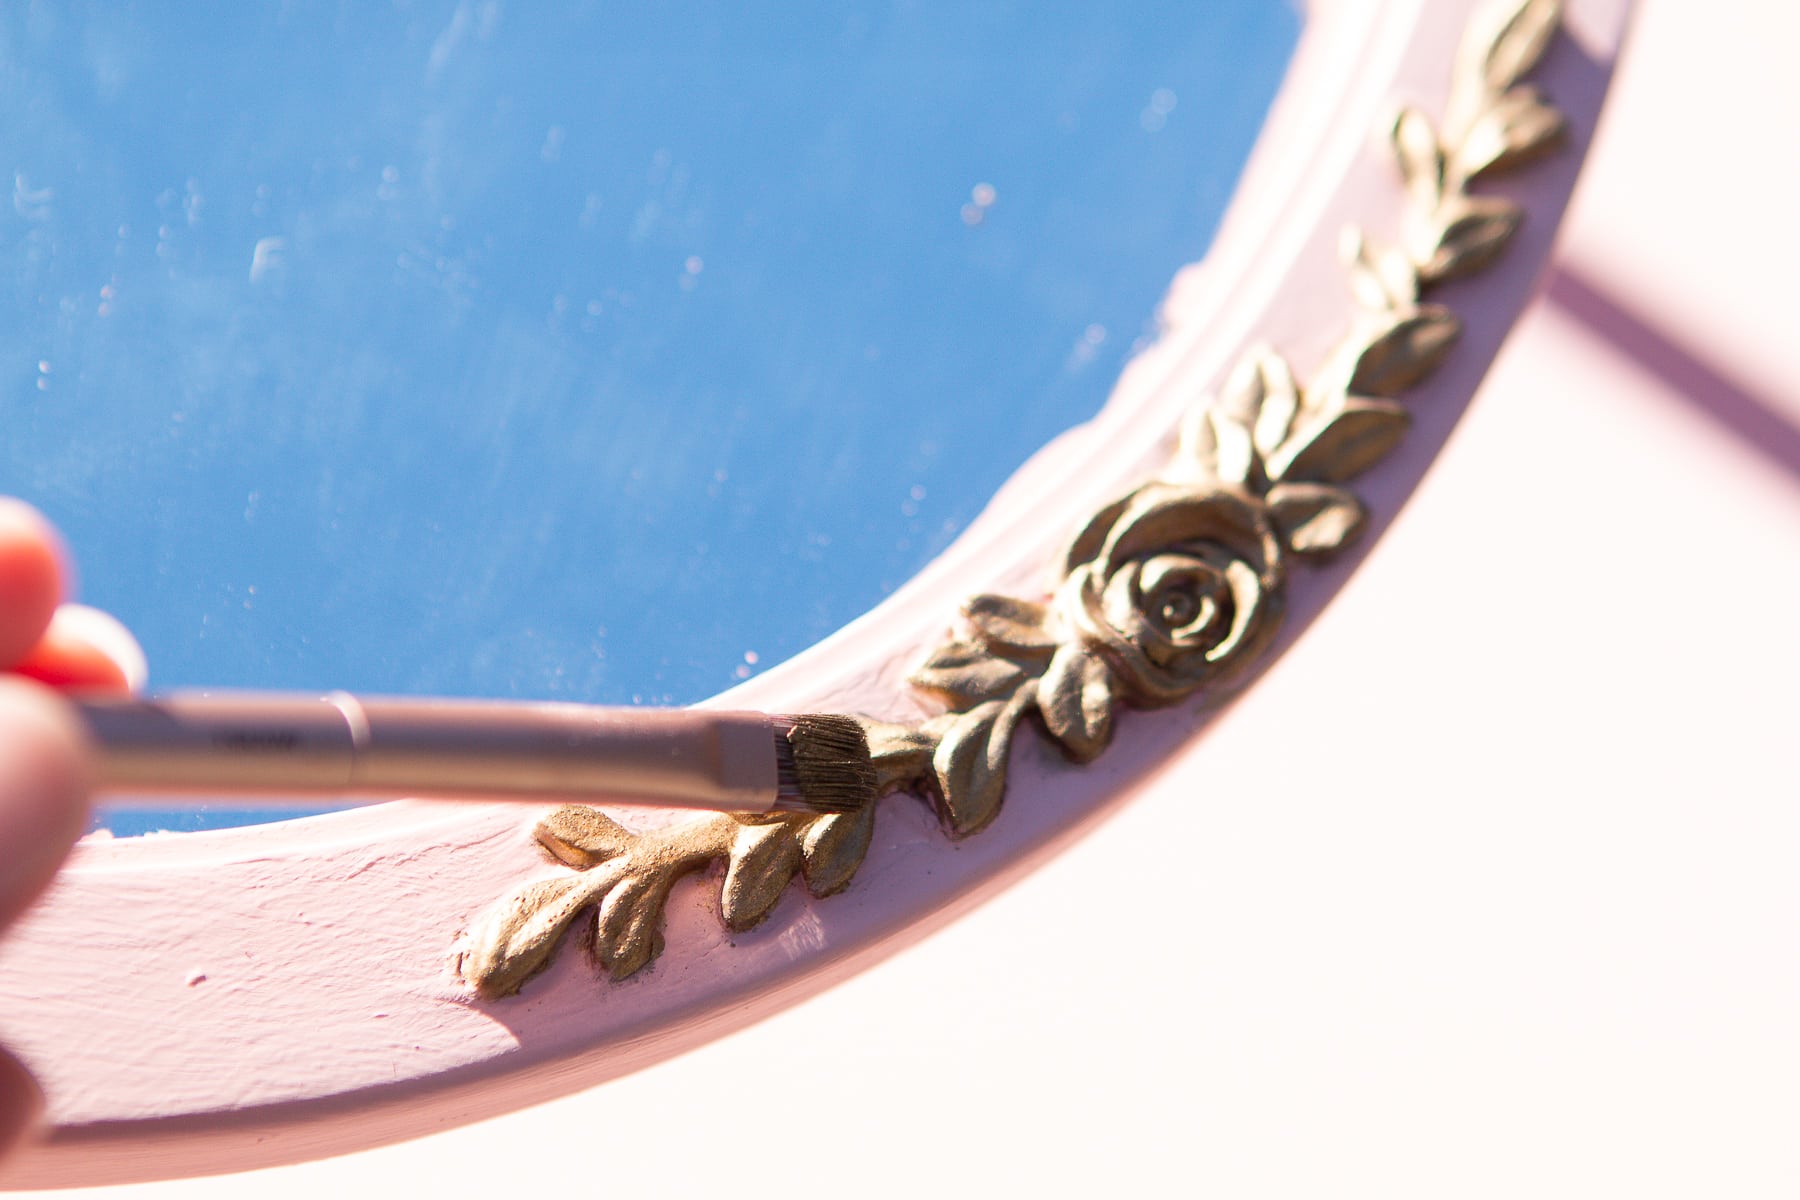
I also decided to add the gold to the drawer hardware, the knobs on the mirror, and the flower decal. This added a nice hint of sparkle and glam to this fun piece.
Adding Interest With Wallpaper

The drawer was just begging for some wallpaper. I remembered that I had some pretty wallpaper leftover from Rory’s closet and I knew it would be perfect for this girly vanity.

I used wallpaper adhesive to add it to the inside of the drawer of the vanity. To trim the sides, I simply used a razor and a straight edge – just like I recommend in my wallpaper tutorial.
Apply Clear Wax
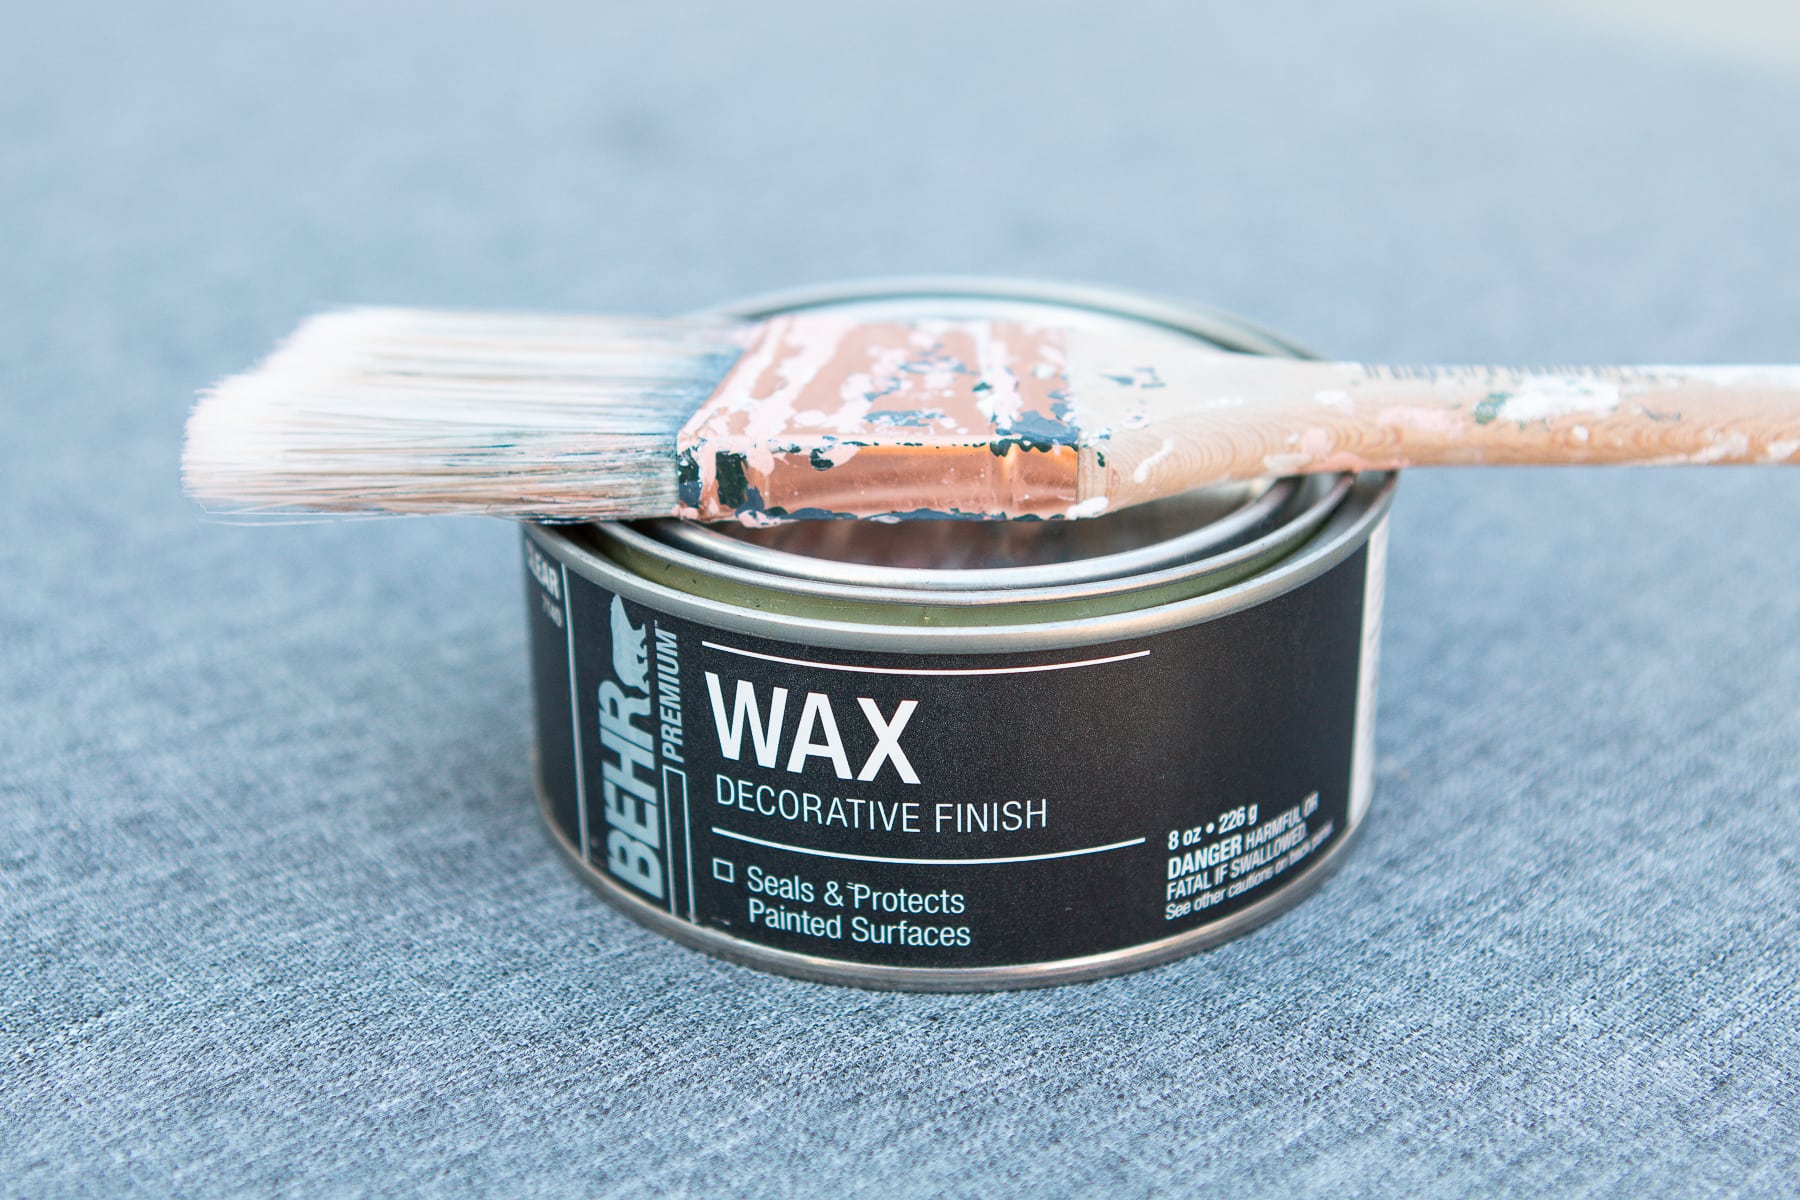
The final step is to apply a clear wax to everything. This helps seal the paint and protect the finish of the piece. They sell wax in various colors (like dark wax or white wax) if you’re going for a shabby chic look. I wanted to keep things simple, so clear was the way to go.
It’s hard, like candle wax, but I just rubbed a regular paint brush into the tin to saturate it. Then, I applied that directly to the furniture. You’ll see that it makes the furniture look a little wet at first. Eventually, it dries and then you can buff it out.
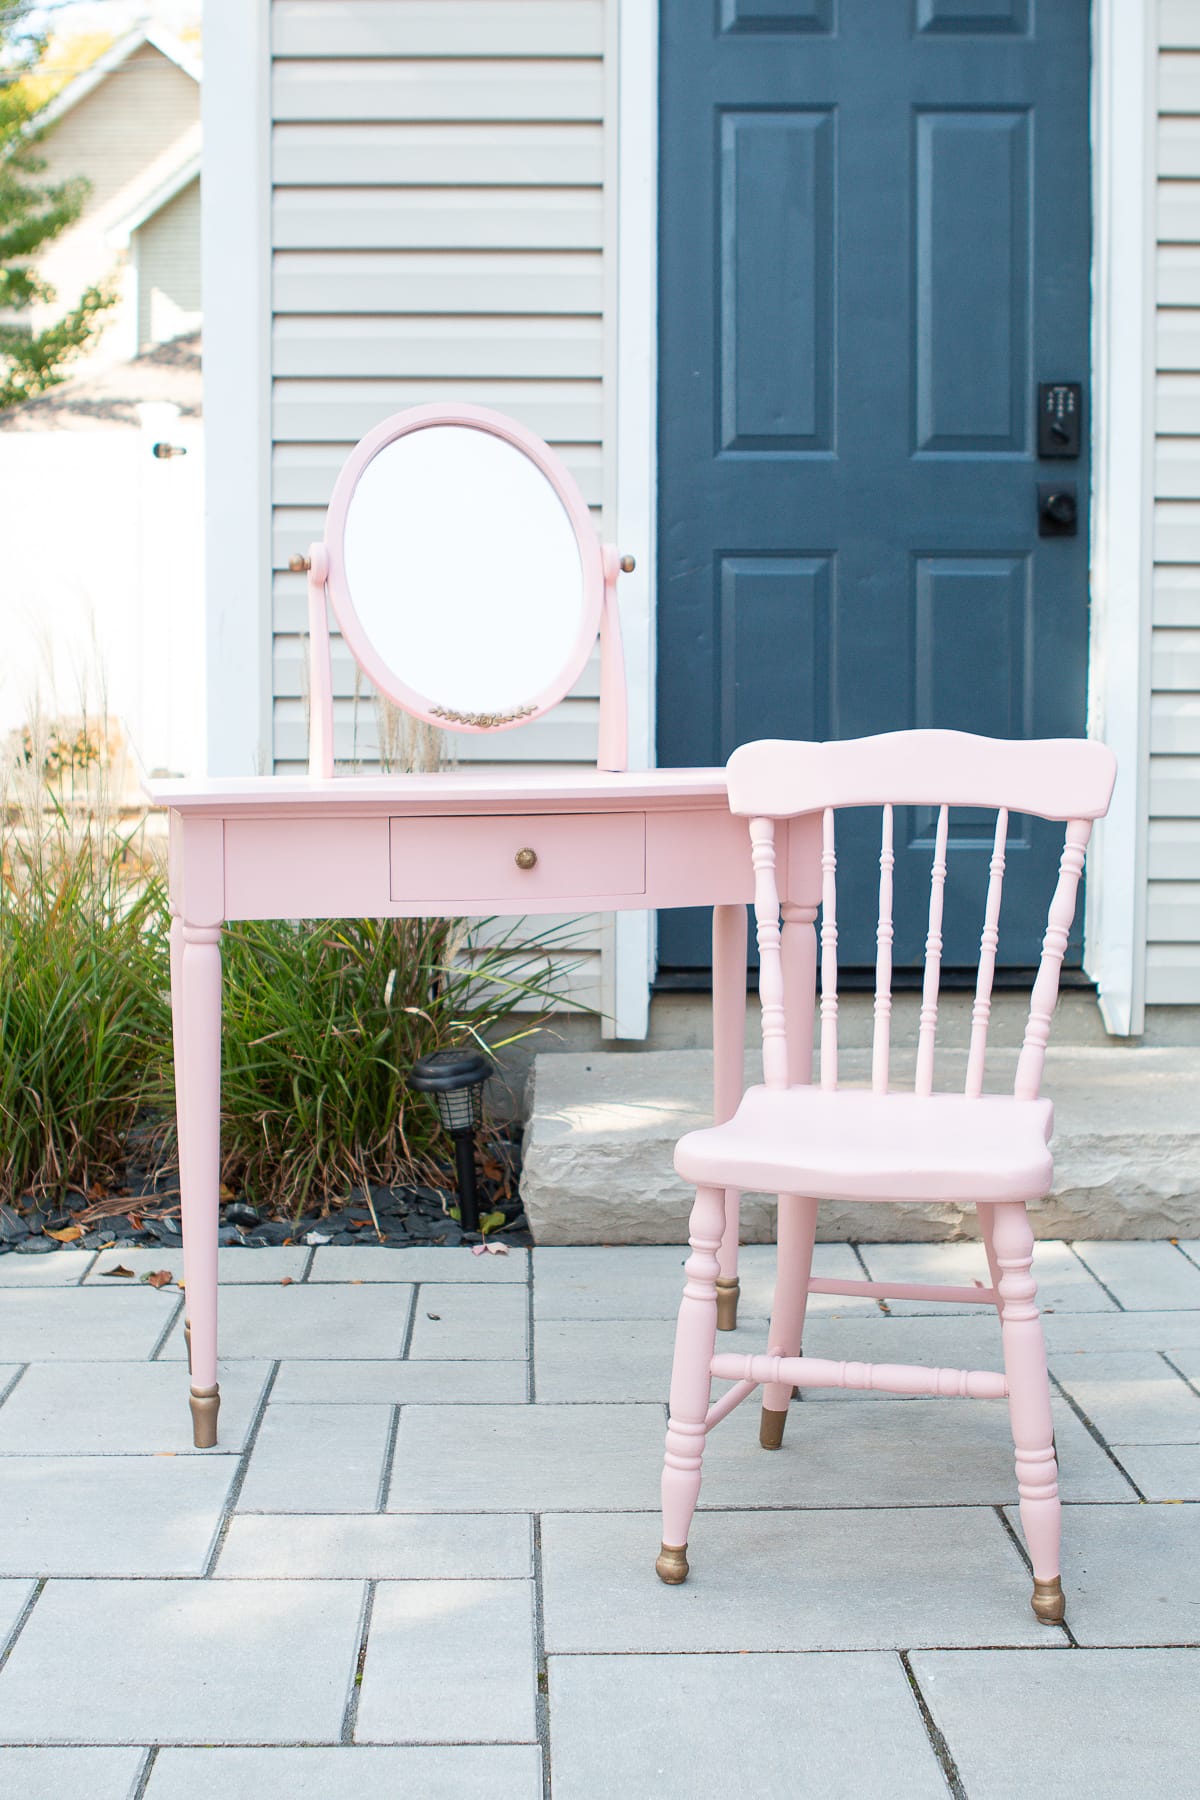
Vanity & Chair – Before & After
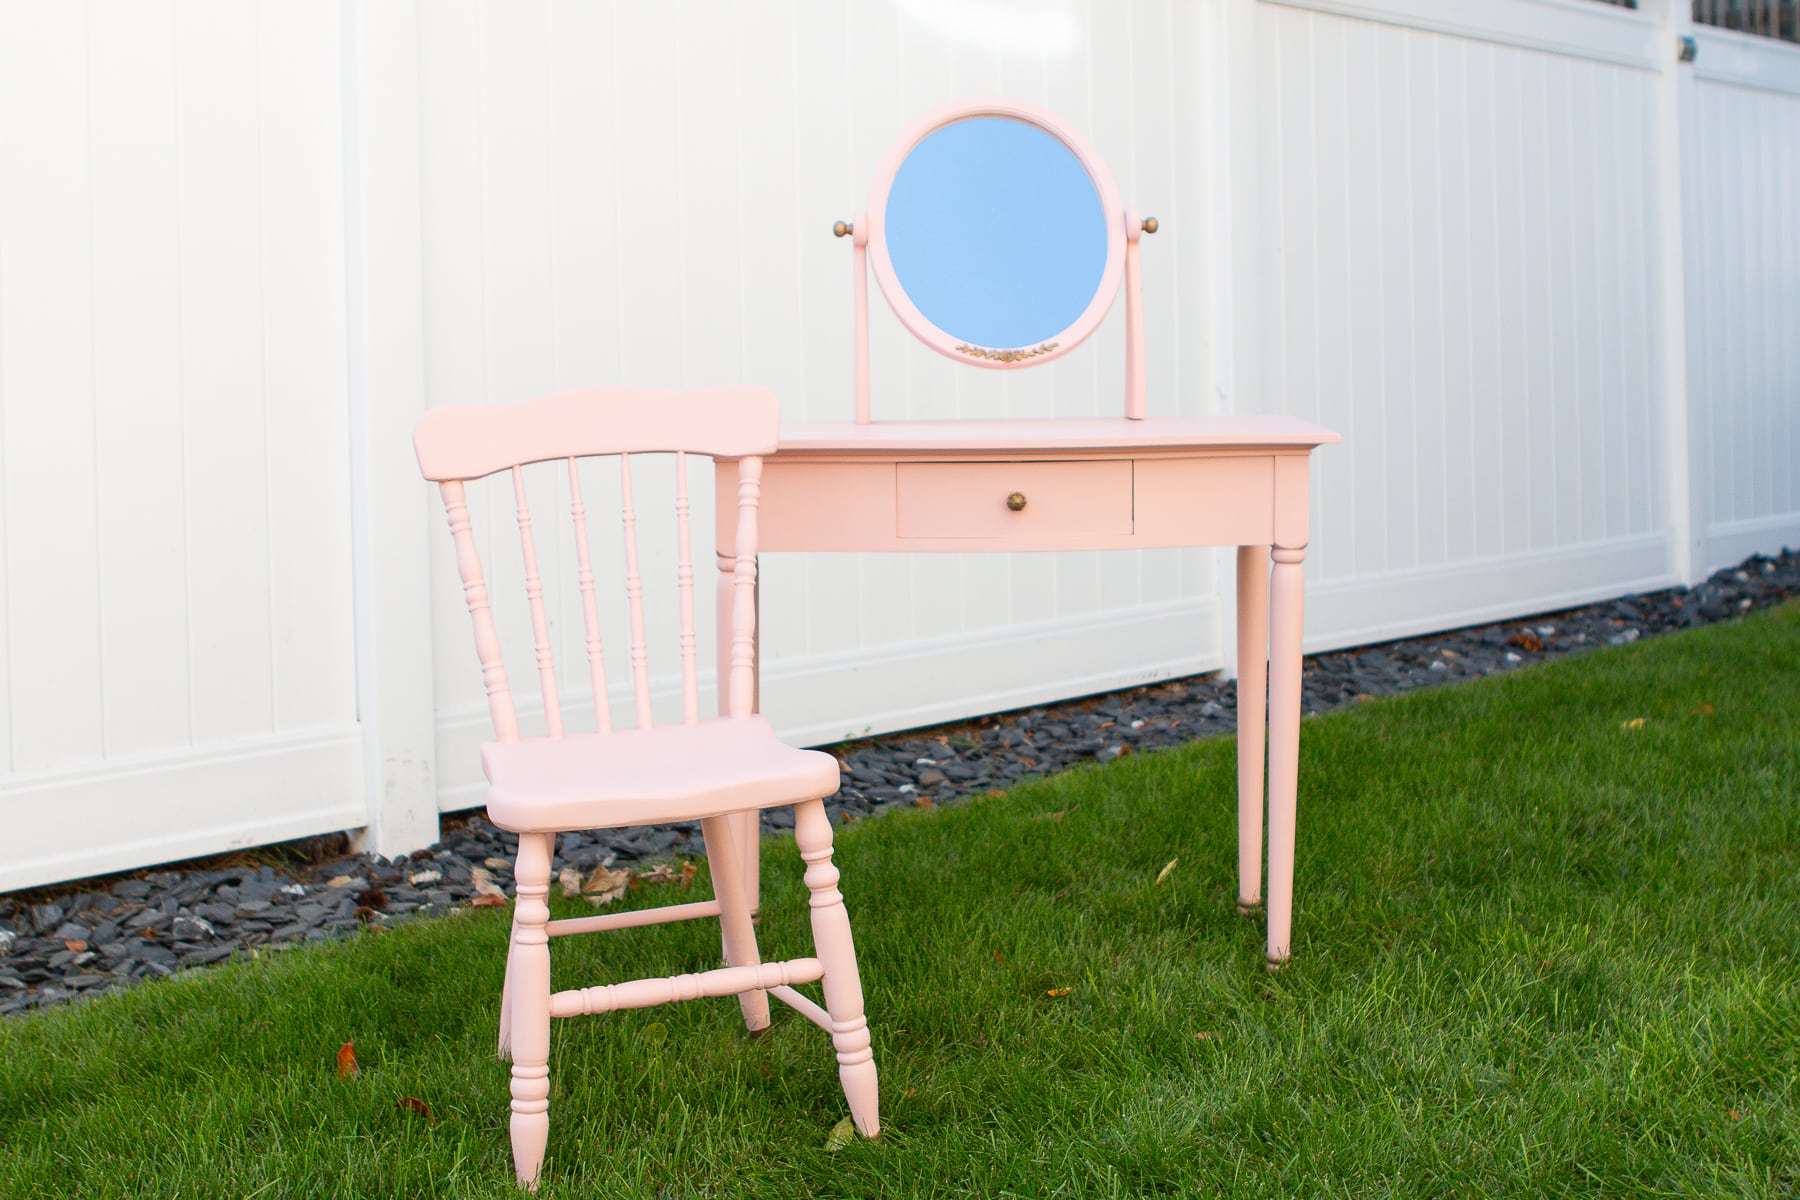
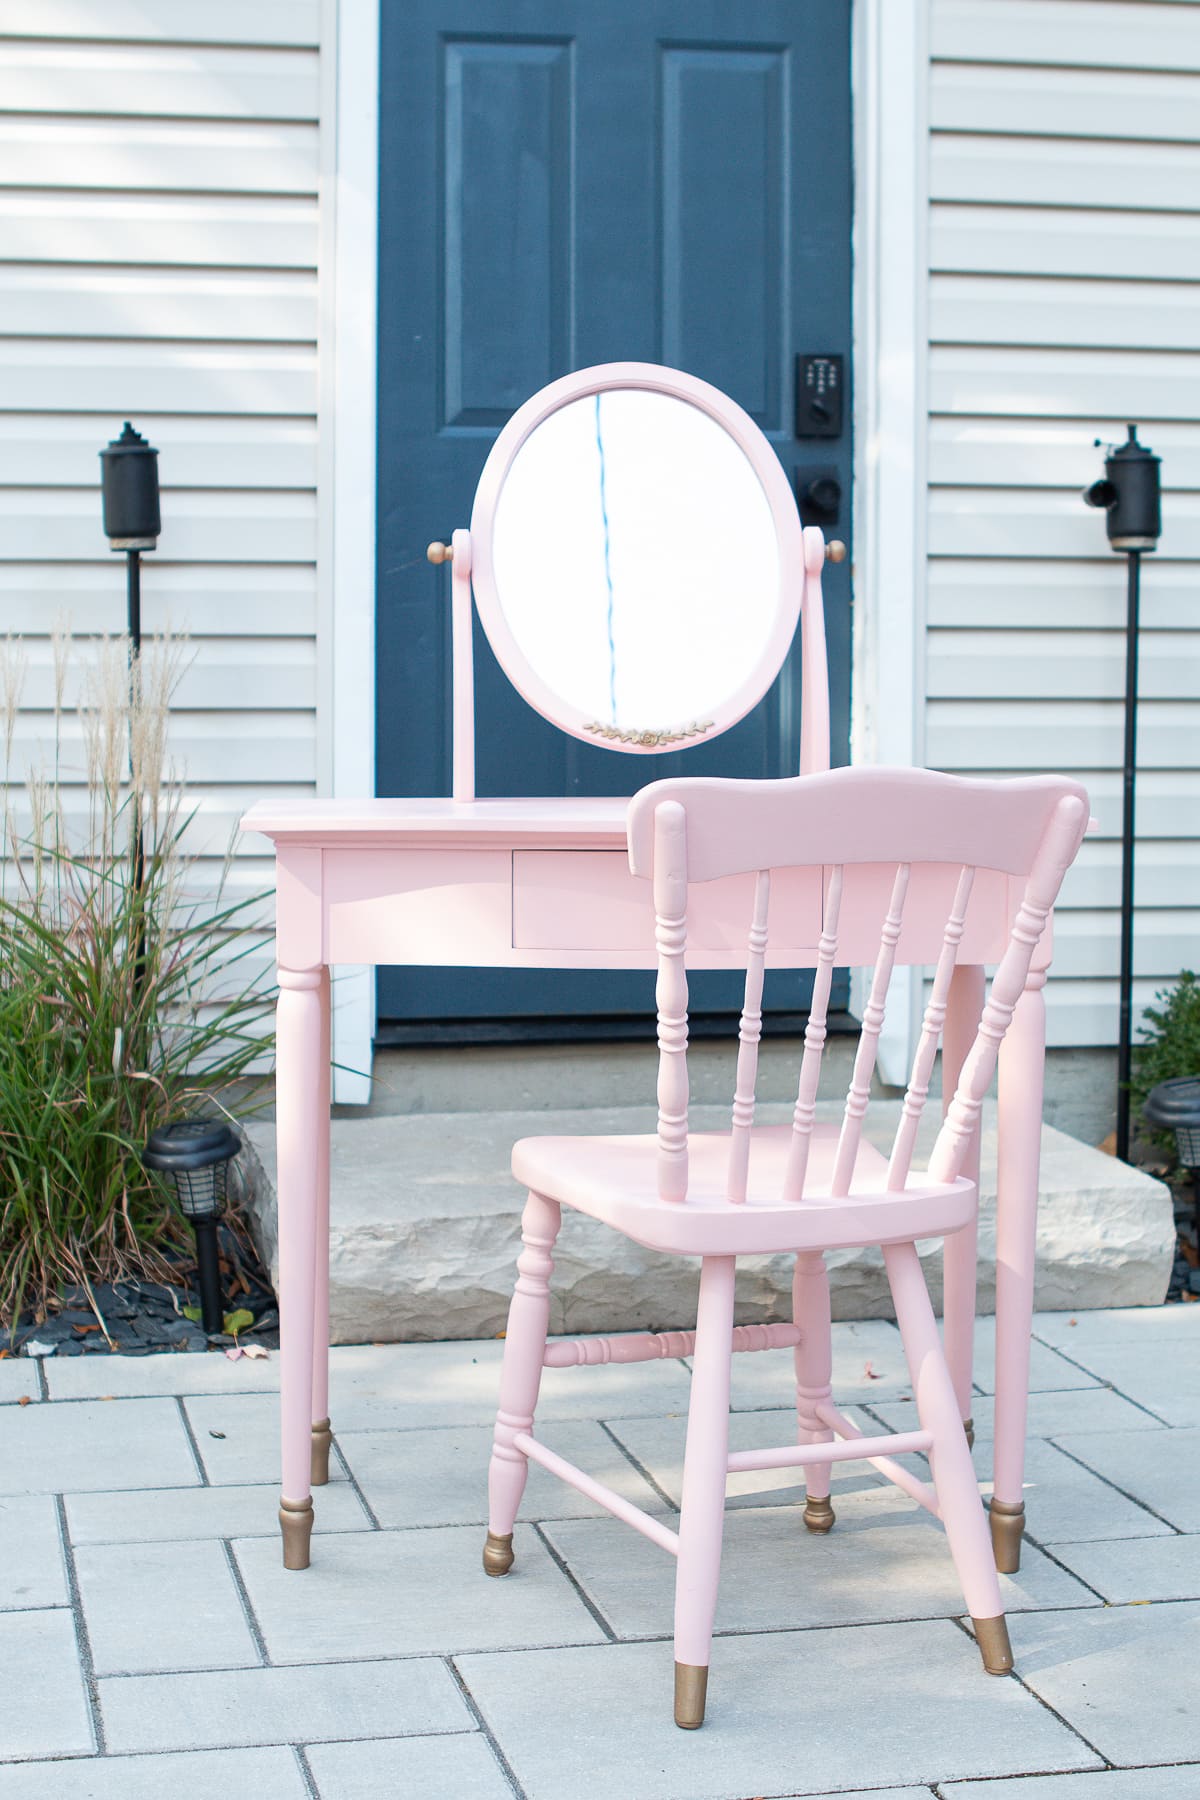
Is this not the cutest little setup? I wish I could see who ends up with this adorable vanity and chair. I know I sure had a lot of fun sprucing it up and giving it a new life.
The pink color is so sweet and I really like the chalky appearance of the paint.
As for chalk paint, I’m a fan! It was super easy to use and I love the matte finish. It really is a great way to transform any old piece of furniture from the thrift store. I have a feeling this won’t be my last time using it…
How You Can Help
The Chicago Furniture Bank needs furniture now more than ever. They’re helping so many people and it’s important that they have a constant influx of furniture for those in need. If you’re moving, redecorating, or just want to declutter, please consider donating your items to them. You can learn more about their amazing work and how to donate right here.